
Changing color schemes in our living room isn’t too hard. The furniture is dark wood and brown leather. I add color around it. I seem to have established a common element…a small quilt hanging above the sofa. This started years ago with a full-size quilt draped over the rod (thus the hefty rod on the wall). After that I went with smaller wall hanging quilts that I could make by hand. They satisfied my love of hand-piecing quilt blocks on a smaller scale. I can change the color scheme in the room by changing the wall hanging and swapping out pillows and throws to coordinate the color.
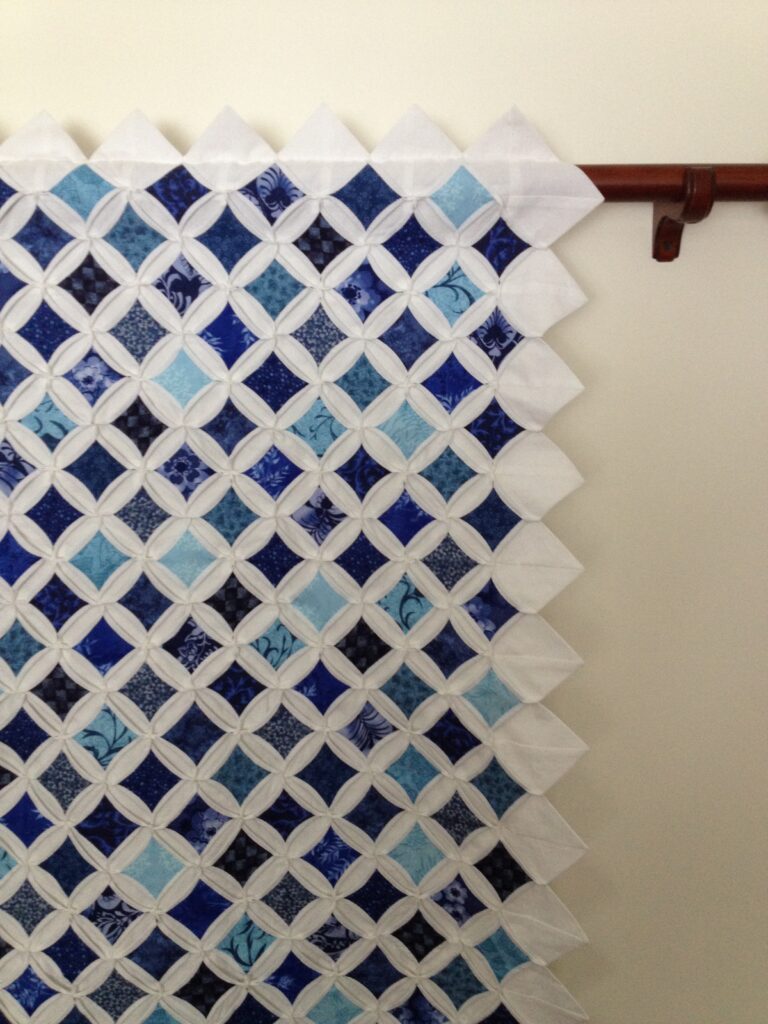
The Cathedral Window quilt hanging that I made several years ago was blue and white and I love it, but I tired of the color over time.
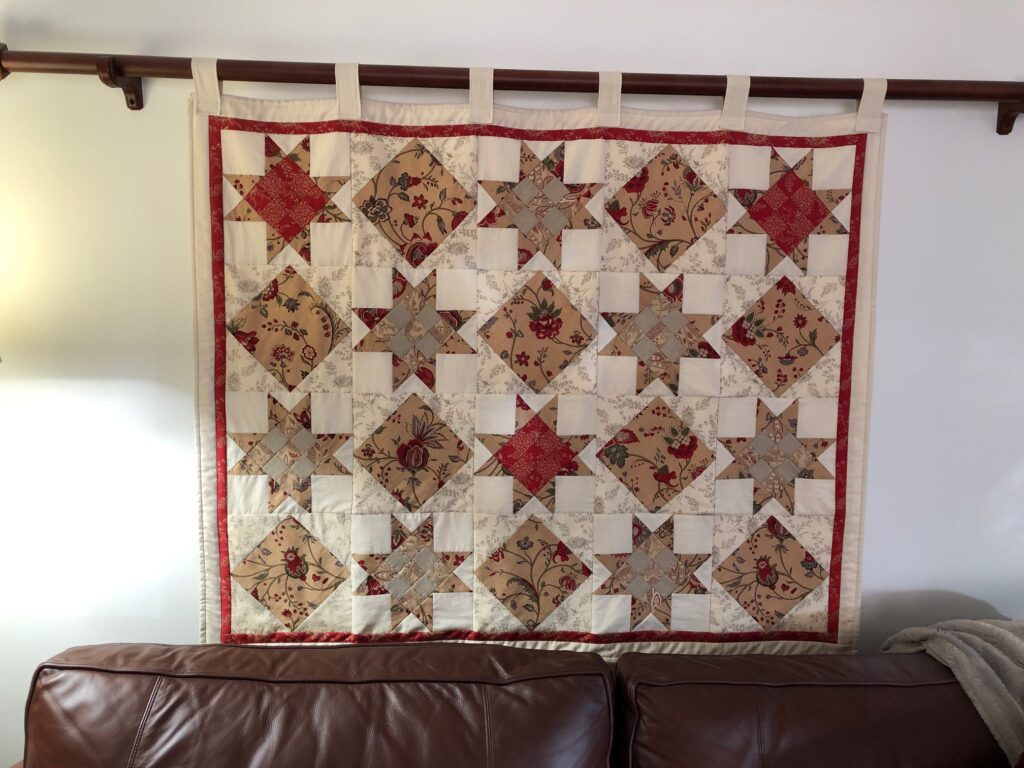
The most recent quilt (that I’m phasing out) started with a plan to make a full-size quilt for Kathy, but by the time I had hand-pieced a few blocks her colors had changed and I lost my motivation. So, it became the next quilt on the wall.
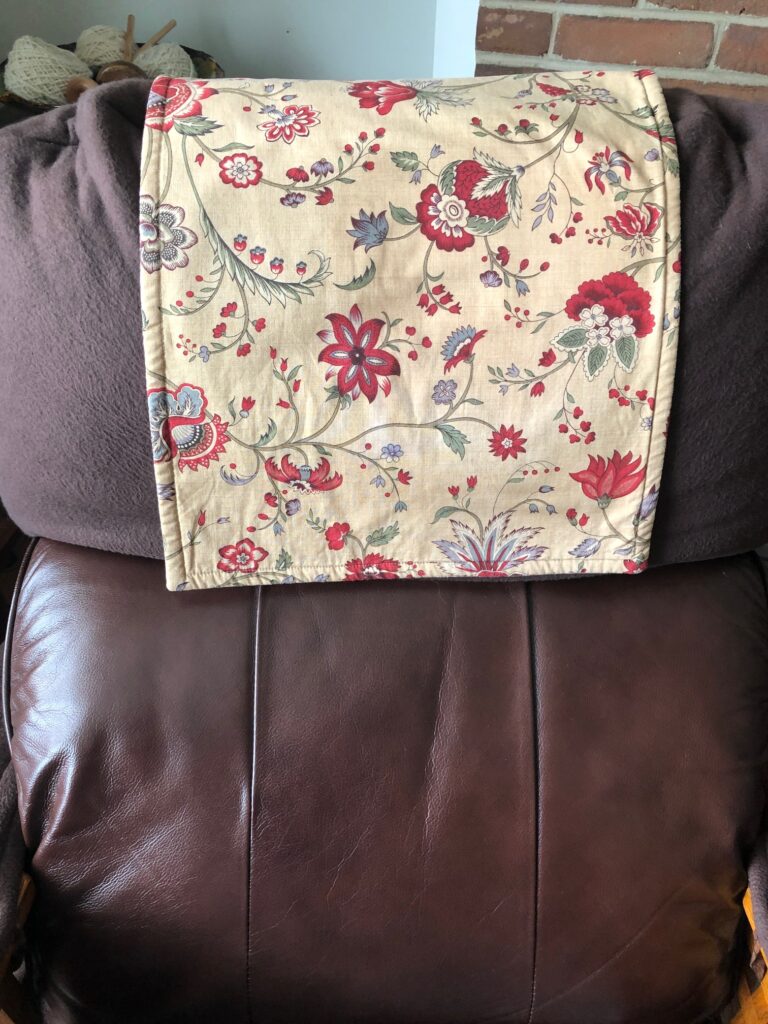
Of course, as I change color schemes, the pillows and throws on the sofa have to change too. A small matching piece of fabric provides a pad on Bert’s chair to protect the back under his head. Thus, I had used extra fabric to make this:
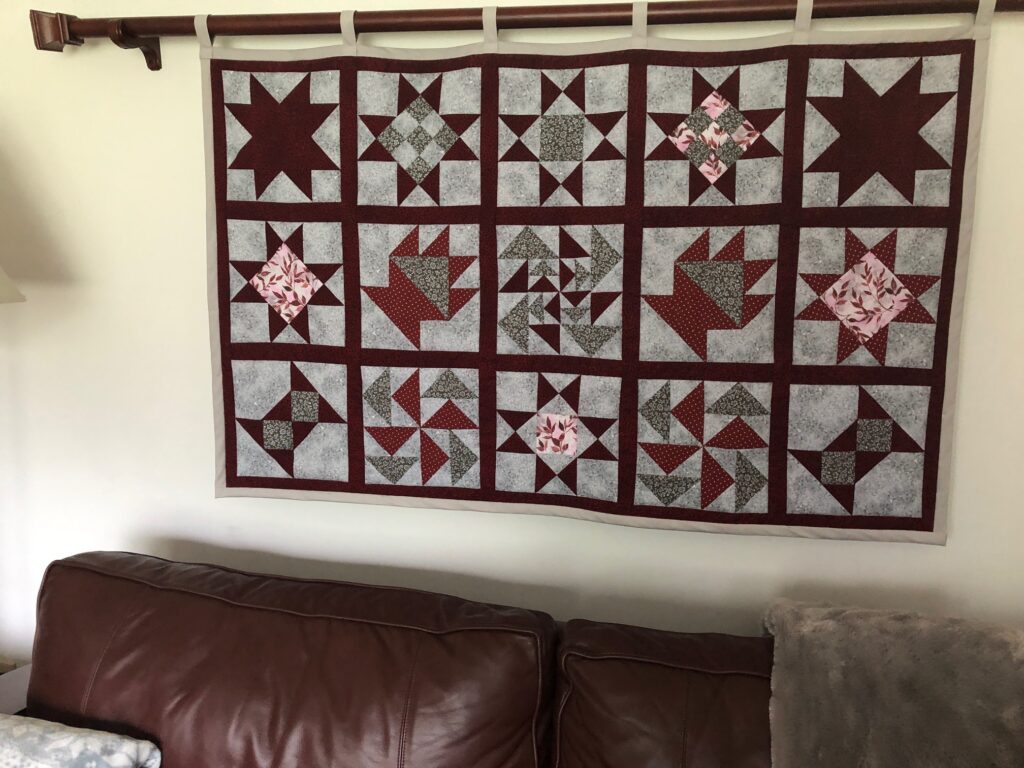
Now that I’ve finish the next quilt, changing my color scheme to gray and burgundy, his chair needed a new head rest piece. This is the new wall quilt:
So today I pulled out the extra fabric and whipped up a new head rest pad. I had two fat quarters and trimmed them to 14″ x 21″ and added a piece of batting.
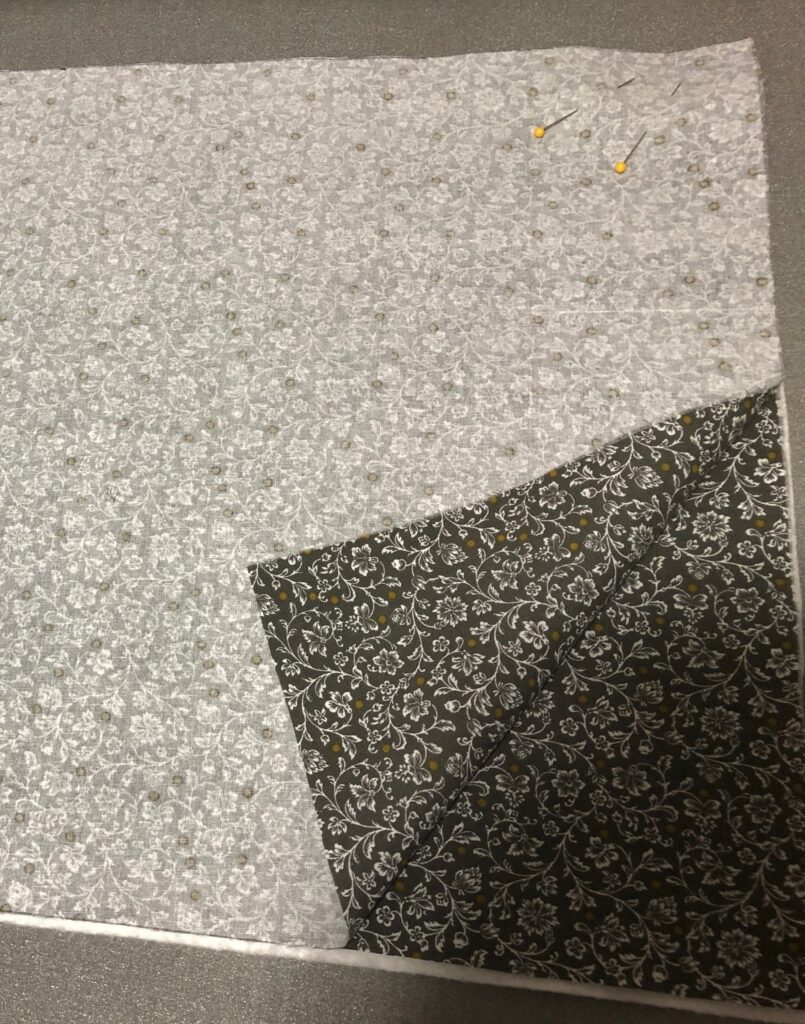
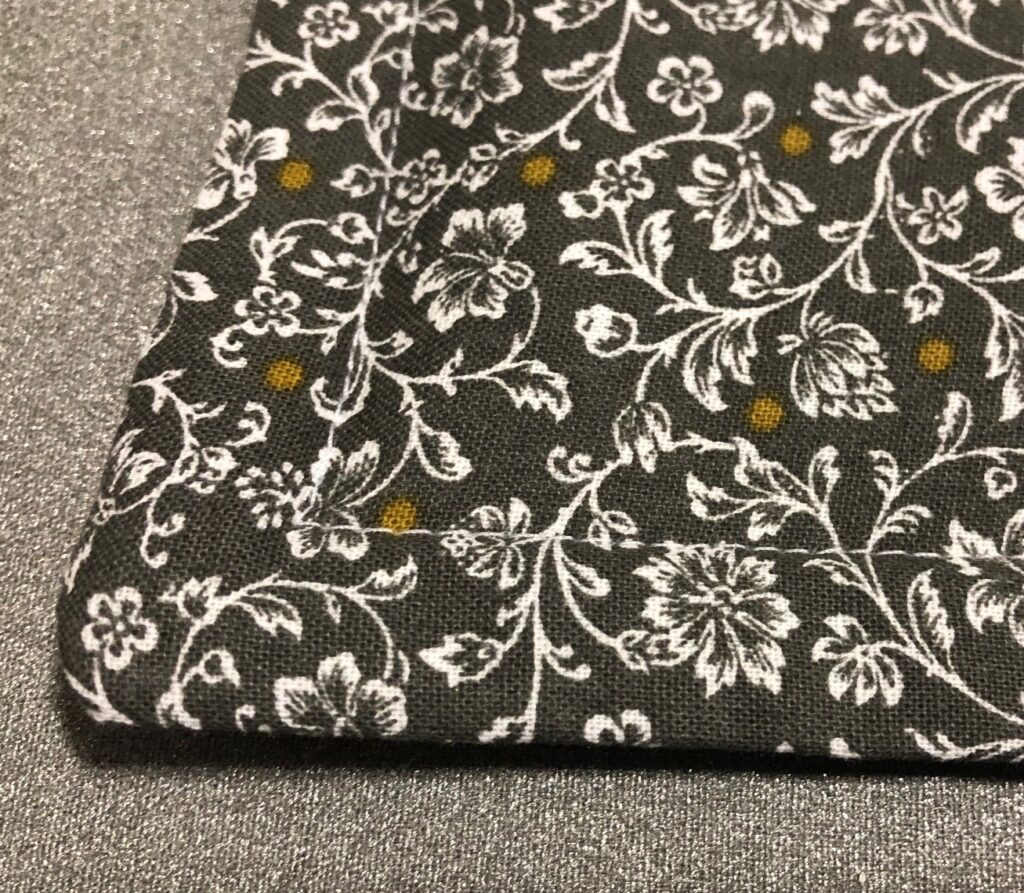
The fabric pieces are right sides together on top of the batting. I stitched around the outside, leaving a 4″ opening to turn right side out. I hand stitched the opening closed and top stitched around the edge. In half an hour I had the final piece of my decorating! Finally, everything matches! Whew!
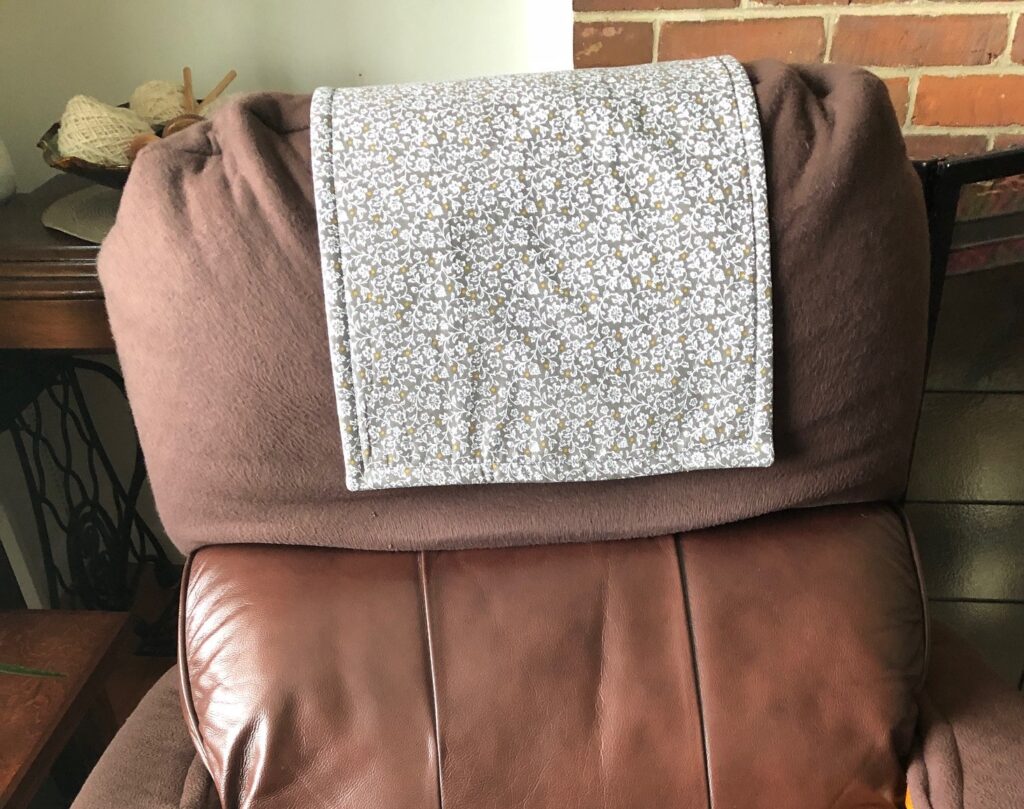
I am definitely not a decorator, but somehow these quick changes I can handle. The slowest part is hand-piecing the quilt, but that makes a good winter project…one block at a time! Enjoy!
Please comment or email me directly if you have questions at marykisner@comcast.net.