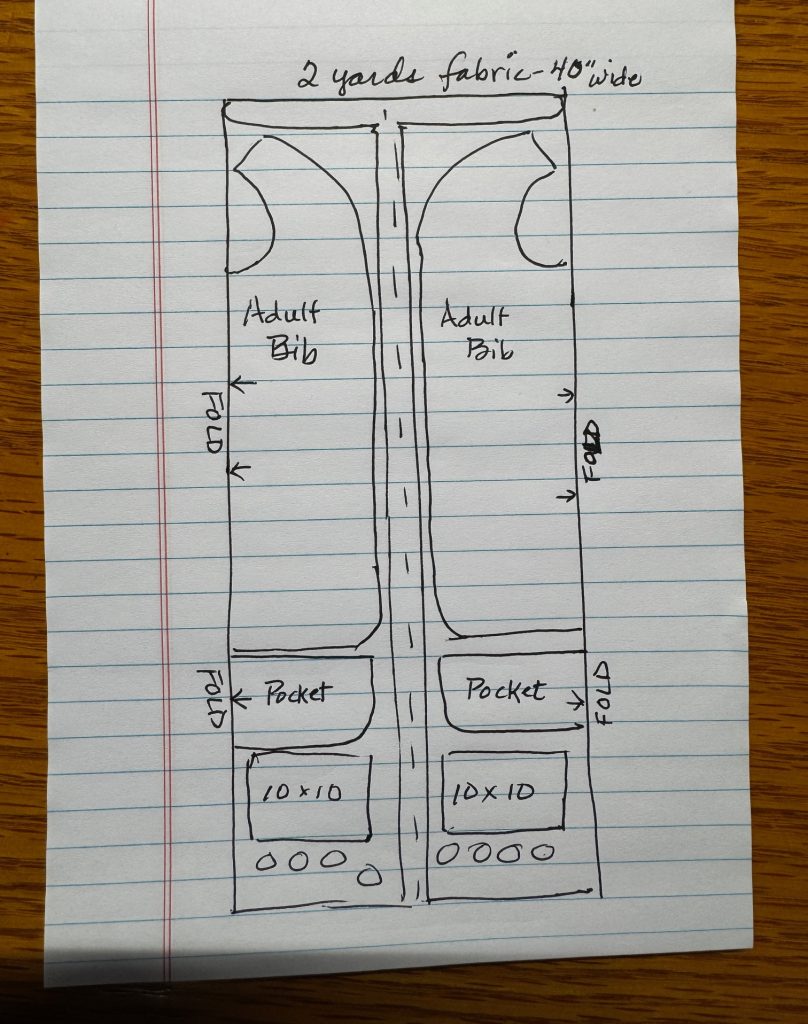
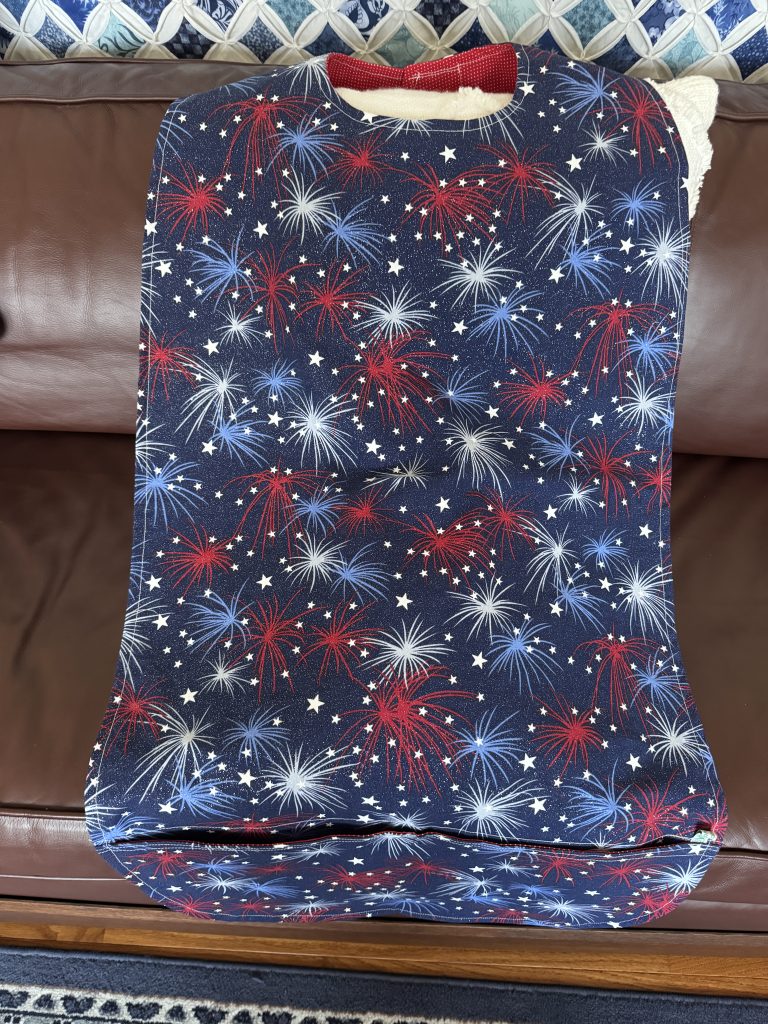
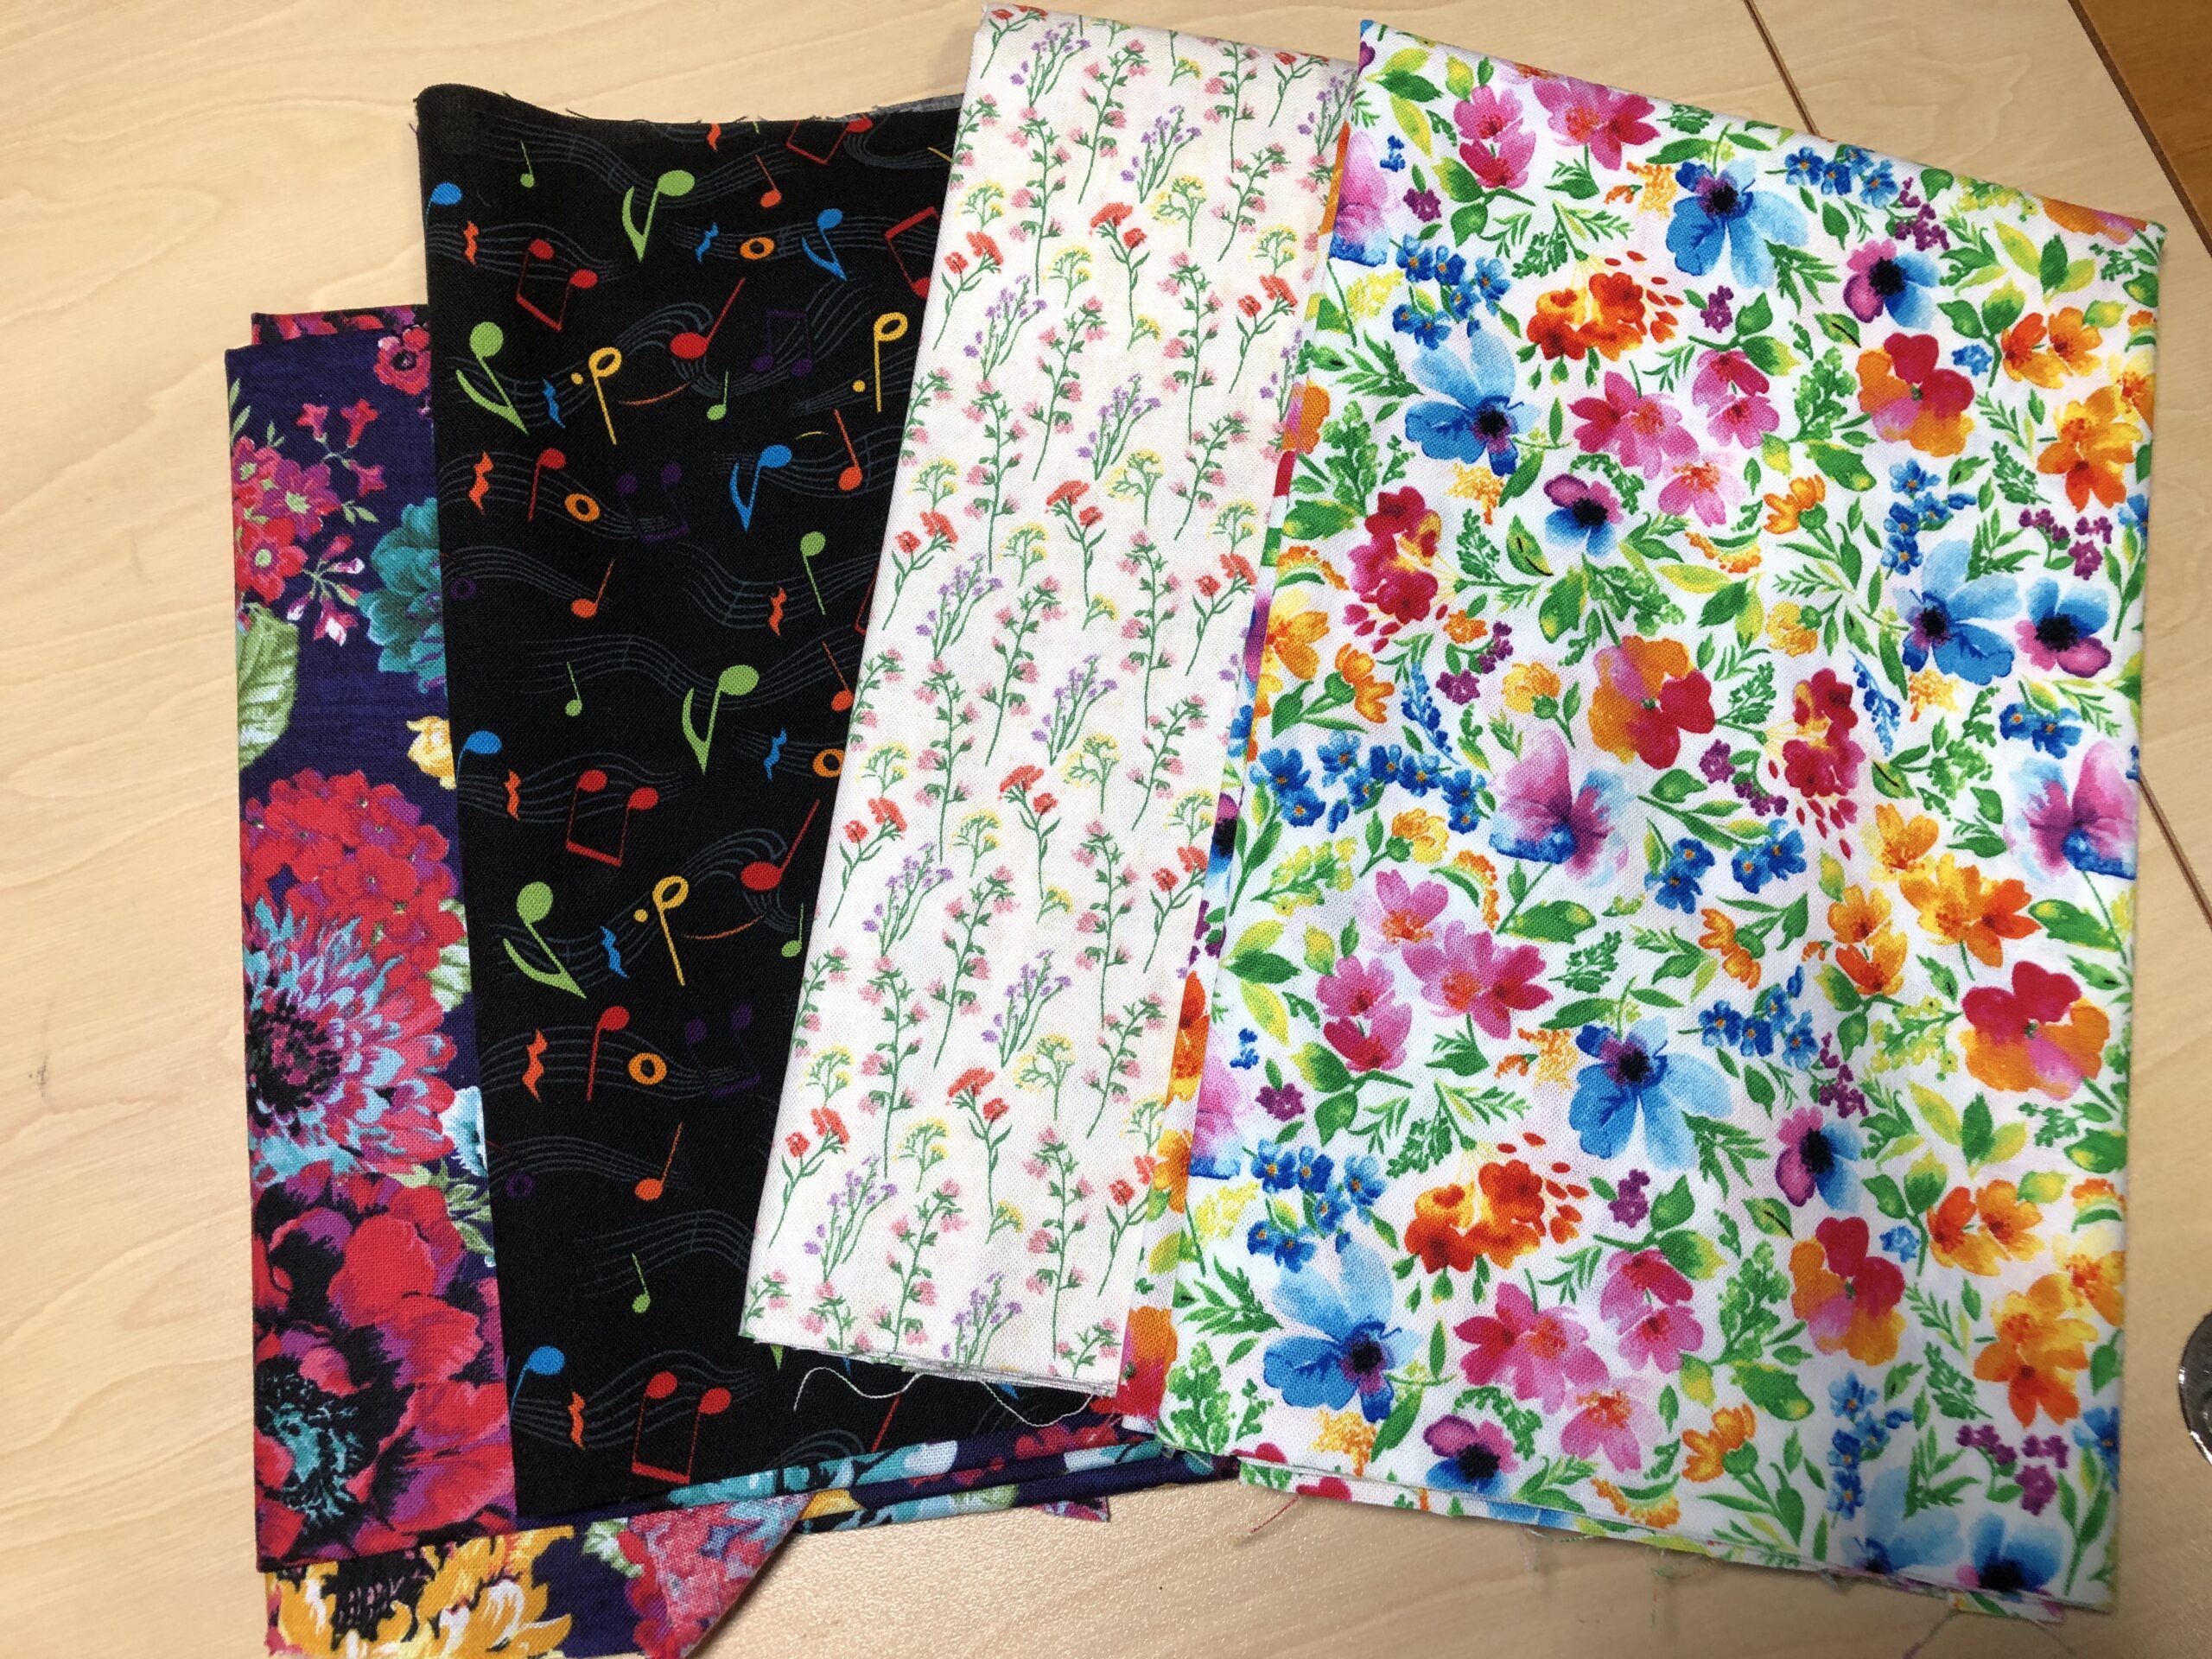
My latest sewing project involved making another adult bib for a friend. My pattern makes an especially LONG bib with a pocket at the bottom to collect crumbs while a person is sitting. Usually, I don’t try to make two of the same fabric, but this time I decided to see if I could squeeze two side-by-side on the fabric.
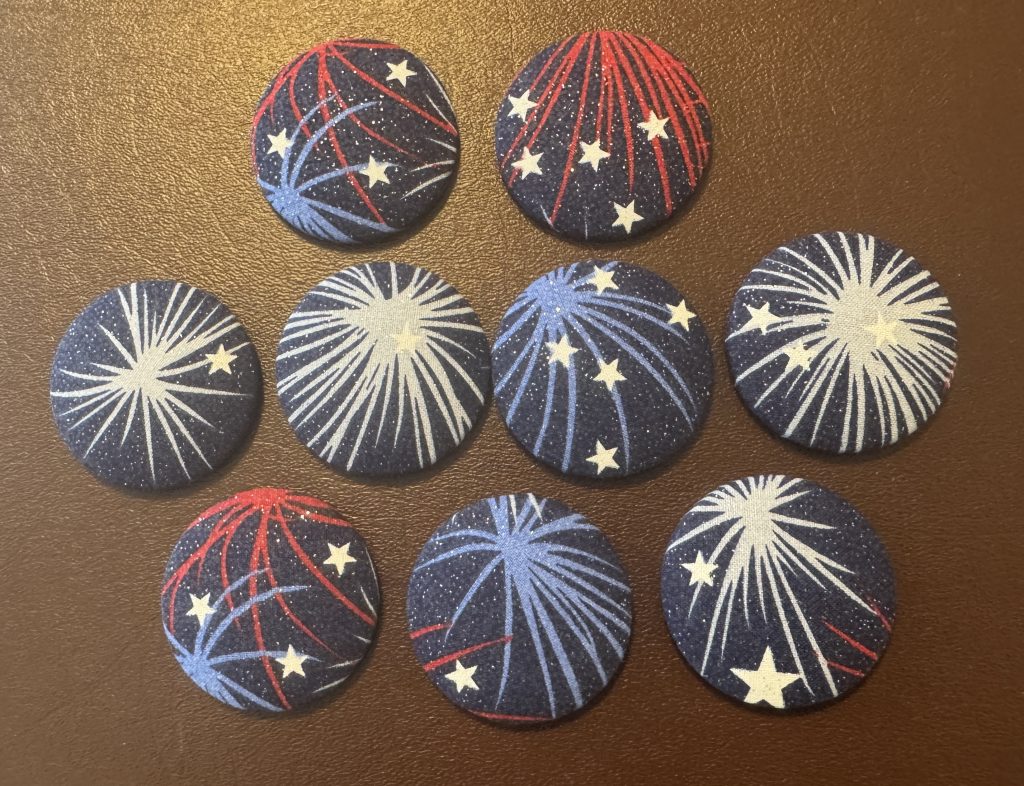
I bought two yards of fireworks fabric and two yards of plain red with tiny dots for the lining. After washing the fabric, I ironed it so I had a crease down the middle. Then I opened it up and folded the selvage edges to the middle, giving me two long folded edges. I ended up having enough fabric left over to make four bowl cozies and 8 refrigerator magnets. This was a fun day!
Here’s a sketch of how I laid out the pattern pieces:
I was pleased to be able to make two bibs that used up 1 1/2 yards of fabric and lining.
It appears I have not written a step-by-step set of instructions to make this long adult bib yet. If you’d like me to do that, please send me an email (maryjkisner@gmail.com) and I’ll put that together next.
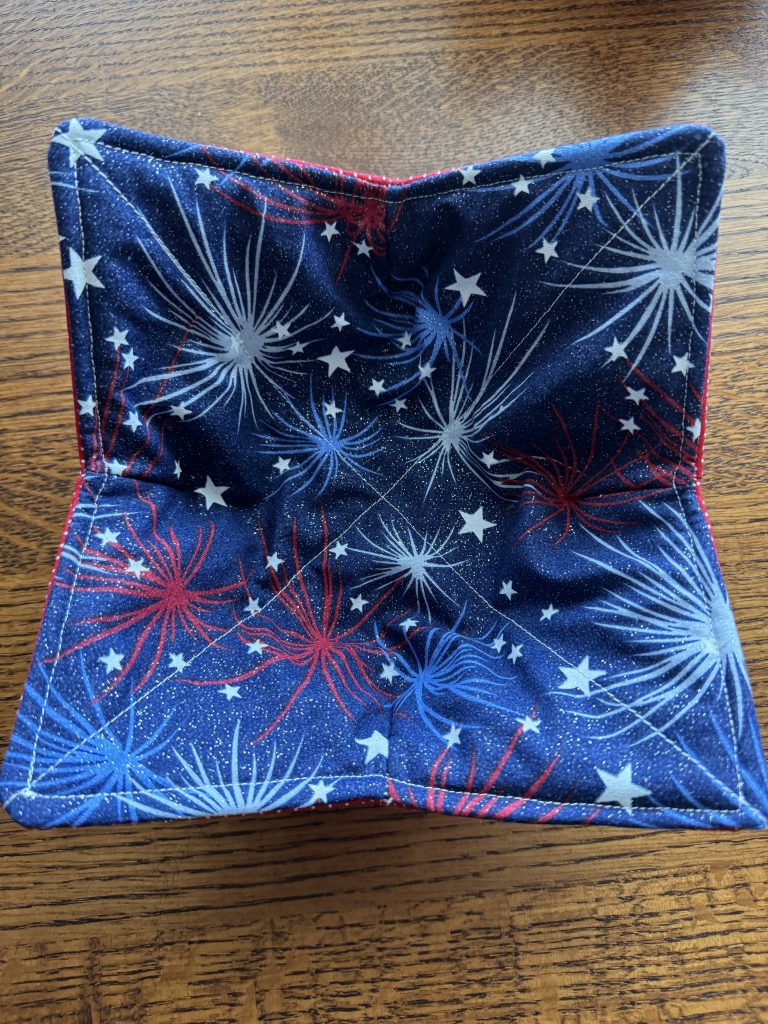
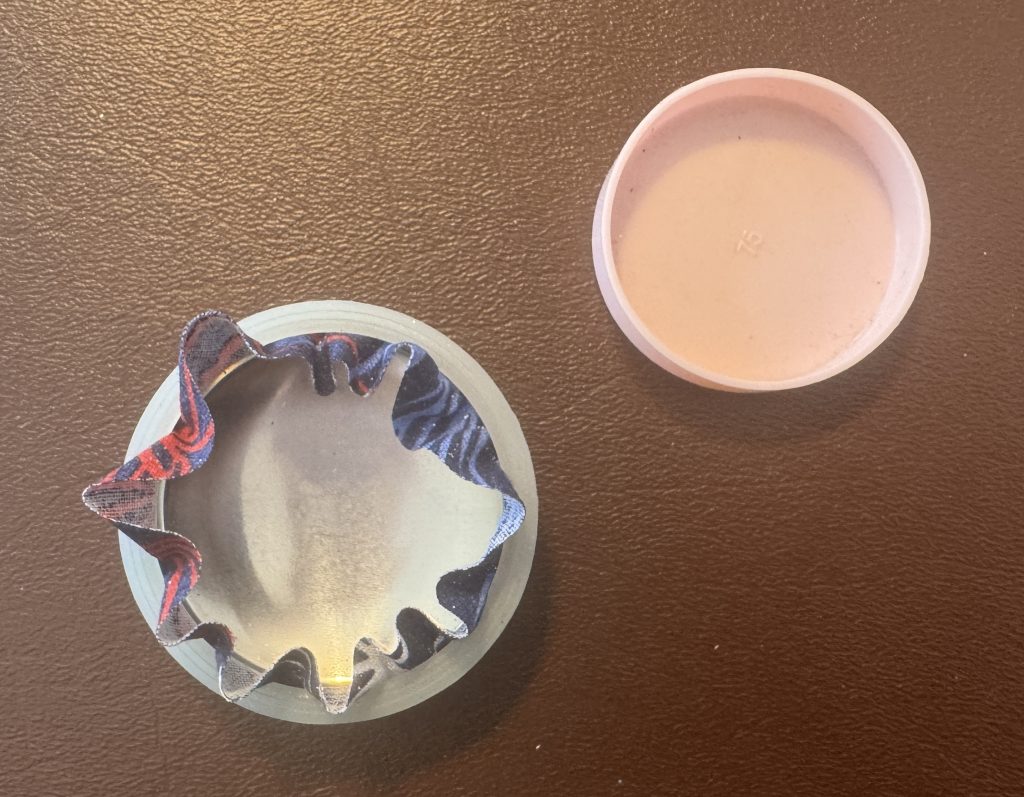
With the 1/2 yard (18 inches) of fabric I had left after cutting out the bibs, I decided to cut out four 10 x 10″ squares out of both fabrics to make bowl cozies. You can read about making these bowl cozies at https://marykisner.com/making-three-sizes-of-hot-pad-cozies/
Sometimes my inspiration for new projects is triggered when I clean up from a previous one! When I finished making multiple sizes of the hot pad cozies in my last post, I had a pile of batting scraps left over. Usually, I stuff them into a clear tote I have on the shelf. These scraps are handy when I need just a small piece of batting for a small project. However, I was still thinking about the hot pad cozies and I knew I’d need 10″ to 12″ squares of batting to make more.
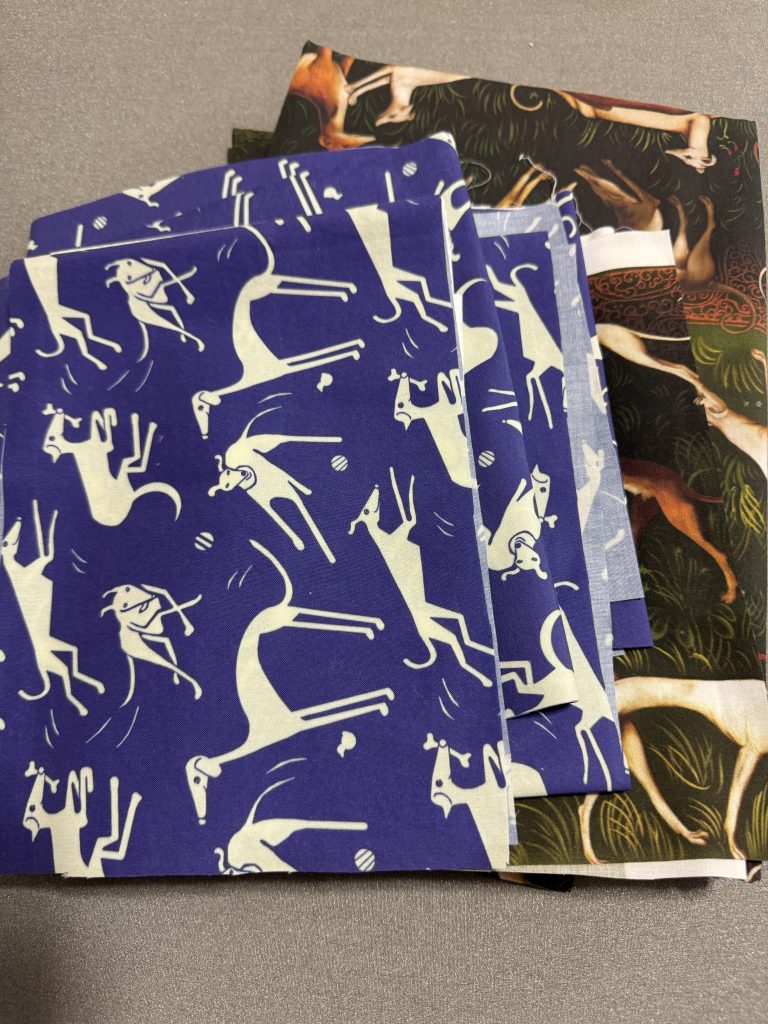
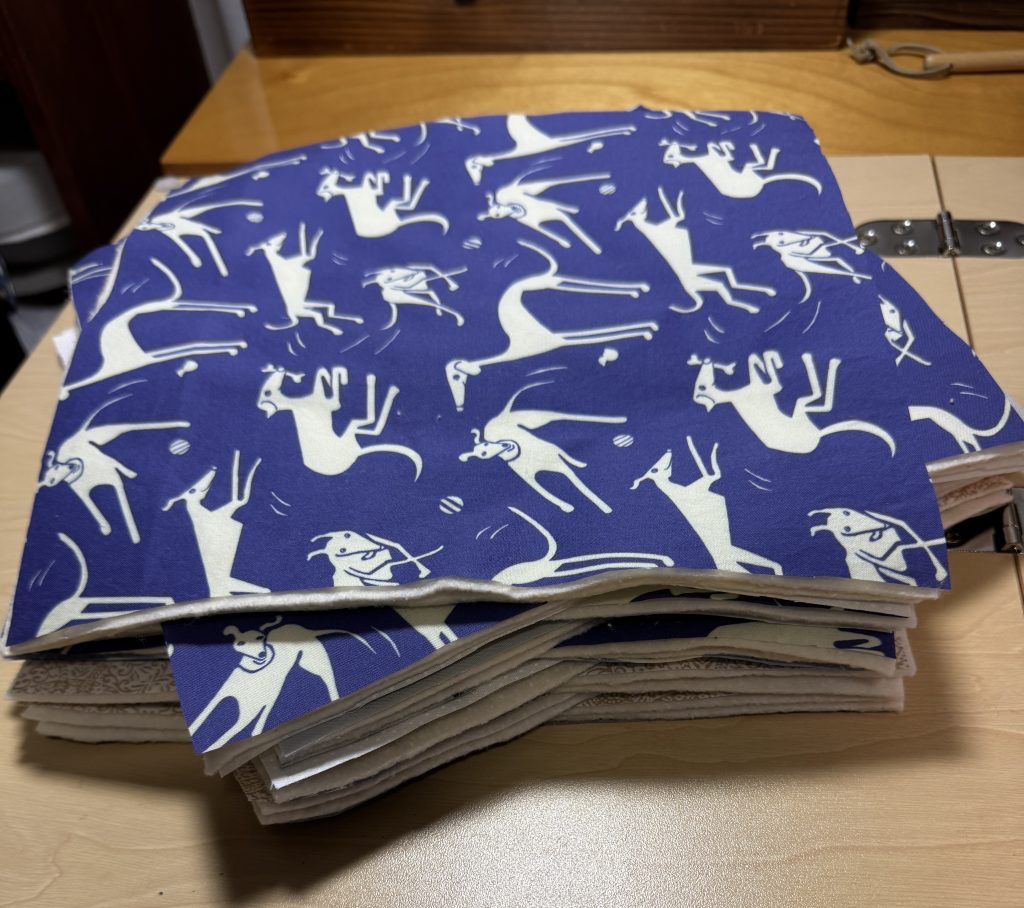
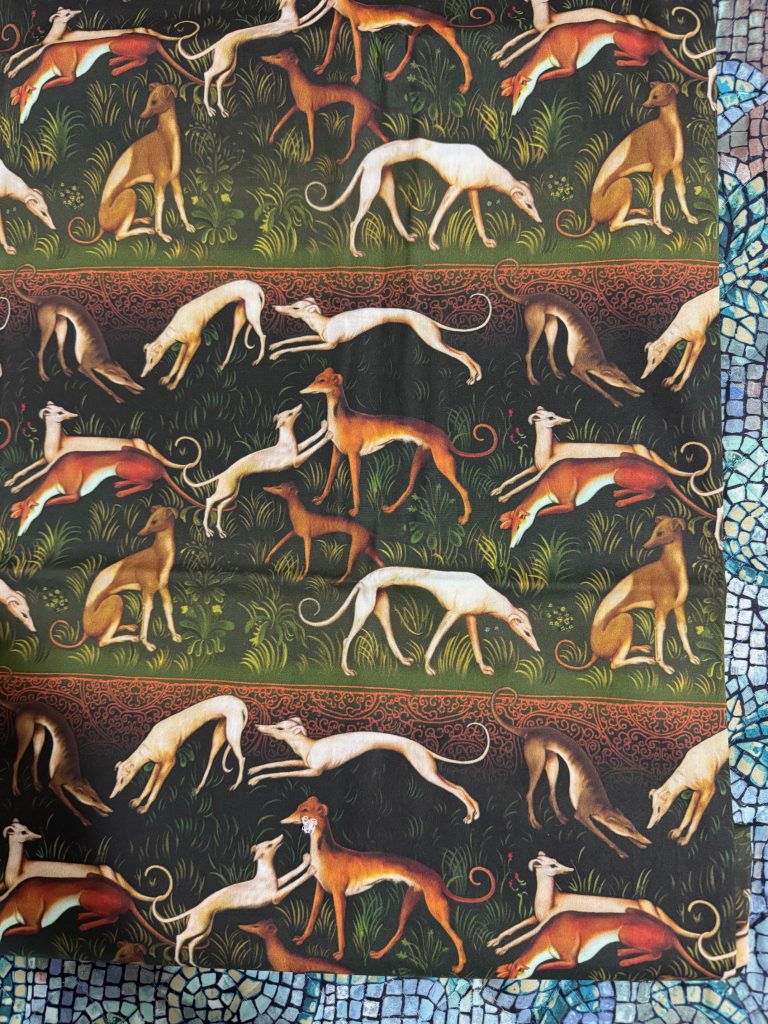
Luckily, that same day I was brainstorming with Toni…my friend with Nittany Greyhounds…about items that could be sold at the next conference. Why not hot pad cozies with greyhound fabric! This special-order fabric is adorable, with prints of greyhounds…but it is VERY expensive. I wondered if I had any scraps left from various projects to try my experiment. I found a pile in my stash I could play with!
Making the Batting Squares
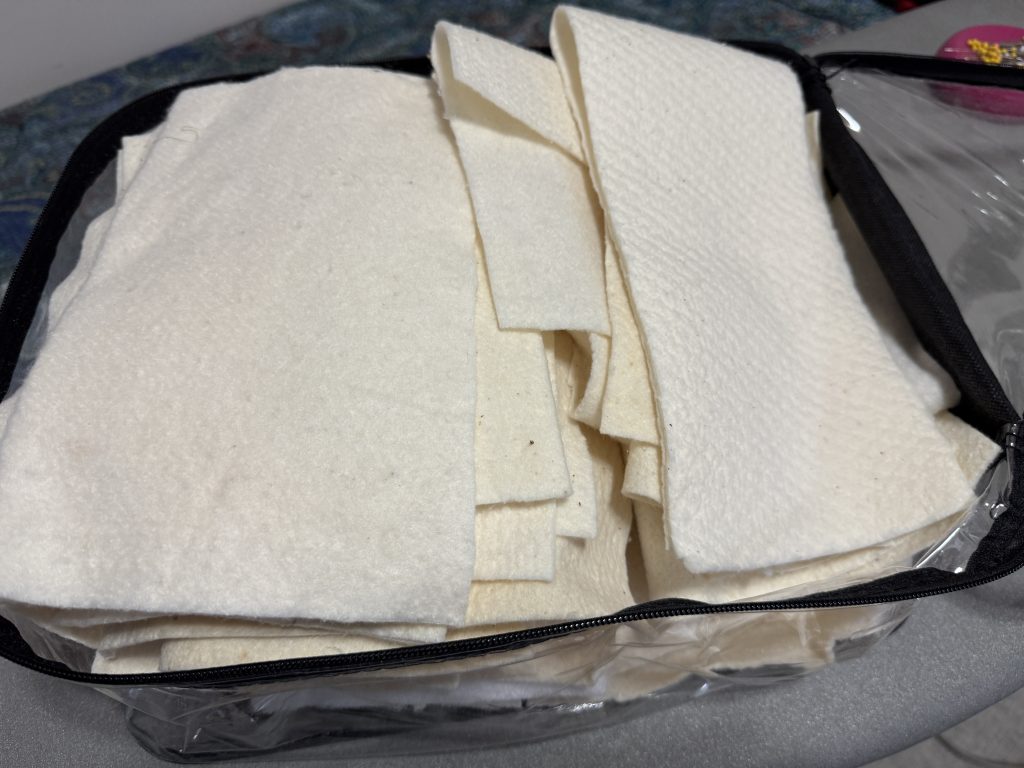
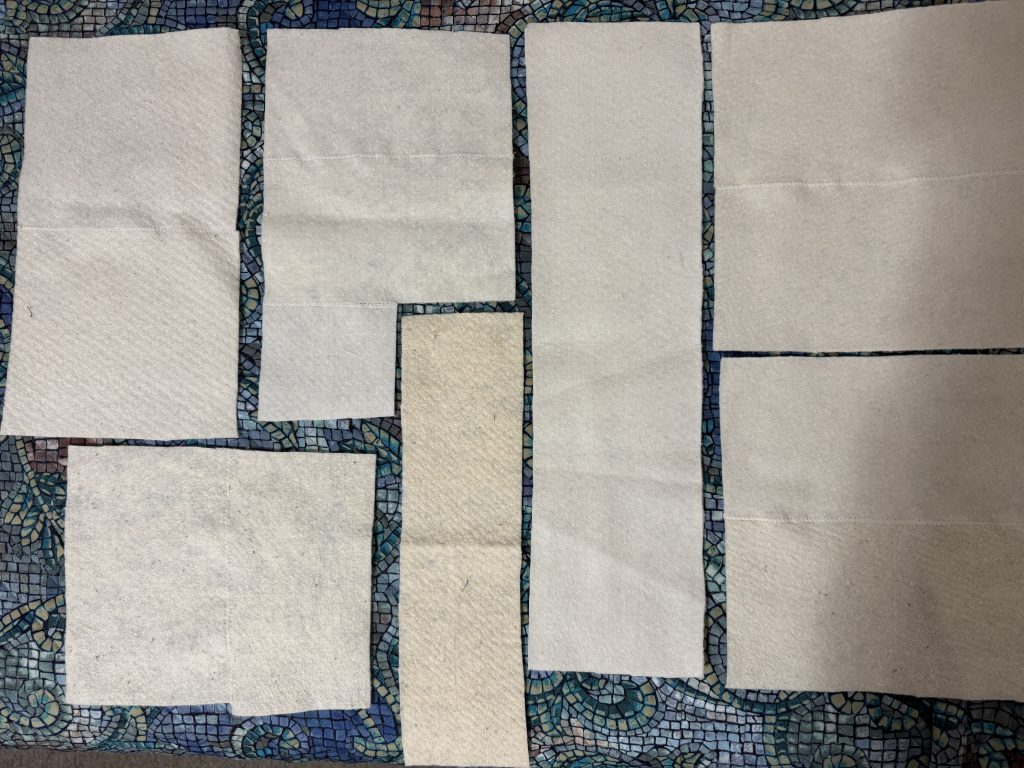
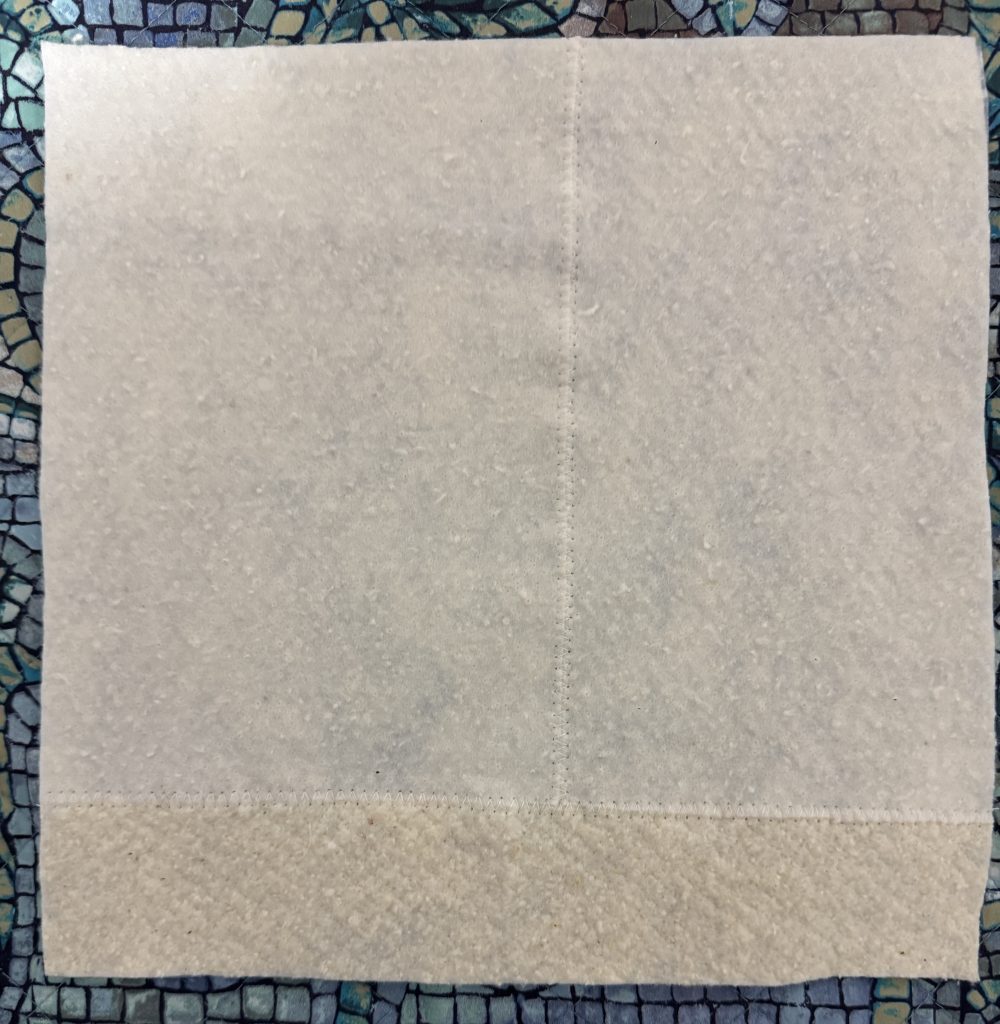
I was determined to try these hot pad cozies without buying anything new. That meant I needed to start with my pile of batting scraps. I started by laying out the pieces and pulling together those that could be stitched together to make 10″ squares.
All my batting pieces are natural cotton and they are all similar weight. They seem to be more “natural” on one side and whiter on the other.
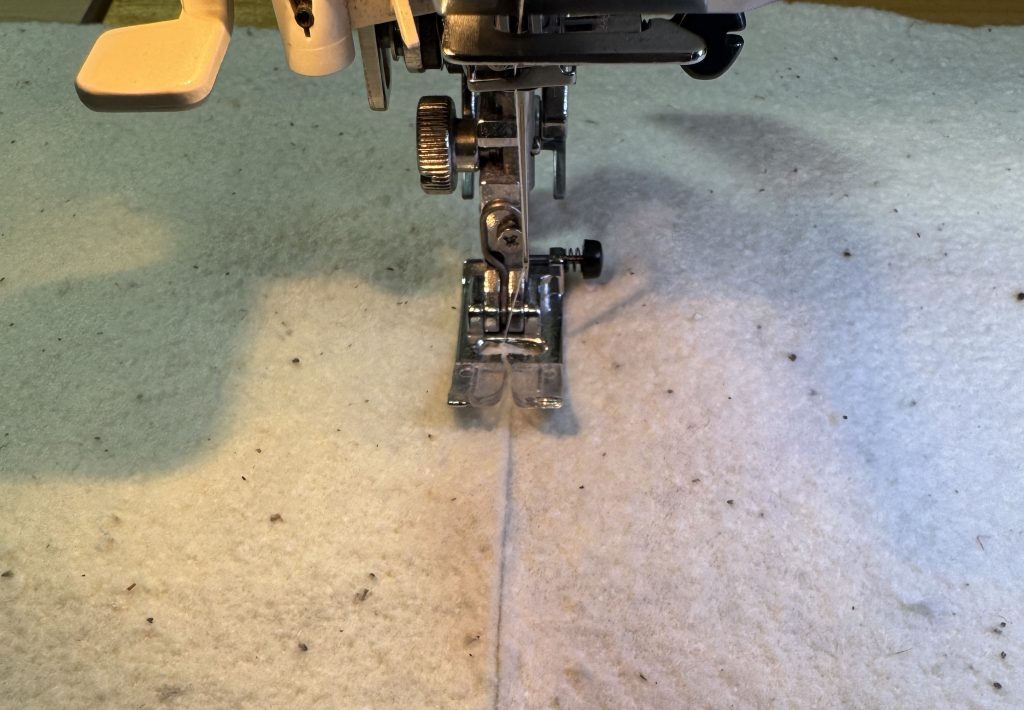
First, I trim the edges that I’ll sew together so they’ll lay flat.
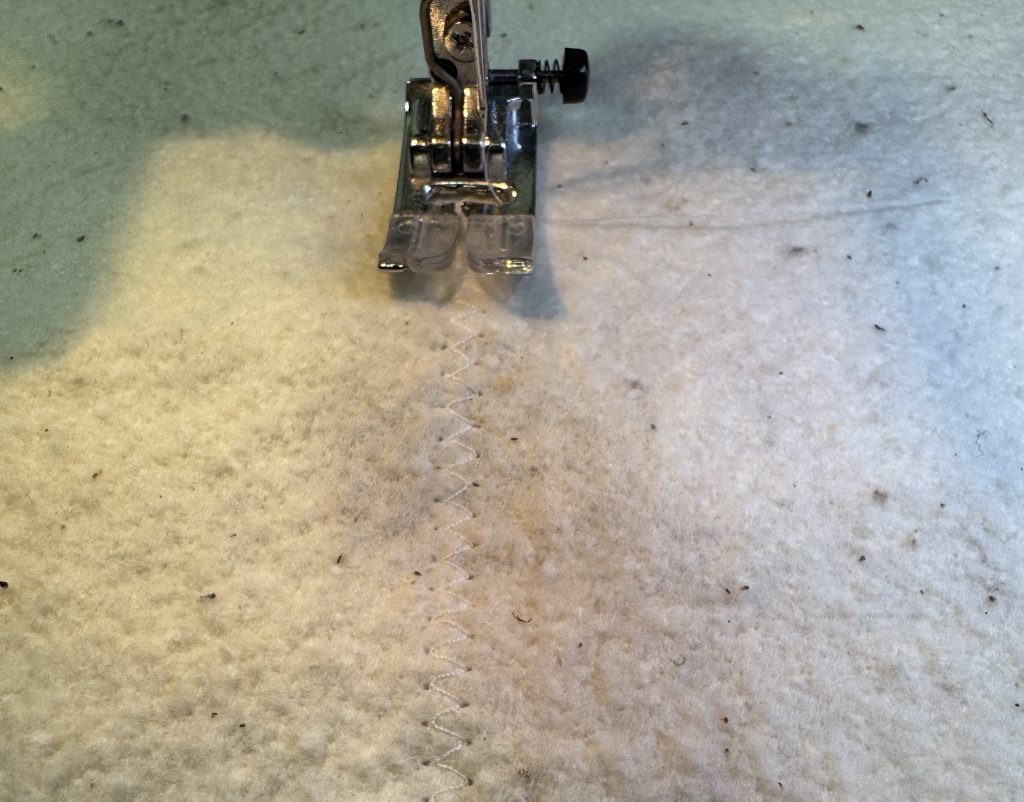
Next, using a zigzag seam, I sew the two sides together. If that doesn’t make 10″ I’ll add another strip to the width. If the total square doesn’t make the 10″ I’ll add another strip along the bottom.
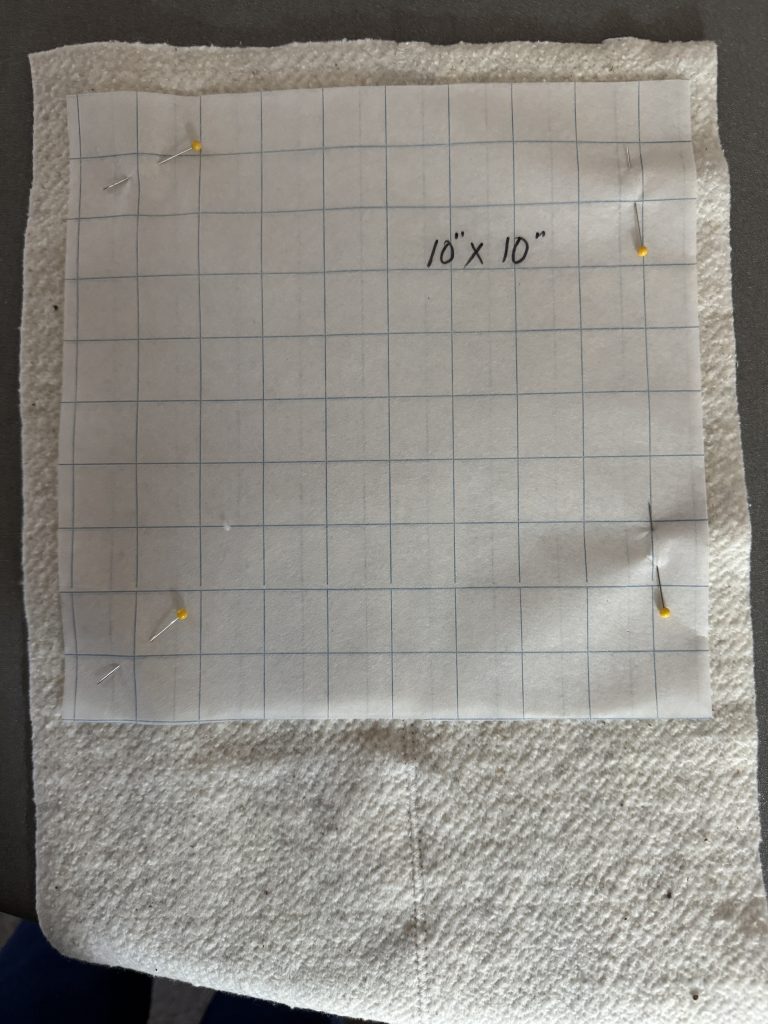
When I’ve pieced a large enough square, I put the pattern on and cut out the 10″ square.
Here are two finished blocks of batting:
Making the Hot Pad Cozies
You can read the details about how to make these cozies at my previous post:
With enough batting squares made, I started cutting 10″ squares of greyhound fabric. I found scraps of coordinating fabric to make the reverse sides.
I started with one of each print, just to see which print worked best. The first one was a very large print of a greyhound. I barely had enough fabric to make just one square. I think the large print doesn’t work…too many extraneous body parts on the edges!
The second cozy I made used a border repeat pattern:
The pattern was wider than the print so it didn’t make good use of the fabric. I did not want to cut off too many heads.
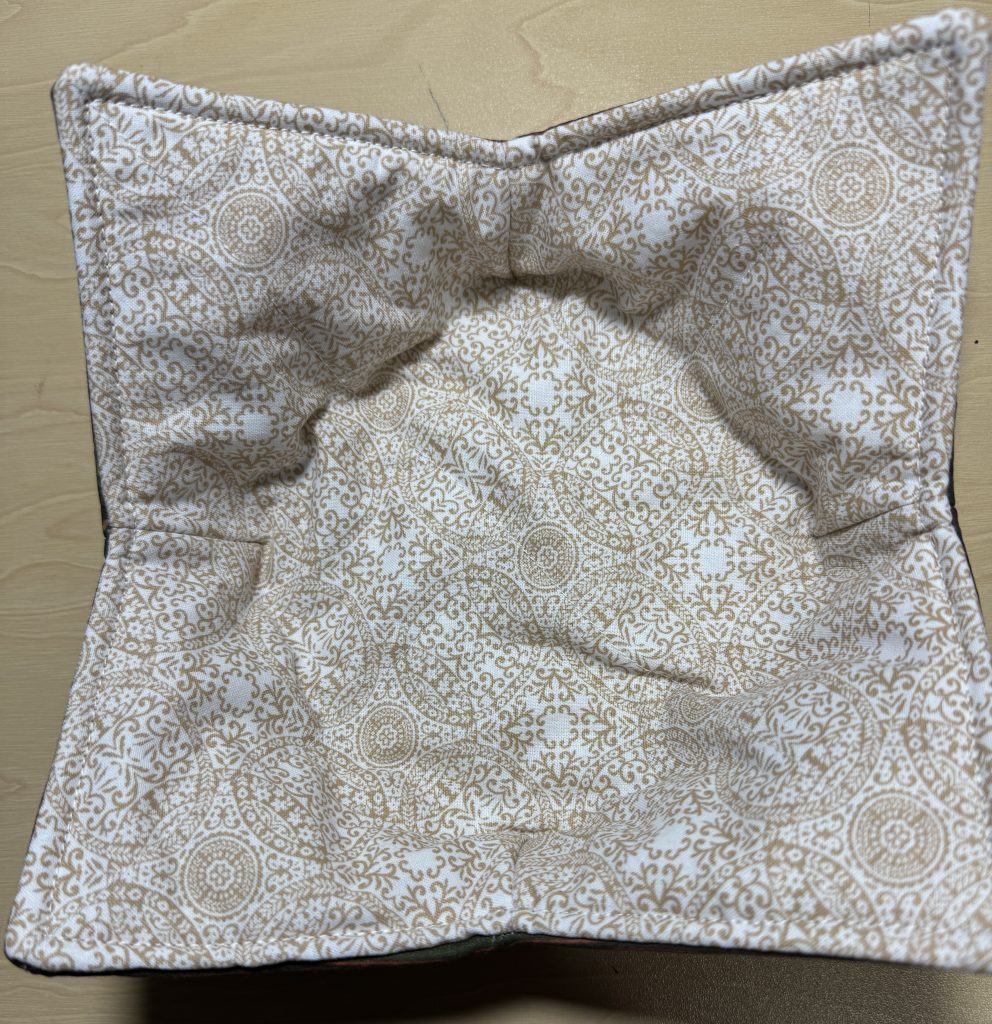
The third cozy I made used an all-over pattern of small greyhounds. I had enough fabric to use the same fabric for the lining; otherwise I’ll use white.
I think if we choose the greyhound fabric wisely, with a small overall print, we could make the best use of the expensive fabric.
For all the sewers out there…save your batting scraps! You never know when you’ll need them! Enjoy!
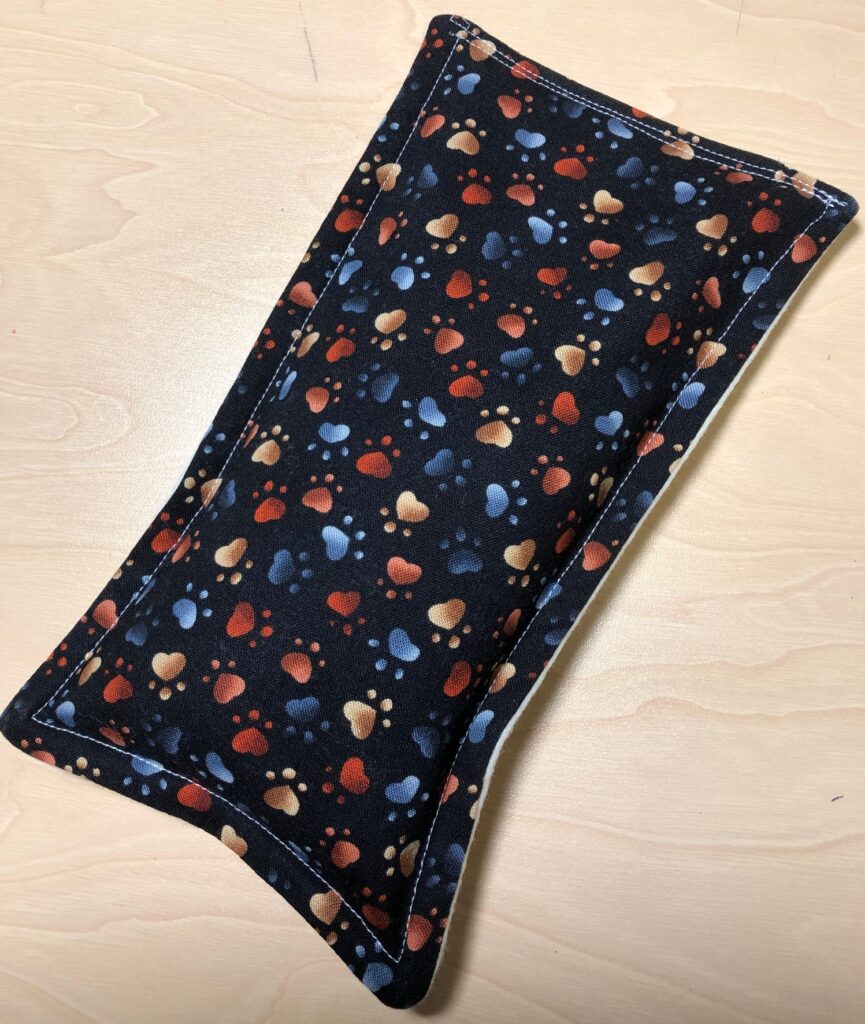
This week I’ve been working on a request from a friend…based on the hot pad cozies I had given her several years ago. She needed a wedding gift for her soon-to-be-married granddaughter. I wrote about these hot pads right at the beginning of my blogging adventure (https://marykisner.com/make-a-bowl-cozy-for-soup-or-ice-cream/)
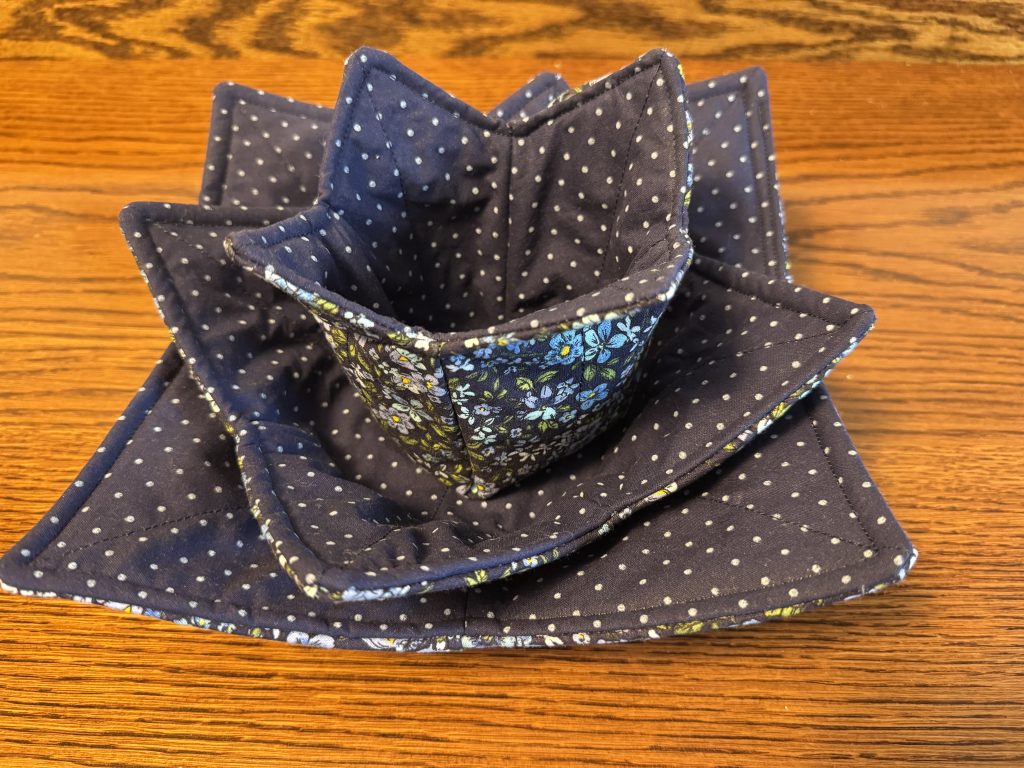
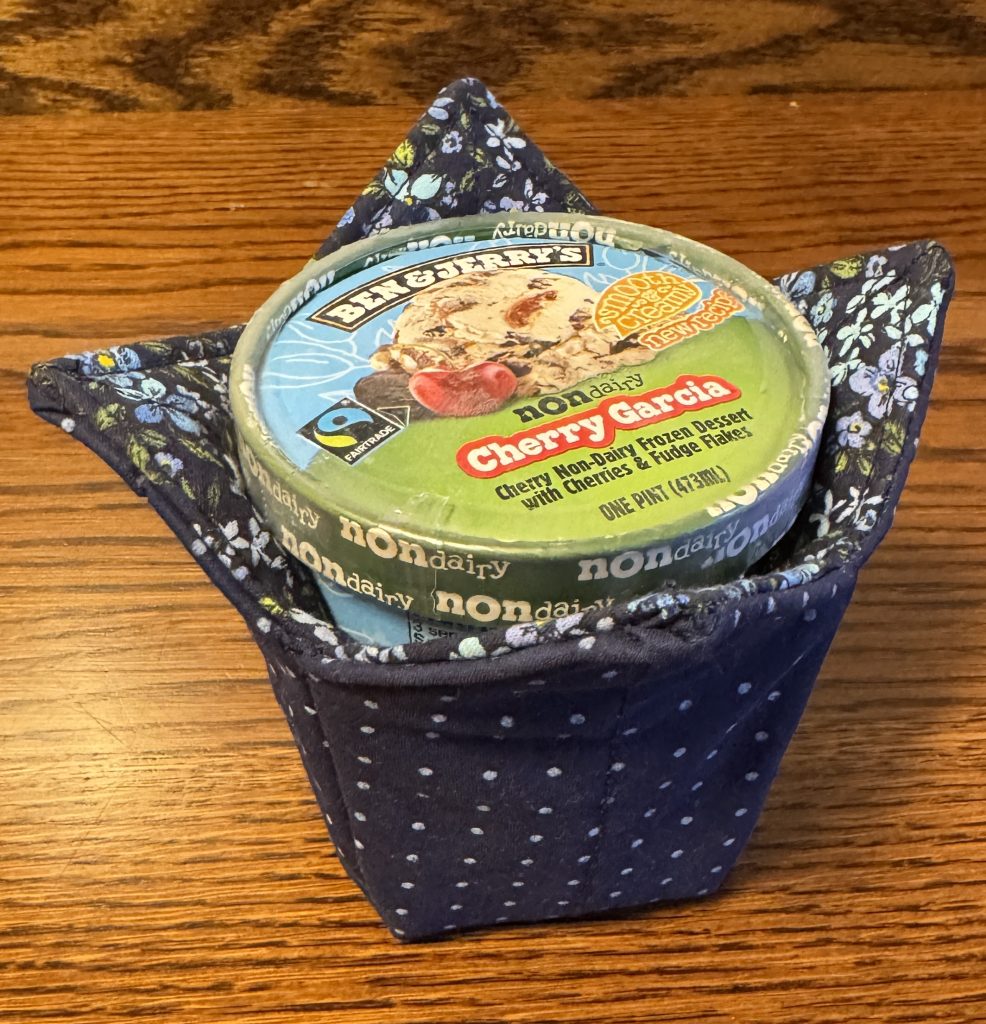
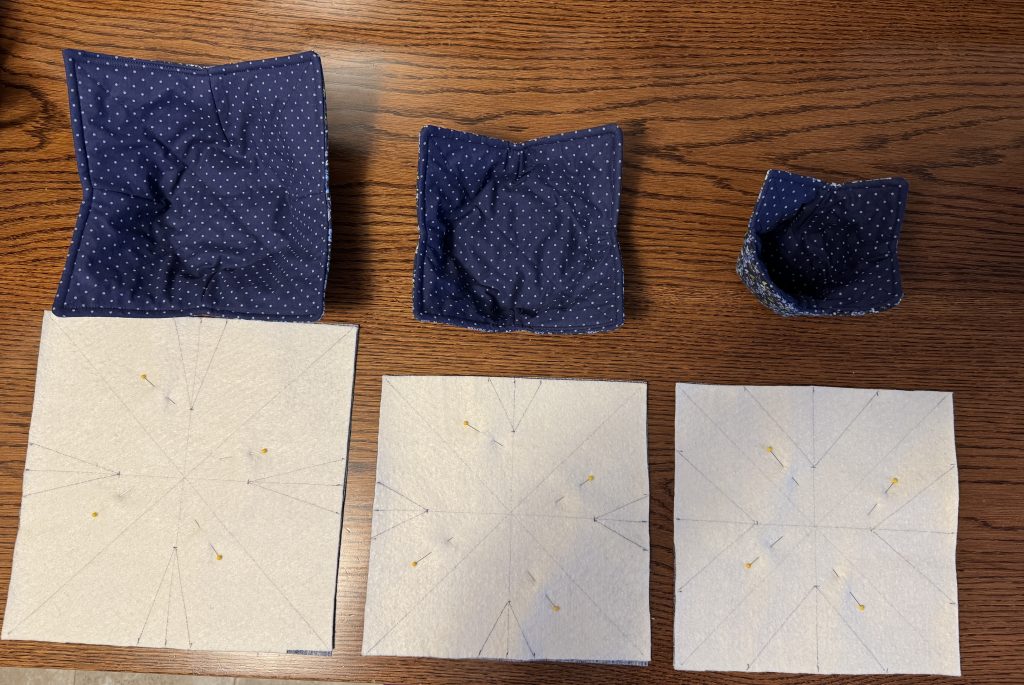
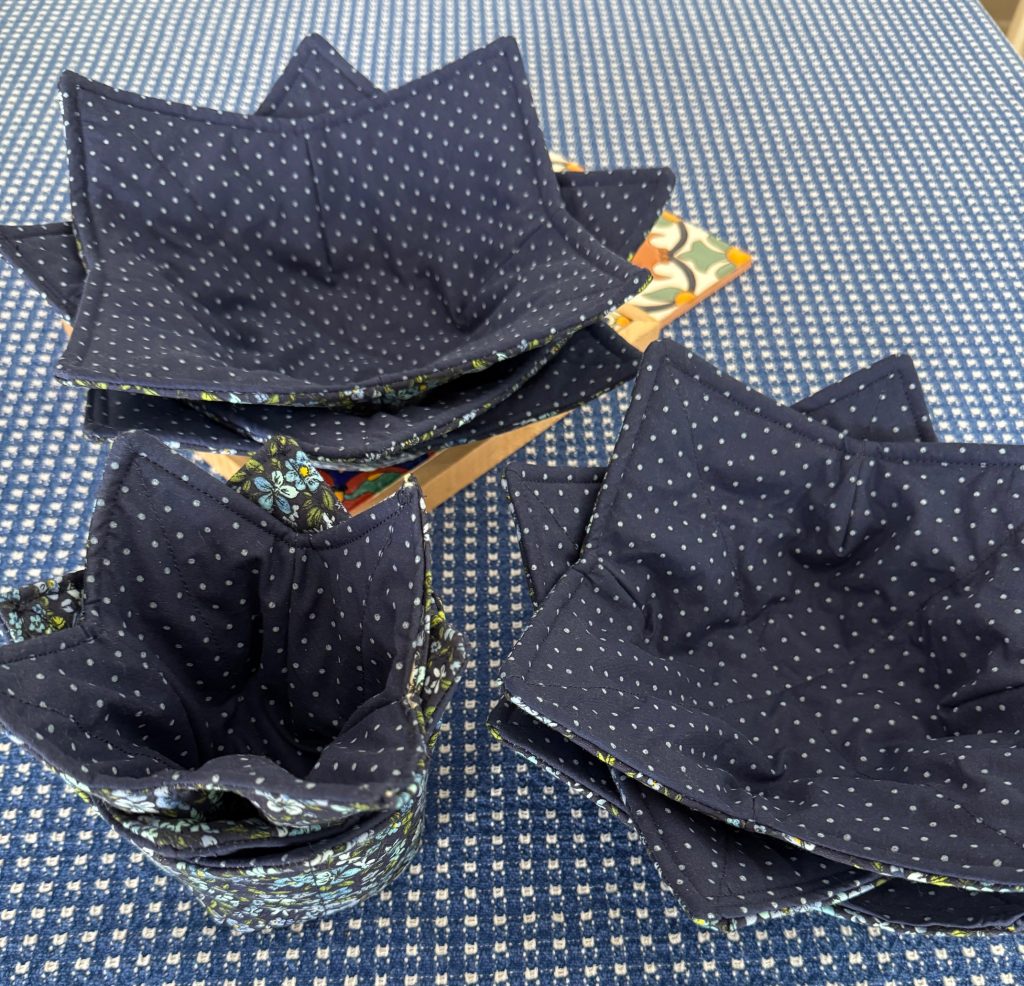
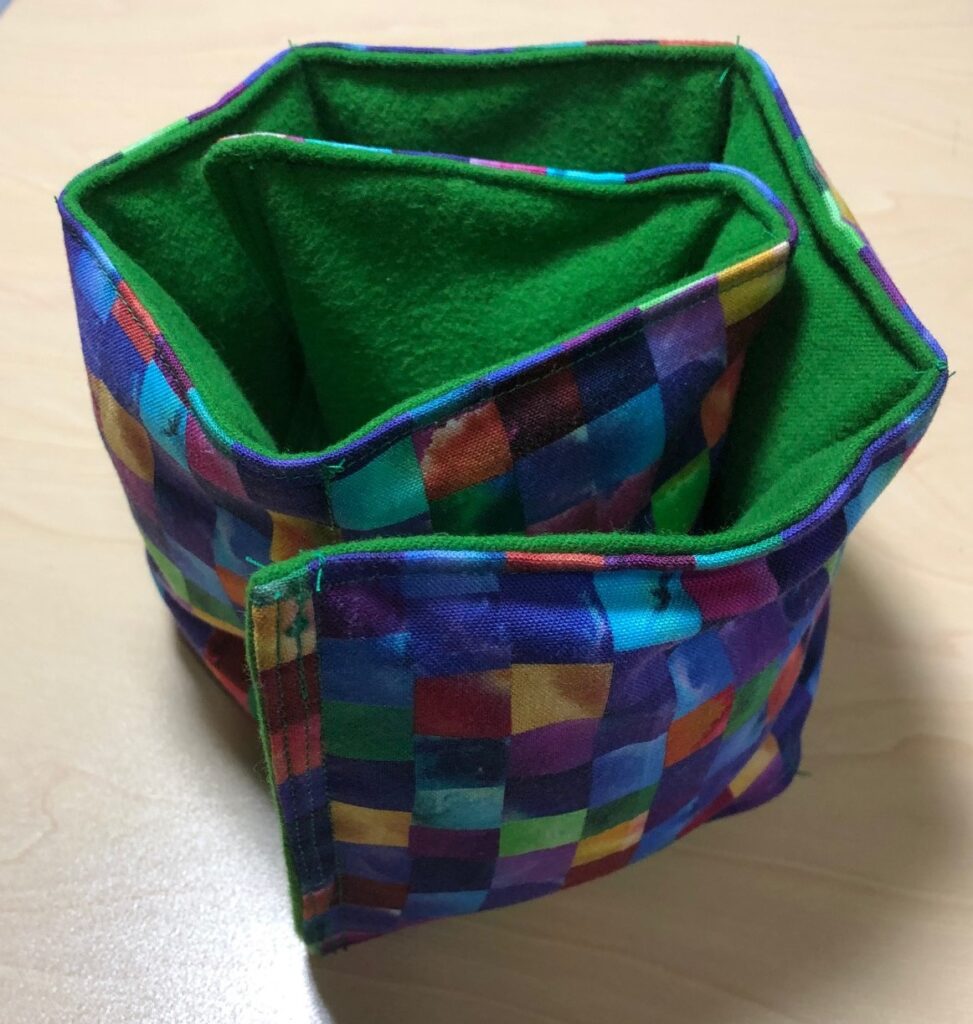
For this project, I needed to make three sizes of cozies. I’ll start with a picture of my finished products:
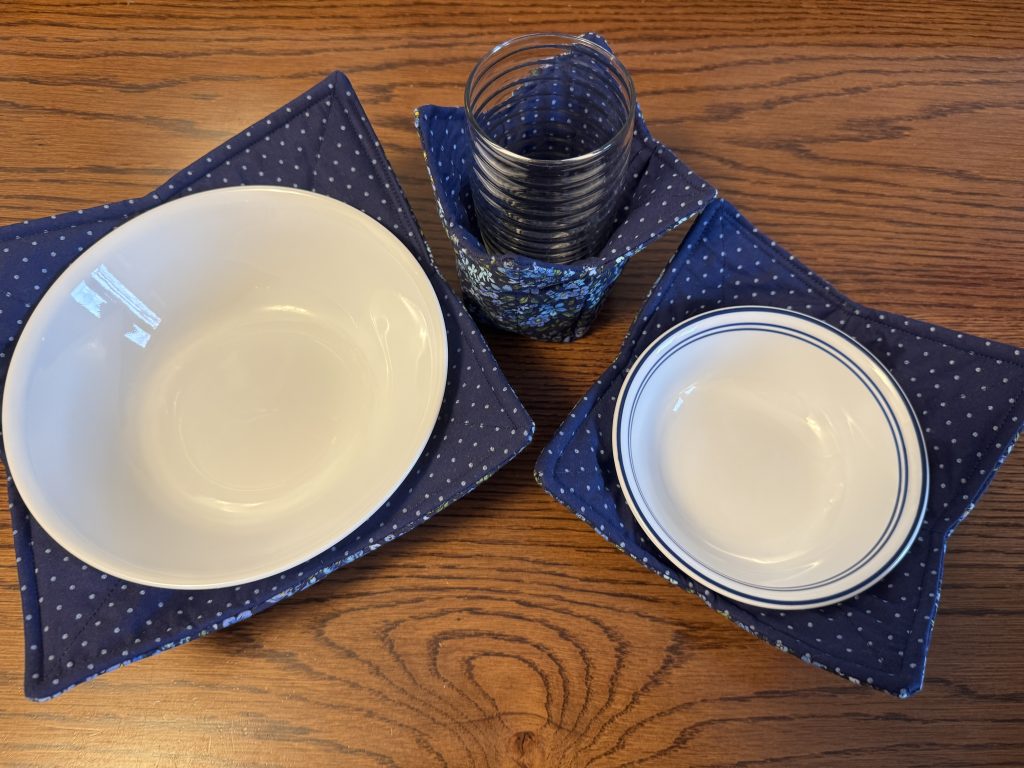
These shaped potholders can be used in the microwave (not the oven) and are great when I want to reheat a bowl of soup or hold a serving bowl of vegetables so it can be passed around the table. The tallest one holds a cold drink with ice or a pint of ice cream!
What a thoughtful gift for a young person setting up a new kitchen!
The difference between the three sizes of cozies involves the size of the squares you start with and size of the darts that make the bowl shapes.
Supplies
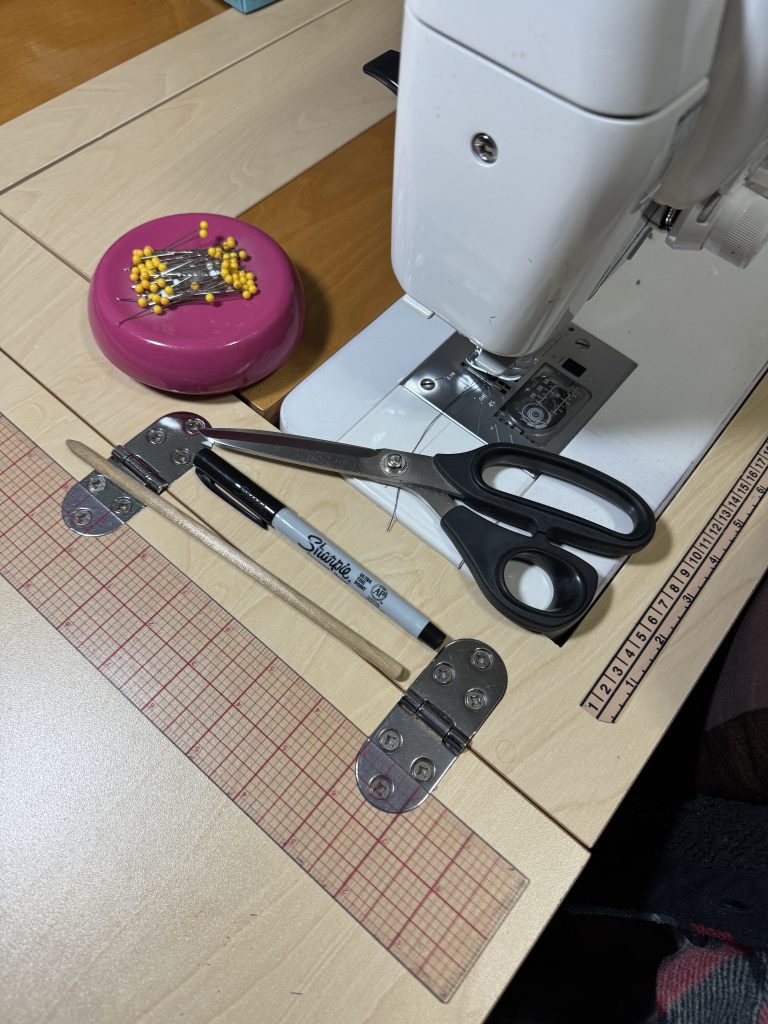
To make these shaped hot pads, here are a few things you’ll need to have:
A ruler, fine point marker and basic sewing supplies.
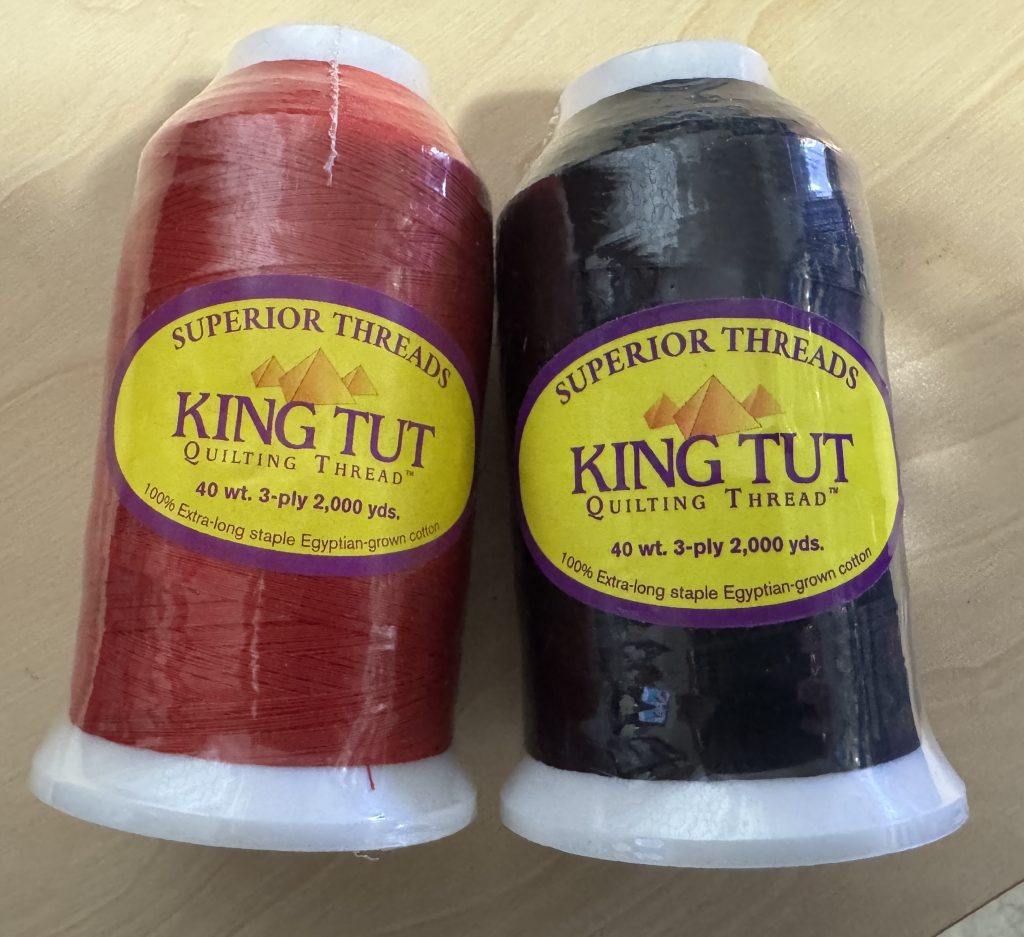
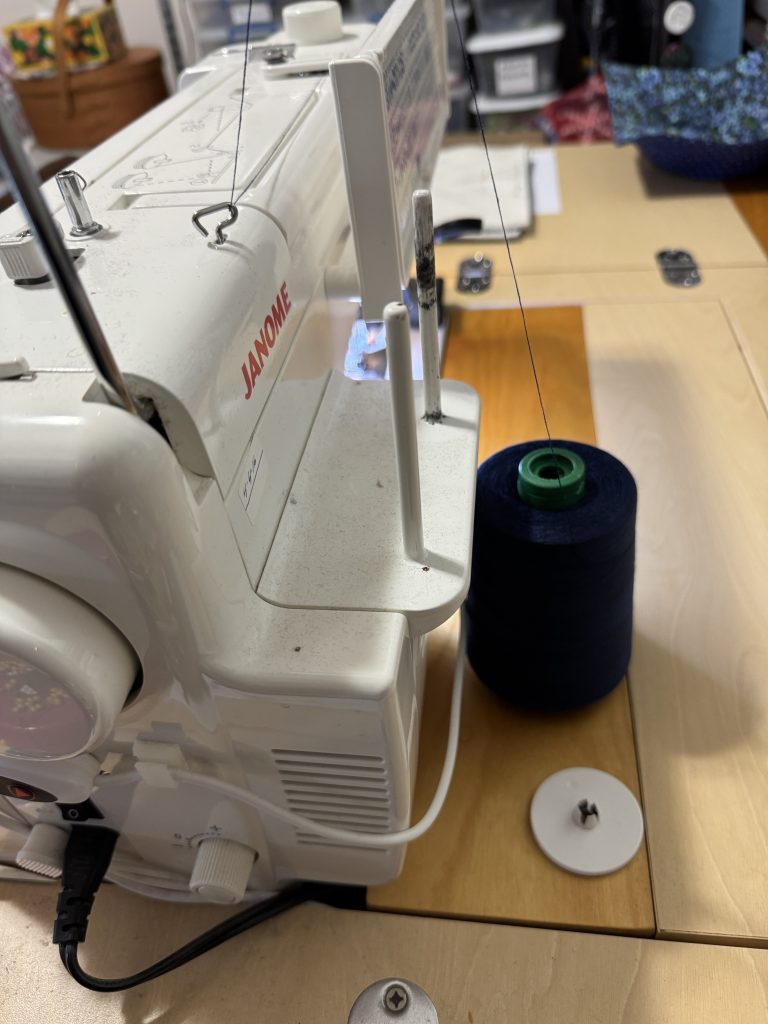
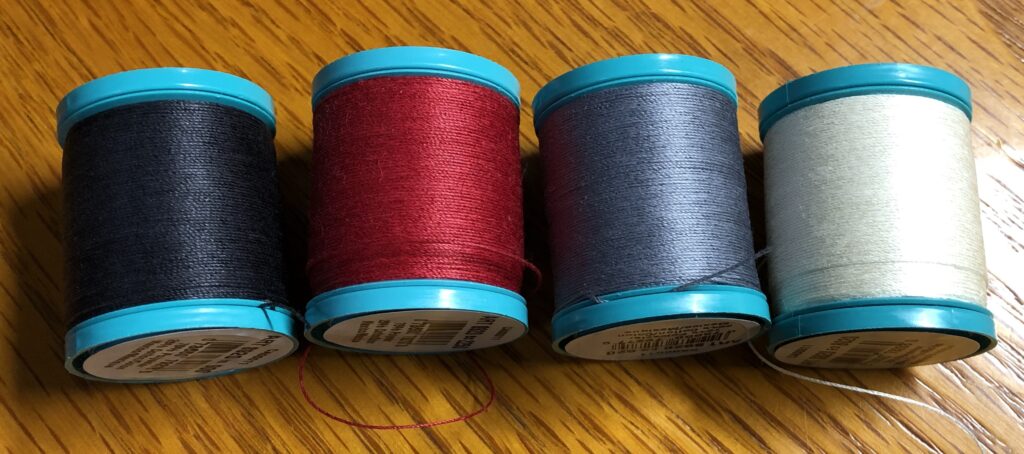
2. Fabric, batting and thread must be all cotton. Check labels for any sign of polyester, nylon or synthetic components…they will melt in the microwave. I look for all cotton quilting fabric, all cotton batting (sometimes labeled as “natural”) and all cotton thread. I’ve ordered thread online like this:
Of course, the cone-shaped spools have to sit behind my sewing machine but they are heavy enough to stay put.
All three sizes of hot pad cozies are made the same way. The LARGE hot pad, made for a serving bowl, begins with two 12″ squares of fabric and two 12″ squares of batting. The MEDIUM and TALL sizes begin with two 10″ squares of fabric and batting.
Instructions for Making the Hot Pad Cozies
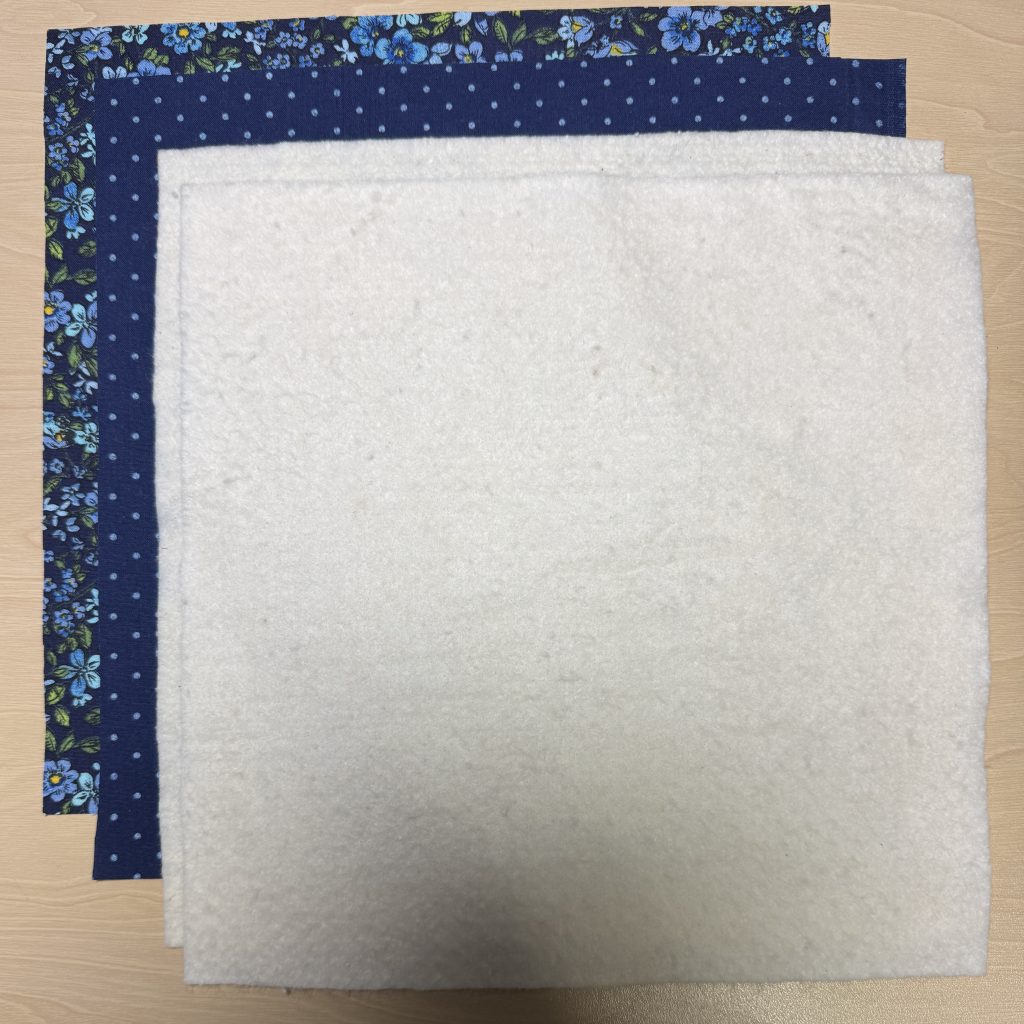
Cut two squares of fabric in coordinating colors (the cozies are reversible):
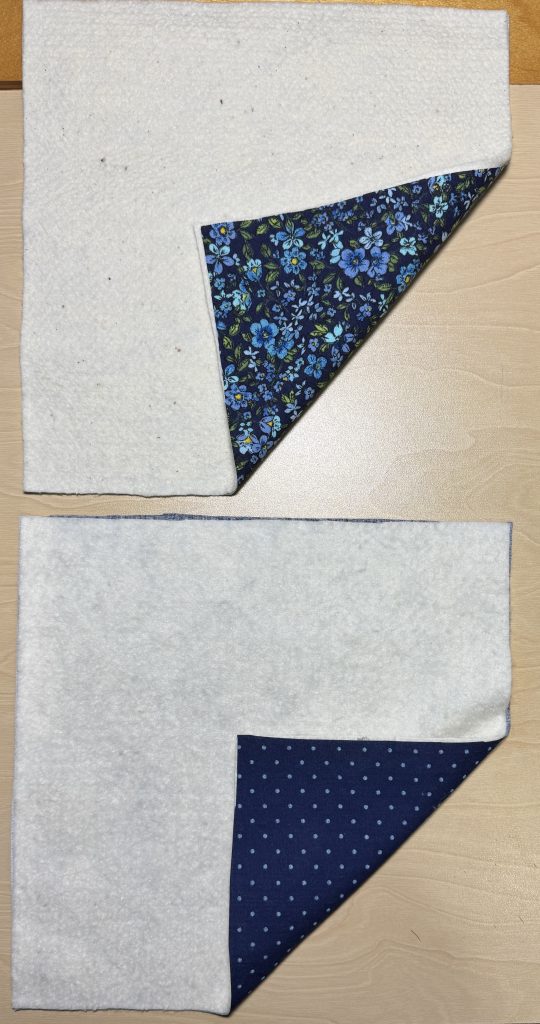
2. Place a square of batting on the wrong side of each fabric square:
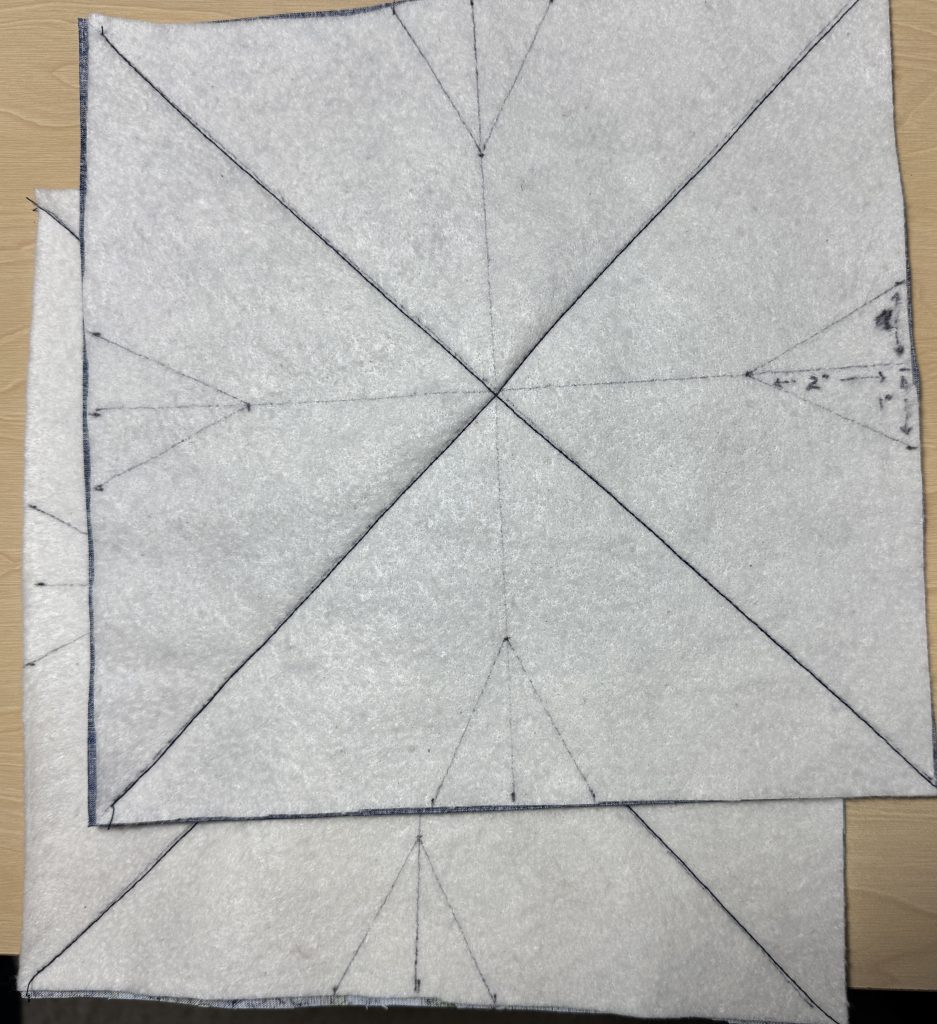
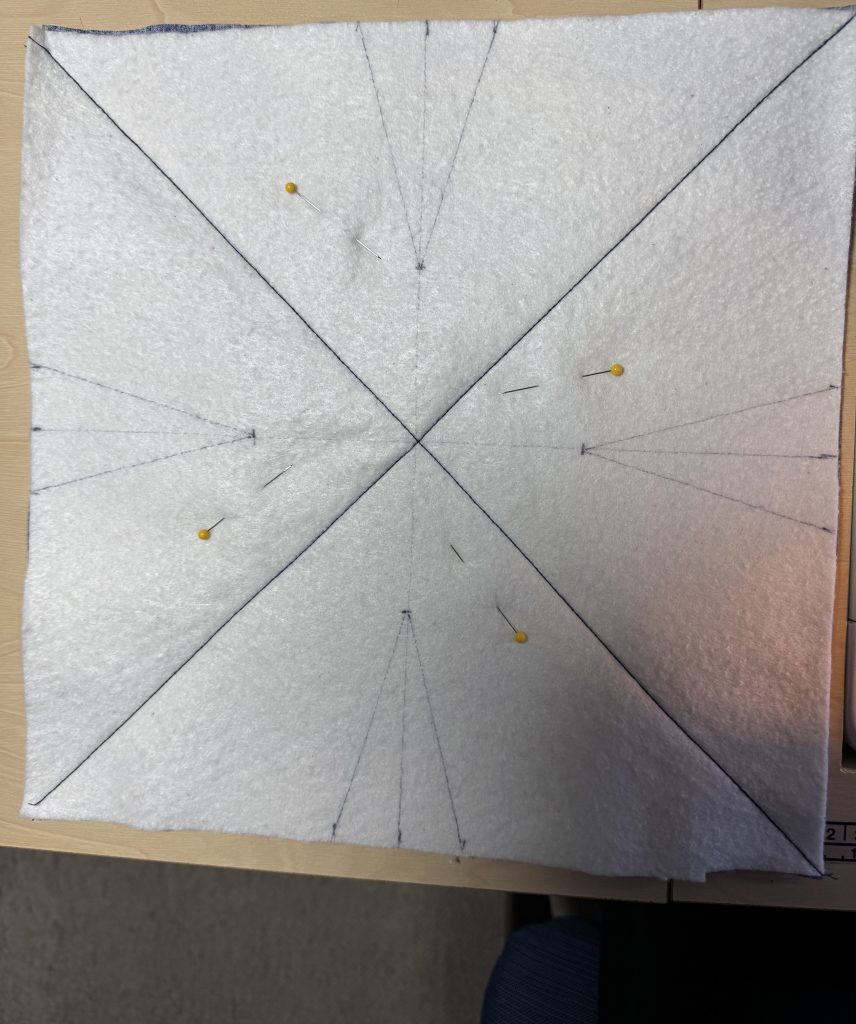
3. Working on the batting side, use a ruler to draw a stitching line from corner to corner. Stitch on the lines.
4. Next, measure the midpoint of each side and draw lines through the center. These are your FOLD lines.
MEDIUM Size shown below (10″ square)
LARGE Size (12″ square) shown below:
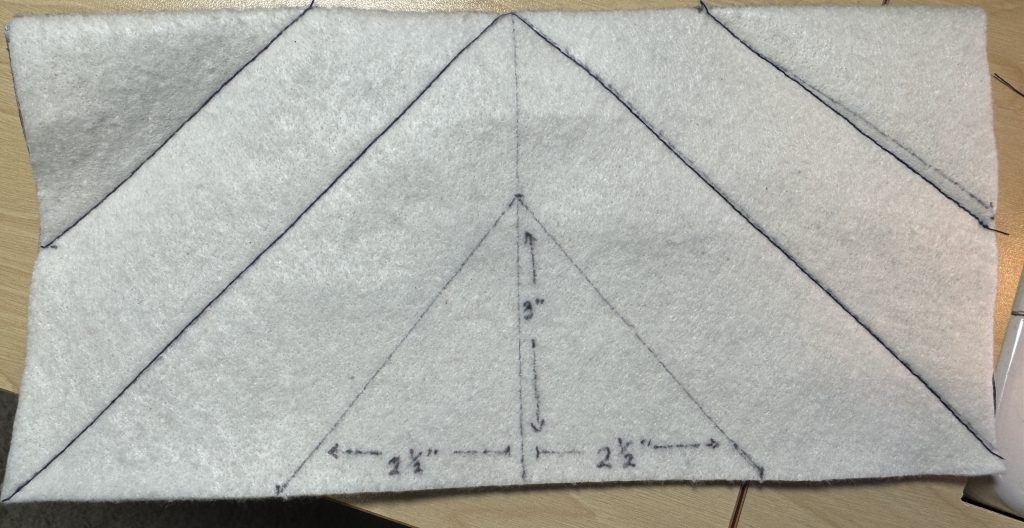
TALL Size (10″ square) shown below:
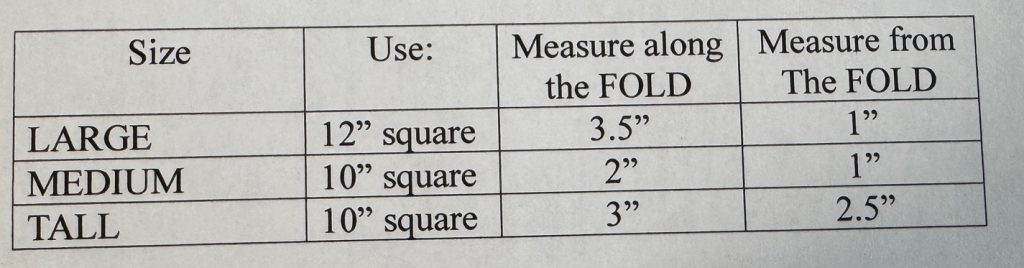
The size of the darts depends on the size hot pad you are making. Here’s a table to determine those measurements. Draw the stitching lines right on the batting.
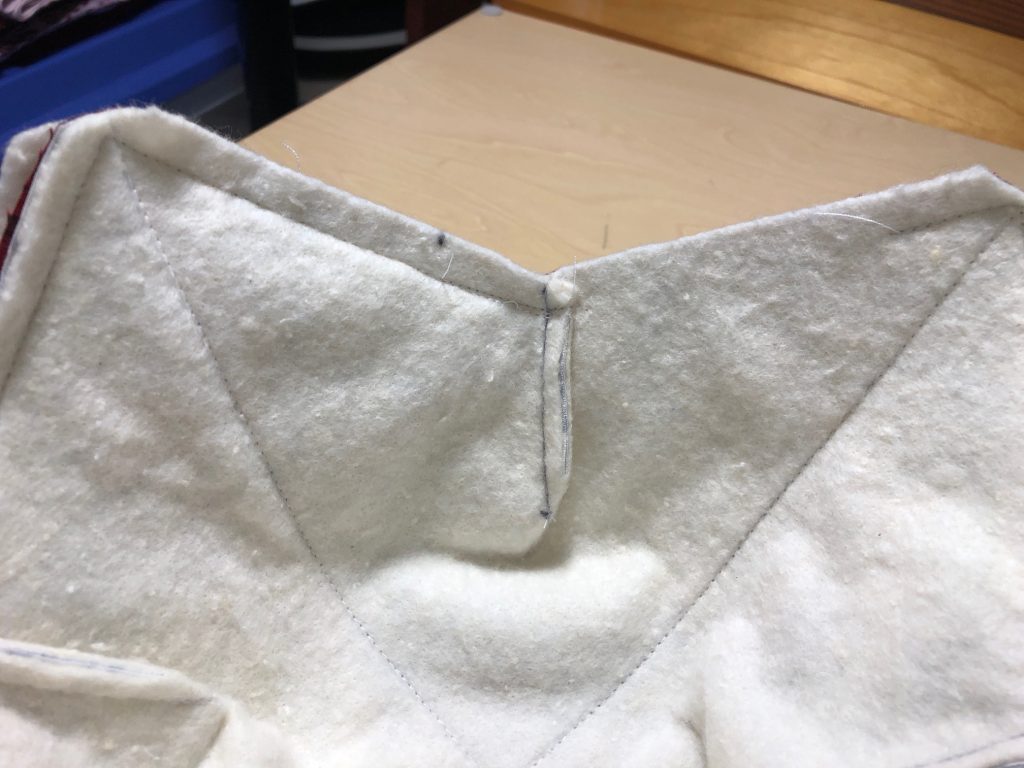
The rest of these illustrations are for the TALL hot pad cozy.
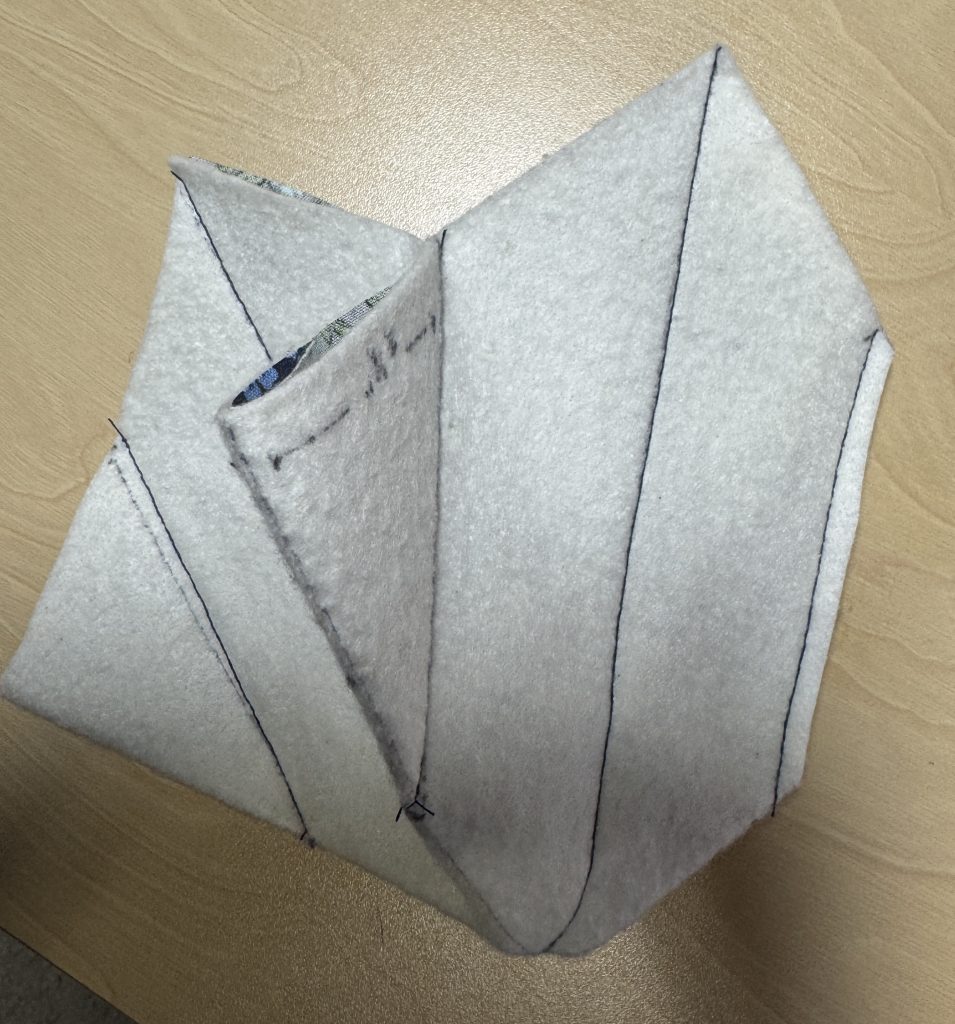
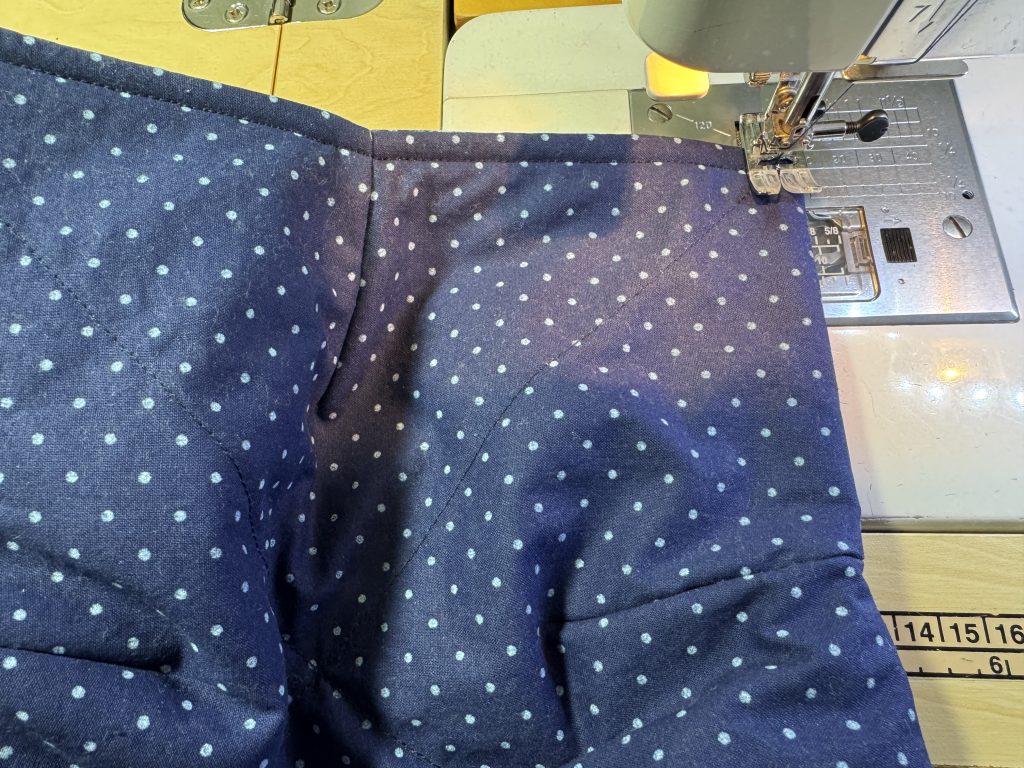
5. Fold the square in half along the FOLD line. Stitch the corner darts (see the picture above):
6. Open the square and fold the other way. Stitch on those corner dart lines:
Trim the darts to 1/4″ to decrease bulk.
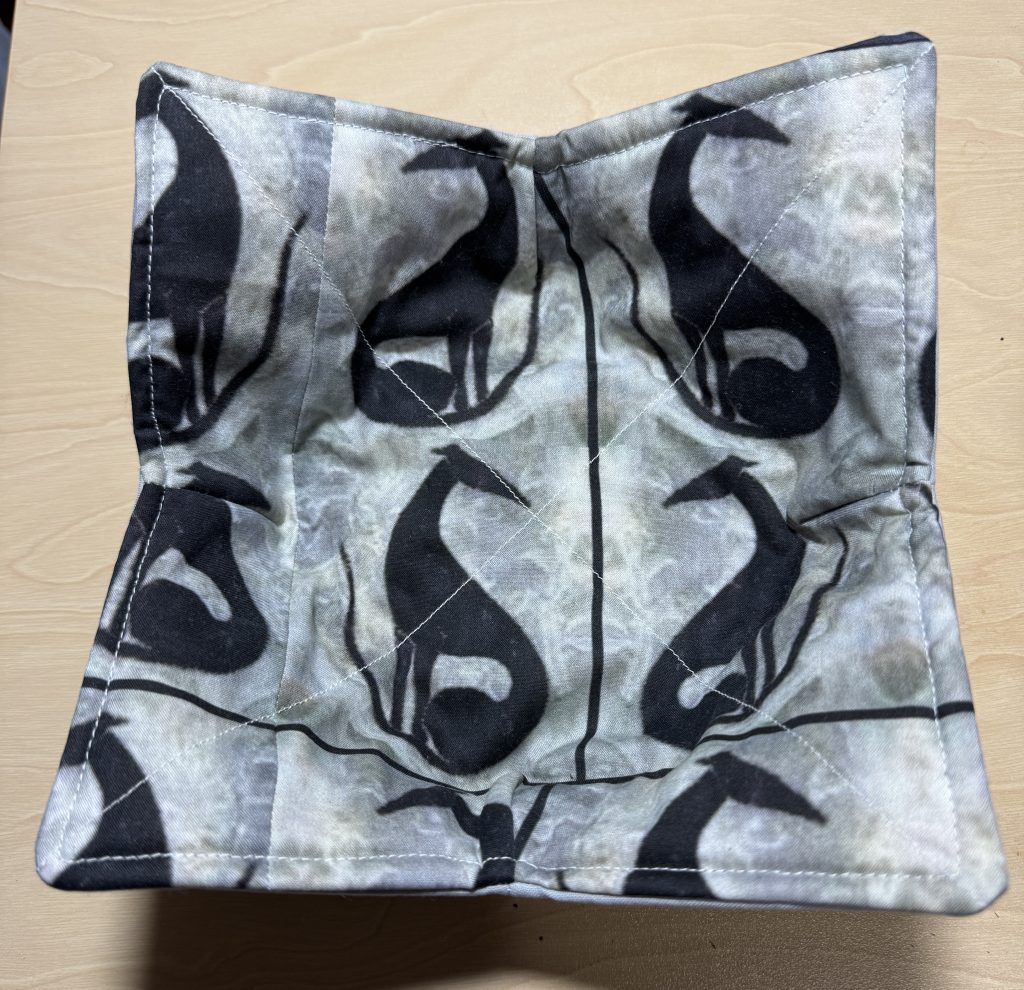
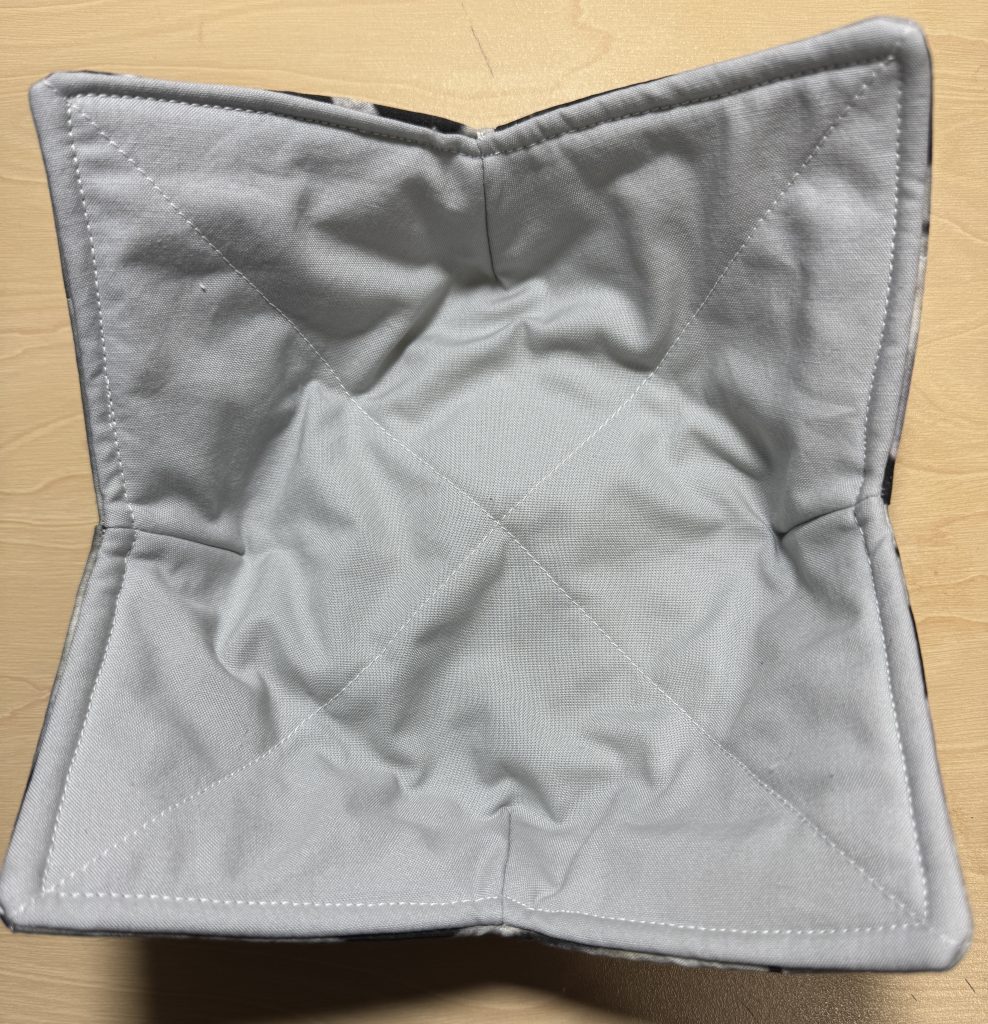
7. When you open the squares, they will sit like a bowl.
8. Repeat with the other 10″ square. This will make the lining piece.
9. Nest the two finished “bowls” right sides together. Pin the two halves together lining up the darts.
10. Sew around the edges with a 1/4″ seam, turning your needle at the corners and the darts. Leave about 3″ open for turning right side out. Trim the corners.
11. Turn right side out through the opening. Poke out the corners with a stick or chopstick.
12. Top stitch all around the top edge of the cozy.
And, FINISHED! I ended up making 3 of each size, so the newlyweds will have plenty to get started!!
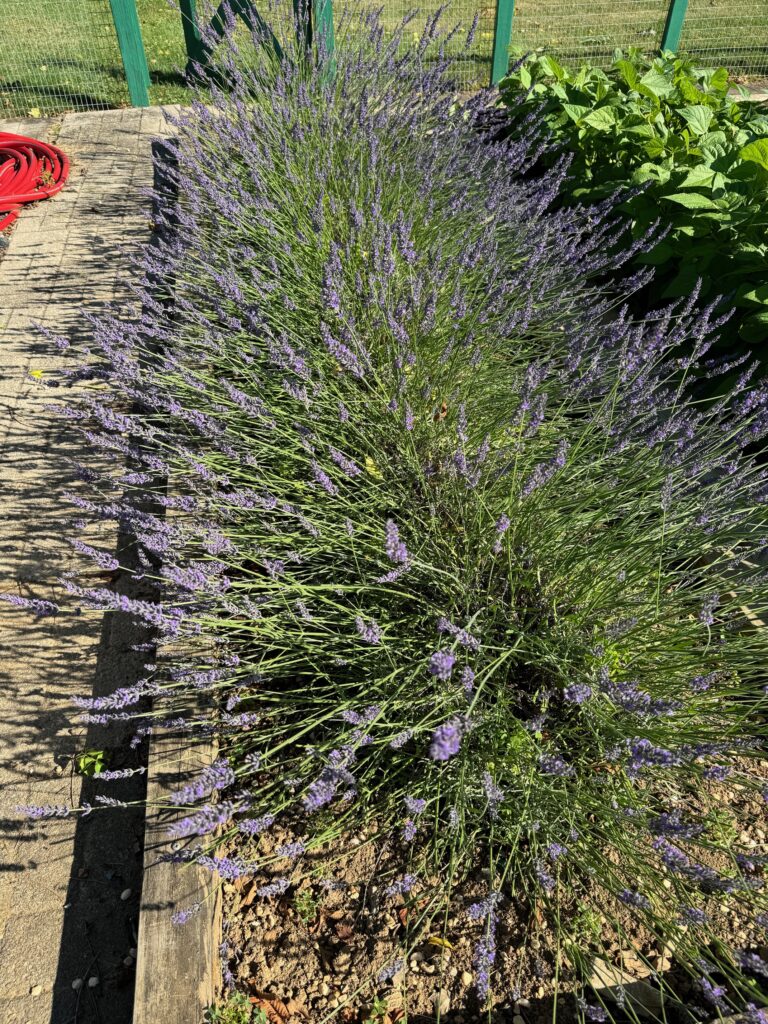
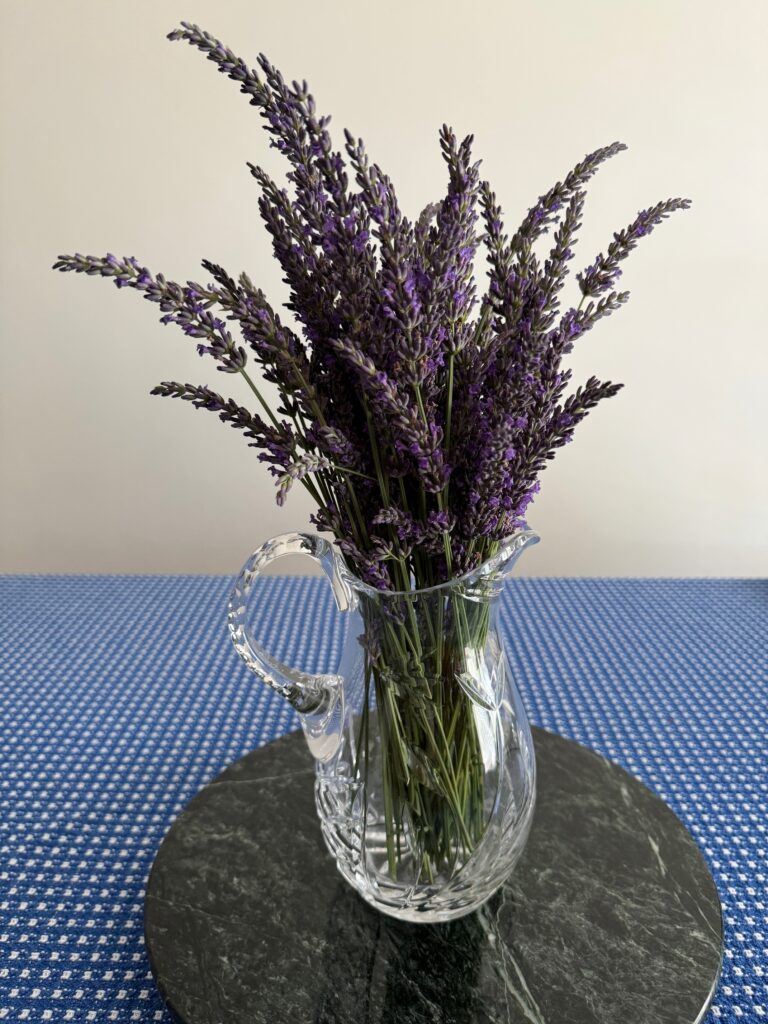
Our lavender plants this summer are doing very well! The flowers are just opening and the bees have discovered them! I’ve been trying to cut some while they are so beautiful but I can tell the bees sense that I’m competition. They even checked out the basket I was using to put the cut flowers in. I promise, I won’t take them all!
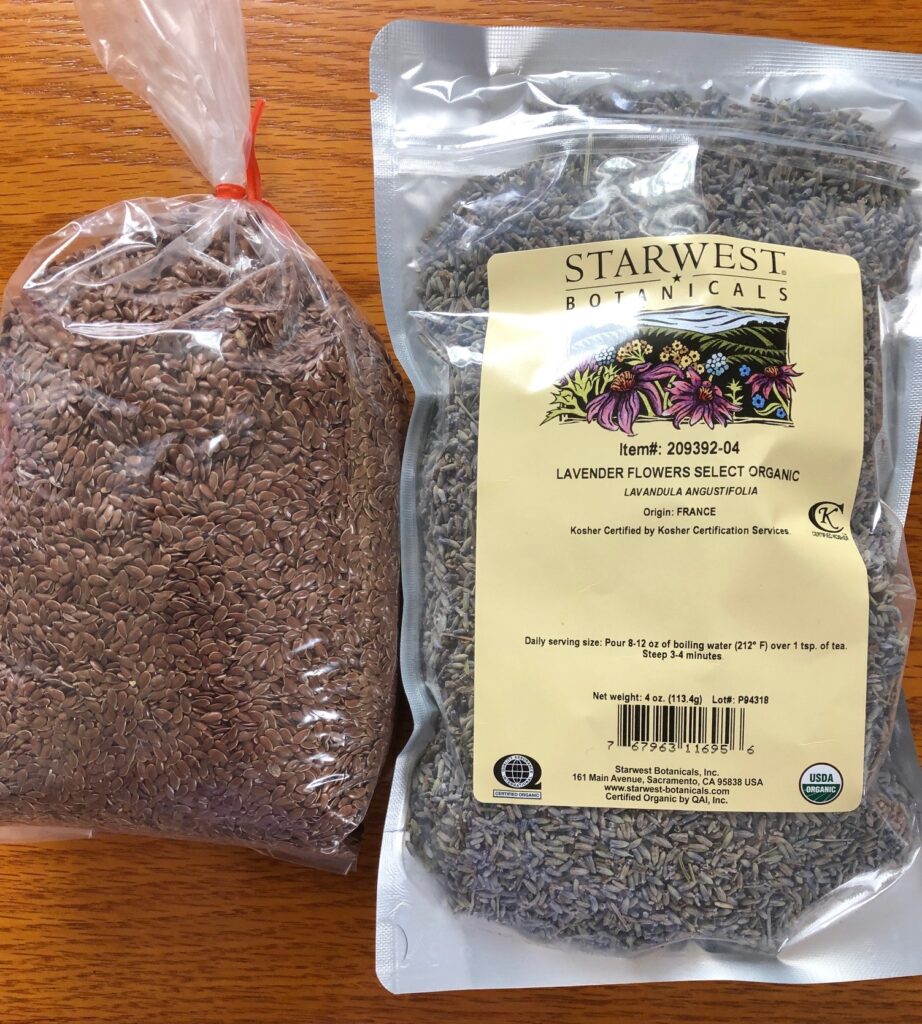
I’m really not cutting the flowers to use as a decoration in the house, although they look nice in a vase without water for a while. I’m hoping to let them dry naturally and collect the flower buds. I can use them in several fabric projects and even in my soap. In the past I have purchased them in bulk from STARWEST Botanicals, as shown in the picture below. The buds are often used with flax seeds in several of my projects. When sealed in a zip bag, they maintain their lovely scent for more than a year.
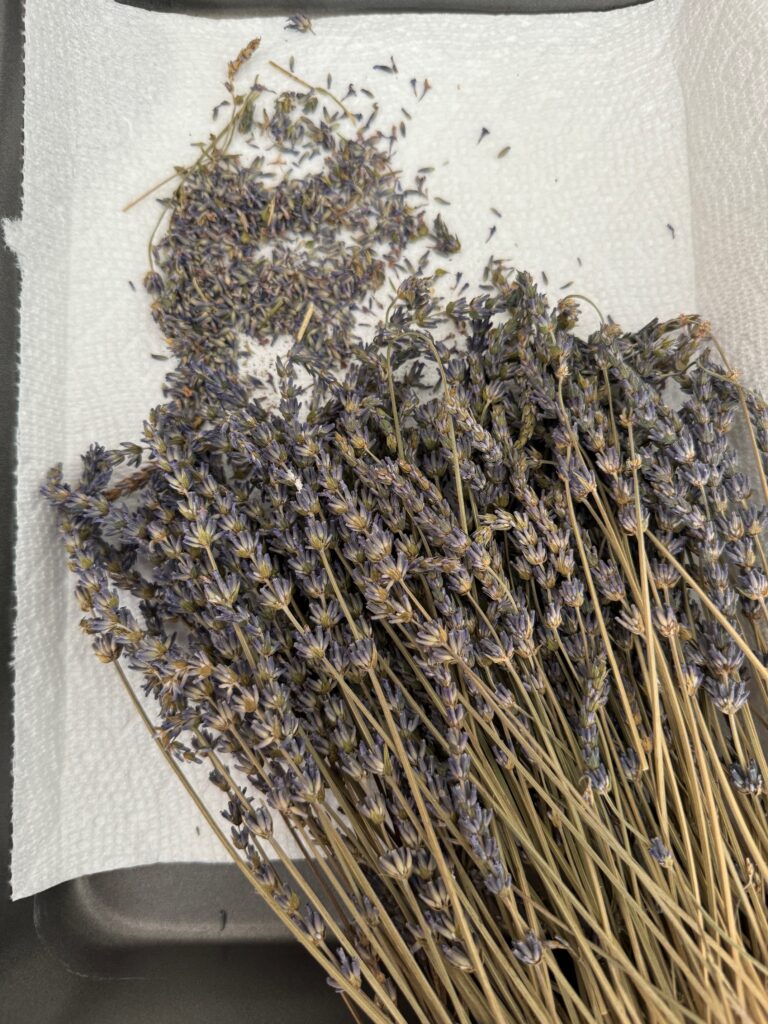
Last year I cut some lavender flowers and let them sit on a try for a month or so. Then I dropped them into an unsealed zip bag and set them aside to continue drying. Actually, I totally forgot about them until this year! They are quite dry now but still have a nice scent, so I will rub the buds off the stems, seal them in a zip bag and use them this year in projects. You can see the buds that have fallen off the stems already.
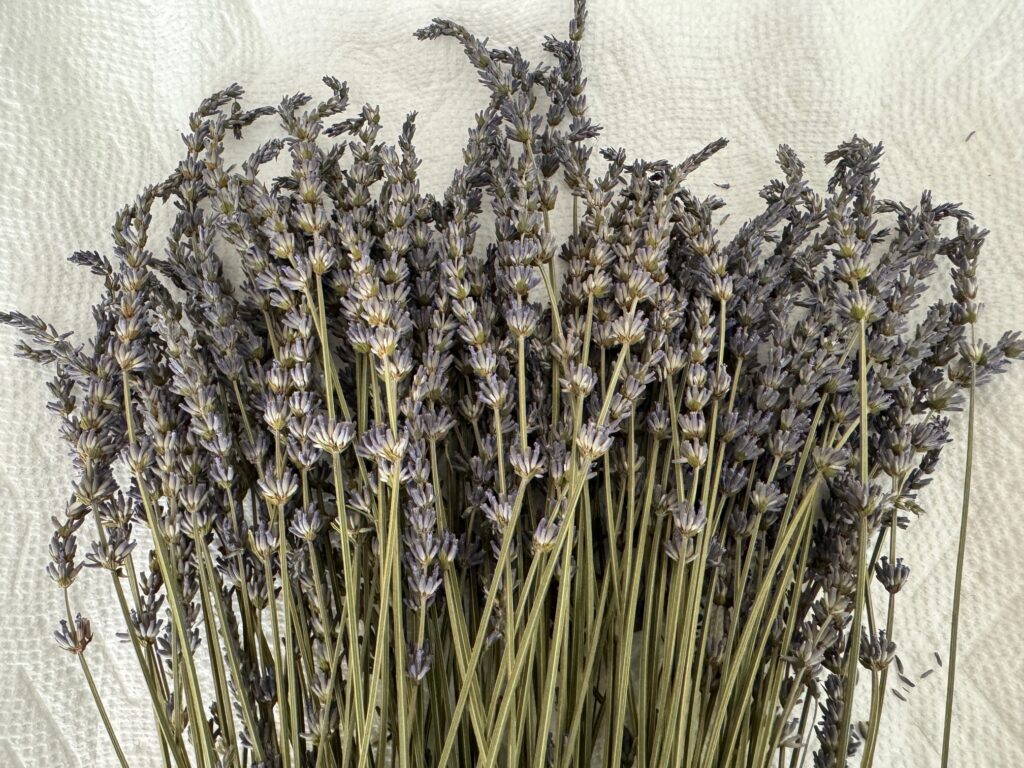
Earlier this month, I cut another batch of flowers to begin the process again. I’ve laid them on a tray in the dining room, right under our ceiling fan.
Today, I cut another batch…not too many…the bees were very interested in my activities! I will enjoy these as a decoration until they start to wilt. They dry better if laid flat or hung upside down. I don’t have a dry barn or attic to hang them in, so a tray will have to do.
Projects Using Lavender Buds
I have three fabric projects where I’ve used lavender buds.
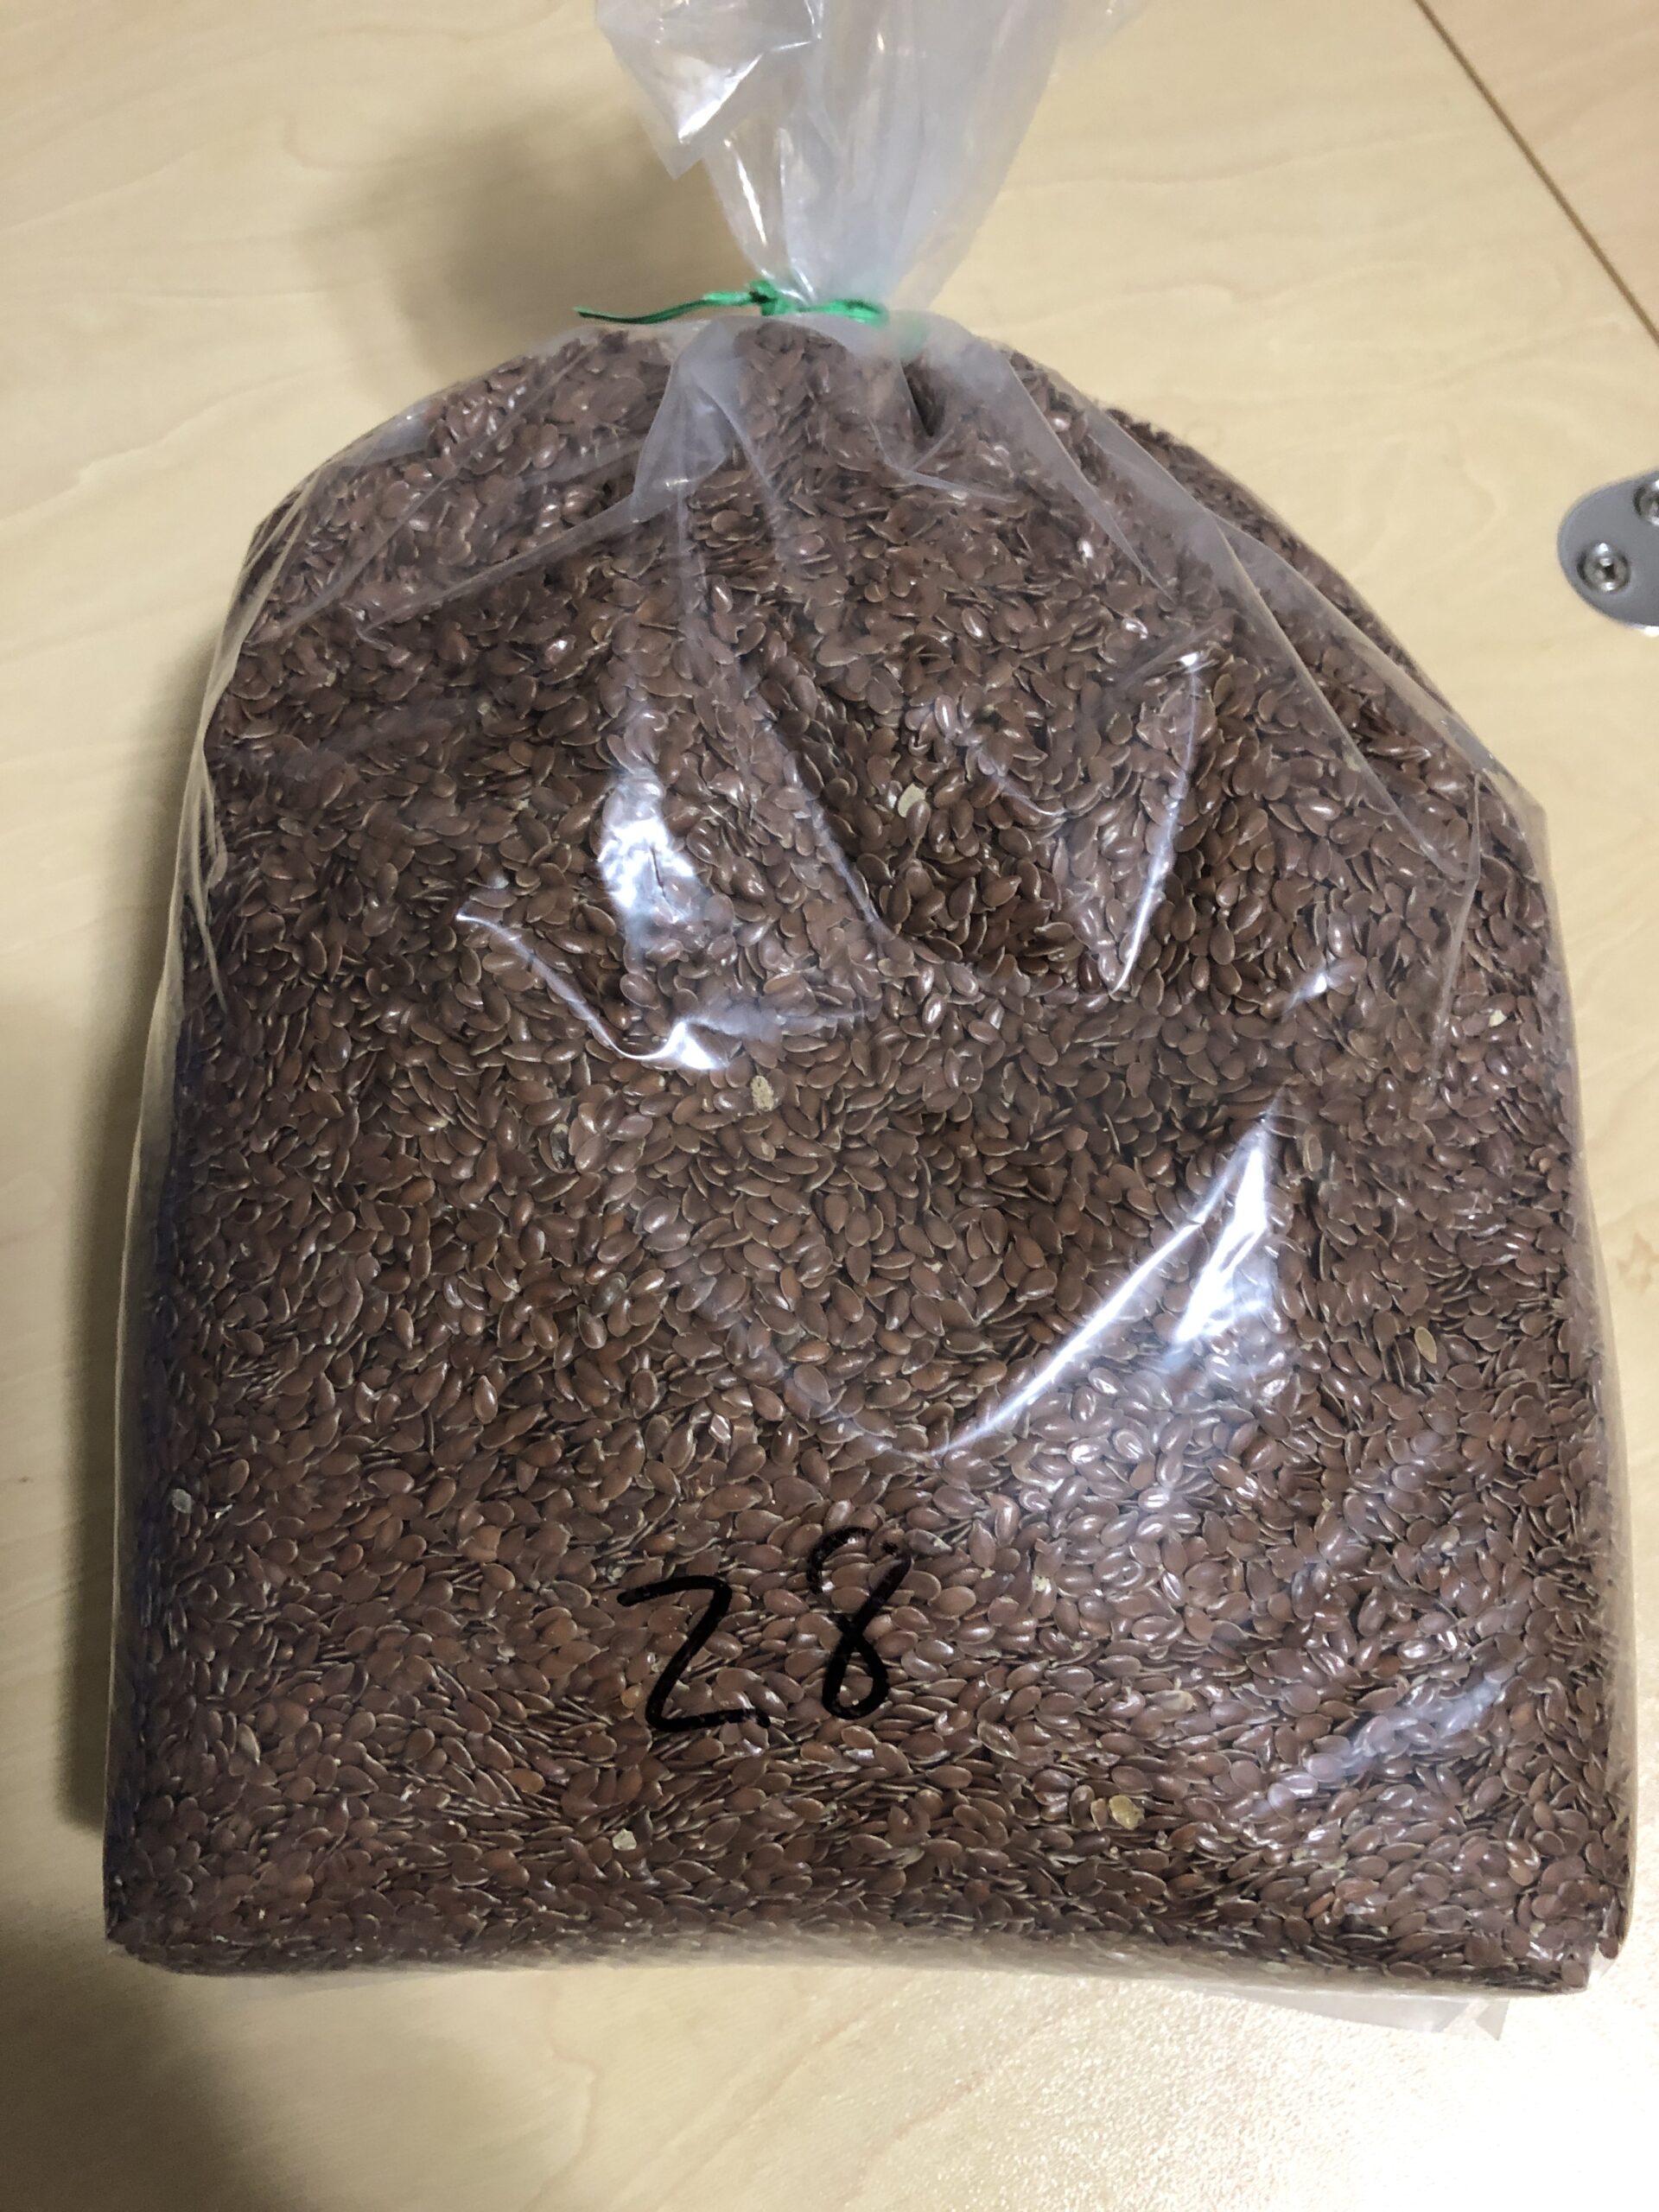
The first is a small pillow (about 5″ x 9″) that can be warmed in the microwave or dropped in the freezer…good for headaches, toothaches or bumps and bruises. I use mostly flax seeds (purchased from the health food store in bulk) and add several tablespoons of lavender buds to the mix. If you plan to use it mostly frozen, I’d suggest using only flax seeds. Having the buds freeze and thaw several times might make them mushy. You can read about how to make this pillow here:
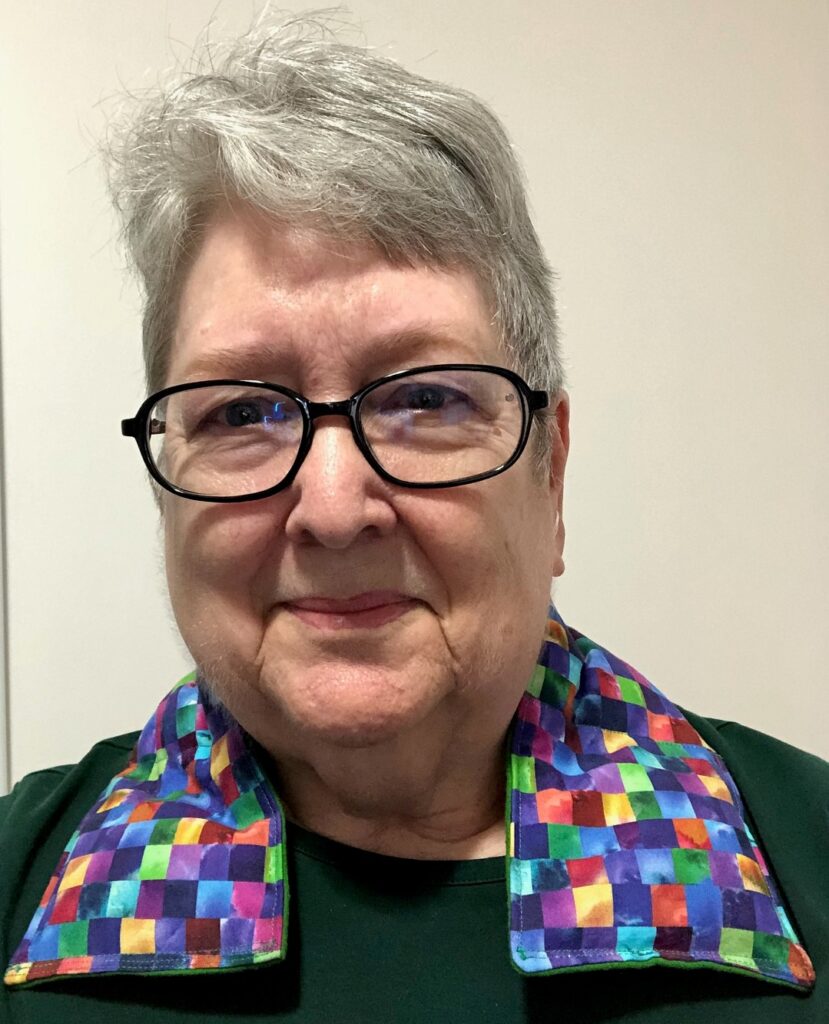
The second fabric project was a hot or cold neck wrap that was longer than the pillow that could wrap around the back of the neck and onto to the top of the shoulders. It is also stuffed with flax seeds and lavender buds and can be microwaved or stored in the freezer until needed. You can read about how to make this wrap here:
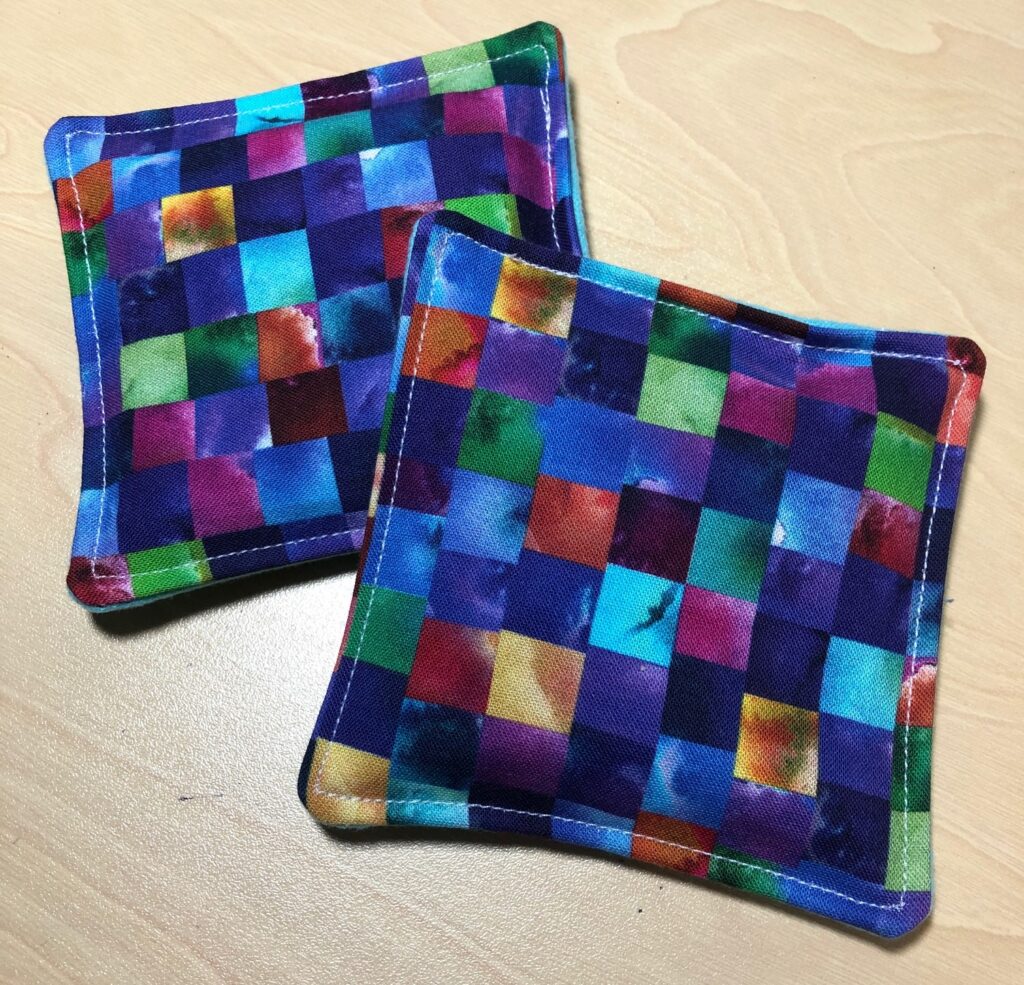
A third project made small pouches (about 4″ square), again, filled with a flax seed/lavender bud mixture. These were called pocket hand warmers…meant to be warmed in the microwave and tucked into your coat pockets on a cold winter day. Good for kids and adult when you need to be outside. You can read about how to make them here:
Those are some ideas for how I use lavender buds. After I’ve worked with the buds, the whole room smells like lavender and my hands smell good for hours! Give them a try…might make good Christmas gifts for the whole family! Enjoy!
Over the last 3 years I’ve been making assorted quilt blocks to decorate my front door. I started with actual fabric quilt blocks. They solved my dilemma of the small space between the door and the screen door that routinely smashed any wreathe I tried to hang on the front door. With 6 quilt blocks, I could change them out about every two months.
Unfortunately, after two months in the sun their color faded and by the second year, I was a little disappointed with using them. You can read more about my transition to painted quilt blocks on wood here: https://marykisner.com/lavender-inspired-quilt-block-on-wood/
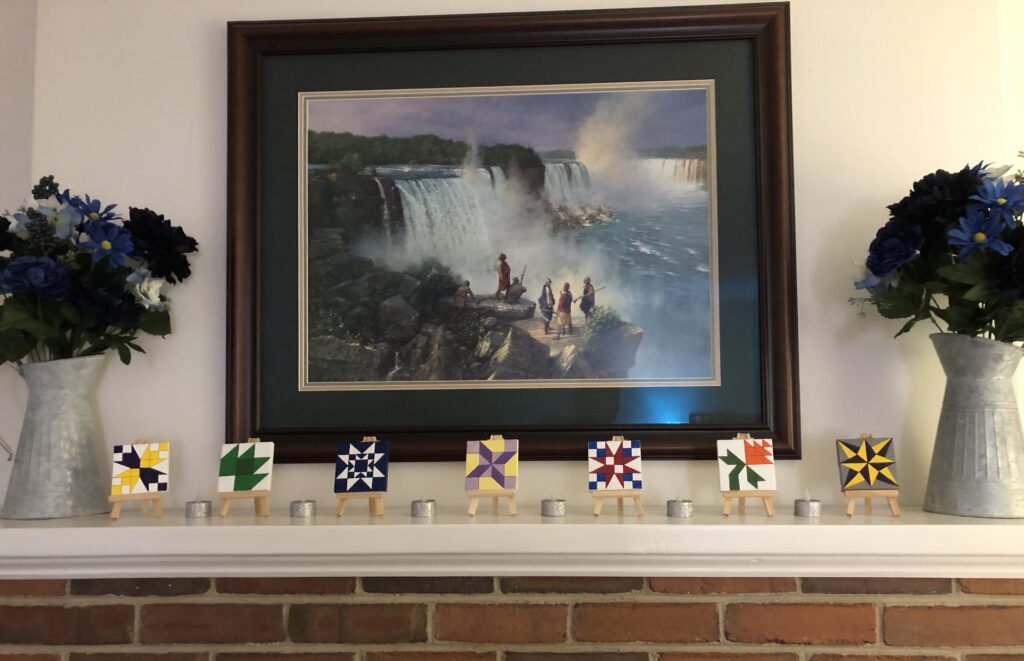
The process of painting a quilt block on wood involves first painting a miniature of the chosen quilt block before starting on the full-size (12″ square) block. While the full-size blocks decorate my front door, one at a time, the miniatures are an interesting decoration for my mantle.
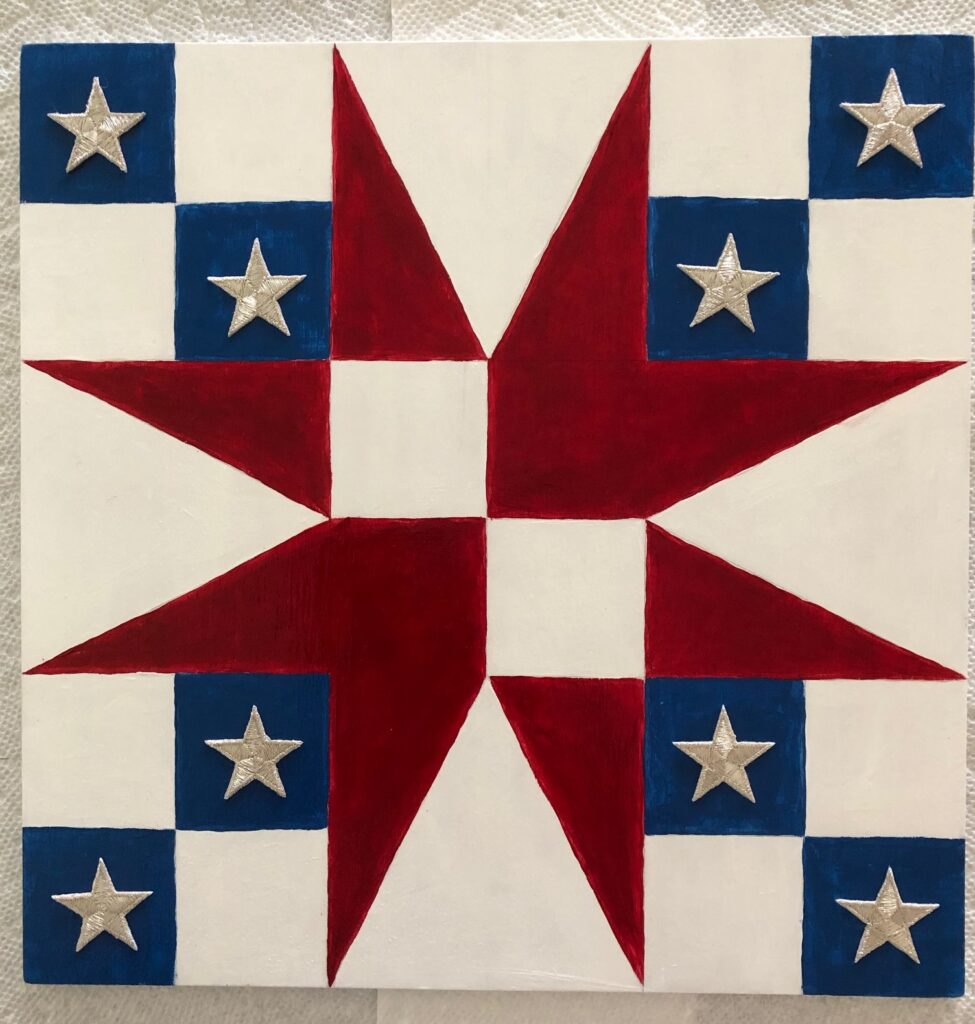
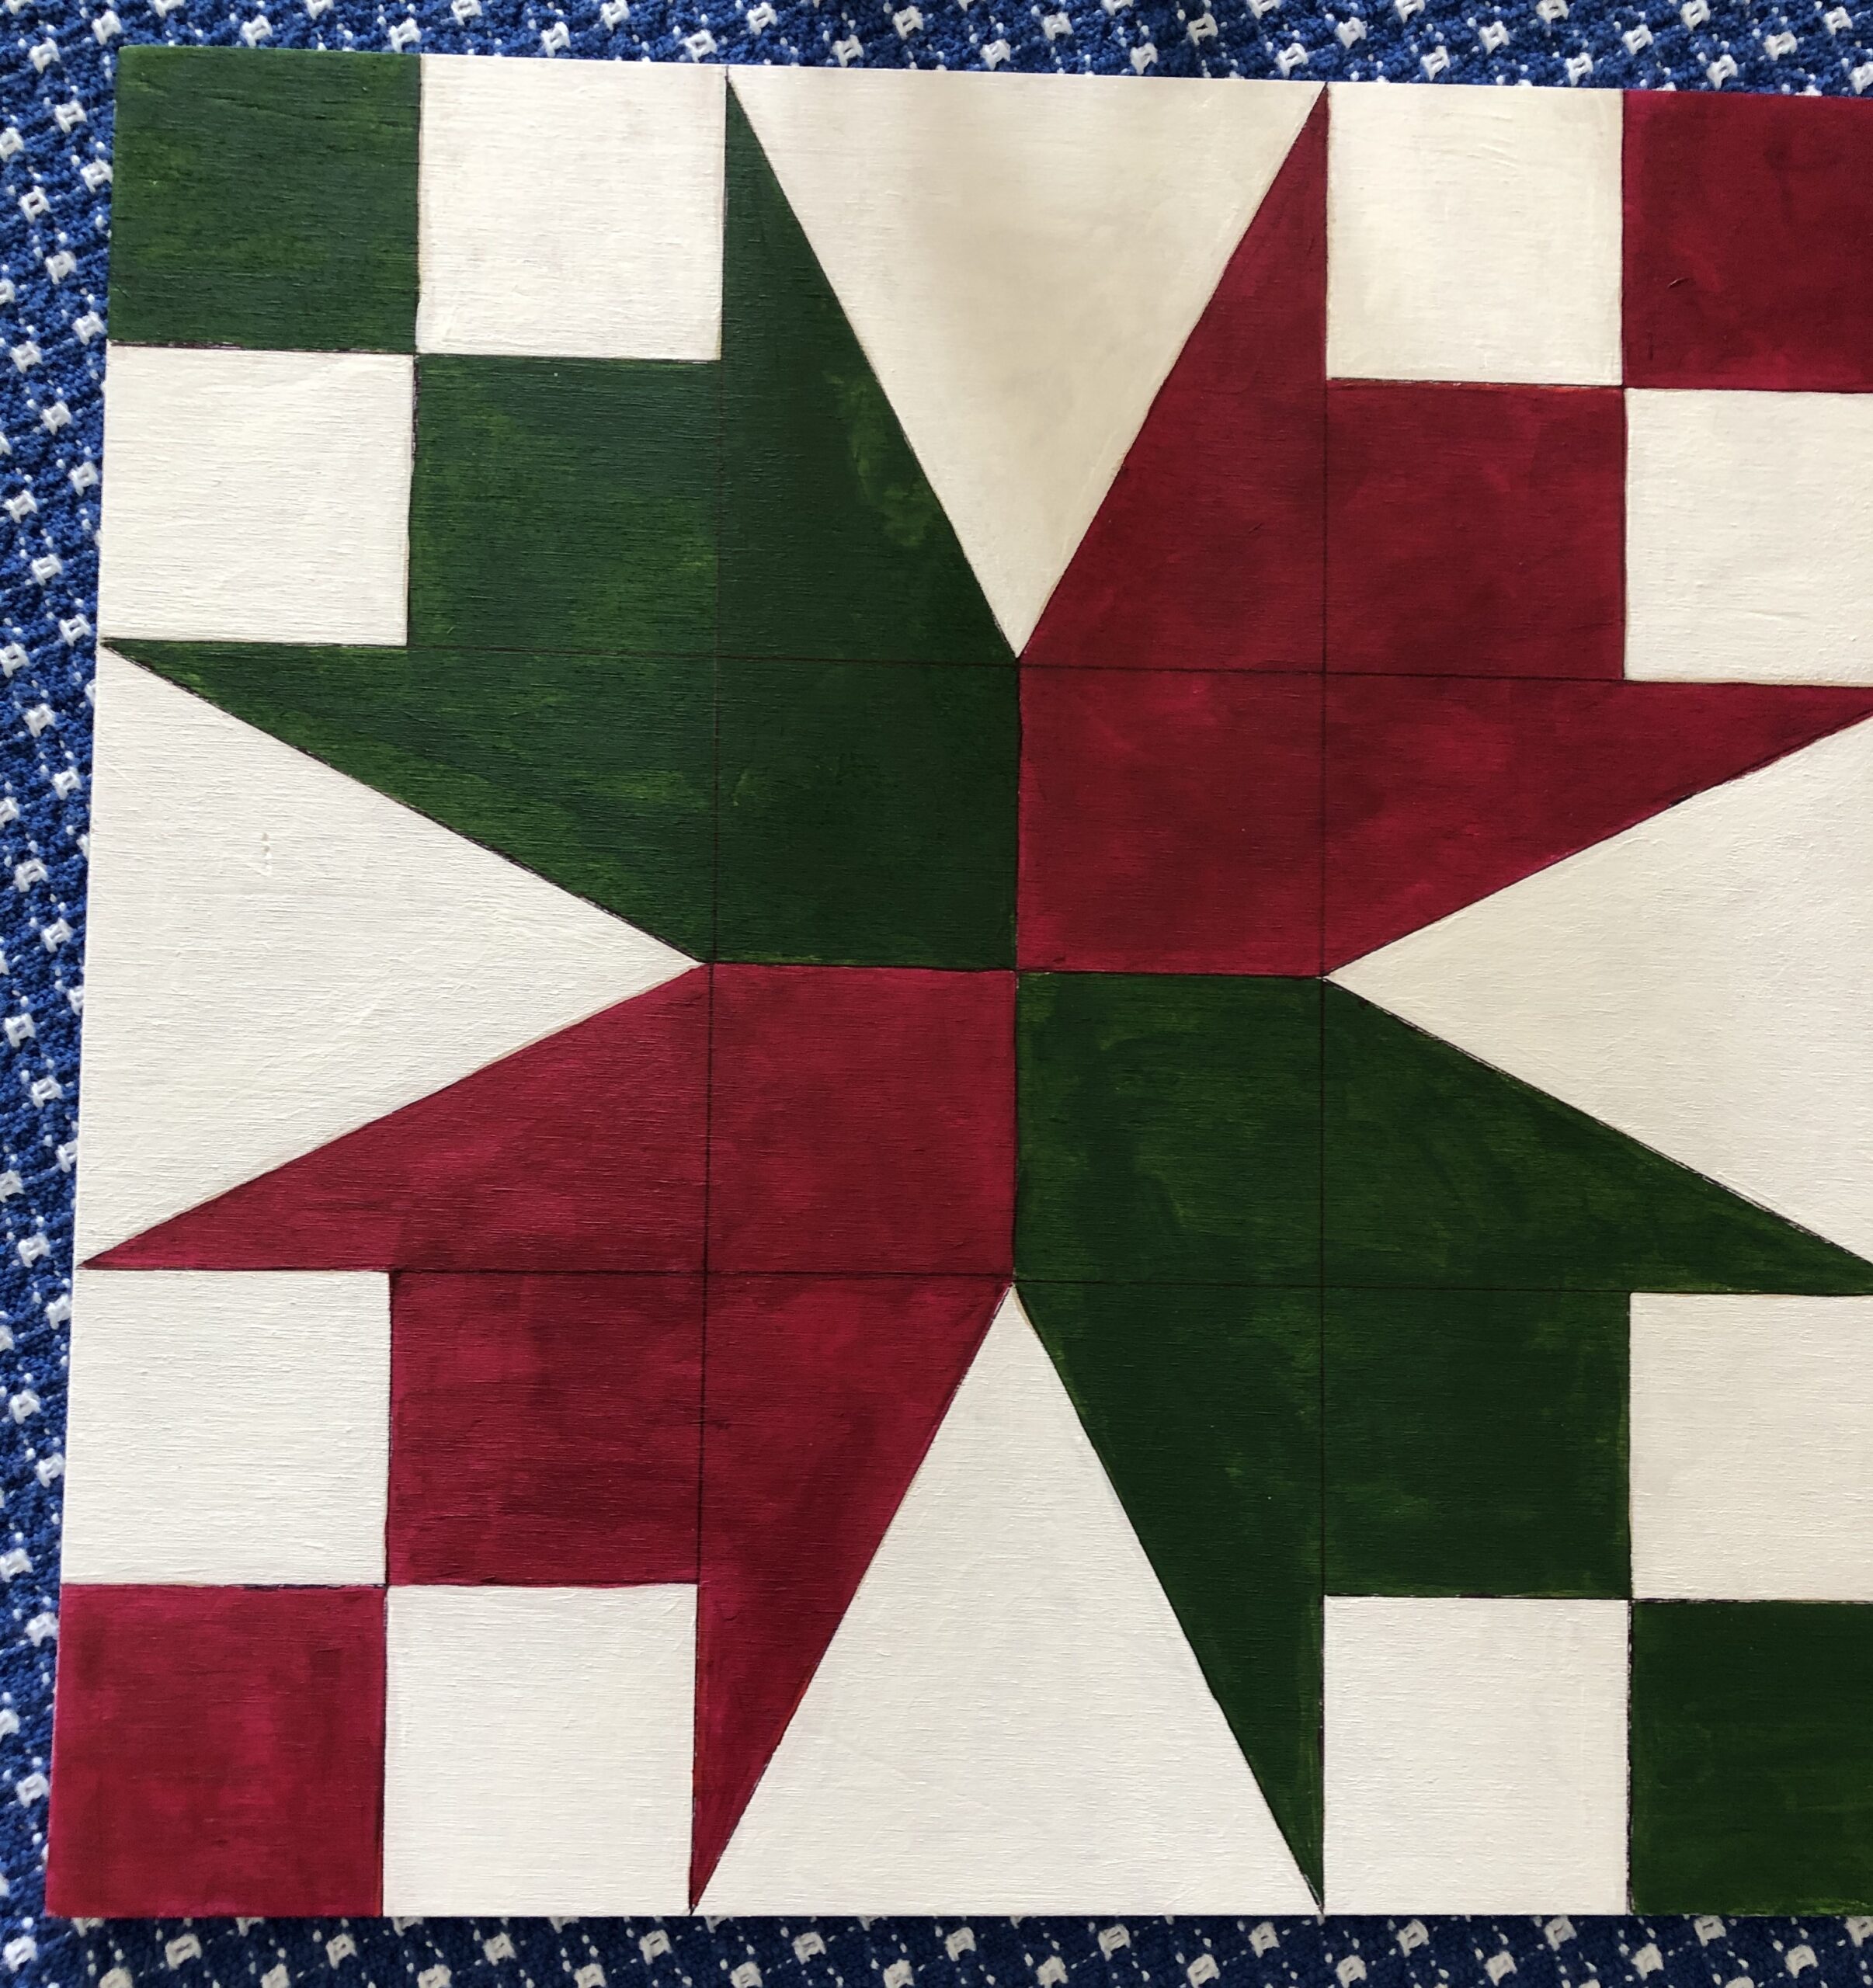
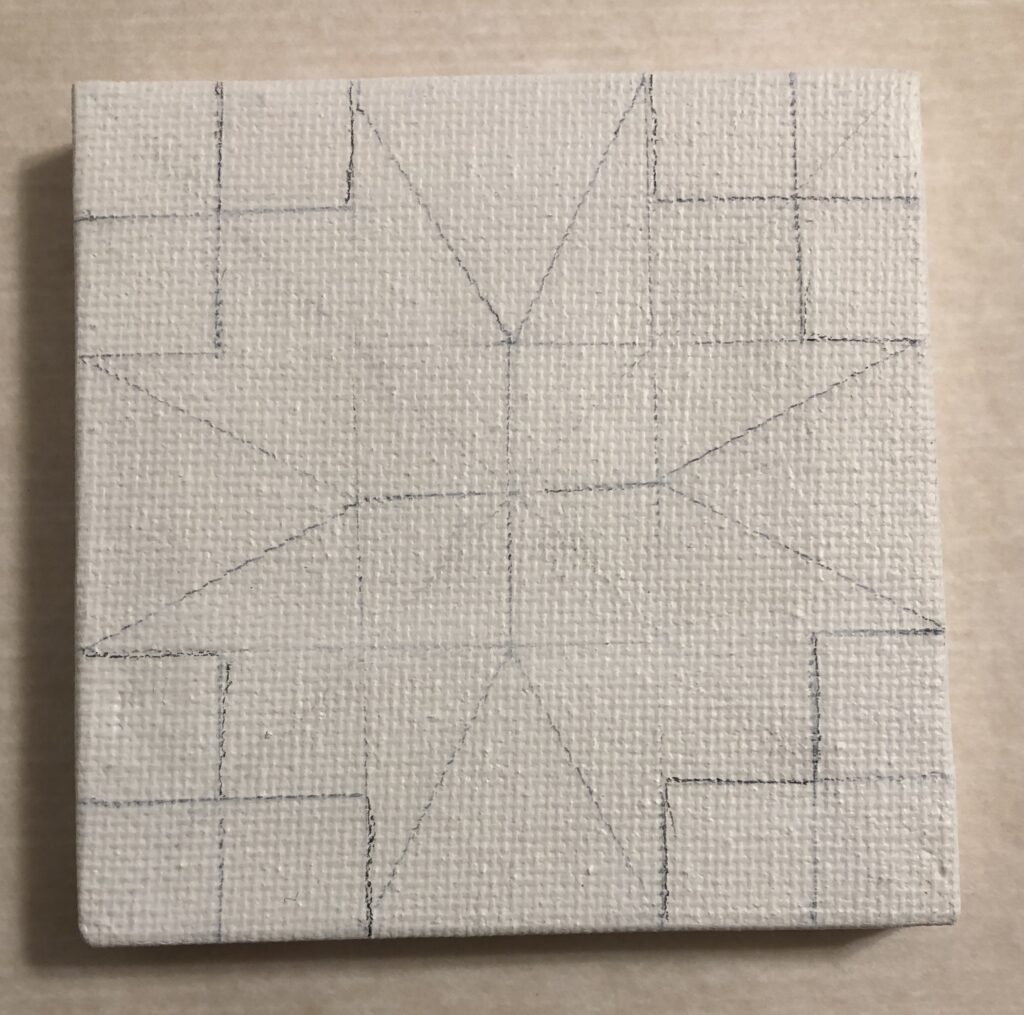
To make my new spring quilt block on wood, I first chose a pattern. I have used this same pattern several times…by changing the colors and their placement I was able to use the pattern below (called Fifty-Four Forty) that I made with patriotic colors and change it into the variation that almost looks like tulips!
I always start with sketching the design on a 3″ x 3″ canvas. That lets me see which lines should be erased so the pencil doesn’t show through the paint. Then, I’m careful when drawing on the wood so the pencil lines are faint and won’t show through.
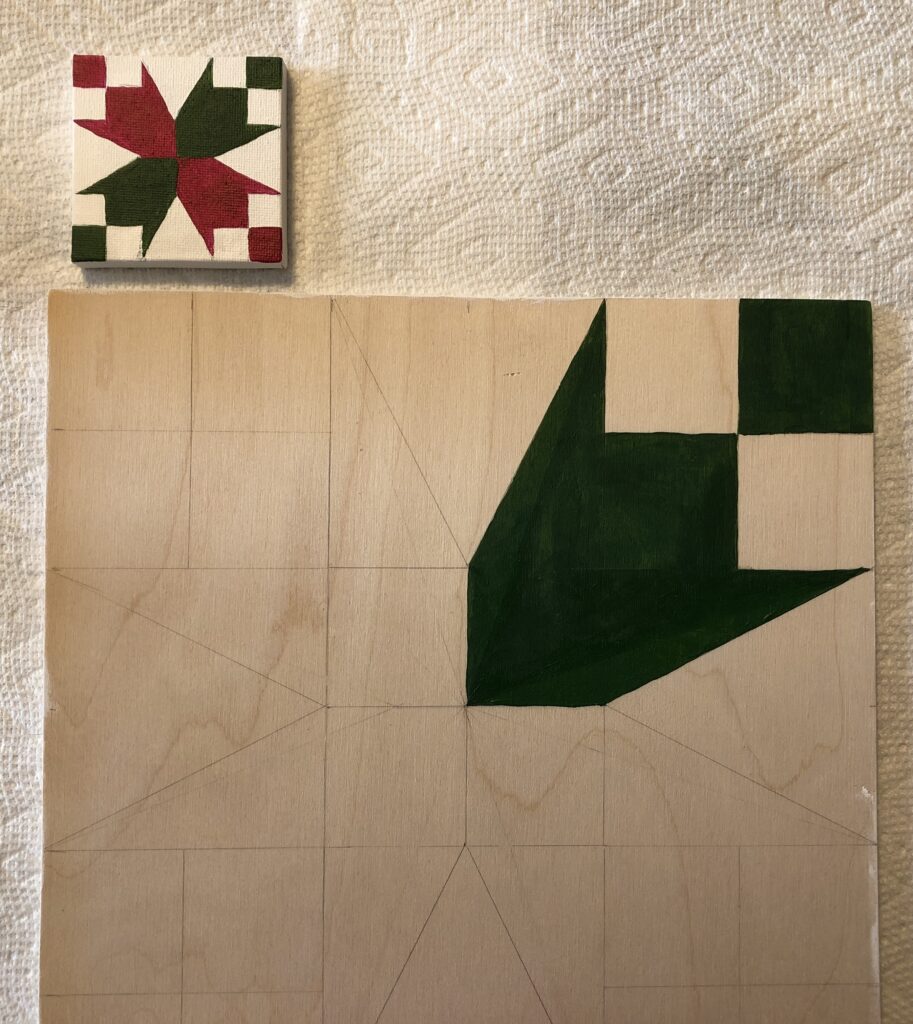
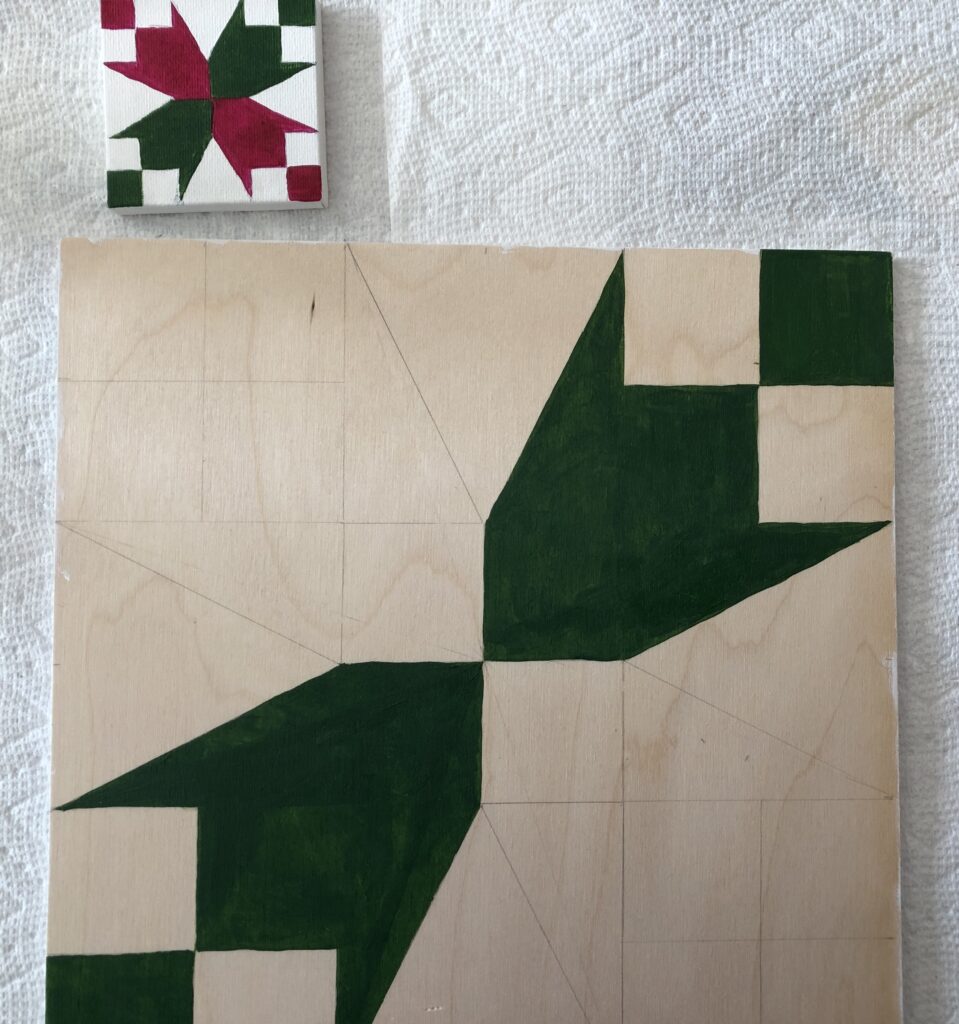
Let the painting begin:
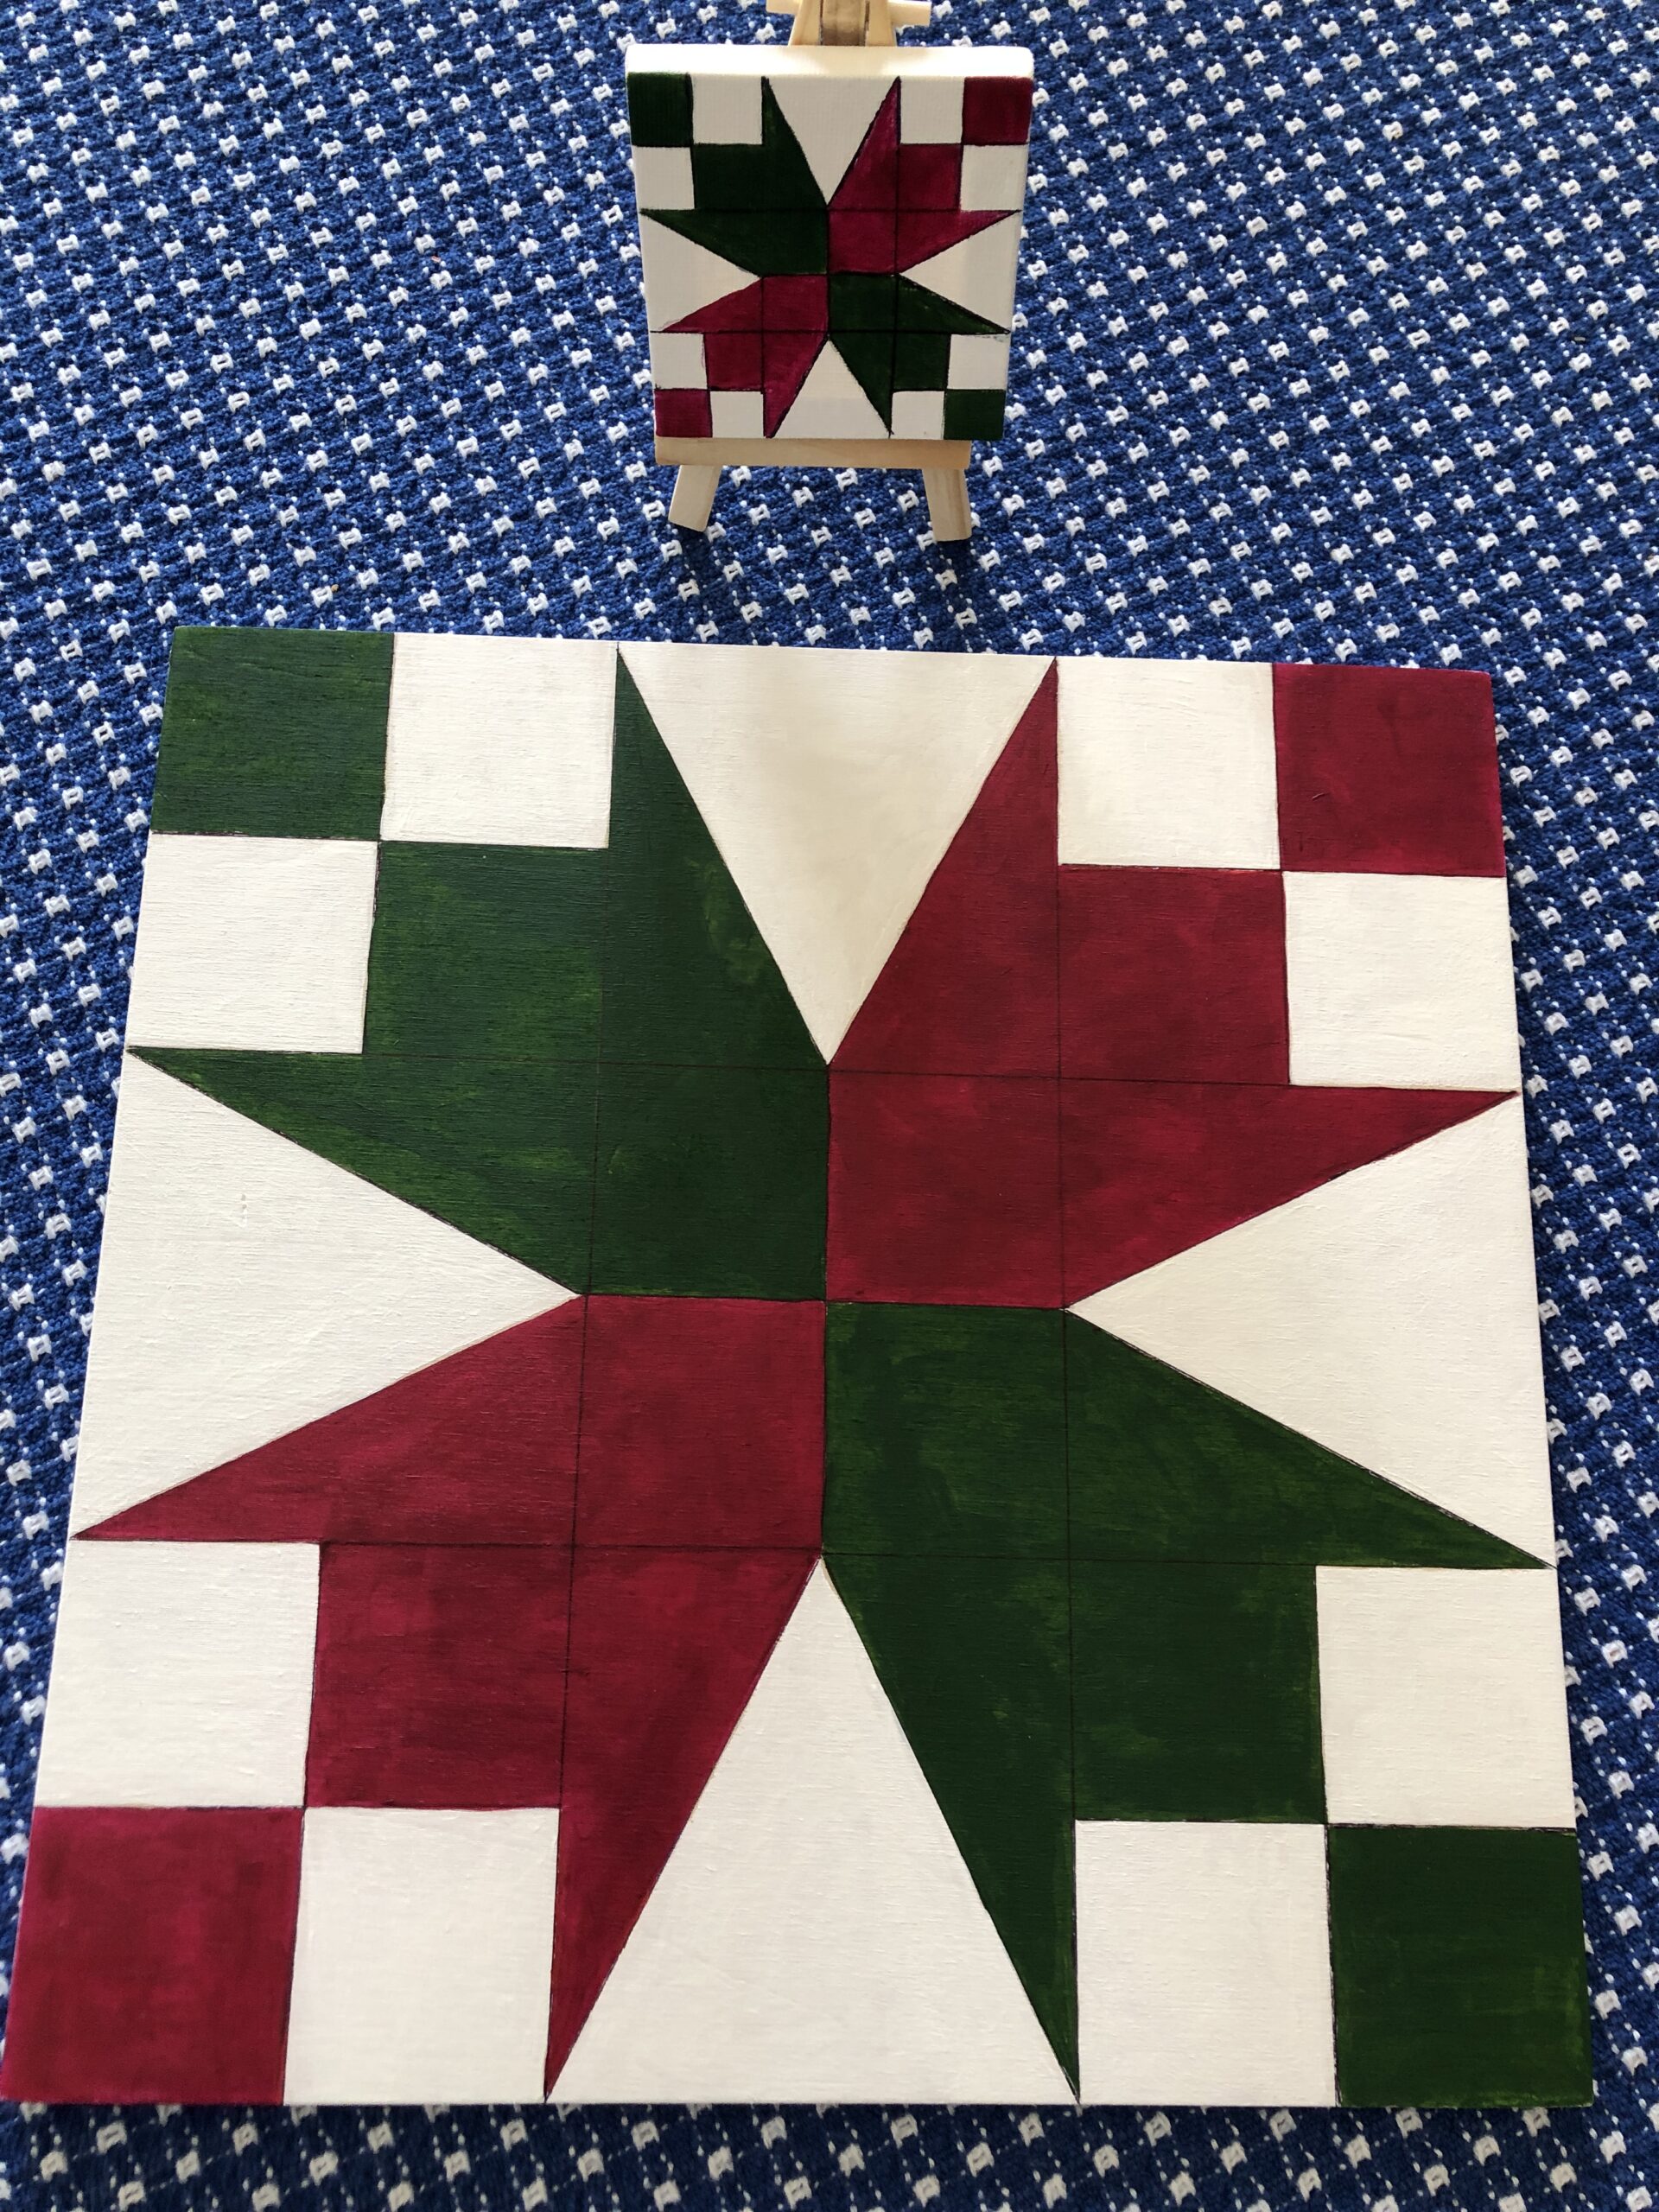
It takes several days to finish a project like this. The final step is to take clear acrylic spray and give it a nice weather-proof finish…all with waiting times between coats. Bert will attach magnets to the back that will stick to our metal front door. In the end, I’ll have a new spring door quilt and a new miniature for the mantle!
Are you looking for a simple project that could be helpful to caregivers working with hospice patients? Making comfort shirts might also be a project suitable for a scout troop or by a teen who needs community service hours. A comfort shirt is a t-shirt that is split up the back, ties or Velcro added and the neckline decorated with buttons or beads. It provides a way for a caregiver to dress a bed-bound patient easily without having to work head and arms through holes. It also provides a little color for those visiting the patient.
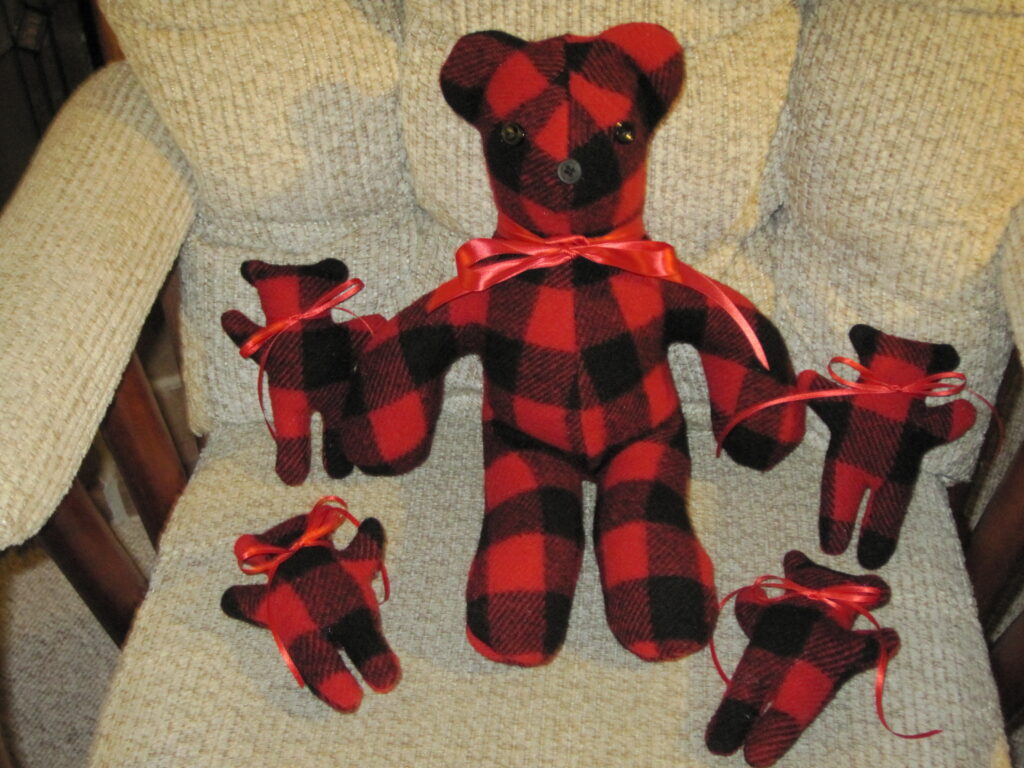
Over ten years ago I was working with a local hospice service making memory bears for the families of their patients. A request was submitted by the nursing staff to try to make colorful shirts that would be easier for them to put on the patients. Regular hospital gowns were drab, too long and not comfortable over the long haul. Most patients were bed-bound and were covered below the waist when they had visitors. Thus, adapting a colorful t-shirt sounded possible.
To make a comfort shirt, you’ll need a t-shirt, ribbon (1/4″ to 3/8″ wide, 2 yards) OR Velcro hook and loop fasteners; assorted buttons or beads to decorate the neckline; a sewing machine to hem the back edges and needle and thread to hand sew the decorations to the front of the t-shirt.
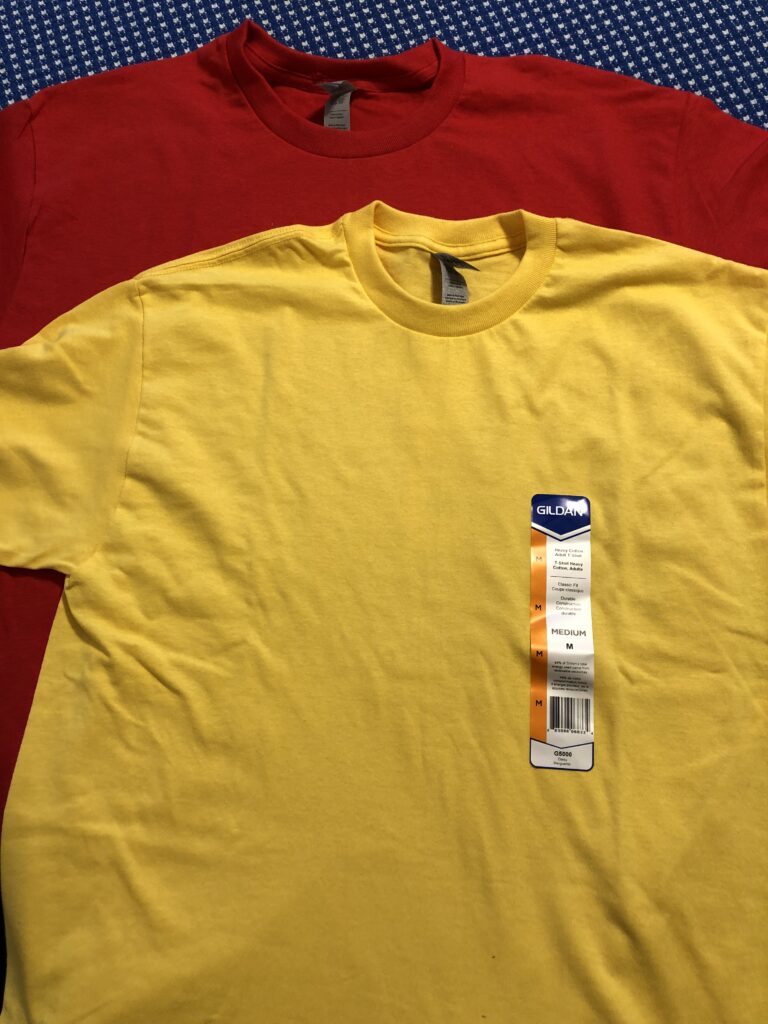
I started by finding inexpensive t-shirts at JoAnn’s Fabric store…they were stocked in all sizes to be used in art projects. I chose mostly the Adult Medium size. All shirts were washed in hot water and dried in the dryer…which is how they will be washed in the future.
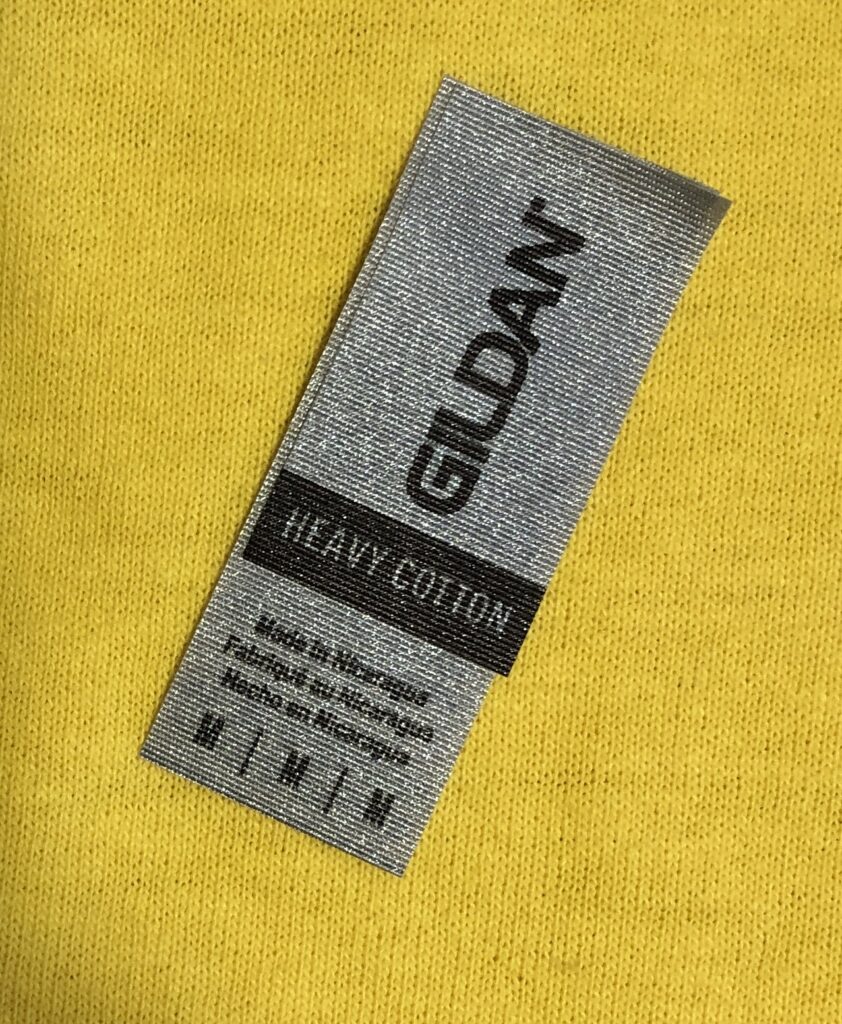
Step 1: I removed the tag at the neckline and saved it. Later, I’ll sew it down low in the back so caregivers know what size it is.
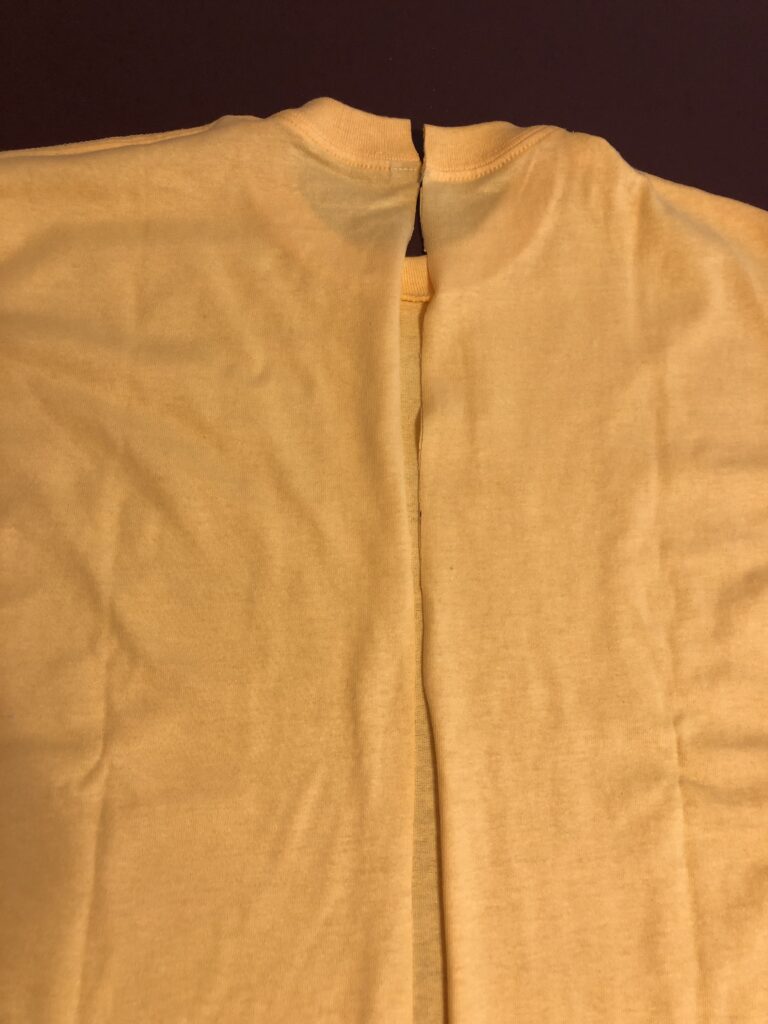
Step 2: I turned the t-shirt over and drew a line from the center back neckline to the hem. I cut the shirt up the back.
Step 3: I folded each cut side over about 1/2 inch and stitch it down. You can fold it again and stitch it a second time to make it sturdier.
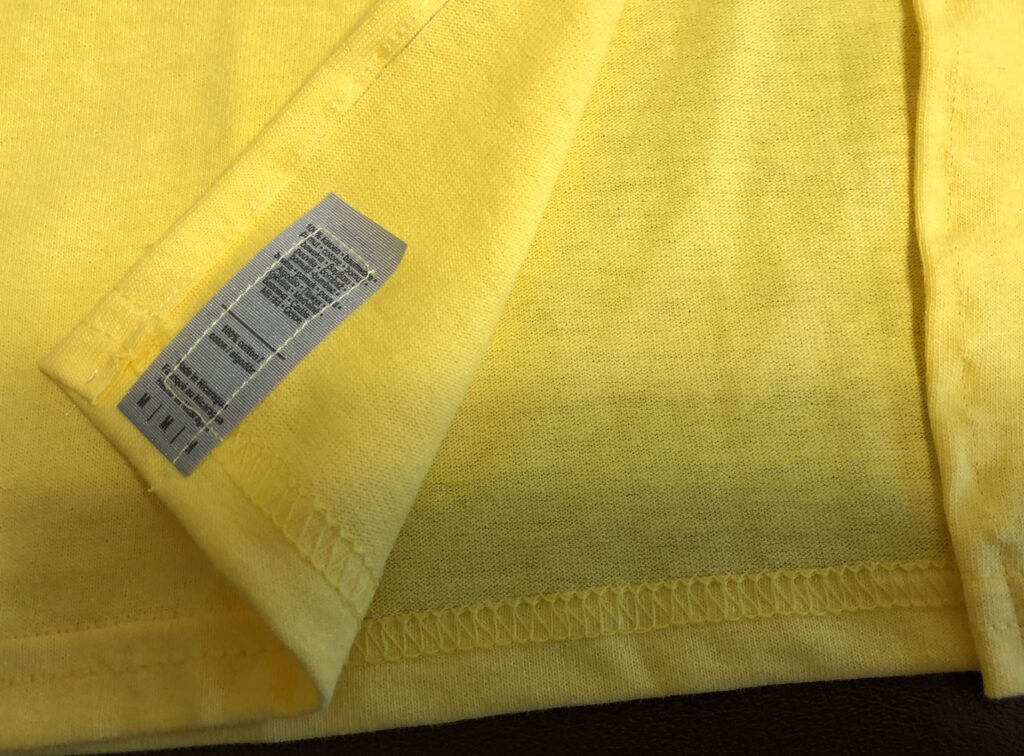
Step 4: Sew the tag to the inside bottom of the t-shirt in the back.
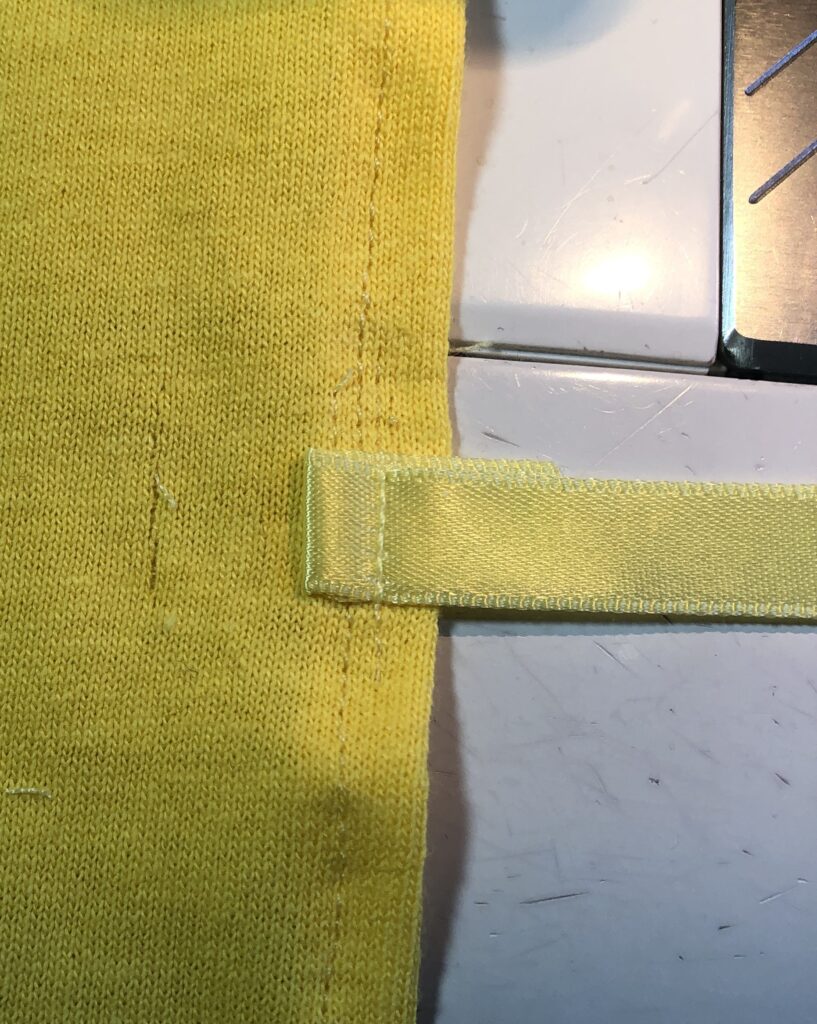
Step 5: Use 1/4″ to 3/8″ wide ribbon OR Velcro for the fasteners. I marked the location of the ties with one near the neckline, another about mid-back. I stitched each ribbon twice…first facing away from the opening and then folded it back and stitched it again in the right direction. This hid the raw edge of the ribbon.
Here are the final ribbon ties.
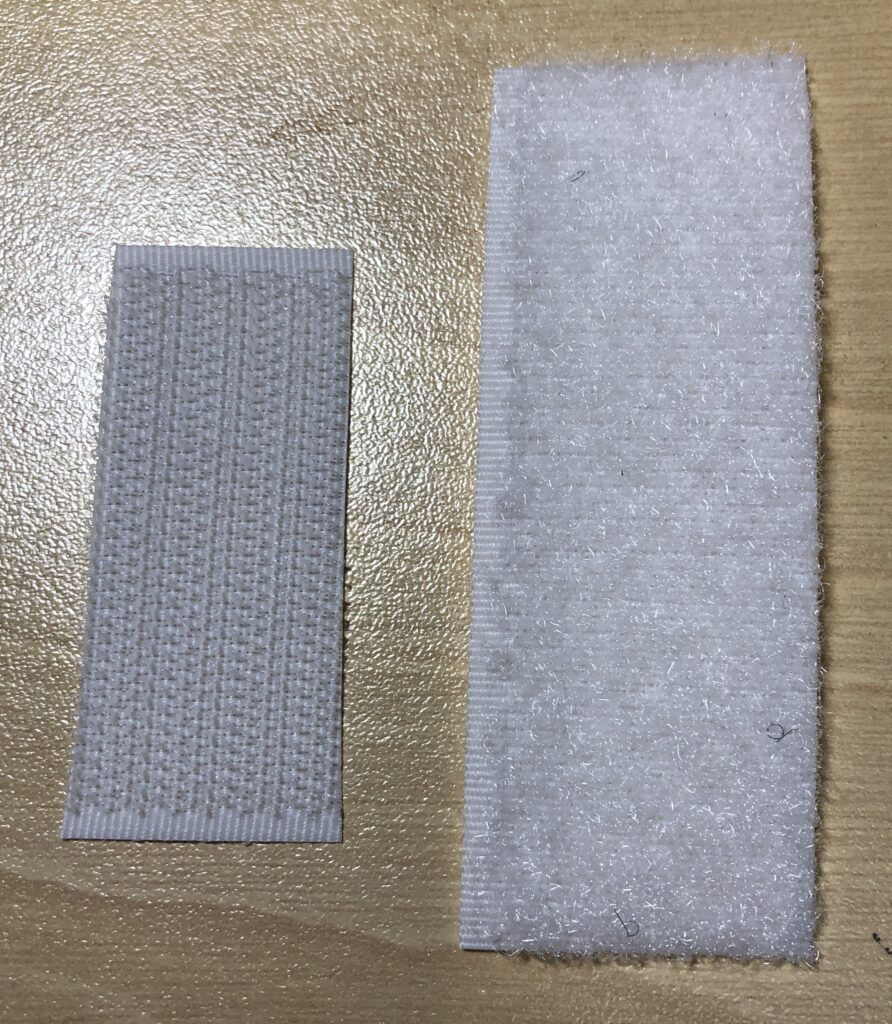
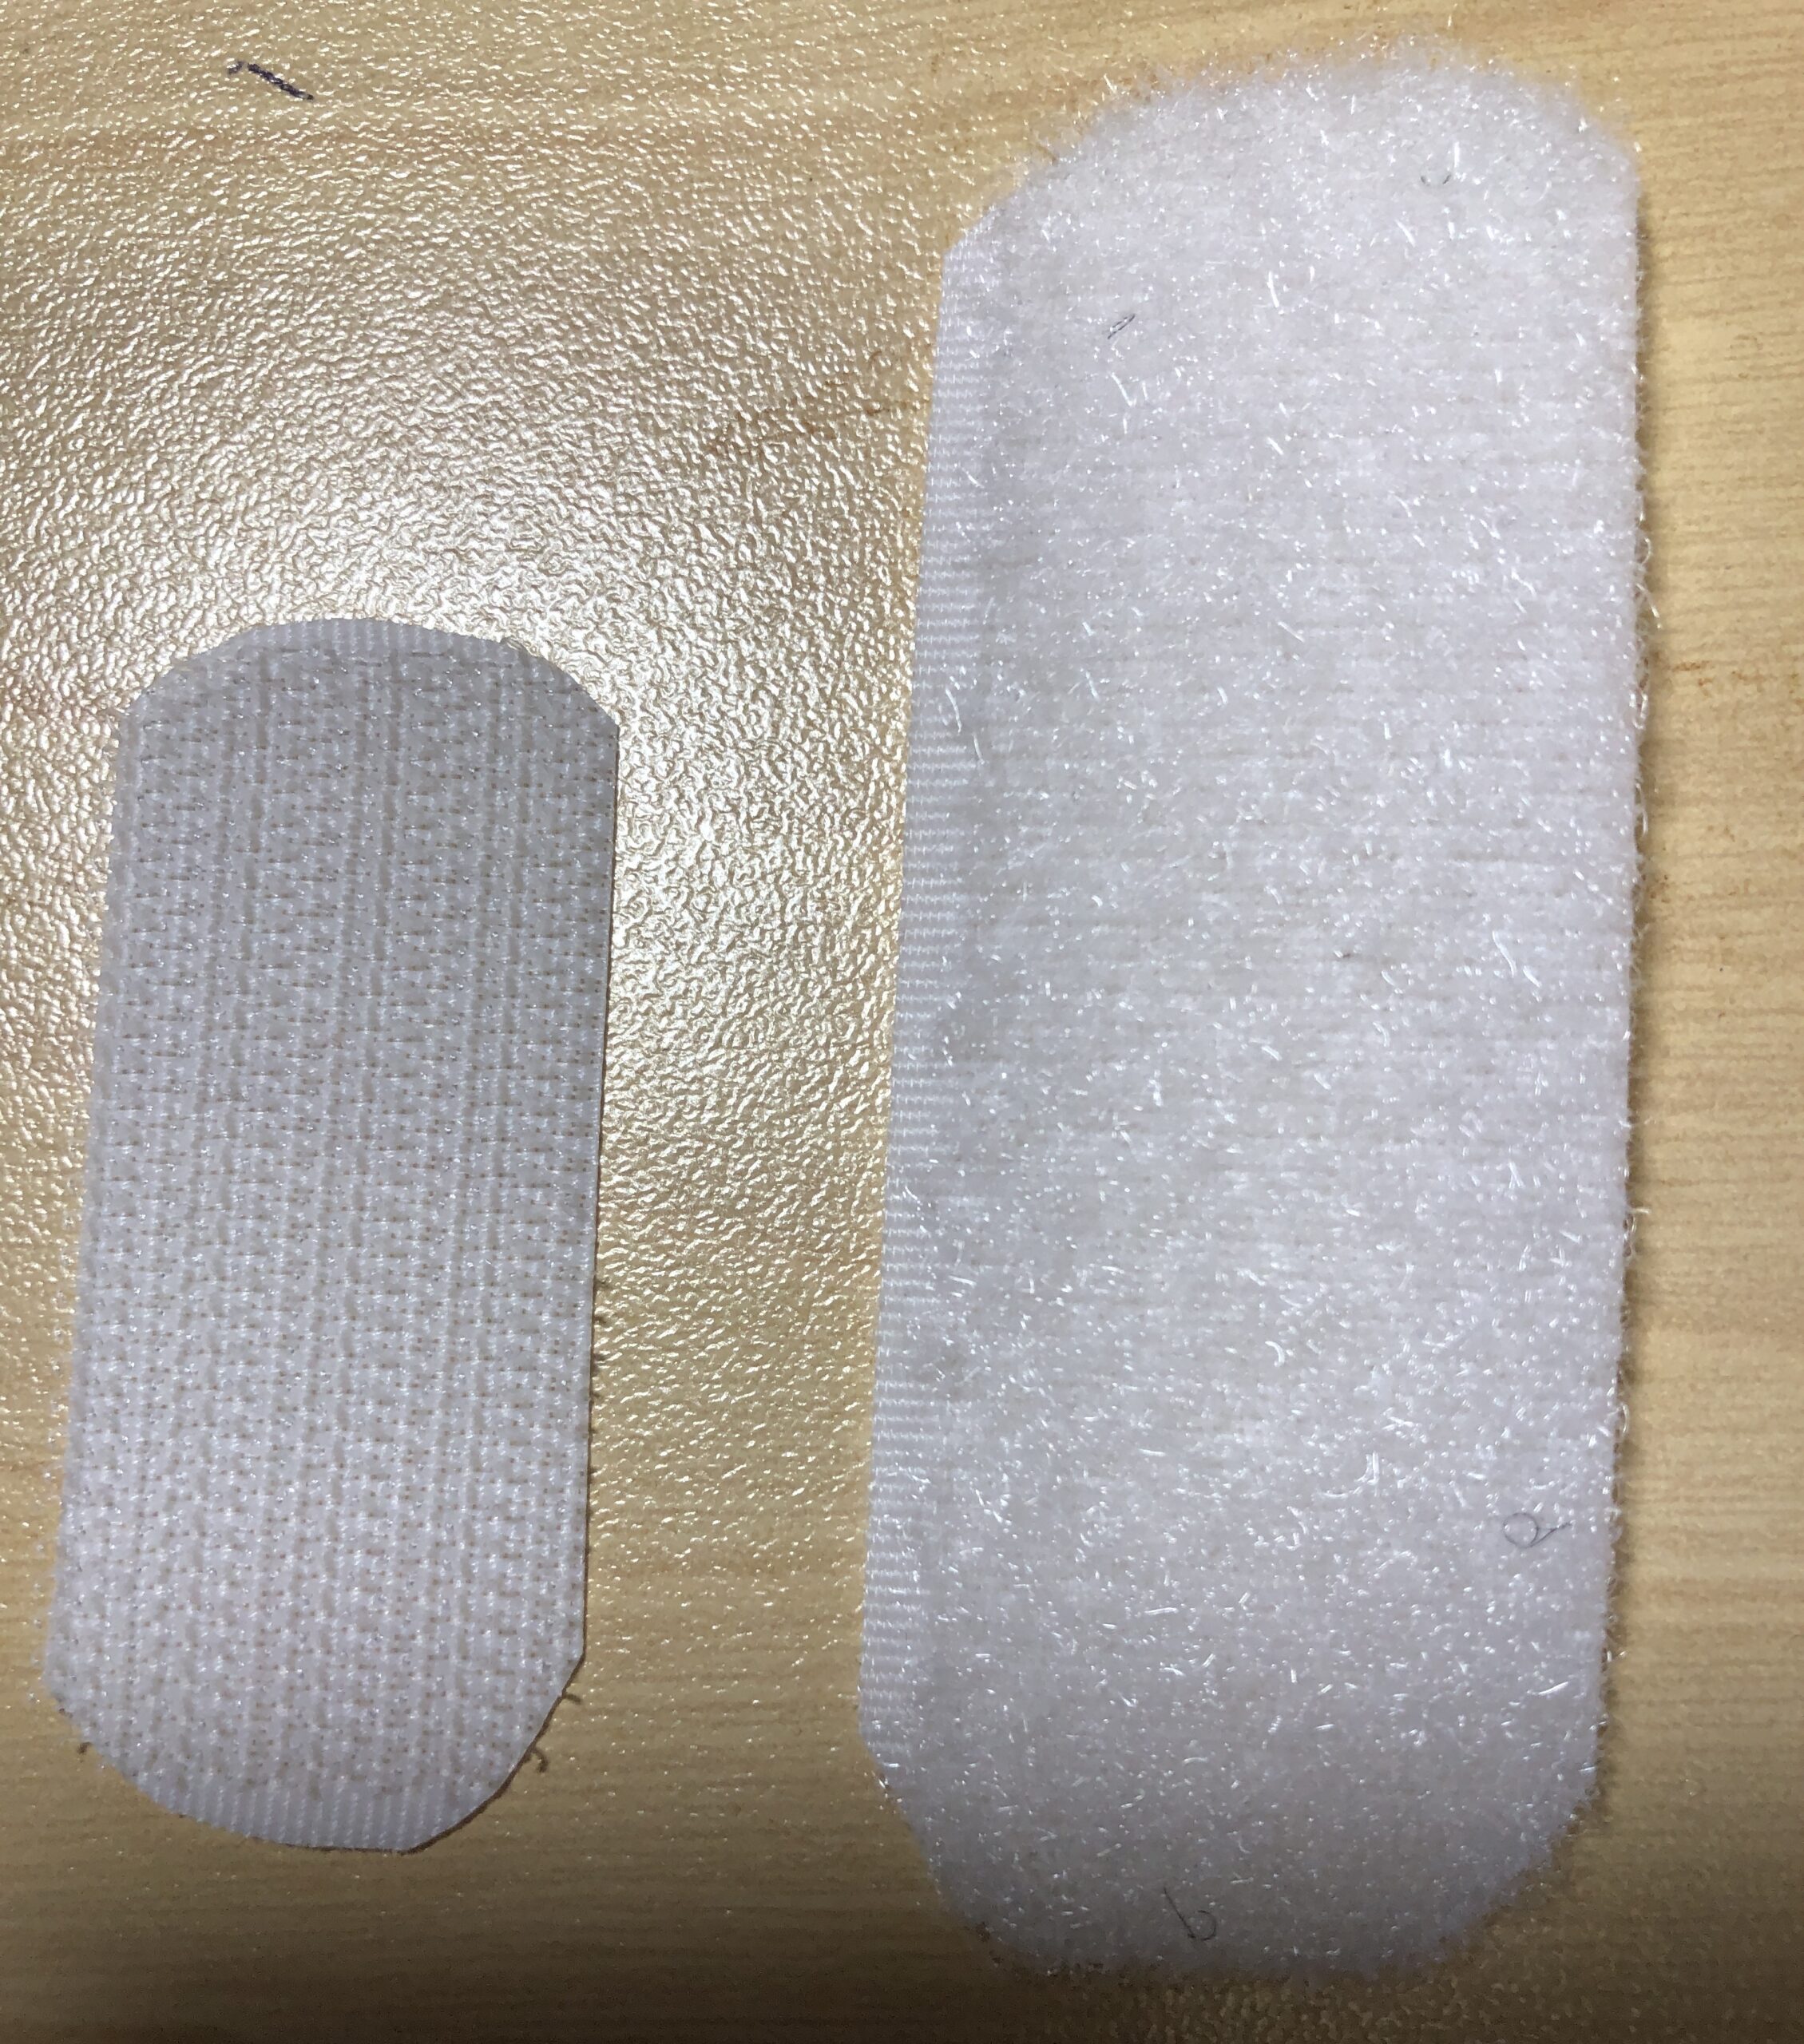
NOTE: If you decide to use Velcro, which my caregivers preferred, I made sure all the corners of the Velcro were trimmed and rounded so the corners didn’t stab the patient in the back. I’ve also learned the Hook part of the Velcro can be smaller than the Loop part…it doesn’t have to be exactly situated to “stick” to a larger loop piece. The Hook part can be about 1″ x 2″ and the Loop part can be about 1″ x 3″.
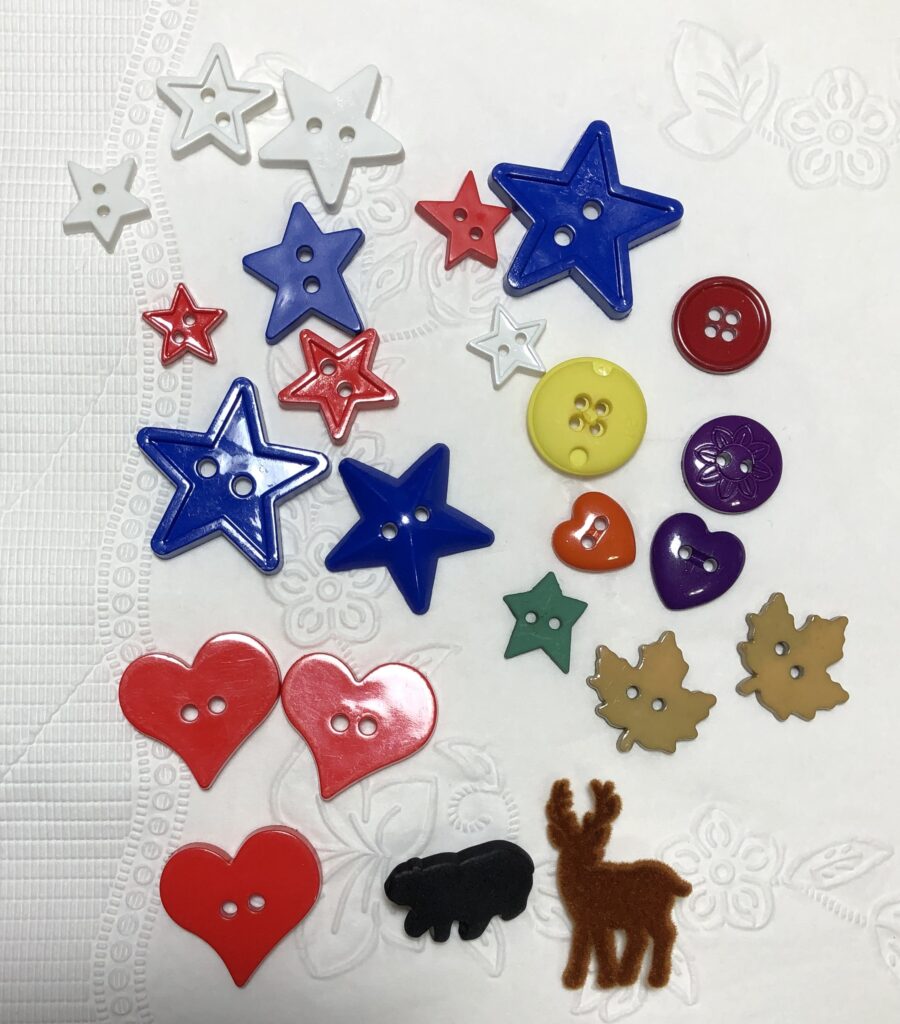
Step 6: Choose buttons or beads to decorate the neckline. Mark the locations about 1″ below the ribbed neckline and hand sew them to the shirt.
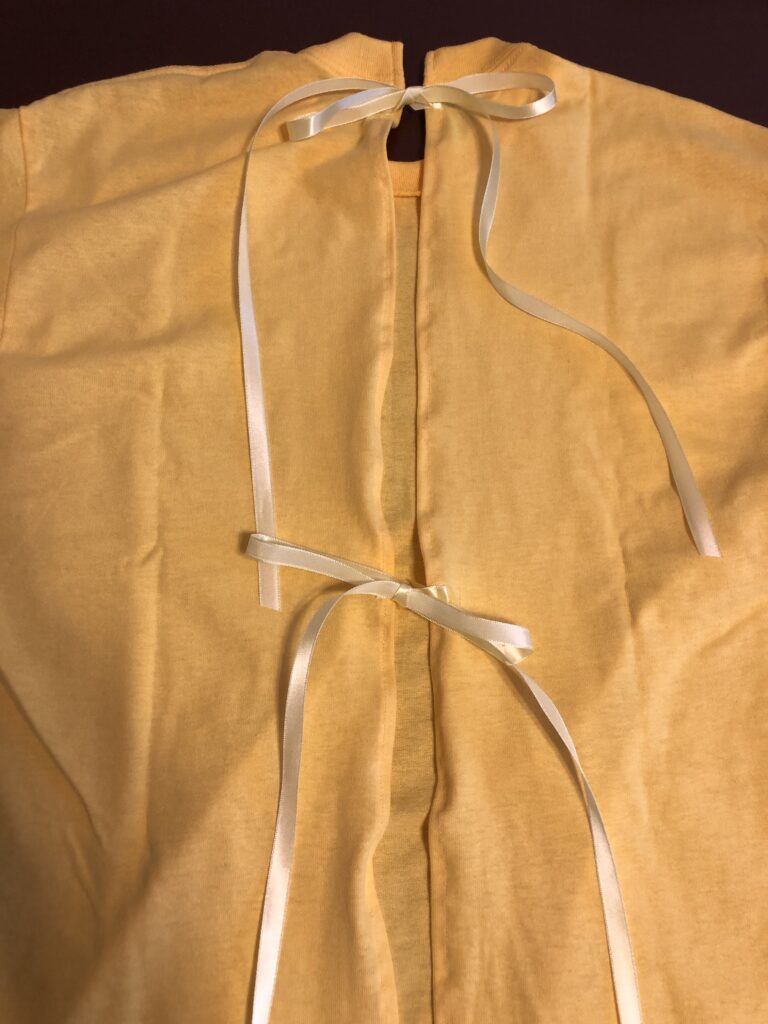
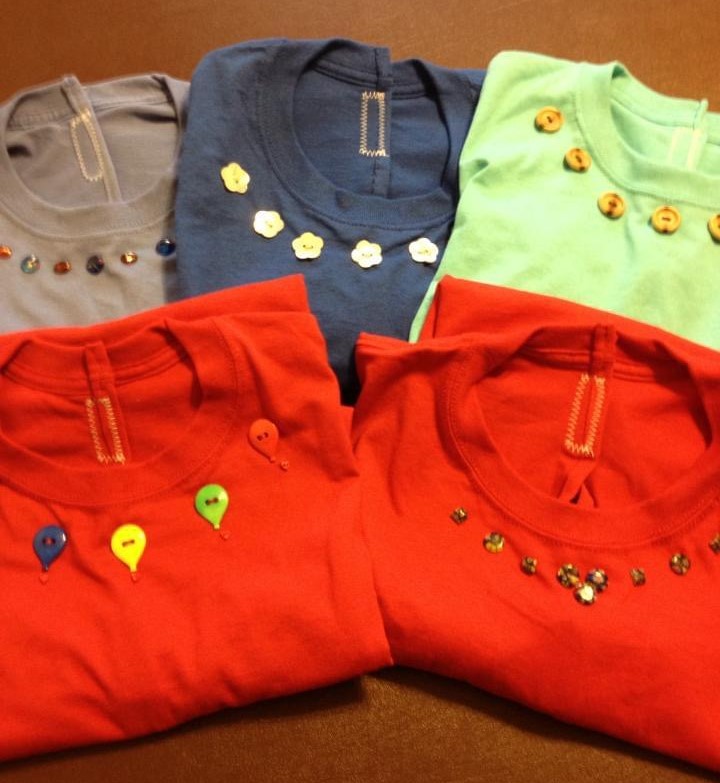
Here are a few of the comfort shirts I’ve made:
Check around in your local community and see if comfort shirts would be useful to caregivers. Great project for folks of all ages! Enjoy!
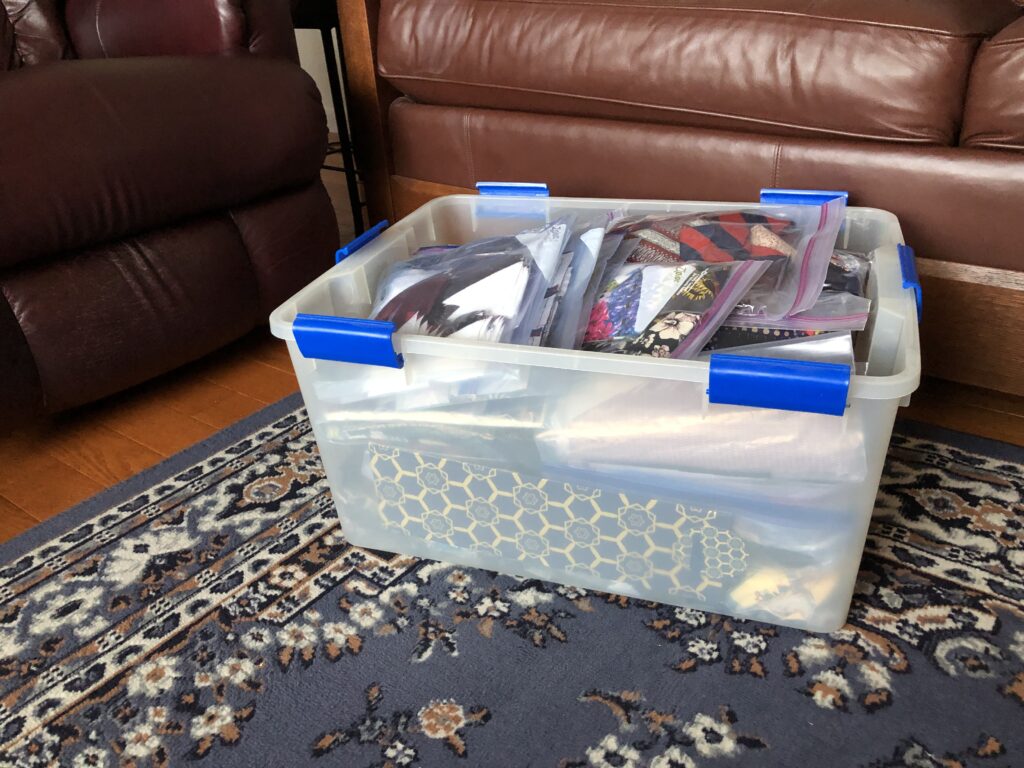
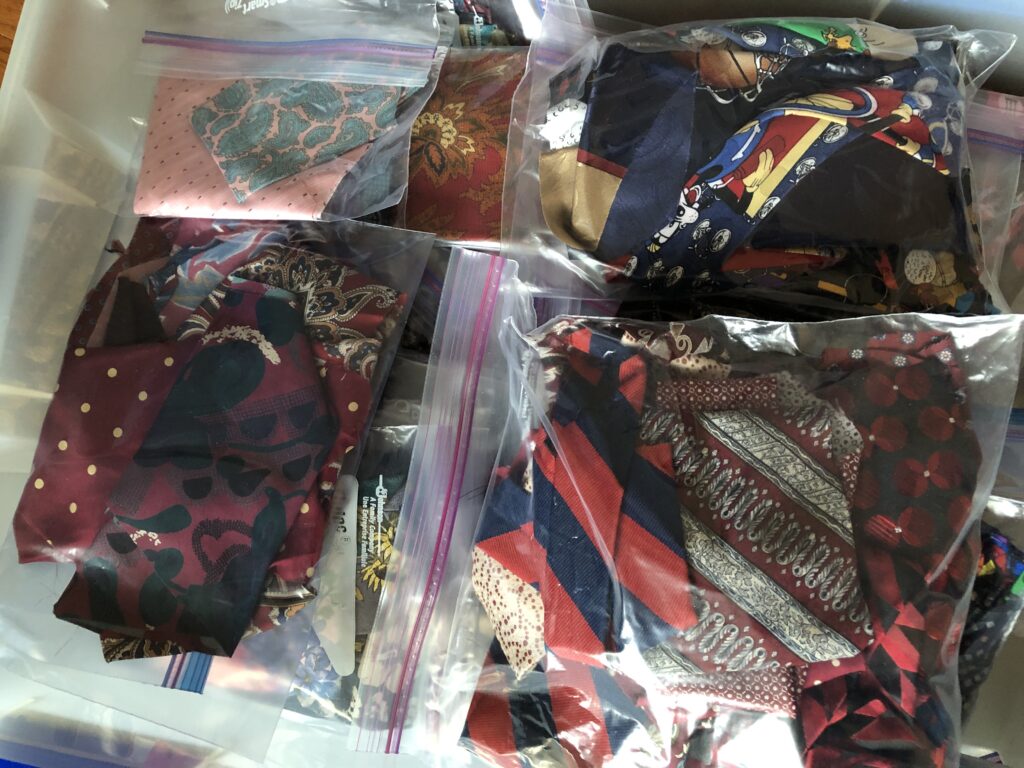
I thought it would be so easy…just drag that bin of necktie material out of the corner, check that I hadn’t stuffed any other kind of materials or tools in the bin, have Bert put the bin in the car and drop it off at Scraps & Skeins! Haha!!
After I had explored Scraps & Skeins Shop here in State College (see https://marykisner.com/exploring-the-scraps-and-skeins-shop/) and had conversations with folks who work there, I determined that was the perfect place to donate my stash of neckties. I thought I could just load up the bin and be done with it! I didn’t realize how emotionally attached I was to that stash!
I couldn’t figure out why I was so attached to these ties…did I have other projects in mind? Was each scrap of material so beautiful that I couldn’t let go? Did each necktie have a memory attached?
What got me started with neckties?
Over 10 years ago, I was volunteering for a local Home Health and Hospice organization. I offered my services to make memory bears from a loved one’s clothing after they passed. I must have made over 100 bears during that time. You can read about the memory bears here: https://marykisner.com/making-a-memory-bear/
One family asked if I could make something out of a collection of neckties…and my quest to find an appropriate item began.
Some neckties can be very colorful and unique. However, there isn’t a lot of fabric in a tie. It is often not washable or colorfast. While some items are made with whole ties sewn together side to side, like a skirt or throw, they end up quite heavy. I did not get enough ties in that first batch to make anything large.
The inner lining of neckties tends to retain odors from the wearer or cleaning solutions. This is often a layer of wool felt or polyester fabric. I found it was just easier to take them apart and remove the inner lining that retained odors. This gave me tie-shaped fabric pieces about twice the width of the tie, tapering to much smaller at the other end.
Ties are cut on the bias (diagonally across the fabric) which makes them too stretchy to work with and is made in three pieces, so two seams are about in the middle of tie. Adding an iron-on interfacing was essential to use the fabric in other projects. To make something, I was limited to small pieces or strips of varying weights and colors.
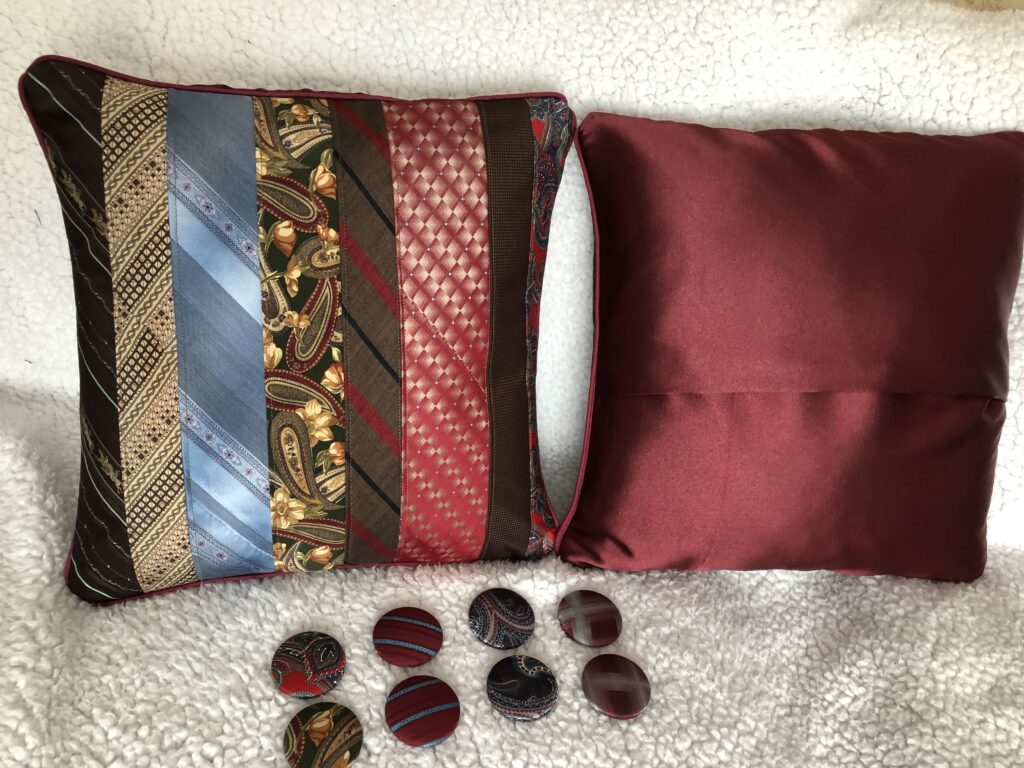
I knew I could not make a bear out of bits and pieces of fabric. A little research on Pinterest for memory items showed many folks had made pillows out of neckties, along with other small items composed of strips, squares, or freehand shapes. The photo below shows a pillow made from 8 neckties. The back of the pillow was a piece of polyester satin. This made a nice memory pillow for the widow.
I have obtained neckties from friends and acquaintances who have cleaned out attics and closets. Sometimes garage sales have a few for sale. Thrift shops, like St. Vincent DePaul’s and Goodwill usually have a collection. I have paid as little as $1 to as much as $4 per tie. That can be very expensive if I’m not careful! Sometimes specific name brands are worth much more.
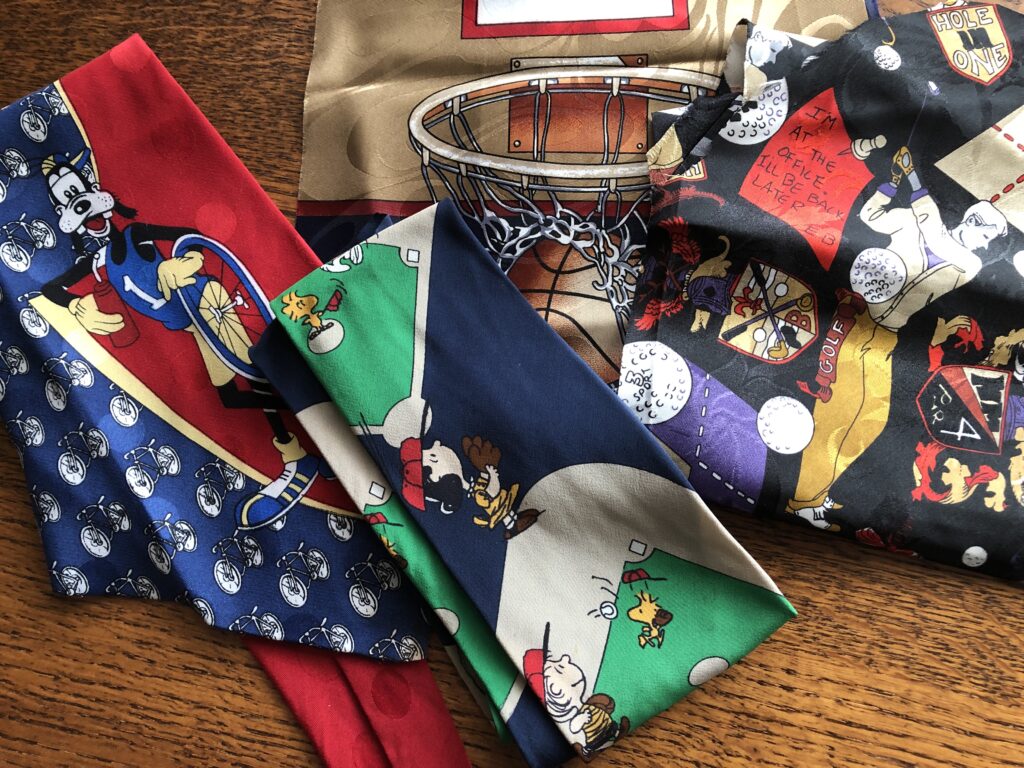
The most interesting ties I worked with came from a retired school Principal…he had novelty ties with cartoon characters appropriate for kids. He probably had enough ties to wear a different one each day.
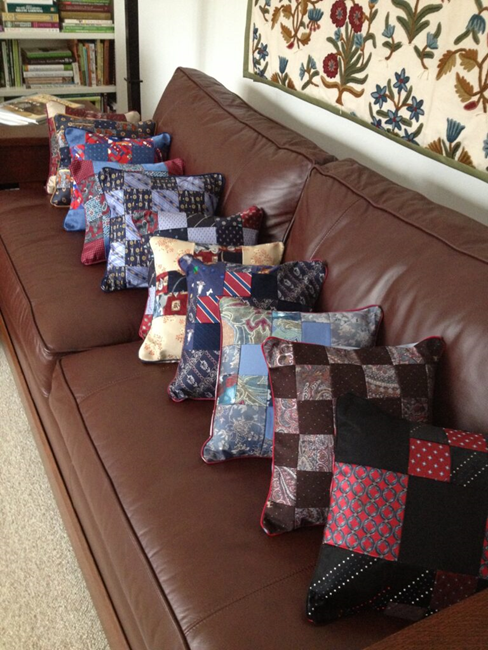
Once I figured out the process to convert a necktie into small but useful pieces of fabric, I was challenged to find other ways to use neckties. First, of course, I cranked out a bunch of pillows just for fun! This pile below I mailed to a niece in California who works as an Activities Director at a gated community. She used them as prizes and gifts in her activities. Obviously, I was focused on make squares from the neckties at the beginning!
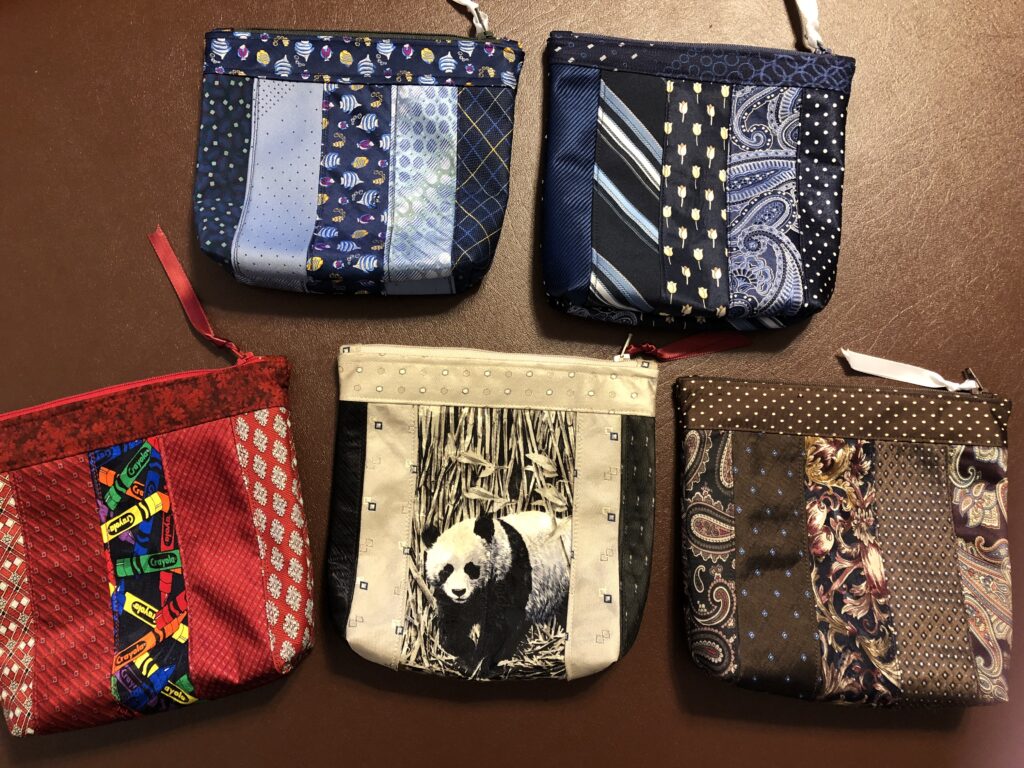
I made cosmetic bags for friends showcasing an interesting tie:
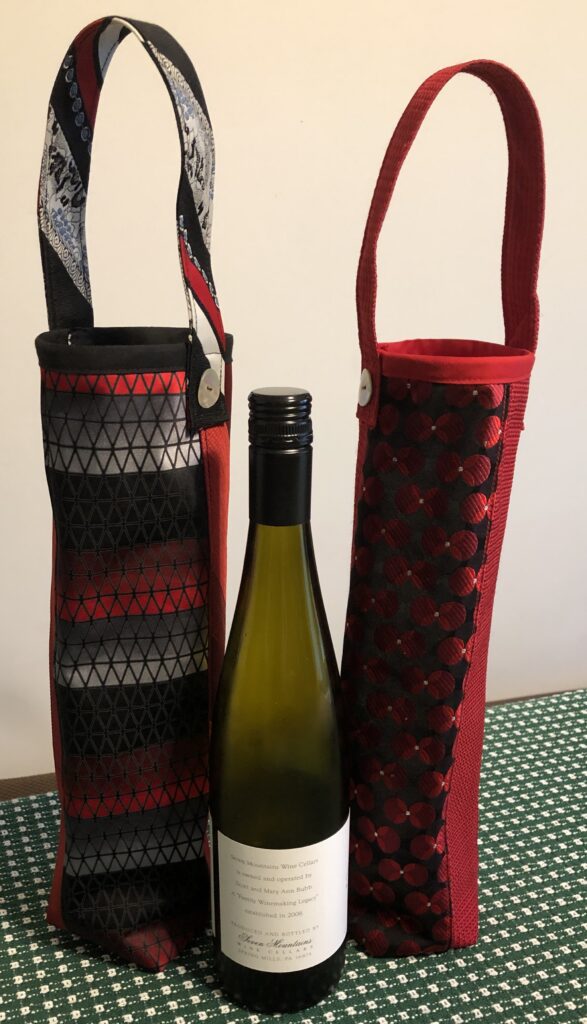
I tried to make wine bags:
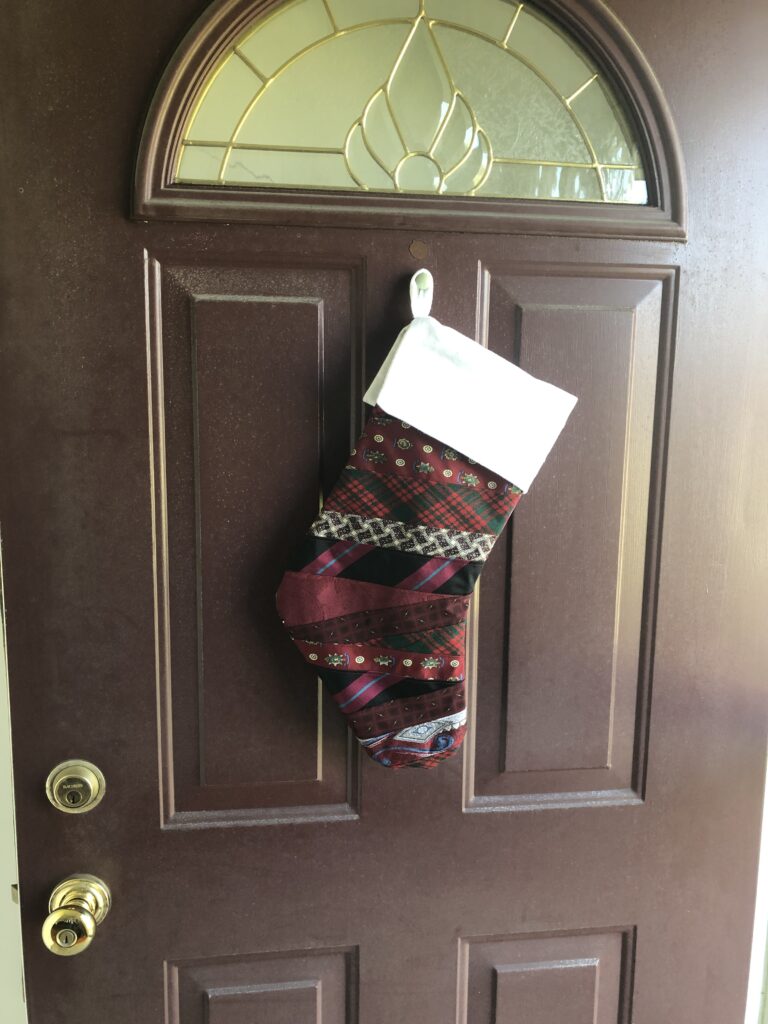
I even made a Christmas stocking for the front door last year!
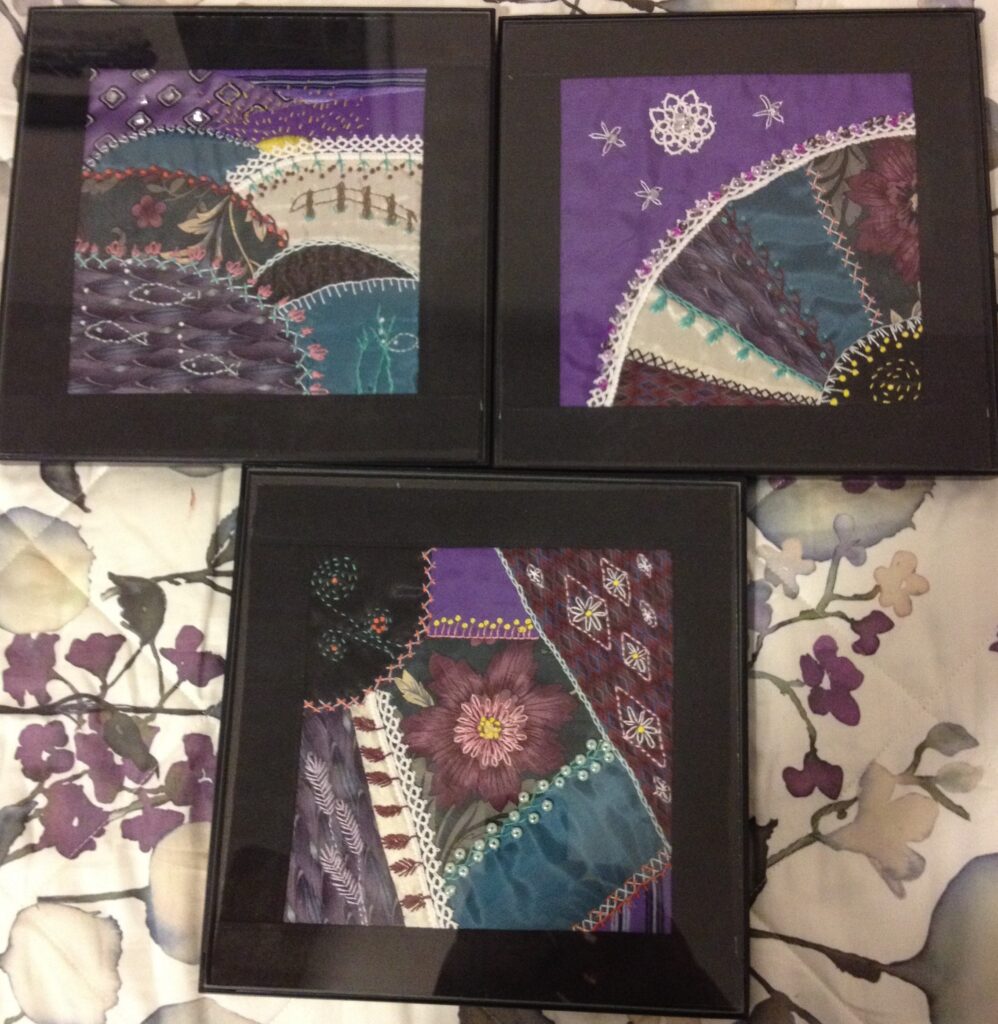
I made crazy quilt pictures…interesting, but I gave them away.
Even though I had made numerous items for fun…all of these projects were missing the deep memories of the pillows I made for a loved one’s family.
Reflecting on why I had this huge stash of necktie pieces was important in the process of letting go. I also realized I will never forget how to work with neckties. If a family loses a loved one, and has a pile of neckties they remember their loved one wearing, I know exactly what to do. I also realized I didn’t need to have this stash of neckties in my cluttered space.
All of this reflection helped me let go of this stash! Maybe someone else can use the pile and do some wonderful things! Perfect!
So, I had Bert load up the bin in the car and off I will go to Scraps & Skeins. What a relief to let go. Now…what to sort next! If I do this a little at a time it might not be so tough! Enjoy!
Thanks to the winter storm moving through our area today, I’m reminded about two projects that I worked on two years ago…the hot or cold wraps and pocket warmers. These items, made with cotton and flannel scraps from other projects, would be perfect for these cold days. Unfortunately, I have managed to give away all the ones I made…so I guess I’ll need to make some more!
The hot or cold wrap just fit around my neck and could be rolled up to fit in the microwave or placed in the freezer…I think I gifted them two at a time so one could be left in the freezer until needed. It is filled with about 3 cups of flax seeds. With just 20-30 seconds in the microwave, I had a warm wrap for my neck, shoulder or knee. I’ve heard they are even comforting for pets after their walks outside in the snow! The cold wraps in the freezer are handy for kids with bumps and bruises!
The pocket warmer was made from smaller scraps of leftover fabric and about 1/4 cup of flax seeds. I’m thinking I’ll make these first. Just 15-20 seconds in the microwave and they’ll warm up my coat pockets before I head outside!
Never in a million years did I think I would want to learn how to mend my socks! Now that I’ve finally found the perfect socks (from https://maggiesorganics.com) I was very distressed to find I had worn a hole at the toe. So sad…both my mother and Bert’s mother passed away over 30 years ago and I couldn’t ask them how they did it! Believe it or not, I found dozens of articles and YouTube videos with instructions online!
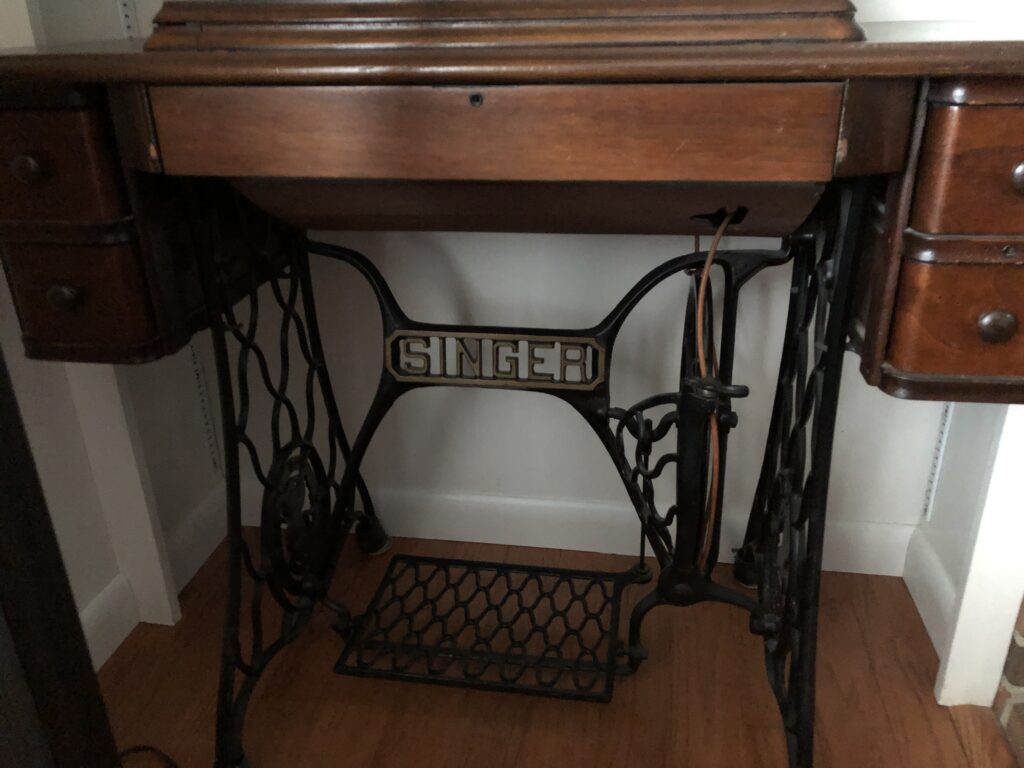
I realized I needed a “darning egg” that would fit inside the sock to stabilize the place I wanted to sew. I remembered seeing such a thing in one of the drawers of my treadle sewing machine. It seemed small…like it would work in a child’s sock.
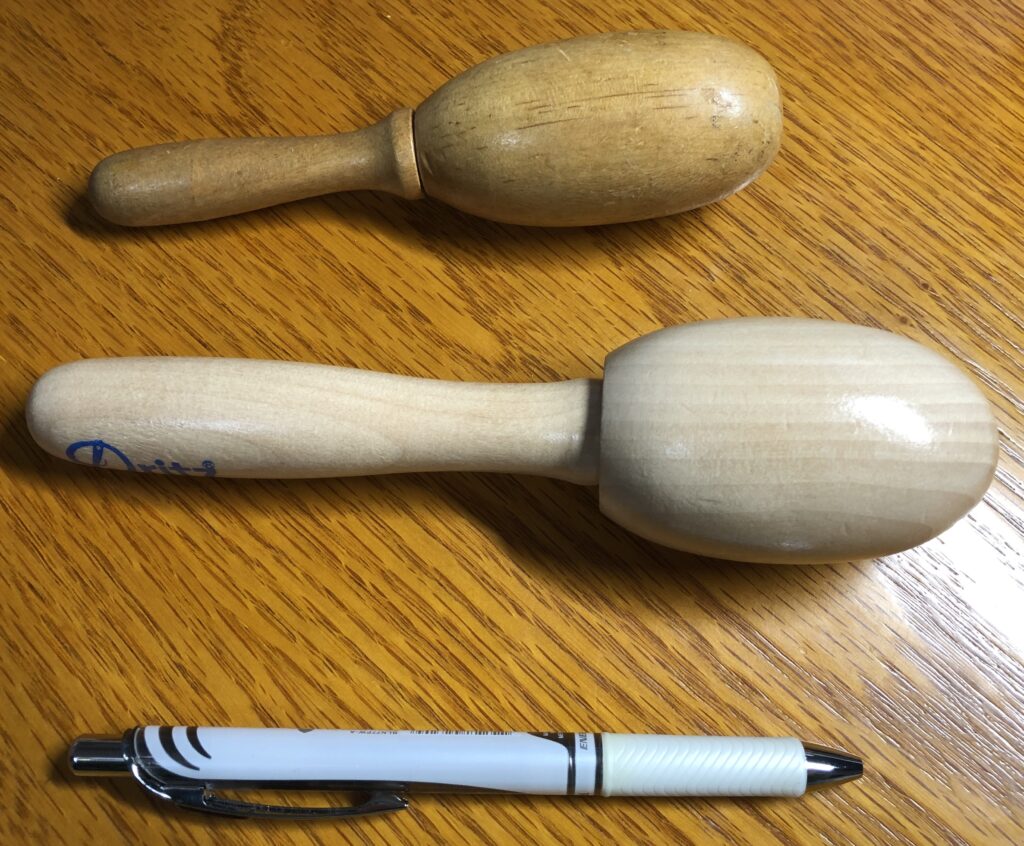
Then I realized I needed appropriate thread! So, I headed to JoAnn’s to see what they had. Lo and behold…they also had a new (larger) darning egg!
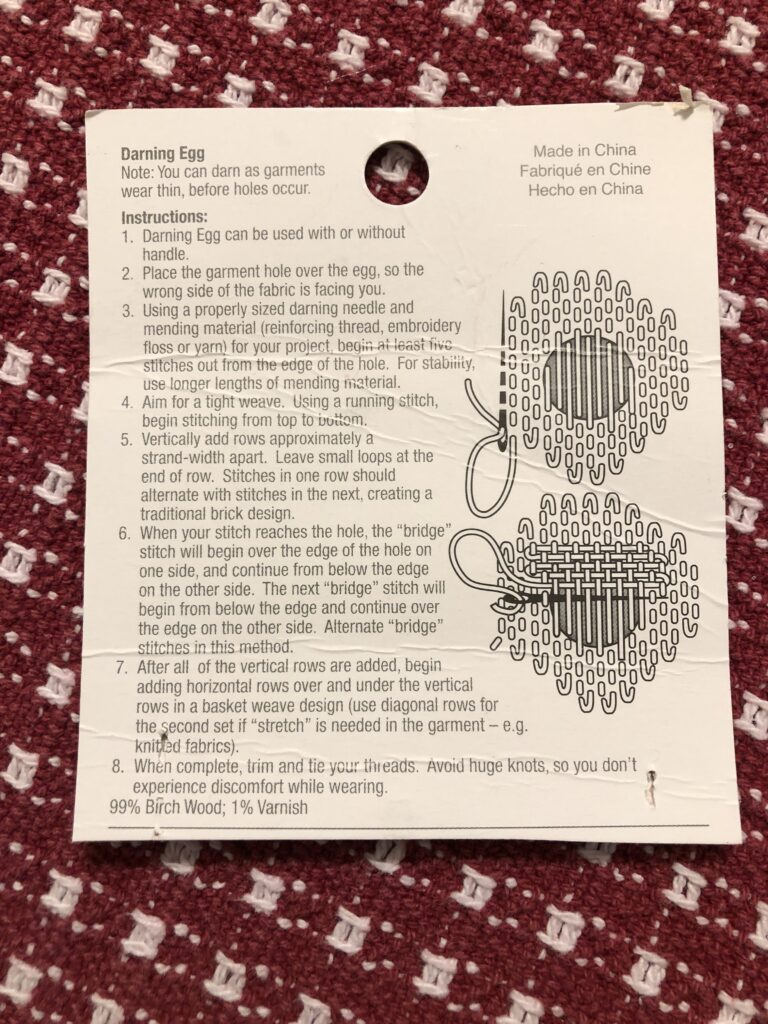
The smaller “darning egg” above is old and used. The new one is larger and made of hardwood. On the back of the packaging for the new one, were these instructions:
Looks so simple, right? Besides needing a magnifying glass to read the instructions, somehow the actual sock wasn’t so precise!
At JoAnn’s I also picked up thread (called “Button & Craft” thread) in four colors, I don’t actually have socks in red or lavender, but I thought it didn’t matter…my socks are usually inside a shoe!
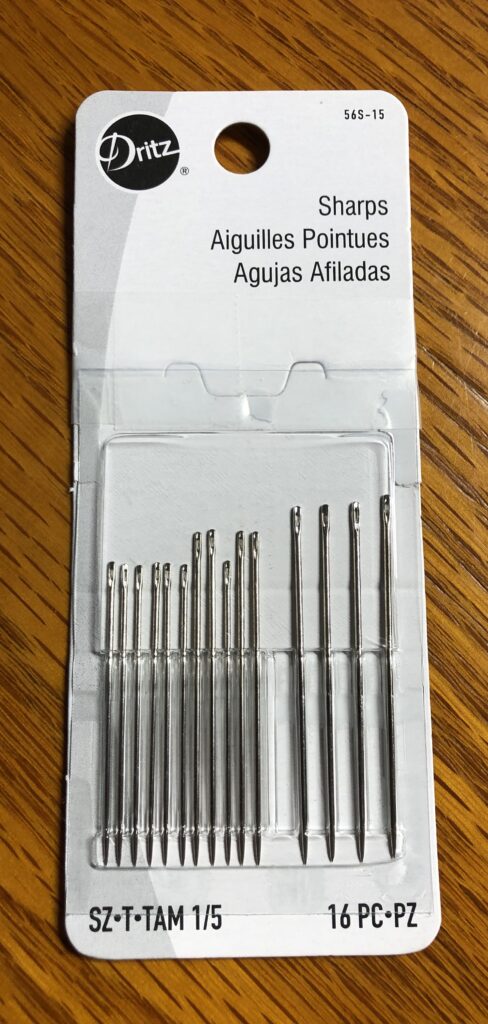
Then I grabbed a packet of needles, with larger holes just in case my regular hand sewing needles were too small:
Sock #1
This was an older sock that I felt I could practice with. The first set of instructions I read told me to put the darning egg inside the sock…so I did.
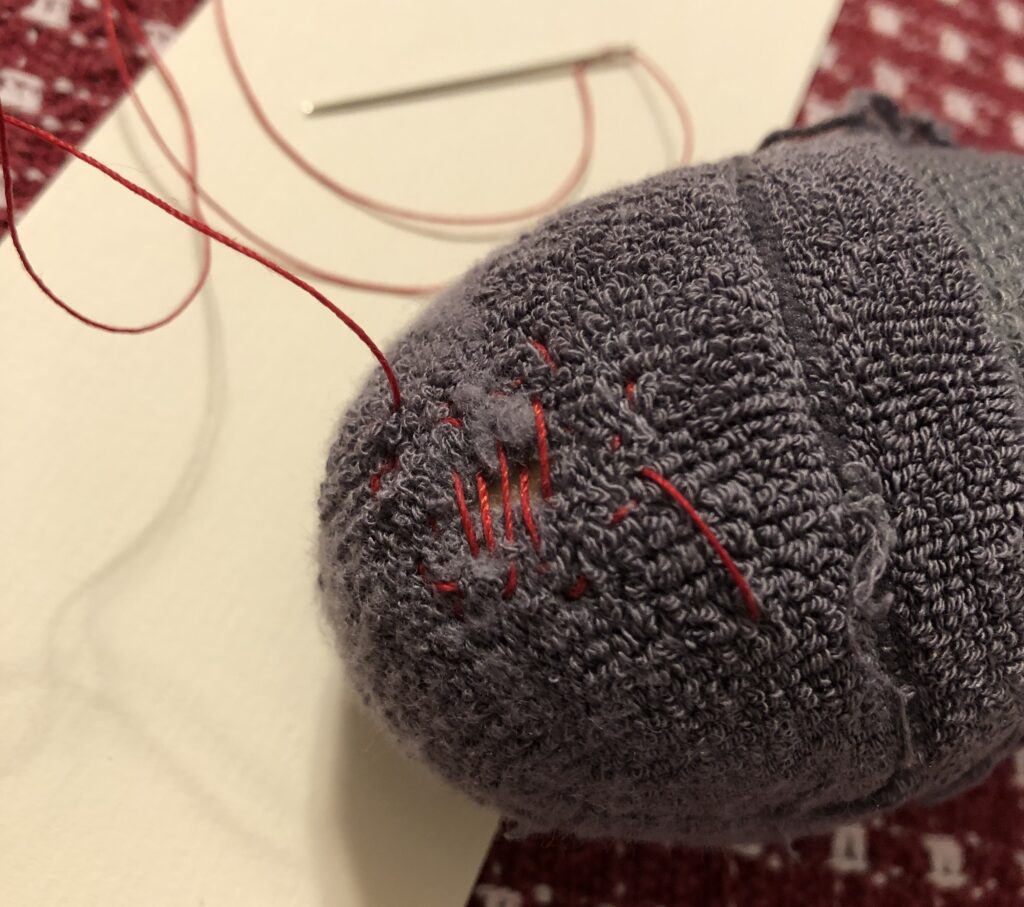
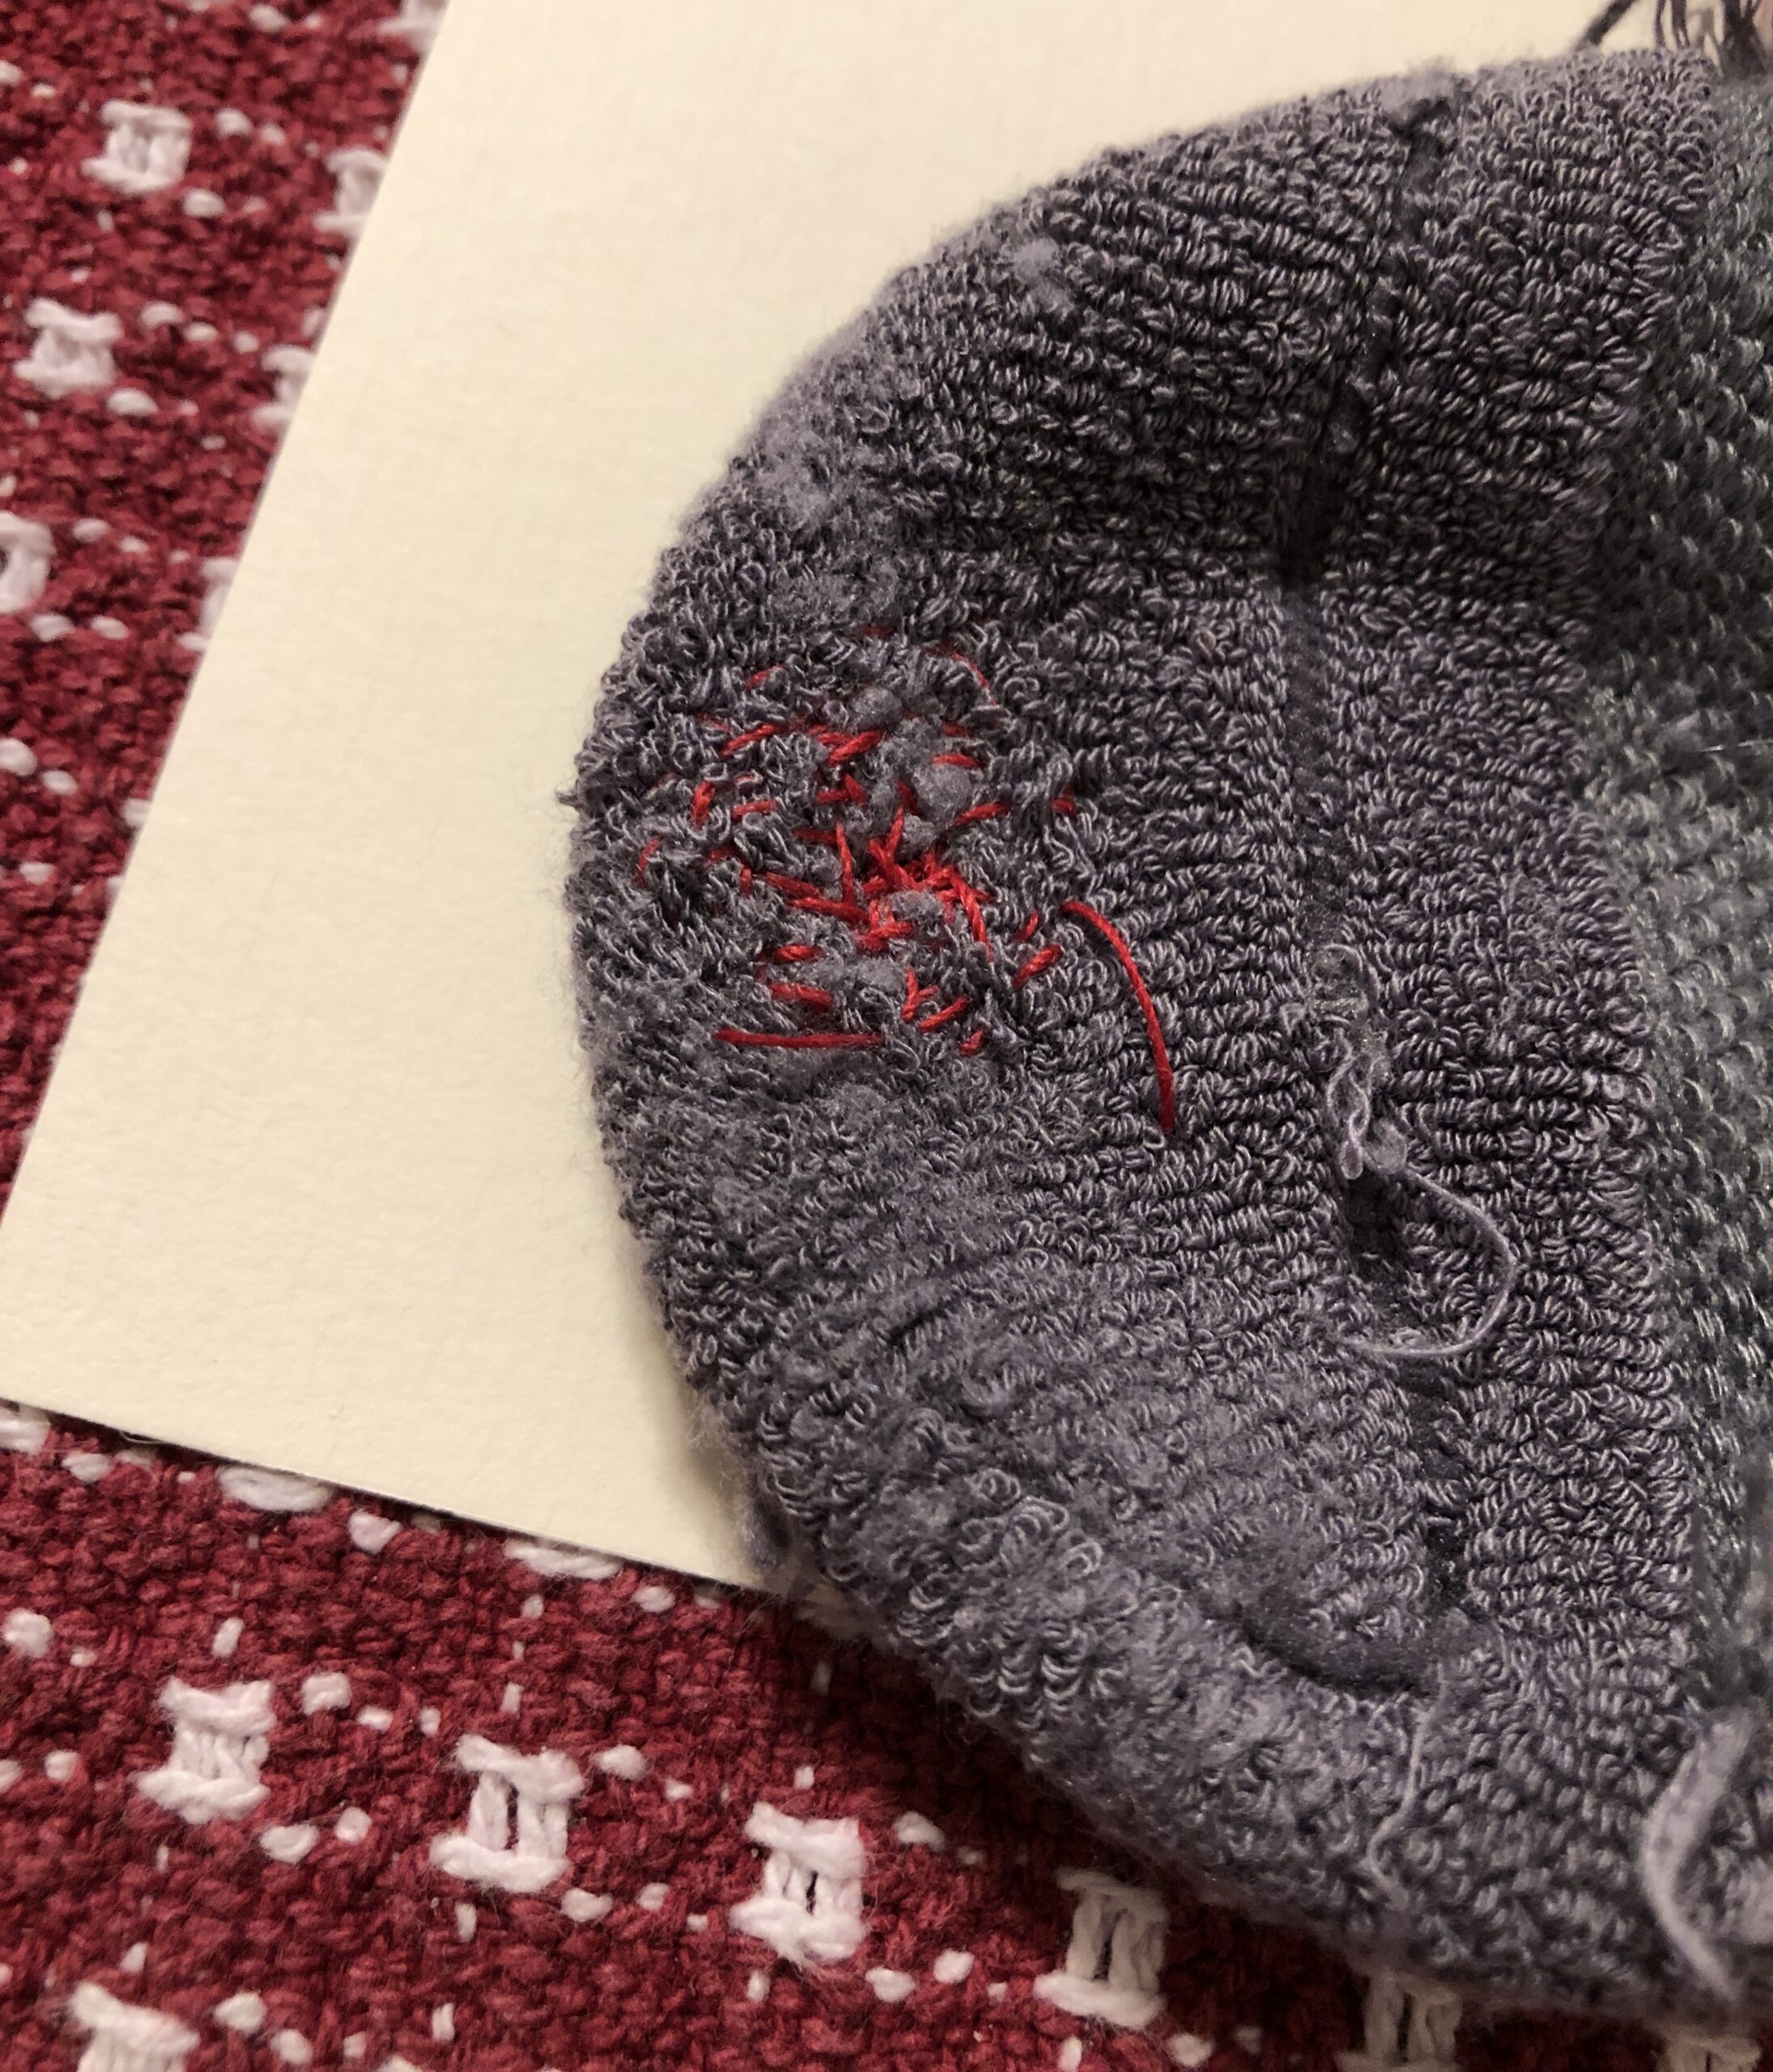
Next, I was to make a row of running stitches around the hole. I used red thread on purpose so it would show up in these pictures. I made a knot at the beginning, before the first stitch. I planned to cut off the knot when I was done.
Then I read the instruction that came with the new darning egg and it said to turn the sock inside out before starting!! Of course! So, I removed the egg and carefully turned the sock inside out…and got the needle to the outside. Geez!
OK…continuing on the inside of the sock…I started making long stitches to create the beginning of the patch.
Then, I tried to weave stitches across the long ones going perpendicular to the first stitches. Then I just went over the whole pile on the diagonal.
Looks crazy and messy, I know! But it did look like I had covered the whole from the inside.
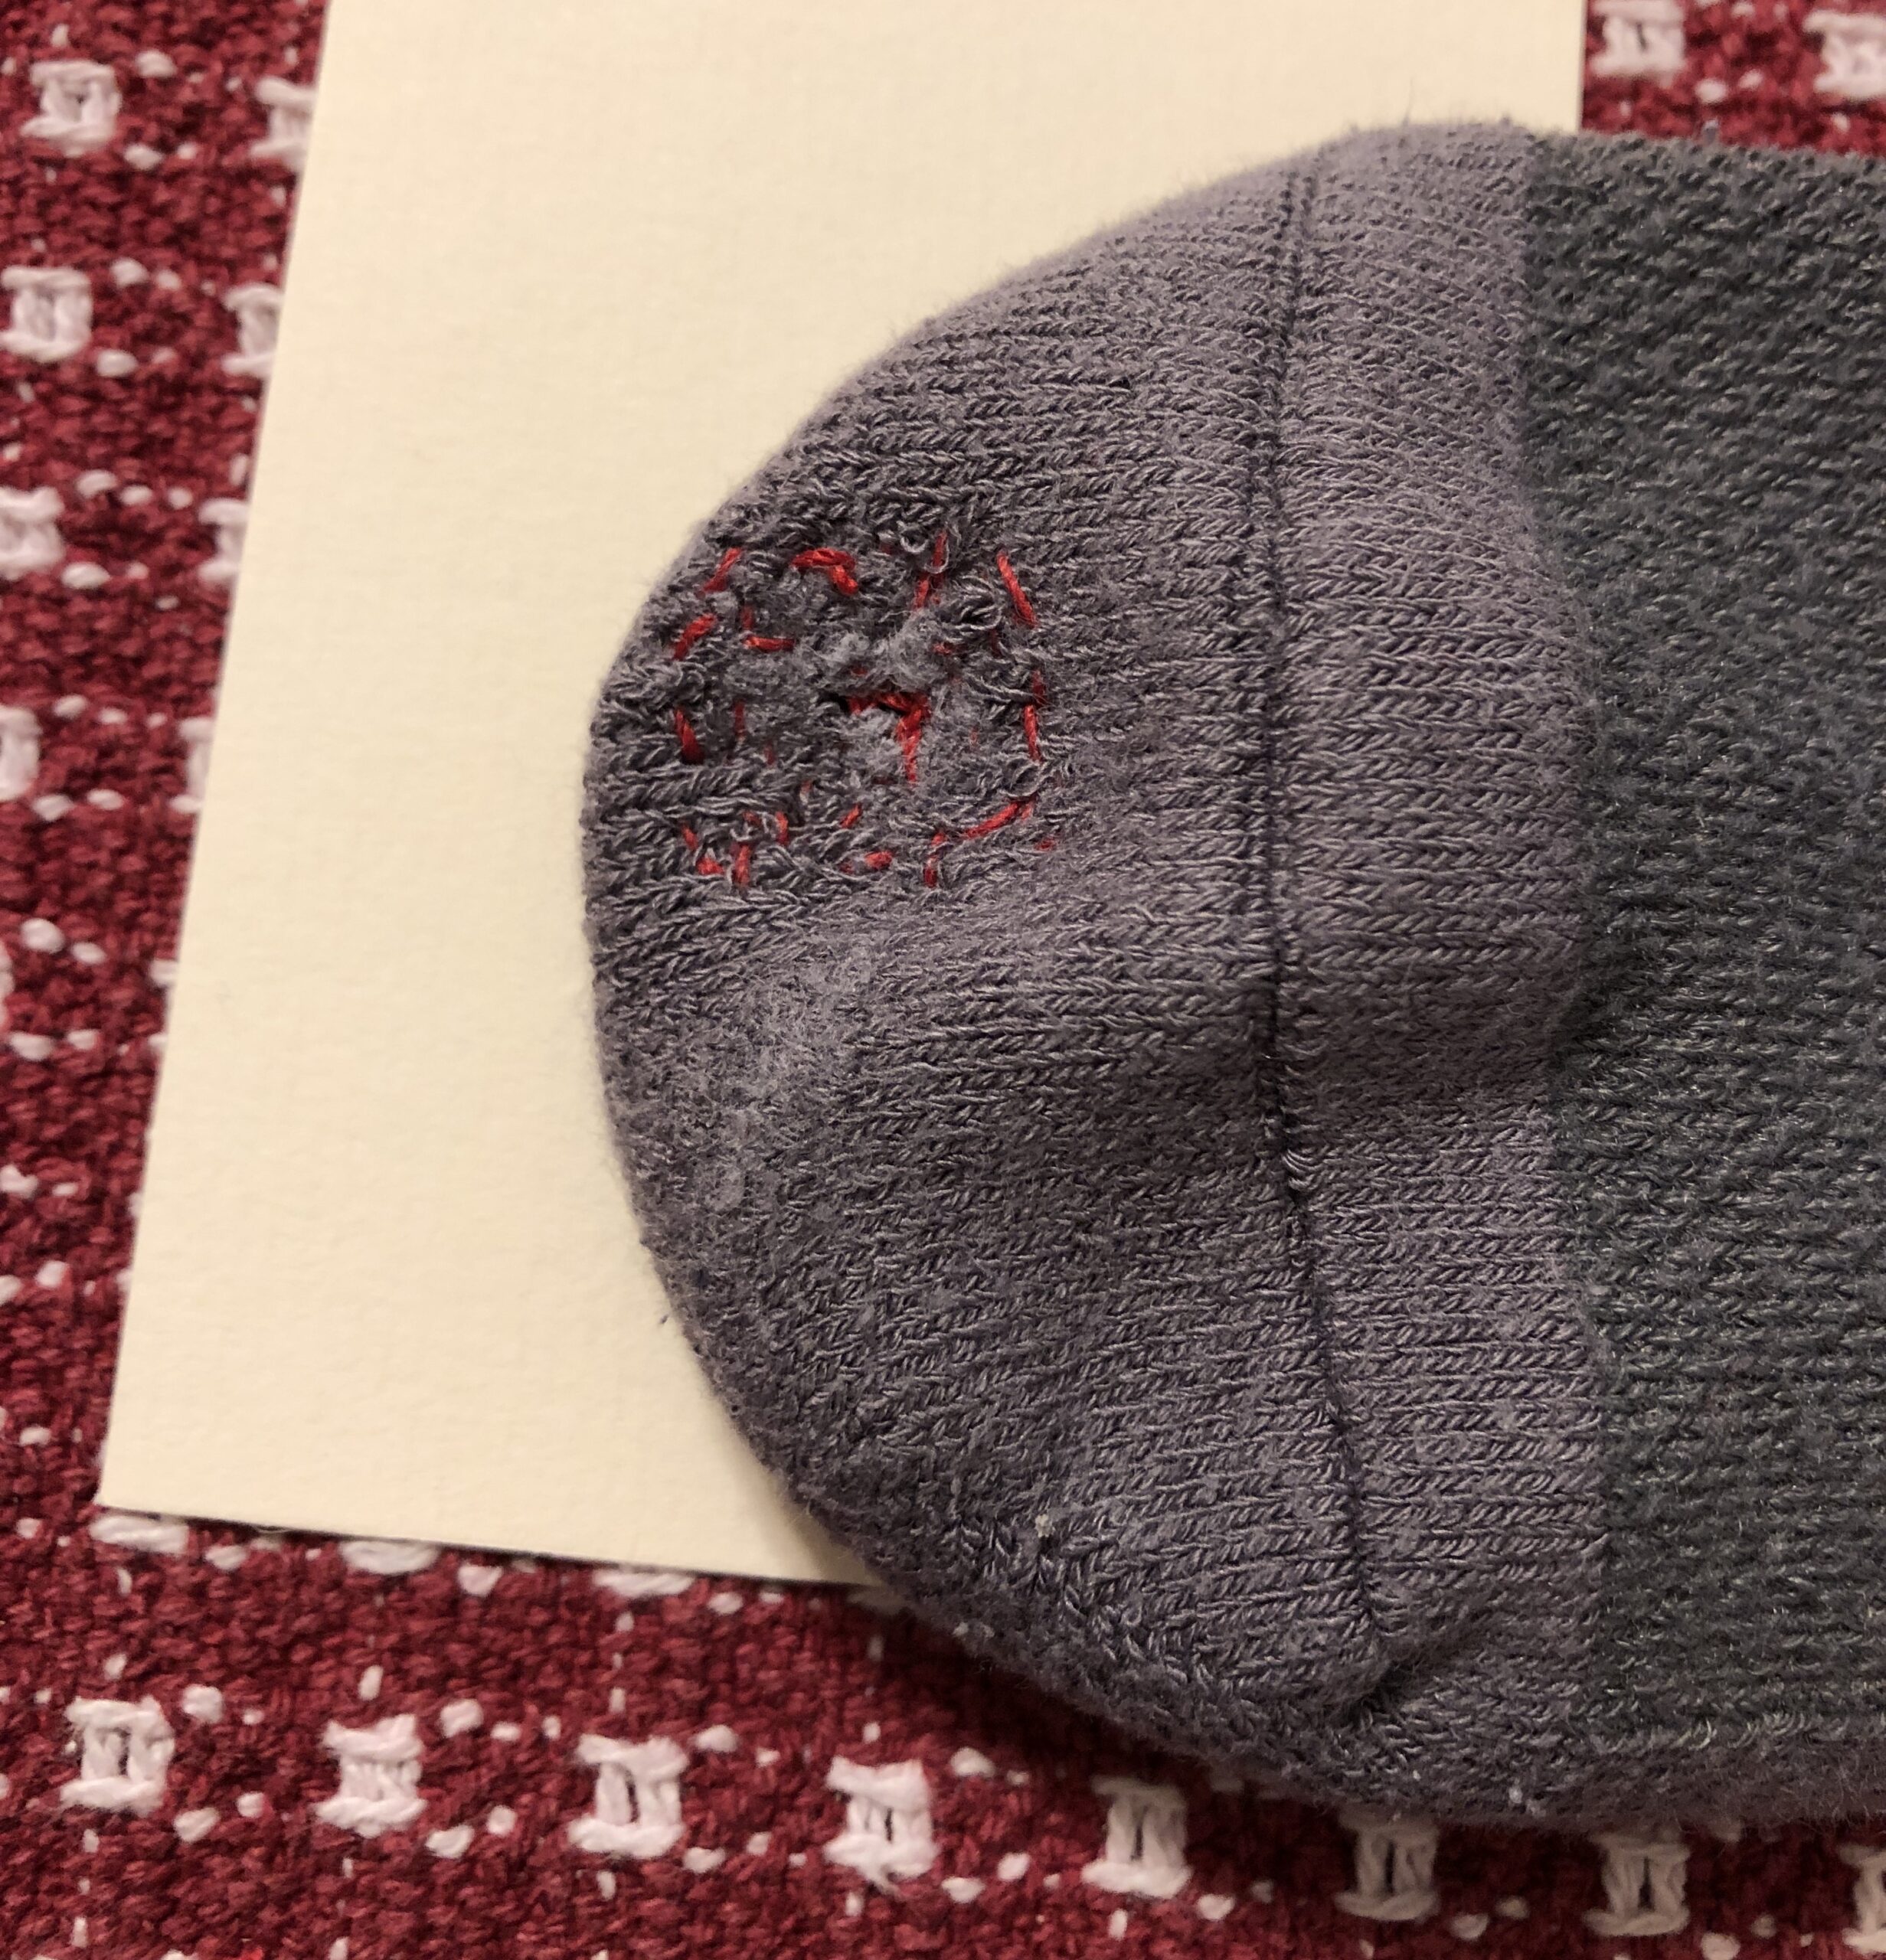
Time to turn the sock right side out to see what I had!
Now the proof of success will be to wear the sock and see if it’s comfortable!
Sock #2
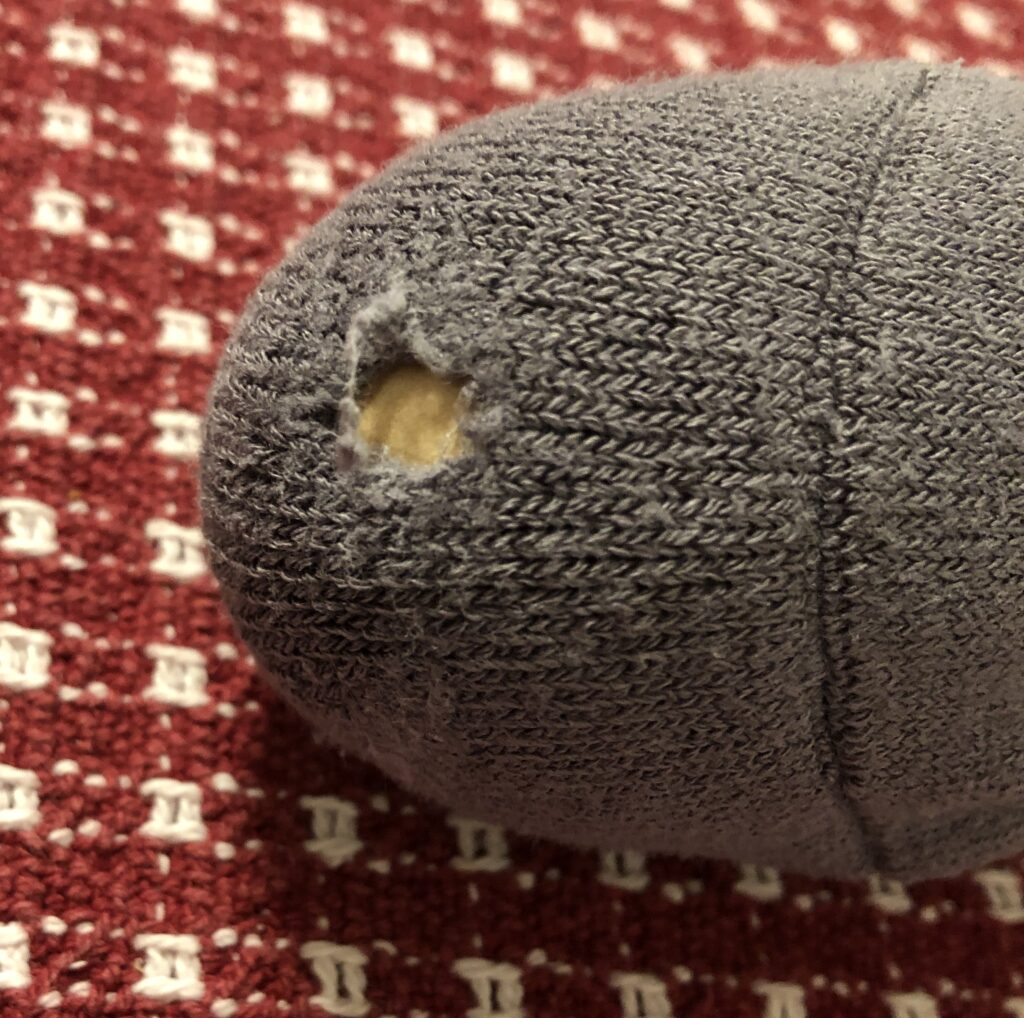
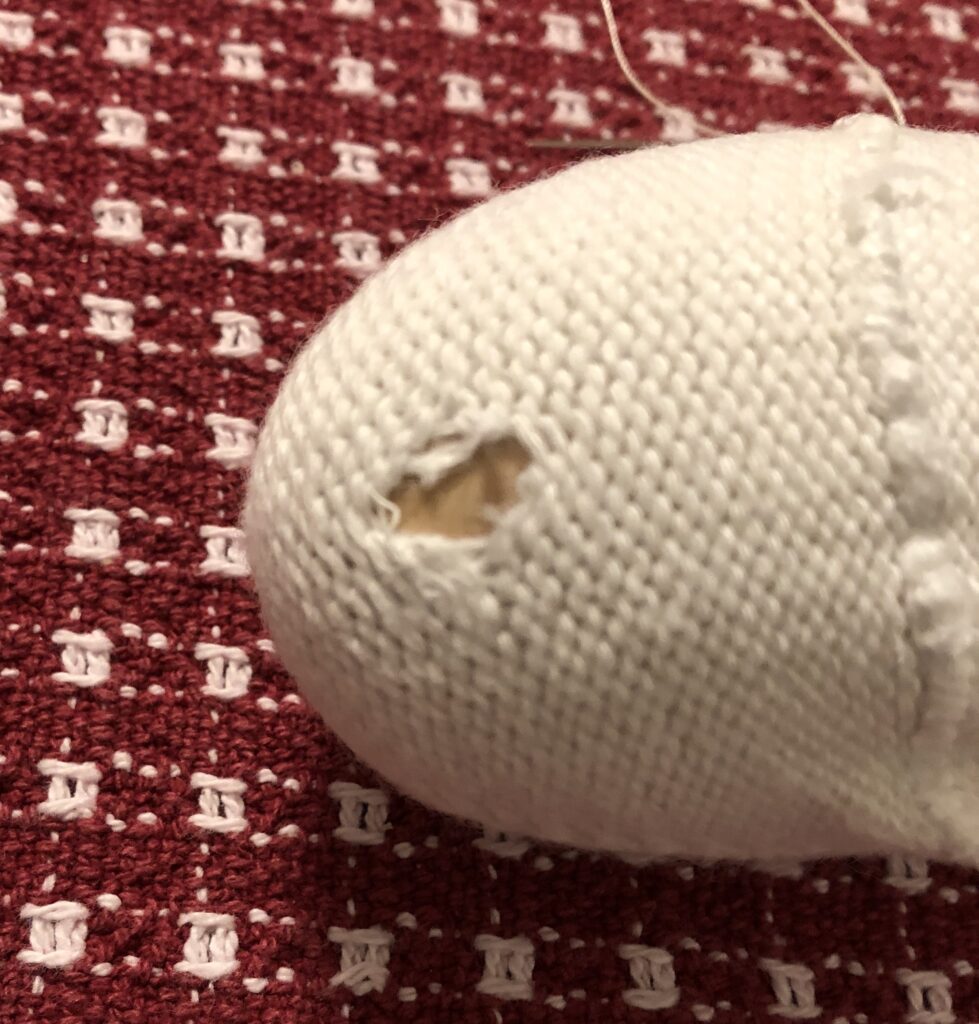
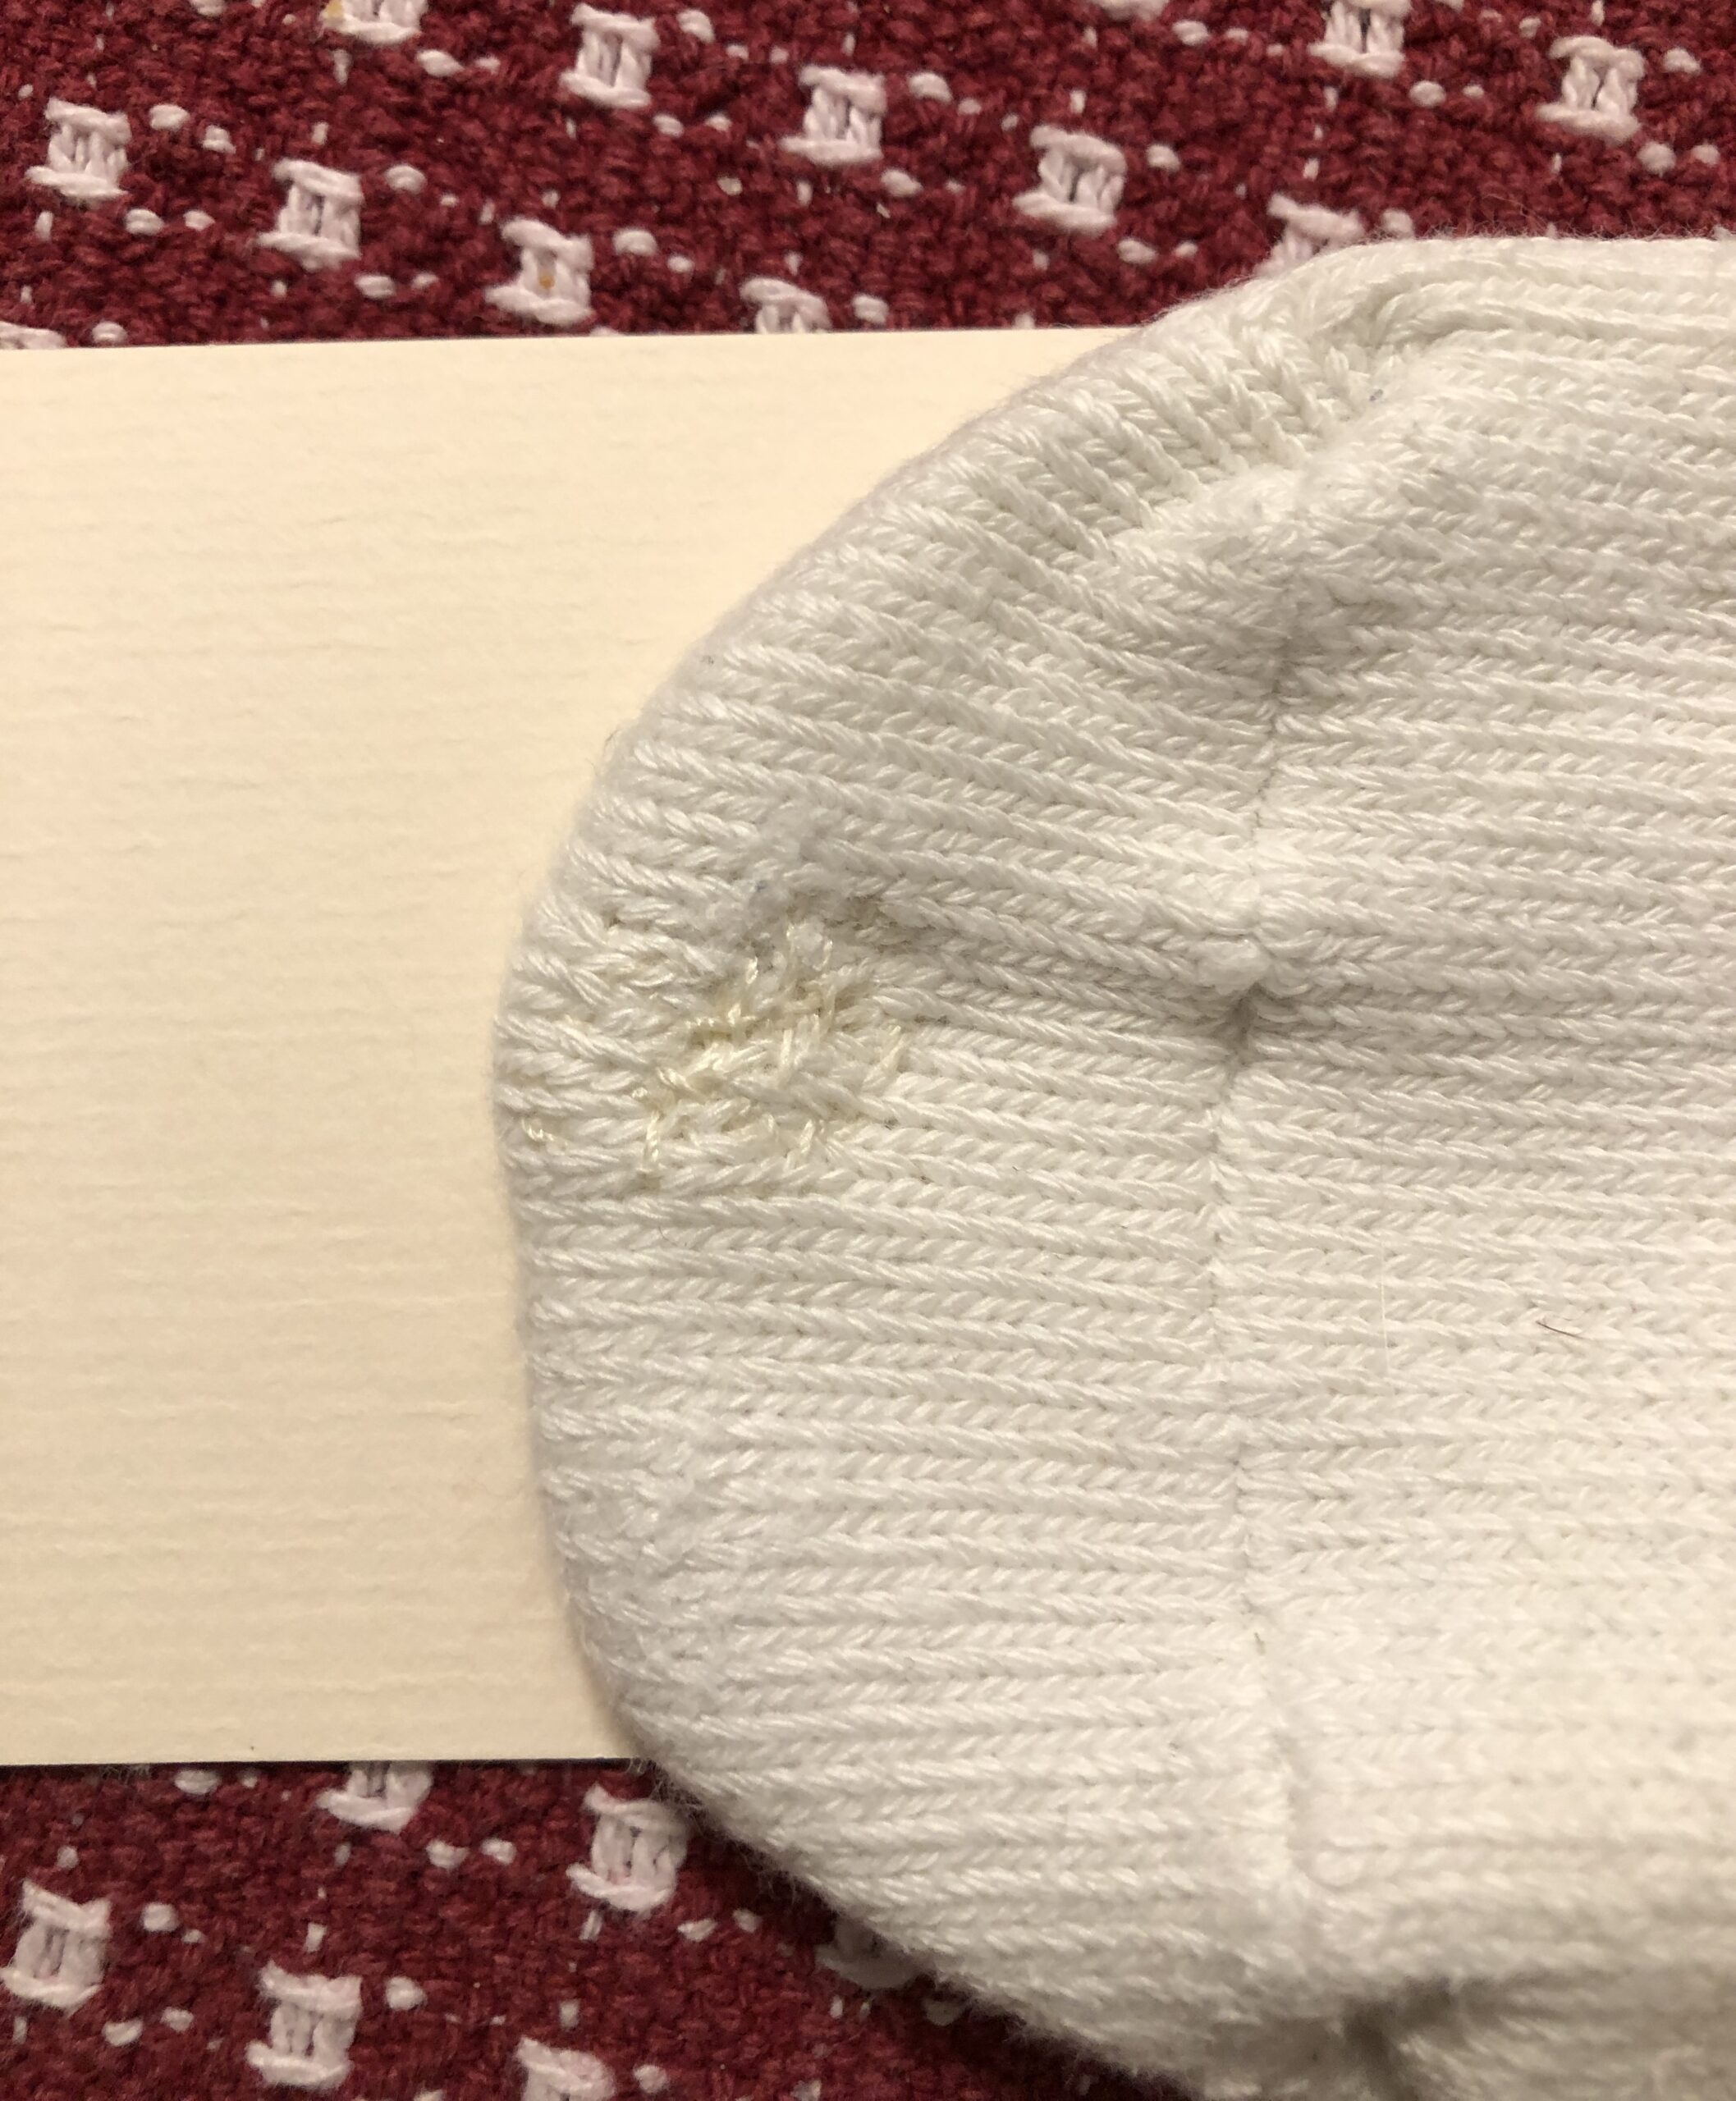
One more time. Here is one of my favorite socks…organic cotton from Maggies Organics. I really didn’t want to throw it away!
With the sock turned wrong side out I dropped in the darning egg. I started with the row of stitches around the hole. Then I started filling in with long stitches across the hole. I pulled the sides of the hole together a little as I snugged up the stitches. Finally, I wove stitches across the long stitches.
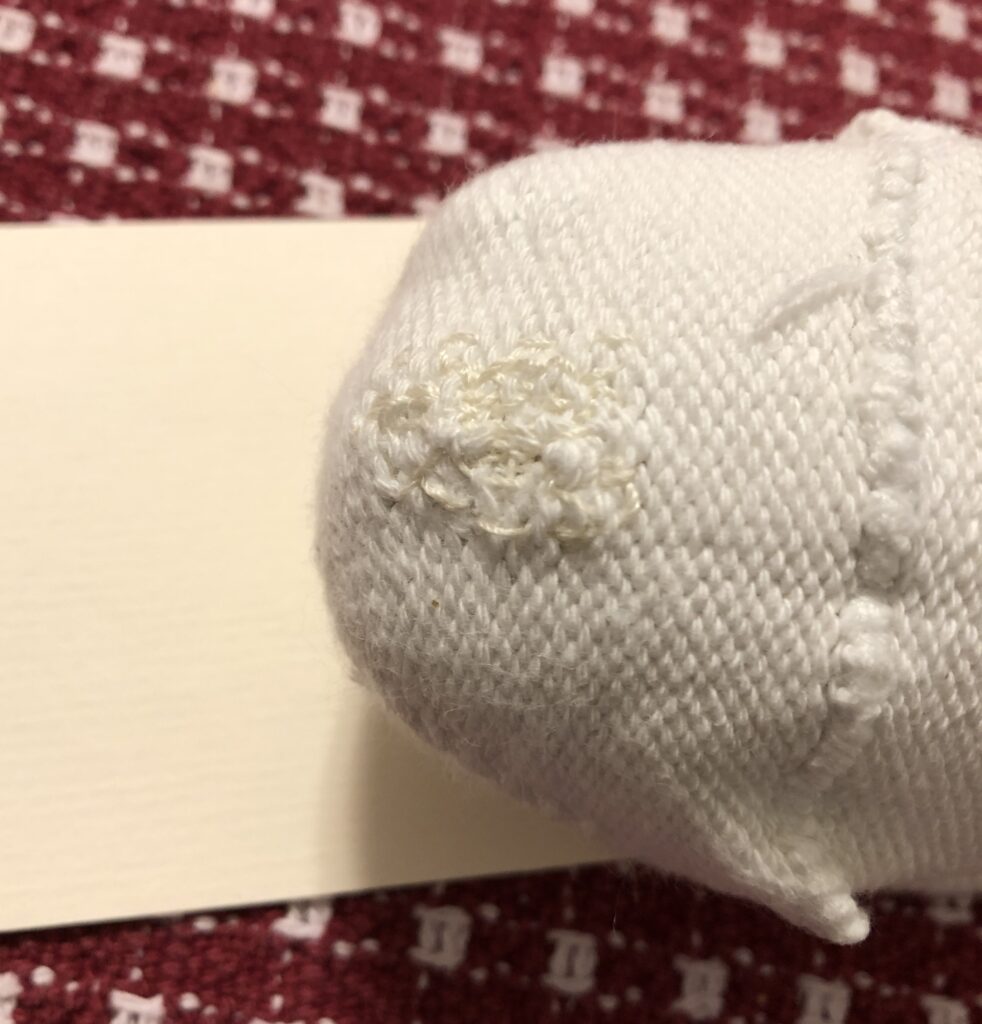
And the final result from the right side:
I hope my mother would have been proud that I saved a sock! Bert and I both remember our mothers darning socks. I probably wouldn’t have bothered this time, but I really like these socks and they were expensive! Now I’ll see if the repair patch is comfortable! At least now I have the right supplies to fix other socks!
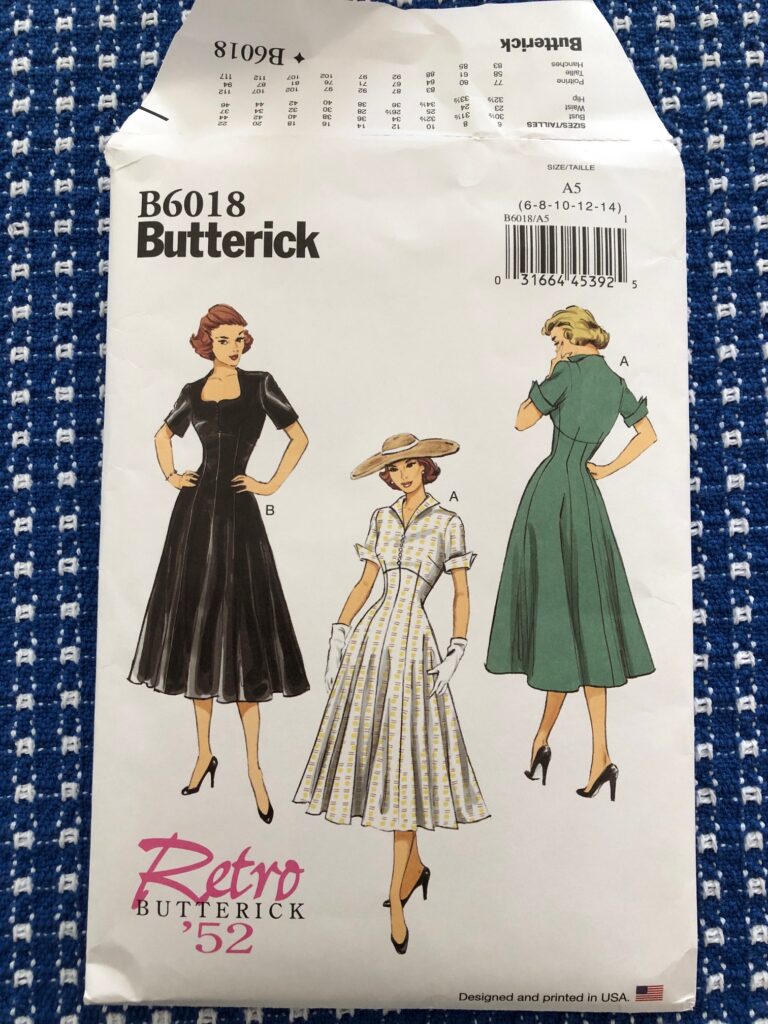
Just a quick post to show you the final pictures of the retro 1952 dress and the retro 1940s aprons. The dress was made for my oldest granddaughter (17) in California. She and her family visited this past summer and spent time in several thrift shops and the local antique store looking for “vintage” clothing. We had fun at the fabric store finding patterns for retro clothing…meaning made new but in a vintage style.
Follow-up of the Retro 1952 Dress
We ended up with this pattern.
After she and her family left town, I had the challenge of making the dress with no way to “fit” it to her…I had just her measurements! You can read about the process of making the dress at this link:
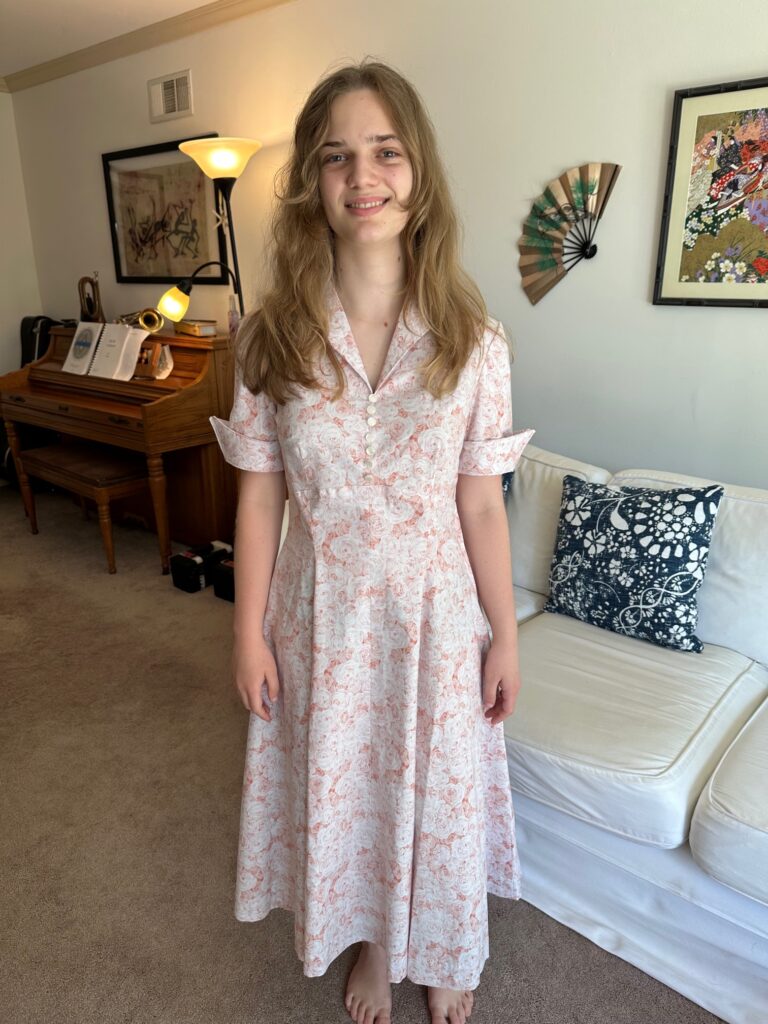
Fortunately, the dress fit just fine, but it didn’t “look” like the pattern picture.
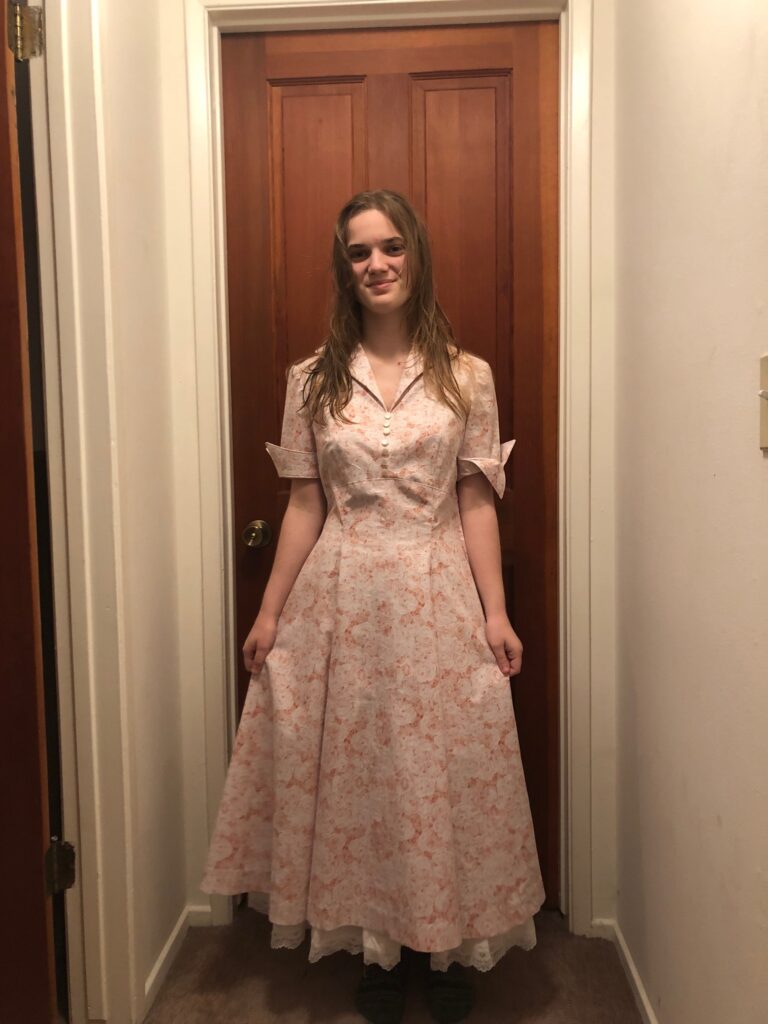
I finally figured out the skirt was full, but it just didn’t look full. It needed a gathered slip to give it shape! So, I ordered a slip and mailed it to her. Now, the dress looks like what I imagined…EXCEPT…since she wasn’t here, I couldn’t estimate the length of the slip. I left it alone and mailed it to California. Of course, the slip is about 4″ too long!
However, she loves it! I guess it could be a new fashion statement…with the lace showing. Warning to my son…if she decides she doesn’t want the slip showing, you’ll either have to mail it back to me or cut it off and hem it yourself! (Luckily, he knows how to do that!)
Follow-up of the Retro Aprons
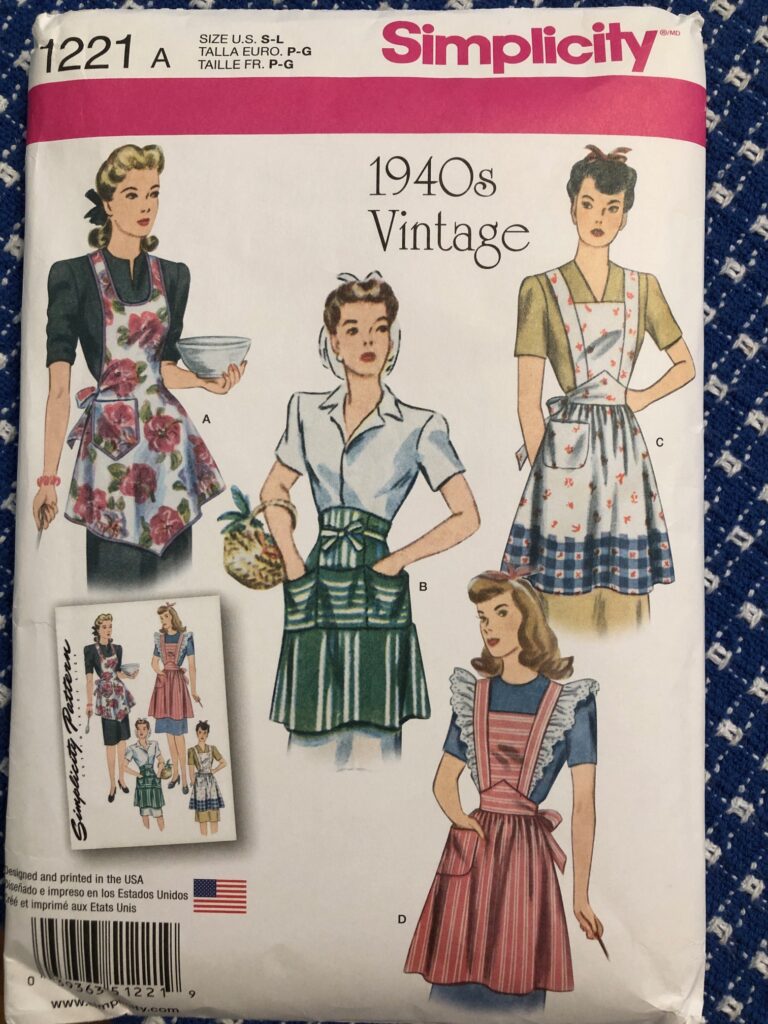
Then, I found a pattern for a set of Retro 1940s aprons.
I knew I wanted to make one like the pinafore apron and possibly the half apron, like the one in green on the pattern. If I made two, then both my granddaughters could bake together! You can read about making these aprons here: https://marykisner.com/making-a-retro-1940s-apron/
The pinafore apron was a real challenge and the half apron with pockets was much too complicated! (I don’t remember the apron I made in Home Ec. class around 1960 being this complicated.)
I can’t decide if I’m just out of practice in following complex instructions or if clothing construction procedures have been simplified over the years.
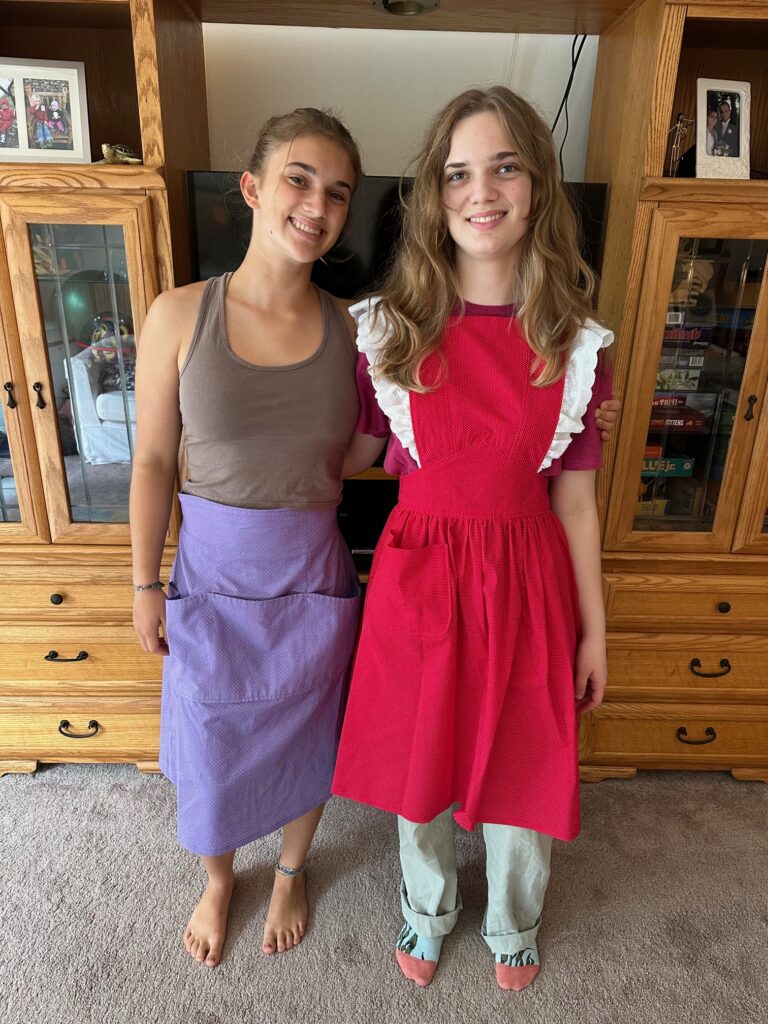
The pinafore apron turned out fine:
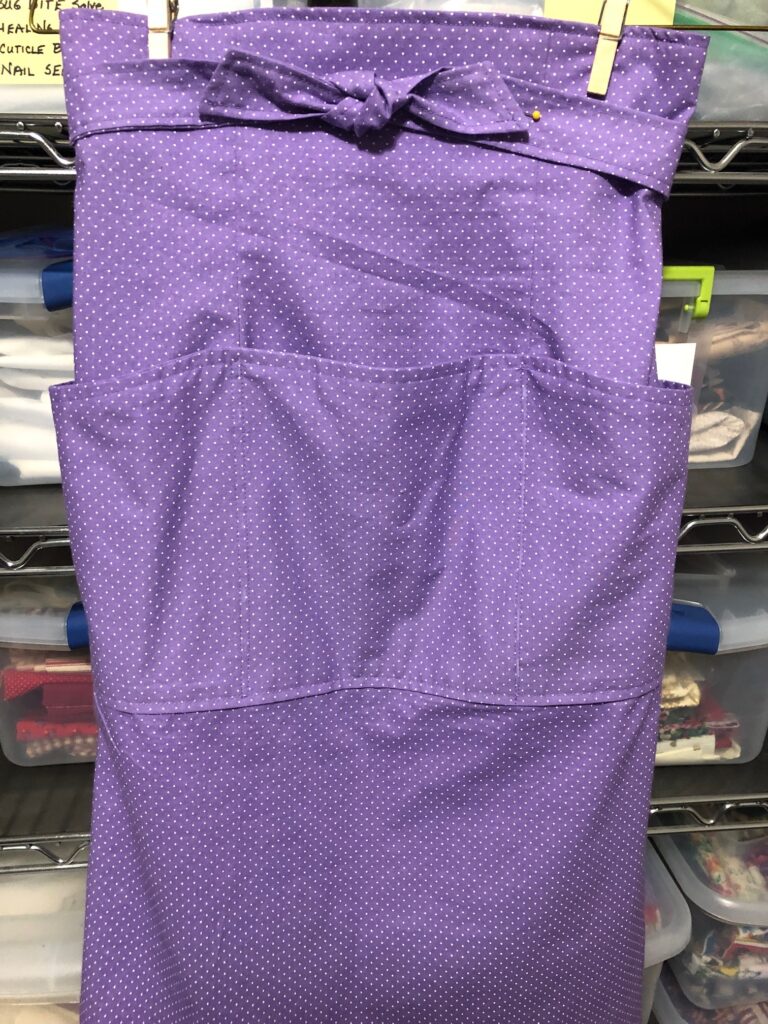
The half apron (in purple) was hard to photograph and needed to sit above the waist.
Of course, without my granddaughters nearby I couldn’t check the aprons for length. Turns out they were willing to put them on and send me a picture. They said they loved them! Hopefully, the next time they bake cookies they’ll remember to wear them!
That’s the story of Mary making retro clothing so far. Who knows what I might try next?