I was reminded (by Facebook no less) of a post I wrote one year ago today. It was a great reminder for me because I’m still making and gifting these items…but since I already posted about each project, I usually don’t post about it again. I’d like to share it here to give you some ideas for a handmade Christmas by giving you the link to the original articles:
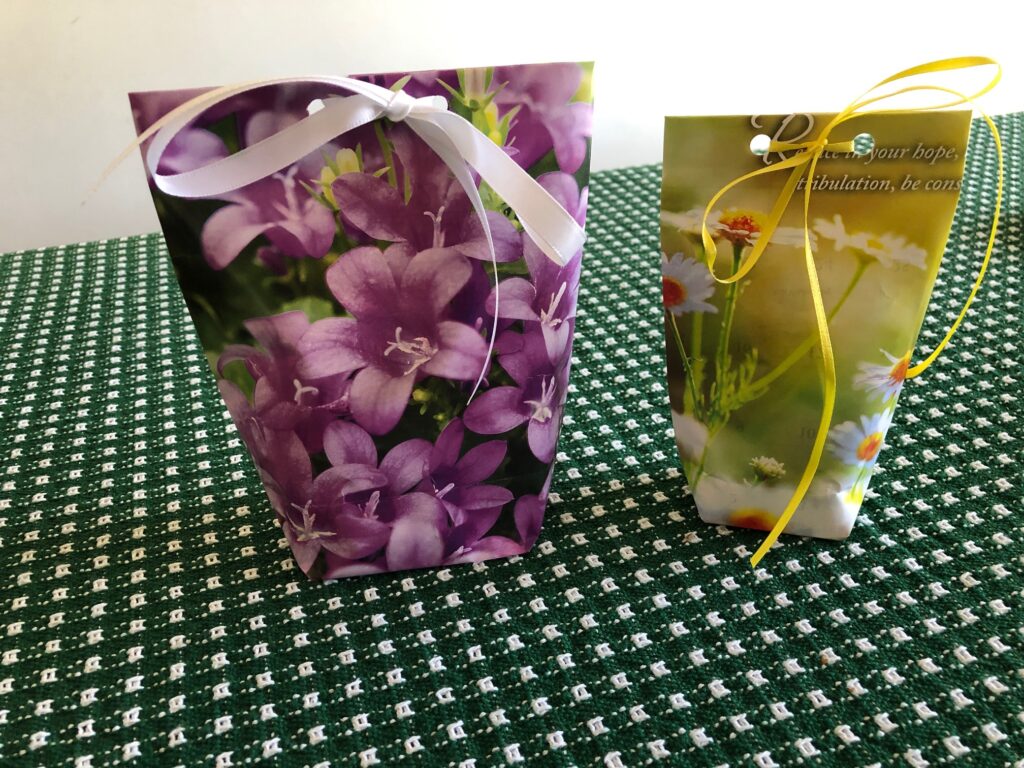
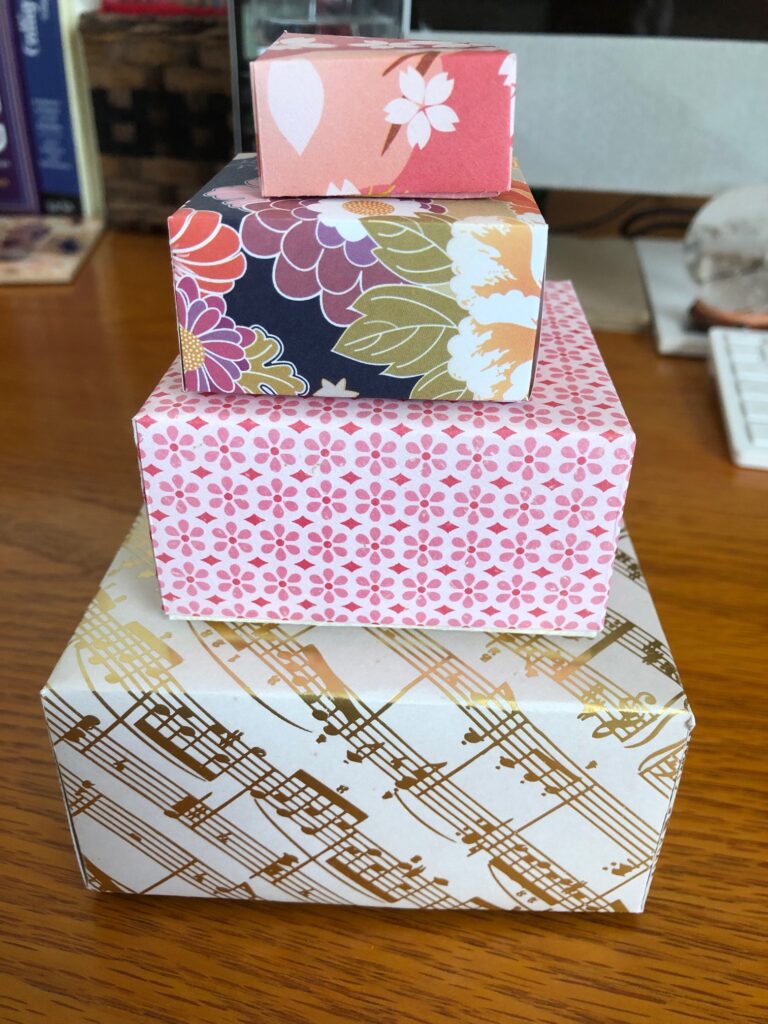
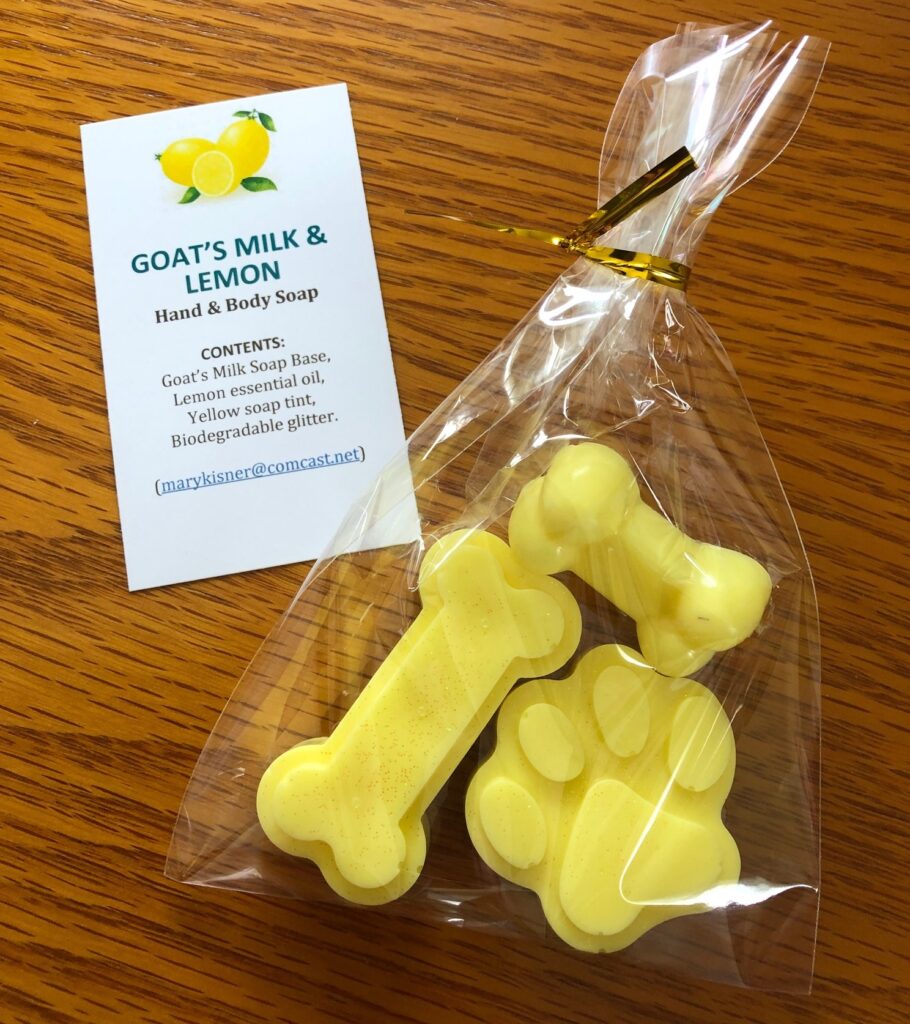
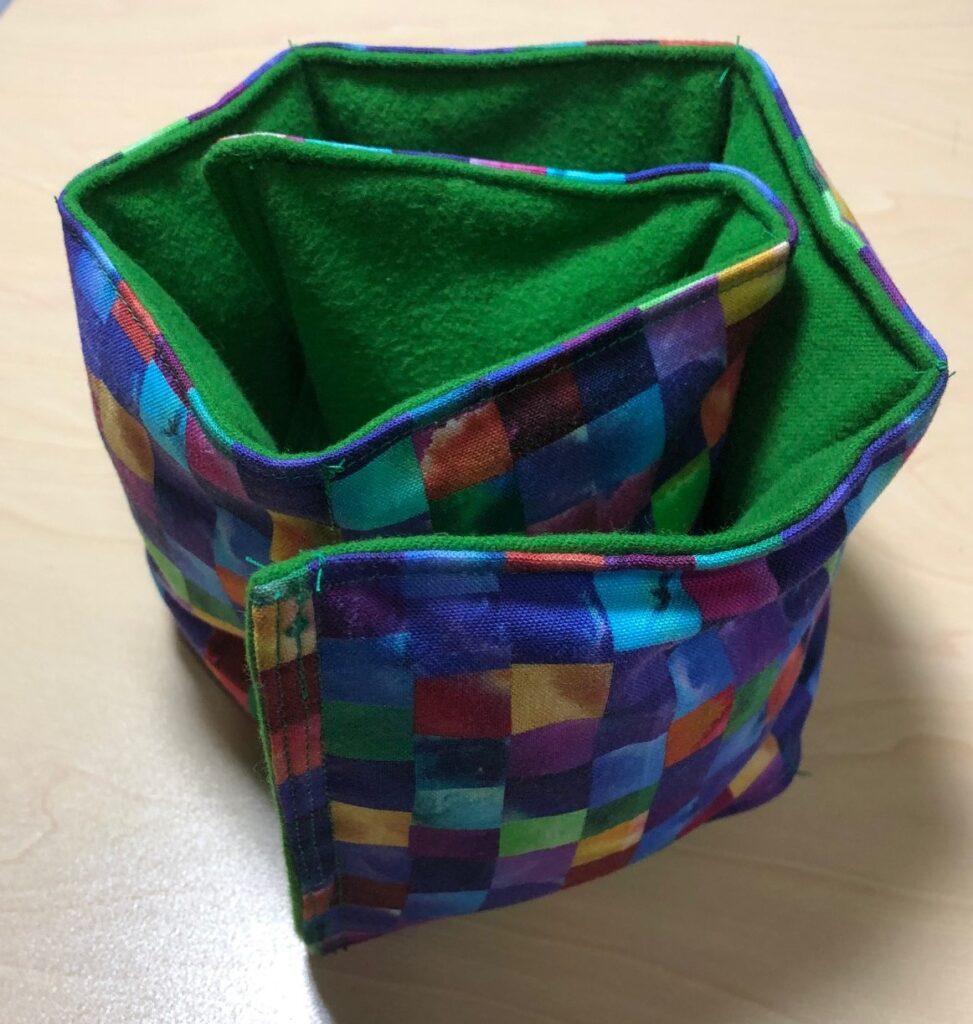
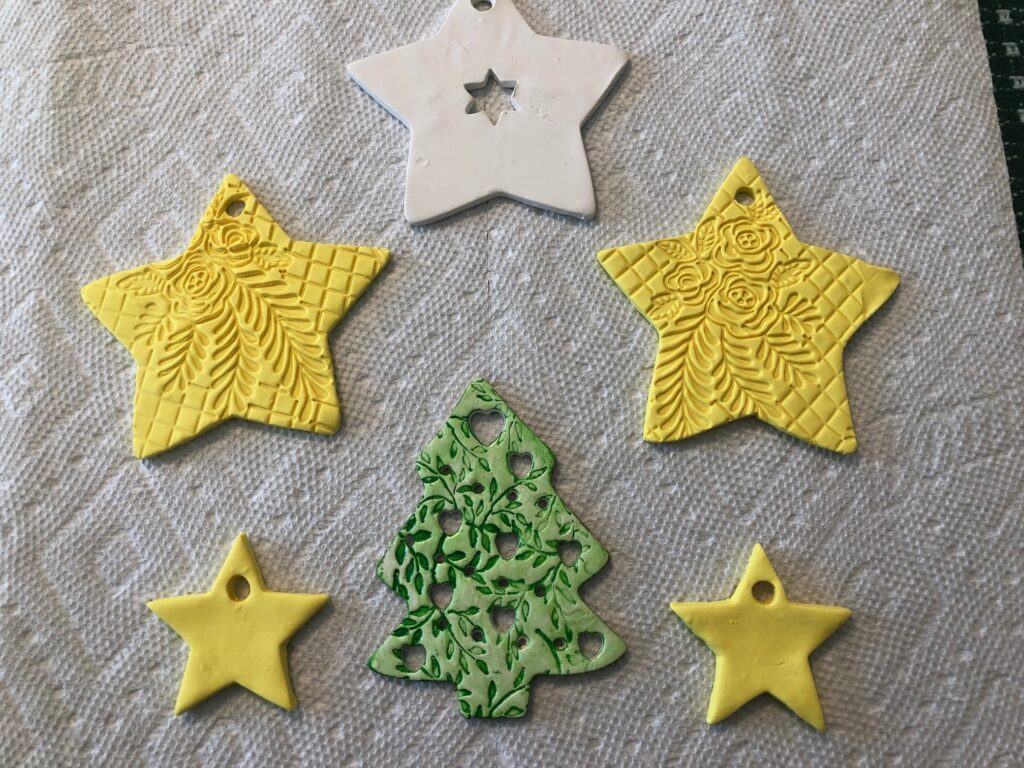
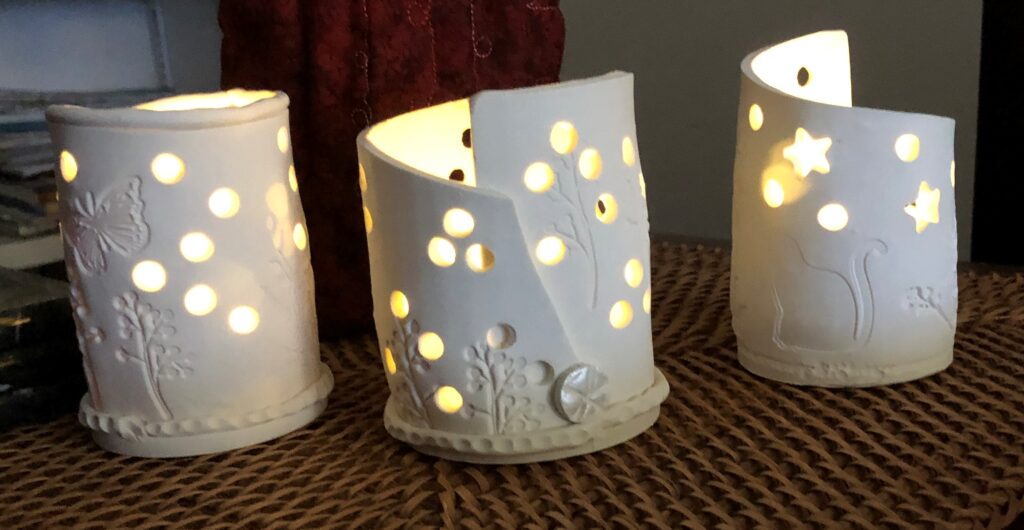
The first post describes (and links to the original posts) how to make gift bags and boxes by recycling pictures from calendars, guest soaps from melt and pour soap bases and making hot or cold neck wraps from fabric. The second post deals with polymer clay projects. If you’re looking for ideas for a homemade Christmas, give some of these a try. Enjoy!
When was the last time you wore an apron? Do you have a novelty one to use when you barbeque, or a heat resistant one to protect you when you drop that Thanksgiving turkey into boiling oil? Maybe your job has an apron as part of your uniform or you grab one when you’re dressed up and want to pull a dish out of the oven. I don’t think I have a single apron anywhere in my house and I haven’t made one since 7th grade Home Economics class…a long time ago!!
In the 1930s and 1940s when fabric was scarce our grandmothers and great grandmothers used aprons to protect their expensive clothing. Those aprons were often made from colorful feed-sacks or repurposed sheets to save money. My mother seemed to have a hankie in every pocket…long before affordable paper tissues. Bert remembers his grandmother always had wrapped homemade candy in her apron pockets that he looked forward to with every visit.
With my granddaughter’s interest in vintage clothing, I thought I could easily make an apron like the ones from the 1940s. Haha! Easy is not the right word to describe making retro 1940s anything!
I should know better by now. A few weeks ago I made her a dress from the 1950s and was amazed how complicated every step was. Maybe I just haven’t made clothing for many years but it feels like in the last 10 or 15 years the methods of construction have been simplified or the instructions in patterns have better step-by-step illustrations. You can see more about the dress I made at https://marykisner.com/making-a-retro-1952-dress/ and the final result on my granddaughter at https://marykisner.com/success-with-the-retro-1952-dress/.
I’ve been bothered for several weeks that something was missing with the dress. She loved it but you really can’t see how full the skirt is. I finally figured out that the dress needed a half slip…it could even be a crinoline (remember that stiff scratchy stuff?) No, that would be too much. I just ordered her a cotton slip with gathered layers. That might make the dress look more like the picture…at least if she wants to look like 1952! We’ll see!
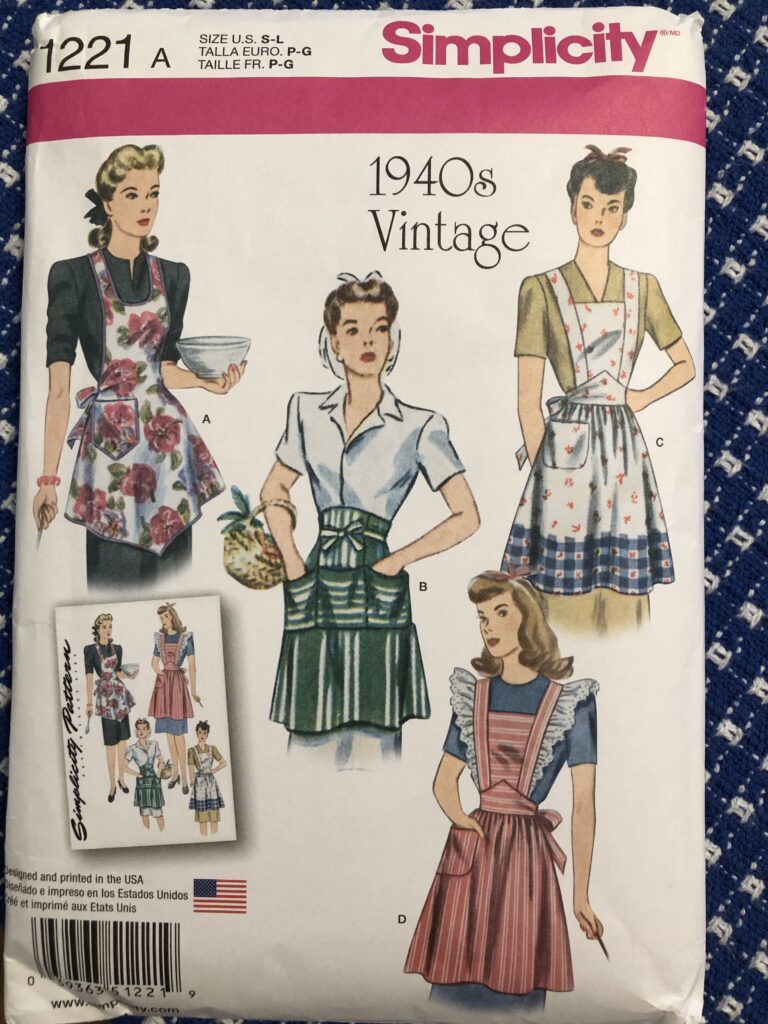
Anyway, she was so happy about the dress and I was feeling accomplished about making it. I started looking at other retro patterns. I found this Retro 1940s Apron pattern and figured it didn’t look too hard. Again…haha!
I was interested in trying the red one with the lace along the side of the bib. This would be called a pinafore apron. She hasn’t really asked for an apron, so it will be a surprise. Who knows? Maybe it will be useful as a Halloween costume or on stage in a play. She’s headed off to college next year but she does like to bake. Actually, this project will keep Grandma Mary busy, so that’s all that matters.
I won’t try to go step by step, but here are a few pictures as I worked on the apron:
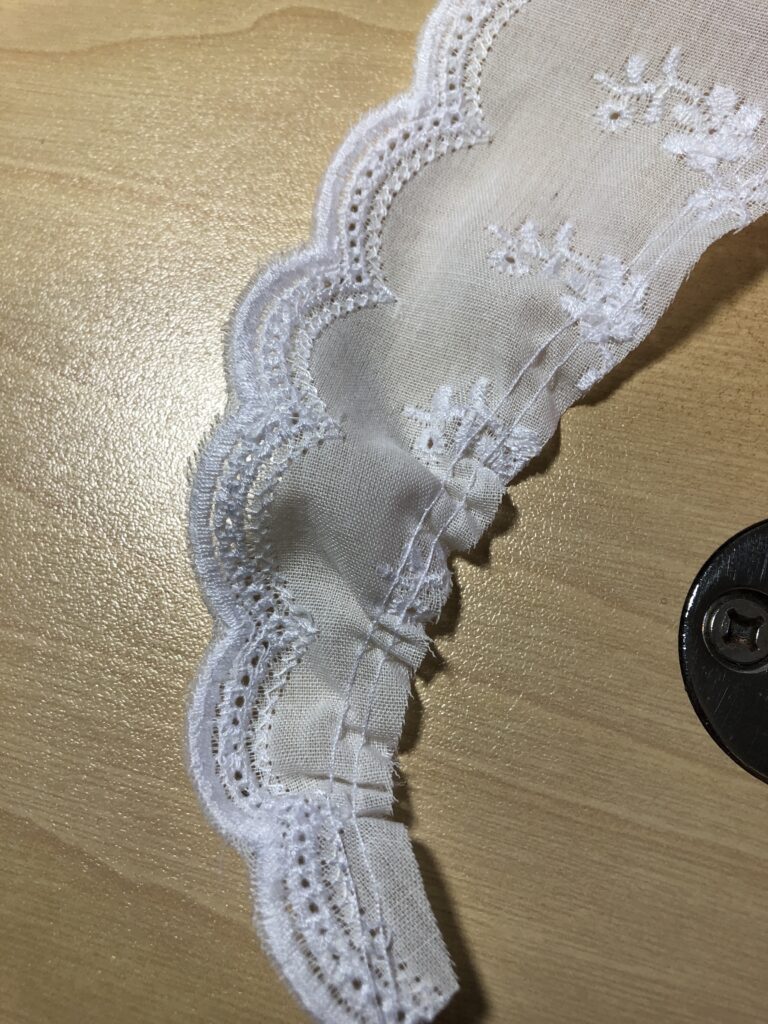
Gathering the eyelet lace:
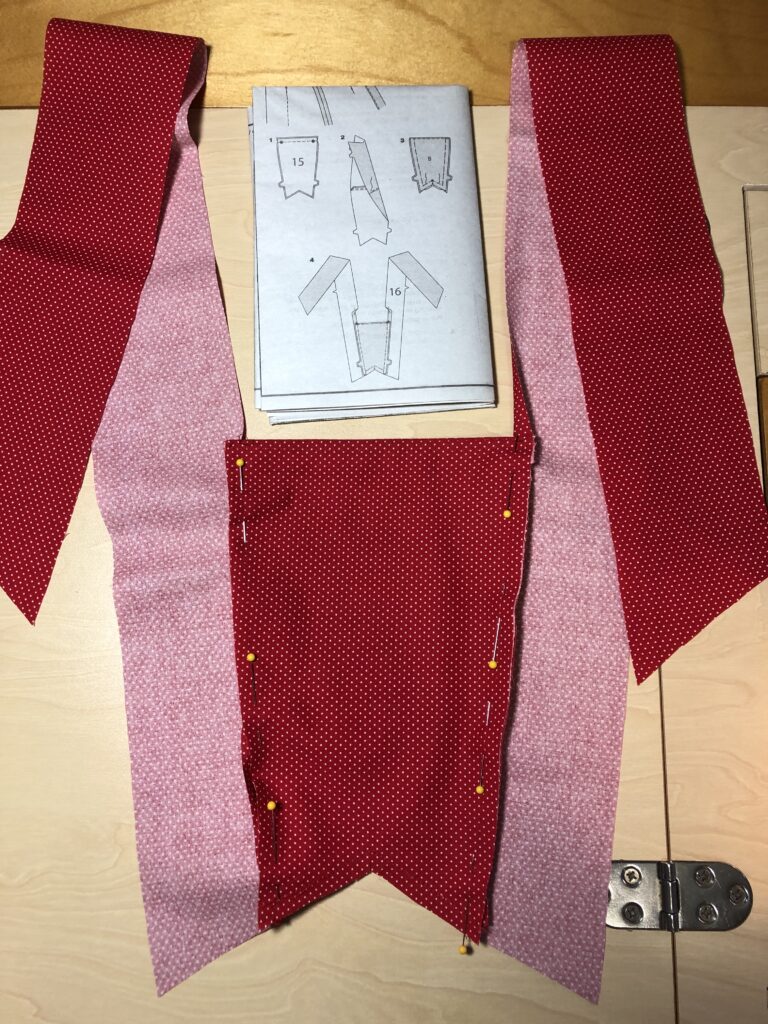
Figuring out how the bib and straps went together:
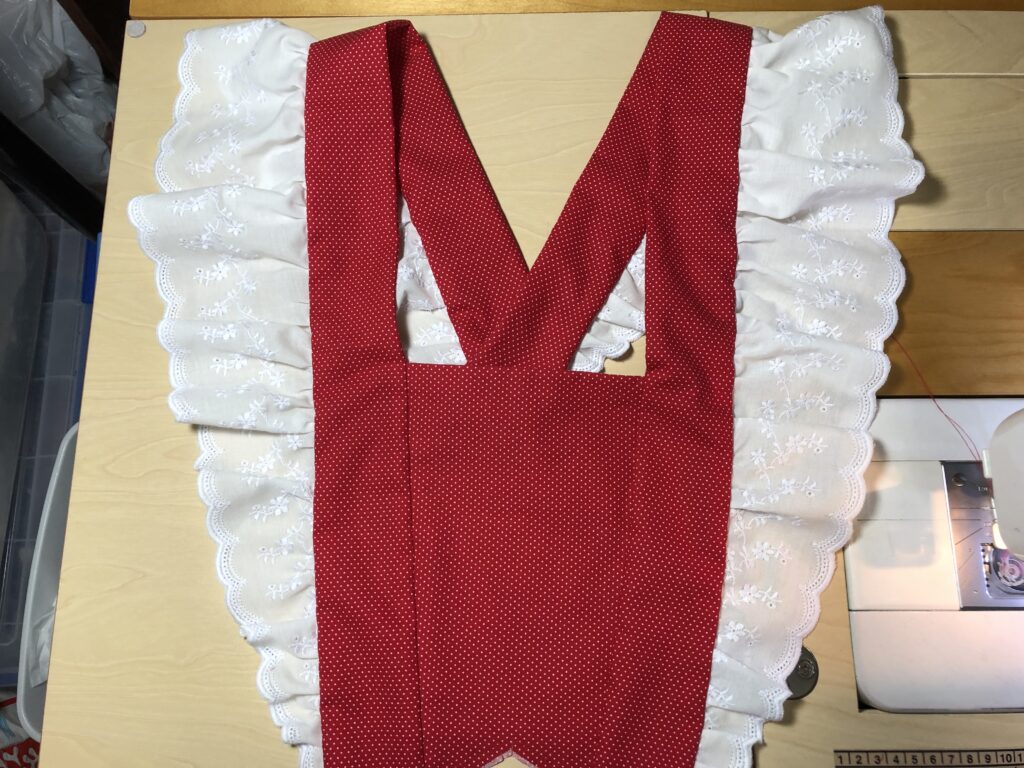
Getting the lace attached:
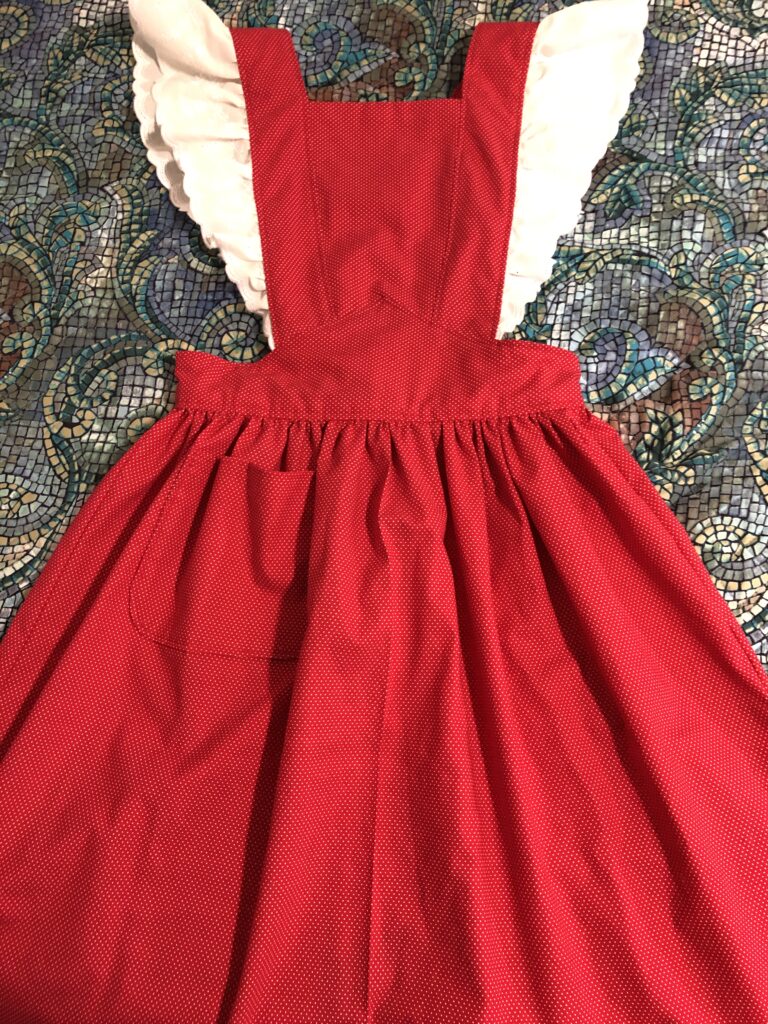
Here is the front of the finished apron:
And the back, with the straps crossed:
If I decide I need an apron, I don’t think I’ll make a Retro 1940s one…at least not from this pattern. If you need an apron, may I suggest choosing one from a kitchen supply store or a novelty one with a clever saying!
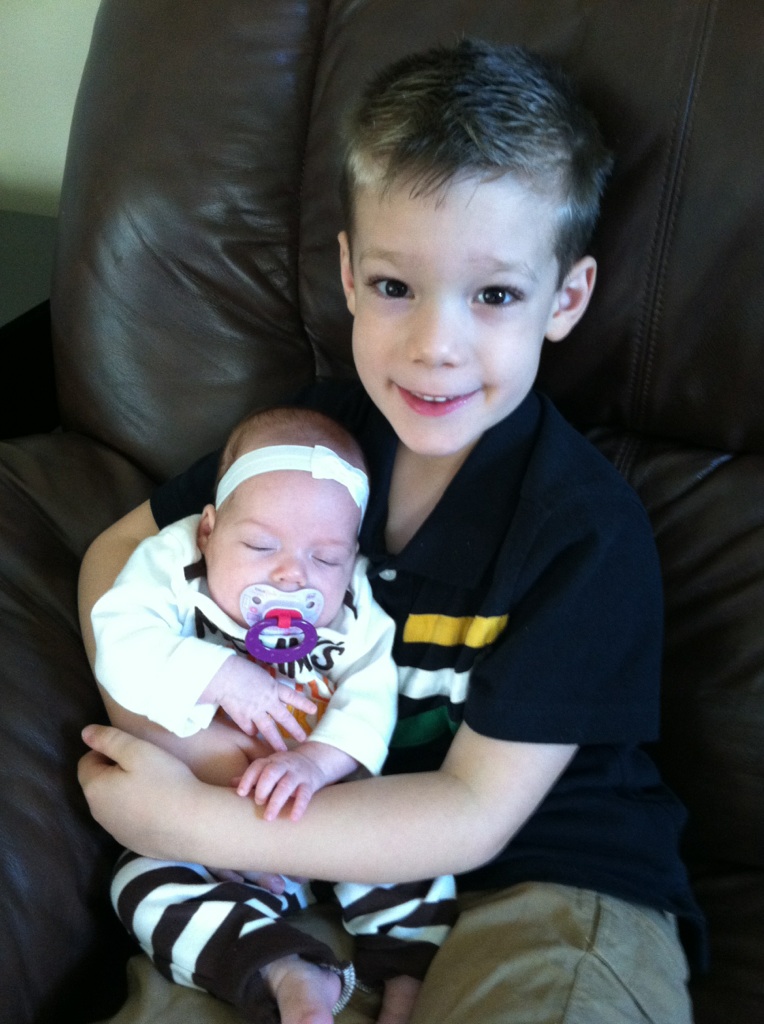
As September rolls around I’m reminded that my dear granddaughter Anna has a birthday! I can’t believe she’ll blow out 11 candles this weekend! She started out so tiny, under 4 lbs. and didn’t come home from the hospital until October that year. She was a fighter and to this day, she’s an independent delightful young lady. Even big brother Ben was learning how to take care of her.
Of course, now she tests the limits of Ben’s patience with hugging! Makes us laugh!
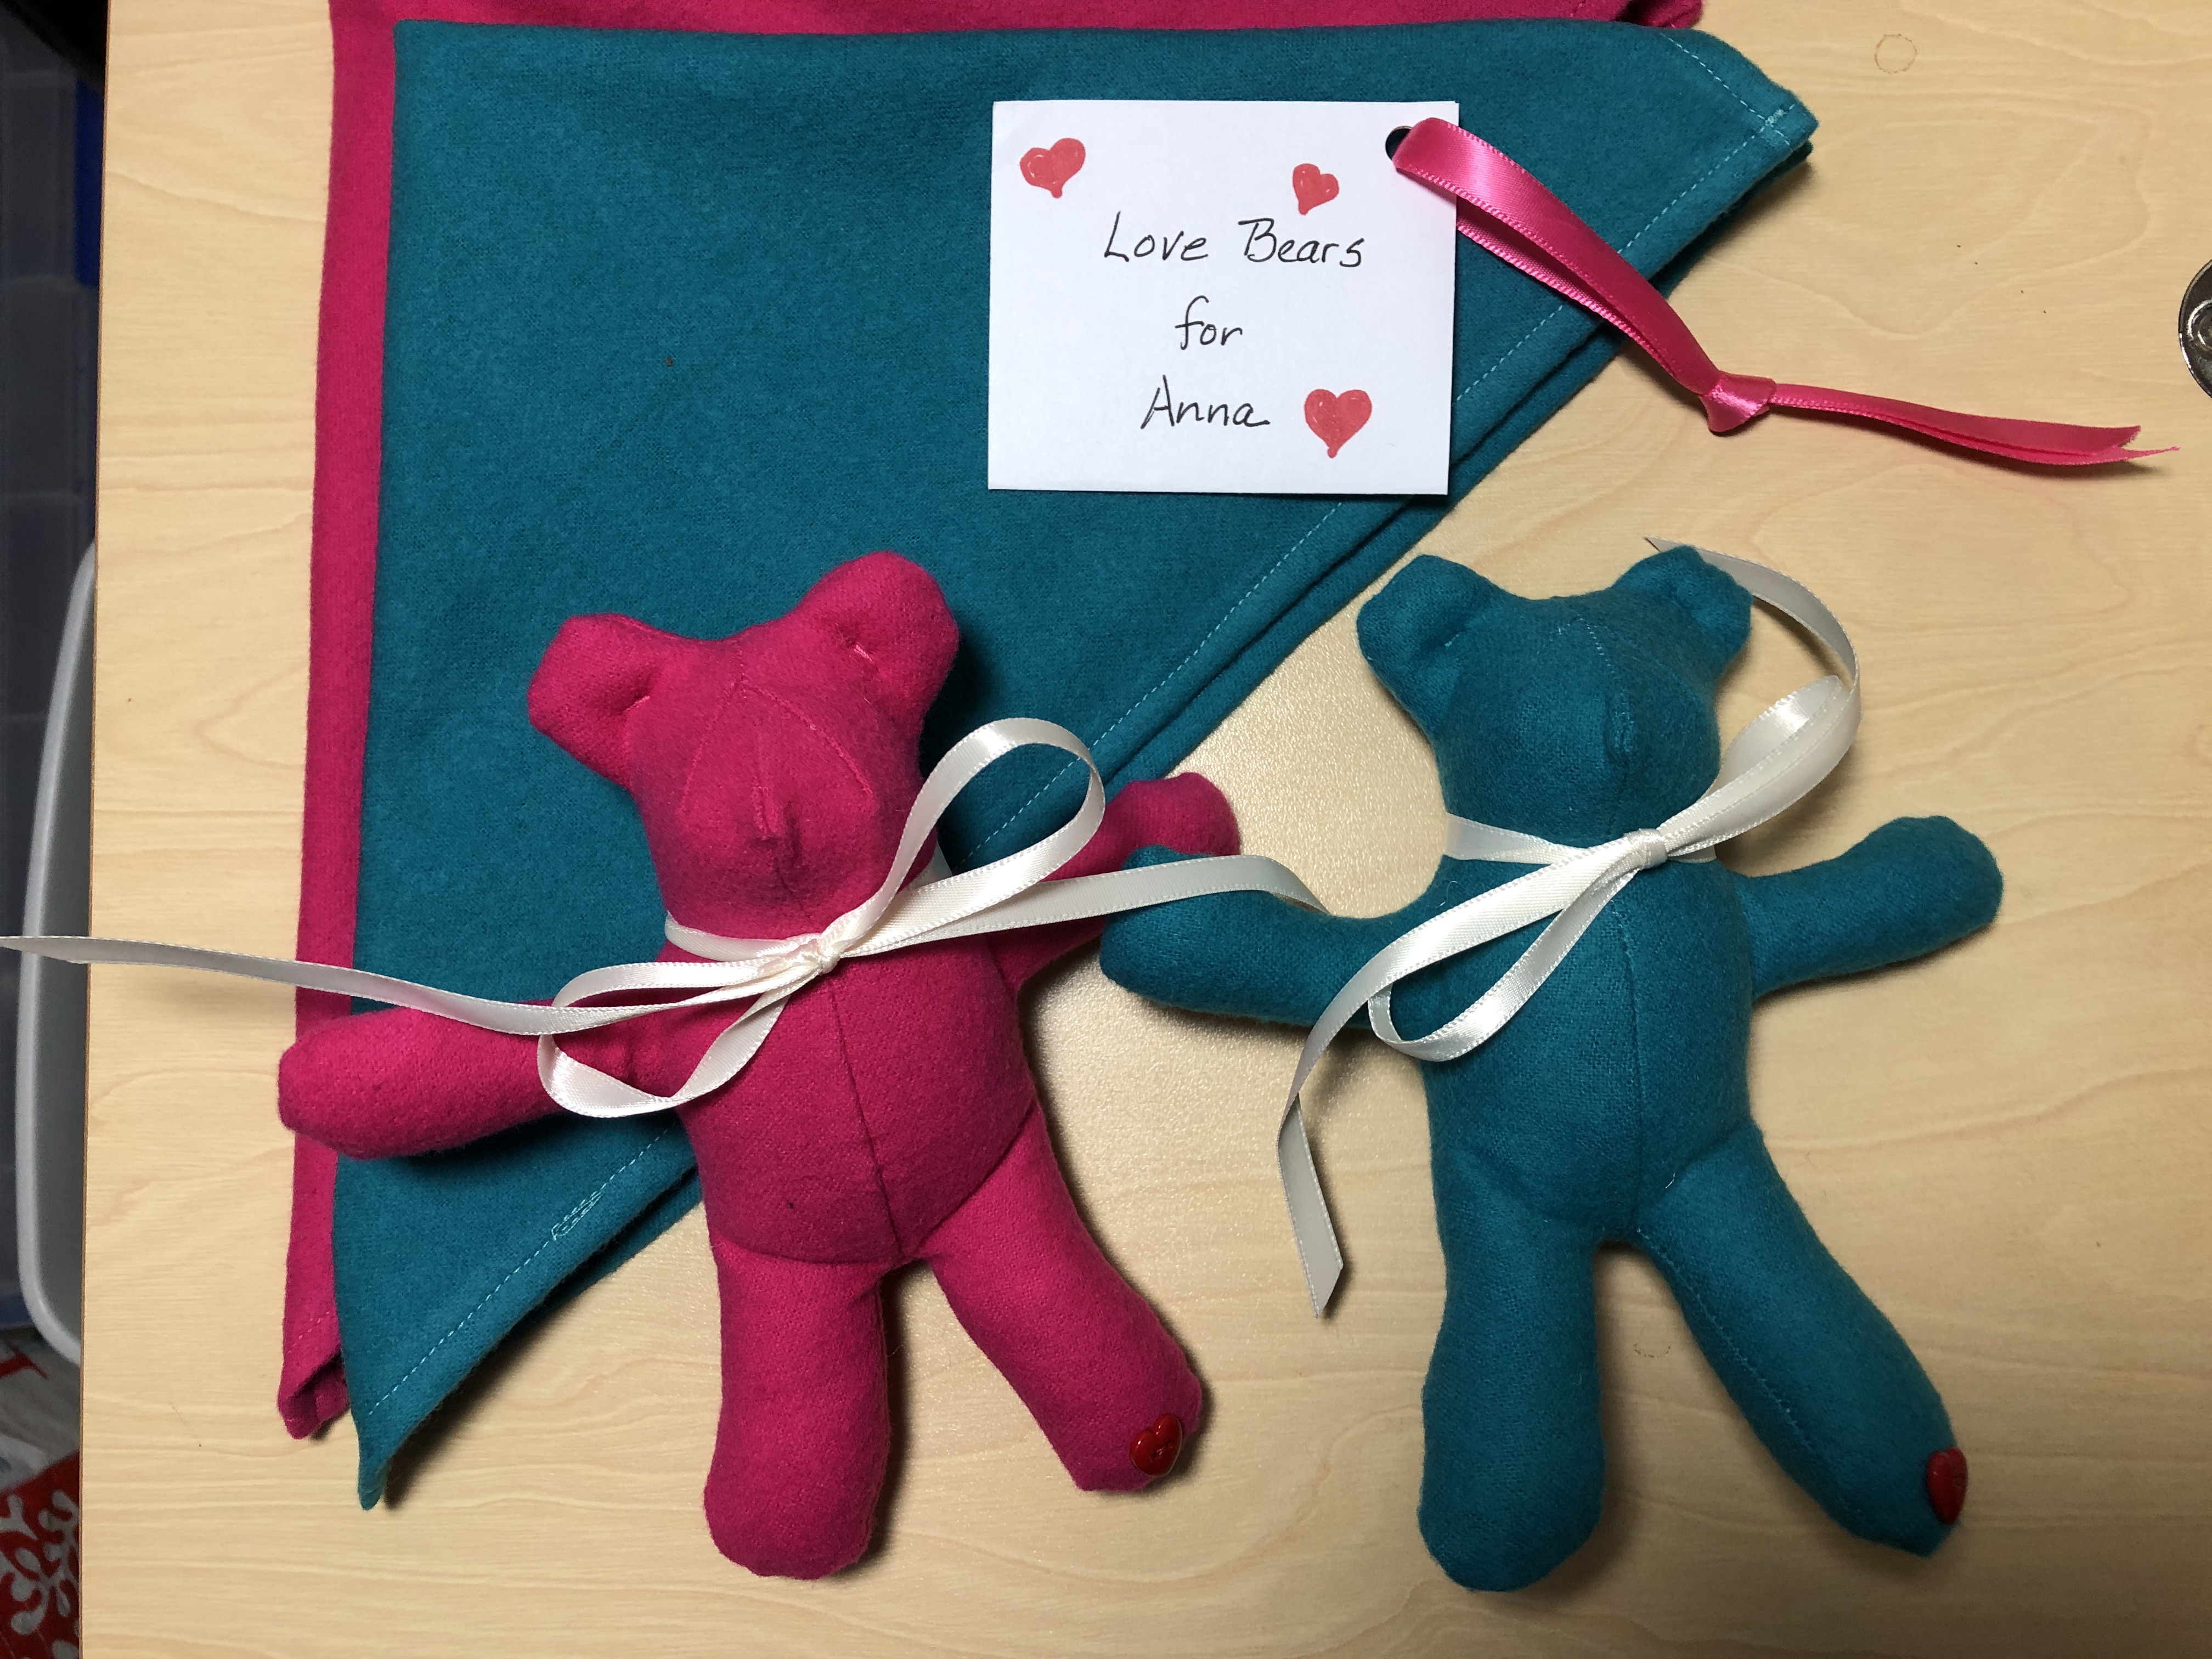
When I traveled with Anna and Kathy to Minnesota recently for a family reunion, I was sharing with extended family about the memory bears I make out of a loved one’s clothing…including tiny bears that could be used as Christmas ornaments or just to hug. Anna piped up… “Gee, I’d like a tiny bear!”
I could not imagine I hadn’t made her some bears already! I certainly can’t compete with all the lovely assortment of stuffed animals she already has. However, who knows, maybe a tiny one or two from Grandma would be good for a hug now and then.
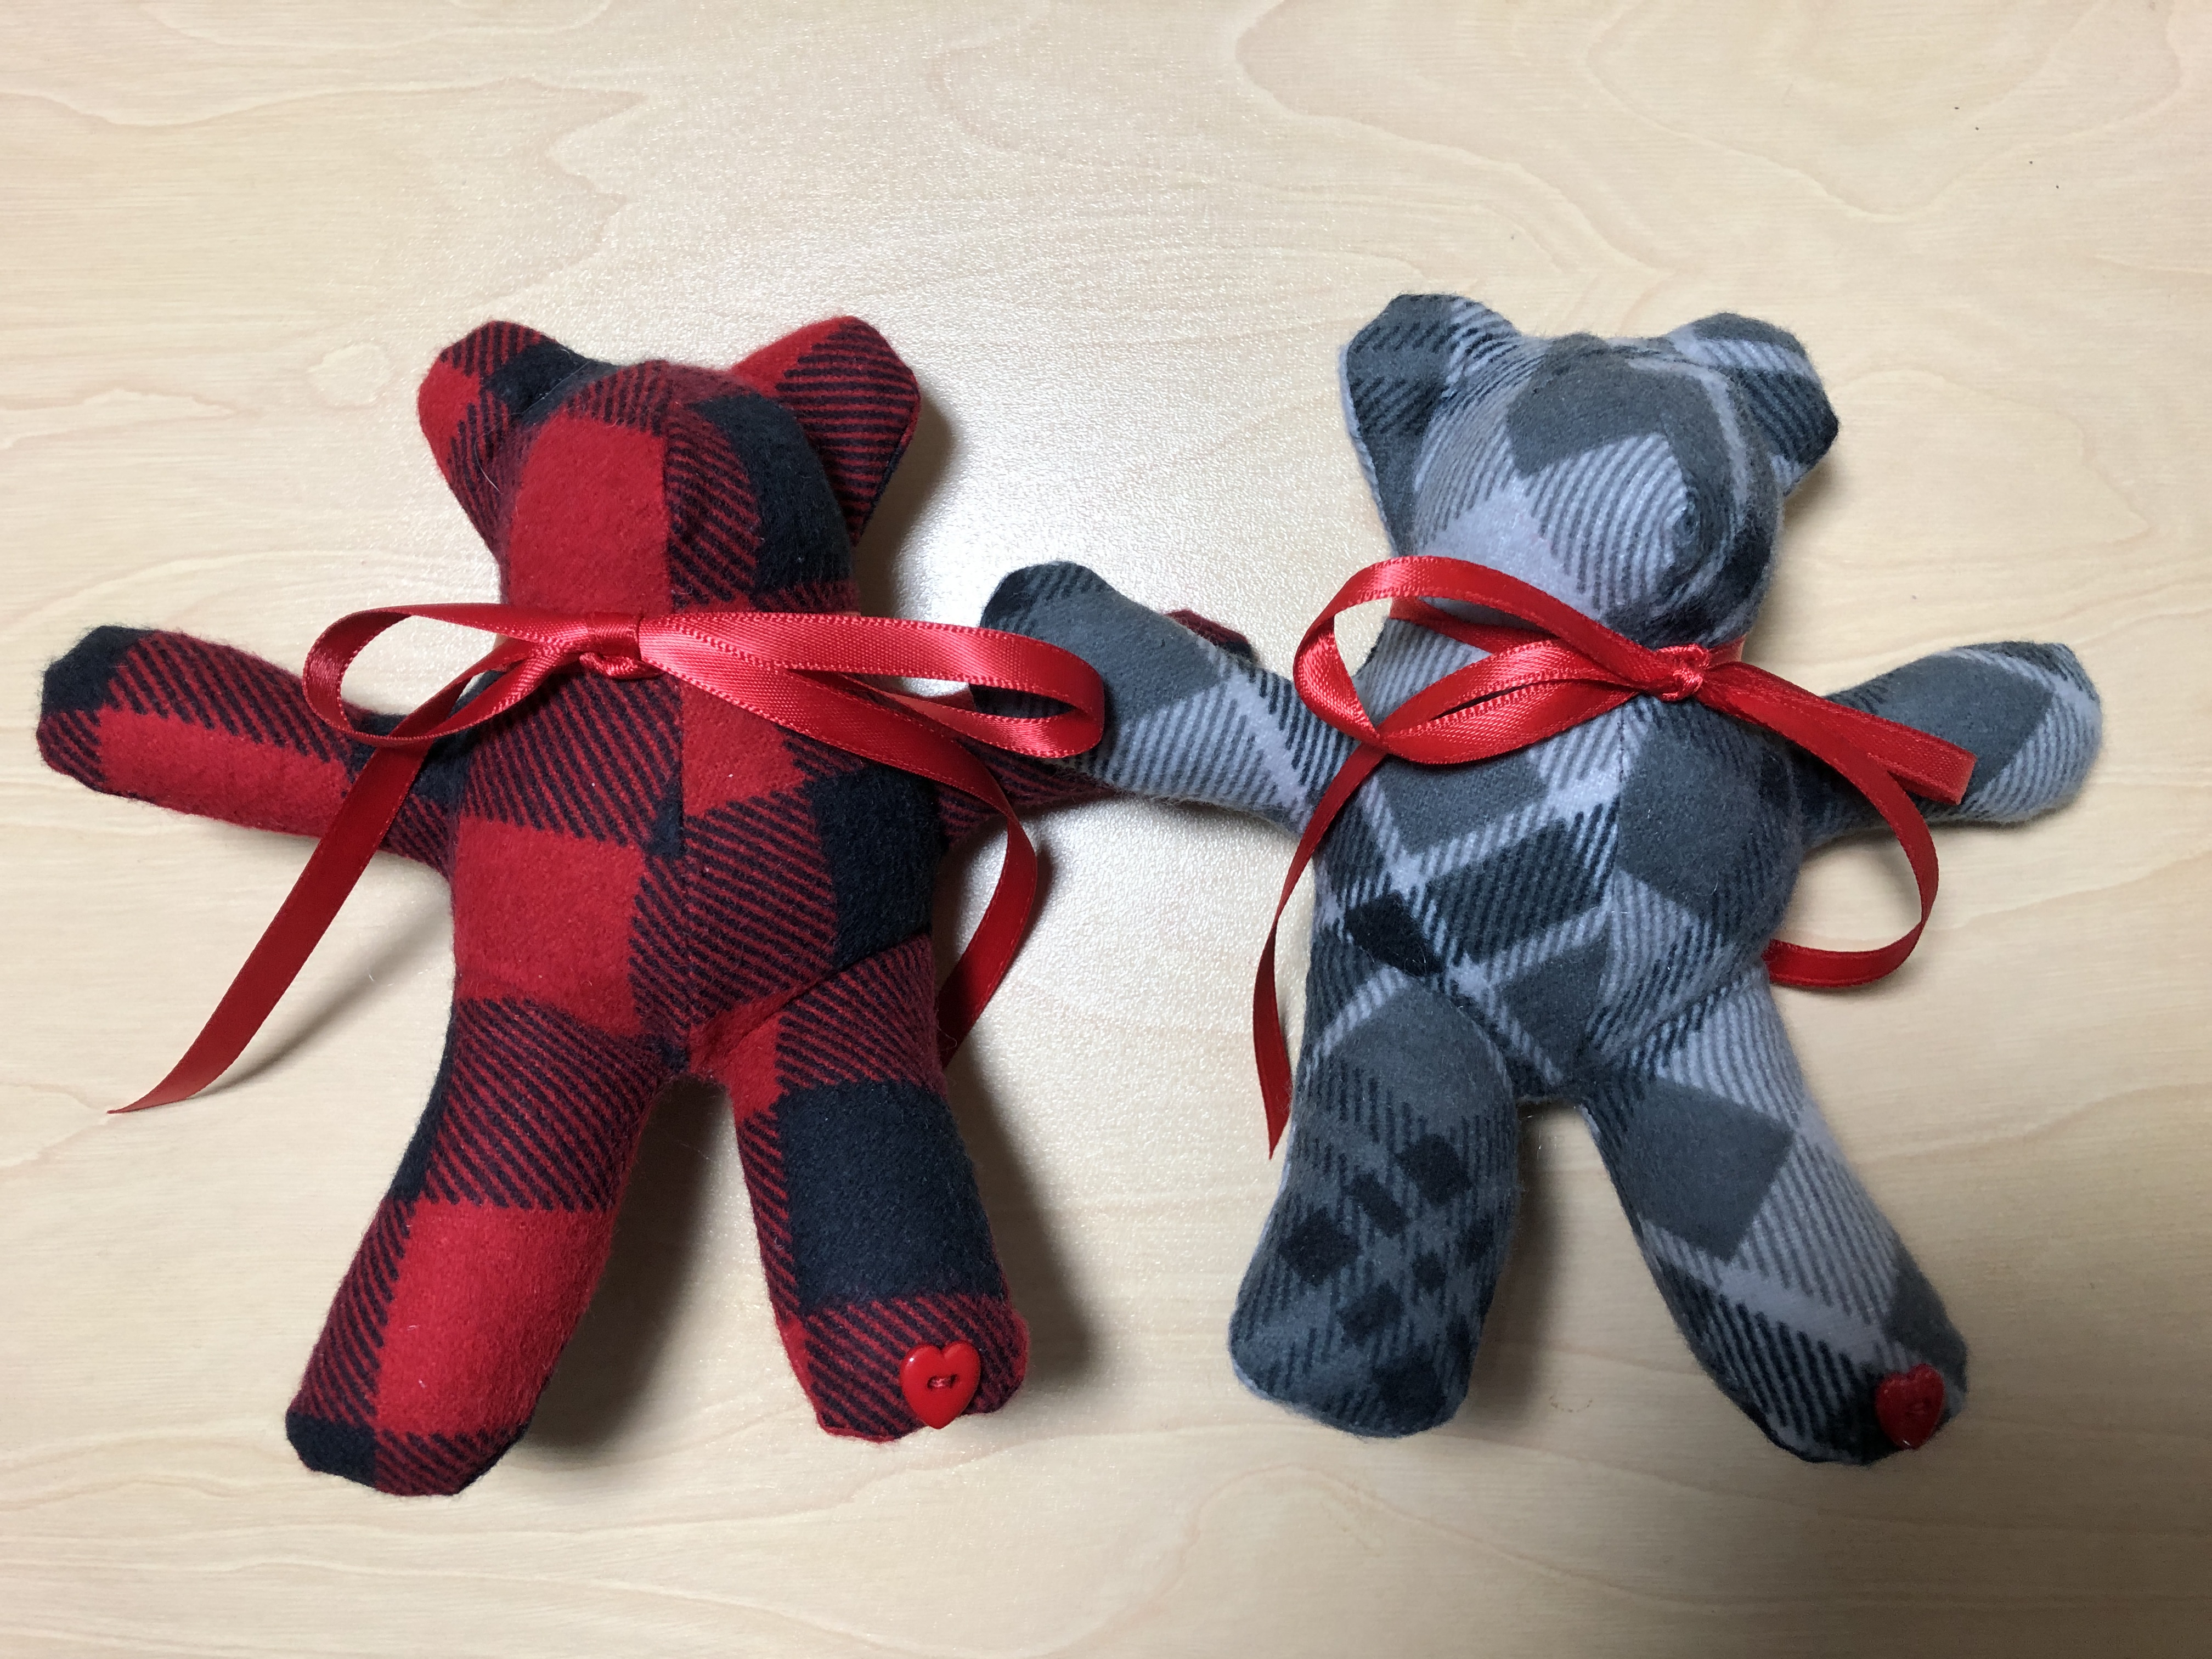
Here are two tiny bears made from men’s flannel shirts. They are about 6″ long. I add a tiny heart button to the toe, unless it will be a gift for a baby.
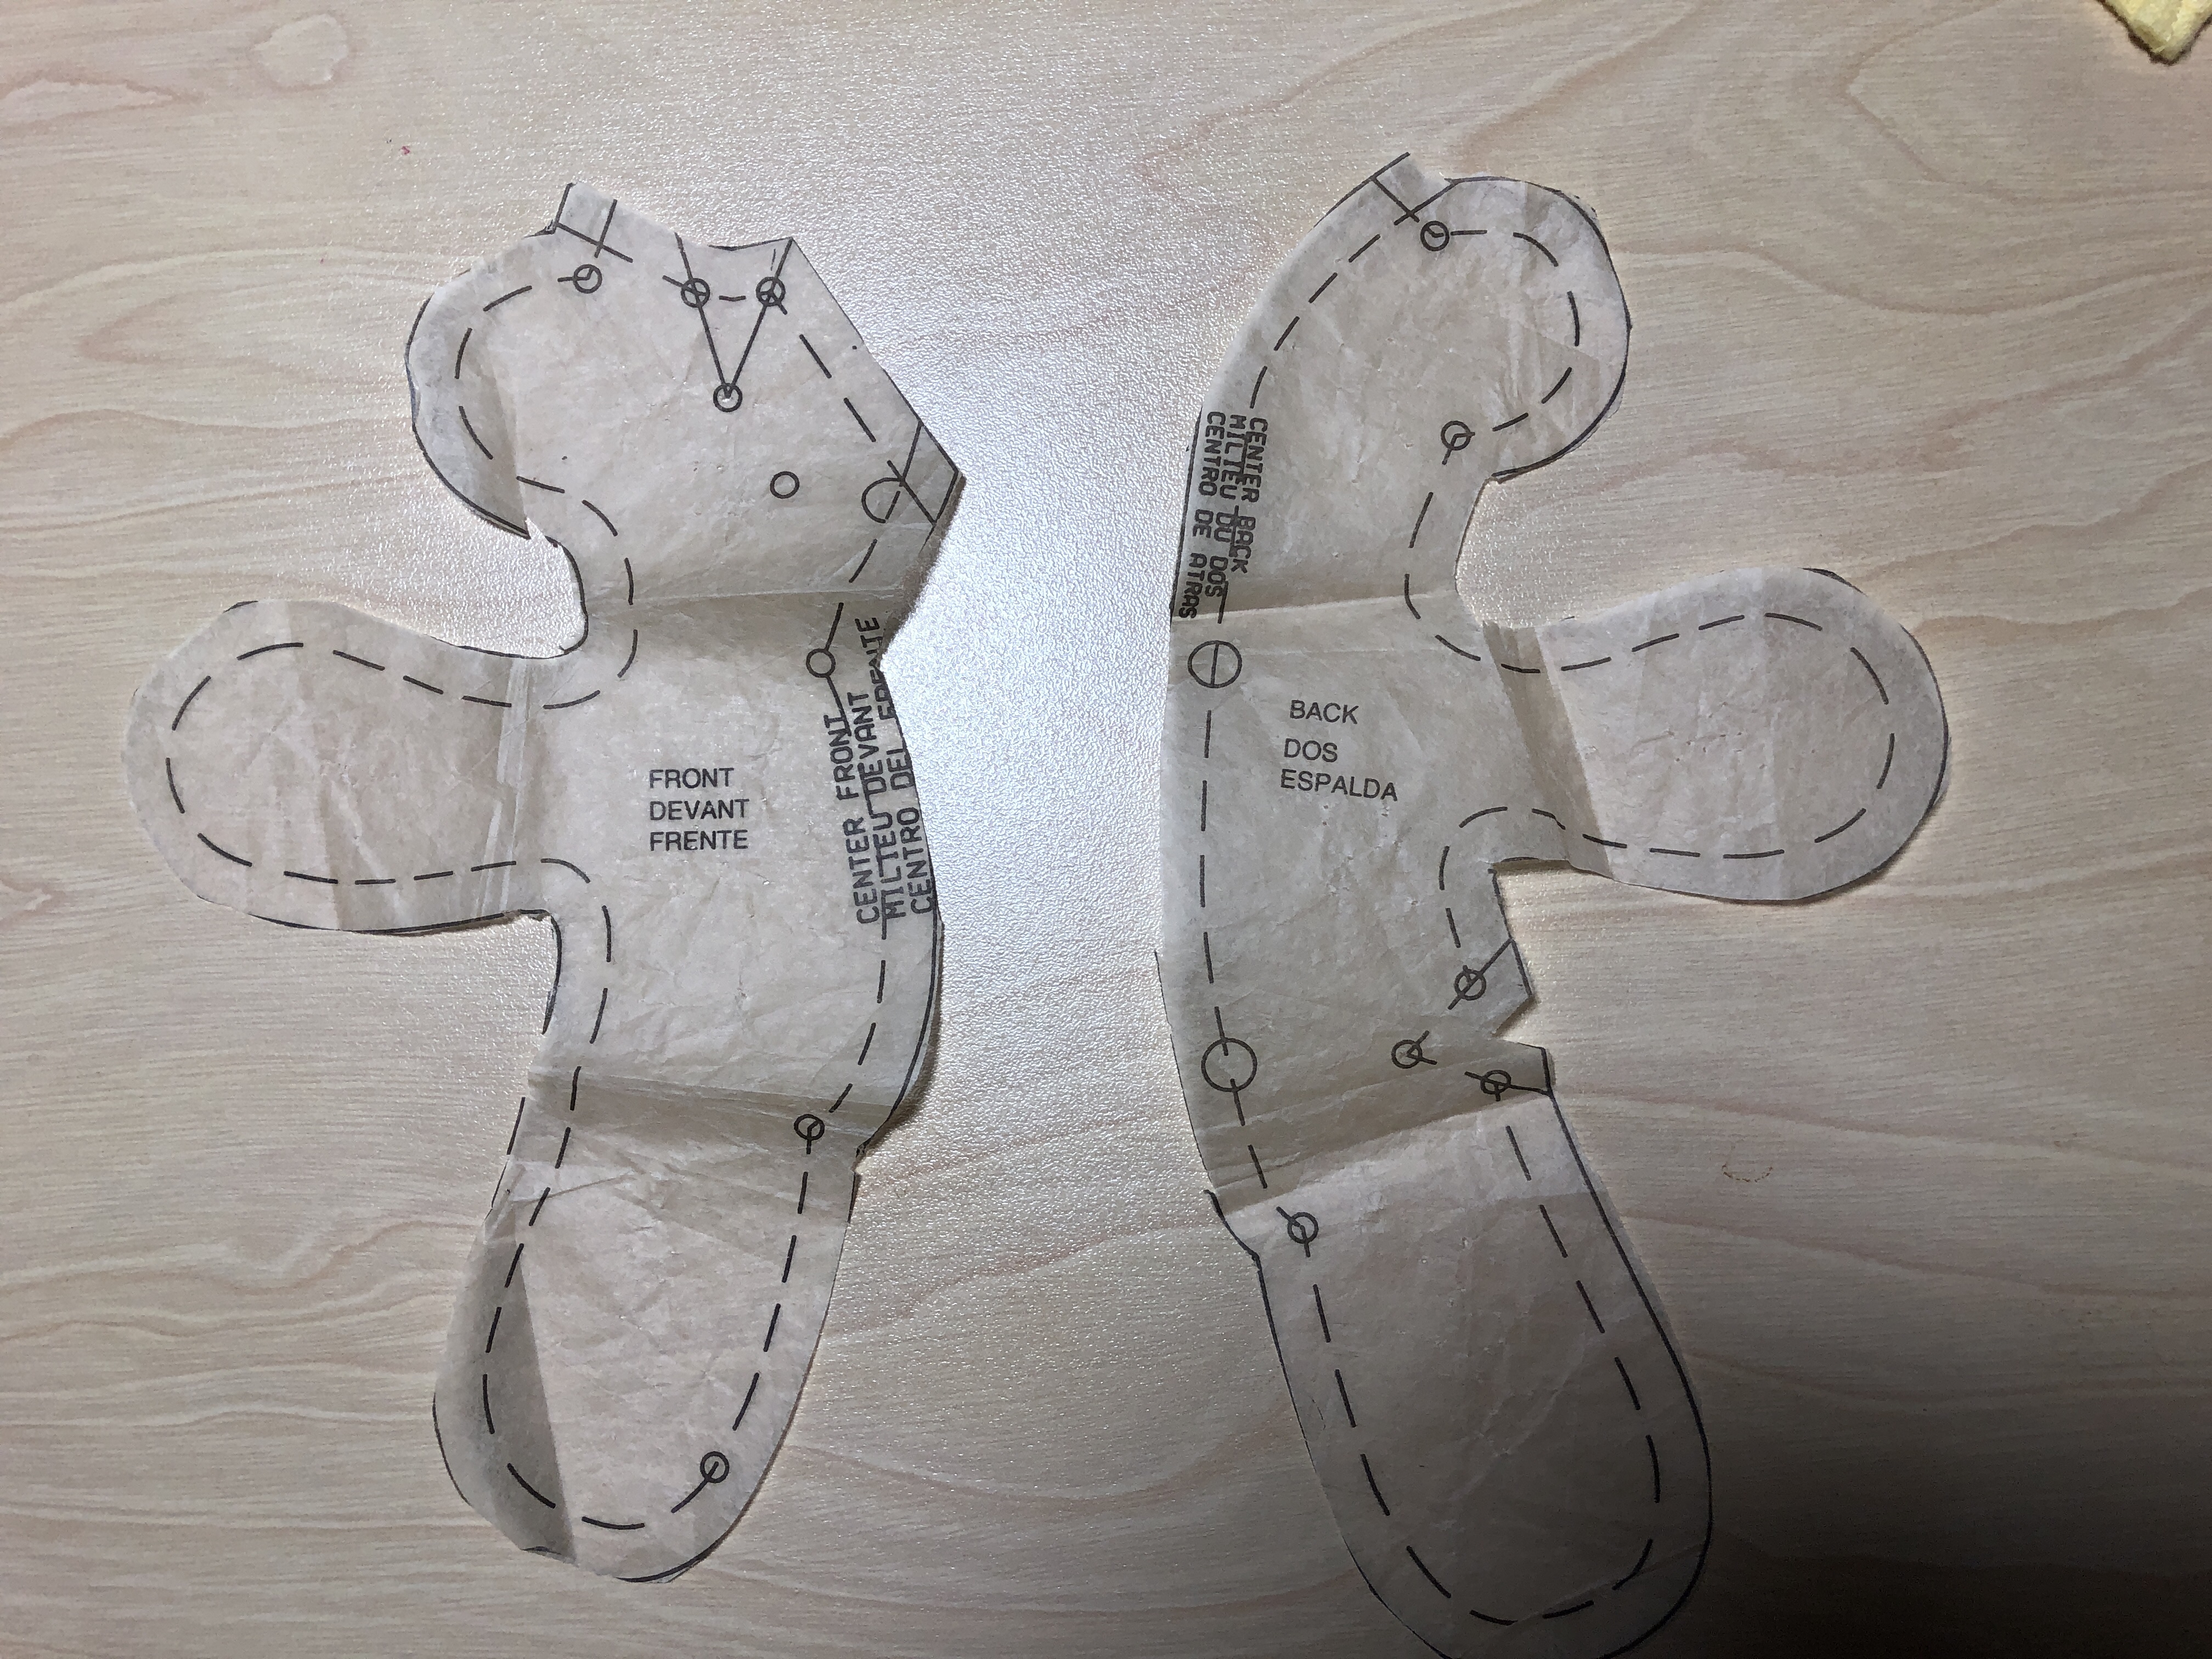
So, I pulled out the pattern and some leftover flannel and got busy.
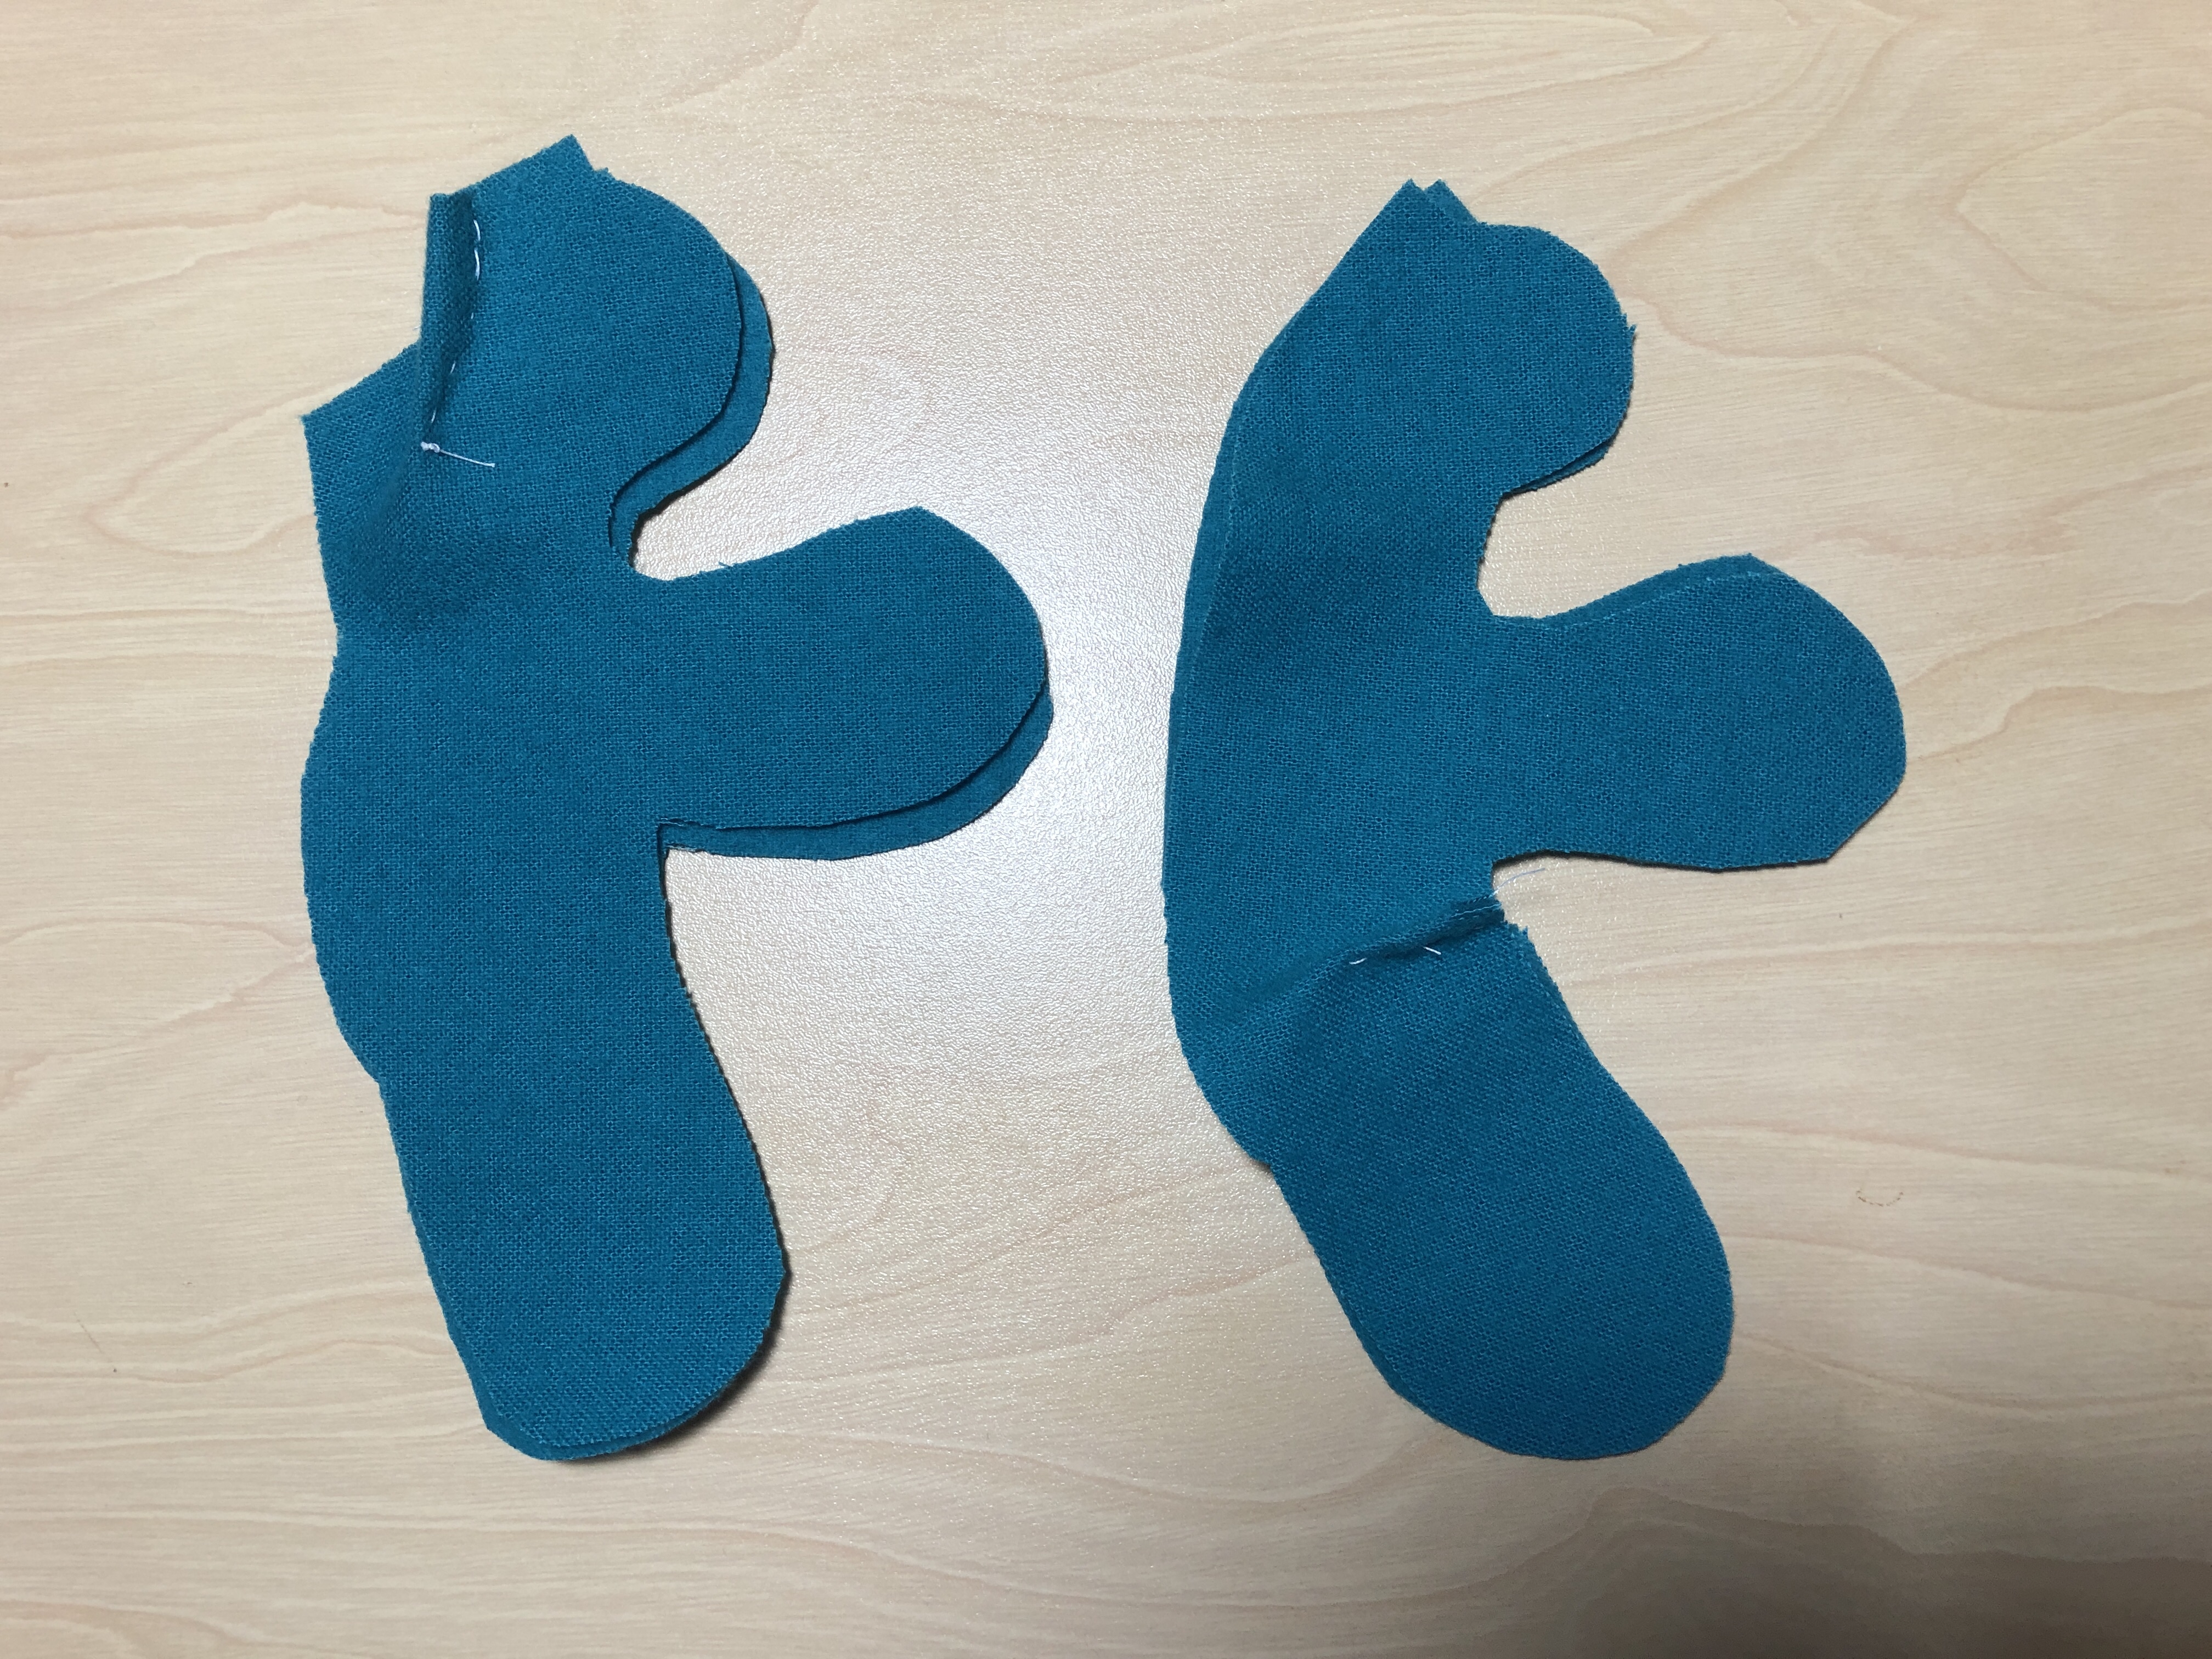
Because the bears are so little, I baste the darts by hand first.
The rest goes pretty quickly, so now when I go to the birthday party this weekend, I’ll bring along some love bears!
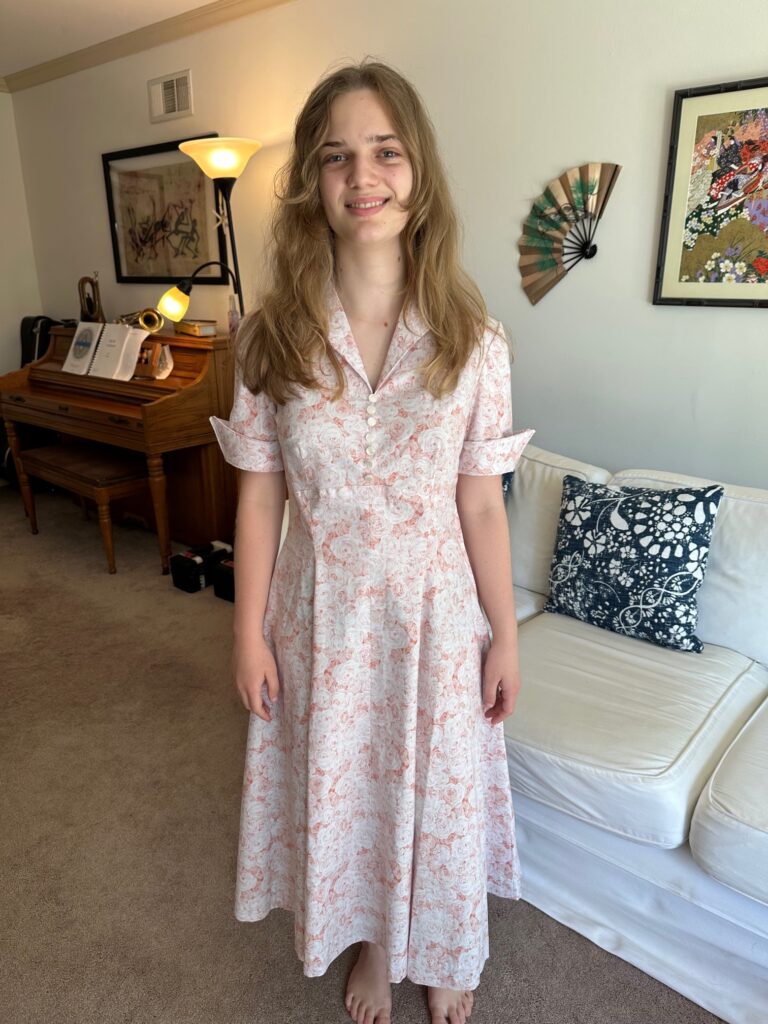
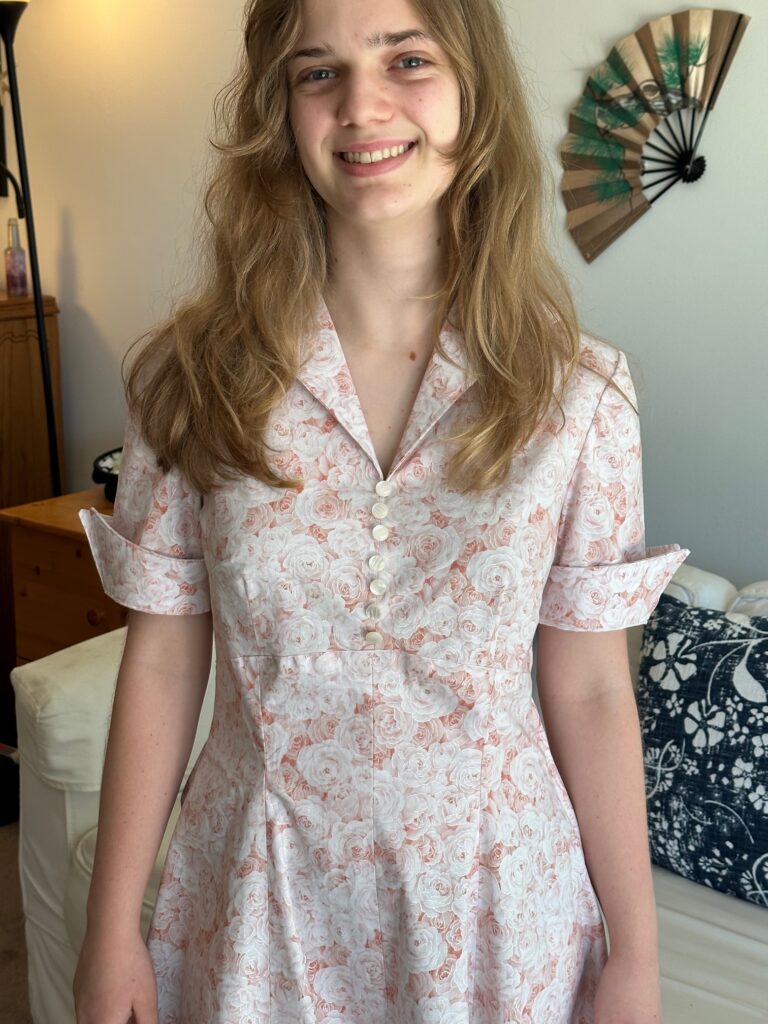
Just a quick update in case you’ve been following the last two posts about my attempt to make a dress for my granddaughter (age 17). Her interest in trying to find a vintage dress from the 1950s led us to finding a retro pattern at JoAnn’s to make such a dress. The previous posts included understanding the difference between vintage and retro, and the steps I went through to actually make the dress. (See: https://marykisner.com/understanding-antique-vintage-and-retro-clothing/ and https://marykisner.com/making-a-retro-1952-dress/)
I mailed the dress to my granddaughter in California and held my breath. Would it fit? Would it require major adjustments? Would she like it?
Yesterday I received pictures and a heartfelt message that it was “wonderful” and “Thank you so much!” Very rewarding to connect with my granddaughter this way! Made my day!
This grandma is very pleased! I just might have to try some more Retro clothing.
On the request of my 17 yr. old granddaughter, who was visiting a few weeks ago, I volunteered to make her a dress, in the style of the 1950s. She had been trying to find “vintage” and “retro” clothing in thrift shops, but around here they were hard to find. (to see the difference between “vintage” and “retro” check out my last post, https://marykisner.com/understanding-antique-vintage-and-retro-clothing/.
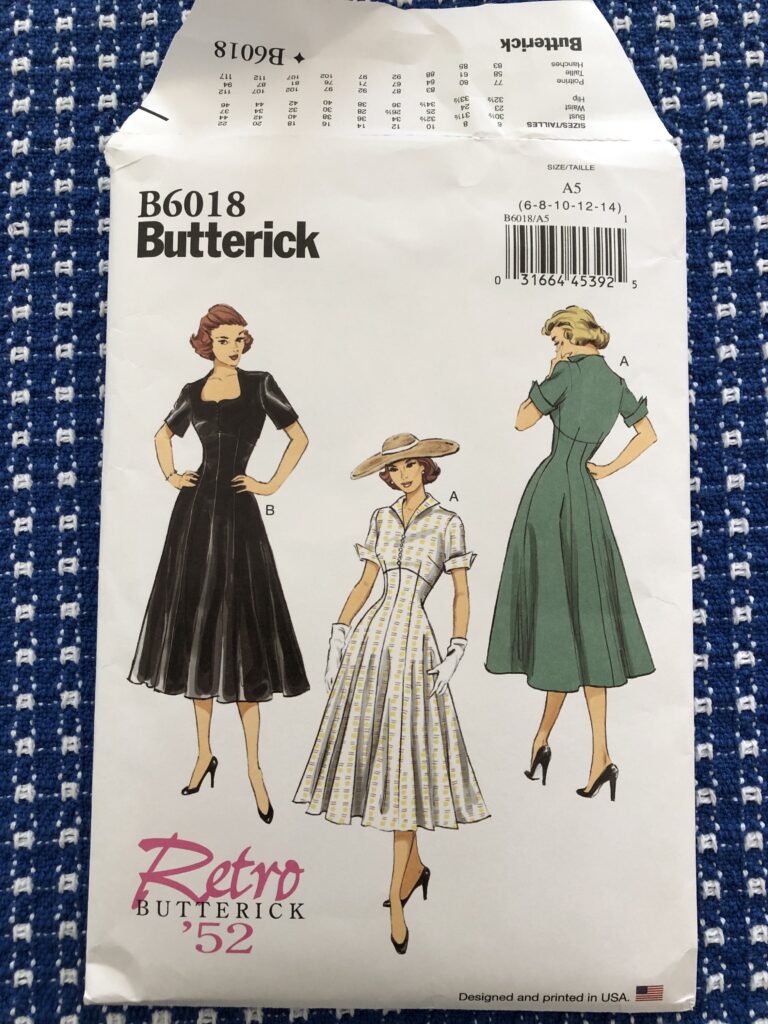
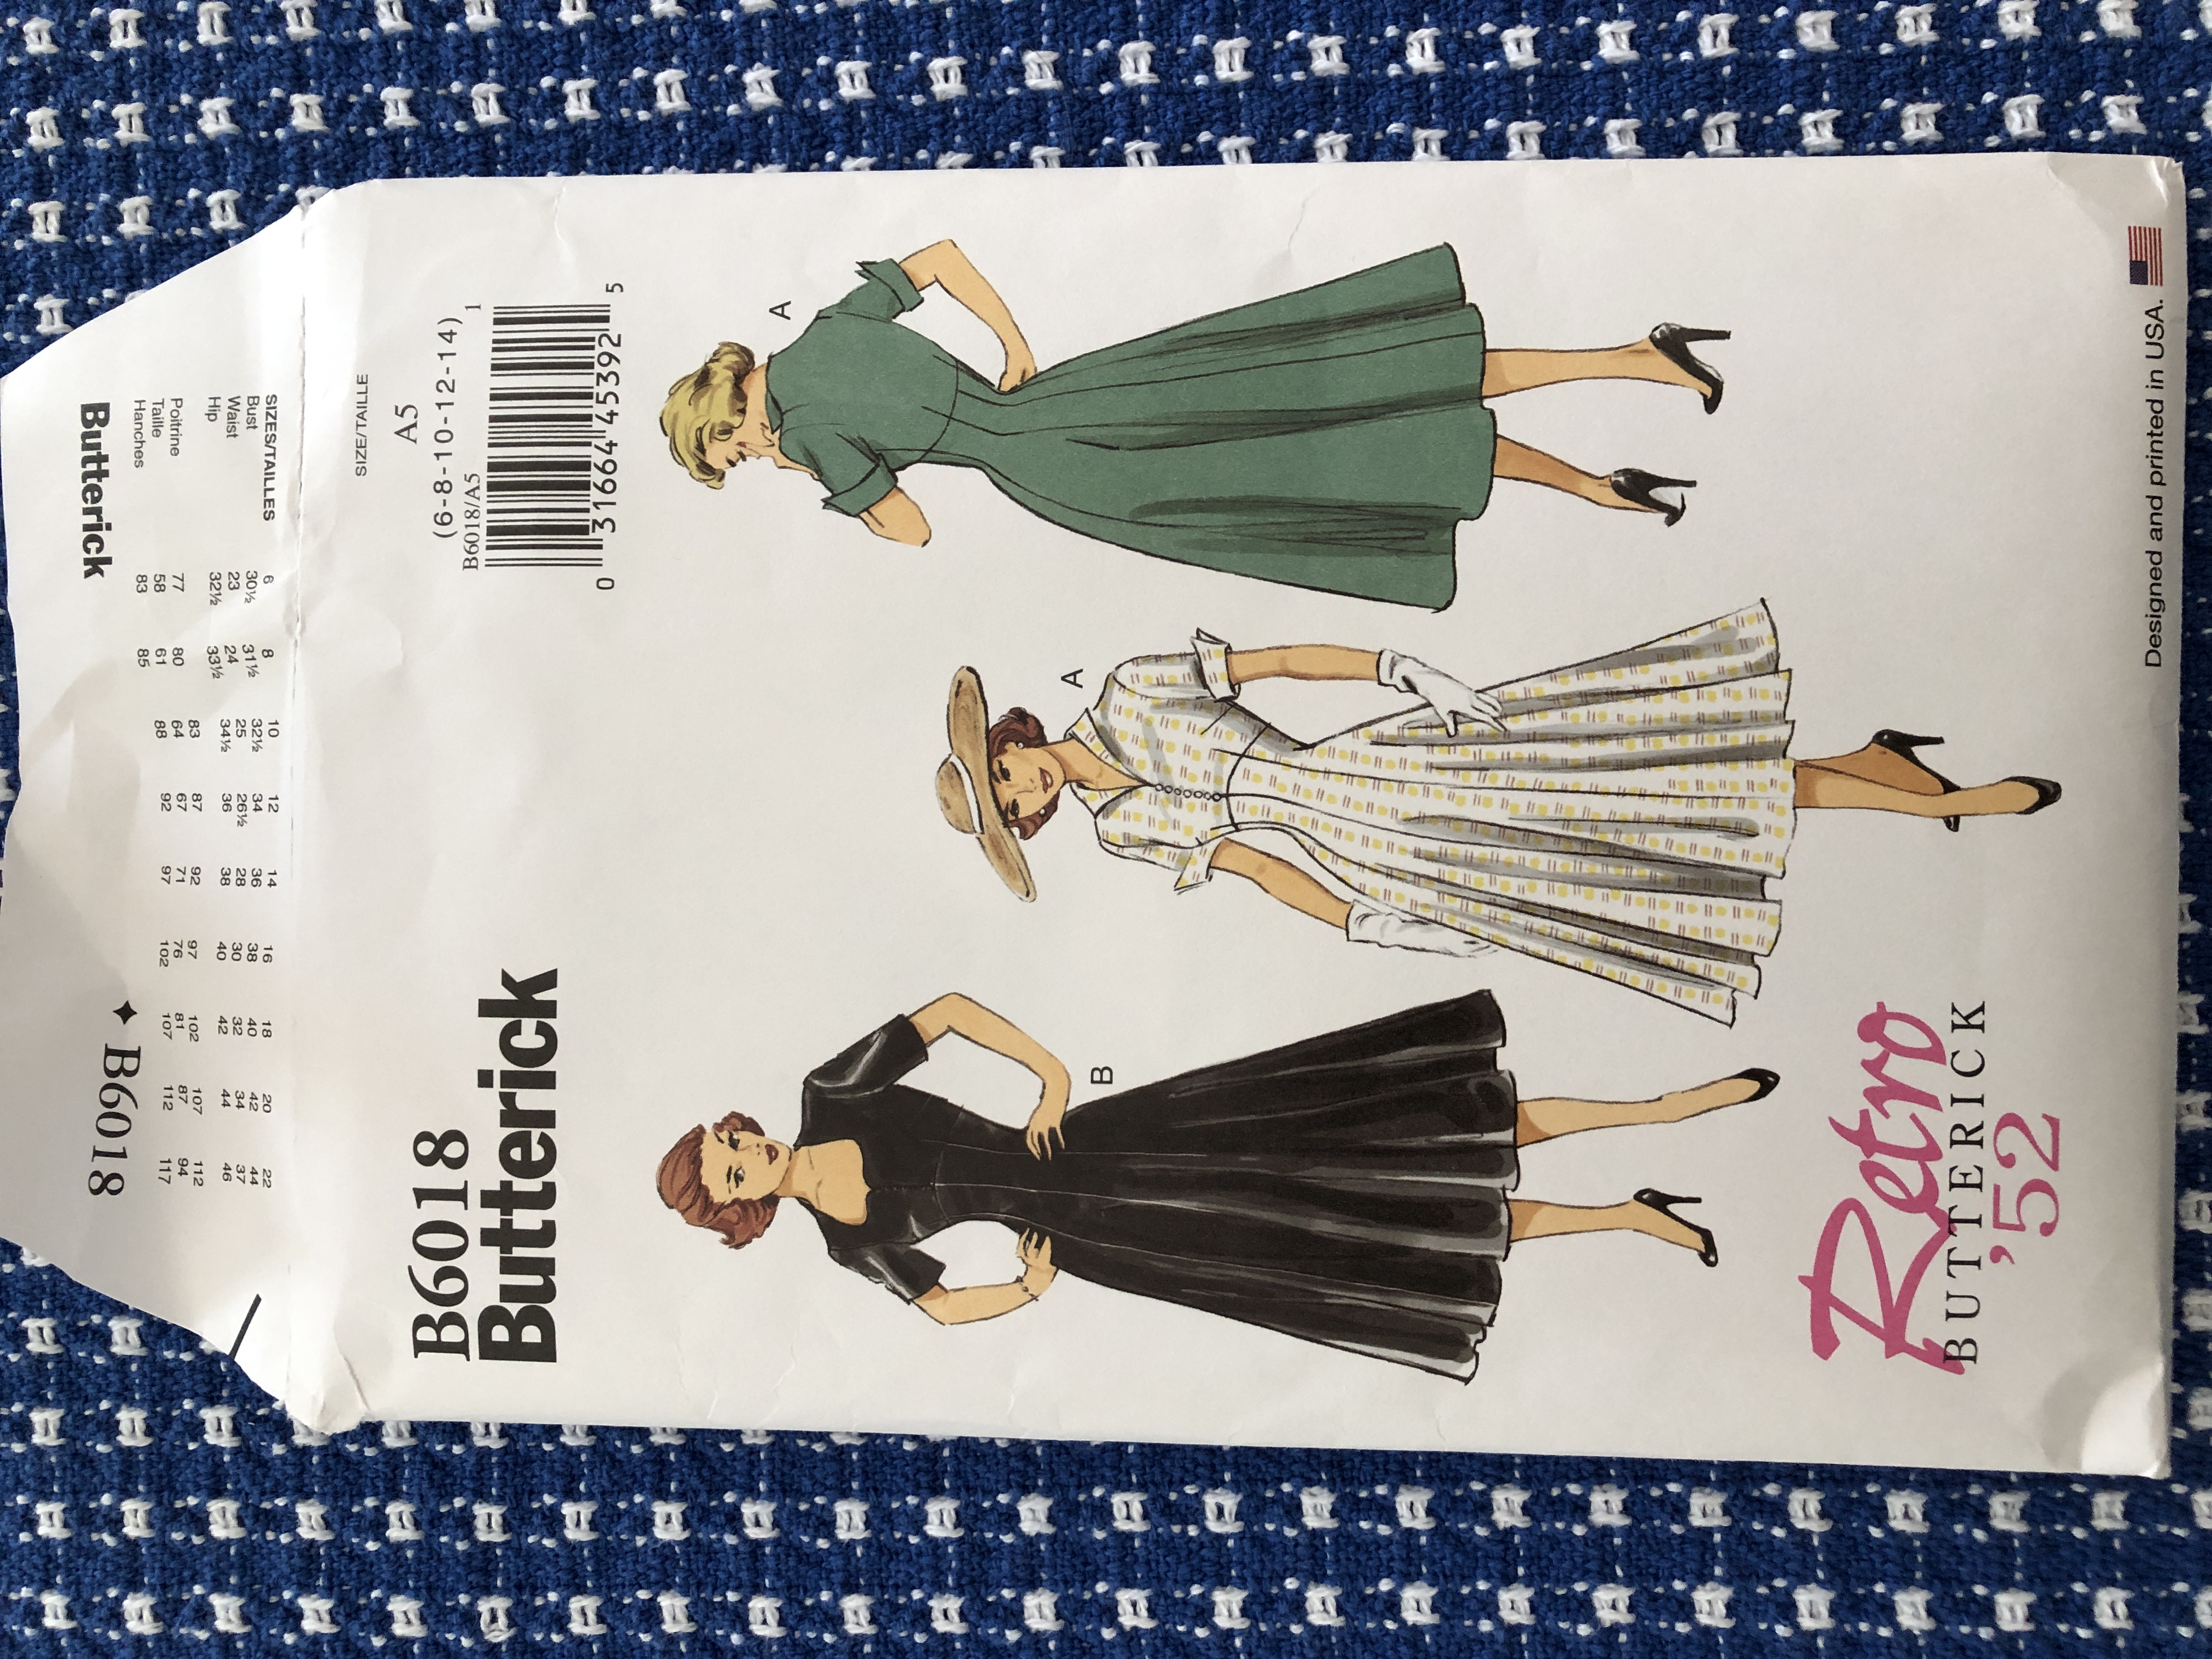
Luckily, we found a pattern at JoAnn’s labeled “Retro ’52”, so we picked out fabric, buttons, zipper and thread for the project.
This is the pattern we chose:
I was convinced I could just read the pattern, follow the directions, and whip out a dress! HA! This project brought back so many memories of my high school Home Economics classes…my teachers would be so proud that I actually did it! (Thank you, Mrs. Shaffer and Mrs. Krause!)
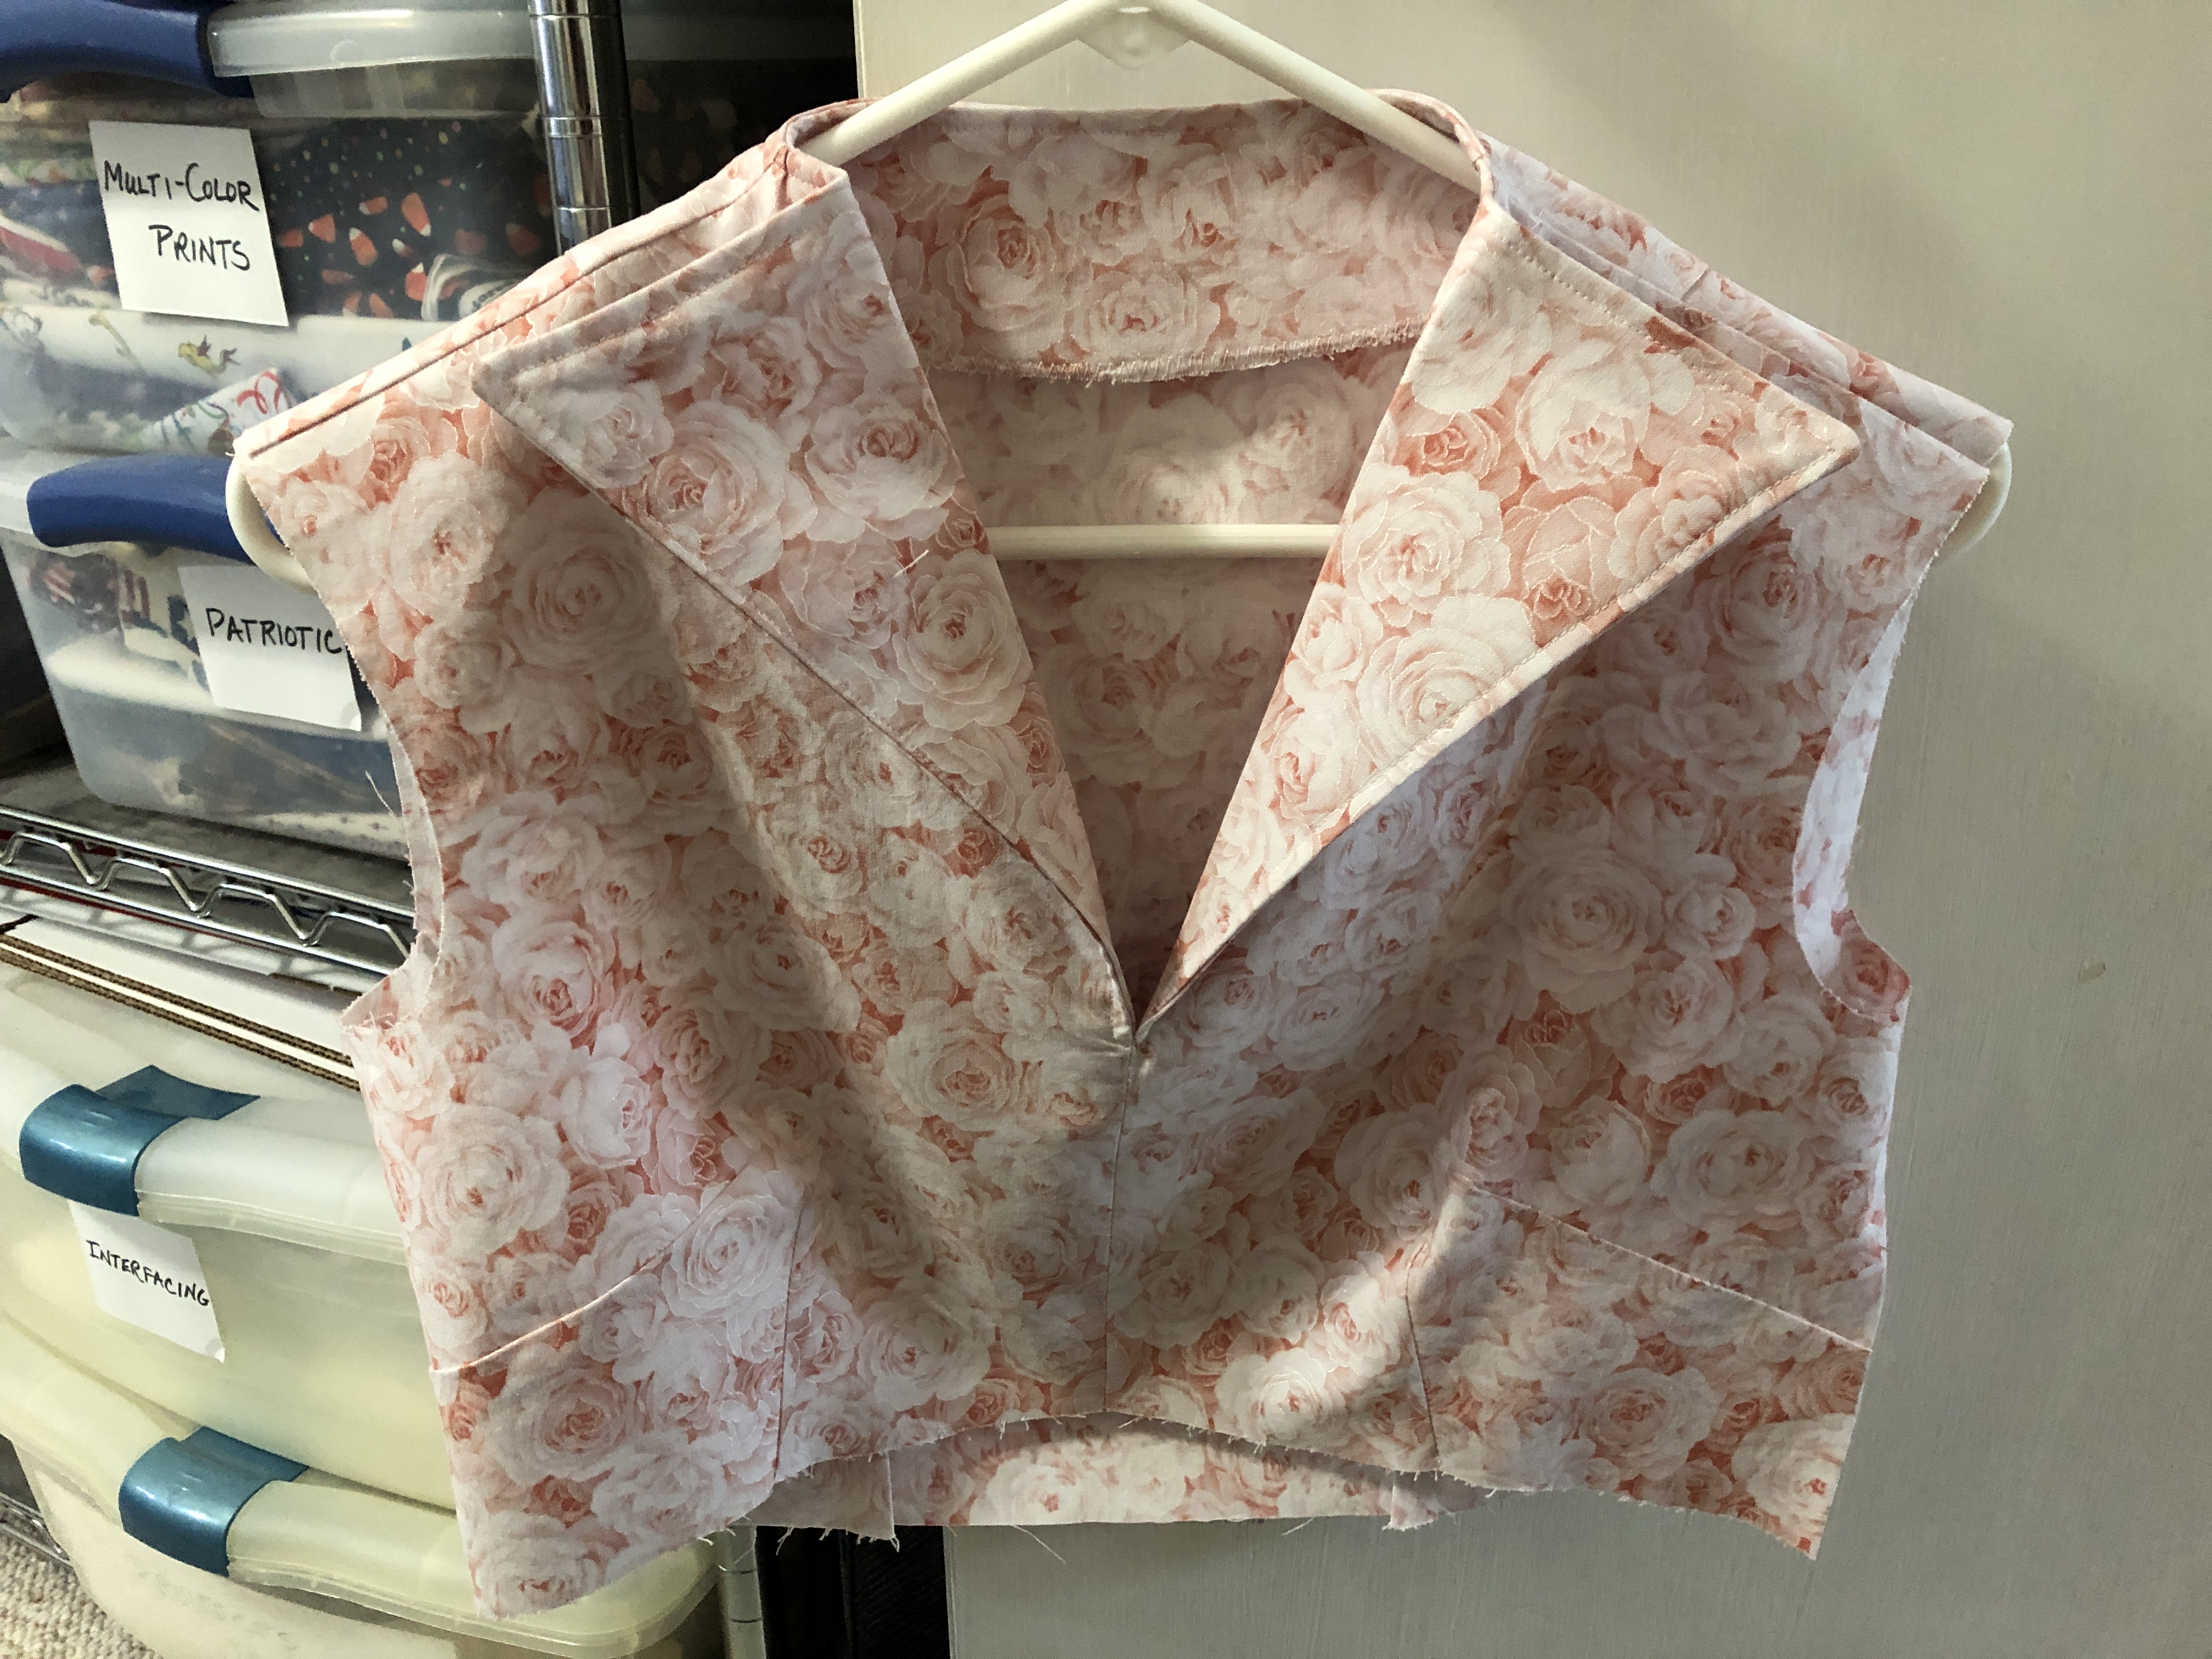
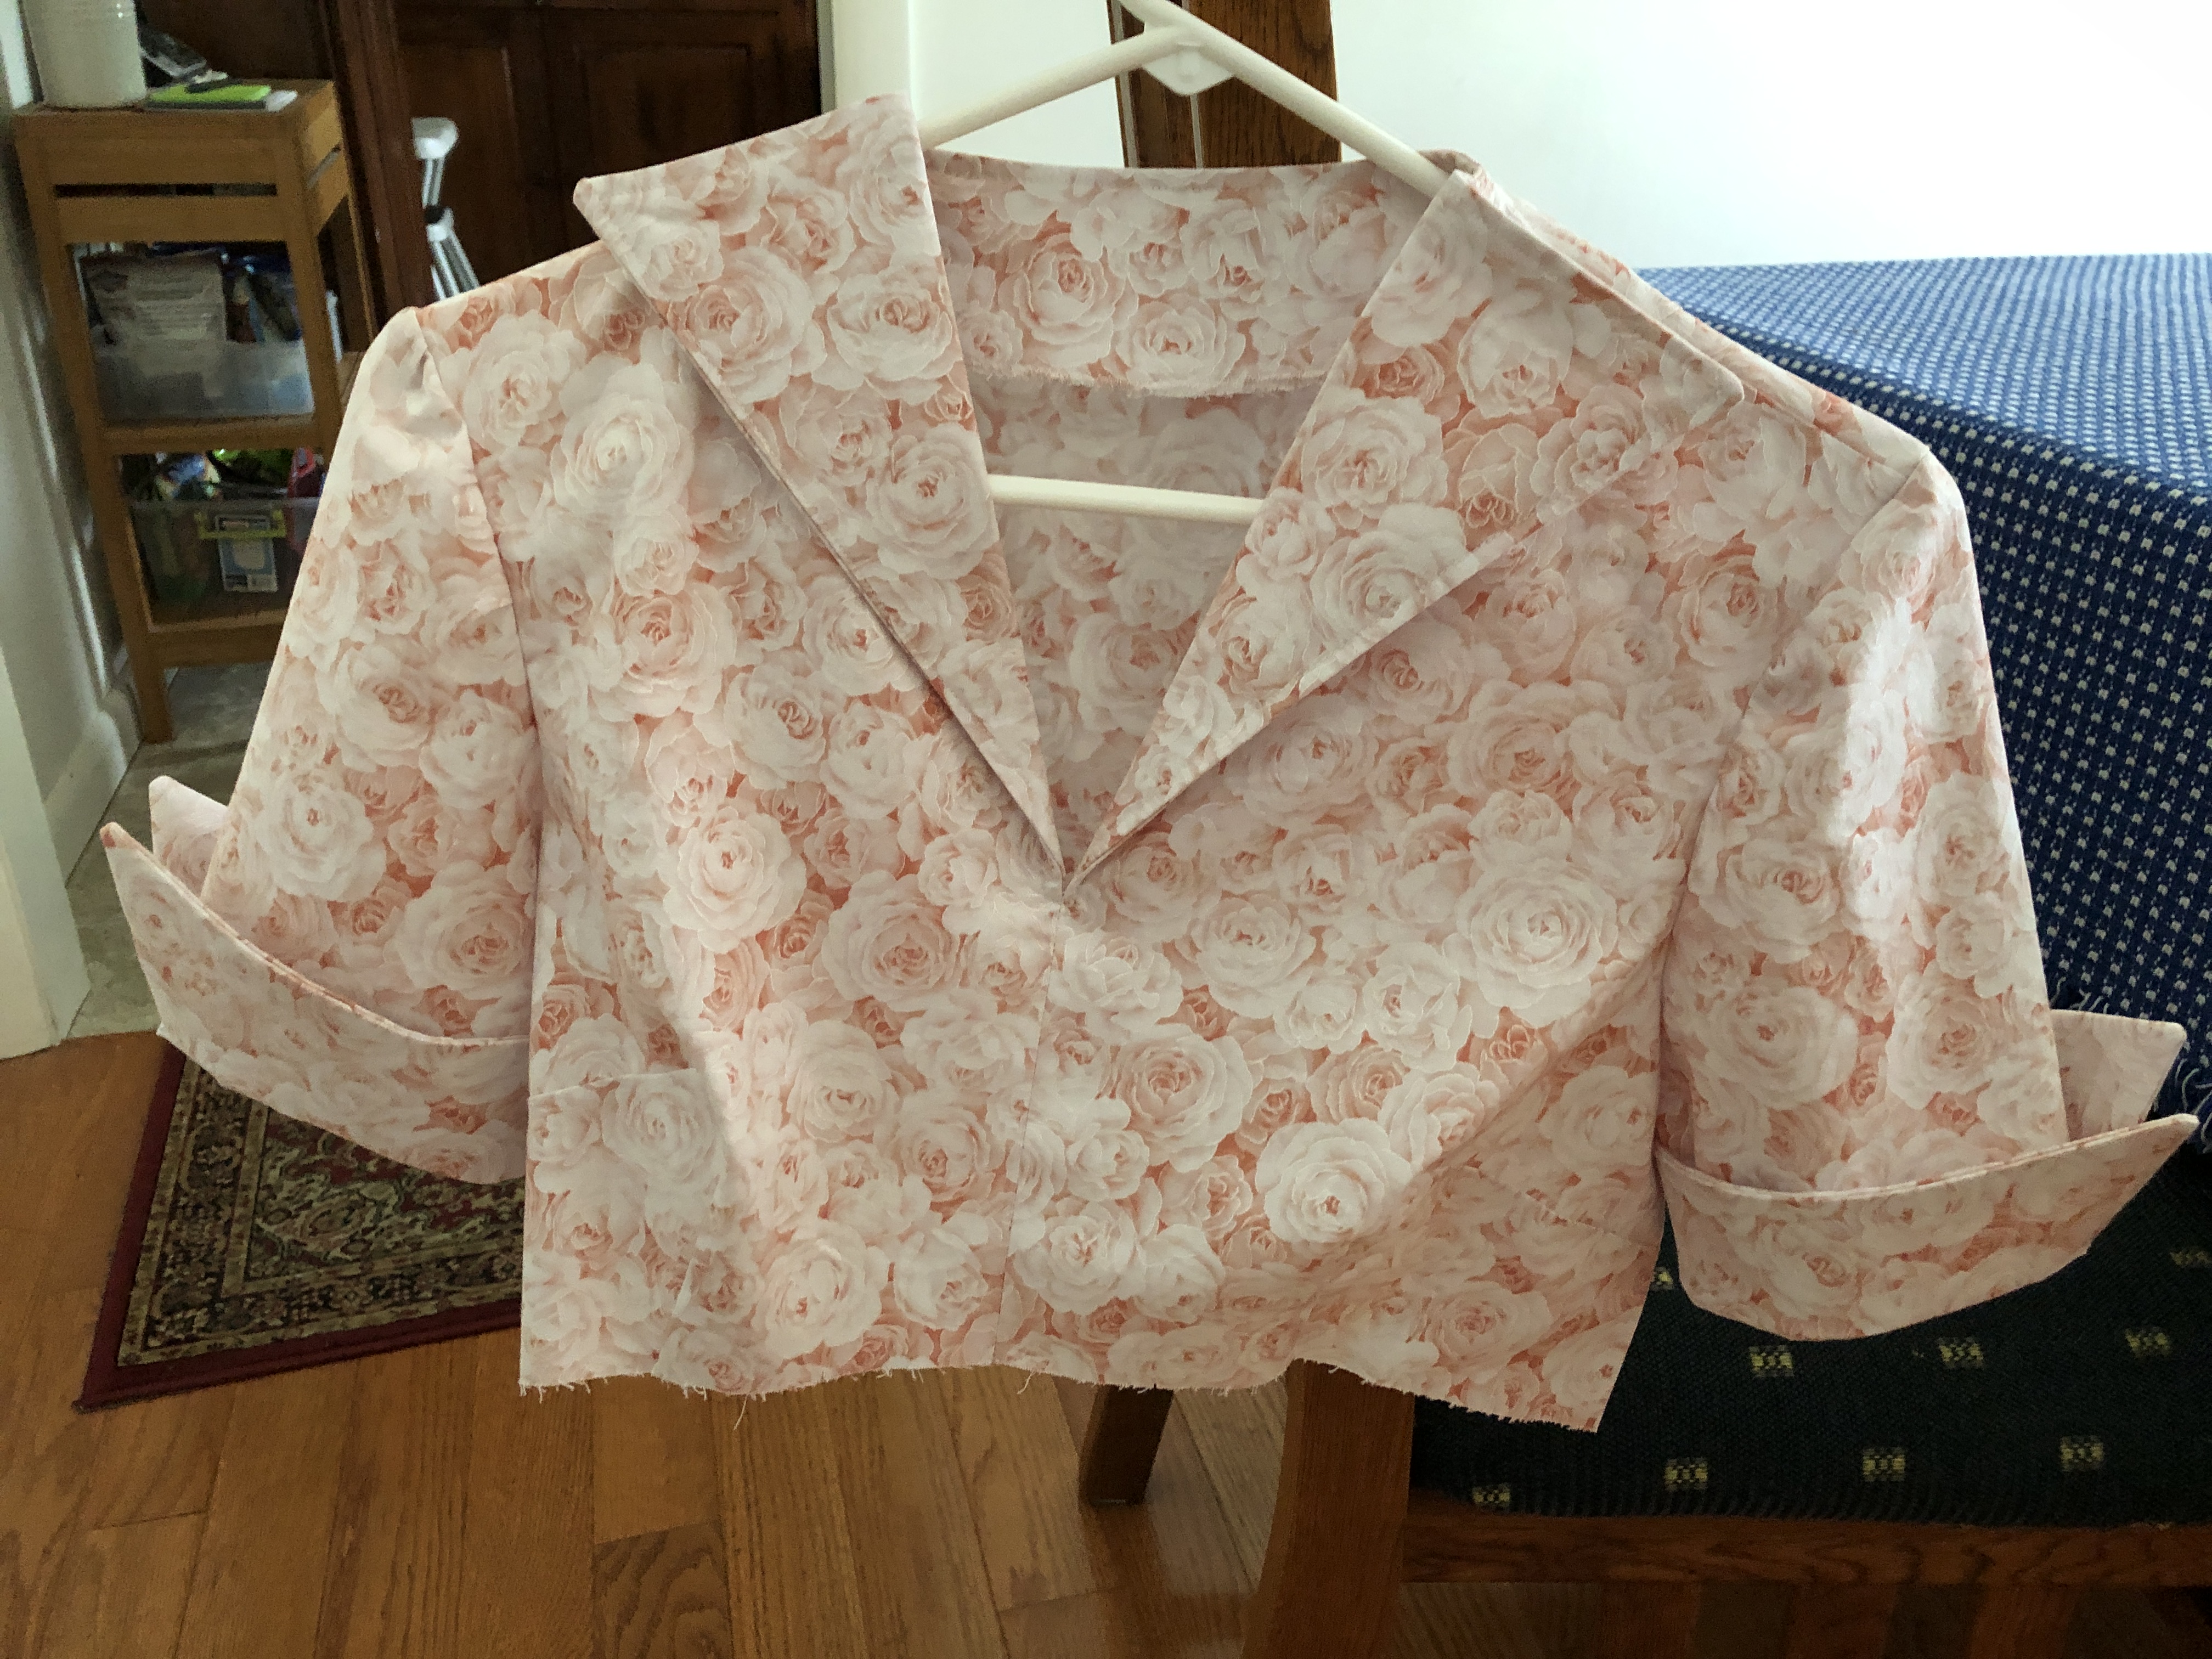
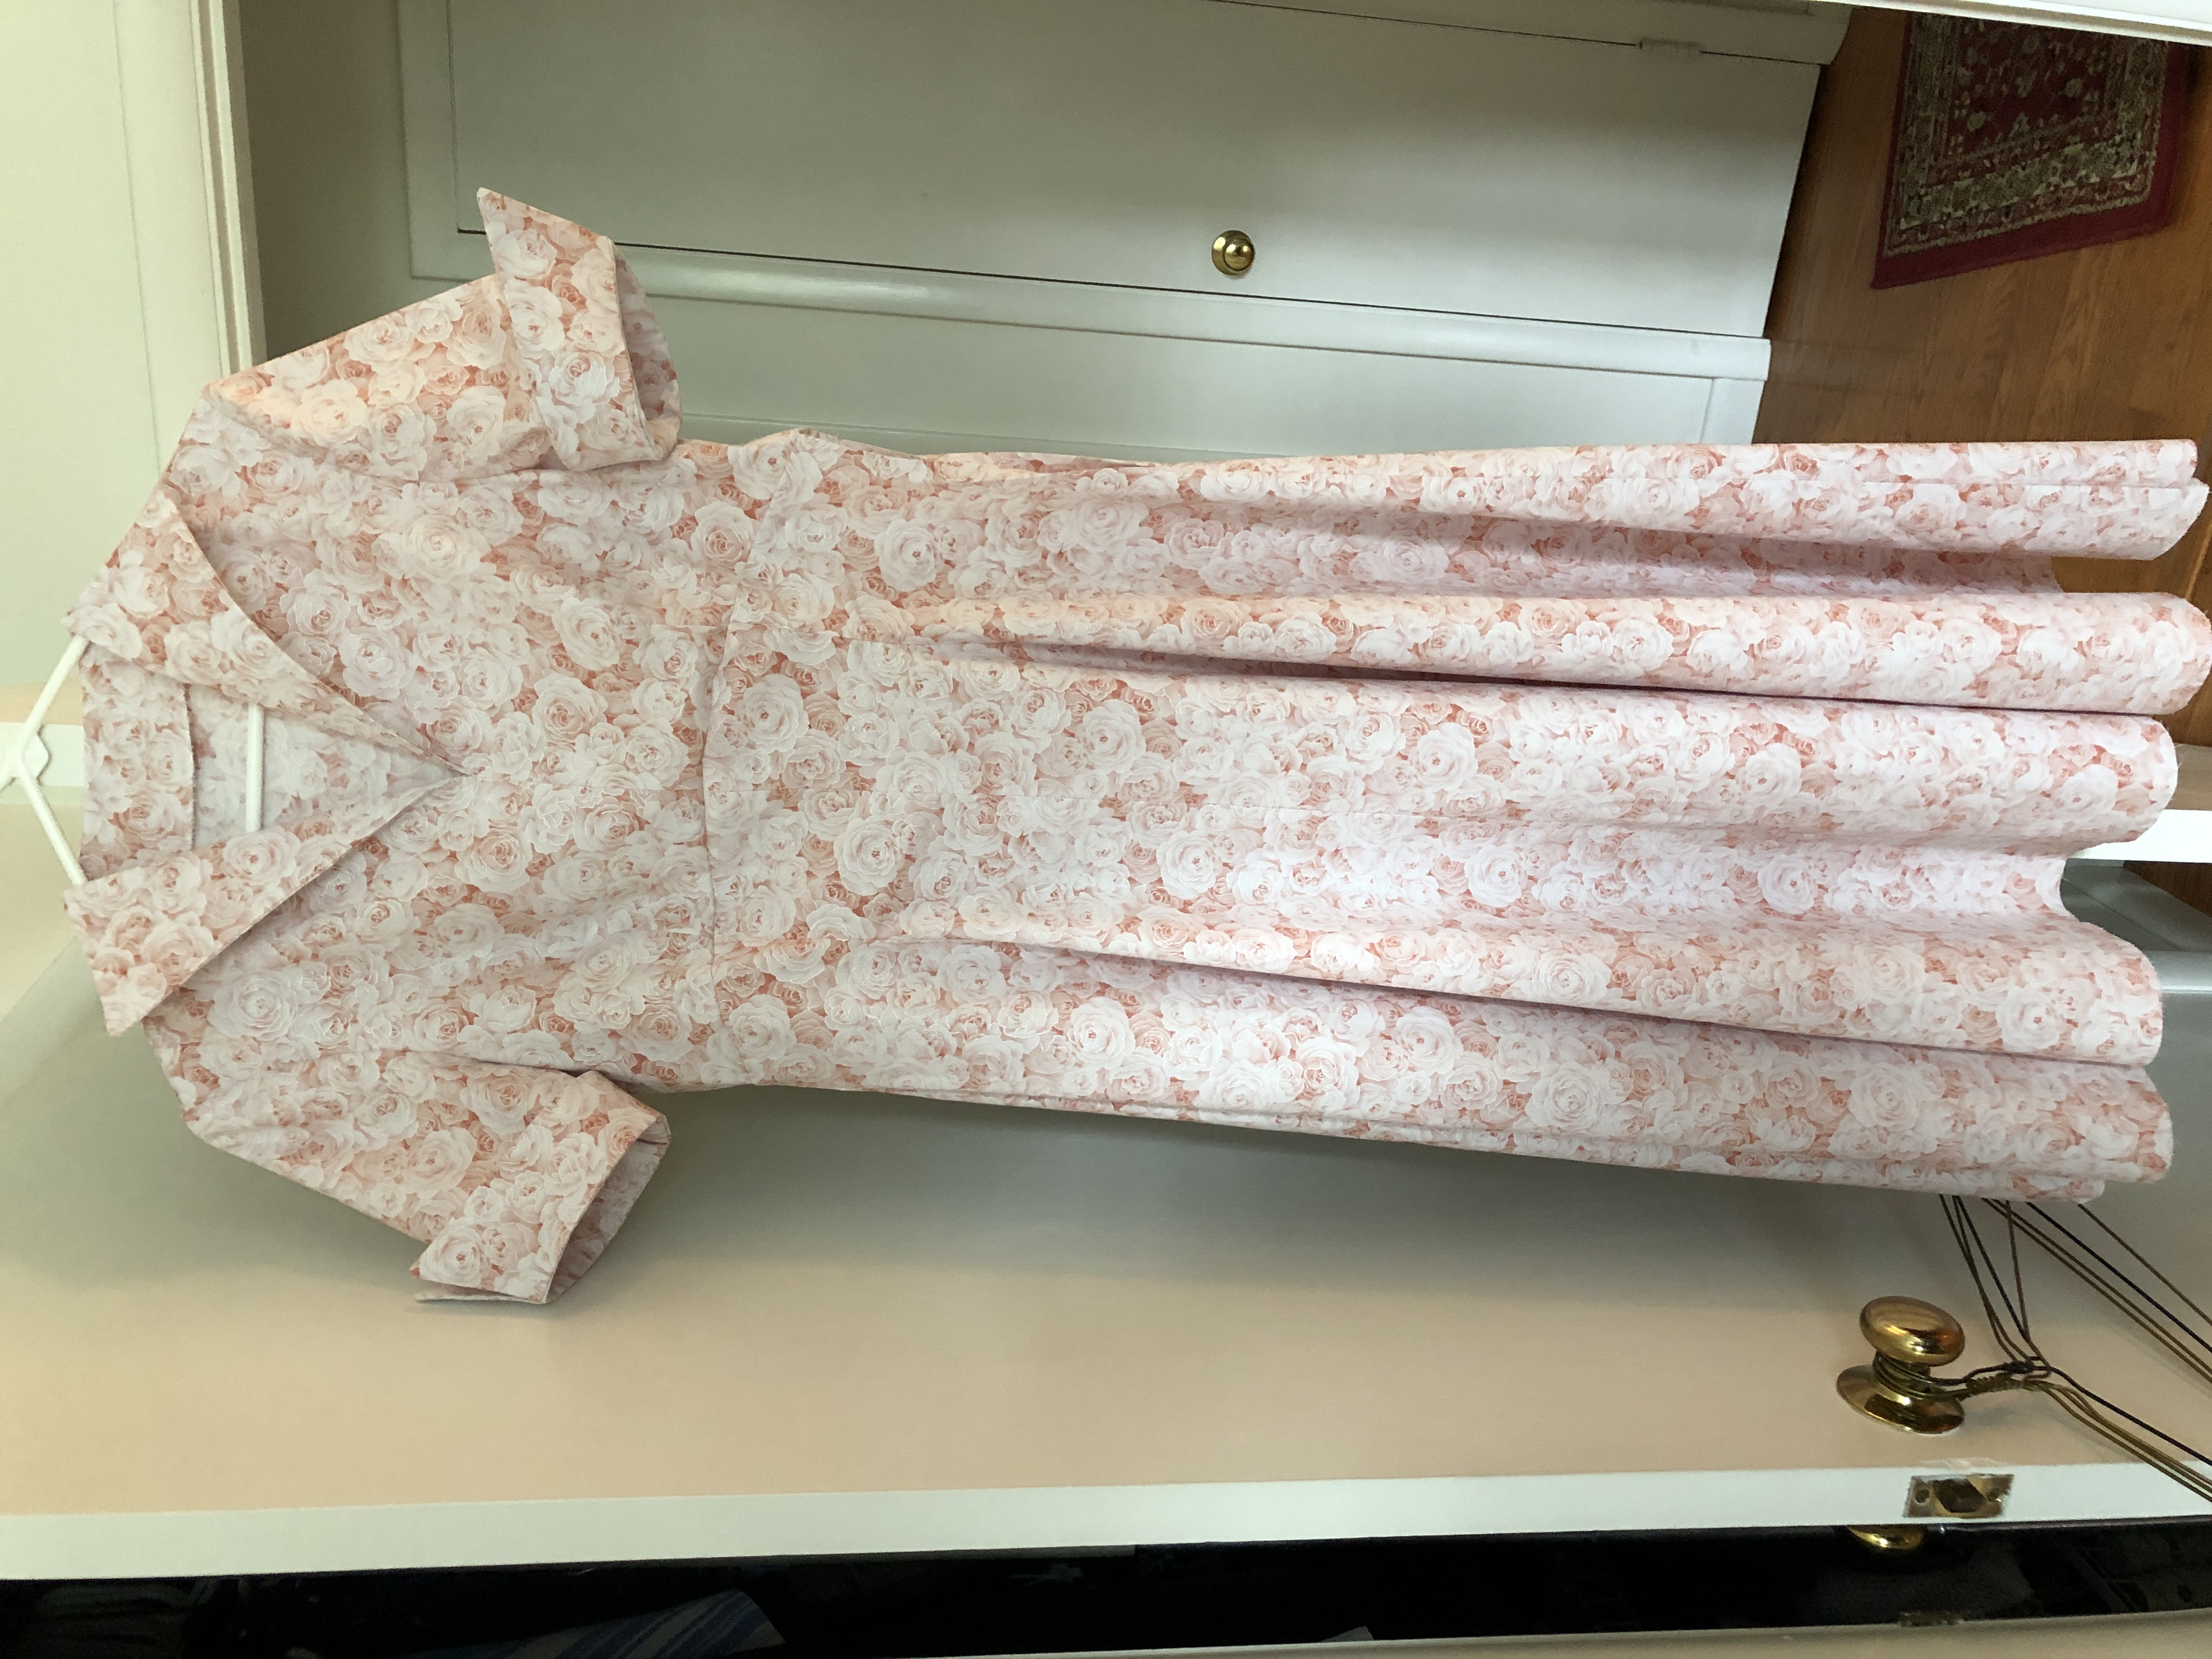
I think it turned out pretty well…hopefully it will fit when it gets to California! Here is the final dress (looks kind of flat without a body in it!).
Some very basic differences in sewing a dress in the style of the 1950s compared to today:
Fabric choices…suggested fabrics were light to medium weight woven fabrics like broadcloth, linen and taffeta. This means no extra stretch and the final dress will definitely need a hot iron! Does my granddaughter even know how to iron?
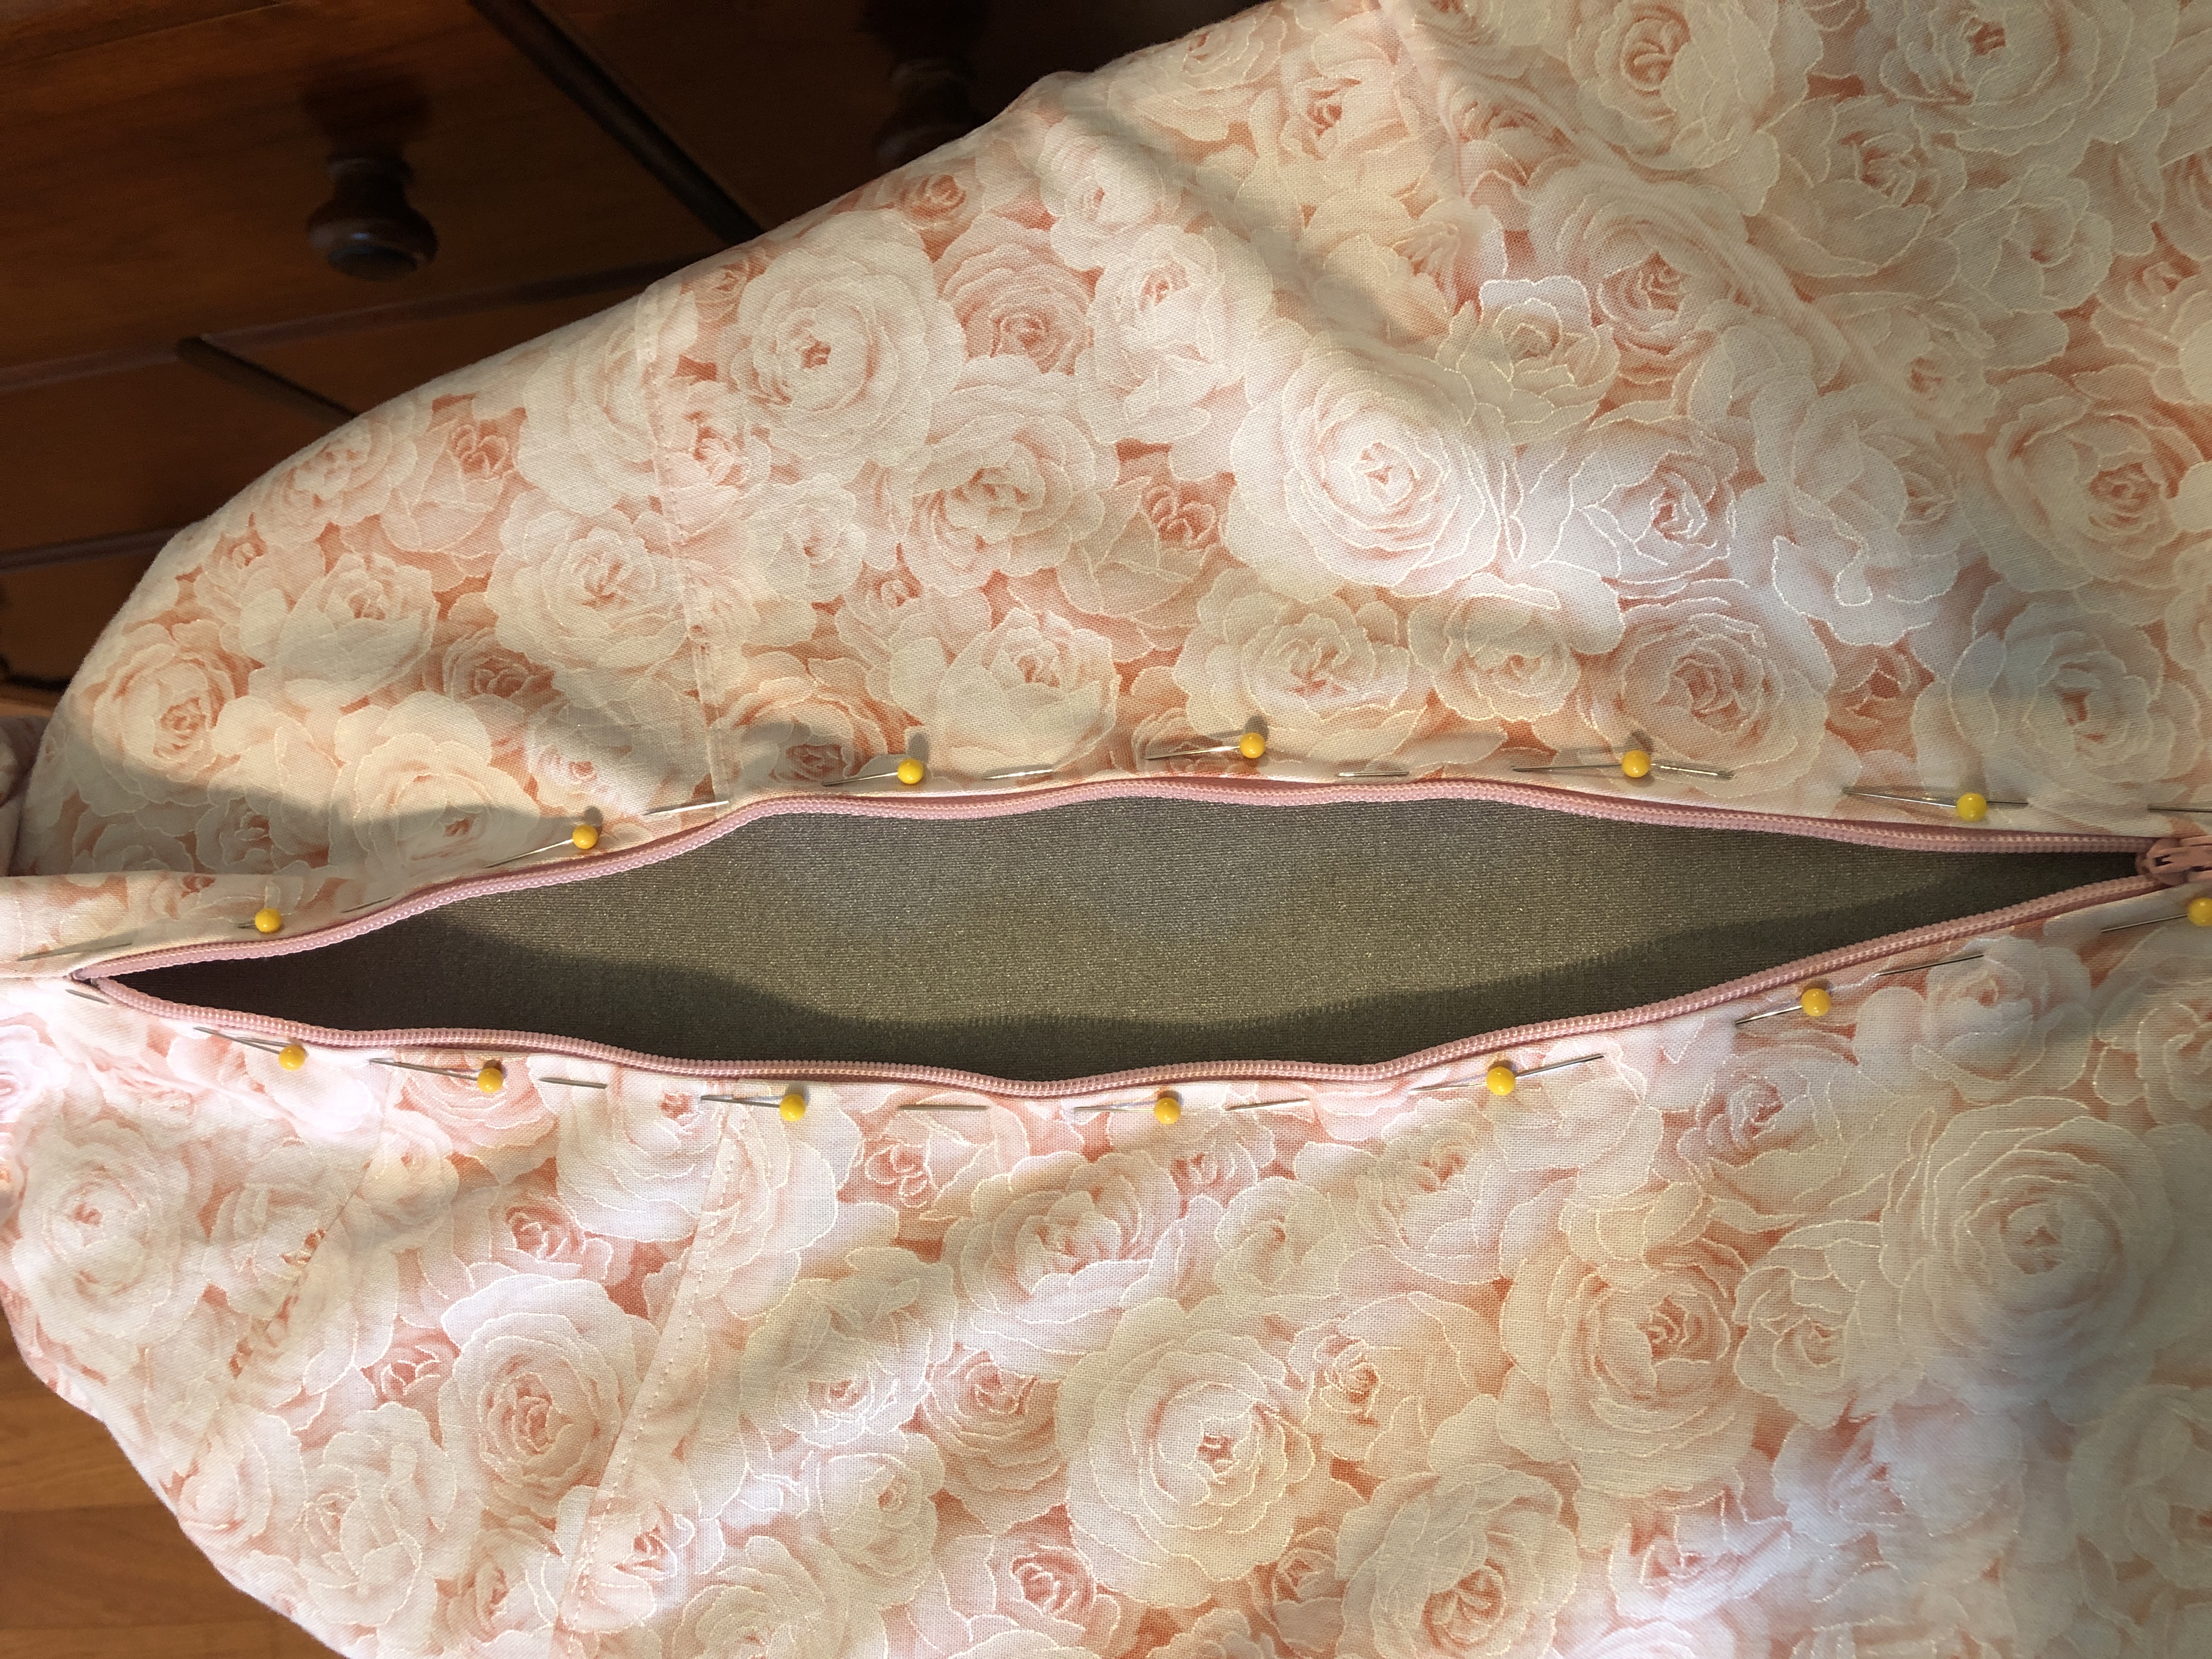
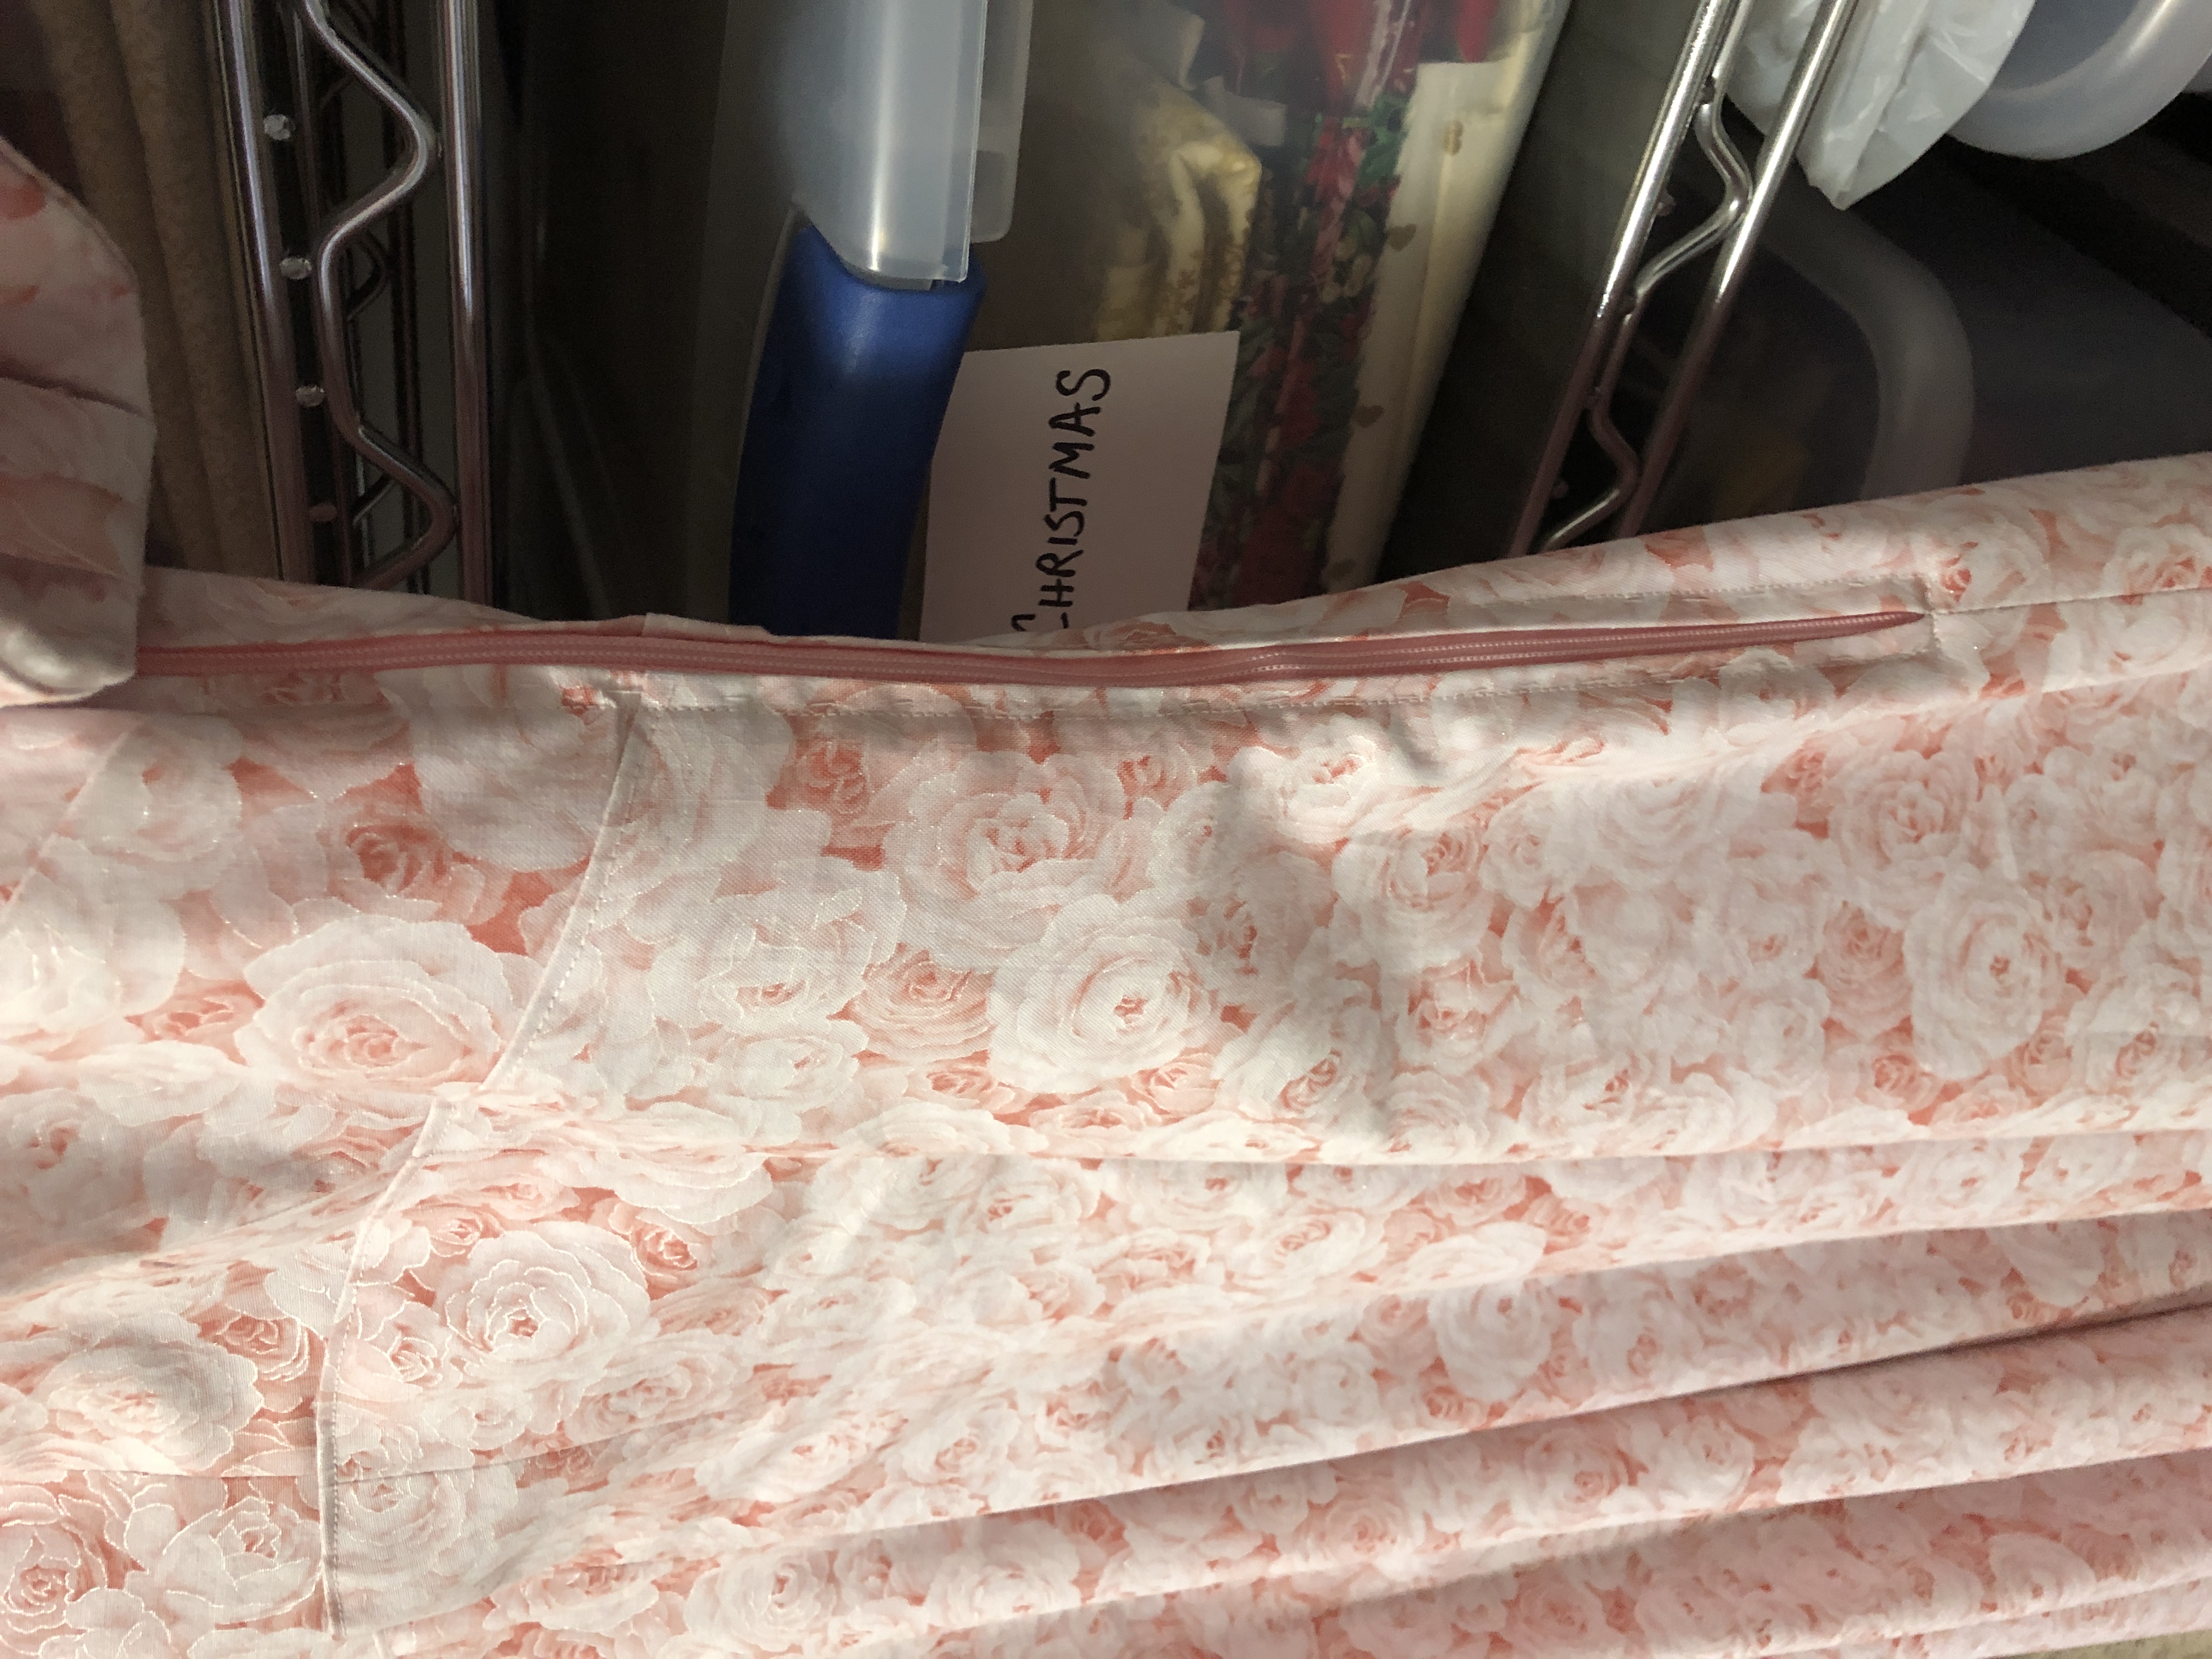
Side zipper…I had forgotten about the zipper tucked under the armpit! The pattern had pretty good instructions but it still took me two tries to get it right! (Gee, I hate to rip out stuff!)
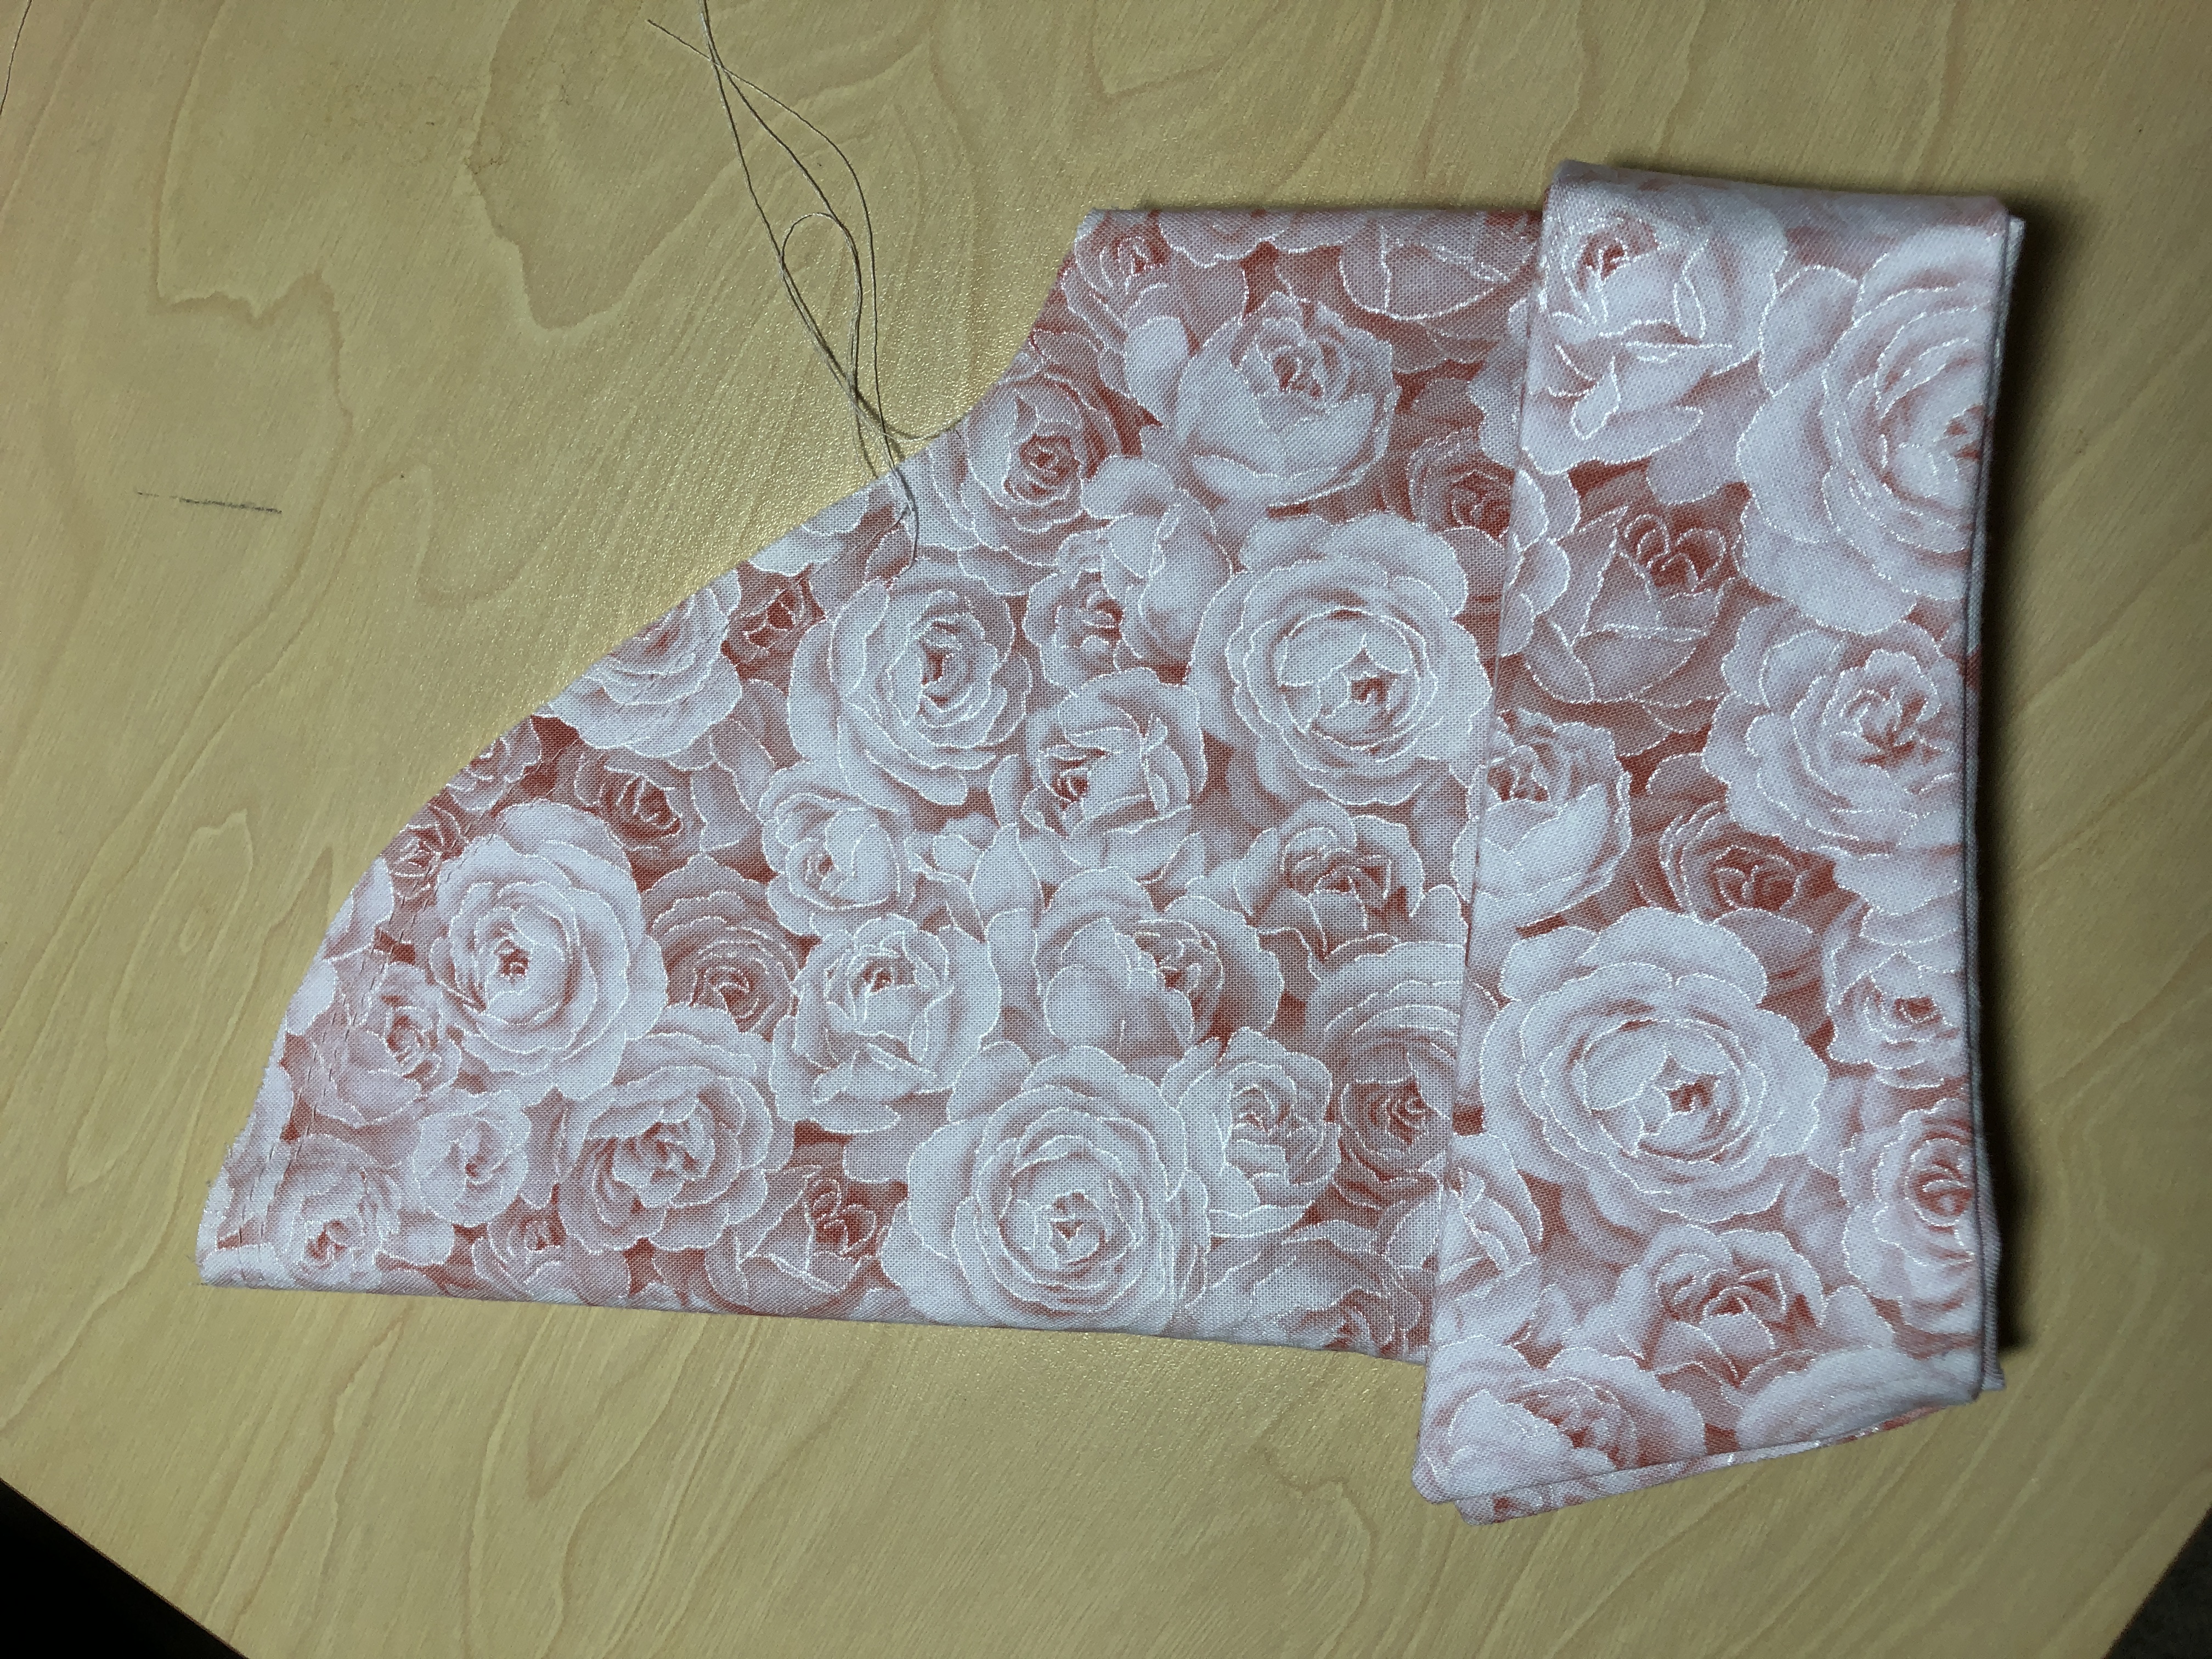
Fitted sleeves…just looking at the shape of the sleeve pattern told me it would be a restrictive sleeve. We are so spoiled with soft stretchy t-shirts!
Full skirt…making the hem a tedious half-day task by hand.
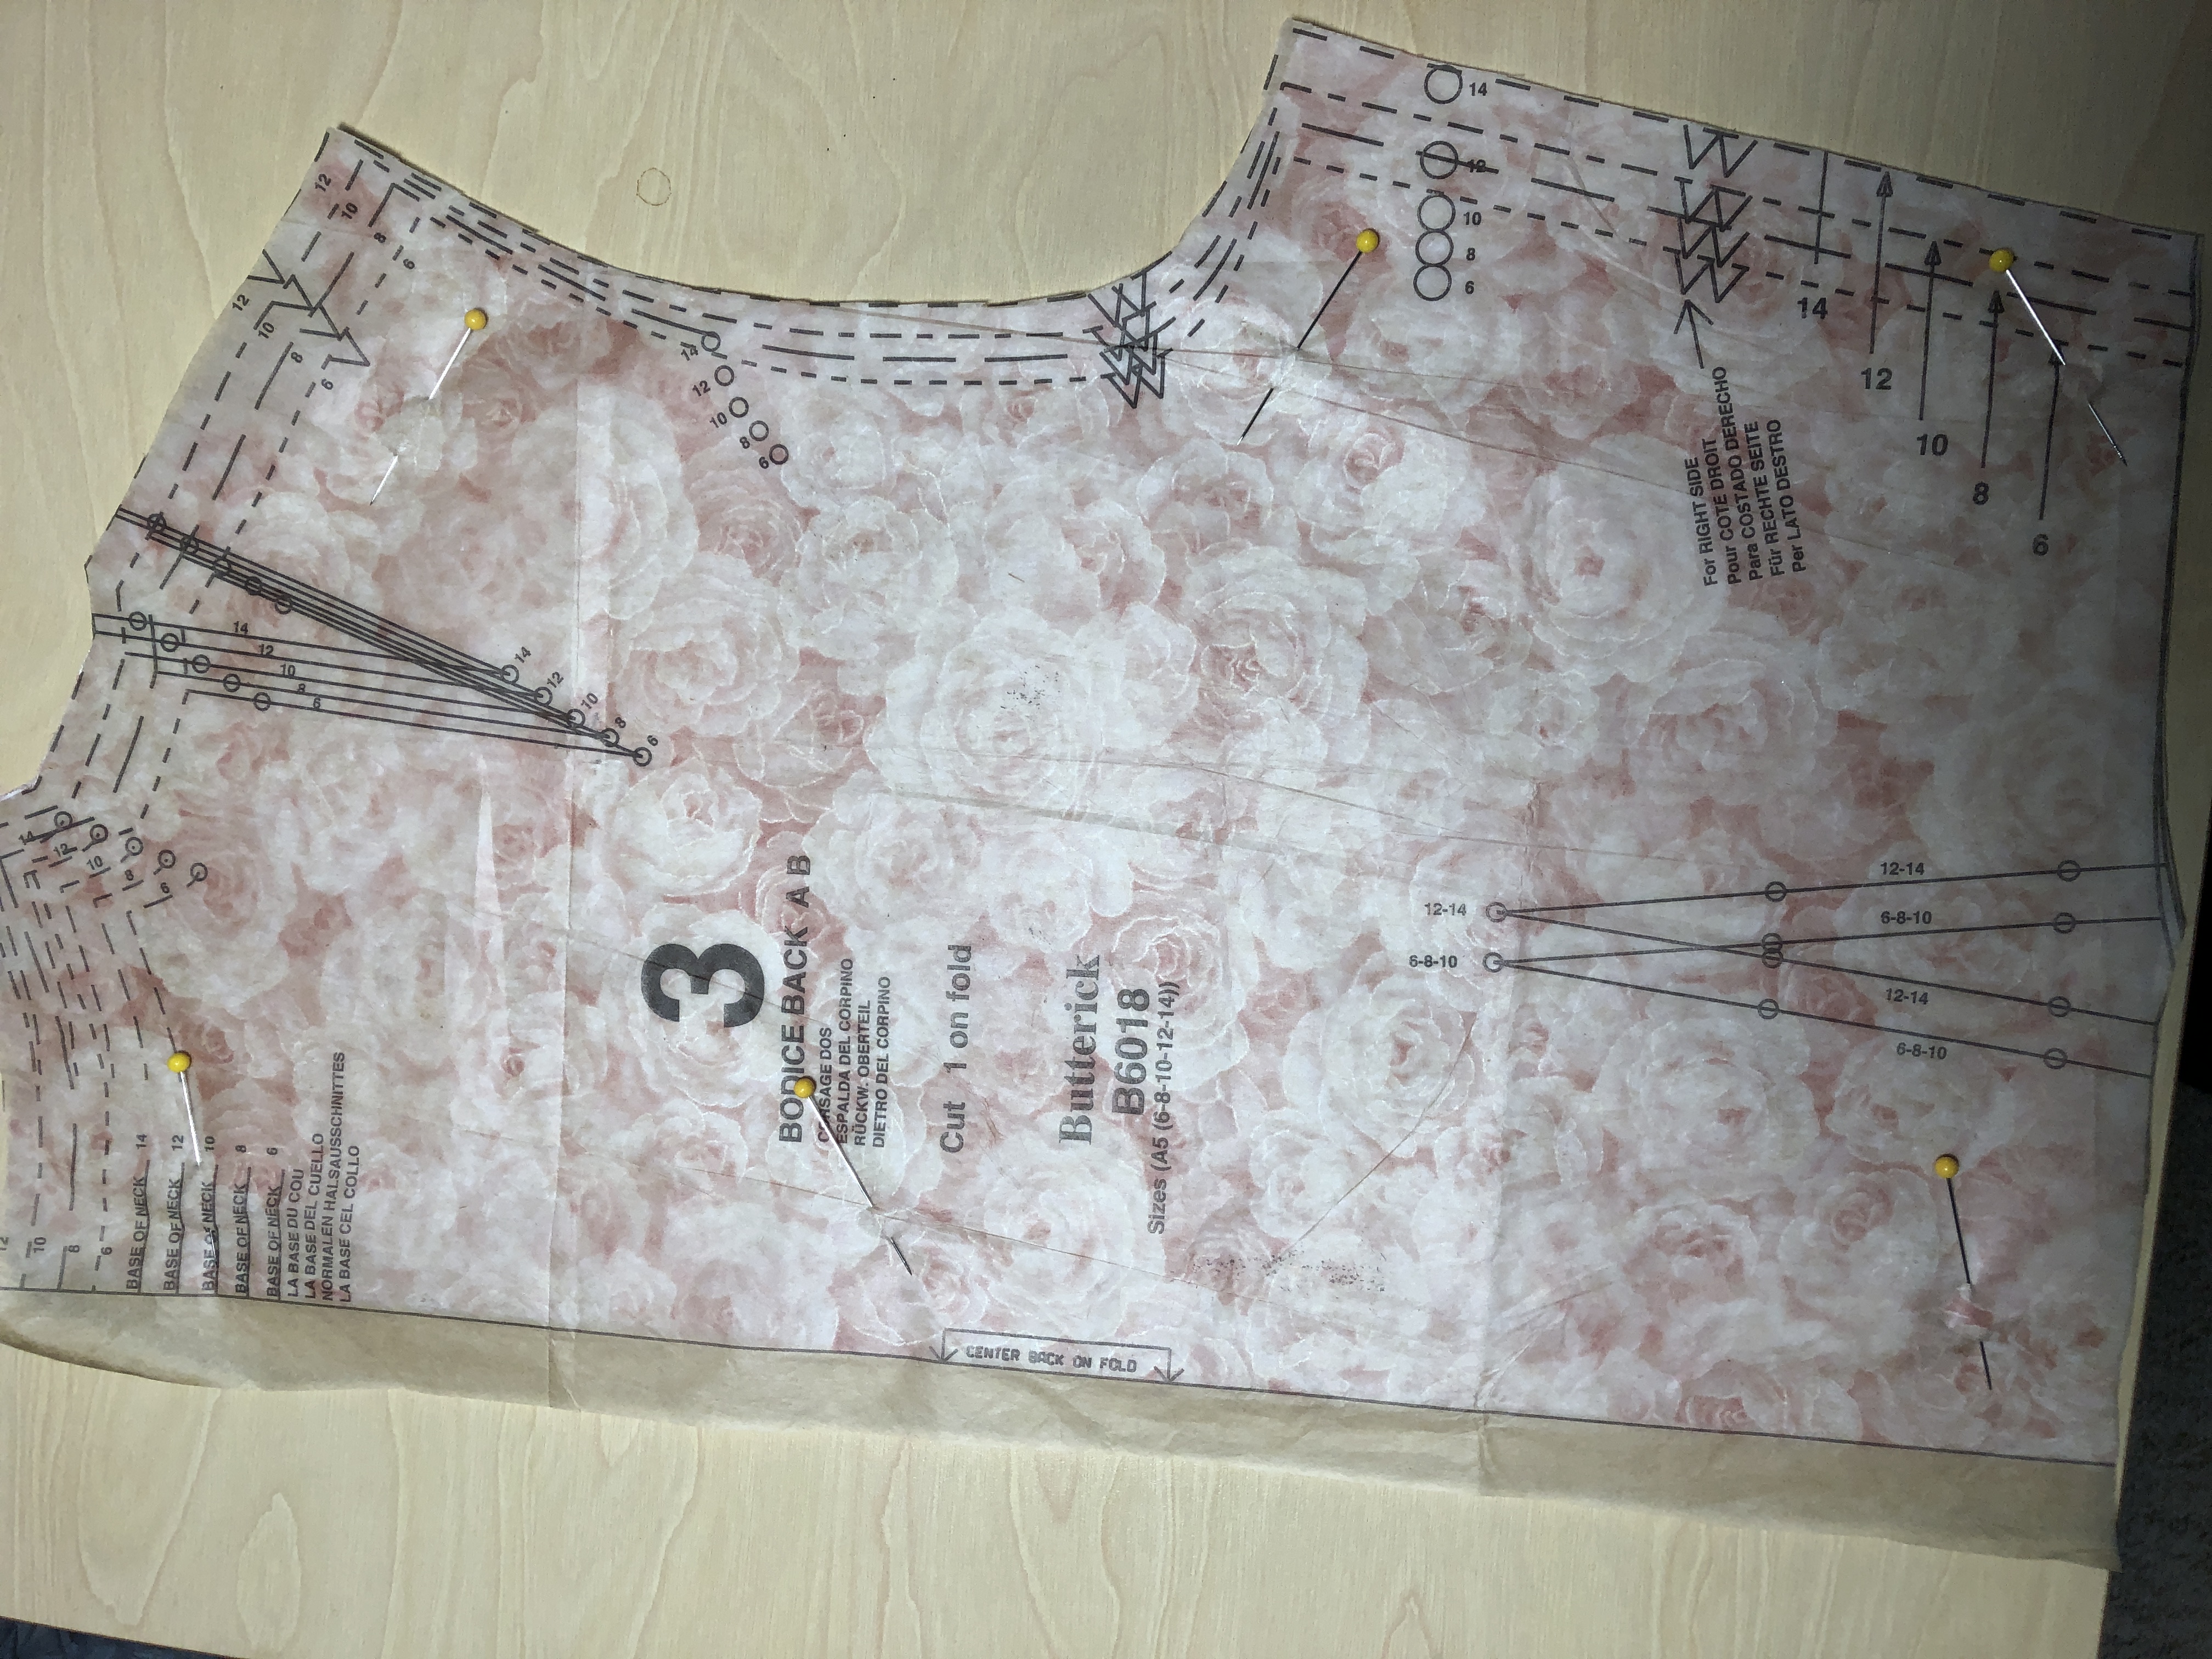
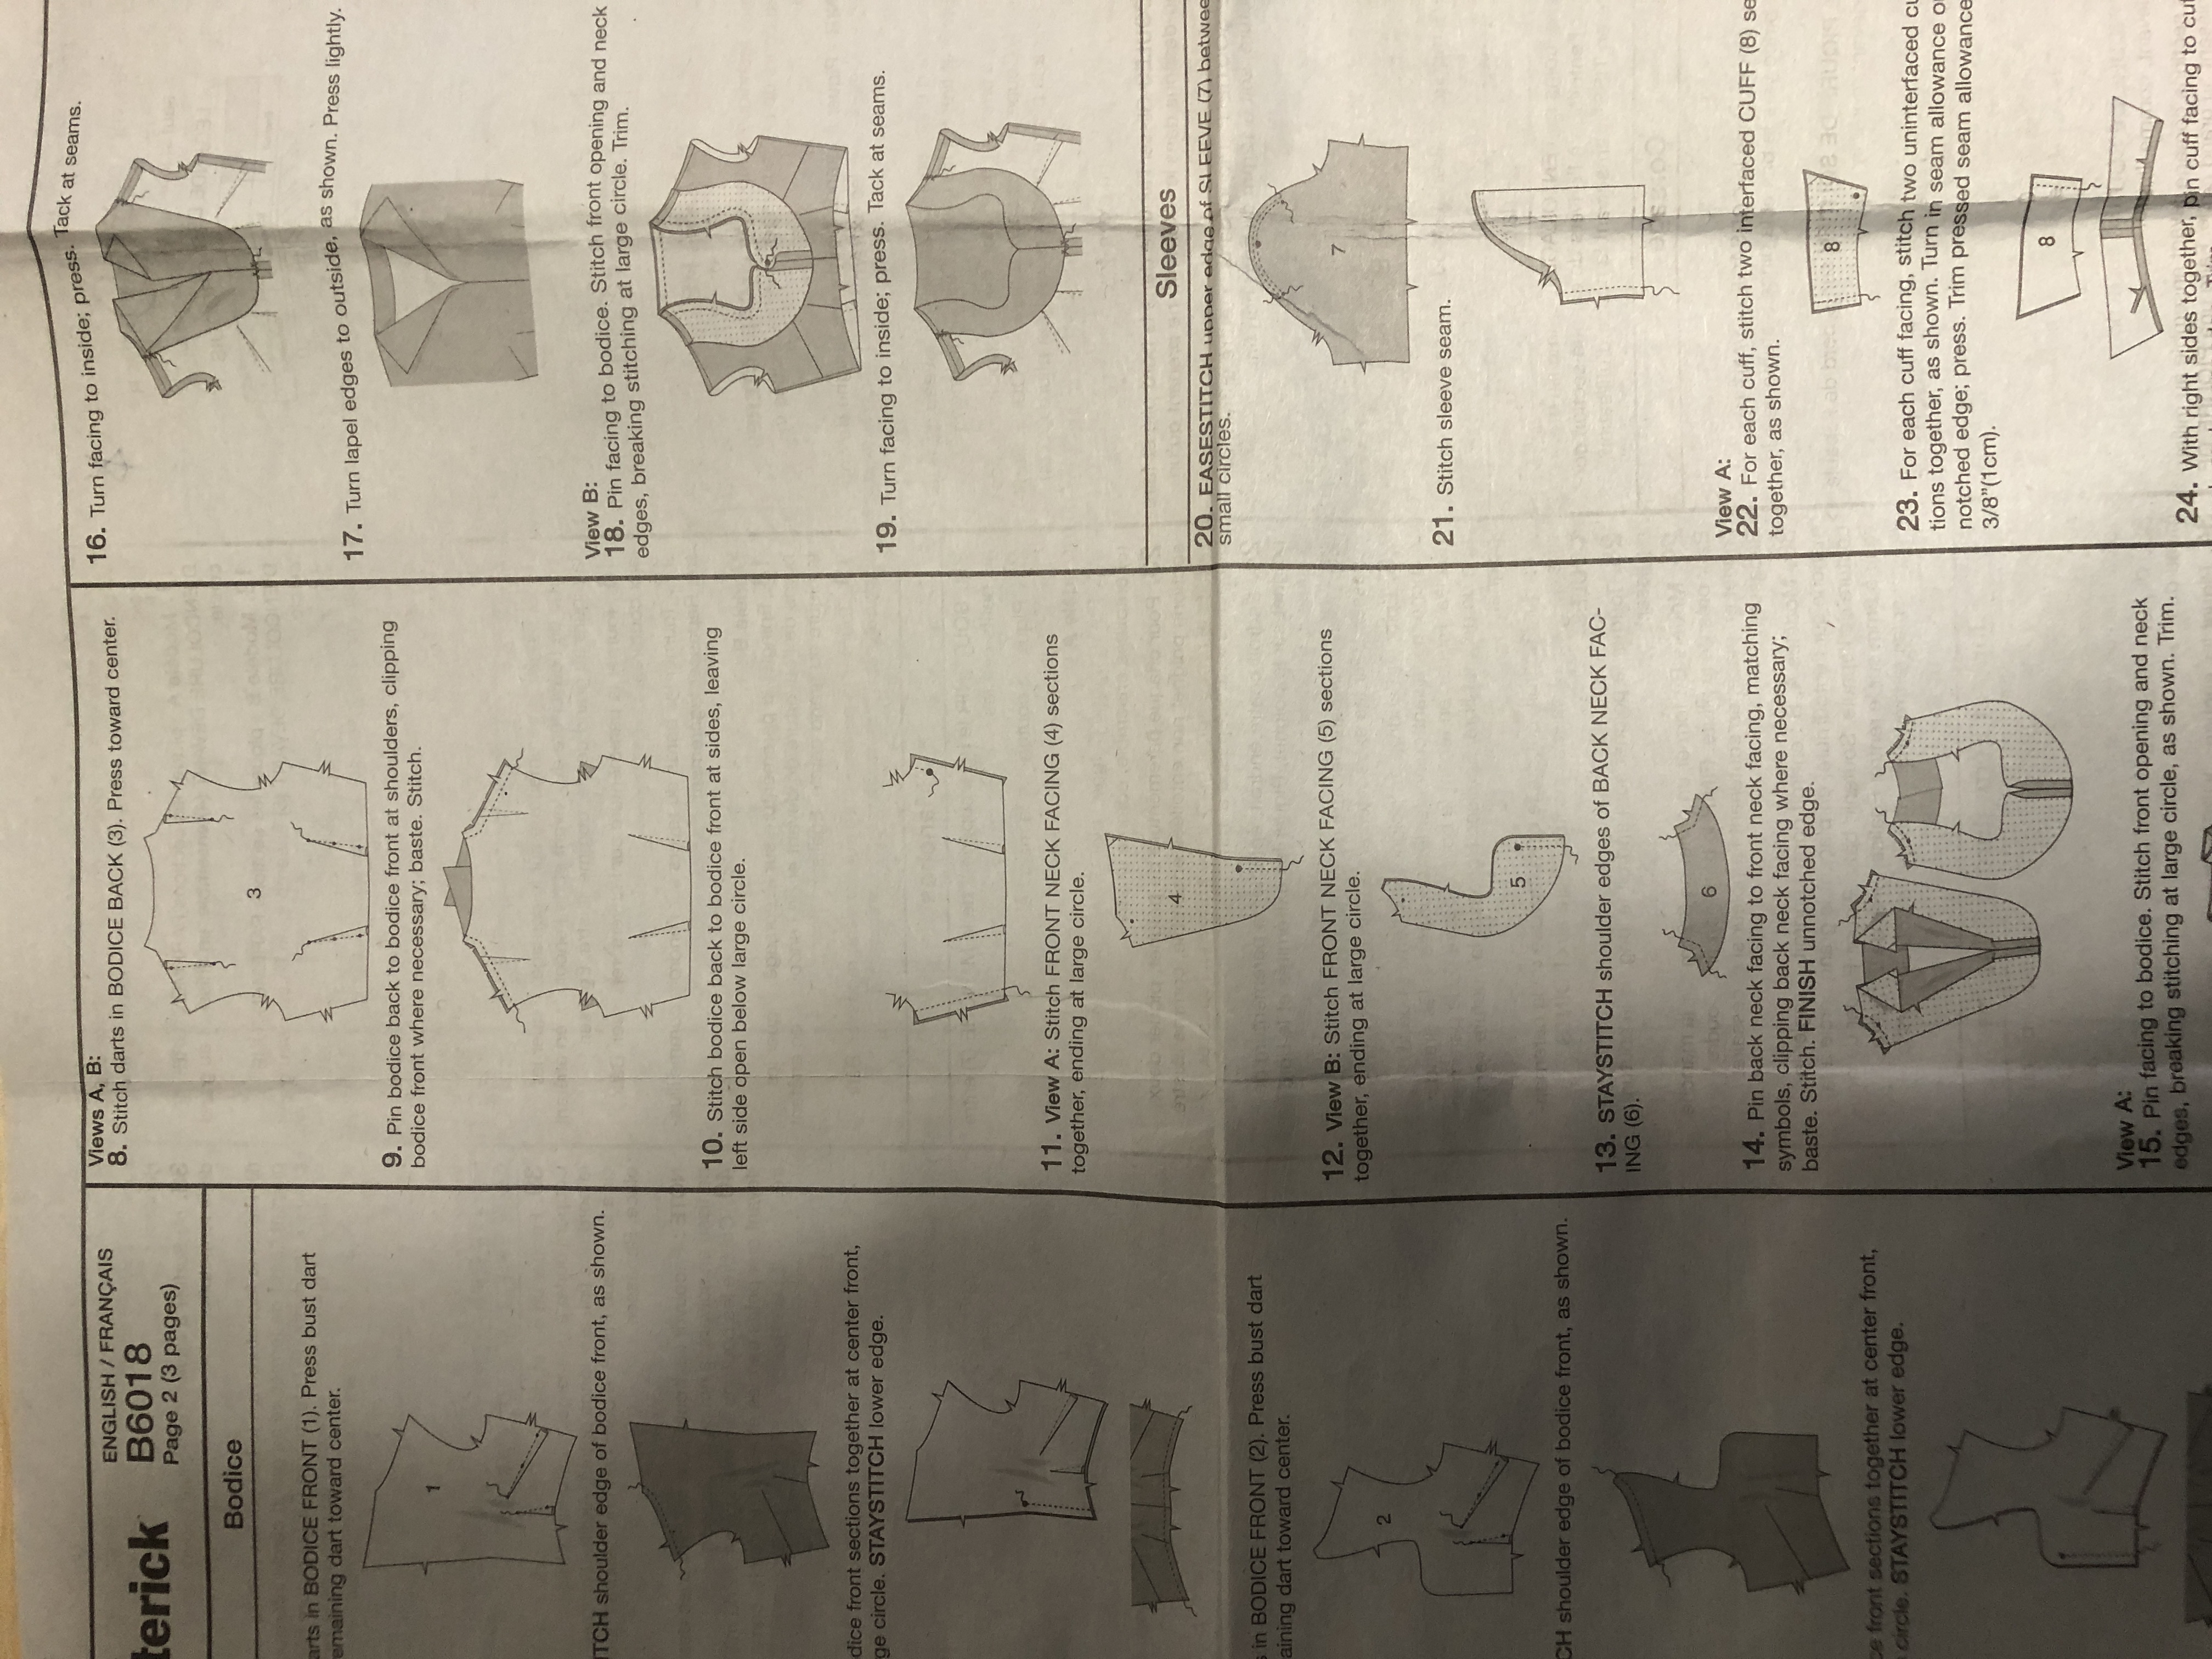
Complexity of the pattern itself…this pattern had 5 sizes in one, from size 6 to 14. To do that every pattern piece had 5 cutting lines, 5 sets of circles, etc.
Cutting Out the Dress
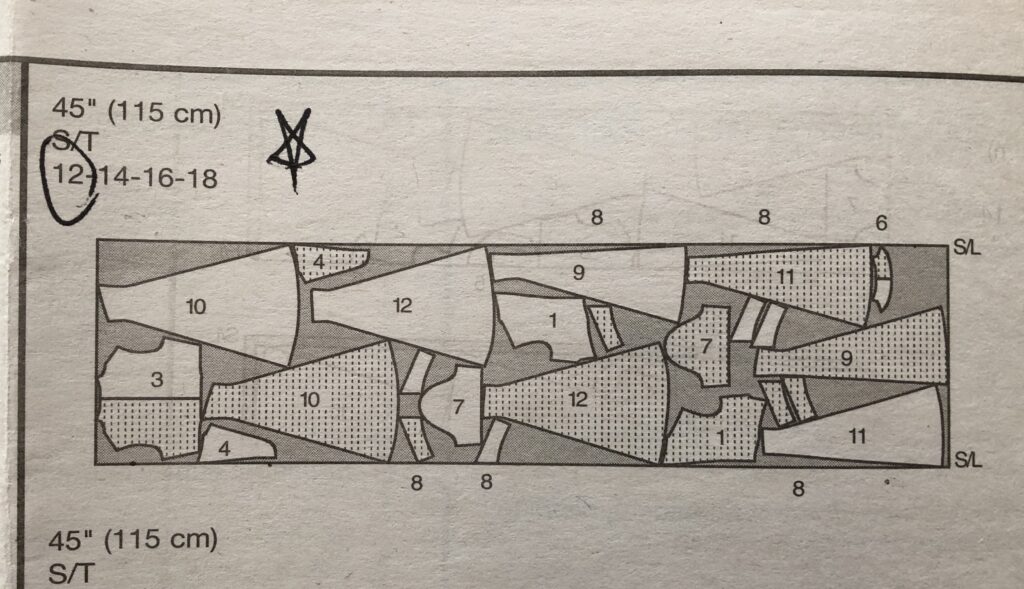
I cut out the dress on a day when I had no distractions. The suggested layout was intimidating:
This layout had me cutting out each piece in a single twice and after stewing about this, I went back to JoAnn’s and bought another yard of fabric so I could do it my way. I just knew I would forget to flip each piece.
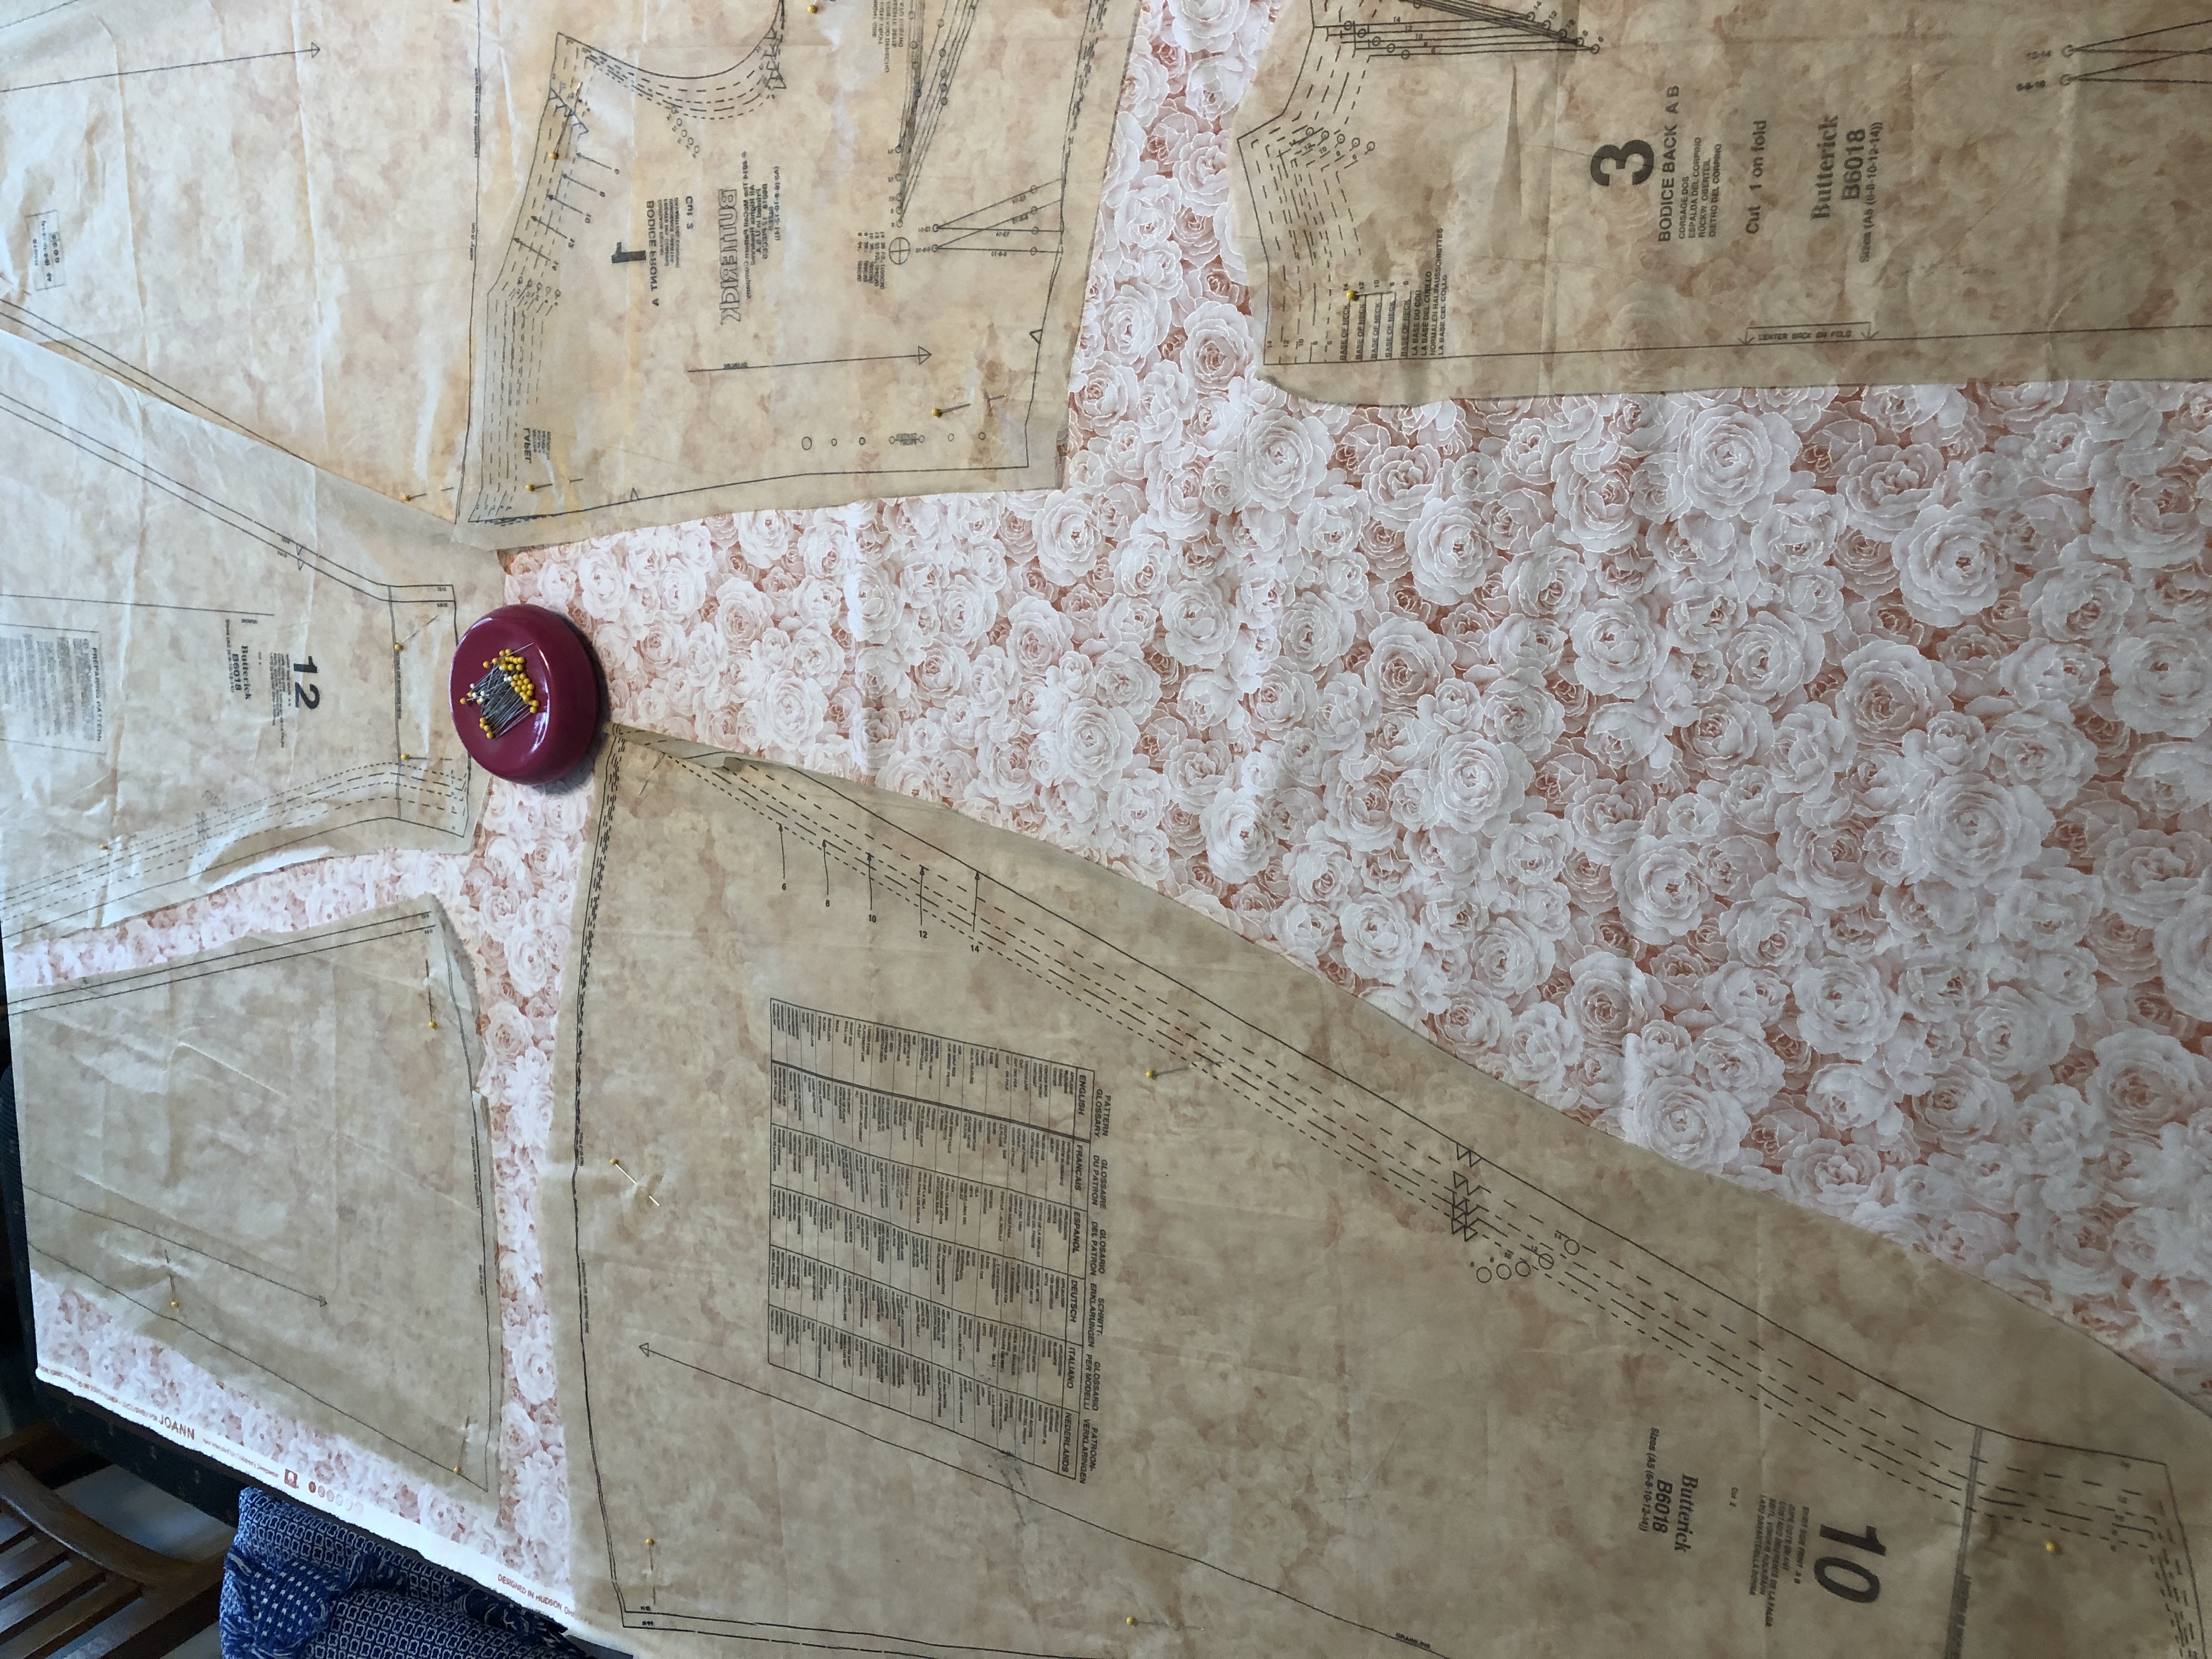
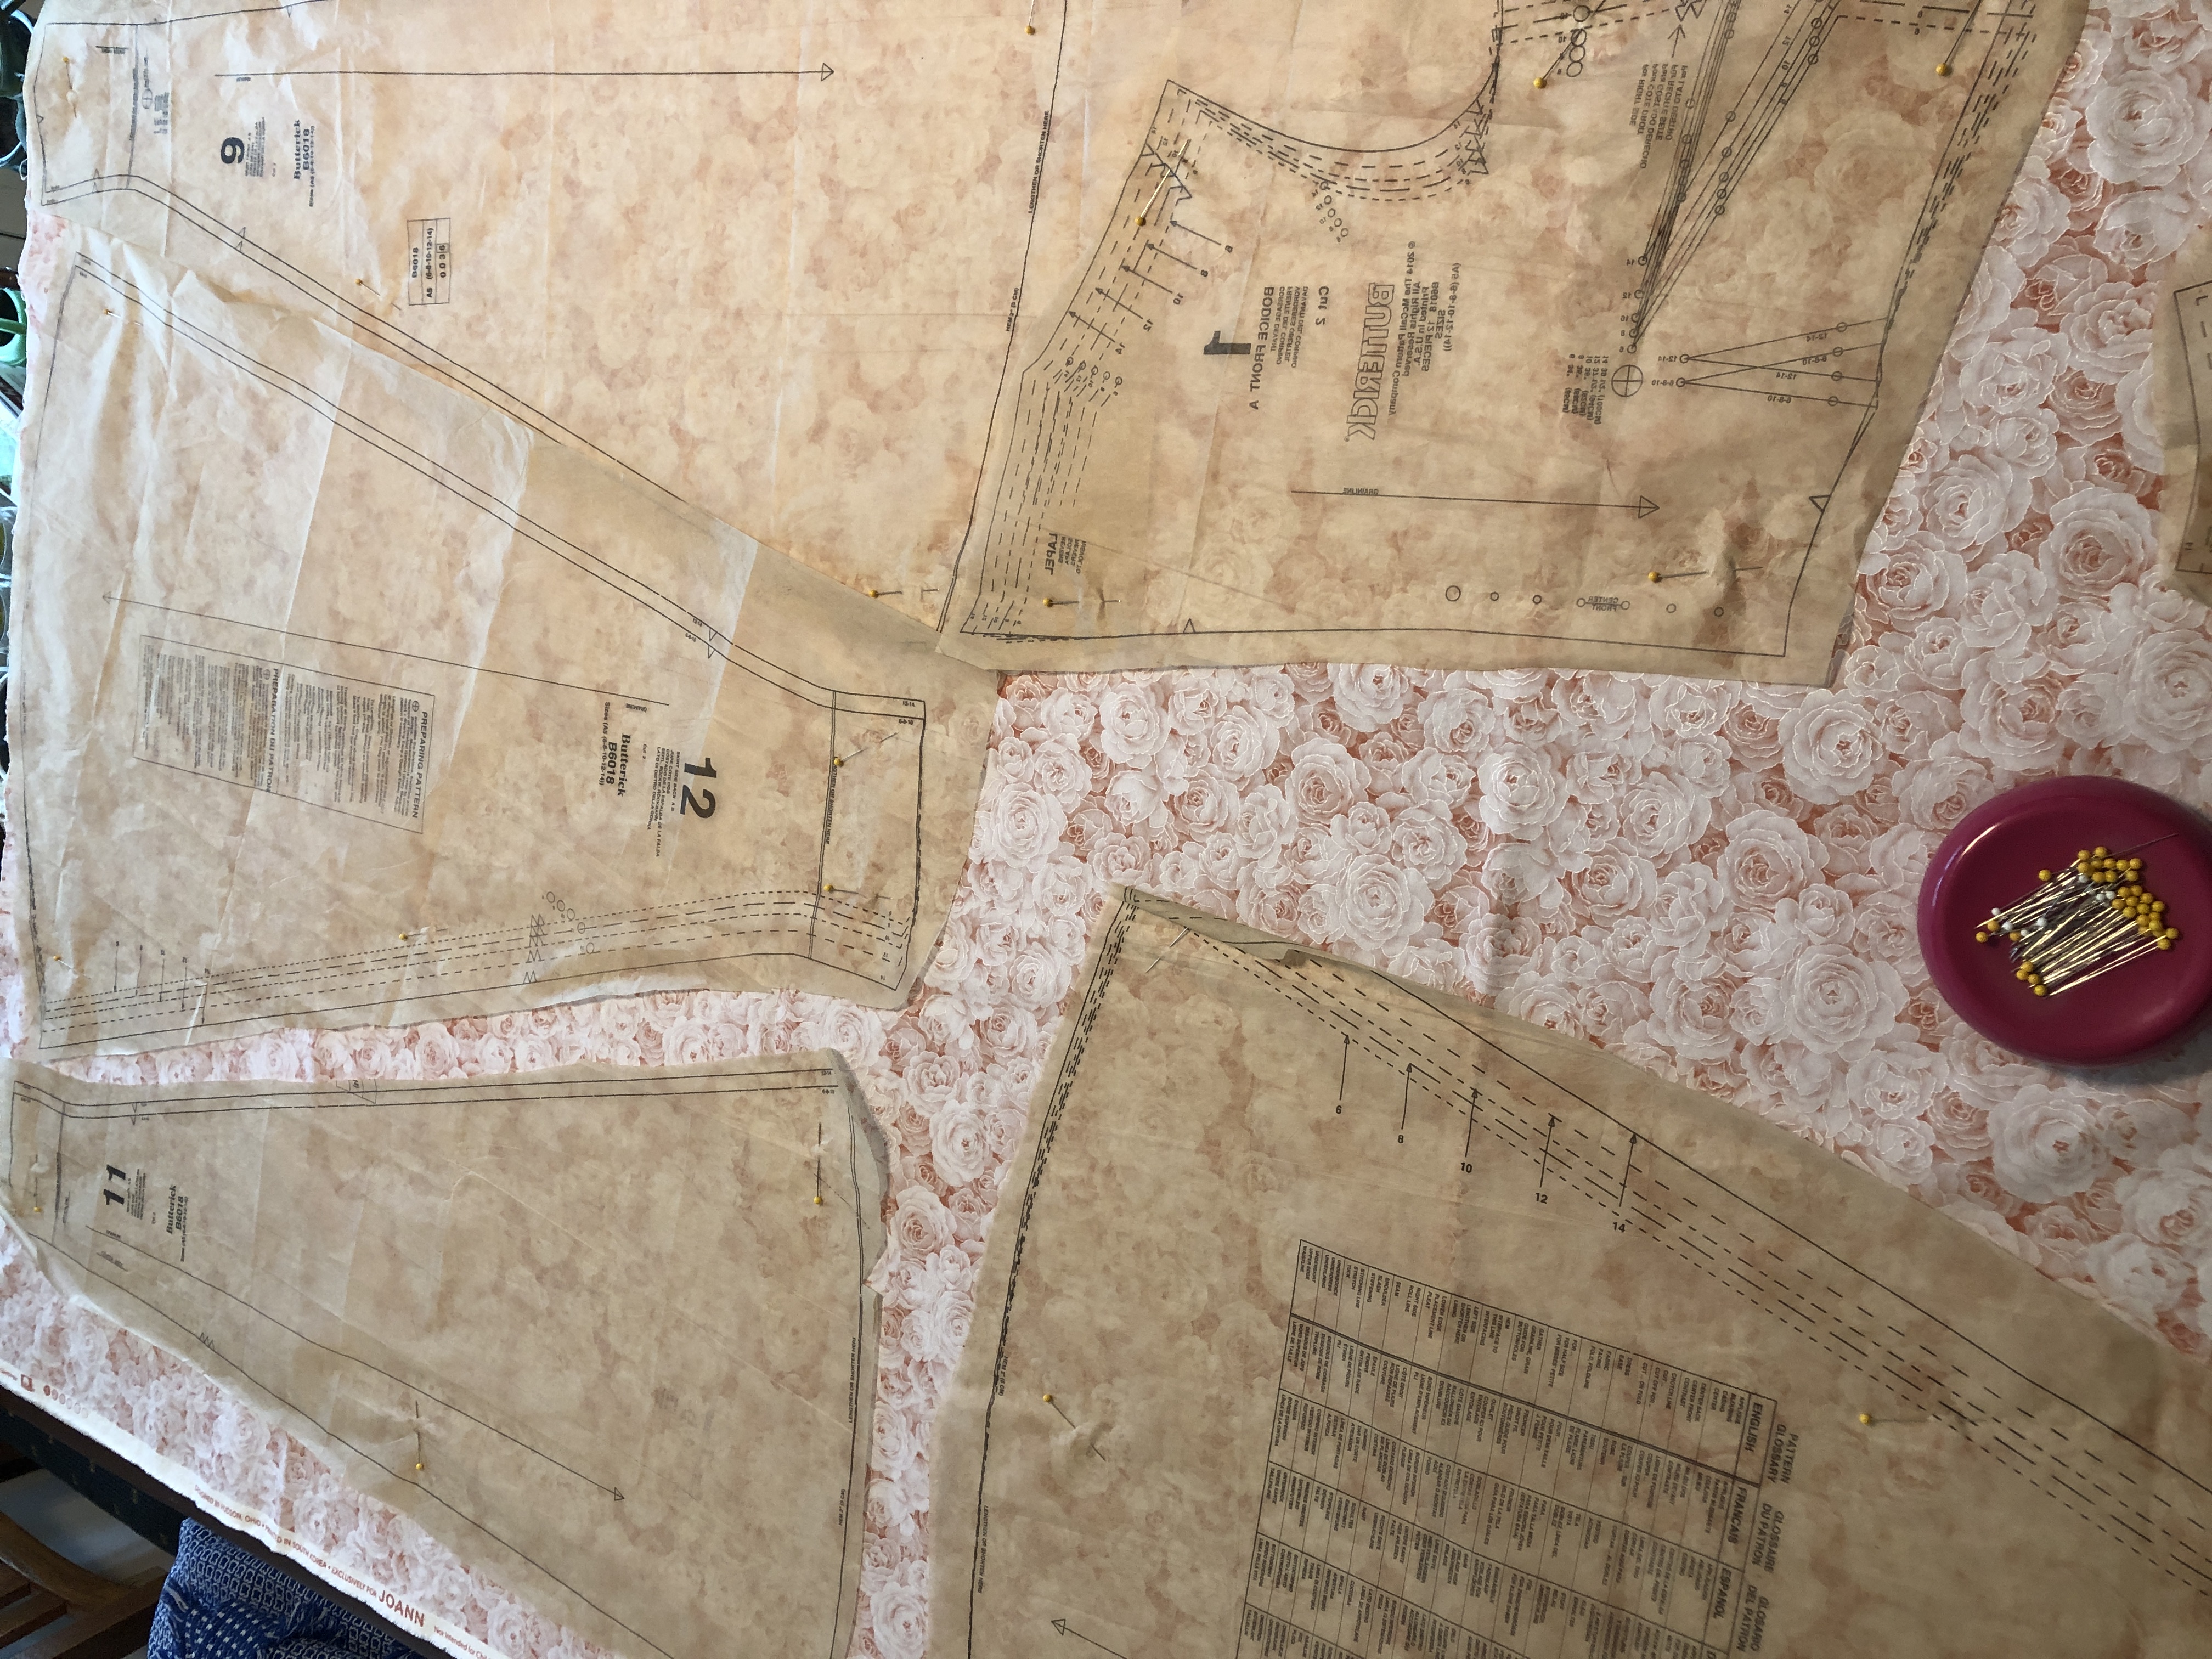
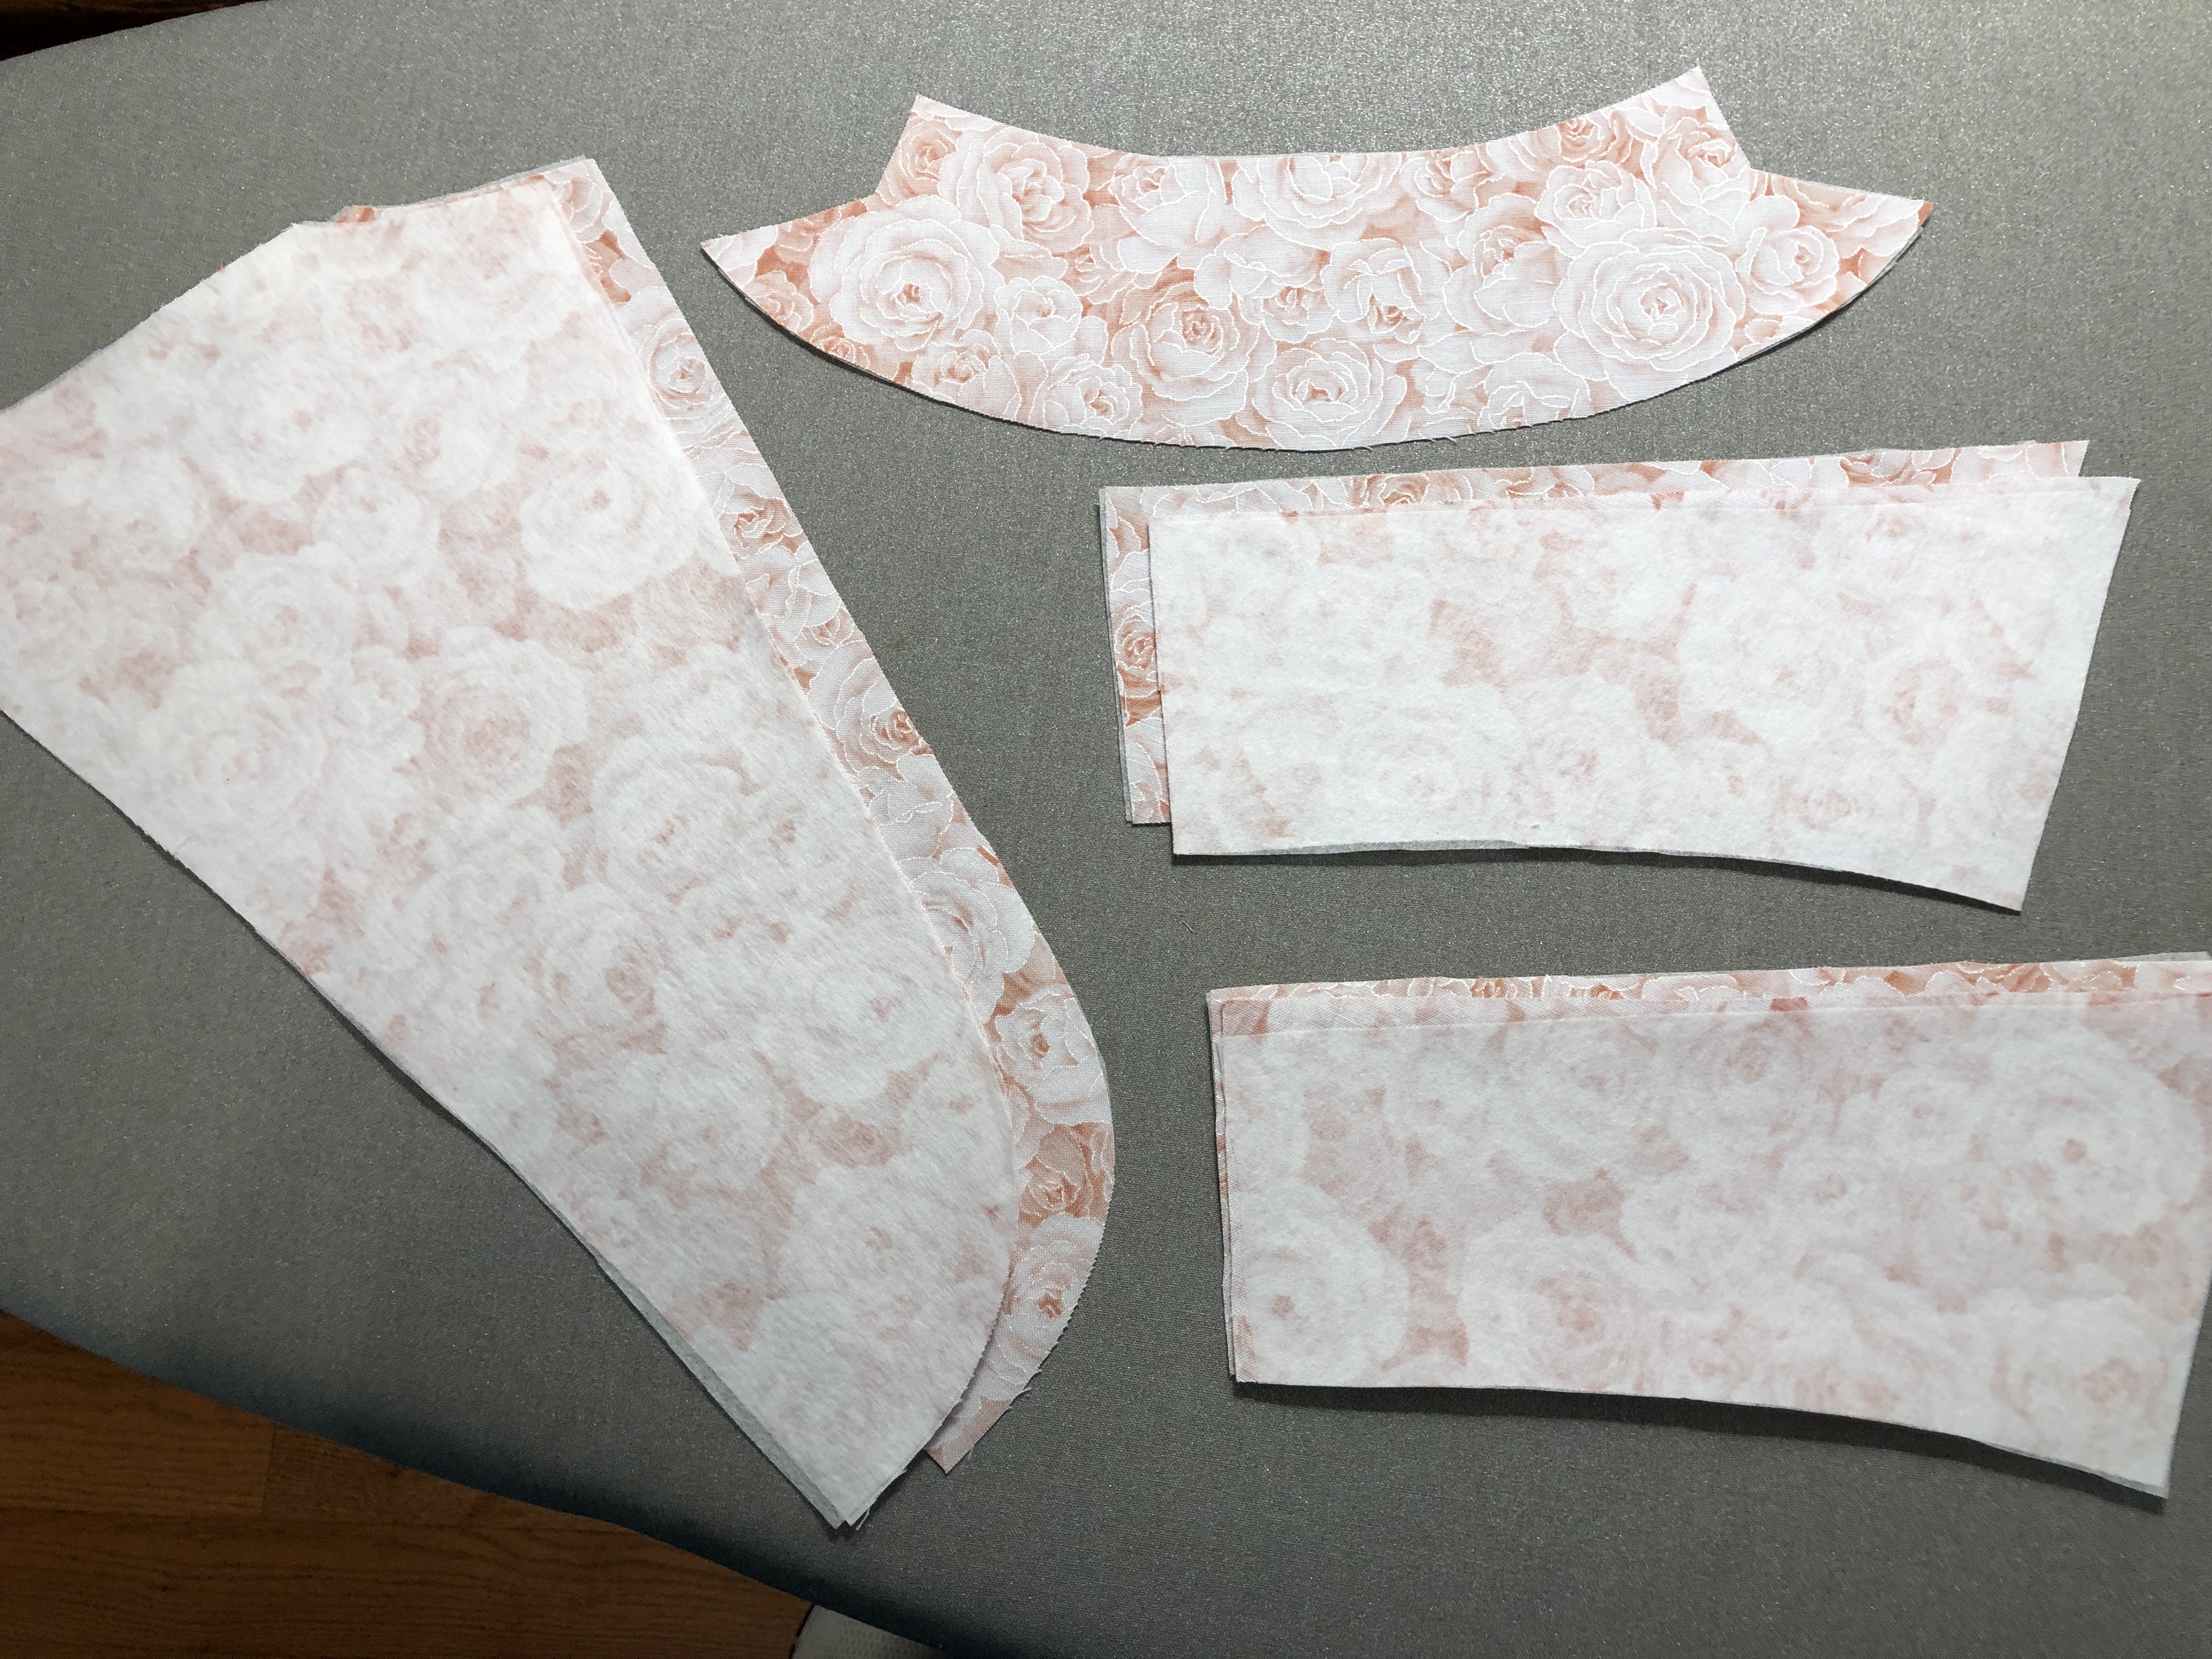
I folded the full width fabric in half and cut two of each piece at once so I was sure to have matching pieces. The extra yard I used to cut out all the little pieces, like the collar, cuffs, facings and sleeves. The length and shapes of the skirt pieces limited my choices of placement on the fabric.
Once I had all the pattern pieces cut correctly, I kept them pinned together until I was ready to use the piece. Then I transferred the various markings (like darts and circles) with pins or a pencil. All the skirt pieces looked alike without the patterns, so I think that was a wise move.
Making the Dress
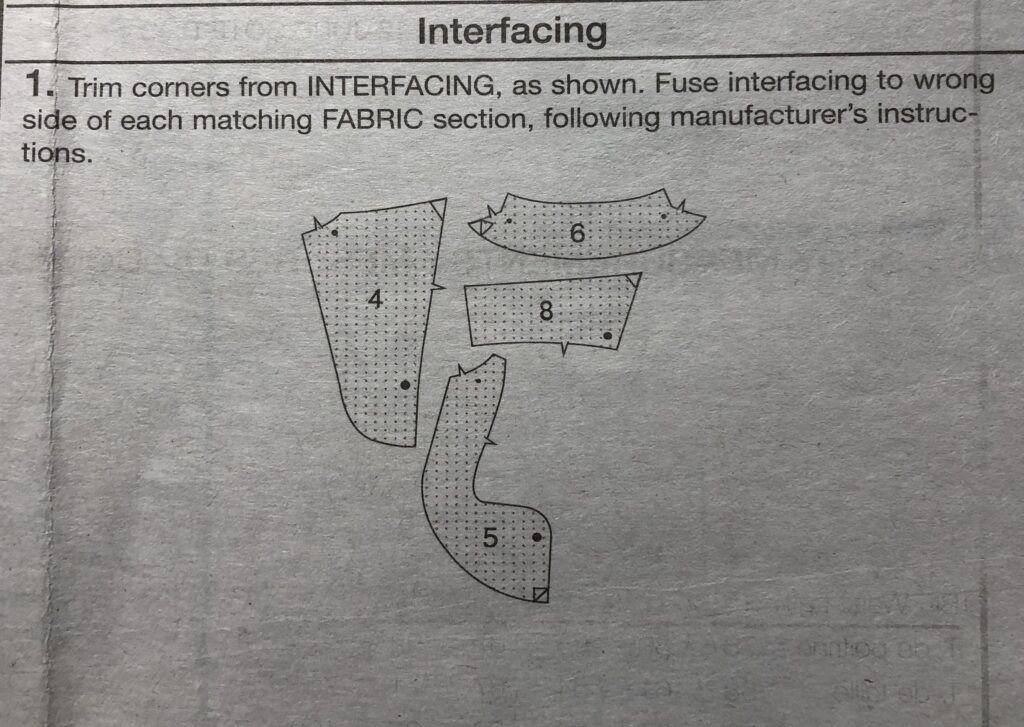
Step 1: Iron (fuse) the interfacing to neck facings and cuffs
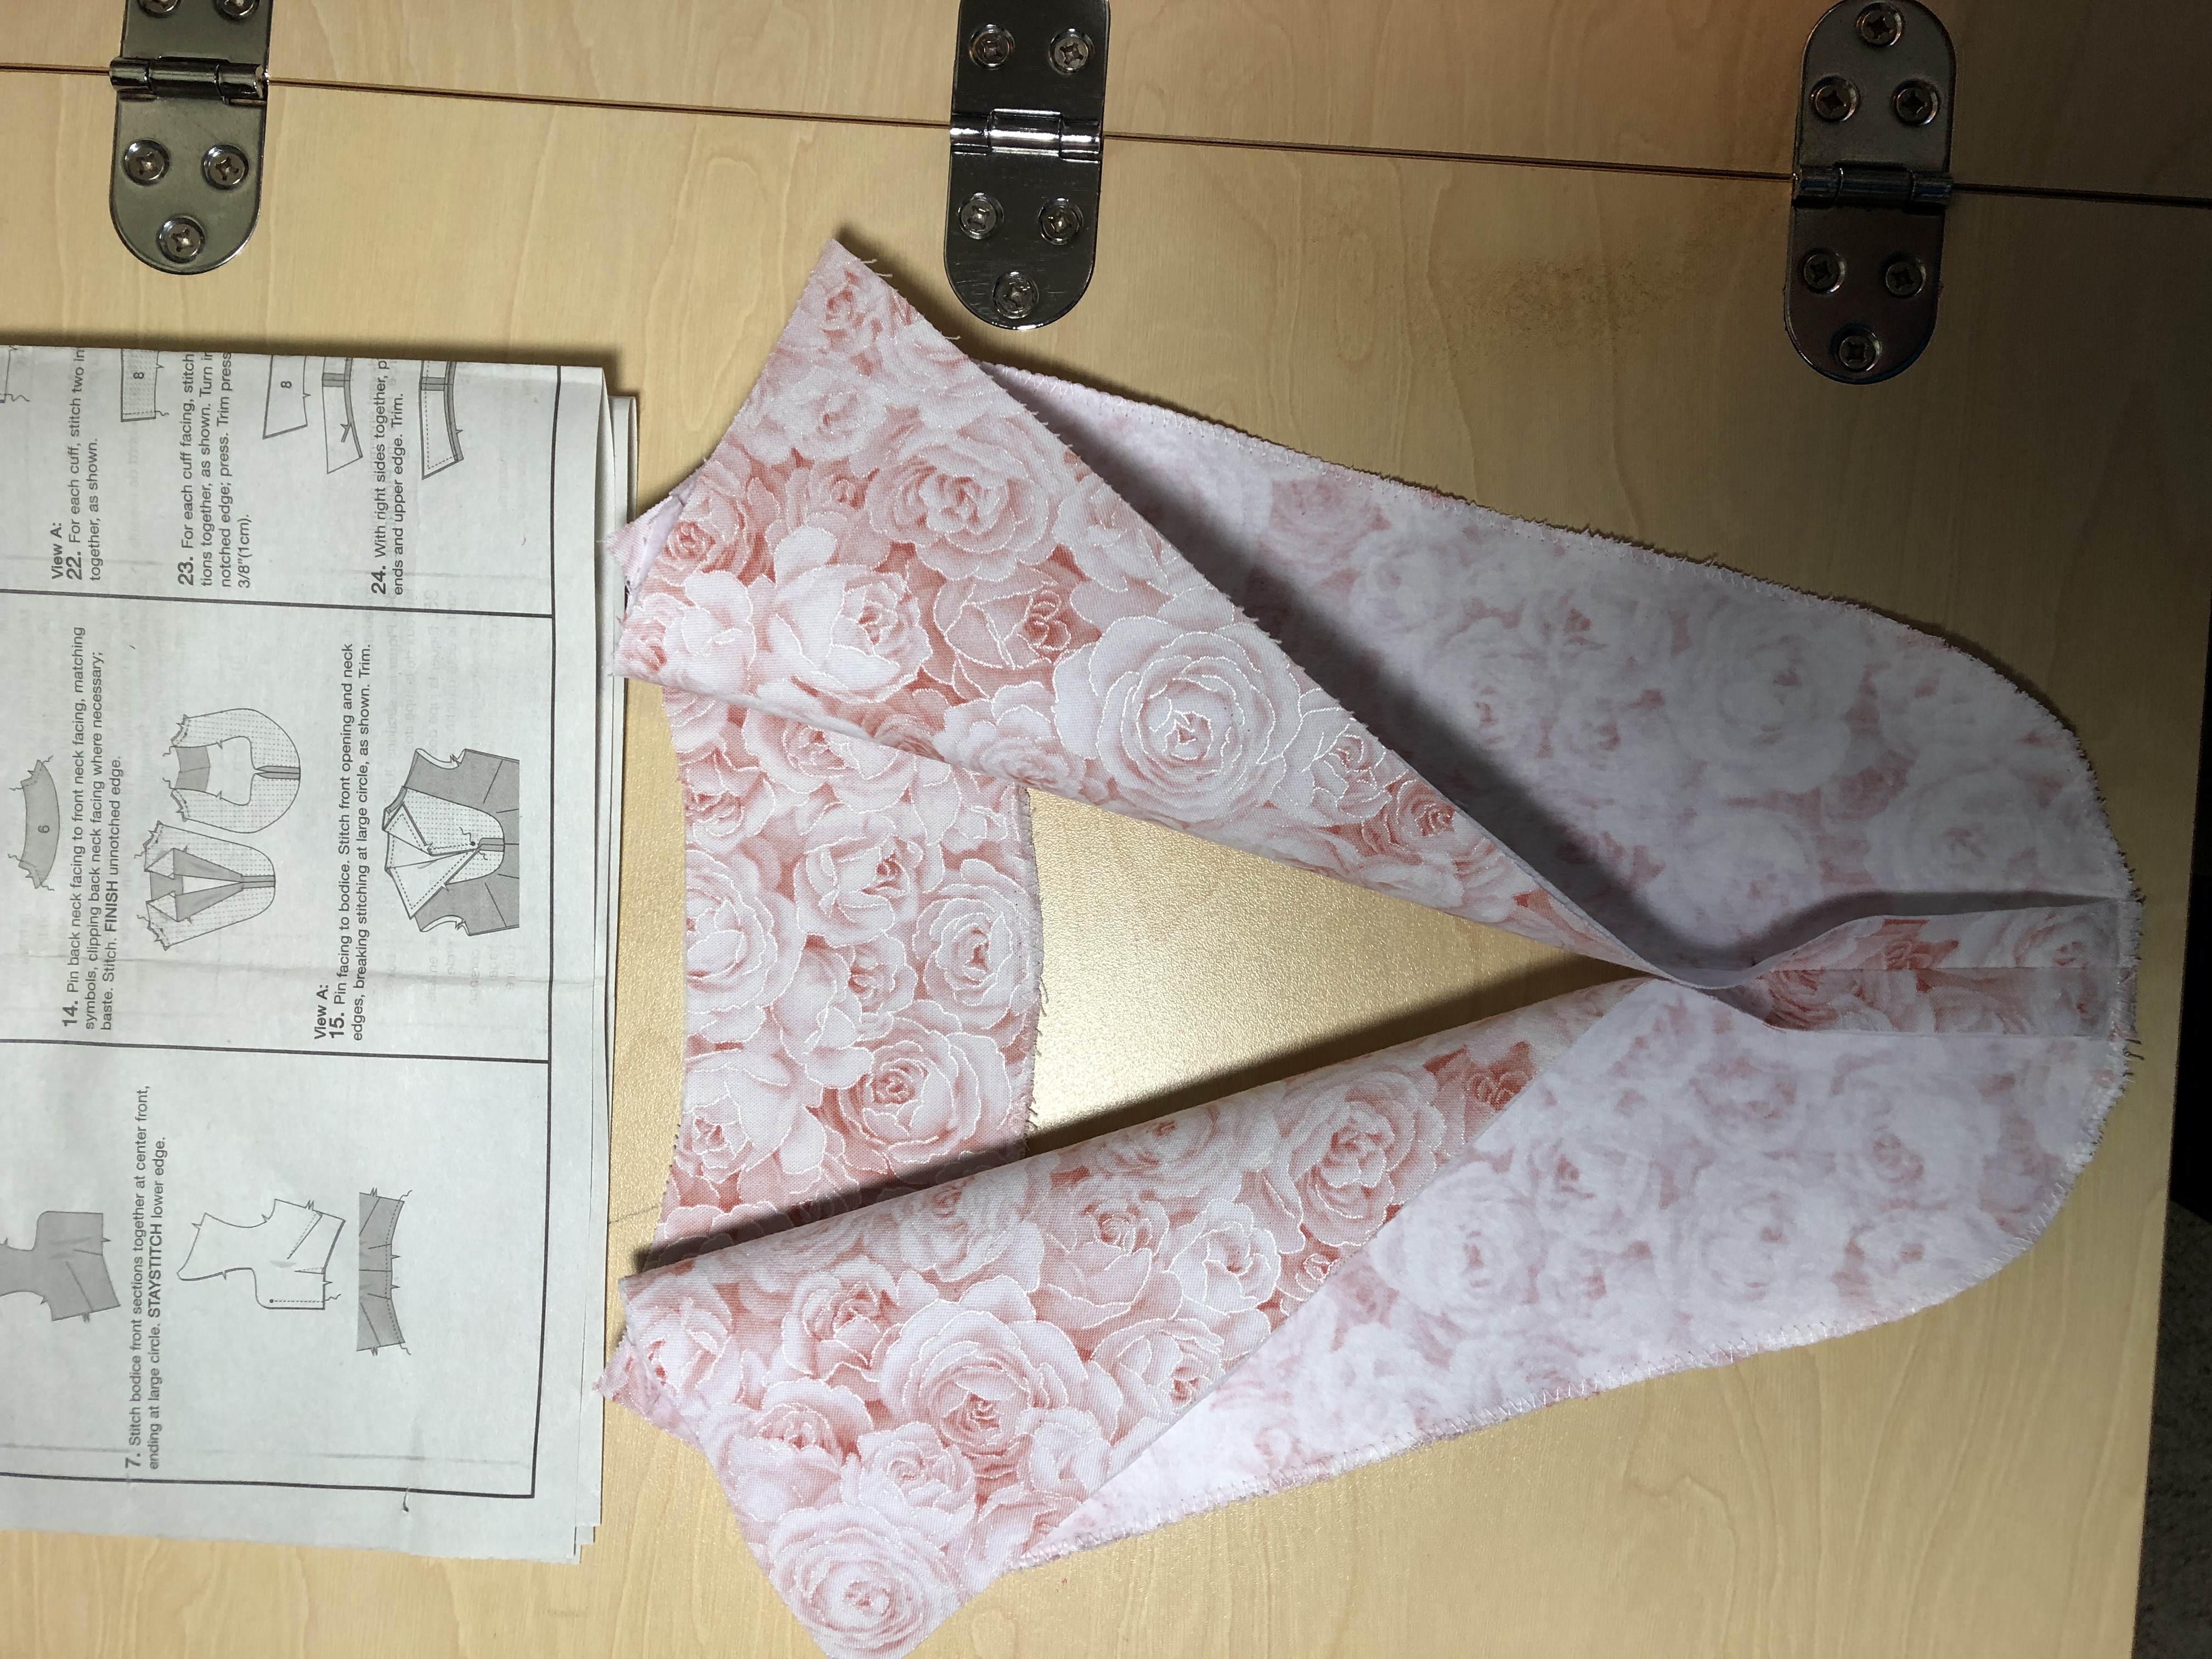
Step 2: Assemble the Bodice
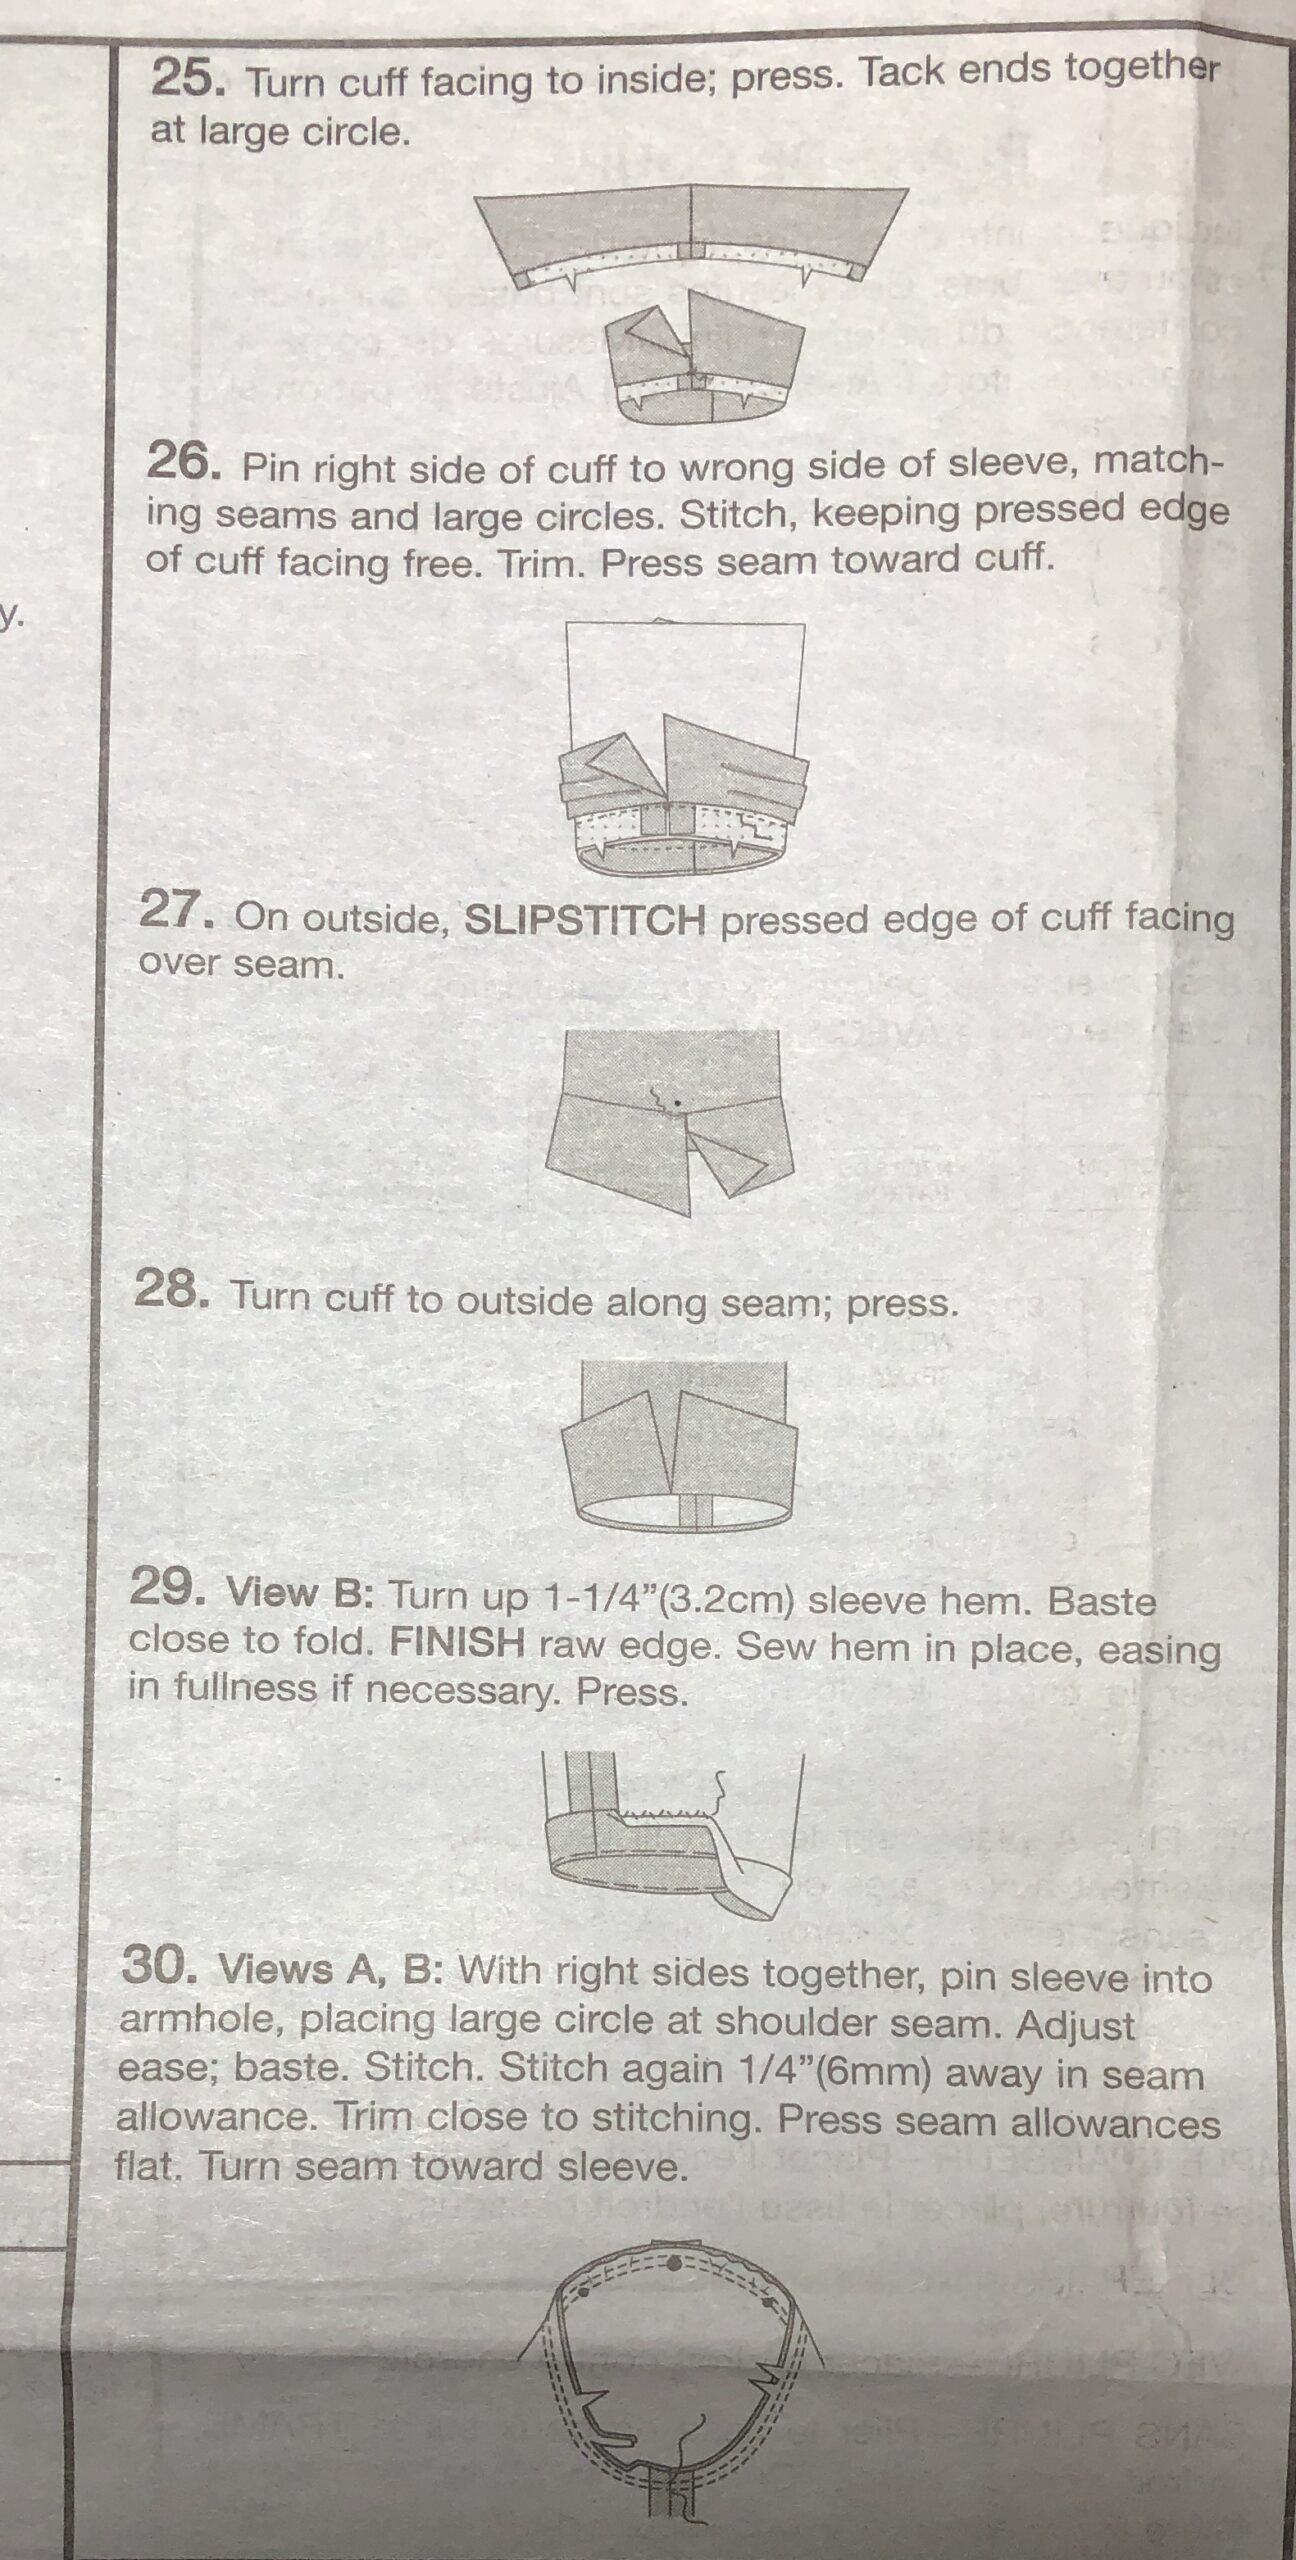
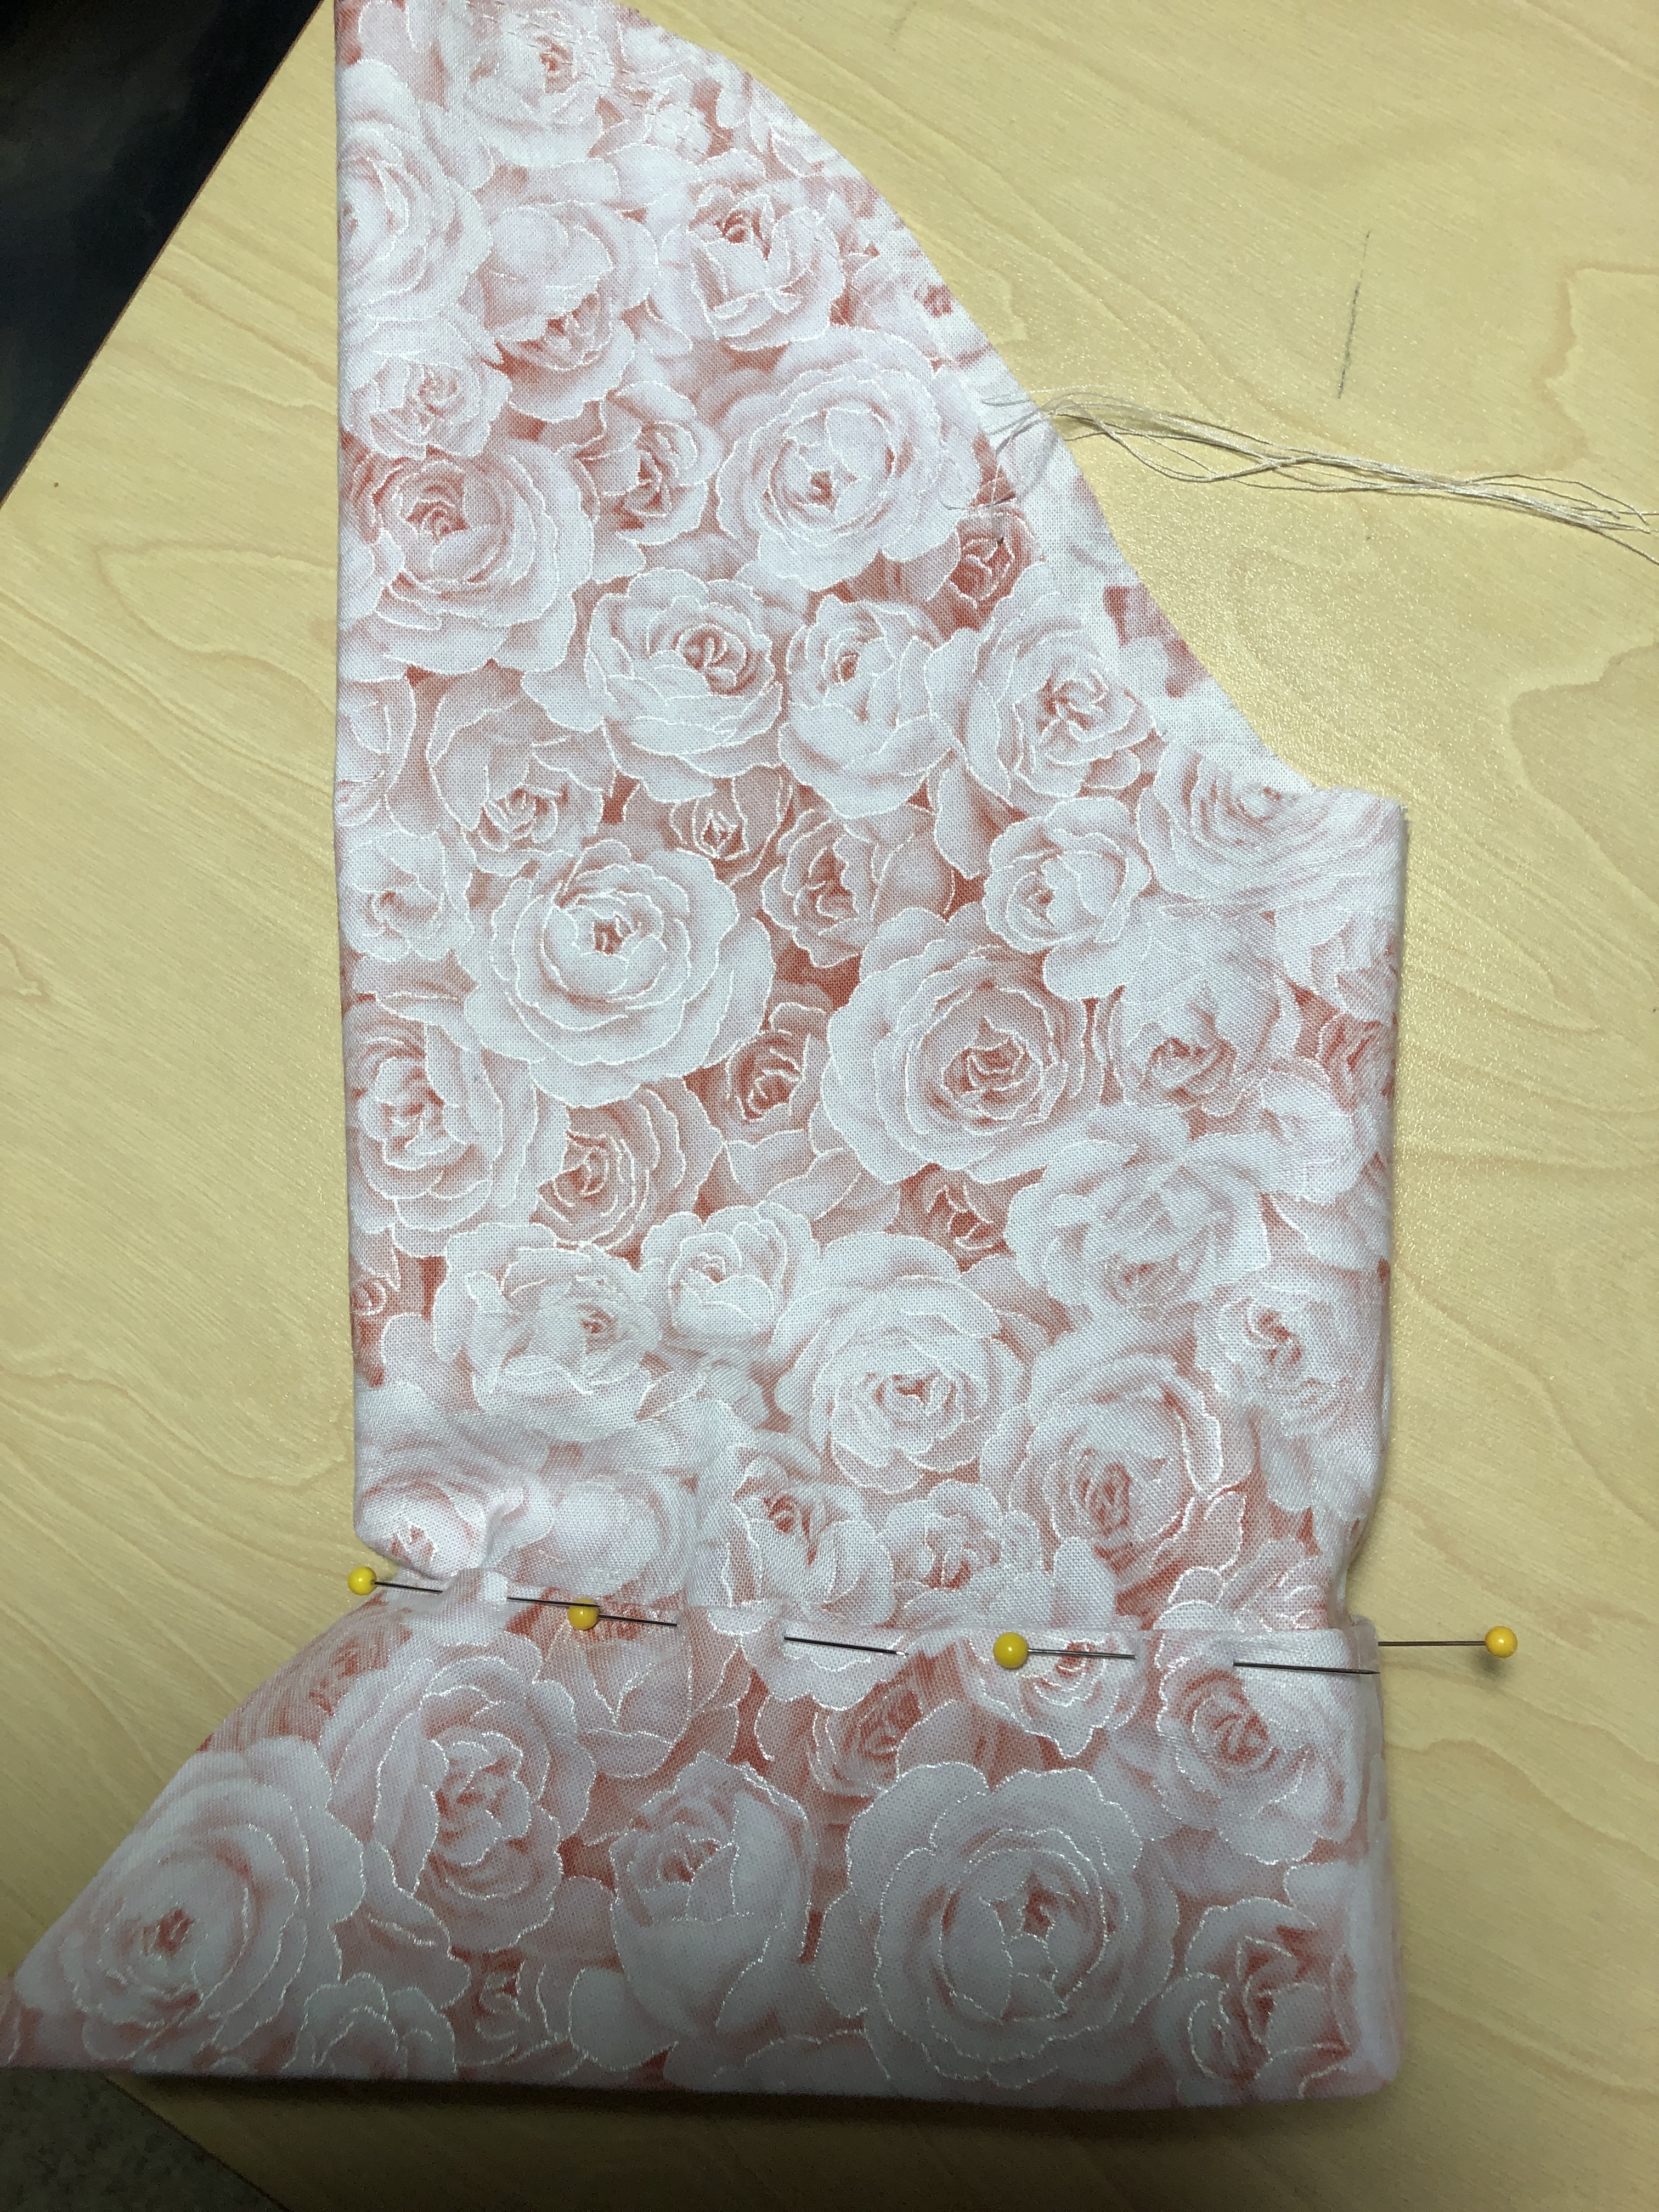
Step 3: Cuffs and Sleeves
Step 4: Sew skirt pieces together and add to bodice.
Step 5: Sew in side zipper.
NO NO NO!!!
Now I remember that’s not how to hide the zipper! Rip it out!
I only had to rip out one side of the zipper!
Much better!!
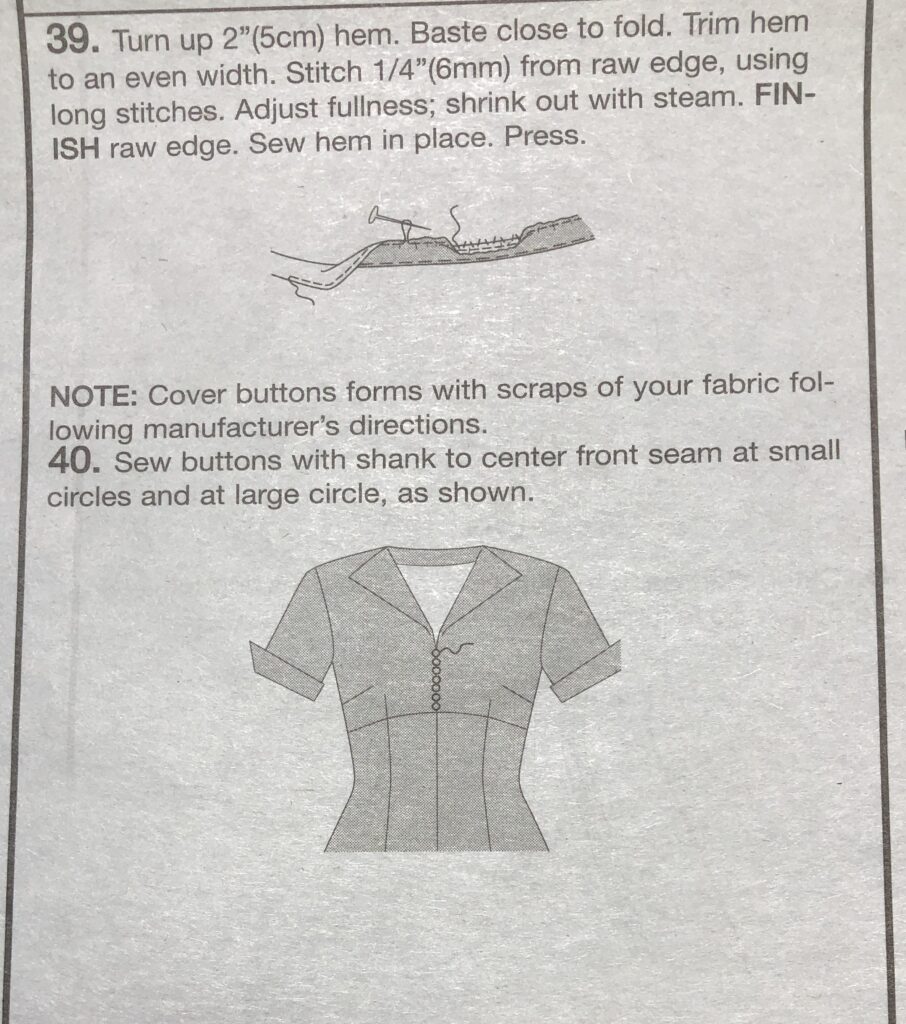
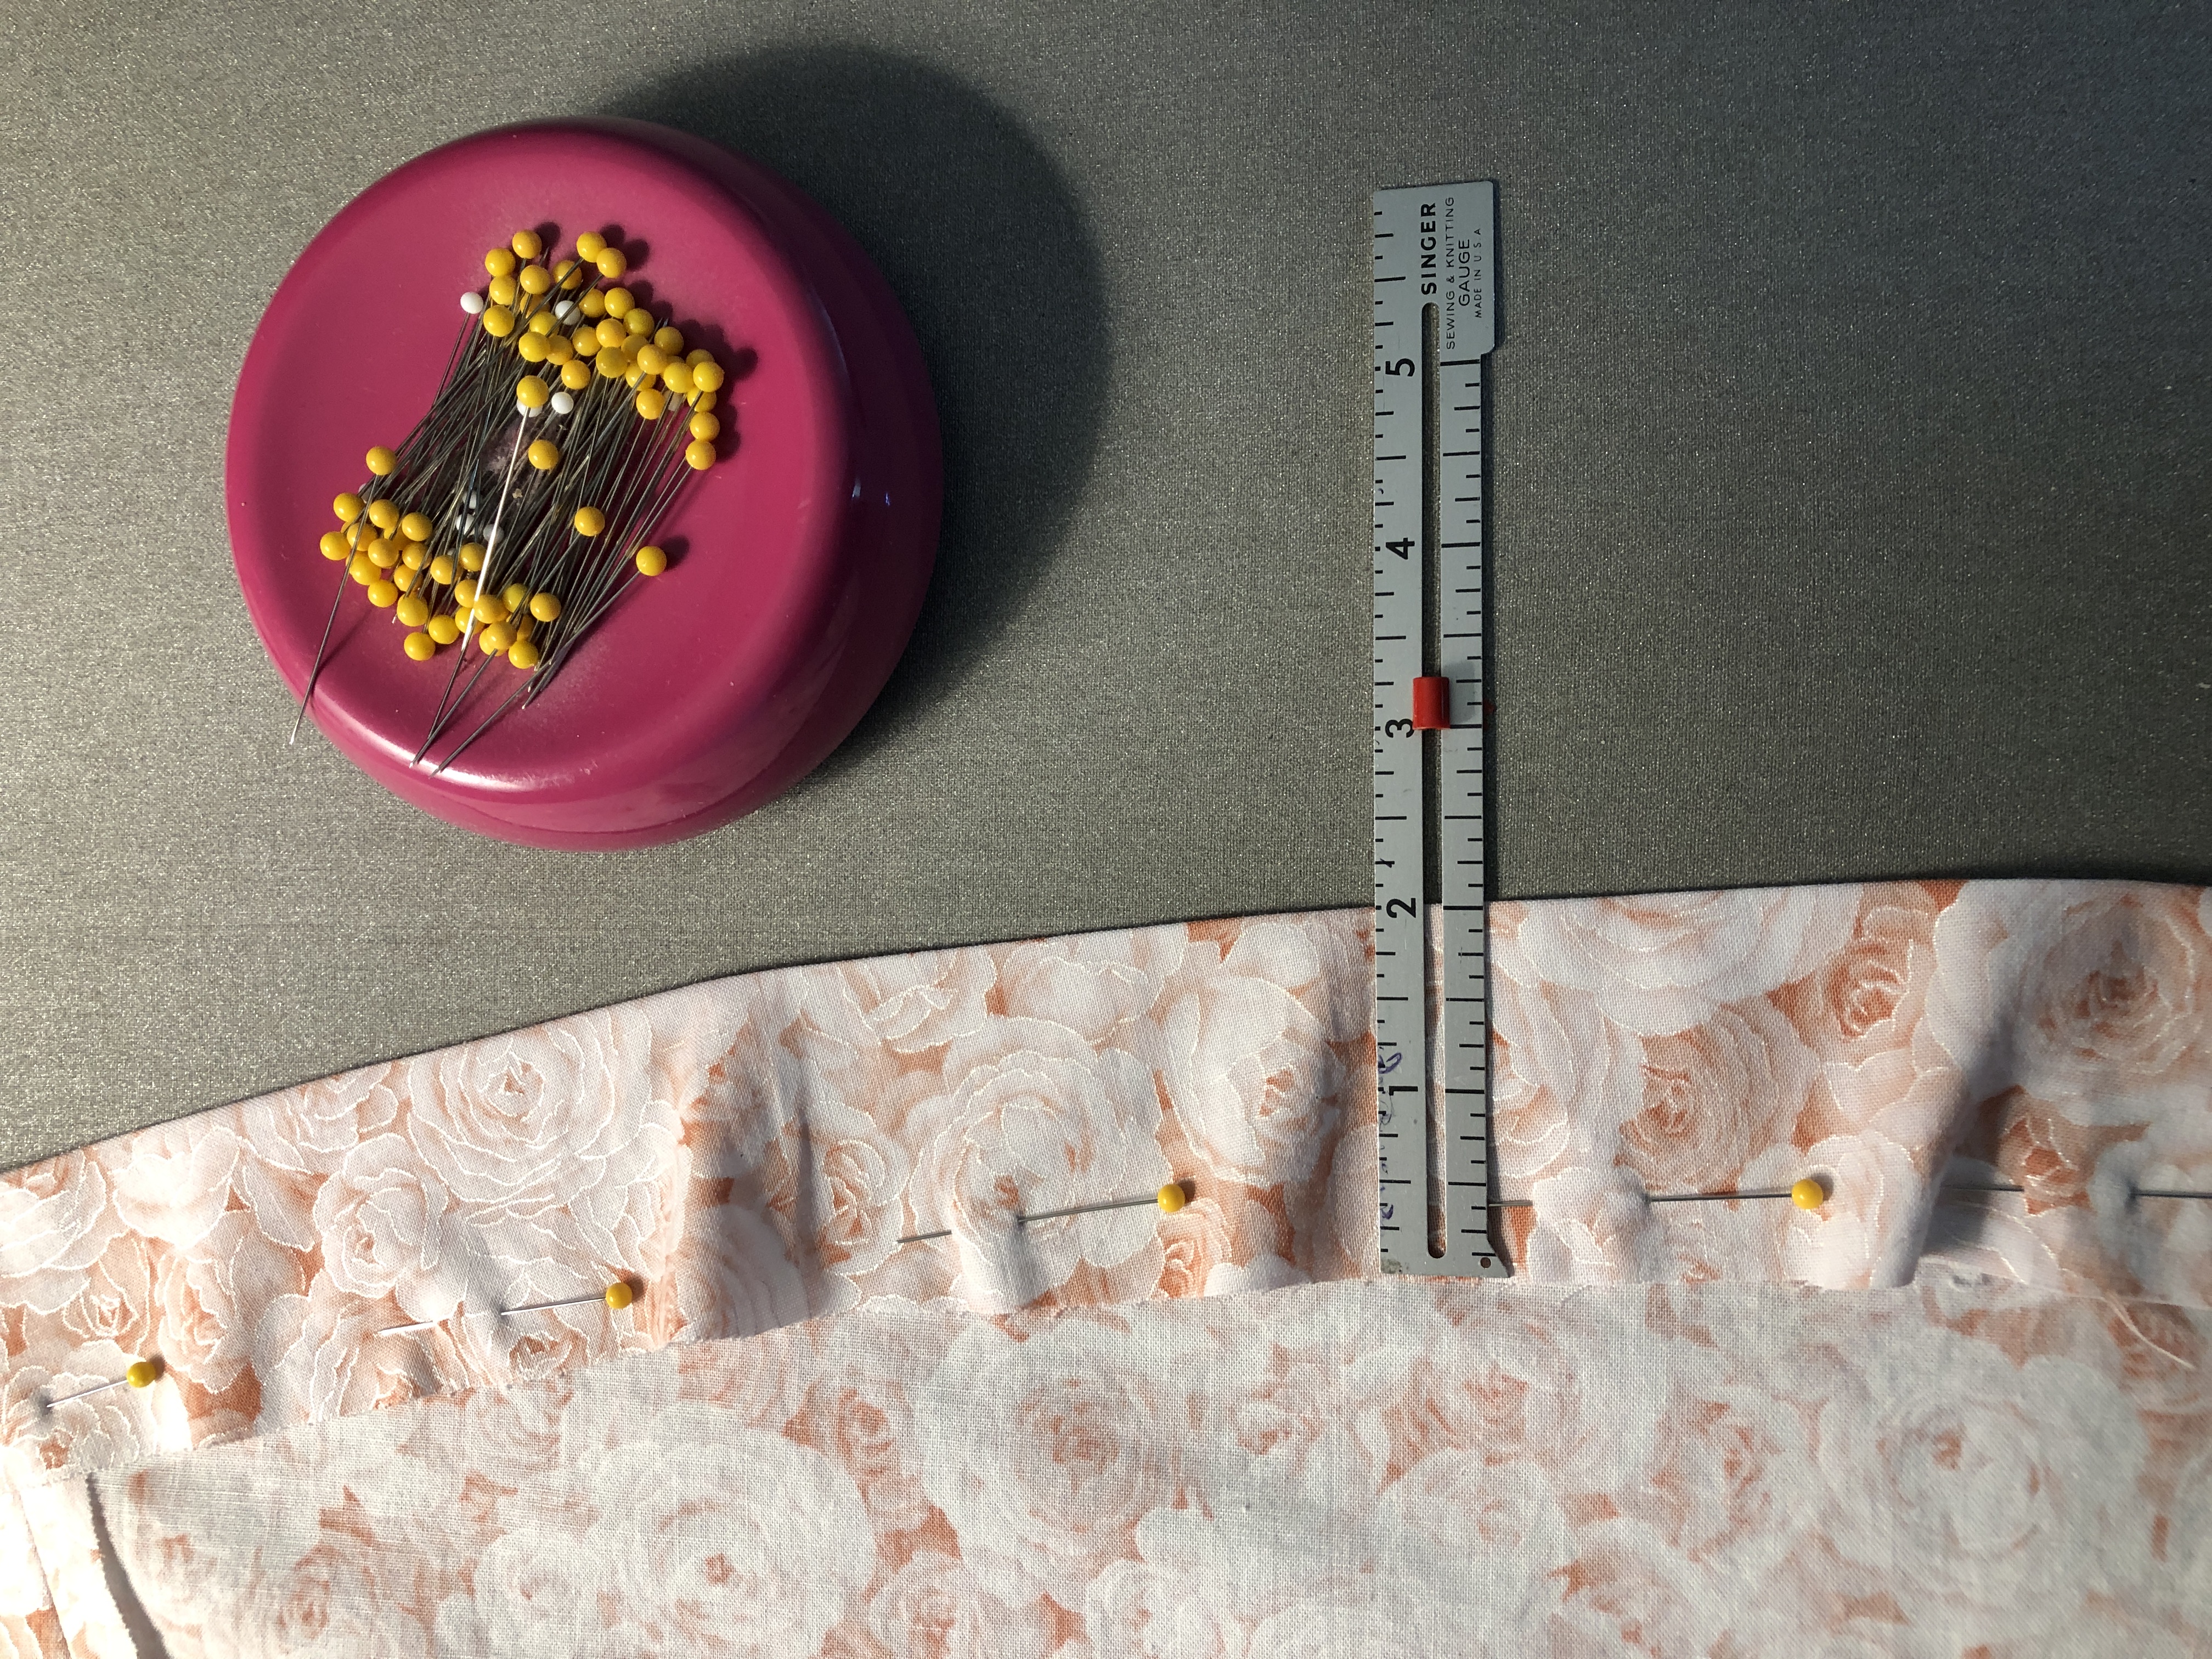
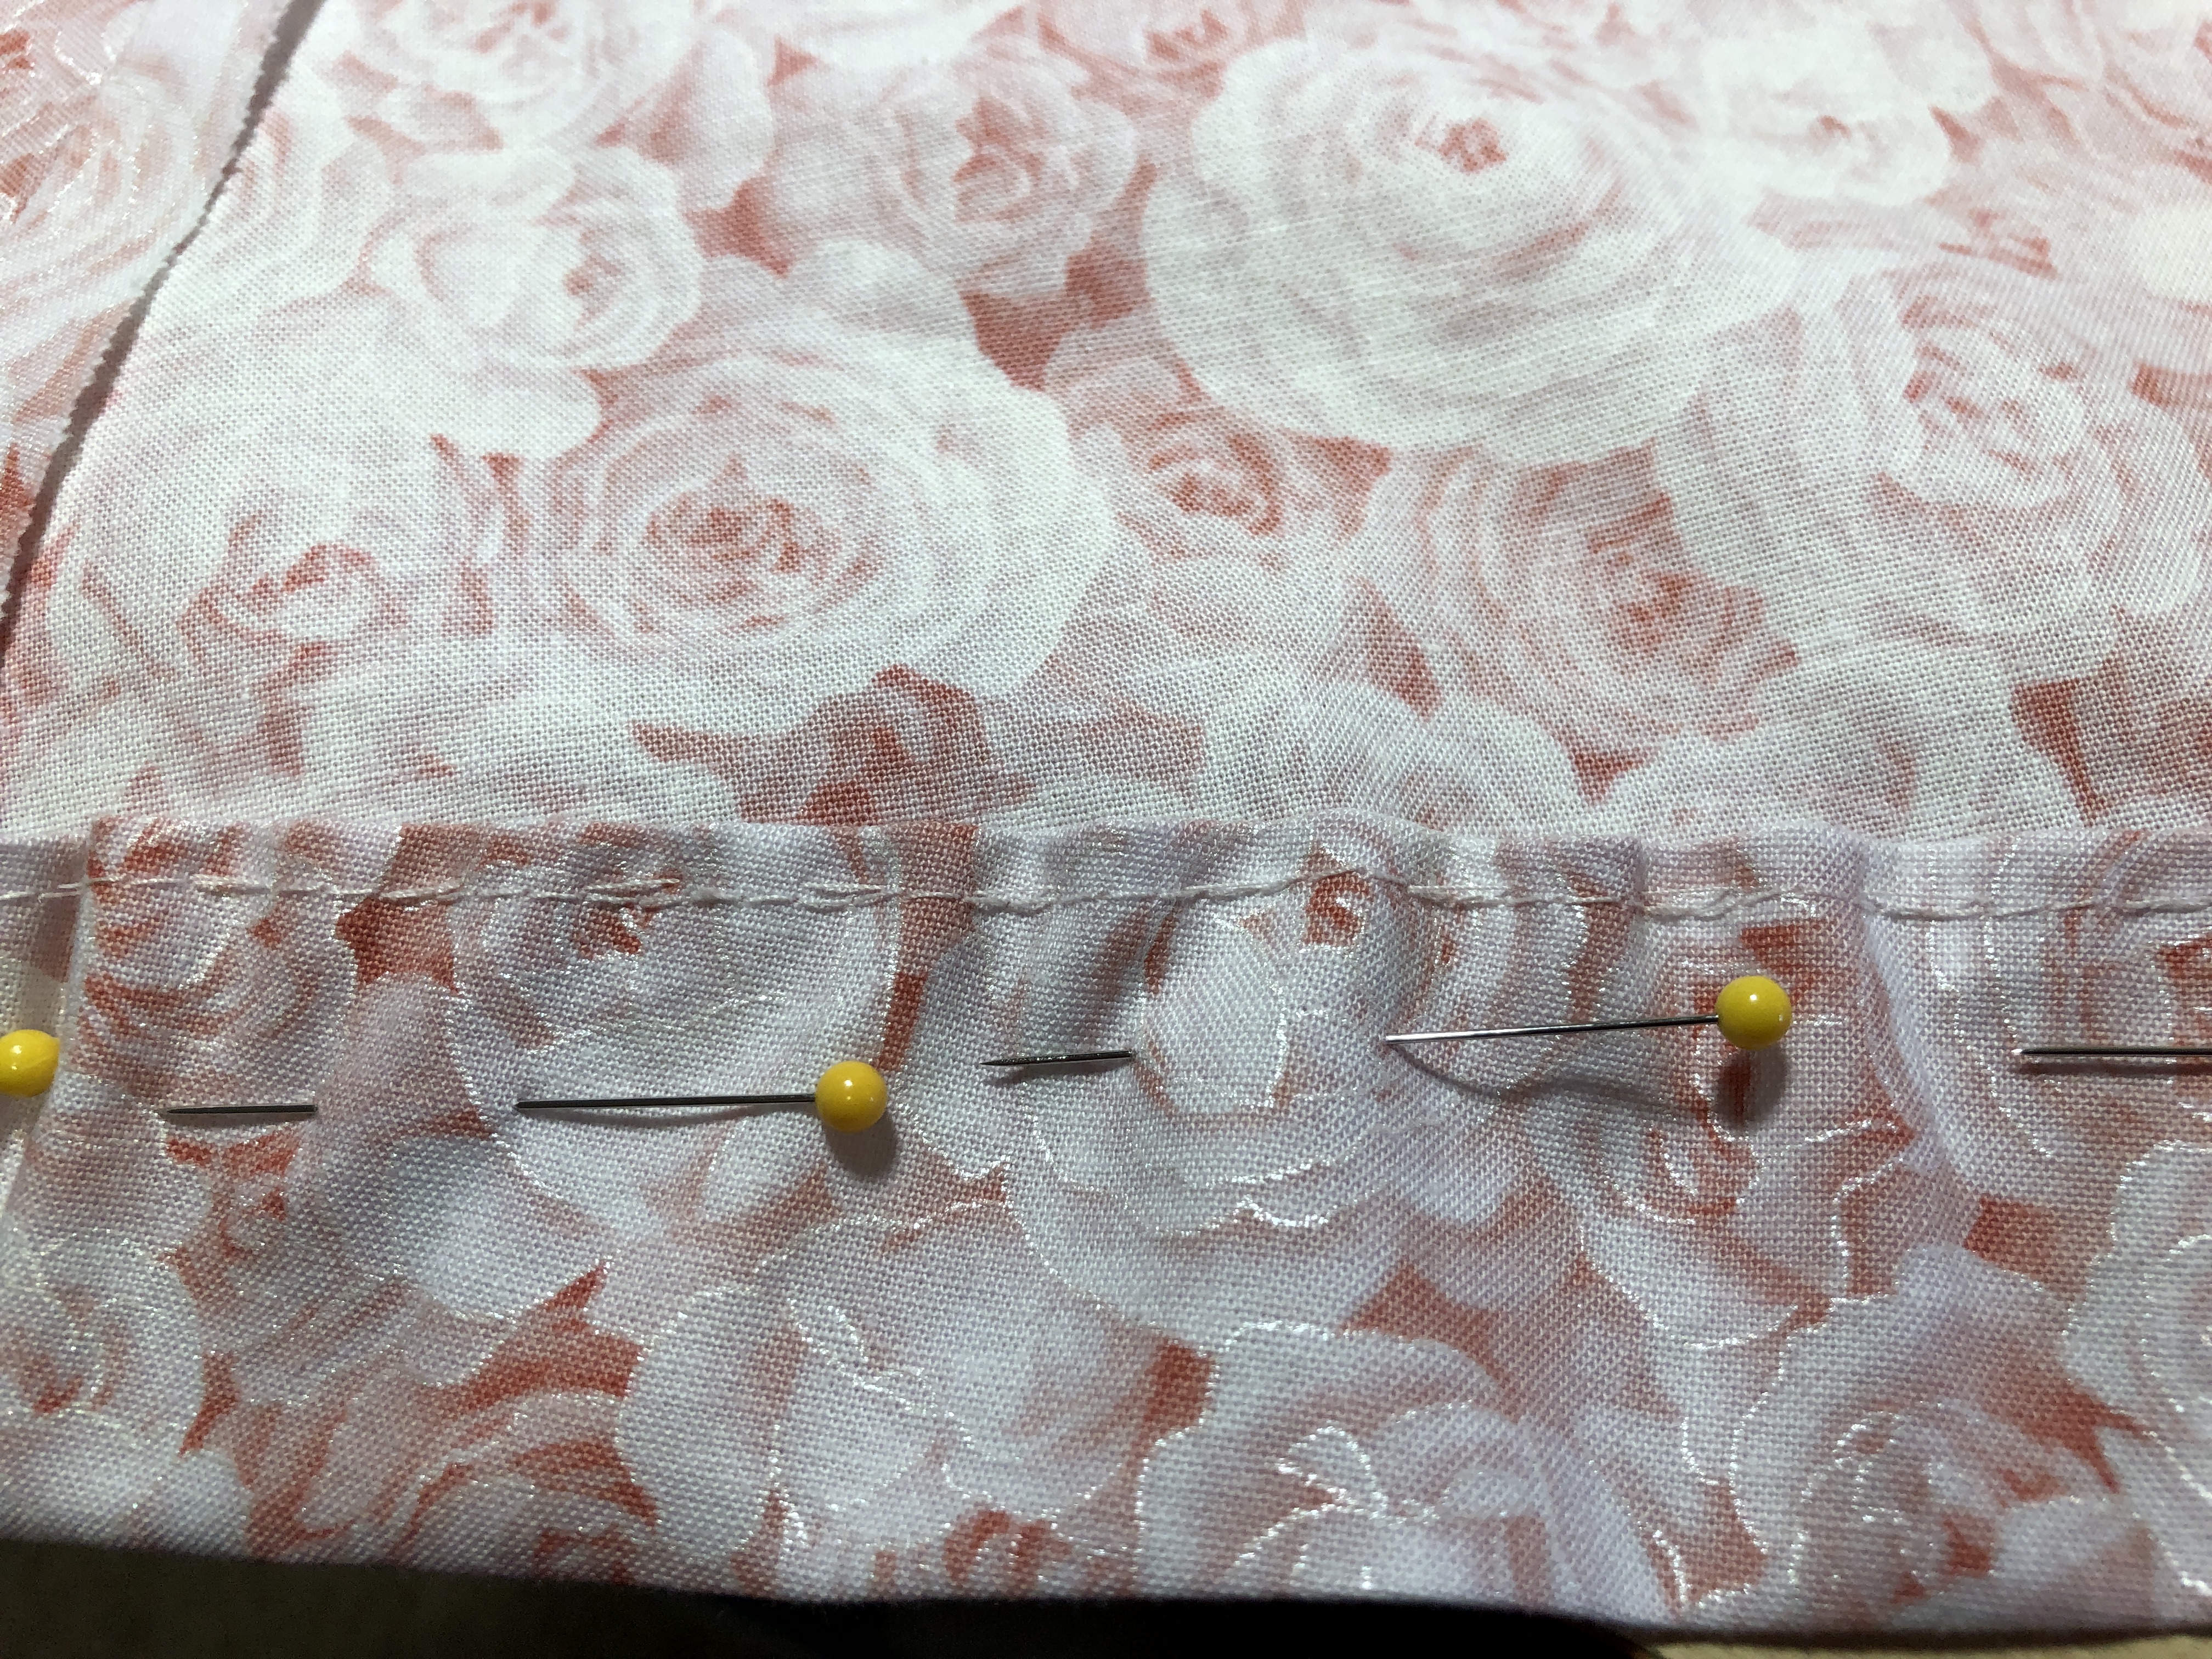
Step 6: Hem the skirt.
Instructions say to sew the edge 1/4″ with a long stitch. I didn’t make it long enough so I couldn’t pull the thread and ease the fullness. I had to make a basting stitch by hand along the 1/4″ stitching to lightly gather the edge to fit. Boo Hiss! Took hours to hem the skirt!
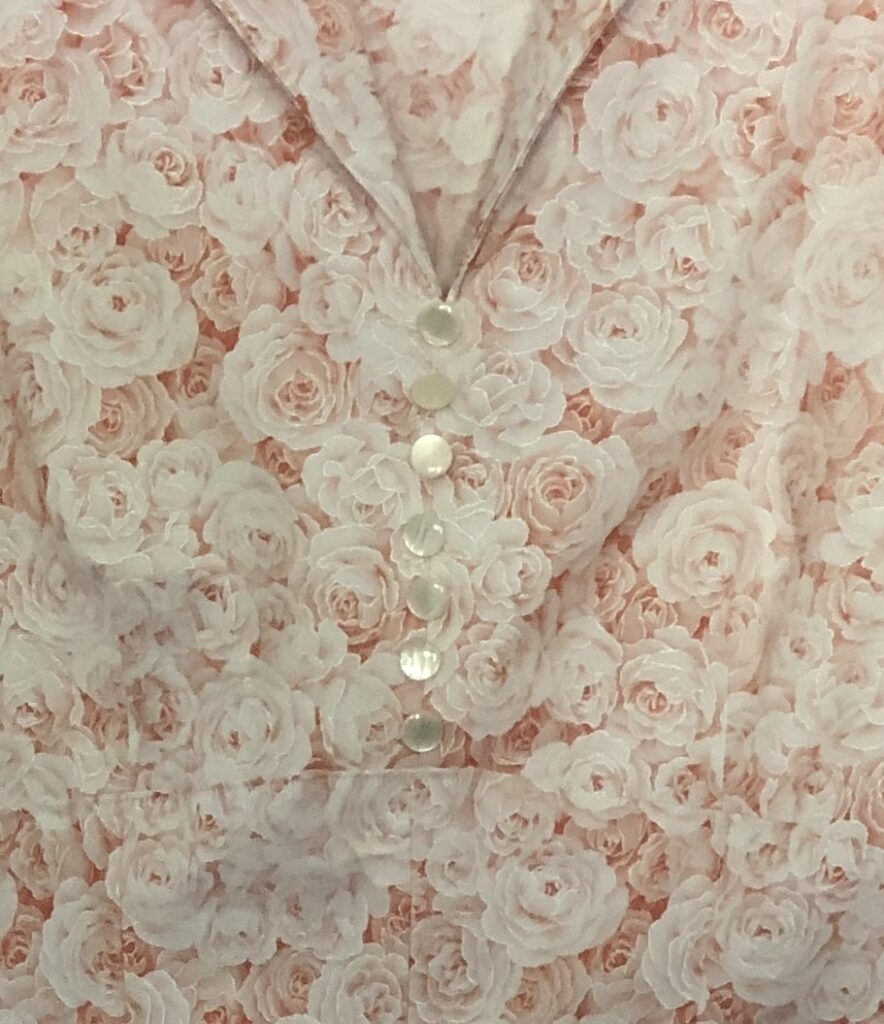
Step 7: Finally, add the decorative buttons down the front of the dress.
I carefully folded the dress up and put it in the mail to my granddaughter in California! I have no idea if it will fit! We agreed that this first dress was an experiment. Alterations may involve her sending the dress back to me. Or…it might make a good Halloween costume for someone!?!
I’ll have an update in the next week or two! Enjoy!
Spending time with my 17 yr. old granddaughter during her family’s visit this month was a wonderful way to get to know her. I was especially interested in talking with her about her hunt for vintage clothing. I took her to the local antique co-op to check out a few racks of clothing on display. I was curious about the styles that appealed to her and finally took her to JoAnn’s to look at patterns. She was able to point out various dresses and fabric designs that looked interesting to her.
So, of course, we picked up a pattern and fabric. I agreed to make her a dress! The next post will be the details about that!
Because the pattern was labeled Retro ’52, I knew I needed to understand the definitions of “antique”, “vintage” and “retro”. This is what I found.
Antique: At least 100 years old
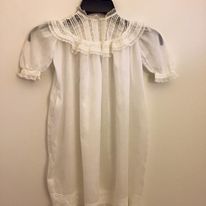
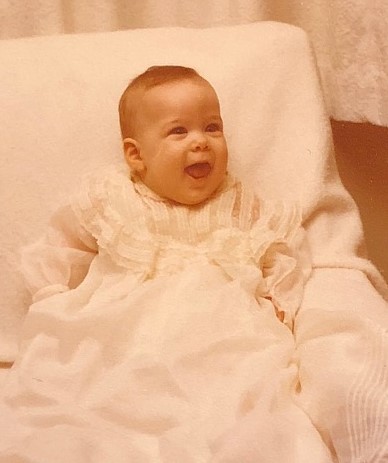
The only “antique” clothing I have saved is the Lowry family baptism dress, worn by my mother in 1912. It has been used by various babies in the family over the last 100 years.
If you want to buy vintage clothing, look in shops that have vintage in the name or description or in second-hand shops.
The most important piece of information I found is a word of caution about sizing! Women’s dress sizes have changed significantly over time. I measured my granddaughter. She said she buys size 6. When I looked at the pattern where it lists measurements, I needed to make a size 12 for it to fit! I’ll make the size 12 dress…then we’ll see if it works for her. Too bad she lives in California…I think we may be mailing the dress back and forth until we get it right!
Clothing that has been made recently with the intention of imitating the fashion of the past is considered “retro”, thus the label on the pattern we chose…Retro ’52.
I recall making clothing during the 50s and 60s so just reading the pattern was enough to give me heart palpitations! Cotton fabric (no stretch), fitted sleeves, side zipper!! Yikes! I had forgotten even how to read a pattern this complex!
My granddaughter and I agreed that this first dress would be for “practice” in case it didn’t turn out, or fit right, or I messed up. I’m still working on the dress and hope to post the details in a few days.
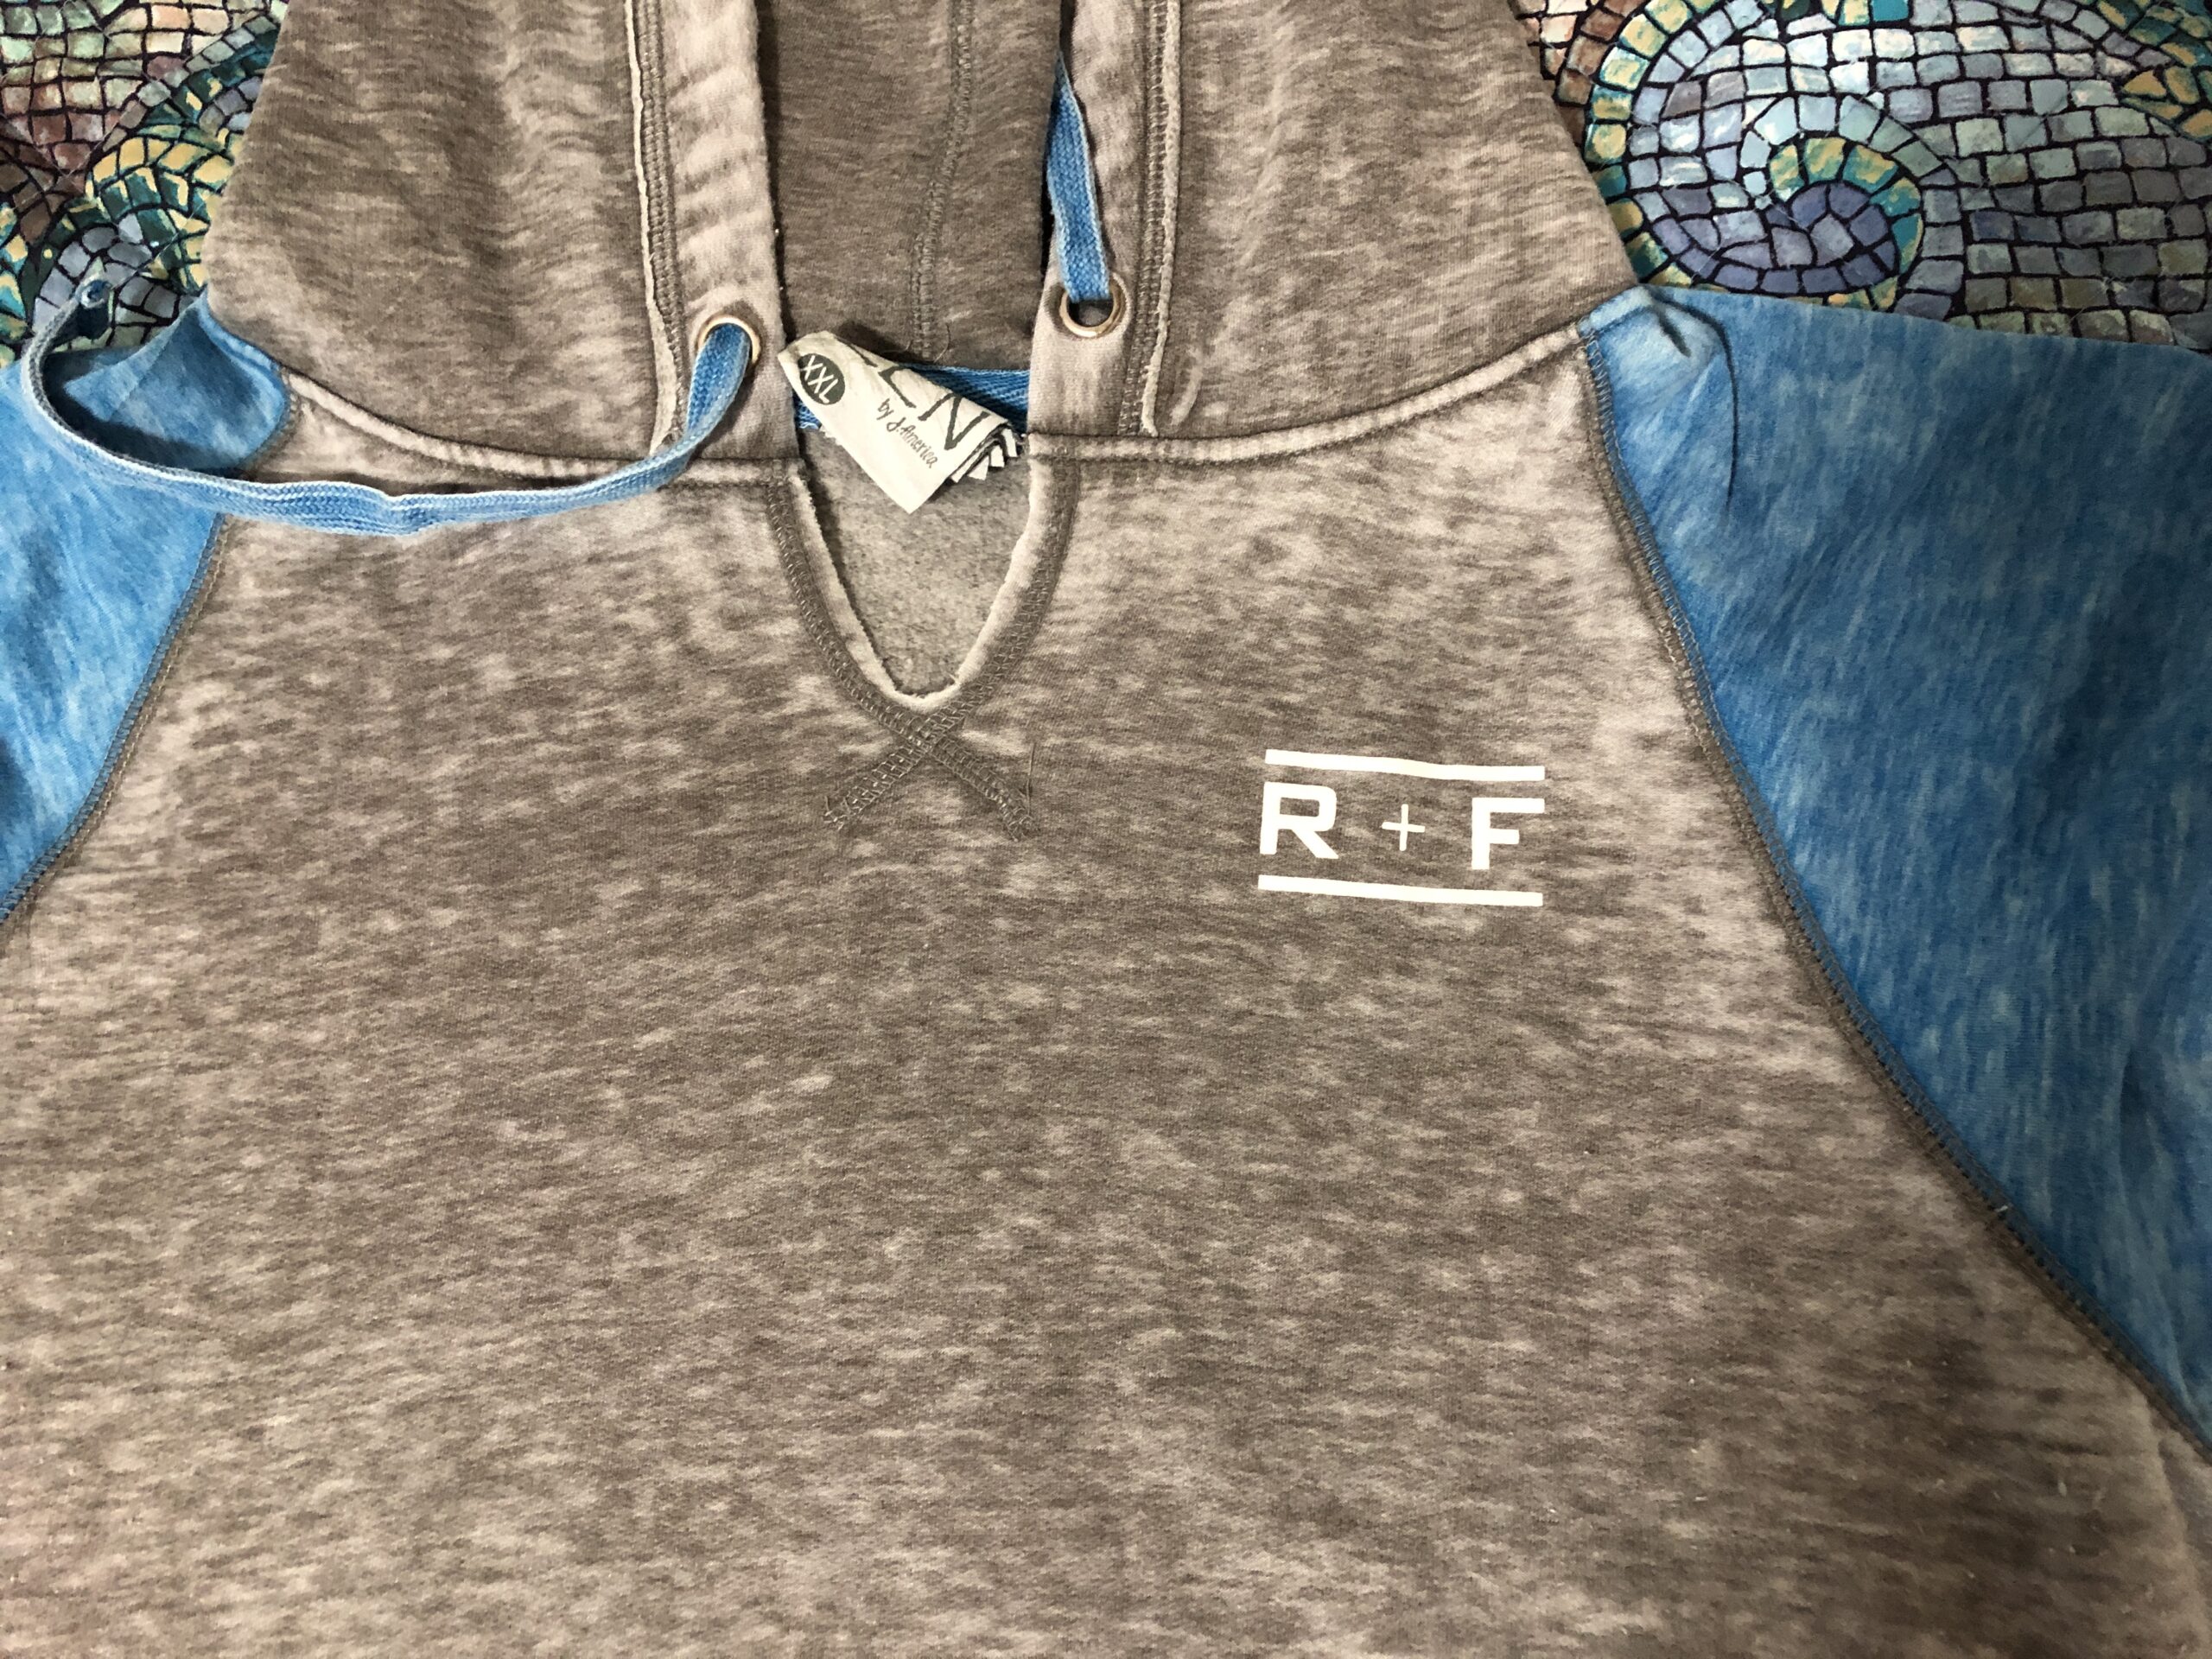
Do you have any shirts or sweatshirts that you like but don’t wear because of a small company logo prominently displayed on the front, back or sleeve? I’m not talking about a giant picture, cartoon or saying that you chose to buy and wear. I’m talking about smaller company logos like a company or bank who sponsored an event and provided a shirt to a group of participants.
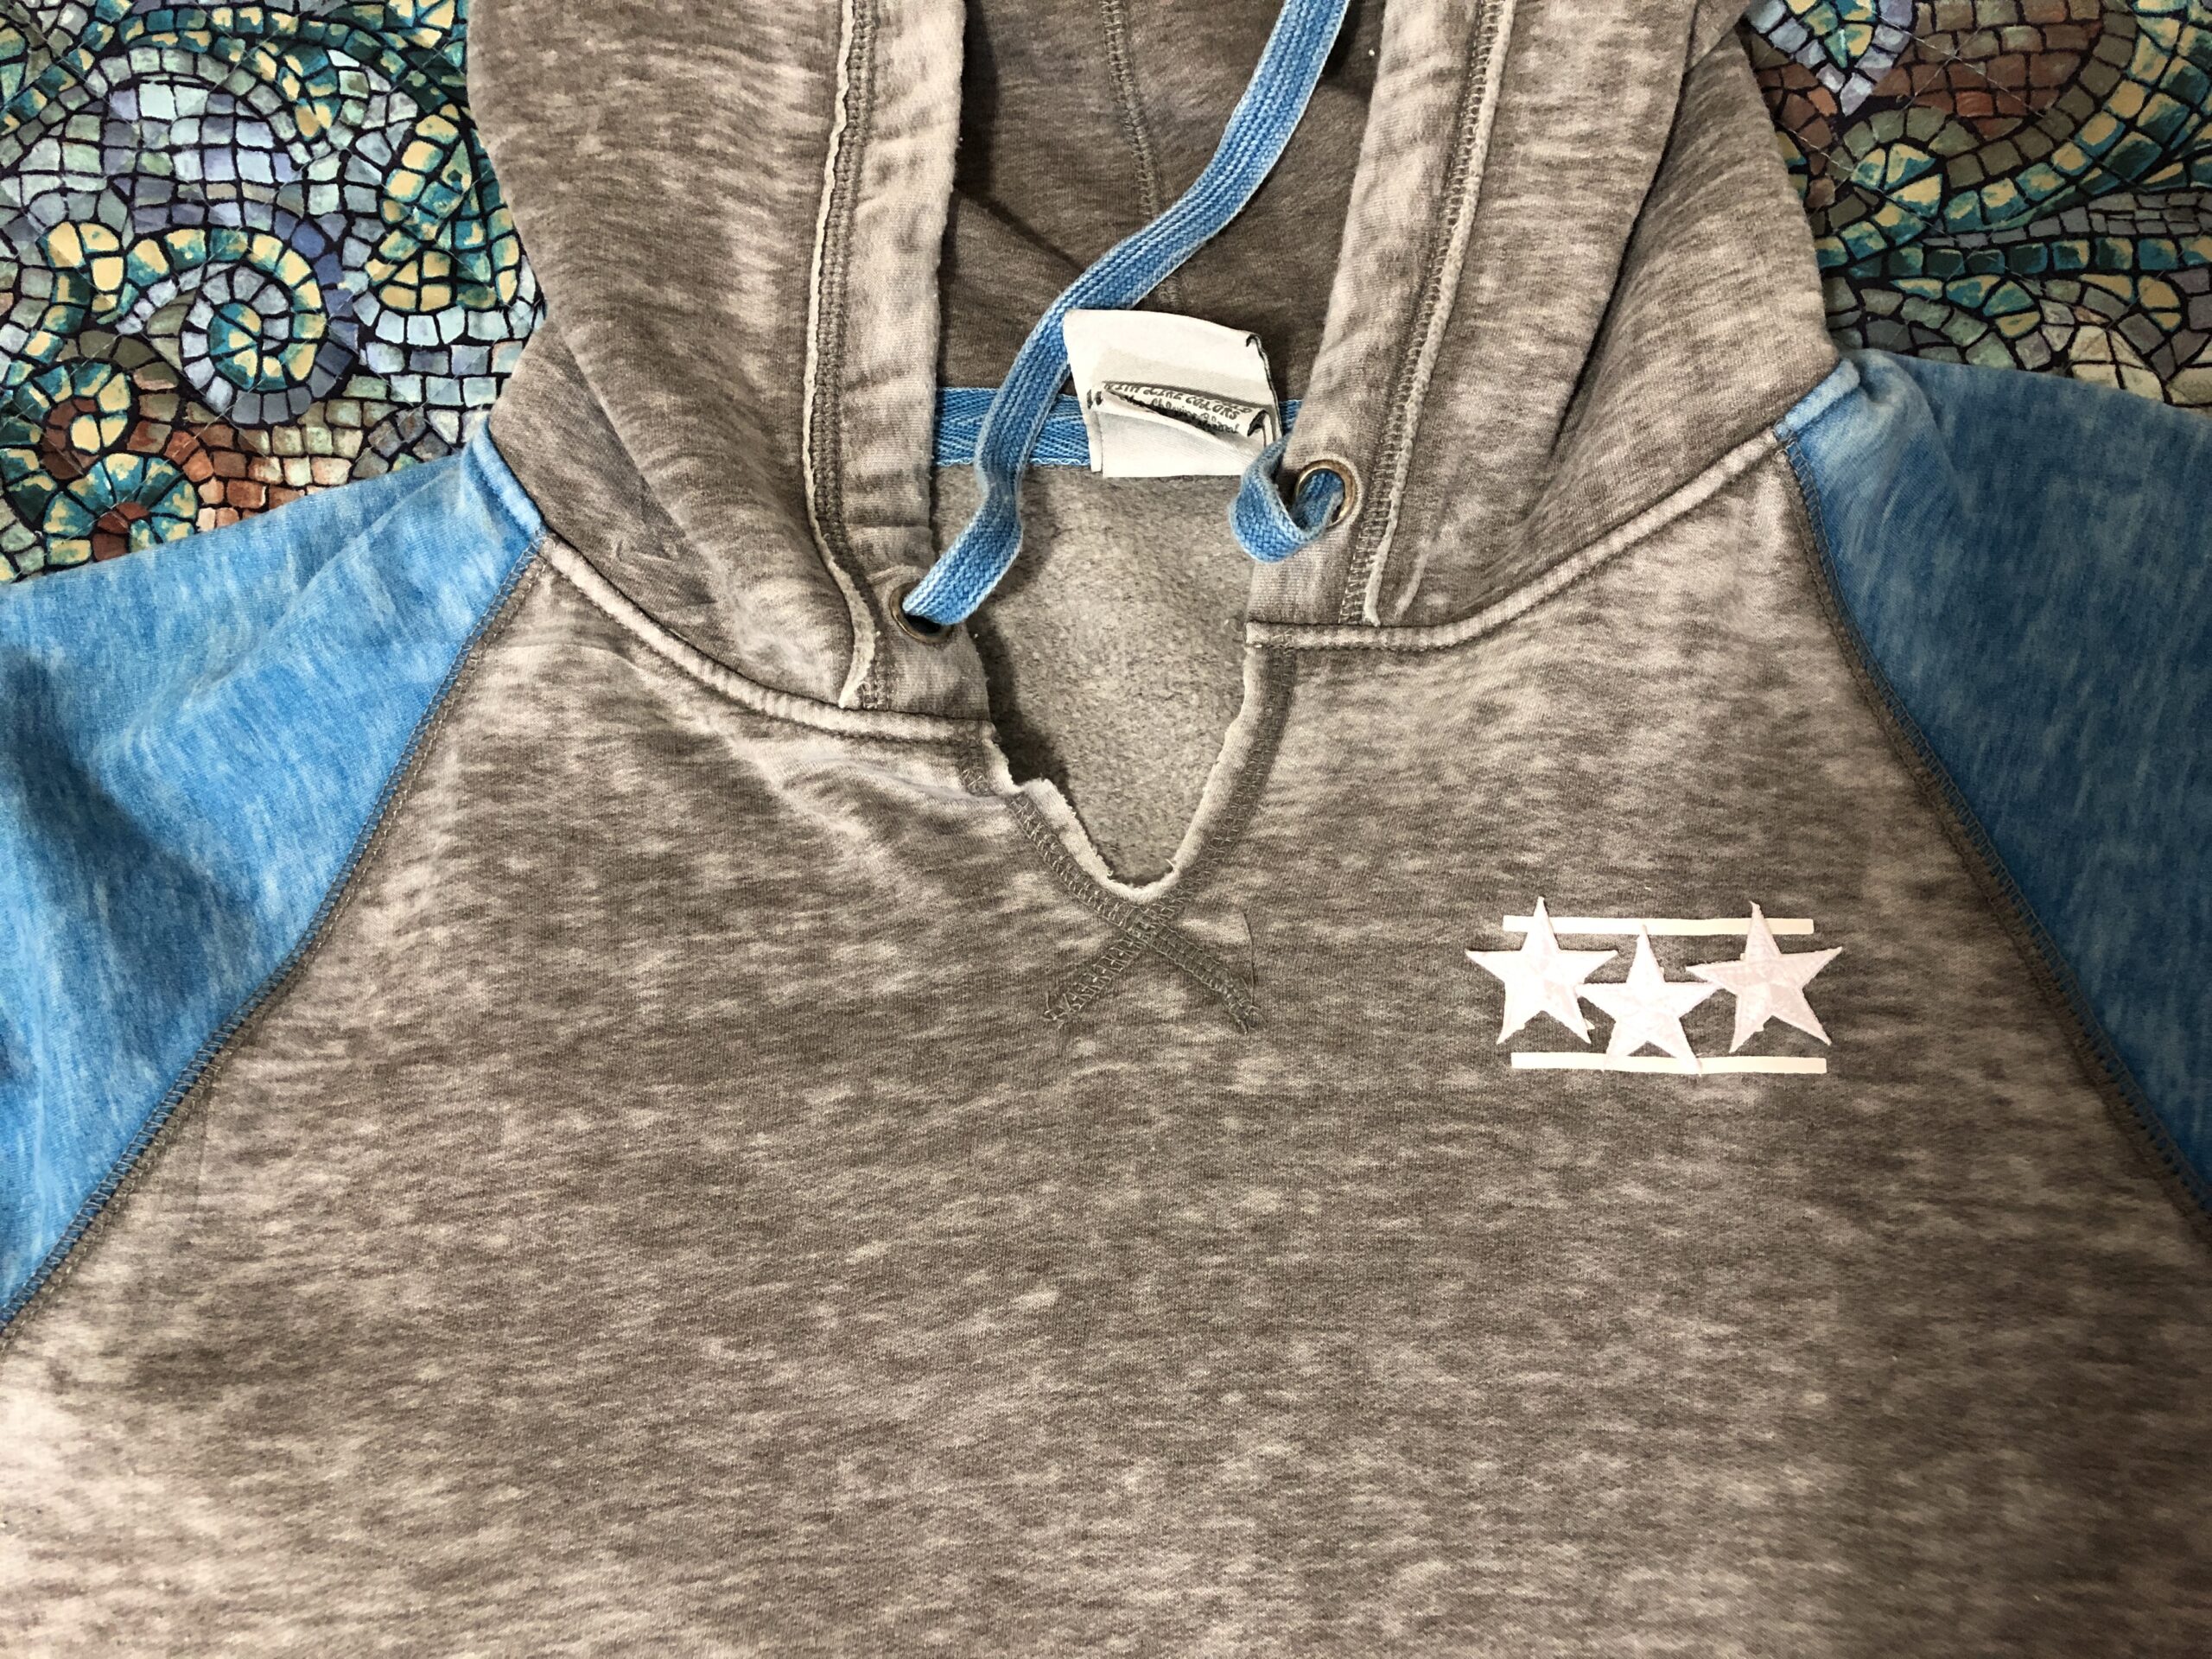
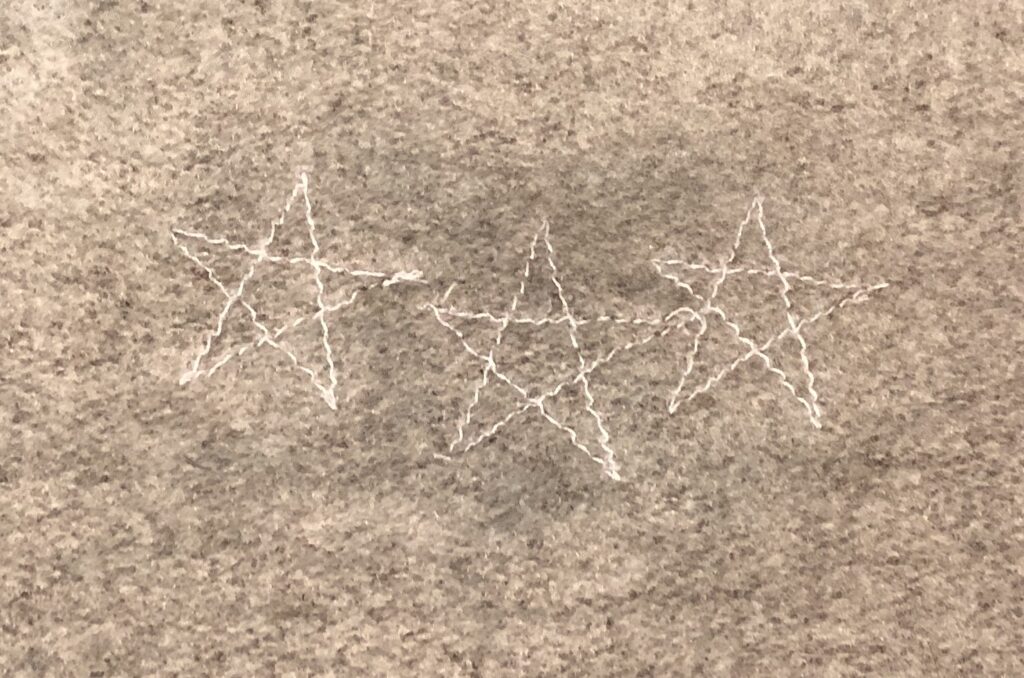
My daughter gave me the sweatshirt below, asking if I could do something to cover the company logo. I first thought of a giant white heart, but remembered my limited embroidery skills wouldn’t look very professional. I found some embroidered stars in my stash and gave them a try. They seemed to work. I sewed them down with a straight stitch.
The inside shows my stitching:
I was curious what other options there were for already-made embroidered patches. I headed to JoAnn’s and all I could find were giant letters.
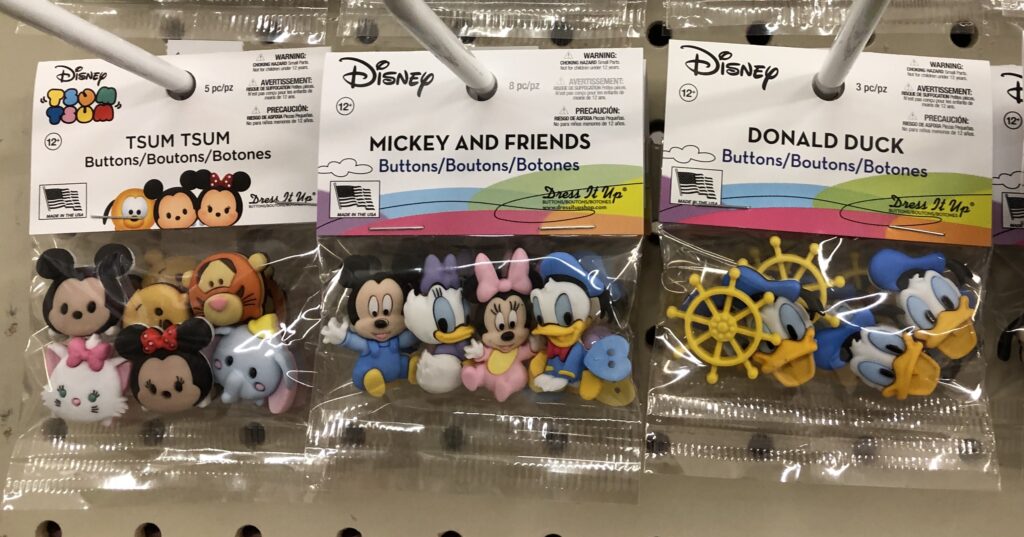
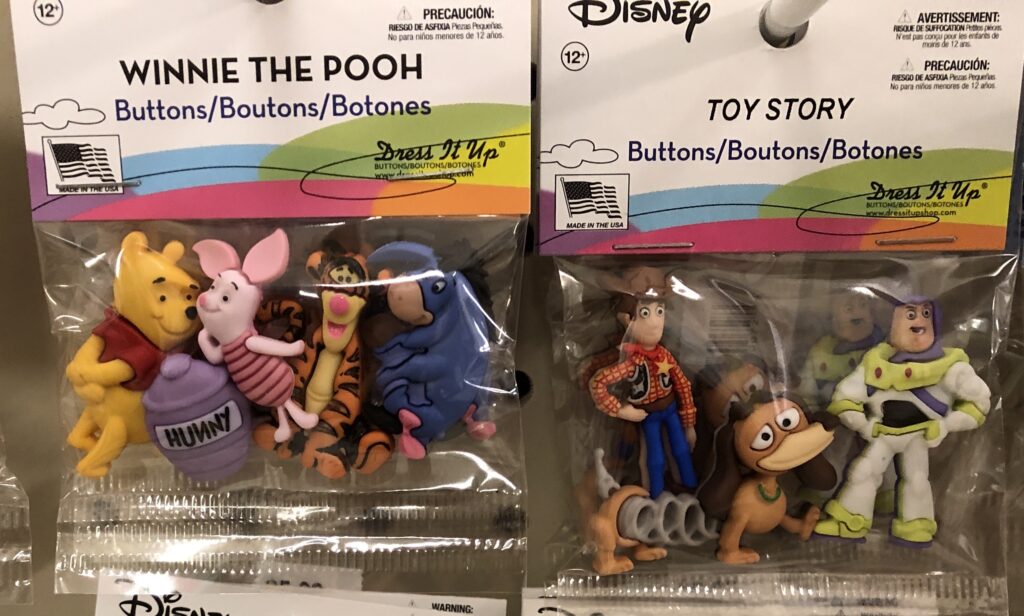
Next, I wandered to the button rack. I found some clever button sets that could be sewn over a logo. They could be fun:
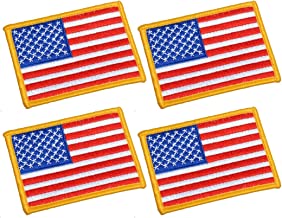
And then, of course, I checked out Amazon. That is a good place to find flags and stars.
Bert has several shirts from charity events that he doesn’t wear:
I don’t think he doesn’t wear them because of the logos. Bert won’t wear them because they don’t have pockets! So, I guess I won’t bother trying to cover the logos…and I don’t plan to add pockets!
However, embroidered patches and colorful buttons can extend the life of shirts that you love. Enjoy!
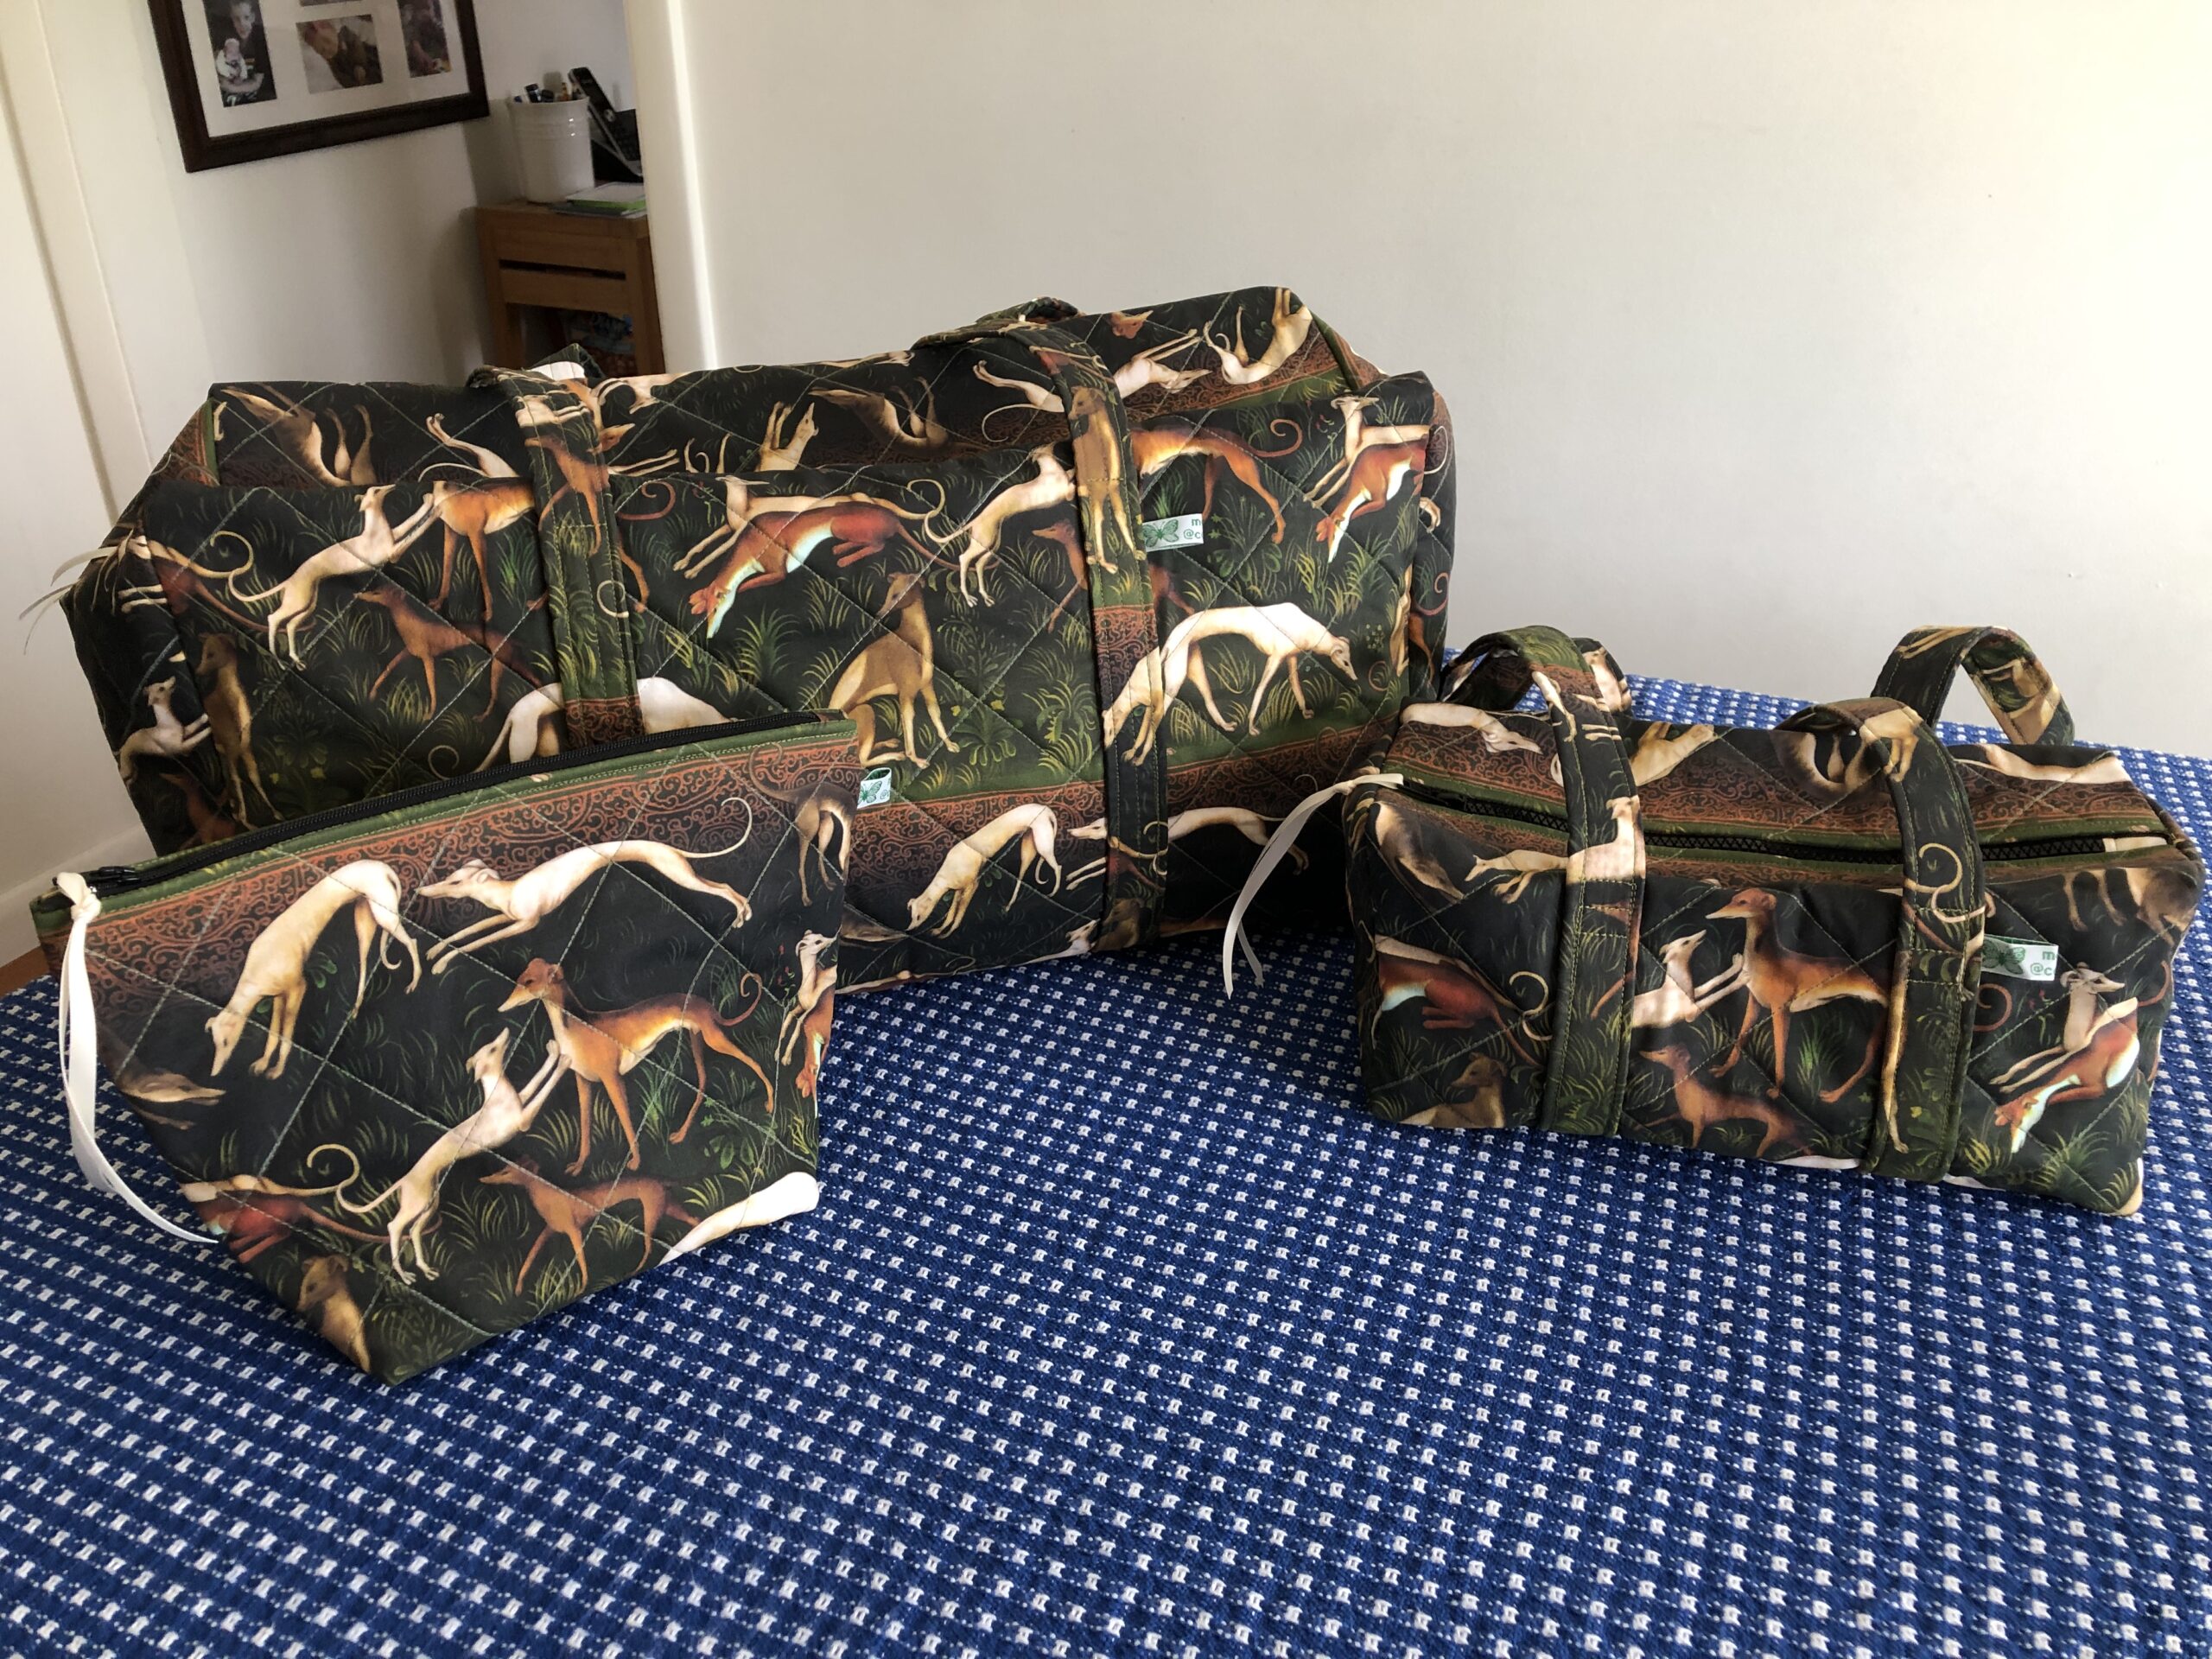
Duffle bags are easily the most common kind of bag to use when traveling or just the right size to transport stuff in your car. They are available with sports logos on the side or made of colorful prints; quilted cotton or waterproof fabric. For the last two weeks I’ve been making a set of three bags that will be auctioned off at a Greyhound Conference next weekend.
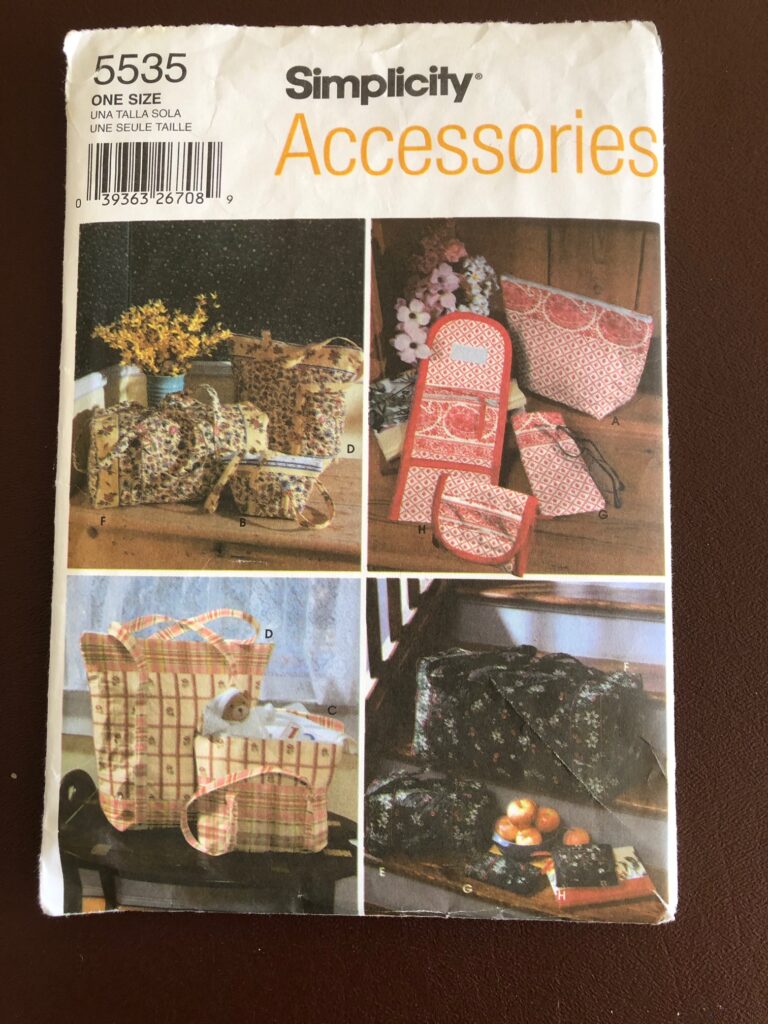
The request was for a large duffle bag, a small duffle bag and a small travel bag to be auctioned off as a set of luggage. The fabric needed to be prequilted before cutting out the final pieces. This is the pattern I’ve used several times:
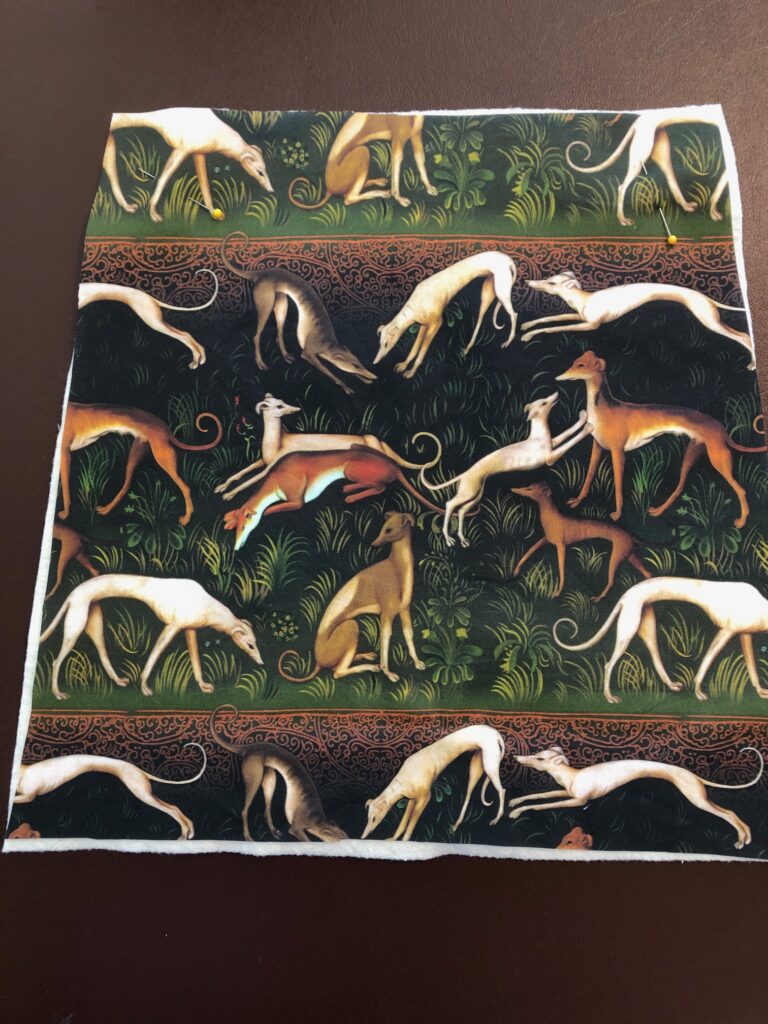
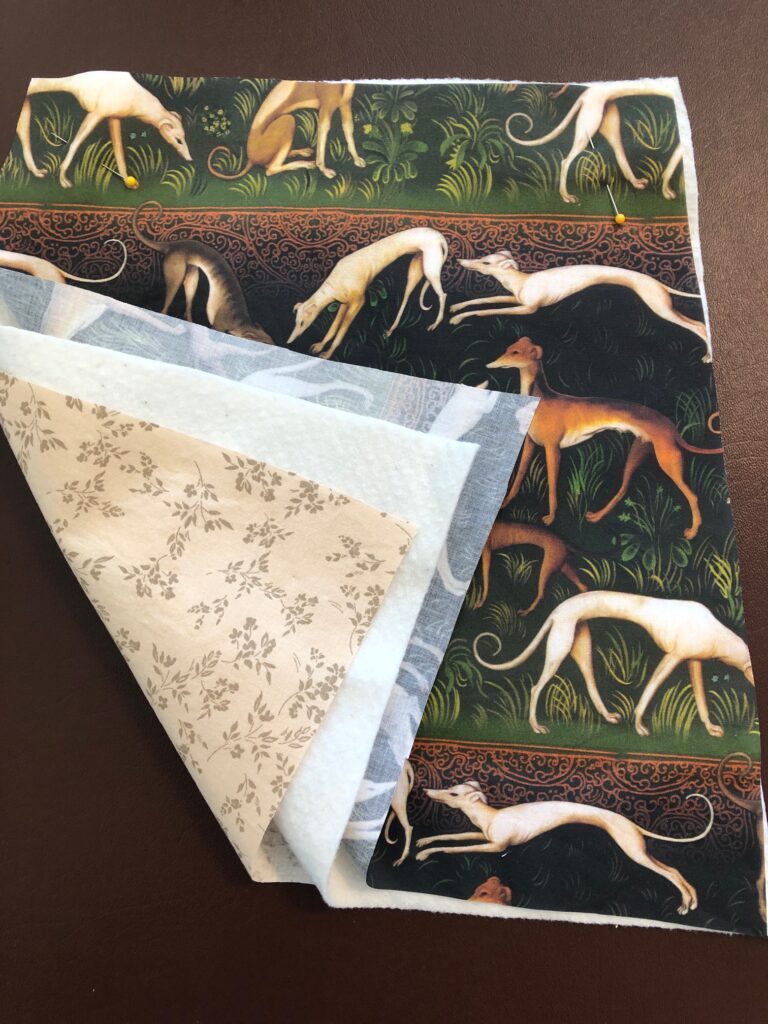
Of course, no ordinary fabric would be appropriate, so a heavy cotton fabric printed with greyhounds was ordered from www.spoonflower.com. This site has many choices to choose from (not just greyhounds!) and the fabric is printed when ordered.
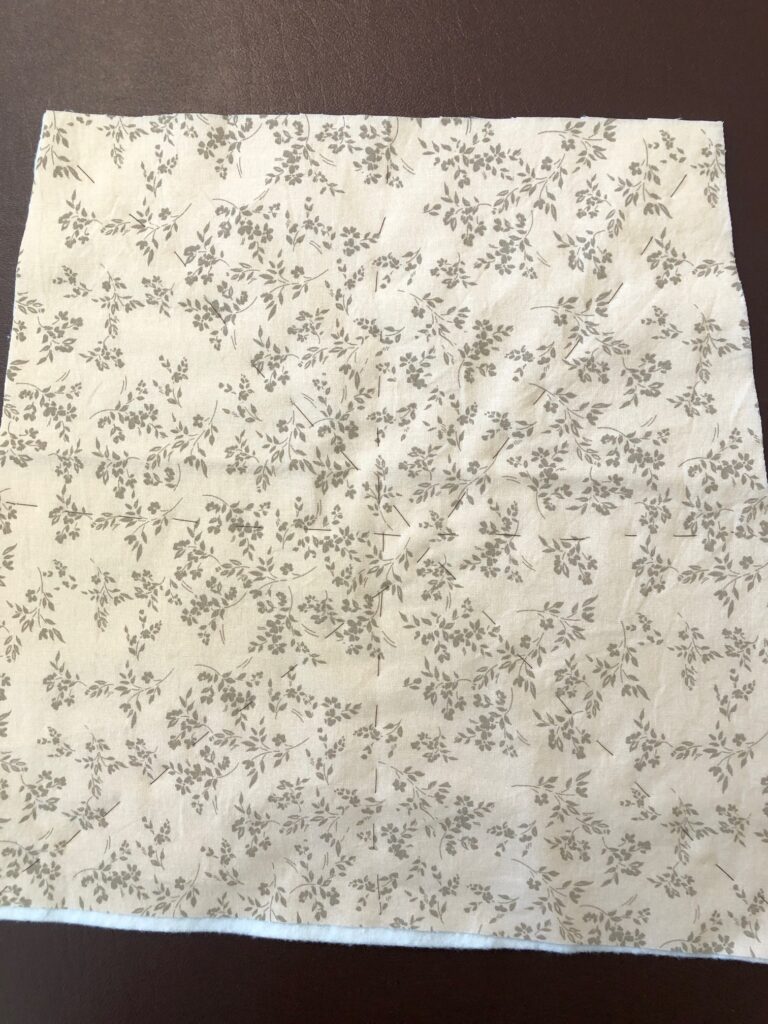
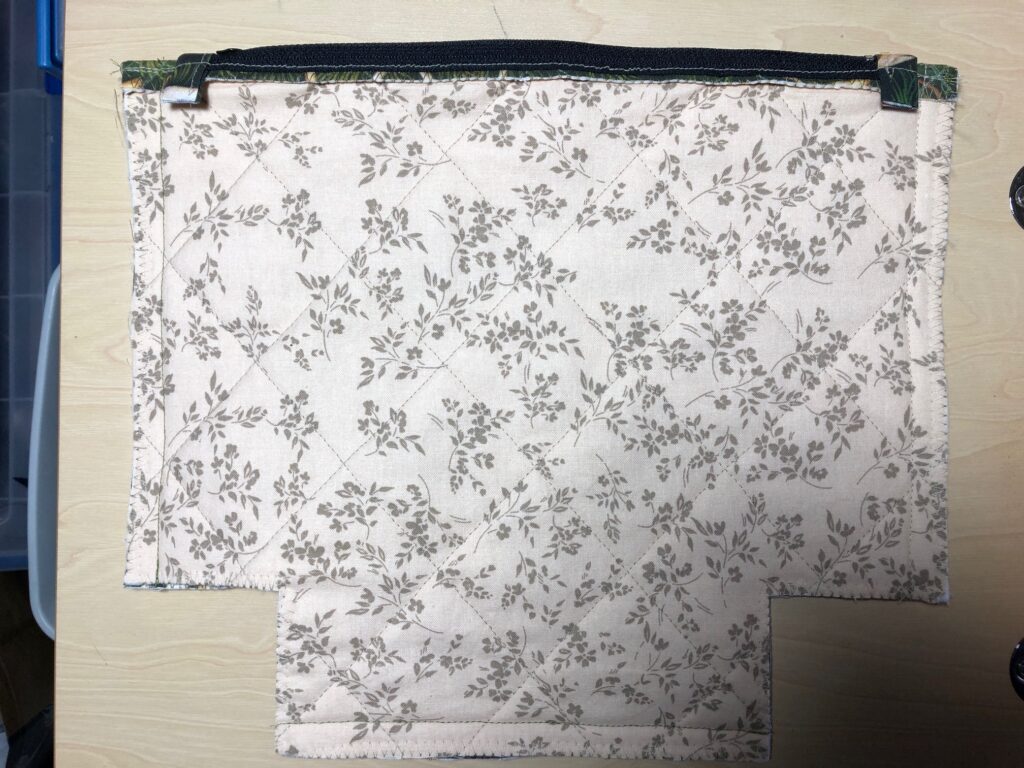
And here is the lining:
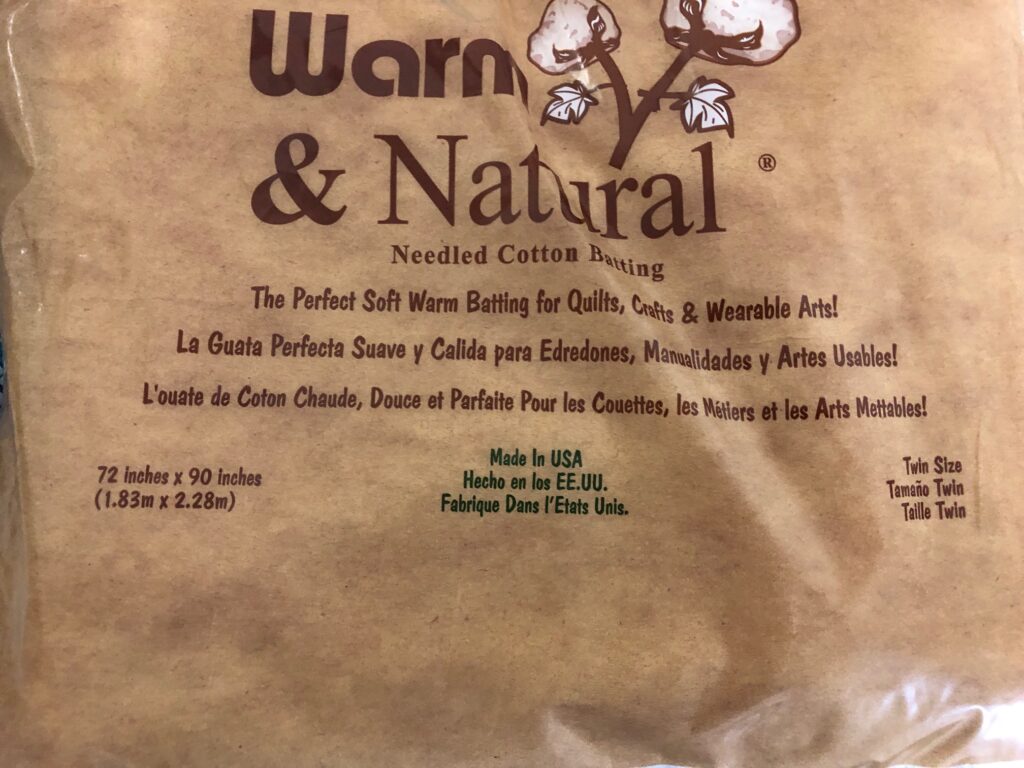
Finally, the batting I used was cotton and a twin-size package provided more than enough to make all three bags.
Making the Small Travel Bag
I will go through the steps to make the small travel bag. The same steps were followed to prep the fabric for the other two bags.
Step 1: Wash, dry and iron the fabric.
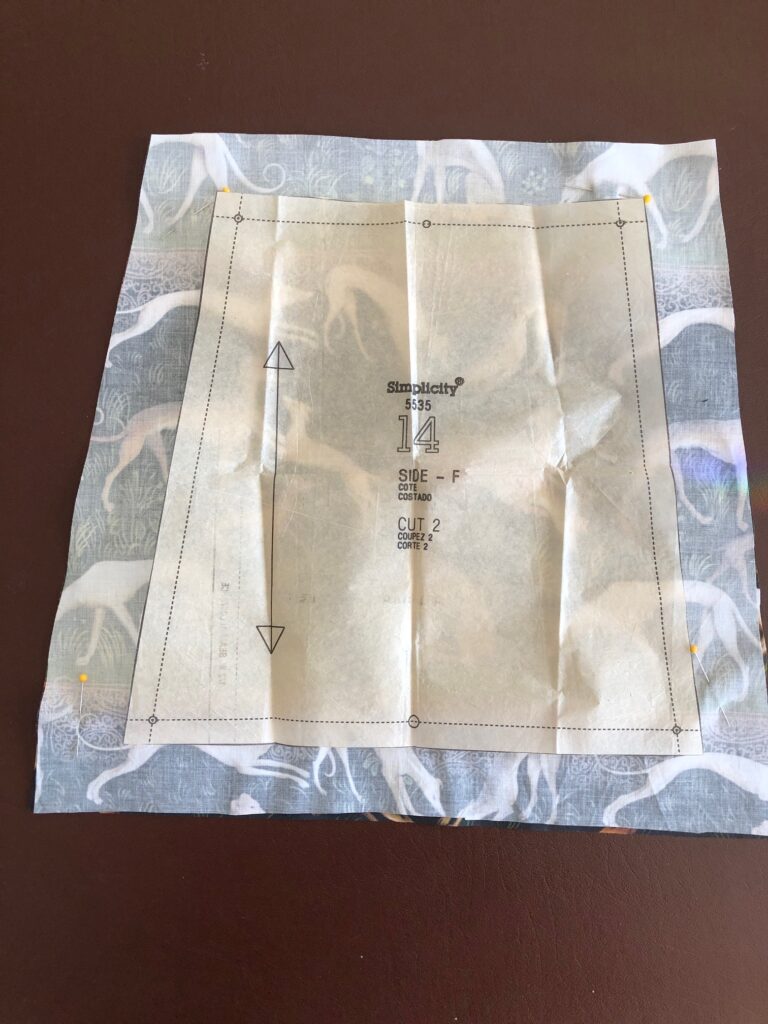
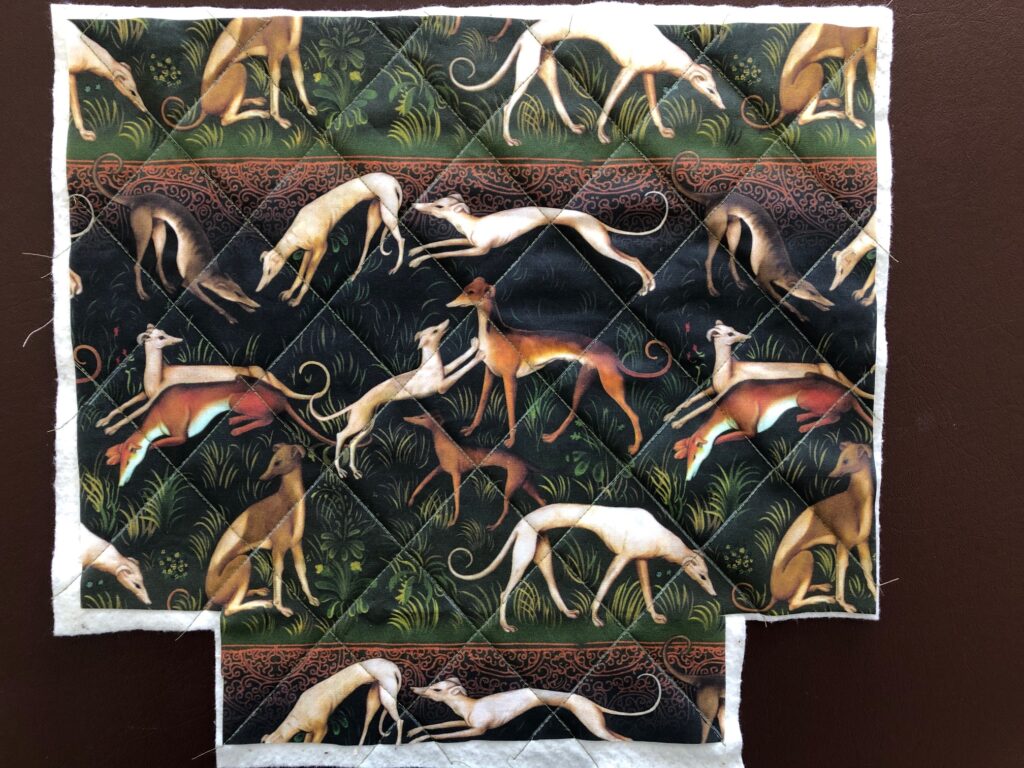
Step 2: Lay out each pattern piece but cut about 2″ larger all around of fabric, batting and lining.
Step 3: Stack each piece into a quilt sandwich with the outer fabric, batting and lining.
Step 4: Baste the “sandwich” together to stabilize it as you quilt.
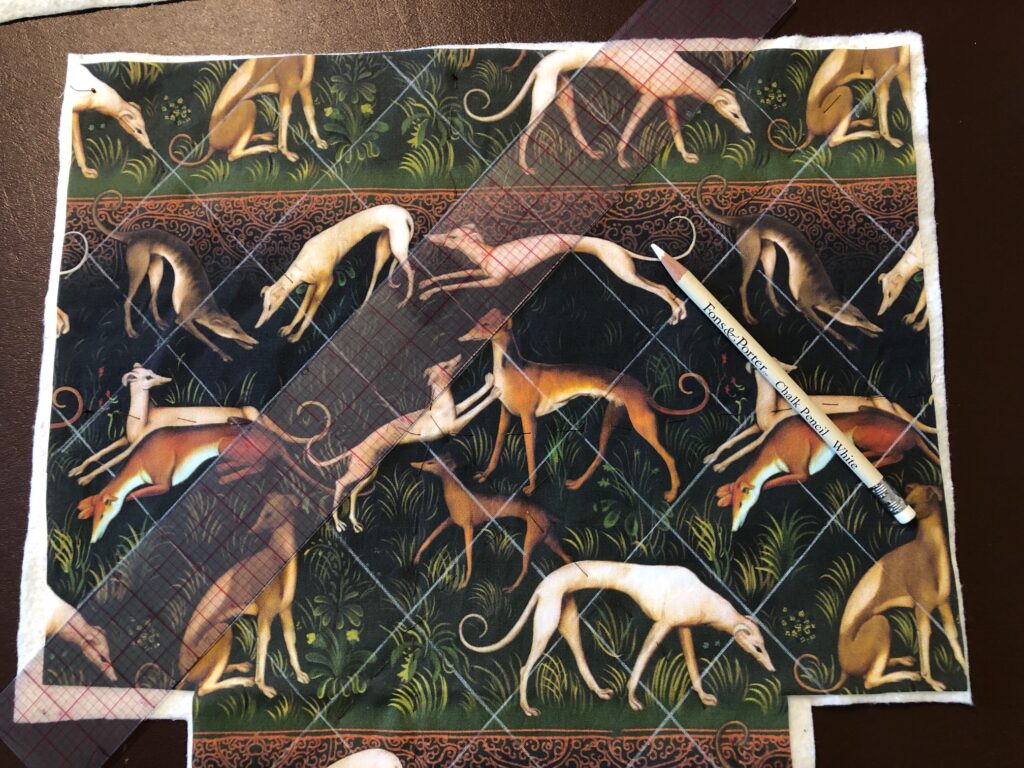
Step 5: Using a chalk pencil (that will disappear over time or with water) draw diagonal quilting lines to follow.
Step 6: When lines are drawn, stitch on the lines with a coordinating color thread. You can see why it’s necessary to start with fabric cut larger than the pattern…all that quilting tends to squish the fabric one way or the other. You need wiggle room.
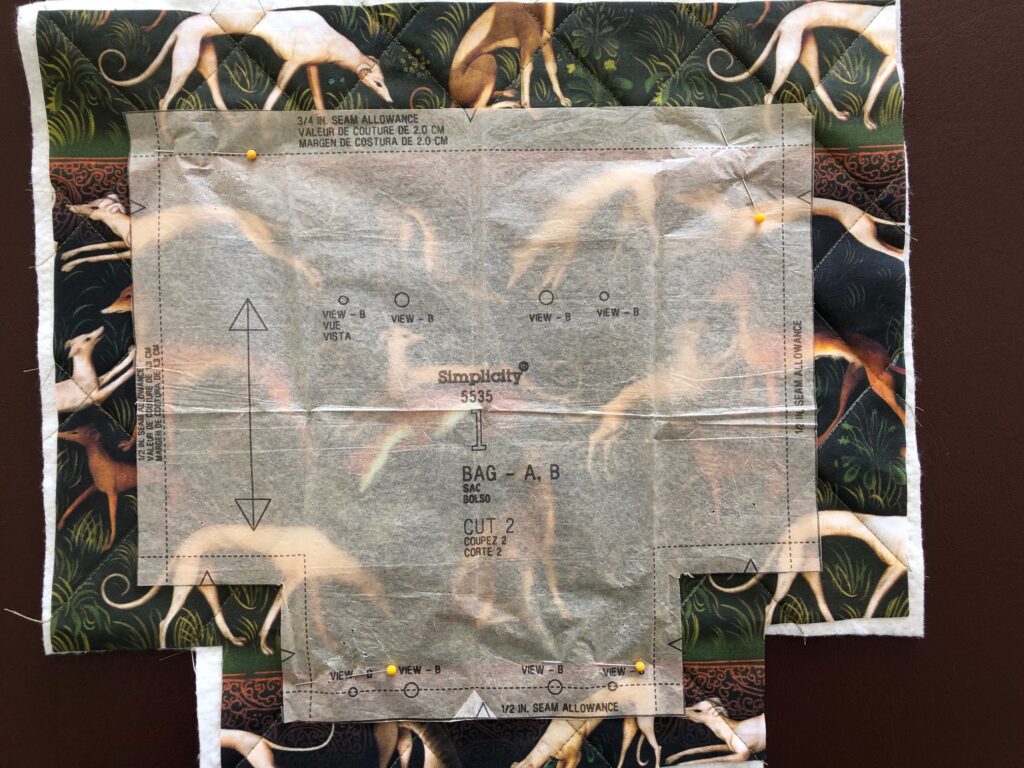
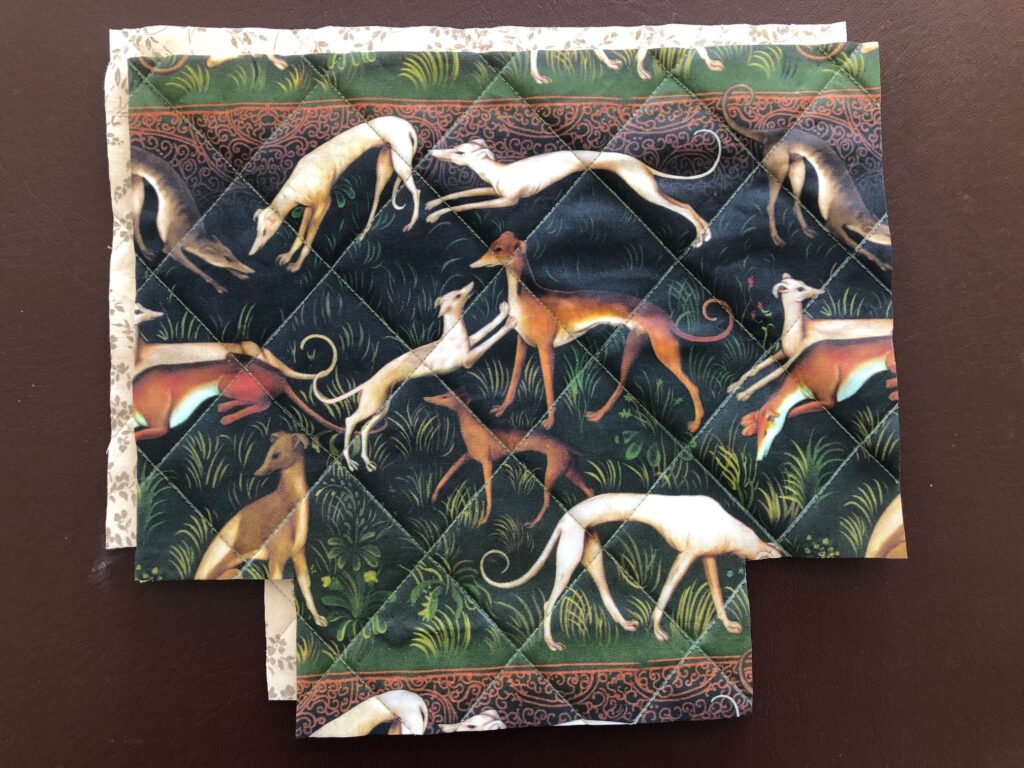
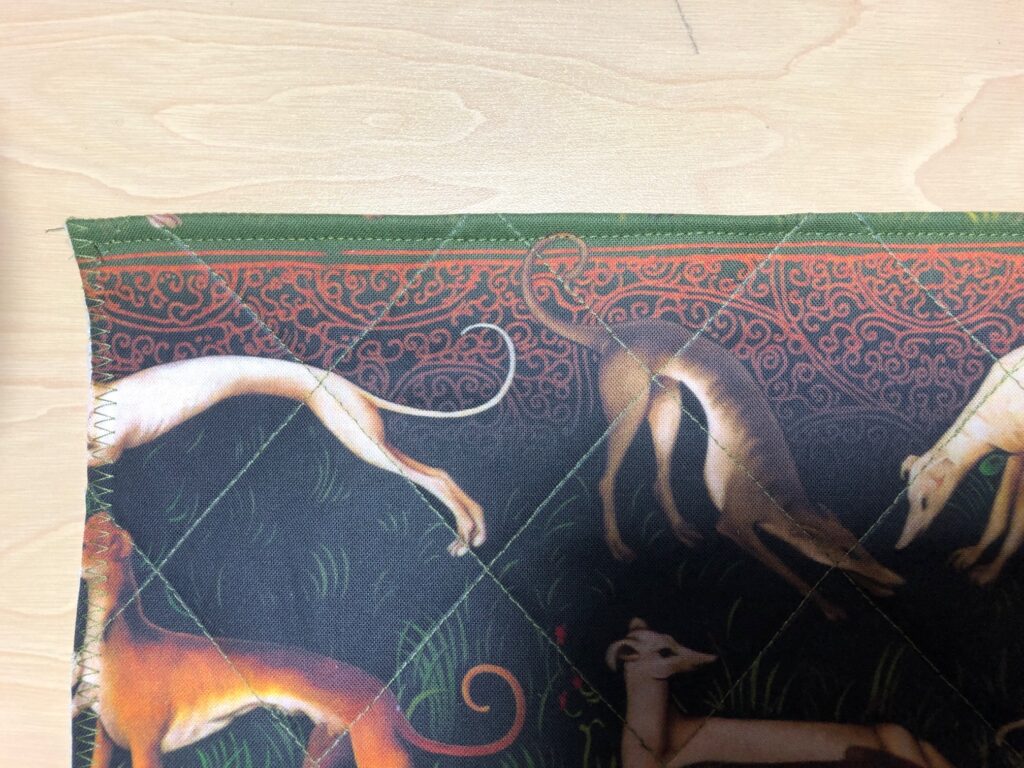
Step 7: Lay the pattern piece on the finished quilted piece and determine the placement on the design. Cut out the final piece.
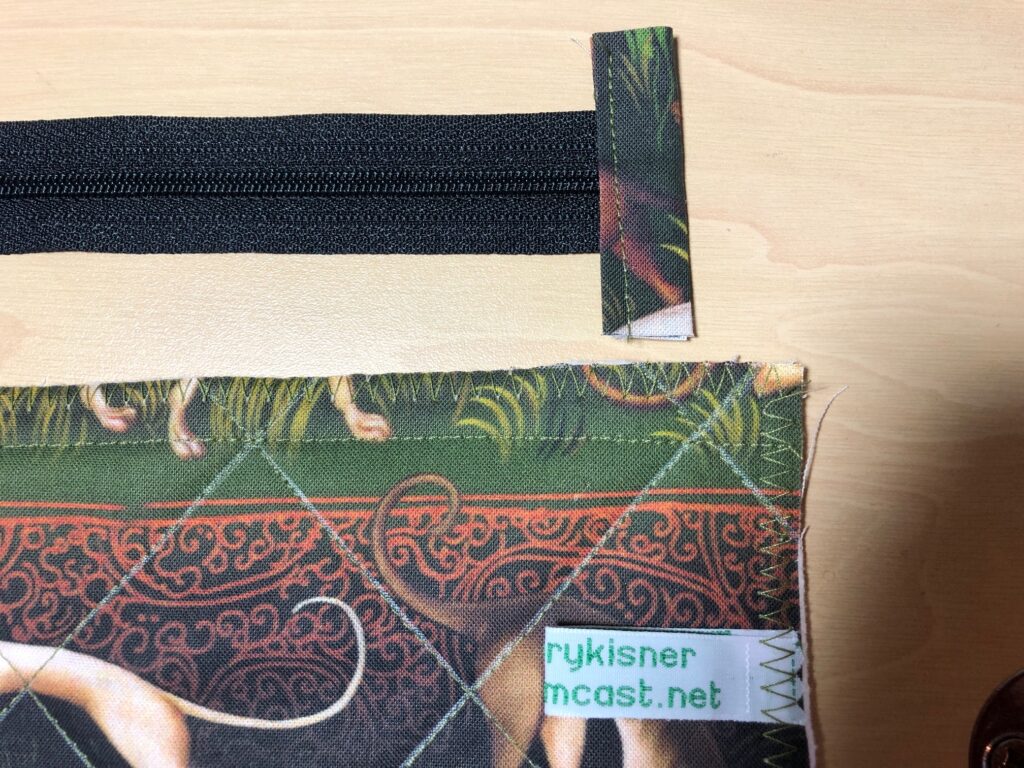
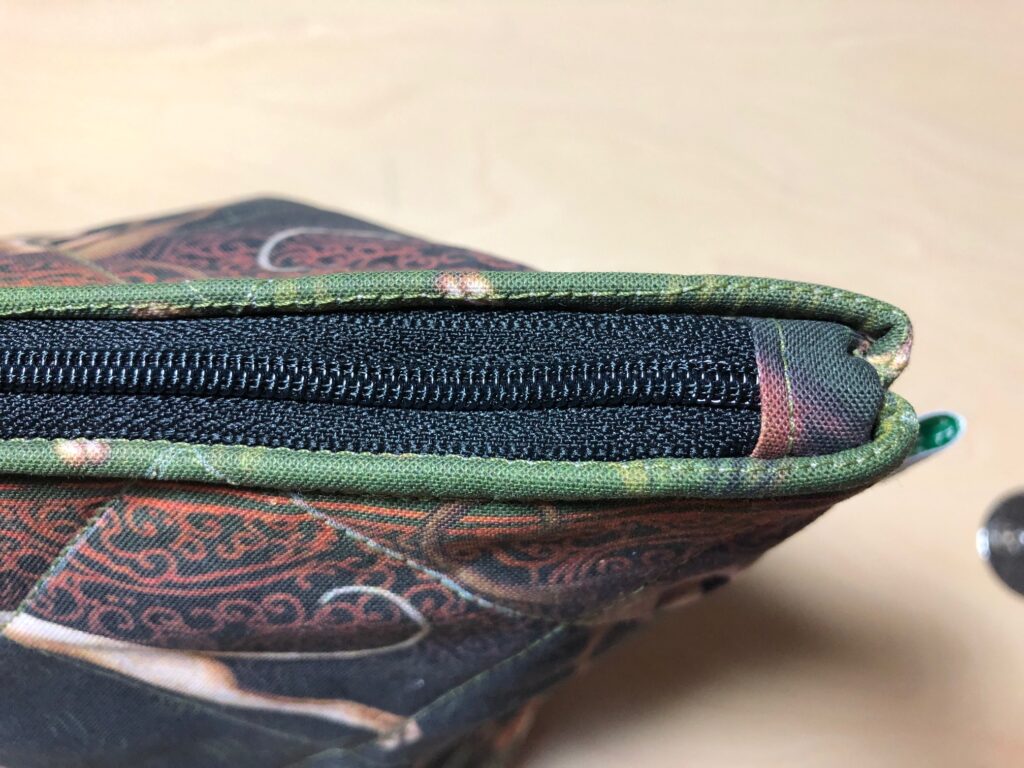
Step 8: Prepare the zipper. Cut out 2″x2″ squares of matching fabric to encase the ends of the zipper. Fold each square in half and then in half again, tucking the ends to the center.
Step 9: Take time now to zigzag around each piece of the bag. Then, run a row of stitching 1/2″ from the top edge. This will be your fold line to stitch to the zipper. (The quilted piece ends up being very stiff and it’s hard to fold just 1/2″ neatly.)
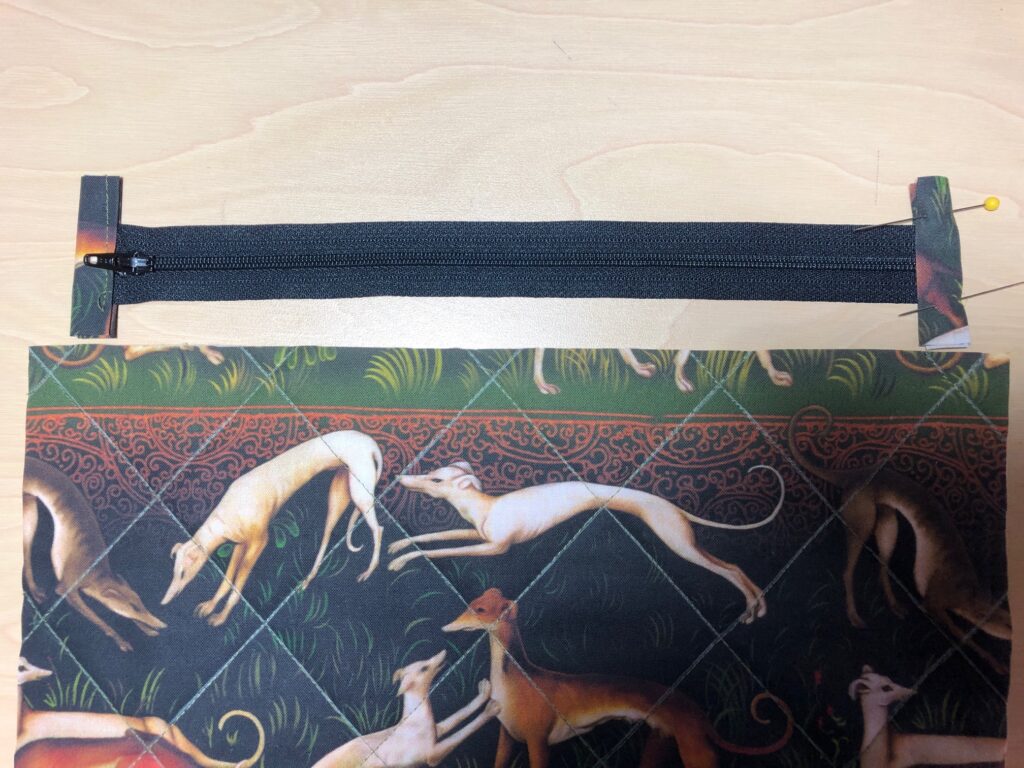
Here’s the folded top edge:
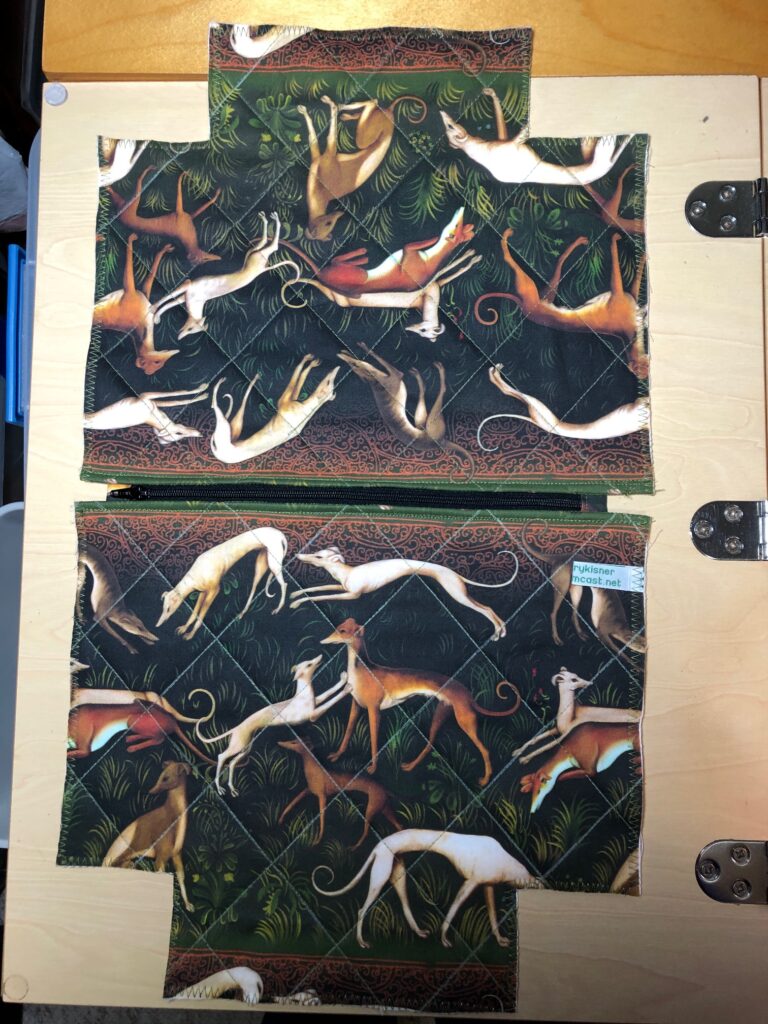
Step 10: Stitch both sides to the zipper.
Step 11: UNZIP THE ZIPPER! Fold the bag, right sides together and stitch the sides and bottom of the bag.
Step 12: Open the bag with your hands and sew the bottom corners closed.
Step 13: Turn the bag right side out. You can see how nice the end caps on the zipper look.
Step 14: Finished Bag
The other two duffle bags follow similar instructions, with the added instruction about the handles and sewing the end pieces. I’ll write these specific instructions in a future post. At any rate, follow the directions with your pattern.
Making your own bags with a fabric of your choice makes for a very unique bag. For all you sewers out there…give it a try! Enjoy!
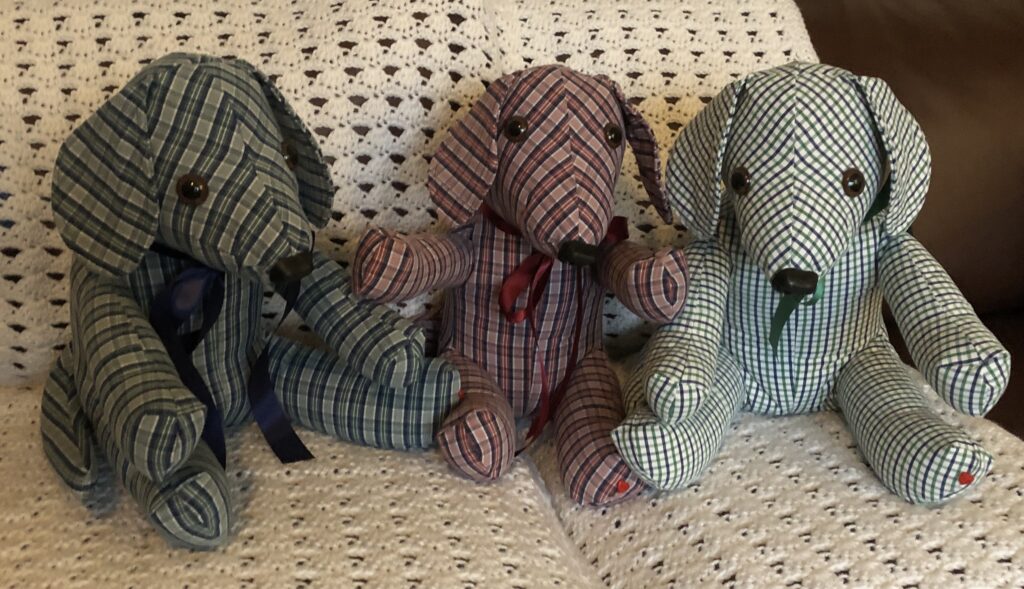
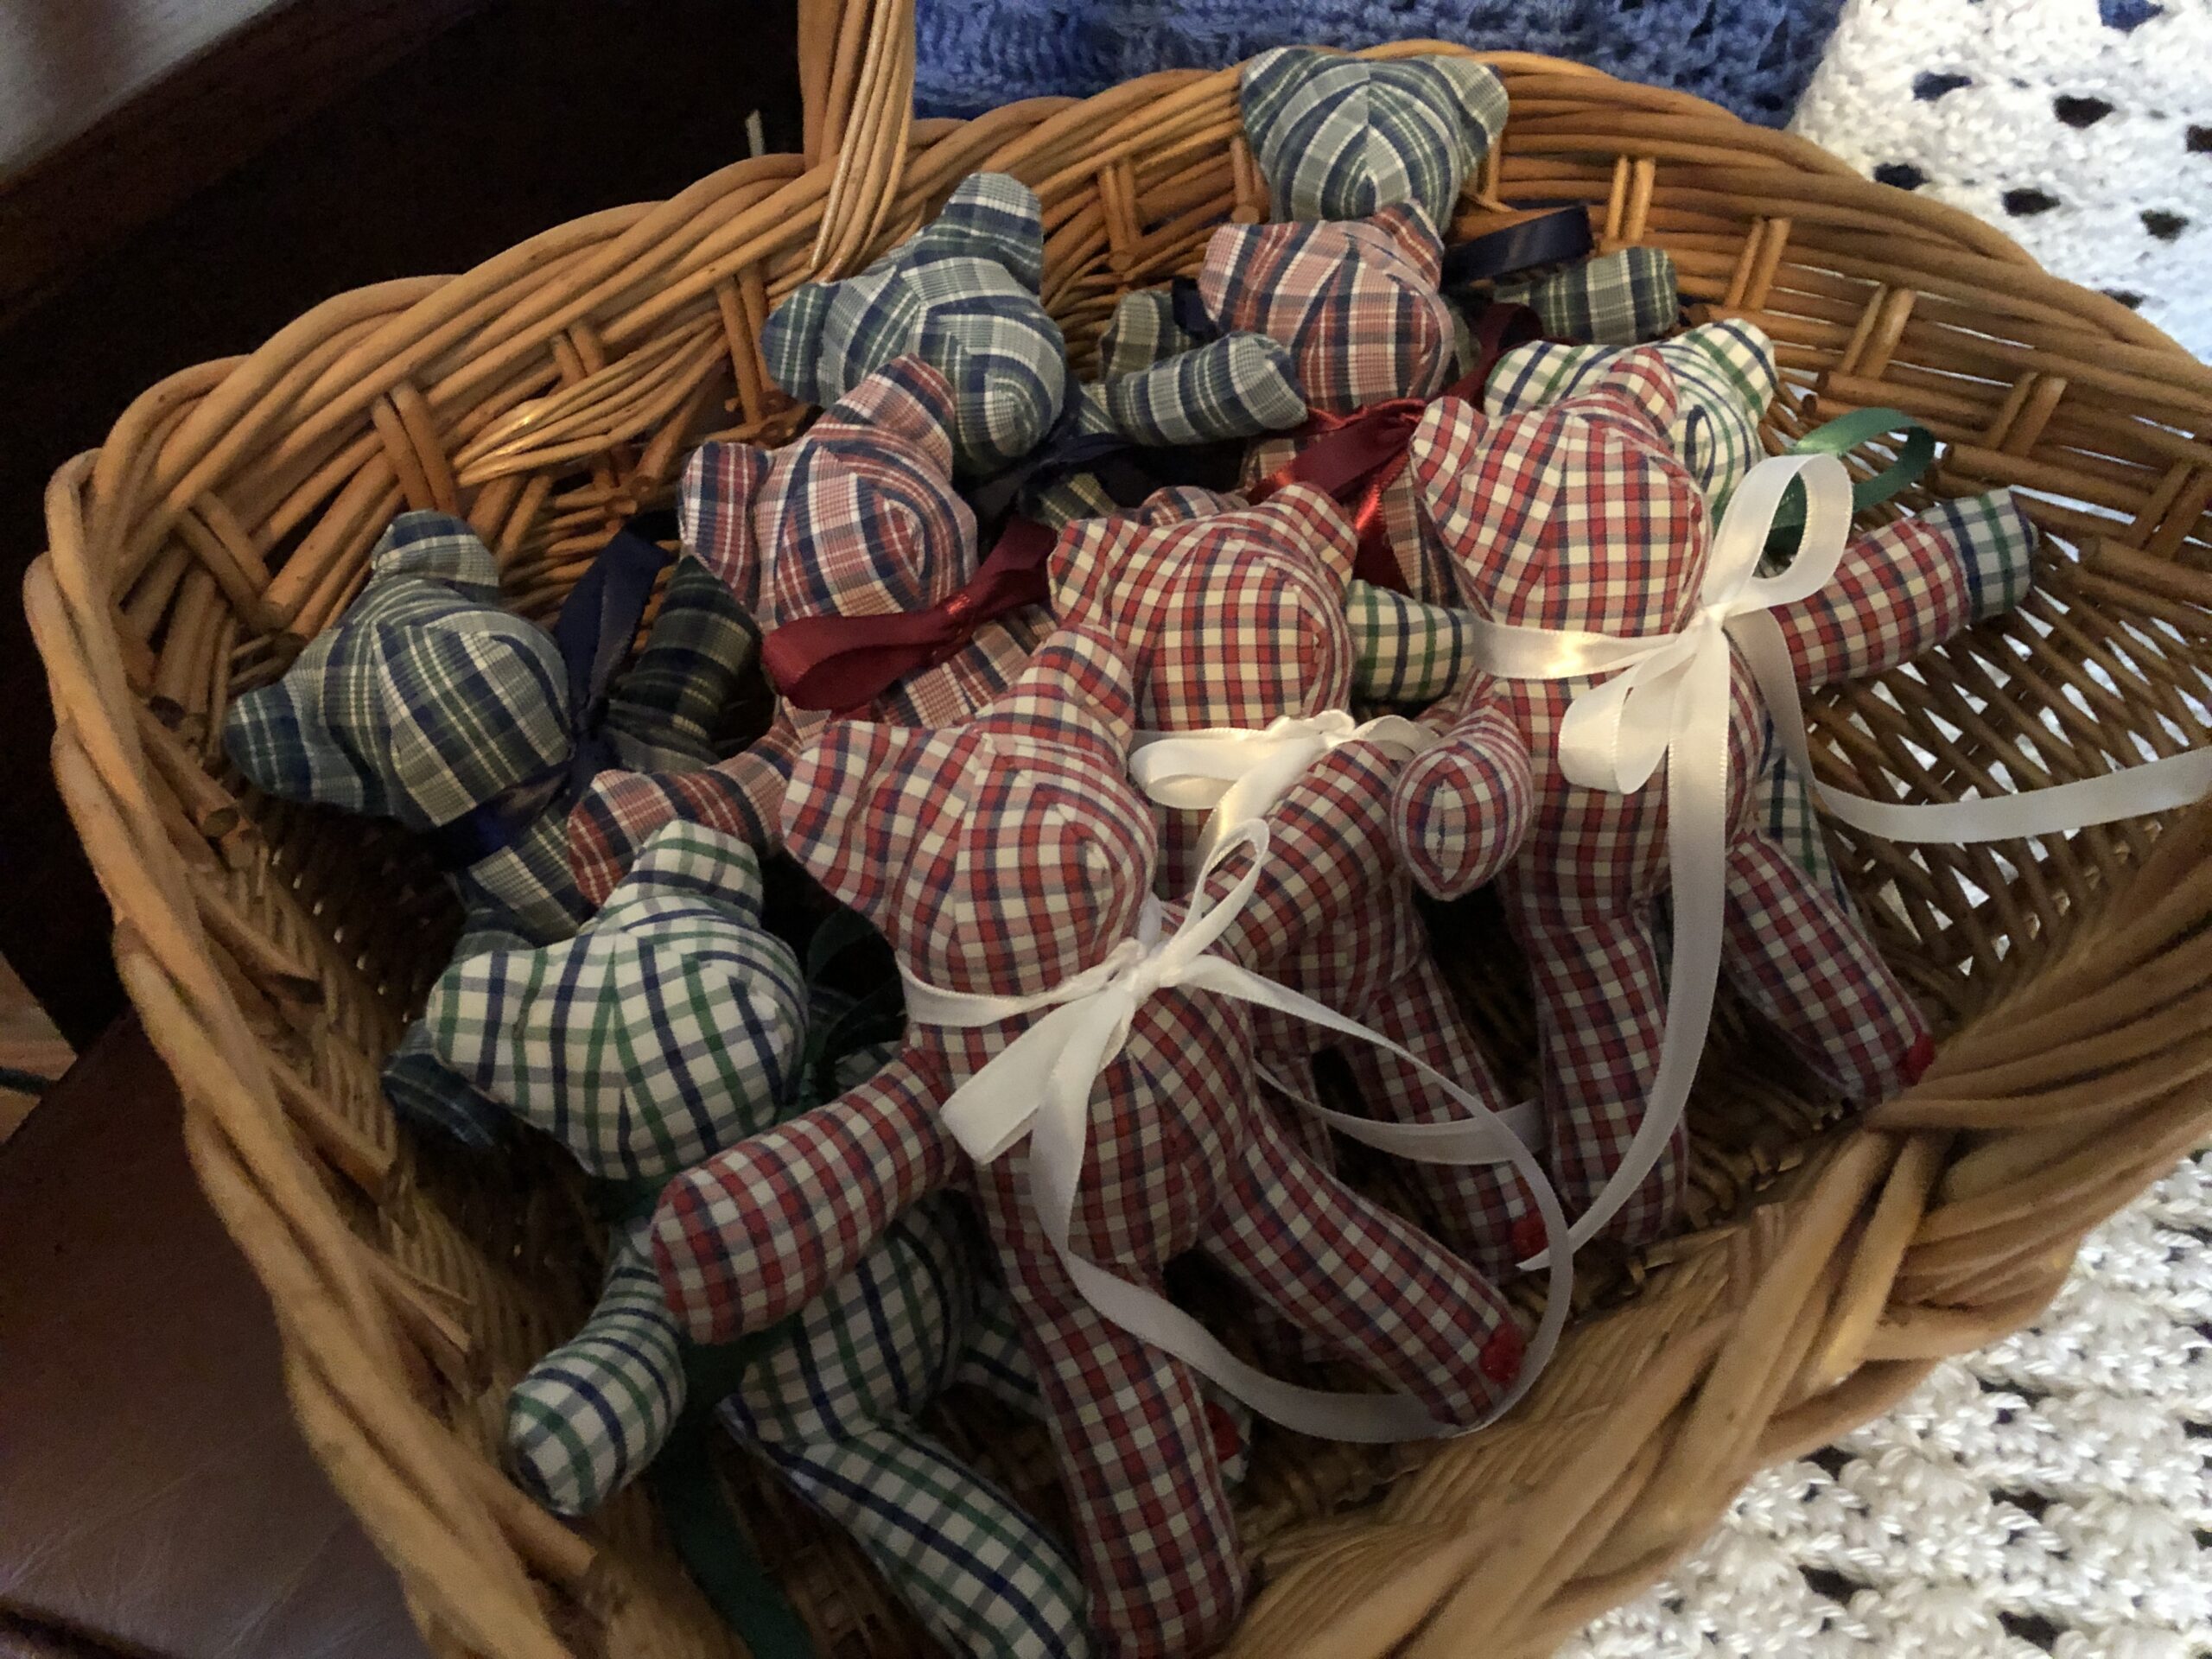
Just wanted to share the finished memory dogs and tiny bears that I finally got in the mail last week. They turned out fine, even with shirt fabric that was not stretchy but should satisfy anyone that has a memory of the loved one in those shirts. You can read about how I made them in the previous post, https://marykisner.com/making-a-memory-dog/. I started with three long sleeved shirts and one short sleeved shirt. I hope they bring hugs and smiles to a family in Fort Worth, Texas.
Making a memory pillow, stuffed bear or dog is more about the clothing it is made from than the actual item. The item is soft and huggable and the clothing is familiar. I have made pillows and bears but recently was asked to make stuffed dogs. In the past, the dogs I’ve made were made of fleece or fake fur…not from clothing so I didn’t know if I could make one dog out of one shirt. If you’d like to read about making a memory bear, see https://marykisner.com/making-a-memory-bear/.
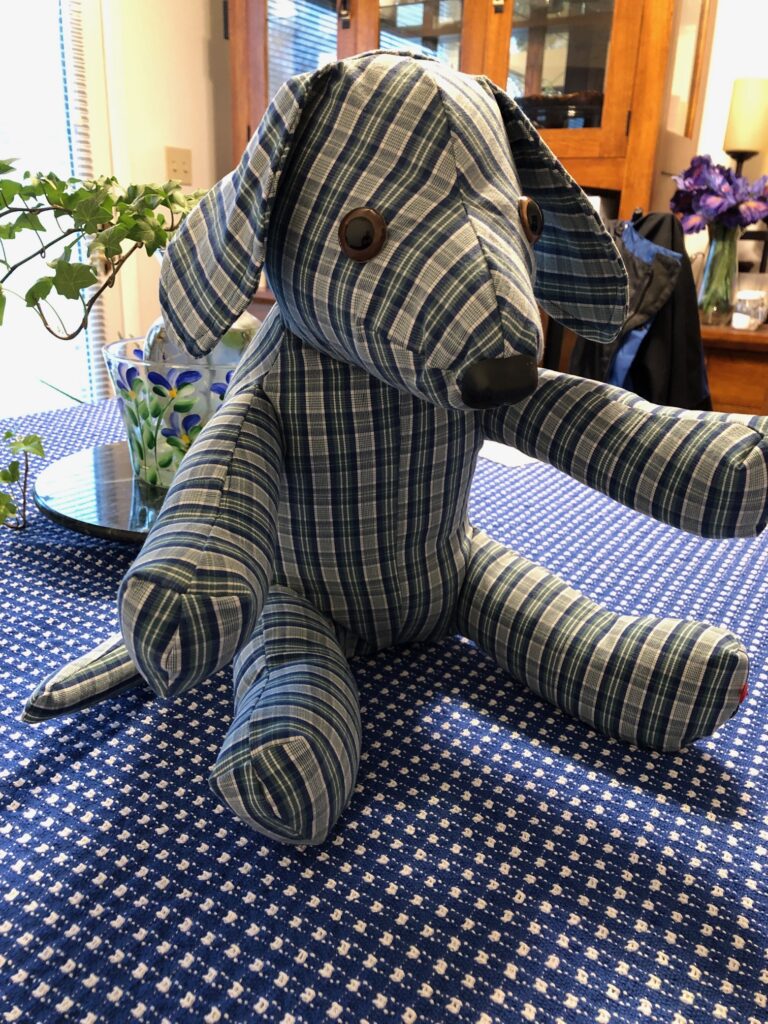
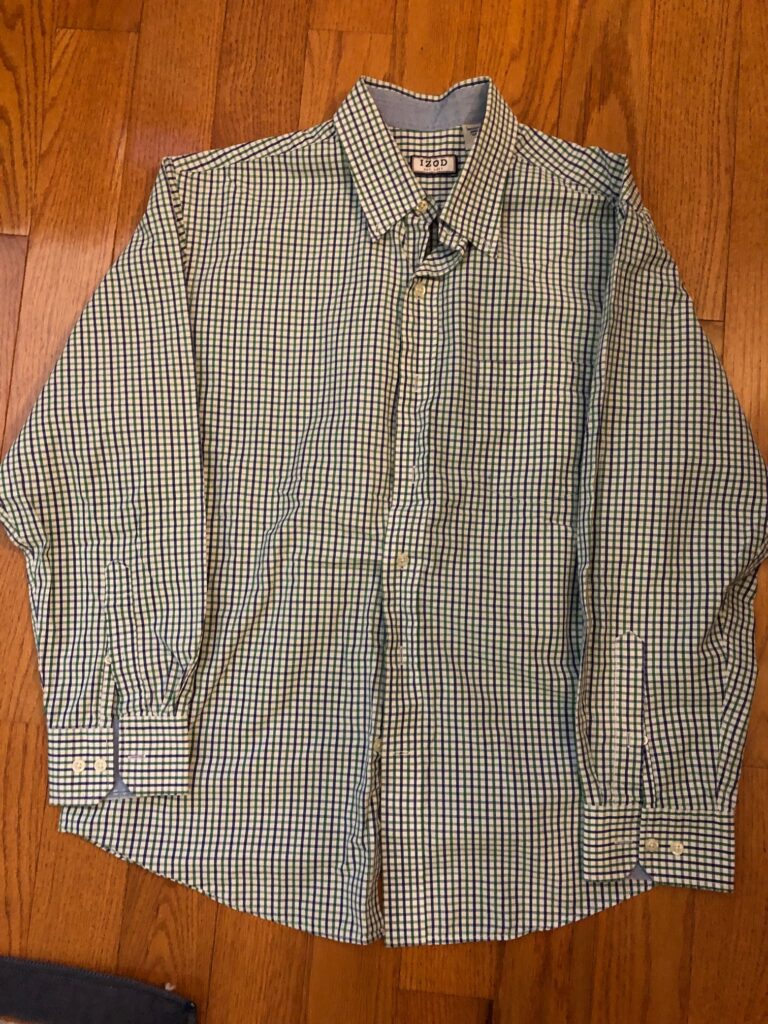
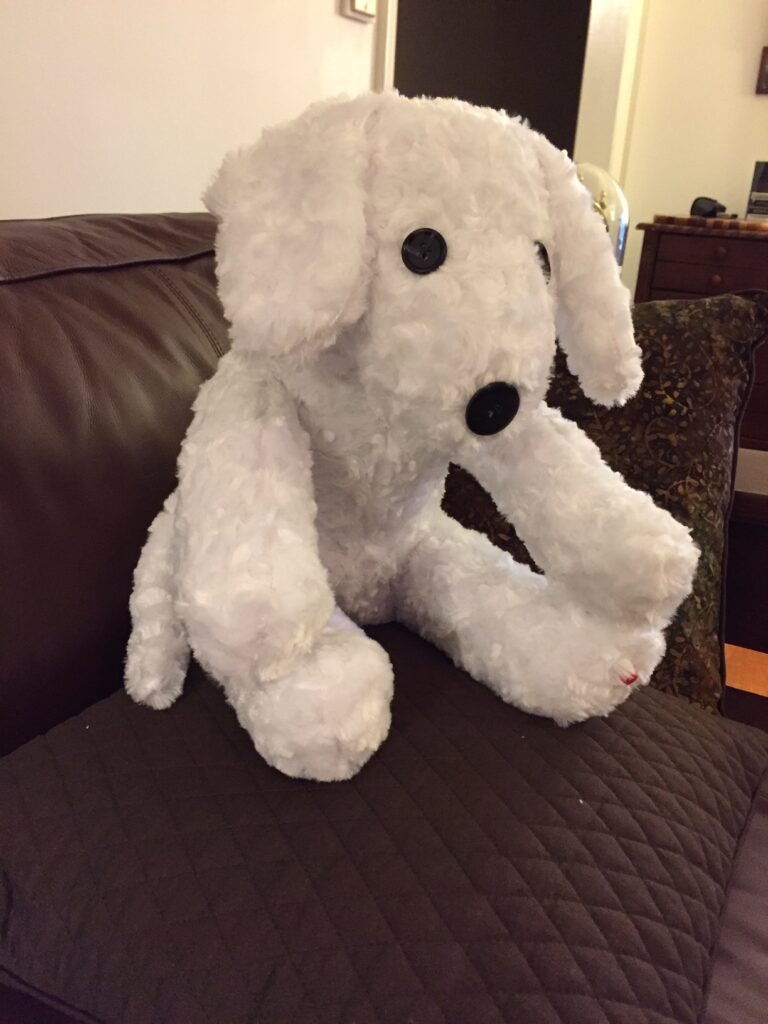
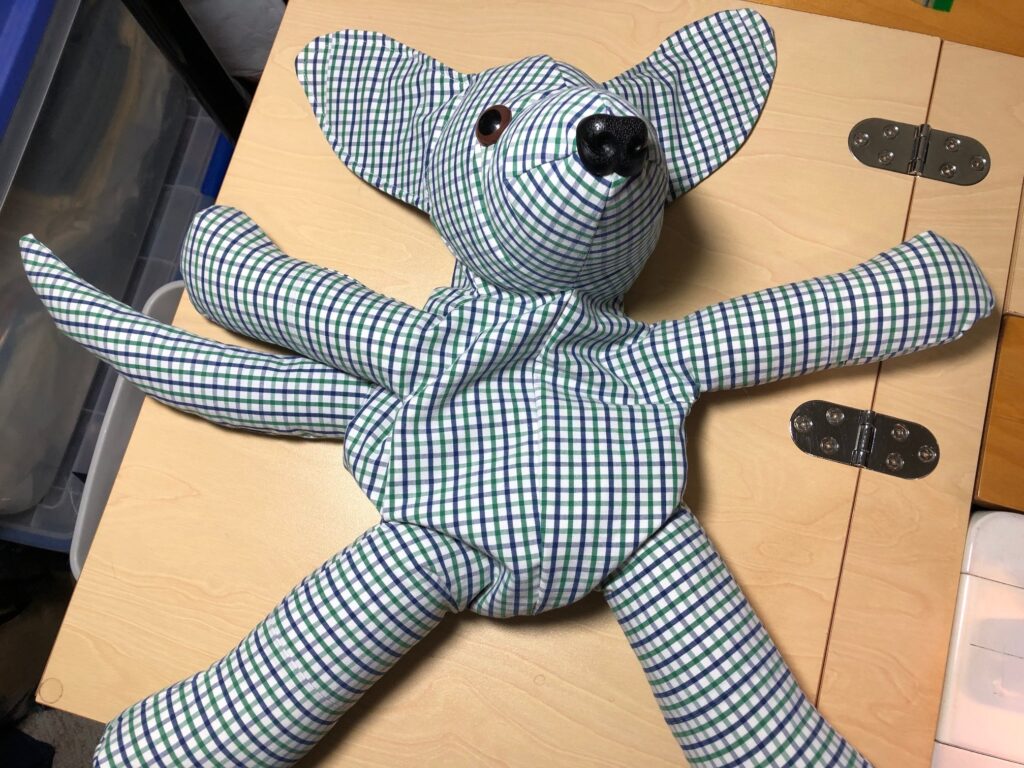
For this special order, I was sent four men’s shirts made of standard cotton and polyester. One was short-sleeved. The request was for three dogs and a bunch of little bears. I think the short-sleeved shirt will be helpful making the tiny bears but it won’t work for the larger dogs. So, I needed to figure out how to make a dog out of one shirt. The first stuffed dog turned out OK, but it wasn’t until I was done, I realized I had forgotten to take an pictures of the process. I did take a picture of the finished dog:
I will include a wide ribbon tied in a bow around the neck…probably navy or green.
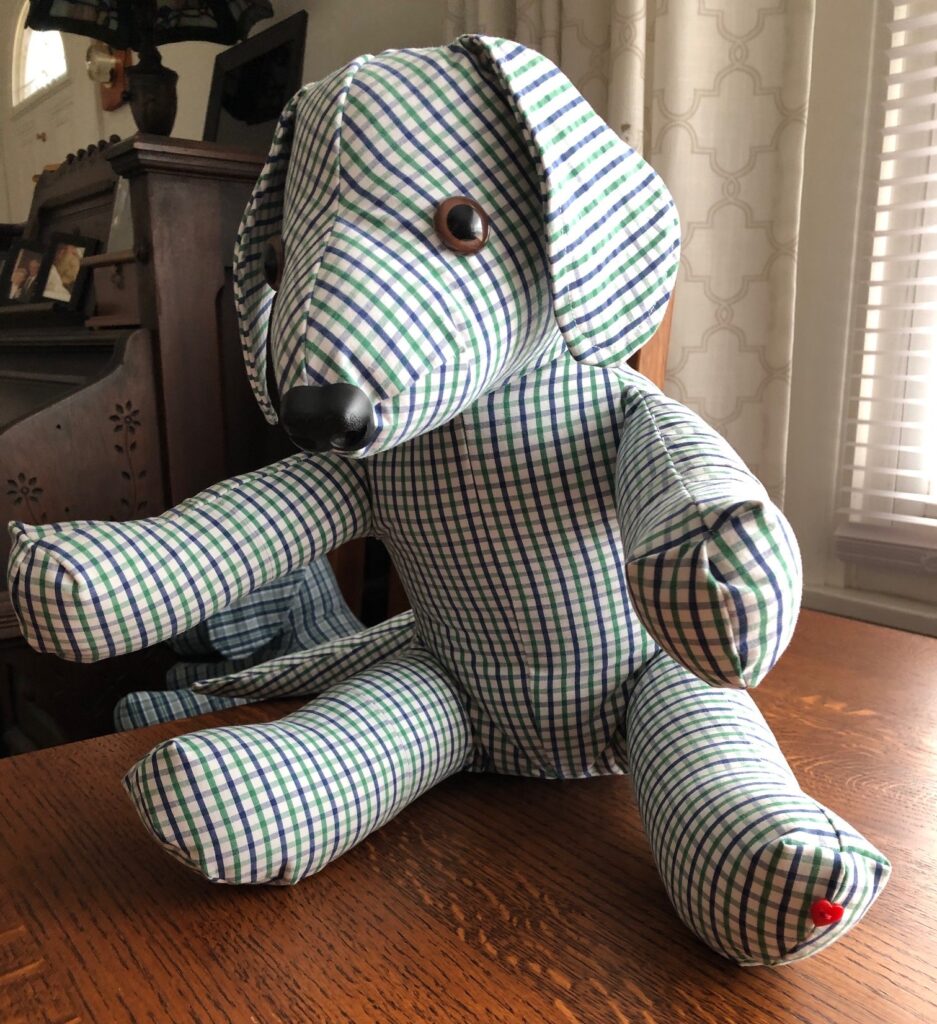
For the second dog, I tried to document the process so next time I won’t have to figure out how to do it again. Here was the second stuffed dog and the shirt it was made from:
I think these dogs will be great keepsake for the family. They are soft and huggable and would feel like hugging Dad.
How to Make a Memory Dog
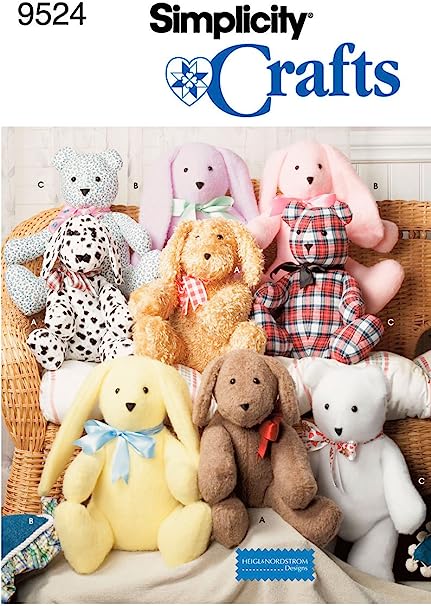
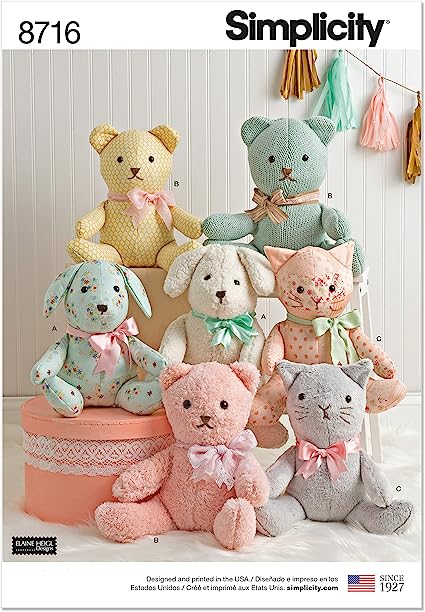
To make a stuffed memory animal, start with any pattern you are comfortable with. Here are two that could work for you:
My pattern started like one of these, but it has been modified over the years to have a longer nose and different ears to represent the greyhounds I work with:
Don’t be afraid to experiment with ear shape to one you like. I made quite a few dogs until I was happy with the ears! I have another modification to represent ordinary dog ears like this:
If you are interested to try making a stuffed animal out of a loved ones shirt, here are the steps below. If you don’t sew, don’t feel obligated to read about it!
Steps to Making the Memory Dog
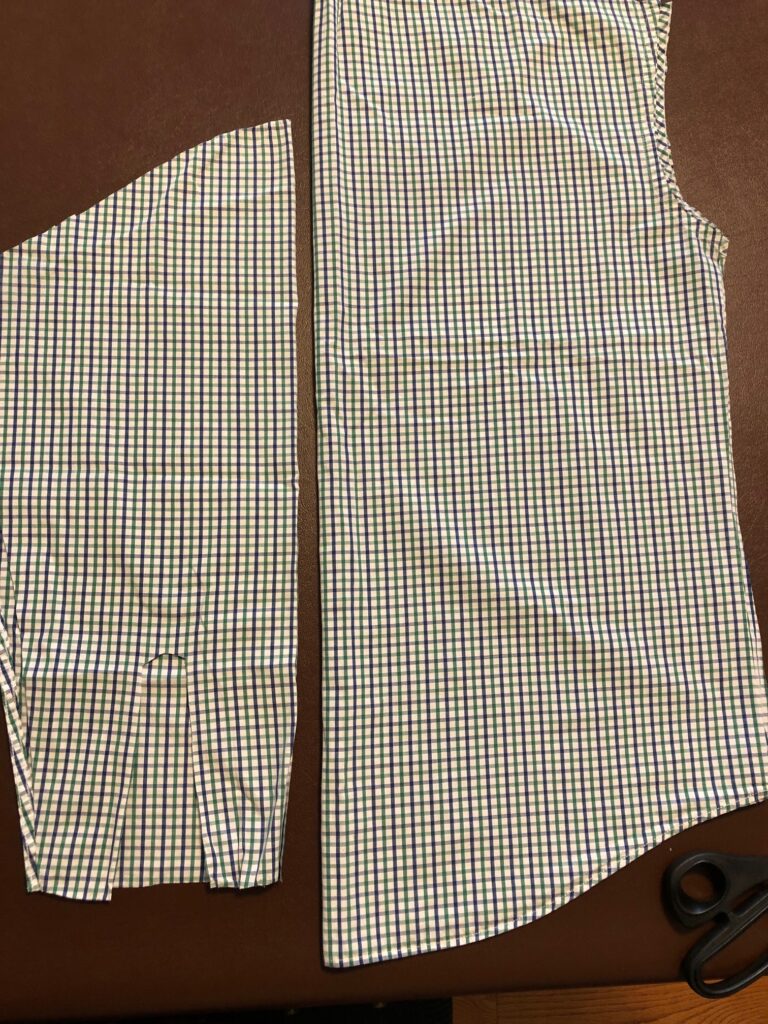
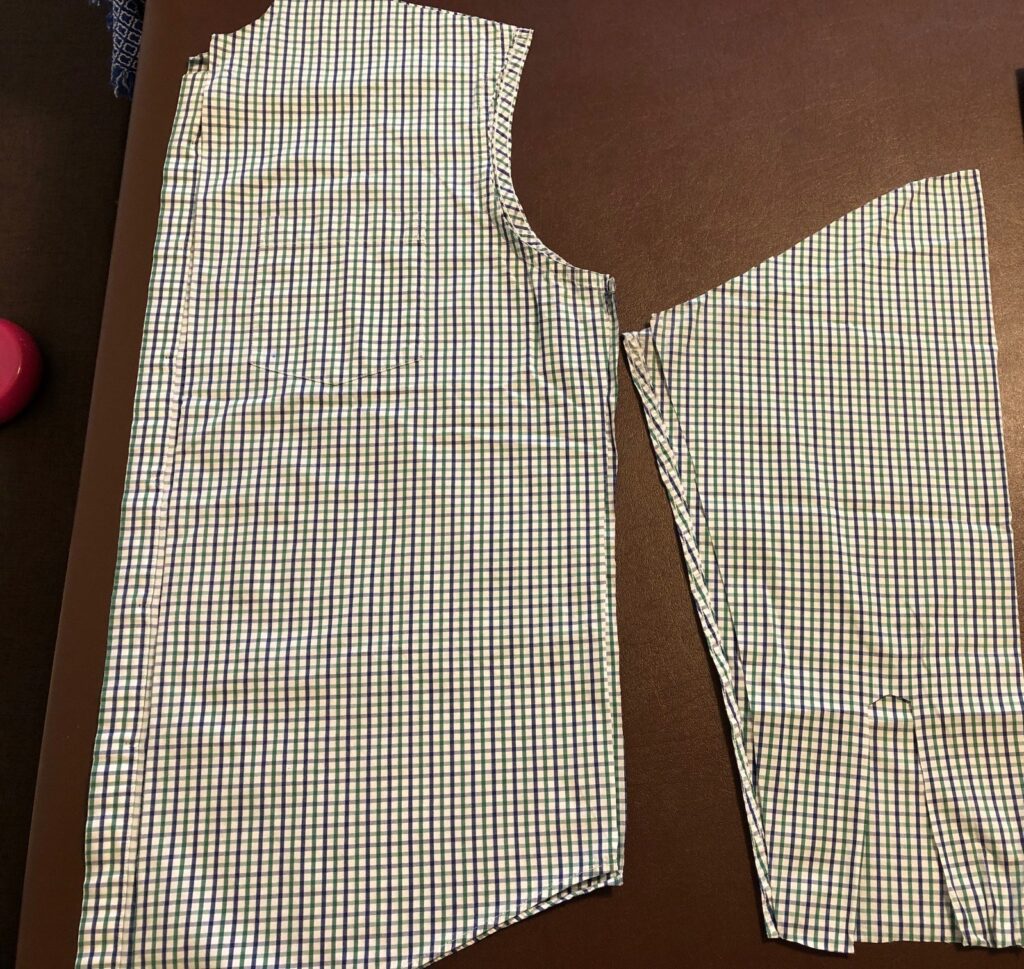
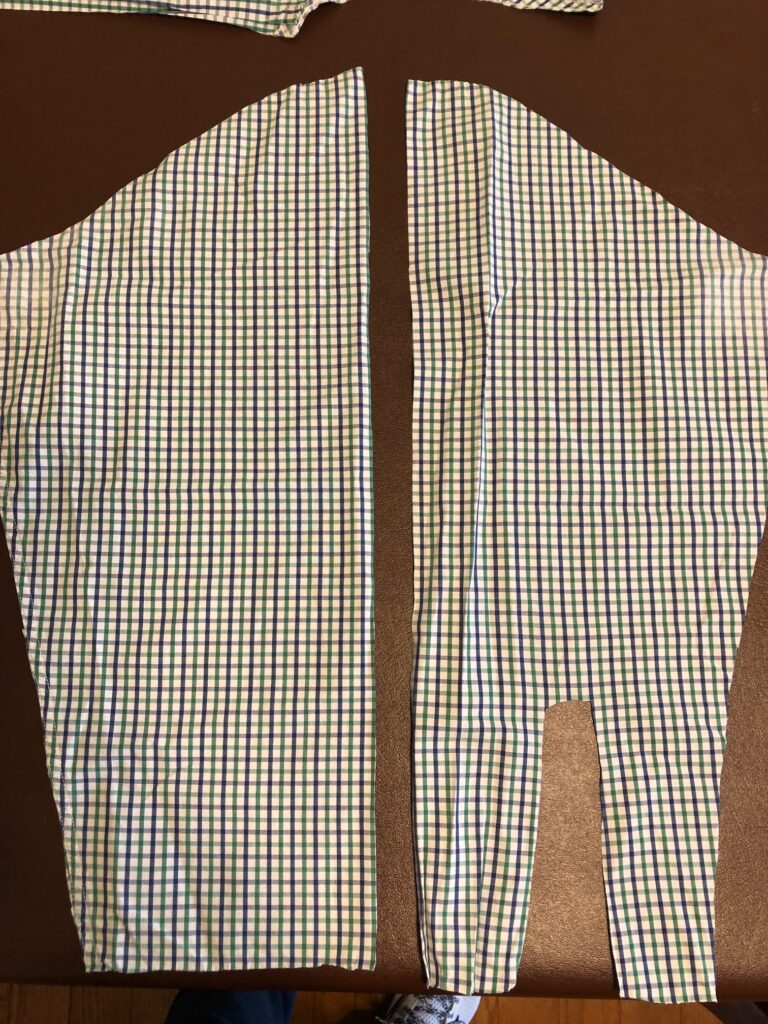
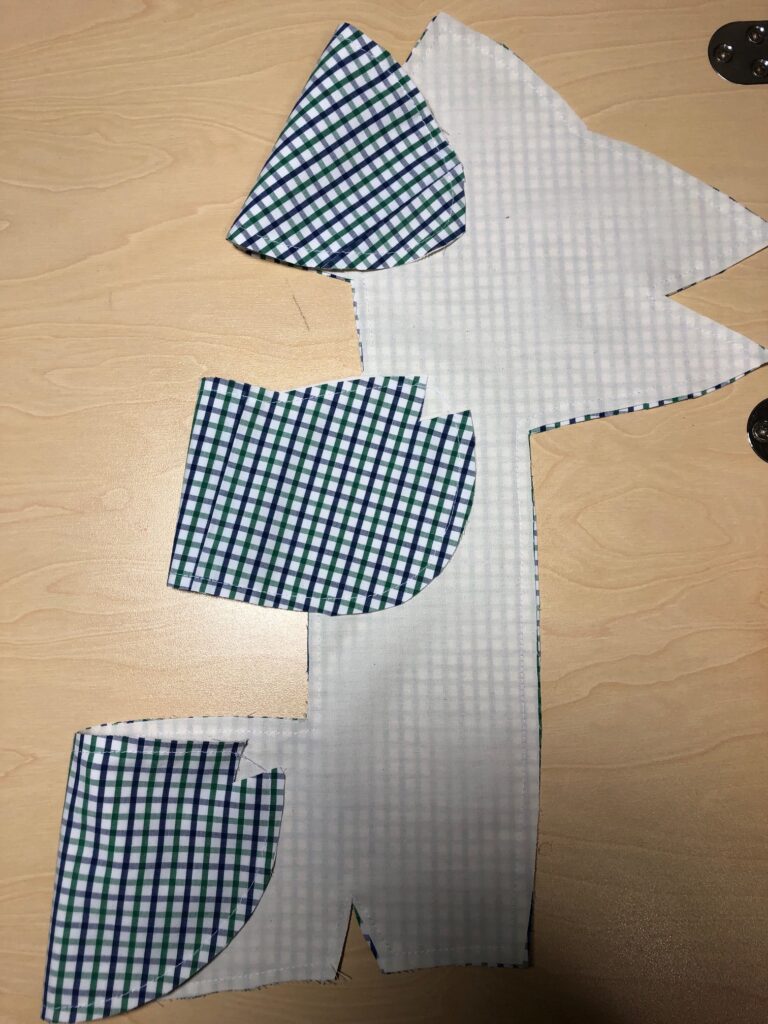
First, deconstruct the shirt. Cut the shirt apart close to the seams. Discard the collar, yoke, cuffs and front plackets. If you want to recycle the buttons into another project, remove them now.
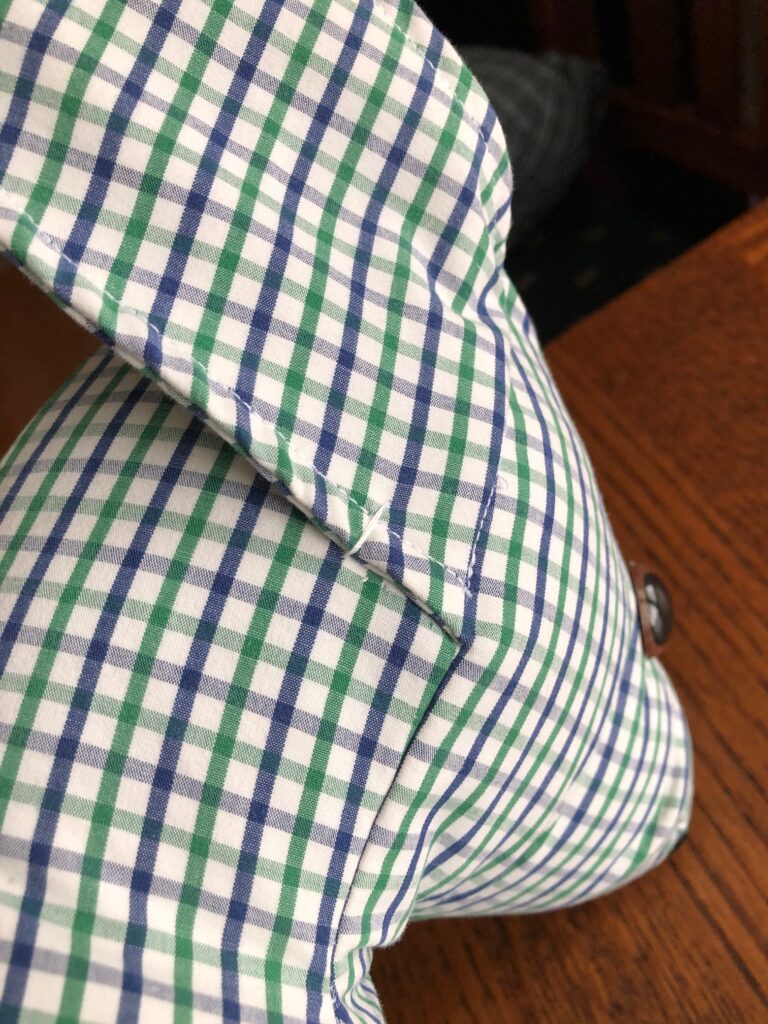
You now have a back section, two front sections and two sleeves. Each sleeve was cut in half and used to extend the front and back pieces so the pattern will fit. That means each arm/leg has a seam about halfway, but it doesn’t really show with the print.
One sleeve cut in half, ready to sew on the sides of the back of the shirt.The other sleeve, cut in half, ready to sew on the sides of the front of the shirt.
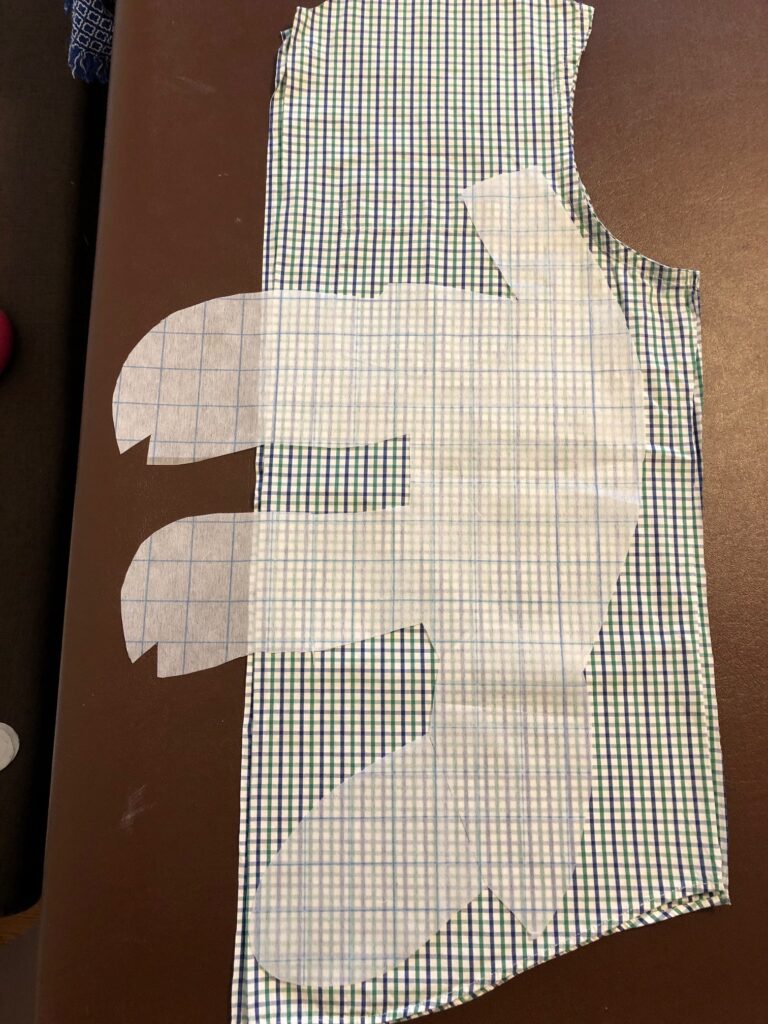
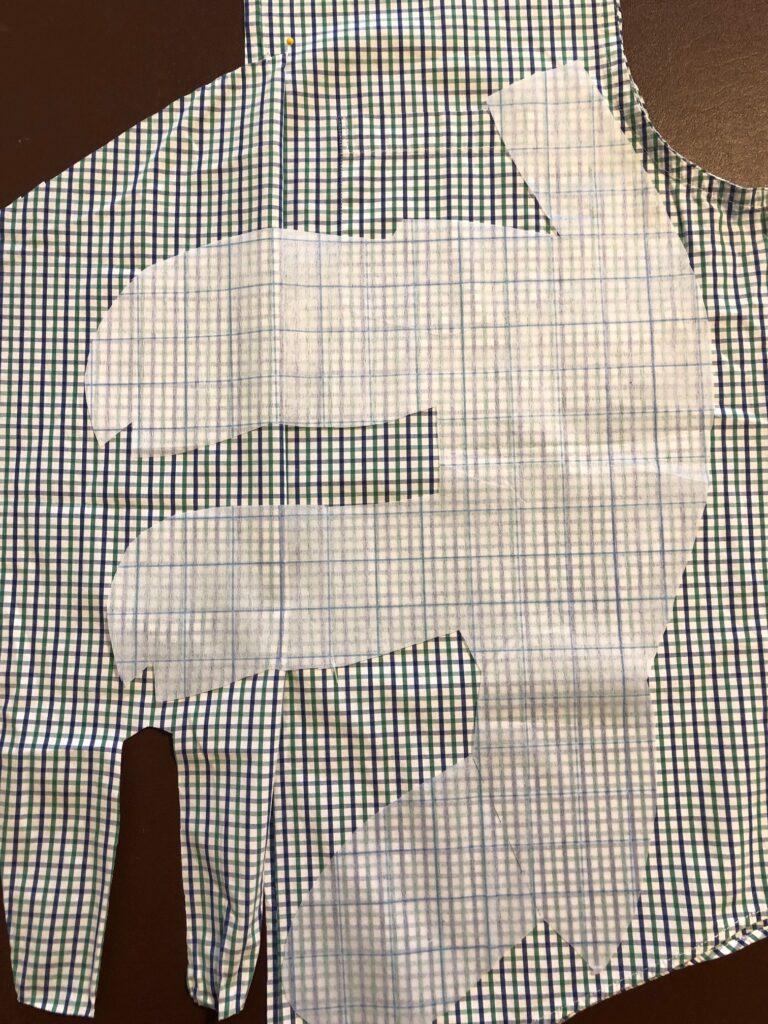
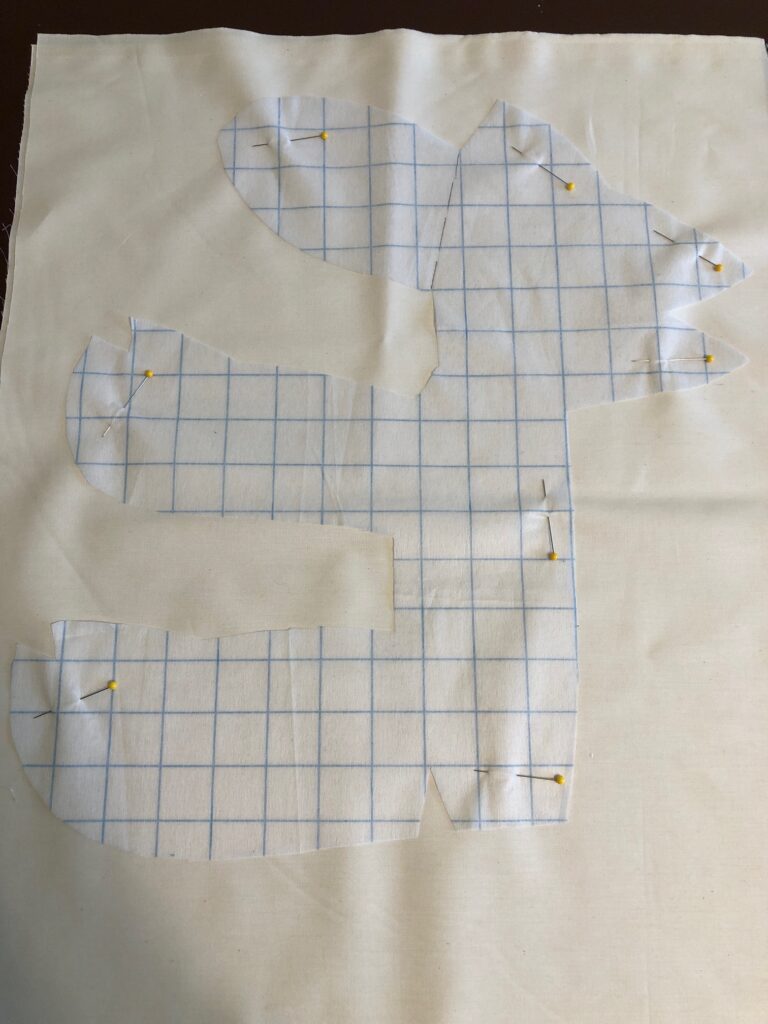
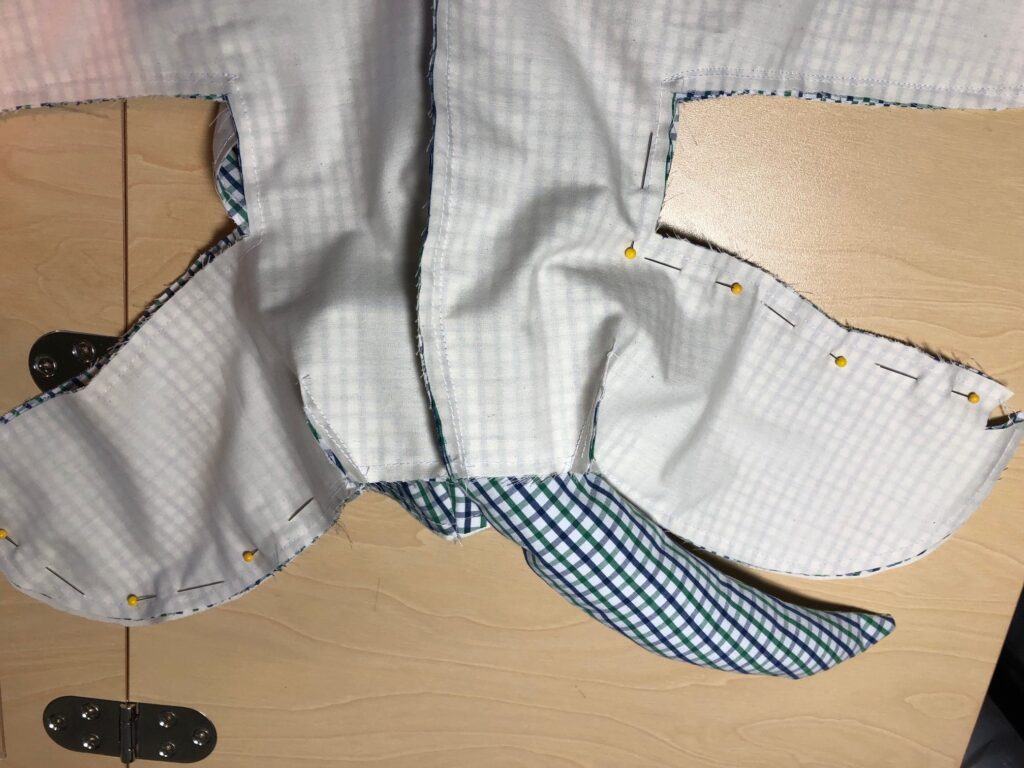
Next, lay out the pattern pieces on the shirt sections to see how it will fit. I needed to use the space where the shirt pocket was, so I laid the pattern so the double layers of fabric would end up on the animal’s bottom.
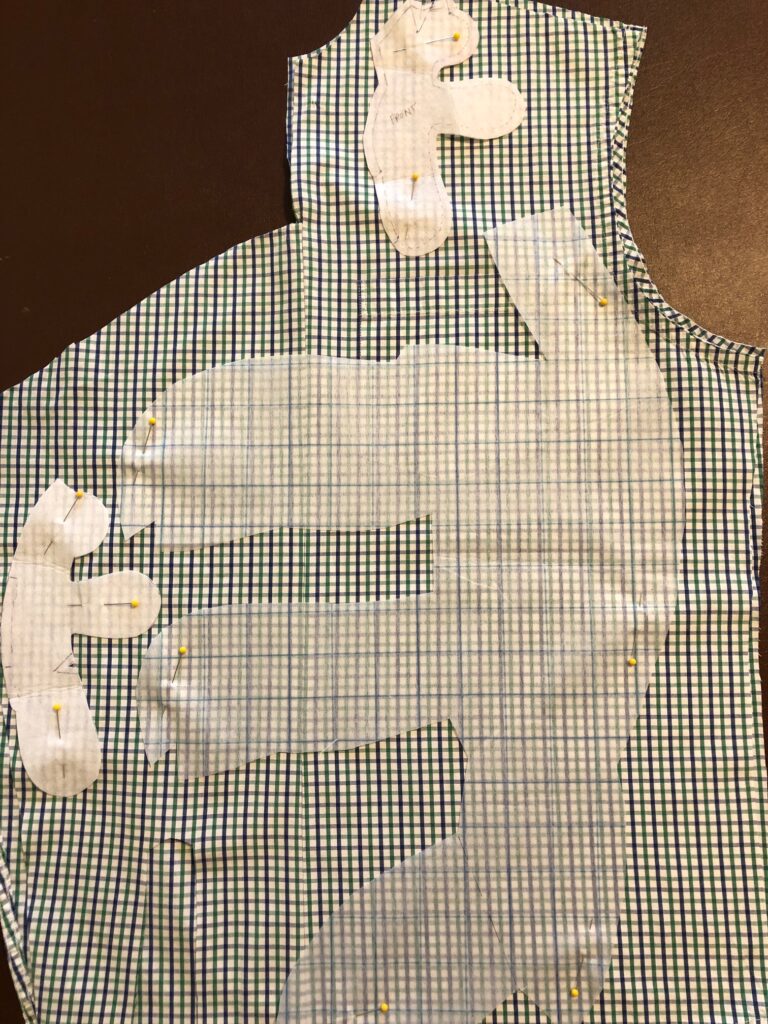
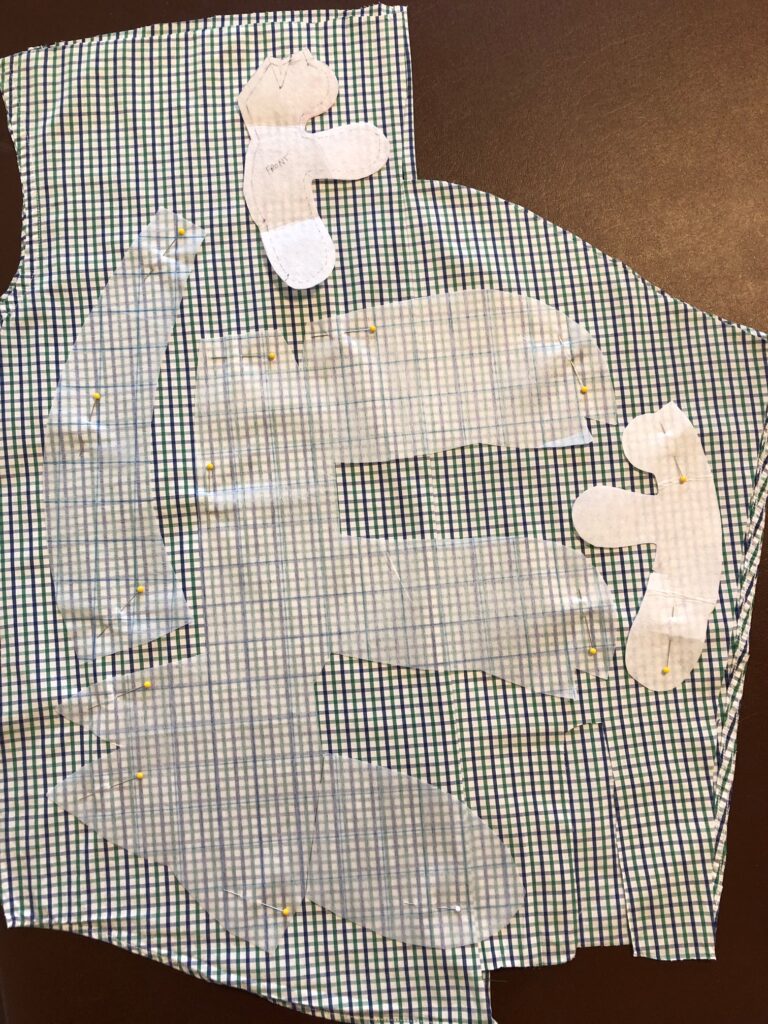
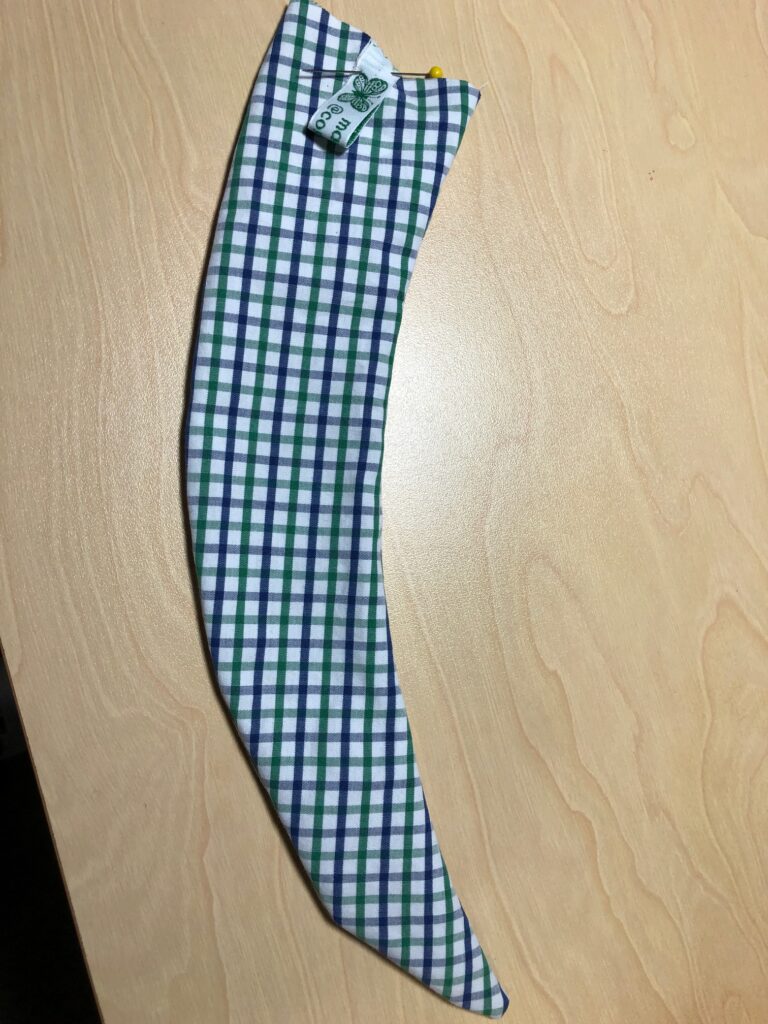
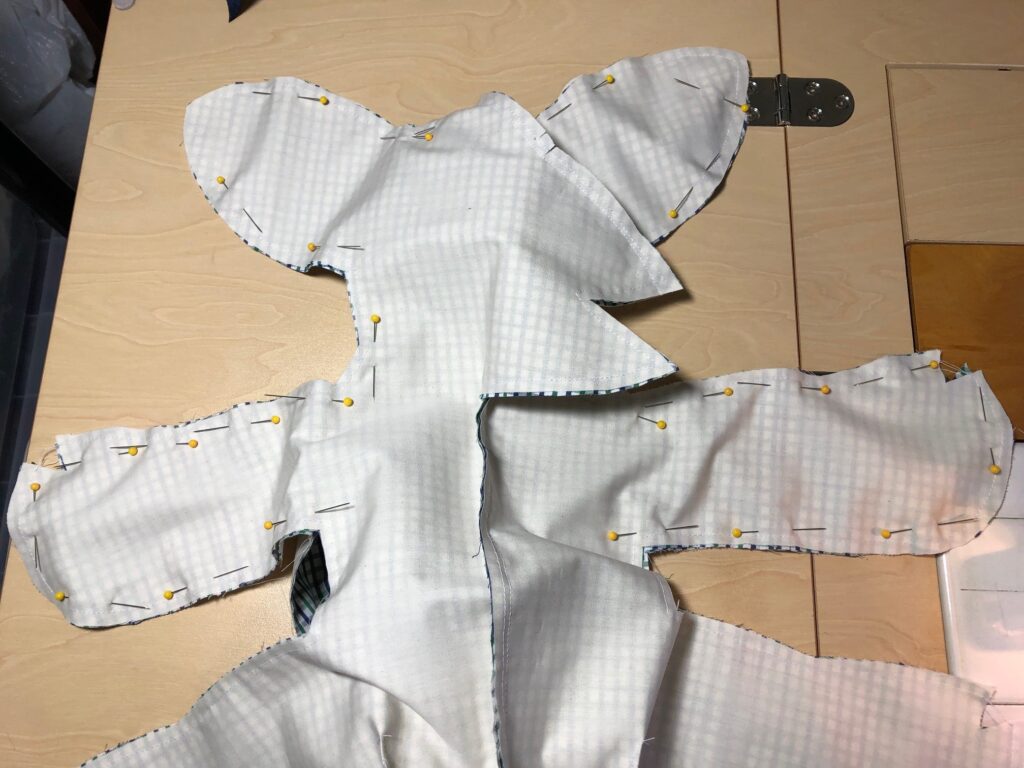
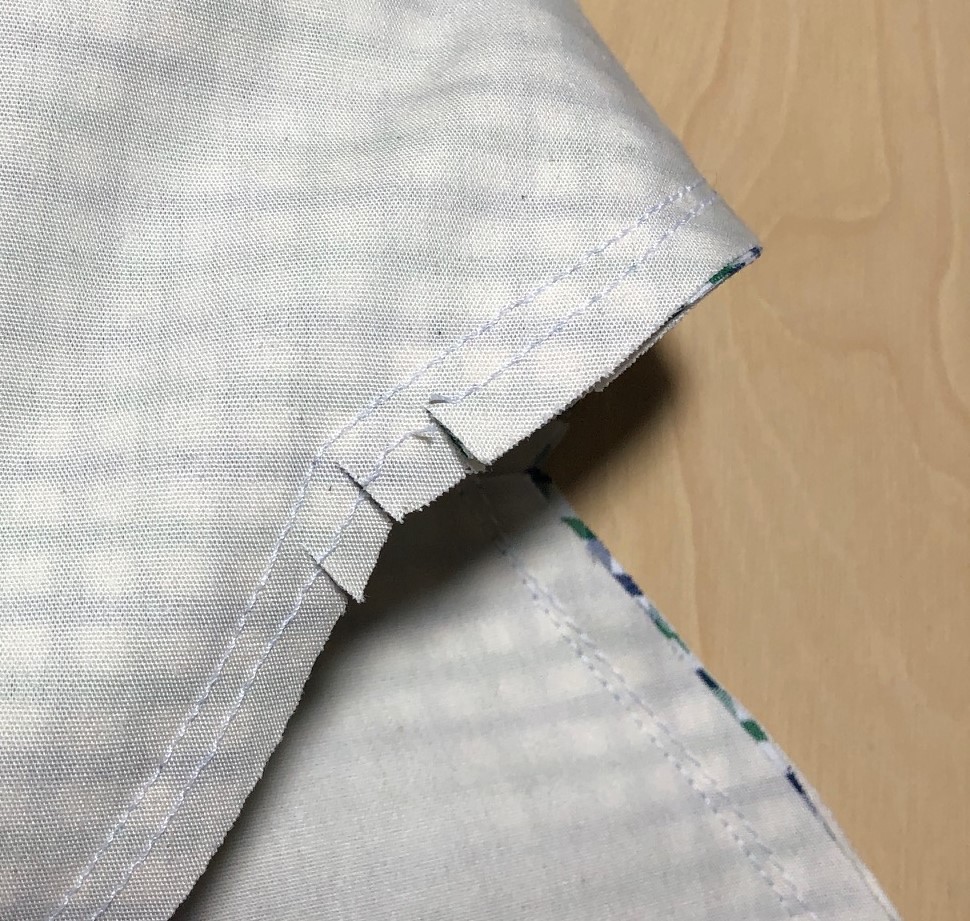
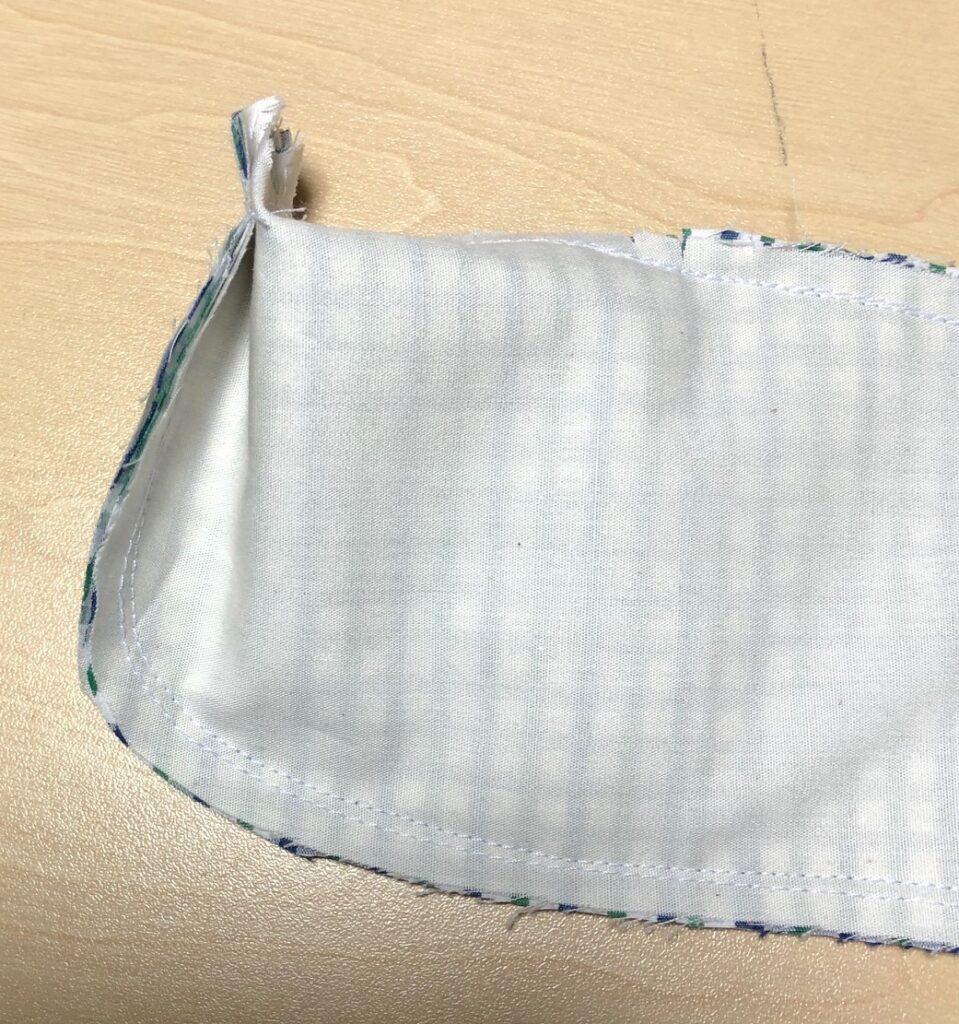
I cut each sleeve in half and used the fabric to extend the back and front, as shown below:I wanted to get at least one or two small bears out of the shirt fabric too.Can’t forget about the tail pattern! It fit beside the dog front pieces.To make the fabric sturdier for stuffing, I lined each piece with muslin.I stitched around the muslin and then treated it as one piece of fabric.The tail was stuffed very lightly and my tag was sewn into the seam.The two fronts and two backs were sewn together. Then the front was sewn to the back. I did the top half first and then pinned and sewed the bottom half…making sure the tail was tucked inside.Didn’t want the tail to get in the way so it needed to be tucked inside.Tail is tucked inside.Clip all seams before turning right side out.When sewing the tip of the nose, leave a few stitches open so the plastic nose can be easily pushed through from the front.Each leg and arm had a cross dart that gave them shape.
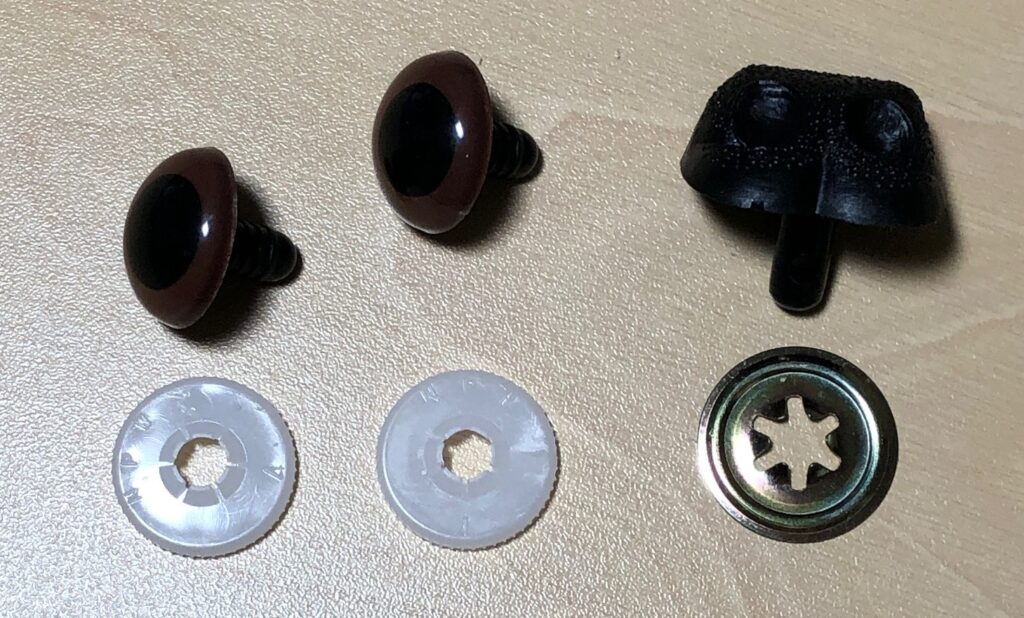
Although I prefer the look of buttons for the nose and eyes, I’ve learned they are hazards for little children. Since these dogs will be hugged by unknown persons (including children) I used the commercial eyes and plastic noses. They get pressed through a hole in the fabric (or through the missing stitches at the nose) and a plastic piece is secured on the back…inside the head.
Commercial eyes and nose.
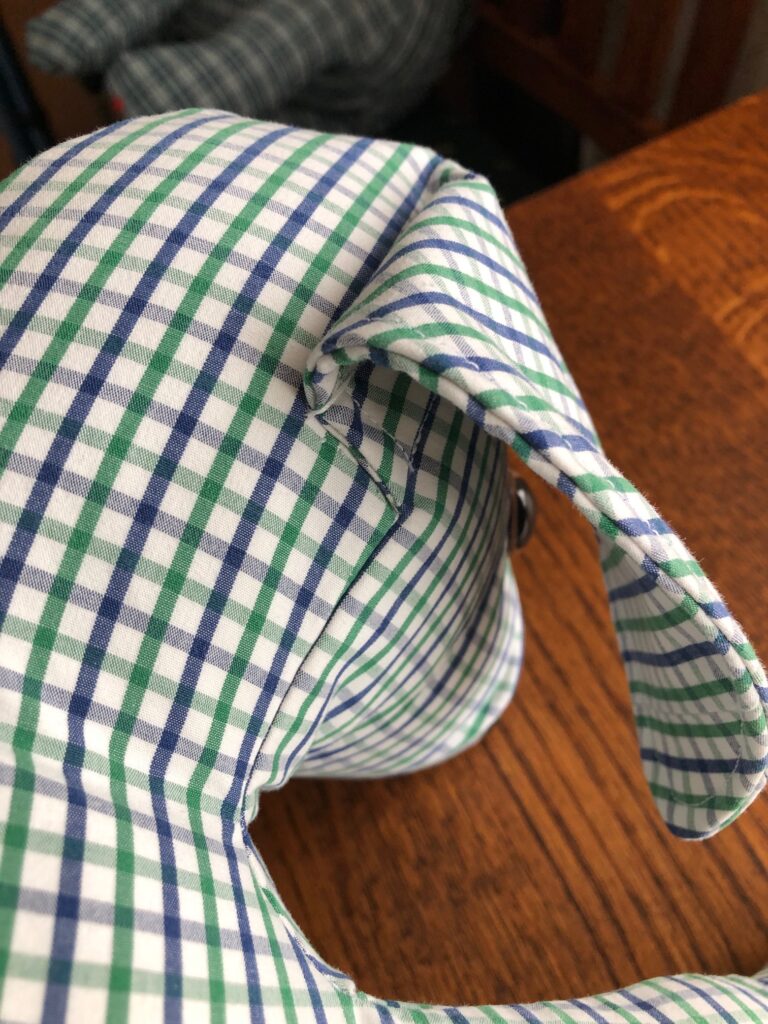
The ears are not stuffed but have stitching around the edge and along the side of the head. Stuff the head first, then the arms and legs, with the body last. A little less stuffing where the arms and legs join the body will keep them more movable.
Stitch up the opening in the back by hand.
To get the ears to hang right, see how they look when the dog is sitting up. I needed to tack a few stitches at the back of the ear so they would not hang so far forward.
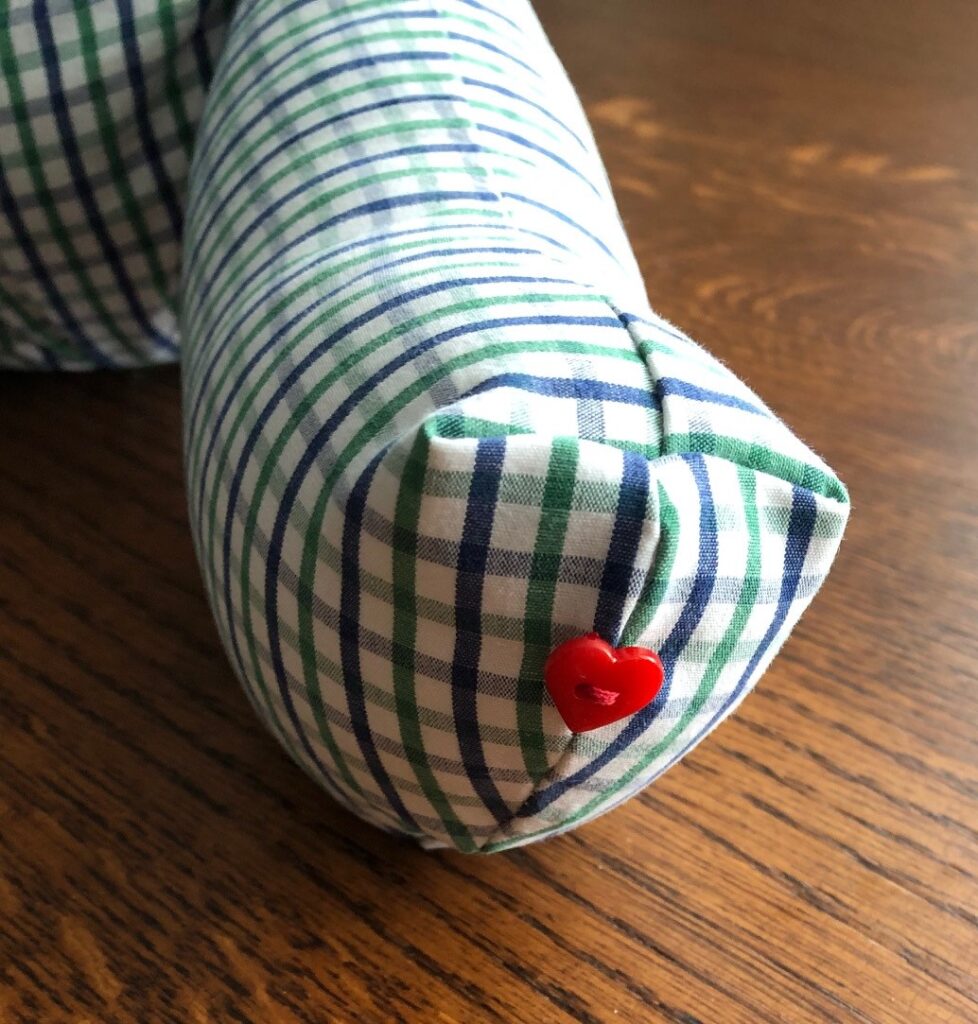
Finally, I add a heart button to the foot of each bear or dog I make, letting the family I had their loved one in my thoughts as I was creating their memory bear or dog.I think I’ll add a white ribbon to this one!
Find a pattern you like and try it with one of your shirts for practice! Enjoy!