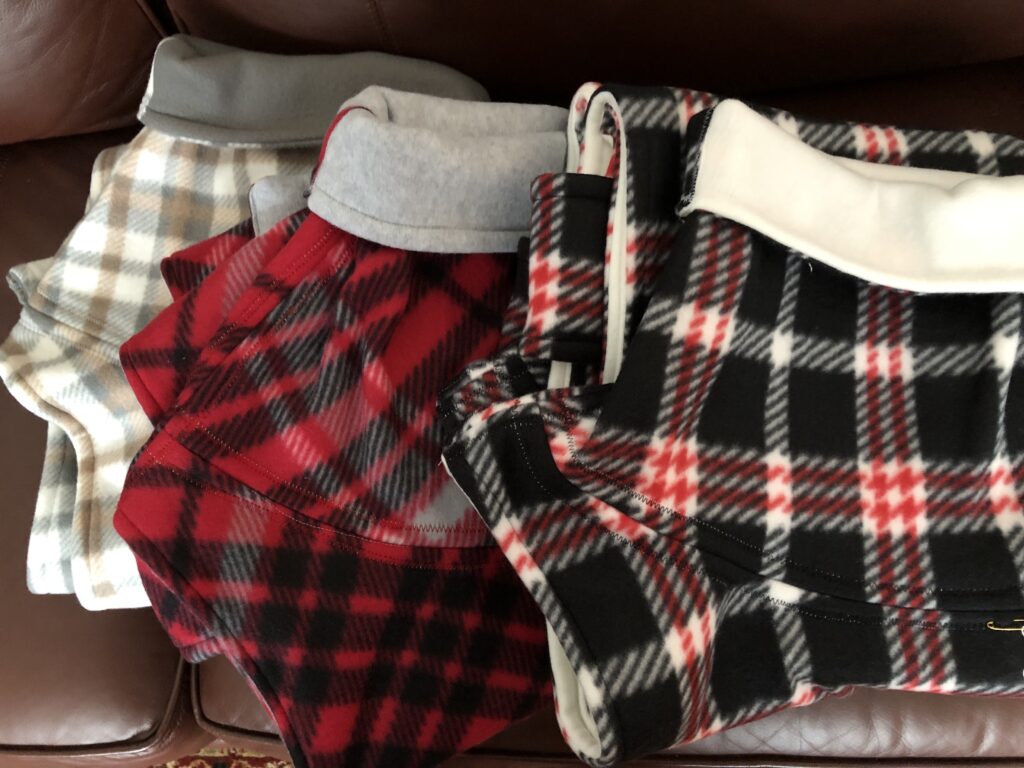
Nothing is more frustrating than to be in the middle of a huge project and have an equipment malfunction! I’m trying to crank out as many greyhound coats as I can now that I have a huge pile of fleece to work with.
This time of year is a great time to be at my sewing machine because all the Hallmark Christmas Movies are on…on three different channels! Some of the movies I have seen before but the background music is usually Christmas themes so I can sew like crazy and not be too distracted.
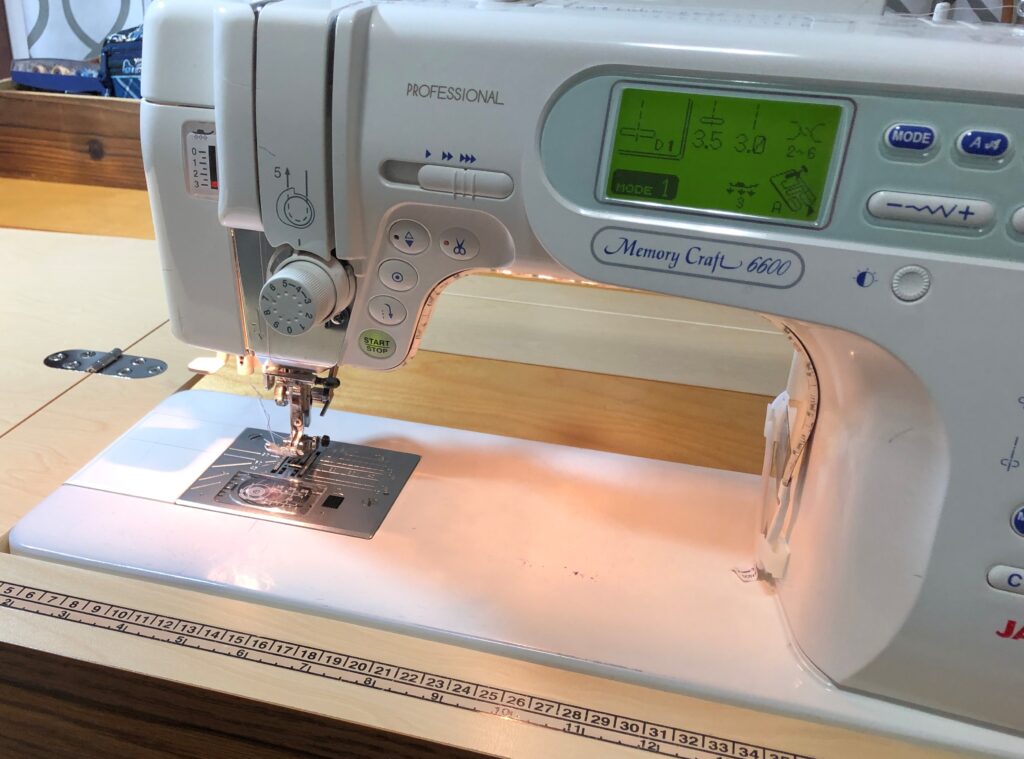
Until my machine stops working properly. After I cleaned out the fleece fuzz, checked that the machine is threaded correctly, checked the needle for any issues, checked the tension, etc. and still…the thread broke, the bobbin jammed and I’m out of business. Grrrr!!
After a quick phone call to the local repair shop (Frye’s Sweeper & Sewing in State College) I was able to lift the machine out of the table case and set it in the back seat of the car…secured with the seat belt, of course…and headed off to the shop.
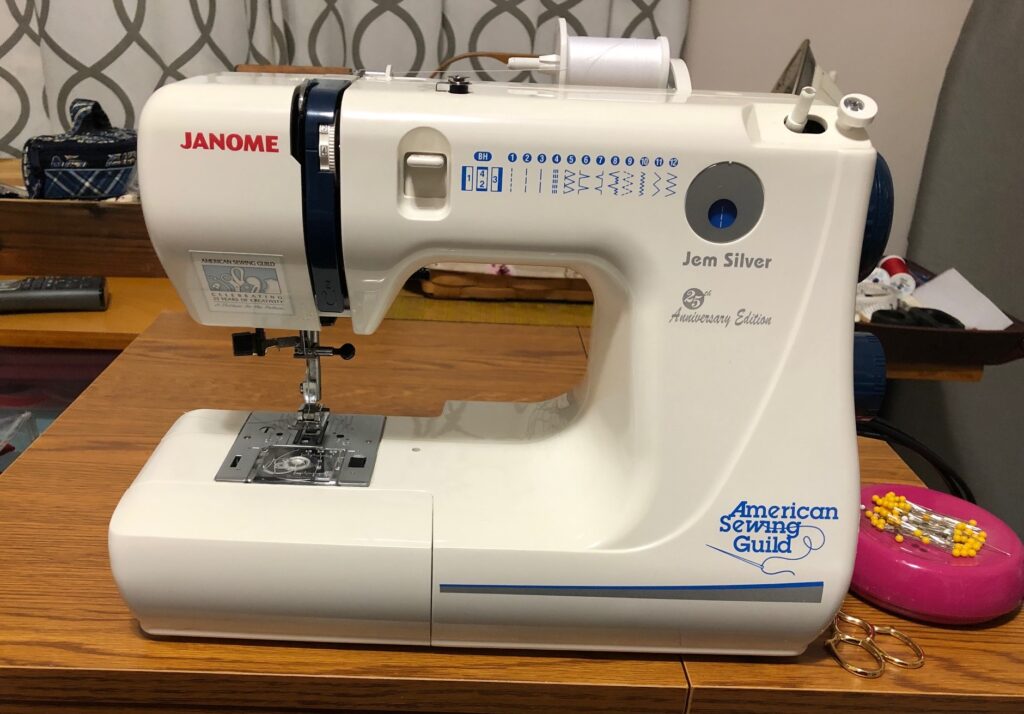
So…I’m out of the fleece dog coat business for a week or so. However, I still have some other sewing to do that isn’t fleece. Time to bring out the smaller portable that I use if I need to sew away from home. Works great…just can’t handle fleece.
I have to close up the table and work on top, but this 3/4 size Janome will work fine with regular cotton fabric. So, for the next week, I’ll be working on other projects…probably making more Christmas ornaments for gifts.
Hopefully, my workhorse machine will be all fixed up soon so I can continue with the dog coats. I know the dogs will appreciate them!
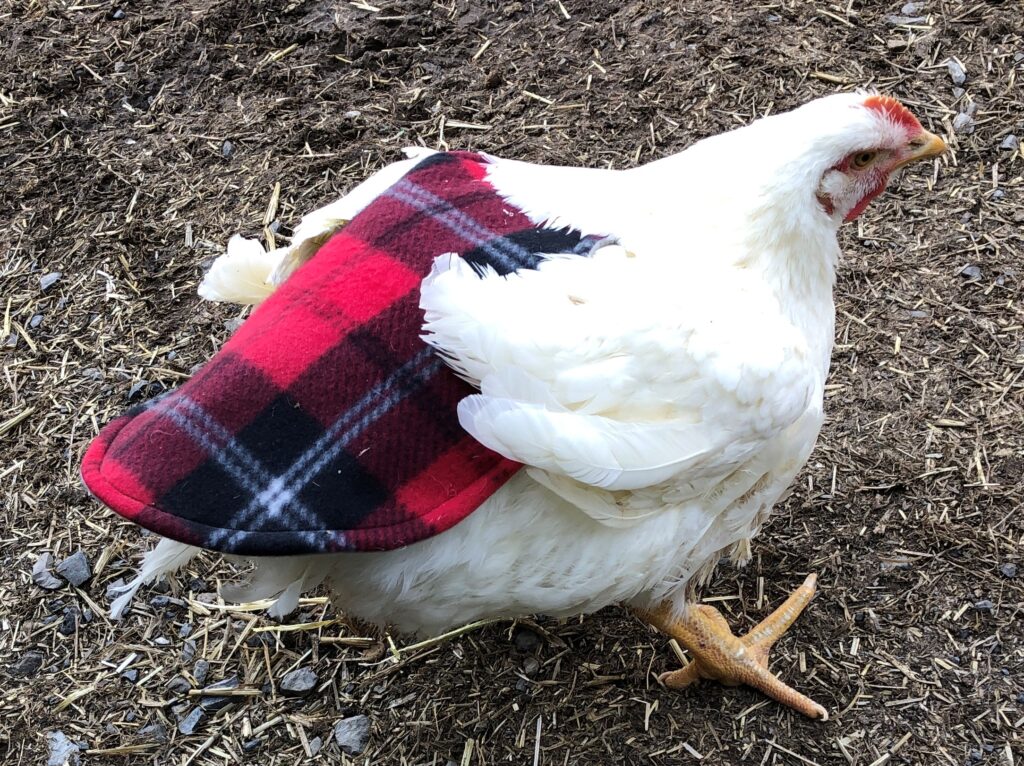
A few years ago I had a request to make a coat for a chicken. Who knew they would ever need one!
Apparently, hens can get damaged feathers and broken skin from mating males or even from other hens pecking on them…you’ve heard of the “pecking order,” right? I had no idea, but I guess folks that raise chickens see the need for these now and then.
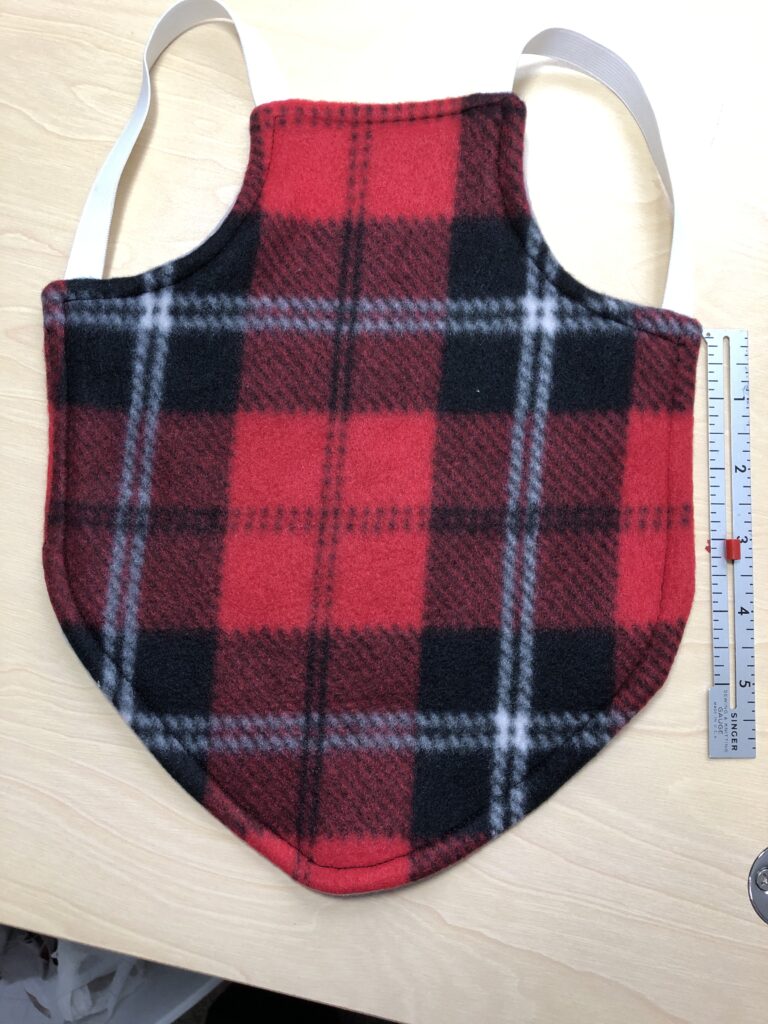
A chicken “saddle” or “hen apron” are all names used for the same thing. It’s a little “apron looking” little piece of material that is used to put on your hens’ backs to protect their feathers. It protects their feathers, allowing them time to grow back. The soft elastic wraps around their wings.
Turns out a friend had some free-range chickens and they were picking on one in particular. Her tail feathers were being pecked out and the poor thing wouldn’t come out of the corner to eat. Hmmm…first a little research was in order. Amazingly, Pinterest had several patterns to make these little “coats.”
The pattern was pretty simple, but of course I didn’t have a chicken to measure so I made one first and had the owner try it on the chicken. Then I adjusted the elastic and general shape until it was right for that chicken.
My first try was a double layer of flannel (see above). The second one was made of denim so it could withstand the pecking better.
It protected the chicken at risk and eventually the tail feathers grew back and the chicken finally risked coming out of the corner to eat dinner. I guess it helps break the habits of aggressive chickens.
I ended up making 3 or 4 coats, including a few that were barely half this size for a very small breed of chicken.
This was an interesting adventure into making unusual “coats” for chickens!
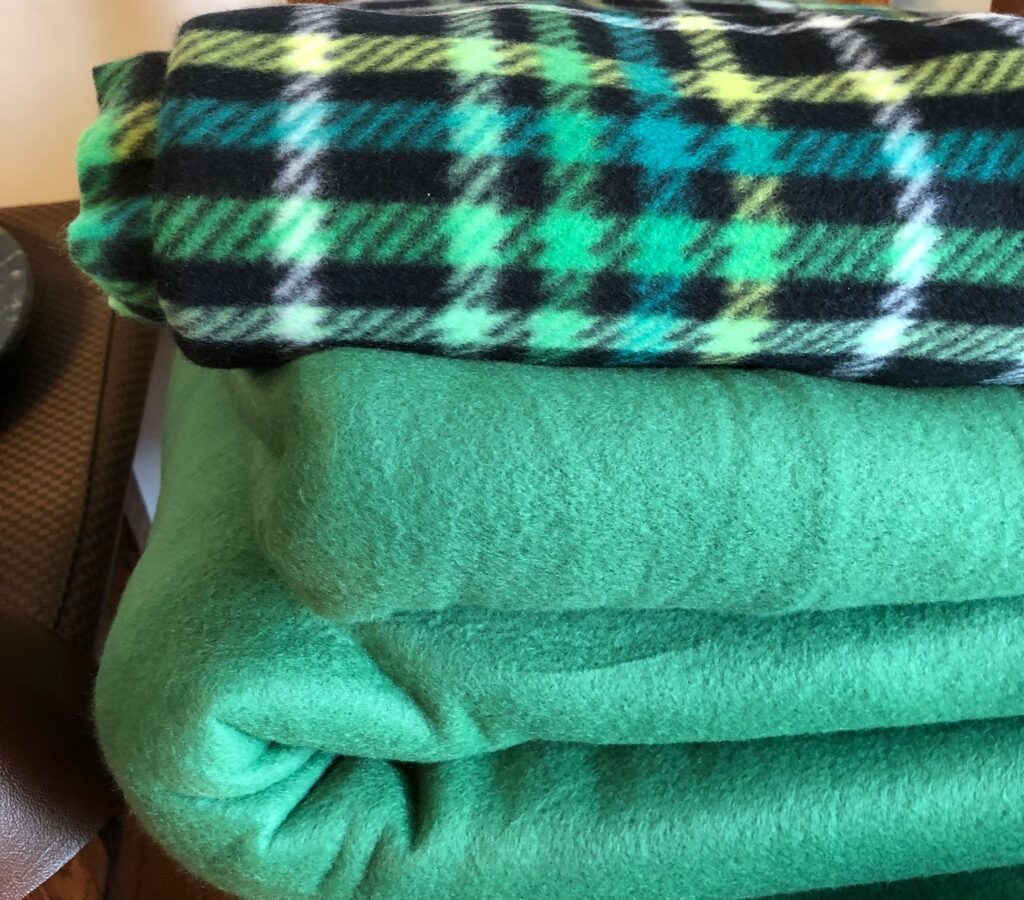
In my research, I found coats are often made for sheep to keep their wool clean until they are sheared. This is really helpful if the wool is going to be spun into yarn…much easier to process the fibers if they start out clean. Of course, it’s also common to provide coats for warmth to goats and horses, but luckily, I haven’t been asked to make those yet! I think I’ll stick with greyhound coats! Enjoy!
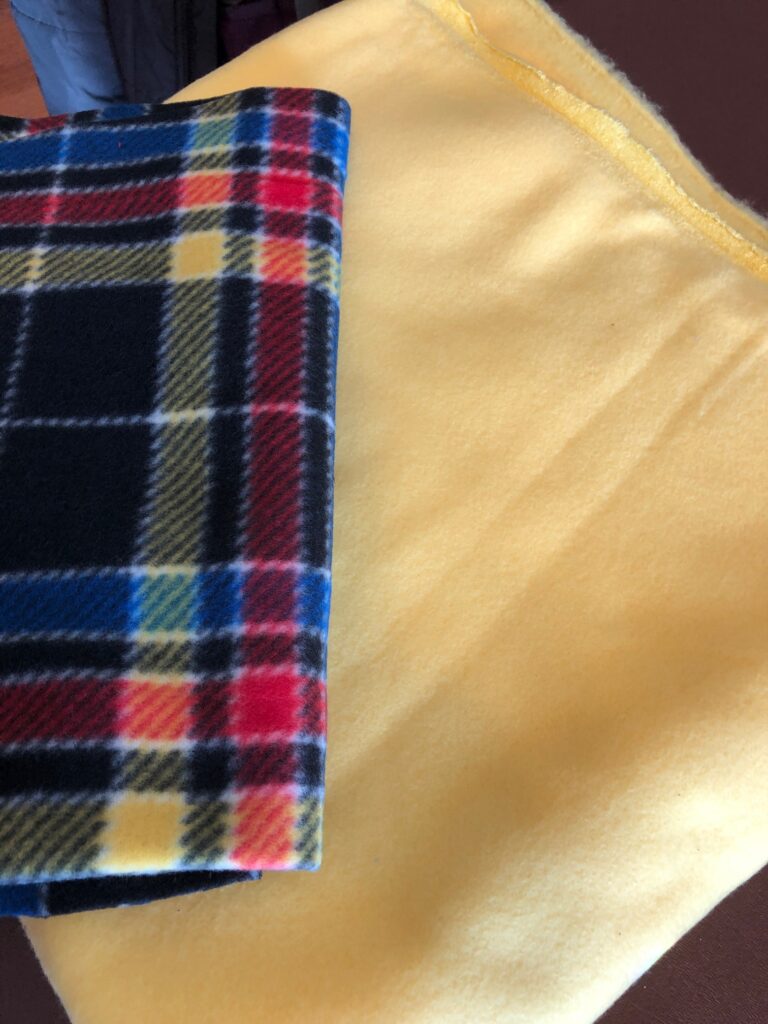
Today began a marathon to crank out some cozy coats for the greyhounds. All of a sudden, Nittany Greyhounds has a full house and adoptions are happening fast. My work with Nittany Greyhounds started years ago, when I was asked to make some coats for the greyhounds. The dogs arrive in Pennsylvania from around the country…and recently, even from Ireland! The group wanted to be able to offer a coat to new adopters but at that time finding a source for coats that fit the unique shape of the dogs was difficult, expensive or didn’t fit well anyway. So, I took on the challenge to make a coat that fit. Thus began my work volunteering with Nittany Greyhounds. Now, years later, we have a coat pattern that works! Let the shopping begin!
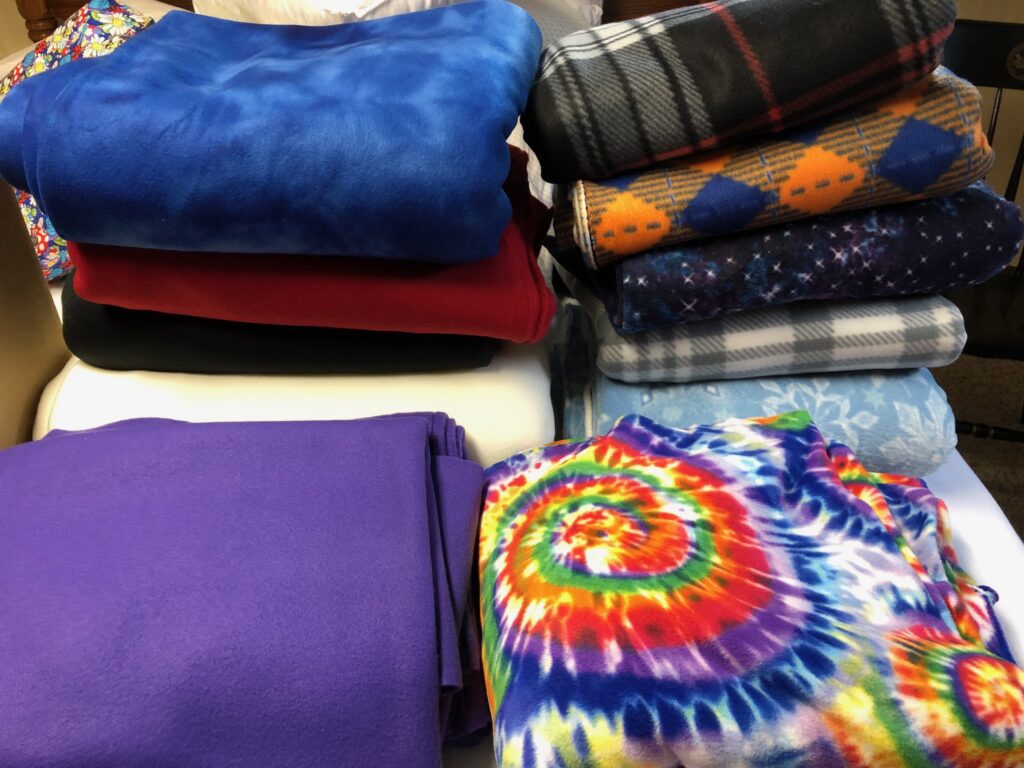
Toni and I spent a productive hour at JoAnn Fabrics to find a stack of cozy fleece.
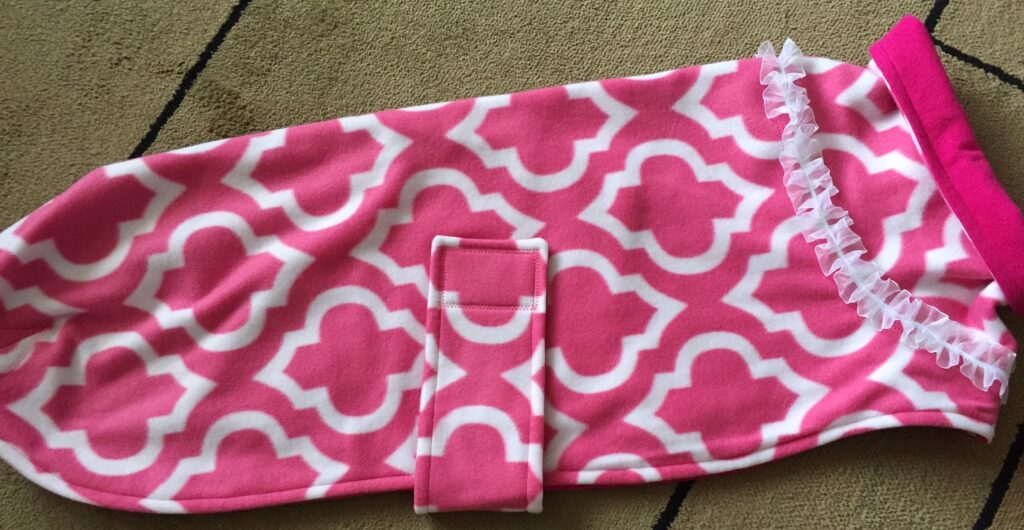
At one point over the years we tried to make some of the small coats to look cute for the females, but because some of the females needed large coats and some of the males needed small coats, there was always a mismatch between the number of dogs and the number of coats in the right size. It was much more efficient to make coats in neutral prints and colors in both small and large sizes.
This coat would only work for a small female, if the owner didn’t mind frills!
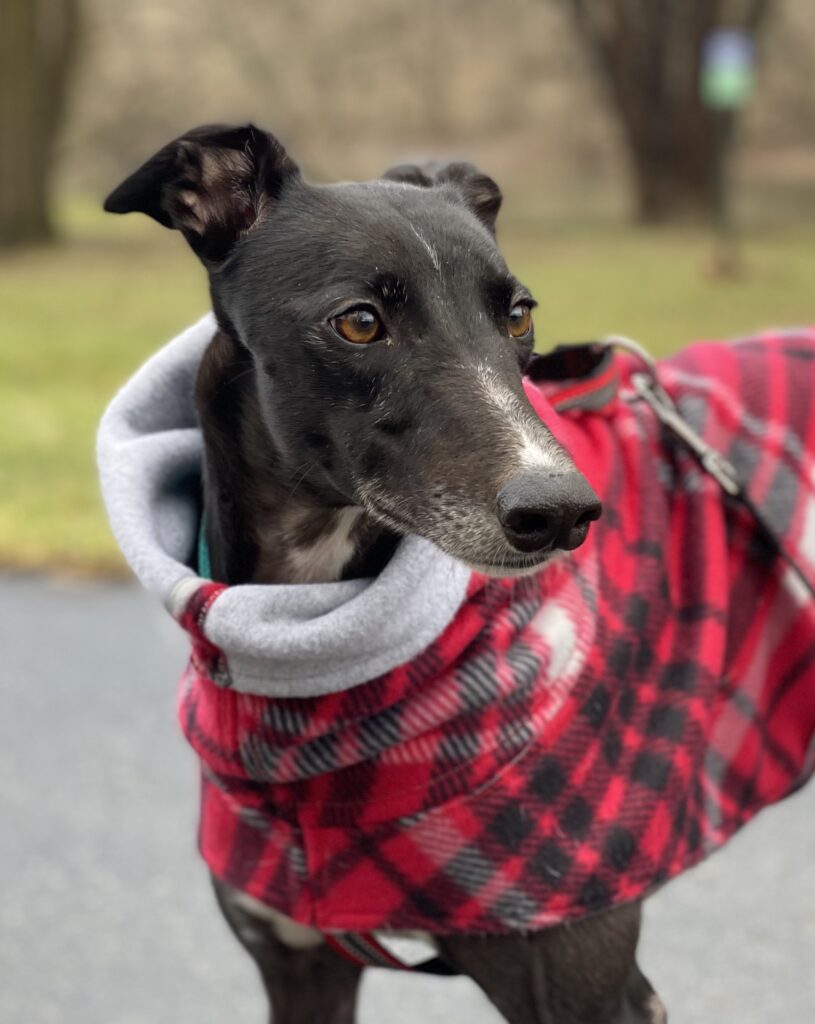
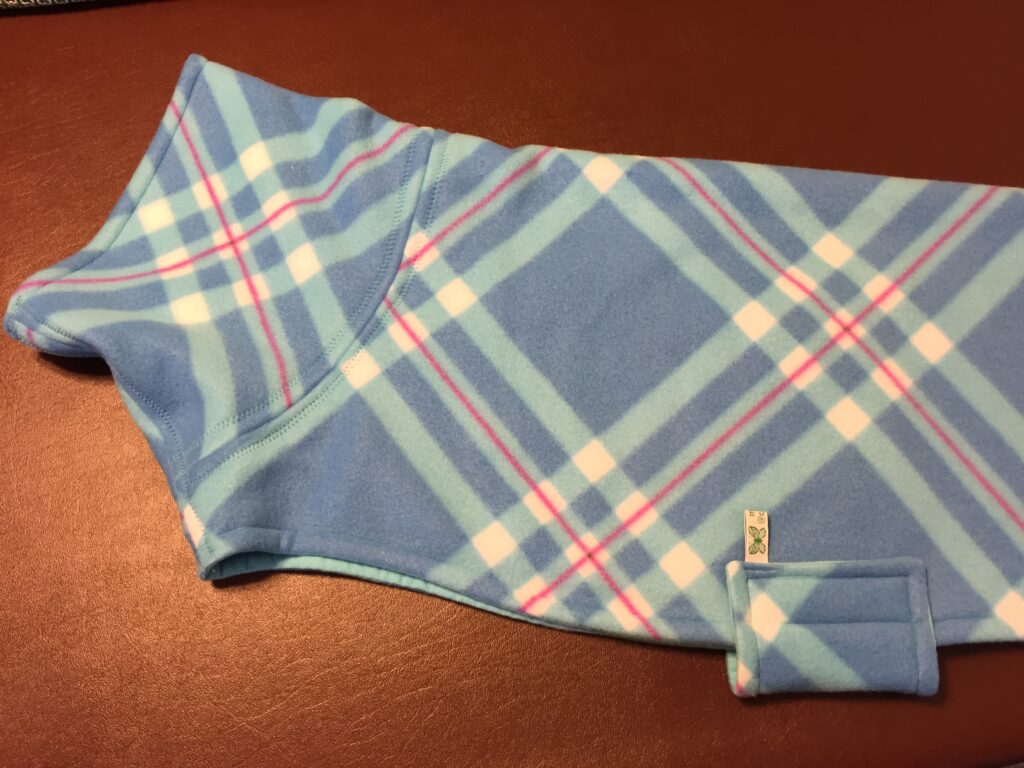
At the beginning the coats had a shorter turtle neck…called a snood. (Not sure where that name came from.)
Over the years the “snood” kept getting longer to accommodate their long necks and sensitive ears. Now this “snood” can be pulled up over their ears for warmth if needed.
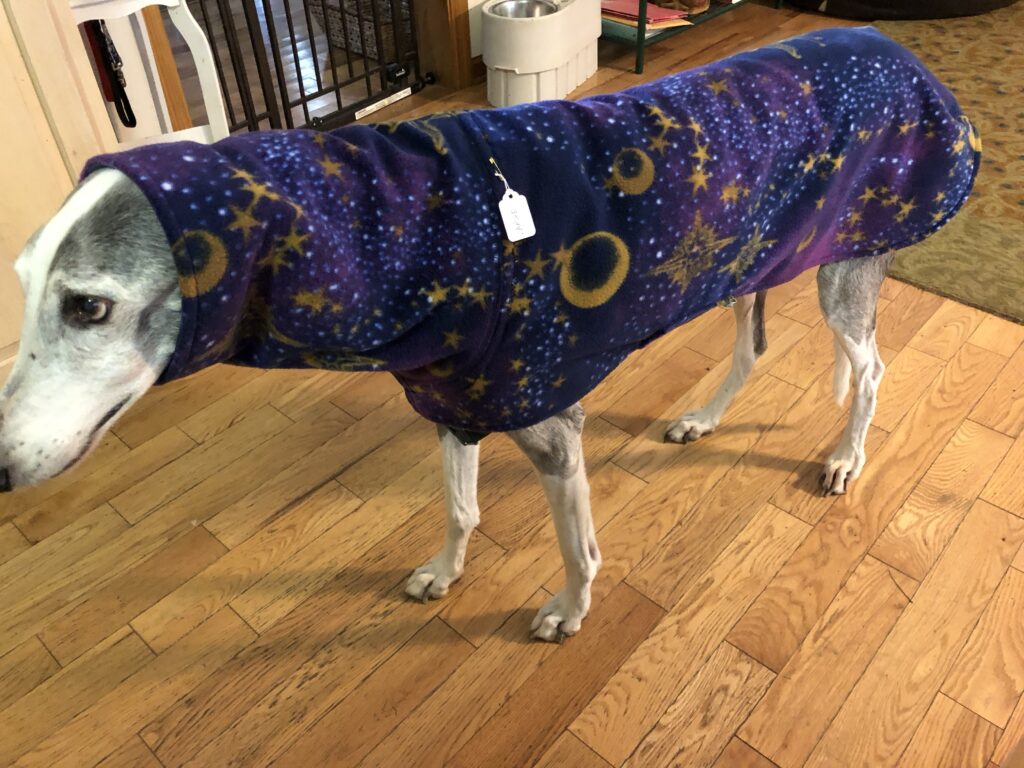
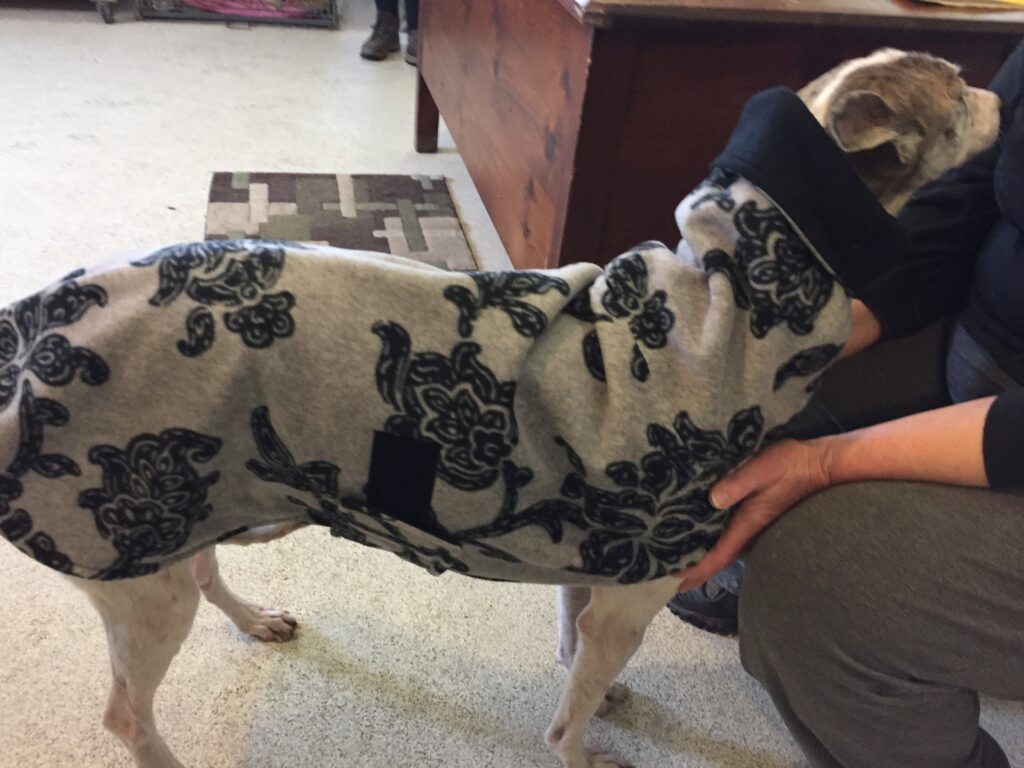
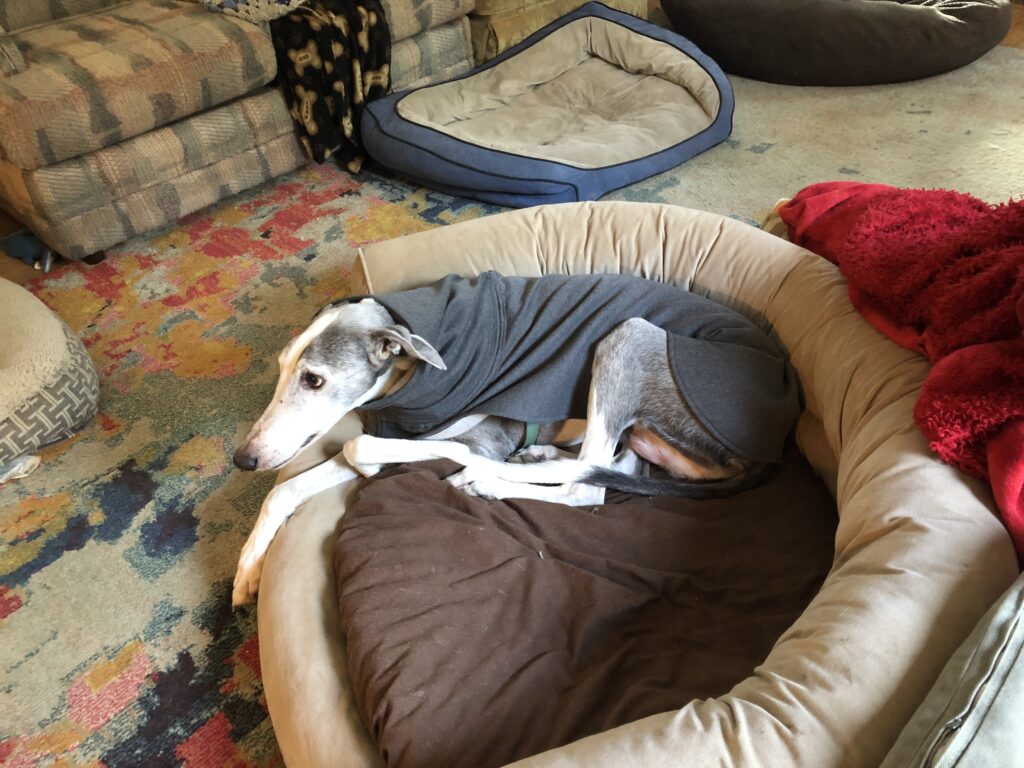
Since many of the dogs wear coats inside and out, we had to do some testing to see how the coat worked when they laid down. This coat looked good when the dog was standing, but scrunched up when he laid in his bed:
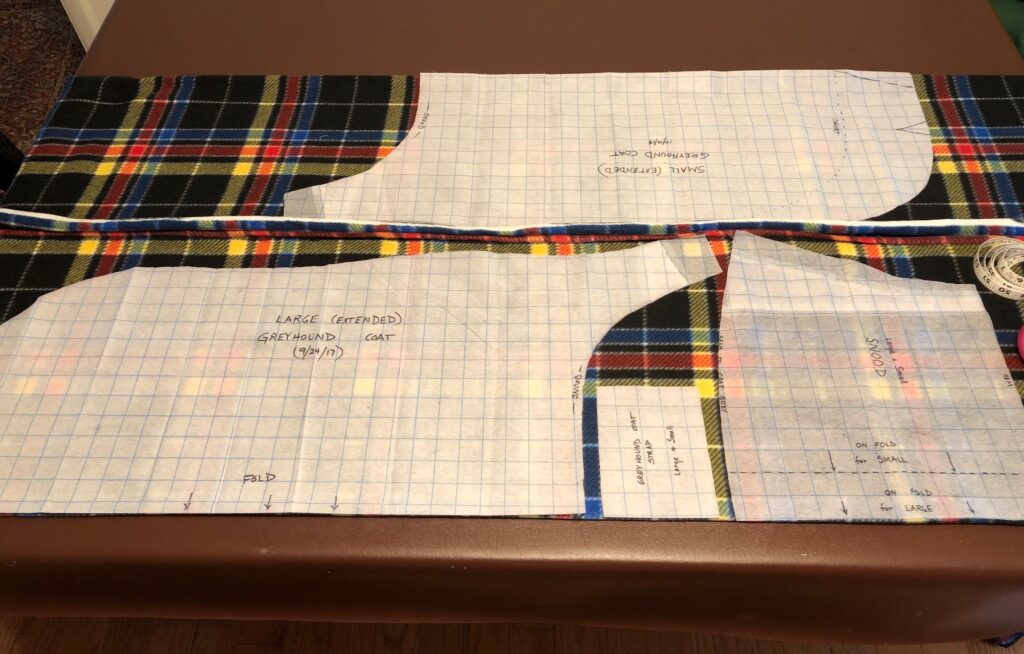
I had to change my fabric to all fleece AND I had to expand the pattern across the chest area.
You can see how my pattern has had to change over the years. This iteration has worked for a while so it’s probably time to lay the pattern on some new grid paper and cut out a new one!
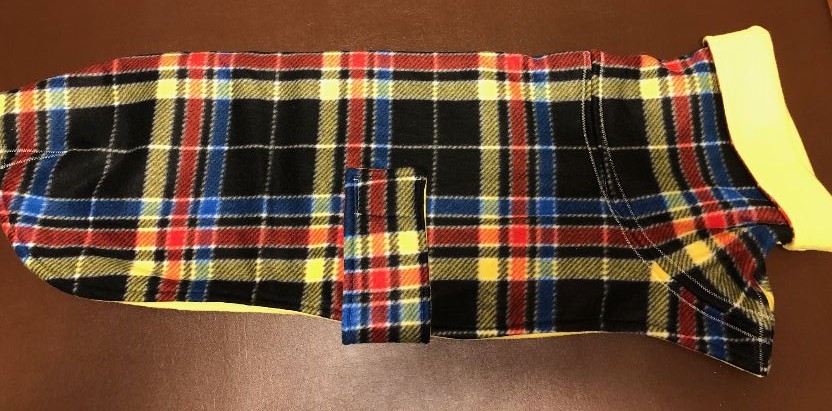
Can’t you see a greyhound in this coat running across the snow this winter!
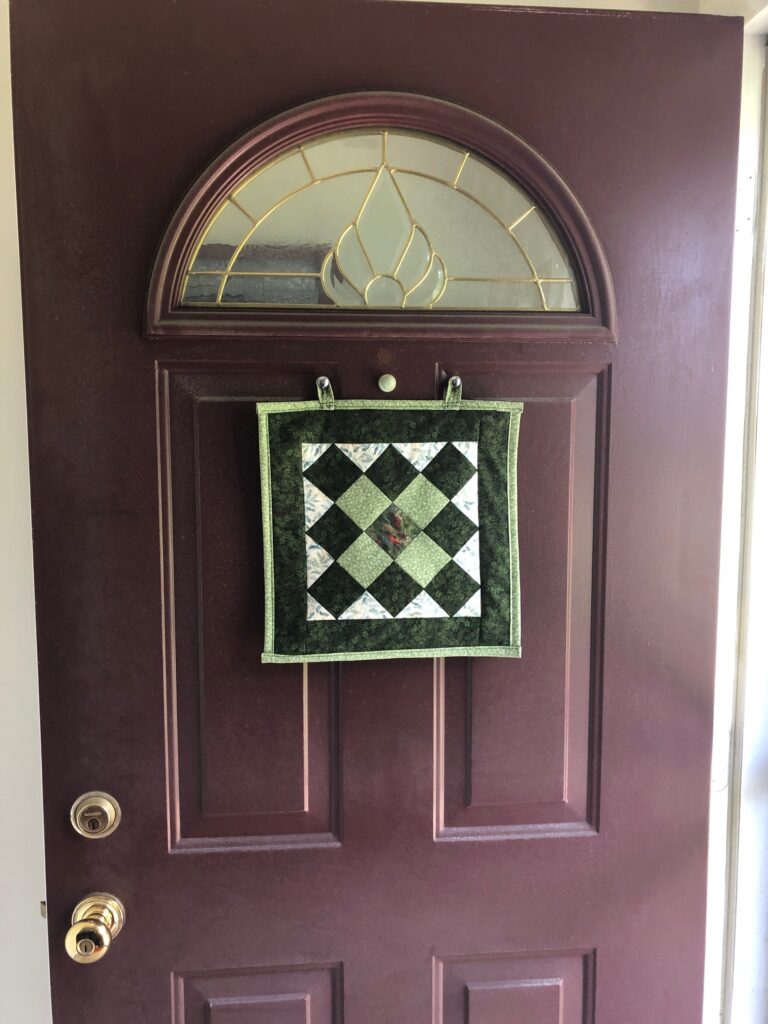
Our weather is finally feeling like Fall…good thing, it arrives tomorrow, September 22.
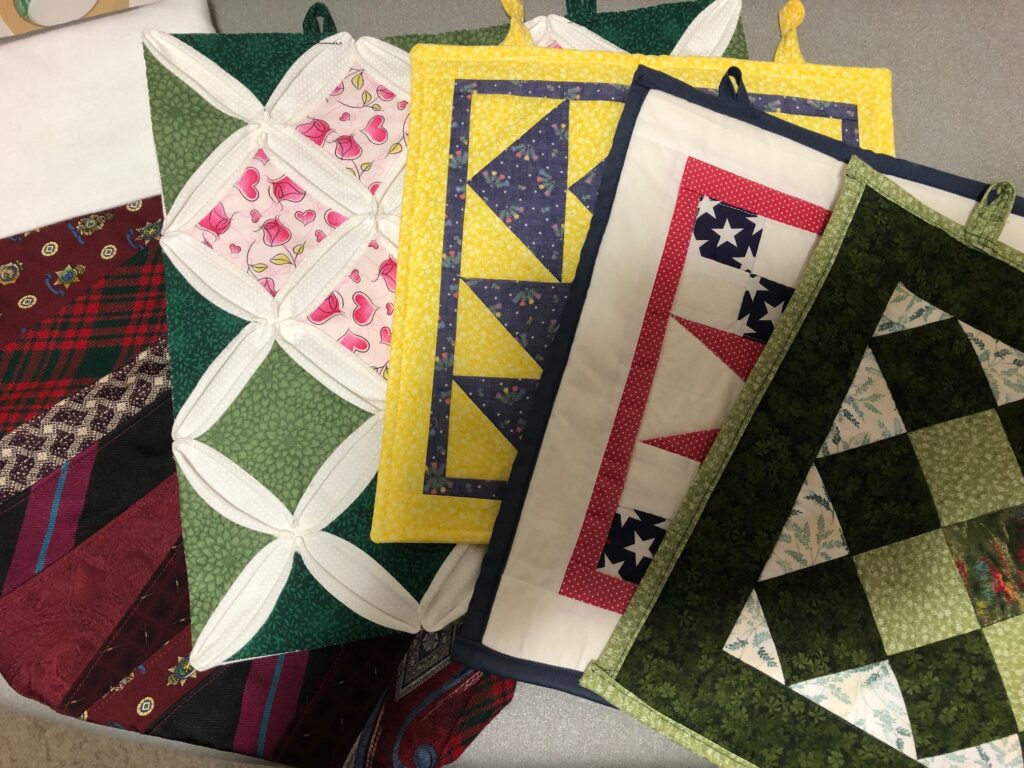
That means I finally got motivated to change up the decoration on my front door. For those of you new to my blogging adventure, I’ve had trouble finding a wreathe for my front door that was skinny enough to not get smashed by the screen door. Last Christmas I gave up and decided to make appropriate small quilts to hang on the door. They stayed flat and didn’t get smashed. Success!
Here are the ones I’ve done this year so far:
If you would like to read about each one, check the index on the Welcome page and scroll to Door Quilts. They should all appear there in order…just scroll down to the article you’re looking for.
I did notice the colors of the blocks faded after two months on the front door, so next year I can just make a different block if I want.
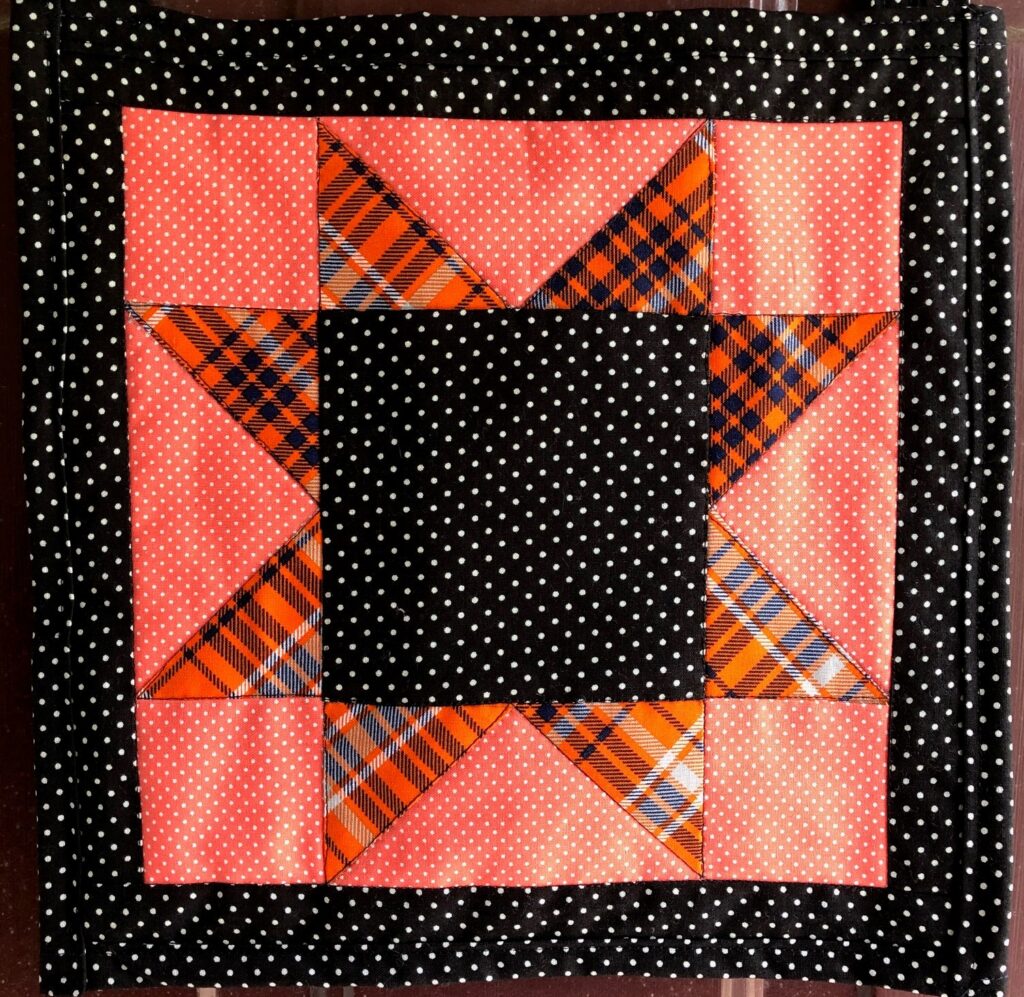
This Fall door quilt was a challenge because I didn’t have a single piece of orange fabric in my stash. Obviously, I have not used orange at all for a long time. To the rescue…JoAnn Fabrics and their “fat quarters” so I could have a few. I also spent time trying to be creative, something like a crazy quilt, but obviously I ended up with a simple star pattern:
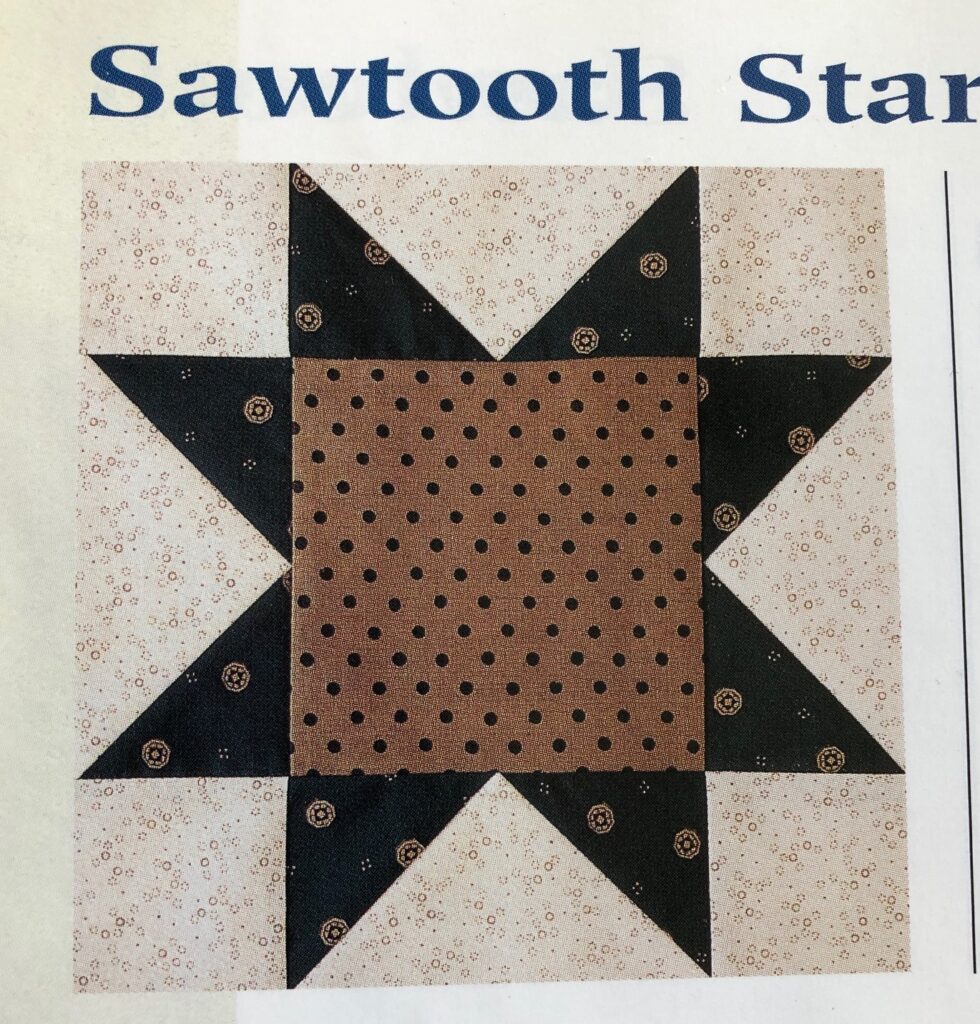
This pattern is called a Sawtooth Star in one book:
However, when I looked up that name in another book, these two blocks showed up:
The one on the left is named, “Saw Toothed Star”; the one on the right is called, “Free Trade”. Go figure!
If you notice, the arrangement of triangles and squares is similar to mine, except the central block is solid.
Oh well, I hand-pieced the block and then machine quilted around the pieces. They are not my favorite colors, but I guess they work for Halloween. I may have to do another one for November and then I can use the Christmas Stocking from last year in December.
Actually, I don’t think this block looks too bad on the front door! Enjoy!
Seems silly to be starting a project for Christmas in September…I know! However, anyone who hand crafts gifts knows that NOW is the time to get started. It’s barely 100 days until Christmas. All the ads for Joann Fabrics and Michaels Crafts stores advertise their patterns and supplies to make gifts and are already encouraging crafters to get started. Television ads show the latest, most desirable toys we should look for soon. The catalogs are arriving with special gifts we could choose for our holiday giving. So, I have begun making my gift ornaments!
Now that I’ve made my trek to Apple Hill Antiques and assembled what I need to make unique ornaments I thought I’d follow up the last post with a sample of what I’m making.
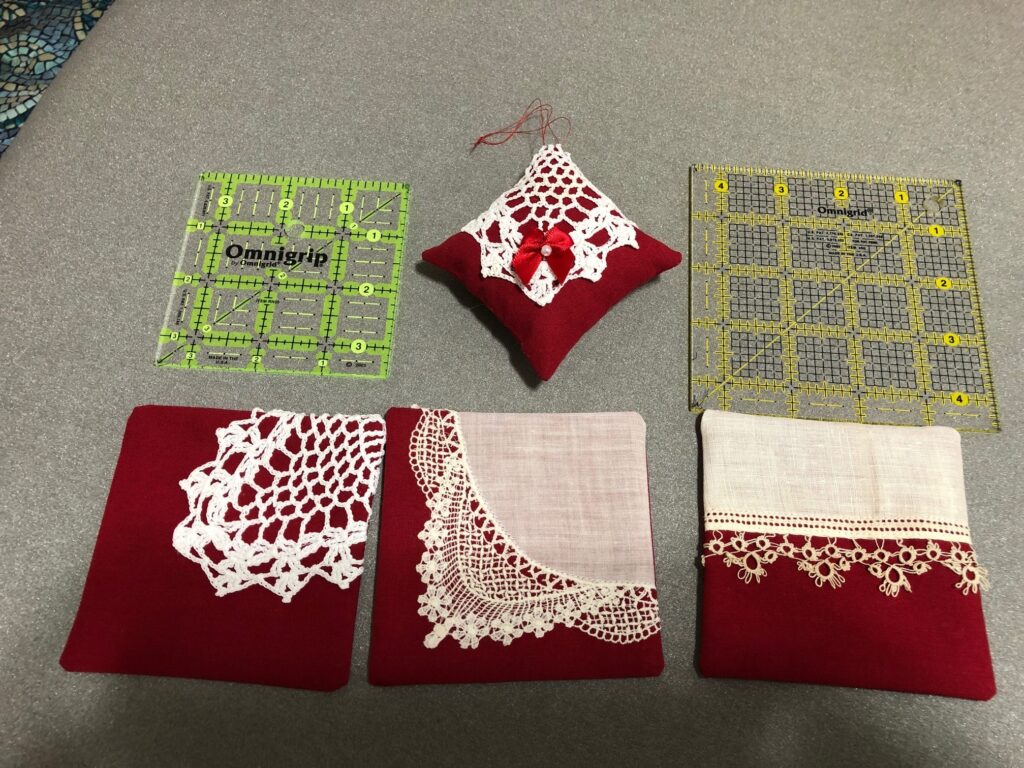
I shared my first “test” ornament:
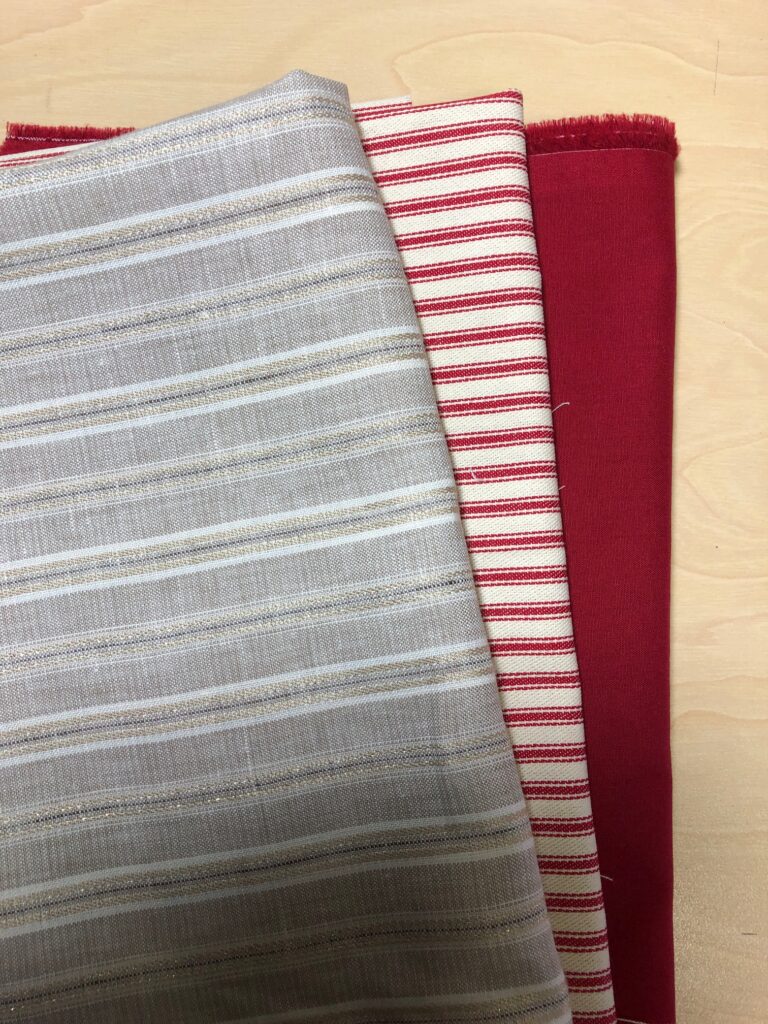
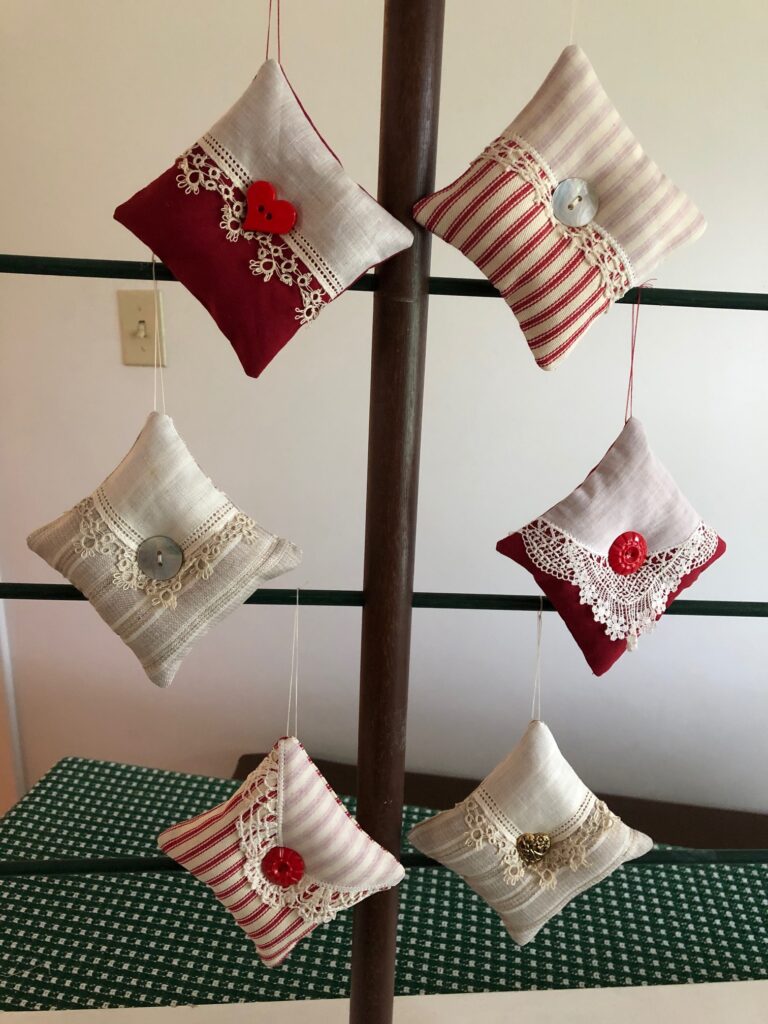
Then, I assembled my base fabrics. I had these on hand and thought they would showcase the lace pieces…and would be good Christmas colors.
The first ornament I made last week (shown above) was based on a 3 1/2″ square. After turning it right side out, I decided to make the rest based on a 4 1/2″ square. It was easier to turn and gave me room to place a button in the center.
I have quite a collection of buttons, some vintage, others I just like. They give a focus to each piece.
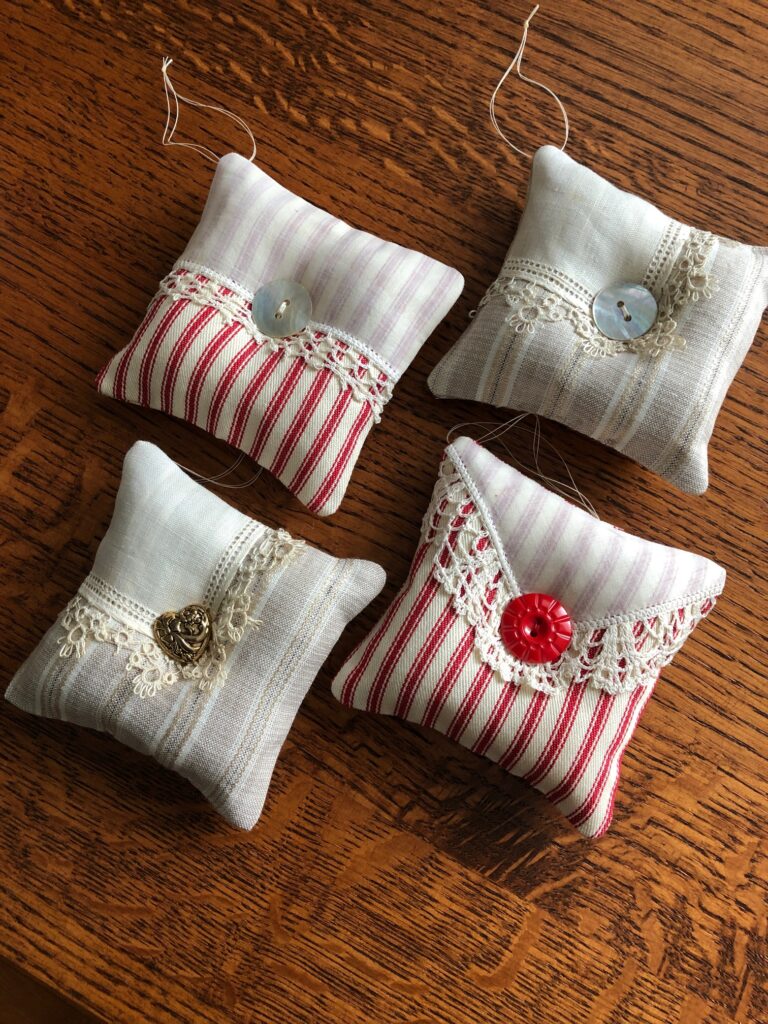
Here are four of the six I finished.
I finished six ornaments and then decided to set up my display tree to see how they looked.
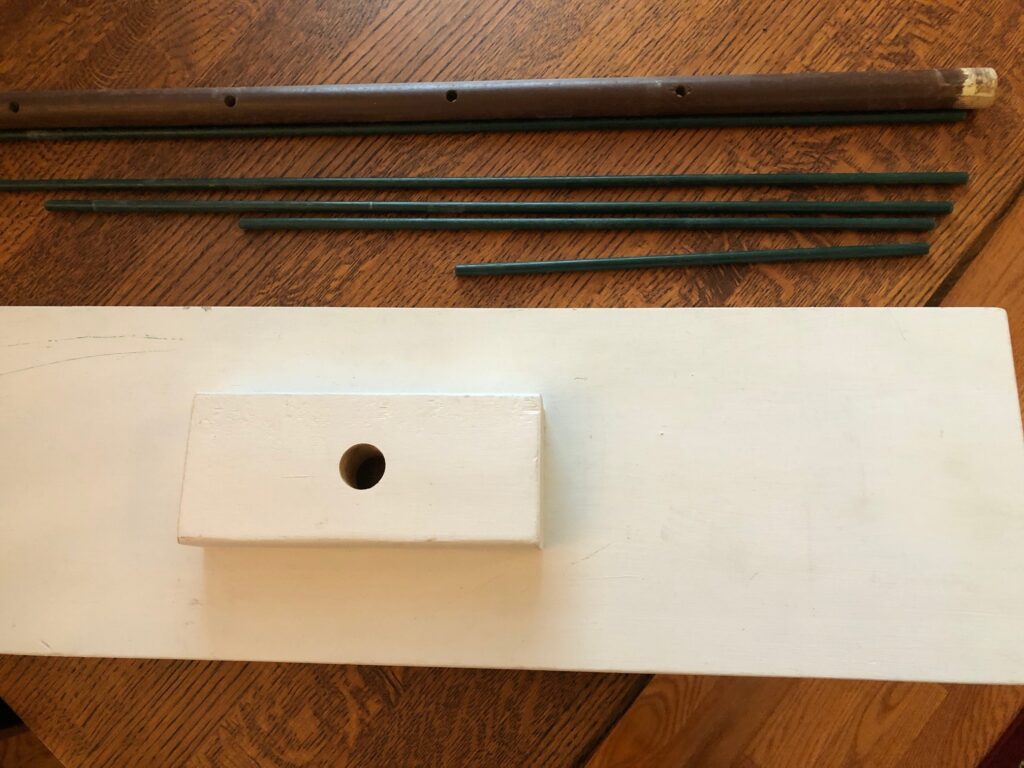
Bert made this simple tree for me many years. It is made of dowel rods and a sturdy base. Unassembled, it tucks into a corner without taking up too much space.
I think these will make nice Christmas gifts!
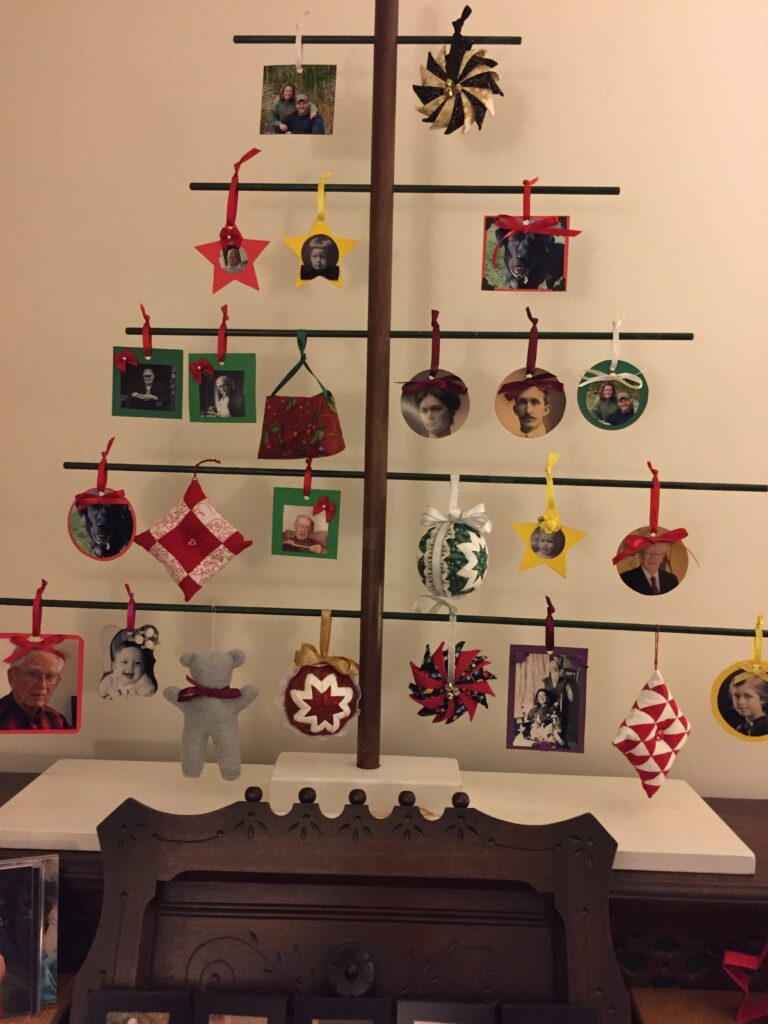
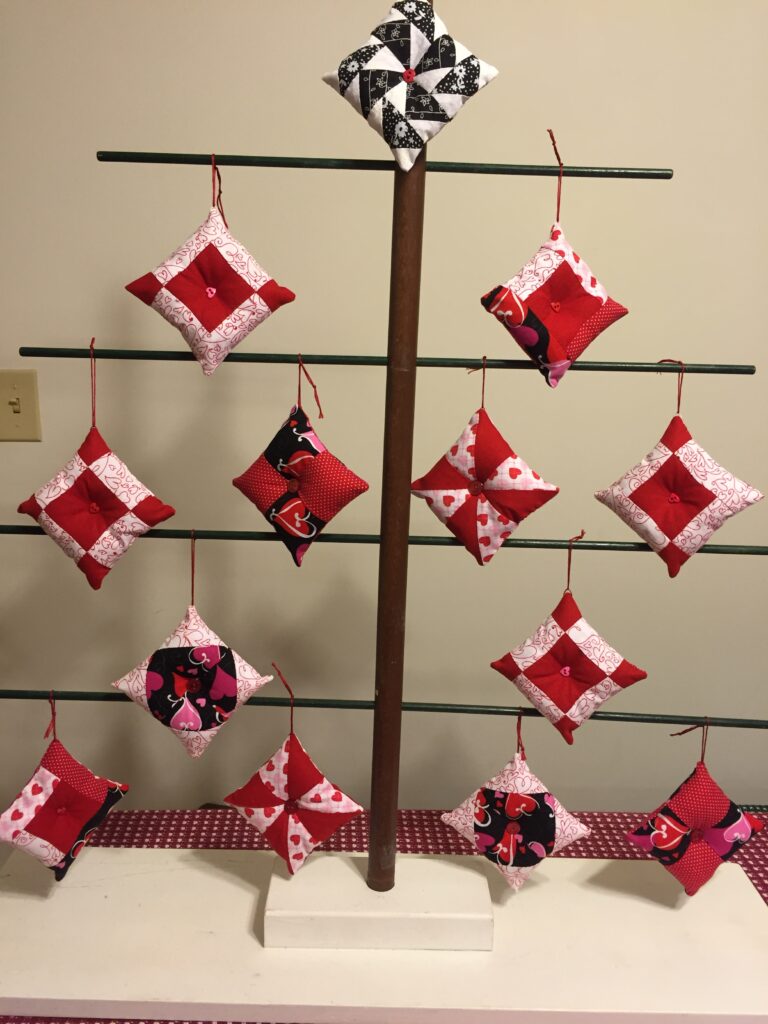
I have used this display tree for clay ornaments at a flea market…
…for a Christmas tree…
…and even a Valentine tree!
I hope to make about 40 ornaments this time. At least I know if I run out of lace edging I can find more at Apple Tree Antiques! Enjoy!
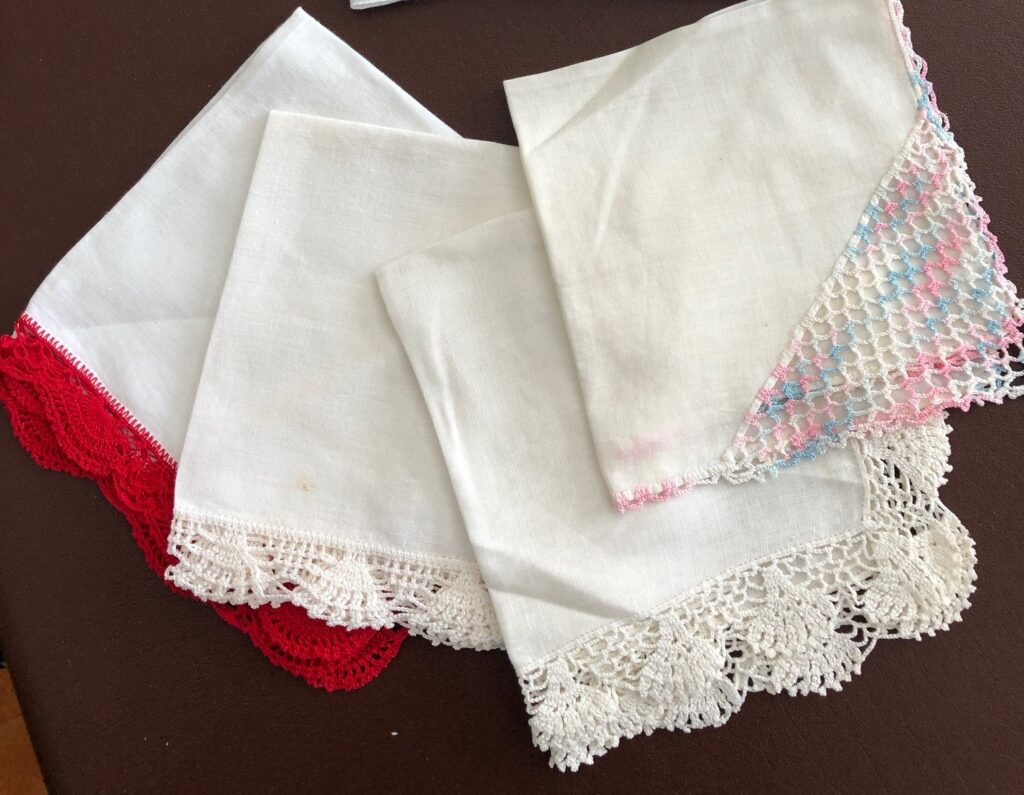
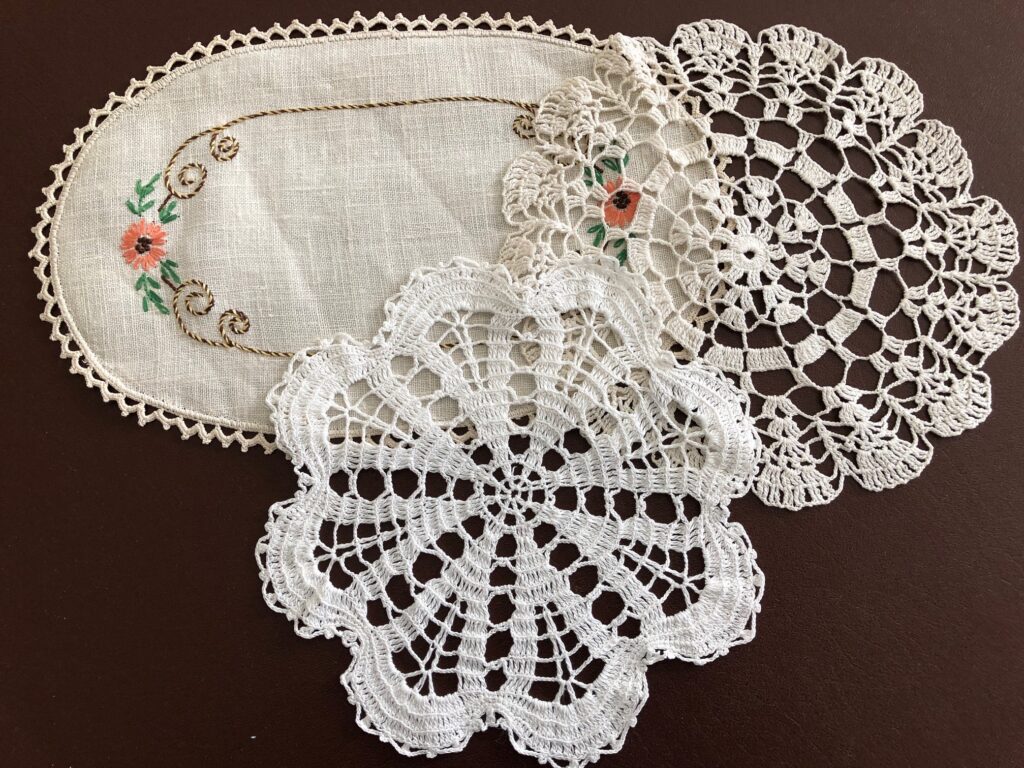
I’ve always been interested in vintage fabric. So many things left in attics and estate sales remind us of life in by-gone times. Those days folks did not use disposable paper products the way we do today. Now, I’m hoping to never need to figure out how to do without toilet paper, but I remember the days before paper towels, paper napkins and Kleenex. I still have an assortment of beautiful handkerchiefs, cloth napkins and dishcloths from my mother. The dresser scarves and crocheted doilies seemed to be everywhere in my grandmother’s home. I have found many similar items in antique stores and flea markets. Besides representing how my parents and grandparents functioned in their homes, I find them a great resource of one-of-a-kind beautiful fabric.
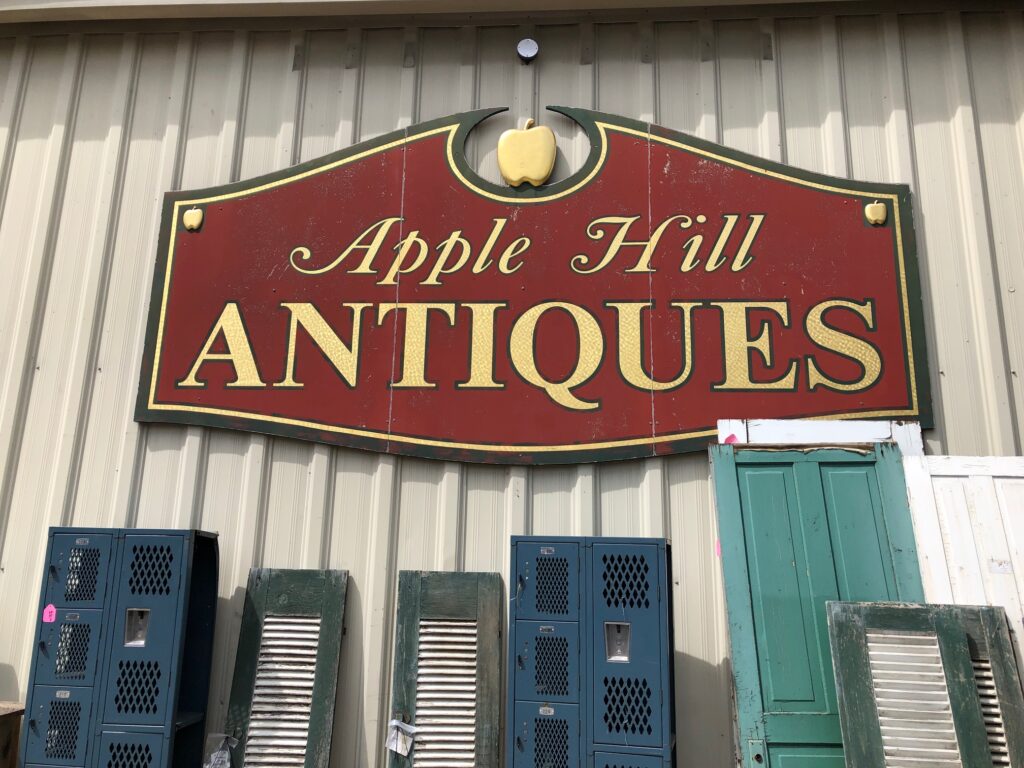
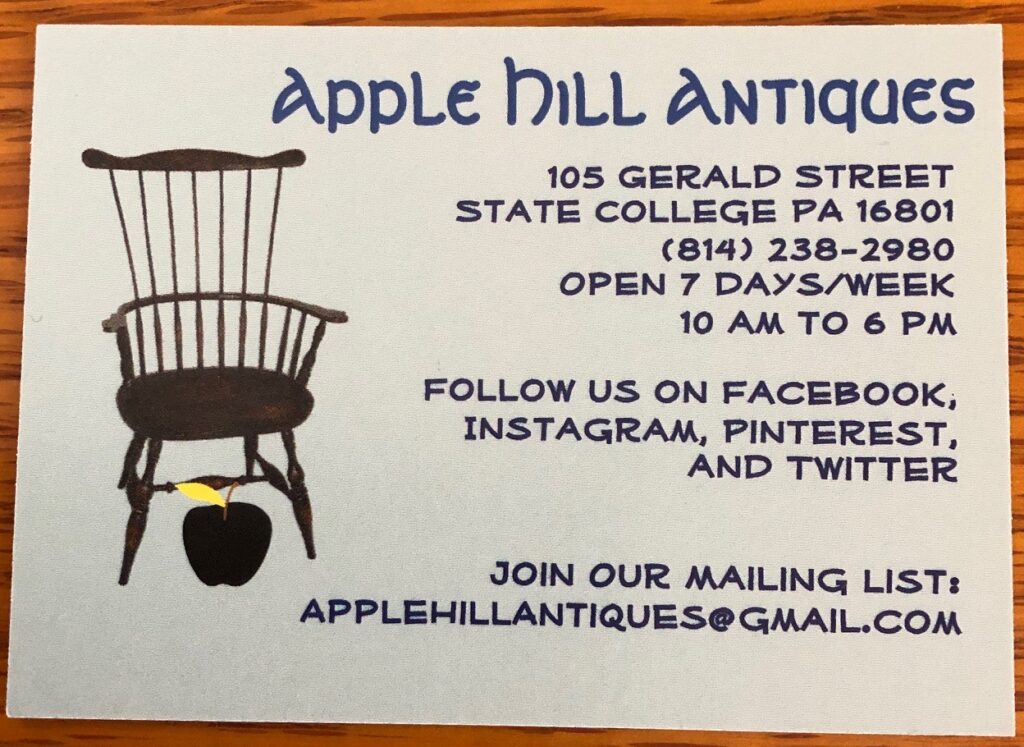
I recently visited Apple Hill Antiques in State College. This large warehouse-size building is divided up into individual sections for individual sellers. This building used to be the local roller-skating rink back in the 1970’s and 80’s. I have fond memories of learning to skate with my kids back then.
If you like to wander through small shops with an assortment of items, Apple Hill Antiques is a great place to visit.
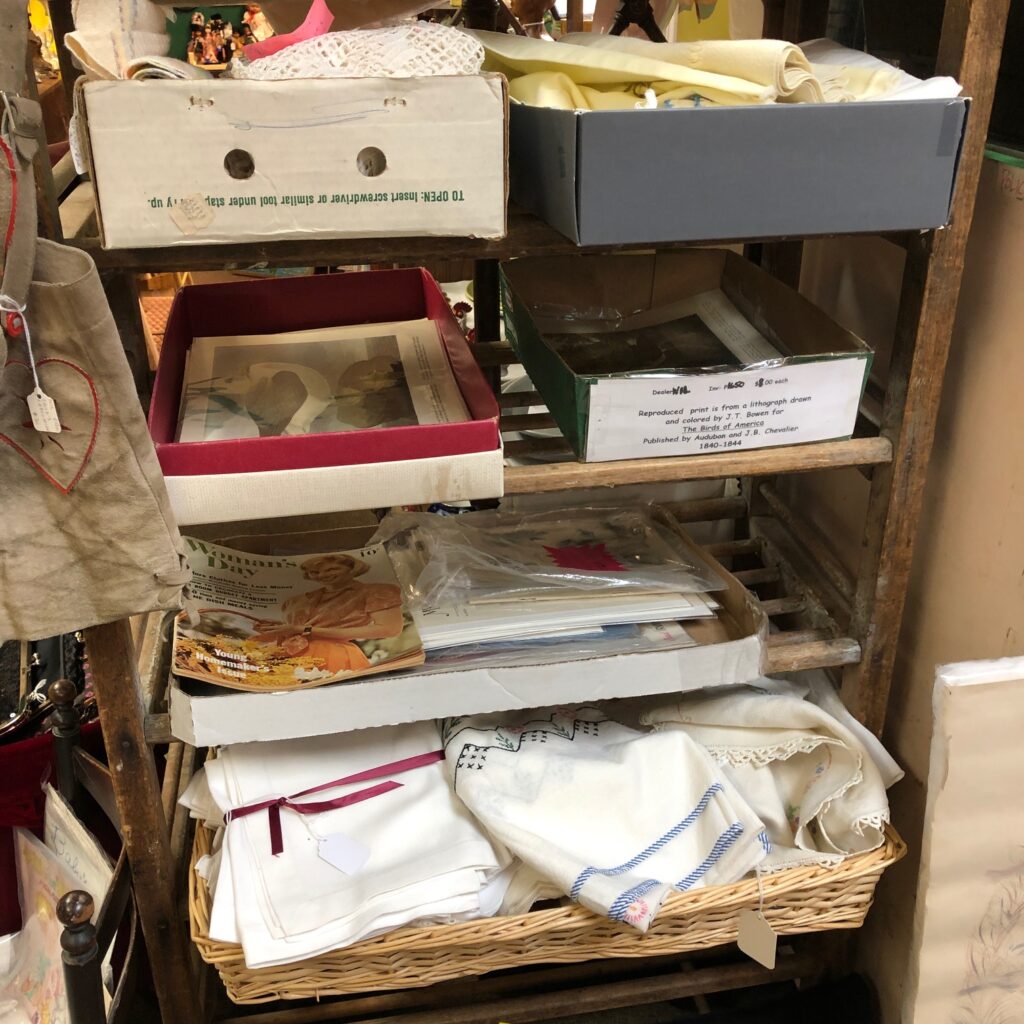
Usually, I find it helps to focus on a specific time period or a specific kind of item from toys, glassware, furniture or textiles. Otherwise, I find the mixture of items overwhelming. When I focus on vintage fabric my eyes look for a certain kind of display.
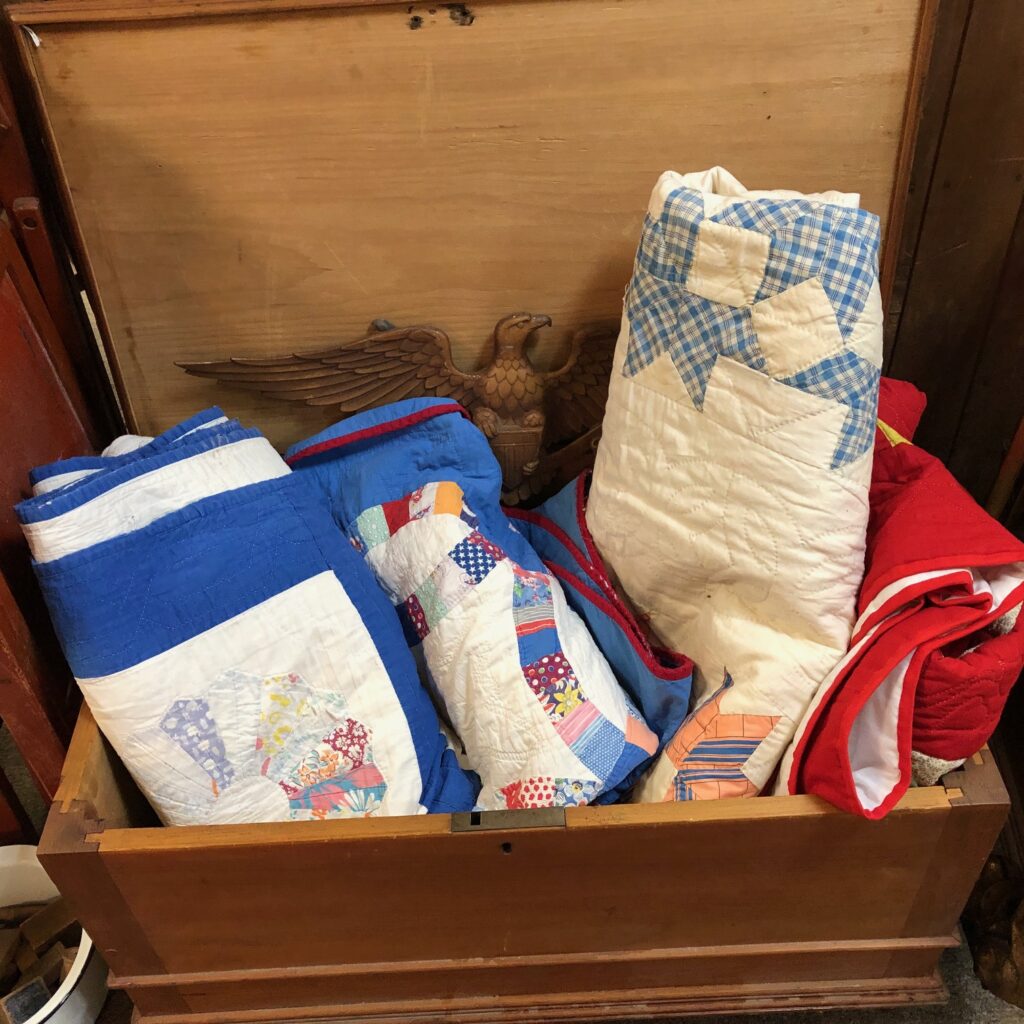
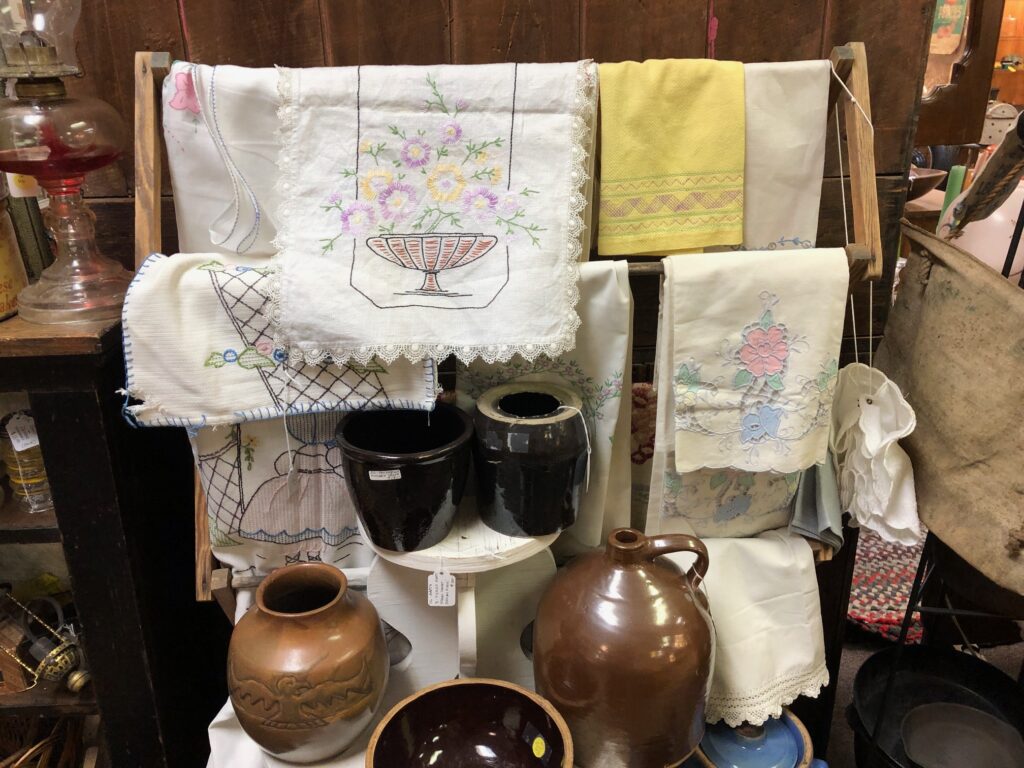
Some items, like quilts, are displayed tucked into trunks.
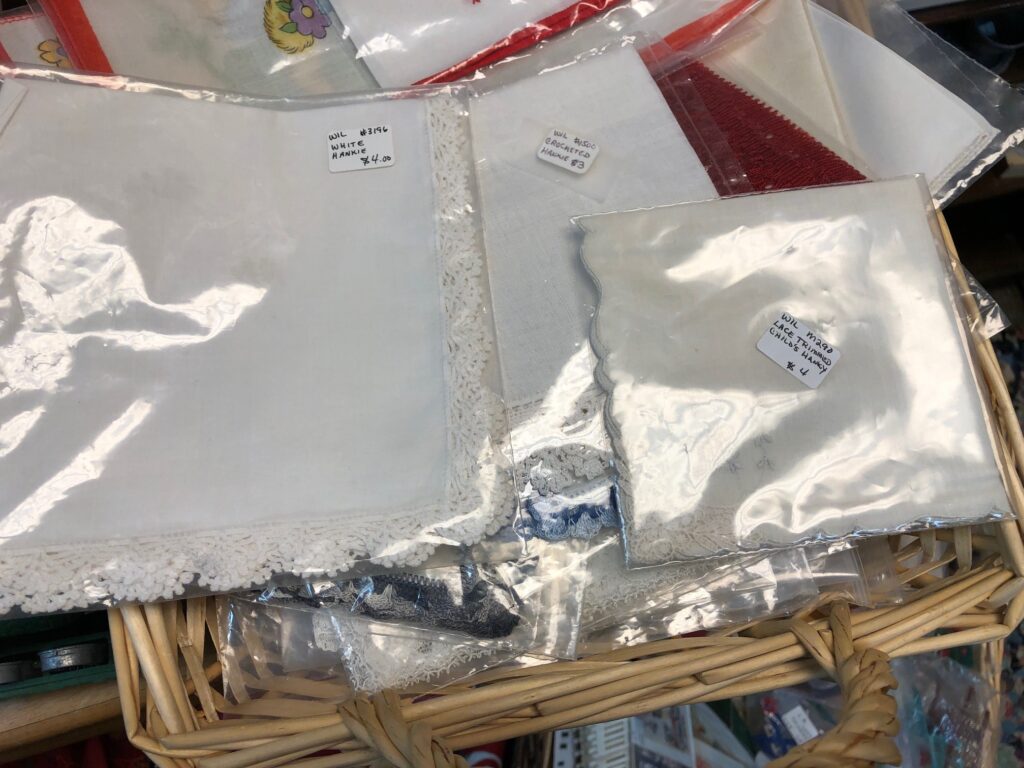
Things like handkerchiefs and napkins are often piled into baskets.
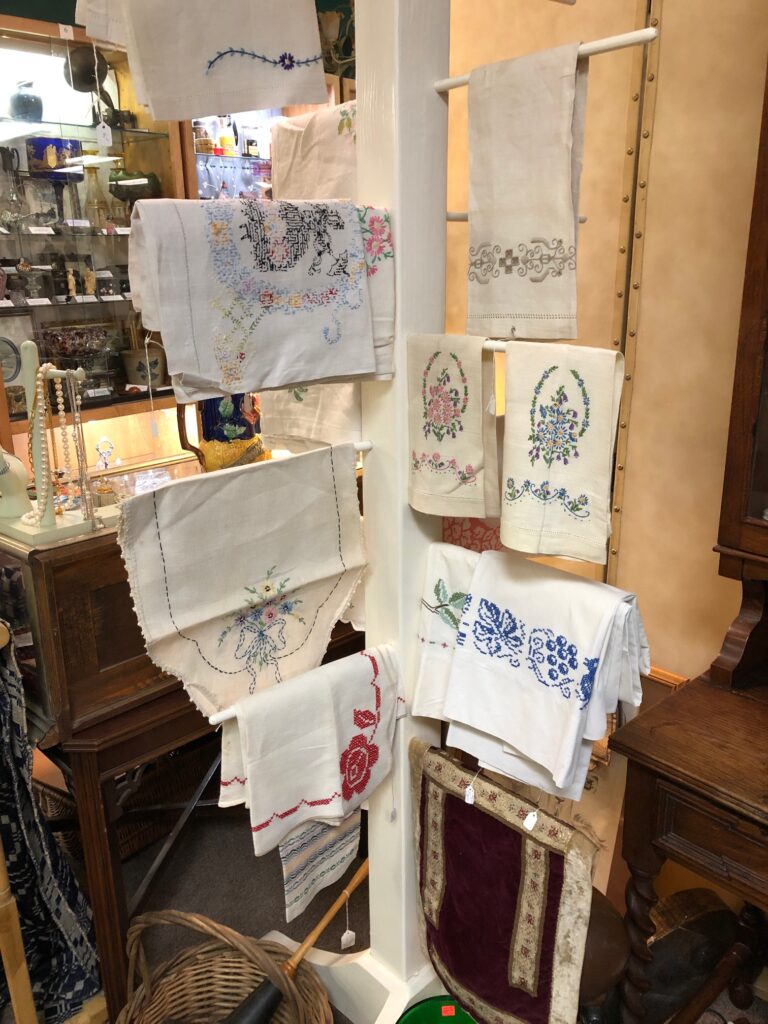
Larger items like hand towels and tablecloths are often hung on hangers or racks.
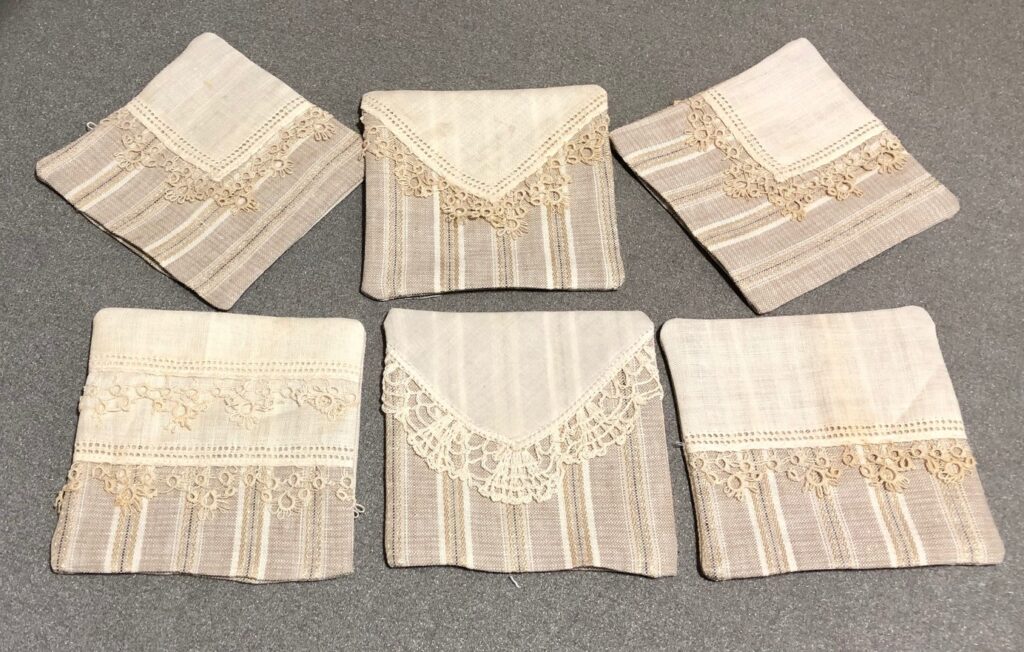
I have a project in mind this time–Christmas Ornaments–so when I stopped by, I focused on smaller items. I was looking for edging on handkerchiefs or embroidery on hand towels. A few crocheted doilies looked promising.
Here is an example of what I hope to make…enough to give as gifts at Christmas:
Therefore, I’m looking for unusual edging on handkerchief or interesting doily patterns.
Apple Hill Antiques is a great place to spend time…to relive the past or to search for special items for your own collections. Here’s their flyer with more information:
You could even join their mailing list:
A great way to spend some time! Enjoy!
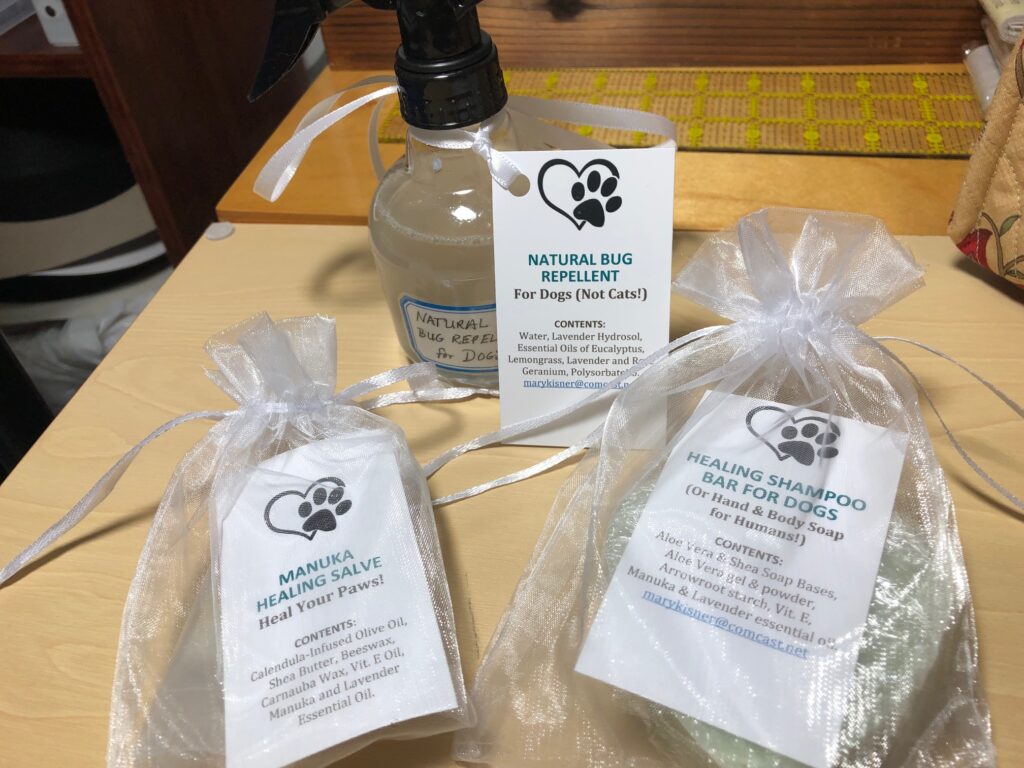
Please leave a comment or email me directly if you have questions at marykisner@comcast.net.
About 10 years ago I volunteered my sewing skills to make memory bears for a local Hospice organization. Over several years I made over 100 bears for families who had lost loved ones. I learned a lot about how to make a stuffed bear from almost any kind of fabric.
All of my work was arranged through a volunteer coordinator and a Chaplain with the Hospice organization. It was very rewarding work. Over the years, the volunteer coordinator’s position changed and memory bears have not been requested for a long time. I miss making those bears…and I think they meant a lot to the families.
I’d like to share pictures of a few of those first bears. Then I’d like to show you how you could make one too, or at least what kind of fabric makes the best bears. You might want to save something from a loved one in the future.
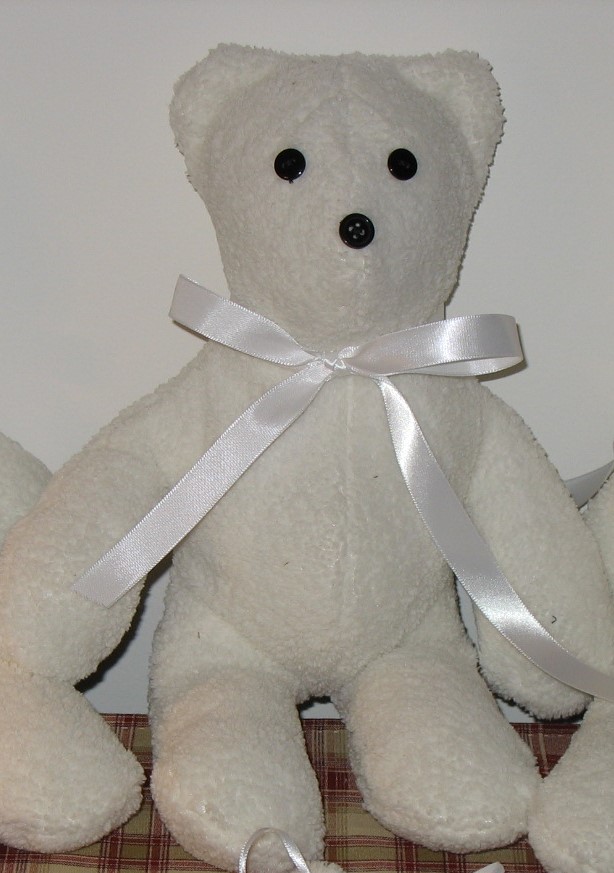
The very first bears I made were for a family who had just lost a young mother. They gave me a while fluffy bathrobe that she wore in her last days. It seemed pretty morbid at the time, but I found it very healing to be able to offer a way to remember her.
Since it was a full-length bathrobe, I couldn’t make just one bear and throw away the rest of the robe. So, I kept going and made three large bears and then was able to make 5 little ones too. They were shared with the extended family. This first project was the most meaningful for me!
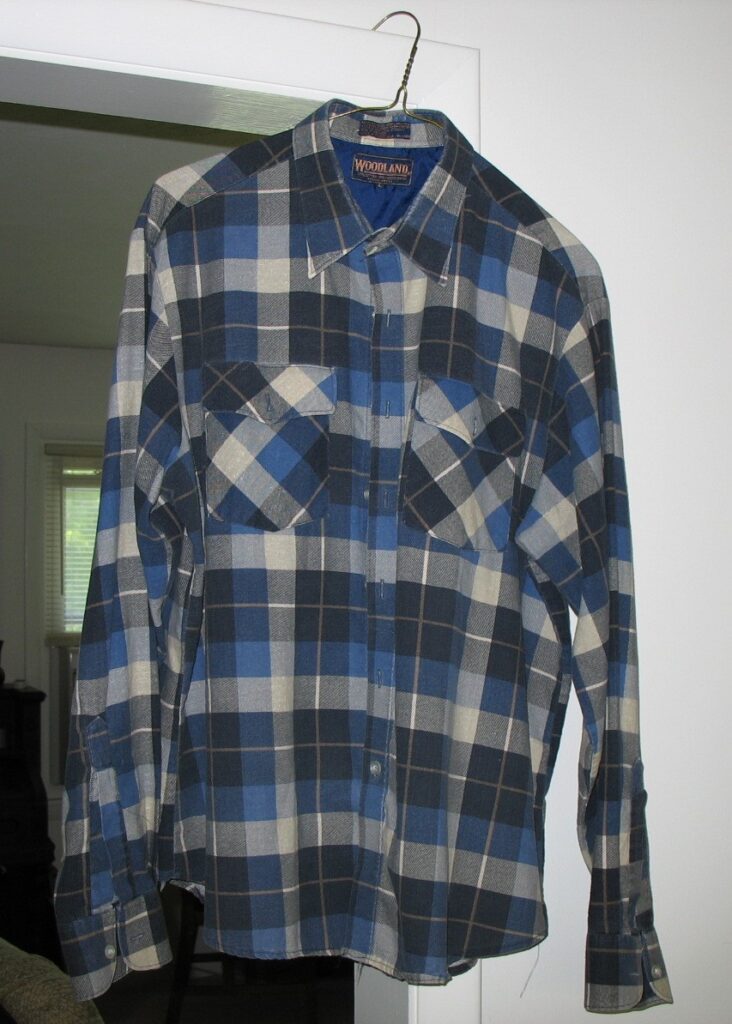
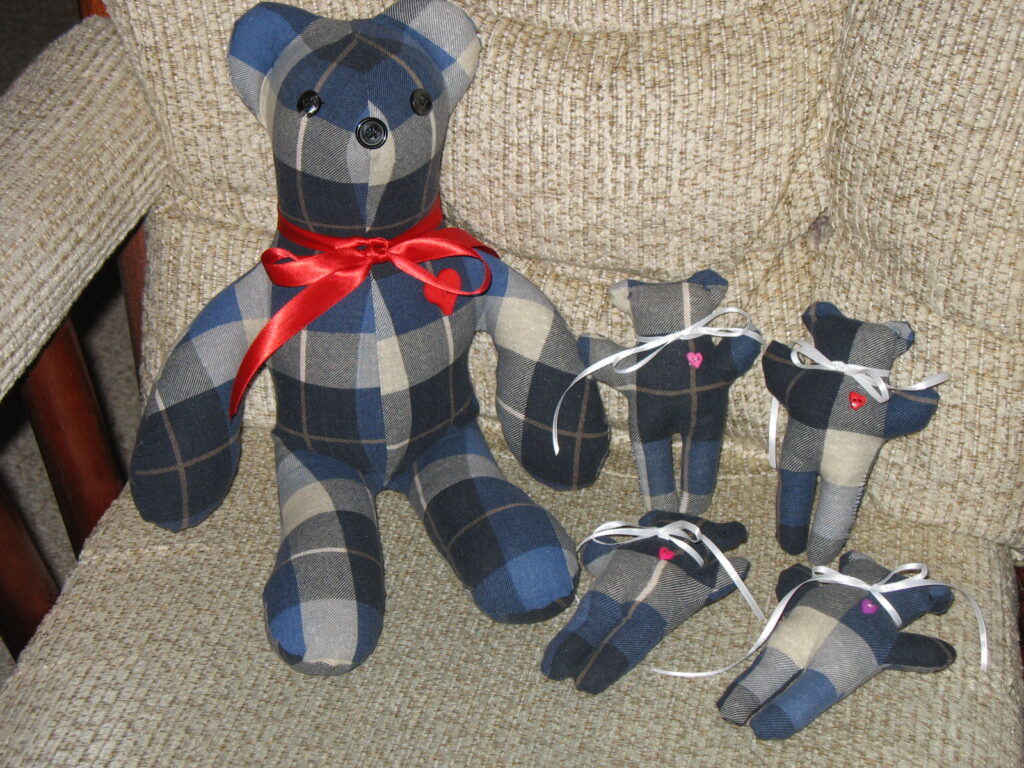
These bears were made from one full-length bathrobe.These bears were made from a single flannel shirt, in memory of a Grandpa.
While I was waiting to get more requests from the Hospice volunteer coordinator I went to Goodwill and picked up a flannel shirt to make a sample for the Chaplain to show families.
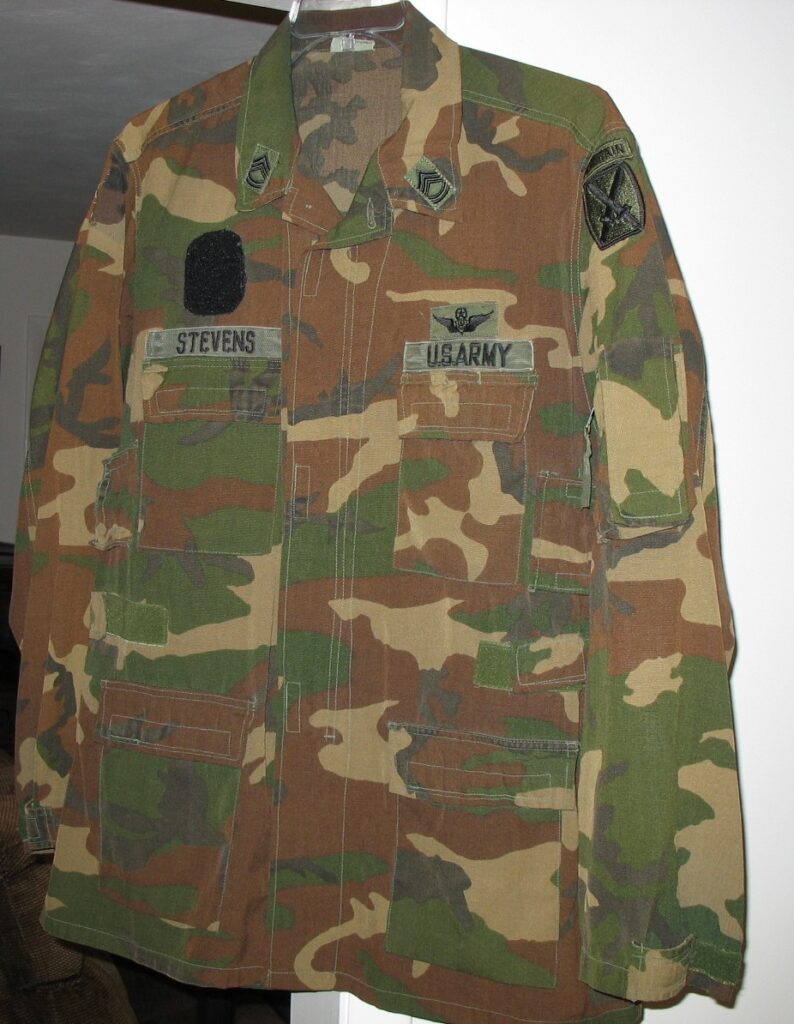
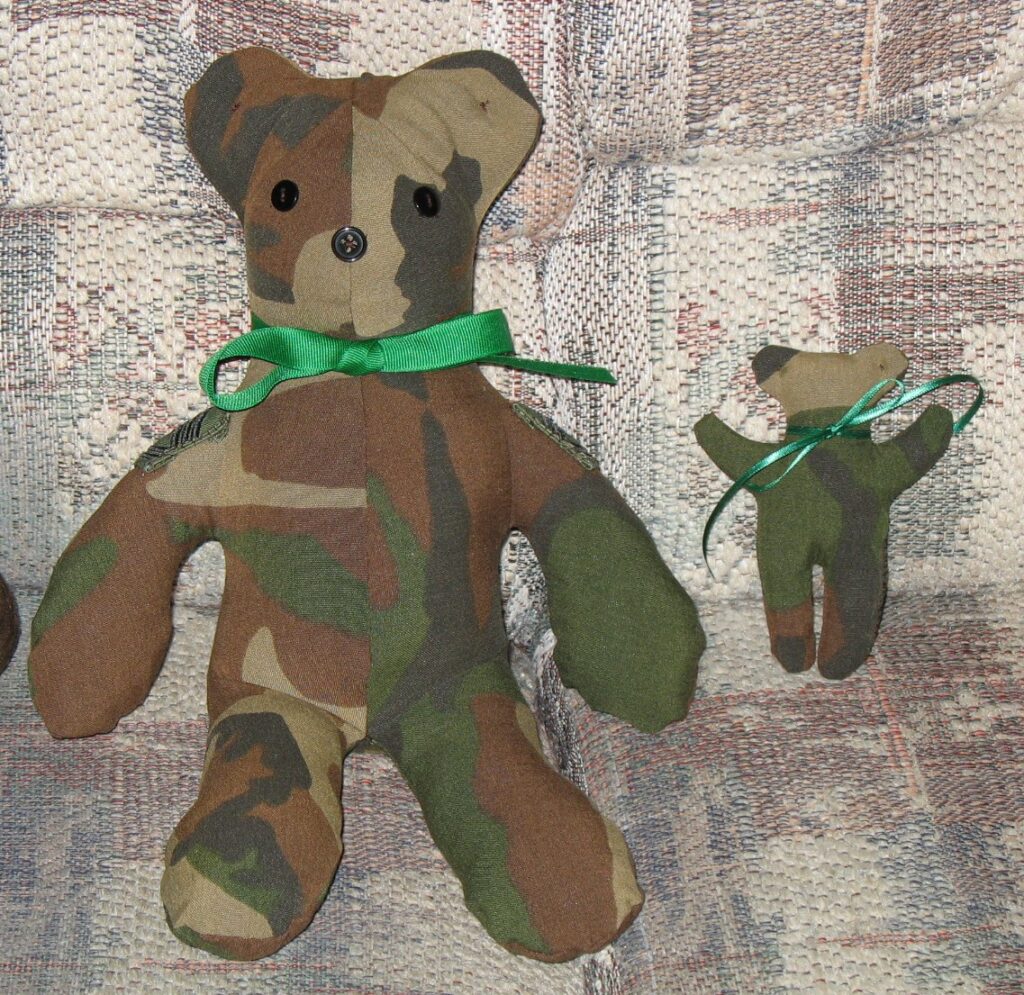
I also went to the Army/Navy surplus store and found a camouflage shirt. I thought I might get requests from a military family and wanted a sample to share. The military shirt was a major challenge…very little fabric available that didn’t have pockets all over it! (Incidently, I did not have a single request from a military family. I guess around this area we don’t have a huge military presence.)
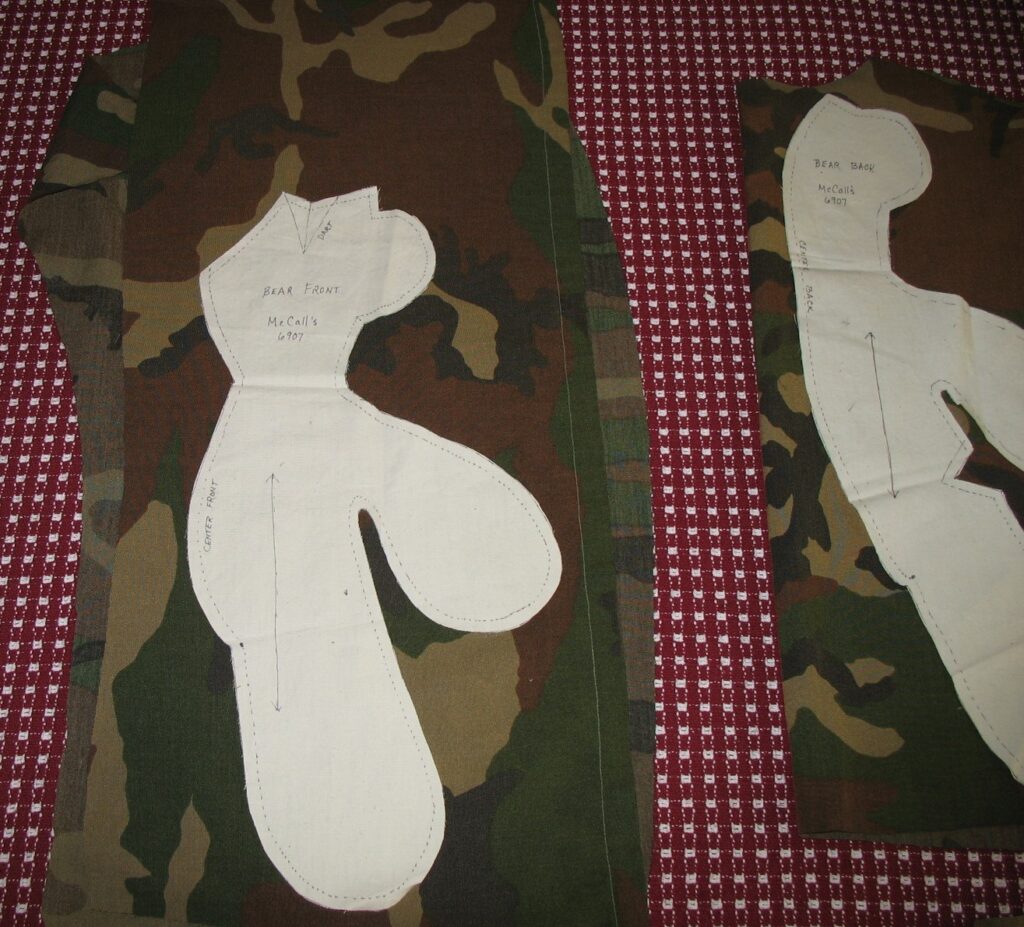
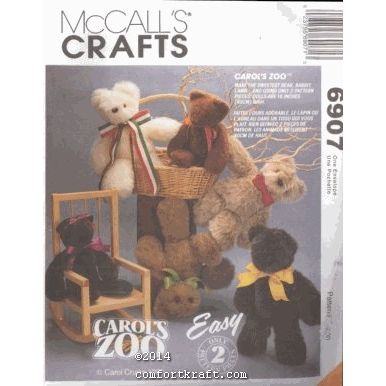
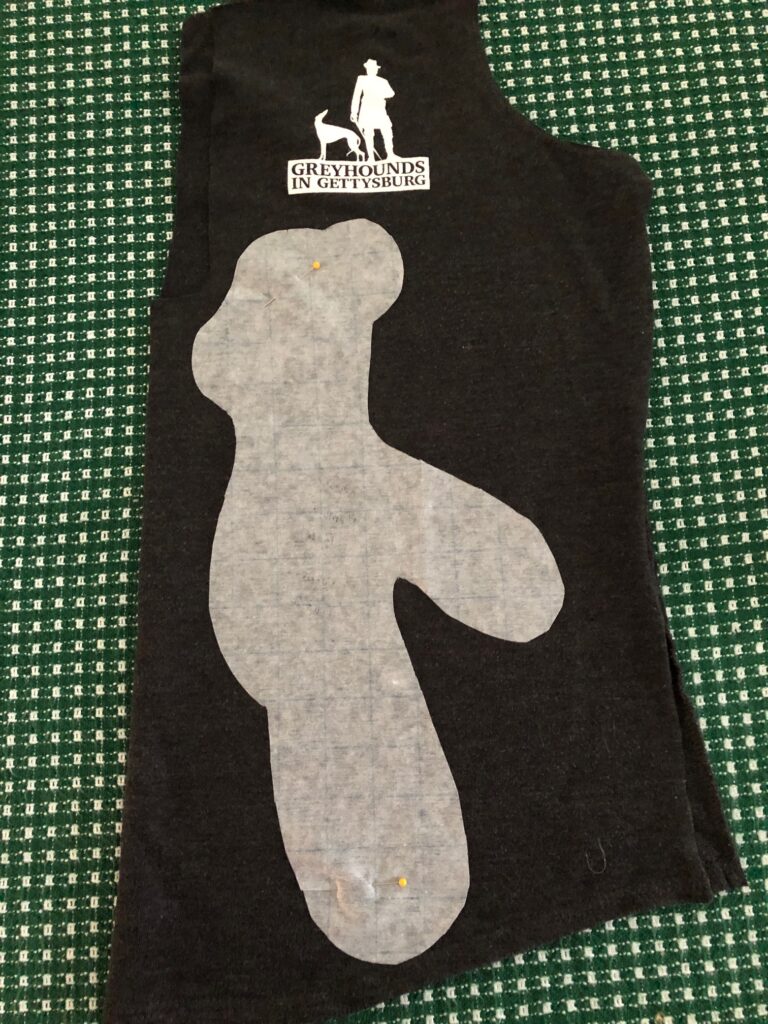
This was the first pattern I used. I have since tweaked the pattern so I liked the shape better. I found the tiny bear pattern on another stuffed animal pattern…like a toy for the stuffed animal!
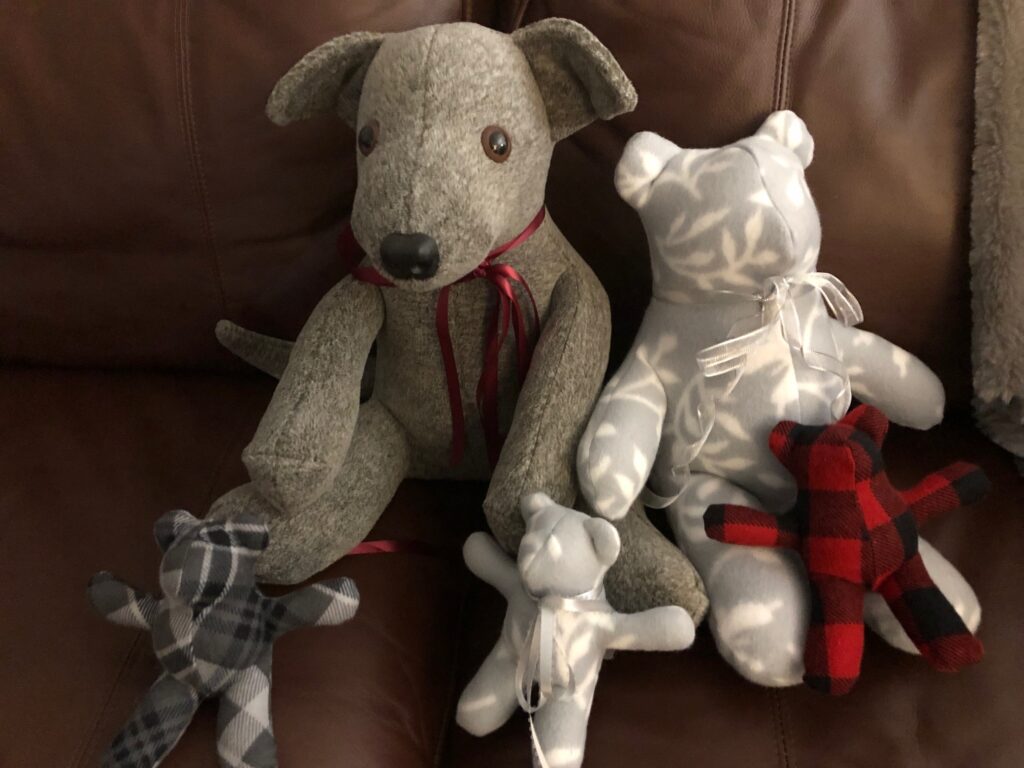
Almost any stuffed bear pattern would work, but the simpler patterns were the easiest to work with. If I were making just one bear, a complex one would make a nicer bear but would take longer to make and need more fabric. Since this was a volunteer project and I was making multiple bears, the most important part was the actual fabric of the loved one…that’s where the memory resided. When I start with a loved ones’ clothing, I feel compelled to make as many bears as I can with it. The little bears even make good Christmas ornaments!
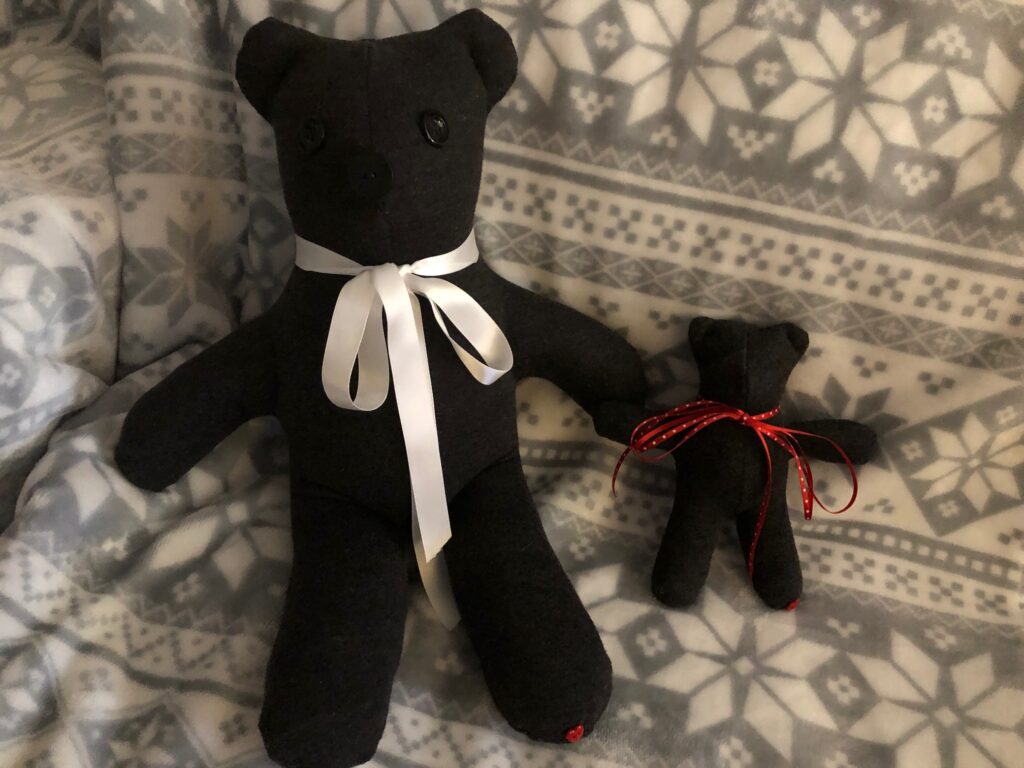
Of course, by now the only bears I have around the house are a few I made out of soft fabric for my grandkids (along with a few stuffed dogs!).
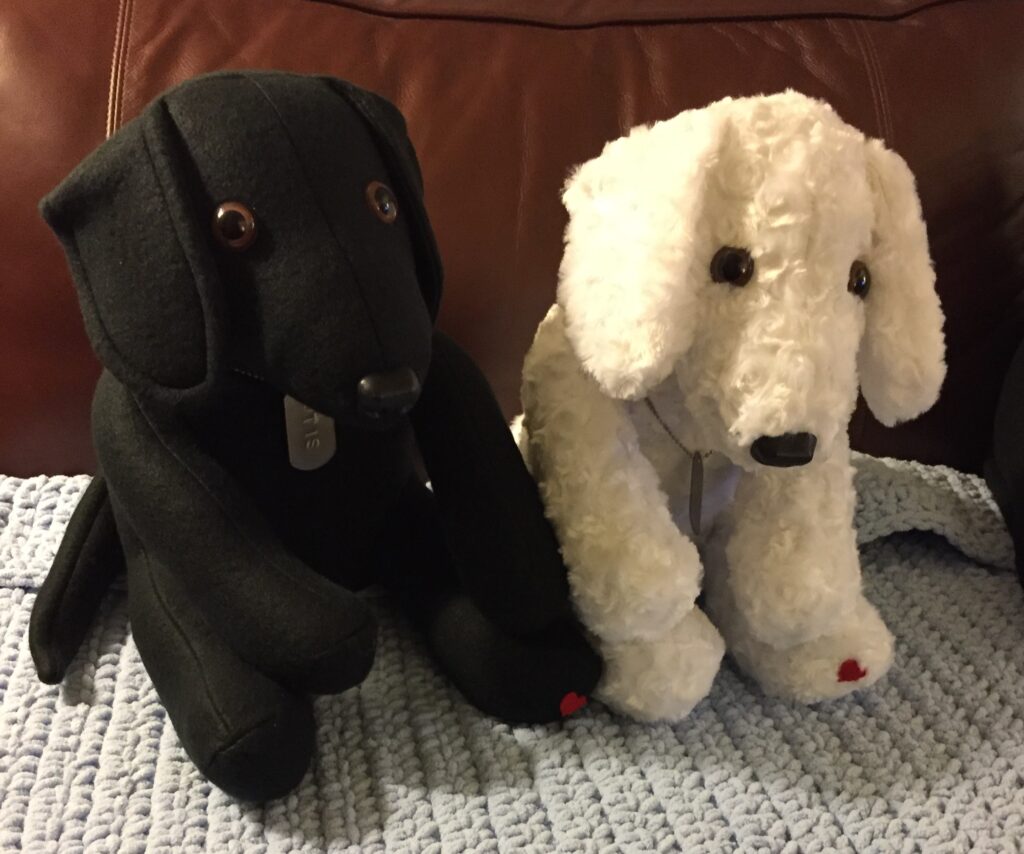
Of course, I had to try a stuffed greyhound puppy…I worked hard to figure out the ears!This is how we remember Otis and Max. I even made dog tags with their names on them.
Steps to make a memory bear
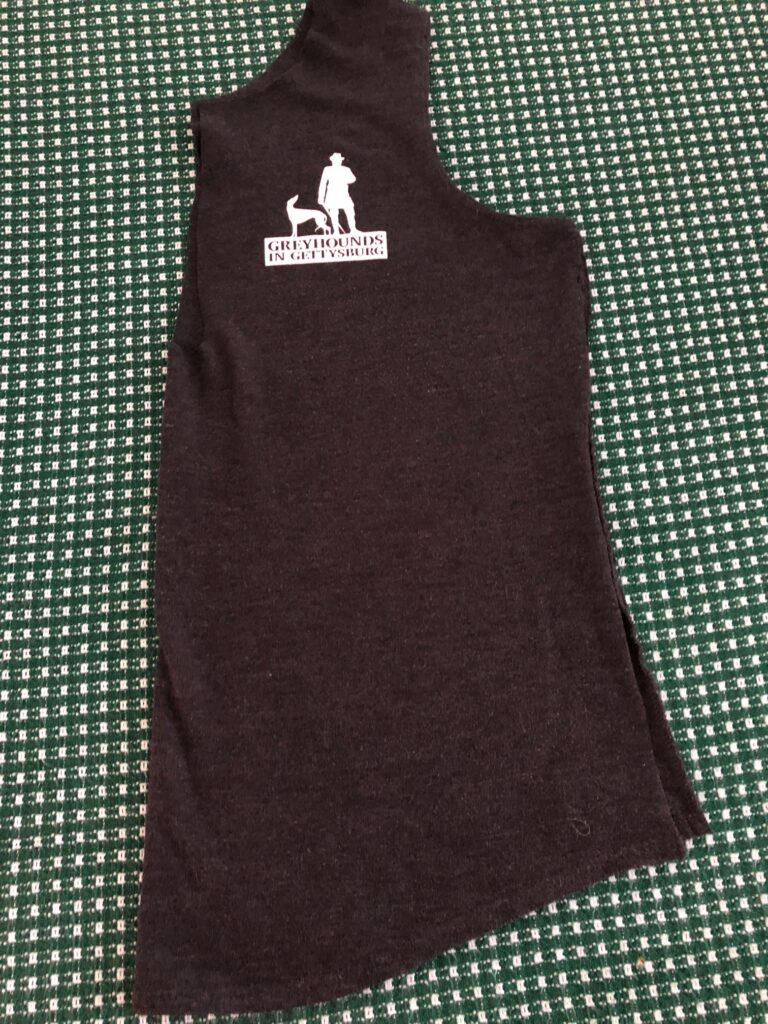
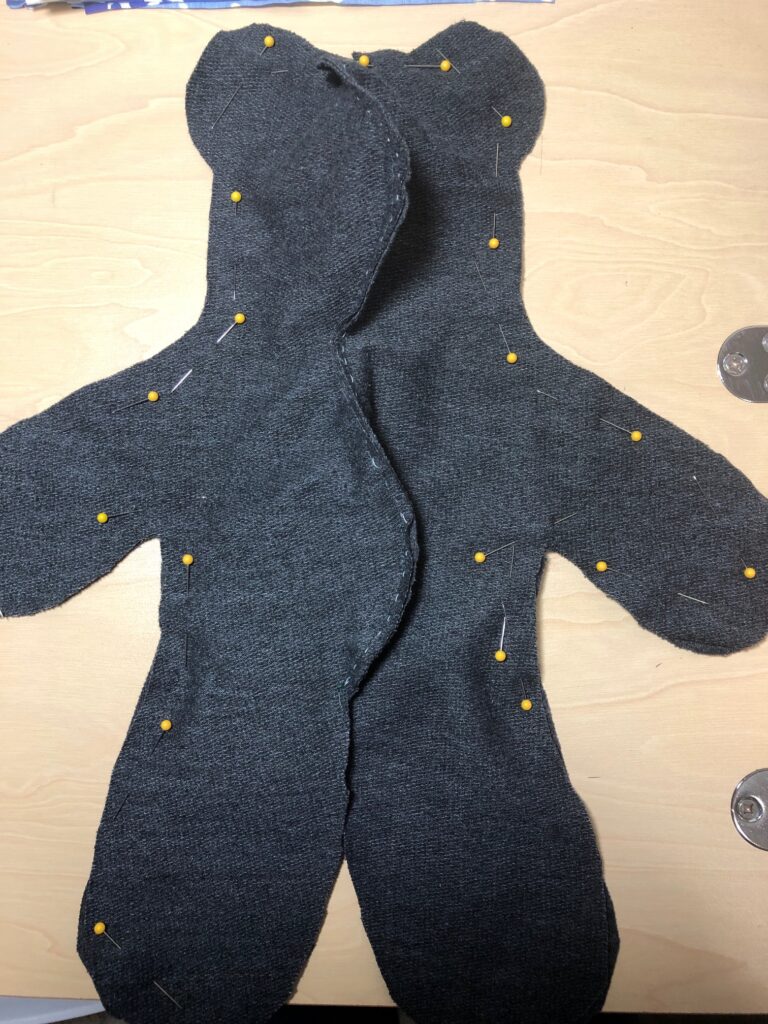
I managed to persuade a friend to let go of a soft fleece shirt that she didn’t wear anymore so I could take pictures as I made a bear. I prefer to work with flannel…it doesn’t stretch as much and is more colorful.
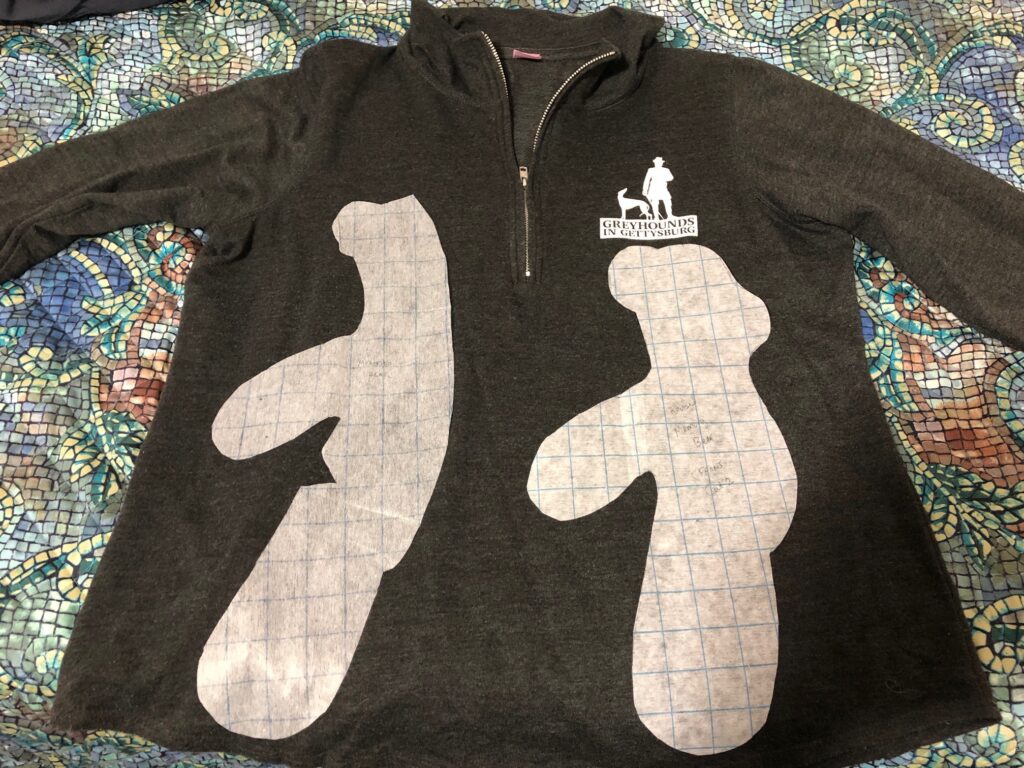
First, I laid the pattern pieces on the shirt to make sure there was enough fabric to make the bear.
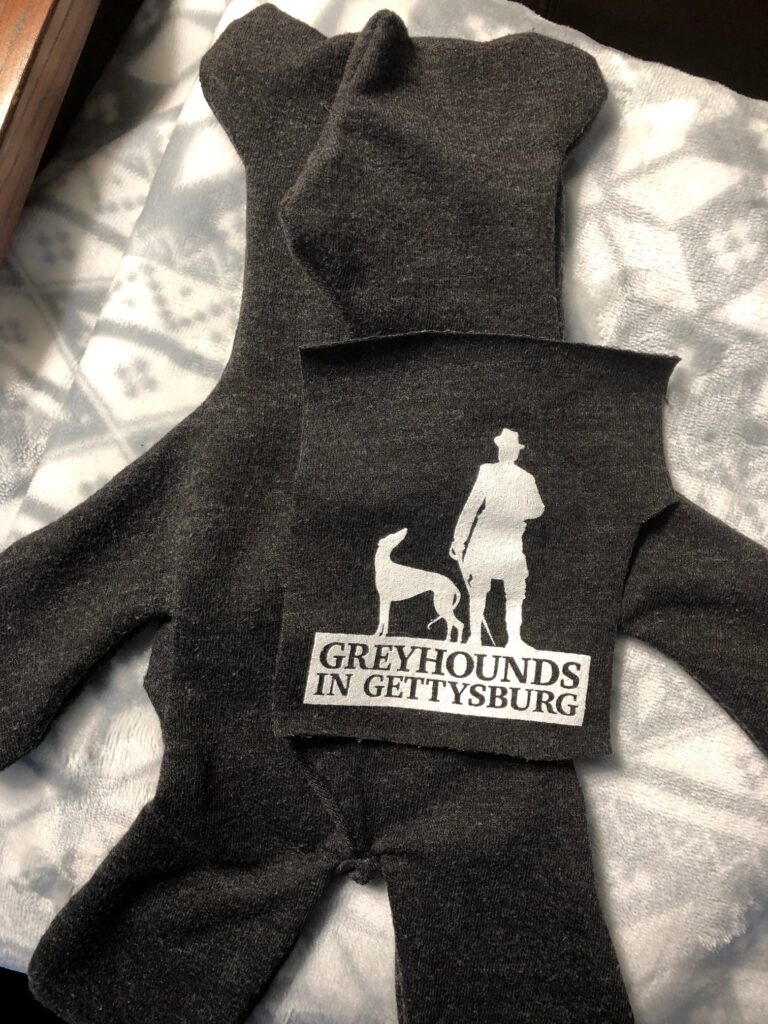
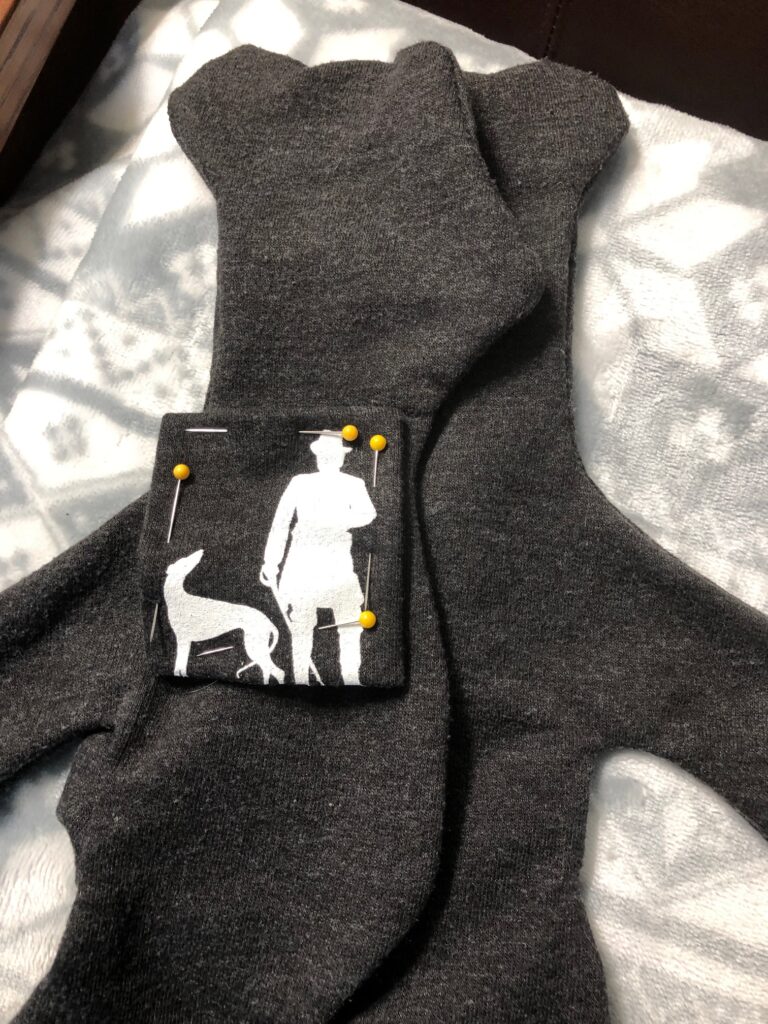
Sometimes a logo can be appliqued to the finished bear. I’ll make the bear first and then see if the picture/logo will fit.
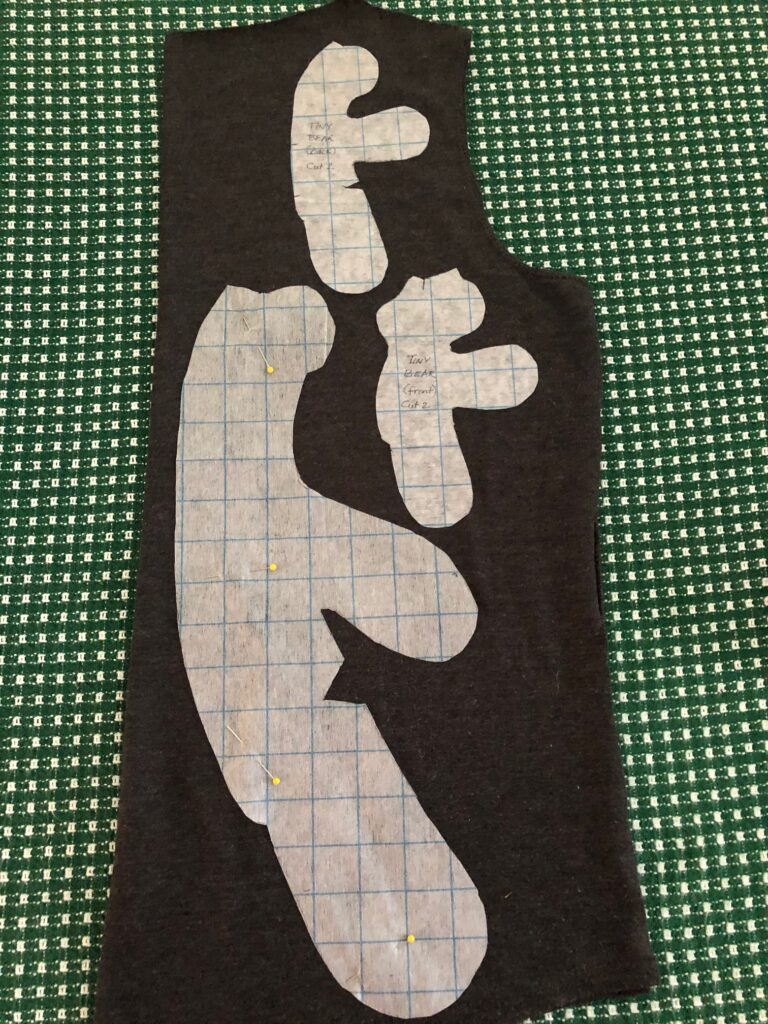
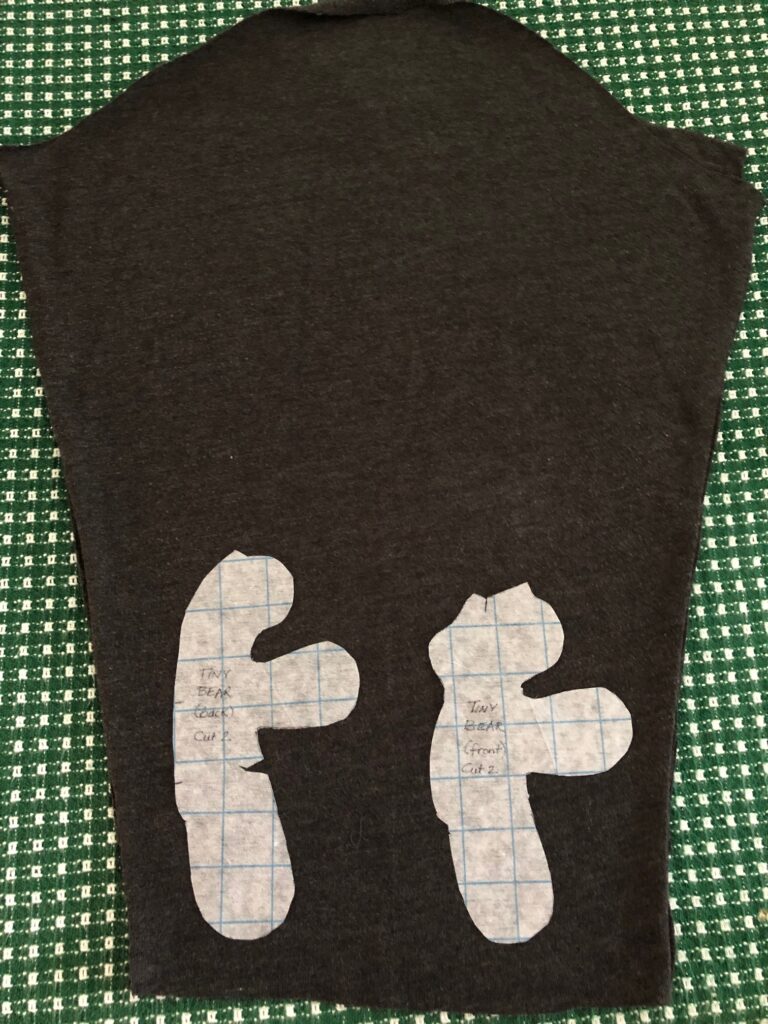
The next step is to cut the shirt apart along the seams. I removed the zipper and discarded the collar. (My mother would be proud of me…I saved the zipper!) The front is folded to cut two of the front pieces; the back is folded to cut two backs. The sleeves when opened up work well for the smaller bears.
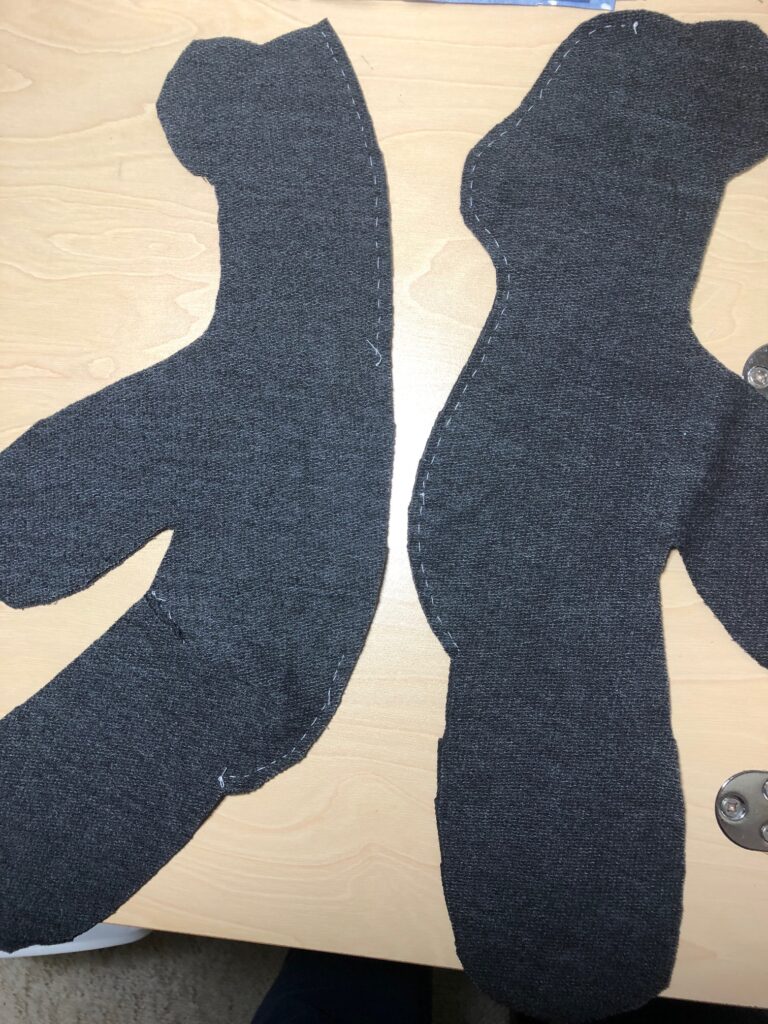
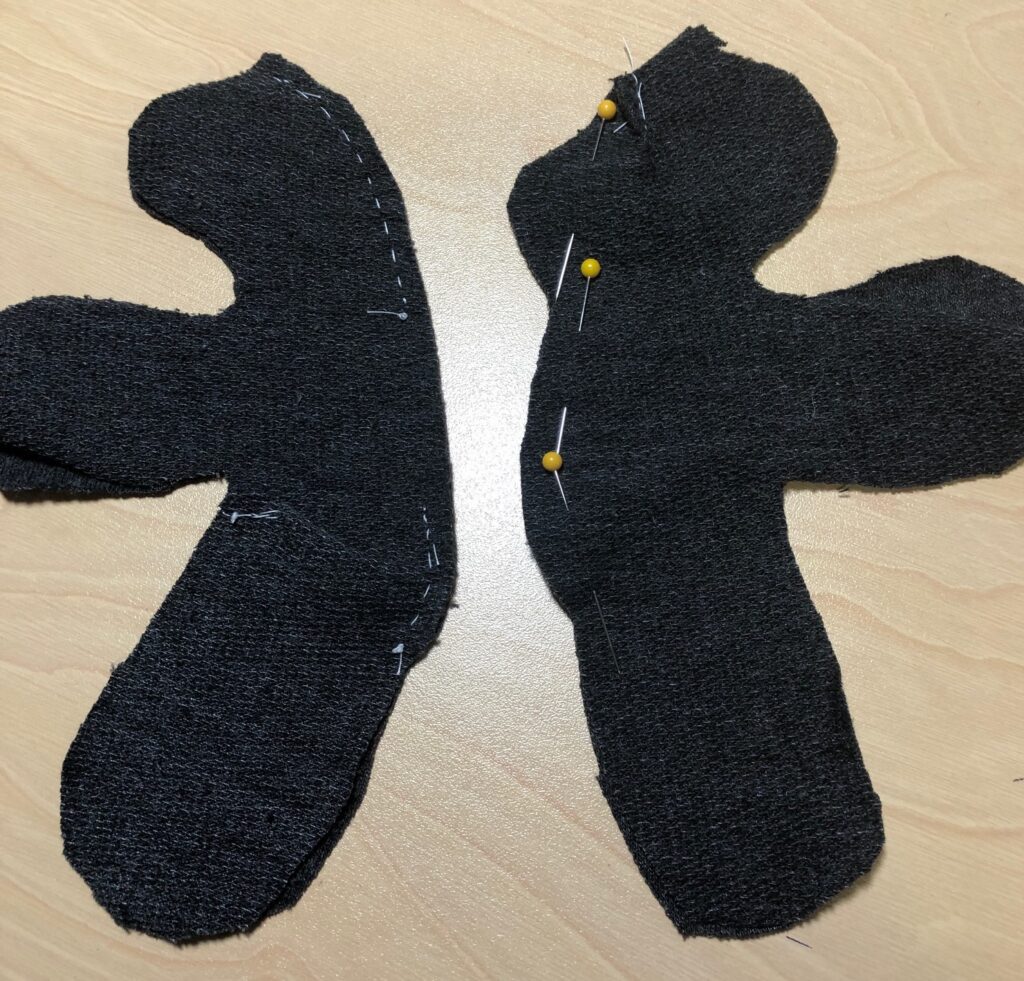
I baste pieces together by hand first because the fabric is so stretchy that sewing around the curves makes it hard to keep the two pieces aligned.
Basting is especially helpful on the tiny bear!
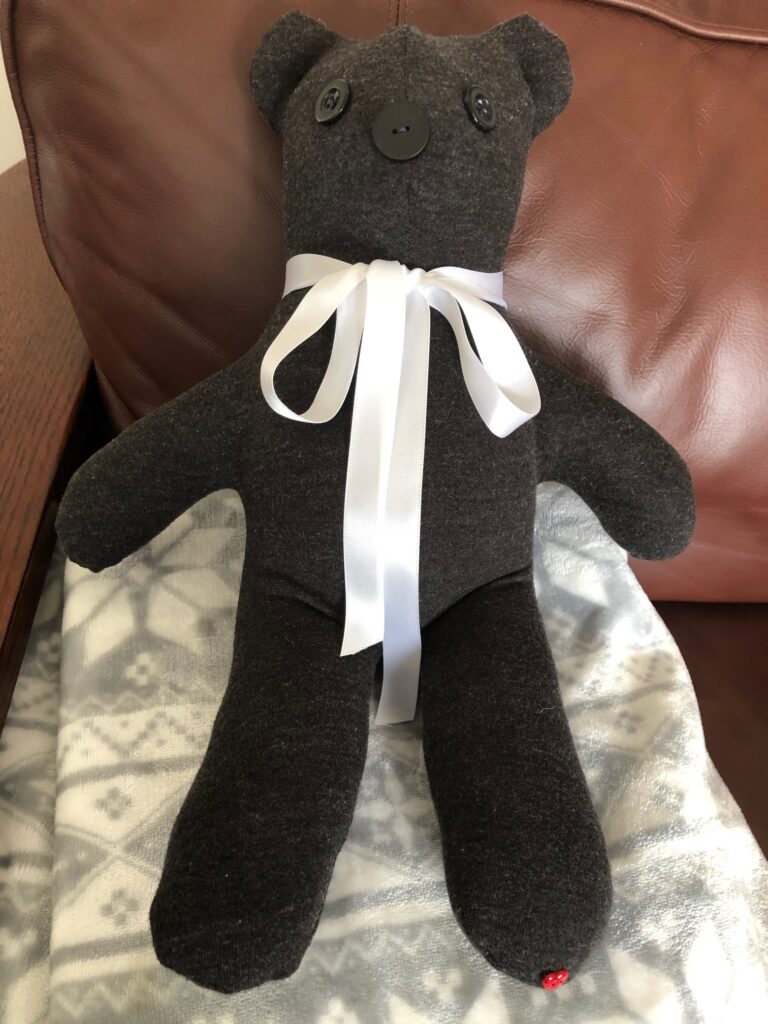
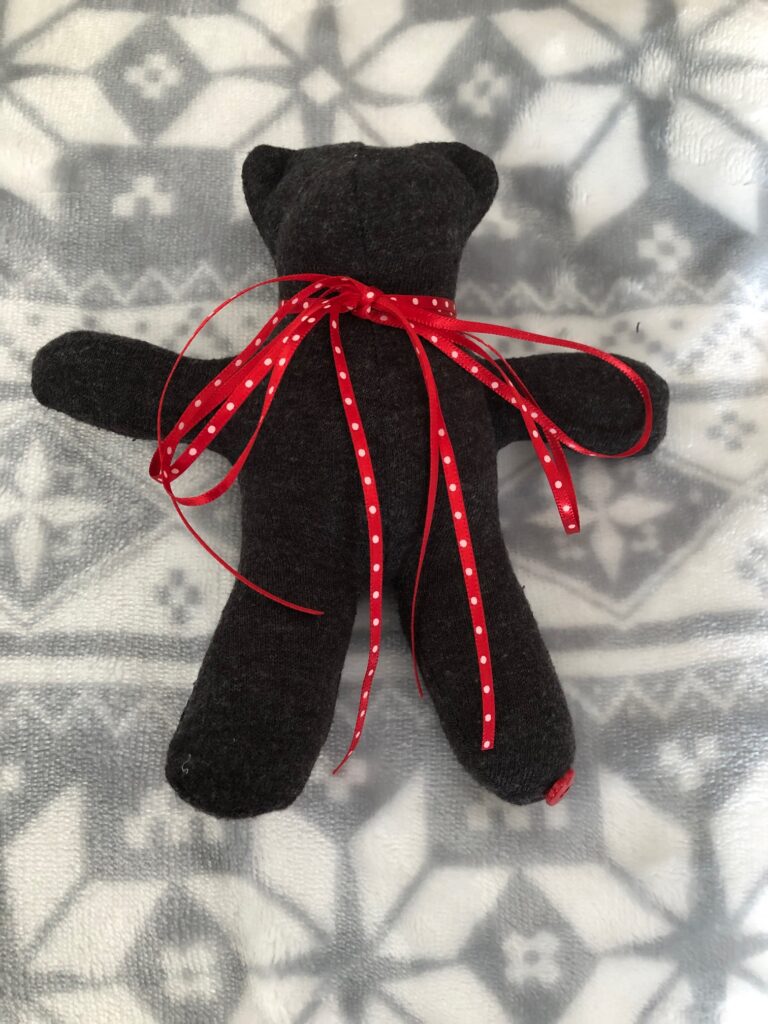
My finishing touches include tacking the ears, adding button eyes and nose, a ribbon and a small red heart button on the foot. If I know a bear will be loved by a child, I’ll use the eyes that are fastened through the fabric…see the dogs above…but I really prefer buttons. The tiny bears have only the heart button, so it can be cut off if necessary.
I still haven’t decided whether to add the logo from the shirt. I will have to make it smaller by using just the picture and not the words. It just feels too big, but I’ll ask the recipient first. What do you think?
Making memory bears for Hospice families was one of the most rewarding volunteer activities I’ve ever done. It was more than just making stuffed bears…it was preserving memories of a loved one. Enjoy!
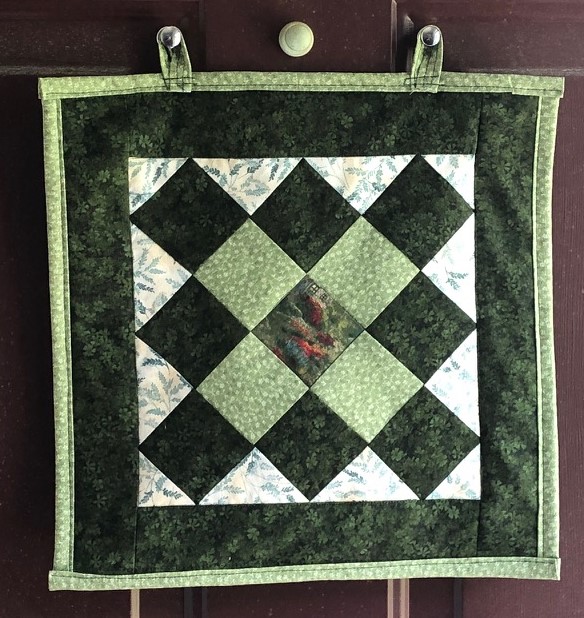
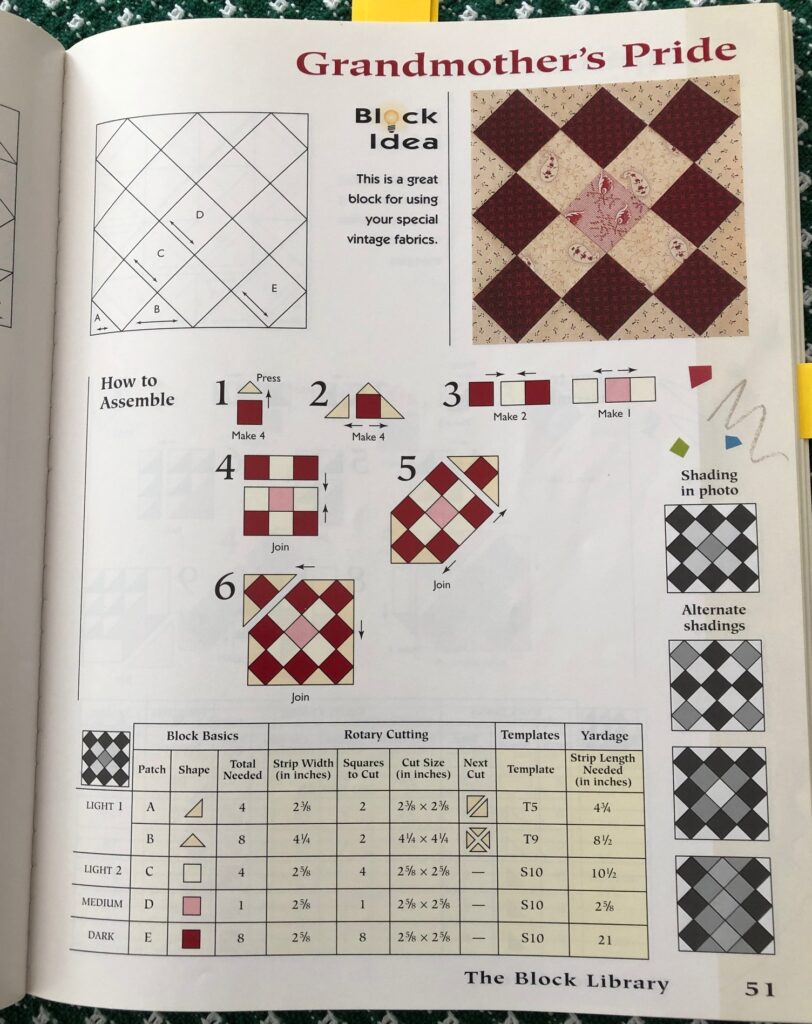
Time for my Patriotic Door Quilt to retire! The colors in the fabric were starting to fade. The block I chose for August and September is called Grandmother’s Pride (sometimes called Courthouse Square).
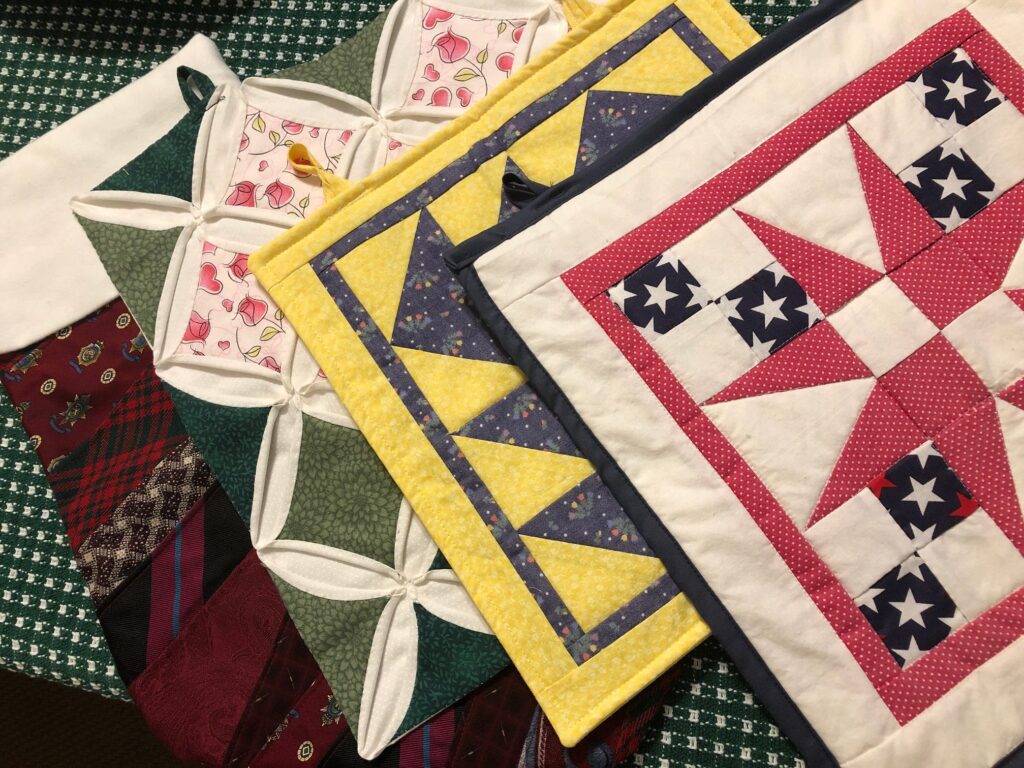
Here are the four previous door quilts lined up, beginning with the Christmas stocking made from recycled neckties. (See earlier postings for each of these blocks.)
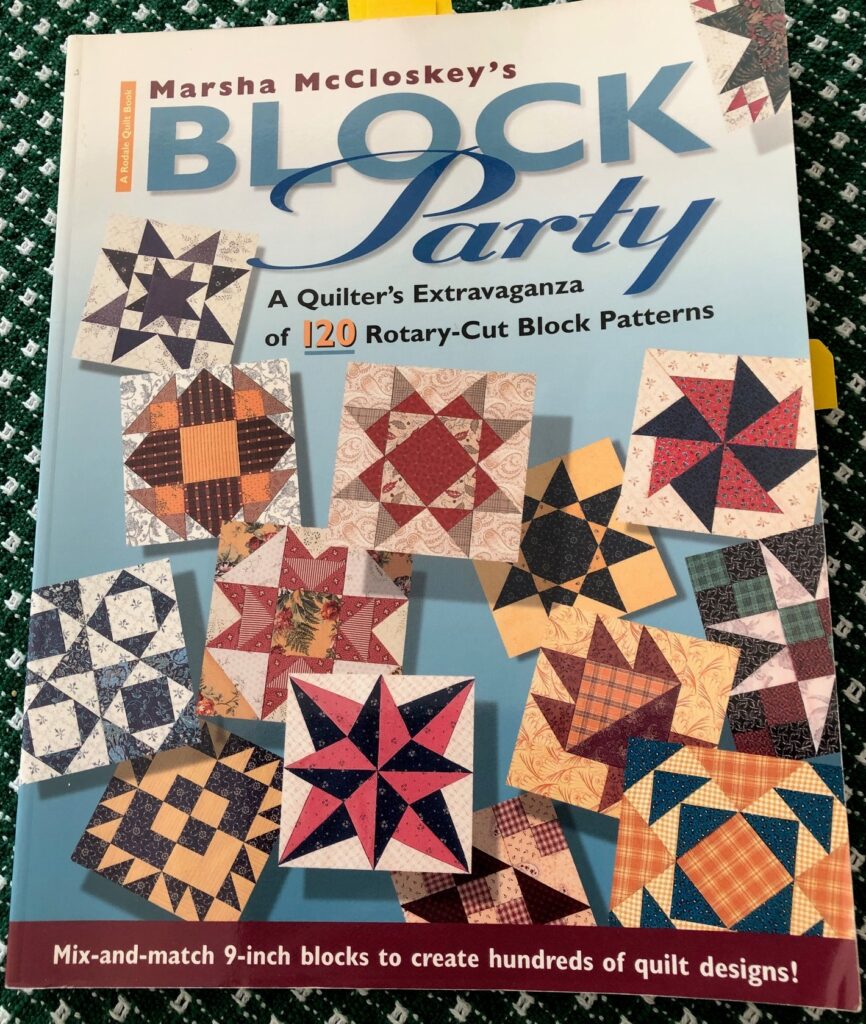
Given the parameters I’ve set for myself…a single quilt block with borders about 12″ to 14″ square, with the outer color being lighter so it will show up on our dark red door…I usually start with Marsha McCloskey’s BLOCK PARTY book…a mix and match book of 9″ blocks.
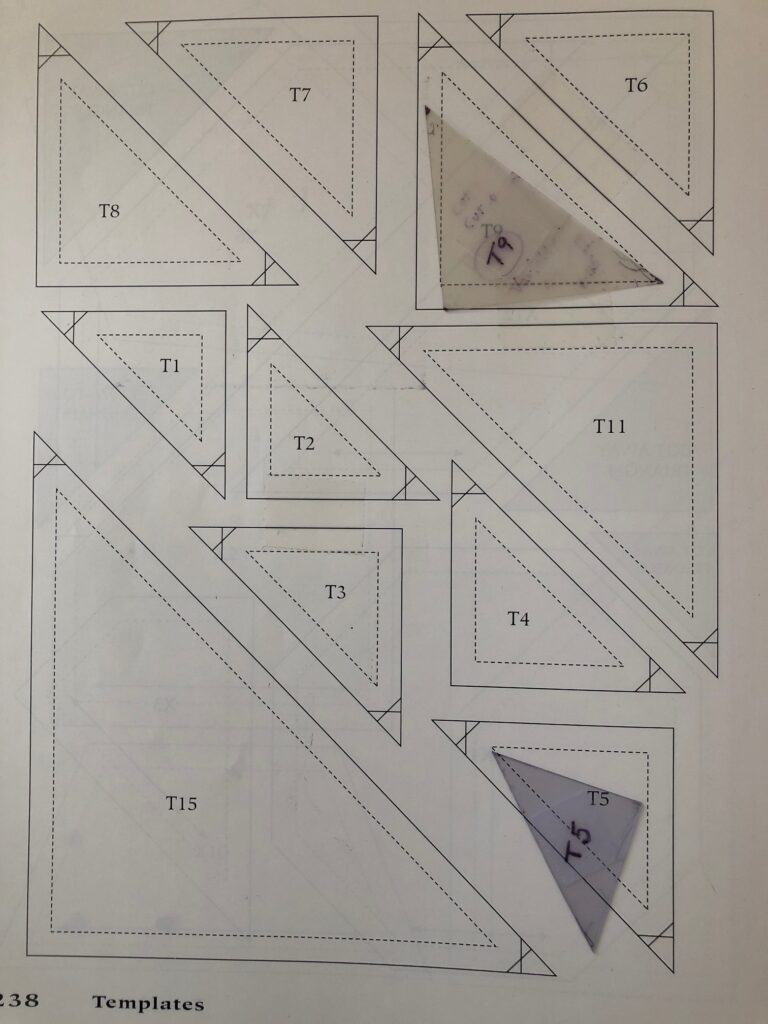
I love the way the pages of instructions are laid out and I have many of the templates already cut. Each page has a color picture of a finished block, a diagram showing the straight of the grain for each piece, step-by-step how to assemble the pieces, alternate color choices and how many of each template to cut.
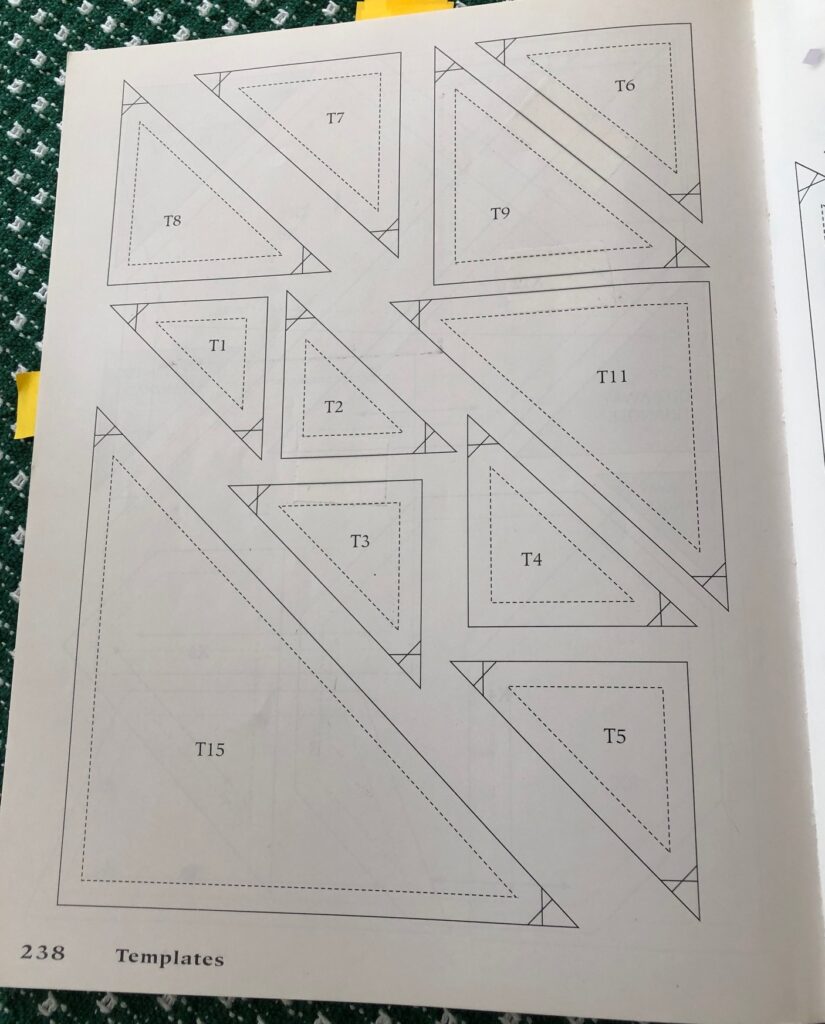
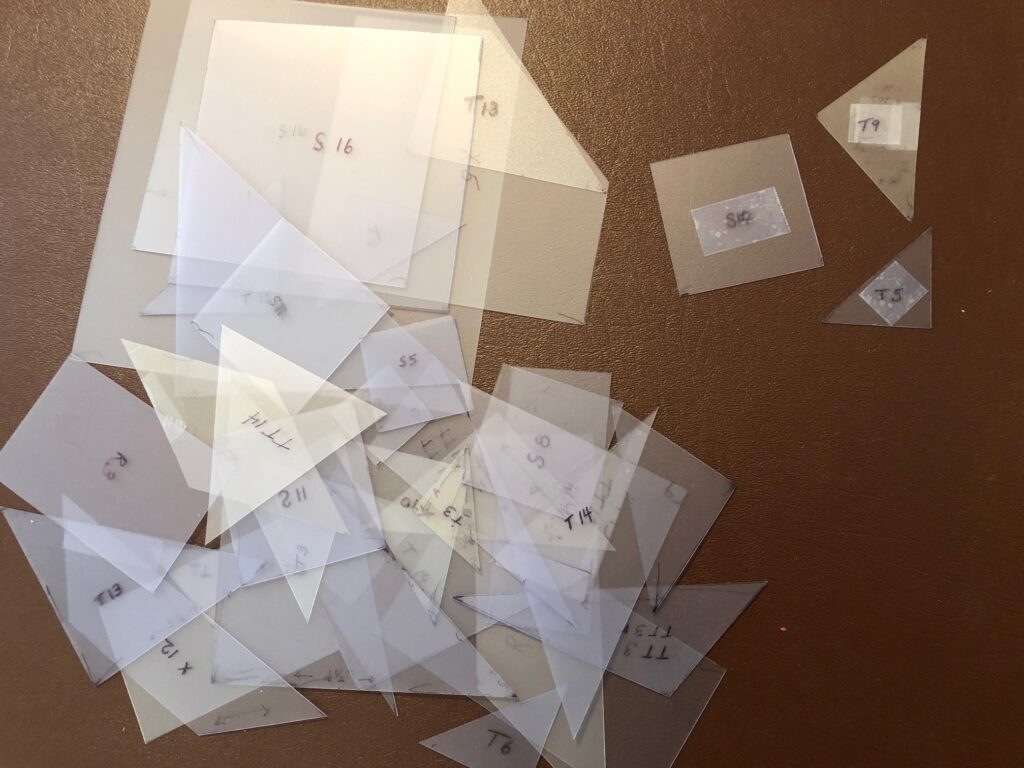
All the templates are diagrammed in the back of the book. All I have to do is lay clear template plastic over the template I want, trace the lines and cut out the template.
Since I usually plan to hand stitch the pieces, I need the stitching line marked not the cutting line. Then I draw around the template onto the back of the fabric and cut each one out, leaving about 1/4″ to 3/8″ seam allowance. It doesn’t matter if I’m exacting in cutting…the stitching line is what matters. So, I trace the inner line of the template.
I have made many of the blocks in this book, so I have many of the templates already cut out. All I have to do is dump them out on the table and sort through to find the ones I need.
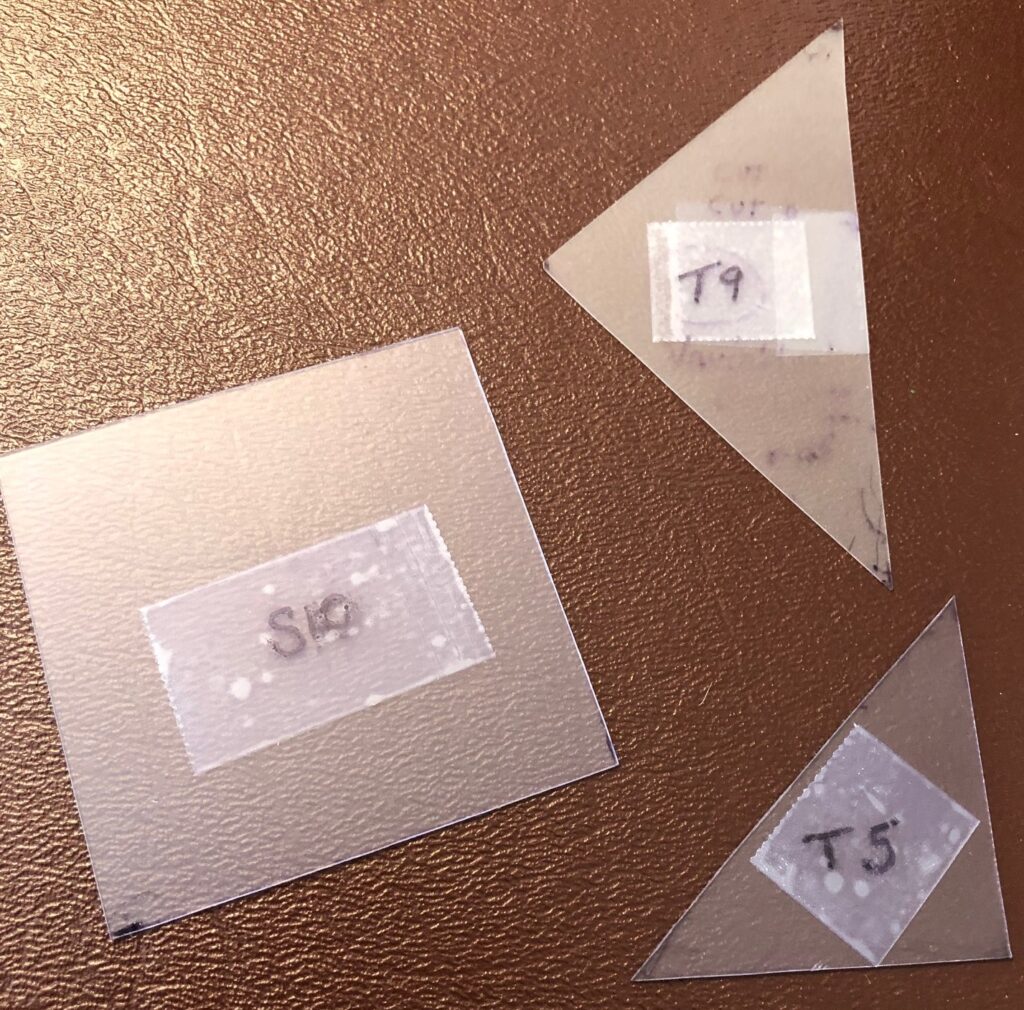
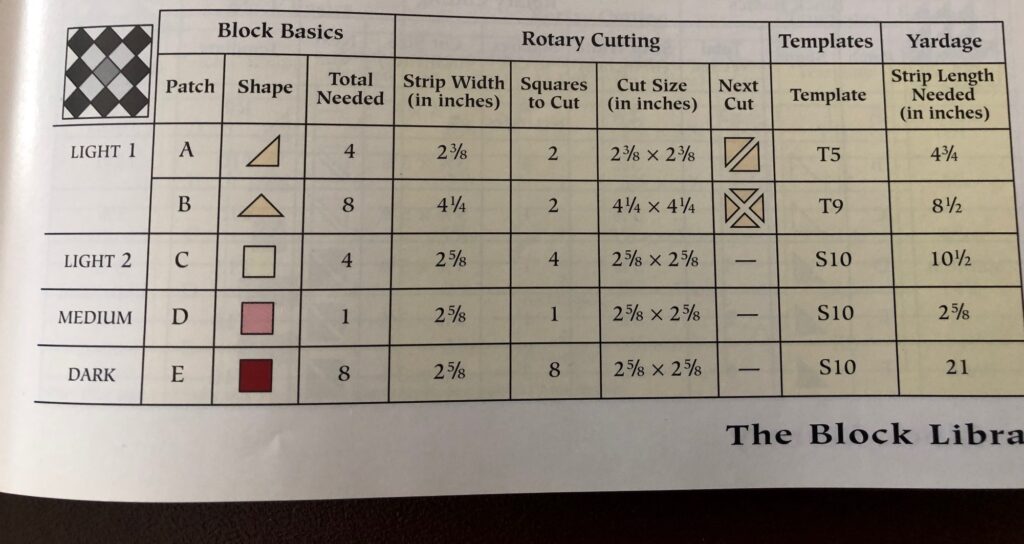
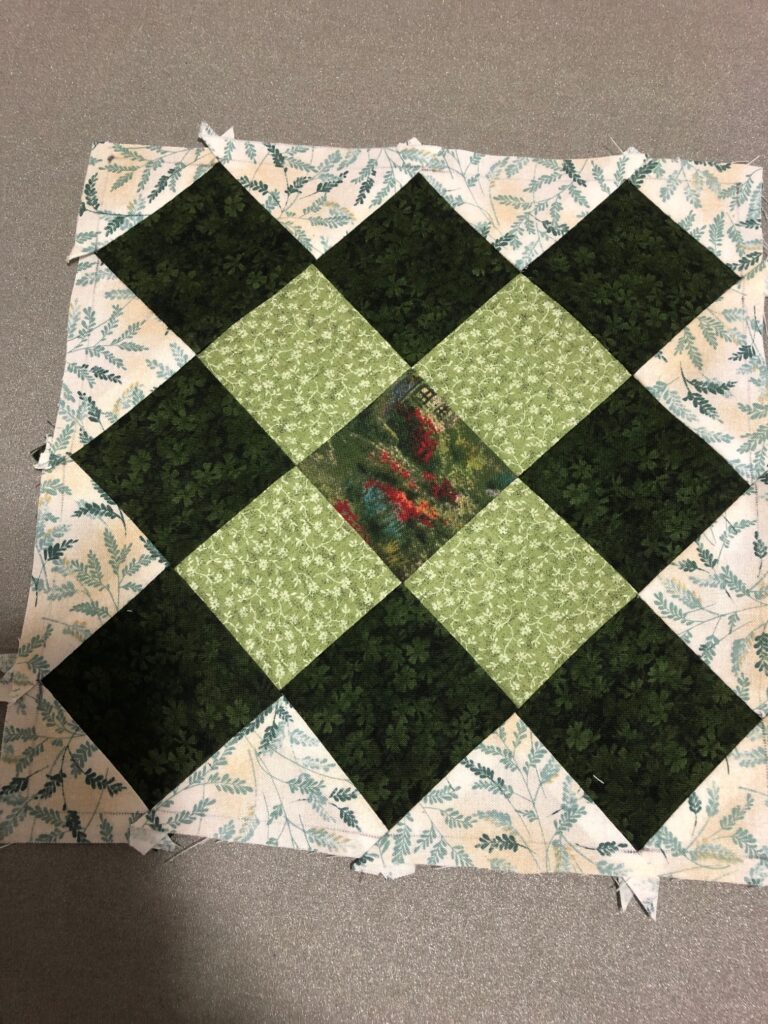
The block I’m making needed only three templates, as indicated on the box of instructions at the bottom of the page. The shapes in the diagram refer to the diagram at the top of the page, which shows the straight grain of the fabric with arrows. You can see on the chart below, Template T5 will be used to make 4 of Shape A. They also give instructions if you are using a Rotary Cutter.
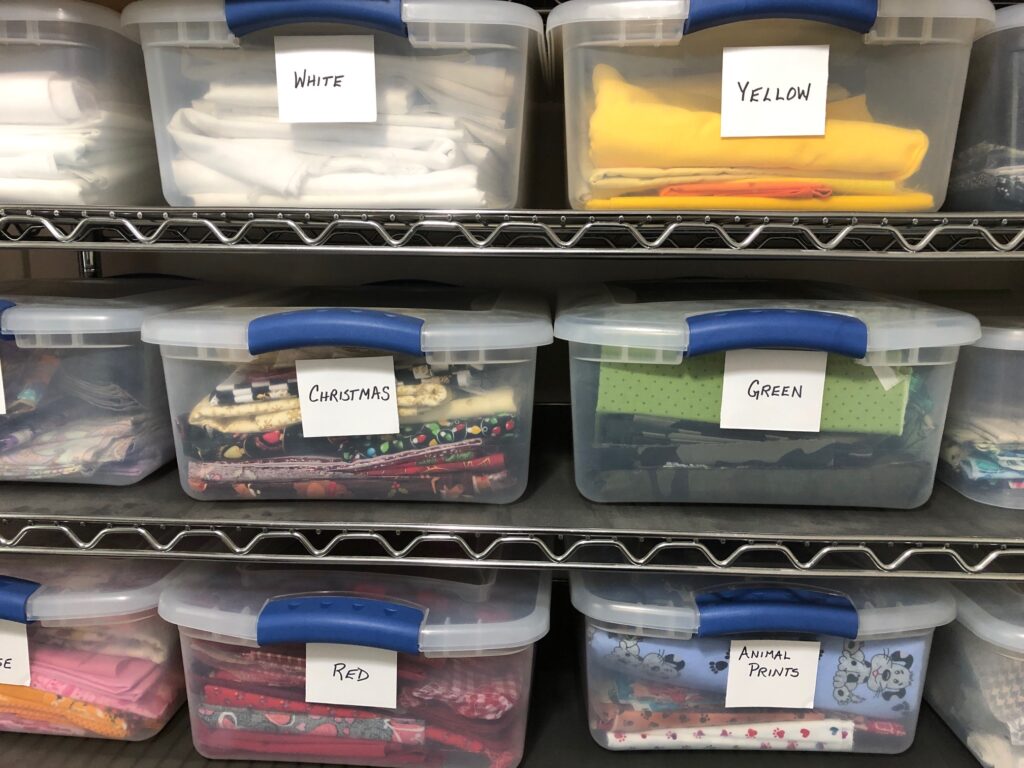
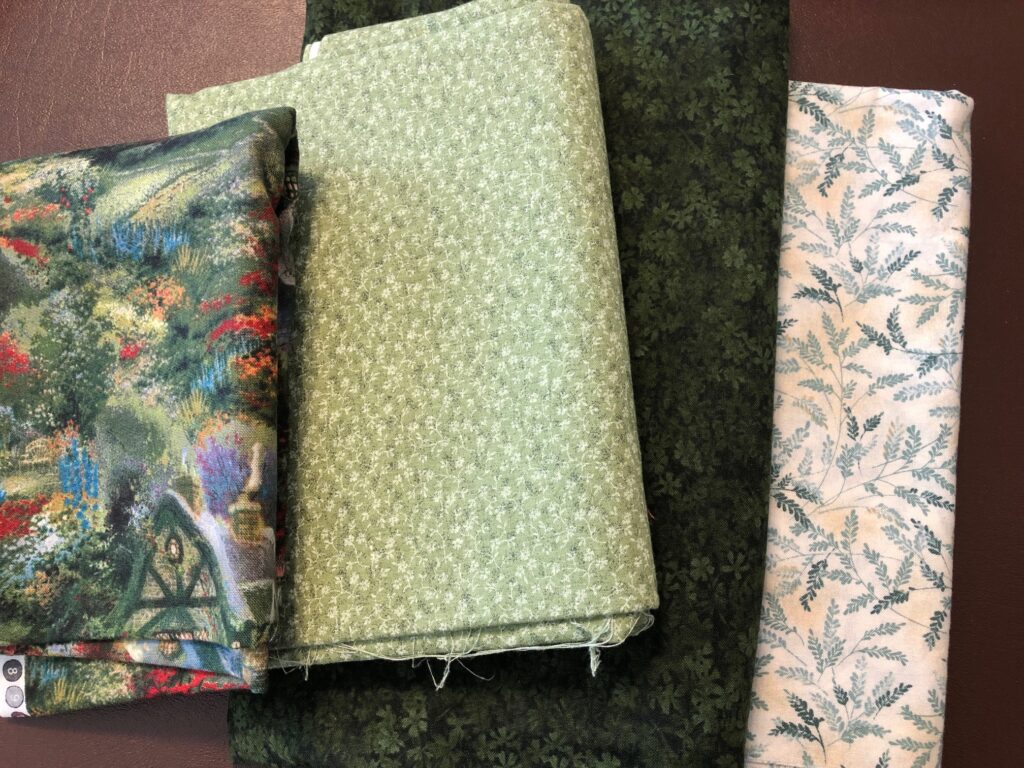
Now that I know I will need 4 different colors, and I know I’m aiming for colors of the season…late summer greens and a splash of color, I head to my bins of fabric. I have found I tend to look for fabric by color, not size of the piece. Most of the fabric I have is cotton and is washed right after I buy it.
In the “Green” bin I found these choices:
This is how I arranged the pieces:
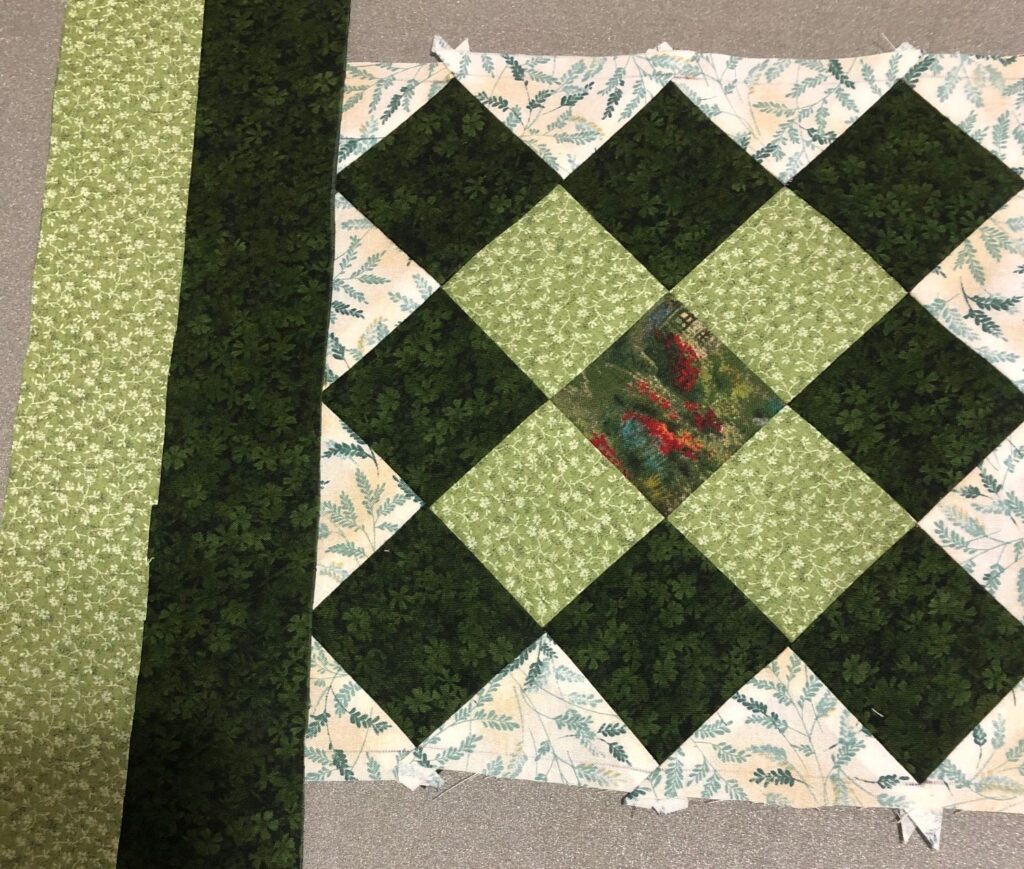
Next, I tried out some strips to see what I liked for the border:
I’m pleased with how the finished block shows up on the door!
So, my door is decorated for the next two months. Around the beginning of October, I’ll find orange fabric to make something for Fall/Halloween/Thanksgiving. Such fun! Enjoy!
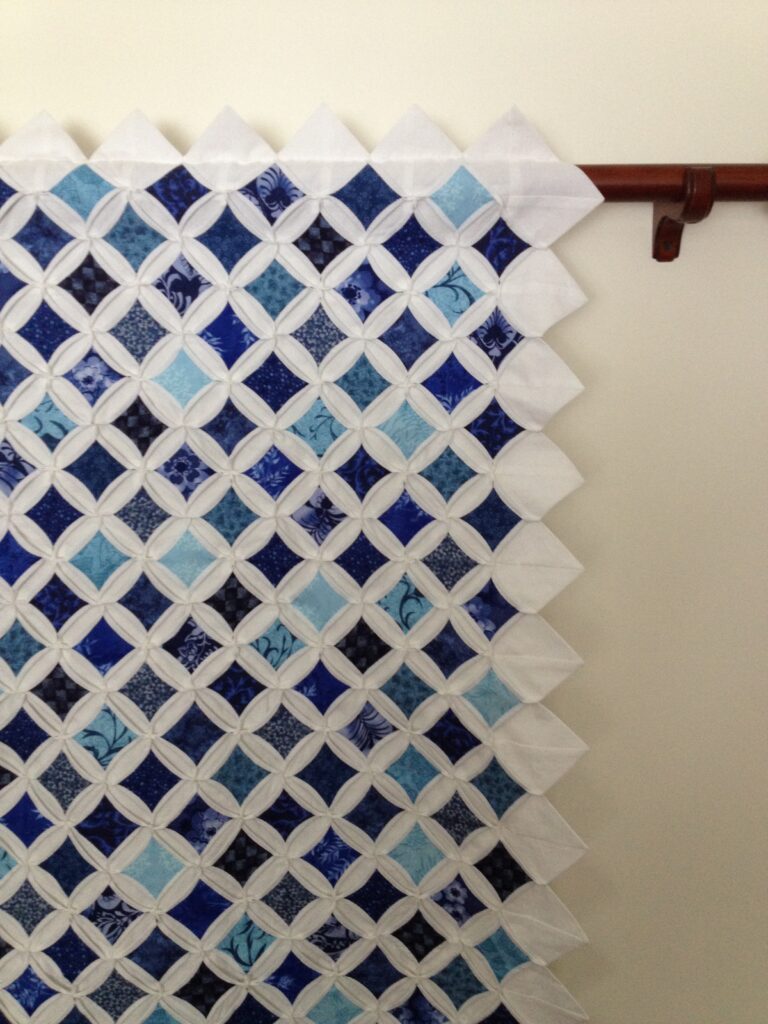
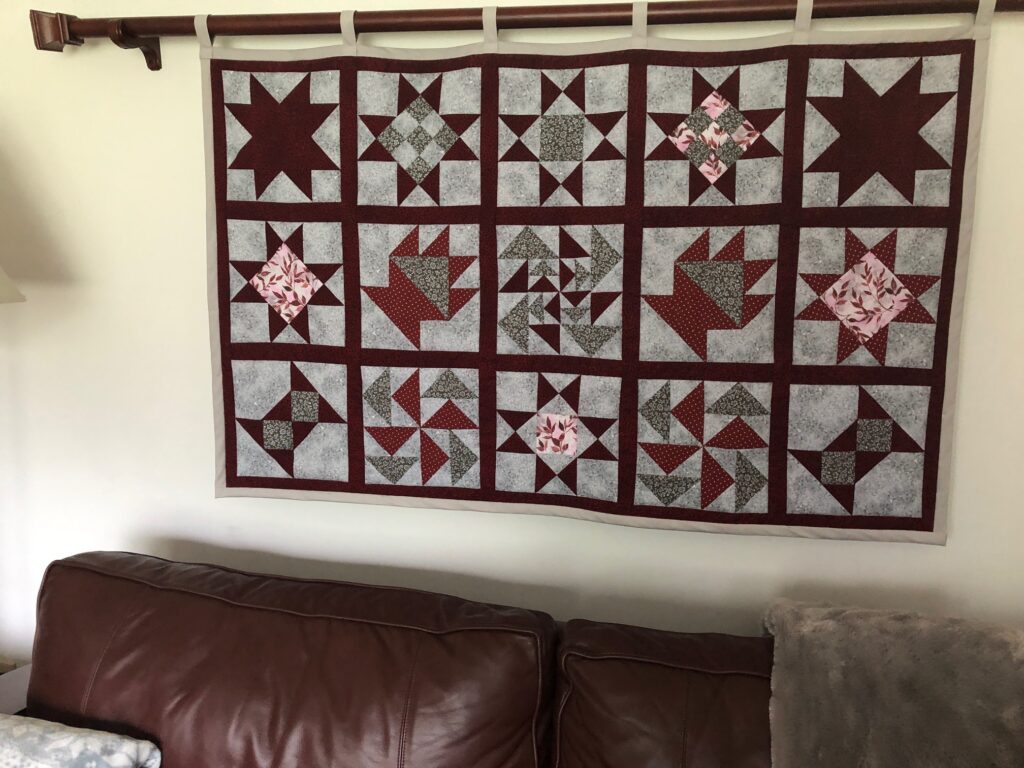
Changing color schemes in our living room isn’t too hard. The furniture is dark wood and brown leather. I add color around it. I seem to have established a common element…a small quilt hanging above the sofa. This started years ago with a full-size quilt draped over the rod (thus the hefty rod on the wall). After that I went with smaller wall hanging quilts that I could make by hand. They satisfied my love of hand-piecing quilt blocks on a smaller scale. I can change the color scheme in the room by changing the wall hanging and swapping out pillows and throws to coordinate the color.
The Cathedral Window quilt hanging that I made several years ago was blue and white and I love it, but I tired of the color over time.
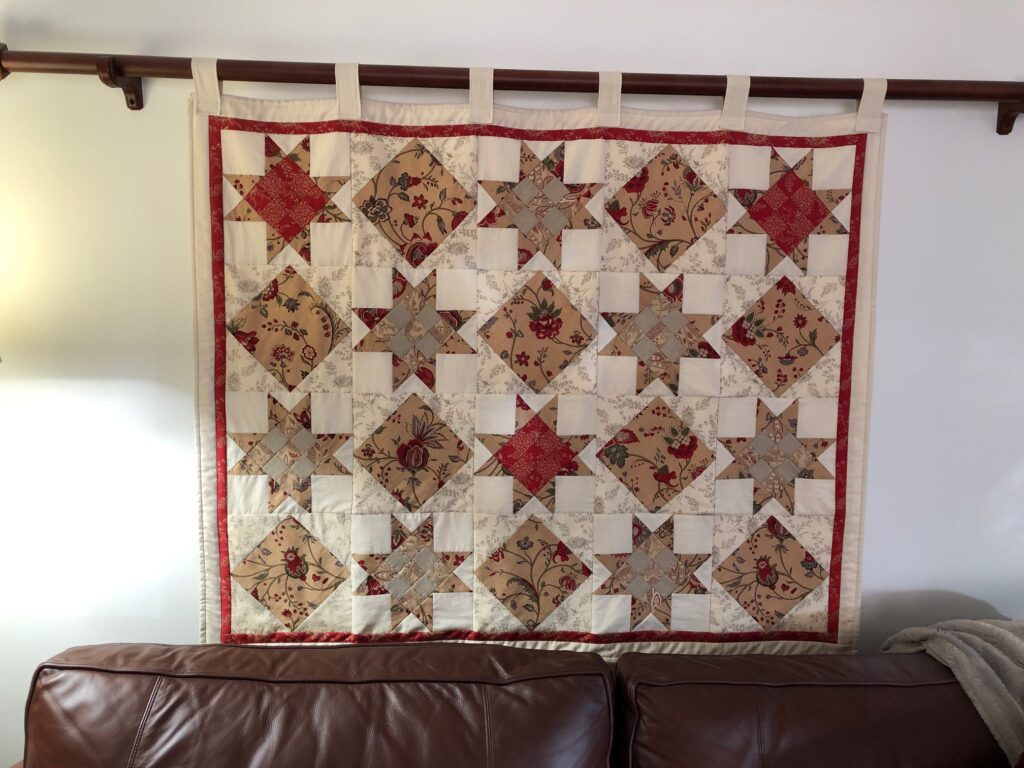
The most recent quilt (that I’m phasing out) started with a plan to make a full-size quilt for Kathy, but by the time I had hand-pieced a few blocks her colors had changed and I lost my motivation. So, it became the next quilt on the wall.
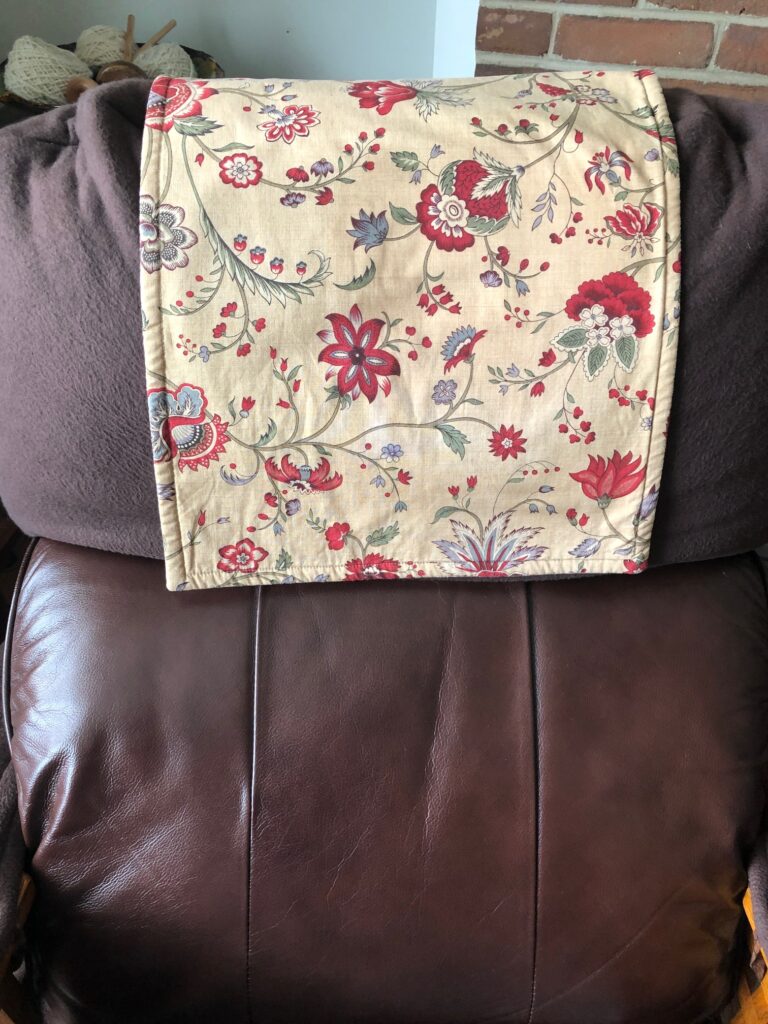
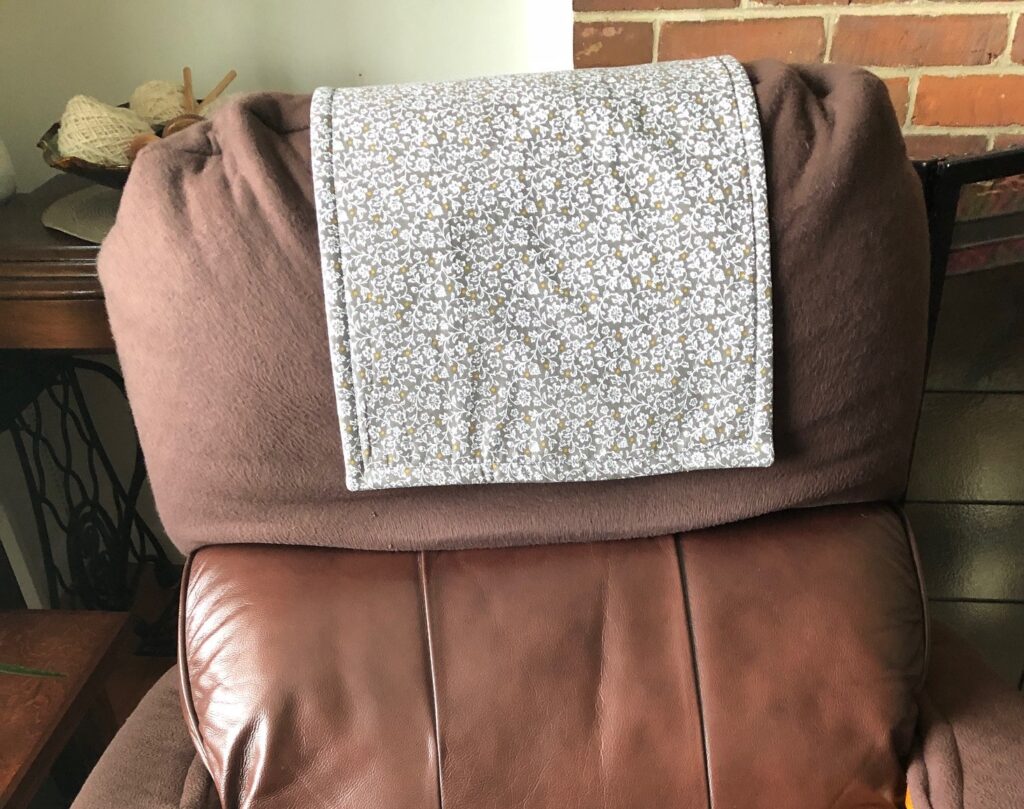
Of course, as I change color schemes, the pillows and throws on the sofa have to change too. A small matching piece of fabric provides a pad on Bert’s chair to protect the back under his head. Thus, I had used extra fabric to make this:
Now that I’ve finish the next quilt, changing my color scheme to gray and burgundy, his chair needed a new head rest piece. This is the new wall quilt:
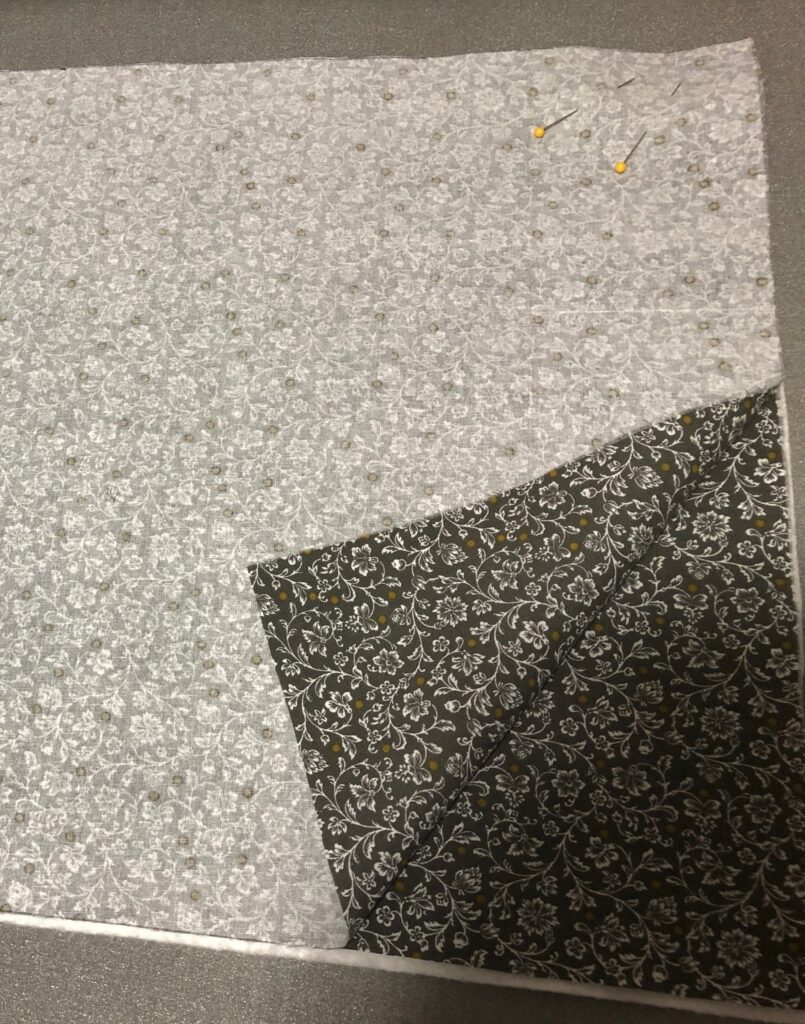
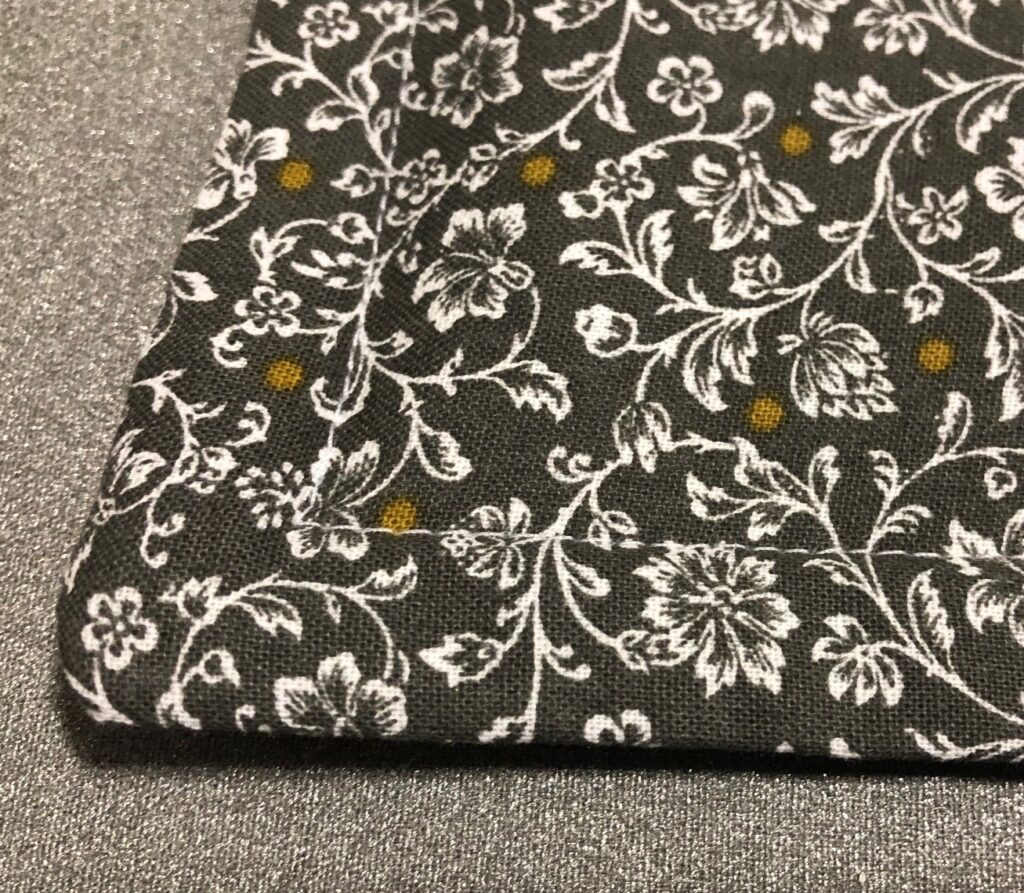
So today I pulled out the extra fabric and whipped up a new head rest pad. I had two fat quarters and trimmed them to 14″ x 21″ and added a piece of batting.
The fabric pieces are right sides together on top of the batting. I stitched around the outside, leaving a 4″ opening to turn right side out. I hand stitched the opening closed and top stitched around the edge. In half an hour I had the final piece of my decorating! Finally, everything matches! Whew!
I am definitely not a decorator, but somehow these quick changes I can handle. The slowest part is hand-piecing the quilt, but that makes a good winter project…one block at a time! Enjoy!
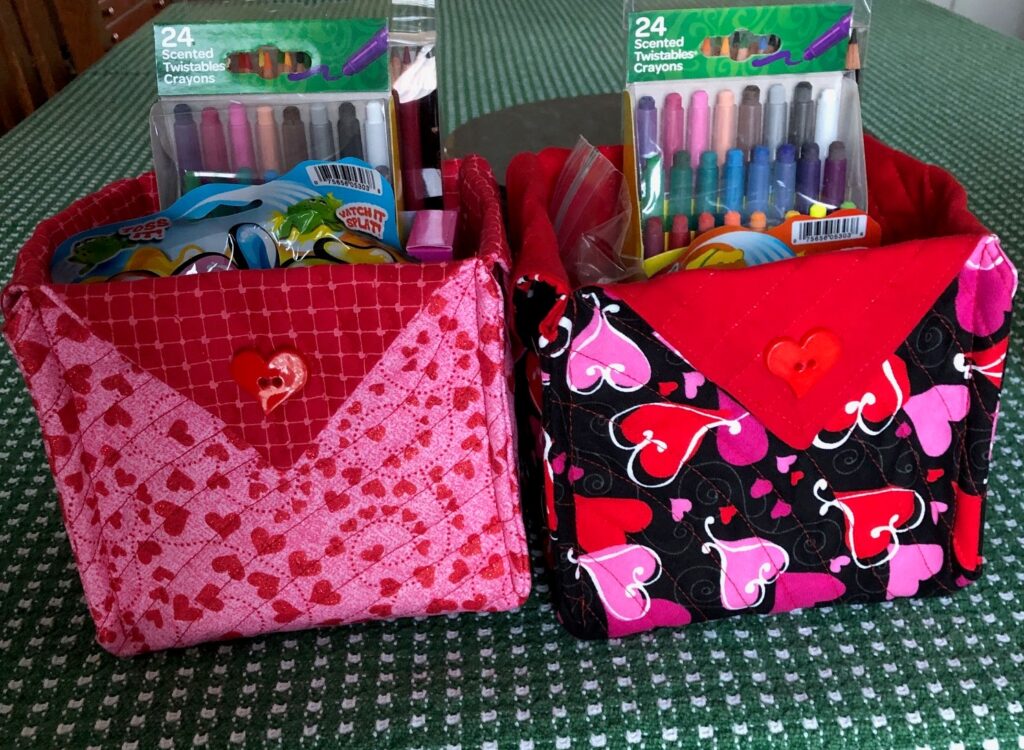
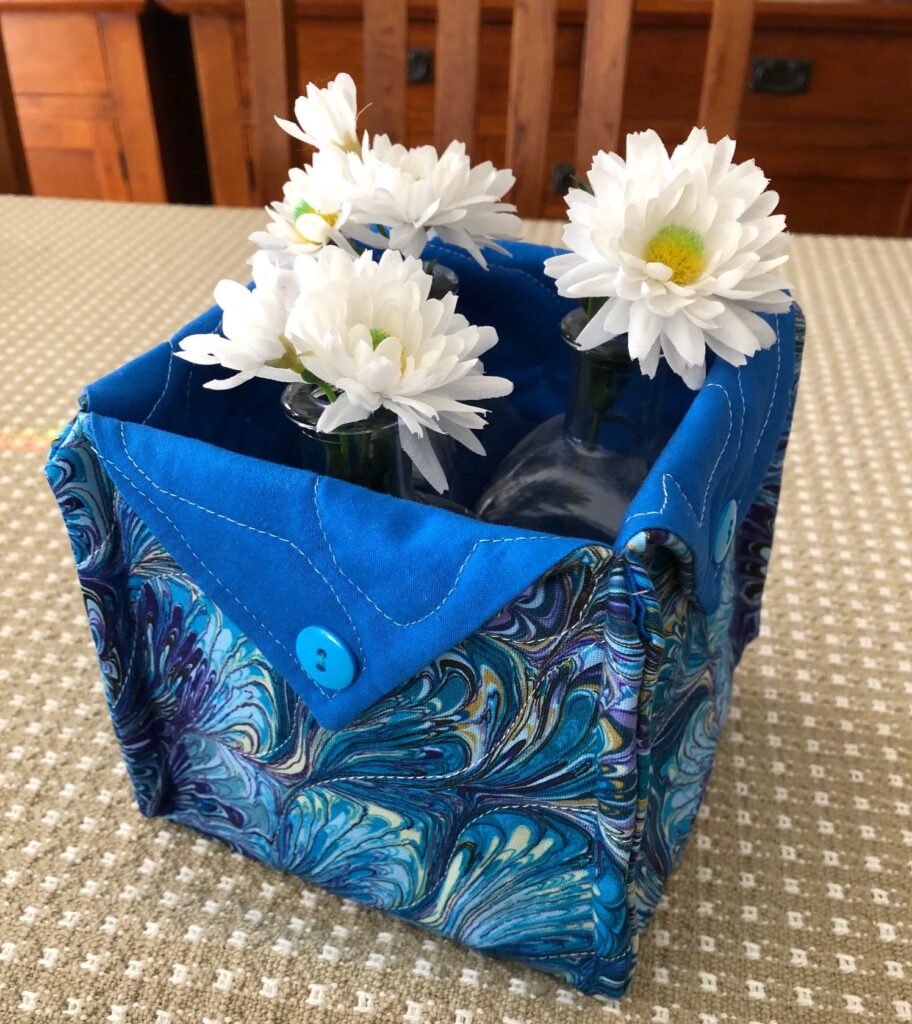
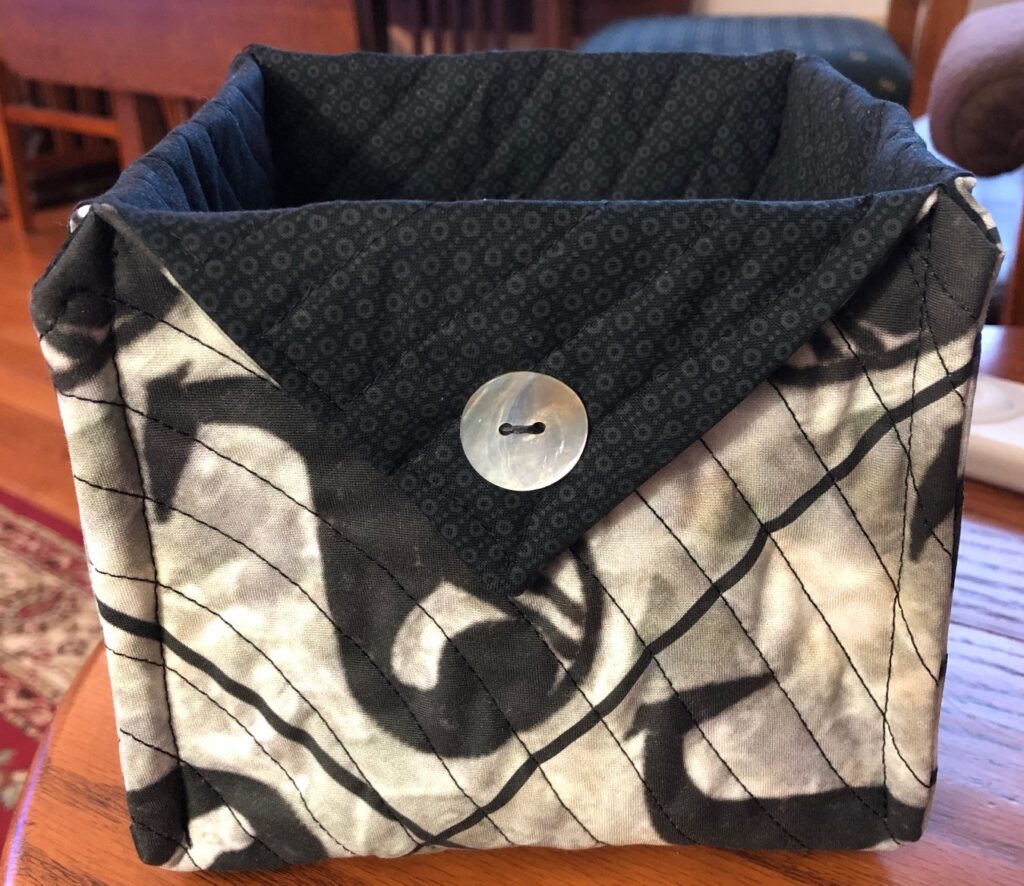
Last week I was brainstorming a nice way to package up three odd shaped items to use as a gift. I didn’t want to have to stock up on small wicker baskets to do the job. My daughter suggested I make a fabric box like the ones I gave to the grandkids. That way I could make one at a time as I needed them. At the time I cranked out a whole bunch of them for gifts and for a greyhound conference and I still have a few around the house.
Luckily, I saved the link to the tutorial, because frankly, I couldn’t remember how to make them! The original instructions are from a website by Connie Kresin Campbell. Here is the link to the tutorial:
What I do recall about these boxes was they perfectly held a square box of tissues but they were not sturdy enough to really pick them up without squishing them. However, they could be made in any appropriate fabric for most any holiday.
I wanted to refresh my memory about how to make them so I referred to the link above. I documented my steps here, but they do mirror the ones in the tutorial from Connie.
How to Make a Fabric Box
Materials:
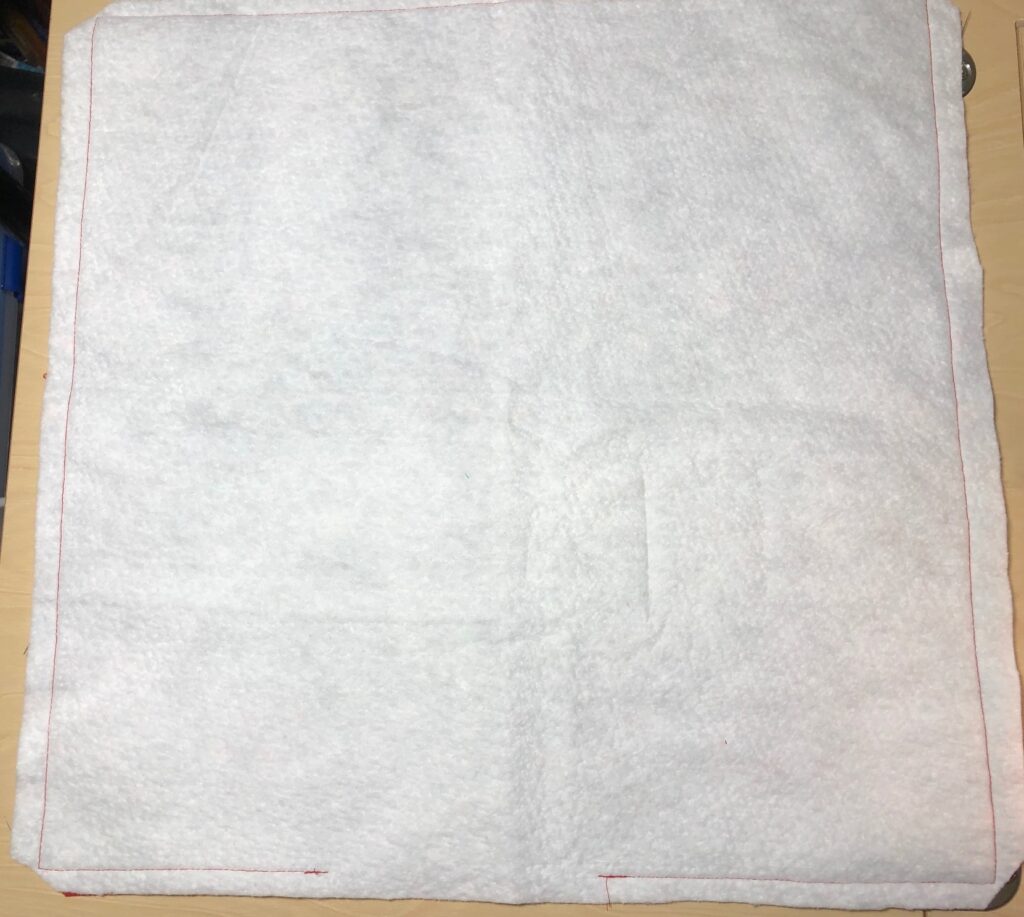
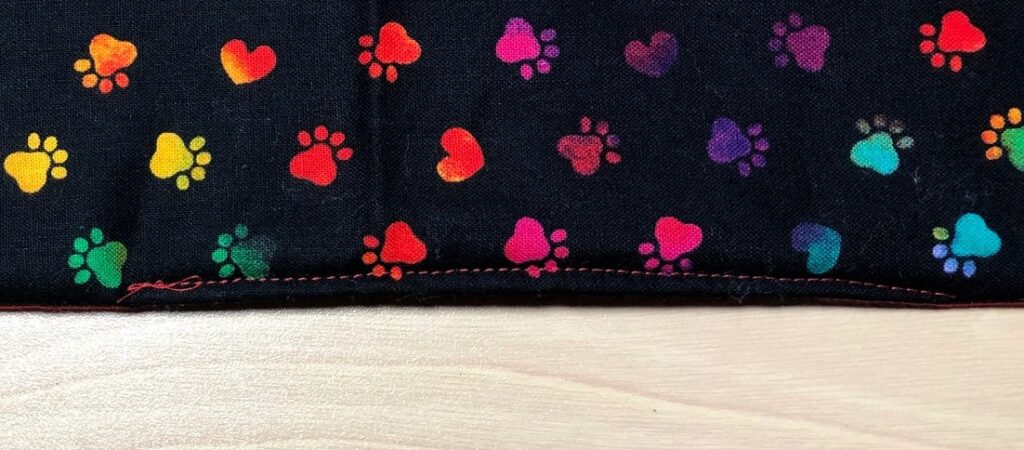
Two 16″ squares of coordinating fabric, one will be the outside of the box, the other the lining.
One 16″ square of lightweight low loft batting
4 buttons
Instructions:
Sandwich the fabric, right sides together, on top of the batting square.
Stitch around the “sandwich” with a 1/2″ seam, leaving a 3-4″ opening to turn.
Trim the corners to reduce bulk.
4. Turn the “sandwich” right side out. Press the finished square. Hand or machine stitch the opening closed.
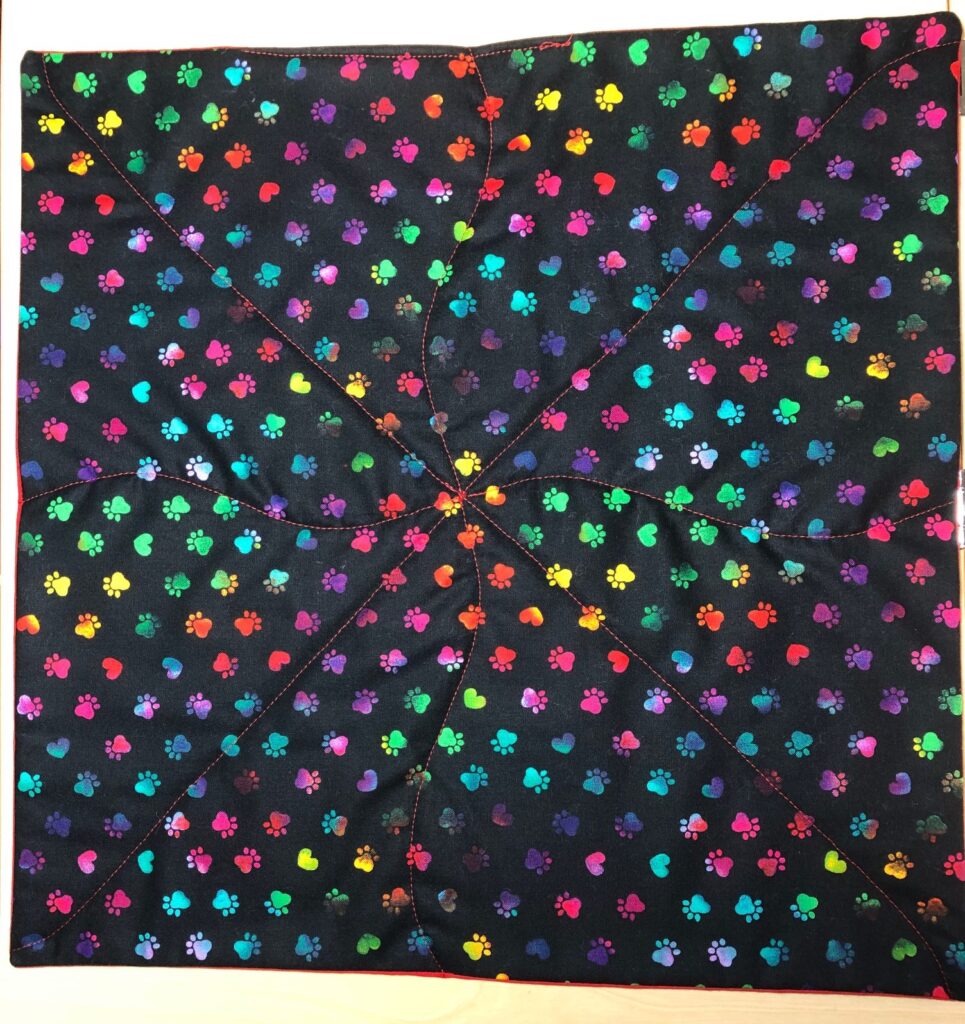
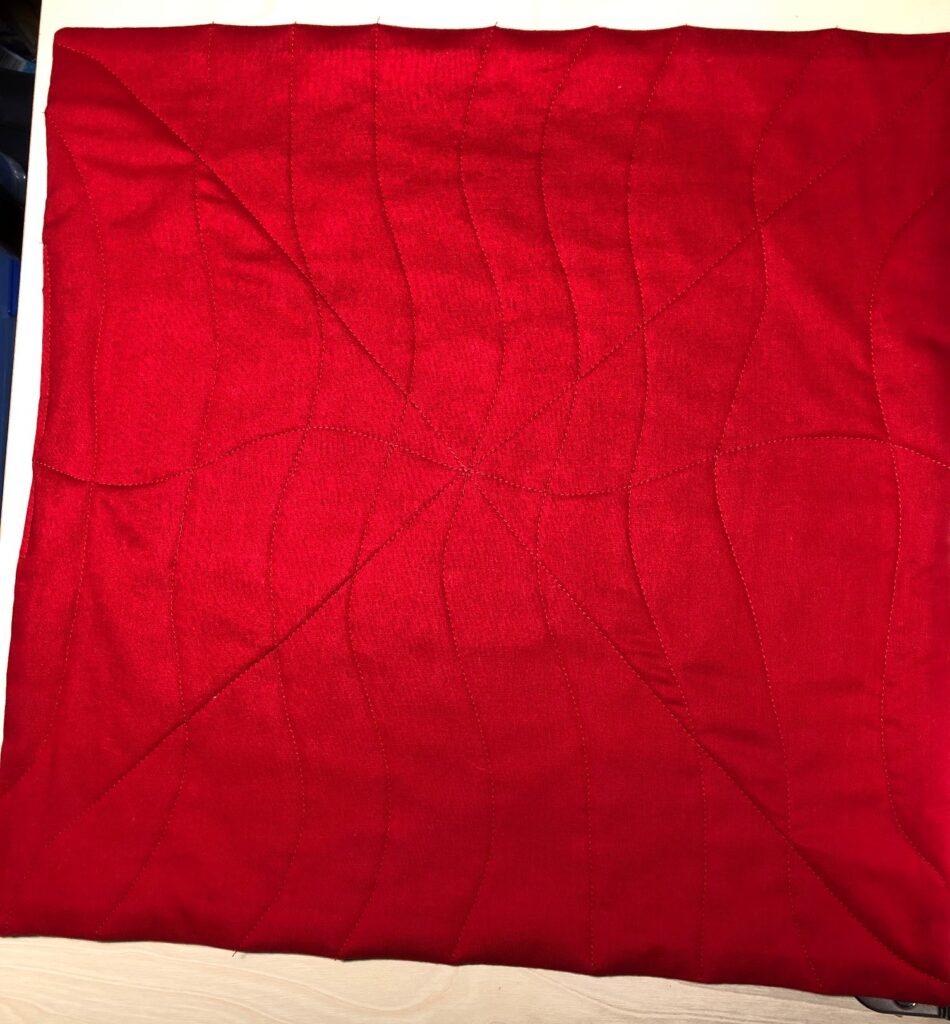
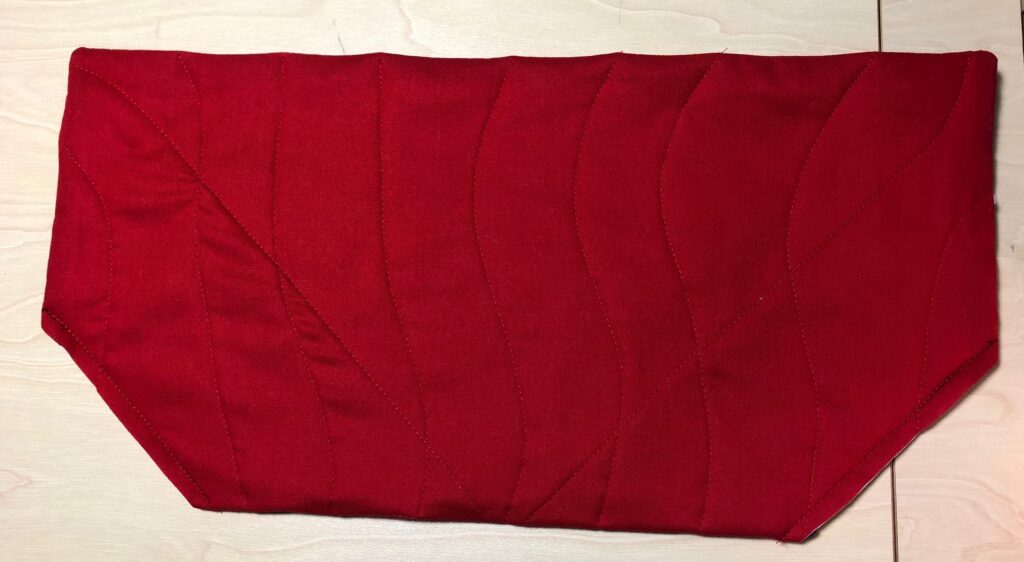
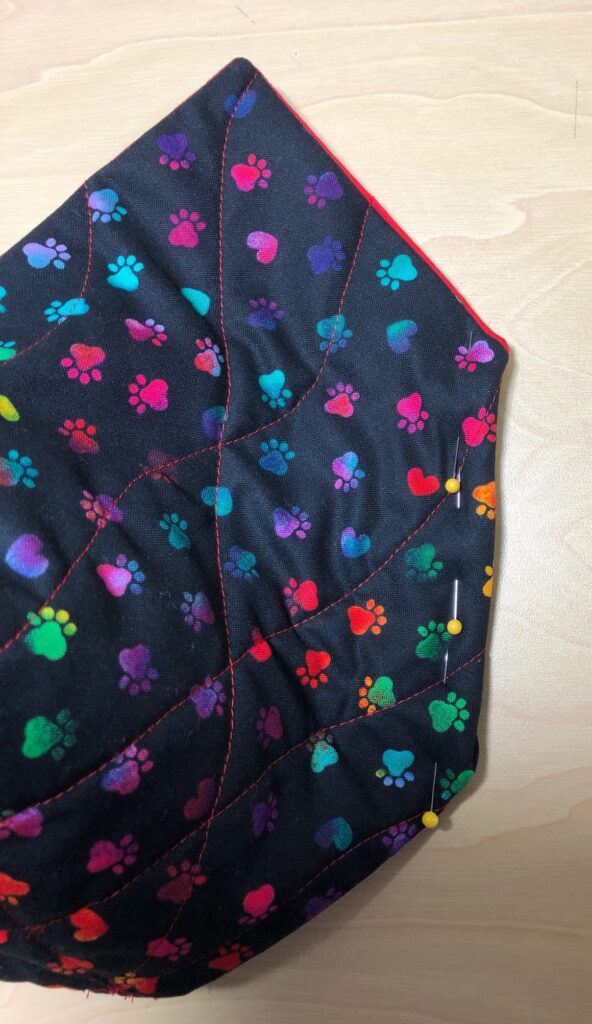
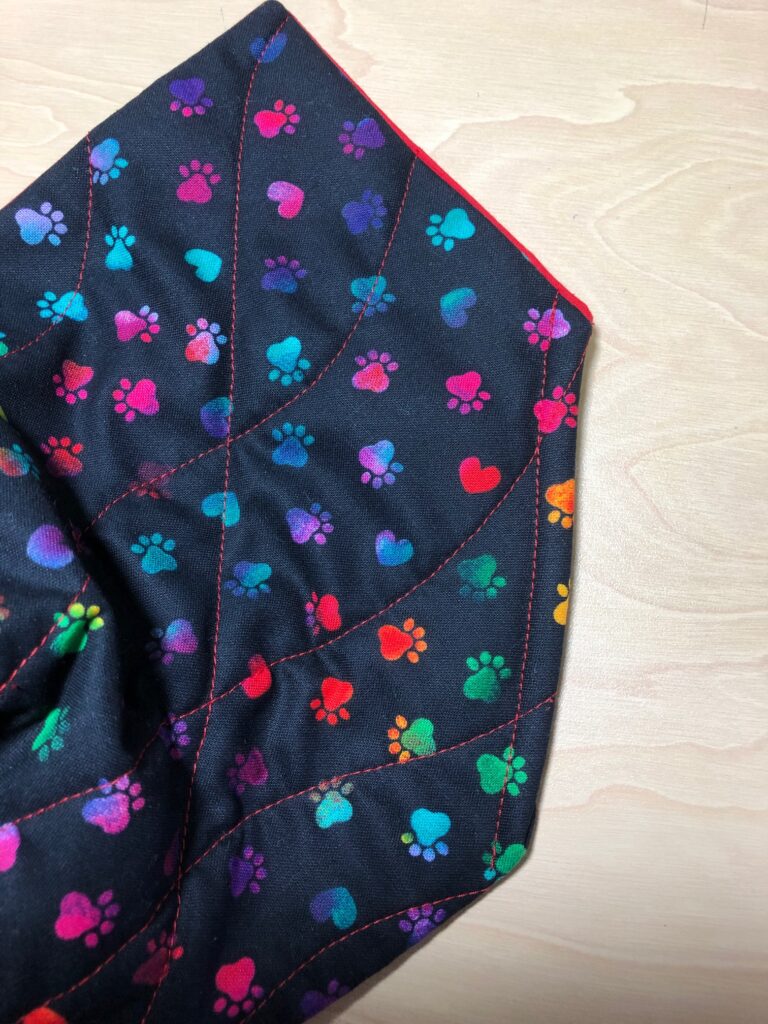
5. Quilt the square in any pattern you like…free motion, straight lines, wavy lines, etc. (Hint: Unless the fabric is quite stiff, the fabric will “creep” as you sew. I started all my stitching from the center to reduce this problem. I also started with two diagonal rows of stitching to stabilize it.)
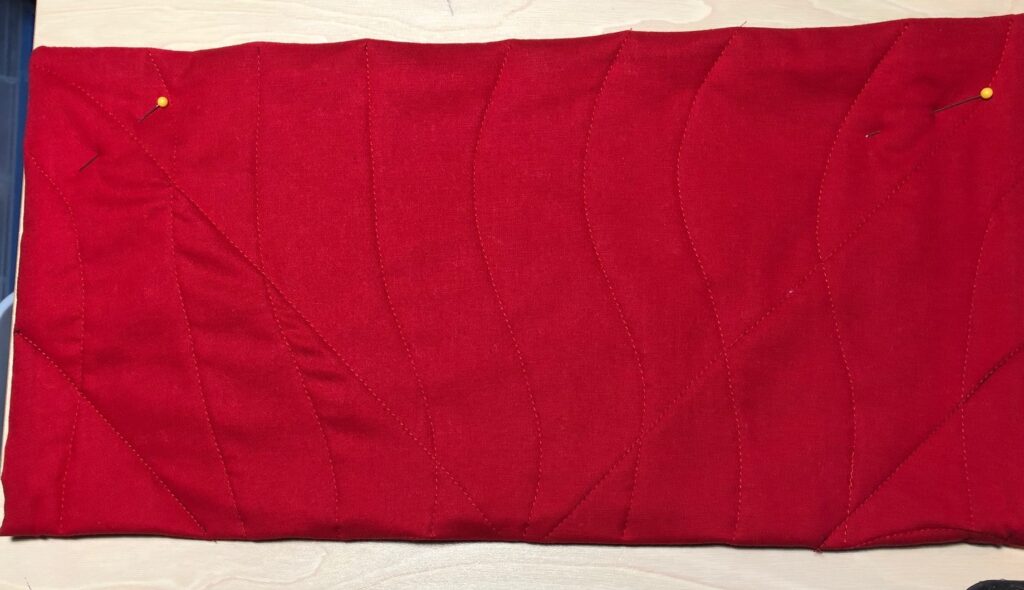
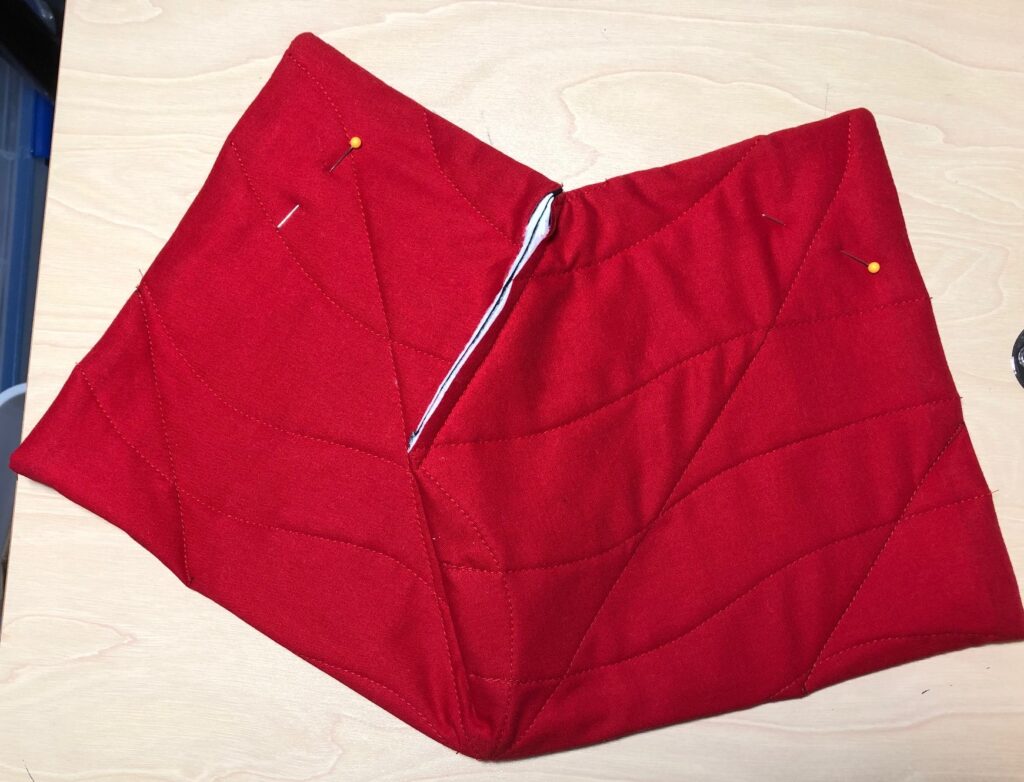
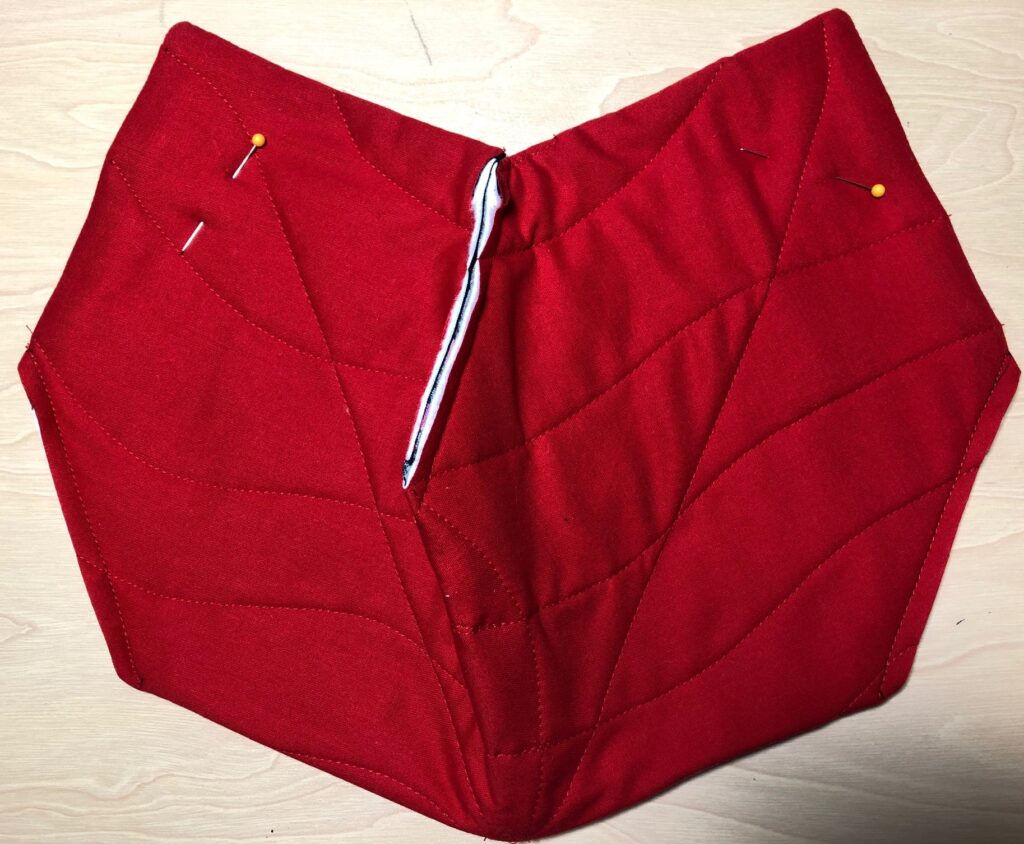
6. Decide which side will be the outside of the box. Fold the square in half with the lining out.
7. Mark the corners 3″ by 3″ with a ruler and pen. Stitch on the lines. Trim close to the stitching.
8. Open the square and fold again in the opposite direction. Mark the corners, stitch and trim as before.
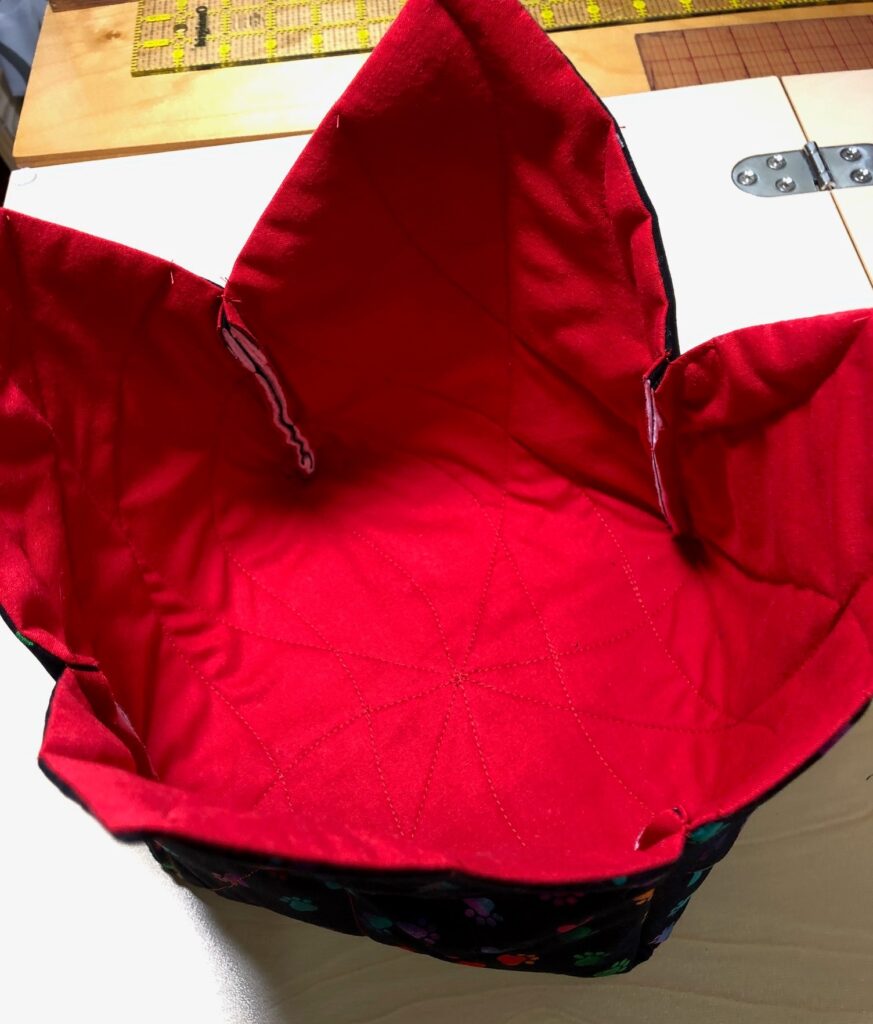
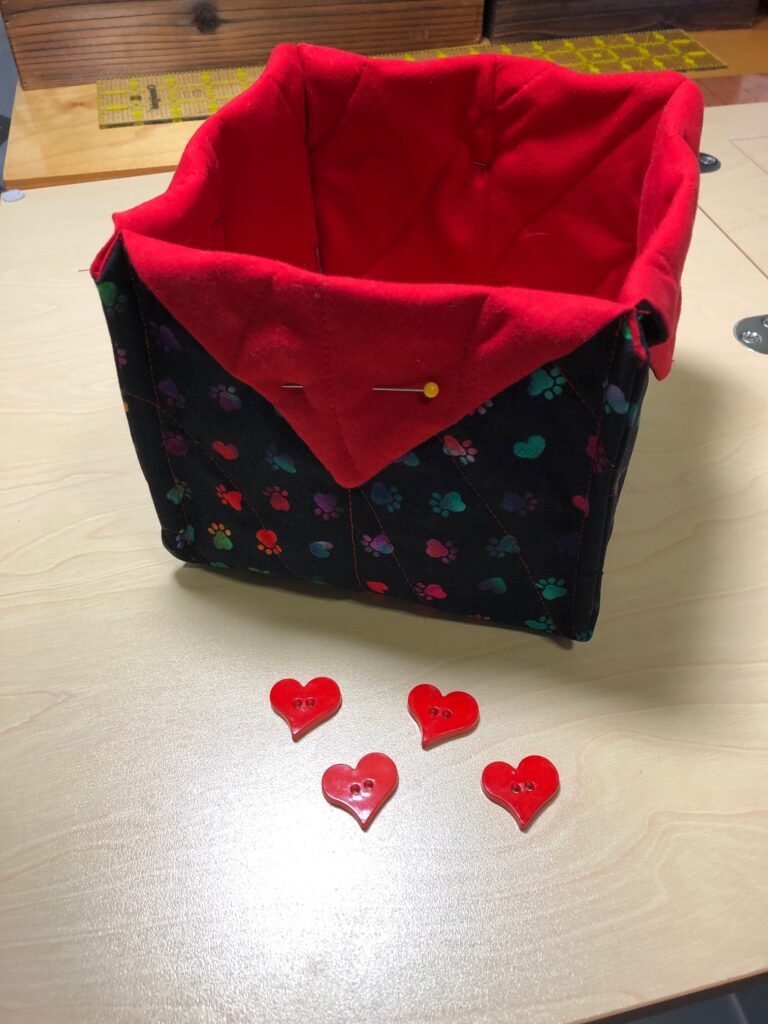
9. Turn the box right sides out. Pinch each corner flat and top stitch as shown below:
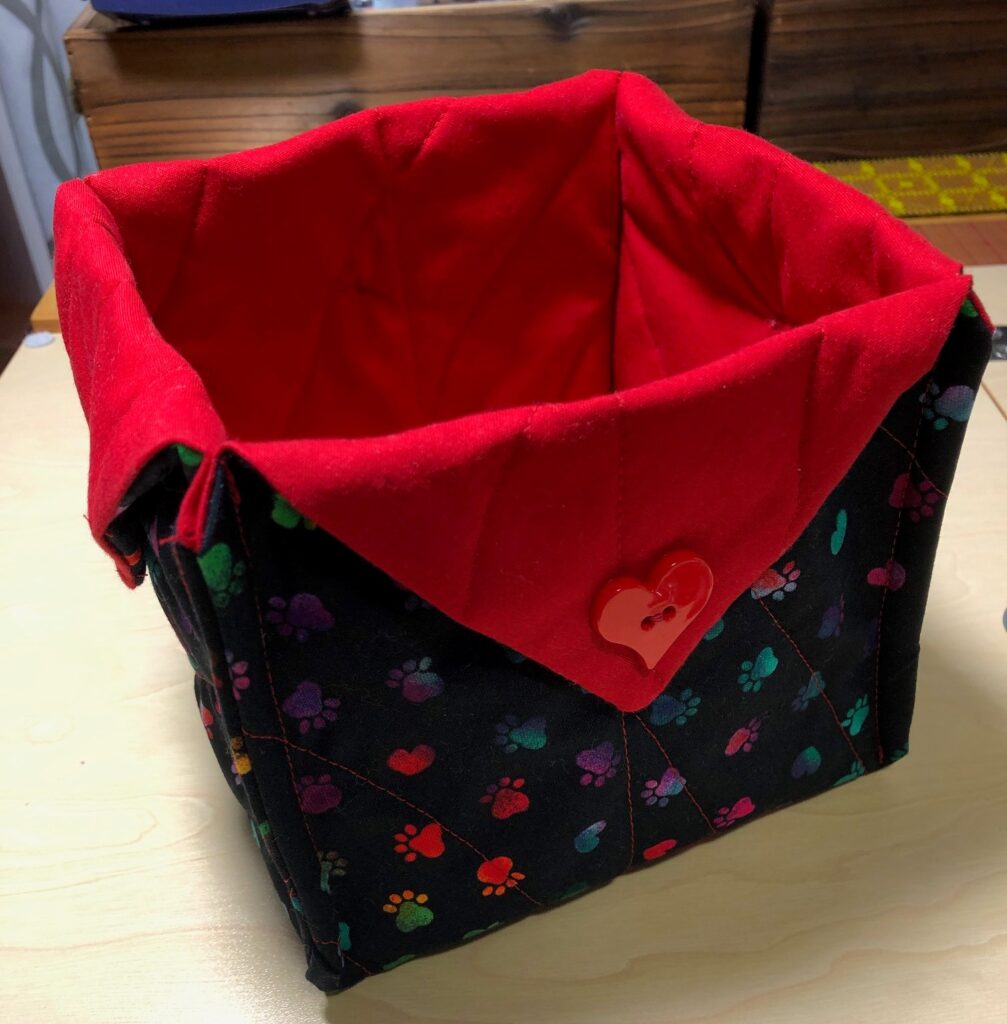
10. Fold down the points and add a button to secure them.
I had three items that I wanted to put in this box. They are lumpy and the basket is hard to pick up.
I think I will have to figure out how to shrink wrap them like a gift basket so they are easier to pick up, or I’ll have to put a handle on the fabric box and add a piece of stiff cardboard inside on the bottom of the box.
I’ll be glad to hear any suggestions you might have! Anyway, now I’m clearer about how to make these boxes…and you can try it too! Enjoy!