
This is a follow-up to a previous posting about recycling a wedding dress (https://marykisner.com/recycling-a-wedding-dress-part-1/). A friend had asked if I could do something with her daughter’s old wedding dress. She had stored it for 15 years and the dress did not hold any positive memories for anyone. Of course, I agreed to see what I could do with the dress.
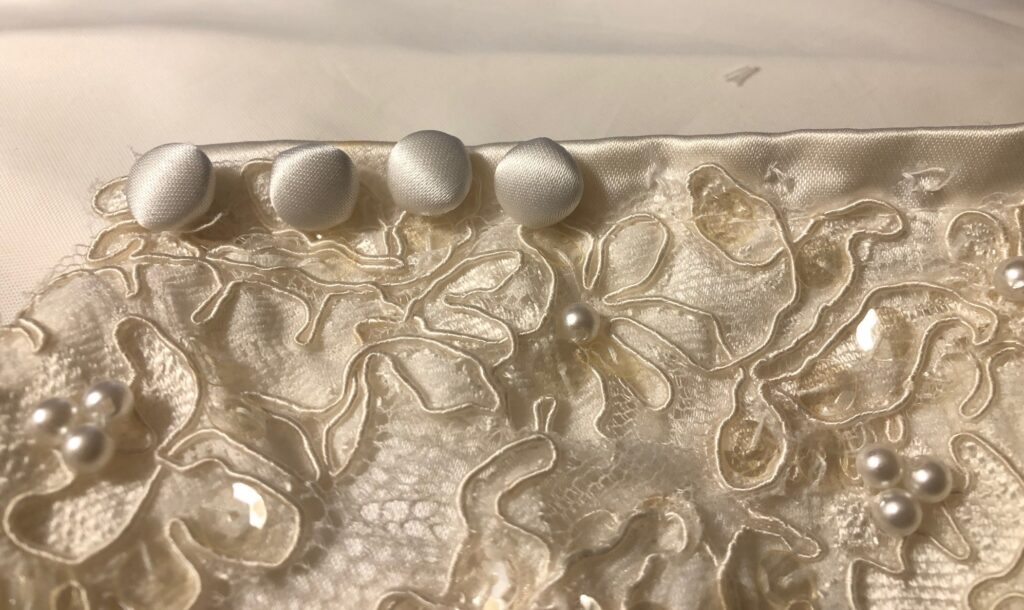
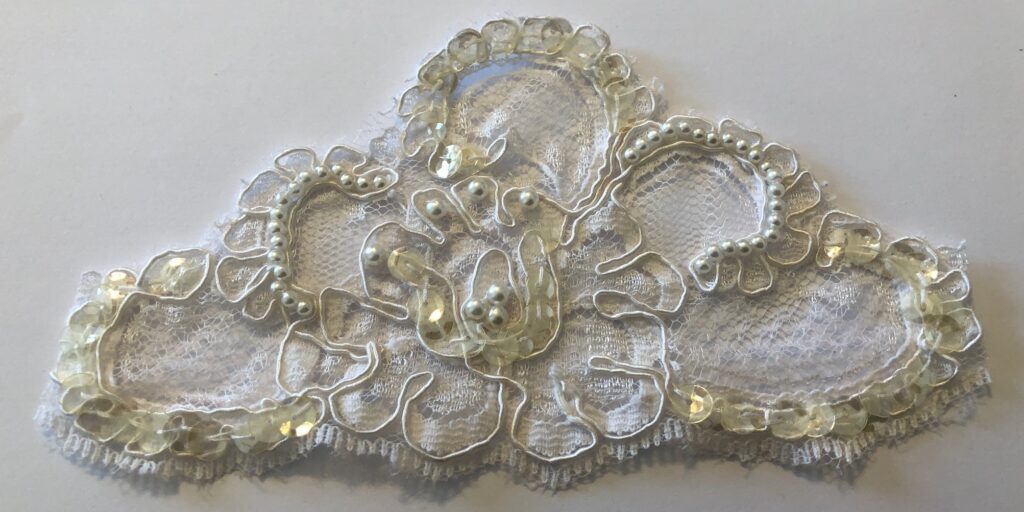
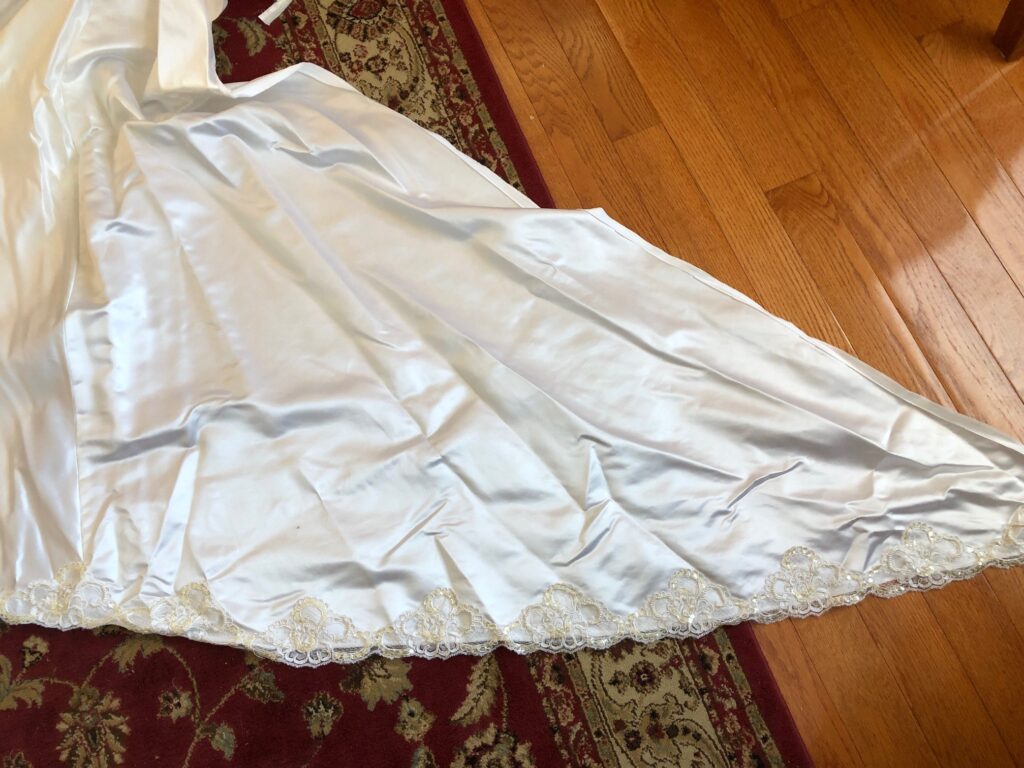
After carefully unpacking the dress and cutting sections apart, I had a huge pile of satin fabric with sections of lace, a huge pile of lining fabric, 23 lovely fancy buttons and a long white zipper! The fabric needed to be ironed and my pattern figured out.

My research about recycling wedding dresses gave me lots of ideas of things I could make out of this dress from Christening gowns to stuffed animals. I decided to focus on trying to make a tiny “angel gown” for a NICU baby who was not going to make it home from the hospital. It’s a very sad topic, I know, but I hoped I could do it justice.
Making the Pattern
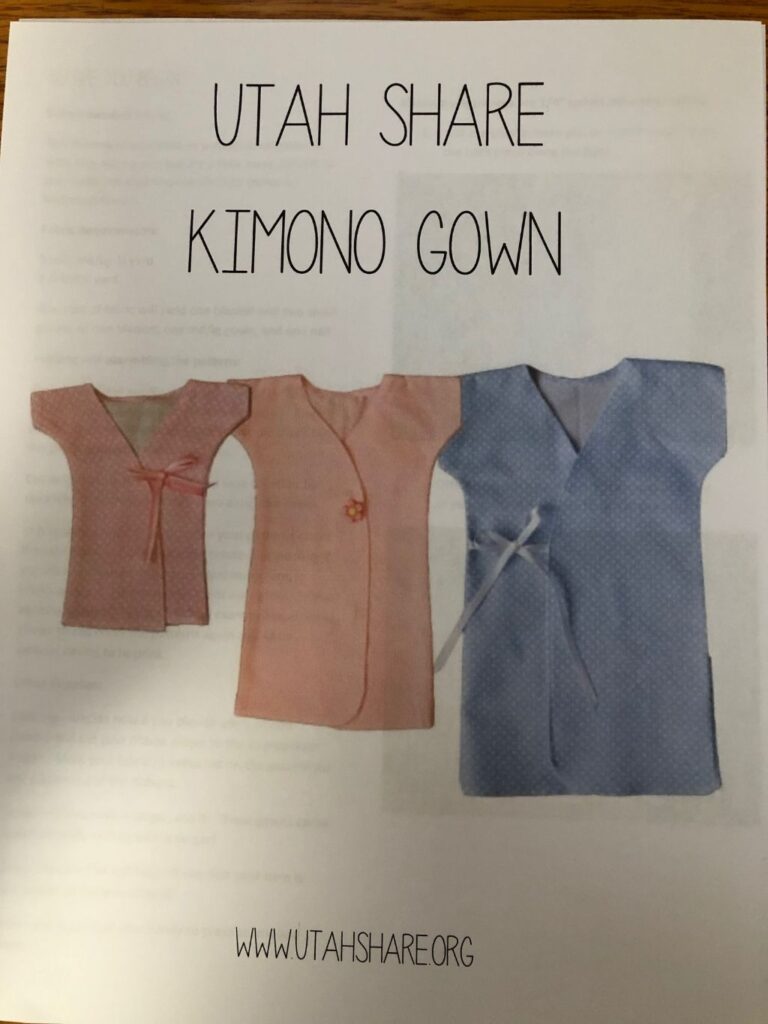
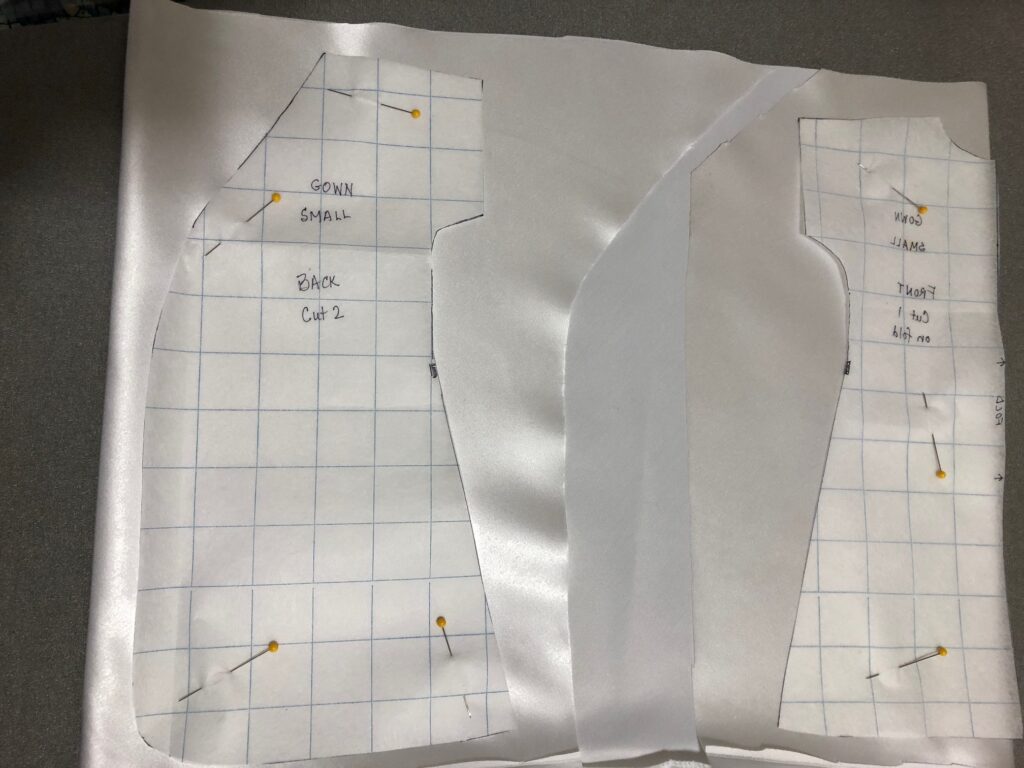
I learned that a simple gown pattern could be fashioned from a standard Kimono pattern…something like this one:
Apparently, the gown is designed to be worn with the overlapping portions as the back of the dress with a simple tie. This simplifies its use.
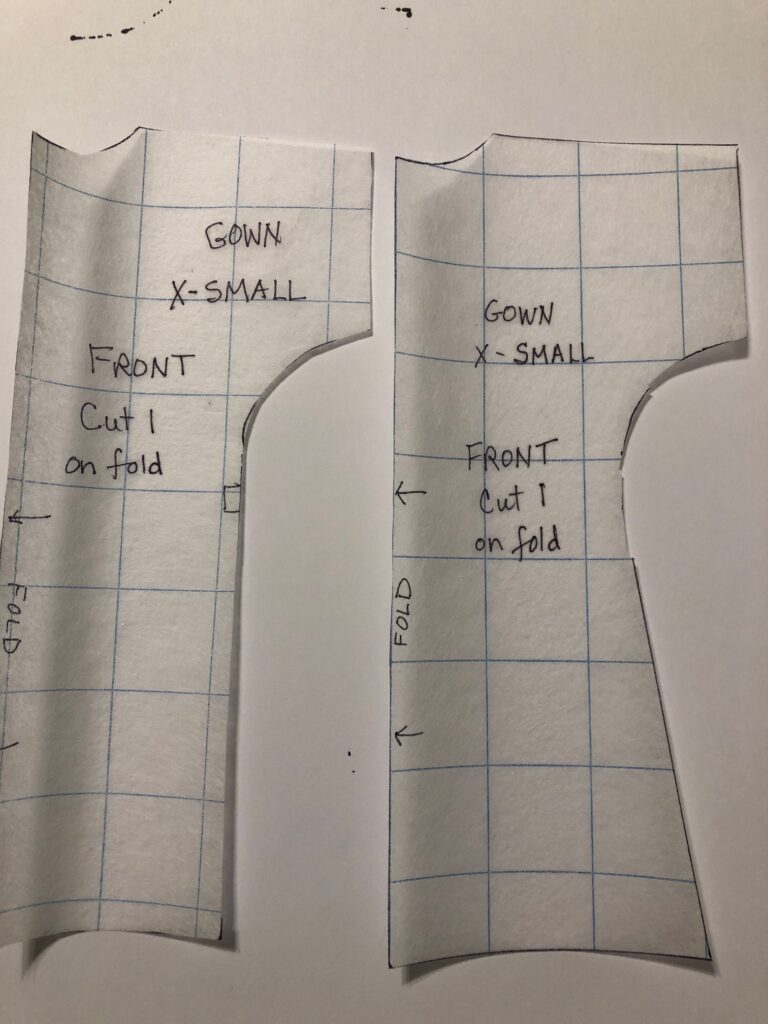
The free pattern above needed to be printed out and taped together, like this:
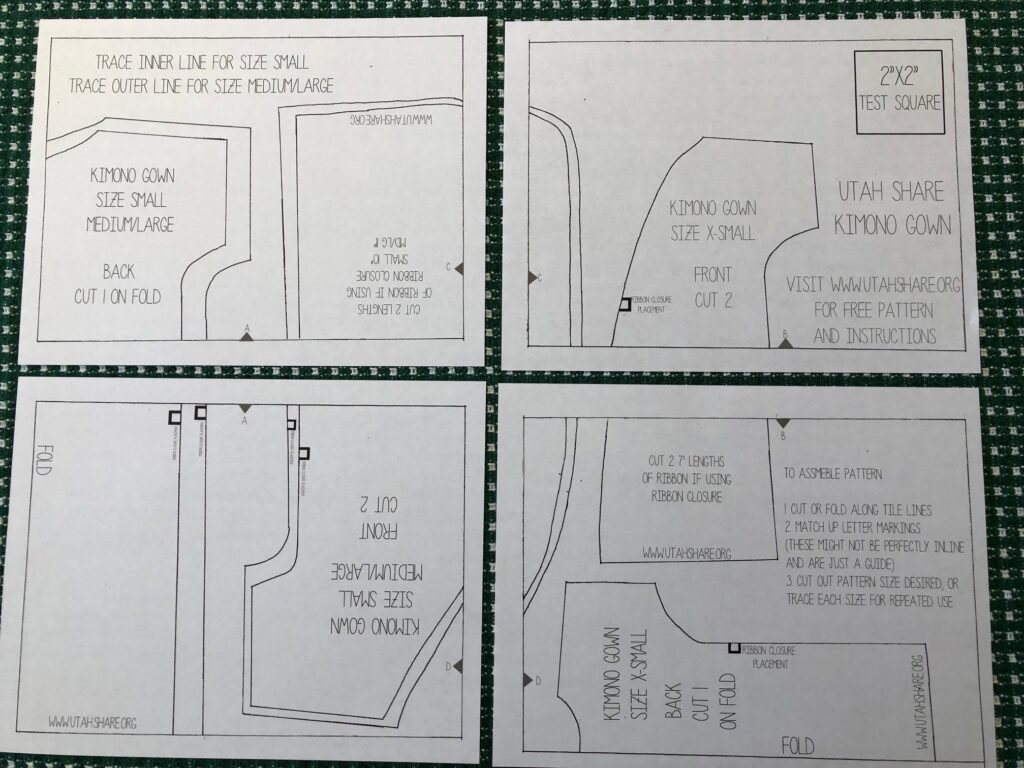

The pattern was quite fitted, while I wanted the finished gown to be flared at the bottom. I traced these onto another piece of grid paper and added the flare at the bottom.
Cutting out the Gown Pieces…but first a Practice Gown!
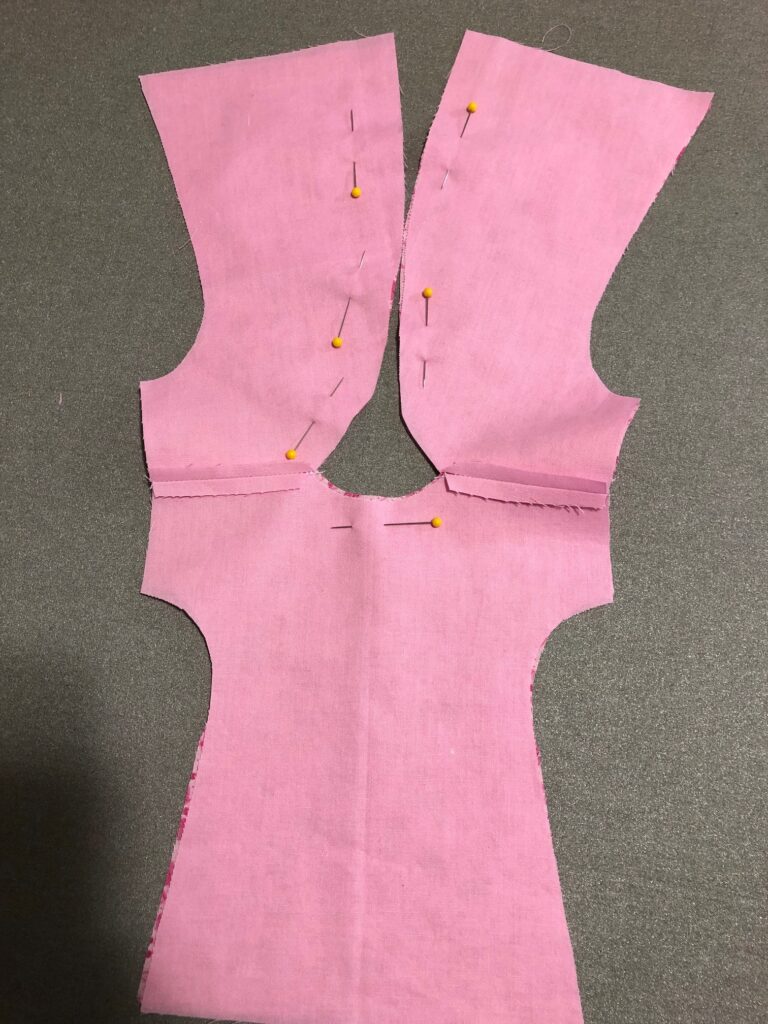
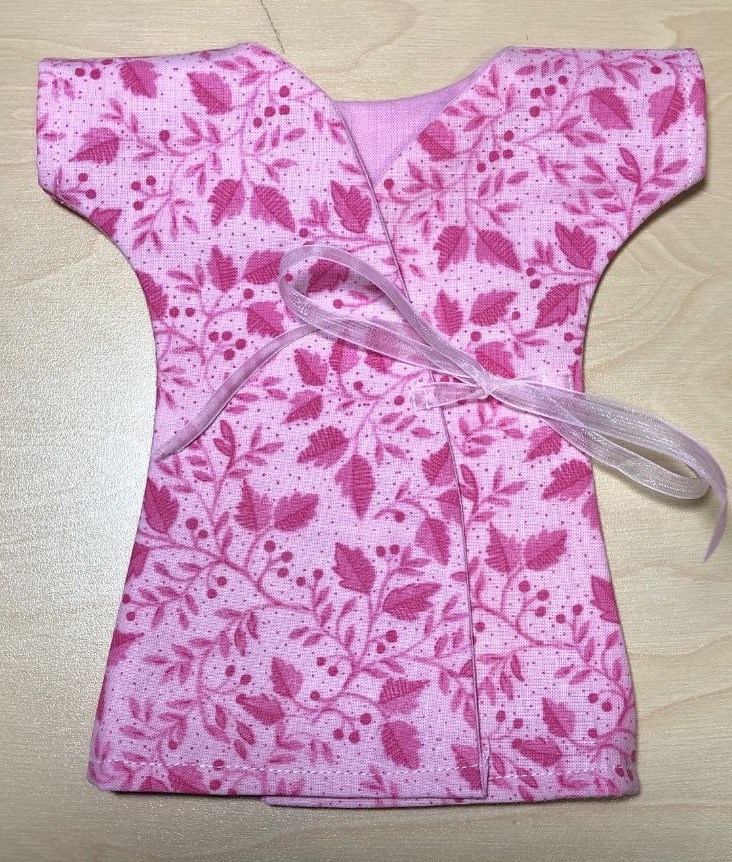
Before committing to cutting the satin, I decided to try the pattern with some cotton fabric. I wasn’t clear about how to sew it together…the original Kimono pattern did not have a lining so adding the lining to the satin made assembly a little more complicated.
I found two pieces of pink cotton and cut out the pieces. I first sewed the shoulder seams and then, right sides together, I stitched up the back and around the neck.
I clipped the seams and turned it right side out. Then I hemmed the arm hole openings.
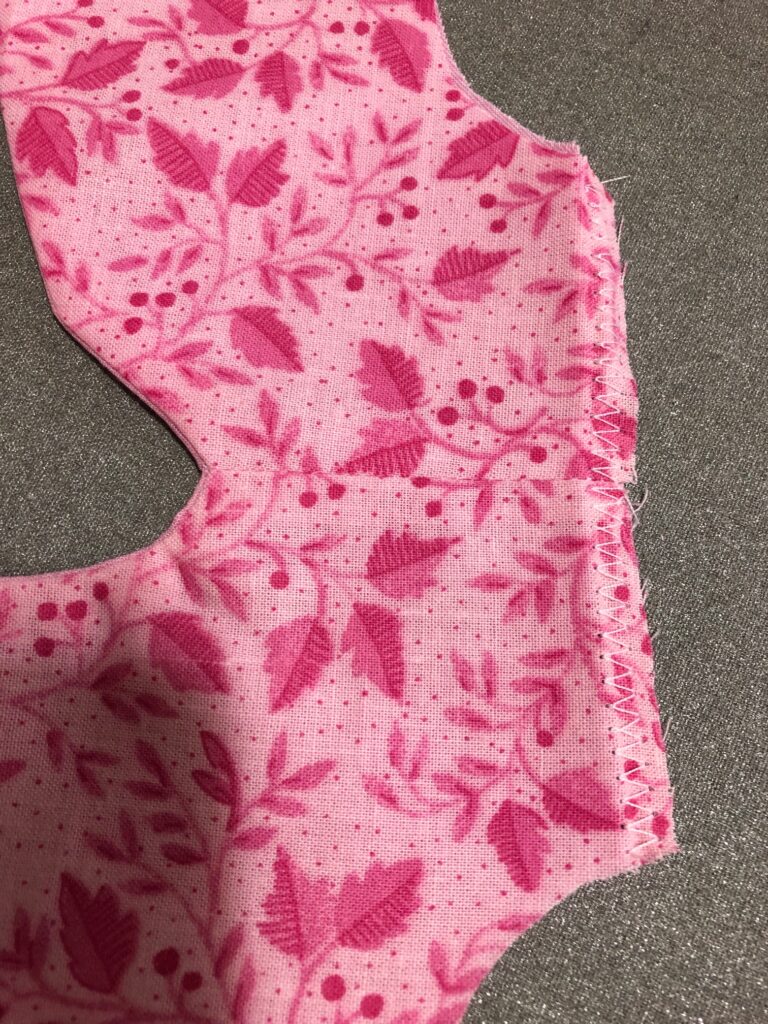
Finally, I sewed the front and backs together along the side seam and finished the seam with a zig zag stitch.
I added the ties to the back. I think it will work in satin!
Cutting the Satin and Lining
Now that I had the sequence to sew the parts together, I could work with the satin. I found a section of the train that was free of embellishments and cut out a piece large enough to handle the pattern. I ironed that piece. There was no point in trying to iron the whole gown…it would get wrinkled again as soon as I folded up the extra fabric.
I cut the pieces for the extra small and the small gowns from the satin and lining fabric.
I started by sewing the shoulder seams of both the lining and the satin.
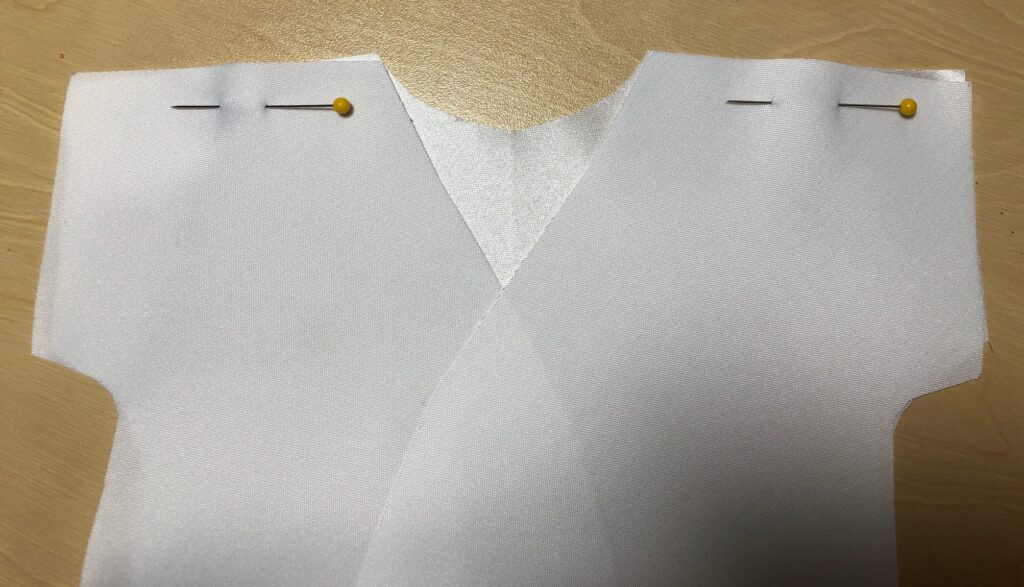
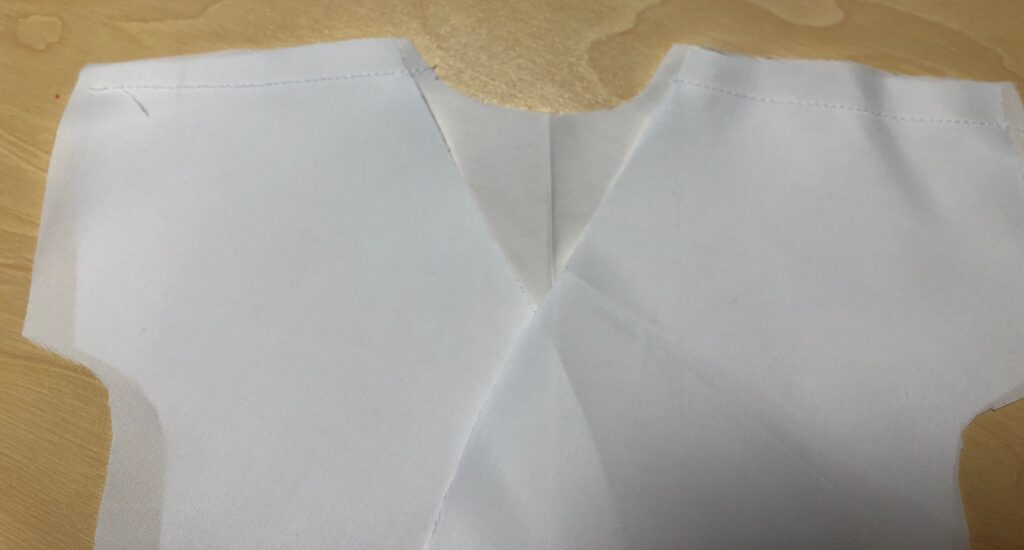
Then I placed the satin and lining right sides together and lined up the pieces around the neck area and the back wrap sections.

I clipped the curves and turned it right side out.
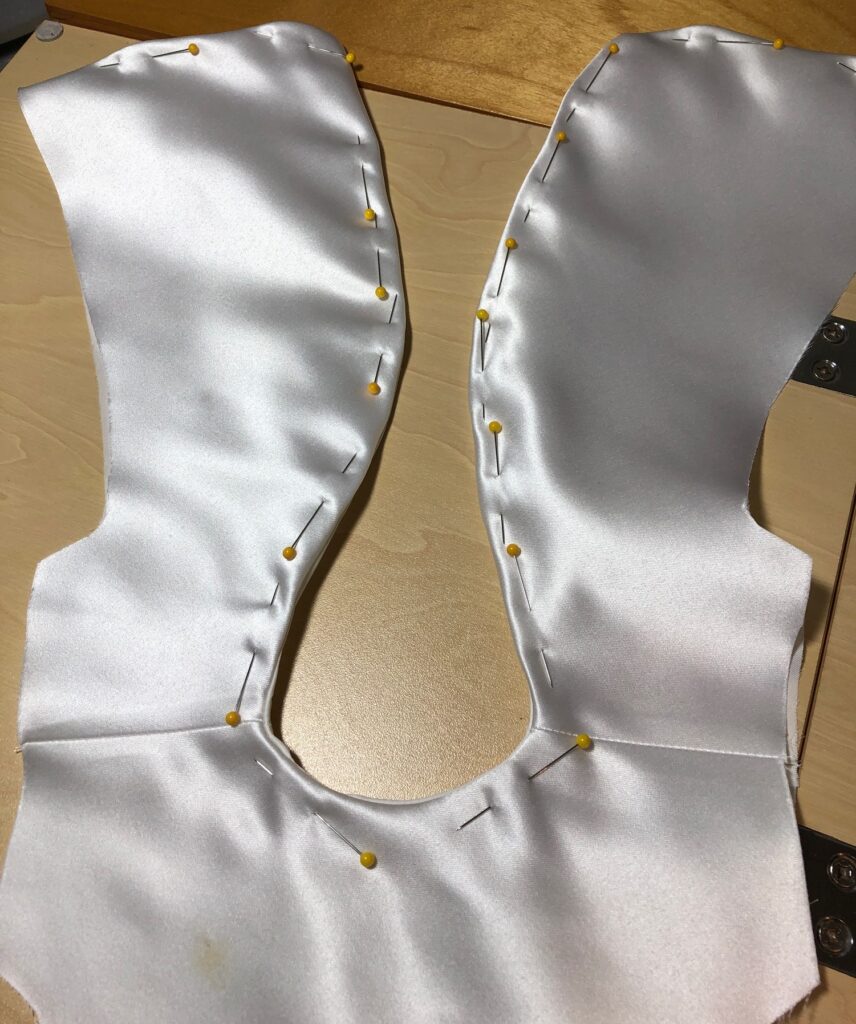
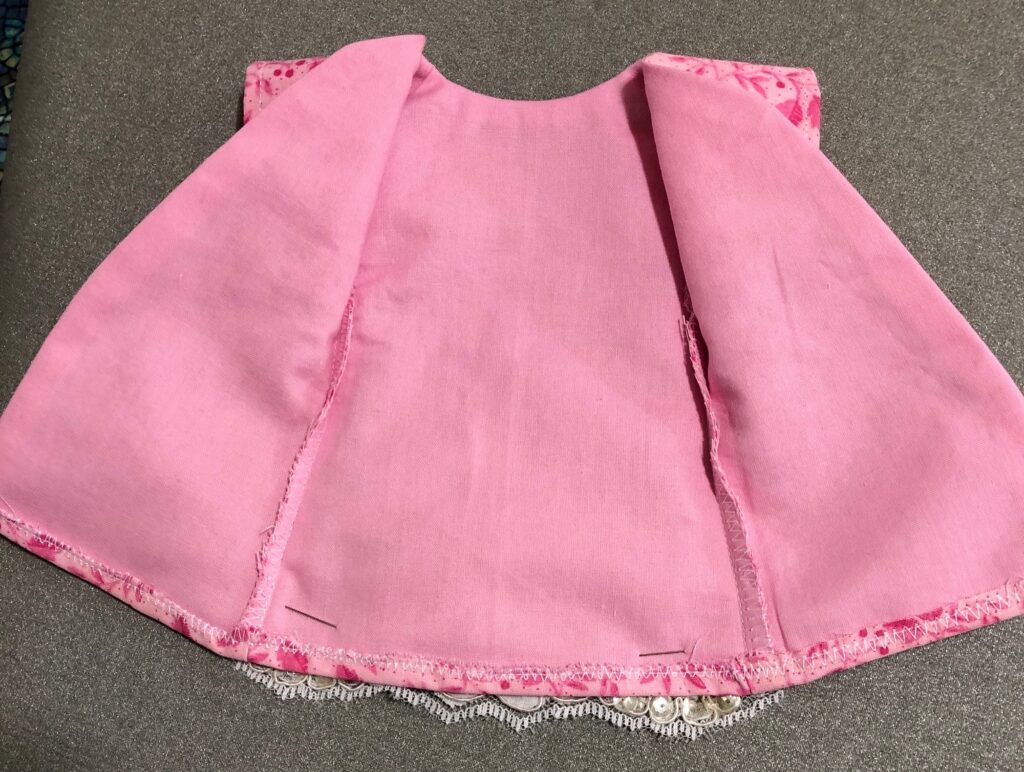
I top stitched as shown below. I also sewed the hem on the sleeve openings.
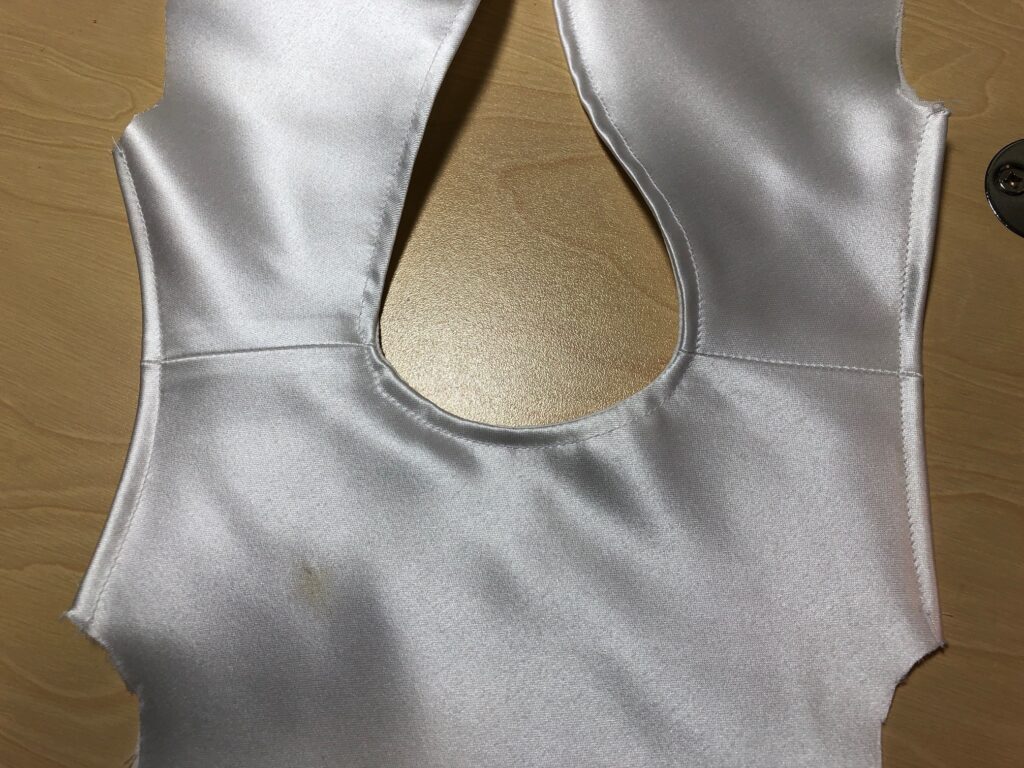
Finally, I sewed the front to the two back and finished the seam with a zig zag stitch. The final step was to zig zag the edge and turn the bottom hem.
Finished Gowns
The gowns looked like this in the front…
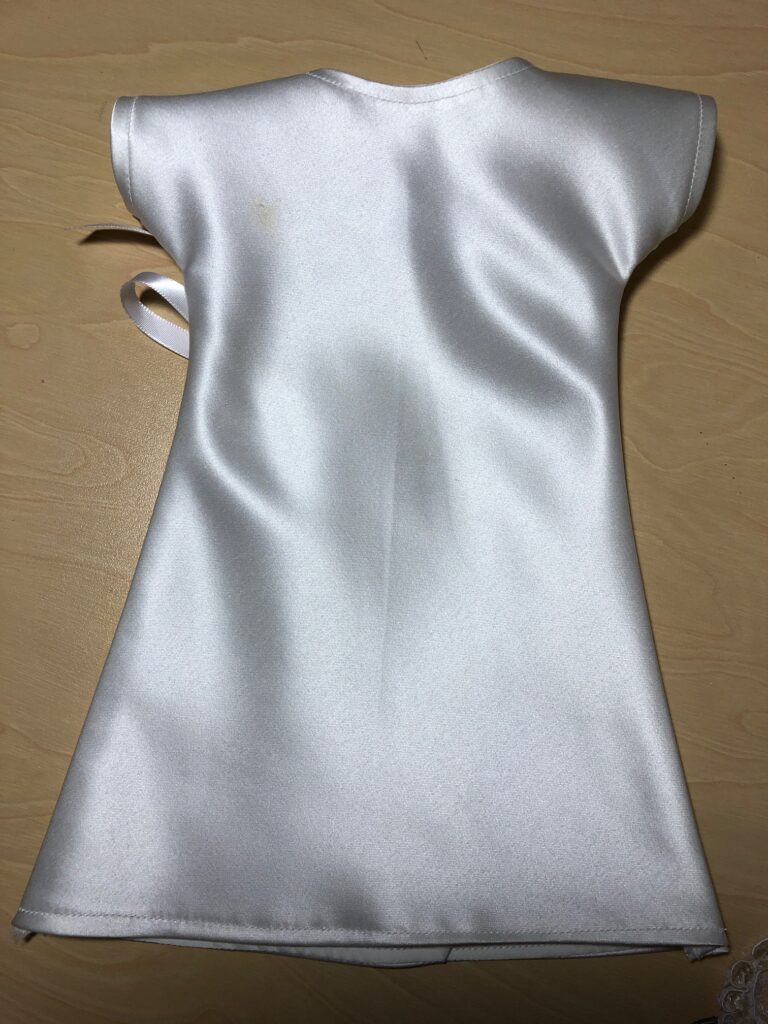
…and this is the wrap and tie on the back.
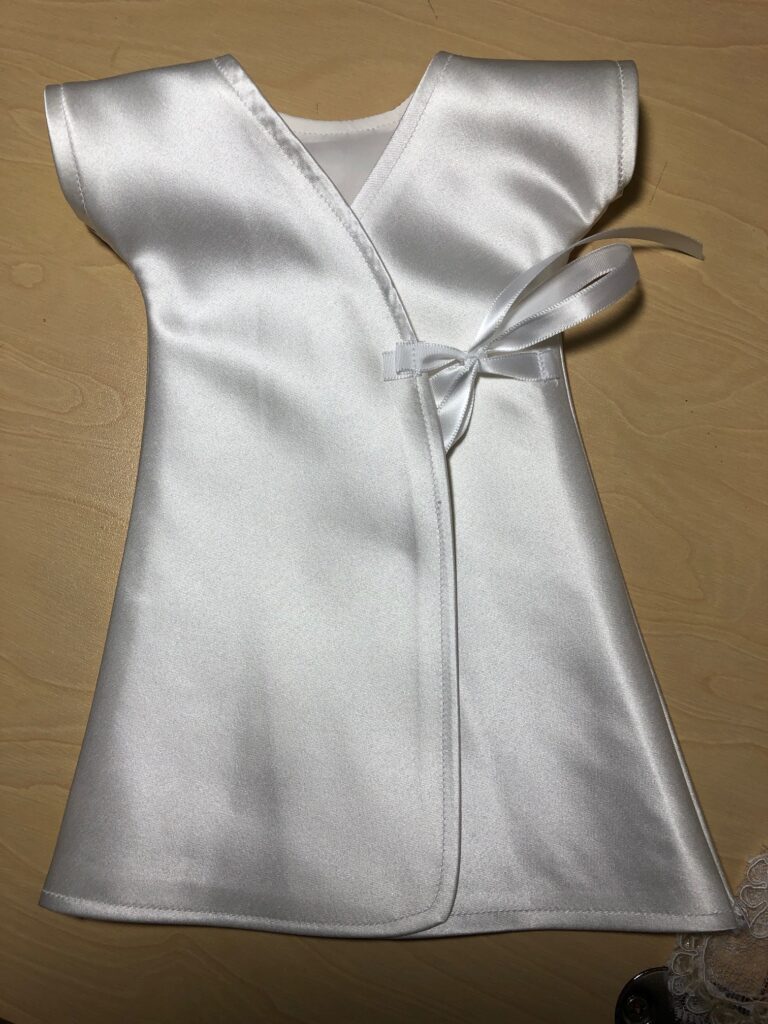
I decided to use one section of the lace border and a few of the buttons to dress up the fronts.
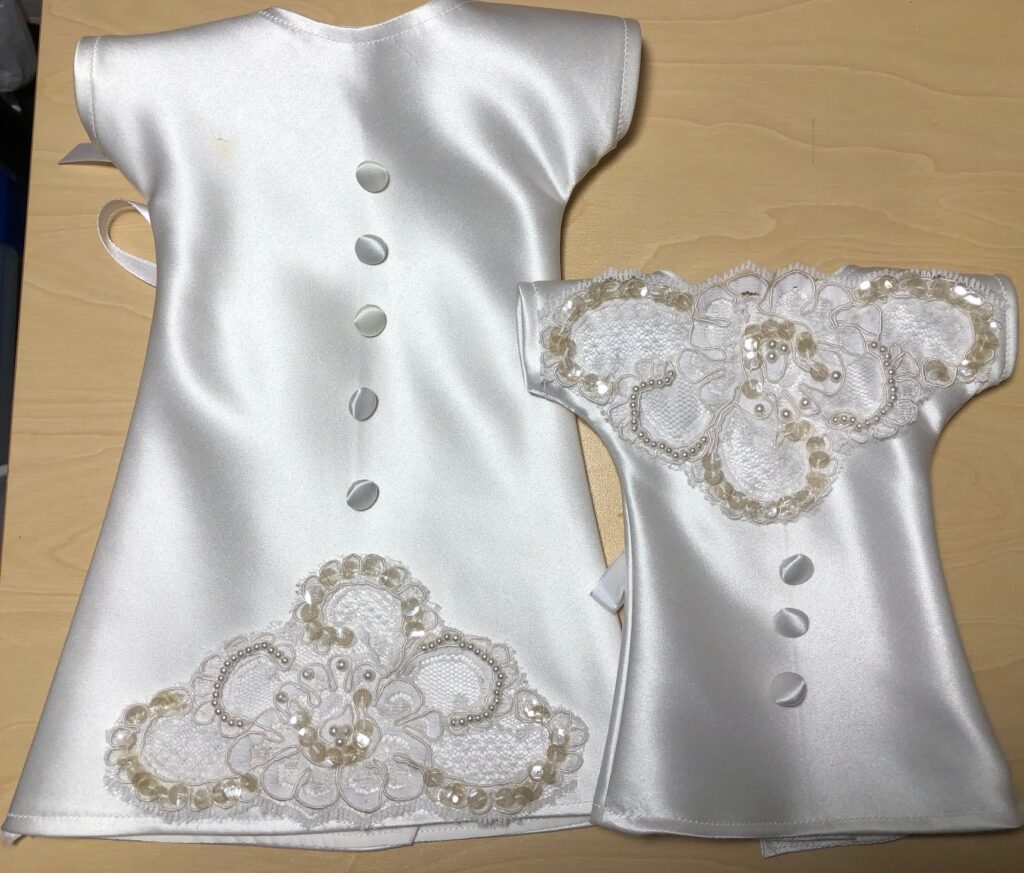
The gown on the left is the small, the one on the right is the extra small. I’m very pleased with how they turned out. My next step is to visit with a nurse or someone from our local hospital to see if these gowns could be useful in their work. If not, I have some lovely doll clothes for my granddaughter! Next time I get bored, I think I’ll try to make a stuffed bear with some of the satin. Enjoy!
Please comment or email me directly at marykisner@comcast.net.