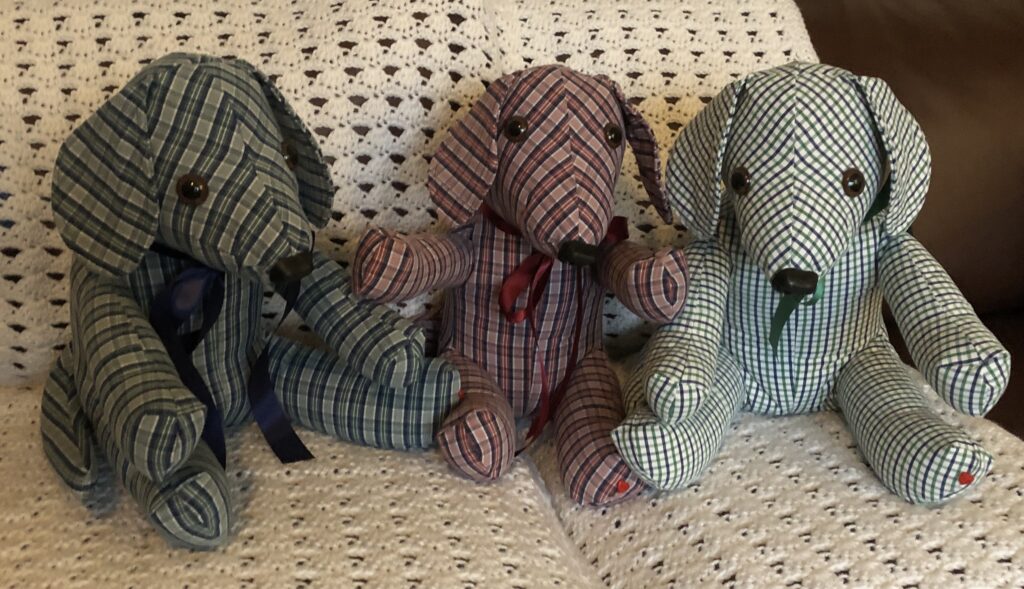
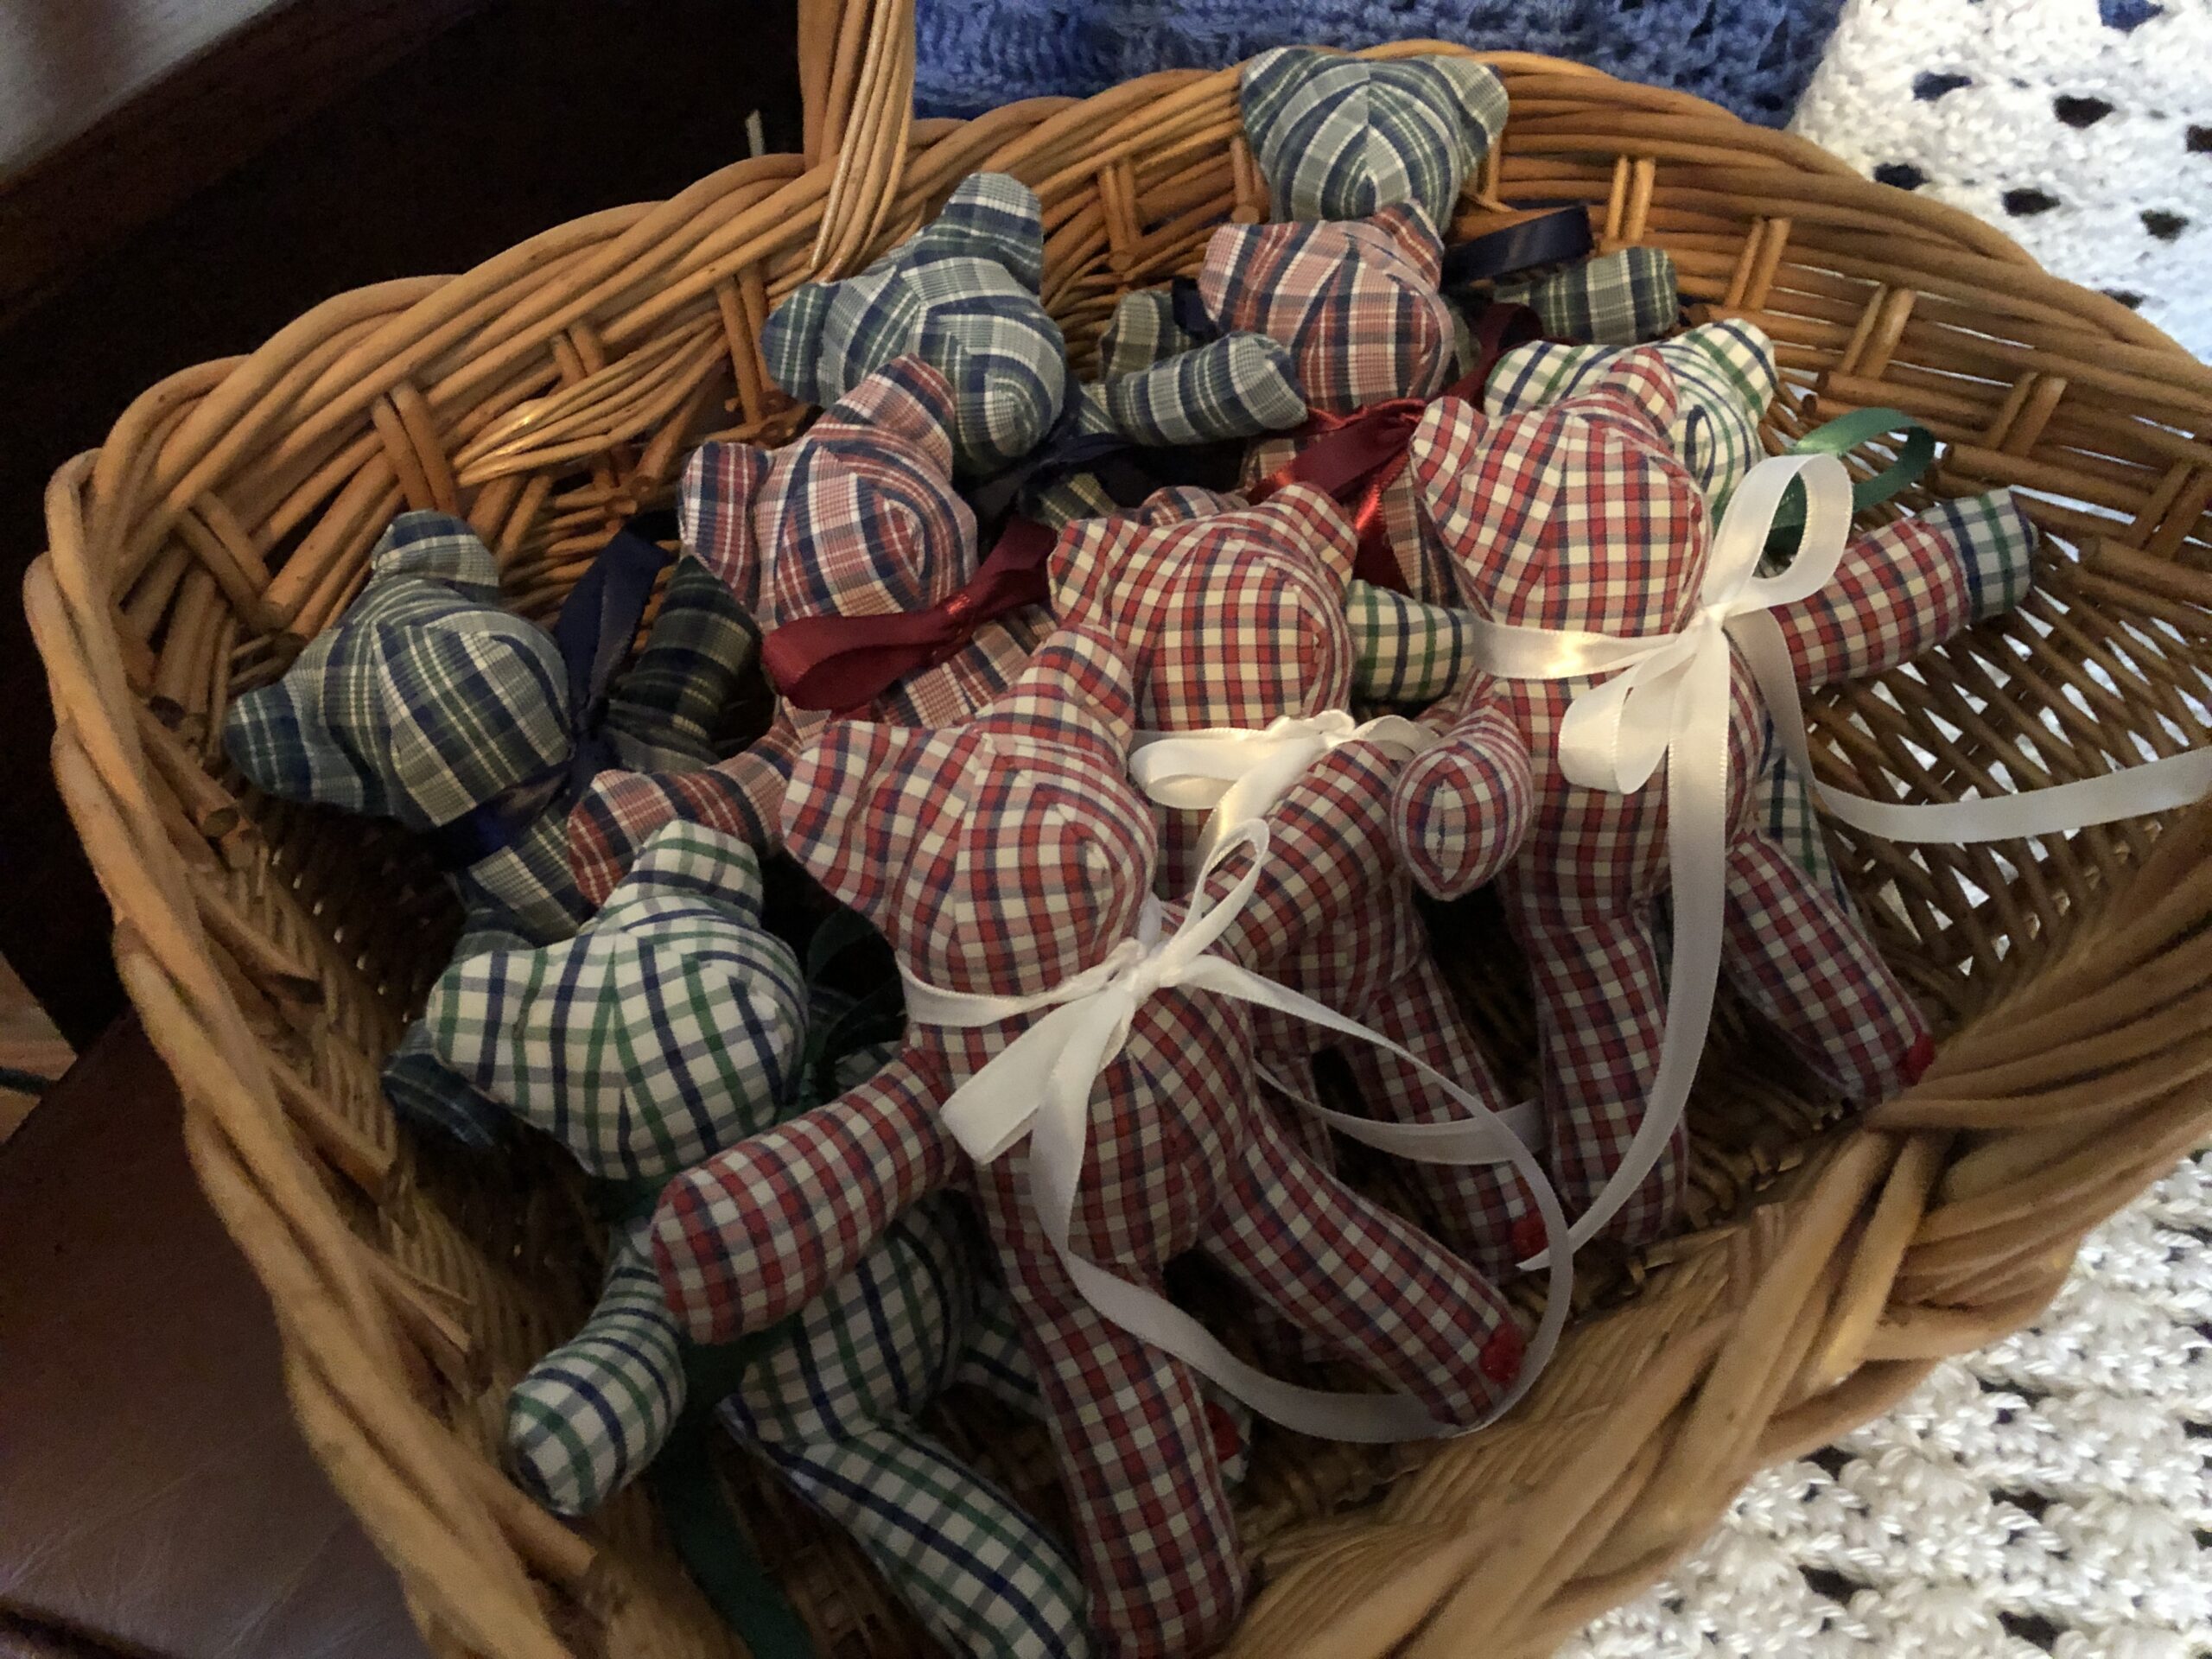
Just wanted to share the finished memory dogs and tiny bears that I finally got in the mail last week. They turned out fine, even with shirt fabric that was not stretchy but should satisfy anyone that has a memory of the loved one in those shirts. You can read about how I made them in the previous post, https://marykisner.com/making-a-memory-dog/. I started with three long sleeved shirts and one short sleeved shirt. I hope they bring hugs and smiles to a family in Fort Worth, Texas.
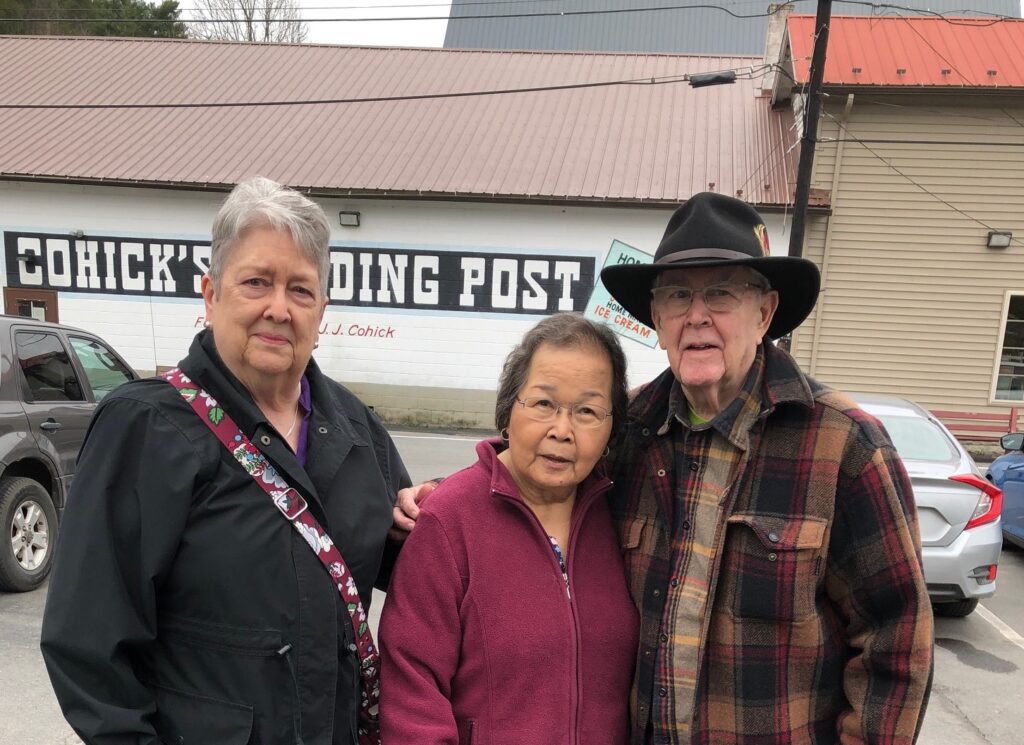
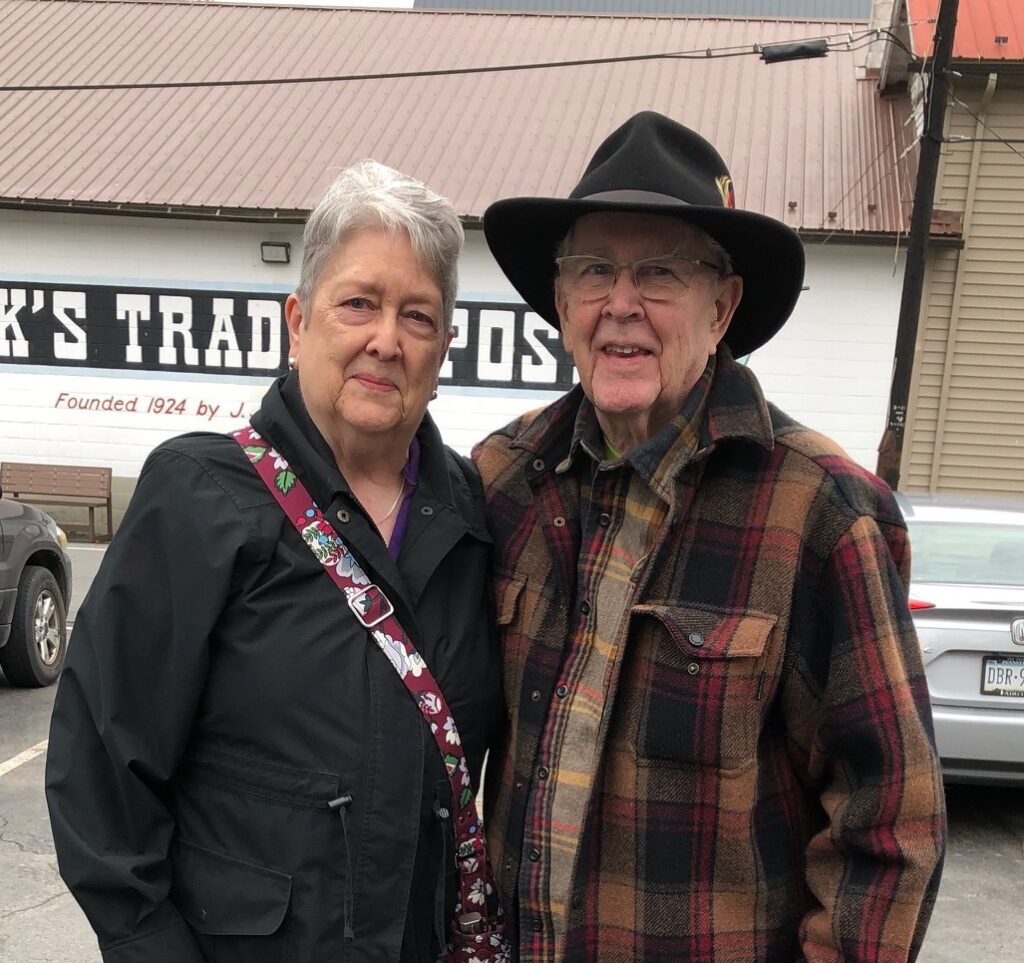
Yesterday was a beautiful day to meet my brother and his wife for lunch. He lives in Wellsboro so we try to meet half way for both of us. This time we headed to a small local restaurant in Salladasburg, Pennsylvania…about 60 miles east of Boalsburg. The restaurant is named Waltz Creamery & Farm House Cafe.
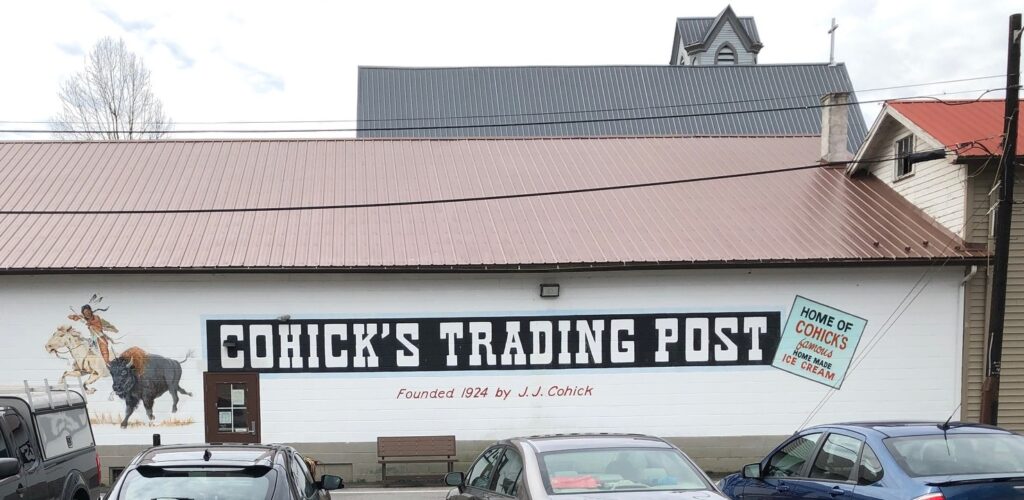
Salladasburg is the smallest borough in Lycoming County. It had a population of 252 at the 2020 census. Salladasburg was laid out by Jacob P. Sallada in 1837. In the 1890 census it had a number of stores and shops, one hotel, a gristmill and a tannery. Today, the population is now set at just 238 residents. Obviously, many folks living here now commute to Williamsport and Lock Haven for work and shopping. The building housing the restaurant is in the former Cohick’s Trading Post.
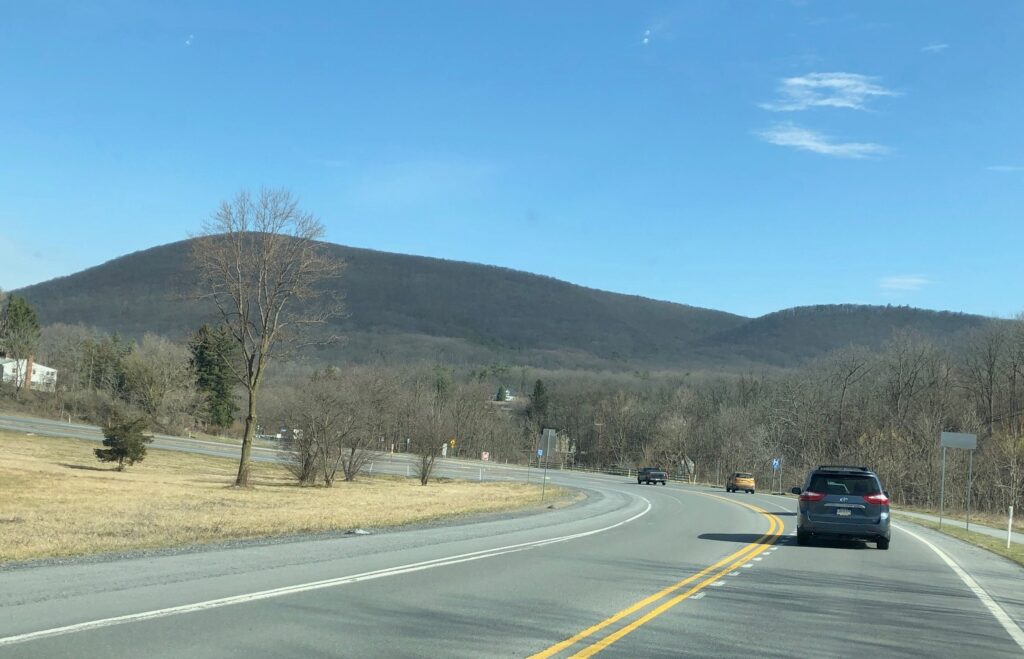
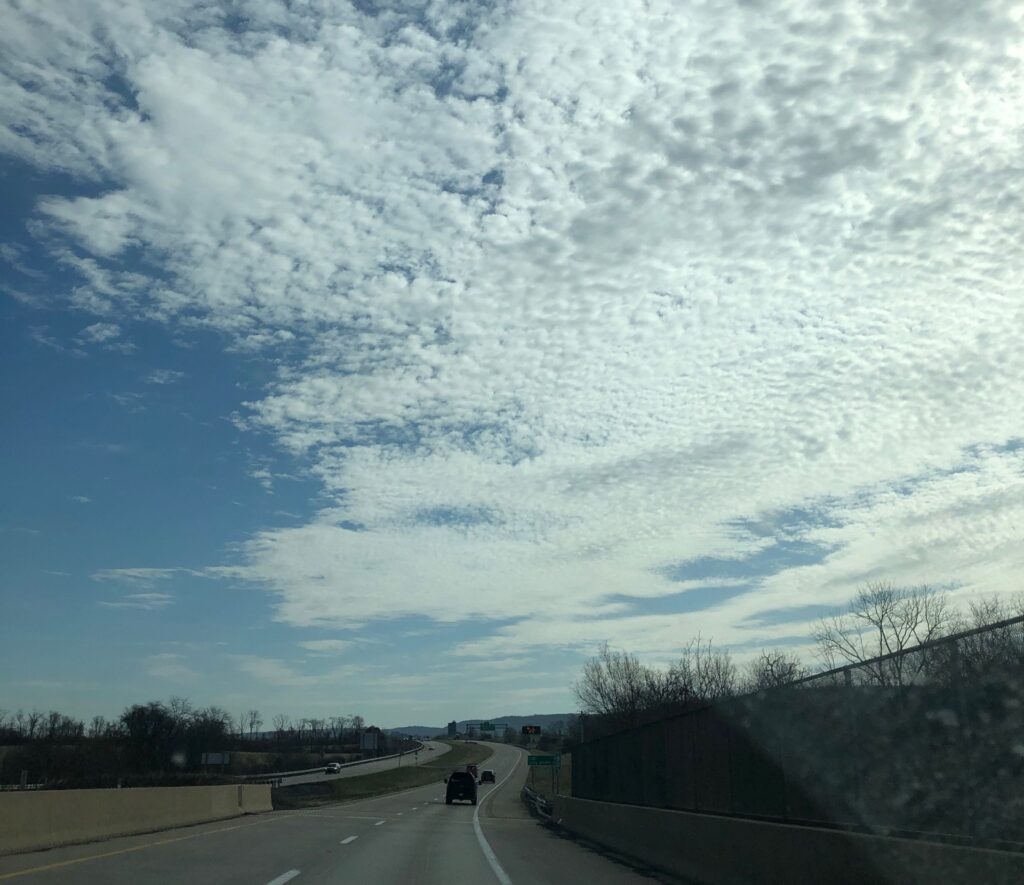
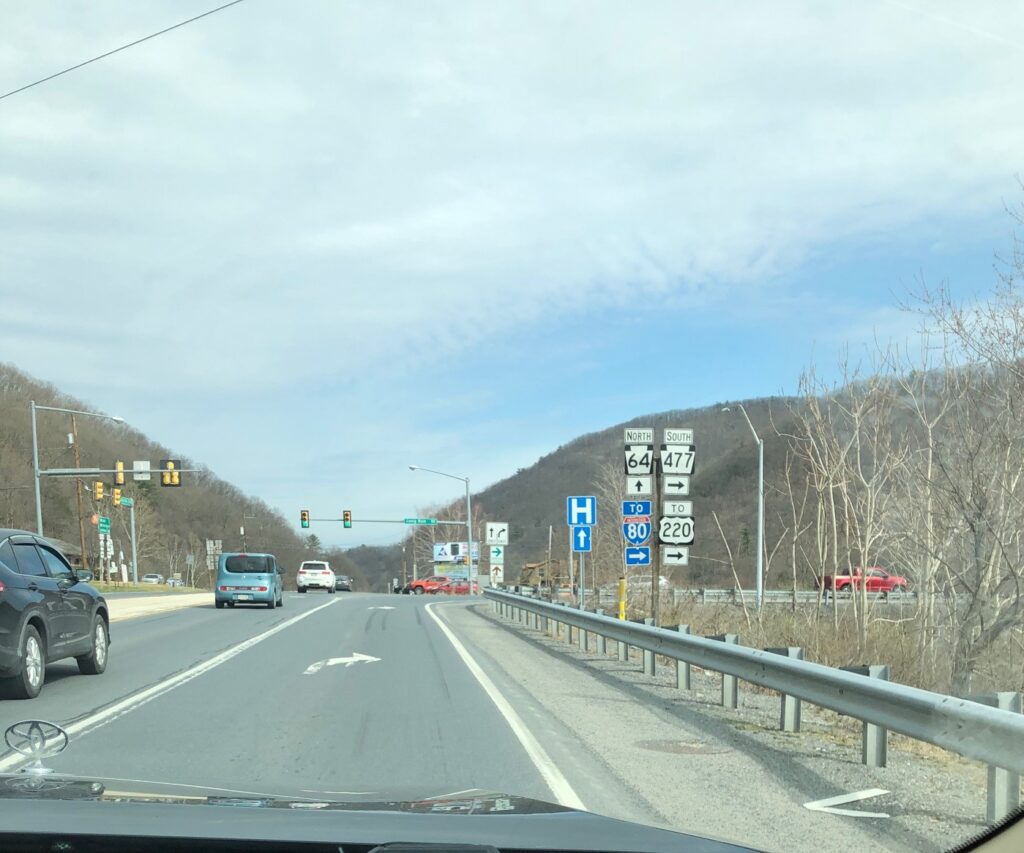
Great view of Mt. Nittany as we head out of town.By the time we were 15 miles down the road, the sky was letting us know that it could rain.We followed Rt. 64 from Pleasant Gap to Mill Hall.We transitioned to Rt. 220 to get around Lock Haven.We went past the restaurant, Restless Oaks, where we often meet for lunch. You can read details about this restaurant at https://marykisner.com/lunch-with-my-big-brother/After Lock Haven and Jersey Shore we headed North on Rt. 287 for a few miles.Salladasburg United Methodist Church and Cohick’s Trading Post (from Wikipedia).
Salladasburg is located at the intersection of PA Route 287 and PA Route 973. I managed to miss the tiny sign that said, Welcome to Salladasburg, but we went by the Church that was mentioned in the Wikipedia entry (see photo above).
Beautiful stained-glass windows.The restaurant is in this building.Local fresh roasted coffee and maple syrup were available.Other local products for sale like pickles and jam.
The restaurant had great food, a varied menu and was busy on a Monday. Seemed like several local “groups” of folks were out to lunch also. We had a nice visit with my brother and his wife! It’s a great place to meet…about halfway for both of us!
After cataract surgery, I’ll be so glad to get my glasses back so I don’t have to hunt for the reading glasses around the house.Somehow, we don’t seem to be getting any younger as time goes on. He’ll always be 6 years older than me! Haha!
By the way, we did have a few raindrops on the way home. Guess the clouds were telling the truth!
Spring seems to be sliding quietly into our awareness here in central Pennsylvania. I thought I’d show you a few tiny signs that let me know it’s almost time to celebrate SPRING!
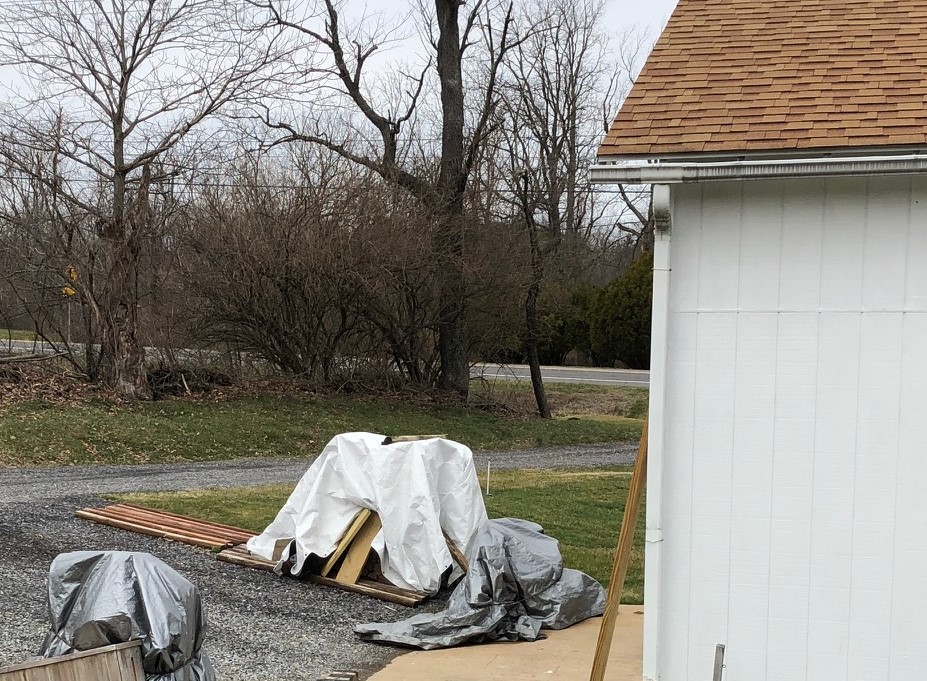
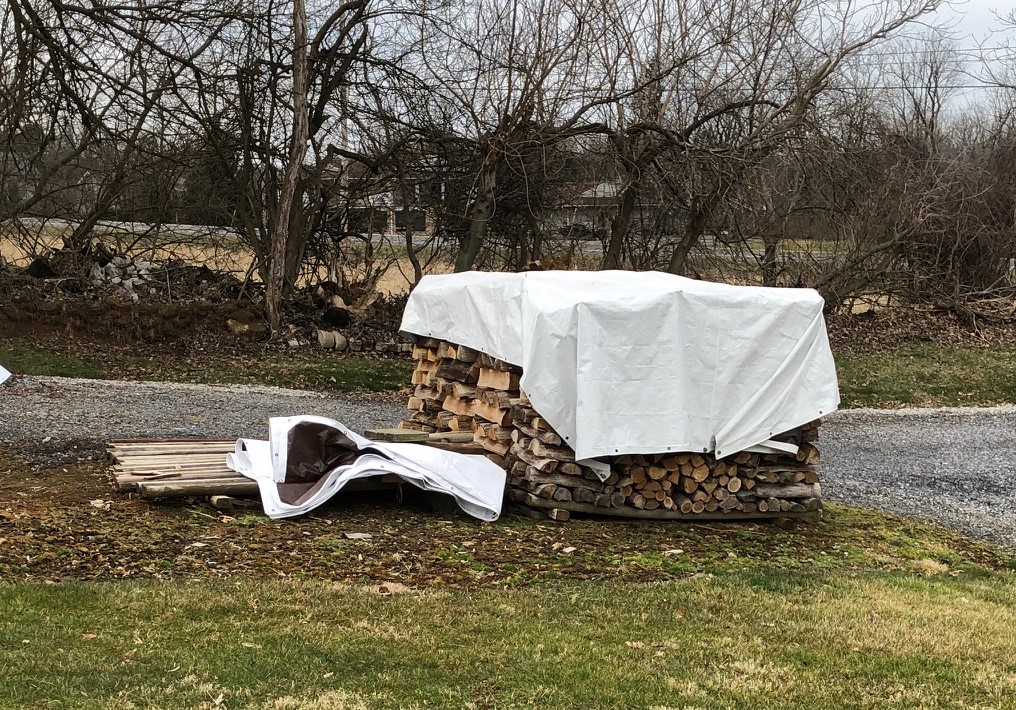
One of the most obvious signs is the green grass and dwindling wood piles. The wood for the shop and the house is visibly reduced. There would have been even less, except Bert had knee surgery a month ago and we’ve depended on electric heat.
Shop wood pile.Wood for the house…half gone.
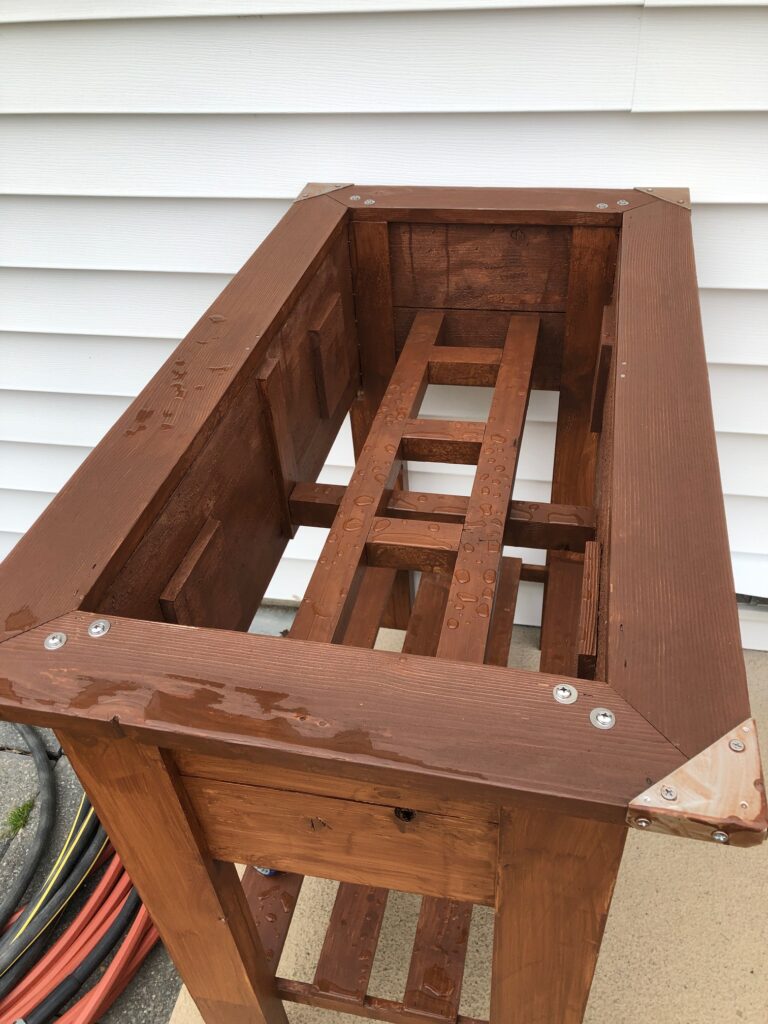
The raised planter needed some repair work after the wind blew it over and cracked the top section. Bert reinforced the corners and sealed it again. Now it’s ready for the containers of dirt that sit inside.
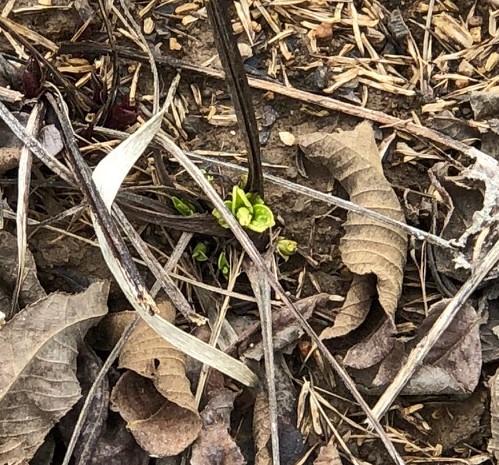
Up in the garden, the echinacea look pretty dormant…
But up close you can see the new plants venturing out!
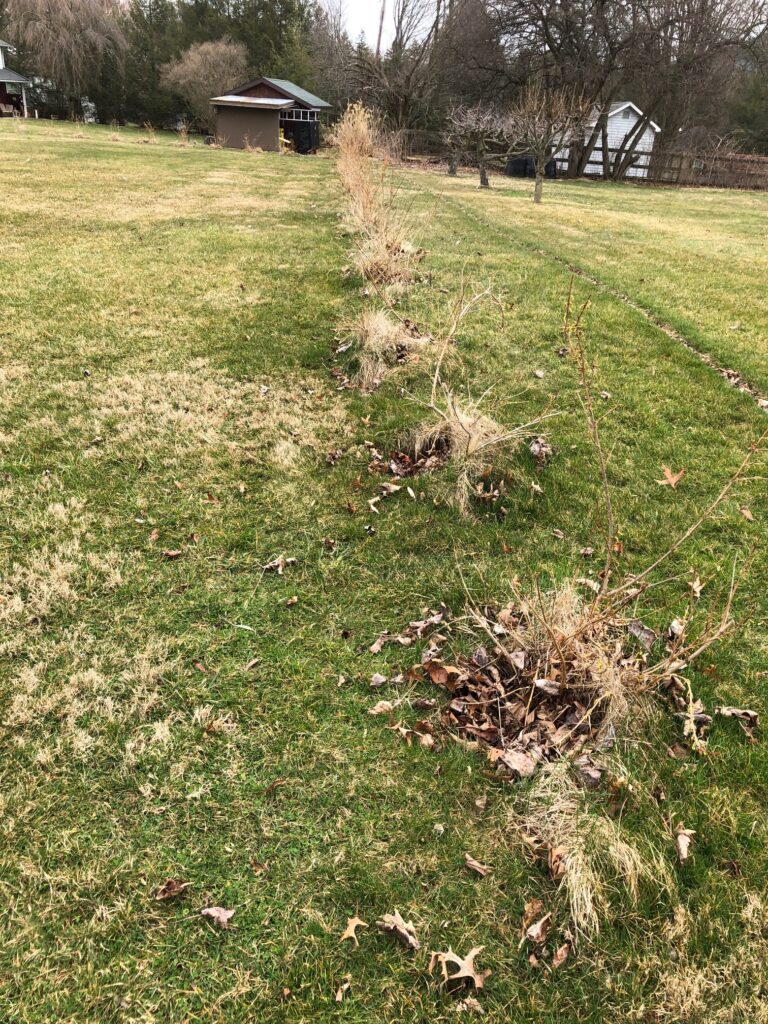
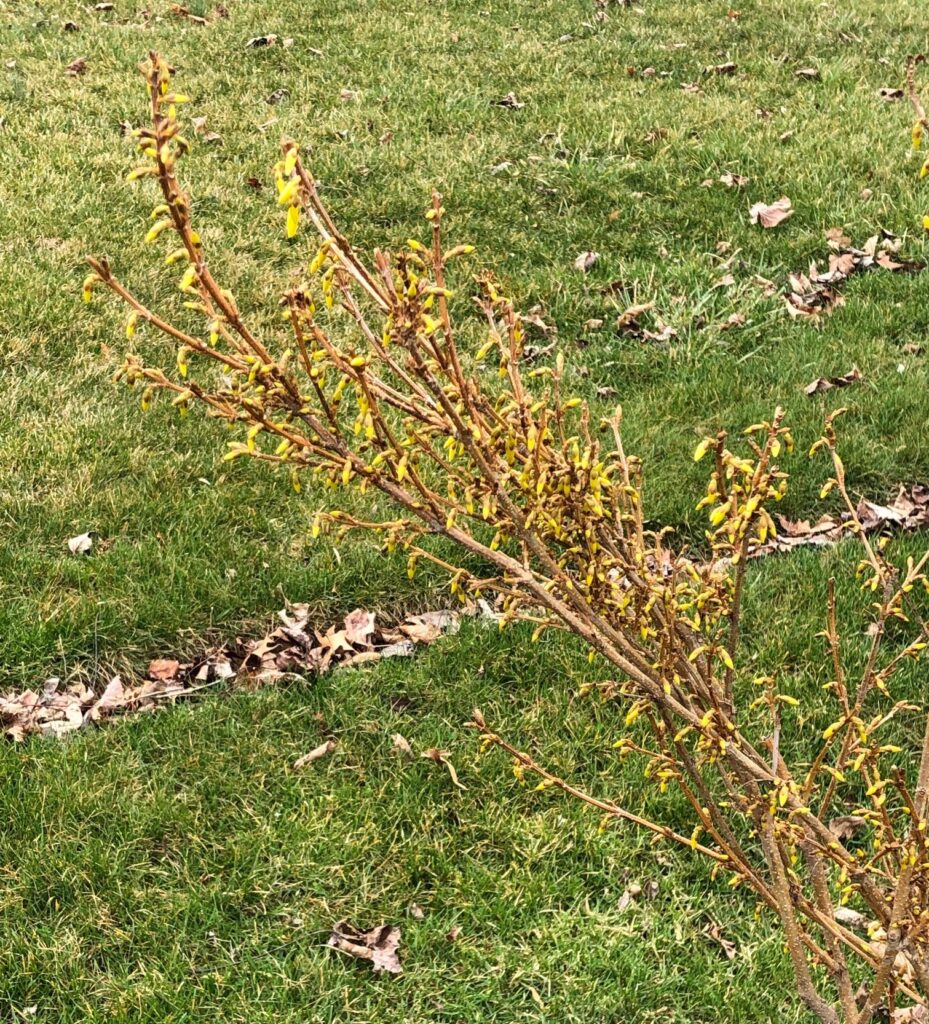
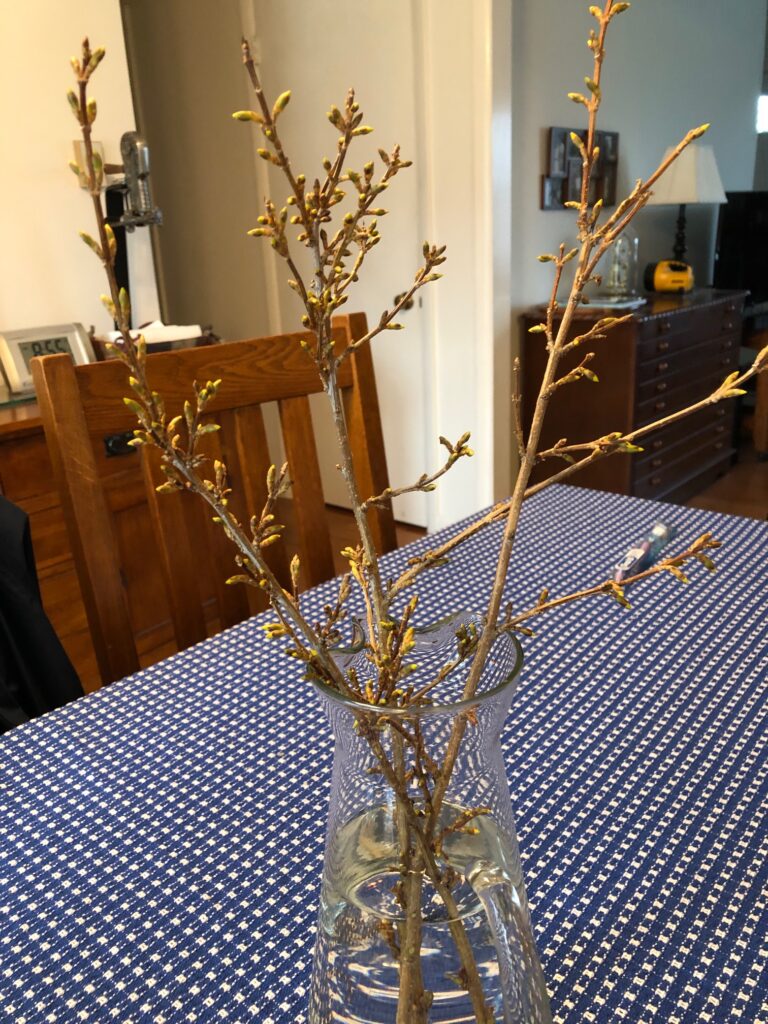
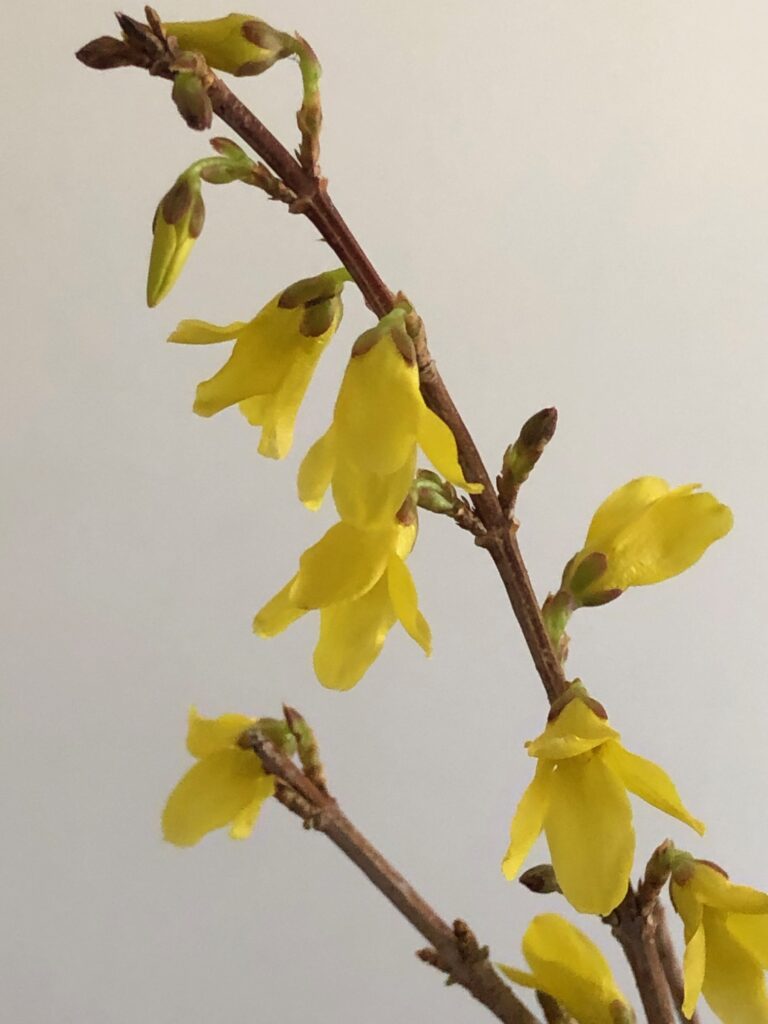
Tiny echinacea plants!This row of forsythia doesn’t look very exciting but……it won’t be long until they’ll look really pretty!I cut a few branches and brought them inside a few days ago.They were ready to pop!
These tiny signs give me hope that Spring can’t be far behind!
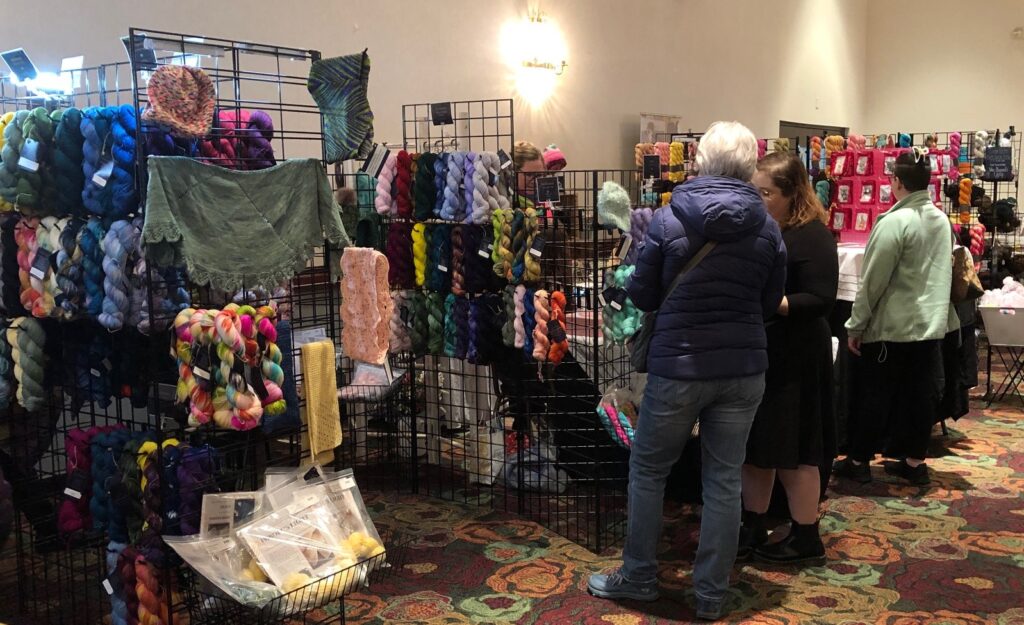
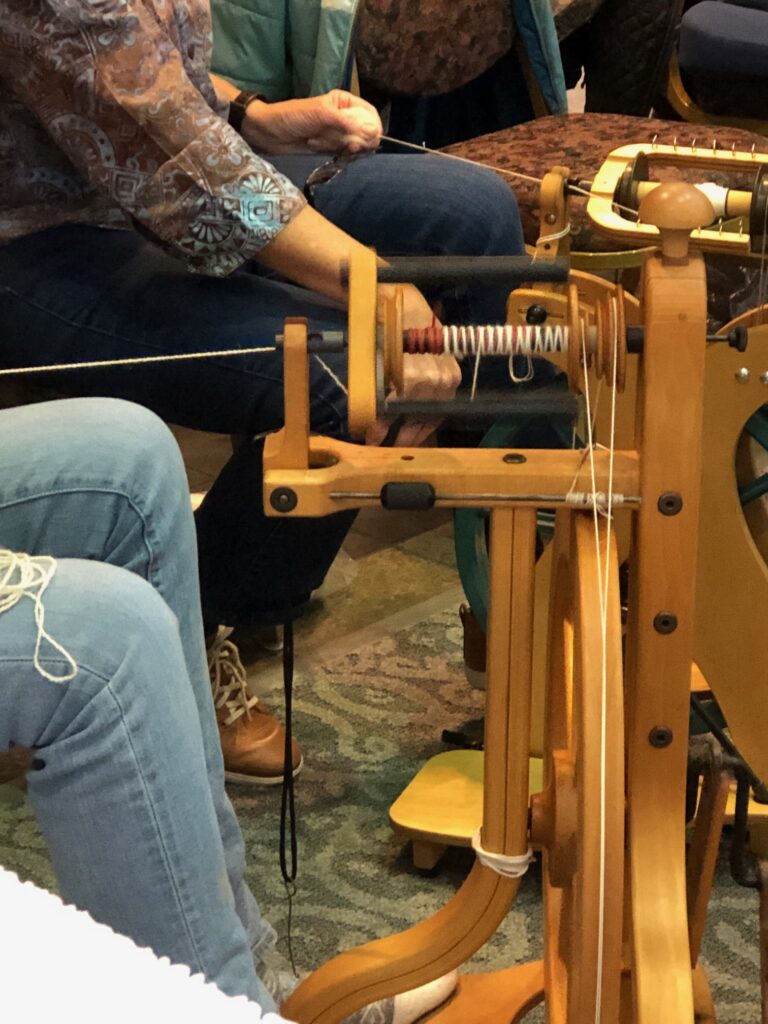
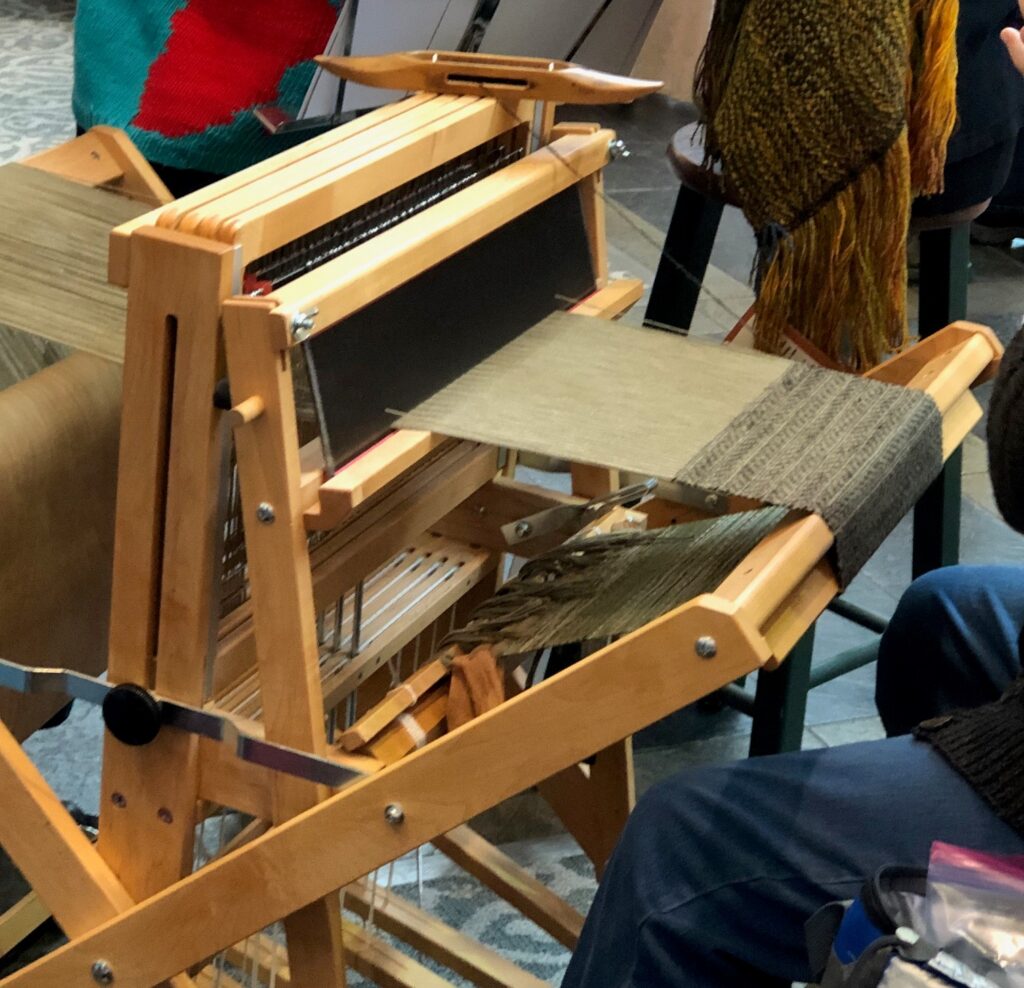
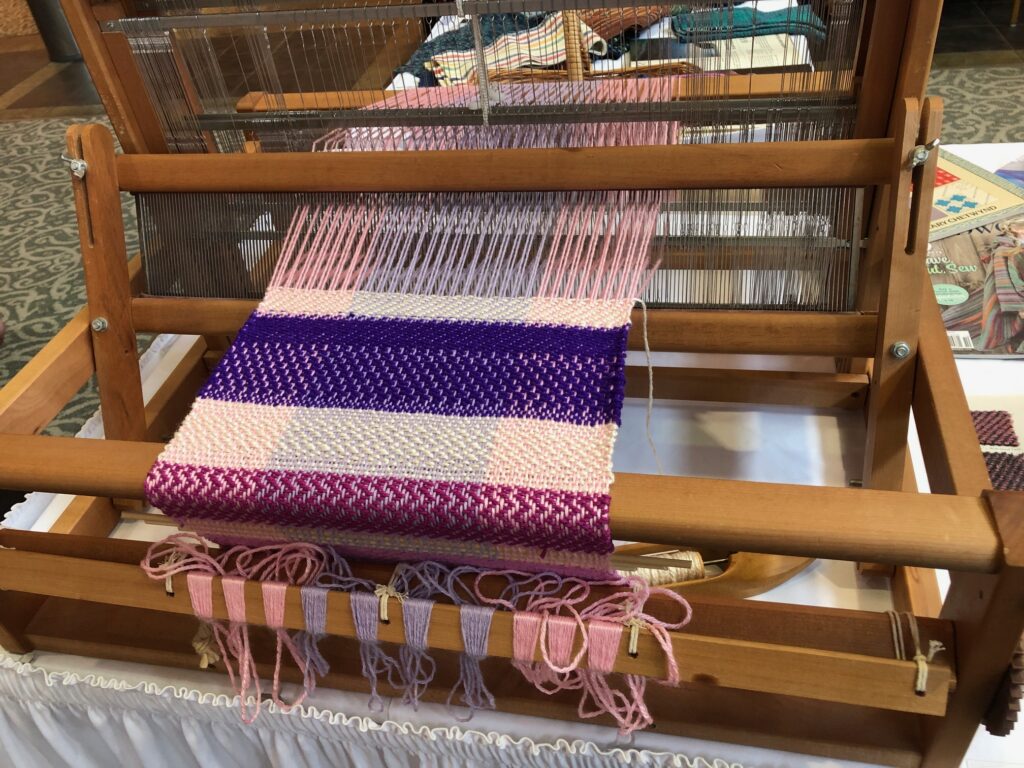
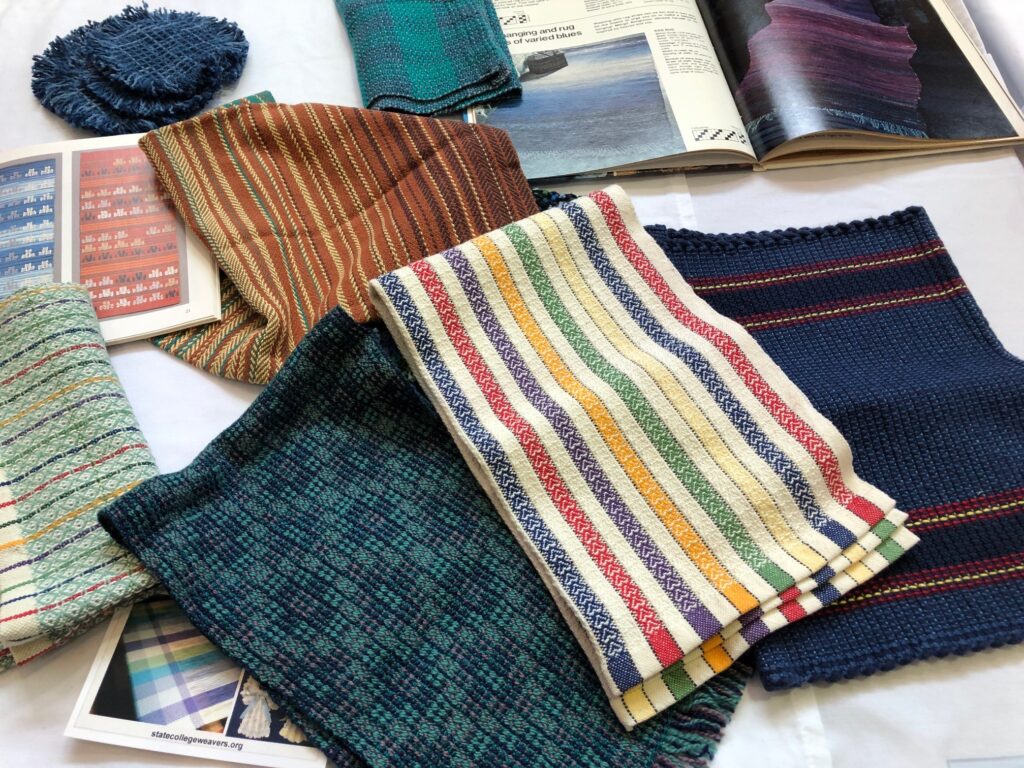
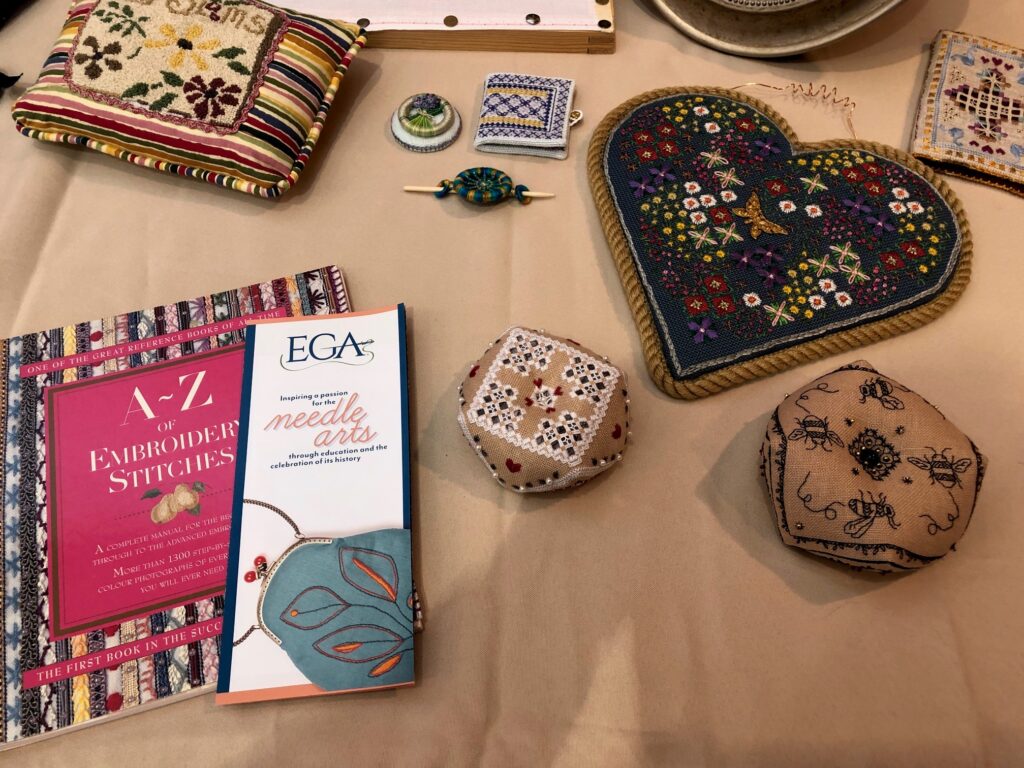
Yesterday, I spent a few hours at the local Ramada Inn attending the “For the Love of Fiber” Conference. This day-long conference was organized by four local “fiber” guilds: Center Knitters Guild, Centre Spinners, Nittany Valley Embroiderers Guild and the State College Weavers Guild.
What an explosion of color and beautiful samples of knitted, embroidered and woven projects. Here are some photos of the displays and demonstrations:
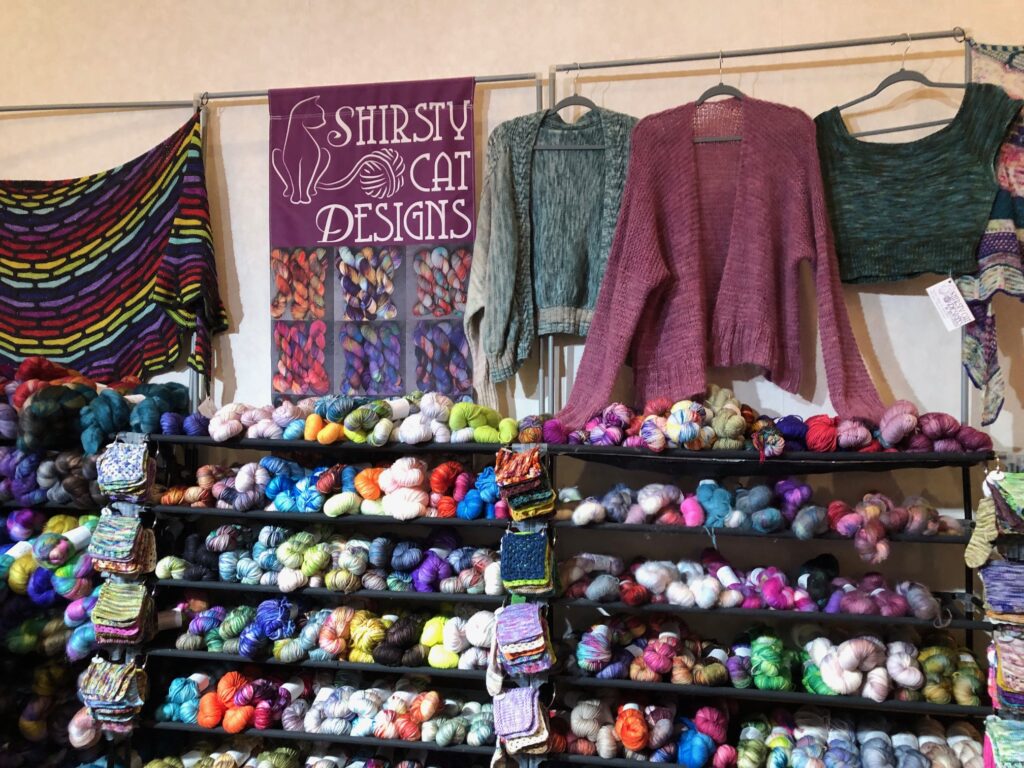
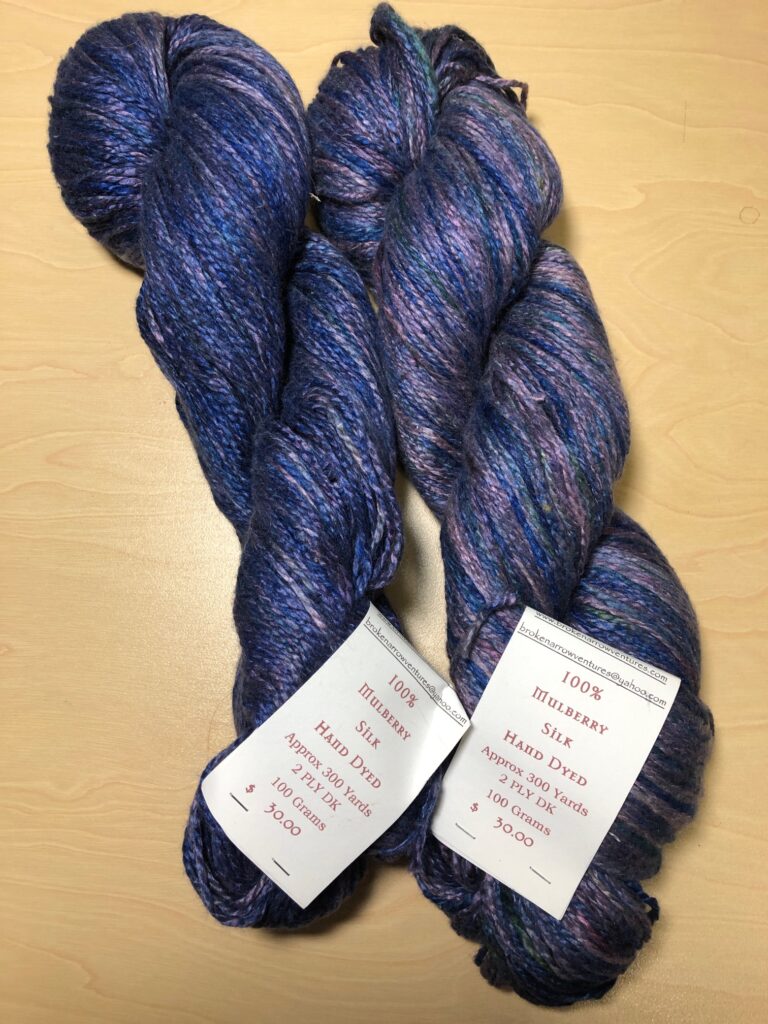
Just a small sampling of the 19 merchants who had beautiful items to sell.Spinning Demonstrations.Weavers working on the Sheep-to-Shawl demonstration.Another weaving in progress.The Weavers Guild had beautiful samples too!The Embroiderers Guild members must have the best eyesight for all the tiny stitches.I was able to track down one of the few yarns available in silk. Of course, the same dye lot produced two different colors determined by where they were in the vat. I hope it will make a lovely scarf but I’ll need to learn how to alternate skeins so they blend together.
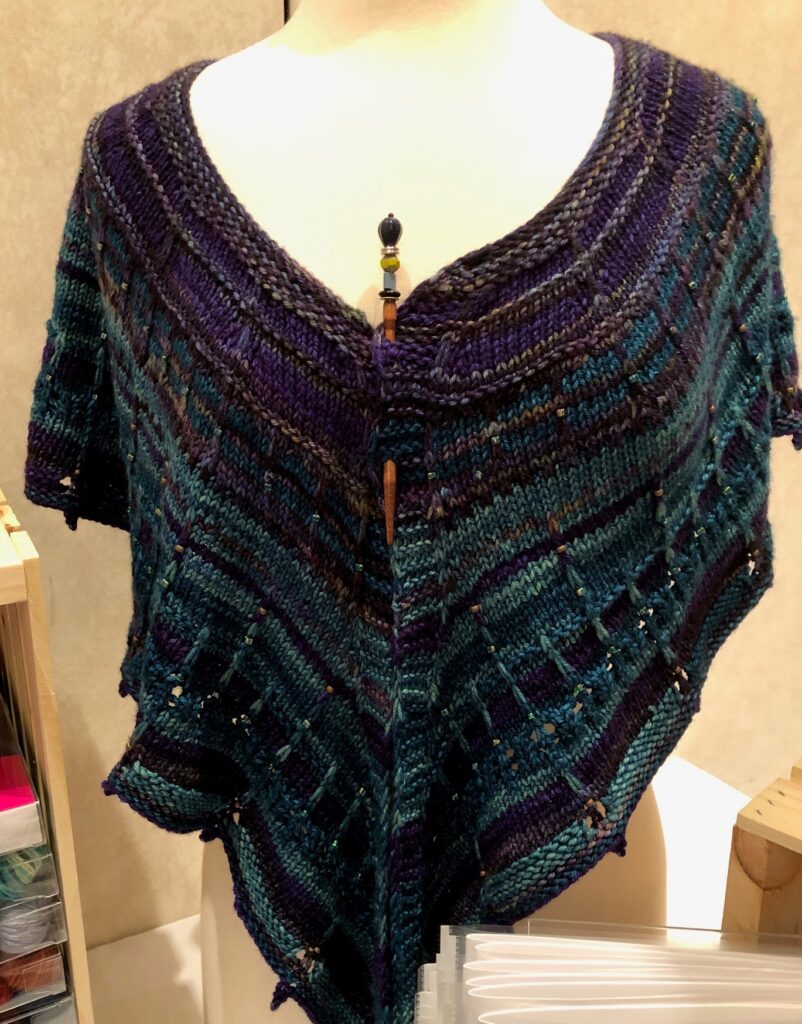
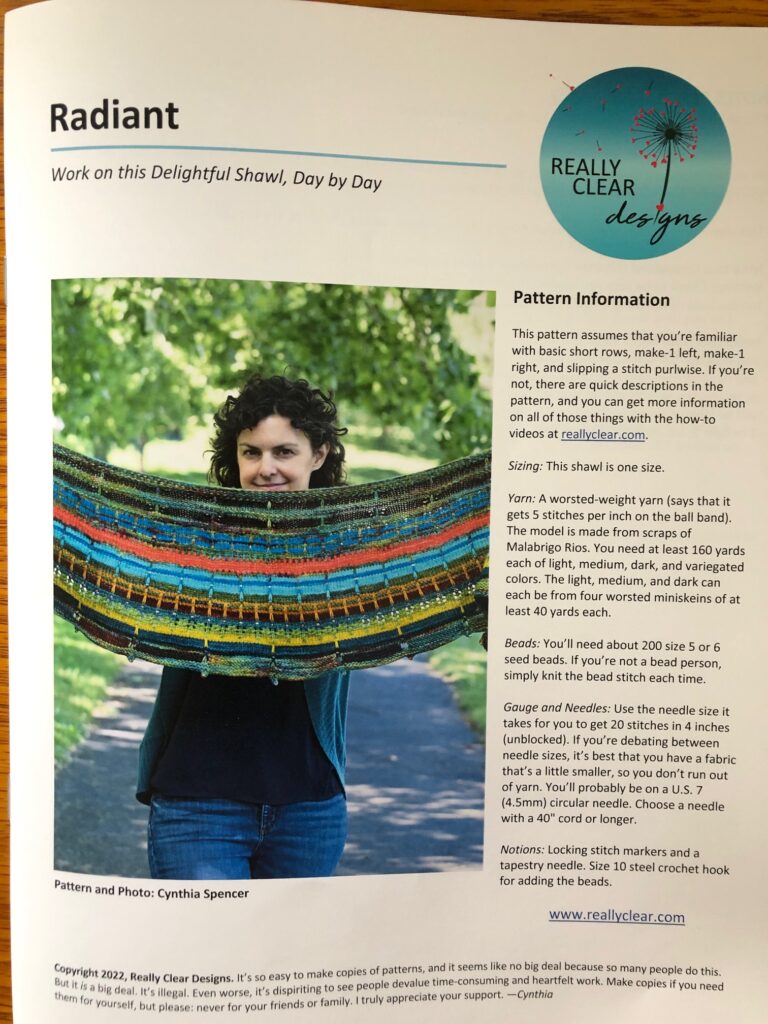
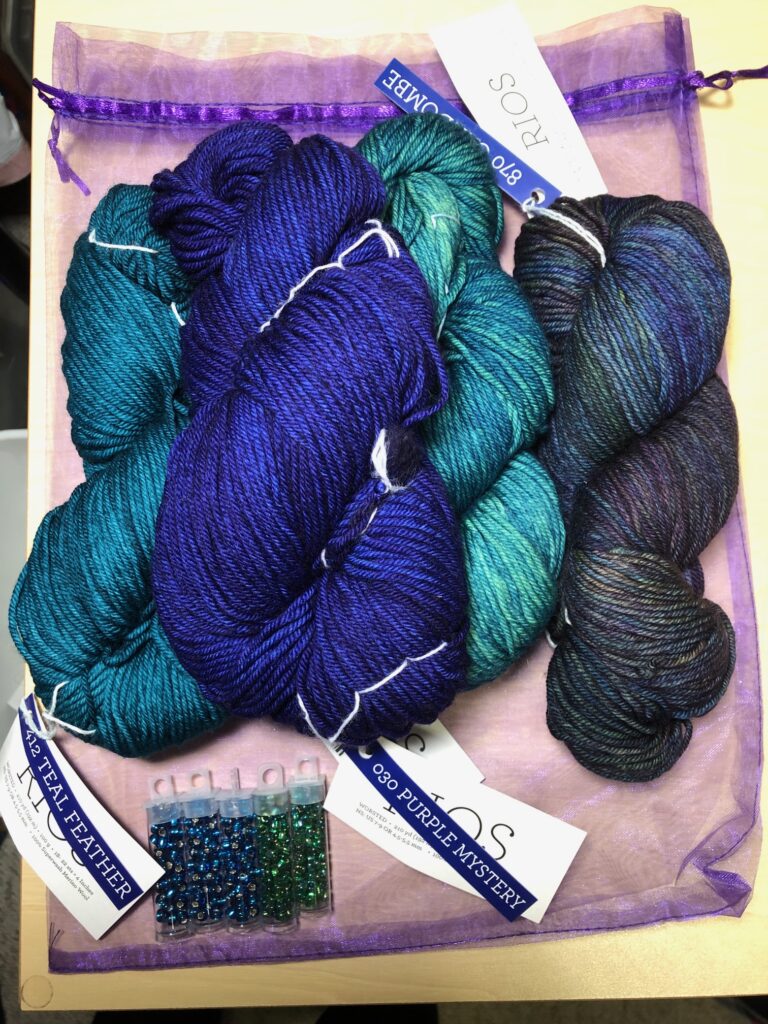
There were many samples of knitted and woven items, from scarves to sweaters. NONE of them were for sale…only the yarn. Then I found the shawl below that blew me away!
I would have bought this shawl on the spot but…NO…I could only buy the kit and pattern!The Pattern.The Kit.
Geez…like I needed another project, but this really seemed like a fun challenge. Luckily, the vendor selling the kit has a shop just up the road and is available to answer questions! Maybe I’ll be able to wear the finished product for next Christmas!
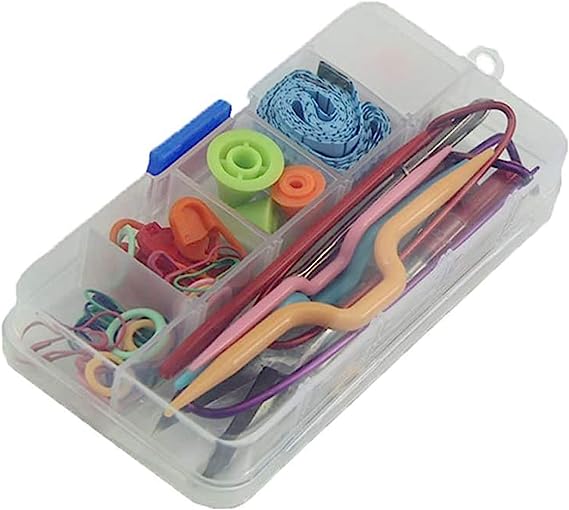
When I got home I remembered I got rid of all my mother’s knitting needles and no longer had any reference books about knitting on my shelf! Amazon saved the day!
A basic book to remind me of the few things I know.All the little do-dads that I don’t know if I need.Of course, needles now look like this!
If any of you out there are knitters, I’ll try to share how it goes…but I suspect it will a long slog!
Making a memory pillow, stuffed bear or dog is more about the clothing it is made from than the actual item. The item is soft and huggable and the clothing is familiar. I have made pillows and bears but recently was asked to make stuffed dogs. In the past, the dogs I’ve made were made of fleece or fake fur…not from clothing so I didn’t know if I could make one dog out of one shirt. If you’d like to read about making a memory bear, see https://marykisner.com/making-a-memory-bear/.
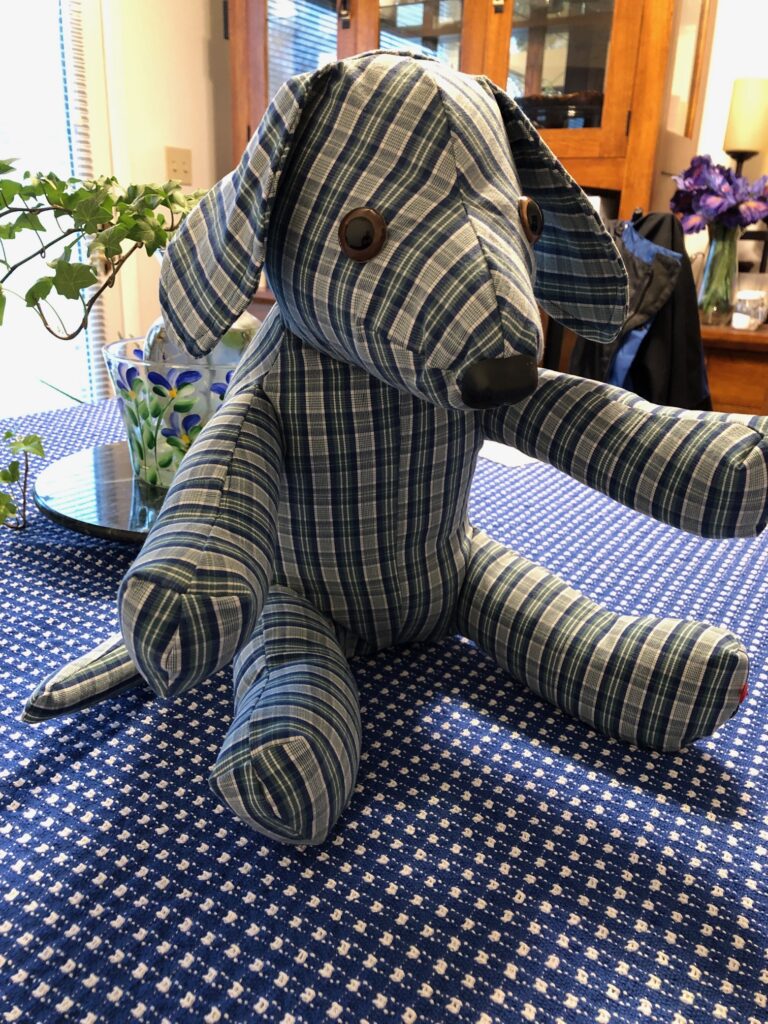
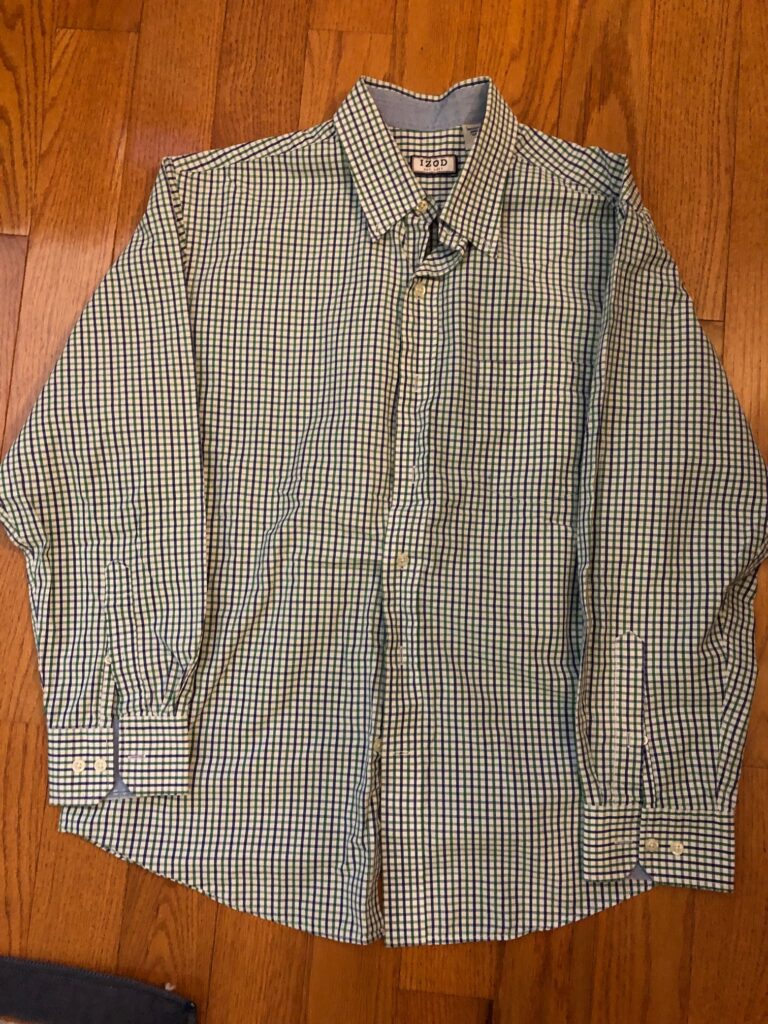
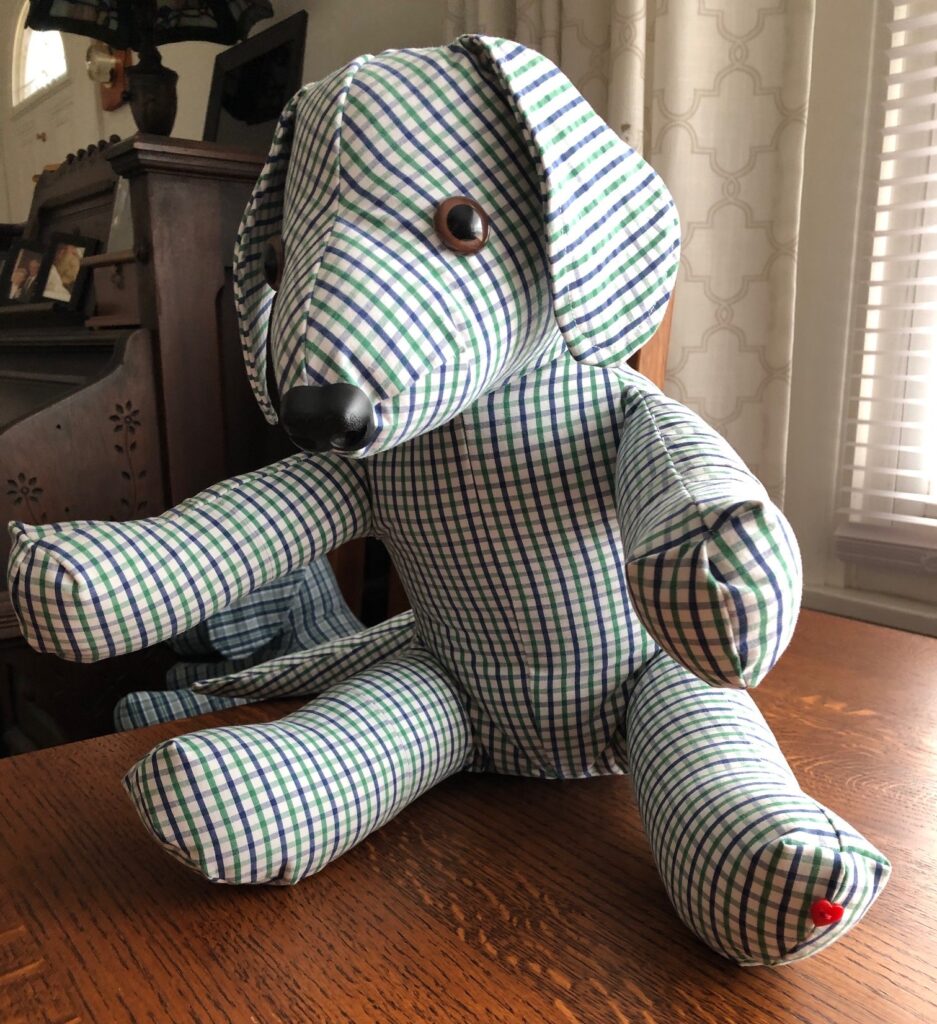
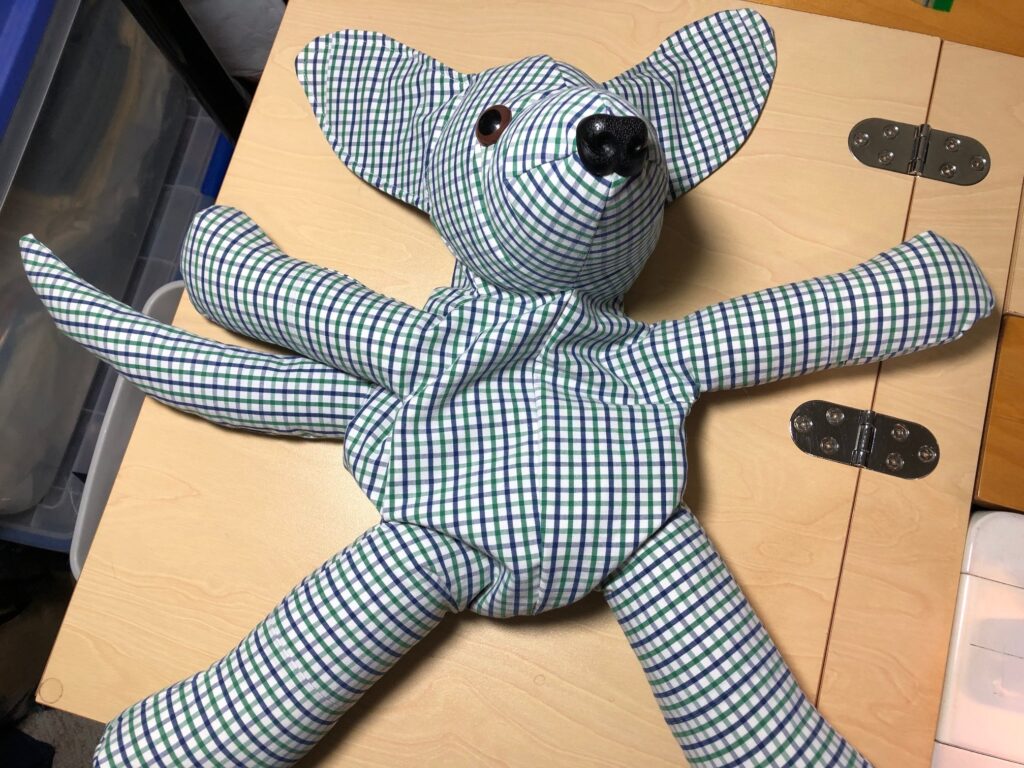
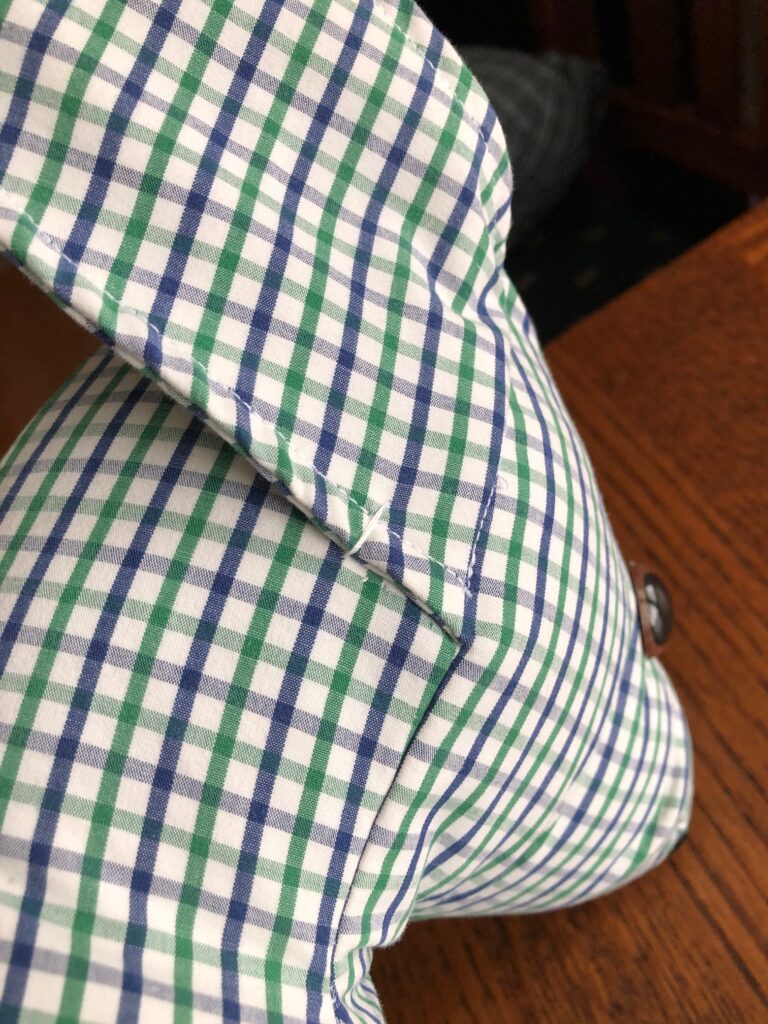
For this special order, I was sent four men’s shirts made of standard cotton and polyester. One was short-sleeved. The request was for three dogs and a bunch of little bears. I think the short-sleeved shirt will be helpful making the tiny bears but it won’t work for the larger dogs. So, I needed to figure out how to make a dog out of one shirt. The first stuffed dog turned out OK, but it wasn’t until I was done, I realized I had forgotten to take an pictures of the process. I did take a picture of the finished dog:
I will include a wide ribbon tied in a bow around the neck…probably navy or green.
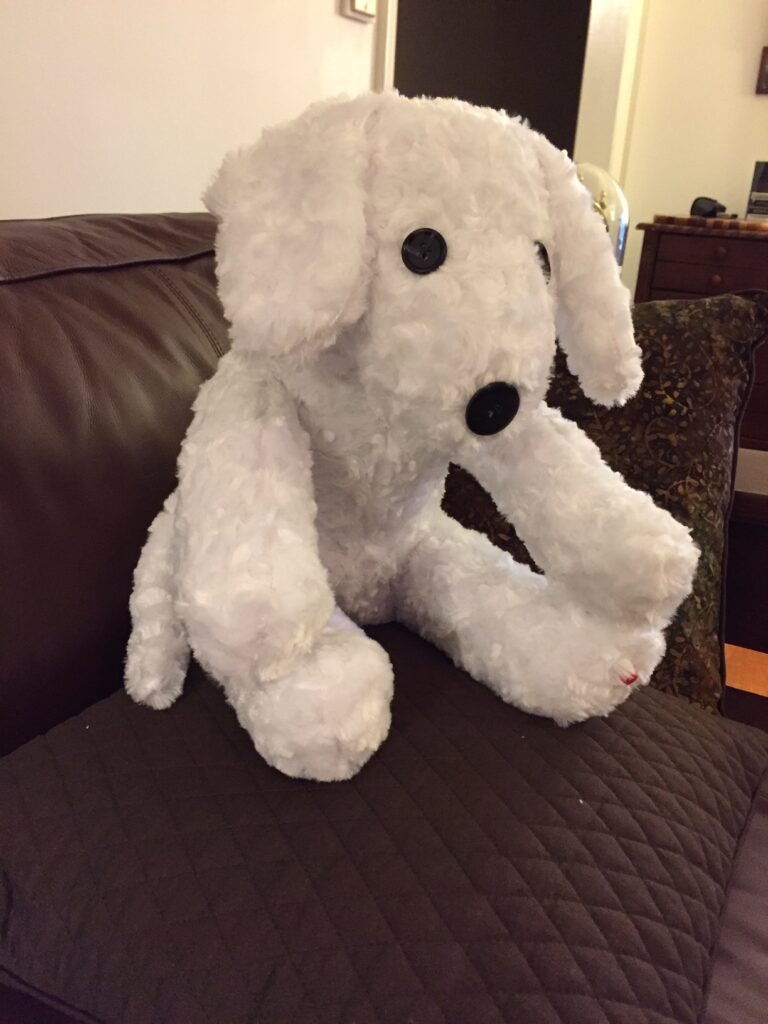
For the second dog, I tried to document the process so next time I won’t have to figure out how to do it again. Here was the second stuffed dog and the shirt it was made from:
I think these dogs will be great keepsake for the family. They are soft and huggable and would feel like hugging Dad.
How to Make a Memory Dog
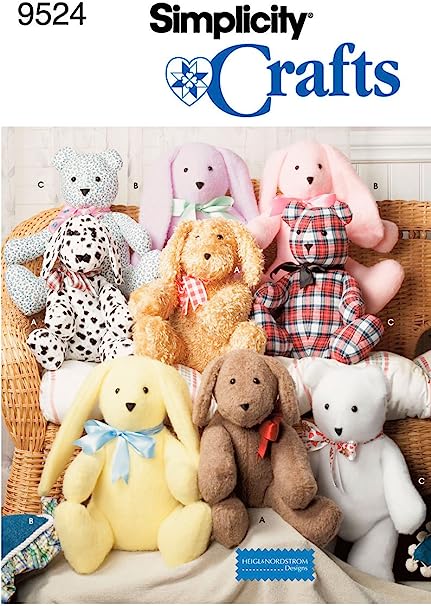
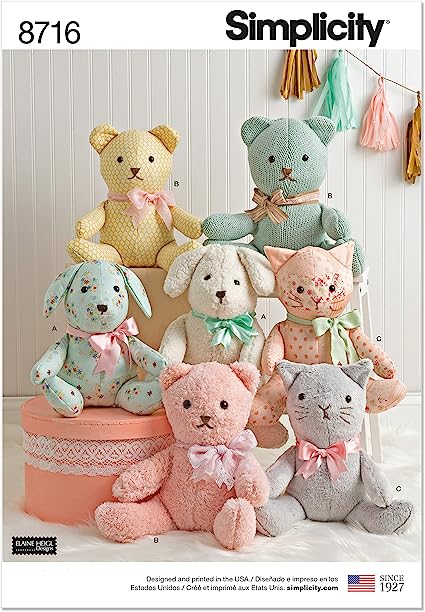
To make a stuffed memory animal, start with any pattern you are comfortable with. Here are two that could work for you:
My pattern started like one of these, but it has been modified over the years to have a longer nose and different ears to represent the greyhounds I work with:
Don’t be afraid to experiment with ear shape to one you like. I made quite a few dogs until I was happy with the ears! I have another modification to represent ordinary dog ears like this:
If you are interested to try making a stuffed animal out of a loved ones shirt, here are the steps below. If you don’t sew, don’t feel obligated to read about it!
Steps to Making the Memory Dog
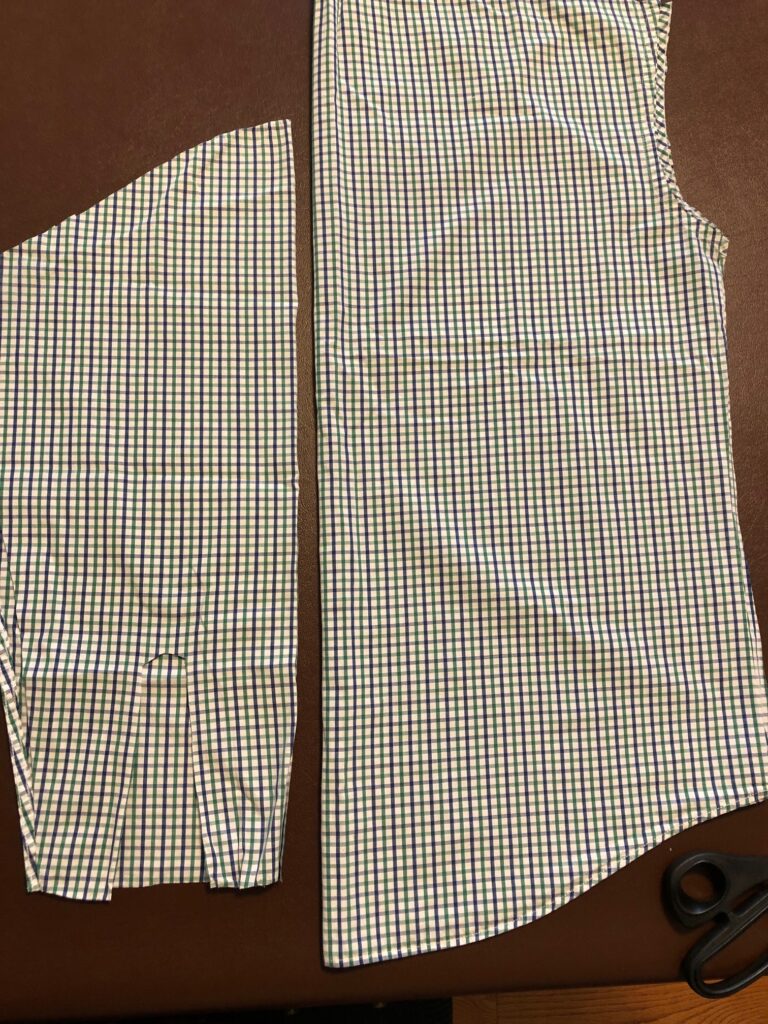
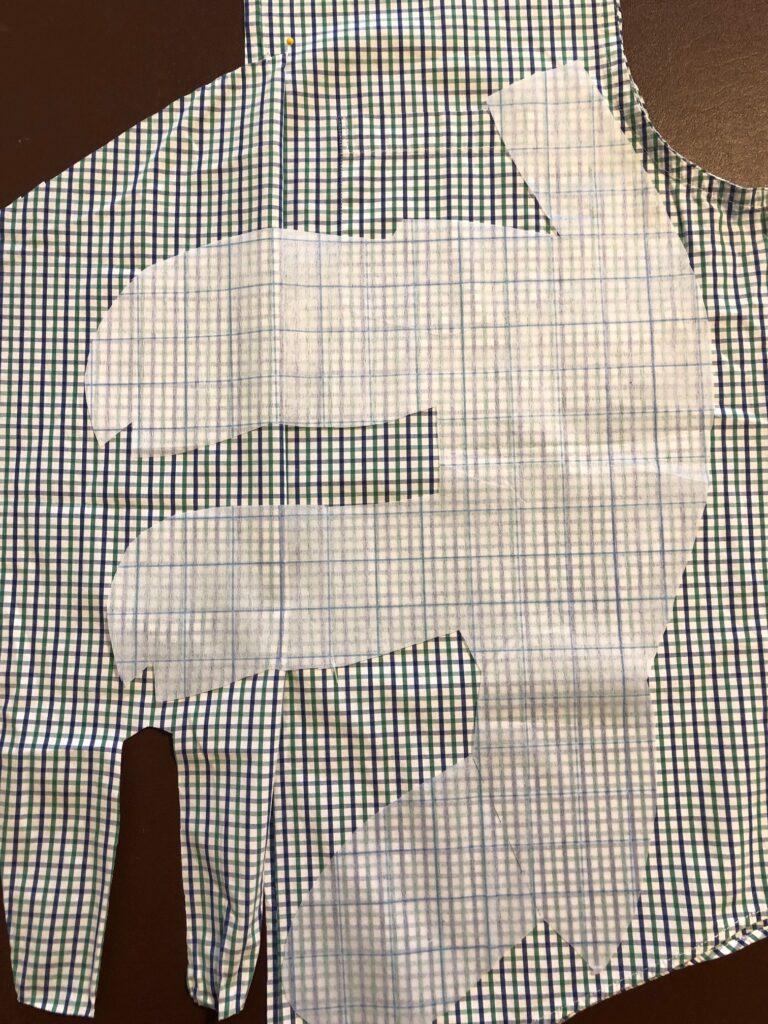
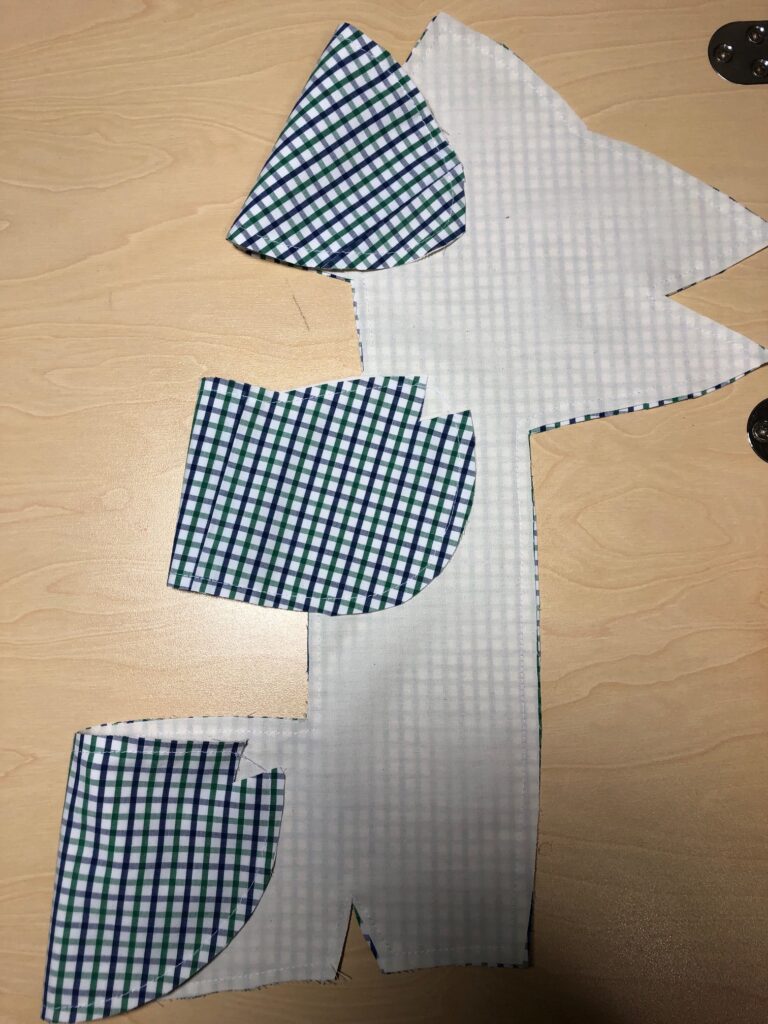
First, deconstruct the shirt. Cut the shirt apart close to the seams. Discard the collar, yoke, cuffs and front plackets. If you want to recycle the buttons into another project, remove them now.
You now have a back section, two front sections and two sleeves. Each sleeve was cut in half and used to extend the front and back pieces so the pattern will fit. That means each arm/leg has a seam about halfway, but it doesn’t really show with the print.
One sleeve cut in half, ready to sew on the sides of the back of the shirt.The other sleeve, cut in half, ready to sew on the sides of the front of the shirt.
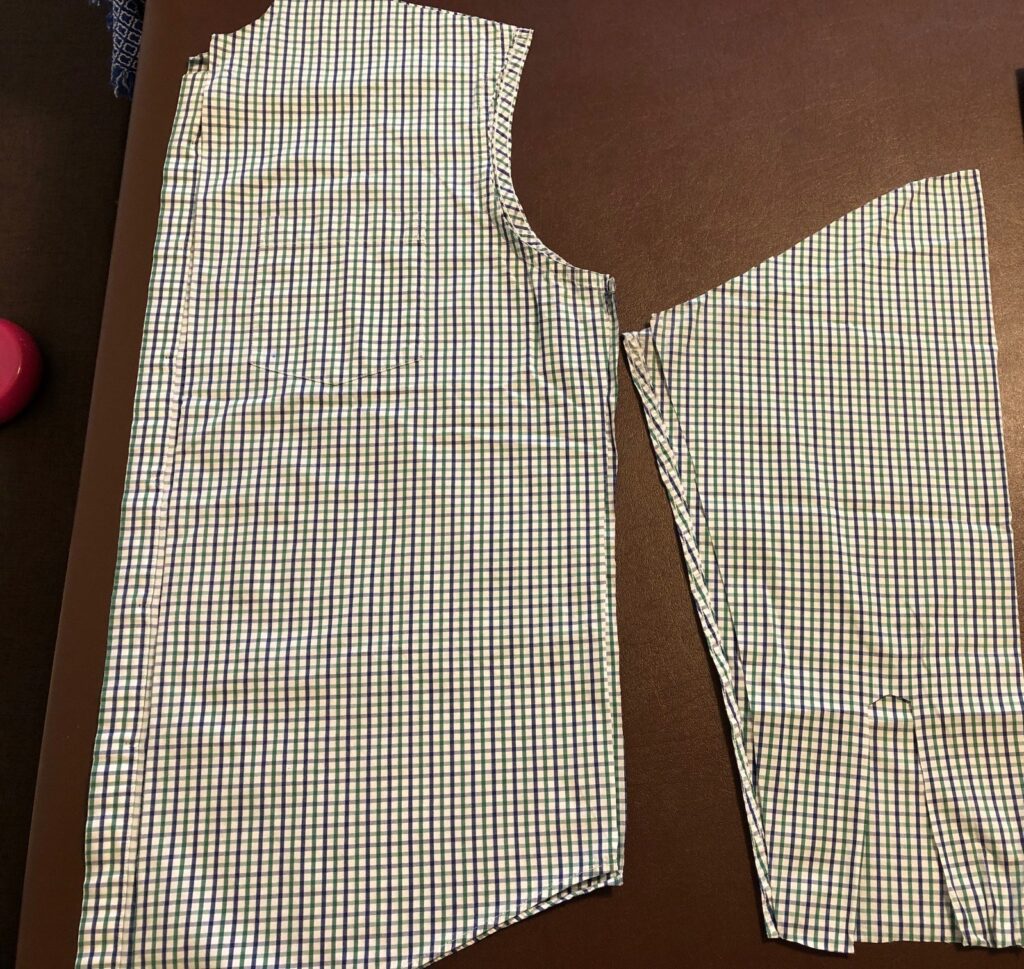
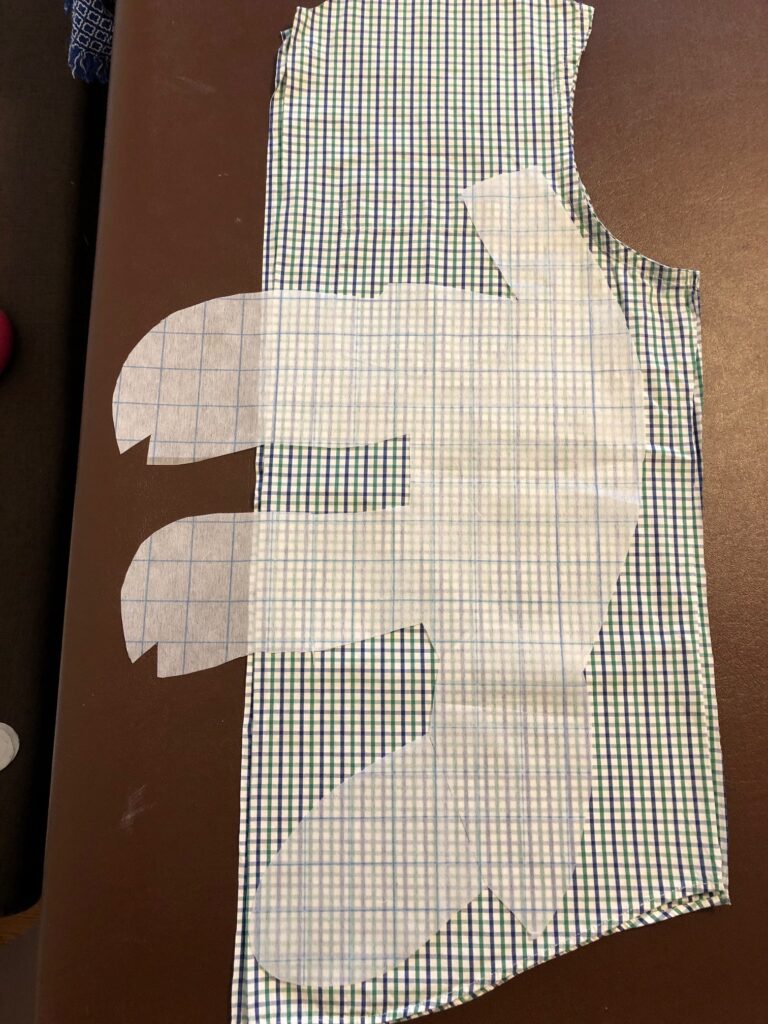
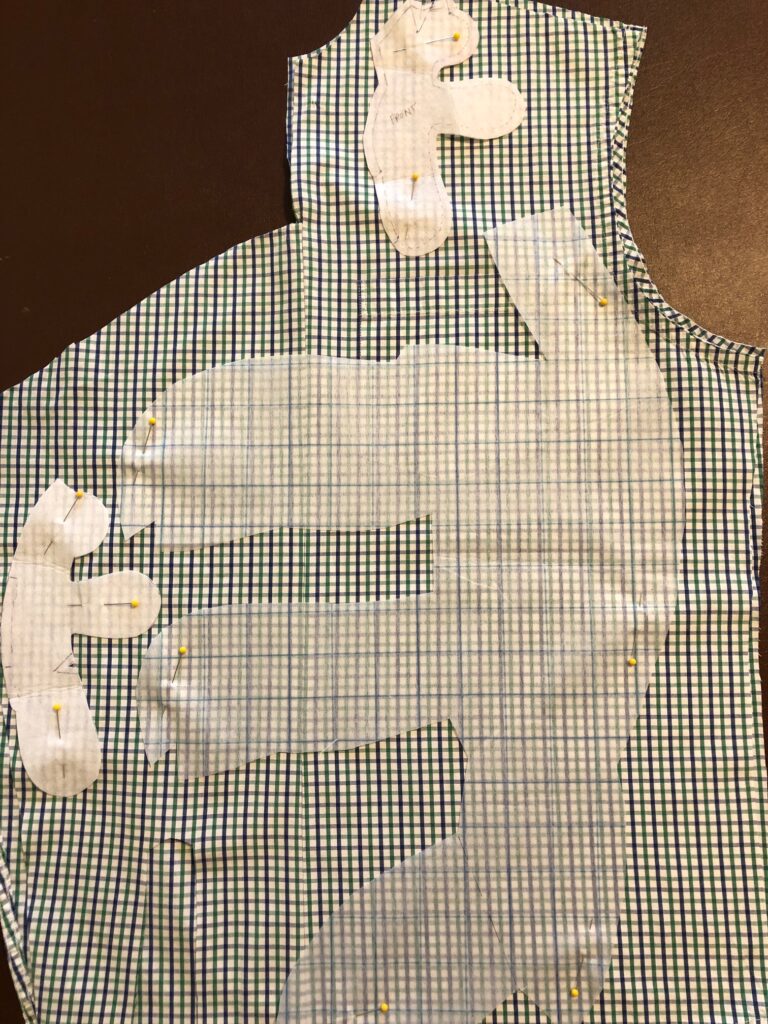
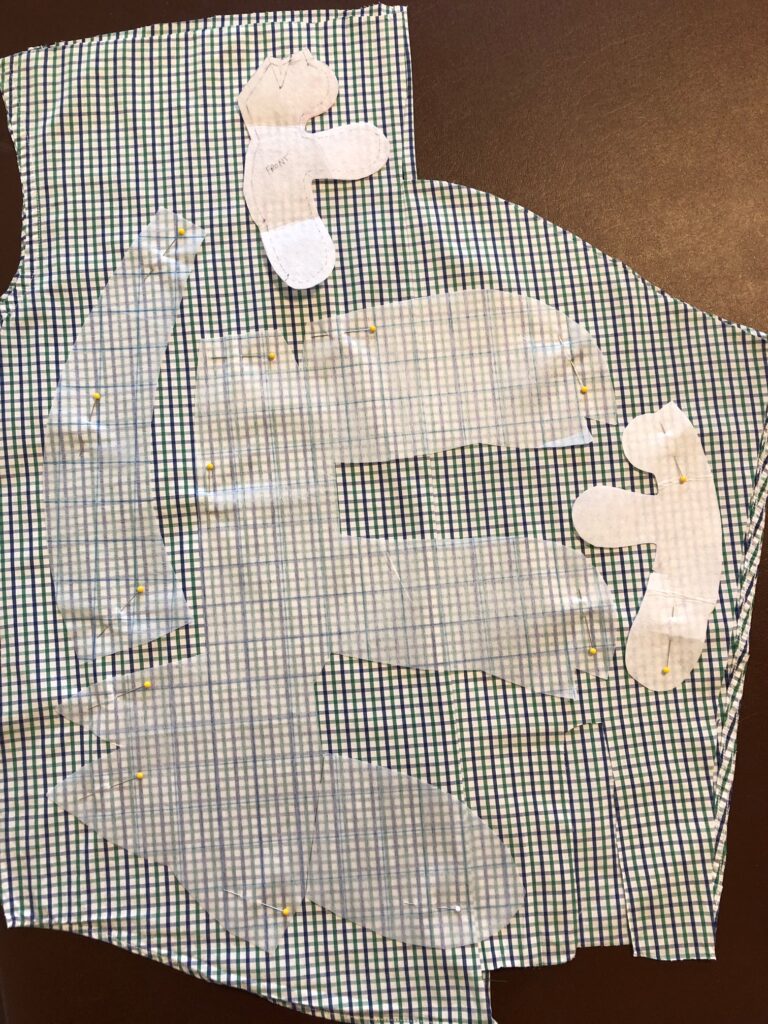
Next, lay out the pattern pieces on the shirt sections to see how it will fit. I needed to use the space where the shirt pocket was, so I laid the pattern so the double layers of fabric would end up on the animal’s bottom.
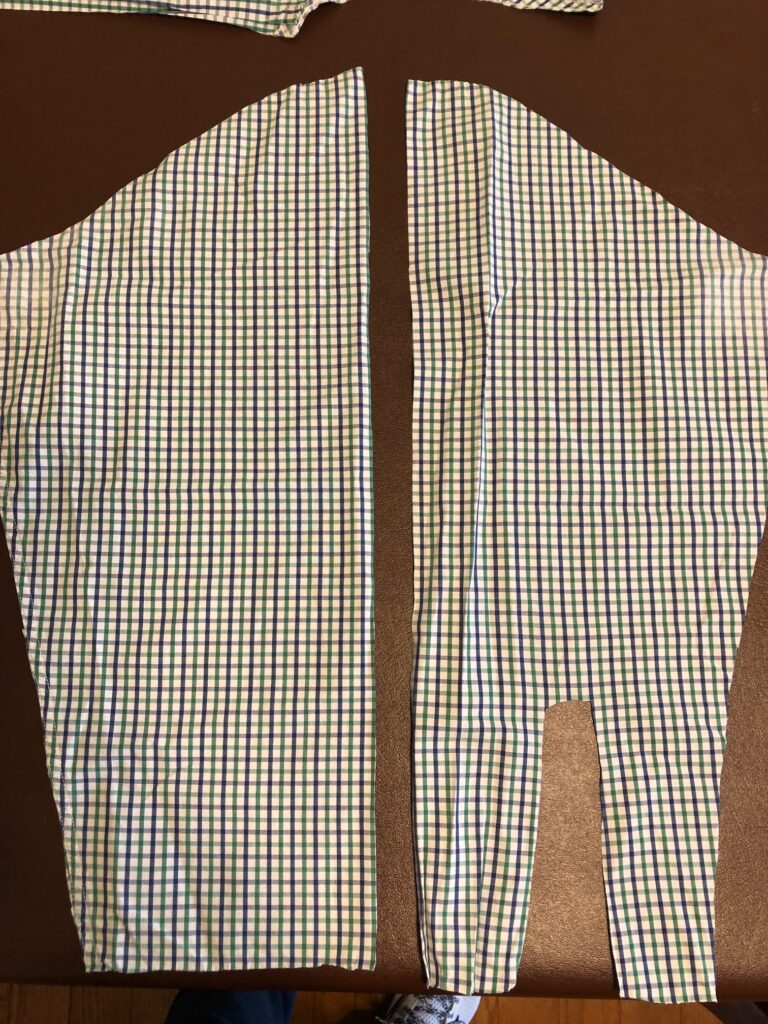
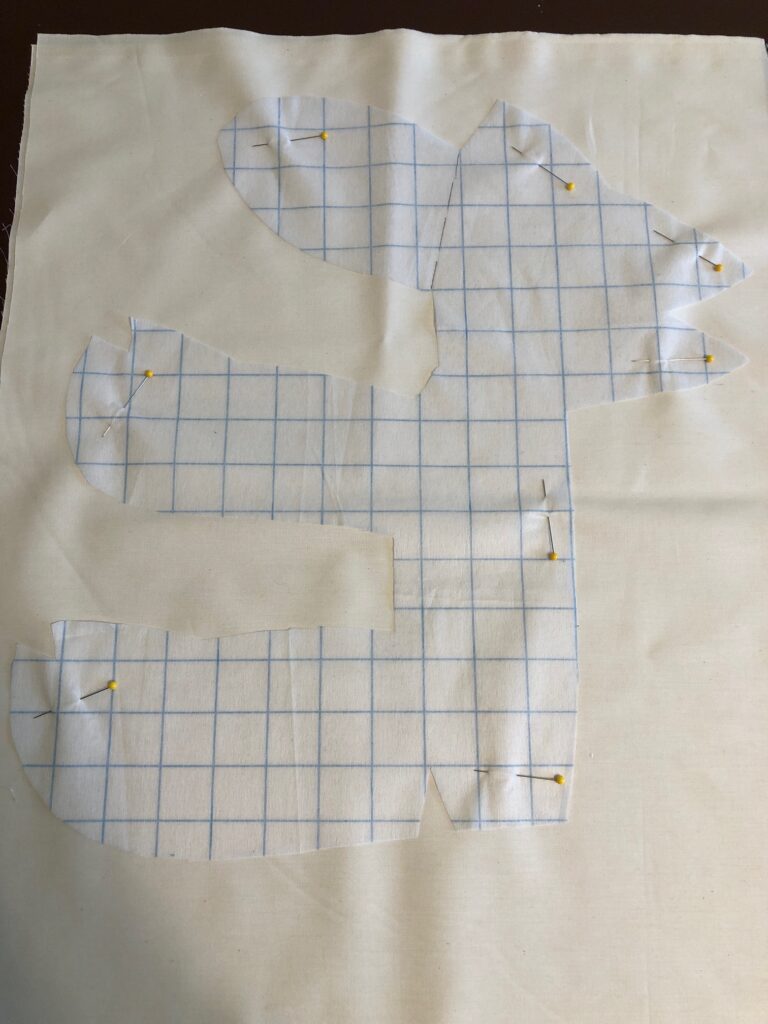
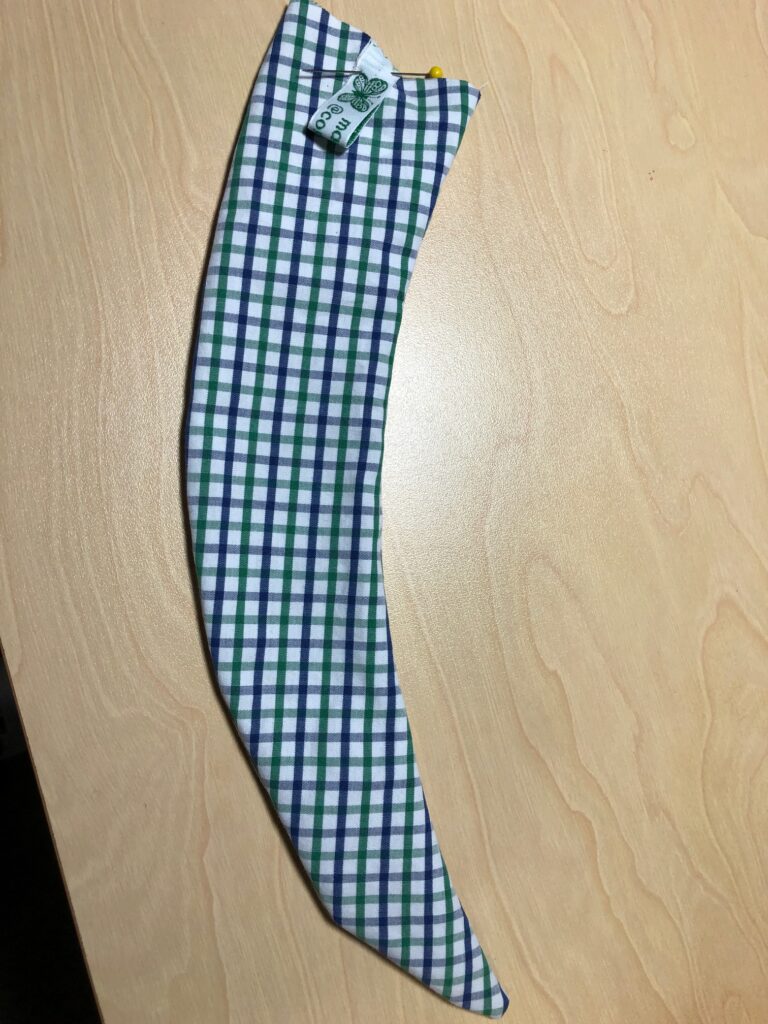
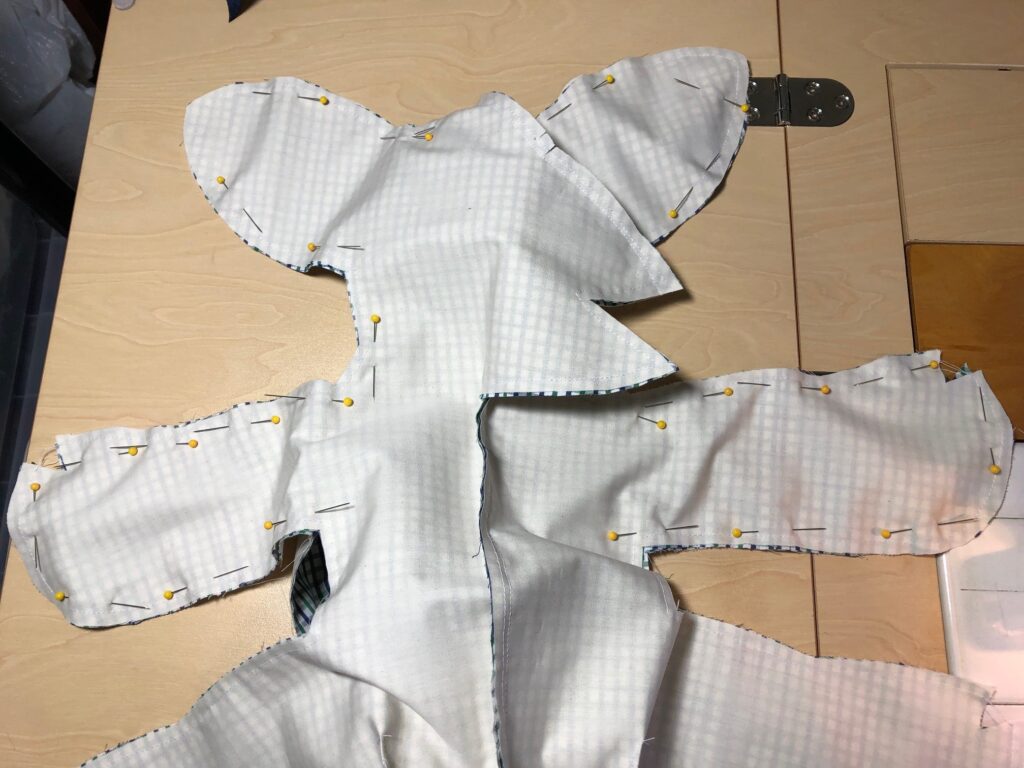
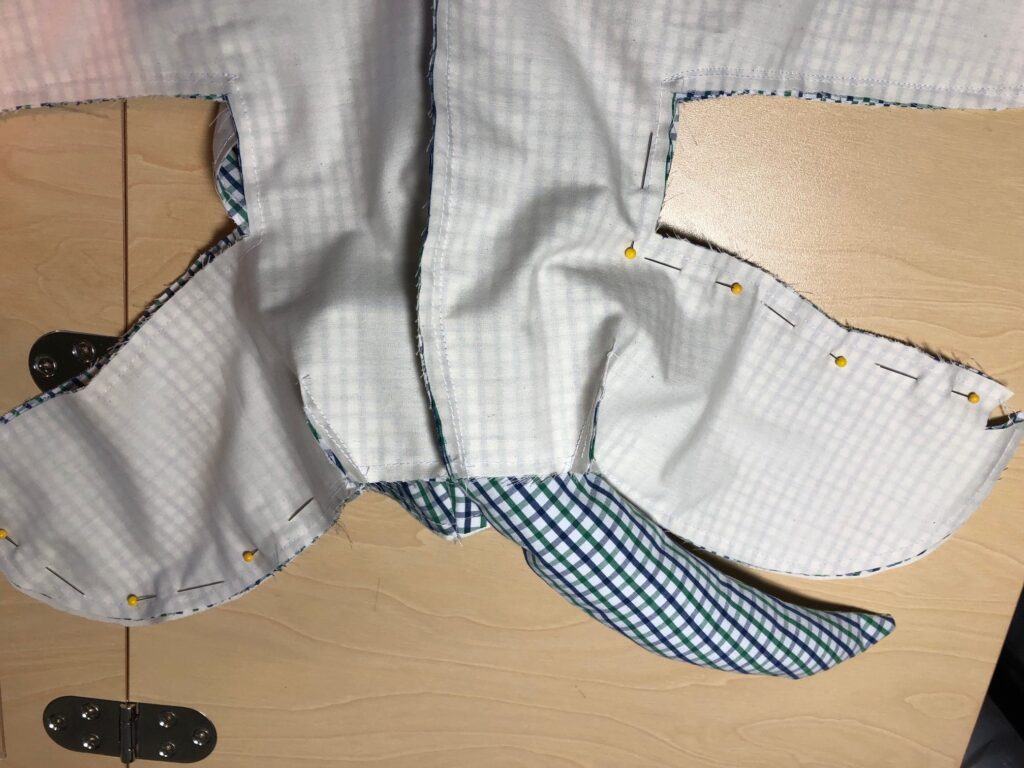
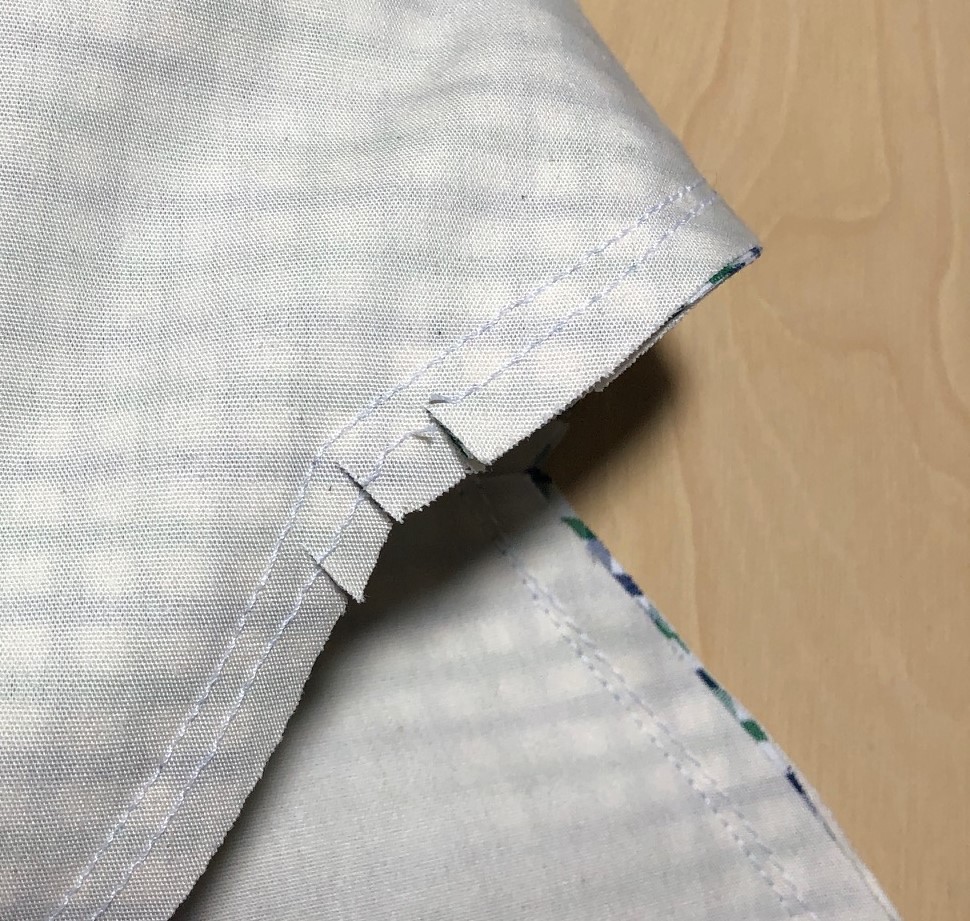
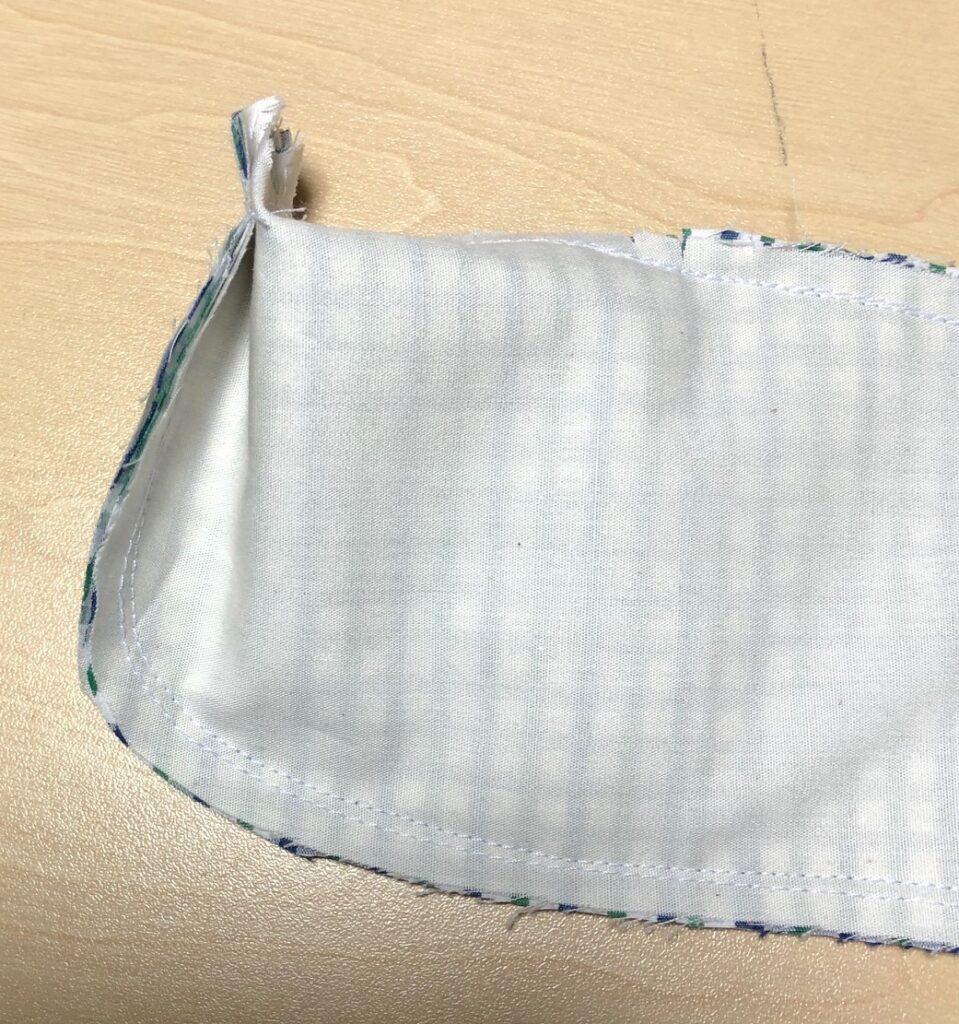
I cut each sleeve in half and used the fabric to extend the back and front, as shown below:I wanted to get at least one or two small bears out of the shirt fabric too.Can’t forget about the tail pattern! It fit beside the dog front pieces.To make the fabric sturdier for stuffing, I lined each piece with muslin.I stitched around the muslin and then treated it as one piece of fabric.The tail was stuffed very lightly and my tag was sewn into the seam.The two fronts and two backs were sewn together. Then the front was sewn to the back. I did the top half first and then pinned and sewed the bottom half…making sure the tail was tucked inside.Didn’t want the tail to get in the way so it needed to be tucked inside.Tail is tucked inside.Clip all seams before turning right side out.When sewing the tip of the nose, leave a few stitches open so the plastic nose can be easily pushed through from the front.Each leg and arm had a cross dart that gave them shape.
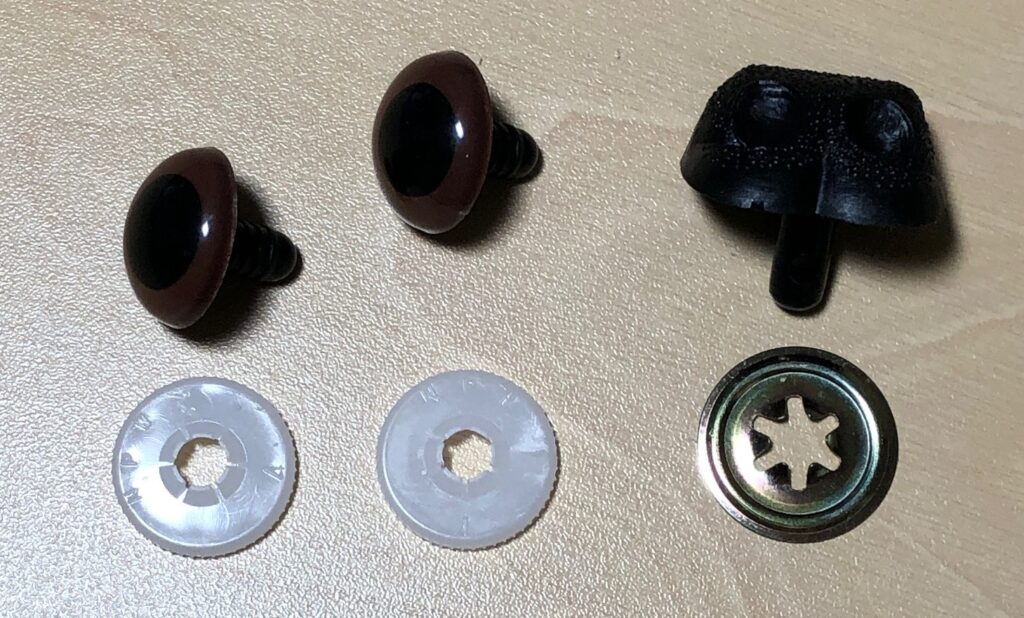
Although I prefer the look of buttons for the nose and eyes, I’ve learned they are hazards for little children. Since these dogs will be hugged by unknown persons (including children) I used the commercial eyes and plastic noses. They get pressed through a hole in the fabric (or through the missing stitches at the nose) and a plastic piece is secured on the back…inside the head.
Commercial eyes and nose.
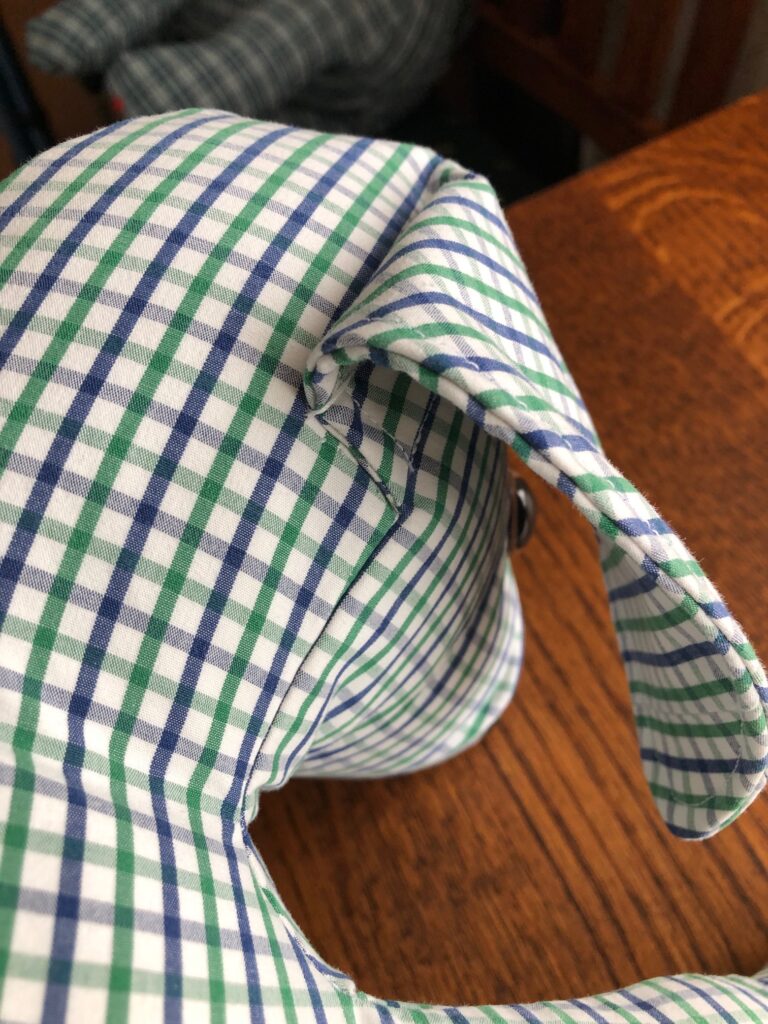
The ears are not stuffed but have stitching around the edge and along the side of the head. Stuff the head first, then the arms and legs, with the body last. A little less stuffing where the arms and legs join the body will keep them more movable.
Stitch up the opening in the back by hand.
To get the ears to hang right, see how they look when the dog is sitting up. I needed to tack a few stitches at the back of the ear so they would not hang so far forward.
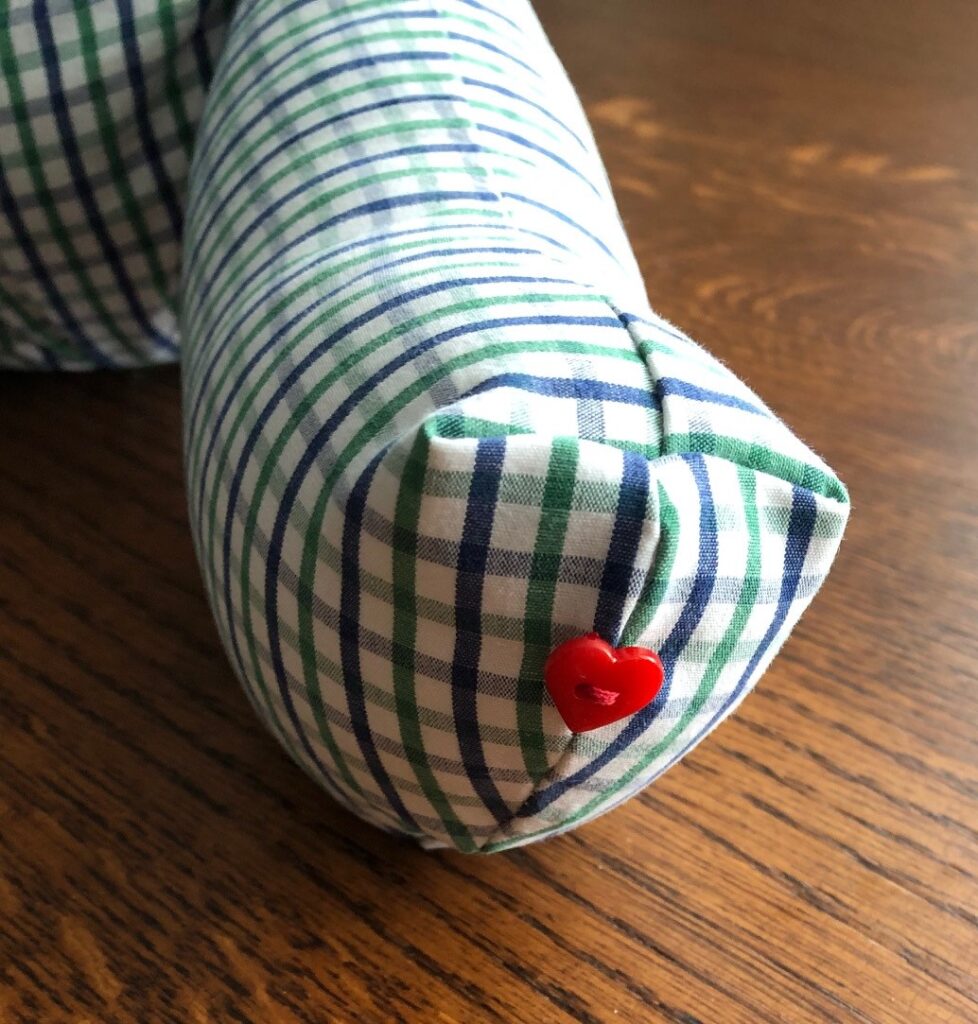
Finally, I add a heart button to the foot of each bear or dog I make, letting the family I had their loved one in my thoughts as I was creating their memory bear or dog.I think I’ll add a white ribbon to this one!
Find a pattern you like and try it with one of your shirts for practice! Enjoy!
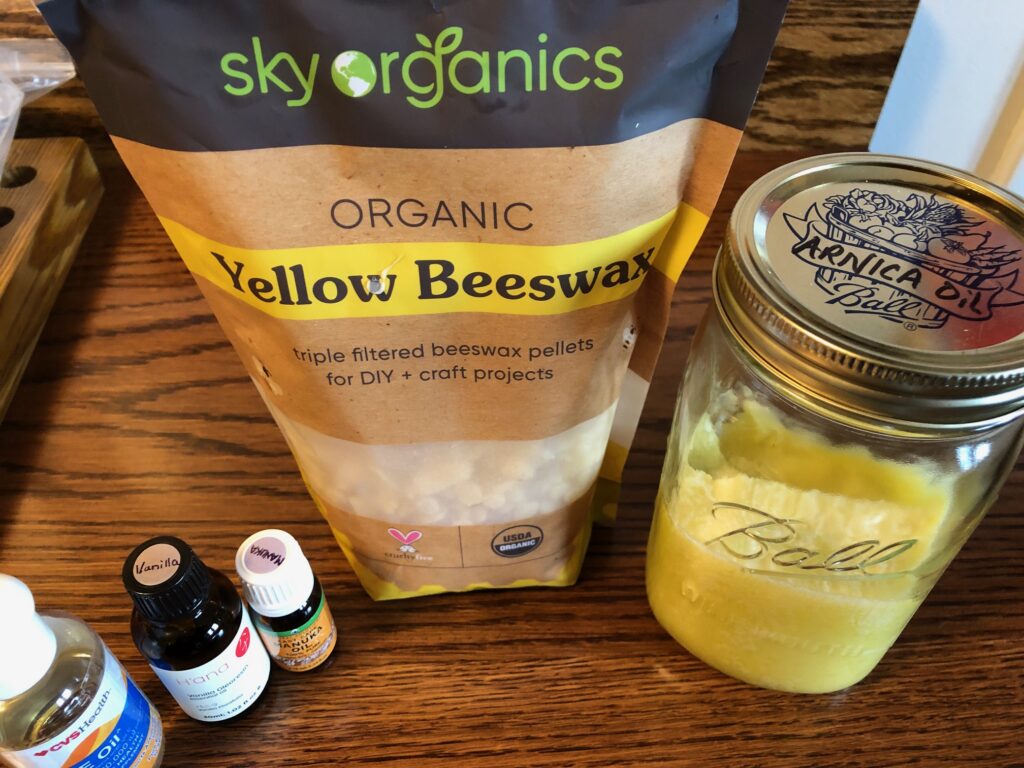
Last year I made a salve with arnica-infused olive oil. Arnica is an ingredient that is added to salves to help relieve aches and pains, bumps and bruises! Look for it in your over-the-counter salves. You can read about making the oil here: https://marykisner.com/making-arnica-infused-oil-for-tropical-salves/.
I shared the salve with just a few people because I didn’t know how effective it was; I wanted to give it a try first. I’ve used it for the last 6 months with some success in reducing small bruises, if used right after they appear.
About Arnica
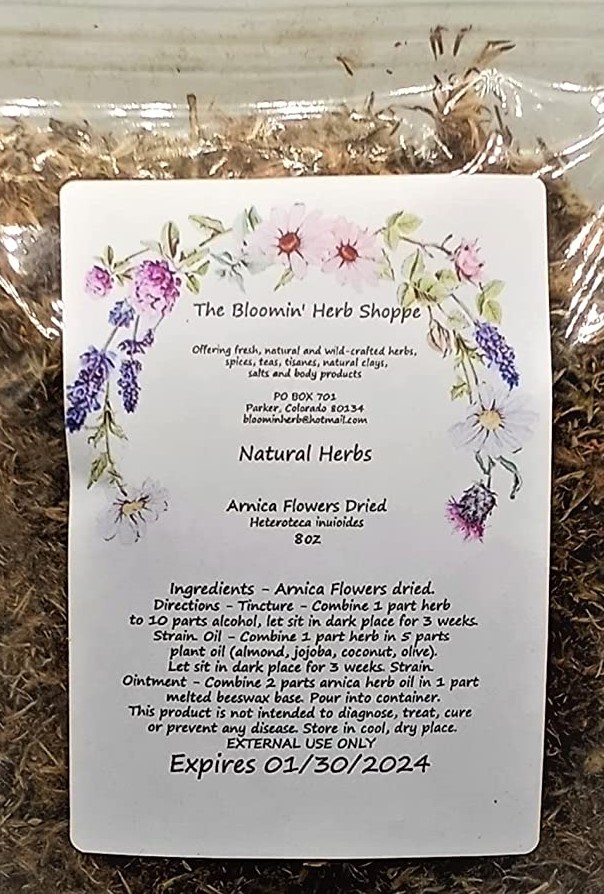
Arnica is not as well-known as lavender and calendula and is sometimes included in over-the-counter ointments and creams sold to soothe occasional aching knees, joints and muscles. It is often used in homeopathic remedies, which means the products contain very small amounts of the active ingredients. Making infused oil with dried arnica plant material is a great way to incorporate these ingredients into body care products. I purchased a bag of the dried flowers on Amazon.
The dried flowers aren’t as pretty as the fresh ones!
Arnica comes from the perennial herb Arnica Montana. It is a yellow-orangish flower that grows in the mountains of Europe and Siberia and the mountains of northwestern North America. It is sometimes called the “mountain daisy,” because its color and petals look like the familiar flower. It yields an essential oil that is appreciated for its ability to reduce pain in osteoarthritis joints and reduce bruise discoloration.
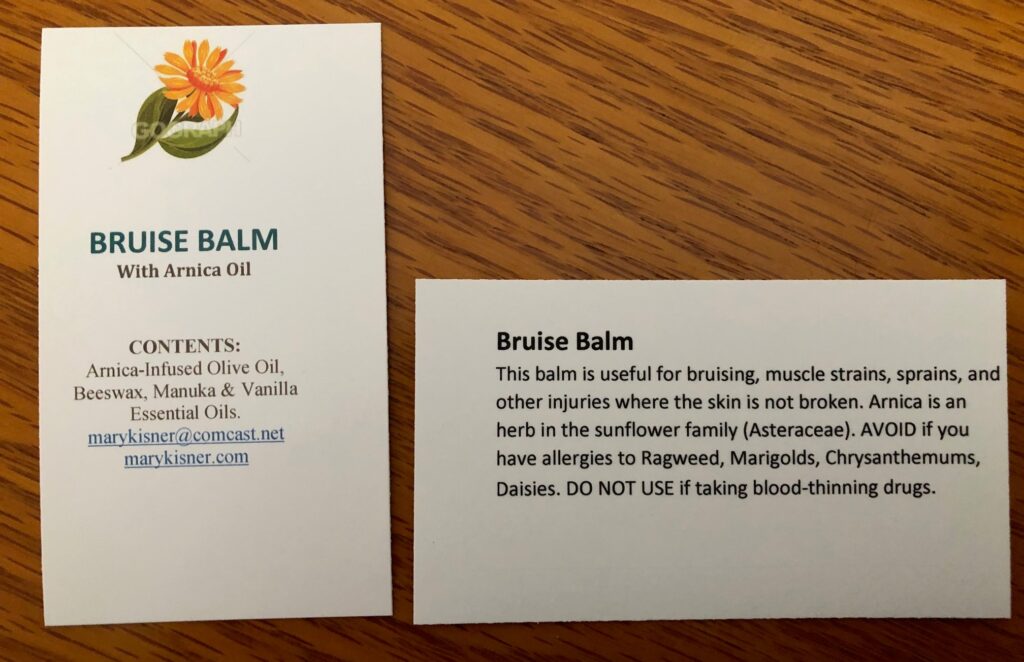
NOTE: This plant does have some drawbacks or cautions for people that are allergic to certain plants of the Asteraceae family…like ragweed, marigolds, chrysanthemums and daisies, or are using blood thinning medications.
Please do your own research about any plant material you might work with, but this process of infusing oil with any plant material would be the same.
I still had some infused oil left from my first project; it kept well in the back of the refrigerator.
The ingredients in this Bruise Balm
I scooped out 1 cup of infused oil and weighed out 32 gm of beeswax into my 4-cup heat-safe measuring cup. The cup is placed in a saucepan of water. I brought the water just to a boil and turned the burner down so the water stayed simmering.
When melted and removed from the stove, I stirred in 1/4 tsp of Vitamin E Oil and 20 drops each of Vanilla and Manuka Essential Oil.
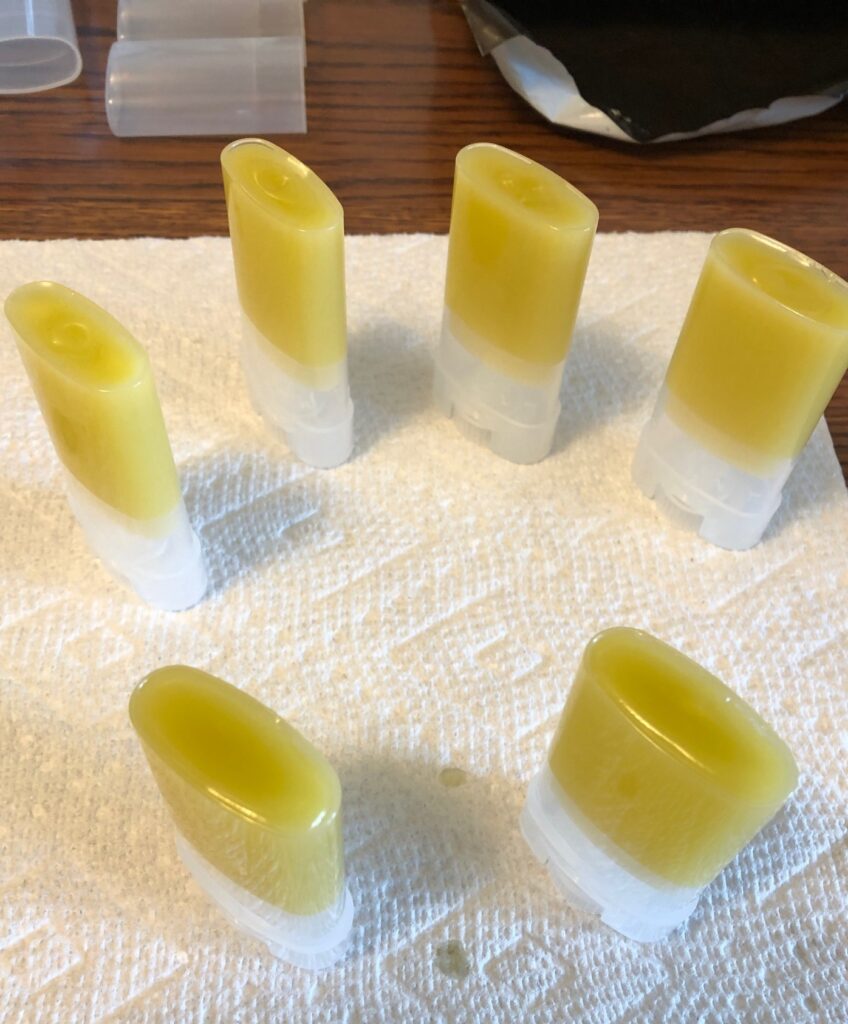
Using a disposable pipette, I filled 36 small tubes and 6 larger ones.
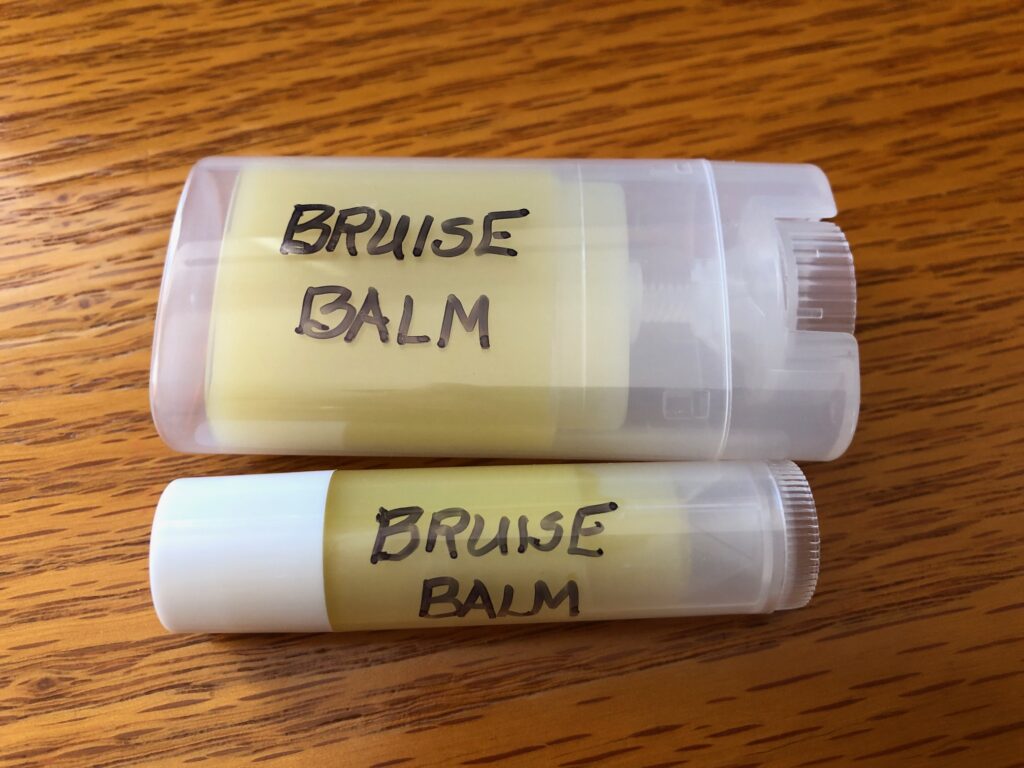
I decided to just hand write the label…nothing fancy. I don’t want folks to get them mixed up with lip balm!I try to label everything I make so the ingredients are clear.
I hope to share these with my high school friends at our monthly luncheon… built in guinea pigs! Try it yourself! Enjoy!
As an American, I’ve always been baffled by the interest our press has with the doings of the British Monarchy. The formalities, the rules and traditions, the line of succession are all topics that are definitely not at the top of my mind most of the time. The few blurbs in the news about the activities of William and Kate, Harry and Meghan, Charles and Camilla…are small anecdotes in my life.
For some reason, I was interested in this latest book from Prince Harry, SPARE, because it was described as being in his own words…without the filter of the press. From the first page I was captivated by the experiences Harry shared, from the grief of losing his mother, to trying to fit into the boarding school model with his older brother.
As a mother and former teacher, I could relate to Harry’s difficulty fitting into the academic setting when his learning style demonstrated he did better with hands on learning. Yes, he made friends, but they often got into trouble stretching and bending the rules. His saving grace was the military and his desire to learn to fly.
All his life, the UK press made sure that anything he did was documented in a most unflattering way. Harry mentioned many occasions where a story was published with damaging pictures. I remember some of those stories from our news. He shares what was really happening and told the real story. Much of the book describes his frustrations. He could complain to his grandmother, dad, brother and body guards to fight back against the made-up stories and share the facts, but the policy of the Monarchy was to not engage and not fight back. So, the stories stayed in the news.
Being harassed by the news reporters with people hiding in the bushes and looking in the windows to take pictures was continual. The competition to get the best (or most obnoxious) photos was fierce. Anything to make a buck. Harry remembered his mother being chased, ending in her death in a car crash. He carried his memory and grief for so many years.
It wasn’t until he met Meghan that all of these issues came to a head. From the beginning, Harry and Meghan retreated to isolated locations in Africa where Harry had established friendships with folks involved in the charities he supported. When they needed to participate in official functions in Britain, the press was relentless. Made up stories that Kate and Meghan were fighting, William and Harry were on the outs…every day another headline. The whole drama made me sad as Harry begged his grandmother and his father to take a stand. I really don’t understand the protocol of stoicism that has developed over centuries in the Monarchy. However, as a mother I identified with Harry’s frustrations.
Now, every time I read another article in the news sharing tidbits of his life that are really none of my business, I will turn the page/turn off the news/not buy the magazine and will send loving thoughts to Harry and his family. I hope they have found some peace and safety in California.
Please leave a comment if you have thoughts about this book!
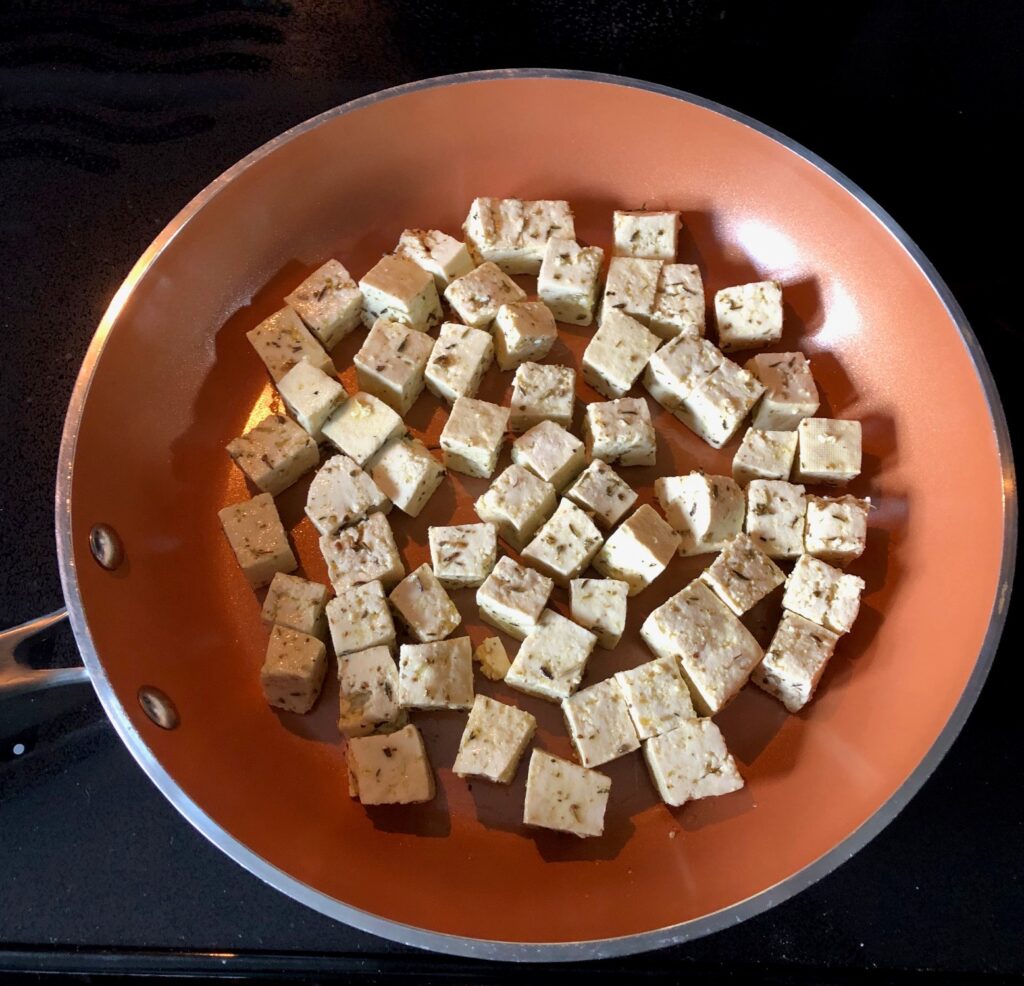
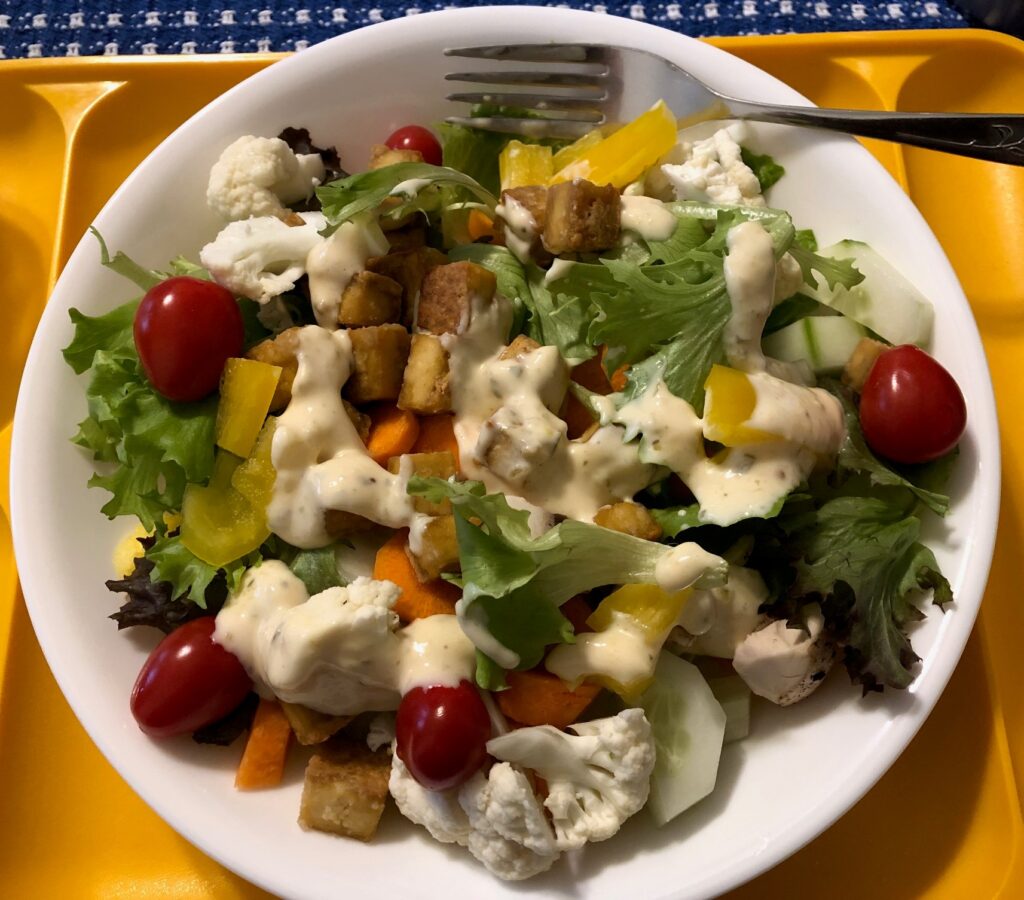
As a follow-up to my first attempt to cook tofu (https://marykisner.com/cooking-tofu-first-attempt/) I’ll try to adjust a few things to try to produce better cubes of tofu. My advice to myself the last time said: cut bigger cubes, add more seasoning and reduce cooking time. I started by doing a search online about recipes to season tofu. While I found and printed out about 10 recipes, I chose a simple recipe of olive oil and Italian herbs so I could use the seasoned cubes in a salad or even put them in soup.
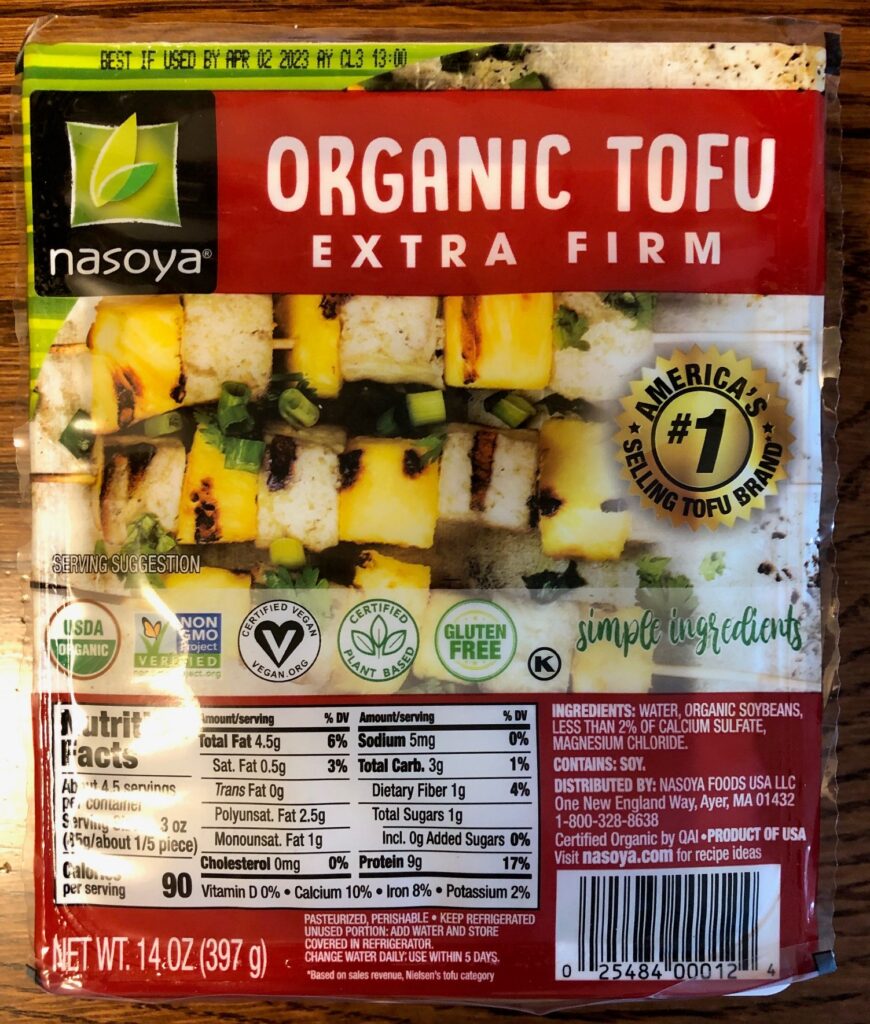
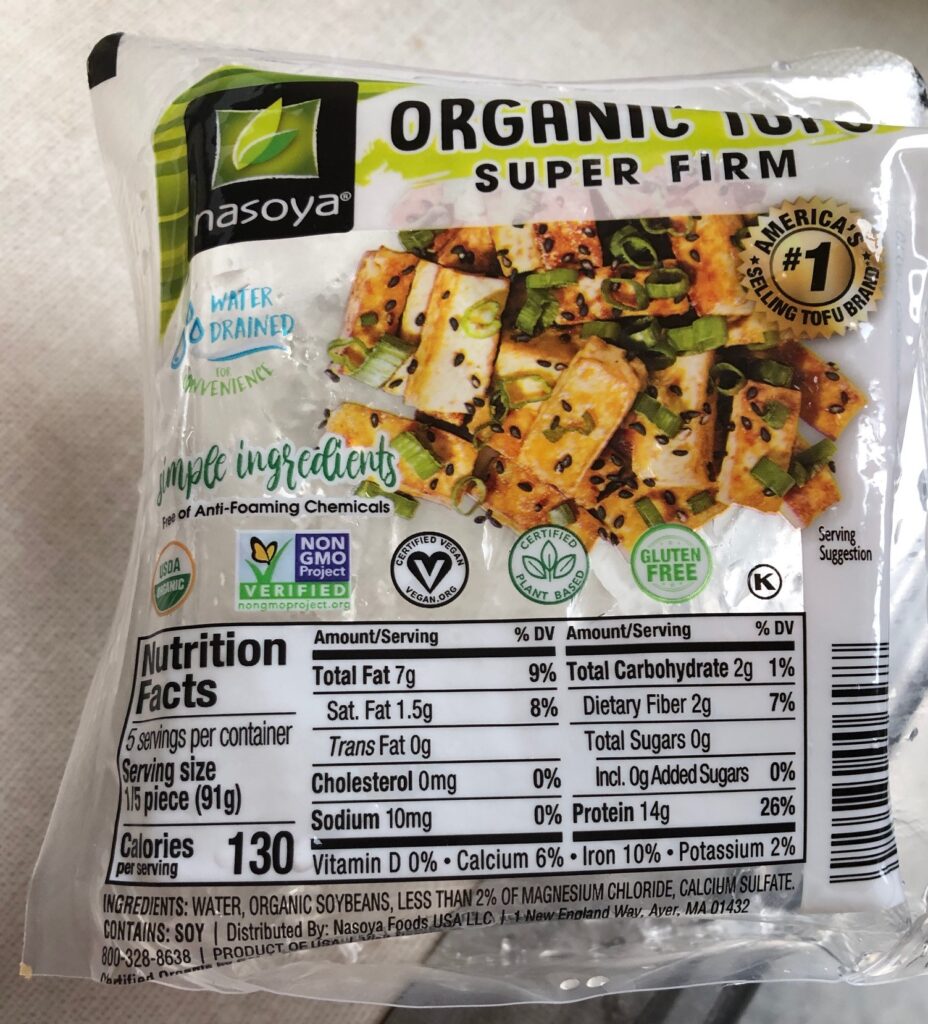
I started with a block of extra firm tofu:
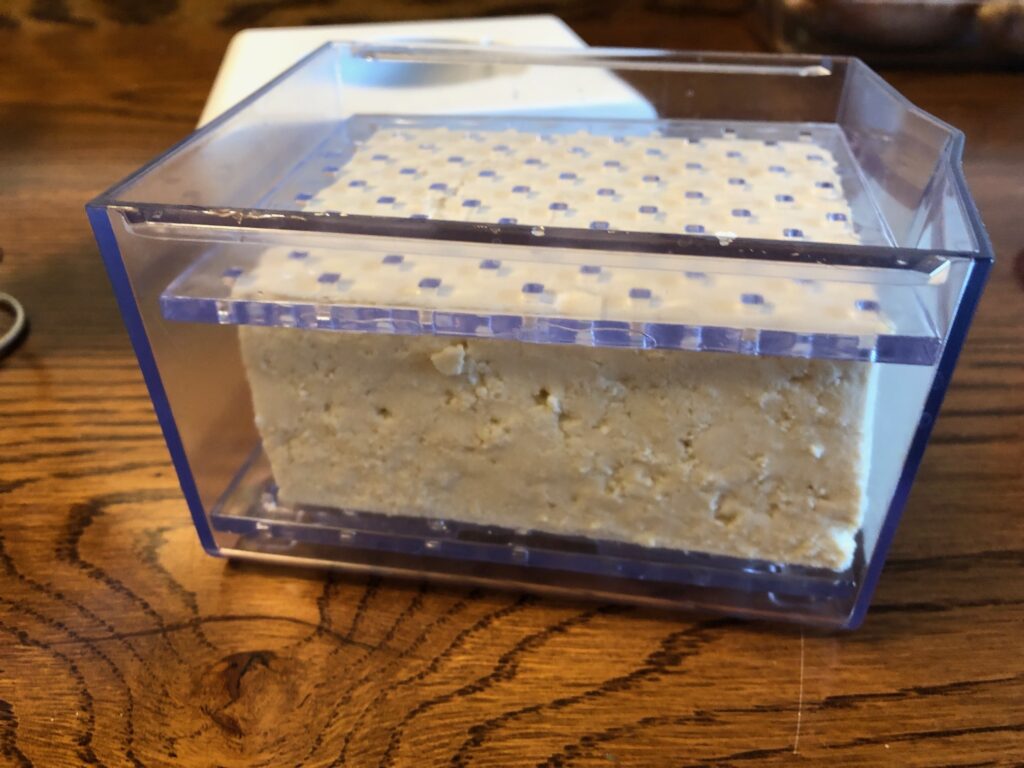
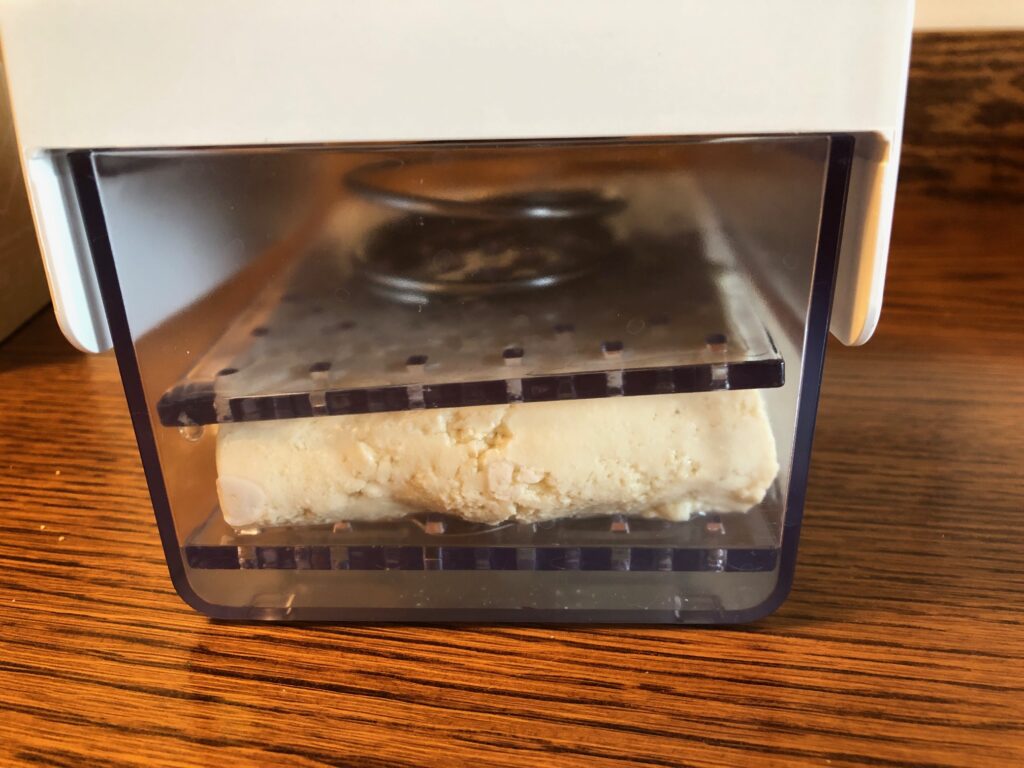
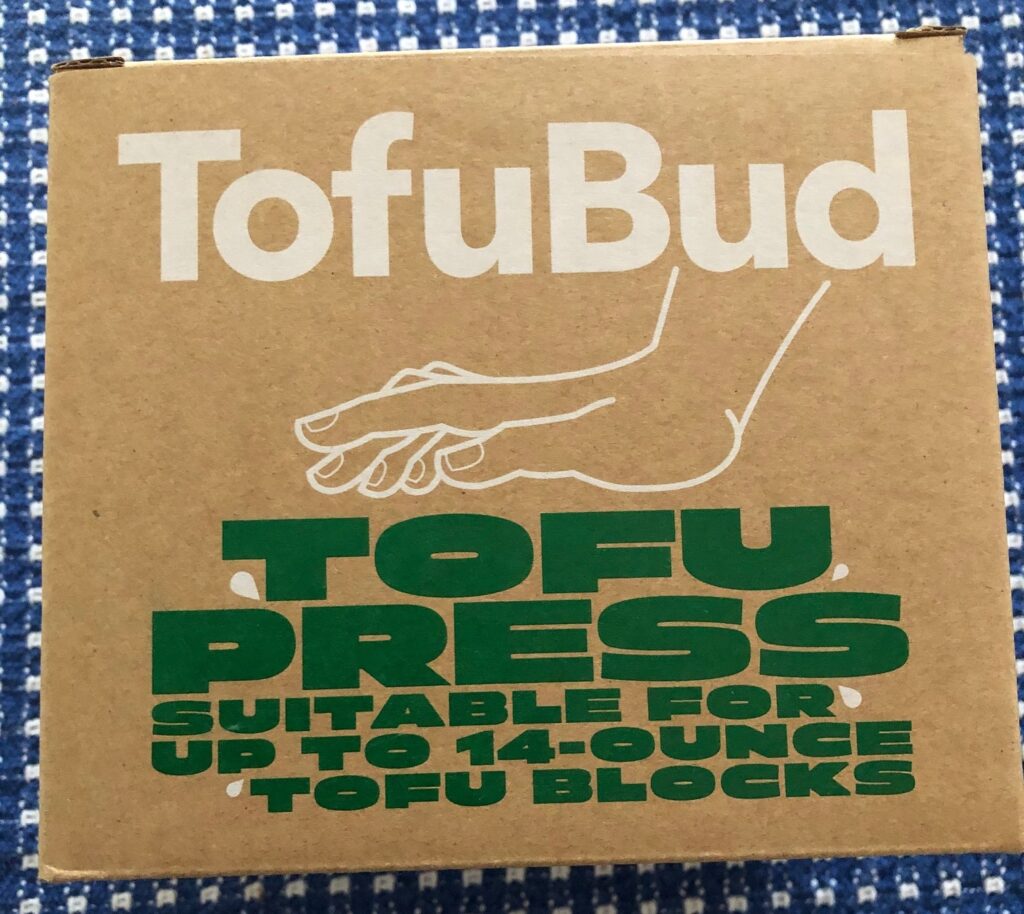
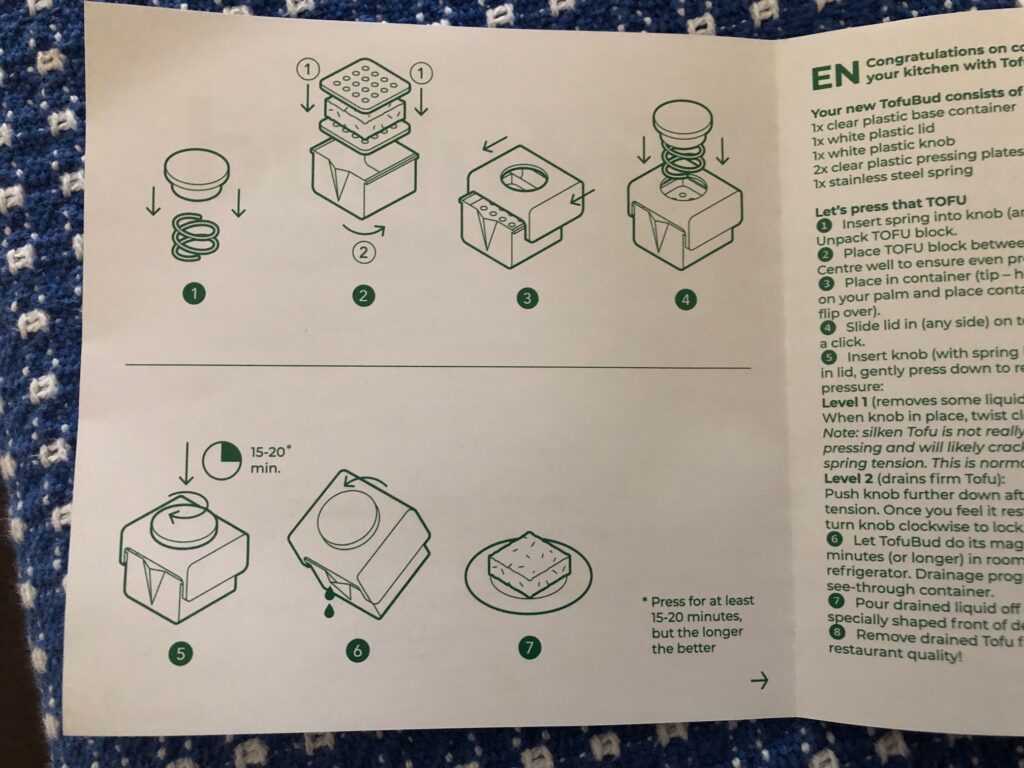
Next, I got out my tofu press and placed the block of tofu in it. This block was not as firm as the first time and felt “fresher.”
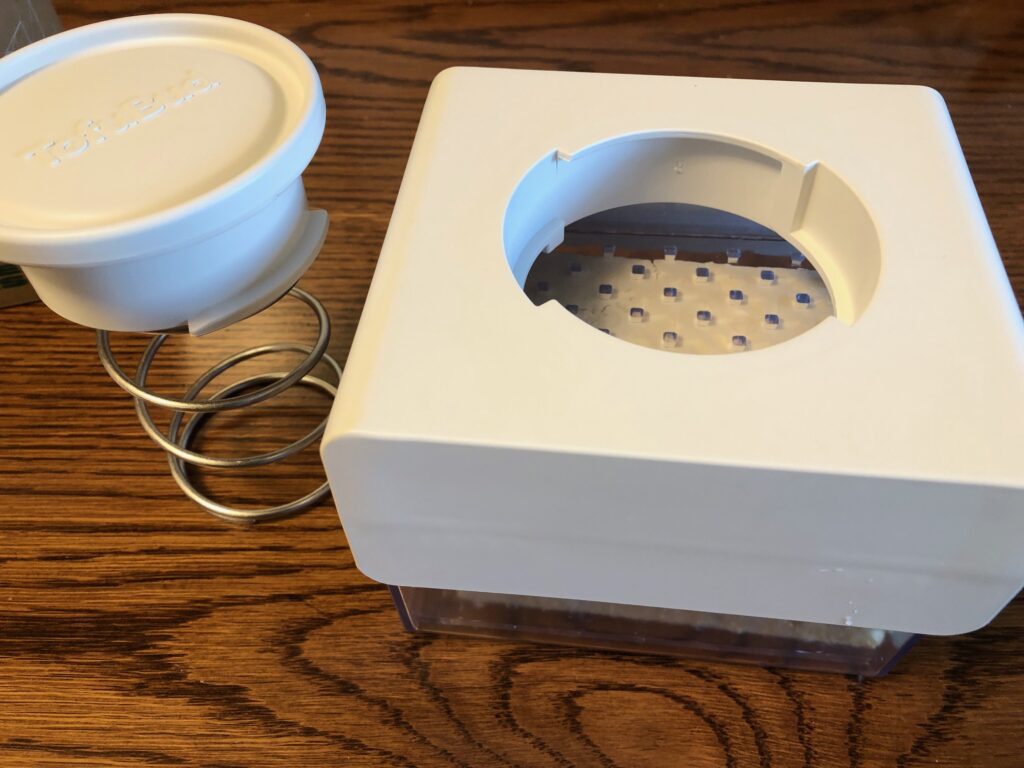
The instructions said to place the tofu block between the two flat inserts in my palm, drop the container over my palm…and then turn it right side up. This keeps the tofu from breaking apart.Pressure being applied.
After 20 minutes the whole block was half as thick and submerged in liquid. I poured off the water and opened the press.
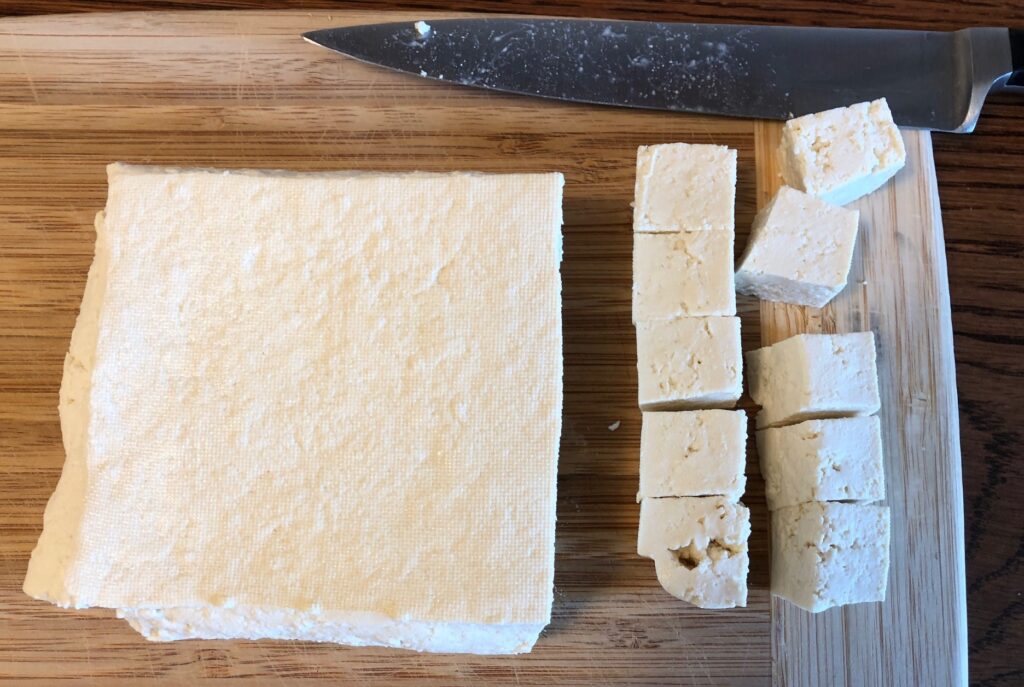
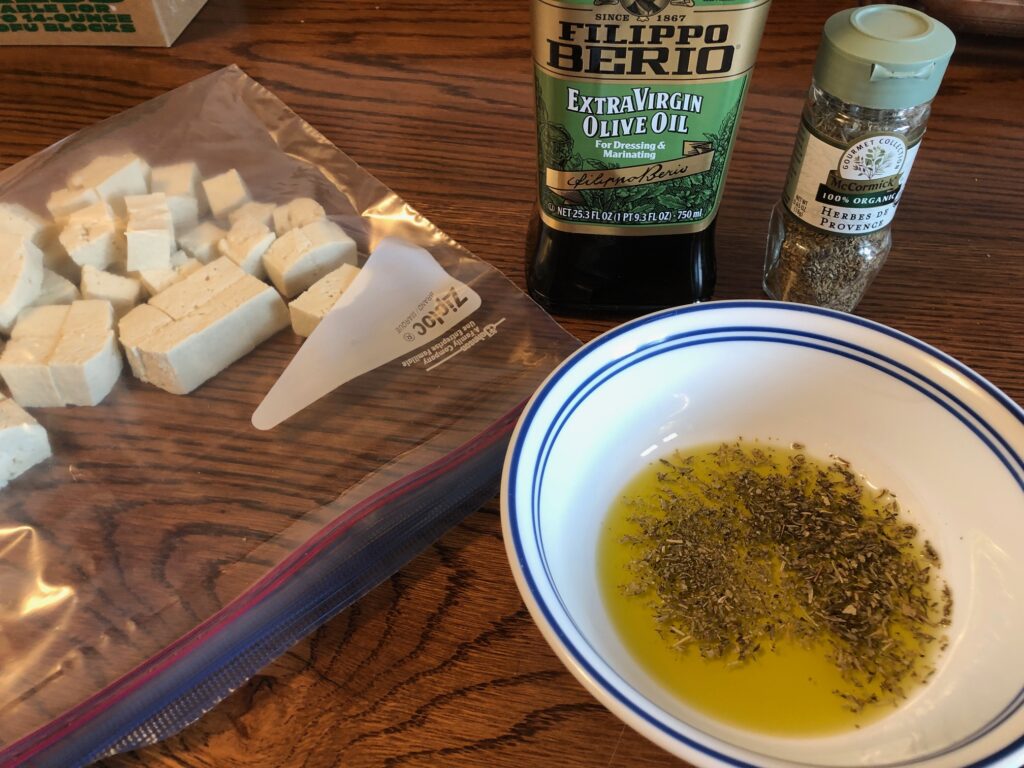
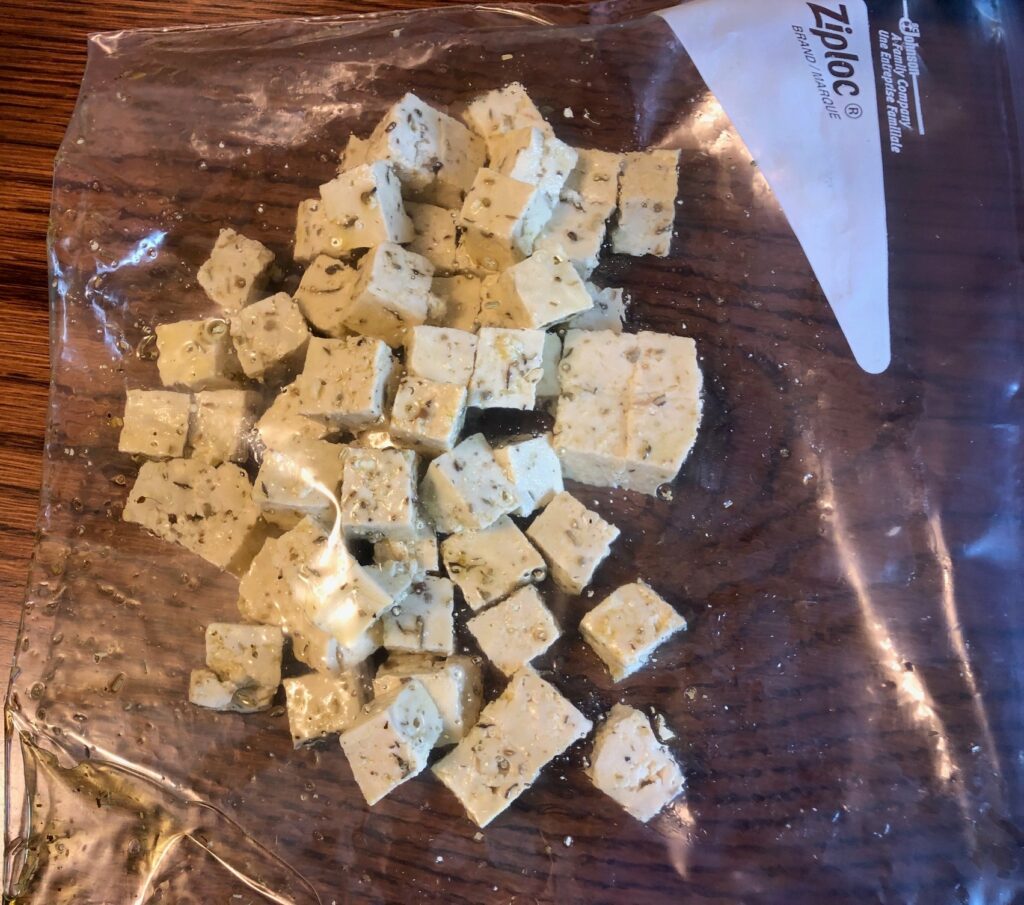
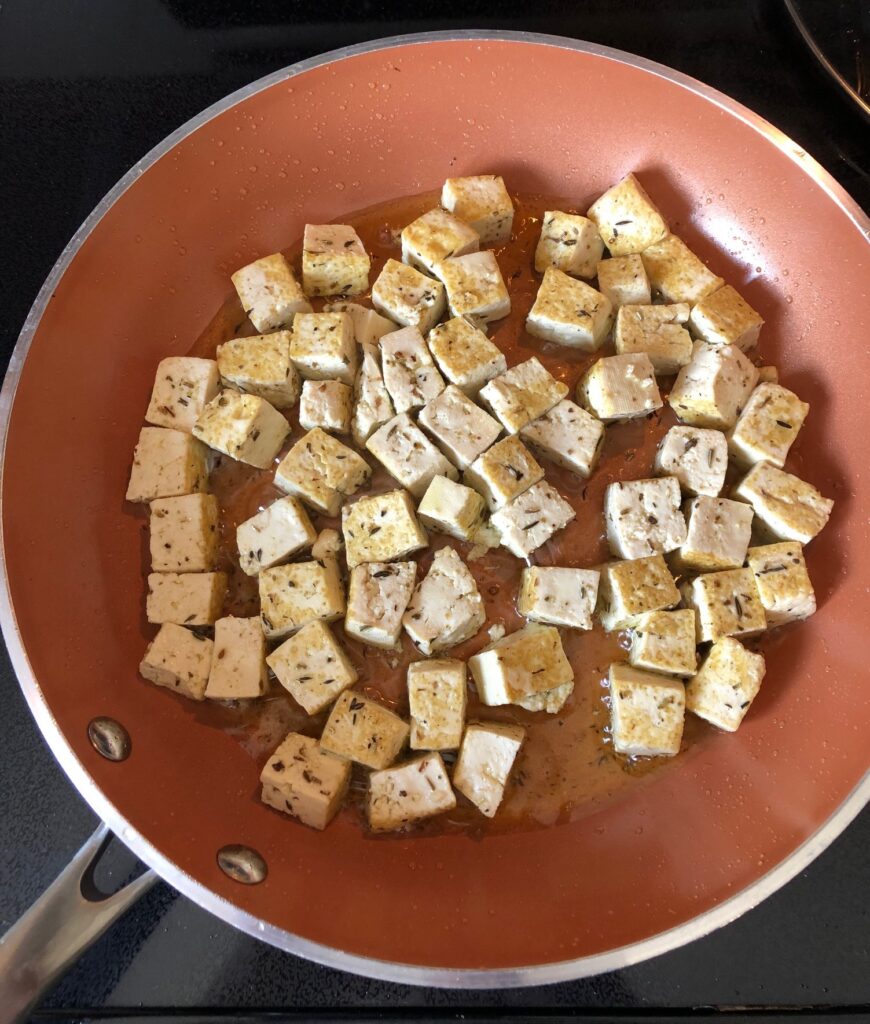
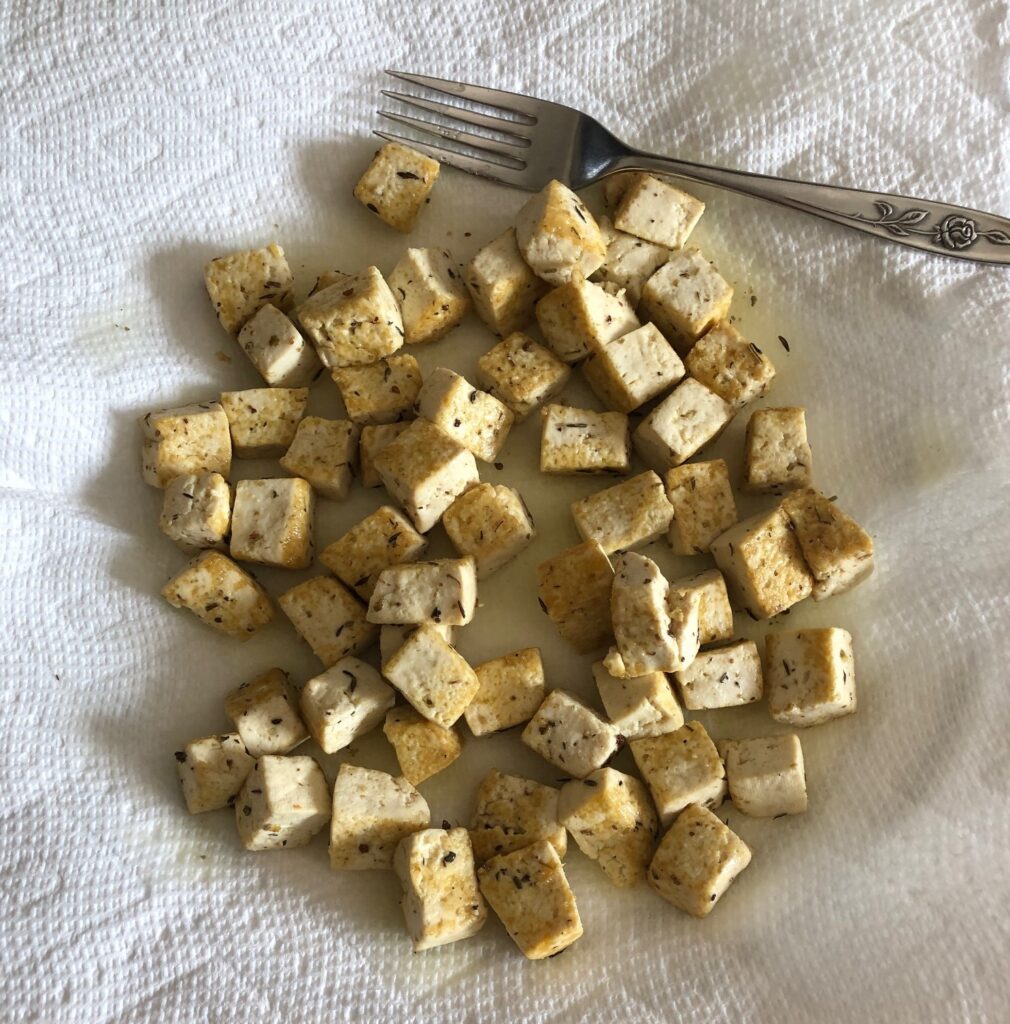
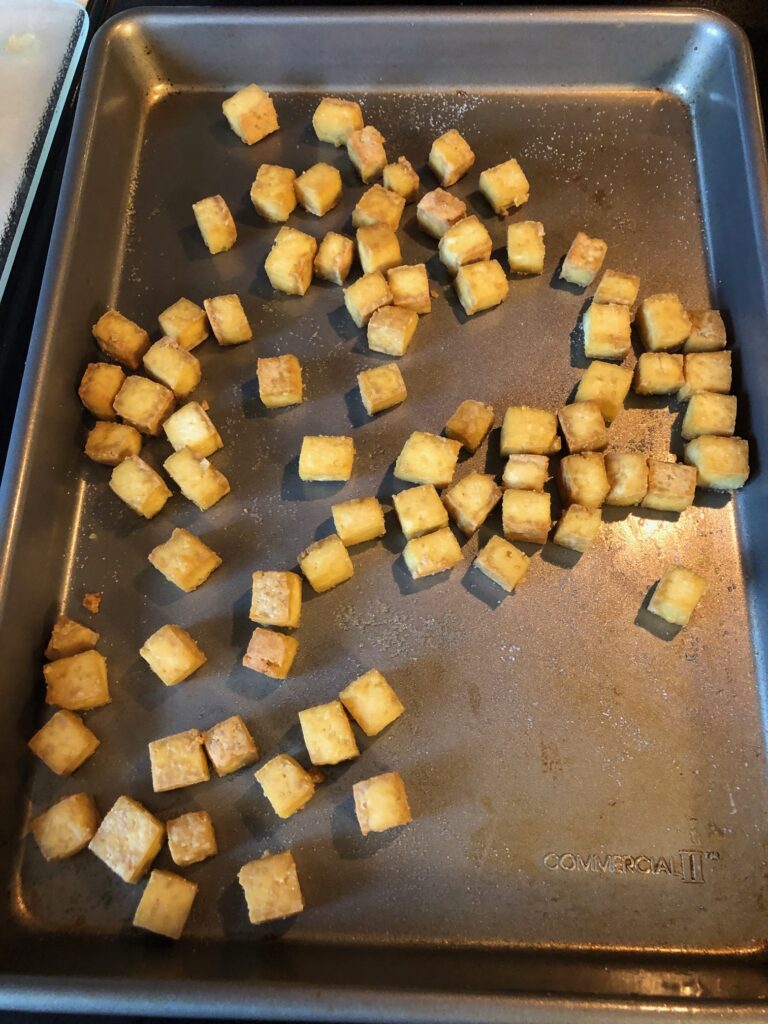
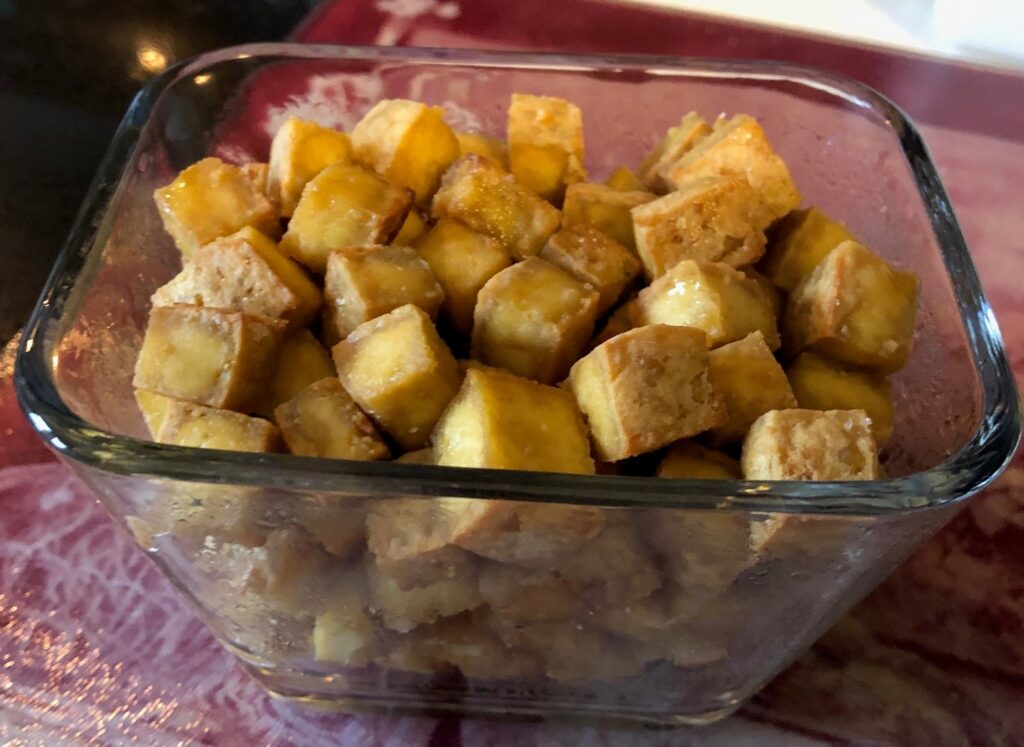
This time I cut the block into larger cubes than the first time.I mixed Italian herbs with olive oil and poured it into the bag of cubes. After gently mixing them up to coat each cube, I put the bag in the refrigerator for 2 hours.Cubes were now soaked with oil and herbs.Into the frying pan with a little more oil.After 10 to 15 minutes on medium heat, the cubes were browned but still soft enough to stab them with a fork.Drained on a paper towel and sprinkled with salt they tasted pretty good right out of the pan!
These cubes are still soft enough to put a fork through them. I think this way of cooking allows me to keep from overcooking them. Now they’re ready to put on a salad or add to soup! Give it a try!
It all seemed so simple! For someone like me, with a not-so-refined palette, the first time I try a new food I depend on the instructions in a recipe to do it right. Adding tofu to my “plant-based” meals seemed like a good idea, even though I’m still including meat and a few eggs in my meals. However, I have no baseline experience about how tofu tastes, how it cooks and even where to buy it in the grocery store! This adventure was a learning experience!
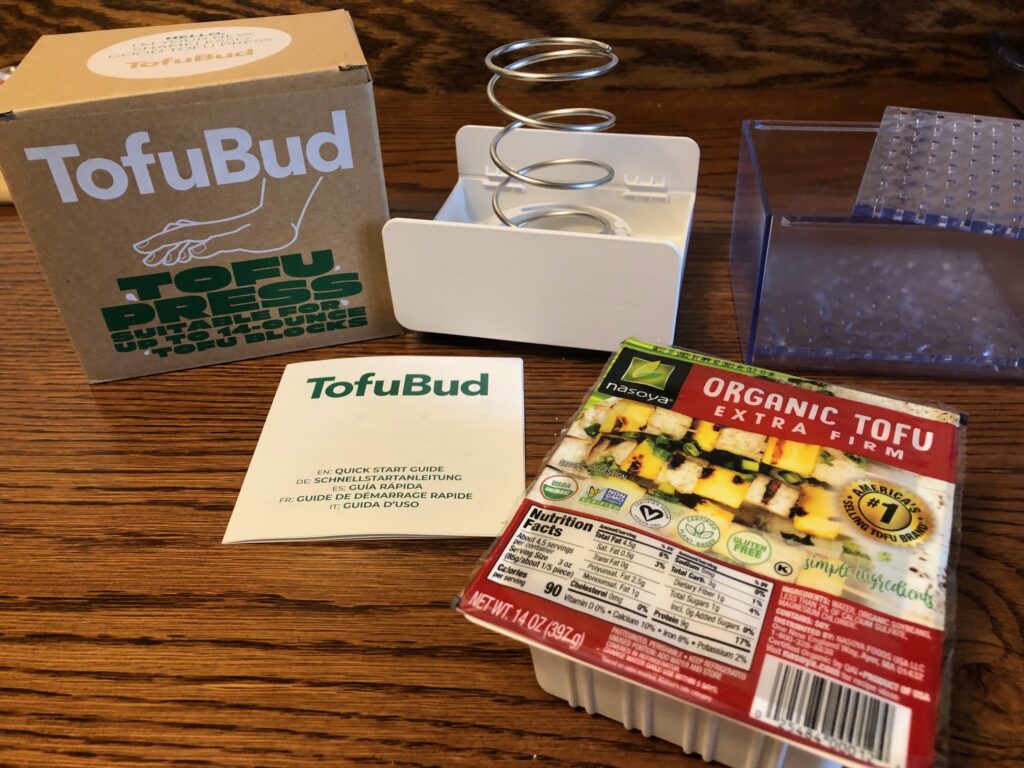
I read a little online about the different kinds of tofu…from silken to extra firm. What I wanted was flavored cubes of tofu that I could put on a salad. It appeared I needed to start with a firm or extra firm block of tofu. Since I really wasn’t interested in figuring out how to press it with a stack of heavy books, I ordered a “tofu press” from Amazon.
Instructions to assemble the press. Looks like Lego instructions!The press, assembled with a block of tofu.
Next, I went to the local health food store to find tofu. They didn’t have any at that moment and said I should go to the grocery store and look in the produce section. Who knew!!
I found several choices high on the shelf above the lettuce and near the wonton wrappers. I took a guess and brought one home.
The package said it was already drained and it was very firm.
I unwrapped the block and put it in the press…even though it said on the package that it had already been drained. At least I could see how the press worked. After 20 minutes or so, there was about a tablespoon of water in the bottom of the press. I dumped out the water and removed the block.
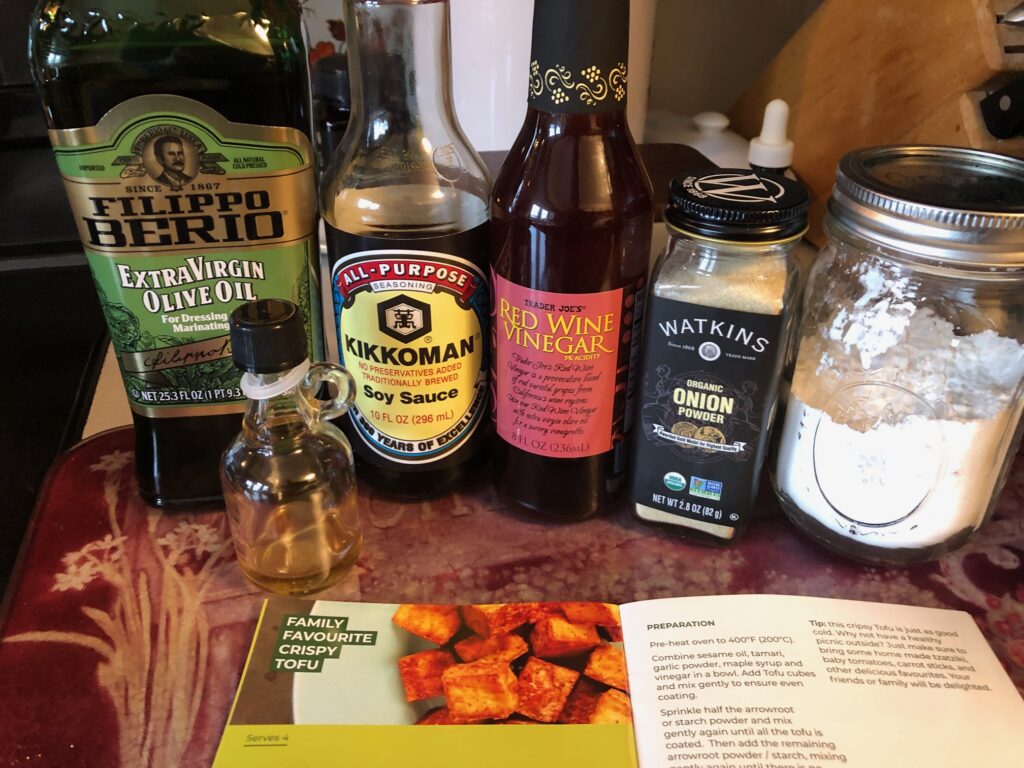
The press came with a little cookbook with a few recipes. The first recipe was for crispy tofu…sounded exactly like what I wanted.
I substituted onion powder for the garlic powder (because I had it and I don’t care for much garlic flavor).
I thought I bought Rice Wine Vinegar…and it turns out I bought Red Wine Vinegar. Oh well. I did have maple syrup and soy sauce. I used olive oil instead of toasted sesame oil. Probably with all these substitutions the tofu won’t taste right.
These were the ingredients I had to work with. I didn’t realize I had no cornstarch in the kitchen, so I raided my soap-making stash to grab the jar of cornstarch.
With all the substitutions, who knows what I’ll end up with!
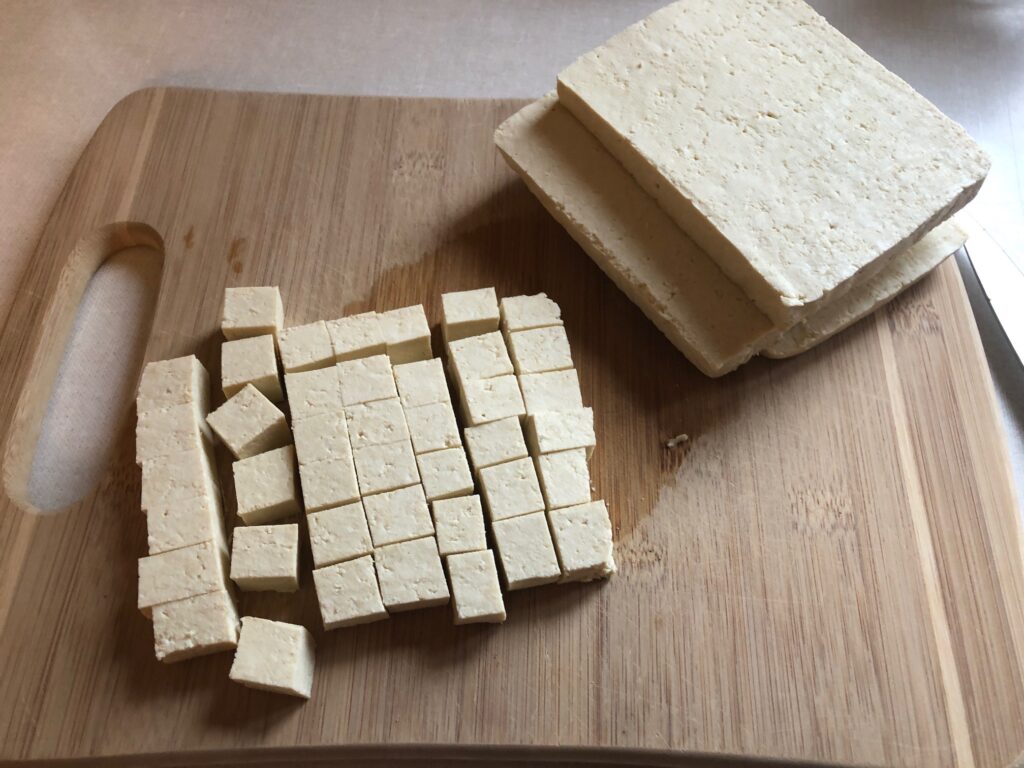
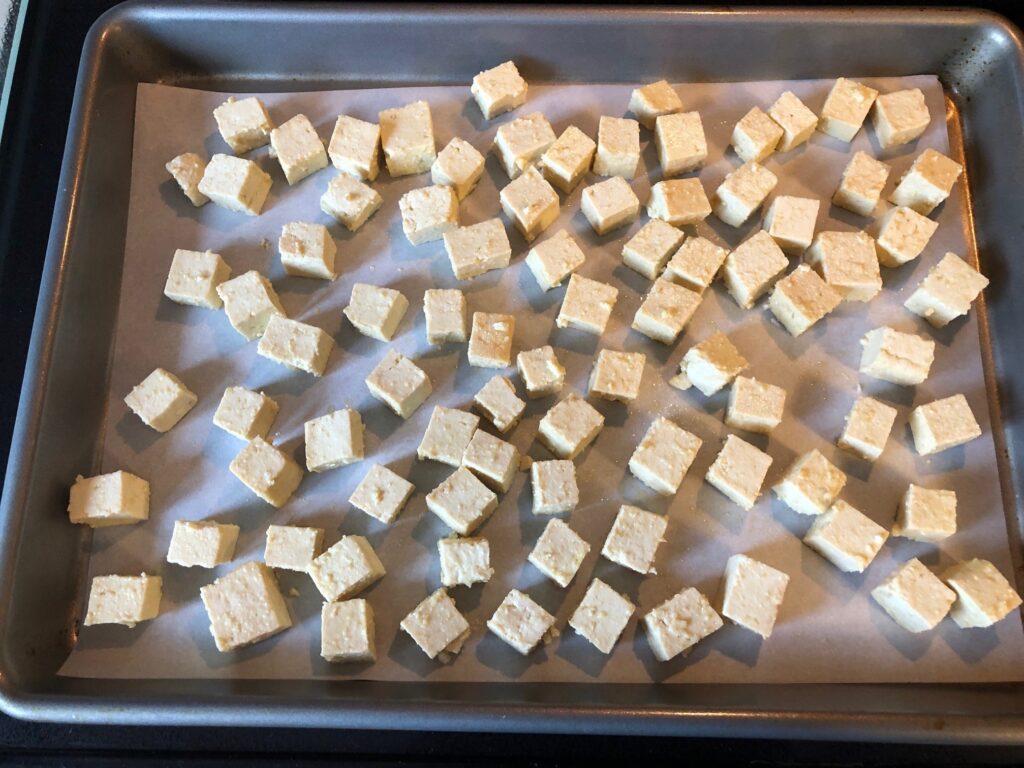
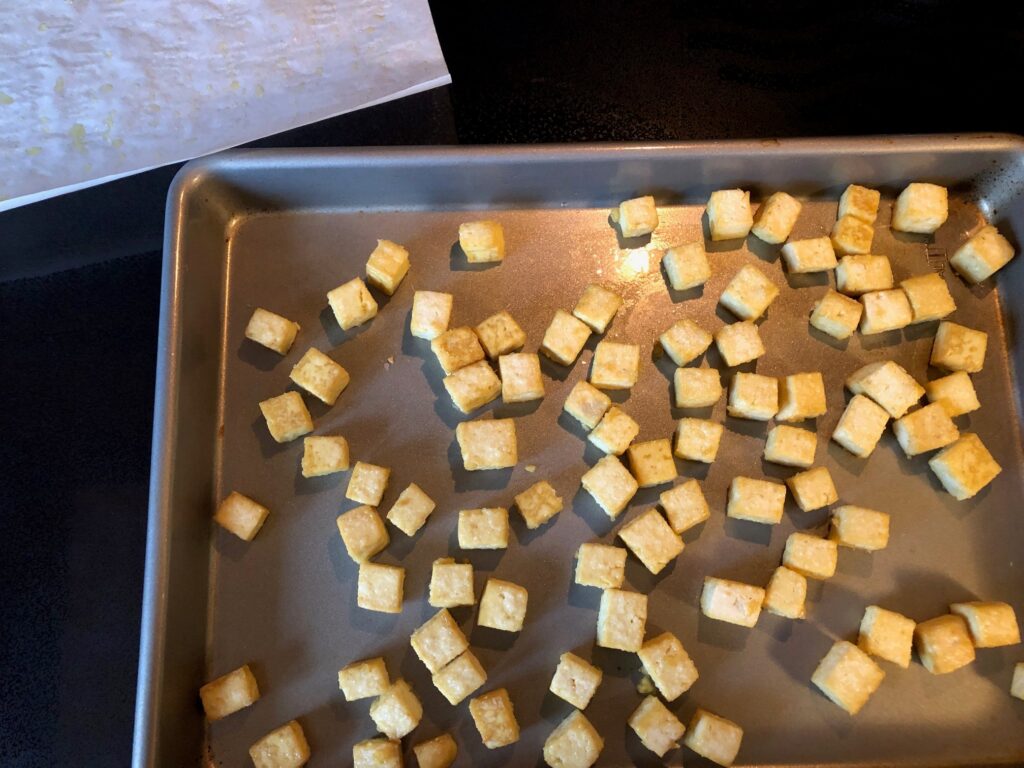
I cut up the tofu into cubes and tossed them in the bowl with the seasoning oil mixture.I spread them out onto parchment paper and put them in the 400-degree oven.When it was time to flip them over, I realized the parchment paper was useless. It slid right off the pan. I just took it off and finished the baking time.Out of the oven they had shrunk and were sort of crispy but got really hard as they cooled.They really had very little flavor and were so firm I couldn’t get a fork in them.They were sort of like very firm croutons on my salad.
NEXT TIME I will:
Cut bigger cubes
Add more seasoning
Reduce cooking time
I guess I need to read more recipes to figure out the seasoning. Stay tuned for the second attempt to cook tofu!
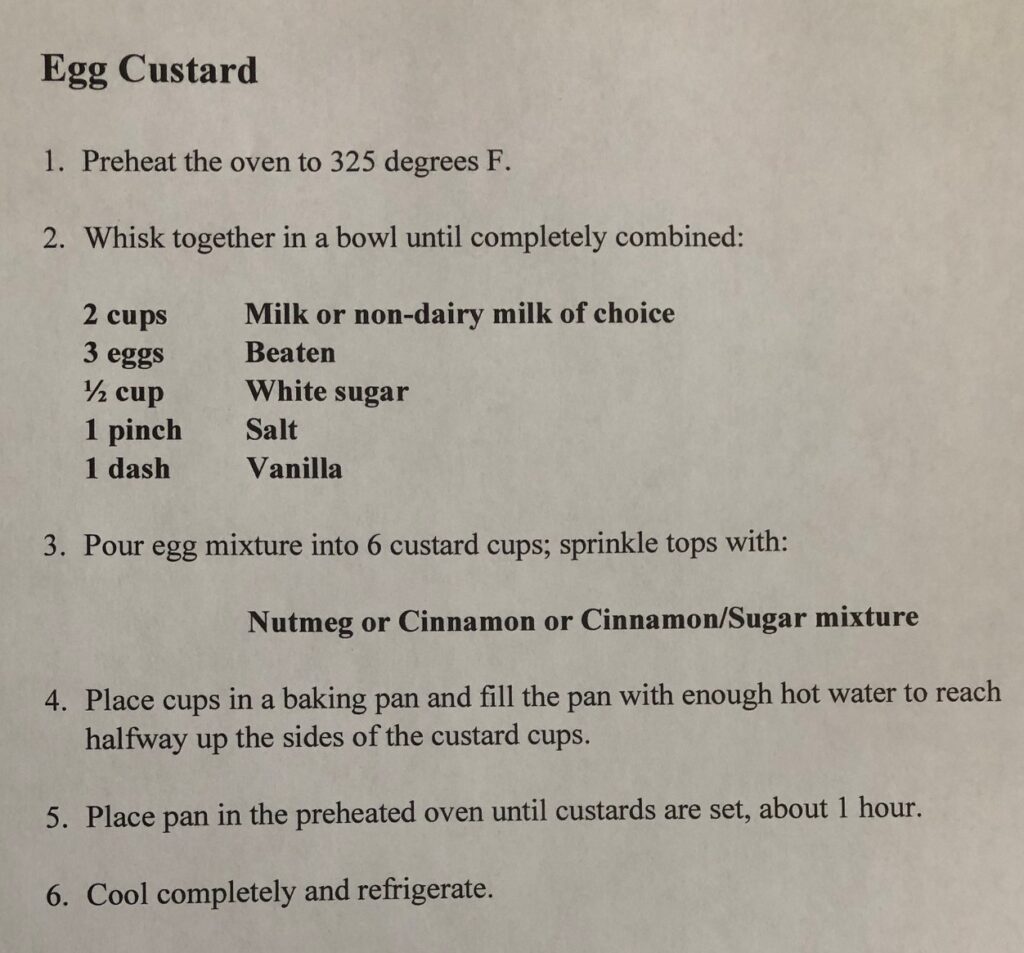
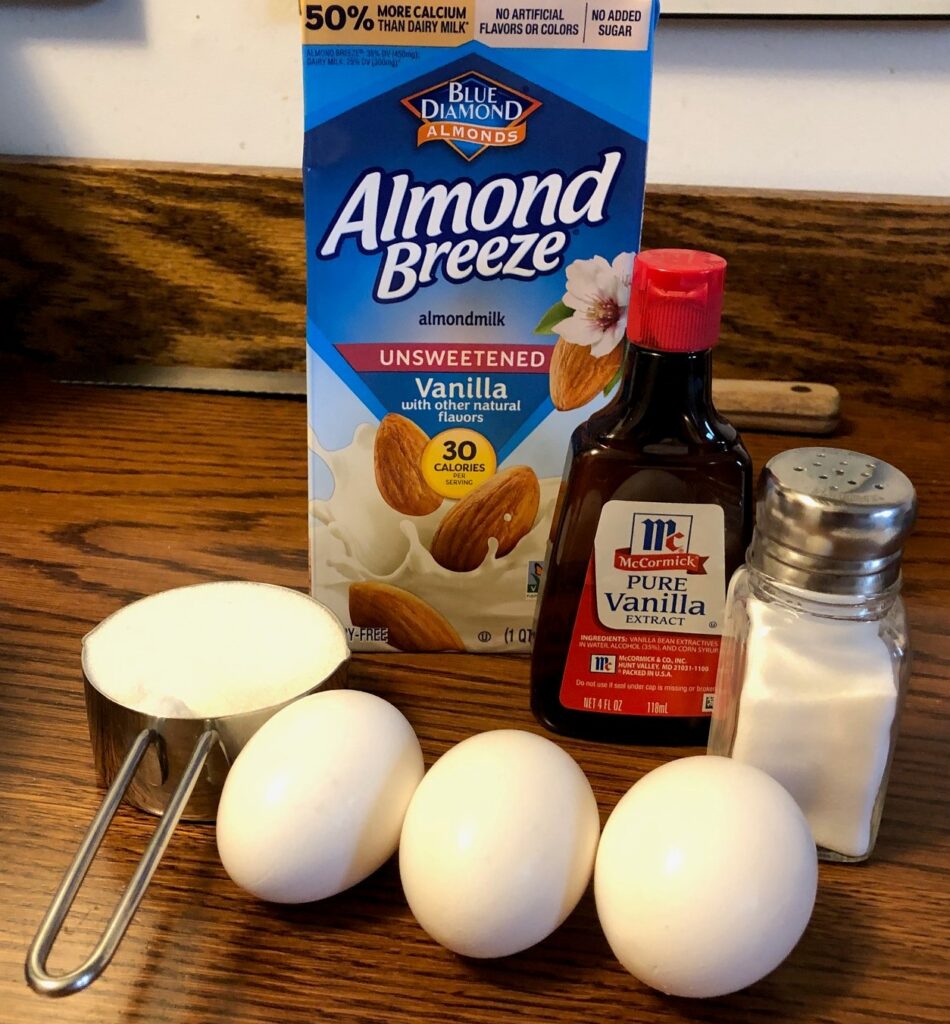
One of my fondest memories of my mother’s cooking was her baked egg custard. It hit the spot on a cold winter day! For the last several years I didn’t even want to think about custard since eggs and dairy were off limits to me. I now seem to be able to tolerate an occasional egg in my diet, while dairy products are still a problem. Bert was interested in having some custard around now and then so I thought I’d dig out the recipe.
I wasn’t sure if the recipe would work if I used Almond milk so I made two batches…one with 2% milk and the other with almond milk.
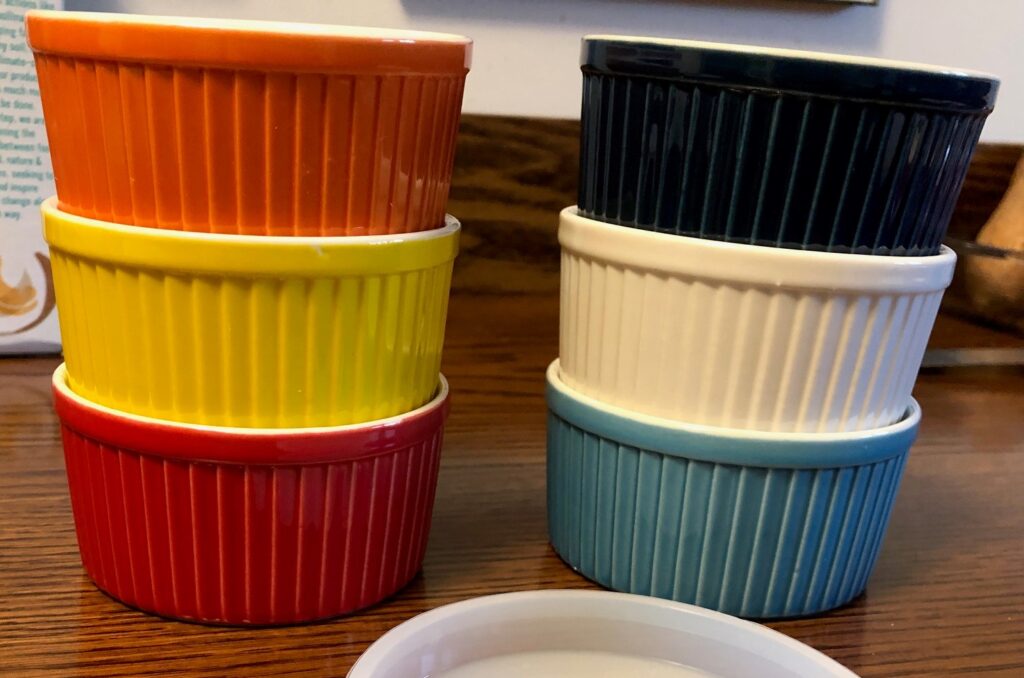
Of course, to make this recipe I needed some baking dishes or custard cups. I can’t seem to find the ones I had that has plastic lids…they really helped because I could stack them in the refrigerator. Luckily, Amazon sells them! I ordered two sets last week and now I can make custard!
The picture from Amazon.
Here is the recipe:
The recipe is pretty simple. The first decision was to color coordinate the cups so I would know which ones used my almond milk. I didn’t want to accidently eat the one made with real milk.
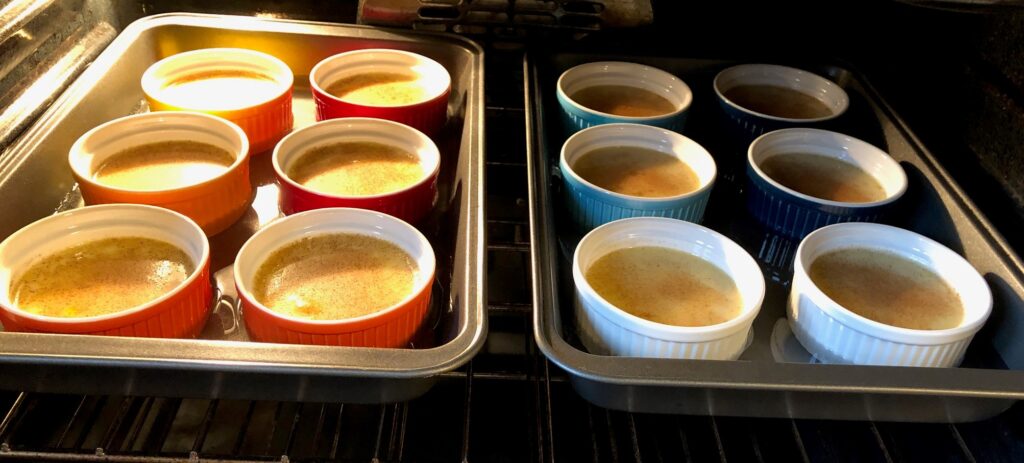
I ended up with the real milk custards in the red/orange/yellow cups and my almond milk custard would be in the aqua/navy/white cups.
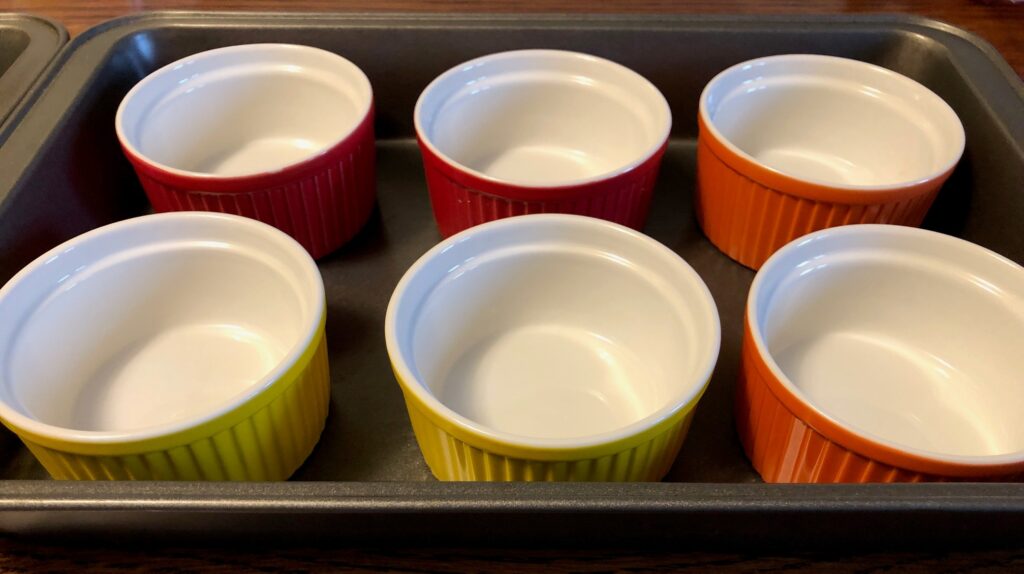
Next, I had to make sure the 6 cups fit into a cake pan before I filled them with custard.
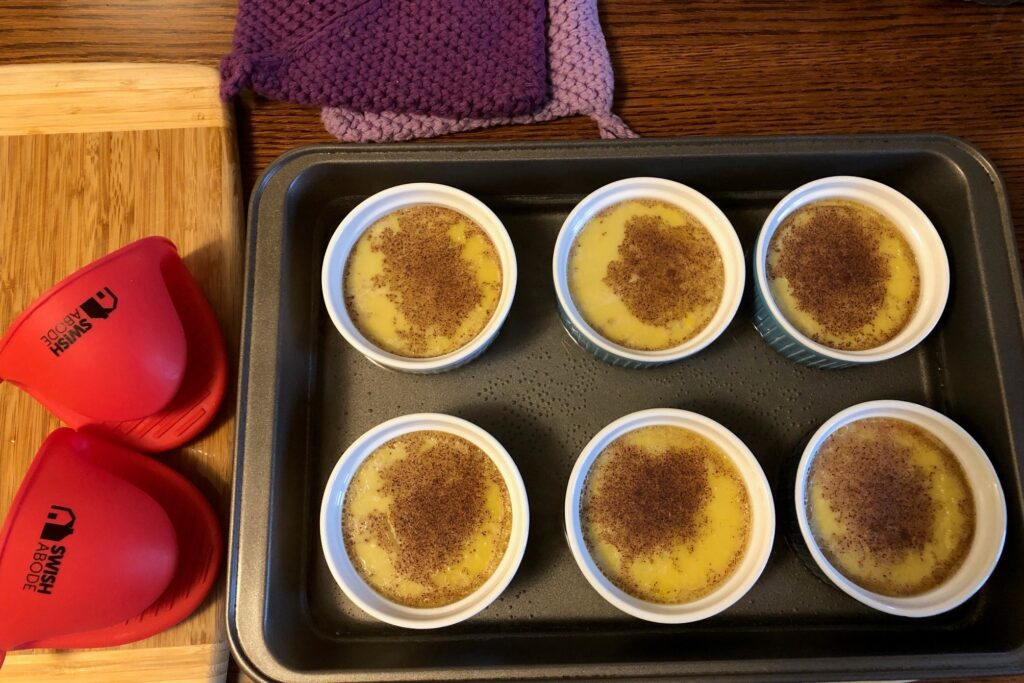
I whisked the ingredients for the real milk custard in a bowl, transferred it to a 4-cup measuring cup and filled the 6 cups. I sprinkled a little cinnamon/sugar on top of each cup. Then I added hot water to the pan and put it in the preheated oven.
Next I mixed up the dairy-free custard.:
Ingredients for the dairy-free custard.Both pans fit side by side in the oven.
When I took the pans out of the oven, I remembered my dilemma from long ago…how to easily lift the hot cups out of the pan filled with water. When I used regular hot pads, I could not get a good grip on the hot cups. I thought I’d try the silicone hot pads that came with out air fryer. They were perfect! Sort of sticky, they gripped the cups and did not get soggy from the hot water.
The almond milk egg custard came out just fine…yea! Now we both have a special dessert this winter. Give it a try!