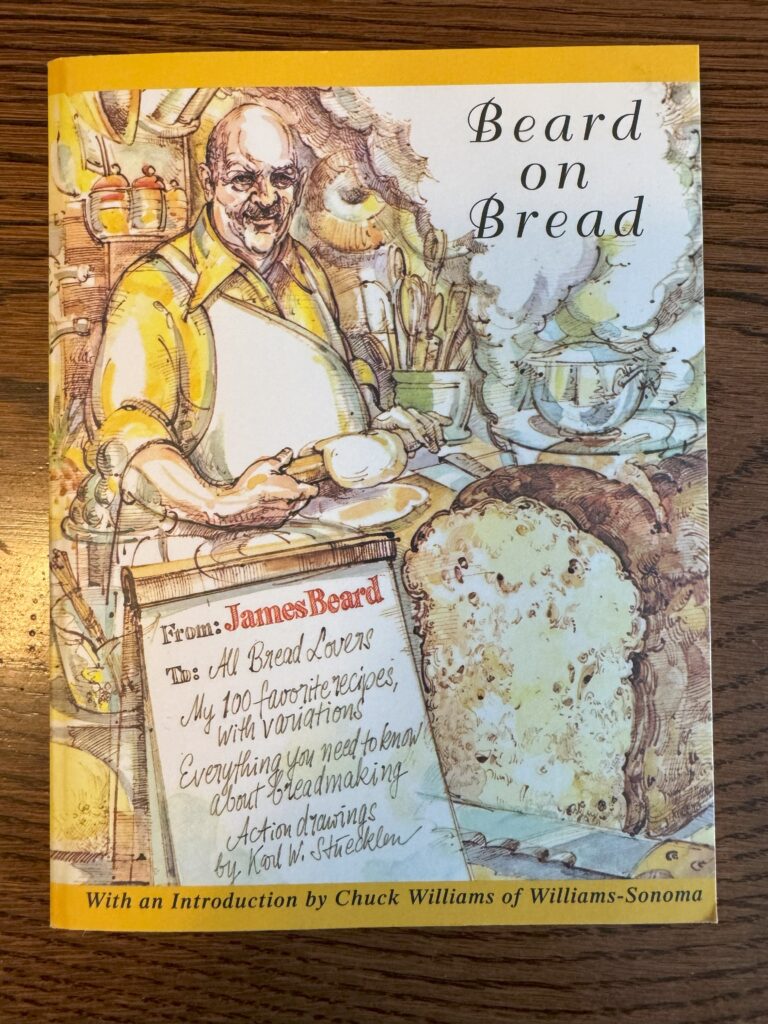
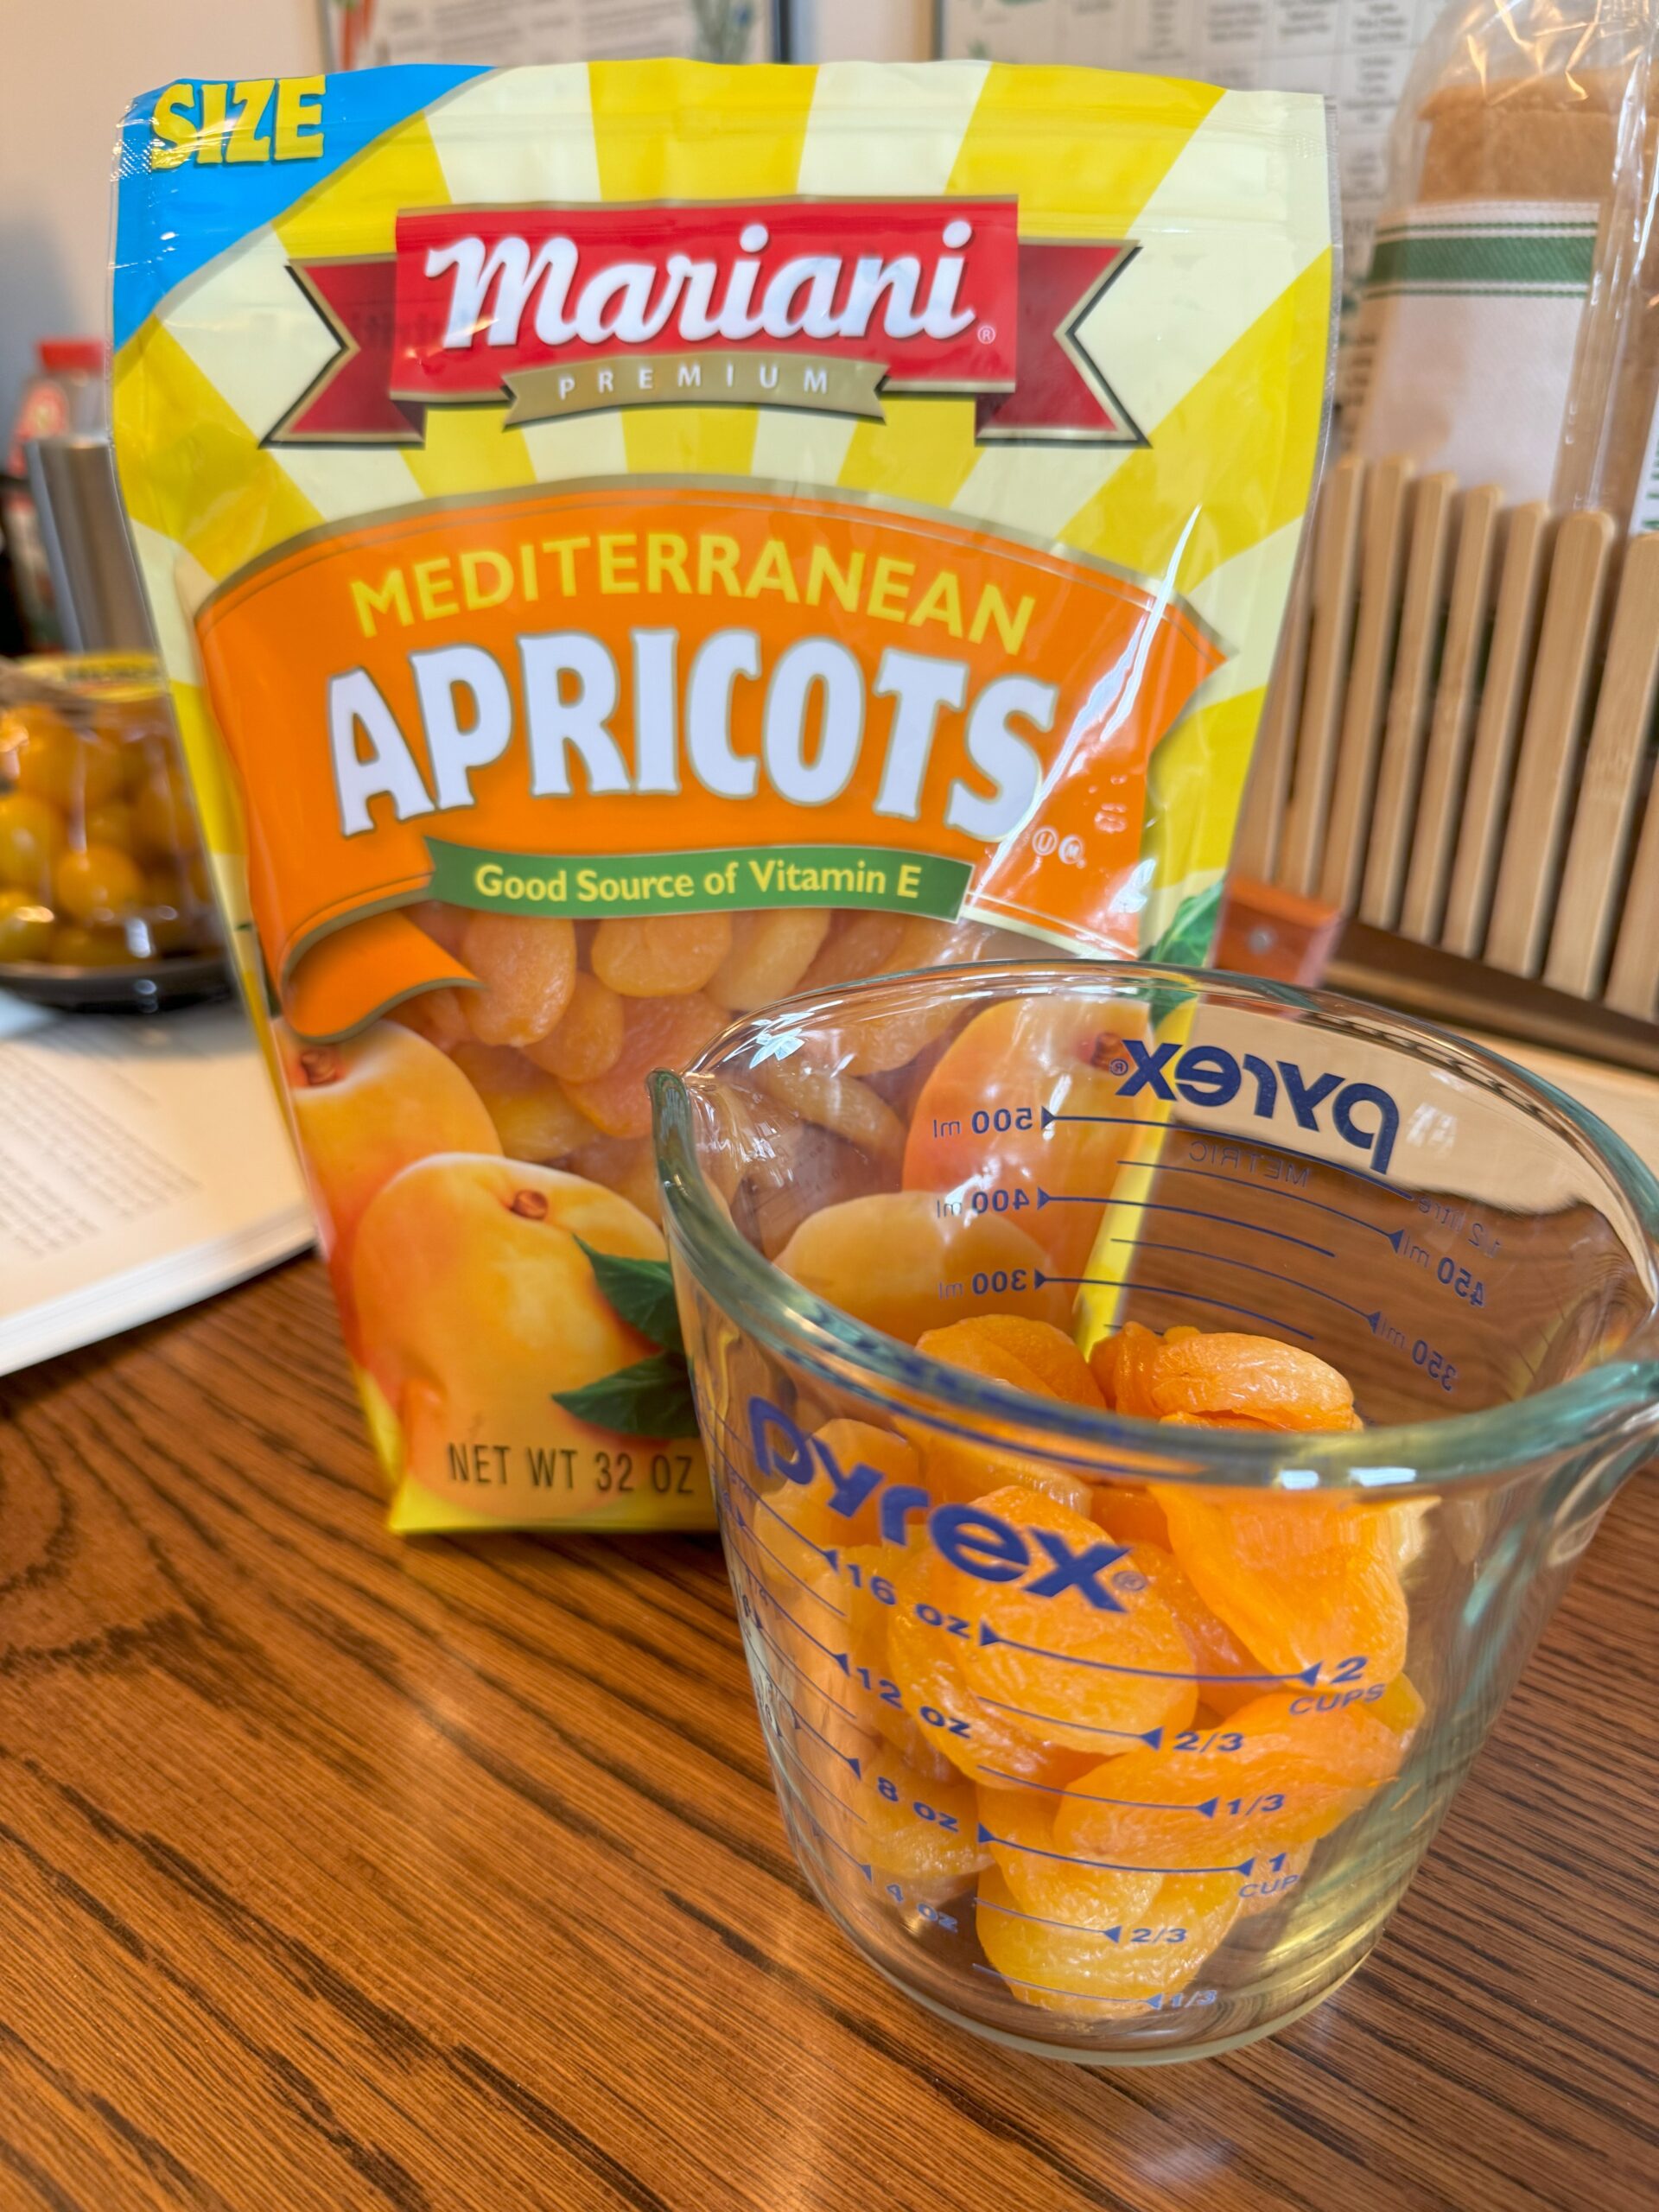
On our trip last weekend to southern Pennsylvania, we enjoyed a delicious addition to our breakfast spread…Apricot Bread! I knew about banana bread, blueberry bread and raisin bread but had never had apricot bread! It was a delicious, colorful bread!
I was told the recipe came from a cookbook written by James Beard…Beard on Bread. I just so happened to have that book on my shelf!
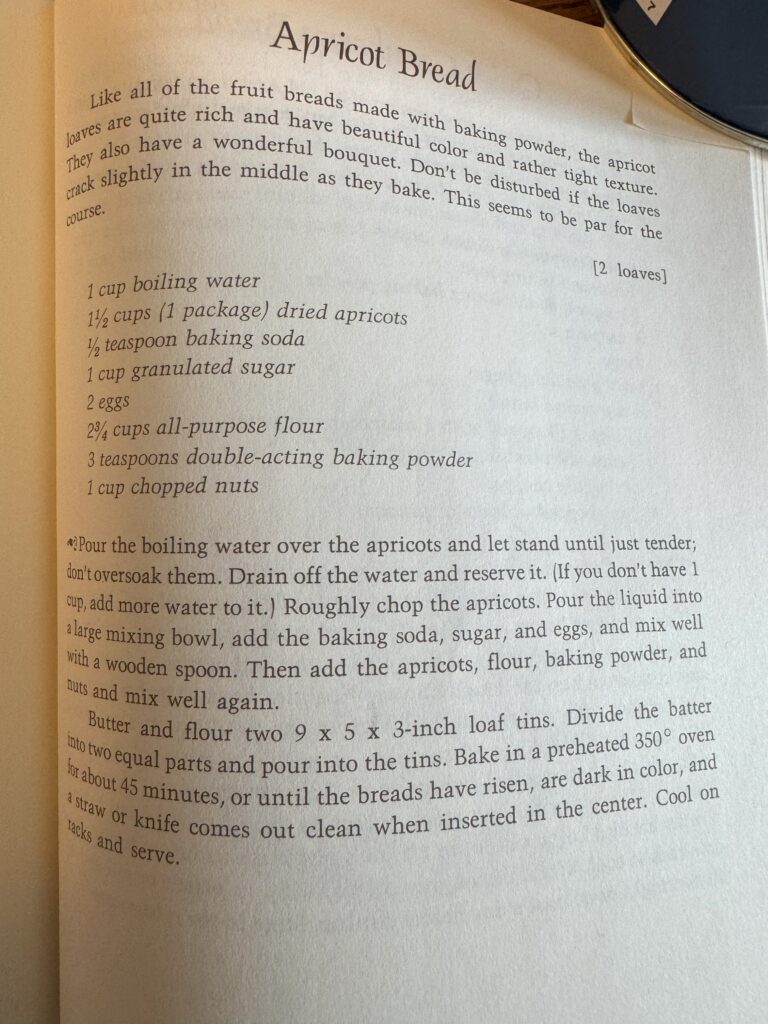
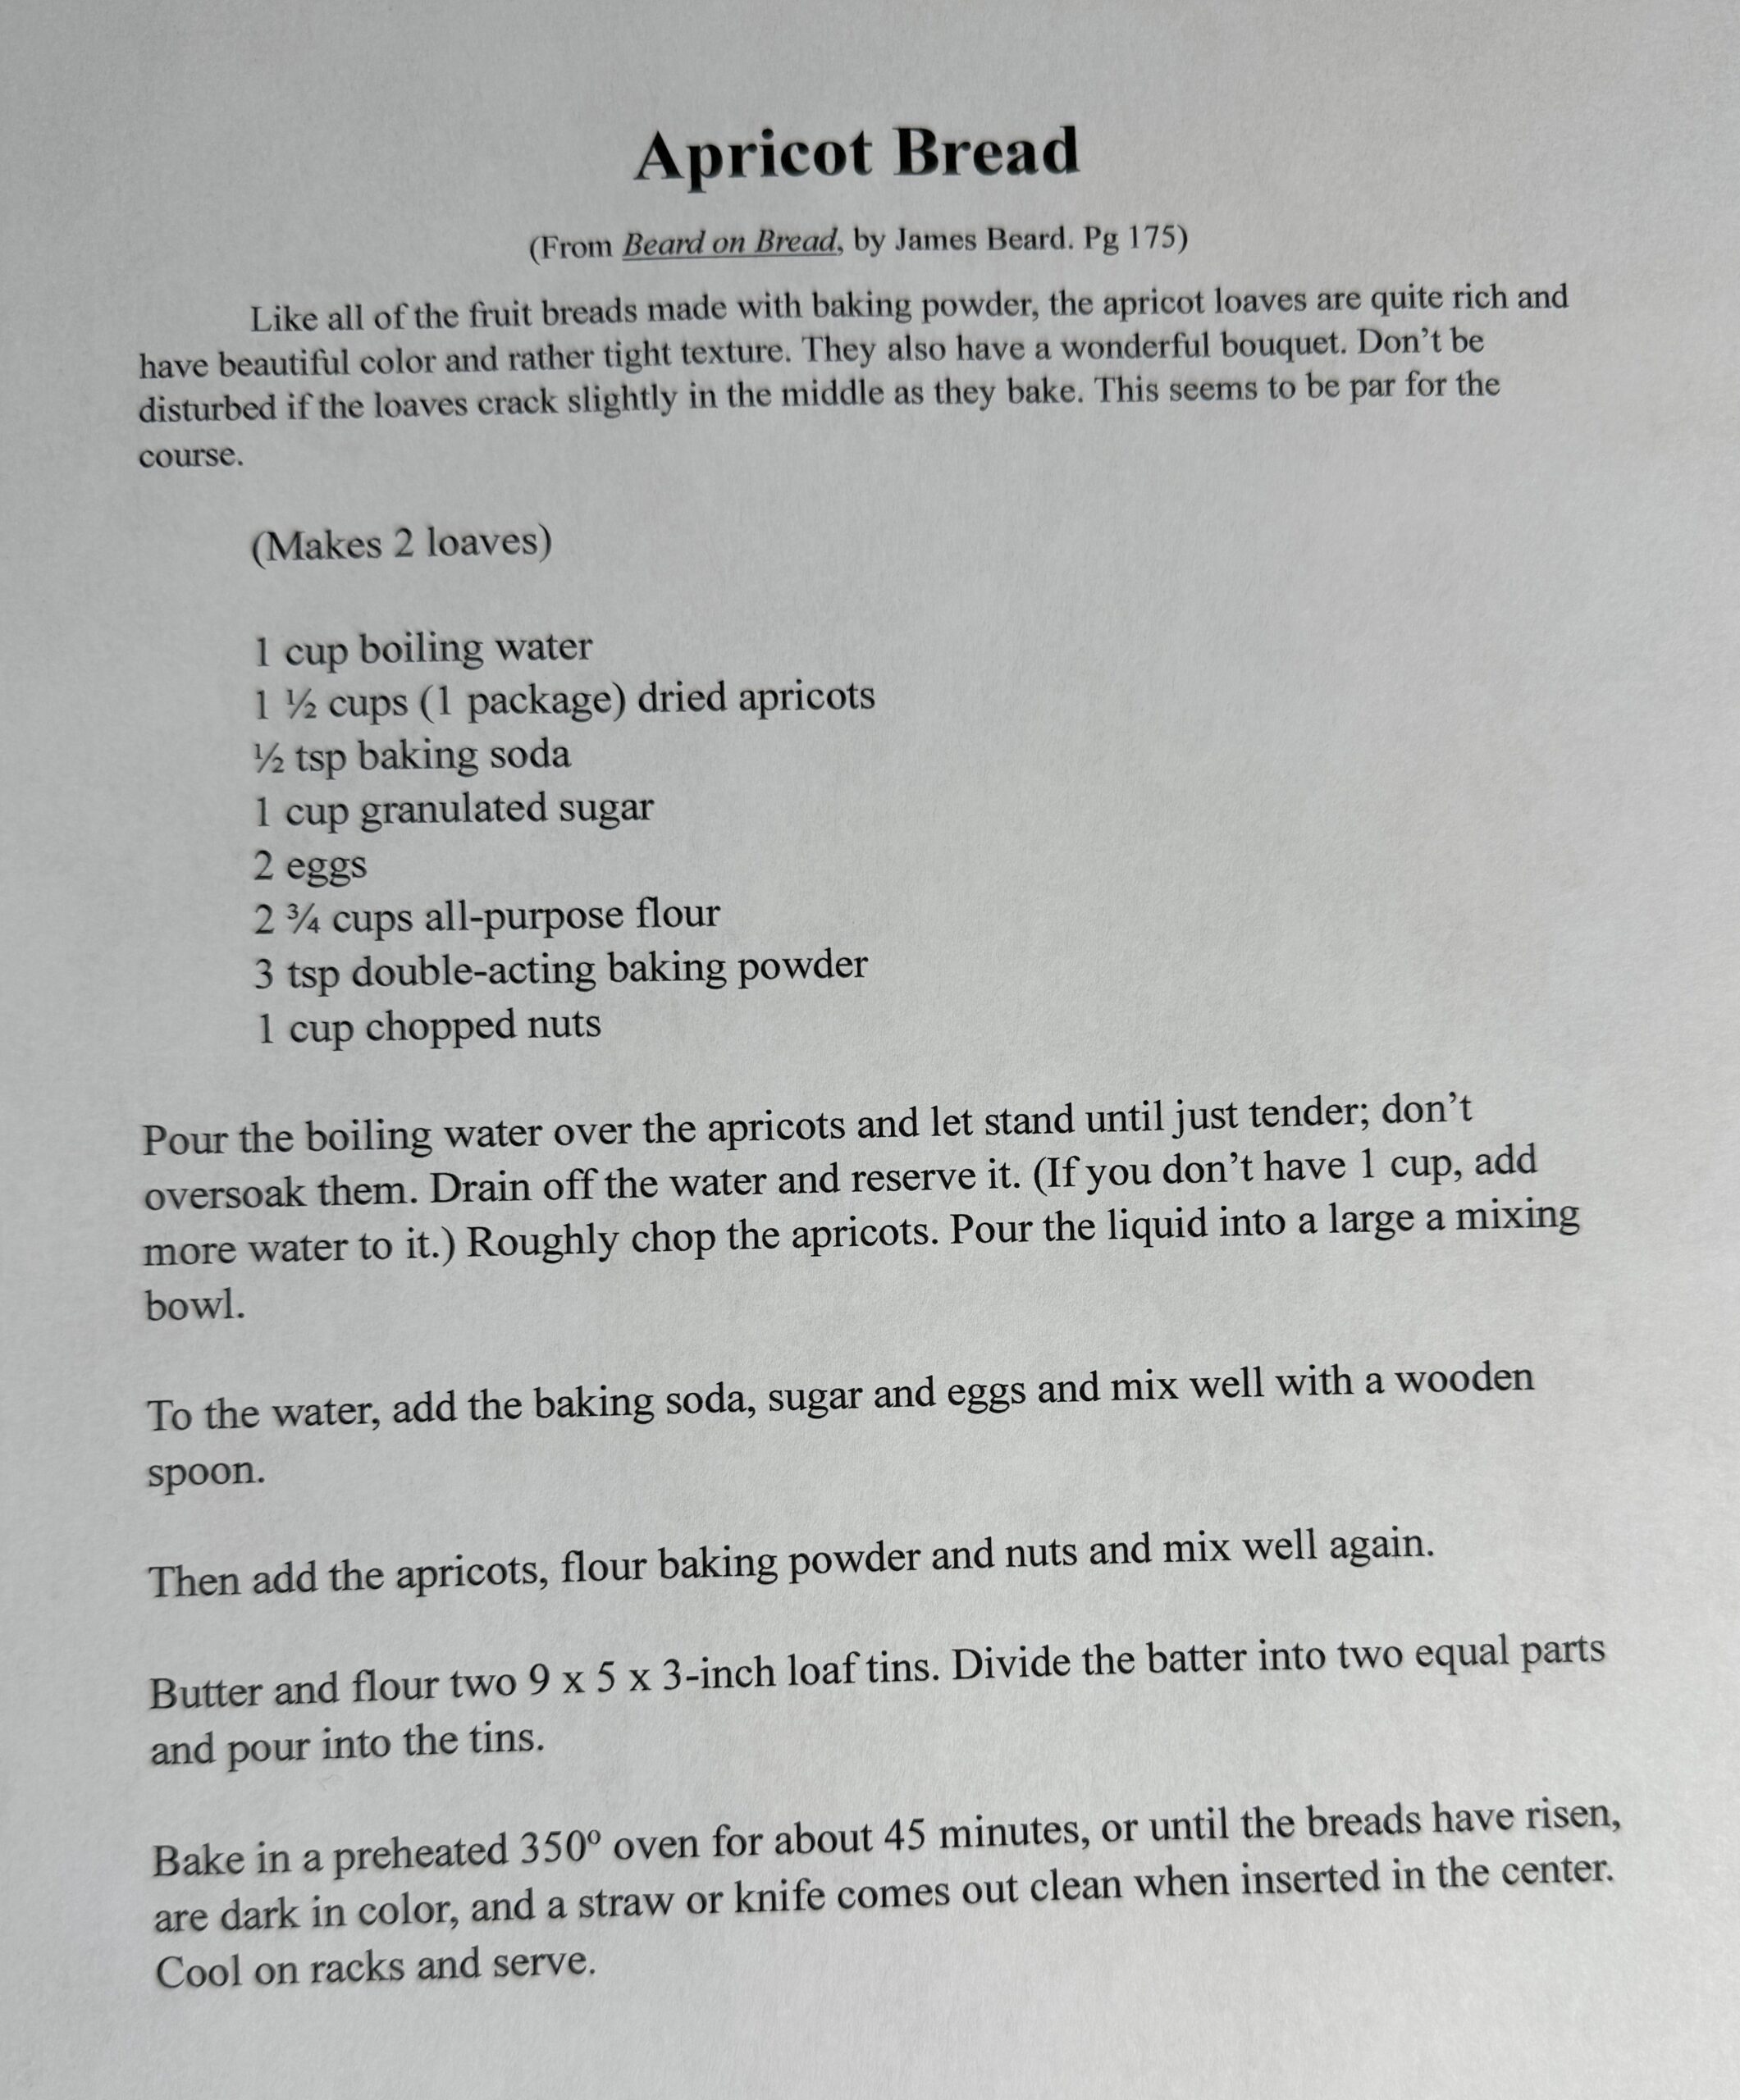
I typed out the recipe because the small paperback would not lie flat and I couldn’t weight it down without covering the recipe! (It’s on page 175, if you also have the book.) I’ll include a photo of the recipe below.
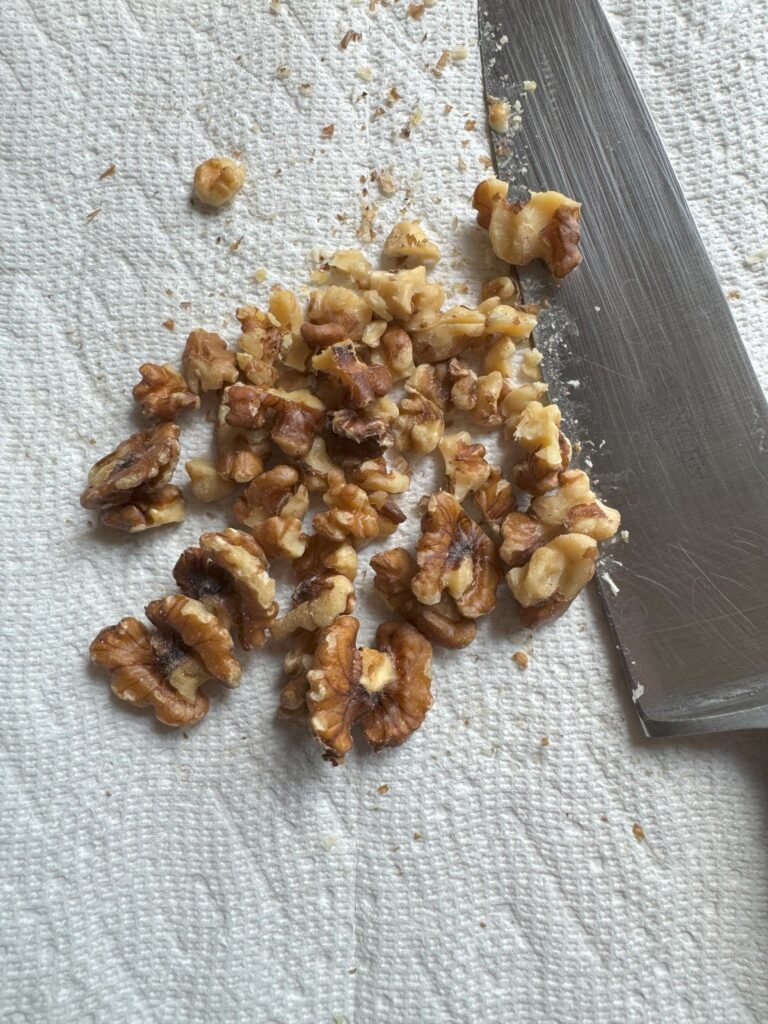
When I start a recipe like this…with several ingredients needing additional preparation, I try to prep them before I start…in this case chopping the nuts and soaking the apricots.
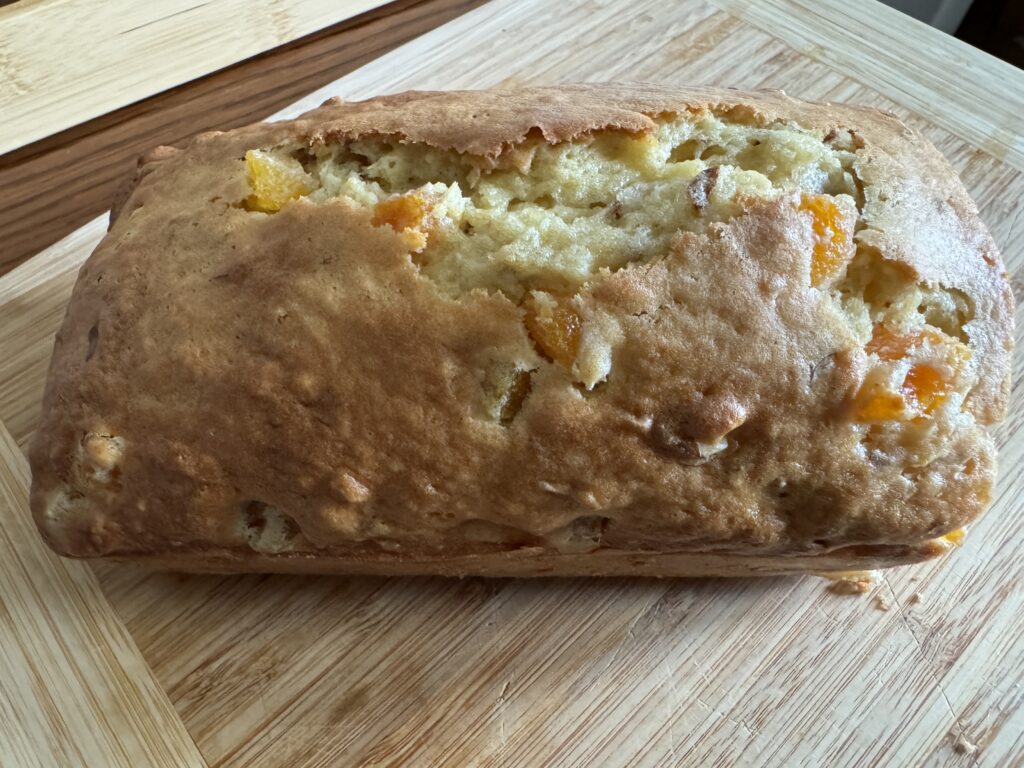
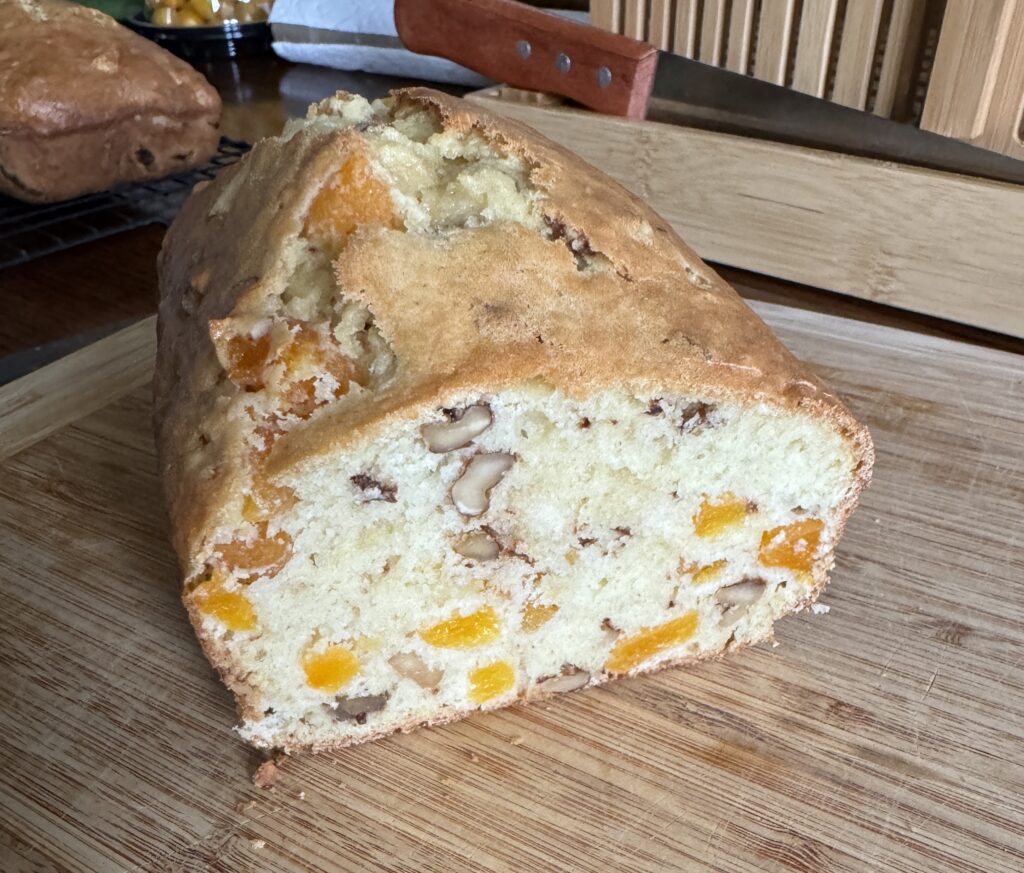
I did not take pictures of mixing the bread up. By the time I thought of it…it was mixed! It was really pretty simple and made the whole house smell good!
It made a pretty loaf. Perfect for breakfast or dessert! Give it a try! Enjoy.
(The dreary rainy weather is prompting me to bake bread today! I especially wanted to remind you about this recipe that starts with grinding the wheat to making the bread. I always feel like The Little Red Hen in the children’s book! This was posted in May of 2022, so forgive me if you remember it. Sometimes I just need to do it again!)
Baking bread has always been my favorite activity when I want to do something that reminds me of my mother. I learned the “feel” of a well-kneaded loaf of bread when I was young and carried that skill over to my family when I became a mother. When sticky buns made an appearance in my mother’s kitchen, I was always glad I had hung around and could try the first batch.
Fifty years ago, we had few choices at the grocery store…white bread was everywhere. There was much in the news about how white flour had lost much of it’s nutrition by sifting out the wheat germ and bleaching it with chemicals. Of course, then we used wheat germ in cookies and added the bran back to our diets with Bran Cereal! When I cruise the bread aisle today. I’m always struck with how many choices I have of whole wheat and multi-grain artisan bread and buns. However, I still enjoy the process of making my own bread.
I’ve already shared my Oatmeal Bread recipe (https://marykisner.com/marys-oatmeal-bread/) but I’m still struggling to find a good whole wheat recipe that tastes good and isn’t as heavy as a brick. Last week, I did an internet search with “the best whole wheat bread recipe” to see what came up. Lo and behold, a recipe called, “The Very Best Whole Wheat Bread Recipe” was at the top of the list. The recipe was from https://www.fivehearthome.com/. It looked pretty simple so I thought I’d give it a try.
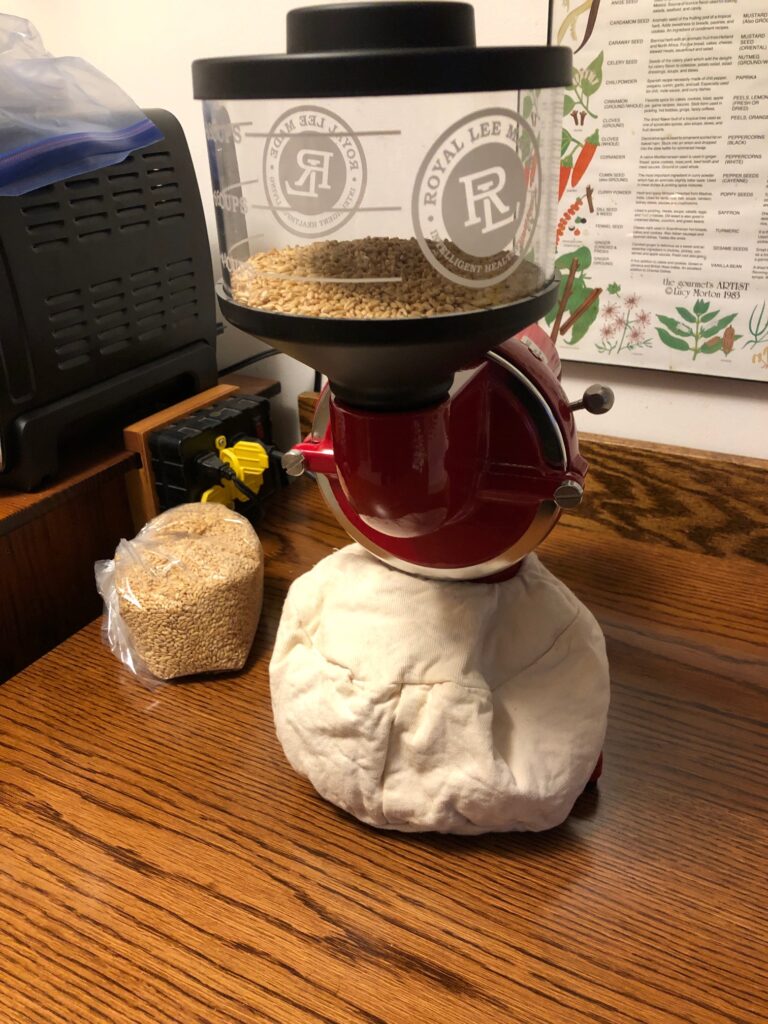
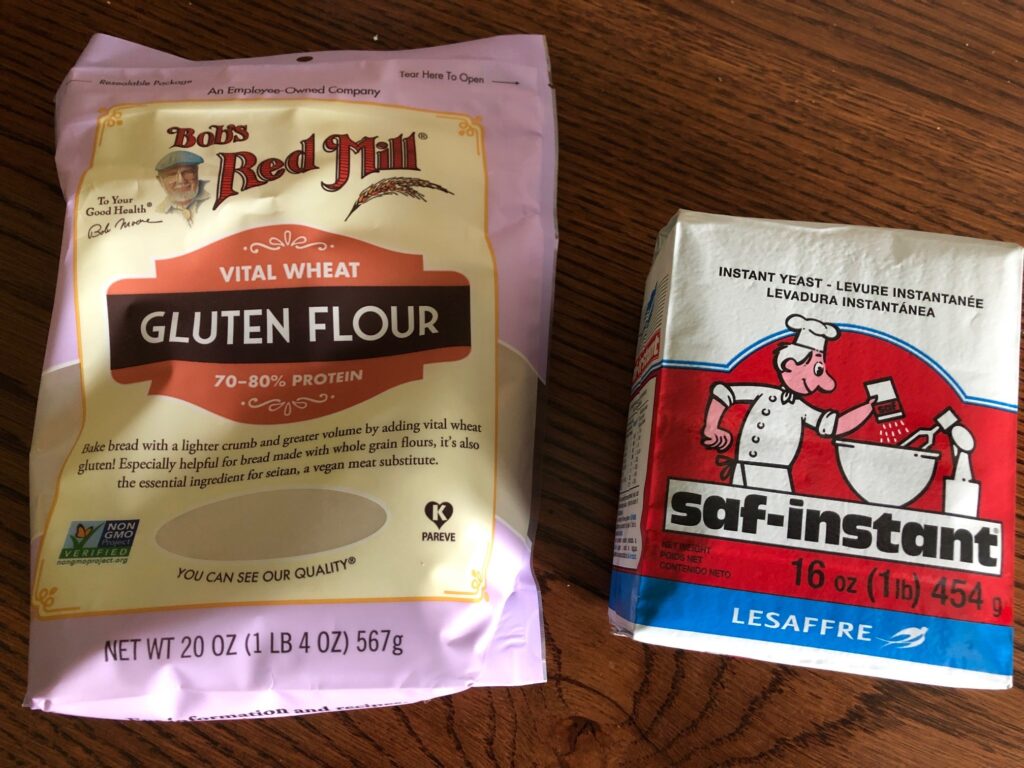
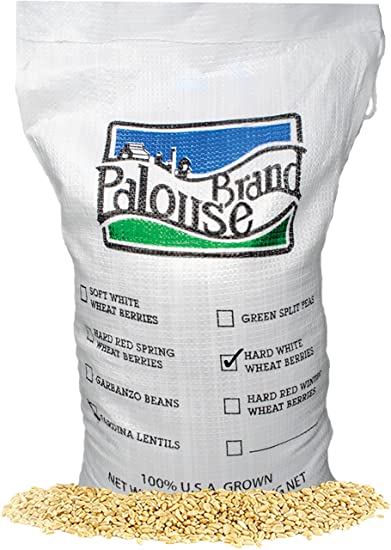
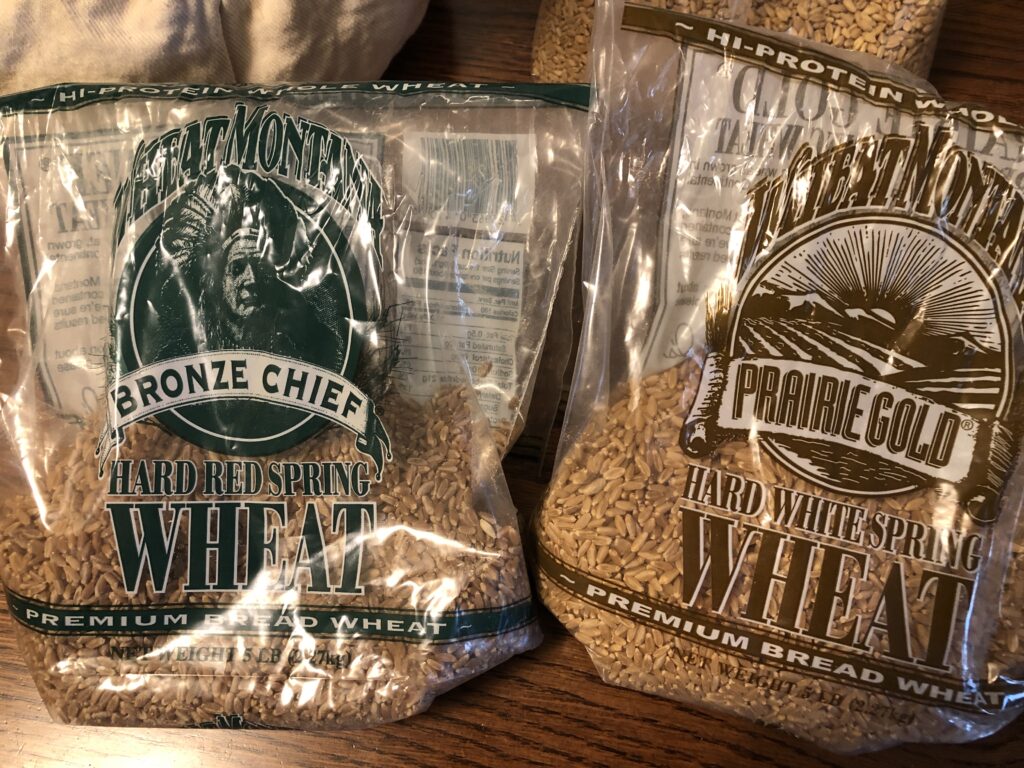
The day before I was going to bake, I went to the health food store and picked up about 10 lbs. of white whole wheat berries and a small bag of Vital Wheat Gluten. This powder will add more wheat gluten so the loaf sticks together better.
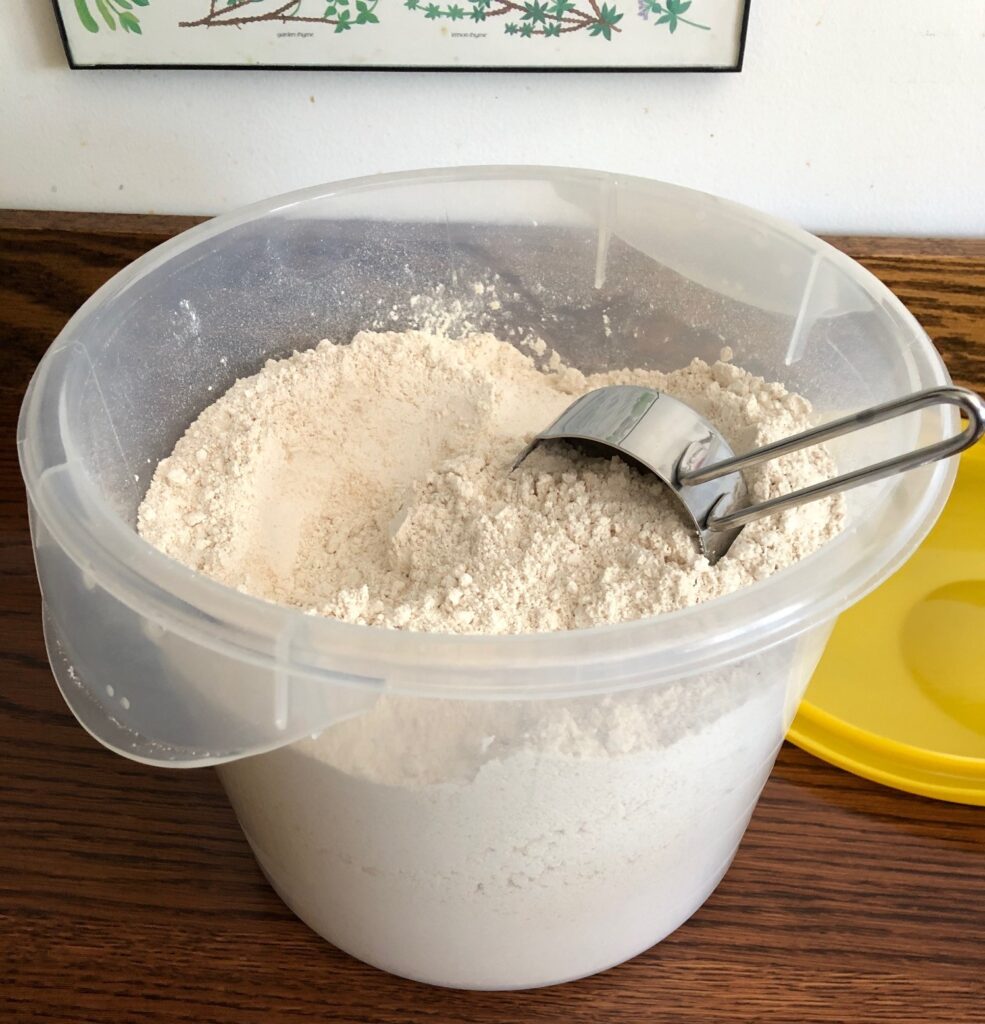
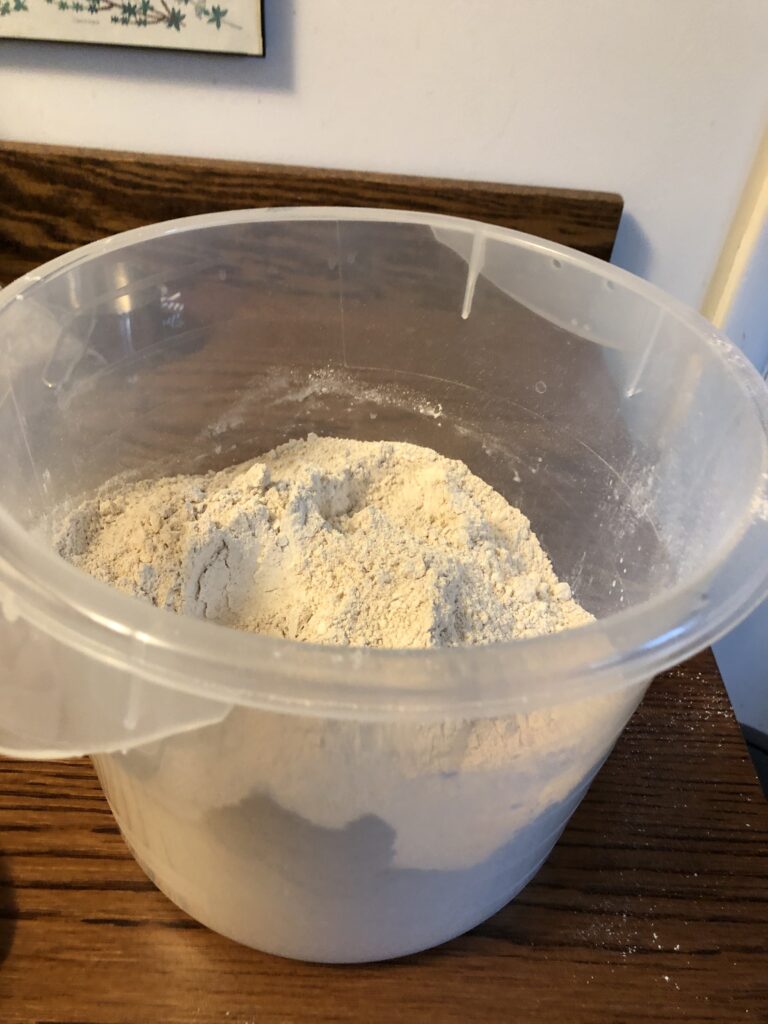
I set up my wheat grinder and got it running. Within an hour or so I had about 10 lbs. of beautiful flour ready to go.
Now I’m ready to bake! I did notice that the grocery store carries King Arthur brand of “White Whole Wheat Flour” now, so I shouldn’t have to grind my own if I don’t want to.
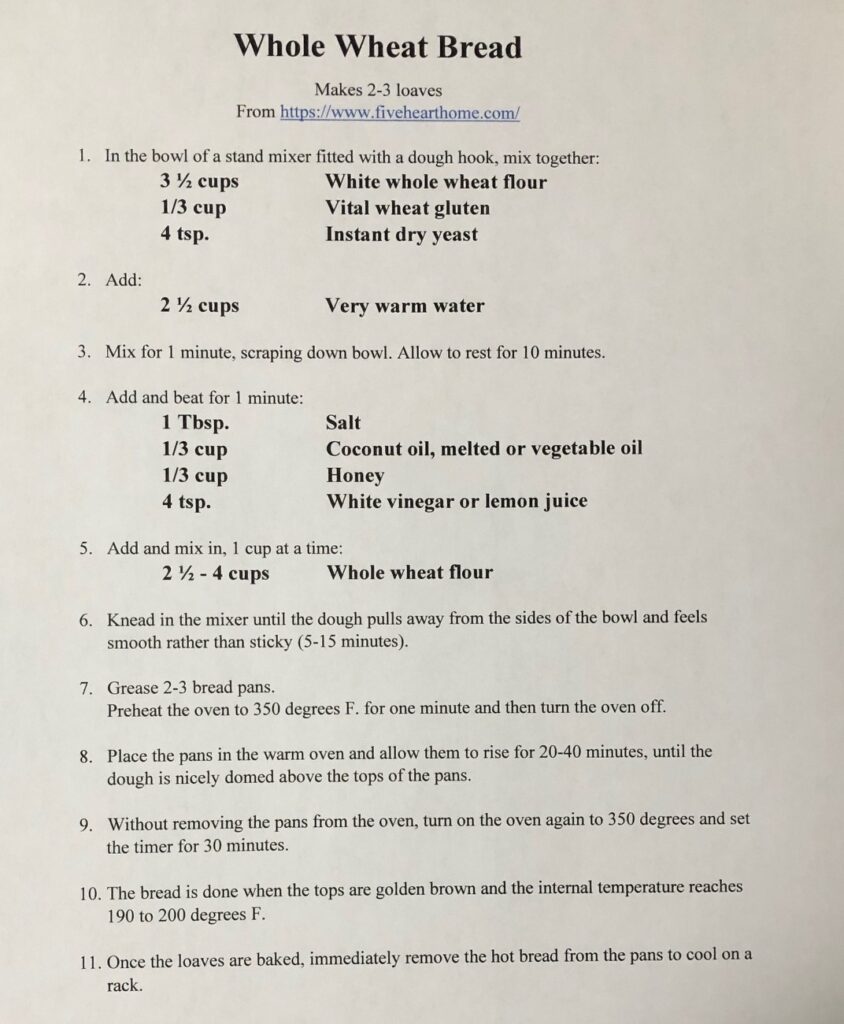
Here is the recipe:
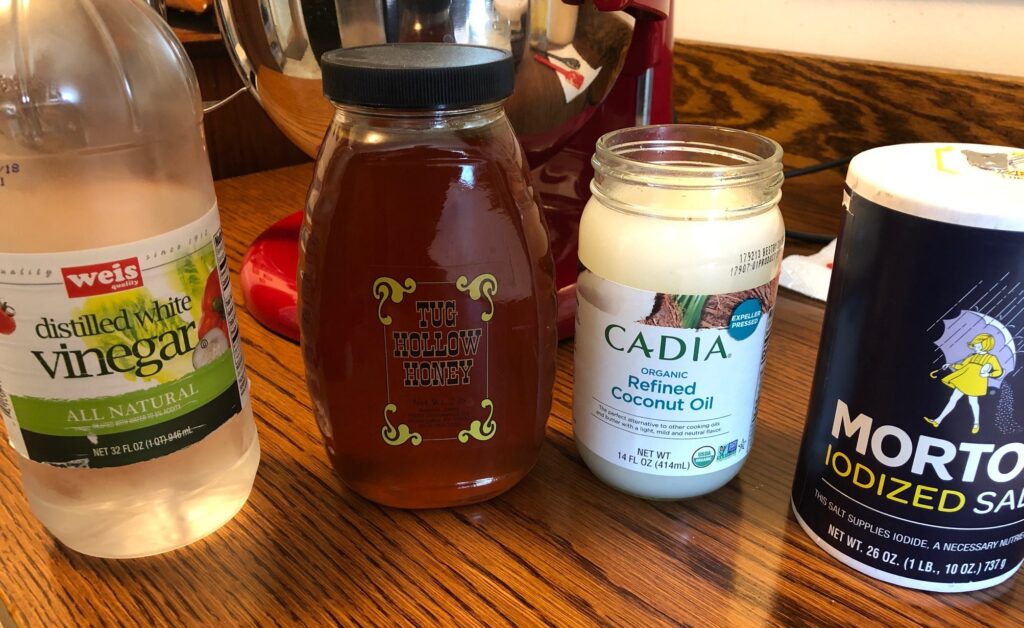
Here are the rest of the ingredients:
Directions:
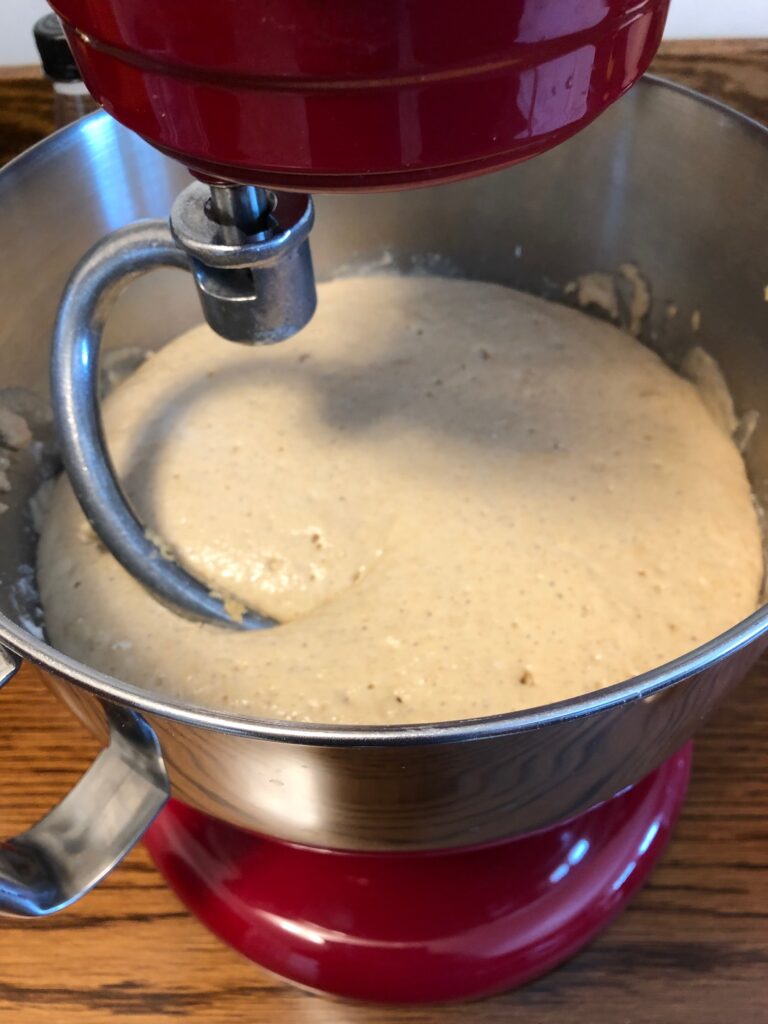
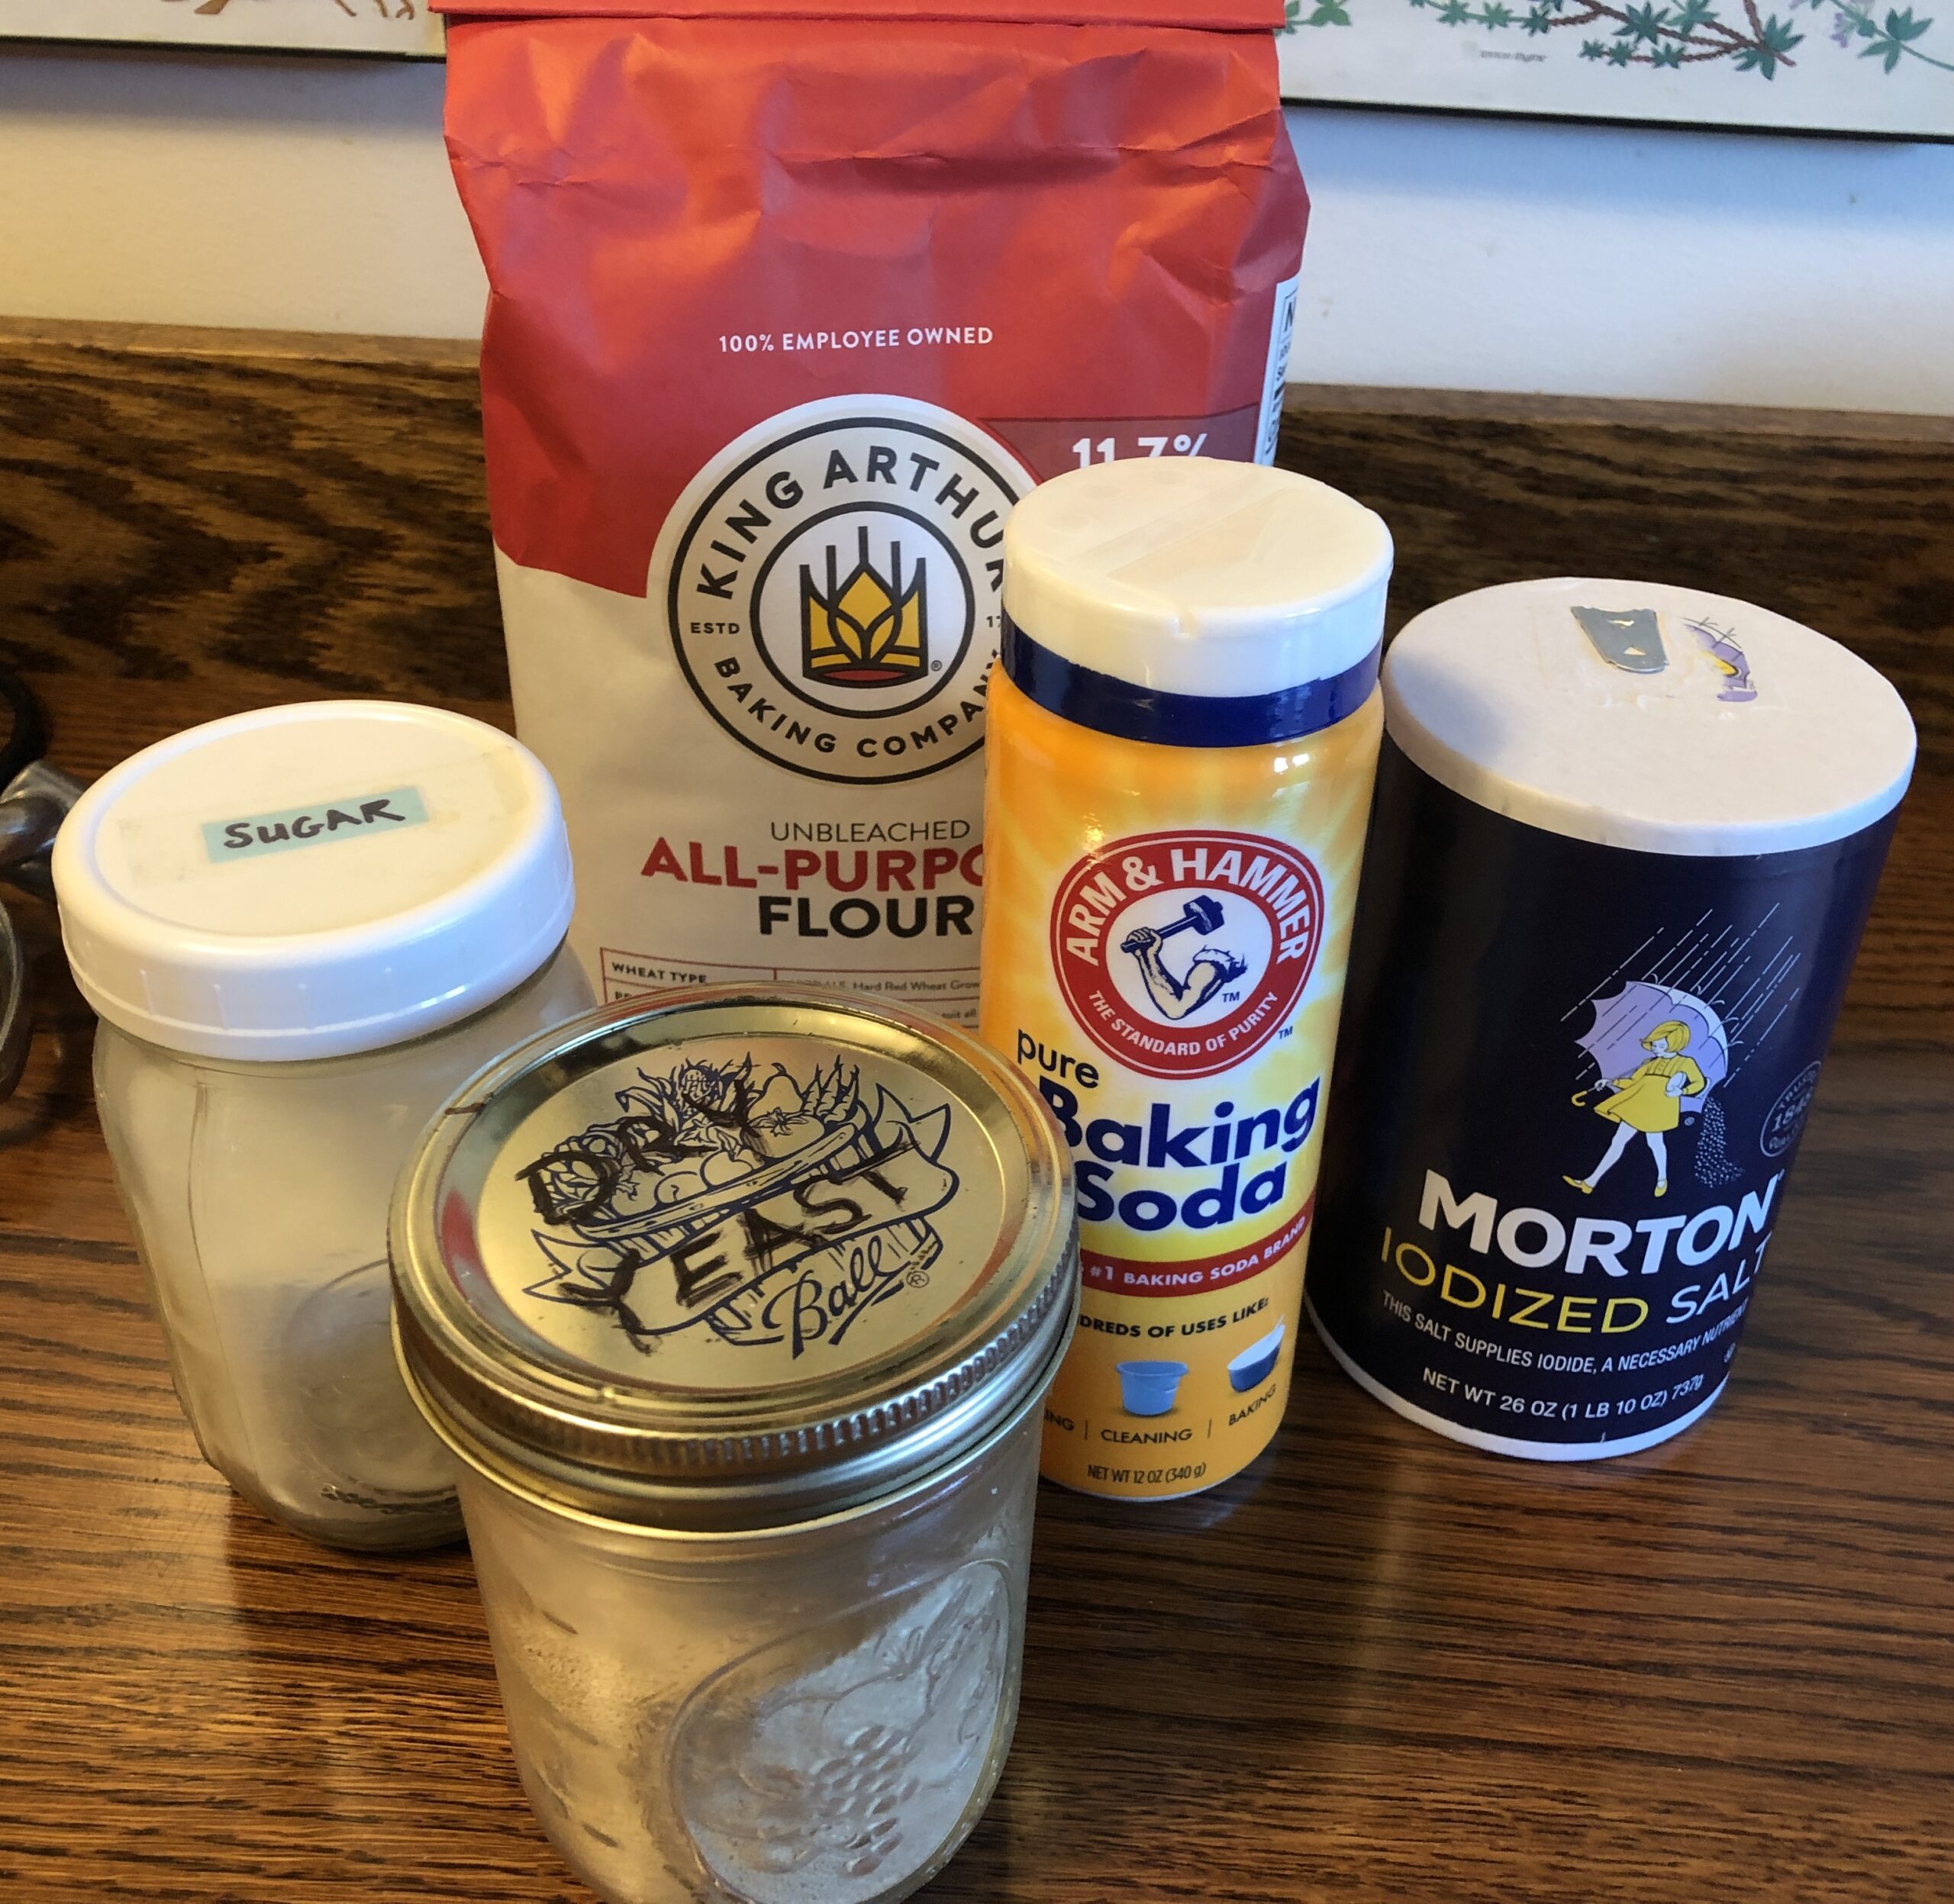
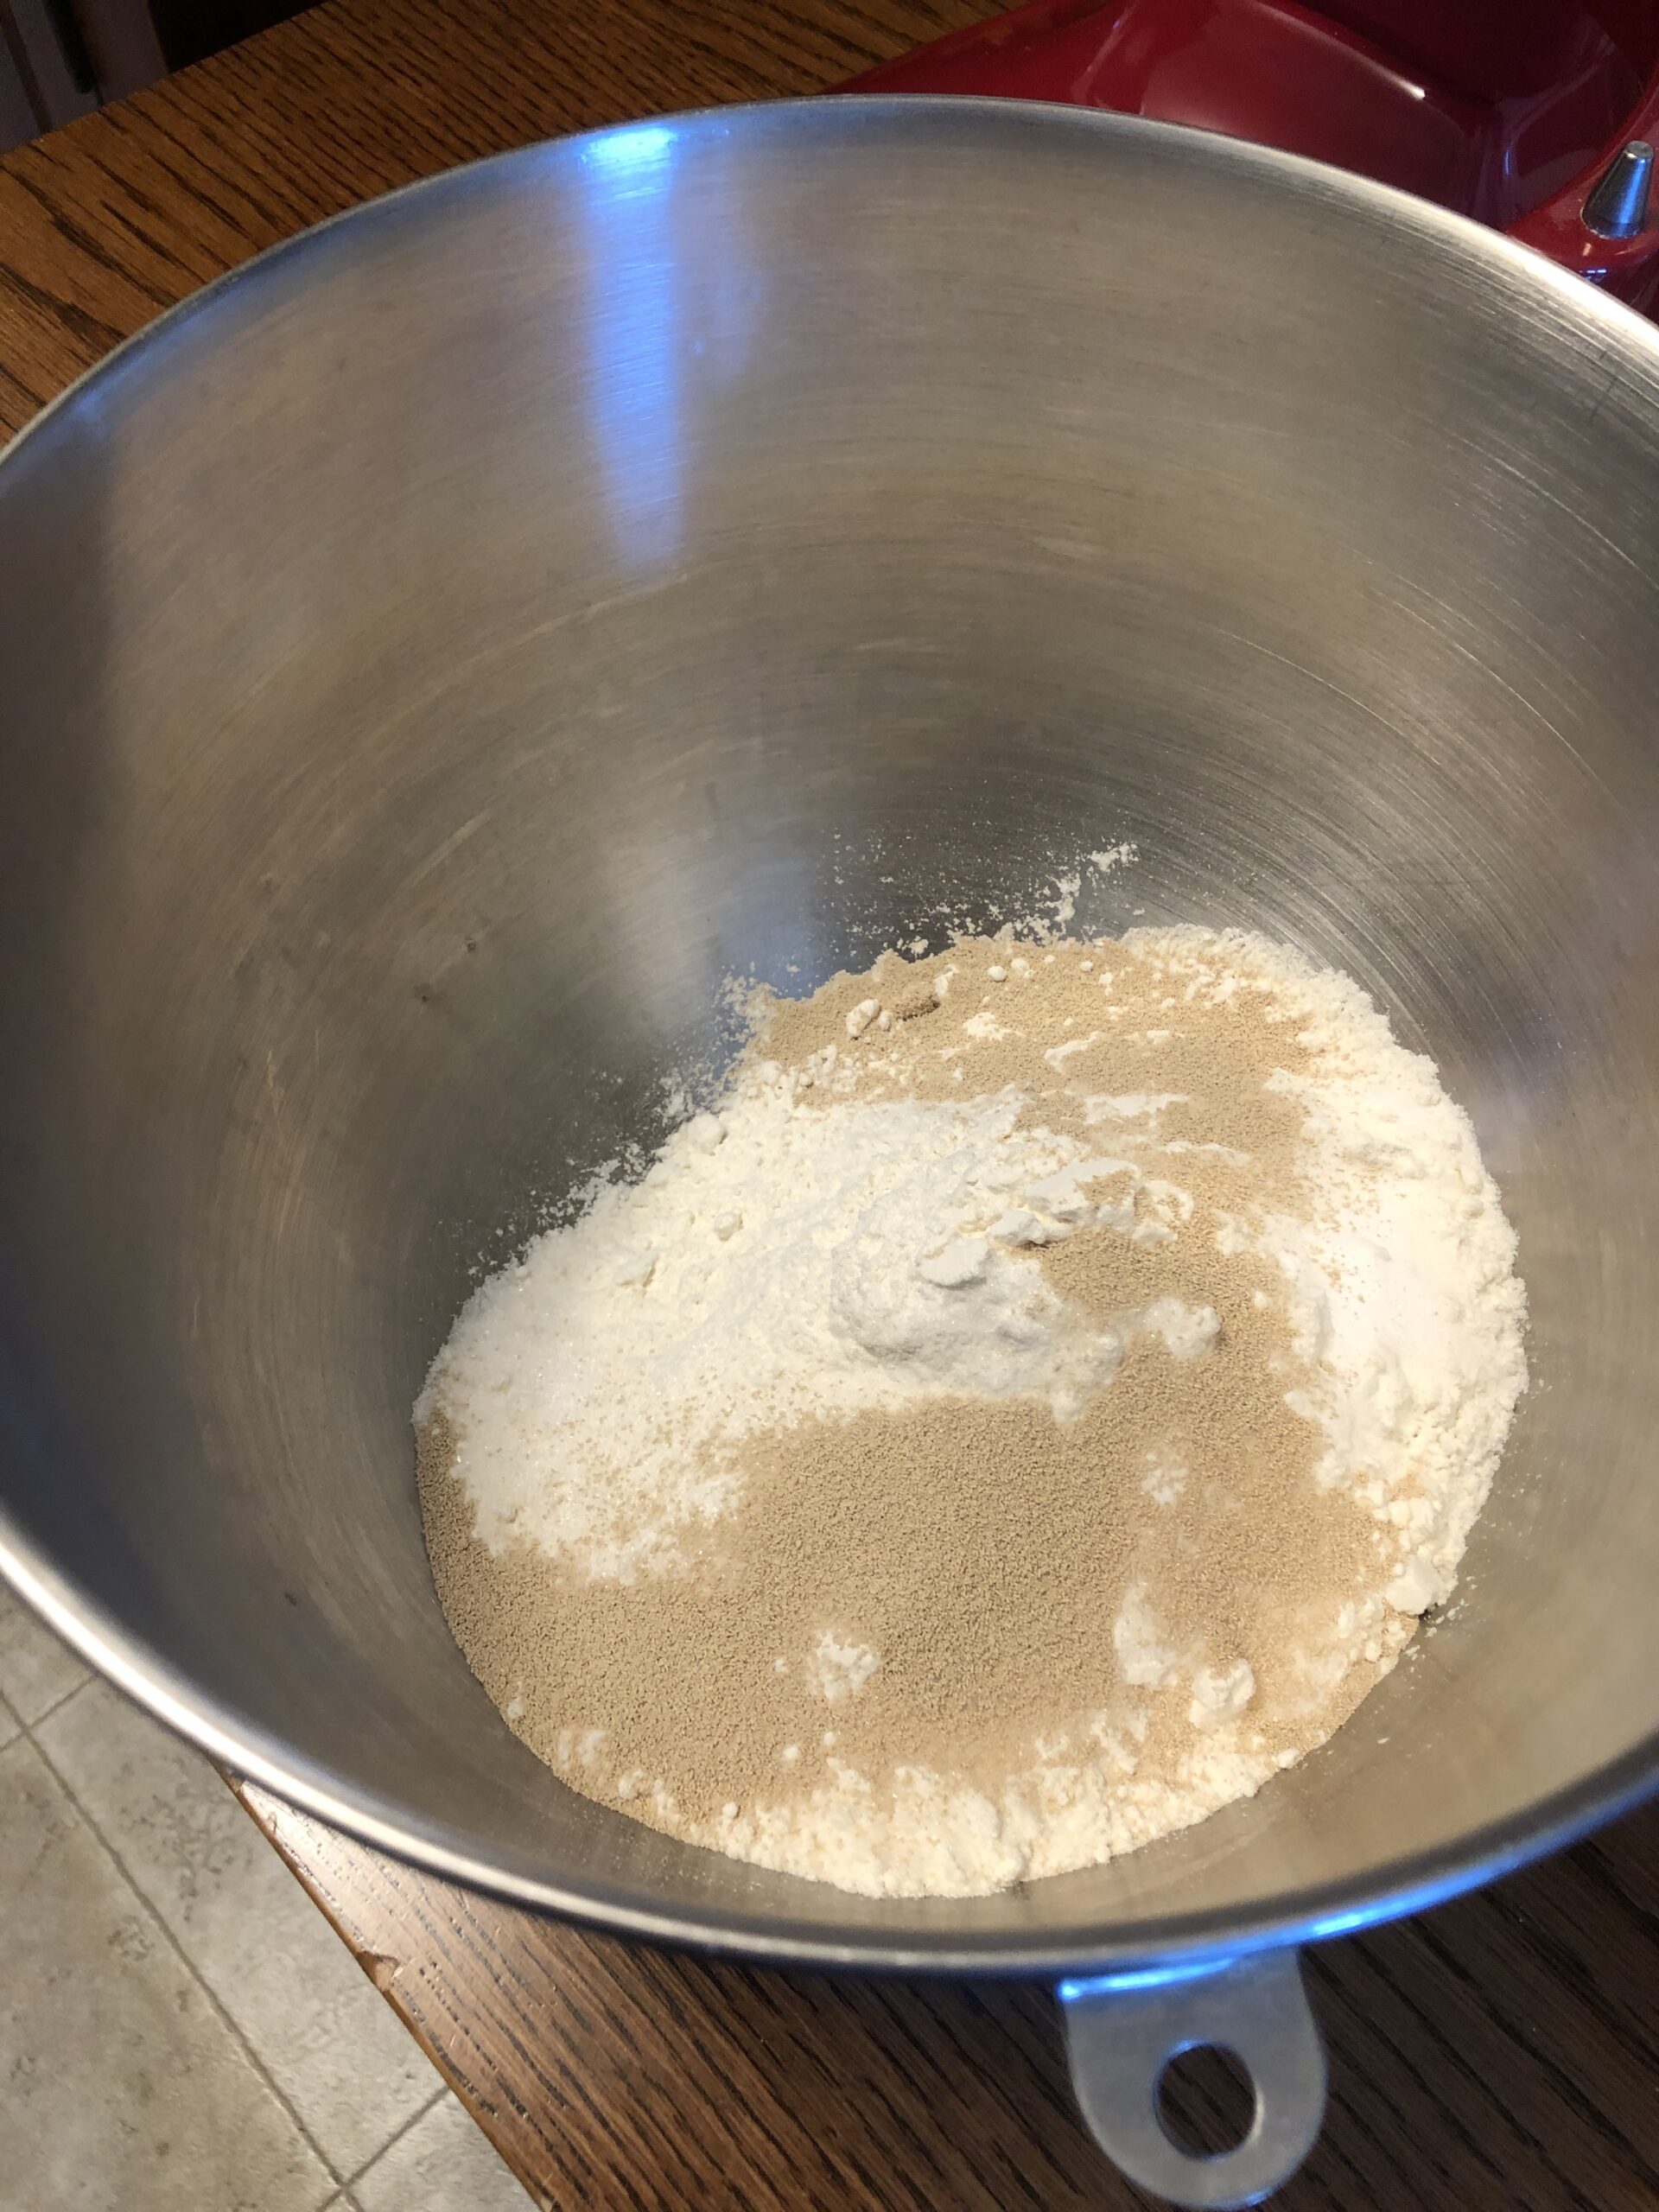
Step 1: Measure out the flour, vital wheat gluten and yeast into the mixer bowl.
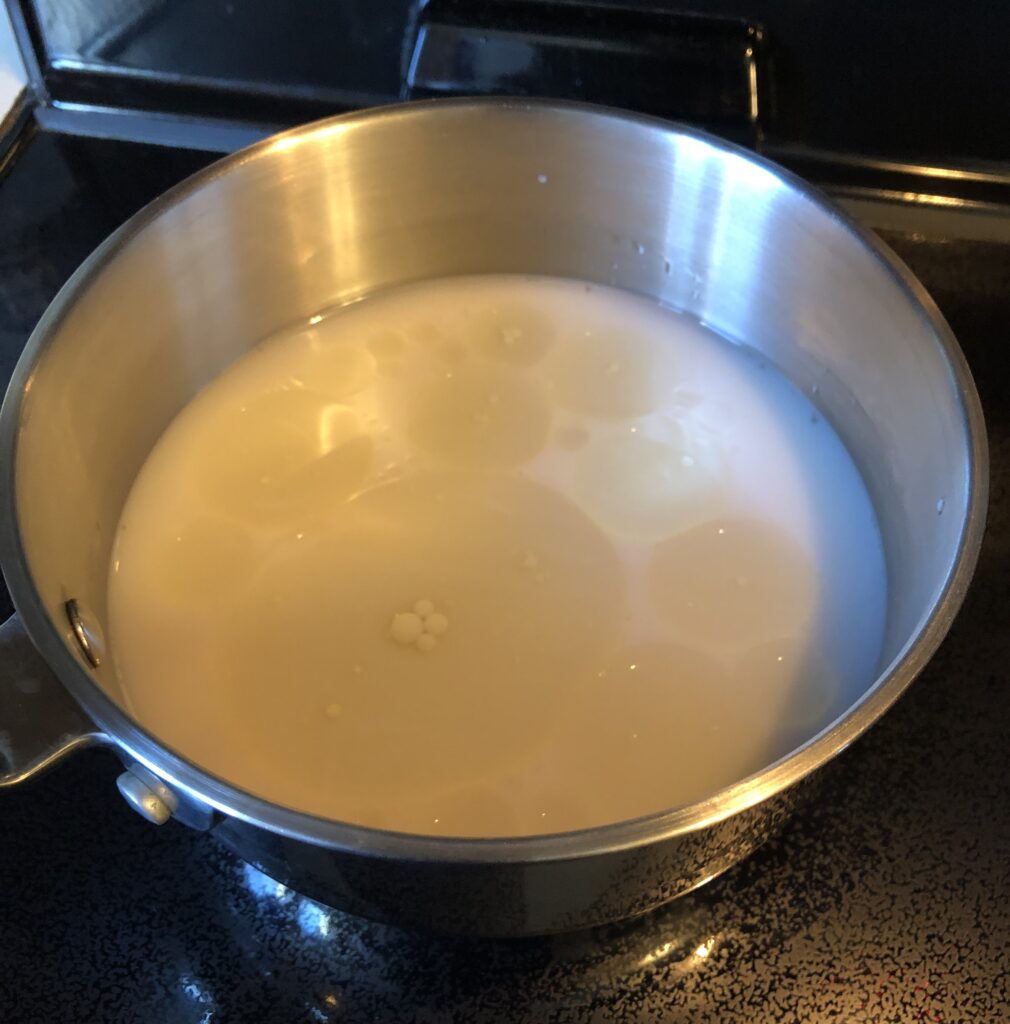
Steps 2-3: Add 2 ½ cups of very warm water. Mix up for 1 minute (I did this by hand) and let it rest for 10 minutes.
In 10 minutes, the yeast is going to town!
Step 4: Add salt, oil, vinegar and honey. Mix for 1 minute.
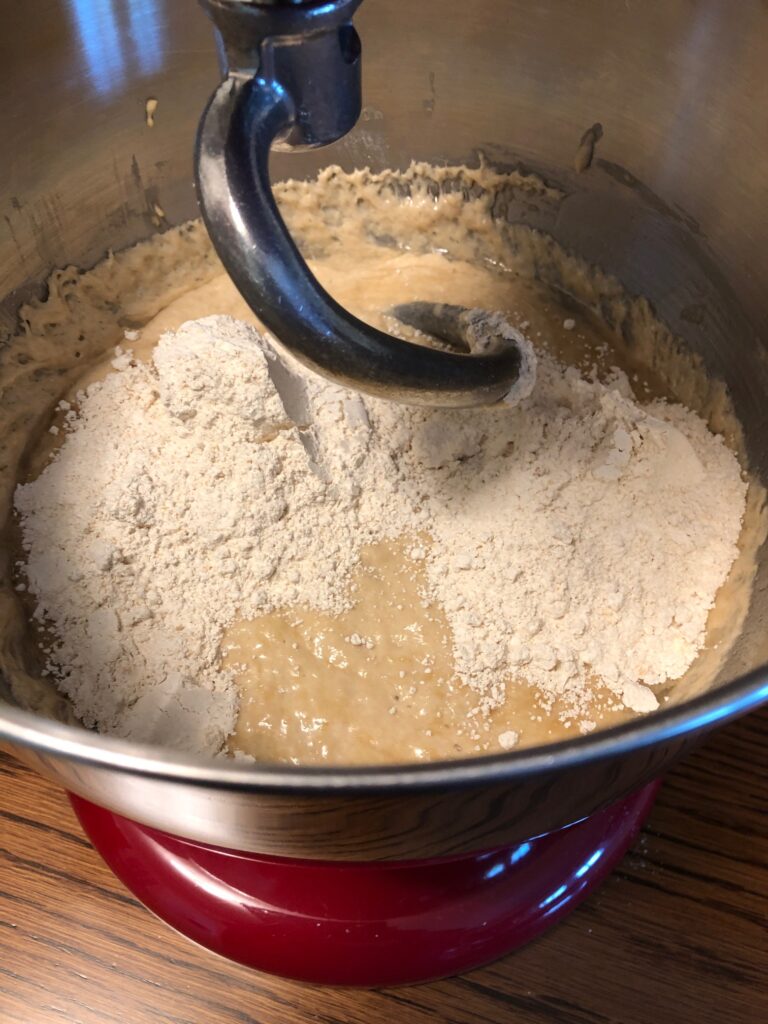
Step 5: Add and mix in 2 ½ to 4 cups of flour, 1 cup at a time.
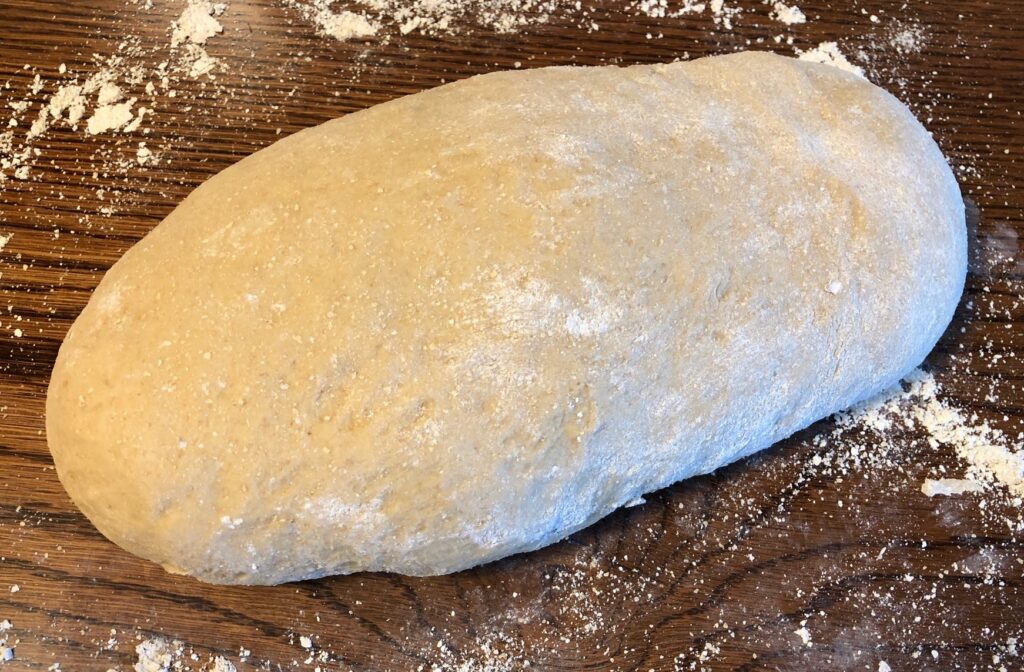
Step 6: Knead in the mixer until the dough pulls away from the sides of the bowl and feels smooth rather than sticky (5-15 minutes). Turn the dough out on to floured surface. Form into a smooth ball.
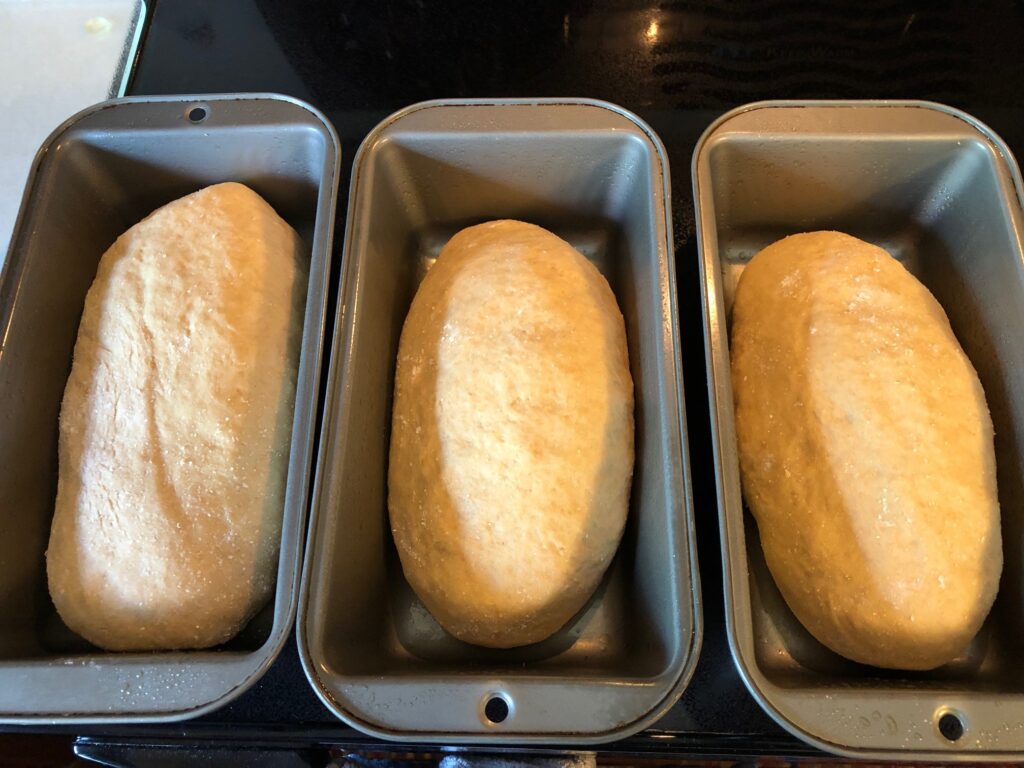
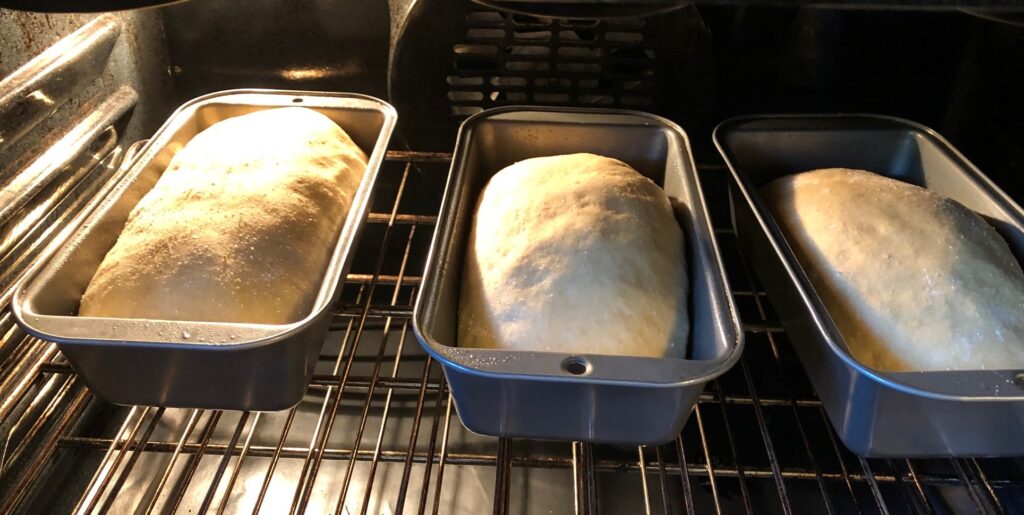
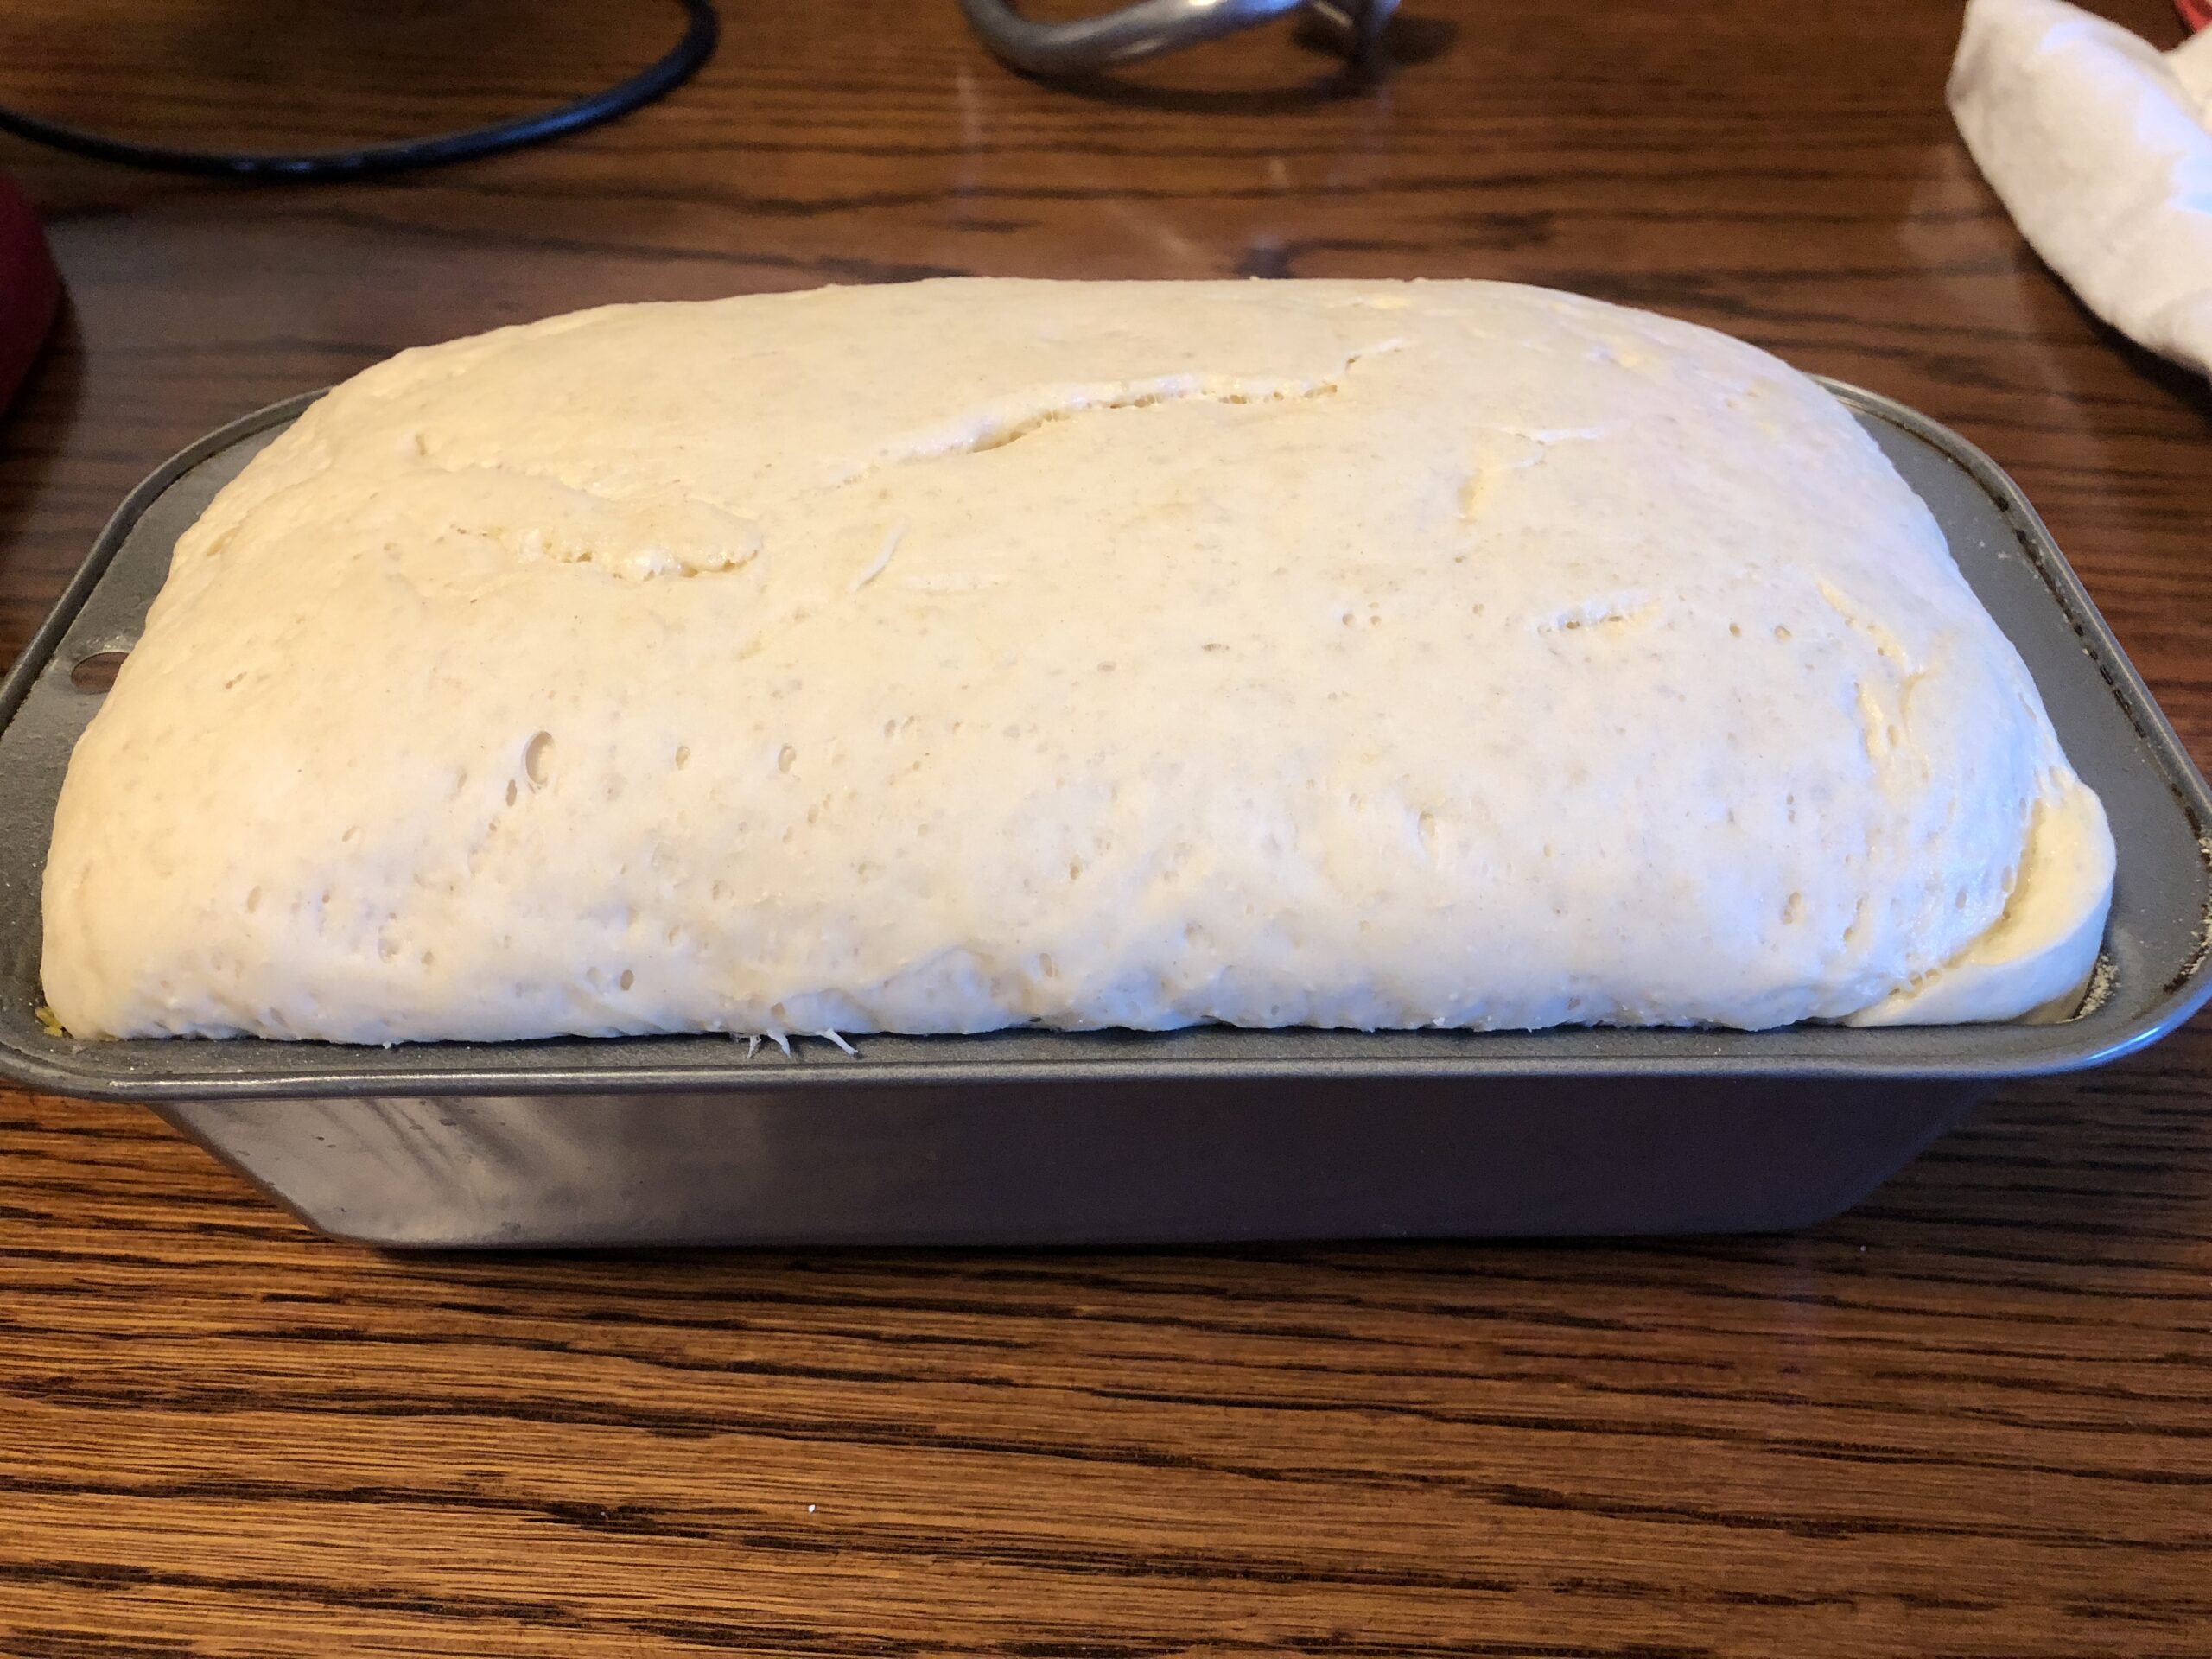
Steps 7-8: Grease 2-3 bread pans. Divide dough into three oblong loaves and put them in the pans. Preheat the oven to 350 degrees F. for one minute and then turn the oven off. Place the pans in the warm oven and allow them to rise for 20-40 minutes, until the dough is nicely domed above the tops of the pans.
Step 9: Without removing the pans from the oven, turn on the oven again to 350 degrees and set the timer for 30 minutes. The oven will go through the whole preheat cycle now, which sets the crust.
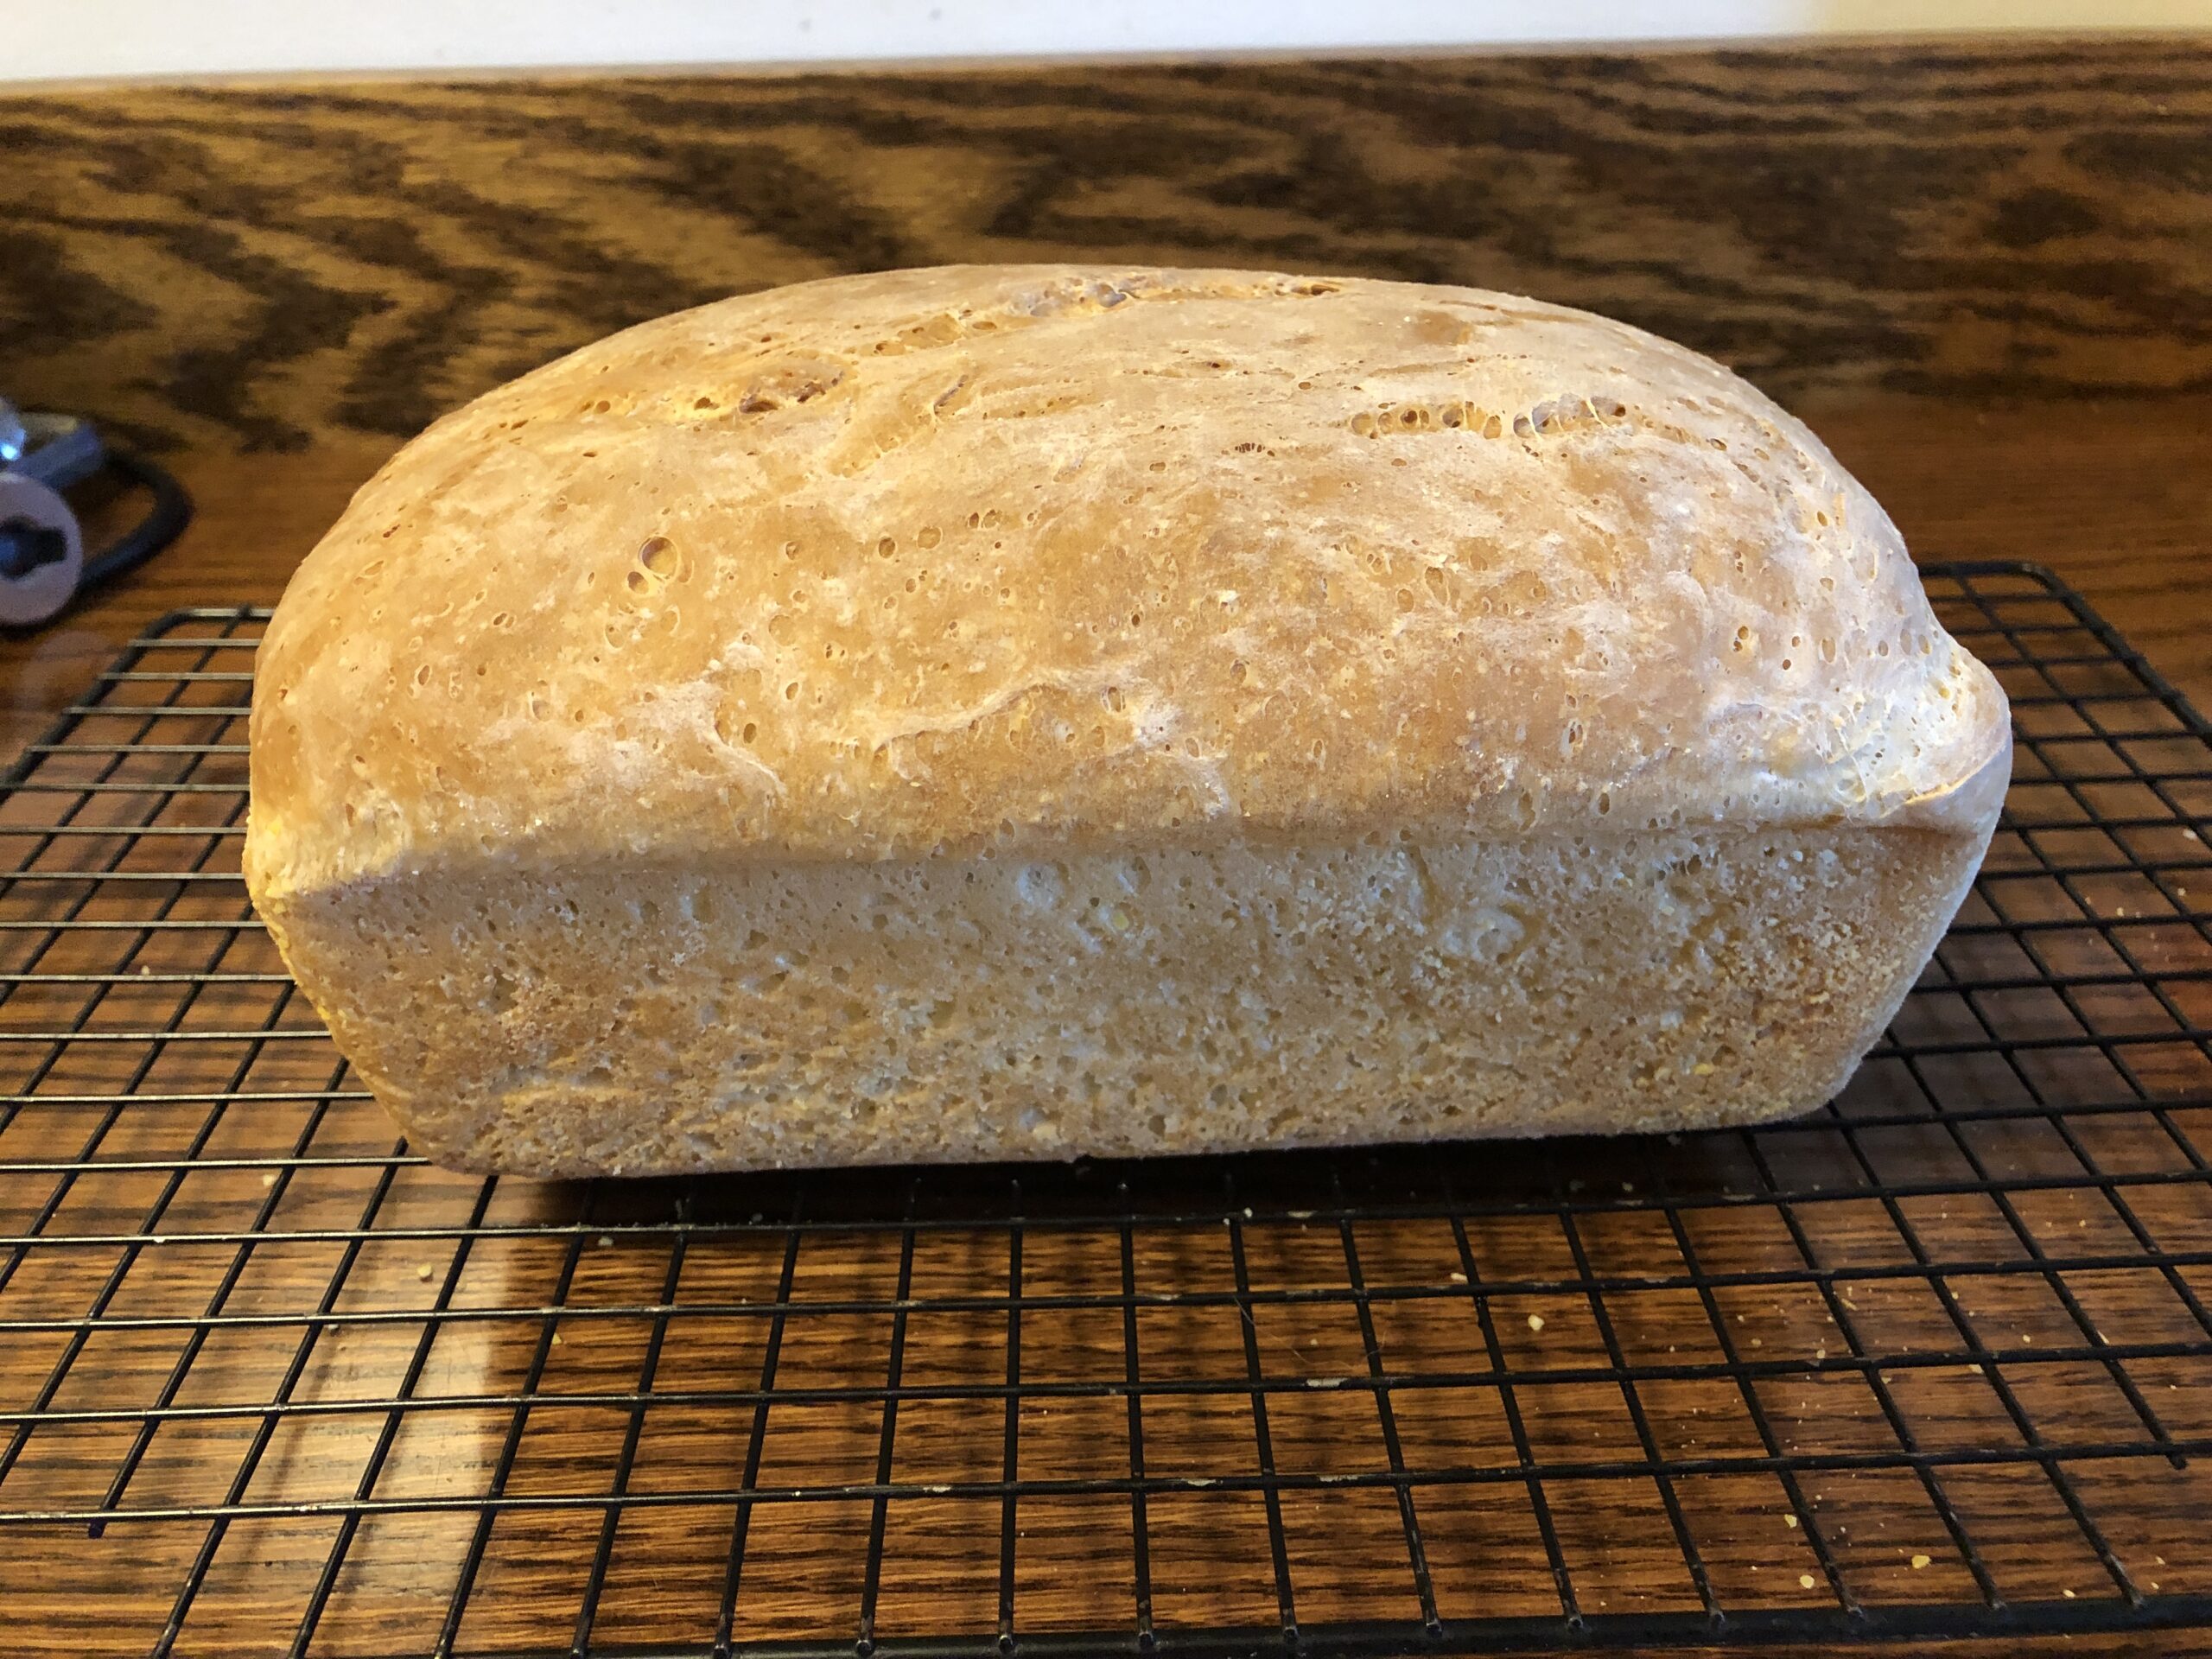
Step 10: The bread is done when the tops are golden brown and the internal temperature reaches 190 to 200 degrees F.
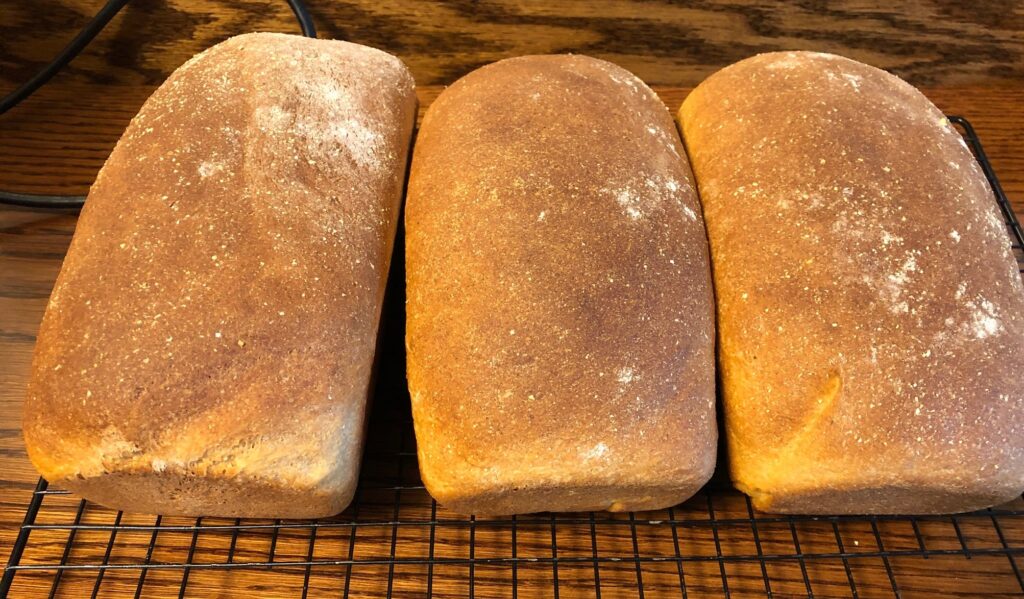
Step 11: Once the loaves are baked, immediately remove the hot bread from the pans to cool on a rack.
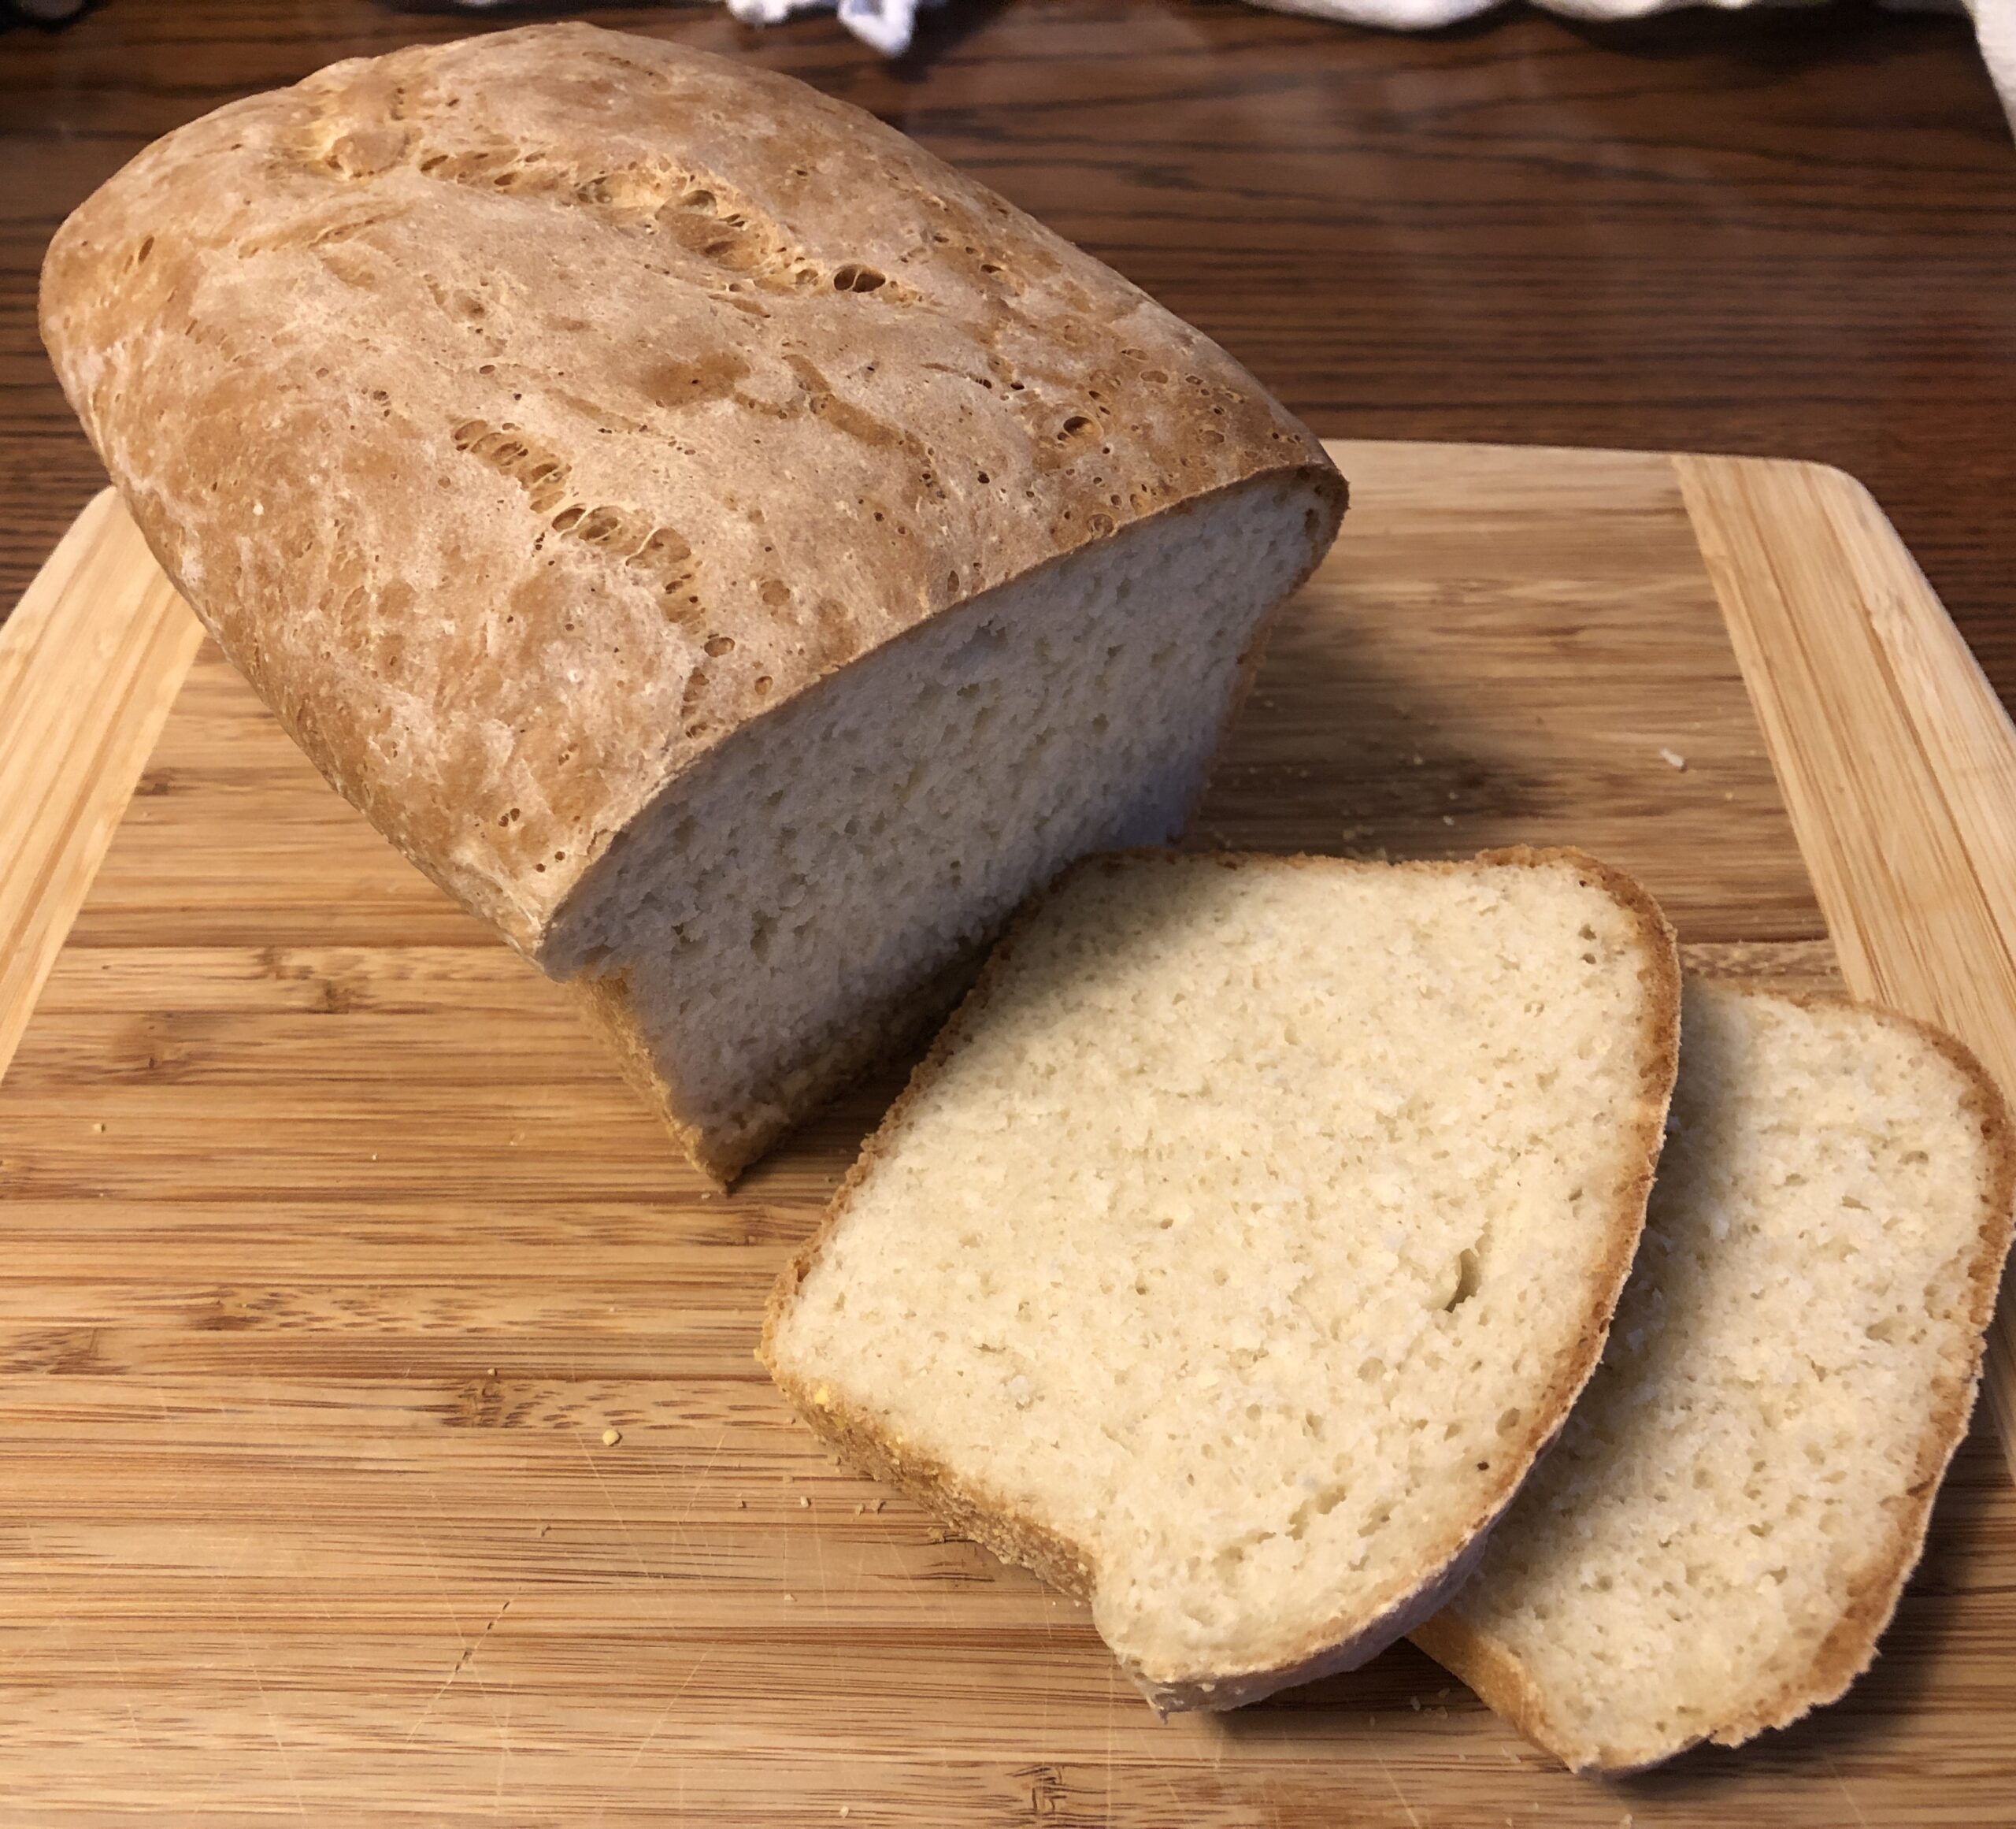
Delicious!
I think this recipe will be my go-to recipe for whole wheat bread. I was so happy with it that I ordered a 25 lb. sack of white whole wheat berries from Amazon! Beats trying to bag it up myself at the health food store.
Looking for a fun activity to do with a group of people…kids, teens or adults? Making raised pretzels is pretty simple and you end up with a snack to share! Here’s one of my favorite recipes to make that is sure to get everyone involved!
This is a simple yeast bread recipe…great for new bakers to start with. It is a small batch recipe and can be mixed up by hand. My directions are pretty detailed because this recipe will be used by a few young people in the family that are new to baking yeast bread.
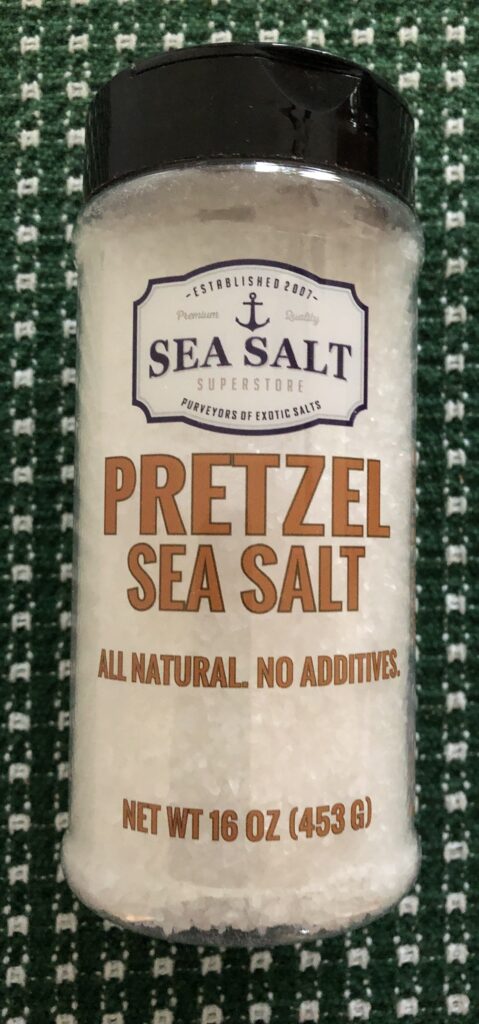
Most of the ingredients are pretty standard to have around, except maybe the Pretzel salt. I recently ordered some from Amazon just to have on hand.
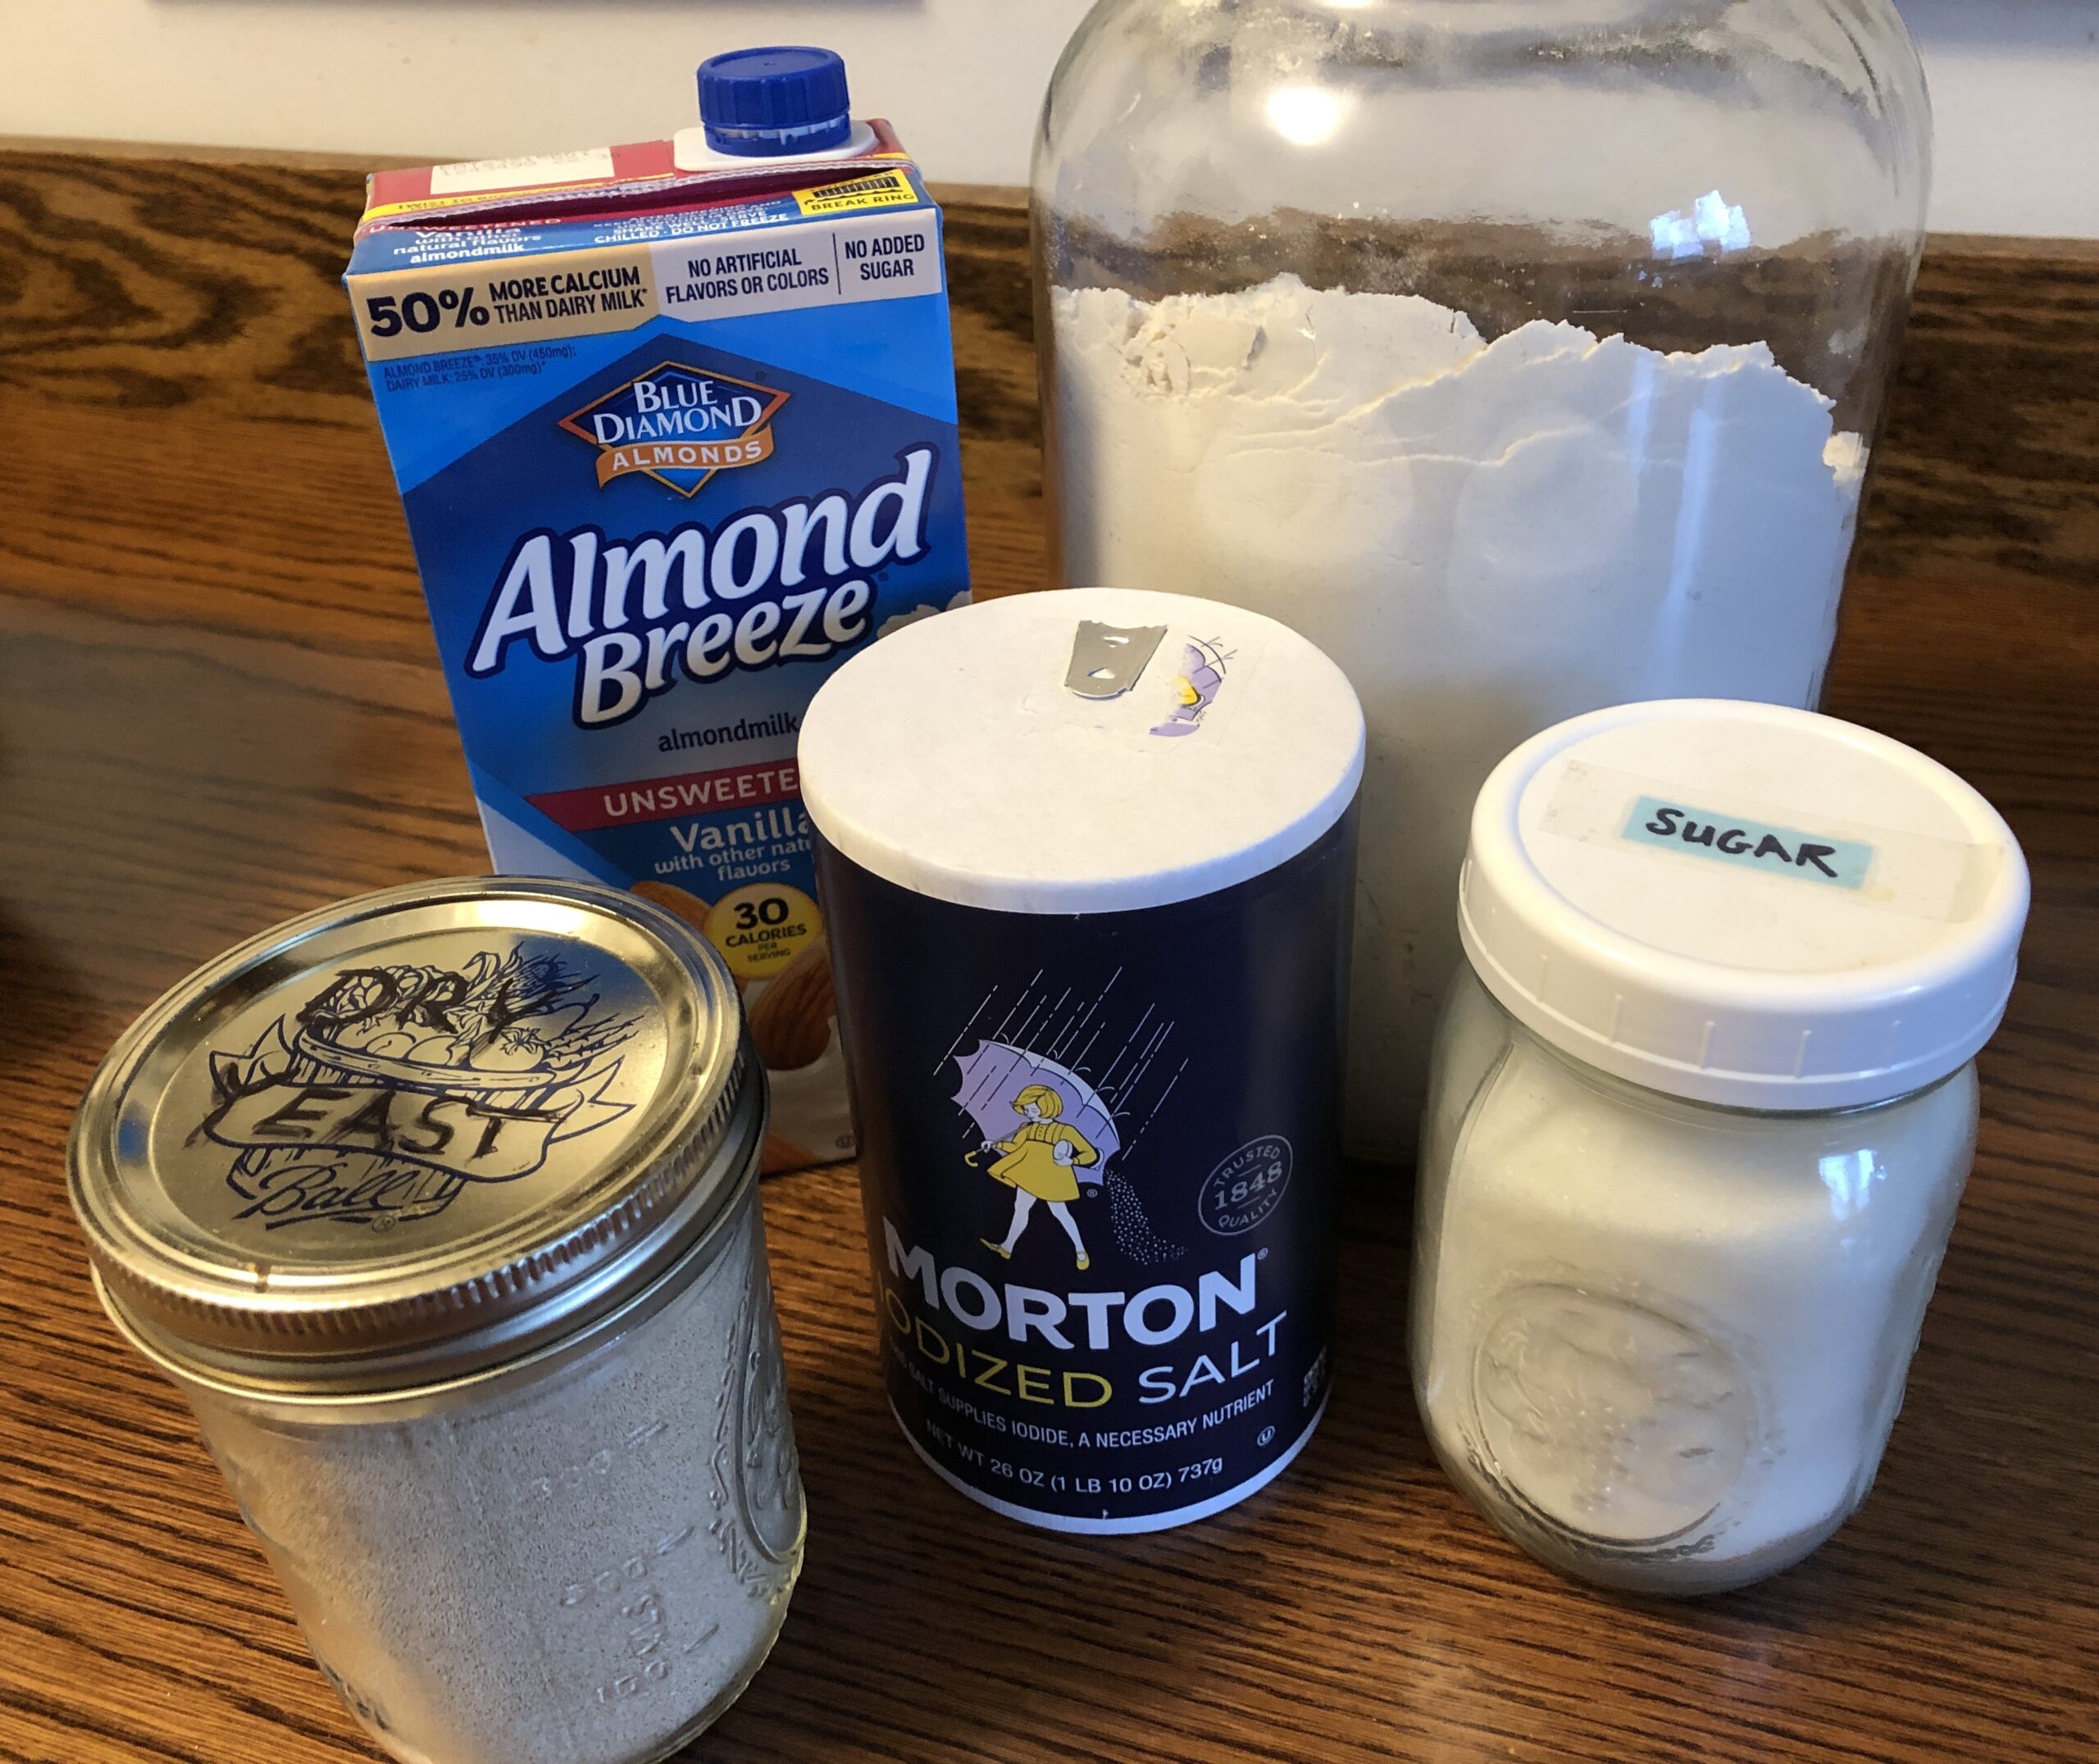
Collect the rest of the ingredients as shown below:
Making the Raised Pretzel Dough
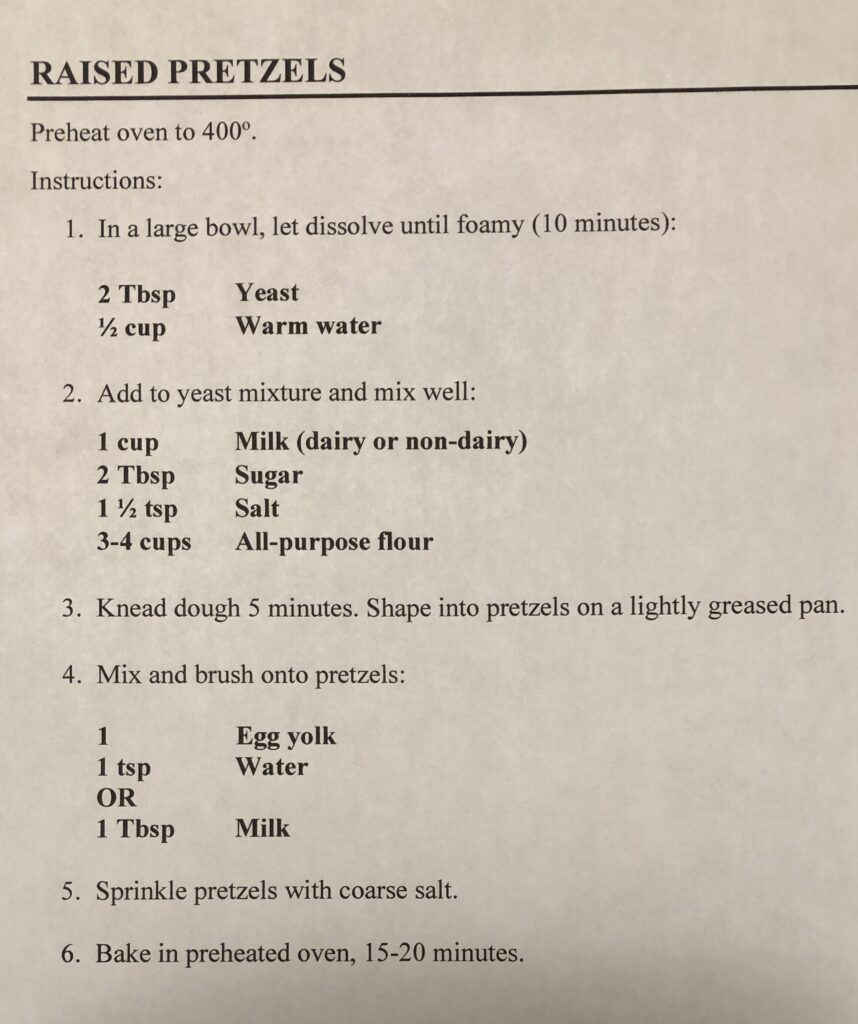
Step 1: Preheat the oven to 400 Degrees F. Spray baking sheets with oil (or use parchment paper or a silicon mat).
Step 2: In a medium bowl, measure out 2 Tablespoons of yeast (or 2 packages). Add 1/2 cup of very warm water and stir. Let it stand until dissolved and foamy (about 10 minutes).
Step 3: Add the milk, sugar, salt and gradually add 3 cups of flour, mixing after every 1/2 cup.
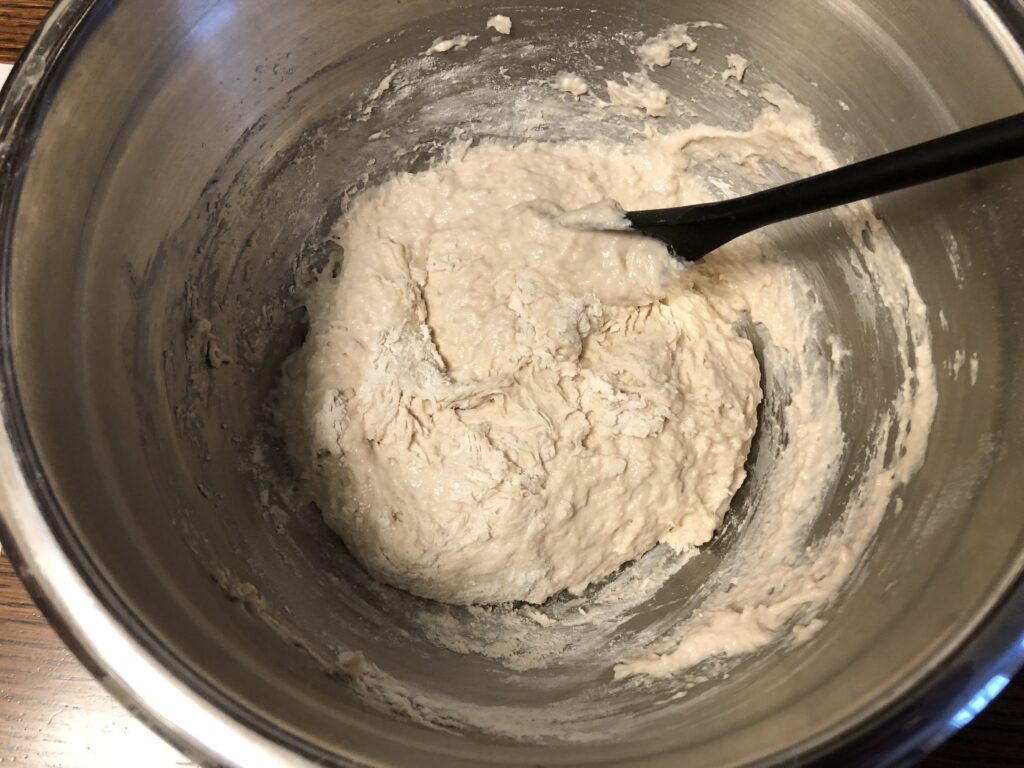
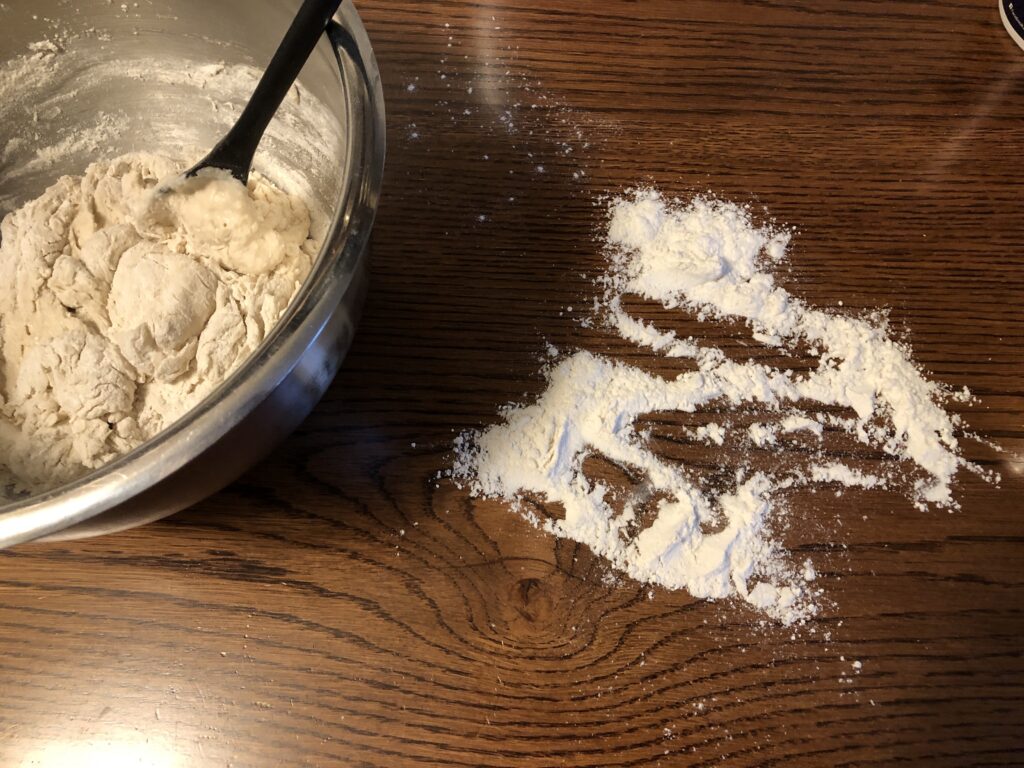
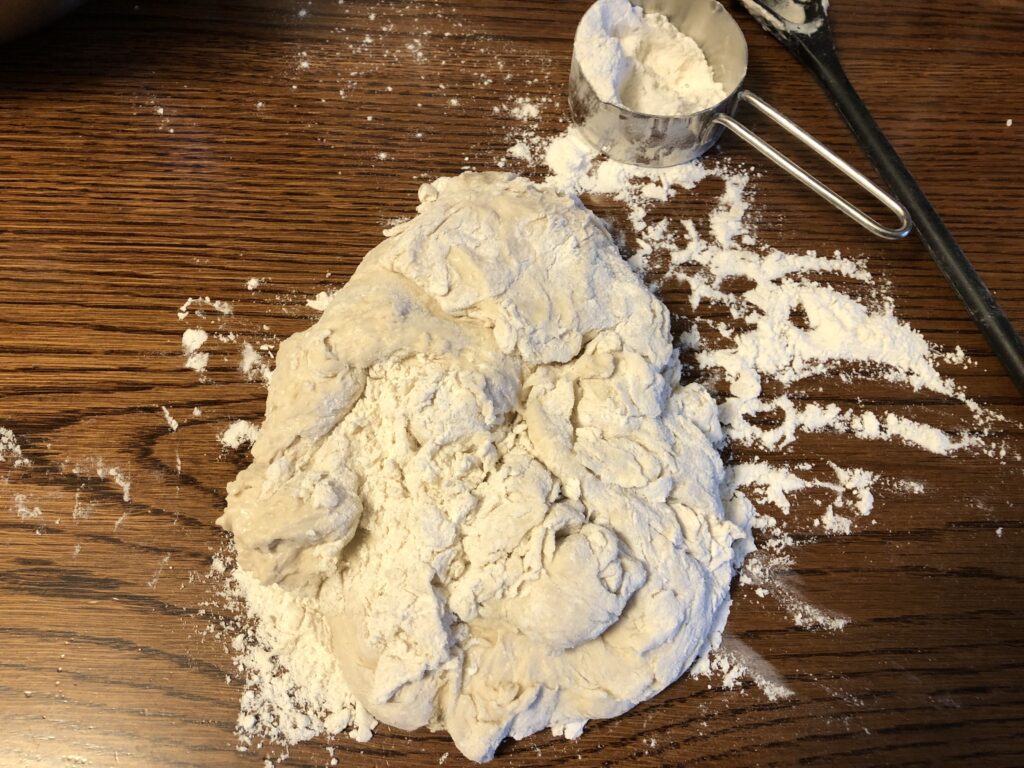
When the dough is too stiff to mix with a spoon, it will still be pretty sticky. Scrape it away from the sides and dump the whole pile out onto the floured surface. You will use about another cup of flour to knead the dough.
Step 4: Knead the dough. Make sure the pile of dough is sitting on about 1/2 cup of flour. The flour will be incorporated into the dough as you work with it. You can add more flour under the dough as needed to keep it from sticking to the table.
Carefully lift and pull the outer edges toward the center of the pile using the flat of your floured hand. Don’t poke into the dough…it will be too sticky.
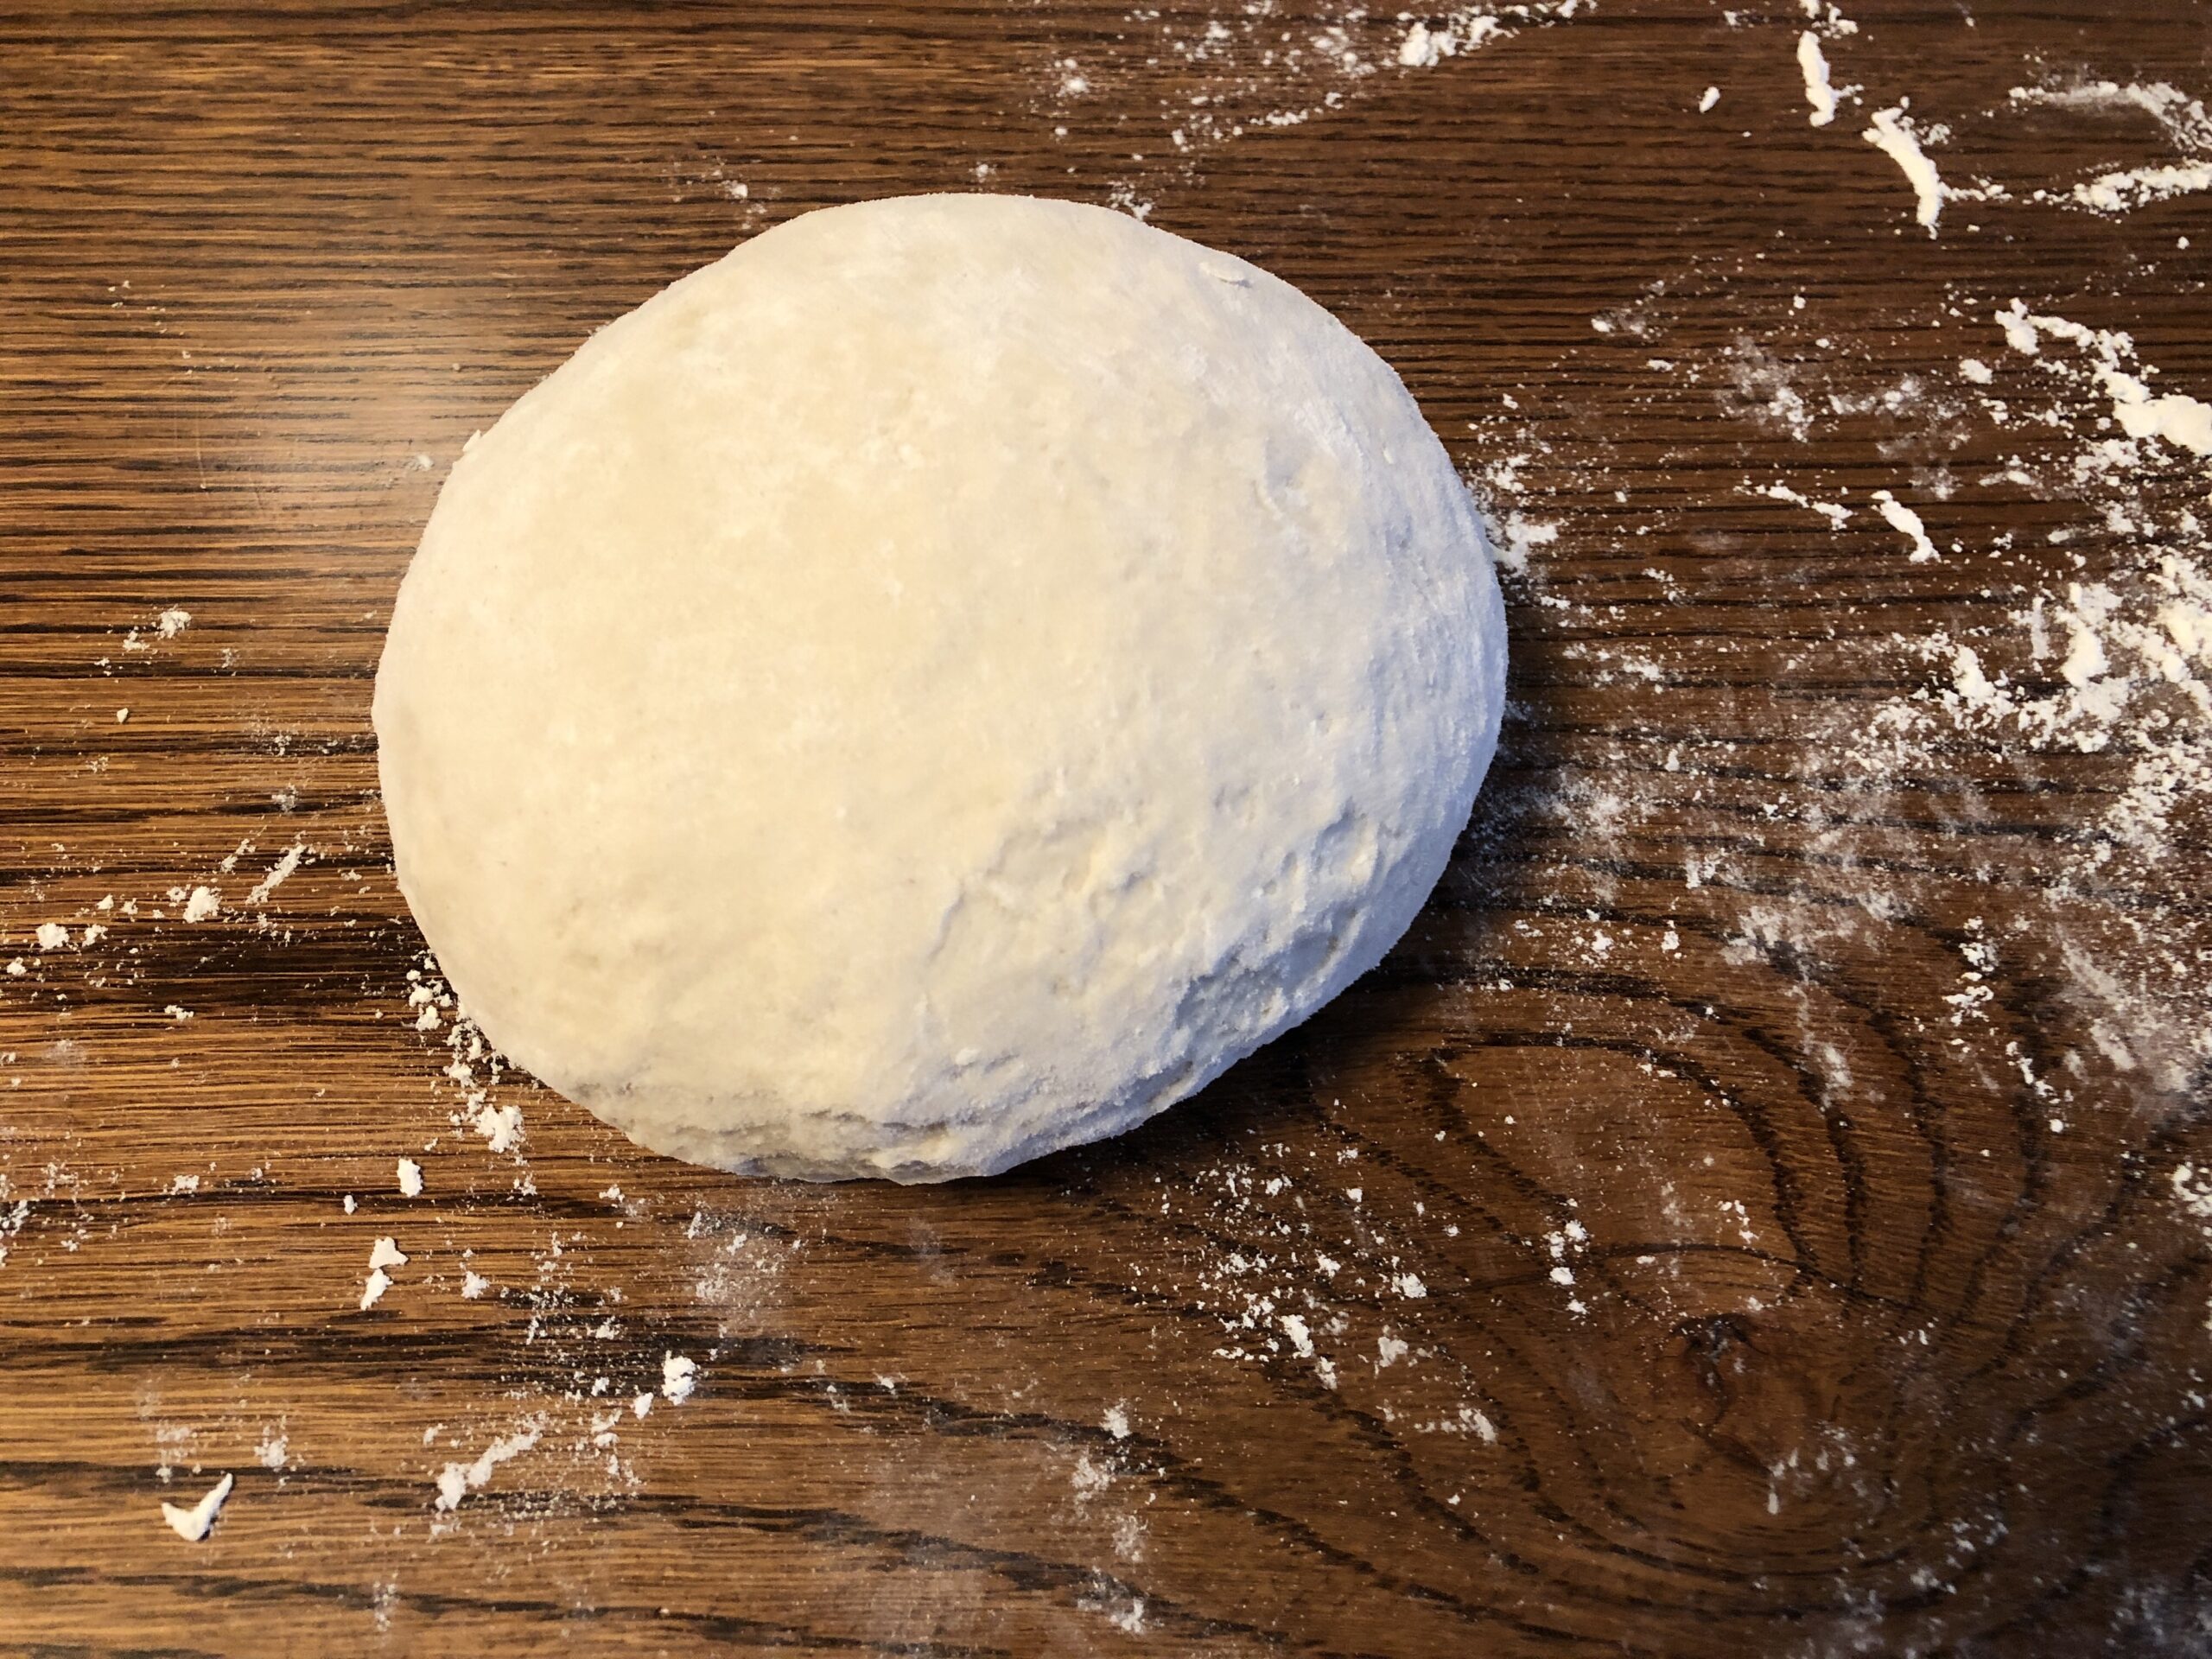
Continue to pull and press the edges of the dough into the middle of the pile, pressing down with the heel of your hand. You will be working your way around the edge. Soon the dough will look smoother, although it will still feel sticky if you poke your finger into the dough. Knead the dough like this for about 5 minutes.
After 5 minutes of kneading, tuck all the edges into the center and turn the ball of dough smooth side up. Let it rest on the table a few minutes.
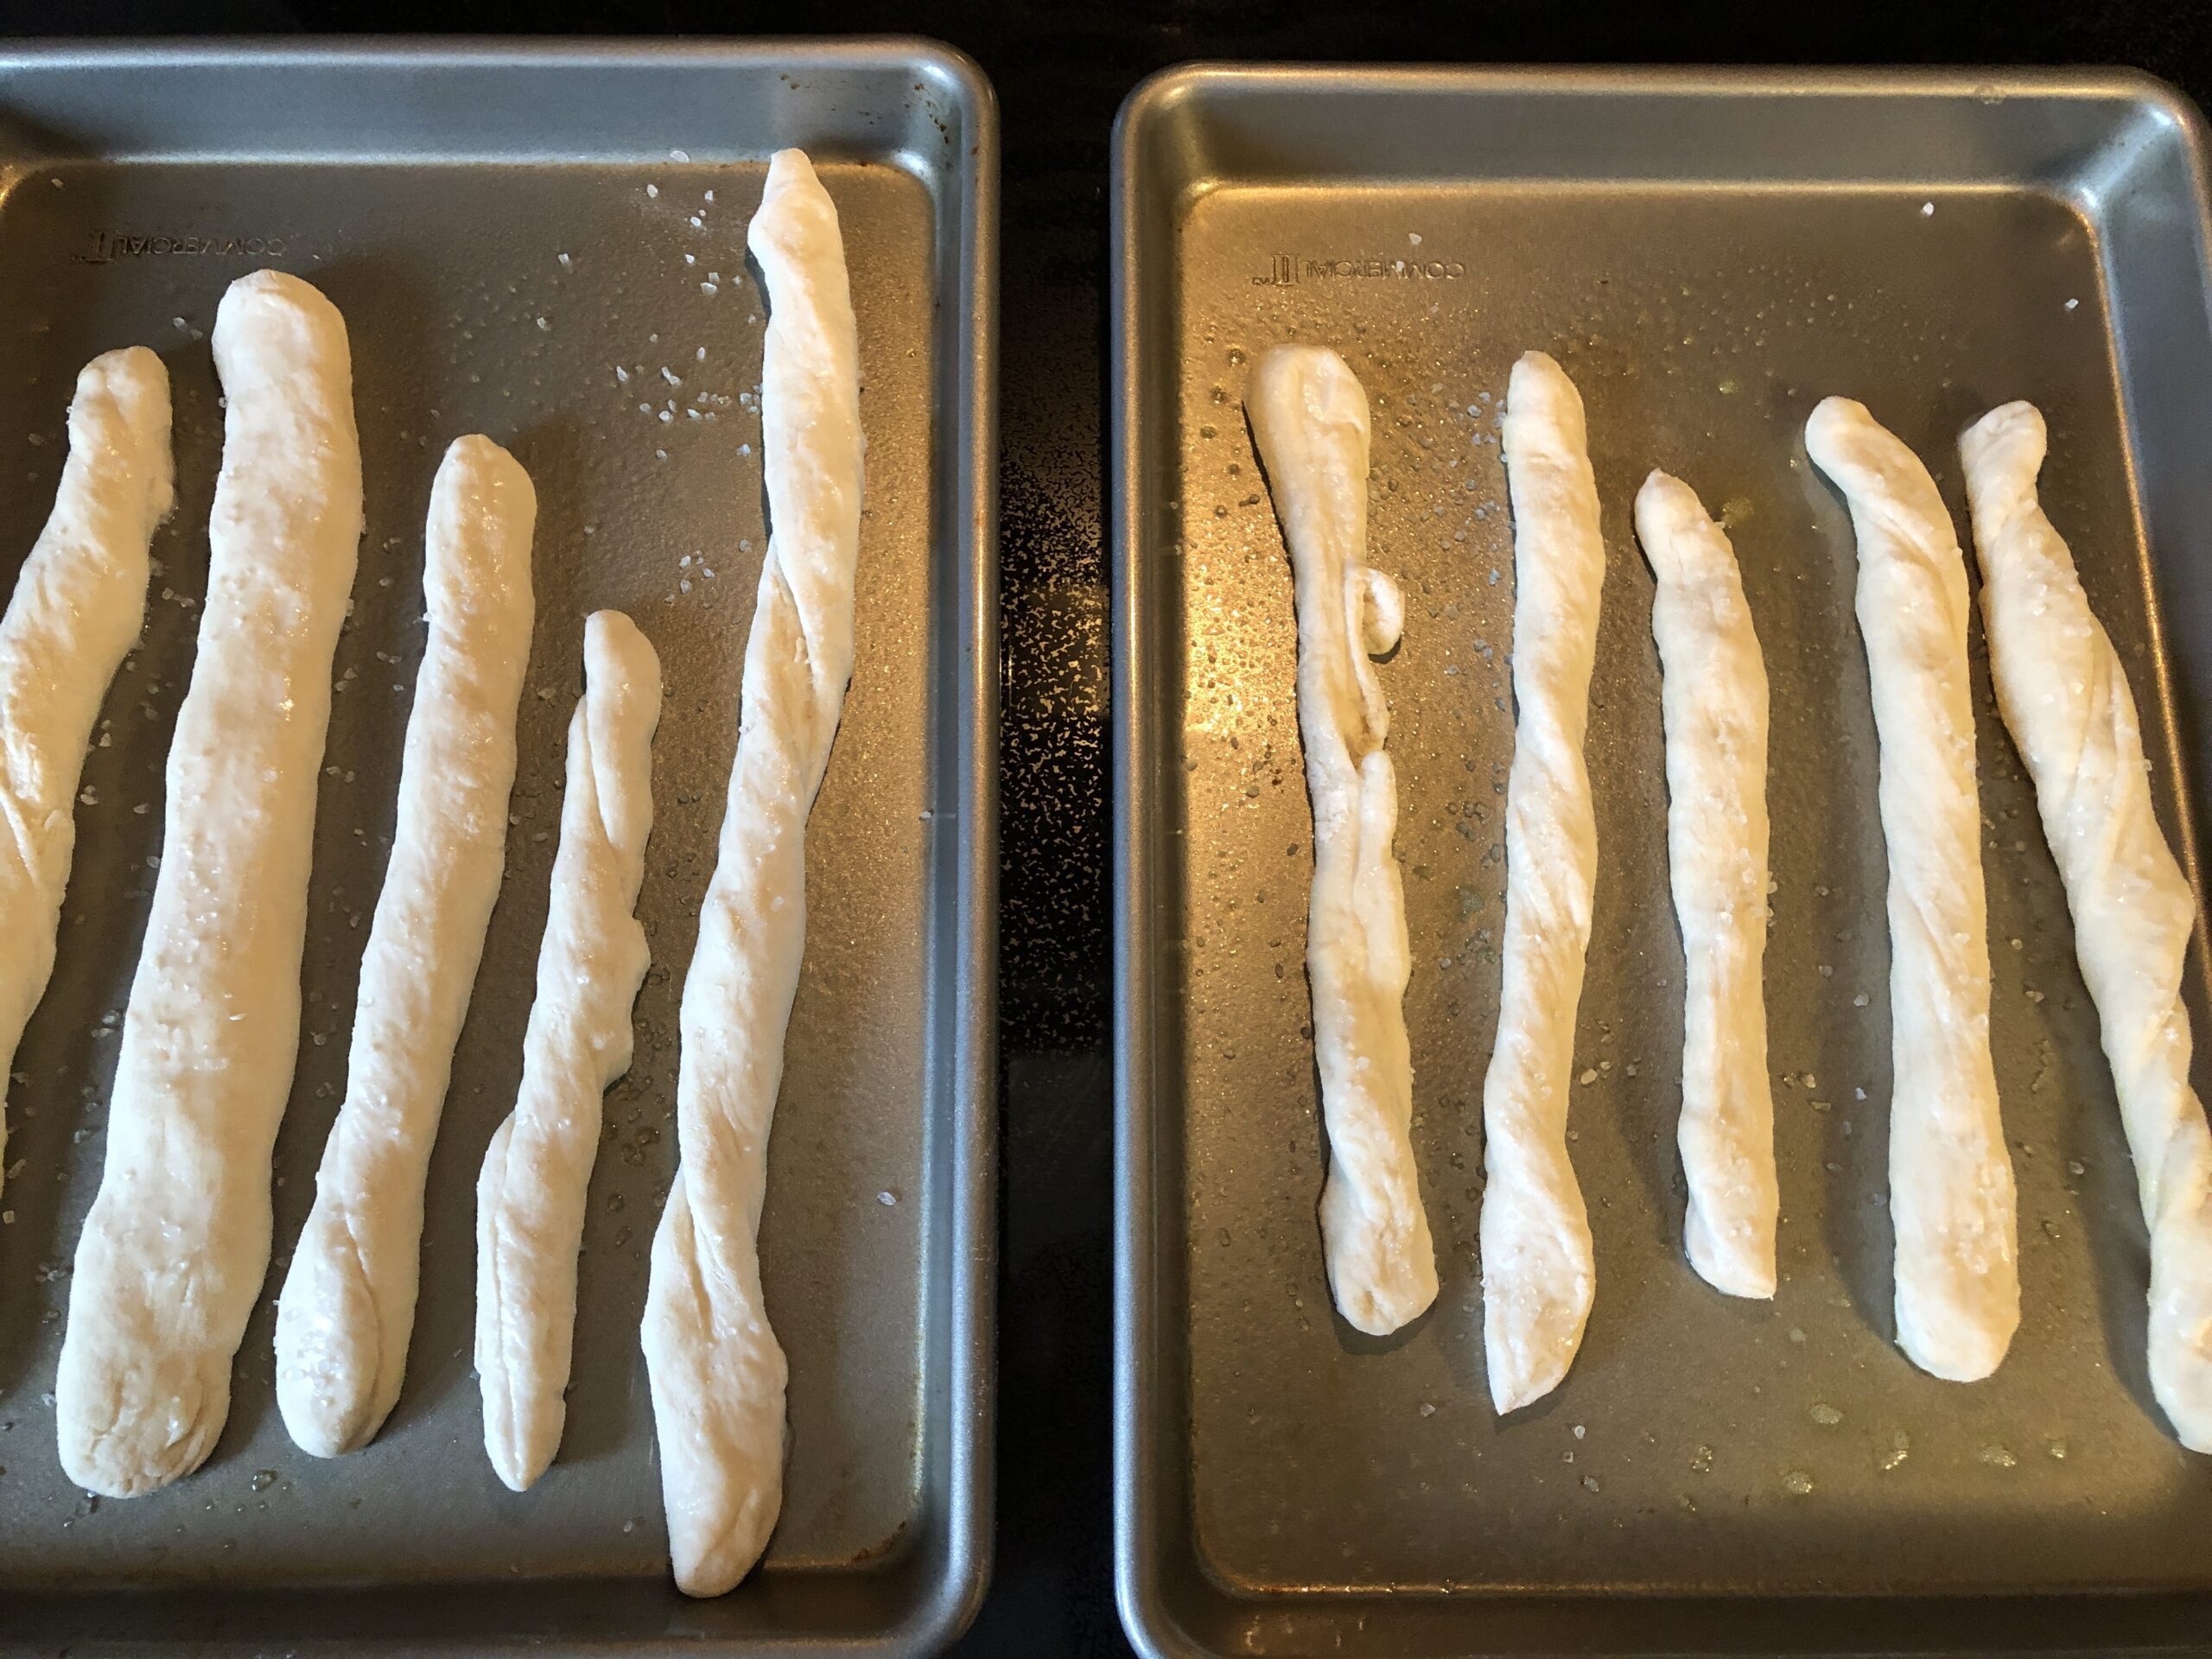
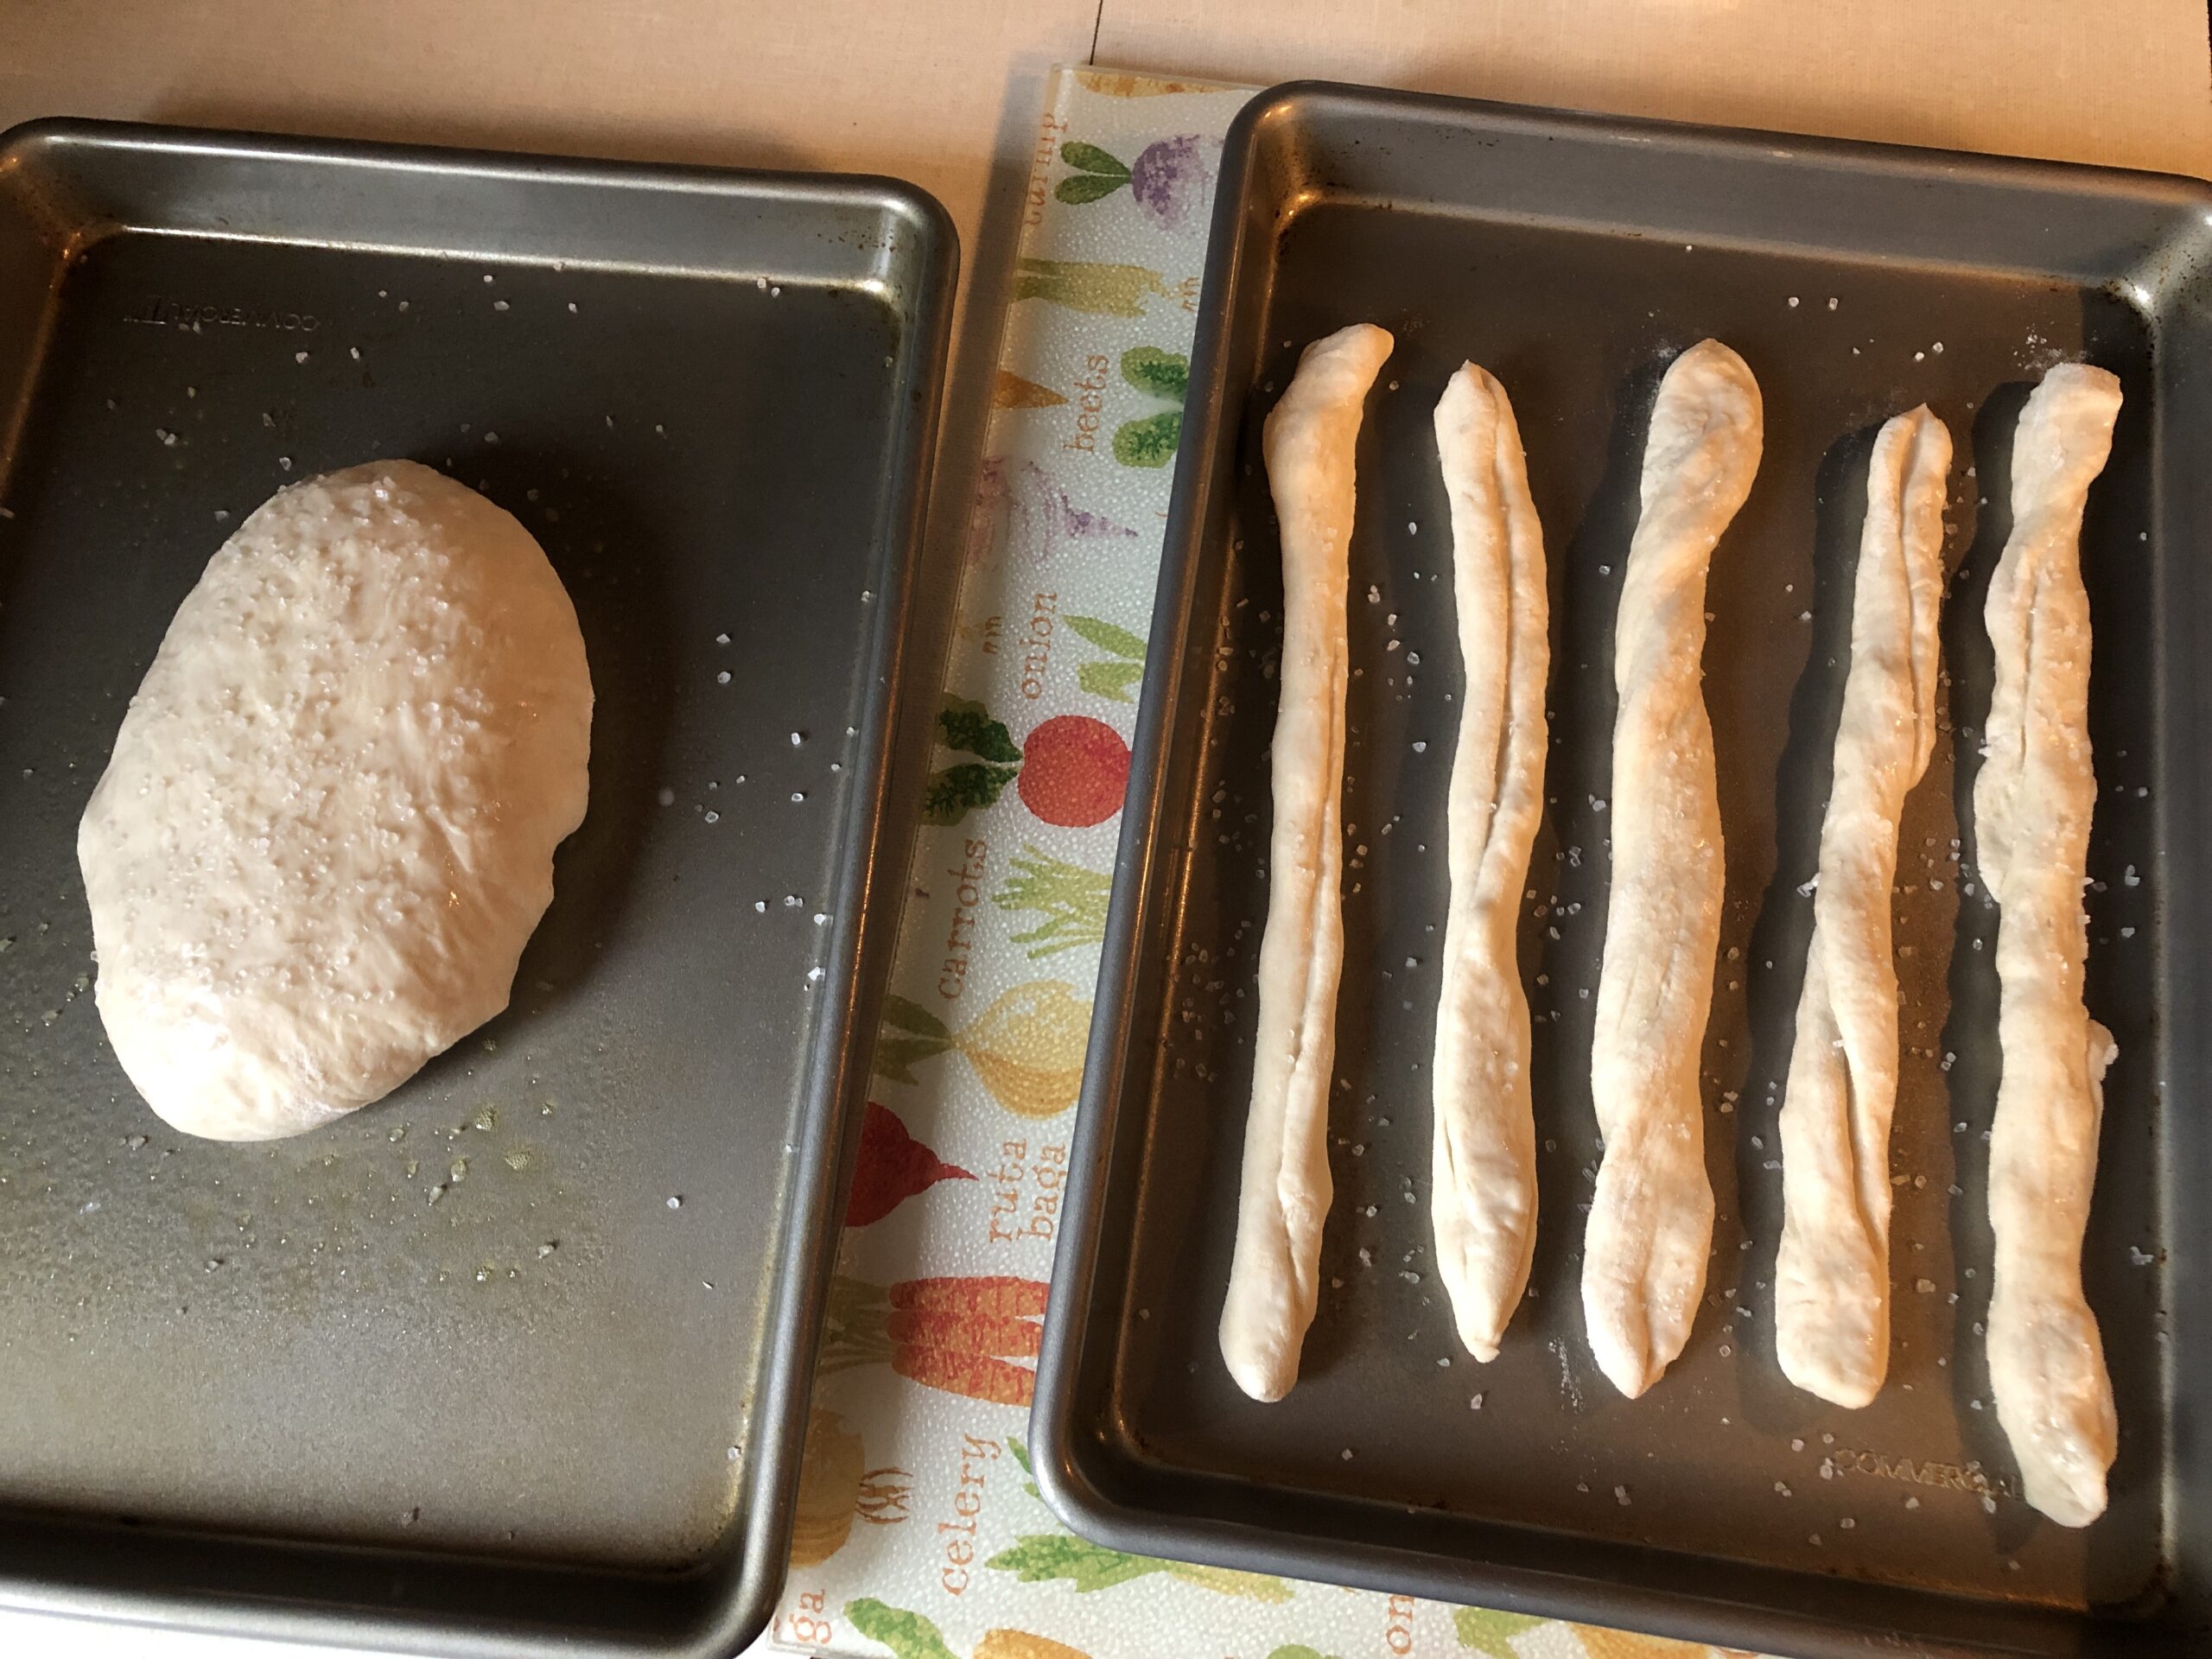
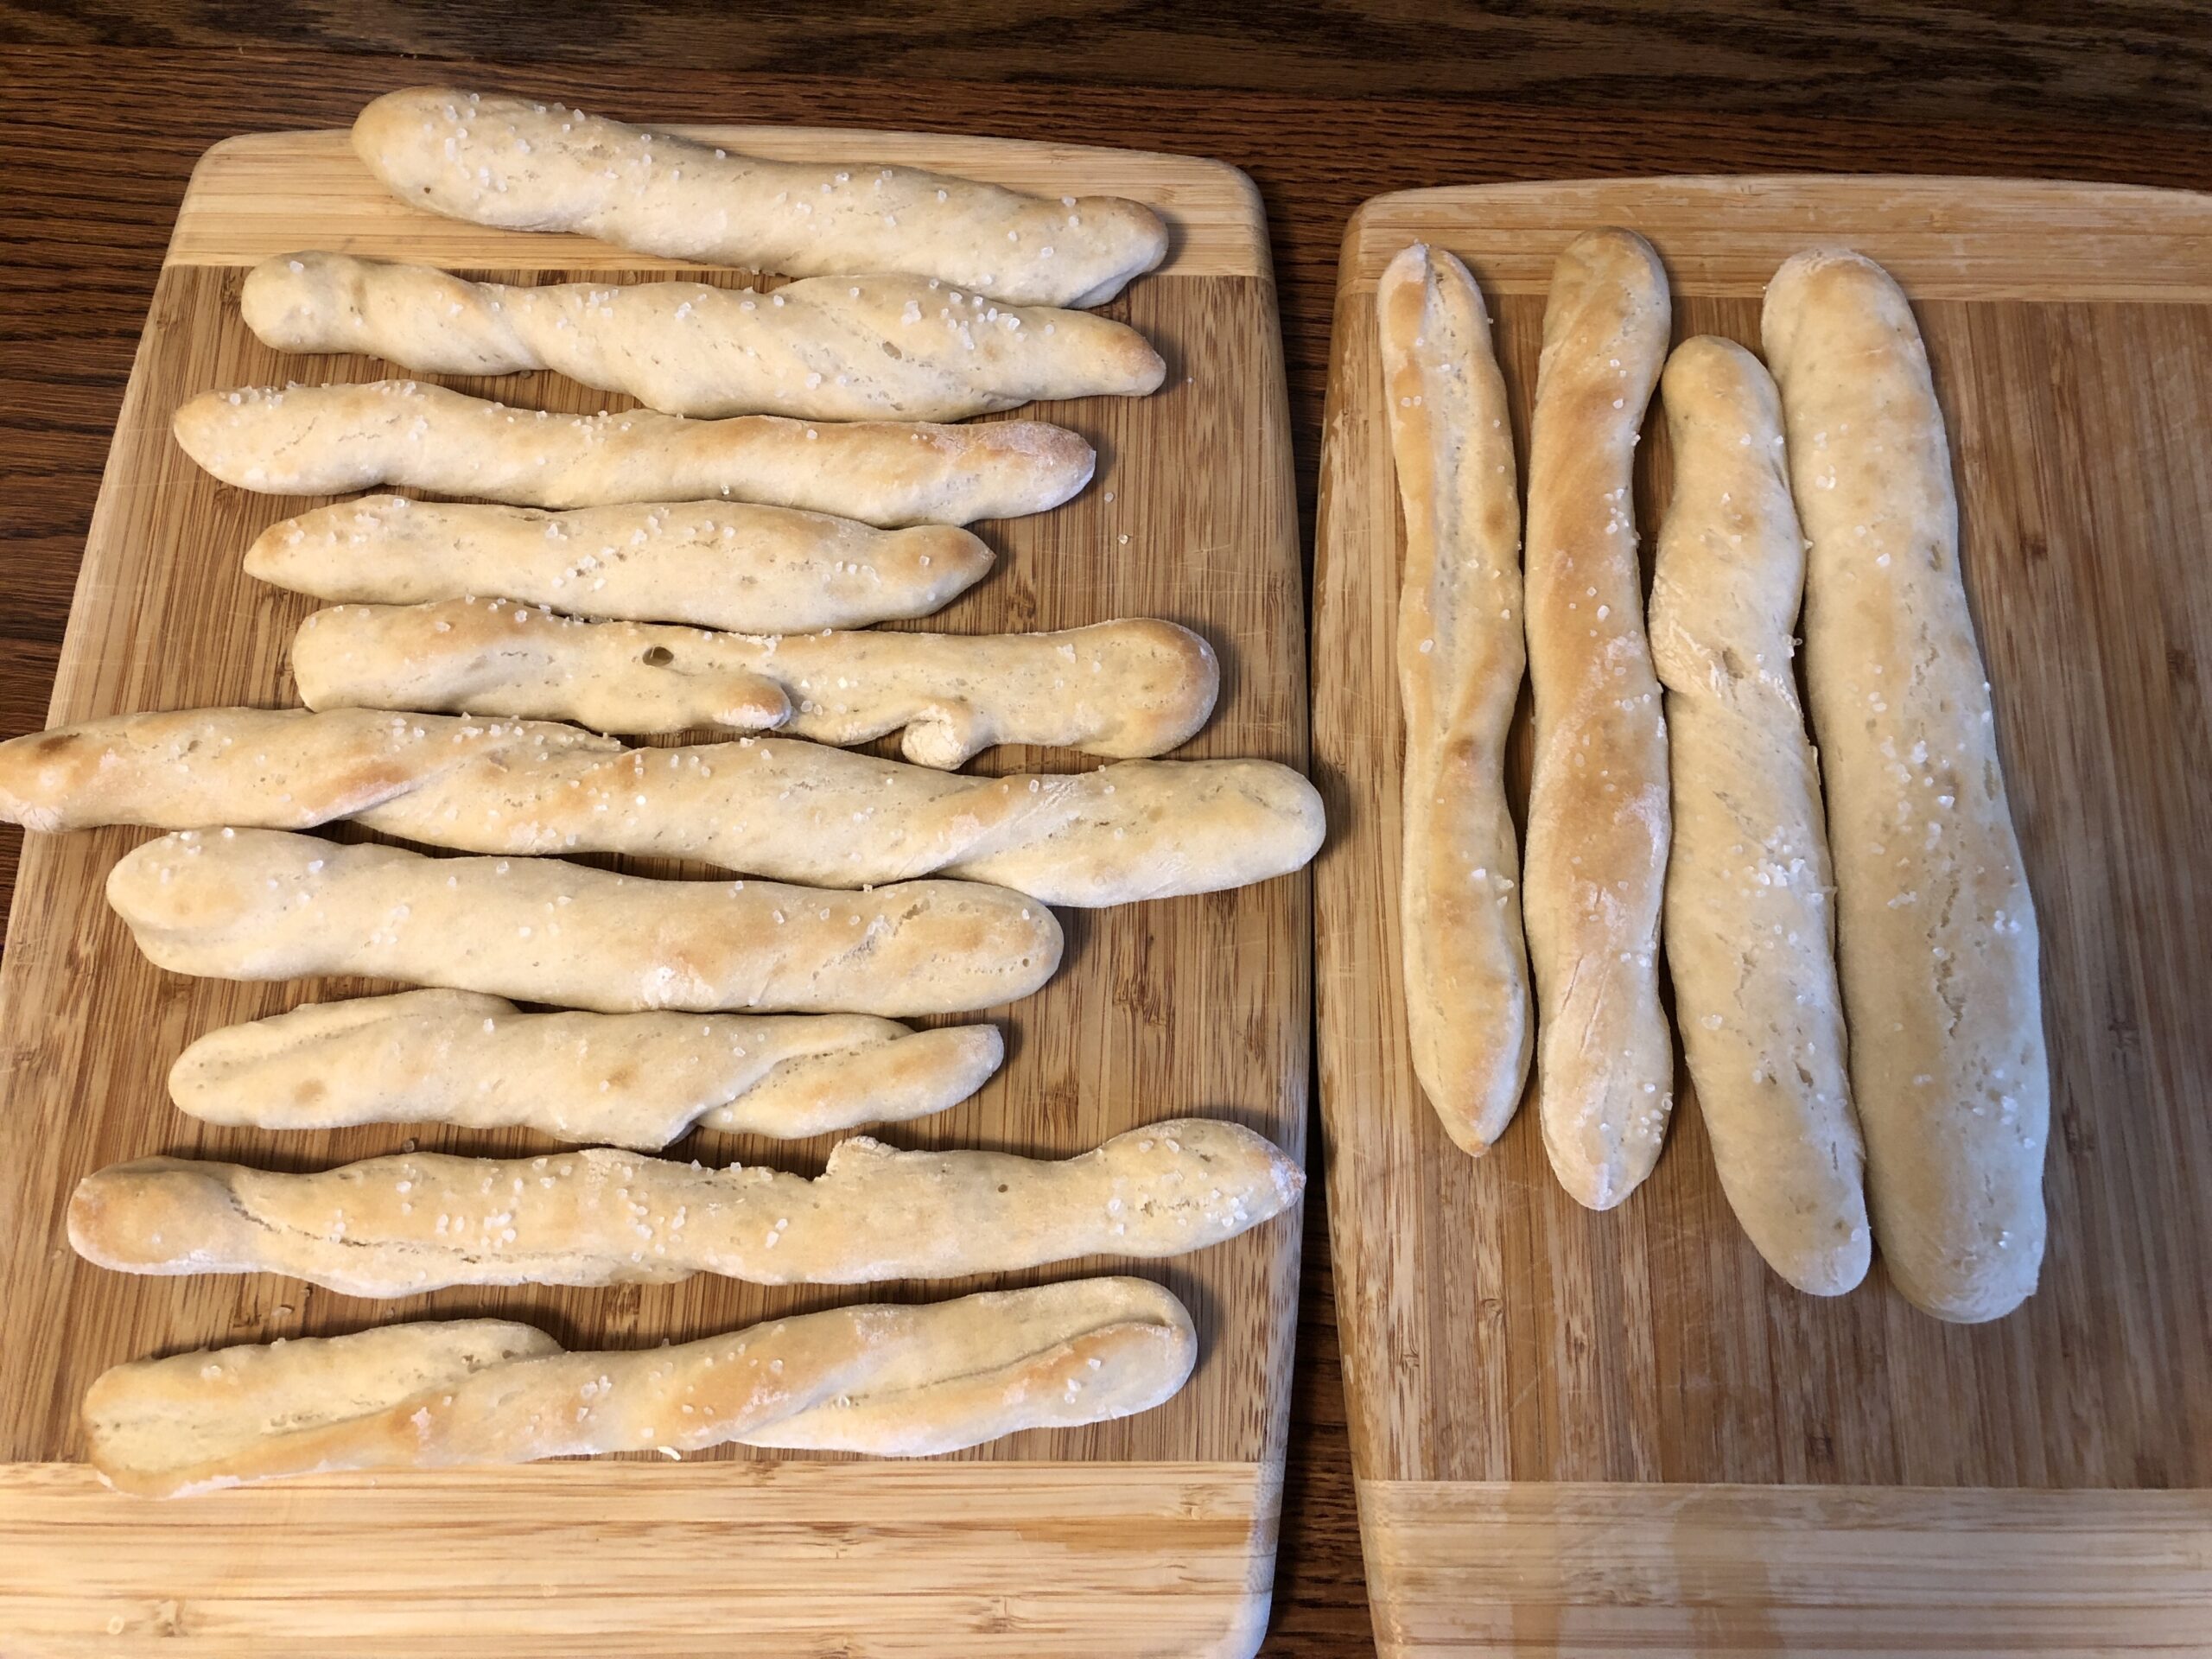
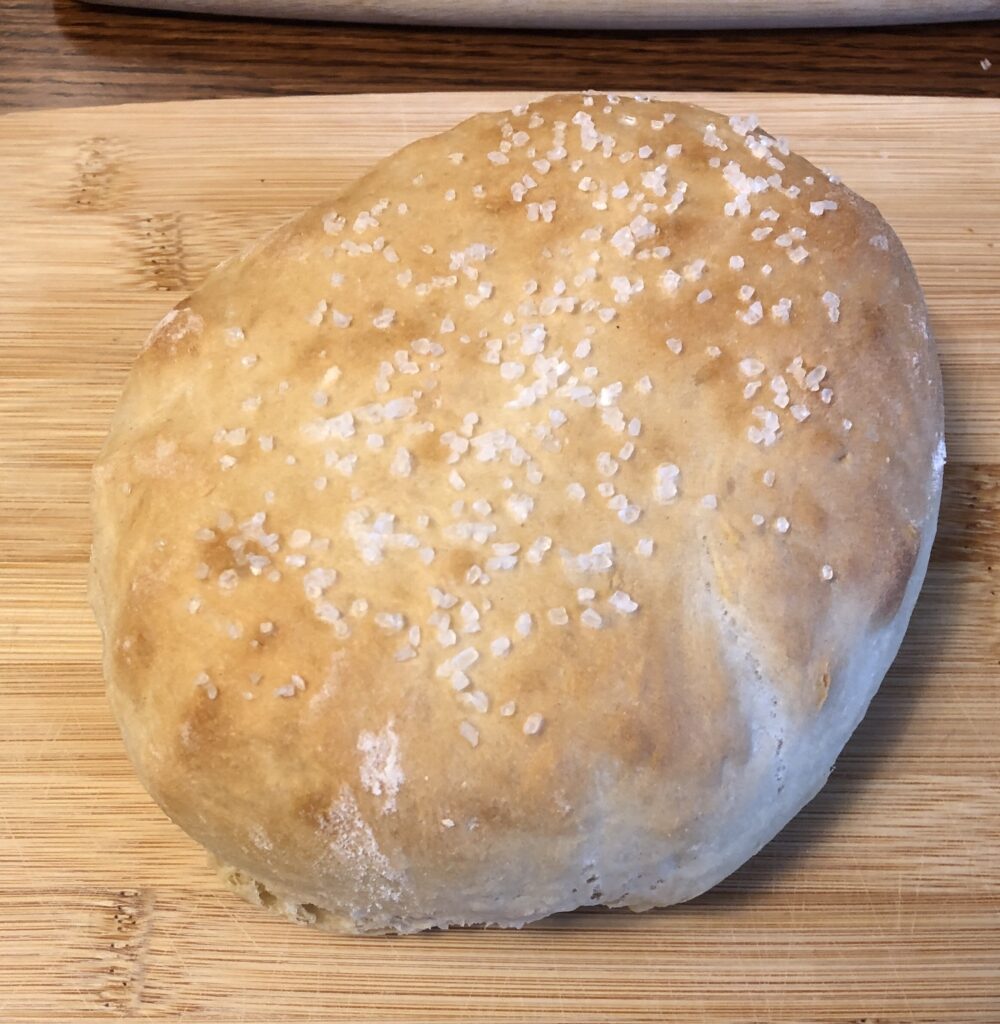
Step 5: Shape the dough. For this batch, I just made pretzel sticks. You could call them bread sticks. After cutting off chunks of dough, I gently stretched each piece, rolling them to make a long stick that fit on my baking sheet. After I made about a dozen sticks, I made a small round loaf of what was left of the dough.
Step 6: Finish the pretzels, by brushing them with milk and sprinkling salt on them. I did the same with the small loaf of bread.
Step 7: Bake 15-20 minutes until golden brown.
I’m sure anyone could do a better job of making pretzel shapes than me, but I think the “pretzel bread” could be interesting toast!
I hope these instructions are useful for Emily, Anna and others as a simple yeast bread recipe. Enjoy!!
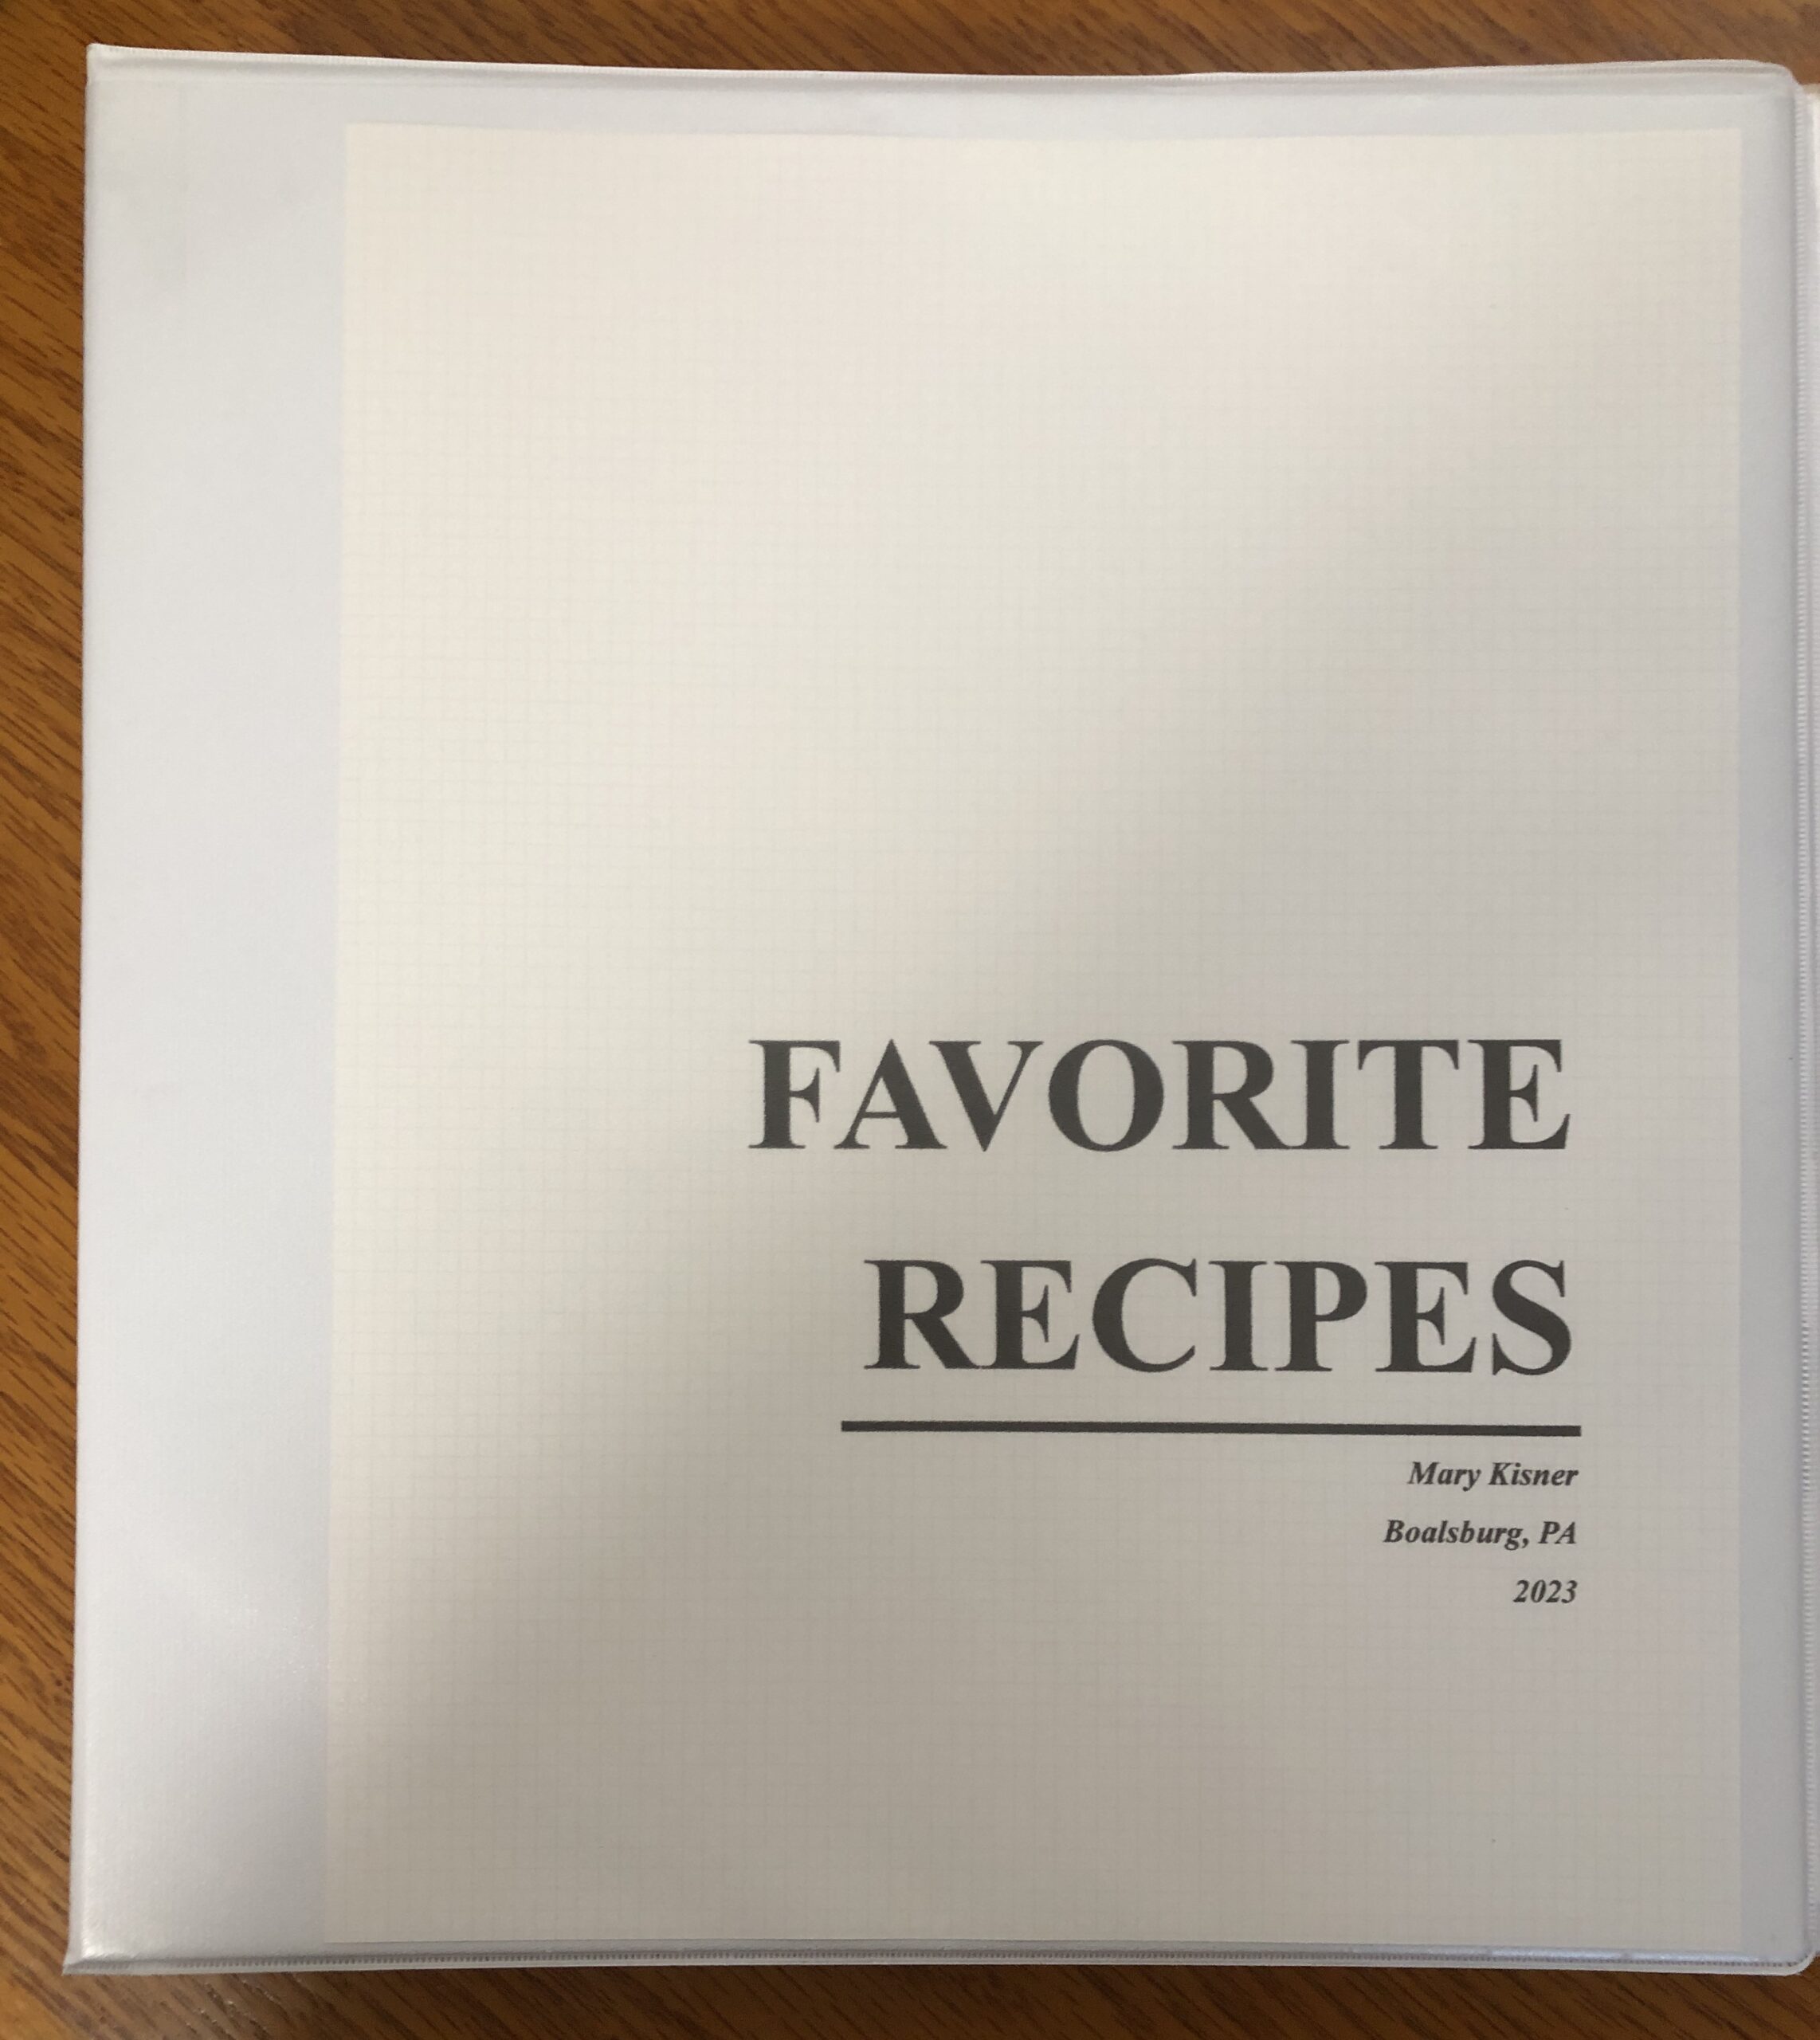
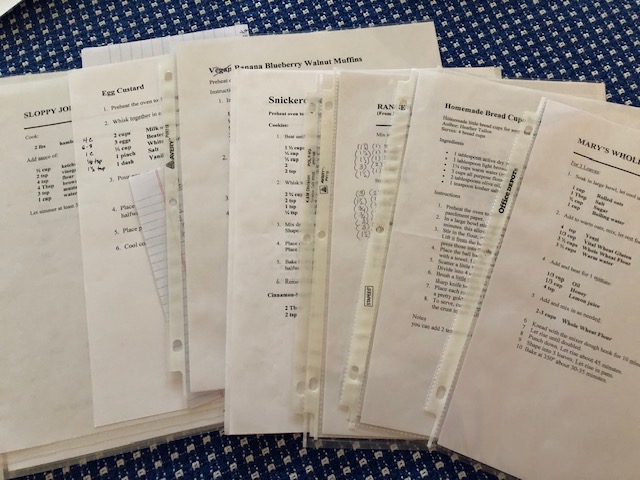
Finishing my Favorite Recipes notebook took almost as long as deciding which recipes to include! The finished notebook includes 32 recipes that I have made over the years.
Several recipes were included by special request, like Deviled Eggs…I’ve never had a written recipe so I had to make them first and take pictures before I could write it down. For others, I had not looked at the recipe for many years and had to make sure I remembered who had given it to me. The recipe for Sloppy Joe came directly from my mother-in-law when we first got married!
Years ago, I gave up on a tiny recipe box. The recipes had to be handwritten and any notes I wanted to make just didn’t fit on the cards. My daughter showed me a 3-ring notebook where she saved recipes she had found on the internet. Each recipe was in a plastic sleeve. She could remove the recipe from the notebook while she cooked and the plastic sleeve kept the original safe from splatters. Great idea! I bought the plastic sleeves at Staples:
I now have several notebooks going, some with my own recipes, another with recipes from the internet I want to try. If I make a recipe and don’t like it, I can just remove it from the plastic sleeve and discard it. If I do like it, I retype it in the format I prefer and add it to my notebook.
Over the last month I’ve been collecting and sorting recipes I wanted to include in this notebook…with plans to send a copy to my son and his family in California, and a copy to my daughter and her family at Christmas. I haven’t made some of the recipes for years, so I took the time to make a few to make sure it was still a “favorite.”
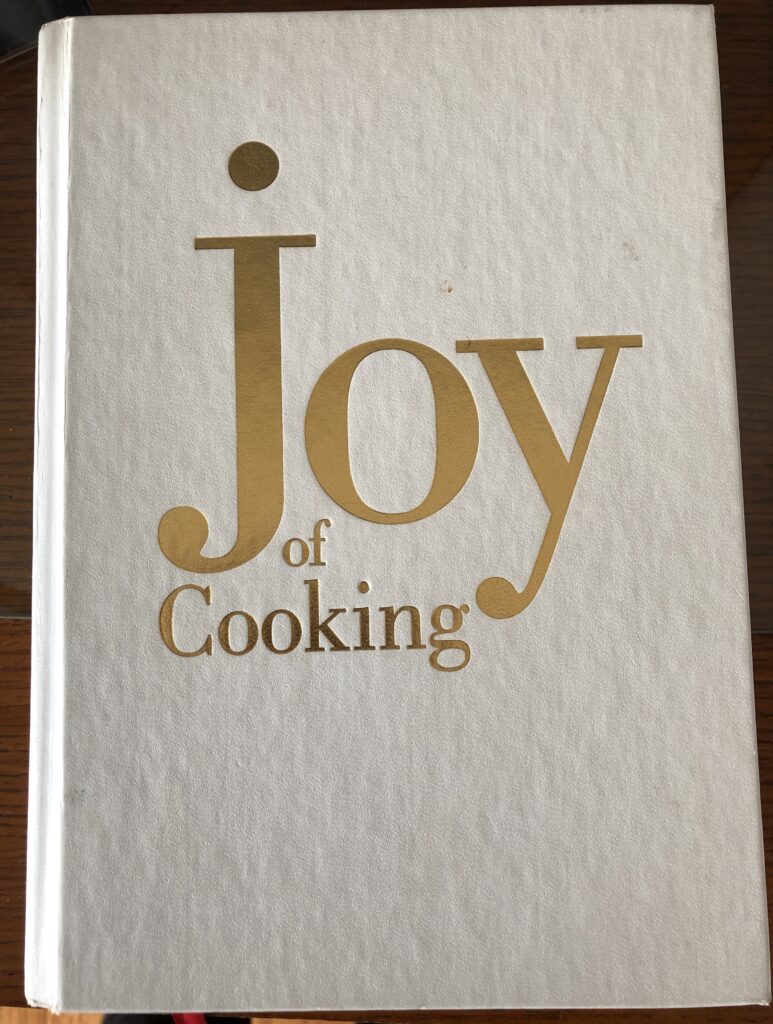
Once I decided on the 32 recipes, I made sure I had good instructions for someone else to follow. For example, I have a recipe from my mother that was in her recipe box with just a list of ingredients and an oven temperature. I had to look up a similar recipe in my Joy of Cooking (by Irma S. Rombauer & others) to see what they recommended for instructions.
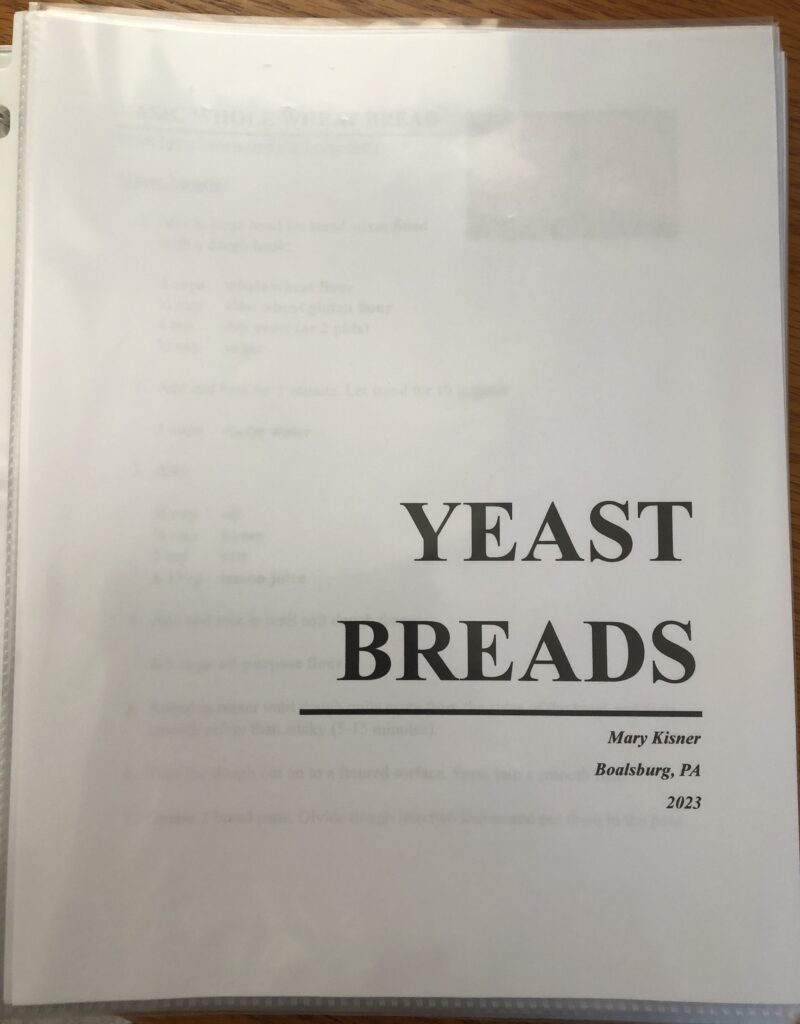
Organizing the 32 recipes into a coherent list led me back to my Joy of Cooking for ideas. I ended up with 5 categories: Yeast Breads, Quick Breads, Desserts, Cookies and Other Dishes. The recipes are listed in alphabetical order in each section. This became the Table of Contents.
Then I made another list of the 11 recipes that I’ve written about on my blog, with links to those posts. Sometimes seeing the step-by-step process in pictures is helpful. That list became the Table of Contents Tutorials.
After I assembled all the recipes in their plastic sleeves, I realized I needed some Section Dividers. Since the pages are not numbered, you just have to get the recipe back into the appropriate section to make it easy to find it the next time. I will also include a few extra sleeves in each notebook so folks can add their own recipes over time.
Finally, I had not planned to create more than 3 notebooks…one for me, one for my son’s family and one for my daughter’s family. Already, I have interest from a few nieces and nephews who would like the recipes. Rather than try to figure out how to post the whole pile on DropBox, especially since it’s a folder of separate PDF documents, I decided to buy a few 1 GB flash drives. When I need to share, I’ll just burn a flash drive and put it in the mail.
Sounds complicated, I know. I think I’m finally done “editing.” Now I can stop baking so much and get back to the greyhound coats! Enjoy!
I’ve been asked to find some cookbooks that would be appropriate for my 11 1/2 year old granddaughter for Christmas. She’s the one that helped make various dog treats for a charity sponsored by her school and made $700! She obviously has some interest in cooking! I have ordered several cookbooks aimed for young teens but I’m not sure if they will interest her (more about those books later). Most of the books, from what I can tell online, show a photo of the finished product but don’t show the steps along the way. Then, the instructions are written in paragraph form. I know written instructions are followed more easily if presented in short bulleted sentences. I also like showing the steps with a photo if possible. I can’t help myself! The format I’m using for my recipes is modeled after my Joy of Cooking cookbook.
I’ve never really written my Deviled Eggs recipe down but I wanted to include it in my notebooks for my kids/grandkids of my favorite recipes. I thought I’d see if I could write the recipe in a way my granddaughter could follow along and make them herself.
Since my WordPress web program won’t let me format in two columns, I’m going to post the recipe first; then I’ll treat each page of my tutorial as a photo so you can see what I’m trying to do. See if this makes sense to you!
Here is the recipe:
Here are the four pages of the illustrated version:
Pg. 1
Pg 2
Pg. 3
Pg. 4
Granted, this is a pretty simple recipe. Before I expand other recipes of her choosing, I’d love some feedback if you have access to a young teen. Does it make sense?
I’m thinking I could work with my granddaughter and try a recipe…take photos of her making the recipe and create an illustrated recipe for her to keep in her very own Favorite Recipes notebook. We’ll see if she’s interested at Christmas time!
Do you have a stash of recipes you refer to all the time? Think about sharing them with your loved ones this Christmas!
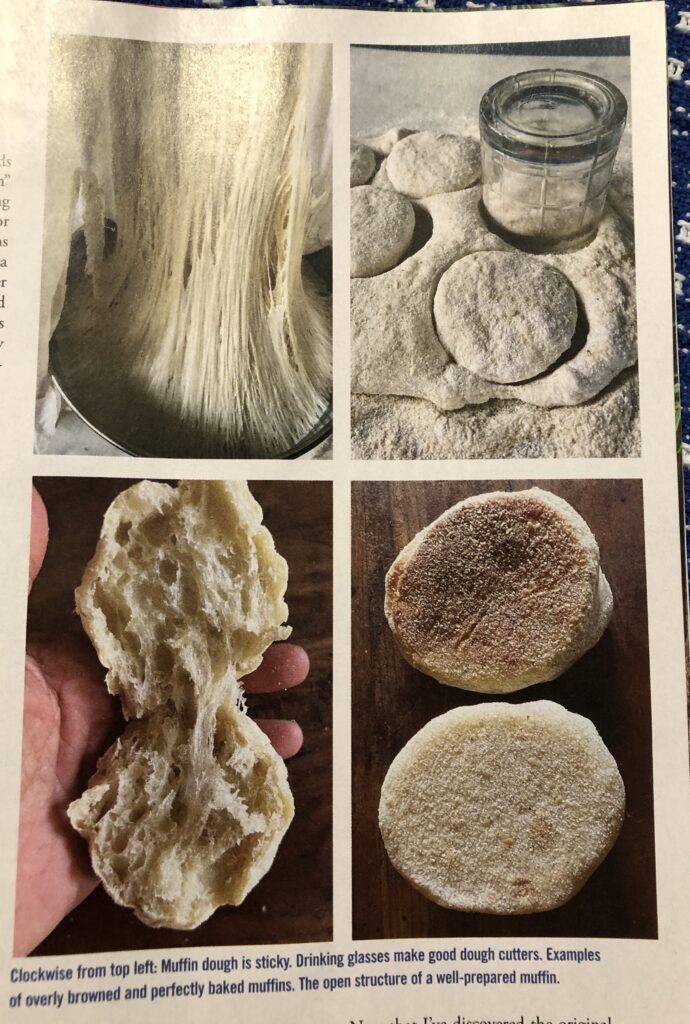
I’m sure many of you love toasted English Muffins. I was interested in trying to make my own when I read my latest Mother Earth News magazine. Right there on the front cover was a teaser…
When I went through the article, I discovered why I haven’t managed to actually make English Muffins! The multi-step instructions seemed complicated. Then I remembered making English Muffin bread years ago that had many of the same ingredients. I found a recipe on the King Arthur Baking website that was pretty simple so I decided to try it before including it in my Favorite Recipes notebook I’m putting together for my kids for Christmas. Here is the recipe from that site: https://www.kingarthurbaking.com/recipes/english-muffin-toasting-bread-recipe/
Following the recipe, you’ll notice it calls for 1 cup of milk. I cannot have regular dairy milk…even in baked goods. So, I substituted almond milk. It worked fine.
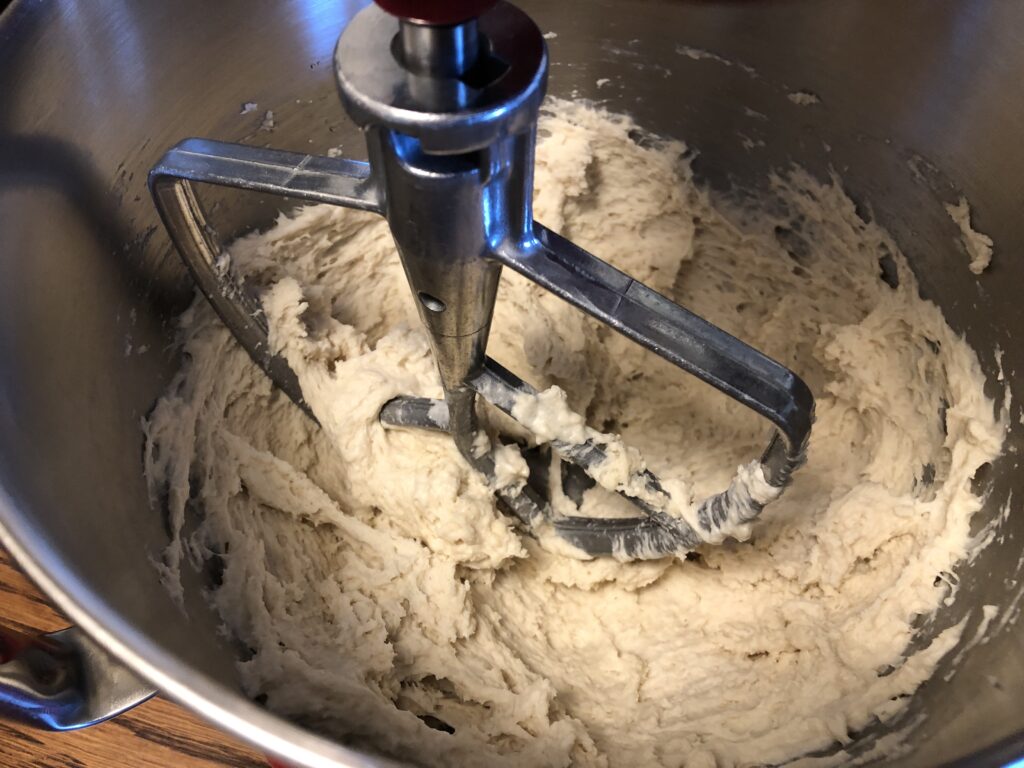
The dry ingredients were measured into my stand mixer bowl.
The wet ingredients were measured into a small saucepan and heated up on the stove. I love the way they said to test how hot it was…120-130 degrees F. “It will feel uncomfortably hot if you quickly dip your finger into it.” That worked great…with clean hands of course!
I poured the warm wet ingredients into the dry ingredients in my mixer bowl and mixed it thoroughly. Amazing, the dough was fairly wet and stretchy…it looked just like the picture in the Mother Earth News article:
Look at the picture below and the small one on the upper left. When the mixer was running it stretched the dough out like that! Success!
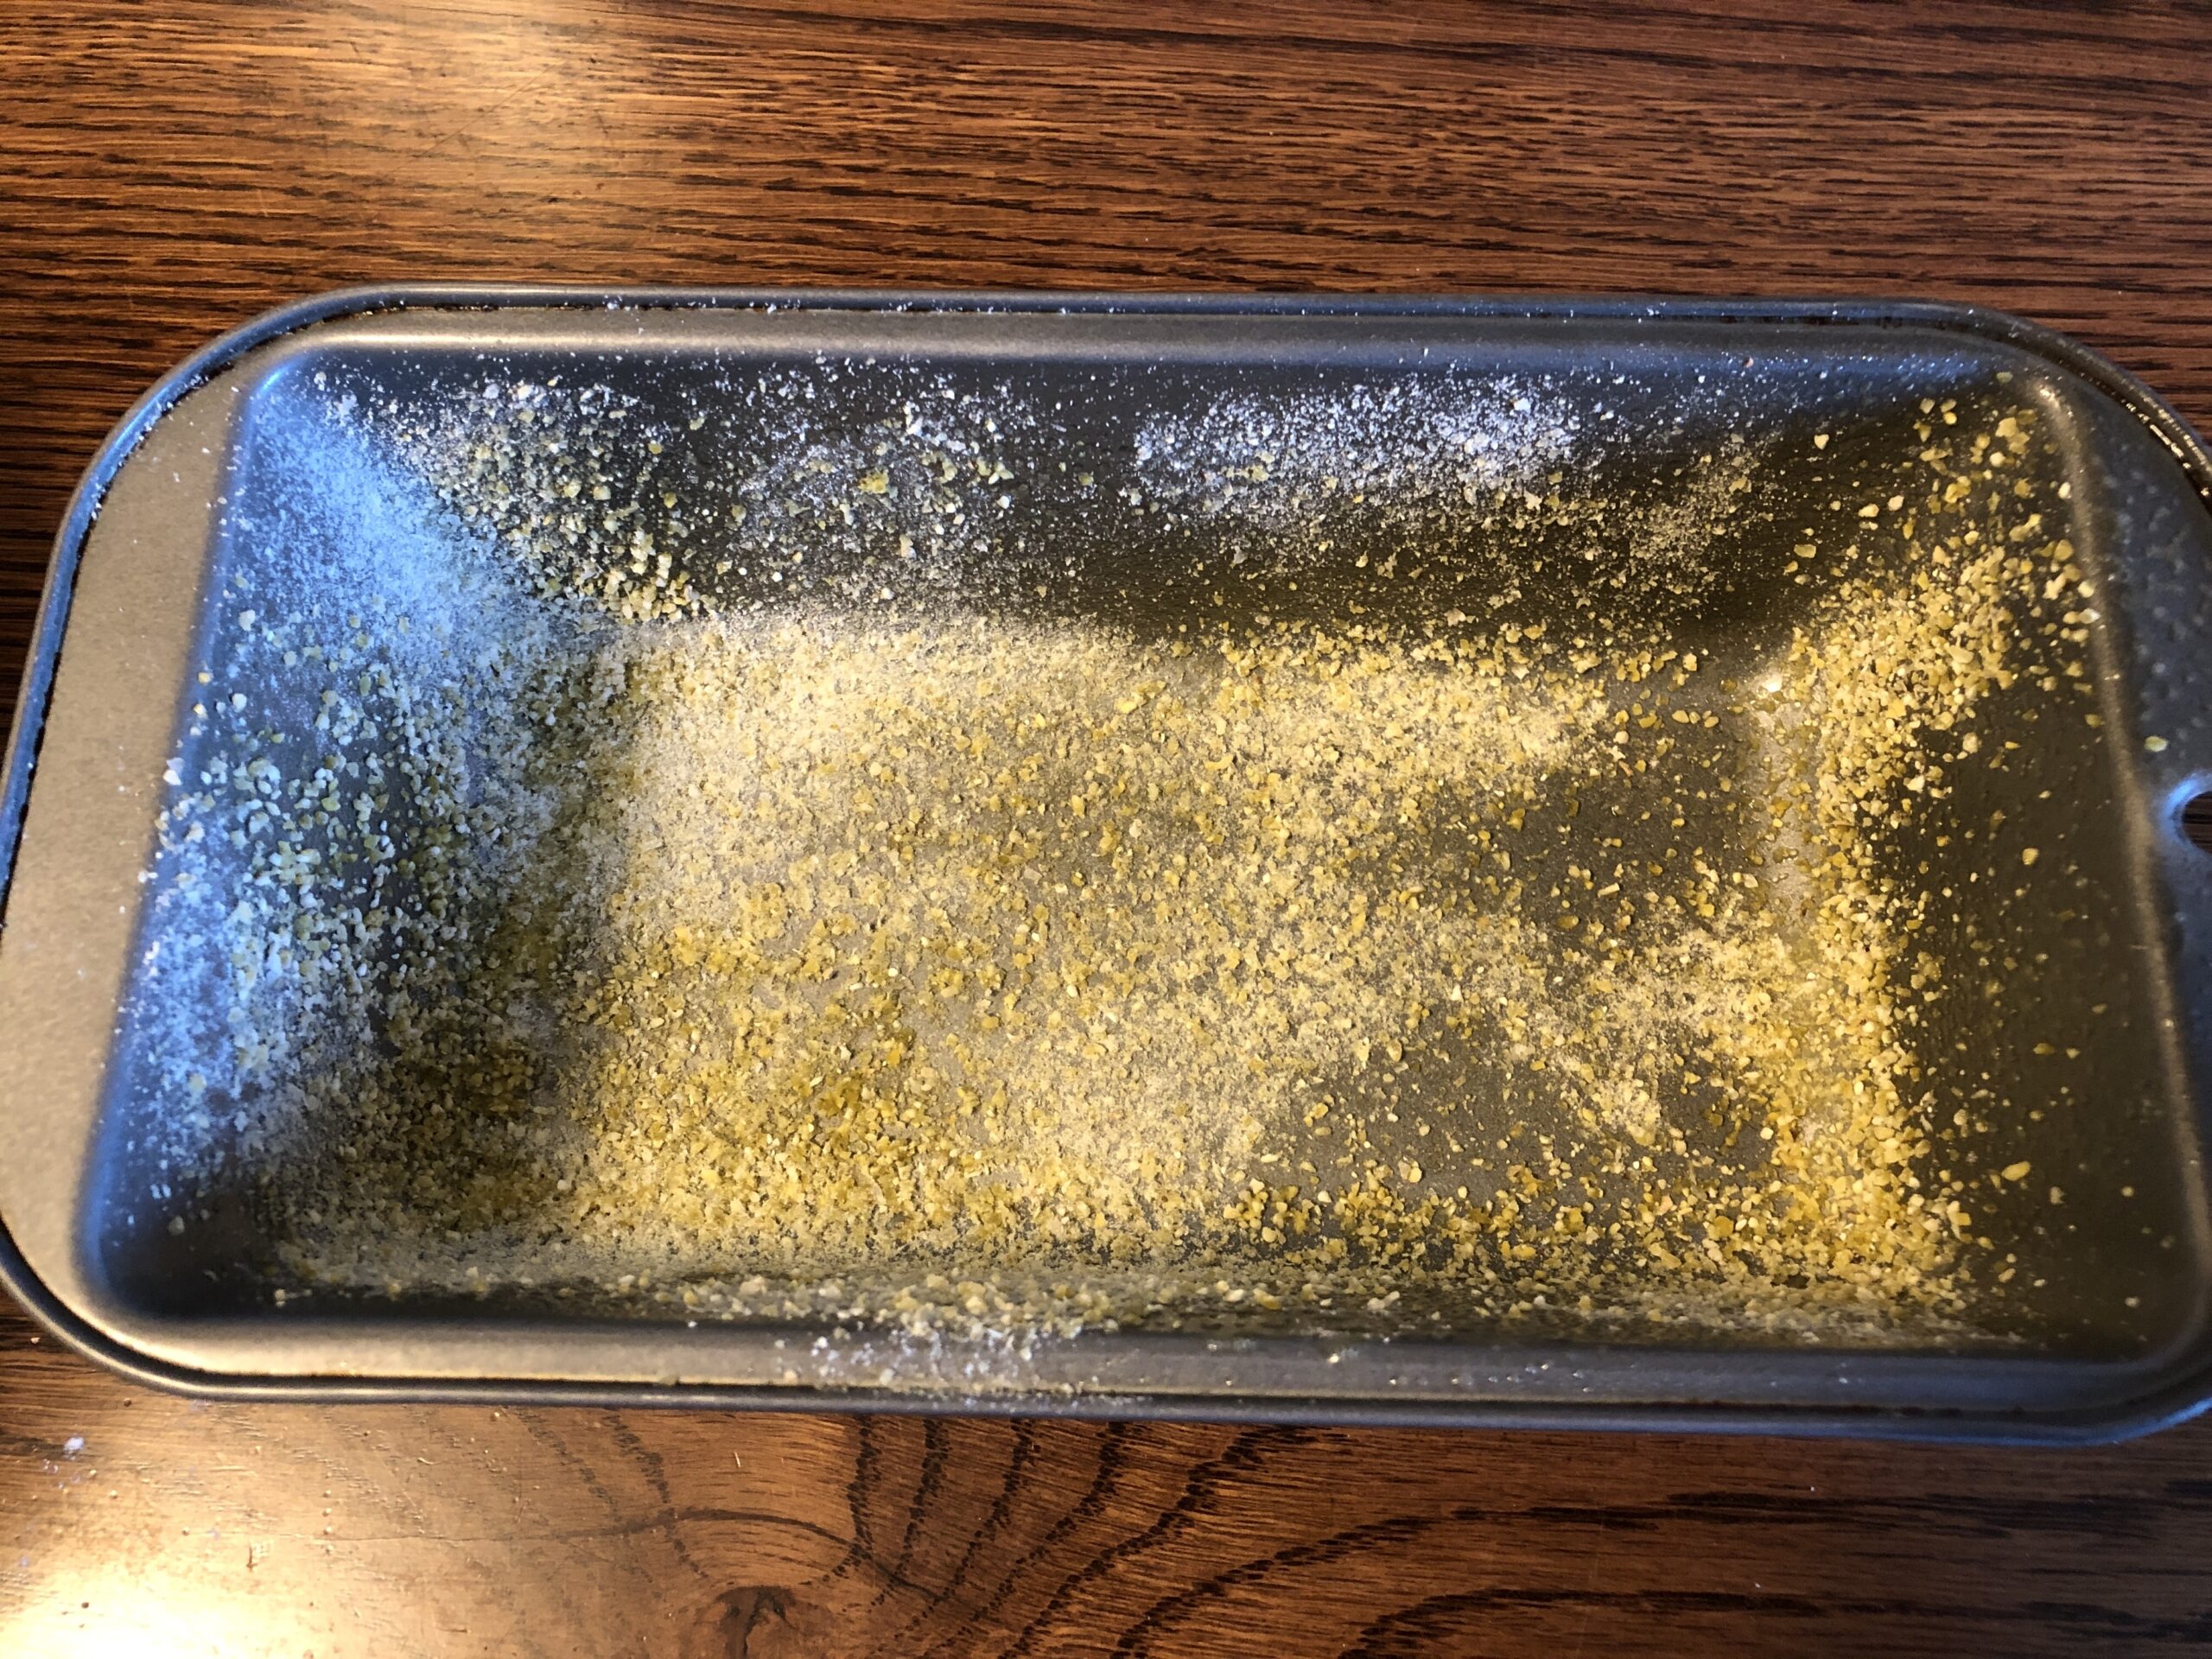
Then I greased a loaf pan and sprinkled cornmeal into it.
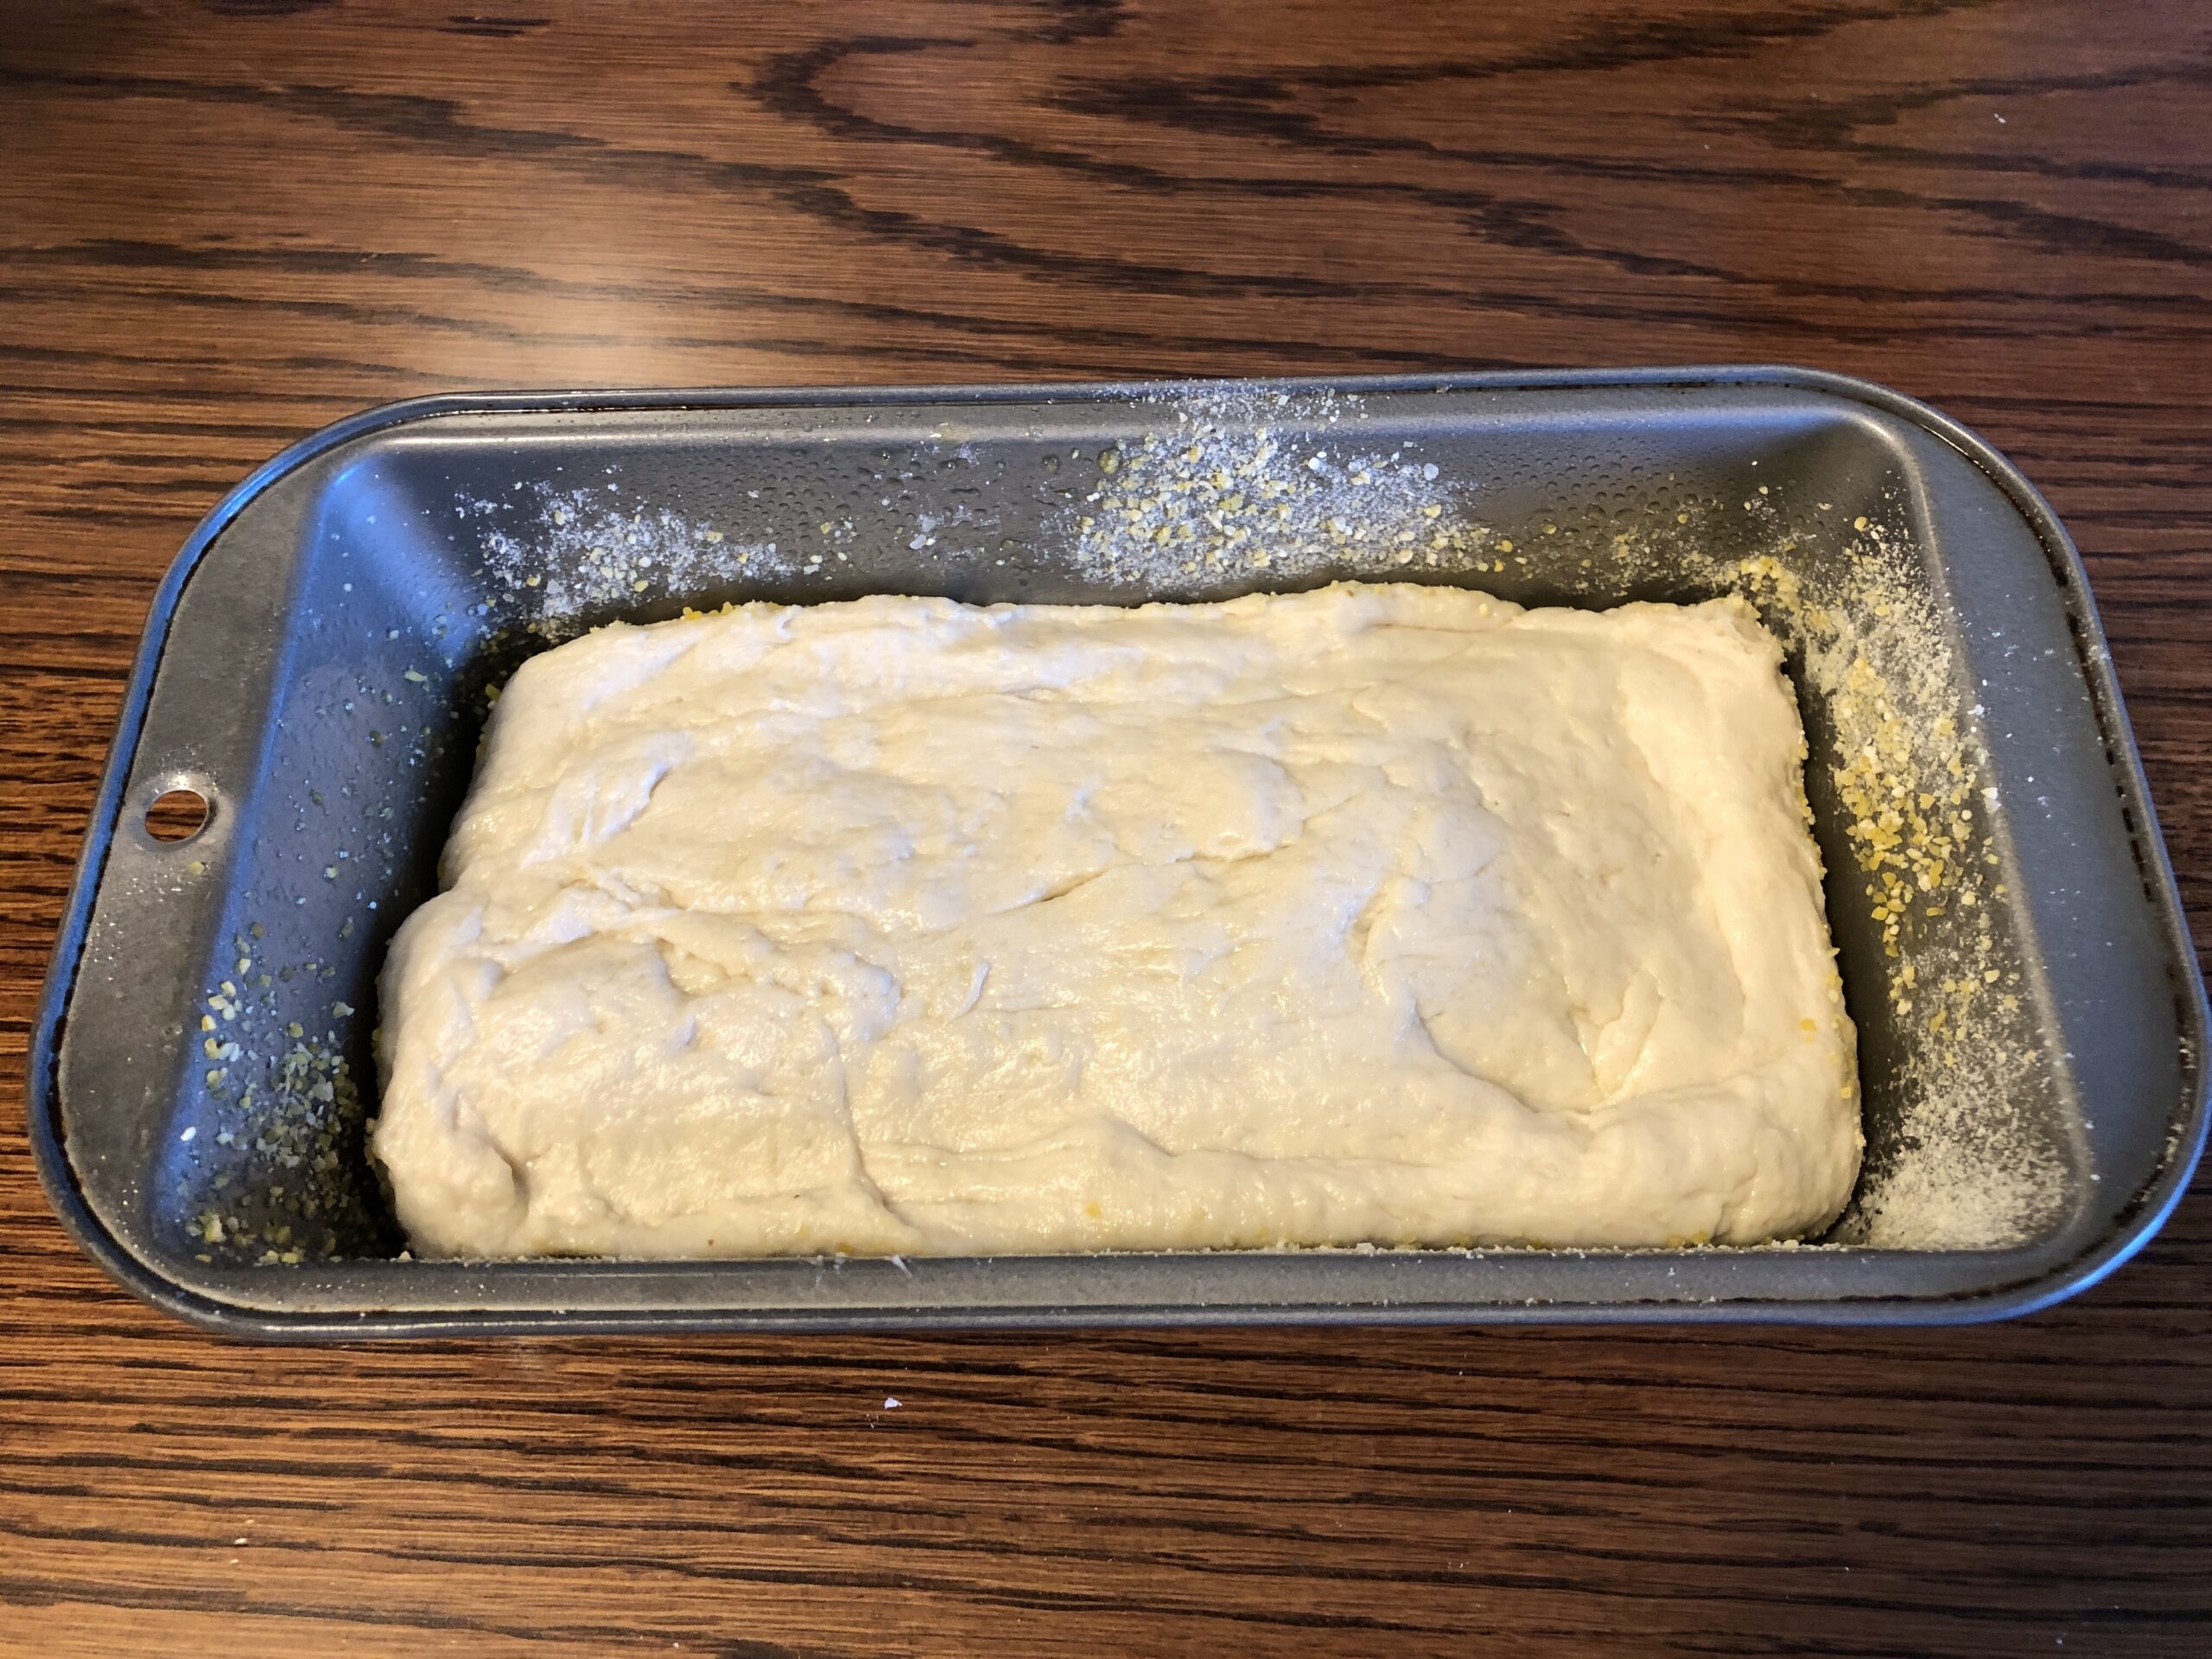
To scoop the sticky dough out of the bowl, I sprayed my spatula with oil. Then I pressed the dough into the baking pan.
I covered the pan with a towel and let it rise about an hour. It rose just above the pan.
I preheated the oven to 400 degrees F while it was rising and baked the bread for 25 minutes. It turned out great!
This bread was delicious toasted and even did well as a sandwich bread! This recipe will go in my Favorites book!
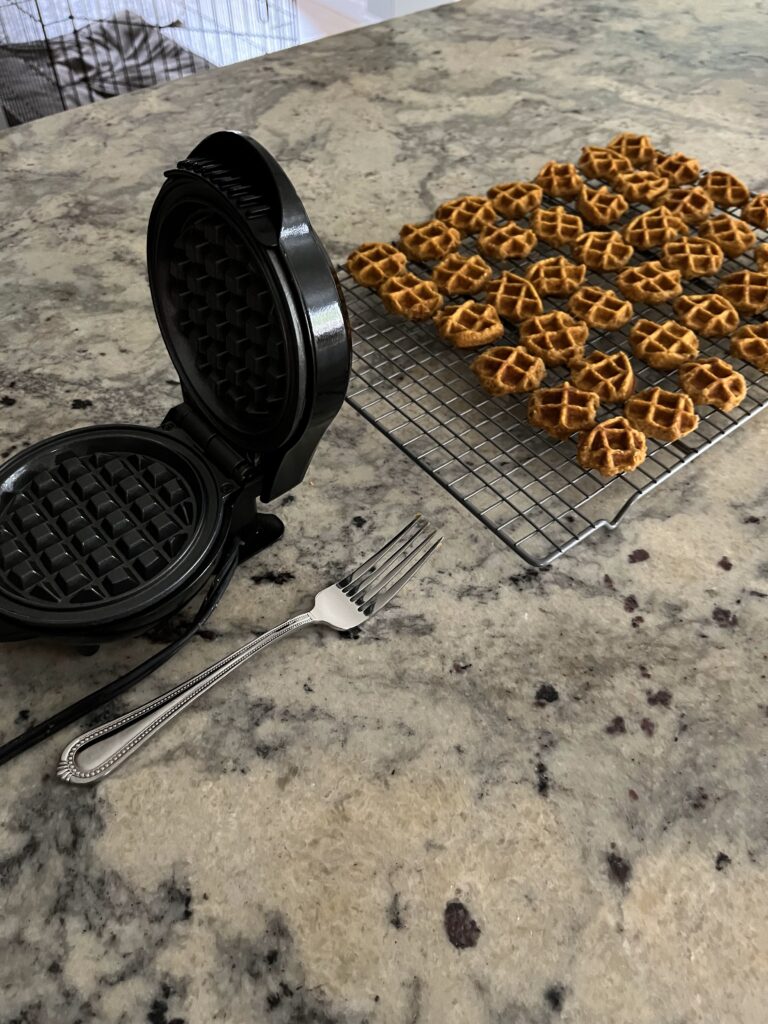
You may wonder why I’m interested in making dog treats! I don’t have a dog…but I do have access to a changing group of greyhounds that love treats! Of course, my grandpuppy Daisy is always available to try new treats when I visit.
In fact, I’m motivated to make dog treats for two reasons. First, making these treats satisfies my need to create something new and useful. I could always make cookies for us, but then we’ll eat them! Second, I’m inspired by my daughter and granddaughter who made and sold bags of homemade treats as part of a fundraiser at their local elementary school last month. Anna worked hard to help make, package and sell dog treats over several weeks and raised $700 for a local charity! Very inspiring!
Anna and Daisy!
My first attempt to make treats started with a simple recipe I copied from online:
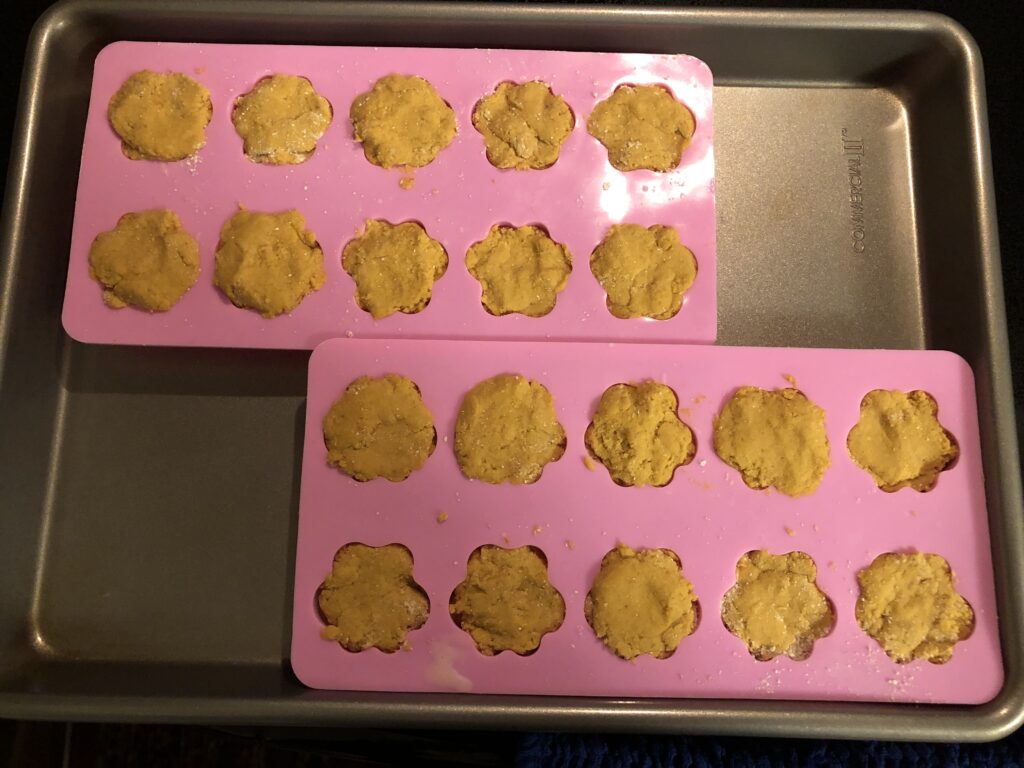
I had paw print molds. I mixed up the batch above and filled the molds…
…and baked them at 325 degrees F. They looked interesting and were scarfed up by the greyhounds. They disappeared so fast, I forgot to take a picture of them!
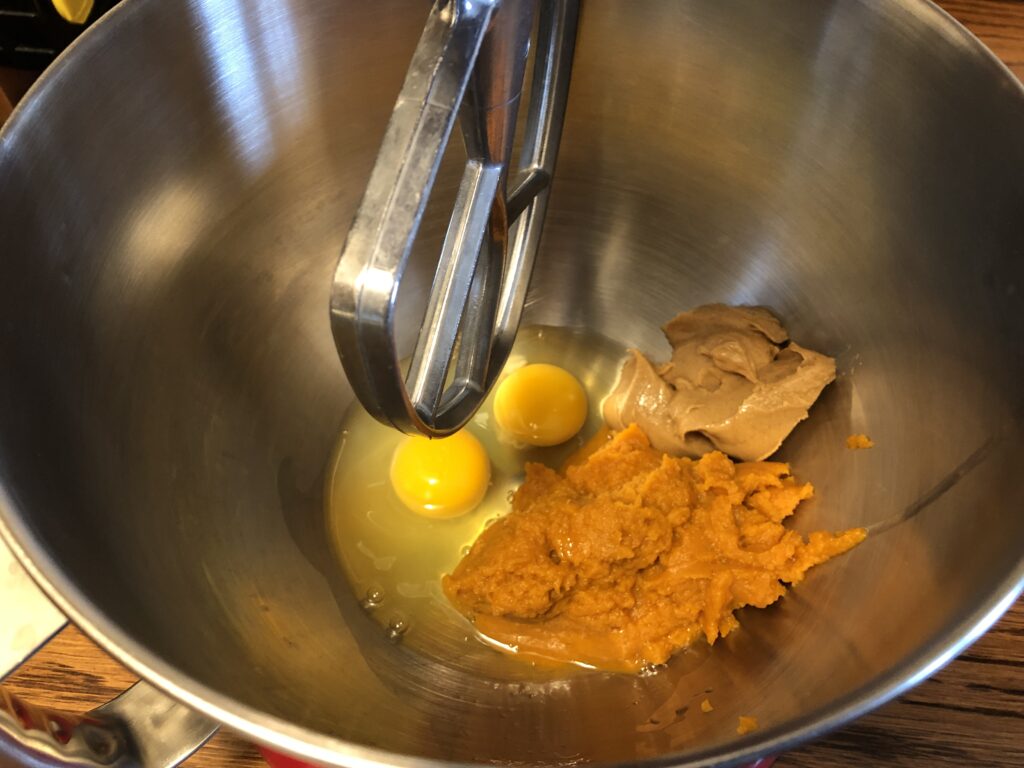
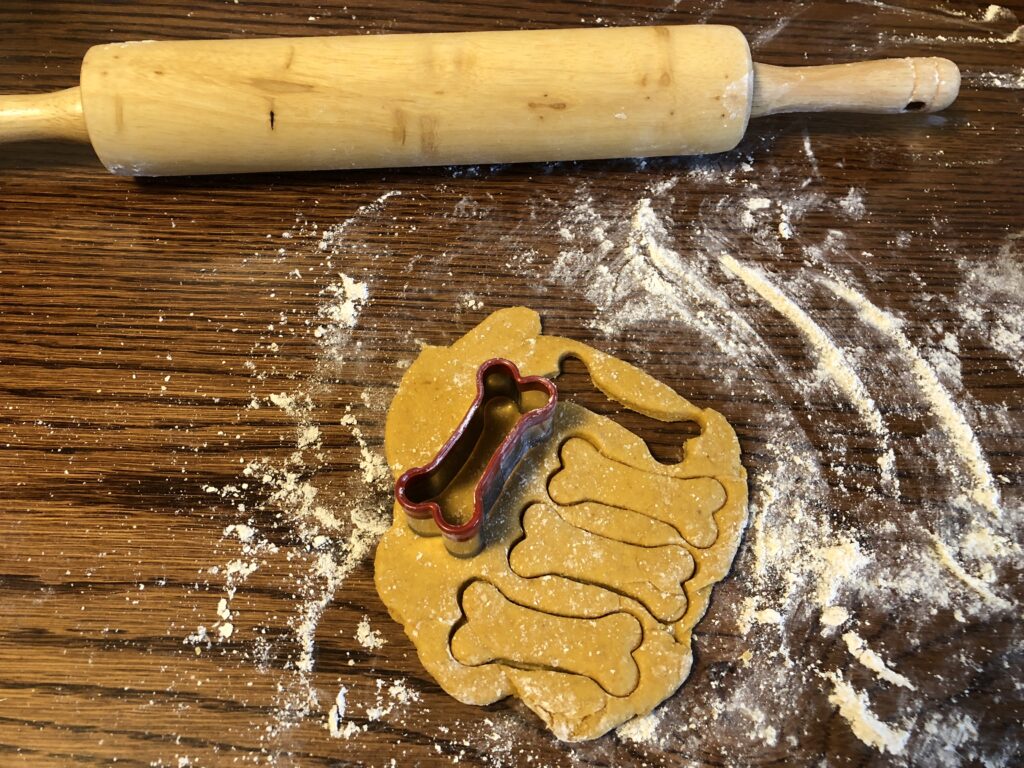
My next step was to get some sturdy bone cookie cutters. They came in the mail yesterday so I found another recipe for treats that could be rolled out. Here’s the recipe:
Mixing up the treats:
Adding the whole wheat flour made a nice dough:
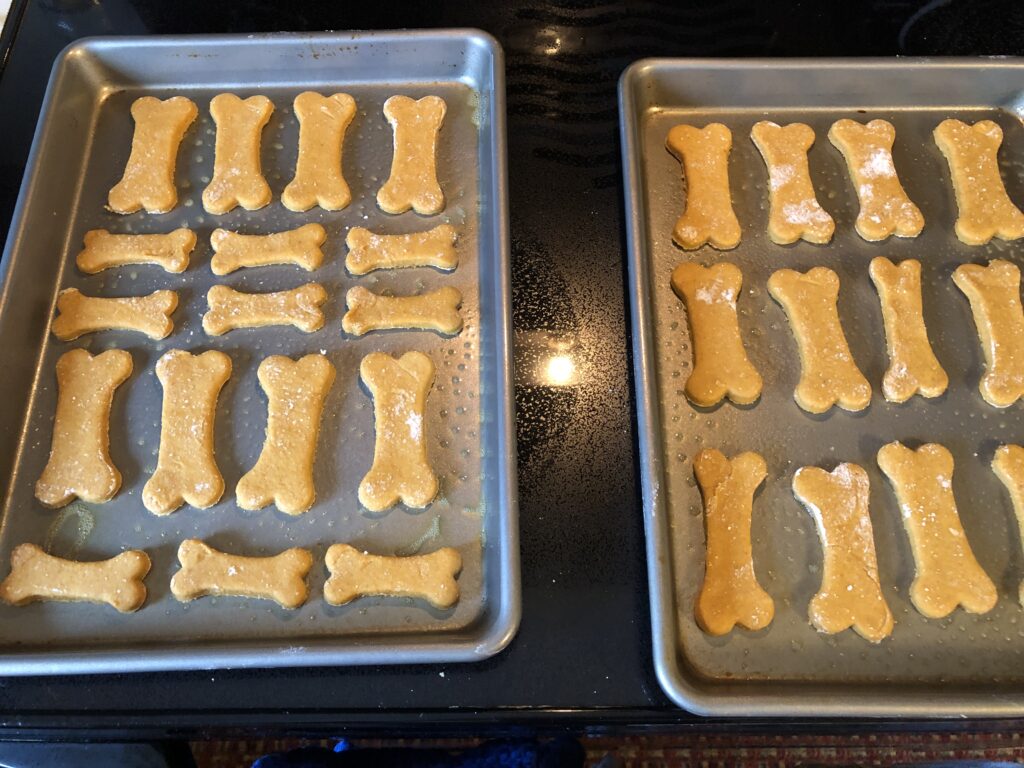
I filled four cookie sheets with “bones.”
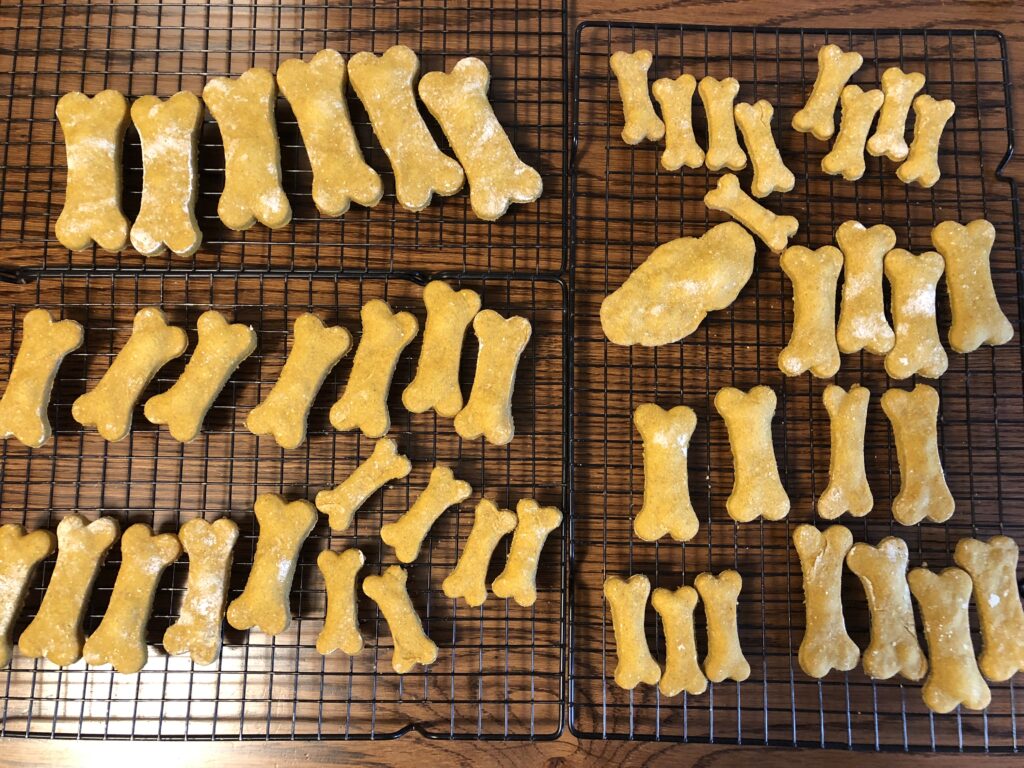
I baked them for 25 minutes. When cool they were still a little soft inside. Next time I think I’ll turn the oven down at the end to 325 degrees and give them an extra 10-15 minutes. The batch made about 40 treats. I’m sure they’ll be a hit!
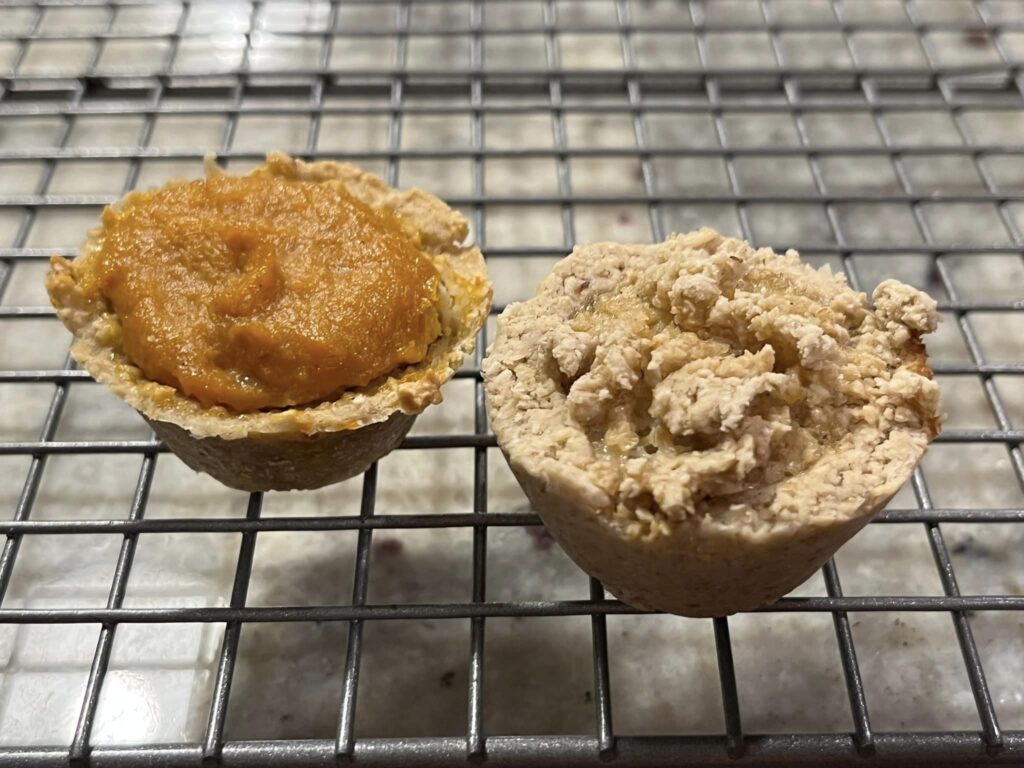
Kathy and Anna found several recipes for dog treats online, from tiny waffles (woofles) and tiny pumpkin pies! I’ll check out those recipes!
Just too adorable!!
So, thanks to my daughter and granddaughter, I have a whole new way to use my baking skills!
The last few weeks I have been baking more than I usually do…cookies, breads, muffins, etc. My enthusiasm for baking seems to come and go. I’ll bake several days in a row and then I put things away and move on to other projects. The last several months I seem to have focused on my sewing projects.
When I started pulling out ingredients to begin some baking projects a few weeks ago I discovered that the bag of commercial whole wheat flour that I had kept in the refrigerator was rancid! Then I tried using some toasted wheat germ that is in a tight jar, but was last used a year ago when Bert made his chocolate chip cookies….yuk, it didn’t smell right! Several other ingredients that I use infrequently had also gone rancid! So, while I wanted to bake up a storm, I first had to replace many of the ingredients. What a waste!
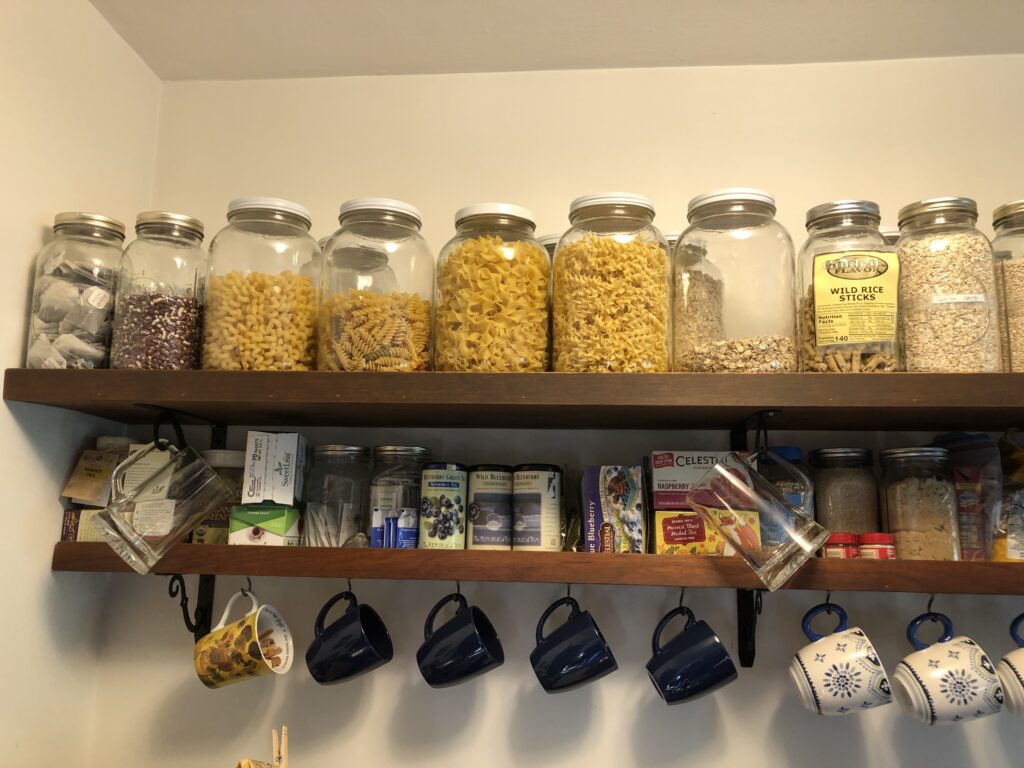
I really like to see what I have on hand in my kitchen. Many years ago, Bert added two lovely shelves in the kitchen so I could store various pastas, rice, flour and sugar in glass jars. I’ve learned over time that the dry pasta, white rice, flour and sugar do well on the shelf. However, I’ve had to store whole wheat flour, corn meal, almond flour and even yeast in the refrigerator or freezer.
I’ll really have to organize the freezer better to store ingredients, not just finished products, like loaves of bread. I finally did a search online to see which baking ingredients can be frozen. you can see the list here:
Here are some of the ingredients I use and how I store them.
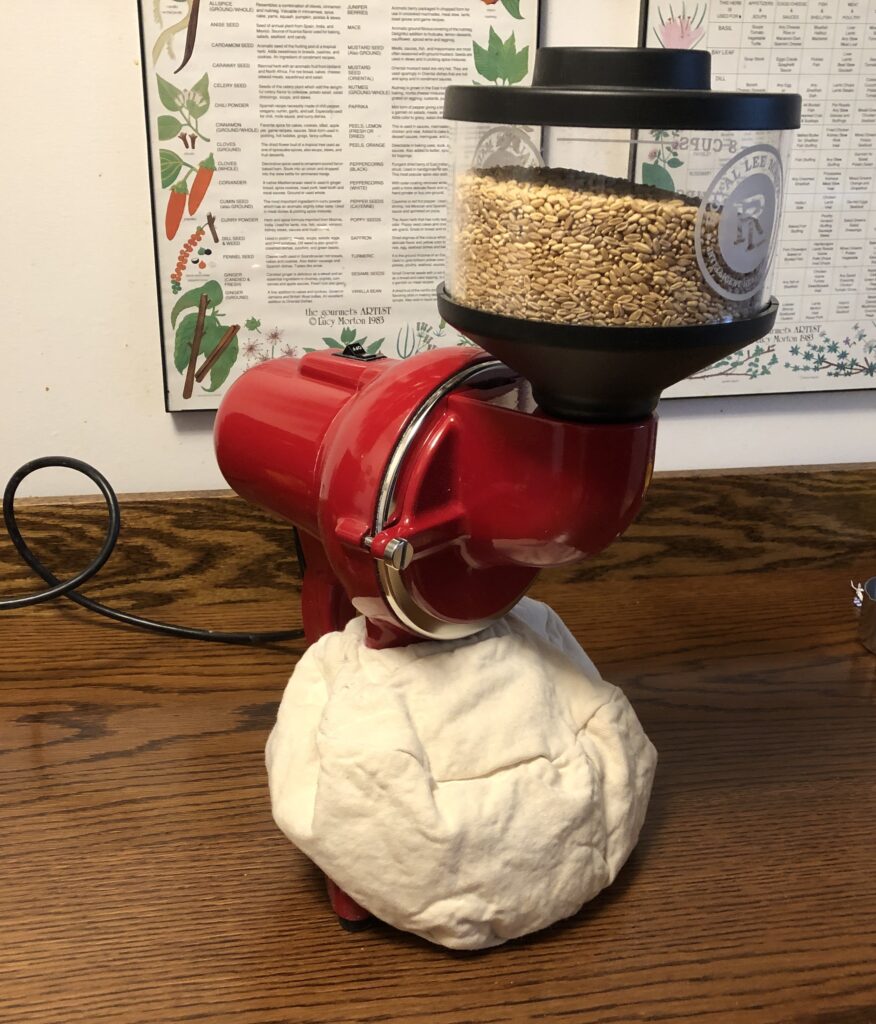
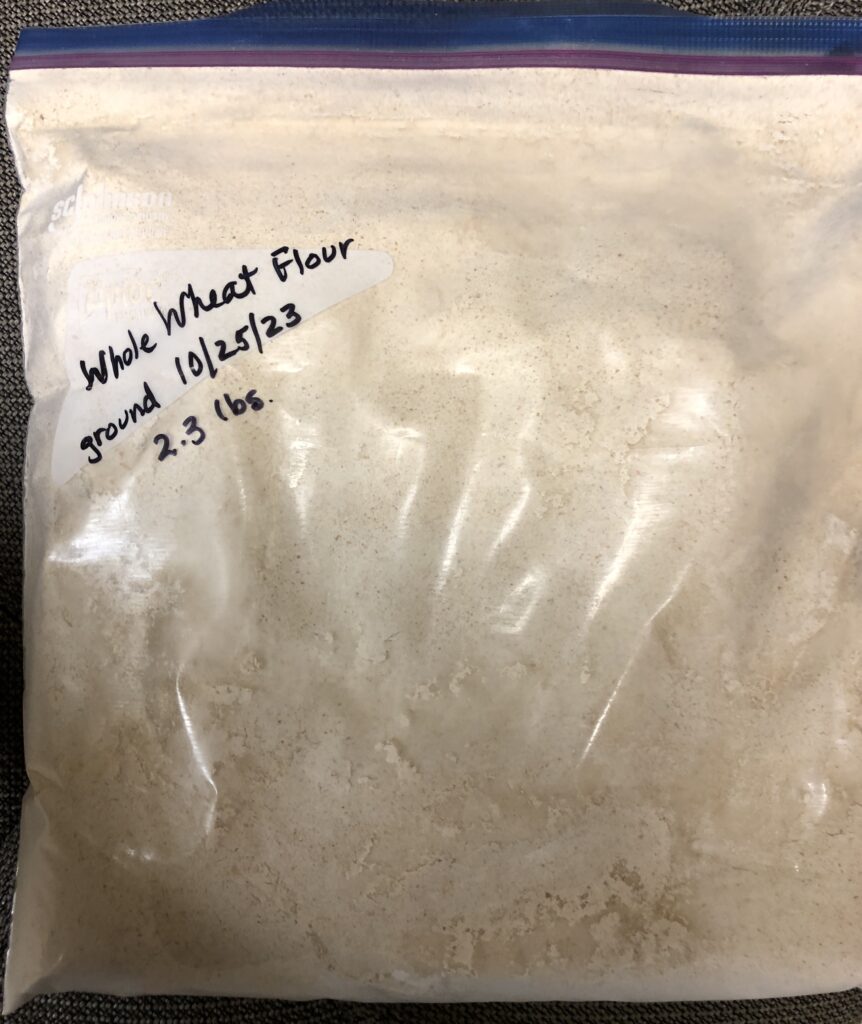
Home Ground Whole Wheat Flour
When I’m ready to bake with whole wheat flour, I pull out my electric wheat grinder and find the wheat berries in the refrigerator:
Then I grind about 5-6 pounds of flour.
After I use what I need right away, I’ll bag the rest in zip bags, about 8 cups (2 lbs.) each and store it in the freezer.
Toasted Wheat Germ
Toasted Wheat Germ comes in a glass jar (about 8 oz.) and is found in the cereal aisle, right near rolled oats. I used 1/3 cup in a cookie recipe and then dumped the rest into a zip bag and stored it in the freezer. I don’t want to ruin another whole batch of cookies with rancid wheat germ!
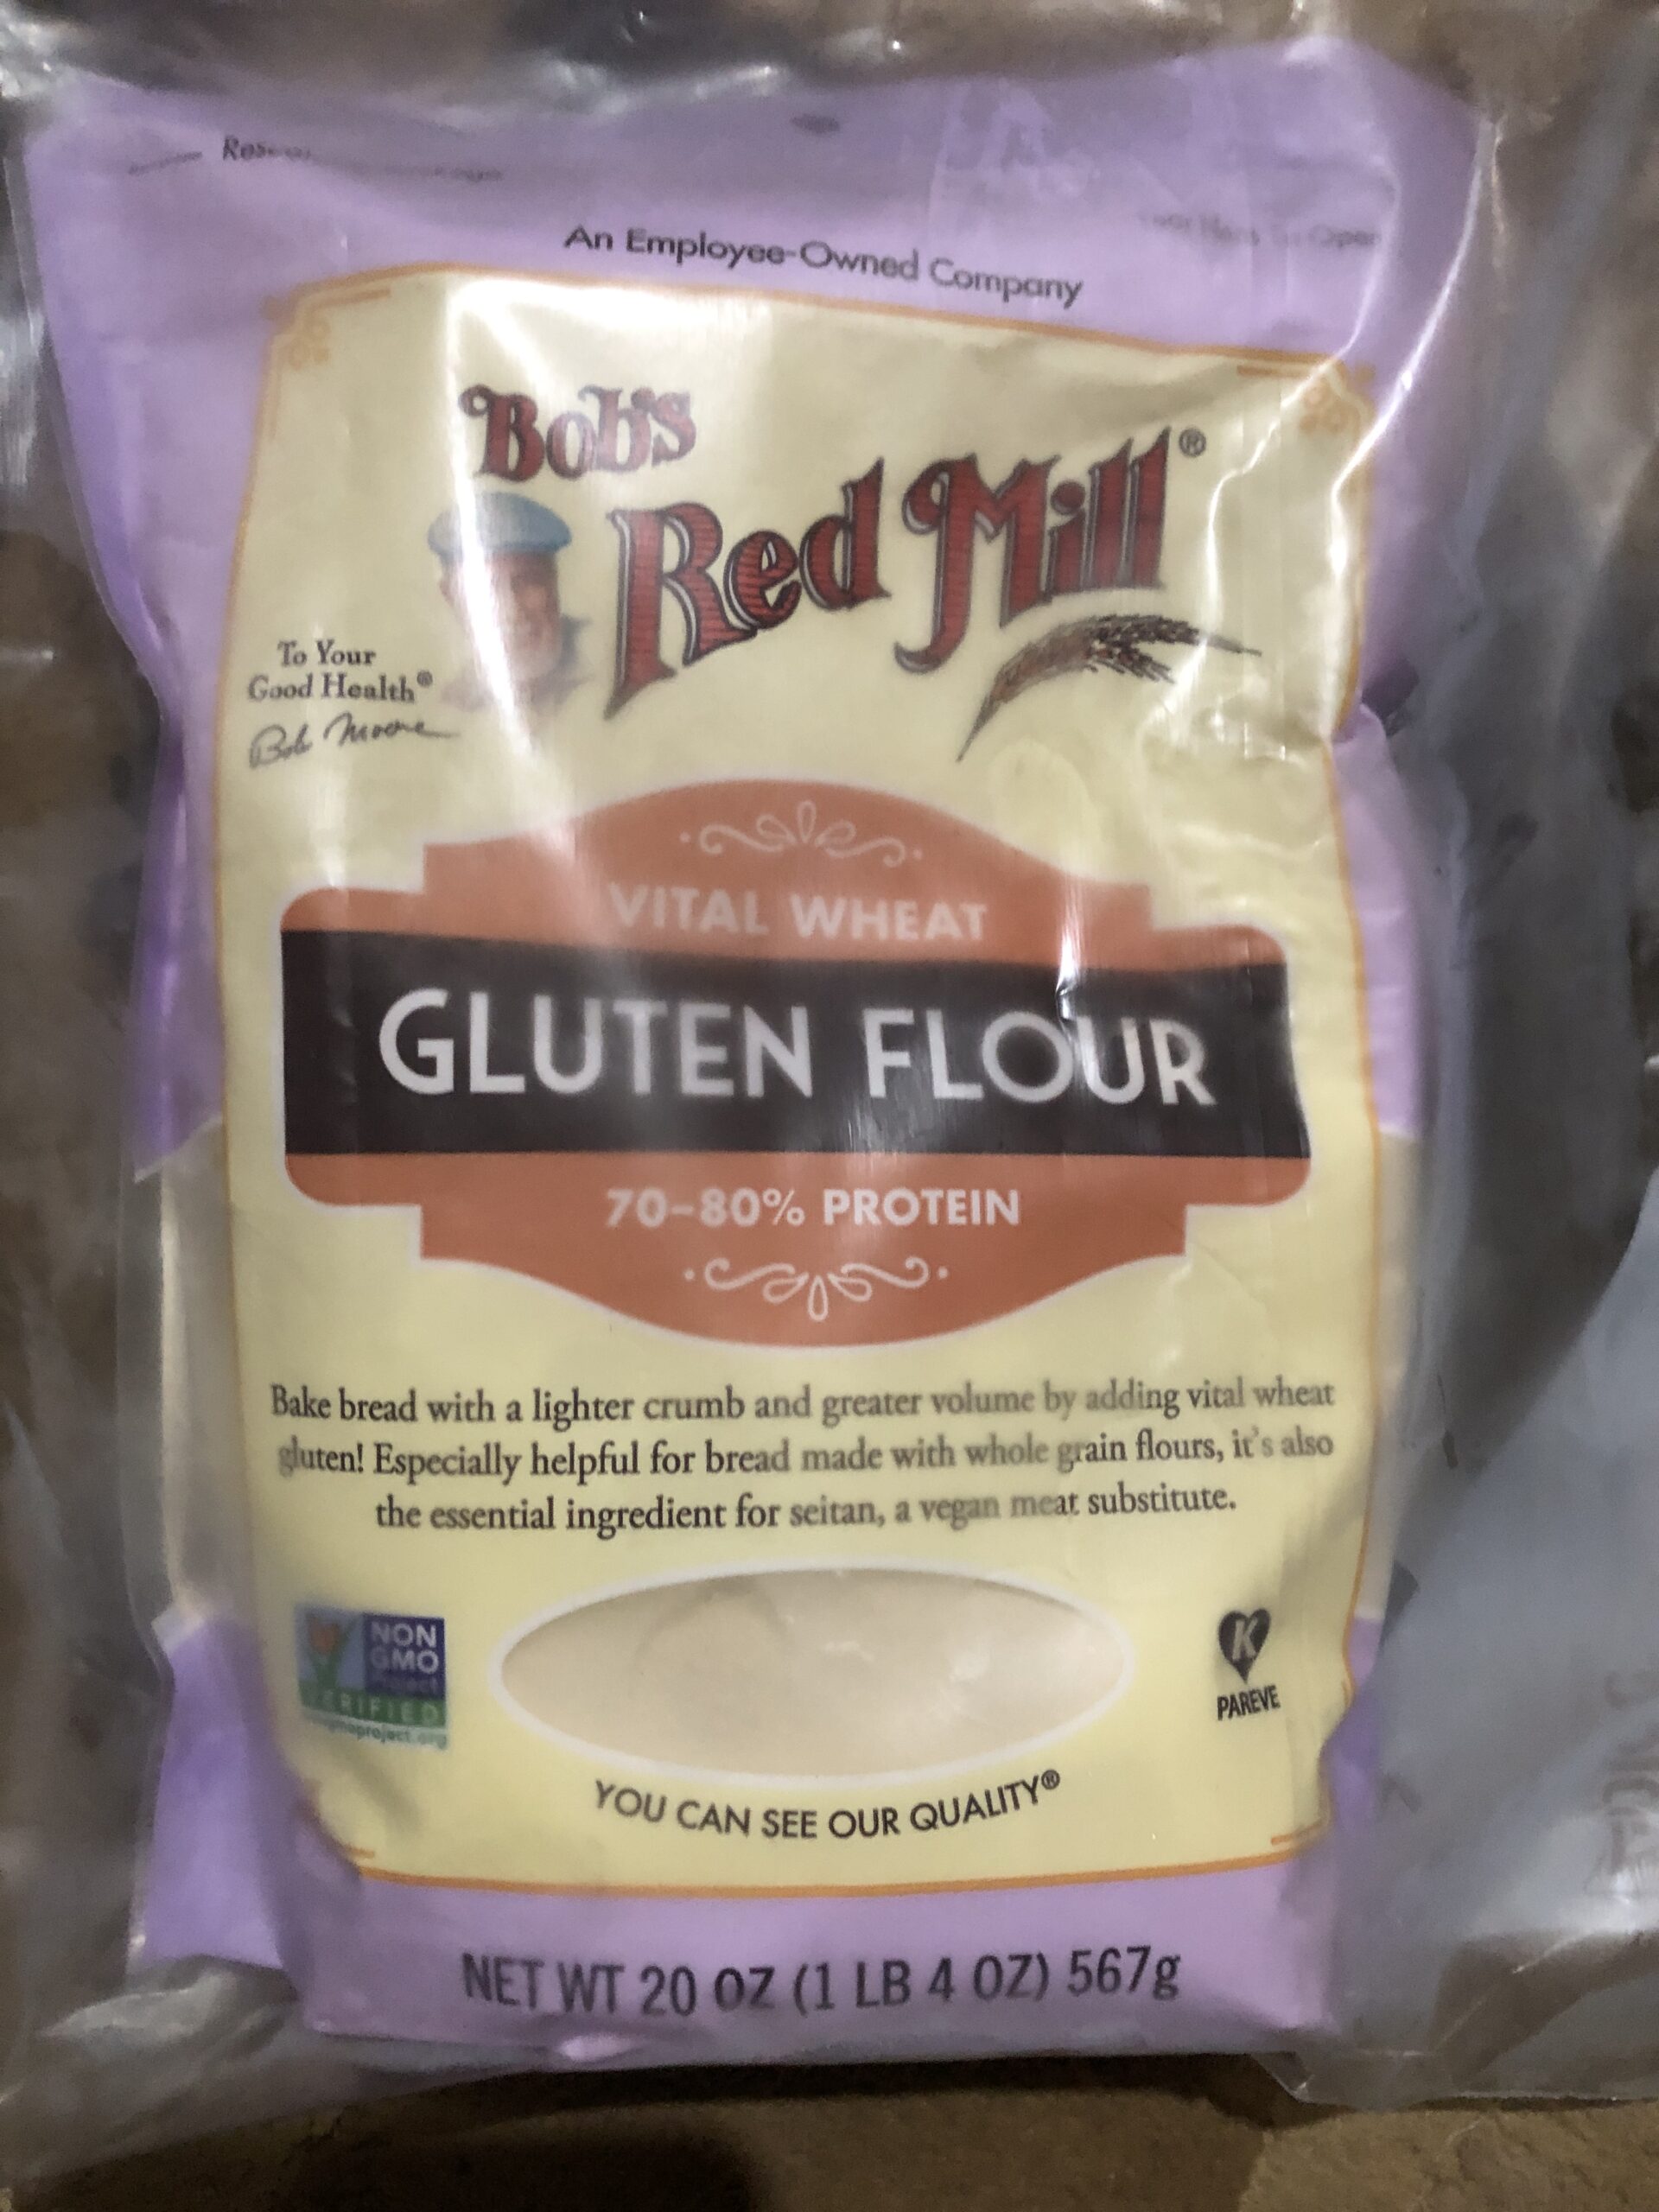
Vital Wheat Gluten Flour
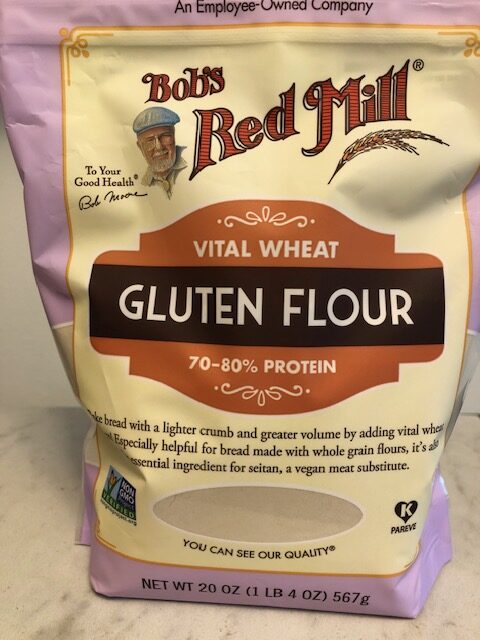
This is an important additive to whole wheat baked goods. It helps make a slice of bread stay together! I seldom use more than 1/4 cup in a recipe, so the rest has to stay frozen so it won’t go rancid.
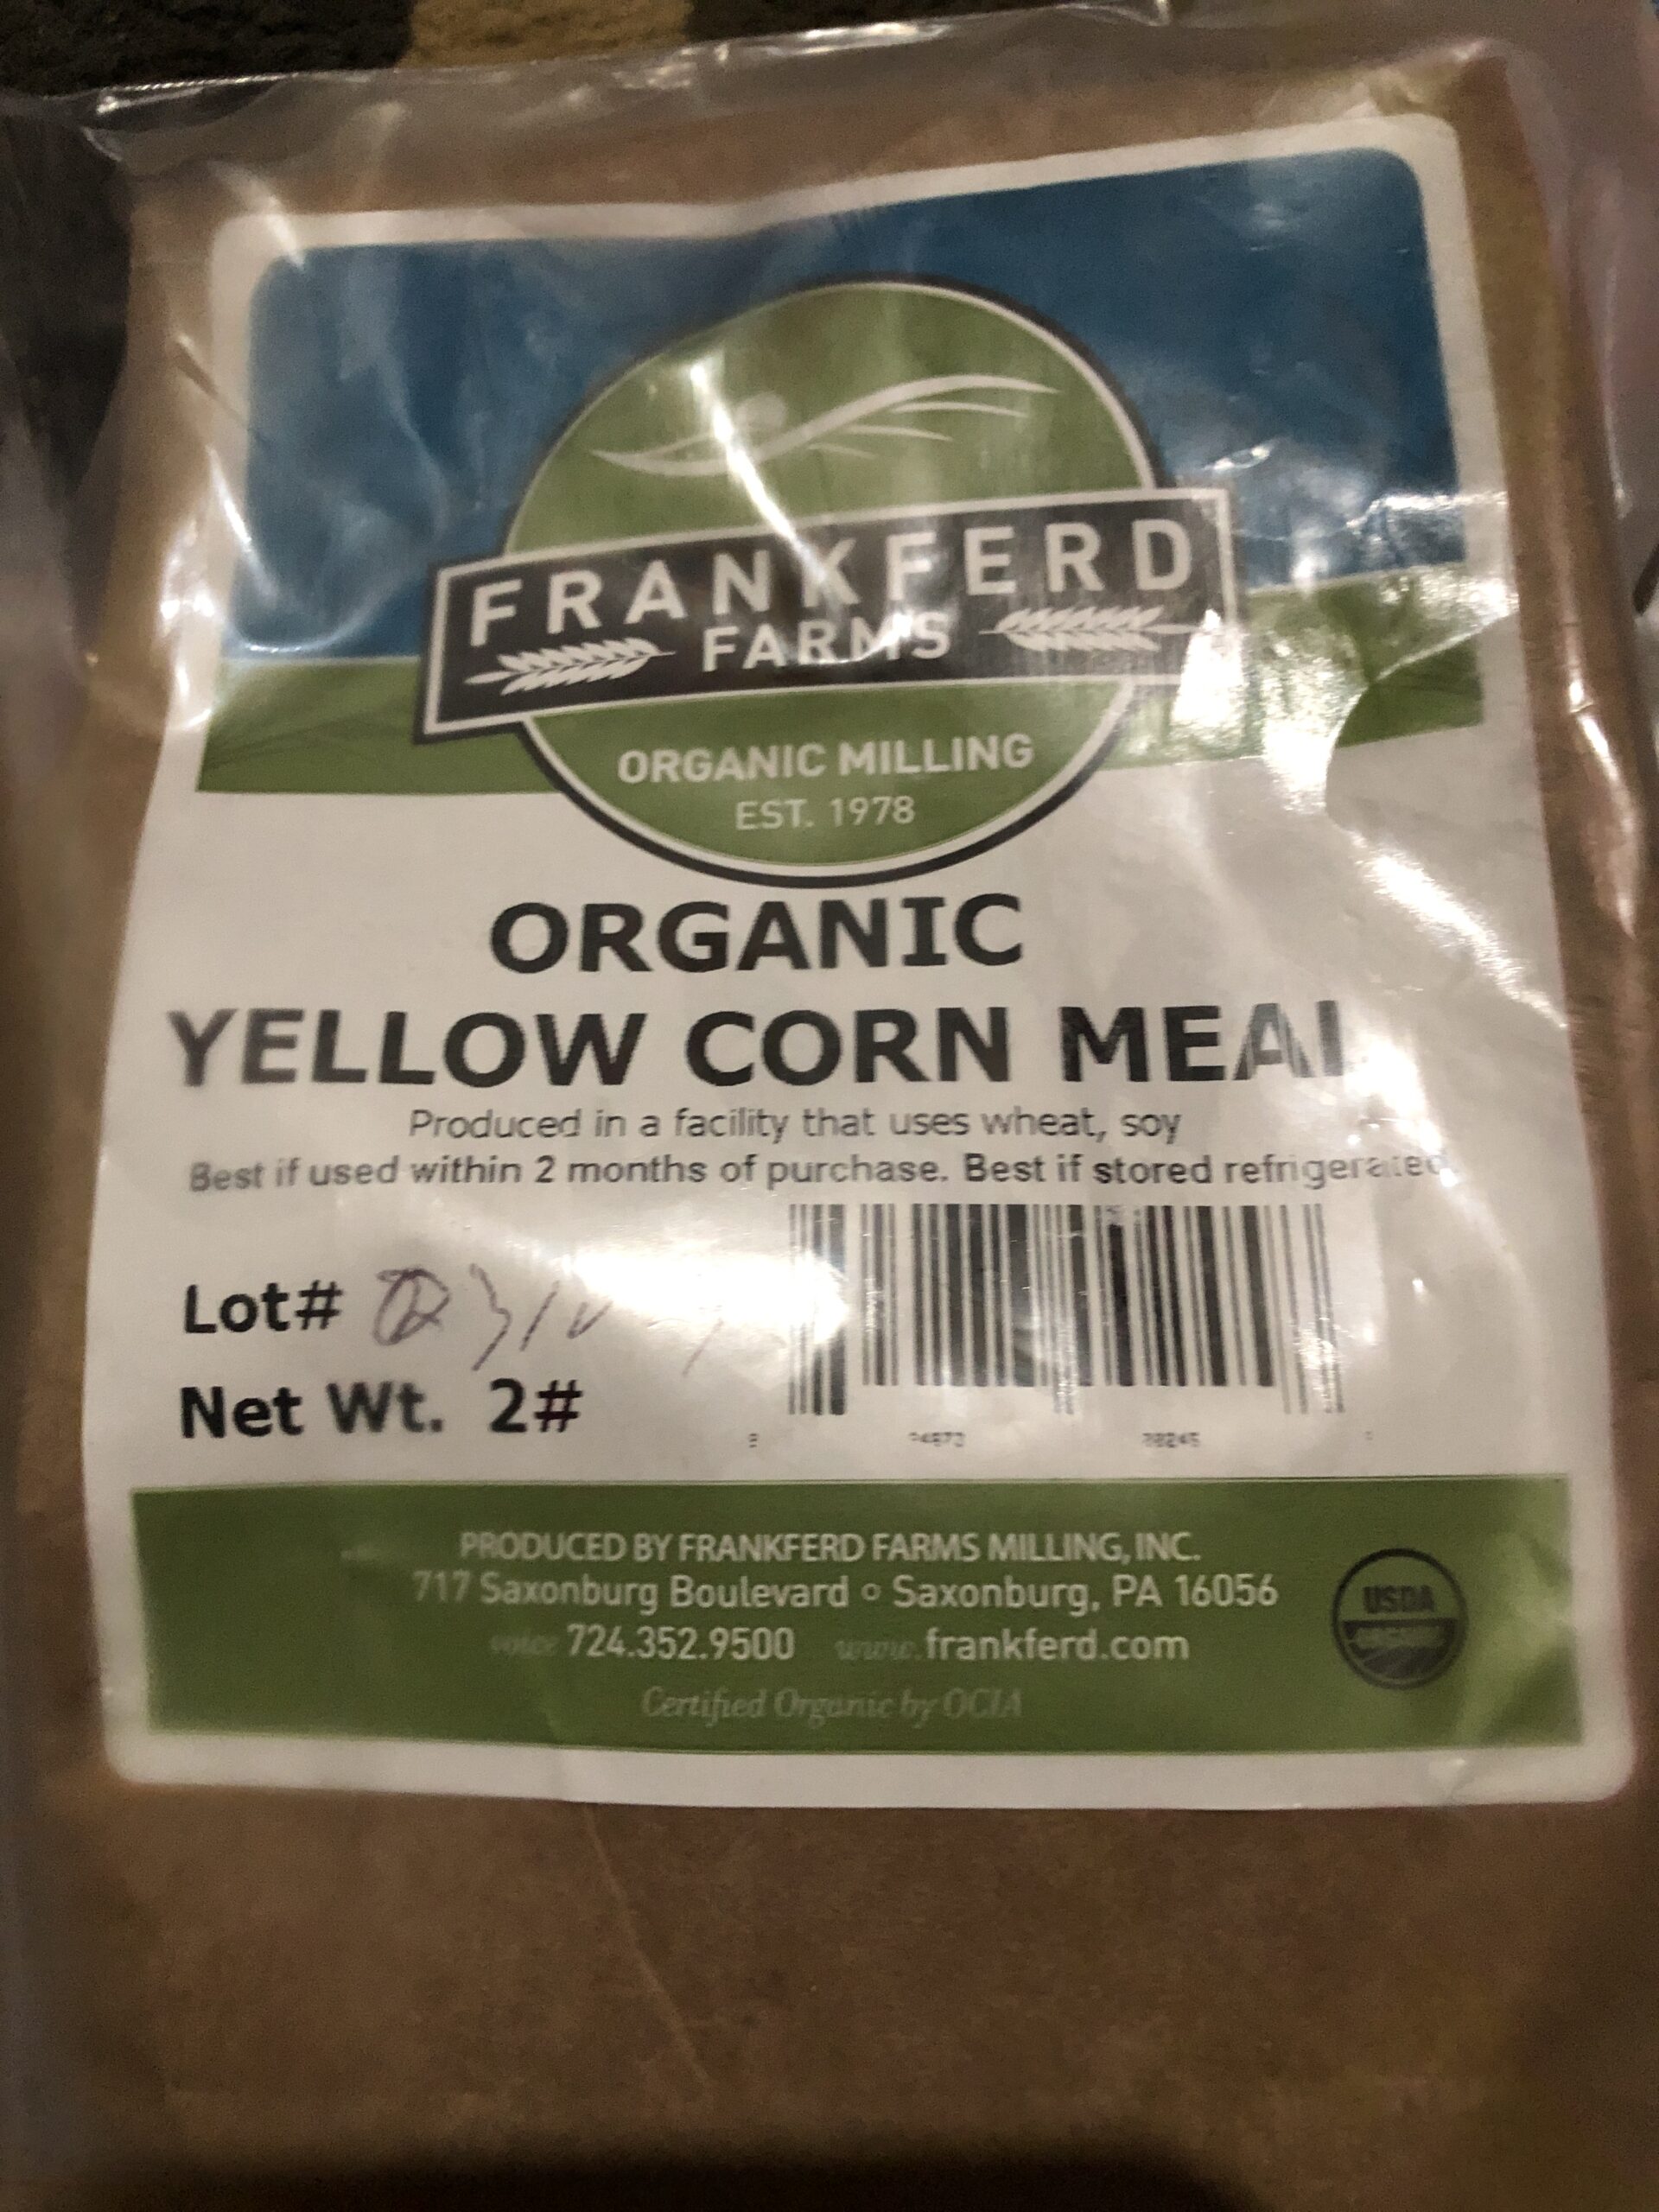
Corn Meal
I don’t use a lot of corn meal, so it’s important to keep it frozen until I need it.
Almond Flour
So far, I’ve kept this in the refrigerator, but I think I’ll move it to the freezer.
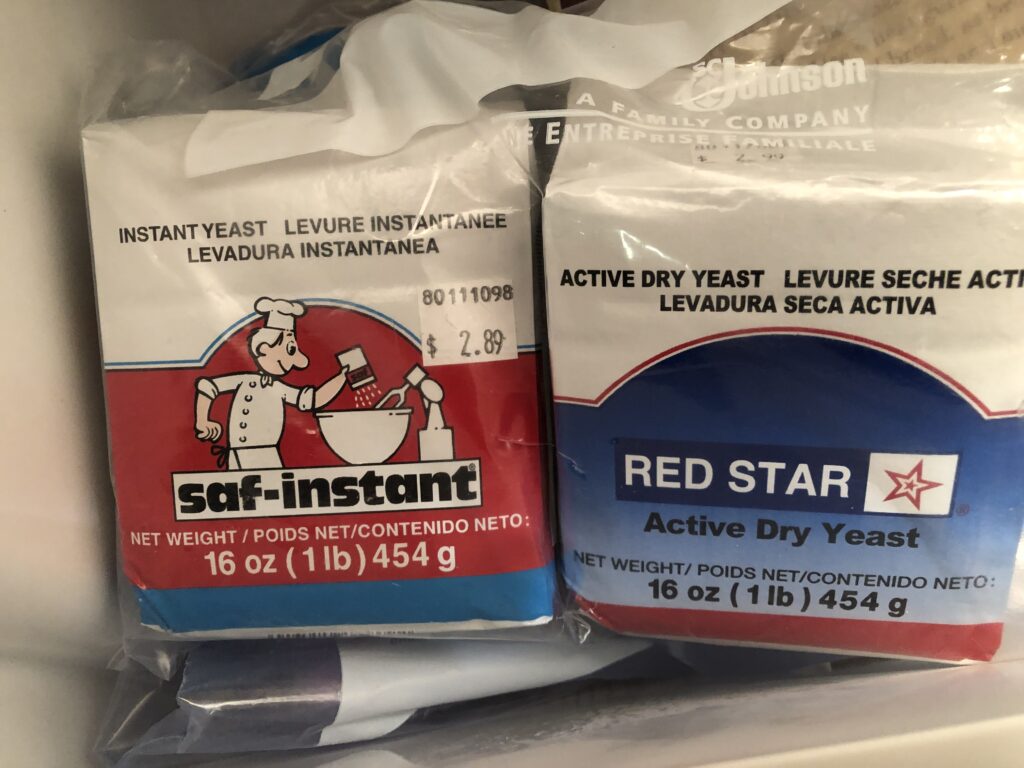
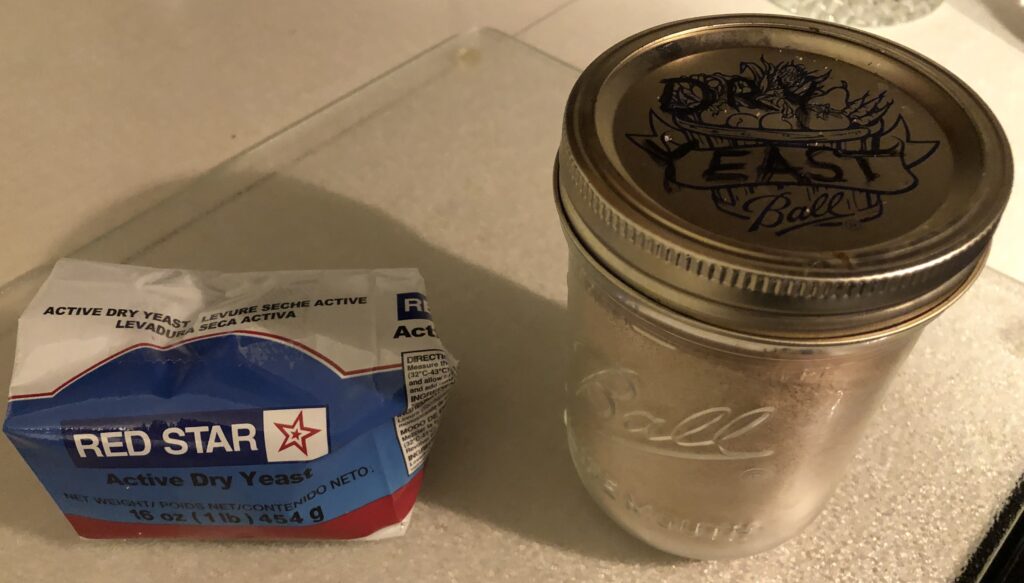
Active Dry Yeast
I keep unopened yeast in the freezer. When I open a package, I put about half of the package in a jar in the refrigerator. The rest of the package I fold up tight, tape it shut and put it back in the freezer.
Butter
We always have several pounds of butter in zip bags in the freezer. It stores well.
Chocolate Chips
We seem to always have a partial bag of chocolate chips in the freezer!
Nuts
I use a lot of walnuts in various recipes. Depending on what I’m making, I may just store them in the refrigerator.
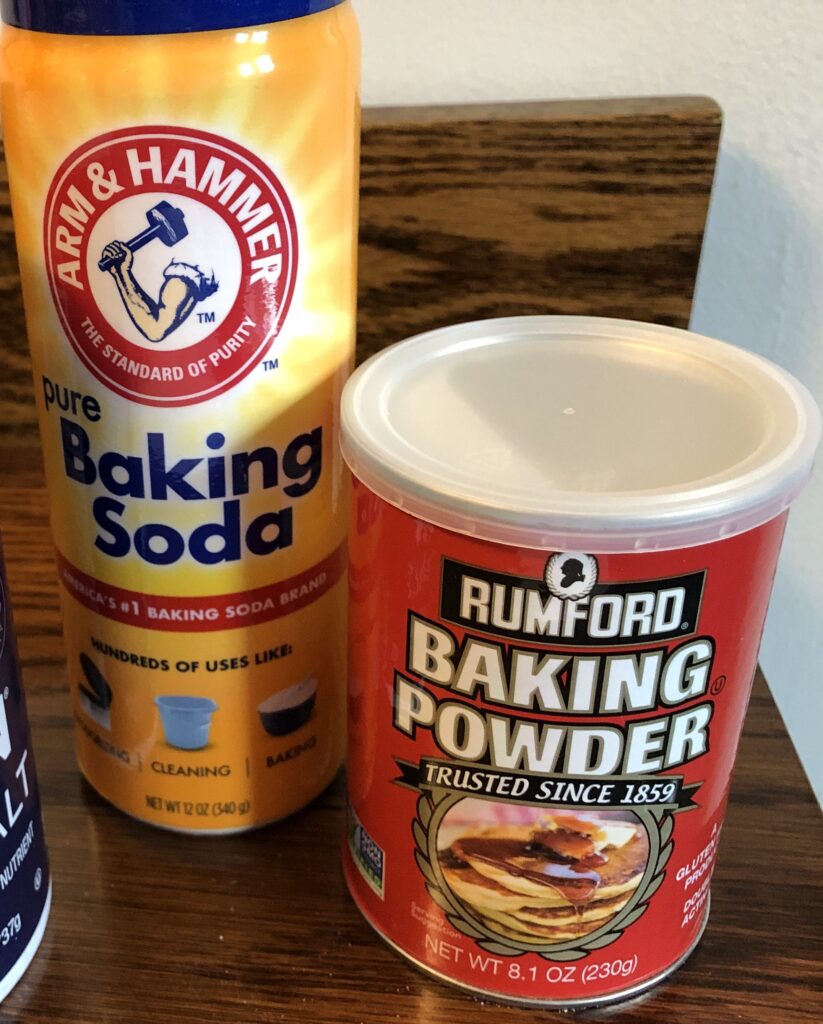
Baking Soda and Baking Powder
I store Baking Soda and Baking Powder in their original packaging in the cupboard. I have found baking soda in a different kind of package instead of the cardboard box. I was not happy with how hard it was to close the container…it just seemed open all the time. This hard plastic container is much easier to scoop out of and closes easily.
Storing ingredients in my freezer sounds easy, but I’ve had to rearrange the freezer some. Bags of things don’t stack very well. I need to invest in some kind of organizers (maybe plastic shoe box-size containers) so slippery lumpy bags of stuff don’t slide off the shelf!
I have begun the planning for a Christmas gift for my kids and grandkids. I hope to pull together about 25 of my favorite recipes to make each family a notebook (kind of like the recipe box my mother handed down to me!).
It seems my recipes are always a work in progress!
Unfortunately, I can’t just use copies of many of my recipes, because my stand mixer is larger than the ones my kids have and the quantities of things I make…like my oatmeal bread…won’t fit in their mixers. I’m not sure anyone has tried to make Bert’s chocolate chip cookies either…the volume of his single batch is huge!
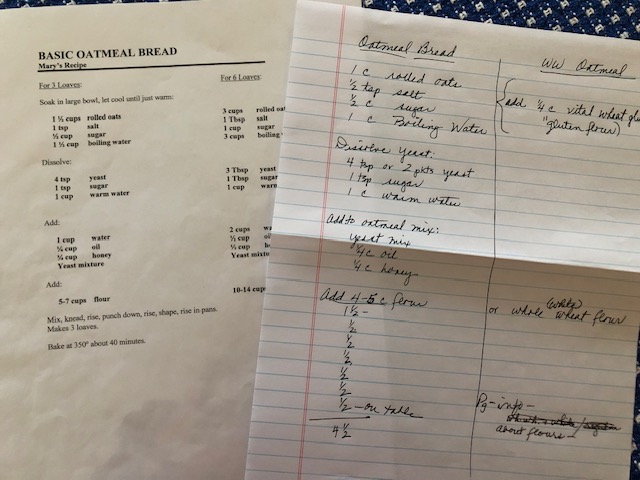
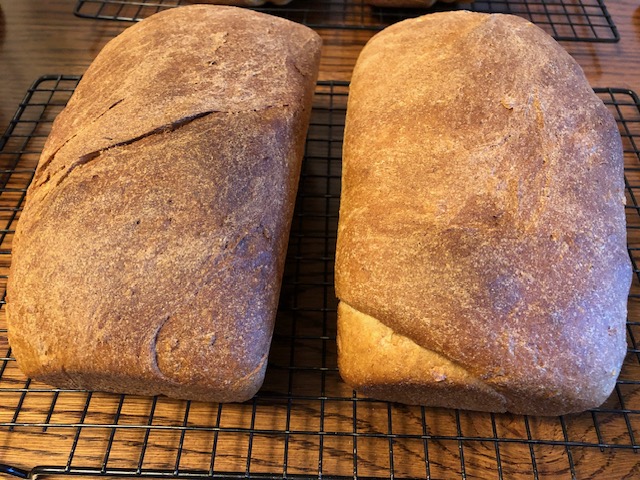
So, today I pulled out my Oatmeal Bread recipe, an adapted Whole-Wheat Oatmeal Bread recipe and my basic Whole Wheat Bread recipe to see which ingredients needed to be adjusted.
My original Oatmeal Bread recipe made 3 (sometimes 4) loaves; I have an additional recipe that makes 6+ loaves of bread if I use our huge industrial mixer that Bert uses for his yearly cookie marathon.
I reduced the ingredients from the original Oatmeal Bread recipe to about 2/3 so my kids can make it with their smaller mixers. I took notes as I measured out the flour. I also had a handwritten recipe to make Whole Wheat Oatmeal Bread using similar procedures, so I tried to show the additional ingredients if whole wheat flour is used.
Then I wanted to compare the Whole Wheat Oatmeal Bread to the basic Whole Wheat Bread to see if using the oatmeal made a better loaf.
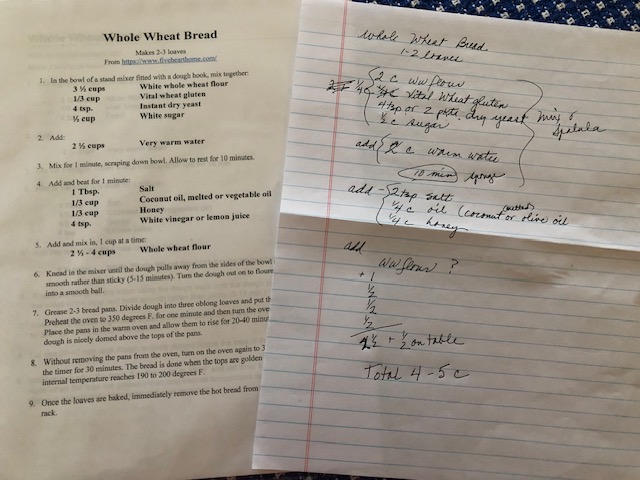
Here is the basic Whole Wheat Bread recipe. It also needed to be reduced, so you can see my notes. Instead of starting with the rolled oats, this basic recipe started by making a sponge with some flour and the yeast mixture.
The key ingredient when making all whole wheat bread is the addition of Vital Wheat Gluten flour. All-purpose flour has more gluten available because of processing. Whole wheat flour is not as processed so adding this extra powdered gluten makes it possible for the slice of bread to stick together and not crumble like a slice of cornbread.
Here is the package of Vital Wheat Gluten flour:
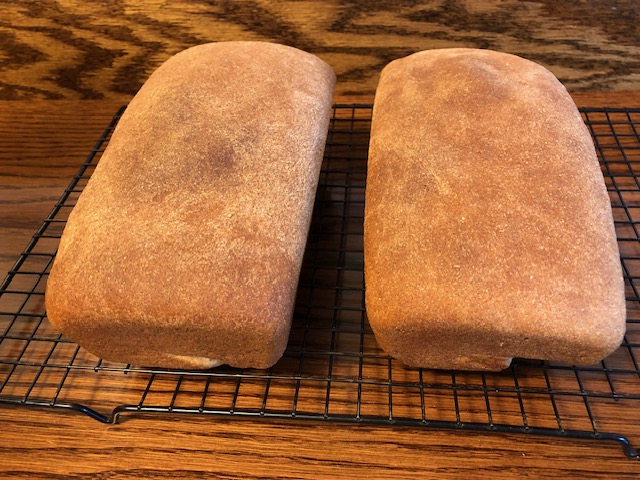
I ended up making two batches of bread…first the Whole Wheat Oatmeal Bread and then the basic Whole Wheat Bread.
Whole Wheat Oatmeal Bread:
Basic Whole Wheat Bread:
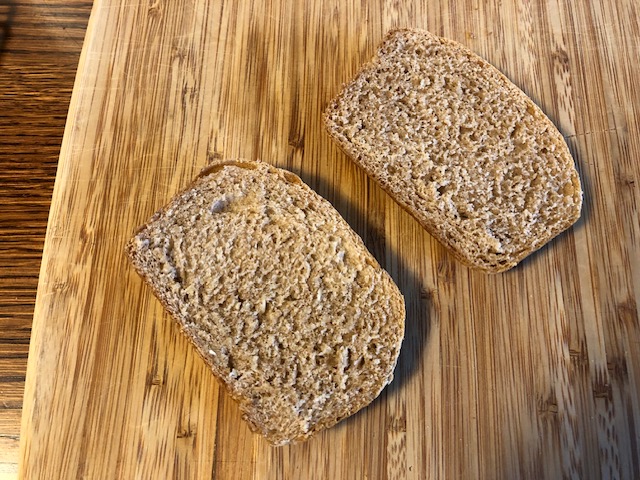
The Whole Wheat Oatmeal Bread slice is on the left. The basic Whole Wheat Bread slice is on the right.
They tasted pretty much the same…EXCEPT…the Whole Wheat Oatmeal Bread on the left had a much lighter, more spongy texture. I think as long as I had rolled oats available, I would choose to make that one.
The next step is to formalize the recipes and instructions so they are ready for the Christmas notebooks! Next, I’ll move on to some of the cookie recipes…including Bert’s Chocolate Chip cookie recipe. The quantities of the ingredients when Bert uses our industrial mixer are huge…I don’t think anyone has tried to make a smaller batch. I’ll see what I can do!
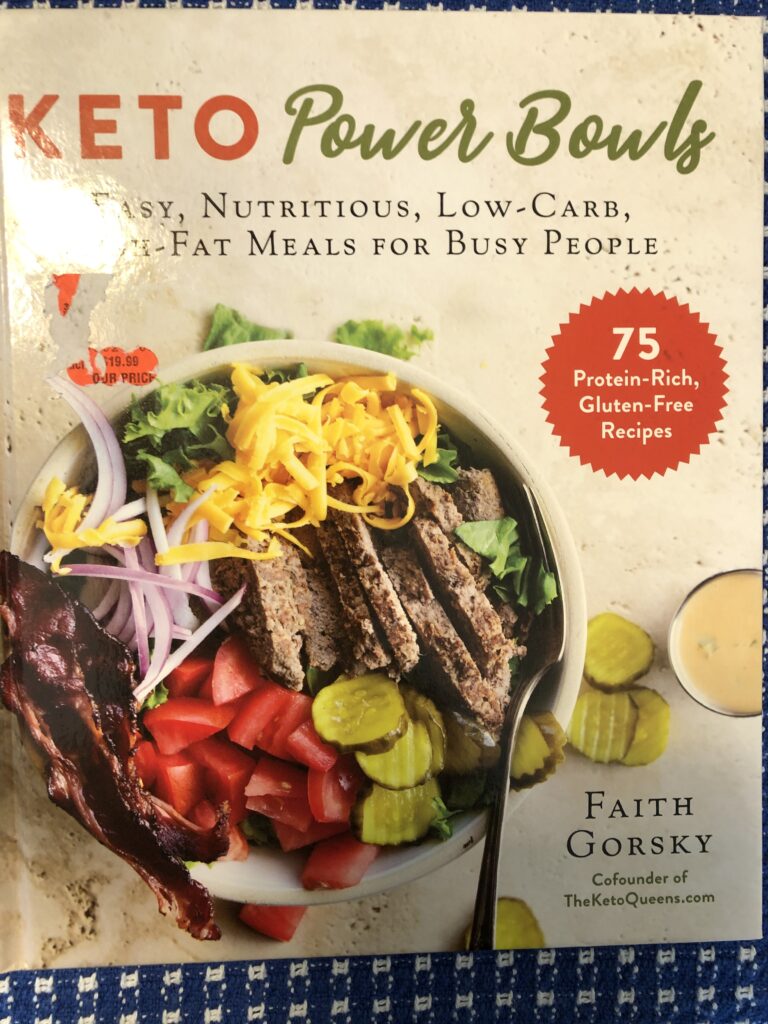
While I was sorting books for the yard sale last week, I took the time to look through my cookbooks. I realized I had cookbooks with recipes focused on plants, whole-grains, beans and meat. I’ve found good recipes buried in diet cookbooks for vegans, vegetarians and followers of a Keto diet. When I looked across the covers, I tried to figure out why these particular books appealed to me…no matter what foods I’m focused on.
The most recent book I picked up, Keto Power Bowls by Faith Gorsky, finally struck a chord! It seems most of the books on my shelf showcase a recipe in a bowl!
I’m sure the plain white bowls are necessary to display salad or soup in pictures, but I think I’m attracted to the concept of a meal in a bowl. So, whole grain recipes start with rice in the bowl with steamed vegetables on top, while the Keto Bowl starts with lettuce or cauliflower rice with cooked meat, onion and cheese on top.
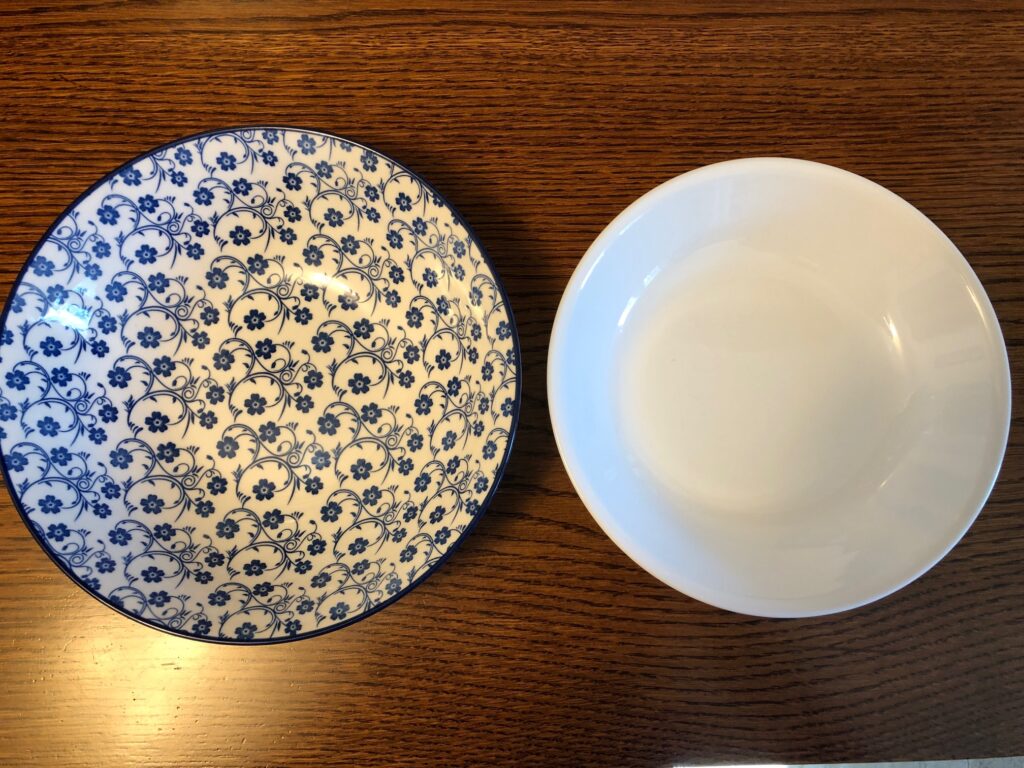
What always sucks me in is the bowl concept! I love beautiful bowls! Curious, since my dishes are plain white. I’m always checking out handmade earthenware or ceramic bowls at antique stores or thrift shops. Frequently, they are not dishwasher safe. I’ve tried to restrain myself so I’m not stuck with dishes I have to wash by hand.
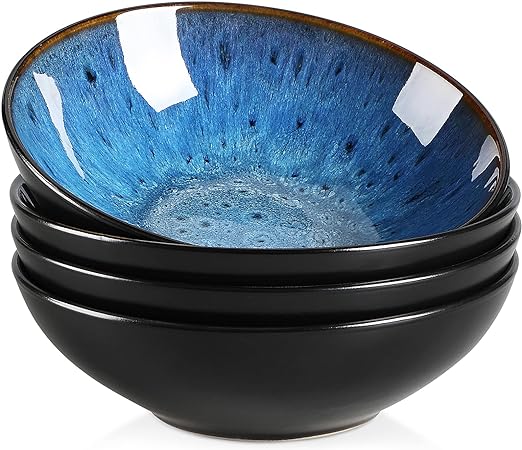
I finally went online and found some ceramic bowls for salad or pasta that could be fun. This set, from Amazon, made me smile:
These are a little bigger and deeper than the ones that come with my dishes:
Then I was looking at other choices…for soup…and ordered these (also dishwasher safe):
So, no matter what I feel like putting in the bowls, I can guarantee I will smile each time I use them!