It seems so long ago, 58 years (62 years now!), yet I’m reminded of our first date every year by the headlines from back then…
(Original Caption) New York, New York: Headlines announcing Kennedy’s assassination from three New York newspapers, the Times, the Daily News, and the Herald Tribune. November 23, 1963.
I was eagerly anticipating our first date. We were supposed to go to a fall dance at the high school. We hardly knew each other…had just met in English class our senior year, even though we had been in the same schools since 7th grade. Our paths had not crossed in any class before.
We were in our afternoon classes when the PA announcements came on that President Kennedy had been shot. We all listened in stunned silence. Over the next few hours, we were bombarded with all the speculations from the news media, our teachers and our classmates. The details would unfold over the days and weeks (and years!) to follow.
Many of the pictures in the news are still familiar to me today:
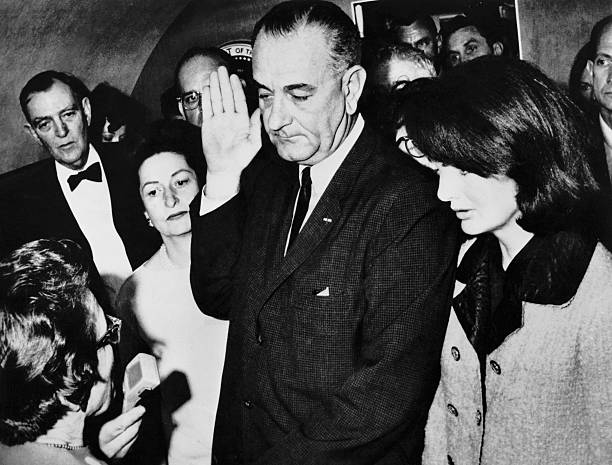
President John Kennedy rides in a motorcade from the Dallas airport into the city with his wife Jacqueline and Texas Governor Johhn Connally.Lyndon B. Johnson, during his inauguration immediately after John F. Kennedy’s assassination, with Jackie Kennedy by his side.
This picture always hits me hard:
Members of the Kennedy family at the funeral of assassinated president John F. Kennedy at Washington DC. From left: Senator Edward Kennedy, Caroline Kennedy, (aged 6), Jackie Kennedy (1929 – 1994), Attorney General Robert Kennedy and John Kennedy (1960 – 1999) (aged 3). (Photo by Keystone/Getty Images)
By the time I got home from school the world had changed. I think we were all in shock. All I could think about was what a relief it would be to go to a dance to feel somewhat normal again…if only for a few hours.
Of course, we had not gotten the memo that the dance was cancelled! (No quick texting back then!). So…I got all dressed up, Bert came over to pick me up and we went to the school. Oh no! The sign on the door gave us a reality check! We headed back home to just go for a walk around my neighborhood and talk. We hardly knew each other so it was an awkward time.
It was also a memorable beginning to our relationship that I will be reminded of every year. I guess it stuck, because 58 years later (now 62 years!) we’re still together!
UPDATE:
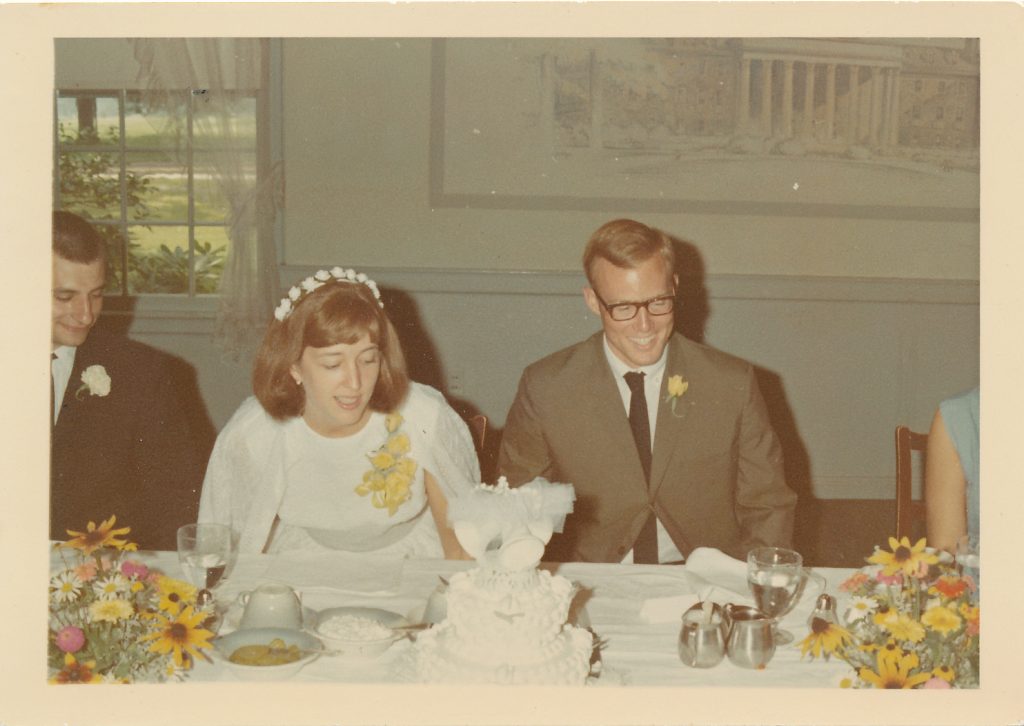
We married in 1967 so this year we’ve been 58 years!).
Here we were in 1968 (we eloped in 1967…had a reception in 1968…that’s a whole other story!)
Here we were in 2021…
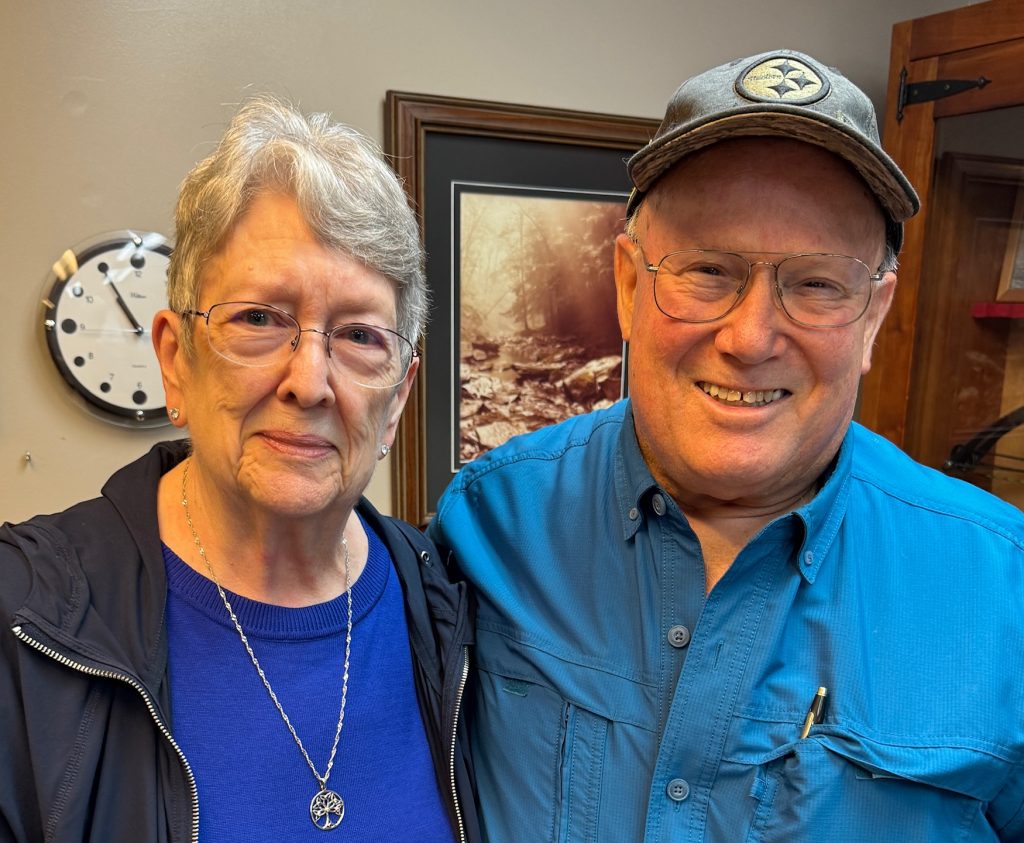
and in 2025!
For such a pivotal moment in our lives, this event was hardly mentioned in the news today…however, we will never forget that day!
I’ve spent this whole week brainstorming what to make for favors for a group of 14 women from the Ladies Auxiliary to the Fire Company at our Christmas party in December. I have 4 weeks until I need them, but I need to decide soon exactly what I will put together. As I brainstormed, I ran all over town to see what I could get. Did I say how much I miss JoAnn Fabrics and how much I hate shopping?!?
I started with the container…I found small red gift bags at Michaels. I had to go to Walmart to get enough white tissue paper.
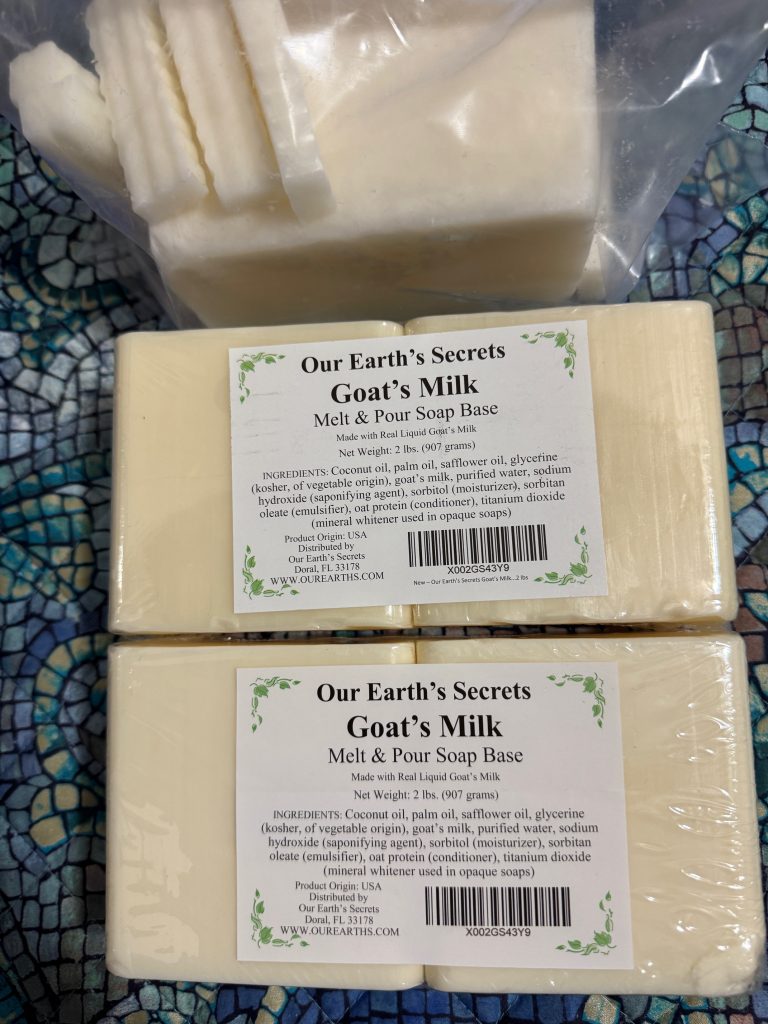
Looking around my various project supplies, I first started with soap. I have enough Goats Milk melt & pour soap base and small molds to make an assortment of small soaps. Two or three in a mesh bag will the first item in the bag of favors and suggested a gift bag for a ‘spa’ day.
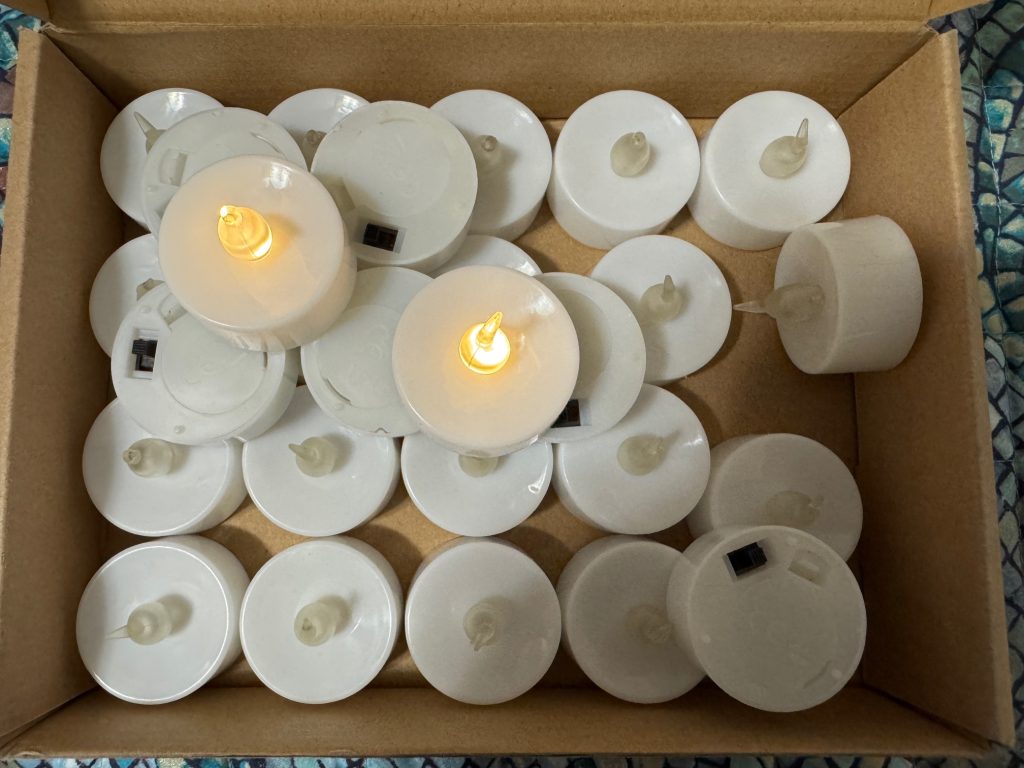
Next, I found a box of tiny tea lights (battery-operated) that would be a perfect addition to the gift bag.
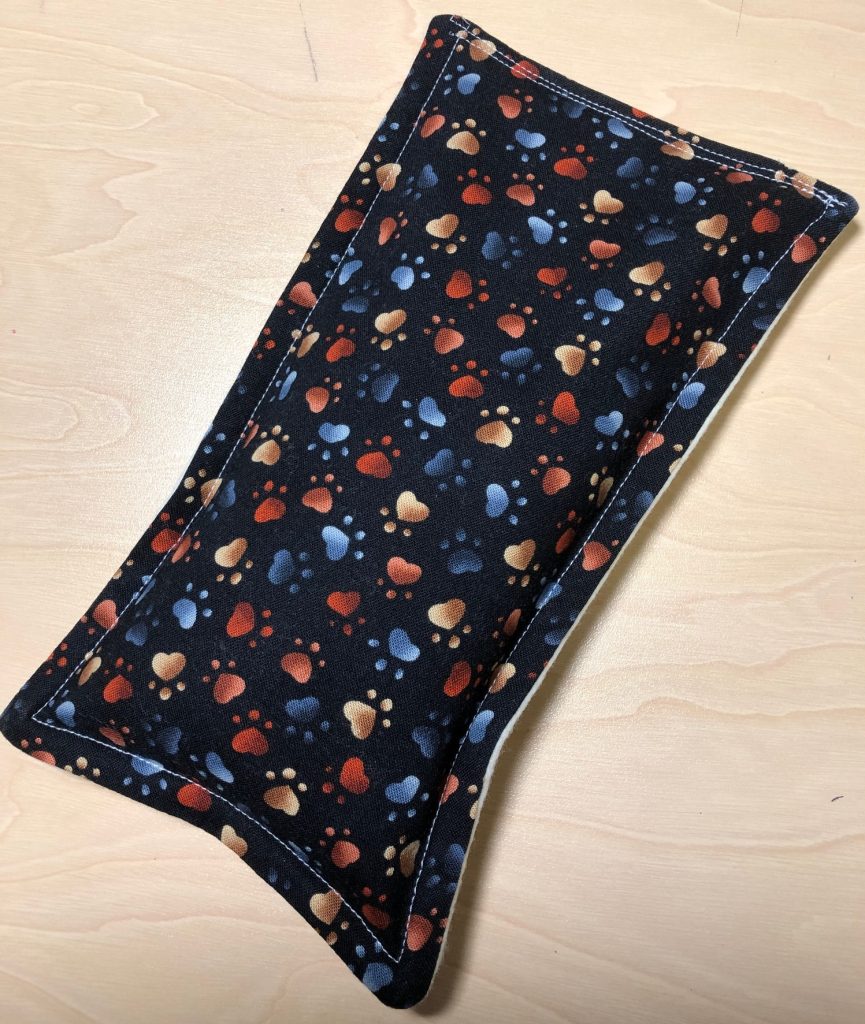
This is what they look like…cotton on one side and flannel on the other. I have plain muslin for the liner (to keep the flax seeds from poking through the outer fabric.) I think I’ll have enough time…if I can get the fabric, flannel and flax seeds in time!
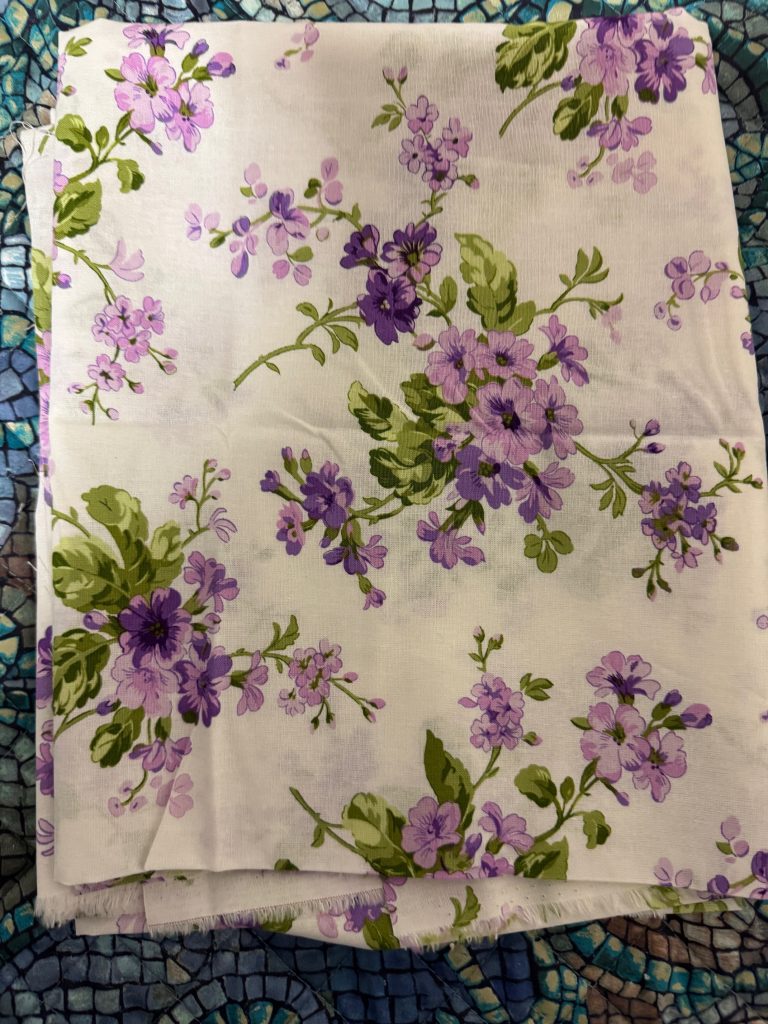
I found some nice 100% cotton fabric at Walmart but alas…no cotton flannel!
I even tried Michaels…no flannel of any kind! Luckily, Amazon came through and 2 yards of flannel will be delivered tomorrow!
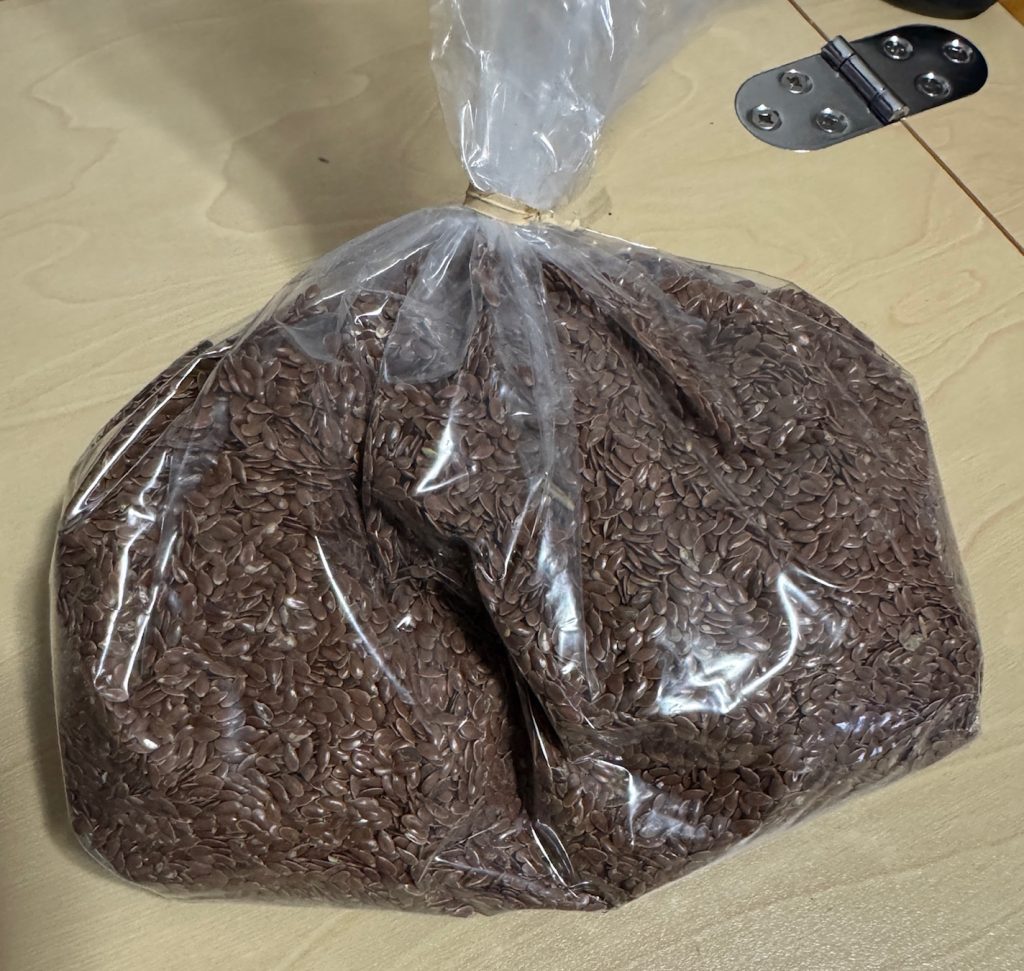
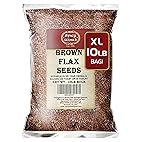
Of course, the eye pillows will need flax seeds for stuffing…but 14 of them will require about 8 pounds of flax seeds (1 cup in each pillow). I had a small bag, but not 8 pounds!
Thank goodness, I could order a 10-pound bag from Amazon. It arrived today!
When I have all the components, I’ll get an assembly line going to crank out 14 eye pillows!
Last, but not least, how about some Christmas M&Ms to snack on while relaxing with a warm eye pillow! Amazon came through again! This bag will show up in a few days.
You can see that preparing these 14 gift bags required some lead time to assemble all the components! Just the brainstorming, sorting through my stash of supplies and running around town took several days. Now, I wait for things to arrive from Amazon so I can start making the eye pillows.
I really like how the focus is around being handmade. I don’t think I’m giving any useless stuff to my friends…the soap can be used, the M&Ms can be eaten and the eye pillow might be soothing during the Christmas season! If nothing else, the bag can be ‘regifted’ to someone else who needs it.
If you plan to have a handmade Christmas, plan ahead so you have time to enjoy the holidays yourself! Enjoy!
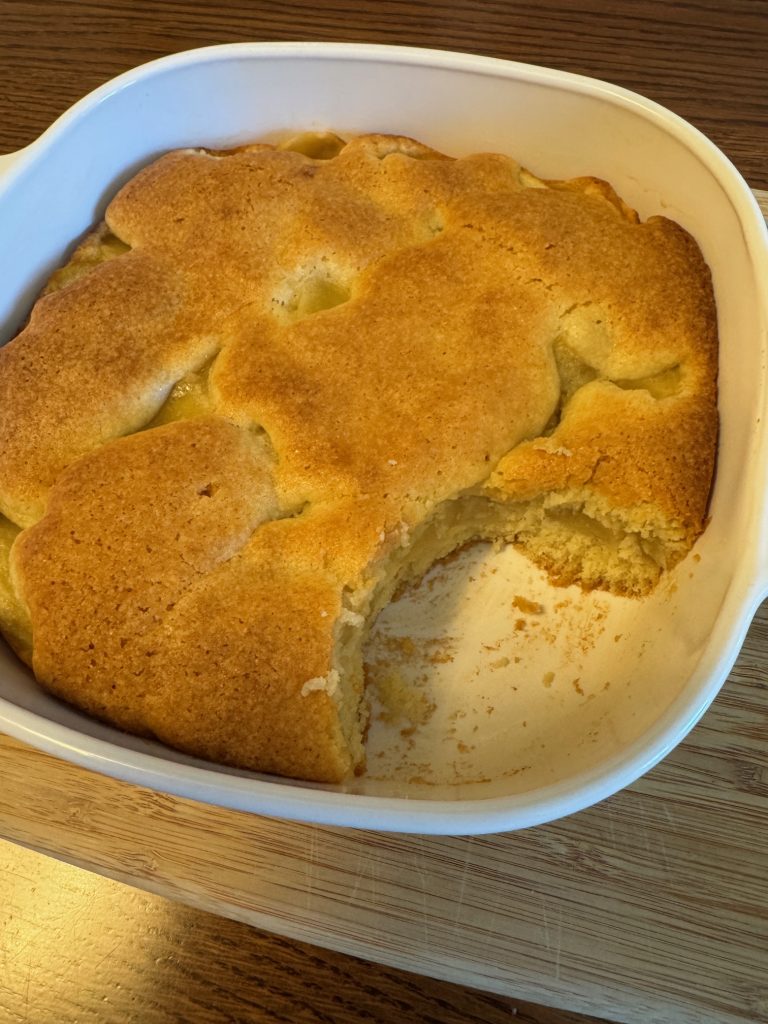
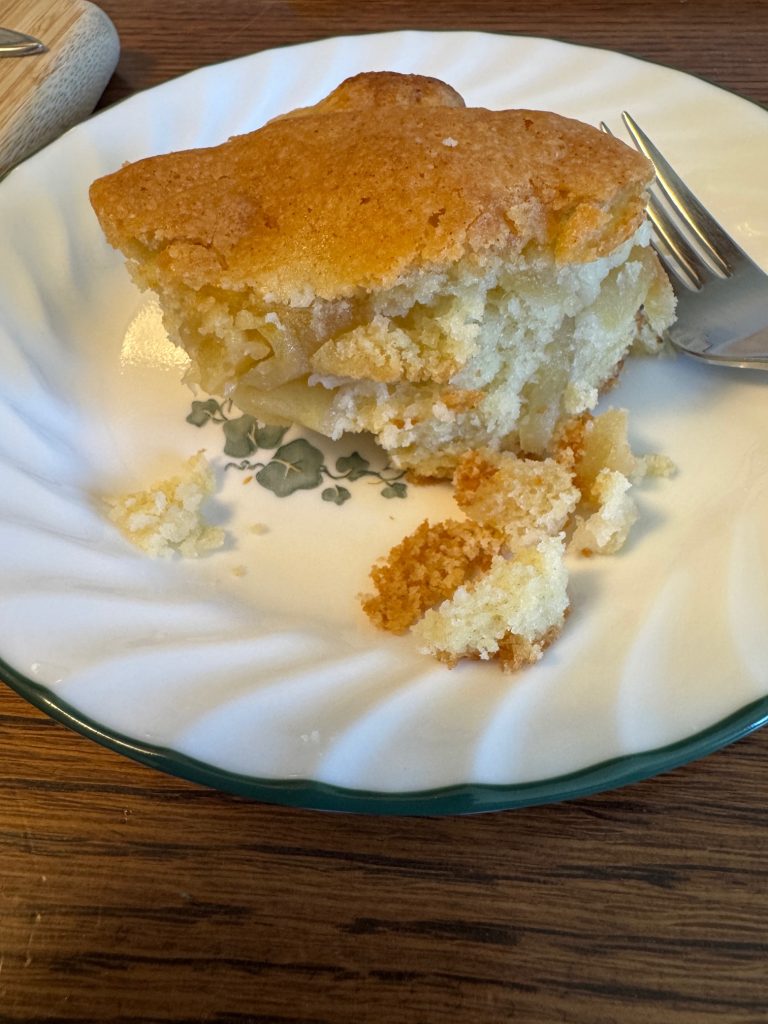
I’m always on the lookout for apple cake recipes. I’ve shared at least three so far…French apple cake (with rum), German apple cake and Cinnamon apple cake. I’ll put the links at the end of this post. Most baked apple recipes include pies, dumplings, crumbles and crisps. I’ve focused on the apple cakes…for some reason they interest me.
This recipe was described as ‘a classic dessert that captures the essence of Swedish home baking. Made with cooked apples, this beloved treat is perfect for fika or any cozy gathering.’
Of course, that phrase, ‘perfect for fika…’ peaked my interest. Never heard that word before. I looked it up and found:
“Fika is a cherished Swedish tradition that goes beyond a simple coffee break, embodying a social ritual centered around taking time to pause, relax, and connect with others. The term ‘fika’ (pronounced ‘fee-ka’) is derived from a slang inversion of the Swedish word for coffee or tea. It is equally defined by the presence of a sweet or savory snack. The practice is deeply embedded in Swedish culture and is considered essential for maintaining a healthy work-life balance.”
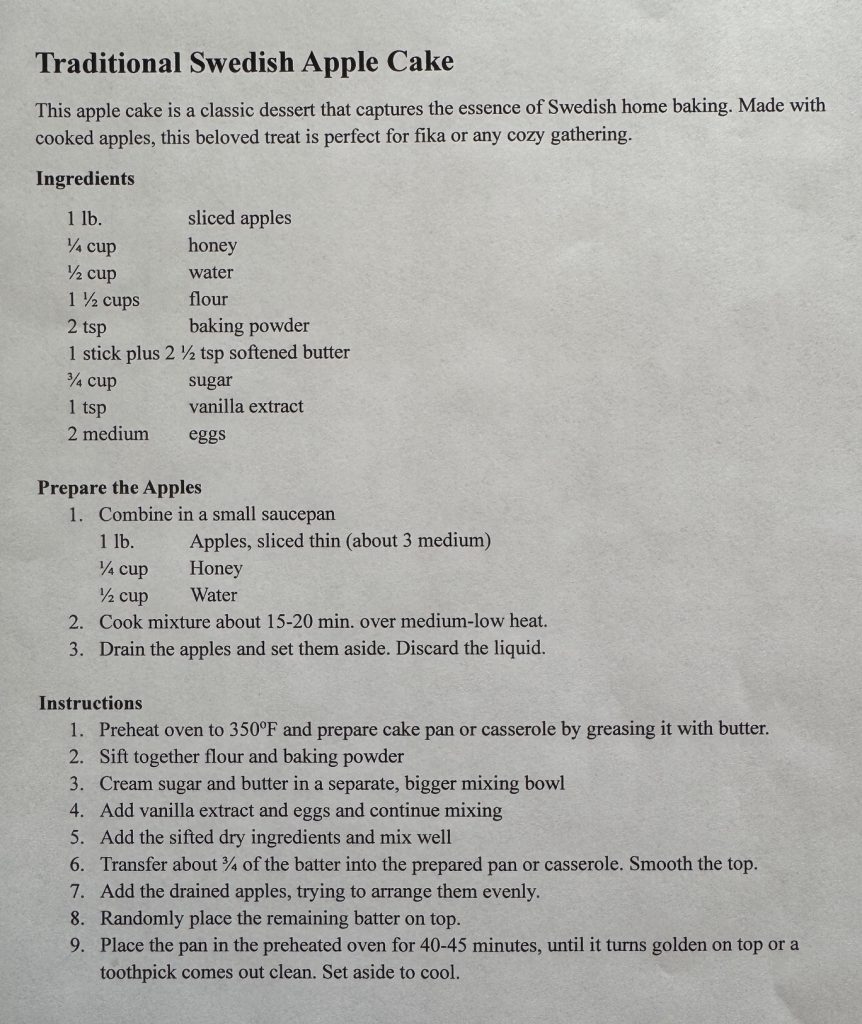
This recipe came from a website called, https://foodandjourneys.net. Some of the ingredients are listed in grams so I retyped it for my convenience. Here is the recipe:
Prepare the Apples
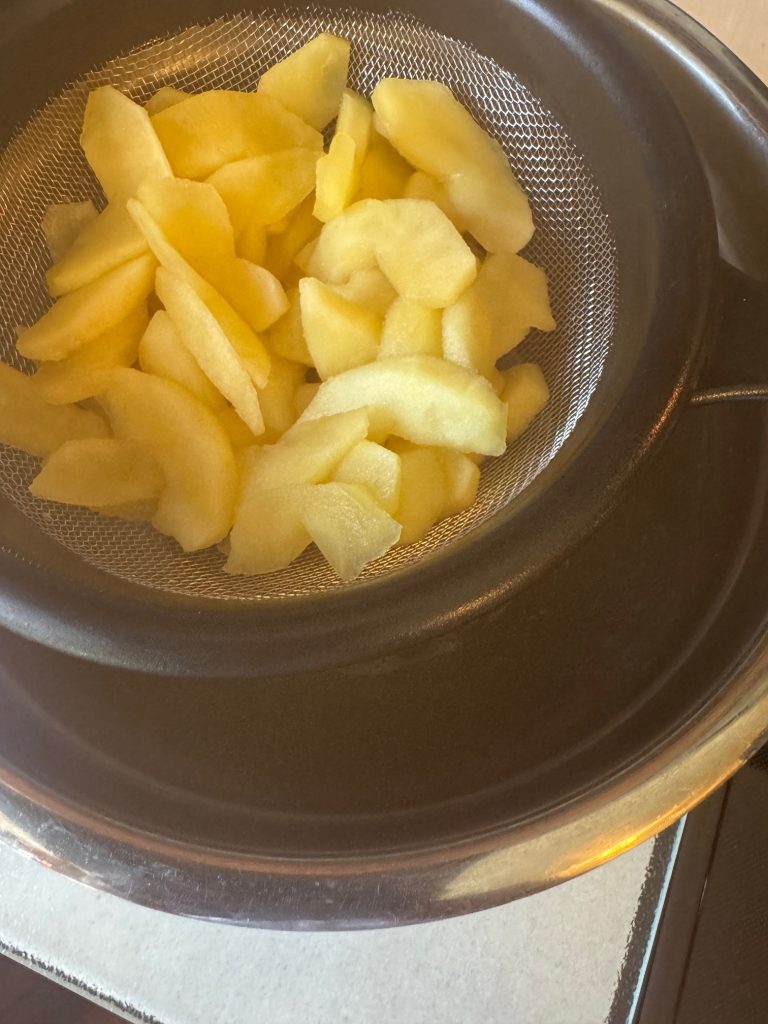
The first step is to prepare the apples. That takes about half an hour, so don’t preheat the oven too soon!
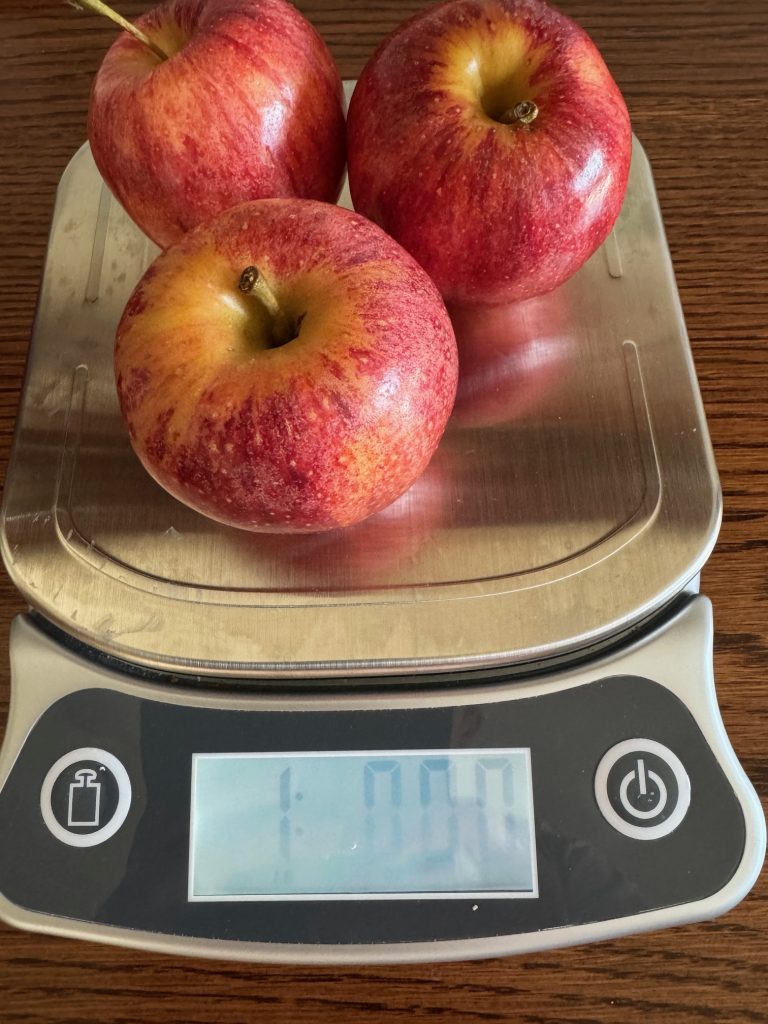
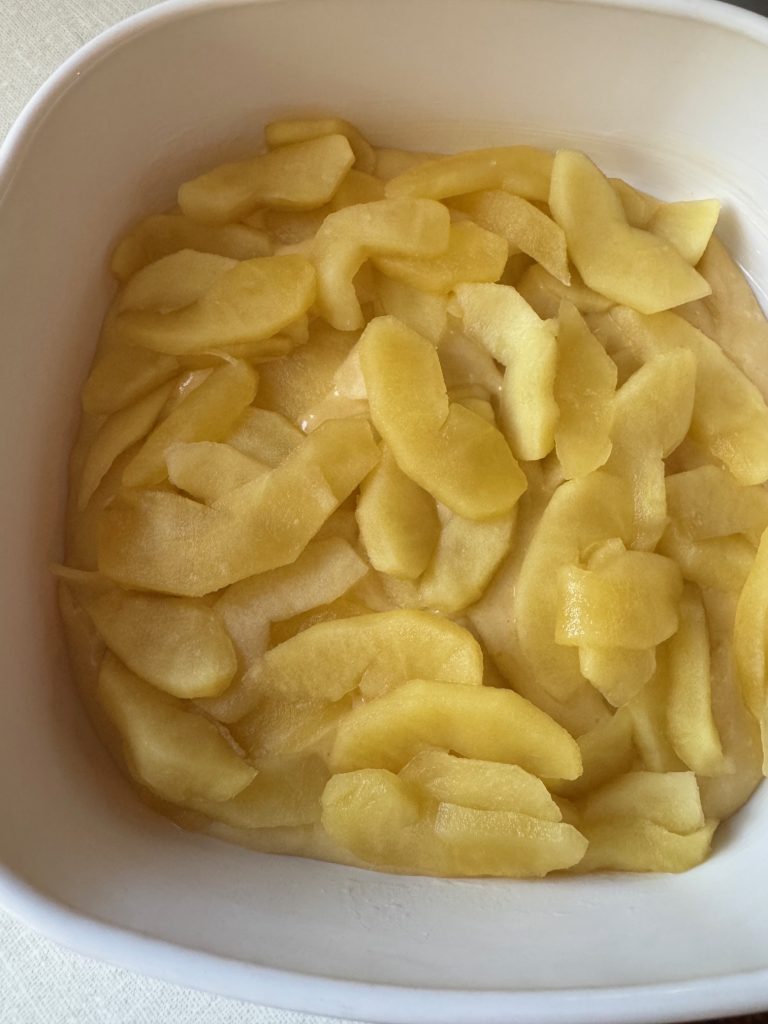
Peel and slice the apples (I used three apples and weighed them to be sure).
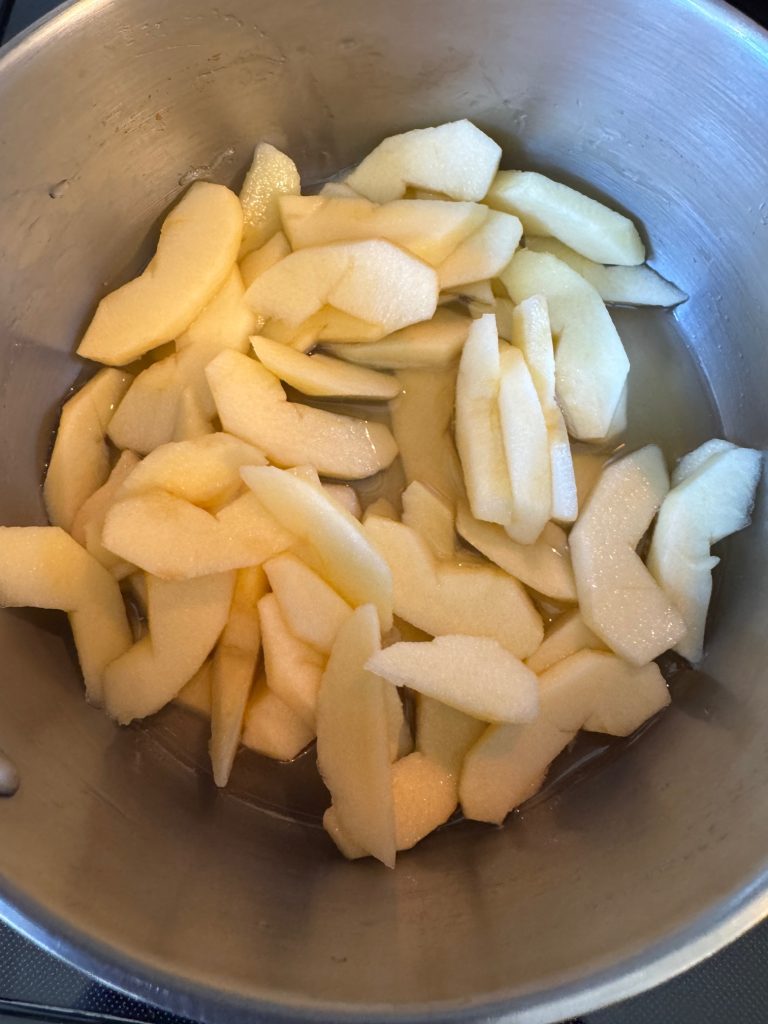
2. Combine the sliced apples with 1/4 cup honey and 1/2 cup water in a saucepan. Cook about 15-20 minutes over medium-low heat.
3. Drain the apples and set them aside. Discard the liquid.
Make the cake
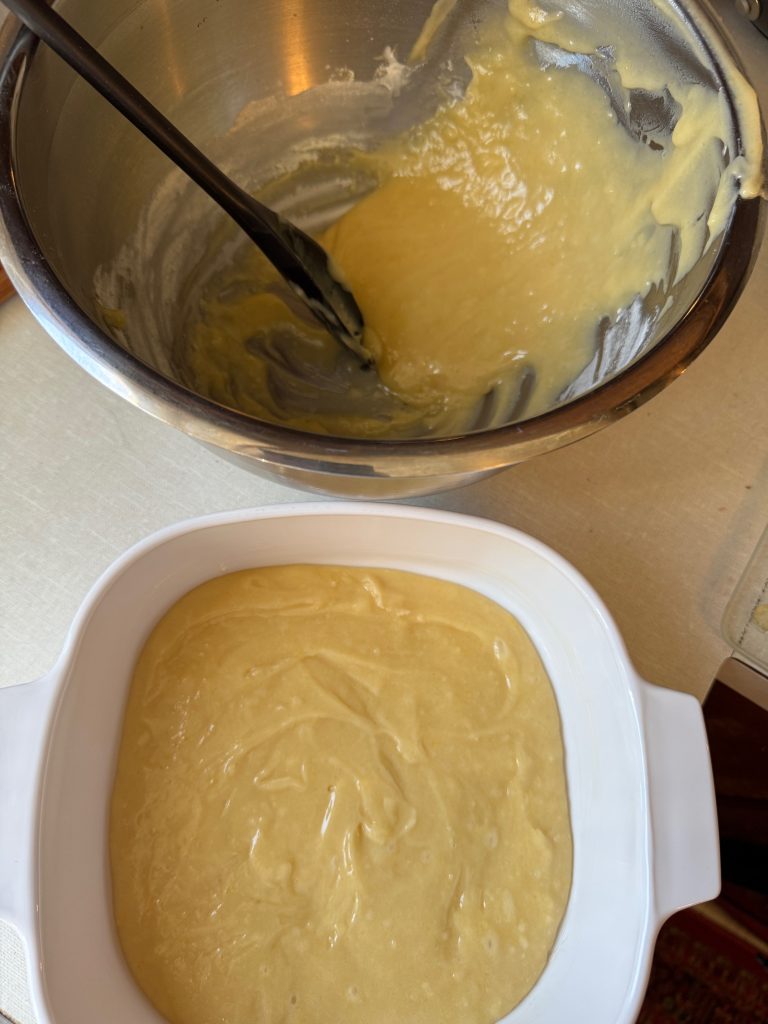
Preheat the oven to 350 degreesF. Prepare cake pan or casserole by greasing with butter.
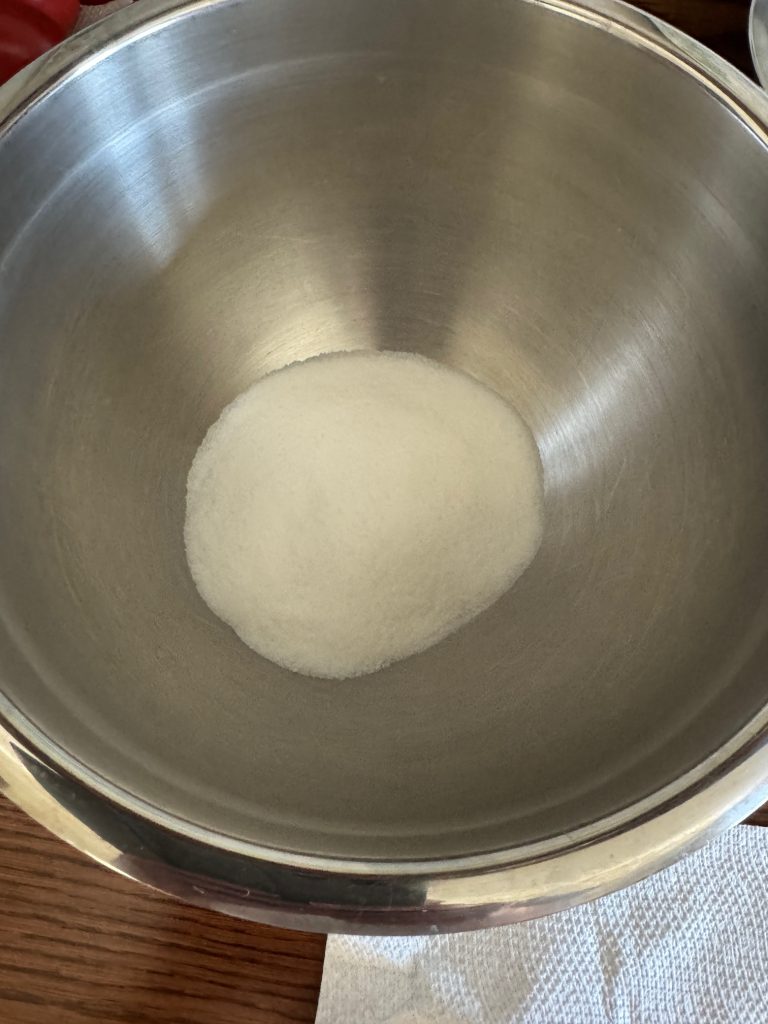
2. Sift together flour and baking powder.
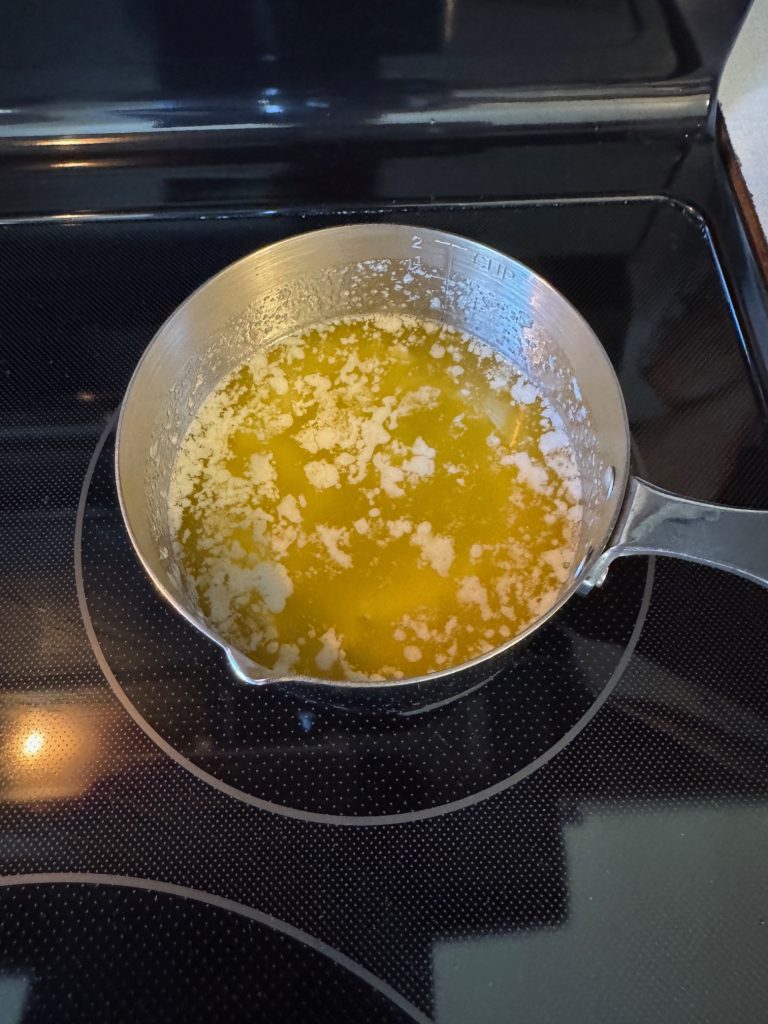
3. Cream sugar and butter in a separate, bigger mixing bowl.
I melted the butter.
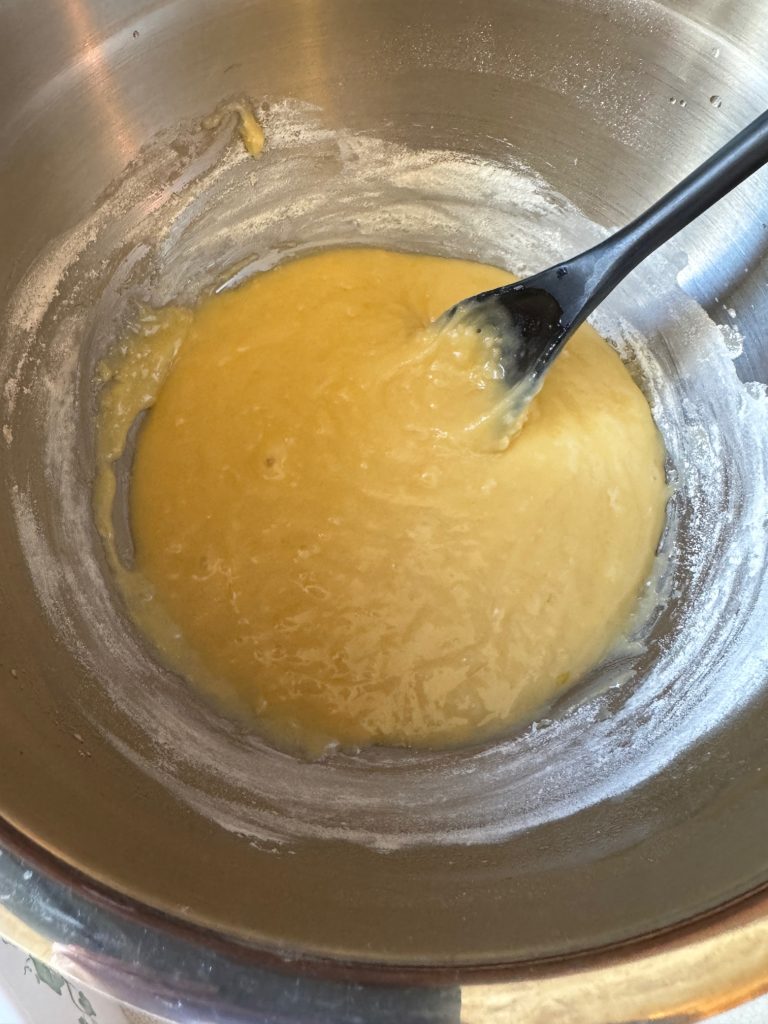
4. Add vanilla extract and eggs and continue mixing.
5. Add the sifted dry ingredients and mix well.
6. Transfer about 3/4 of the batter into the prepared pan or casserole. Smooth the top.
7. Add the drained apples, trying to arrange them evenly.
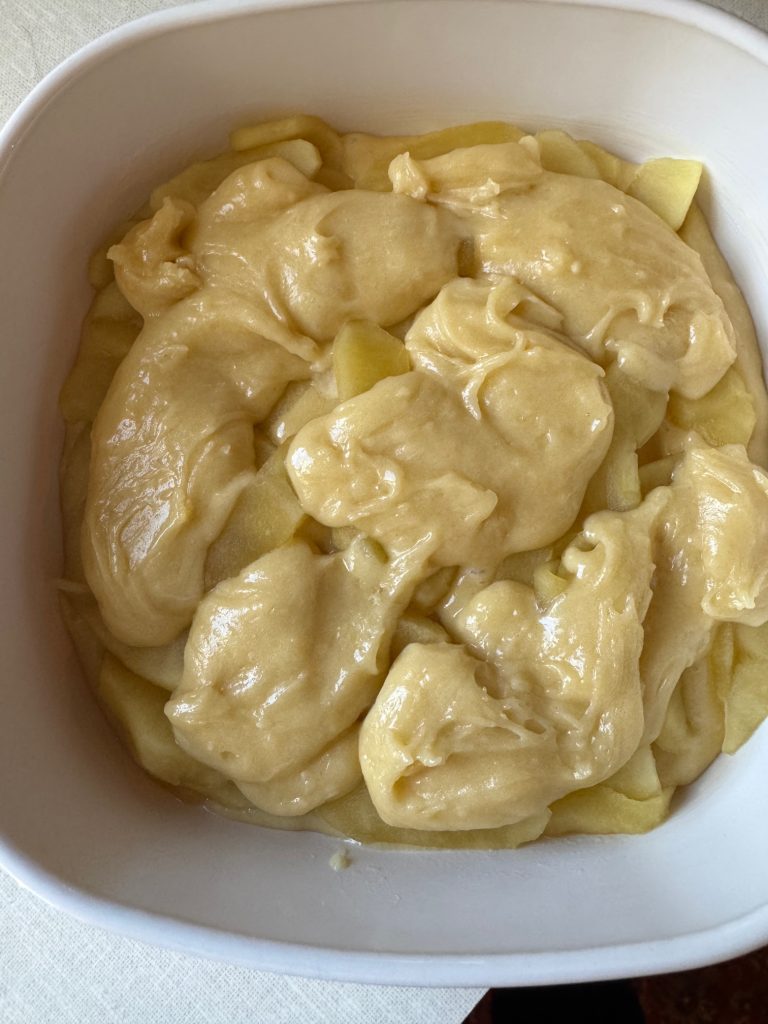
8. Randomly place the remaining batter on top.
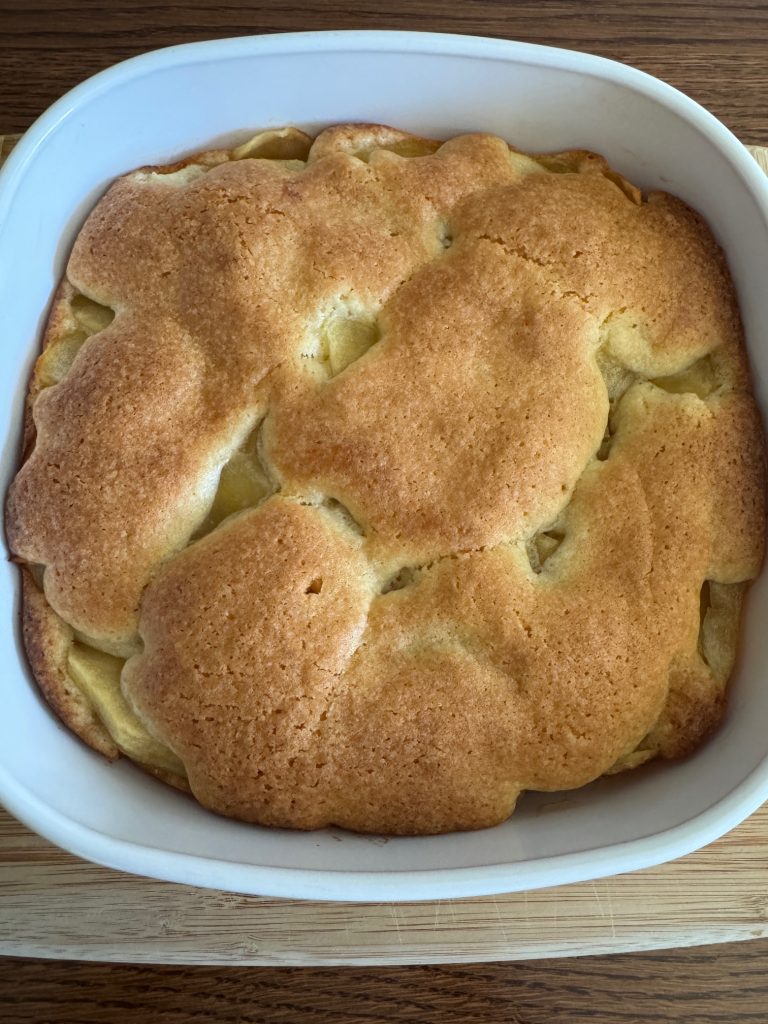
9. Place the pan in the preheated oven for 40-45 minutes, until it turns golden on top or a toothpick comes out clean. Set aside to cool.
This Swedish Apple Cake was delicious!
This certainly was not low carb, but it was one more apple cake in my recipe file. Enjoy!
If you’d like to check out the other apple cake recipes, here are those links:
Yesterday I followed a rabbit trail of ideas about my family history. I started with the fiction novels I was reading about the Scottish Highlands and the descriptions of the Tartan plaids that various groups were wearing. Characters could identify friend and foe from a distance, depending on the colors they were wearing. The various colors were associated by Clan name.
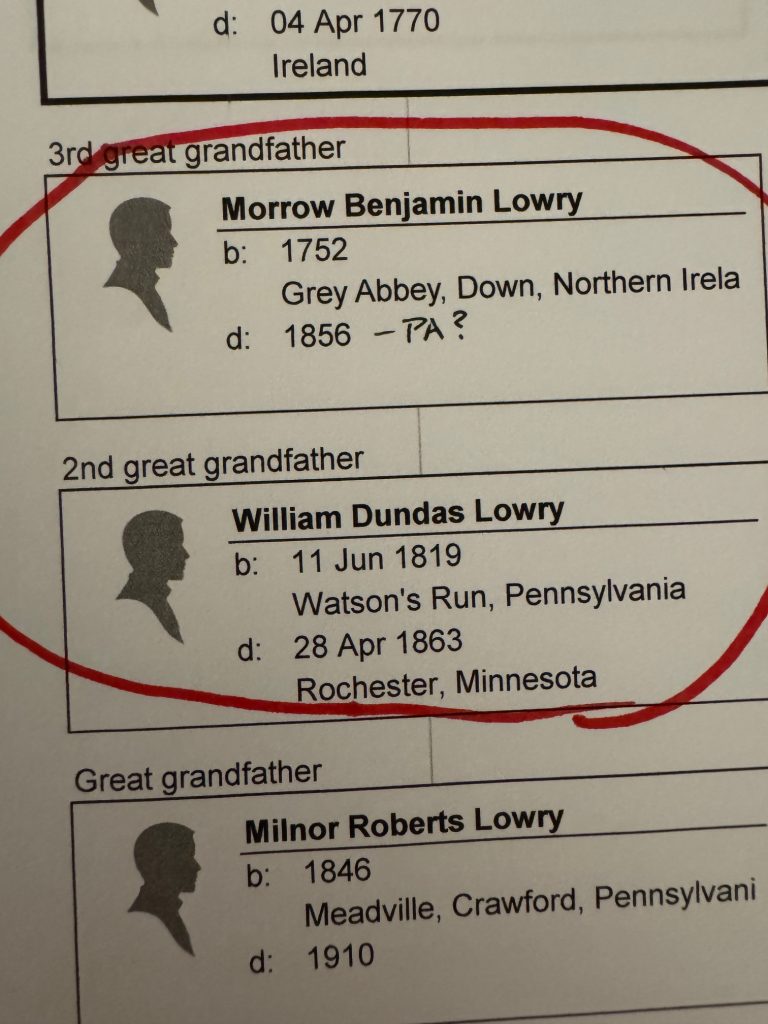
Of course, my maternal grandfather’s line was the LOWRY name, back at least 5 generations and I remember my mother saying the Lowry’s were Scotch-Irish Americans. I tried looking up the name Lowry in the Scottish list of clans…nothing. So, I pulled up my genealogy program and found the generation listed before coming to America…and lo and behold, there was my 3rd great grandfather, Morrow B. Lowry…born in 1752 in Grey Abbey, County of Down, Northern Ireland!
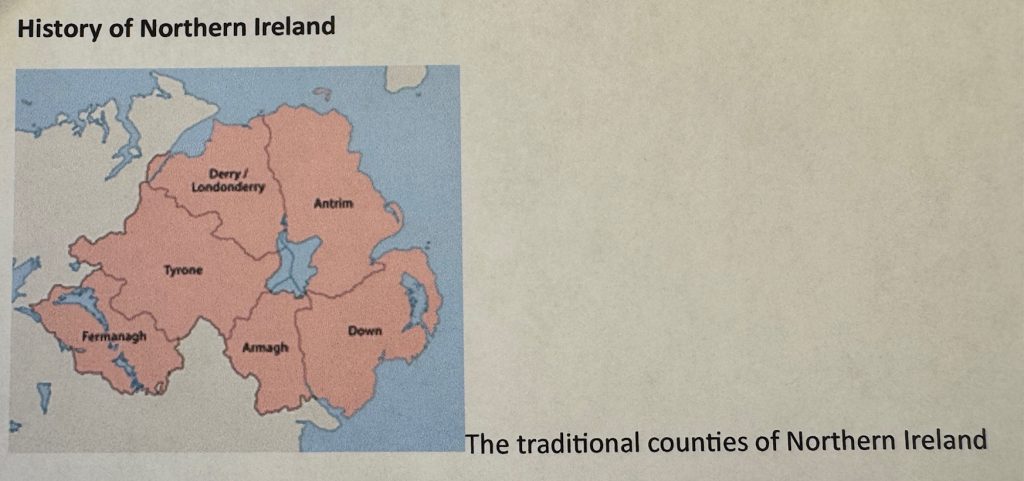
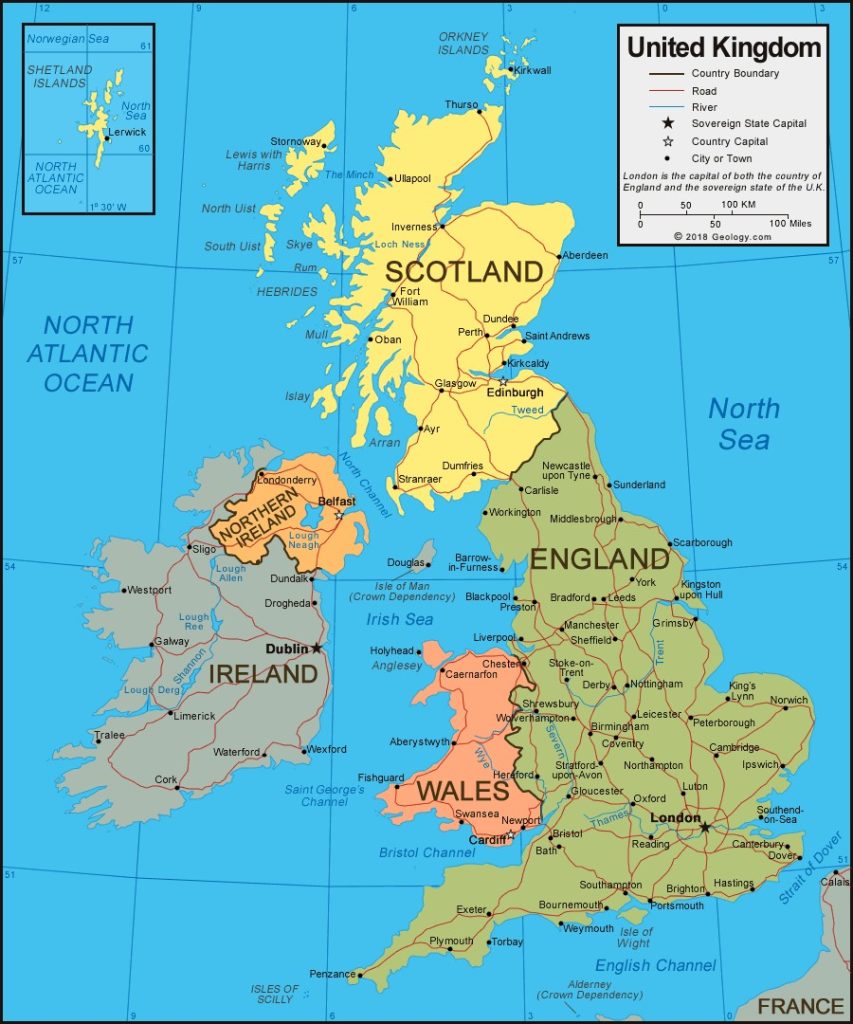
I discovered the Tartan plaids in Ireland are associated by County name so I was able to look up the Tartan plaid for Down county!
The County Down tartan, representing the county in Northern Ireland, is a traditional plaid pattern primarily featuring brown and orange with gray and sky blue accents. The tartan’s colors are symbolic: blue represents the sea, orange and brown represents the earth and landscape, while gray reflects the granite found in the region.
Of course, then I had to check out the history of Northern Ireland in Wikipedia.
My goodness! Northern Ireland has been struggling with invaders forever! The region now known as Northern Ireland was historically inhabited by Irish-speaking Gaels. It consisted of several Gaelic kingdoms within the province of Ulster. In 1169, Ireland was invaded by Anglo-Norman forces under the English crown, initiating centuries of foreign dominance and religious strife.
Many rebellions, battles and wars are documented and remembered to this day. During the Scottish famine of the 1690s, many Scots migrated to Ulster Province adding to the conflicts. You can read many more details on Wikipedia. I had to print out the map to see how close Ireland is to Scotland (I think about 12 miles across the North Channel).
The following sentence clearly caught my attention:
Between 1717 and 1775, approximately 200,00 Ulster Presbyterians emigrated to the American colonies, where their descendants are known as Scotch-Irish Americans.
My mother was right! I suspect my 3rd great grandfather was one of those folks! My second great grandfather was born in Pennsylvania!
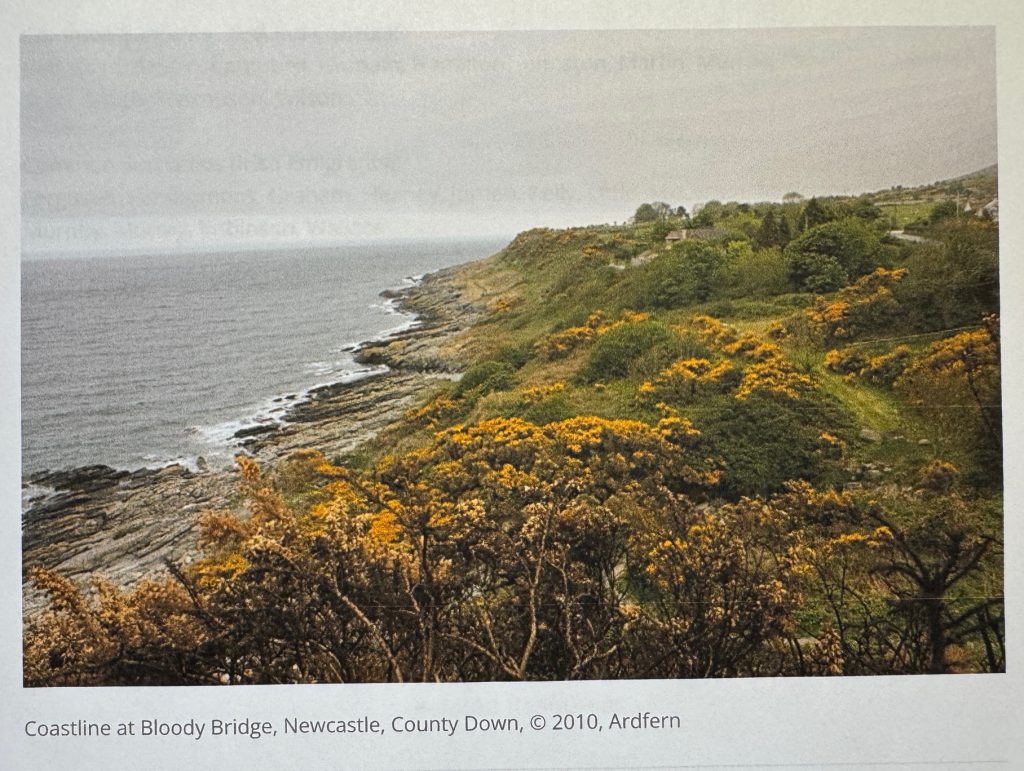
Here’s a picture of County Down coastline. It certainly brings my fiction novels to life!
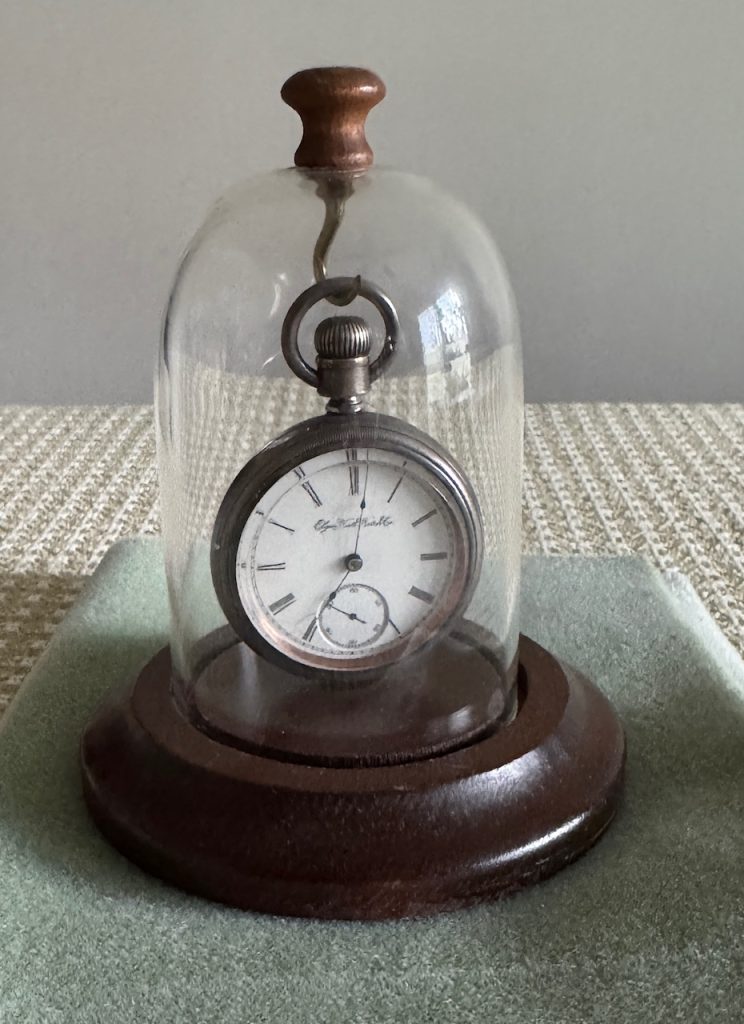
So, what do I have left to remember my Lowry family history? I do have my grandfather’s pocket watch. He died before I was born but my brother is older so I’ll have to ask if he has any memories of him.
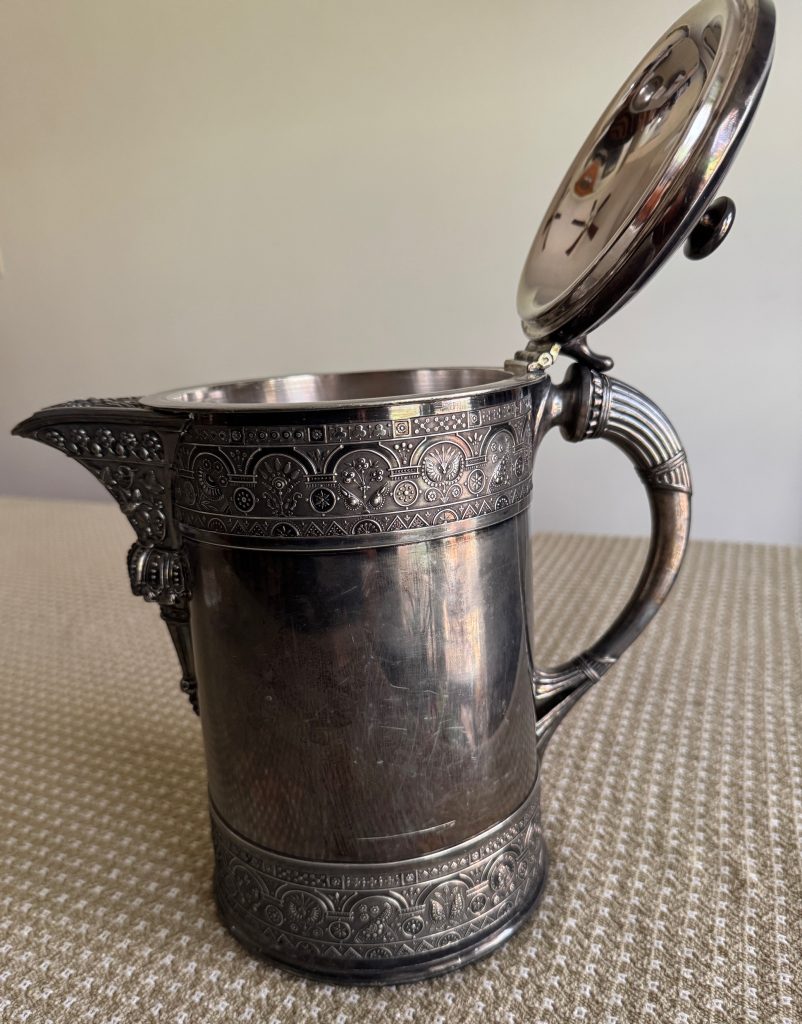
I also have a large silver-plated tea pot that has a real story! It weighs 5.58 pounds and could be polished up, but I hate to lose any silver plating that is left.
Tucked inside the pot was this story…written by my Aunt Winifred when she passed it on to my mother. I’m glad I can read cursive writing! I’ll type it out here, but I think I’ll include a copy in the pot so future generations can read it!
Silver (?) Tea Pot
The silver tea pot was brought from Pennsylvania by the William Dundas Lowrys who settled on a large farm near Rochester, Minnesota. They gave the tea pot to their son, Milnor Roberts Lowry (our grandfather) when he and his young wife (Mary Jane Wilcox Lowry) and their first baby our Uncle Will, came to Fergus Falls in a covered wagon in June 1871.
Milnor R Lowry started a feed store in Fergus Falls, which later became the first bakery in Fergus Falls. He and his family lived upstairs over the store.
He traded the silver tea pot to a Mr. Smith of Smiths Book Store for wall paper.
In June, 1945, a Mrs. Sidney Smith brought the tea pot to our house on Whitford St. She was the wife of one of Mr. Smith’s sons. She knew the history of the tea pot and thought it should go back to a member of the Lowry family.
Mother (Minnie Sweet Lowry) had the tea pot for a little while but was willing to give it to me when our father wanted me to have it. I was interested in family history at that time.
I gave the tea pot to you, Ruth (Lowry) Bixby, June, 1971
Winifred (Lowry) Nelson, 1971
Now that I’ve explored my Scotch-Irish heritage and seen the maps and pictures, my fiction novels feel more realistic! Now to figure out how the highlanders wrapped all that tartan fabric around them and then rode horses! Doesn’t seem to be very comfortable! Enjoy!
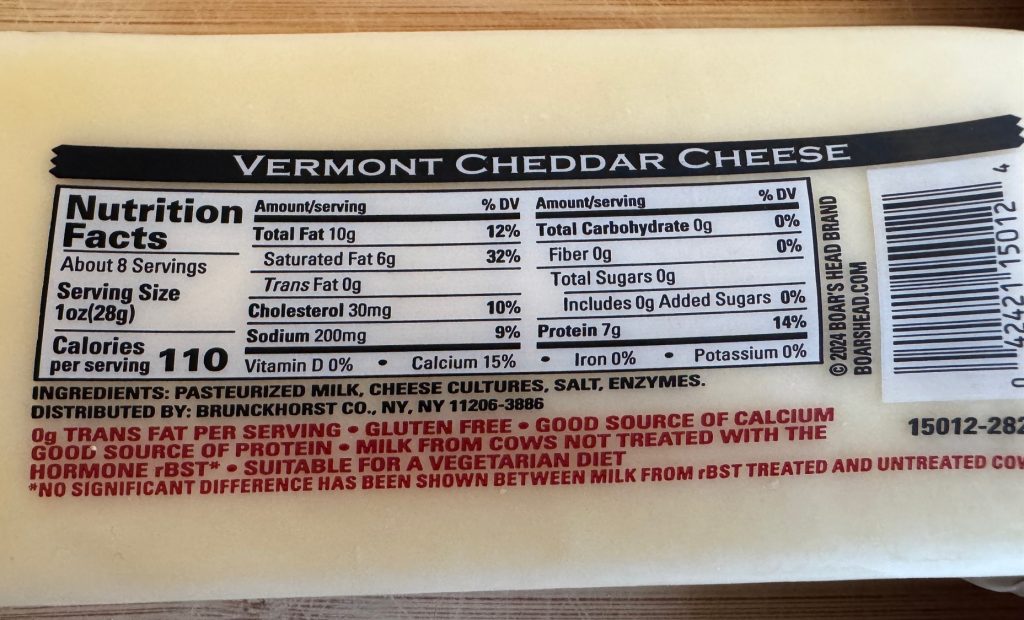
Today was a day to experiment! Let me first say…if you like cheese, consider just cutting a chunk of cheddar or grab a mozzarella cheese stick. There are no carbs and they are easy to eat on the run.
Cheddar has no carbs:
Mozzarella also has no carbs:
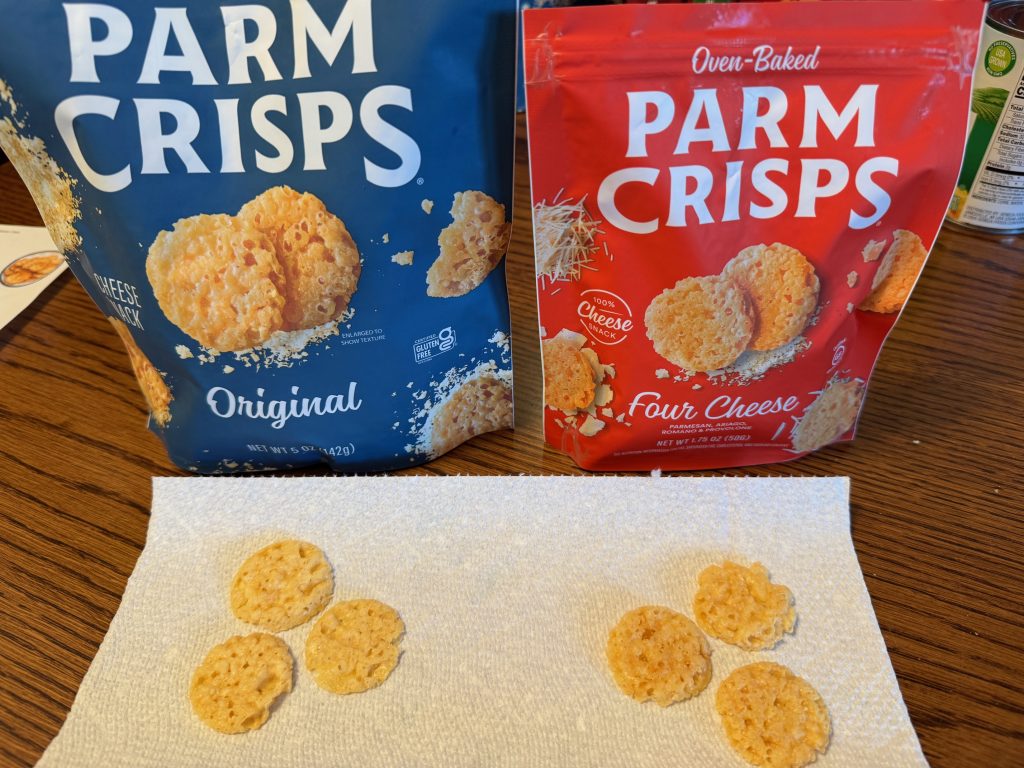
If you’re looking for a crunchy cheese snack, I found these at Walmart…with 1gm or less of carbs! They don’t taste too bad if you like Parmesan cheese. Also quite carb free!
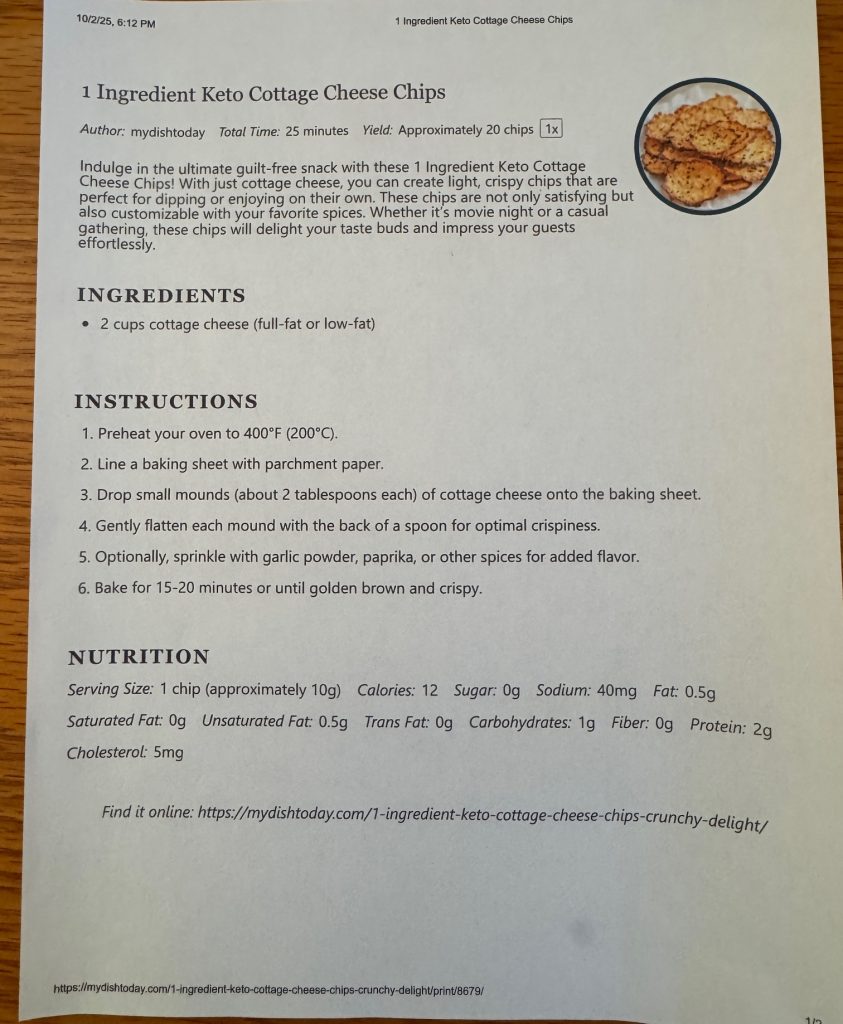
Then, I found a recipe to make a cottage cheese snack. It looked pretty easy and cottage cheese is also quite low in carbs…6gm for 1/2 cup. Here is the recipe:
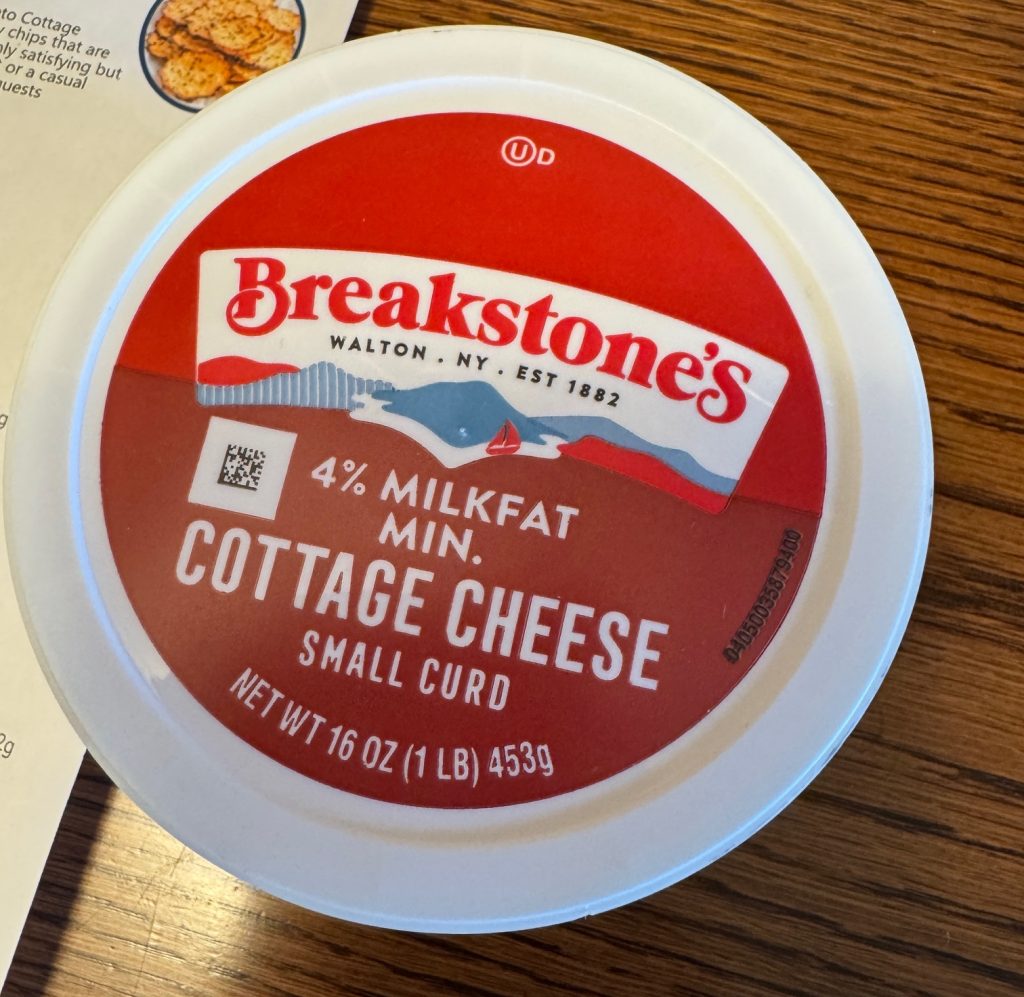
I like cottage cheese better than Parmesan, so I thought I’d give it a try. Now came the experimenting!
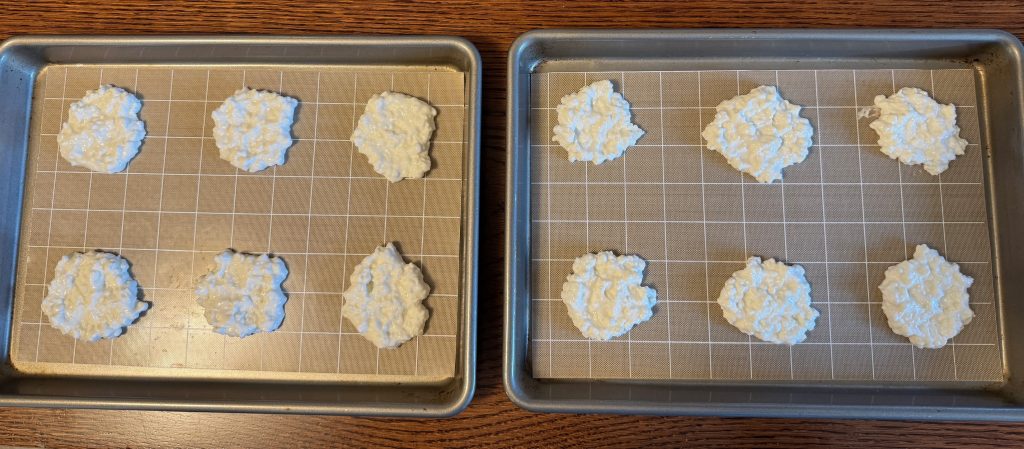
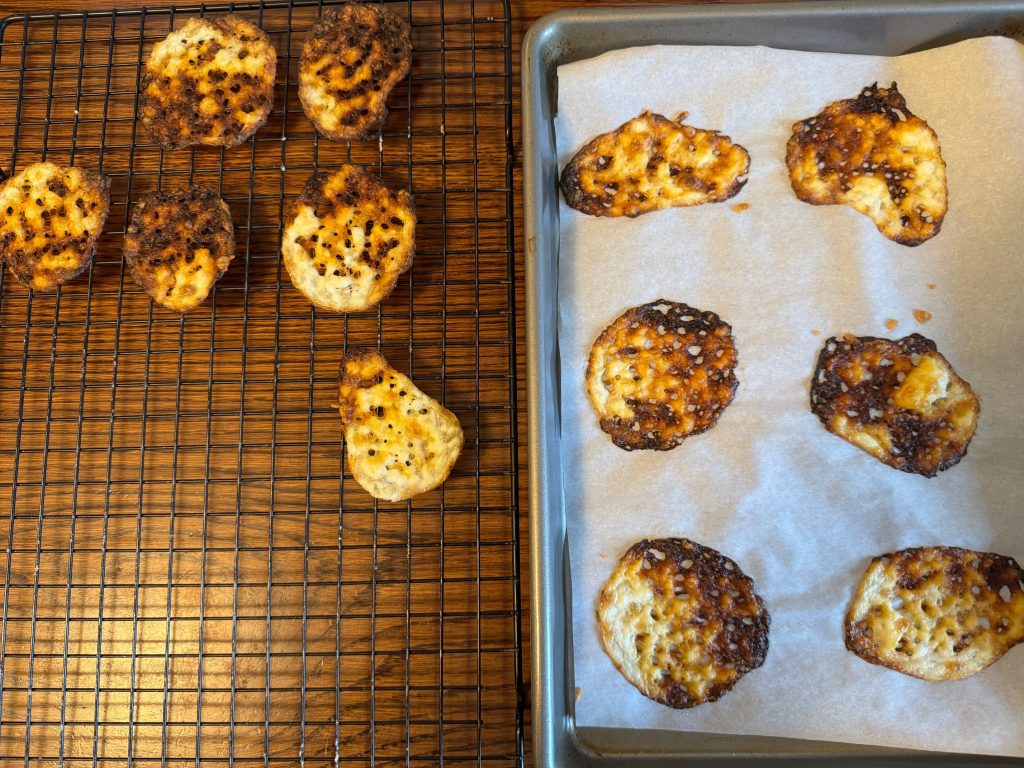
My First Attempt:
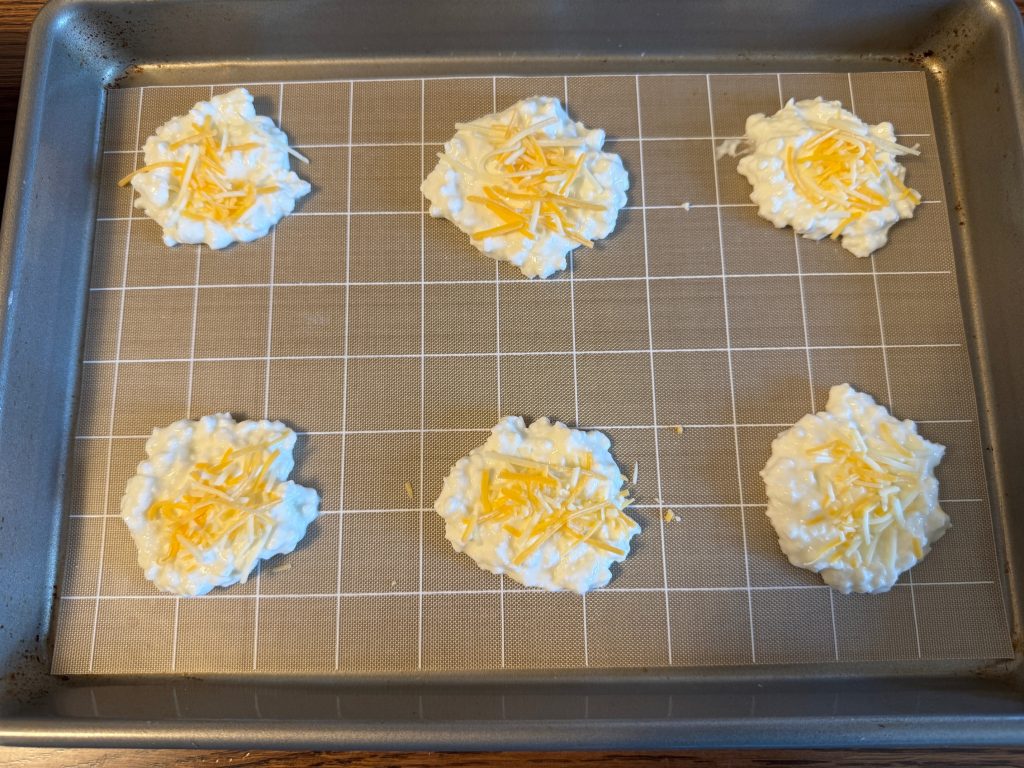
In my first attempt I used my standard baking sheets with the silicone sheet on them. I scooped out a large spoon of cottage cheese (it called for 2 tablespoons) and even sprinkled a little grated cheddar on half of them.
I put them in the preheated 400 degreeF oven.
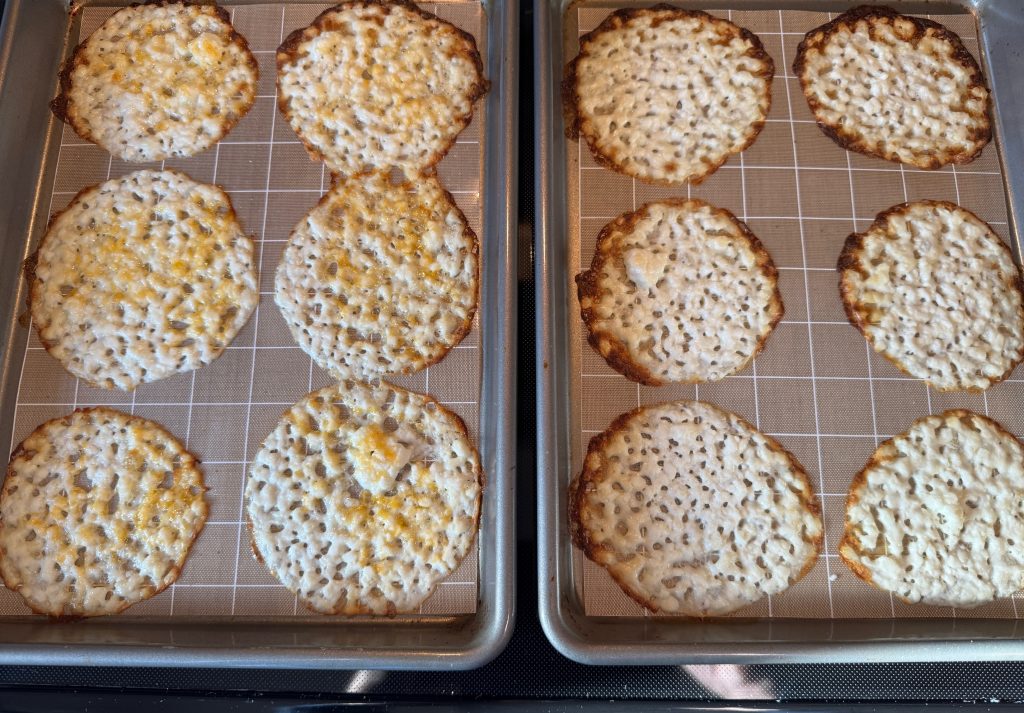
In 20 minutes they were flat, starting to burn around the edges and quite soggy in the middle. I could barely get them off the sheets…a real mess.
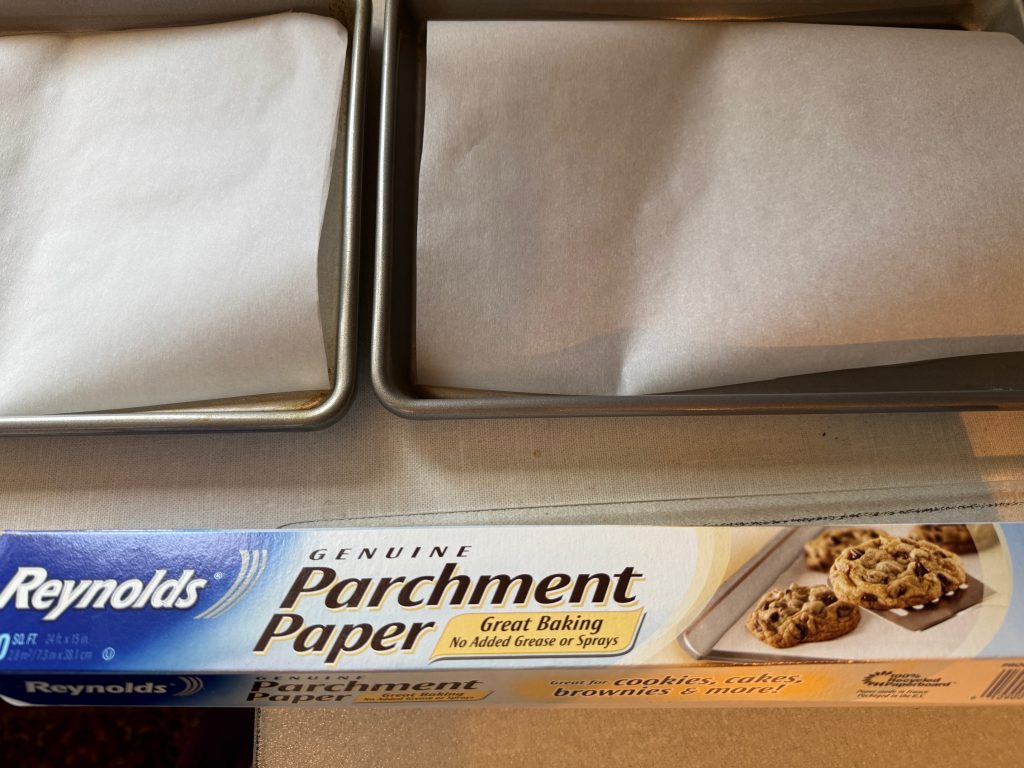
My Second Attempt:
Obviously, my silicone mats were not helpful. I got out my roll of parchment paper and cut two for my baking sheets.
This time I used less cottage cheese and turned the oven down to 350 degreesF. These were at least edible, but the oven was still too hot.
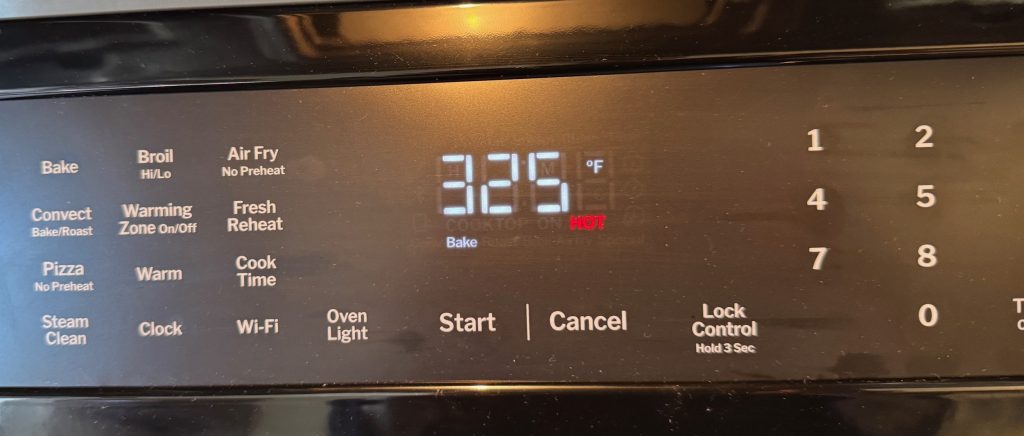
My Third Attempt:
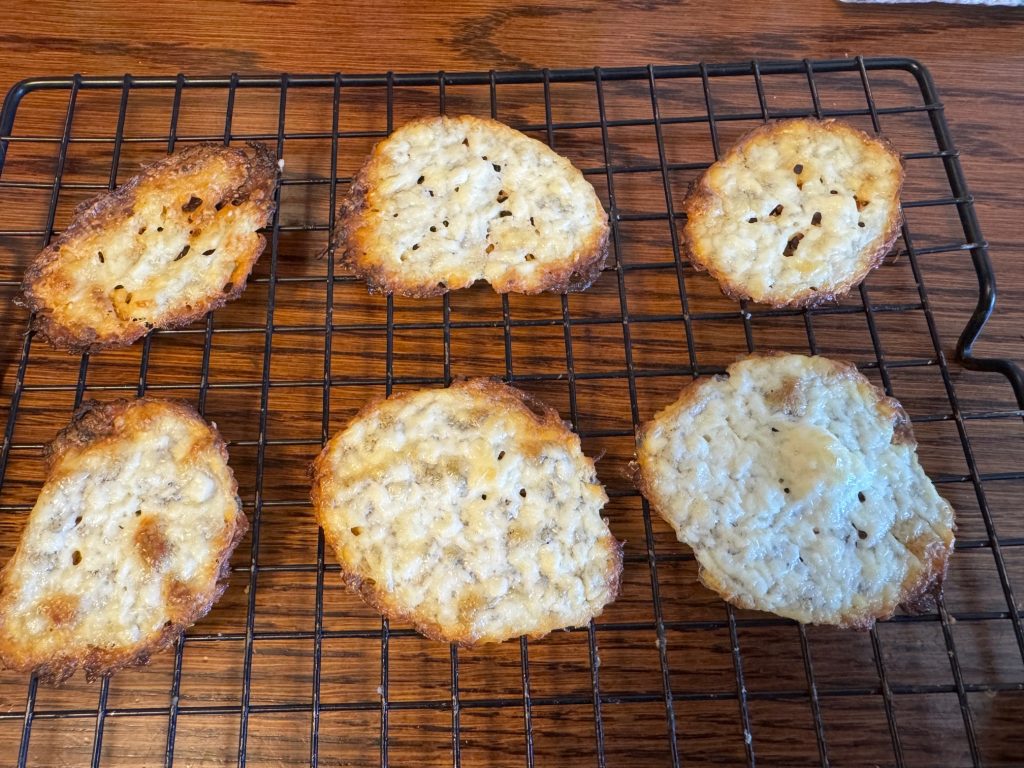
This time I turned the oven down to 325 degreesF and timed them for about 30 minutes.
Then, I turned the oven off, opened the oven door and let them cool and dry out even more. They turned out much better!
So, I guess it is possible to make a cheese snack with cottage cheese, but frankly…it seemed like a lot of messy work. I might as well just eat 1/2 cup of cottage cheese for 6 gm of carbs!
My Fourth Attempt to Make a Snack:
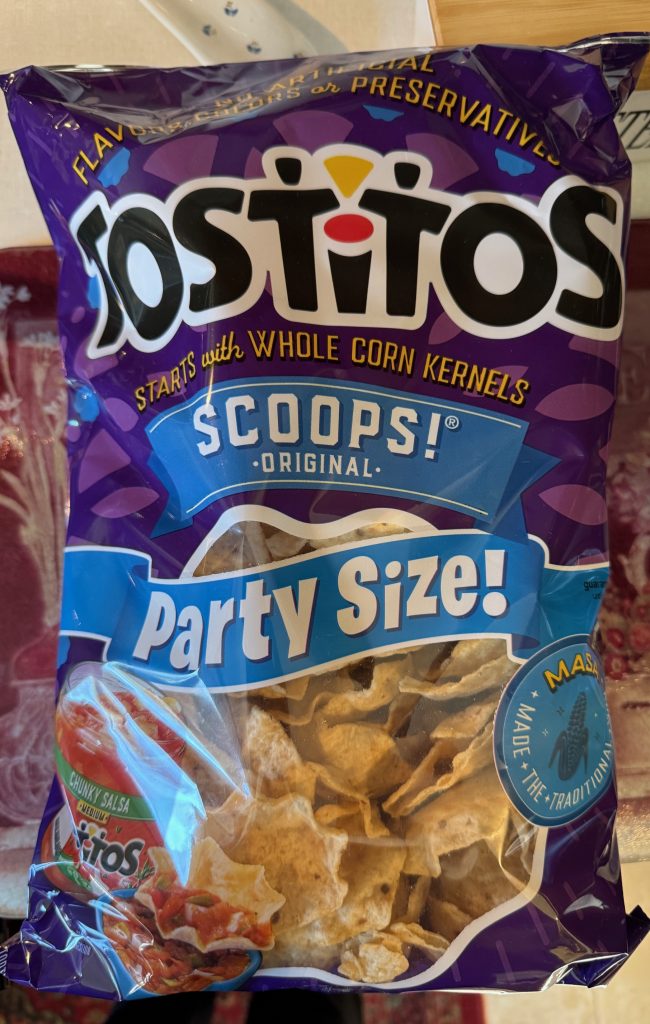
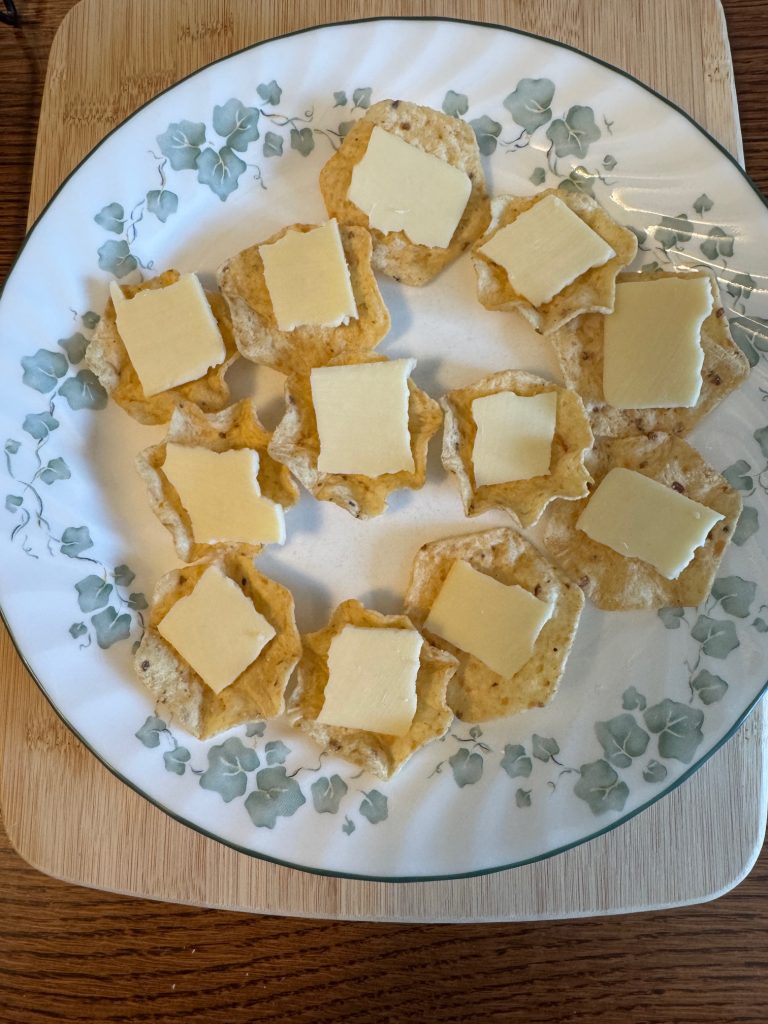
While I was waiting for the last batch to cool, I tried something else. I pulled out 12 corn chips (one serving, 12 chips, had 19 gm of carbs).
I arranged the corn chips on a dinner plate and put a square of cheddar cheese on each one.
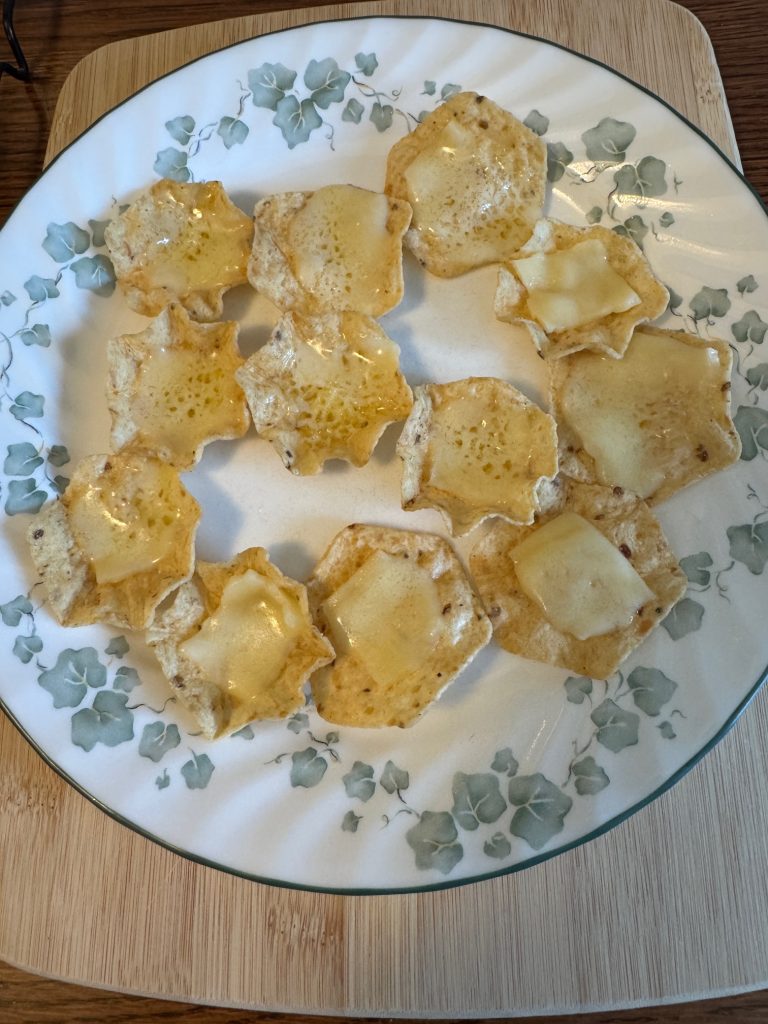
Then, 20 seconds in the microwave melted the cheese and I had a simple crunchy cheese snack. I think I’ve found a fairly low carb snack/lunch that was very easy to make!
Frankly, if I want a crunchy cheese snack, I’ll use corn chips and the microwave. If I want cottage cheese, I’ll eat it with a spoon! If I want Parmesan cheese…I can buy a bag of snacks from Walmart! So, that’s my experimenting for the day! Enjoy!
If you have comments or questions, please email me directly at maryjkisner@gmail.com.
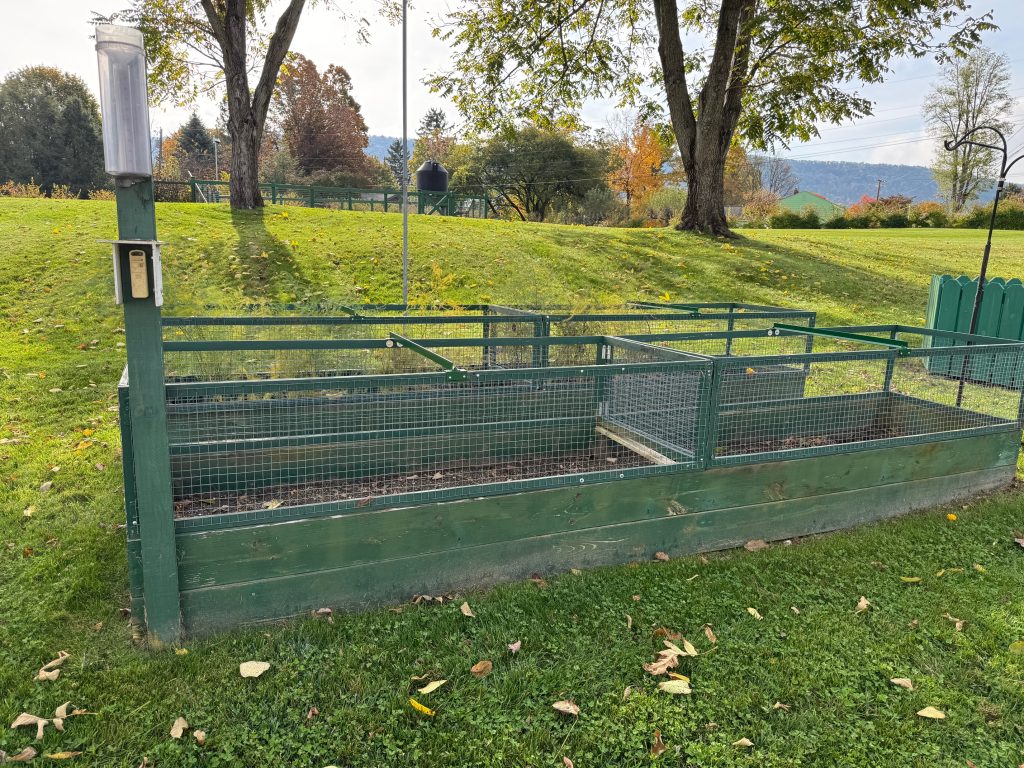
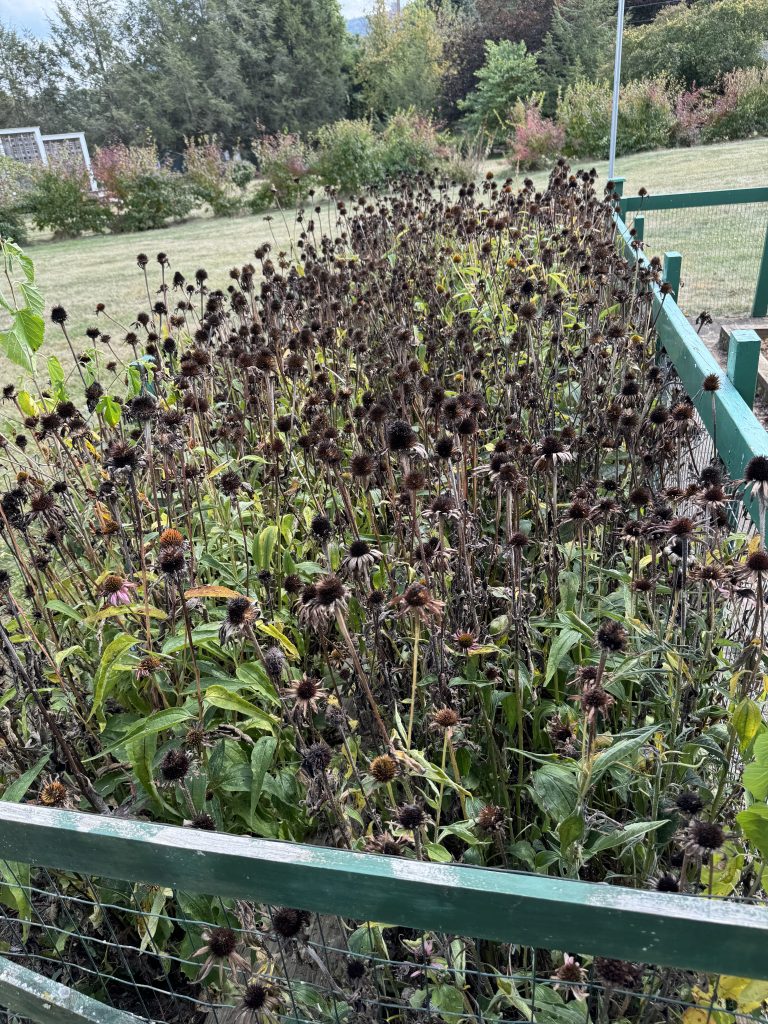
We finally had a heavy frost and 29 degrees a few days ago, so it is time to give you a final update on the 2025 garden. Everything is out of the garden now. Bert will soon trim the Echinacea stems to ground level, and probably trim the lavender stems off also. Nothing to see there now. The asparagus ferns are still green, but I imagine they won’t last long. They will get trimmed down also.
The large rain barrel in the garden will be totally emptied and the rain barrels by the shop will be drained and stored until next spring.
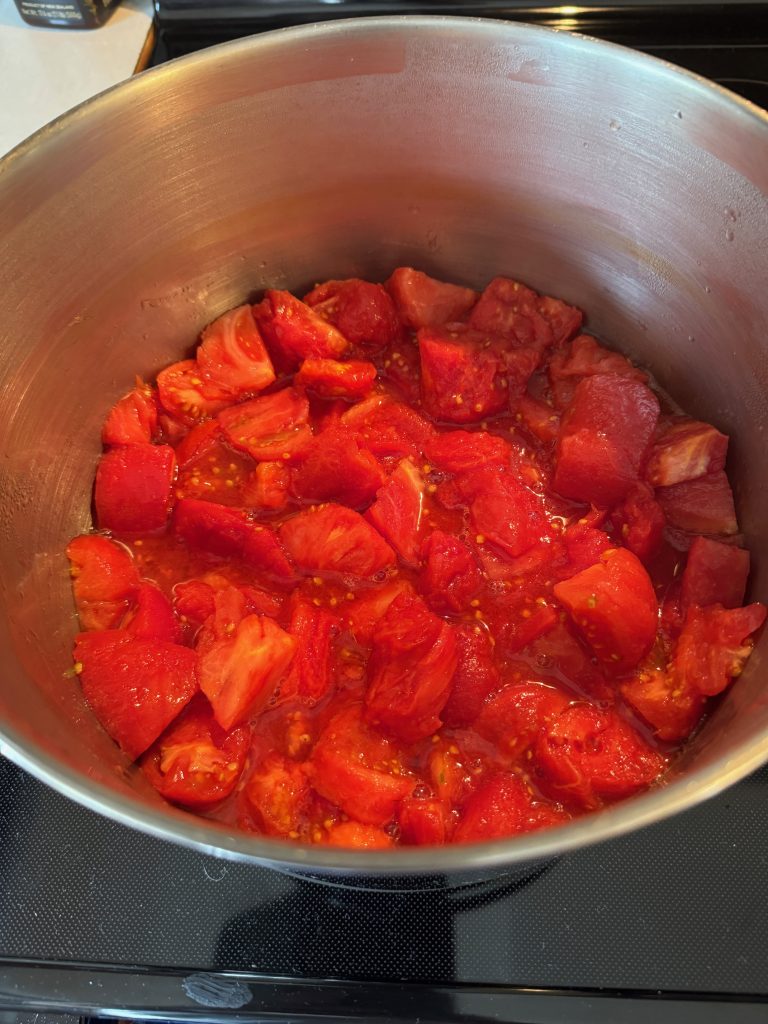
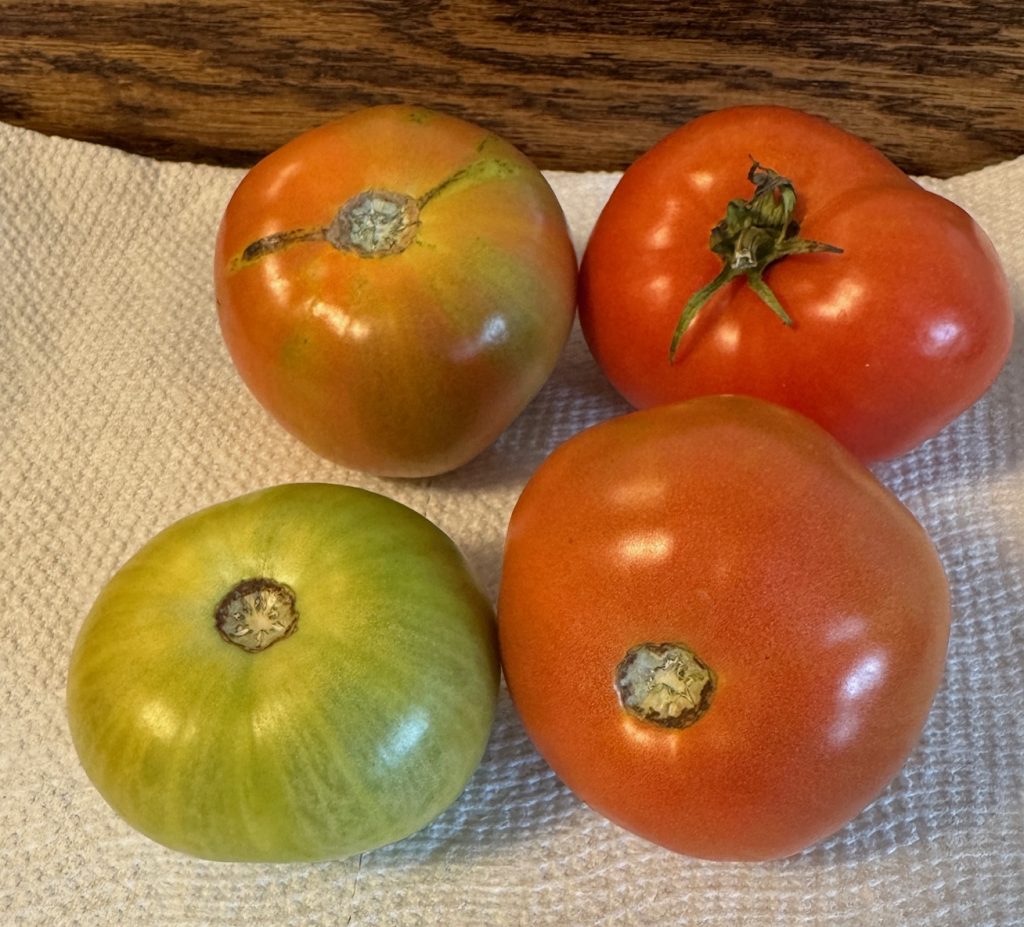
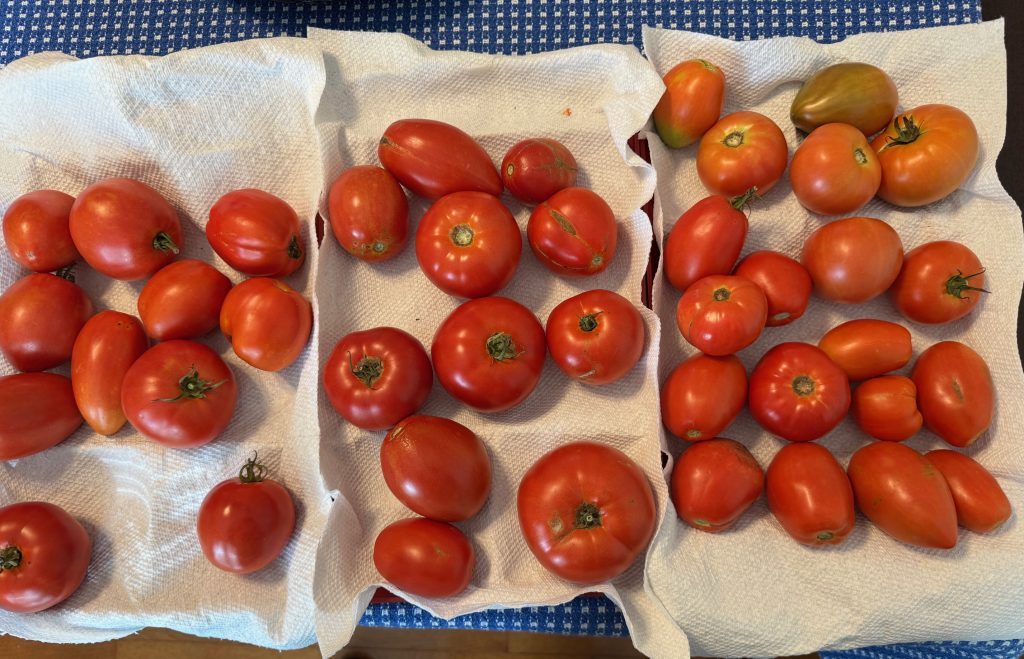
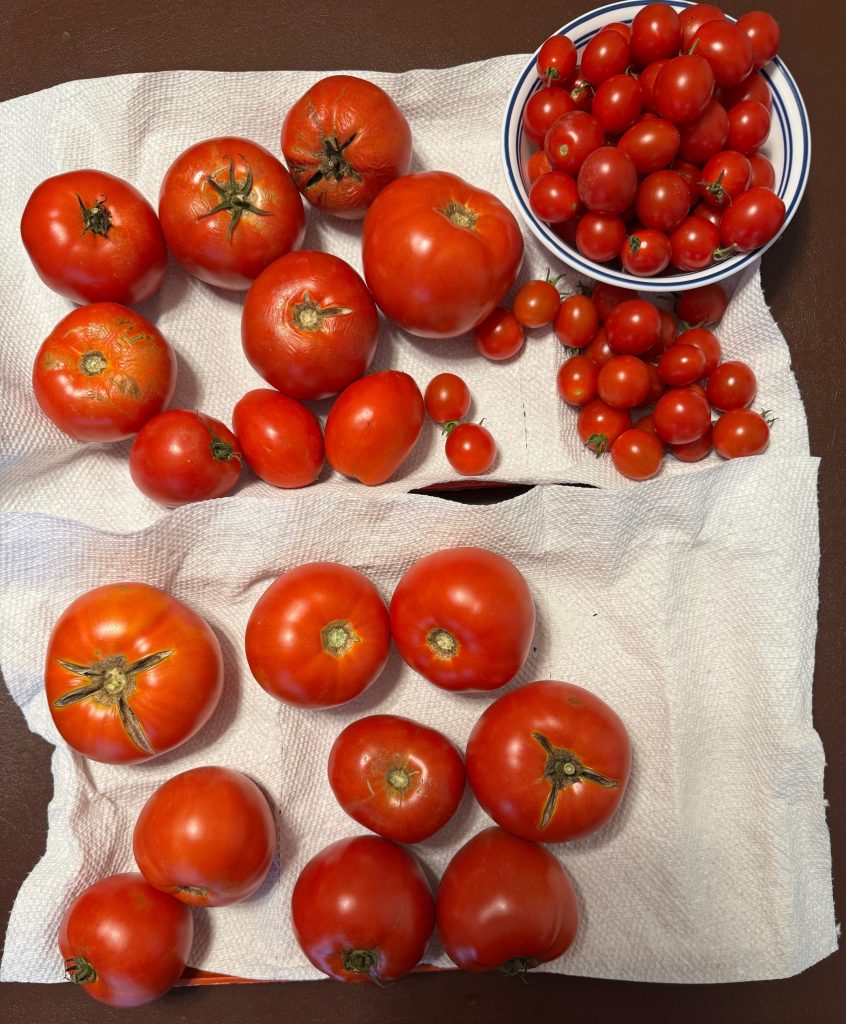
The last of the tomatoes that had been sitting on the counter are finally in the pot. Only four are left and two may not even ripen. We’ll see!
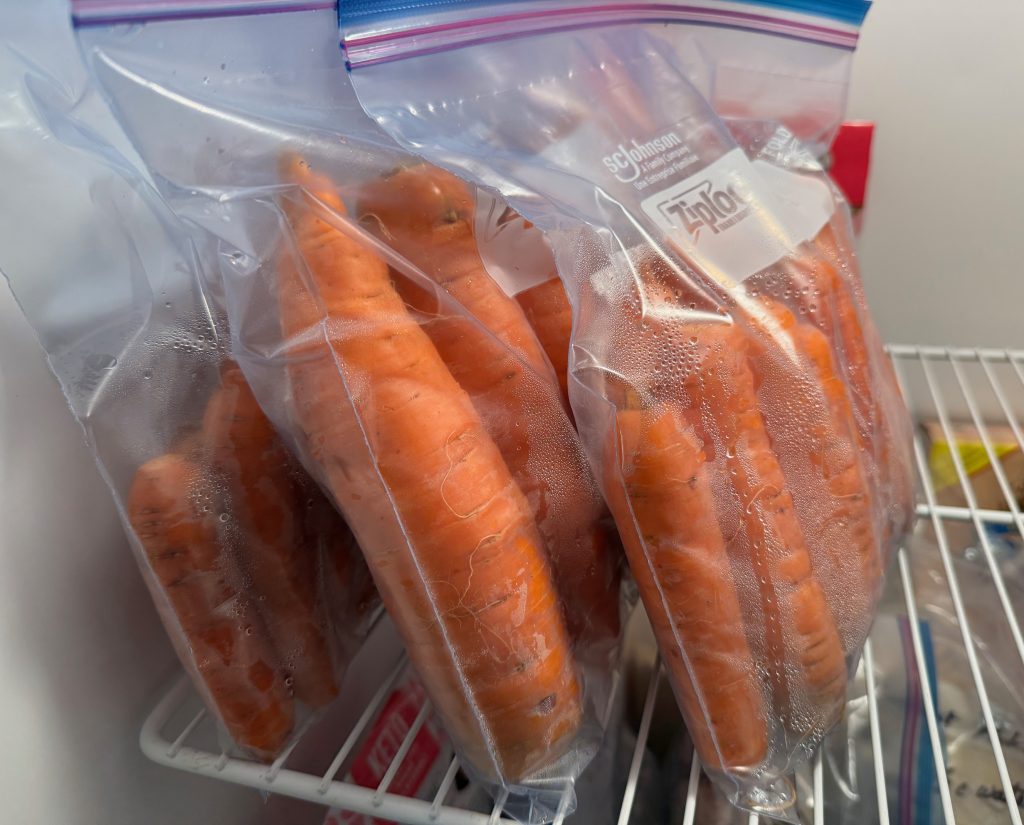
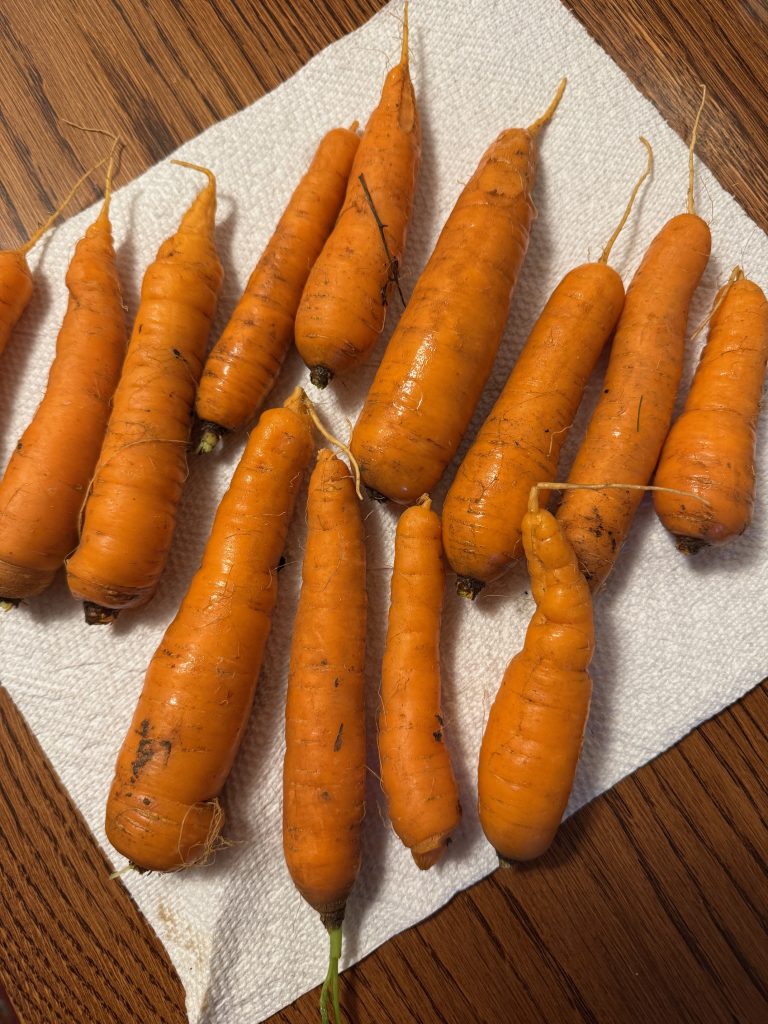
The carrots are stored in the refrigerator and will stay nice until Christmas.
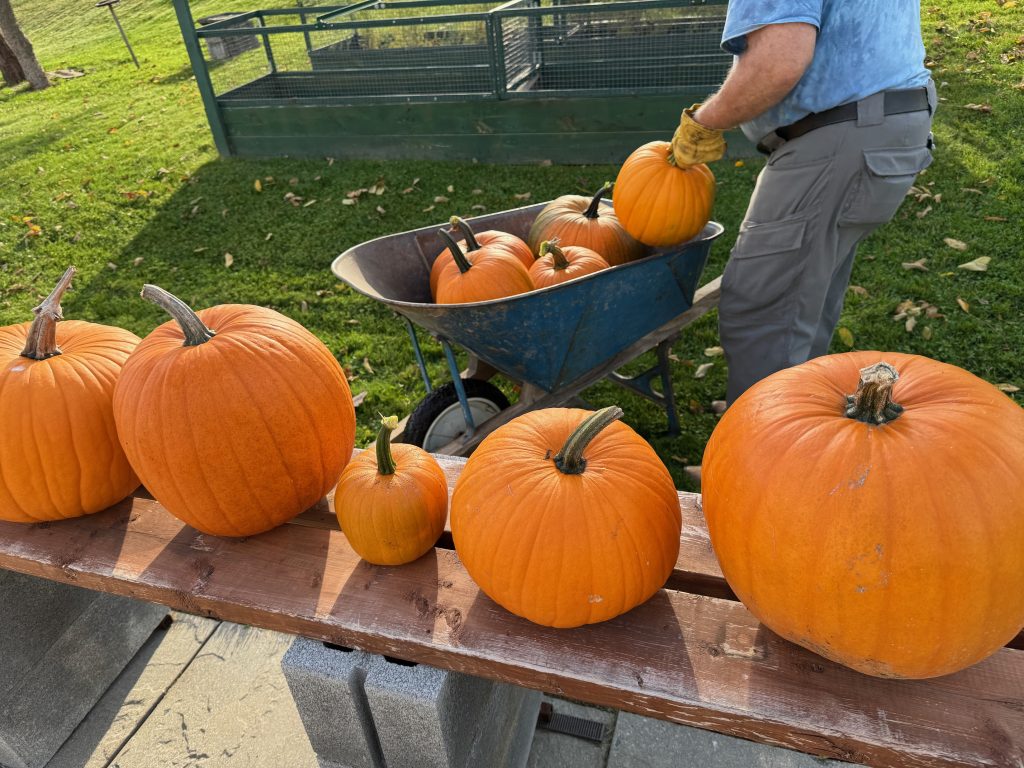
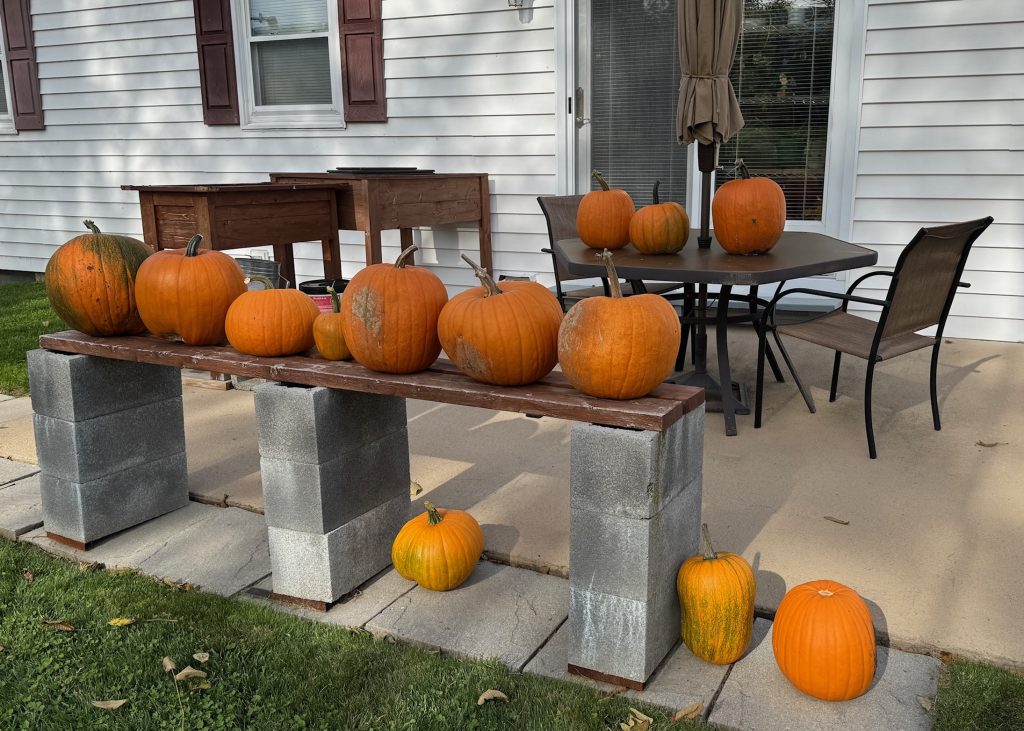
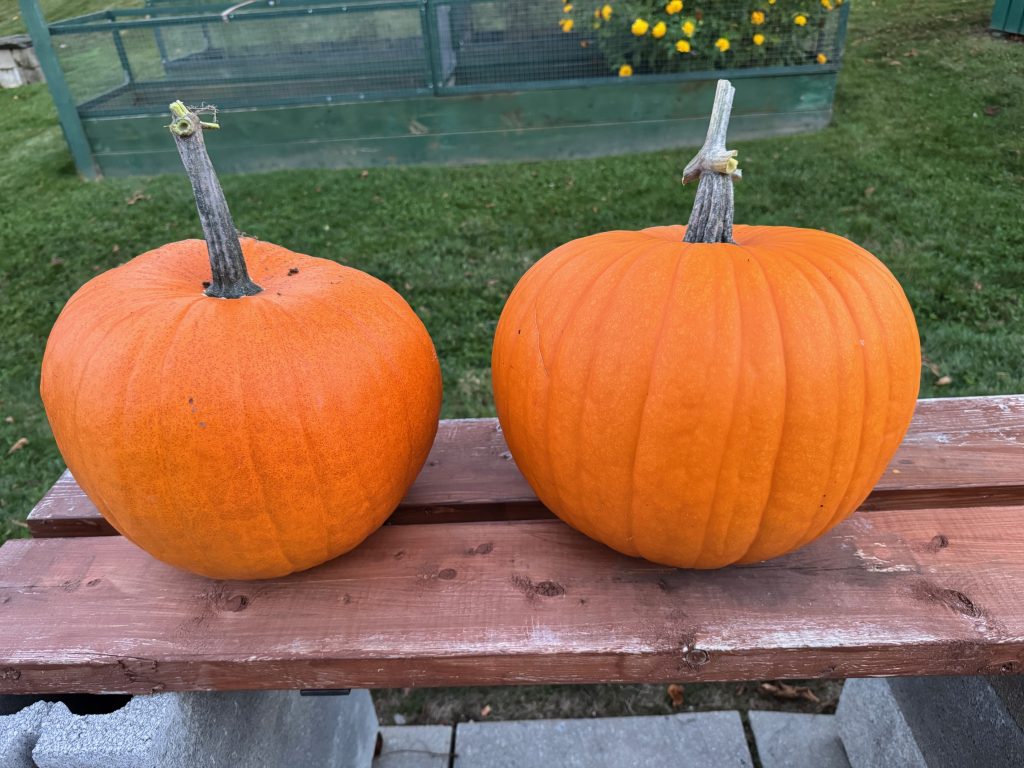
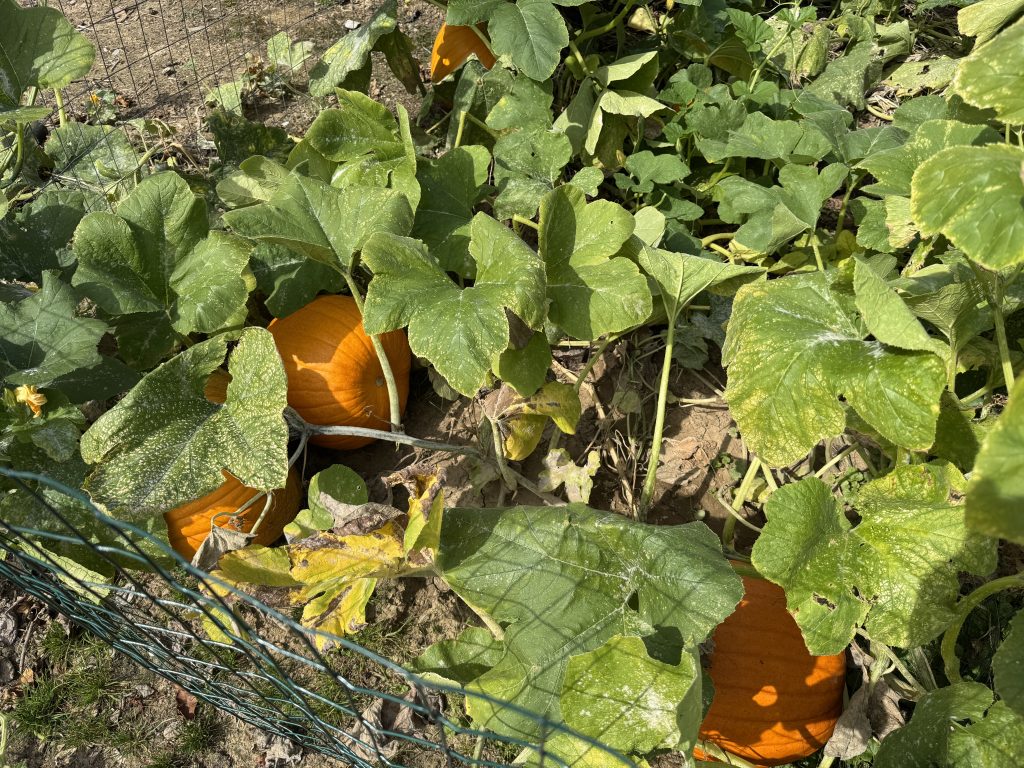
And today Bert harvested the rest of the pumpkins! Such fun!
I feel like we’ve truly decorated for Halloween now! I just noticed that Bert placed the pumpkins with the good sides facing the house so I could see them! I love them!
Remember, if you have comments or questions, please email me directly at maryjkisner@gmail.com.
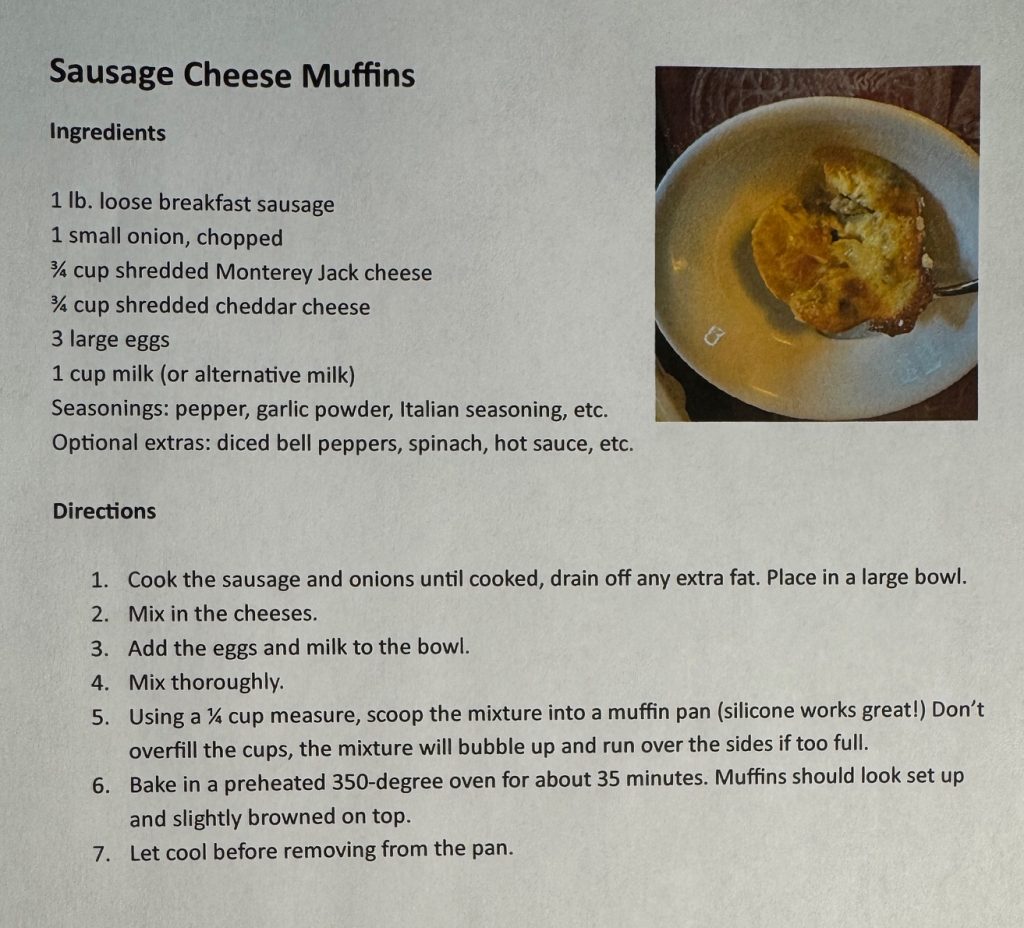
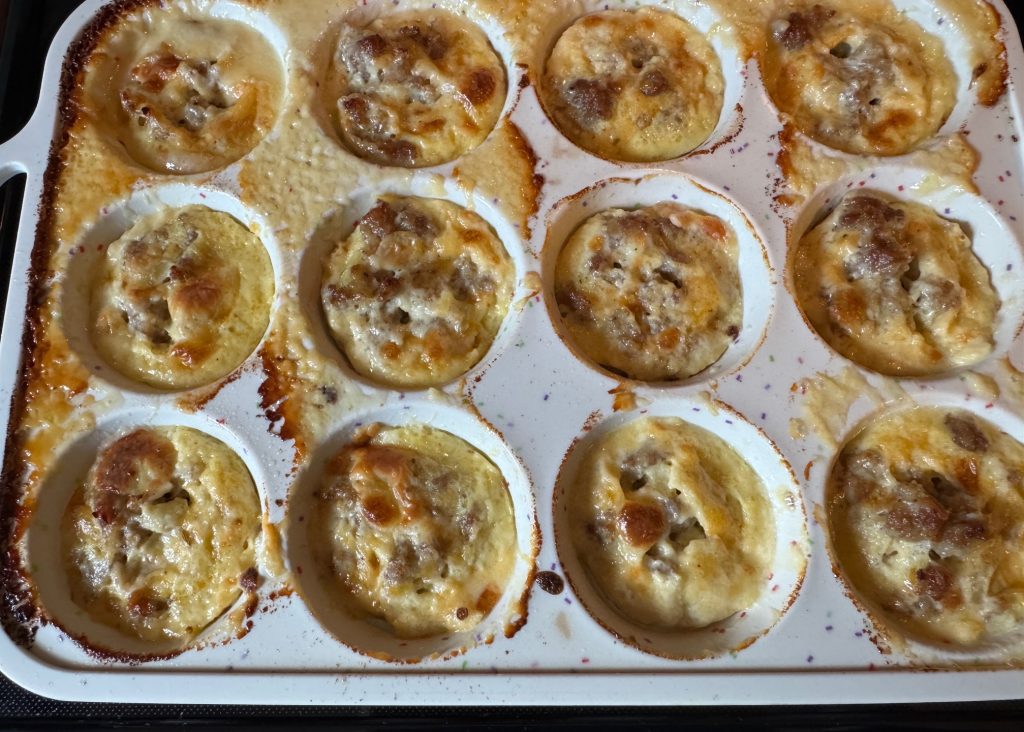
In my search for low-carb foods, I came across a recipe for Sausage Cheese Pie. It sounded interesting. The picture even looked interesting, but before I had even begun, I was suggesting changes.
There are only two of us and leftover pie would be hard to keep in the fridge. I also didn’t want to mess with a pie crust, so we thought a casserole dish might work. That still made a messy leftover. Finally, we adapted the recipe to work in my silicone muffin pan.
Our adapted recipe looks like this:
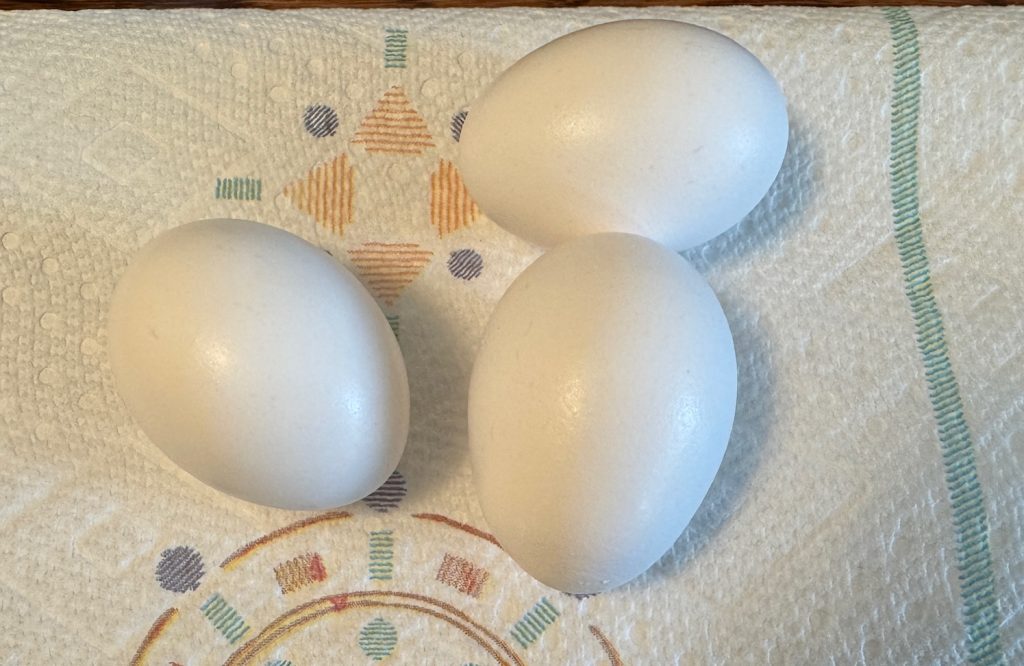
The original pie recipe suggested we cook the sausage and onion together, mix in the shredded cheese and put it in the pie crust. Then the eggs and milk were beat together and poured on top. It would bake like a custard on top.
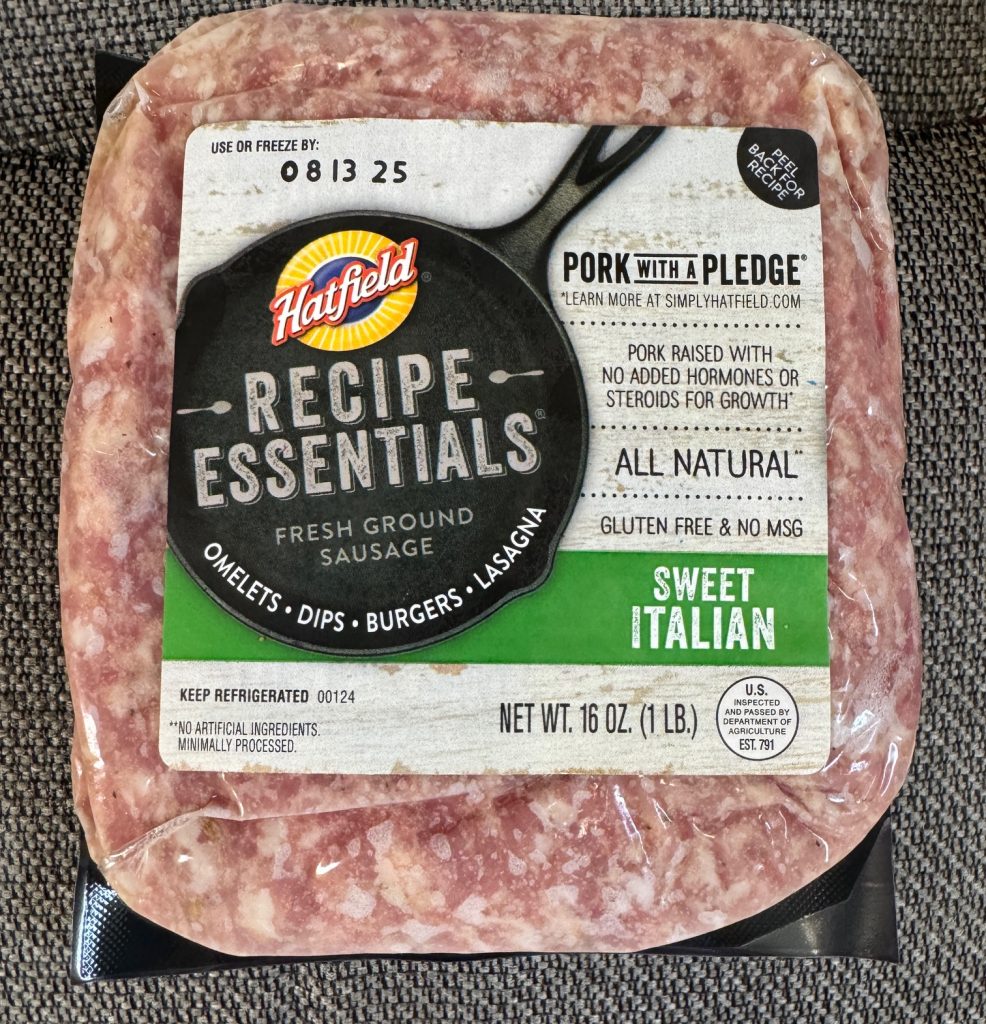
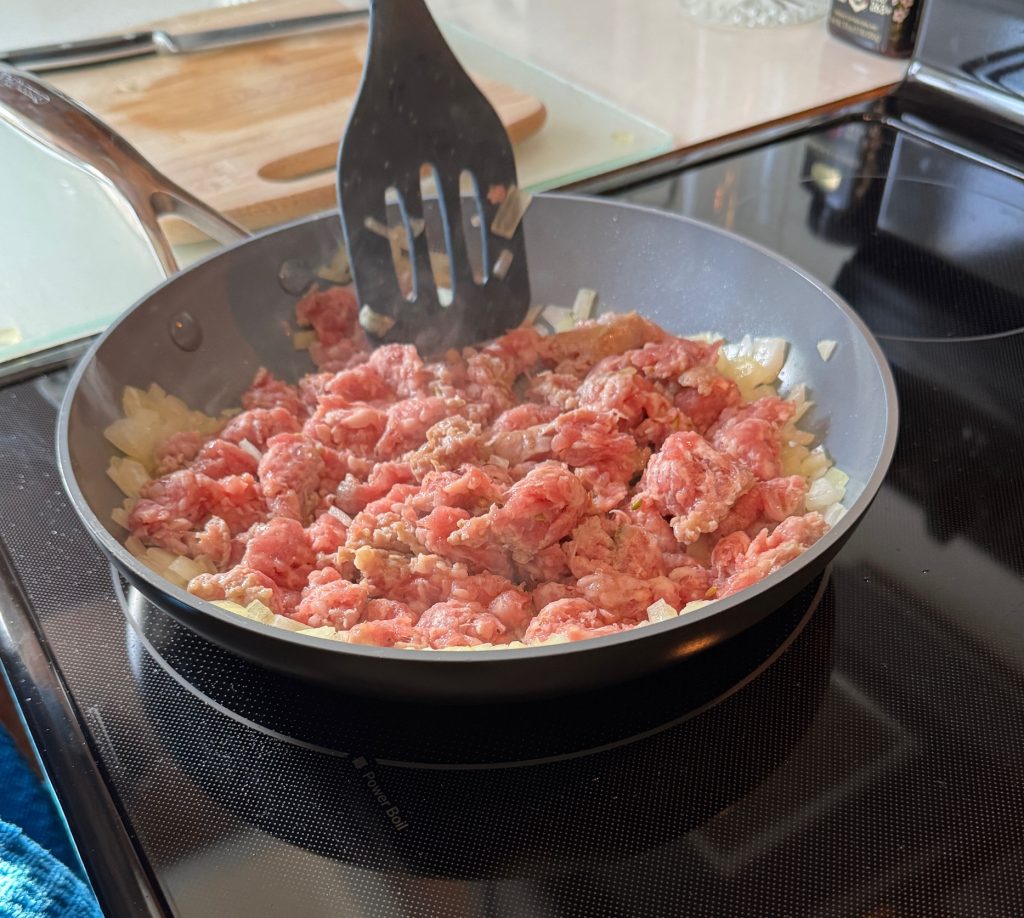
We ended up cooking the sausage and onions first and just mixing everything together. The sausage was in the freezer so we thawed it in the refrigerator overnight.
Bert doesn’t mind doing the chopping and cooking of meat and onion. Thank goodness!
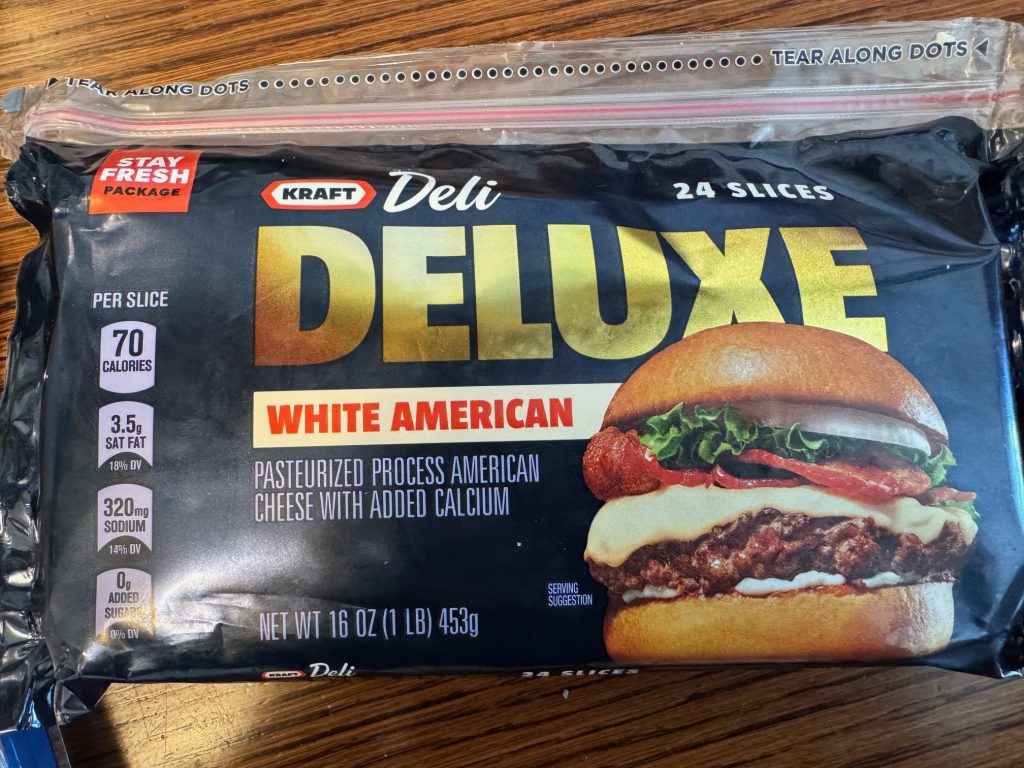
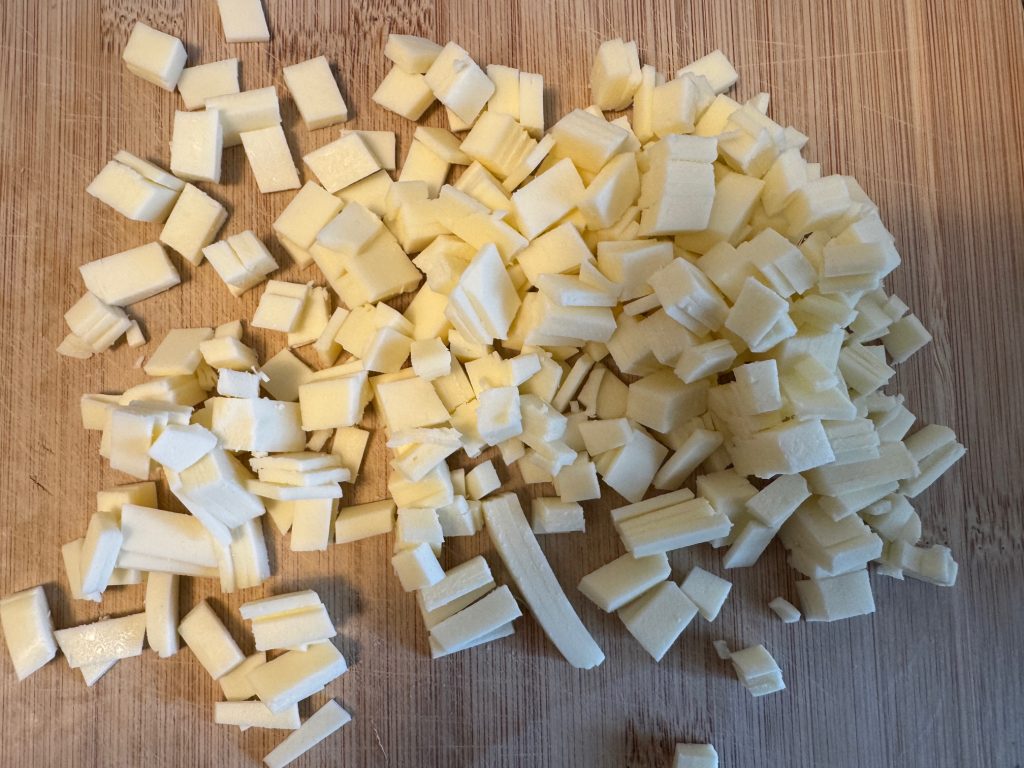
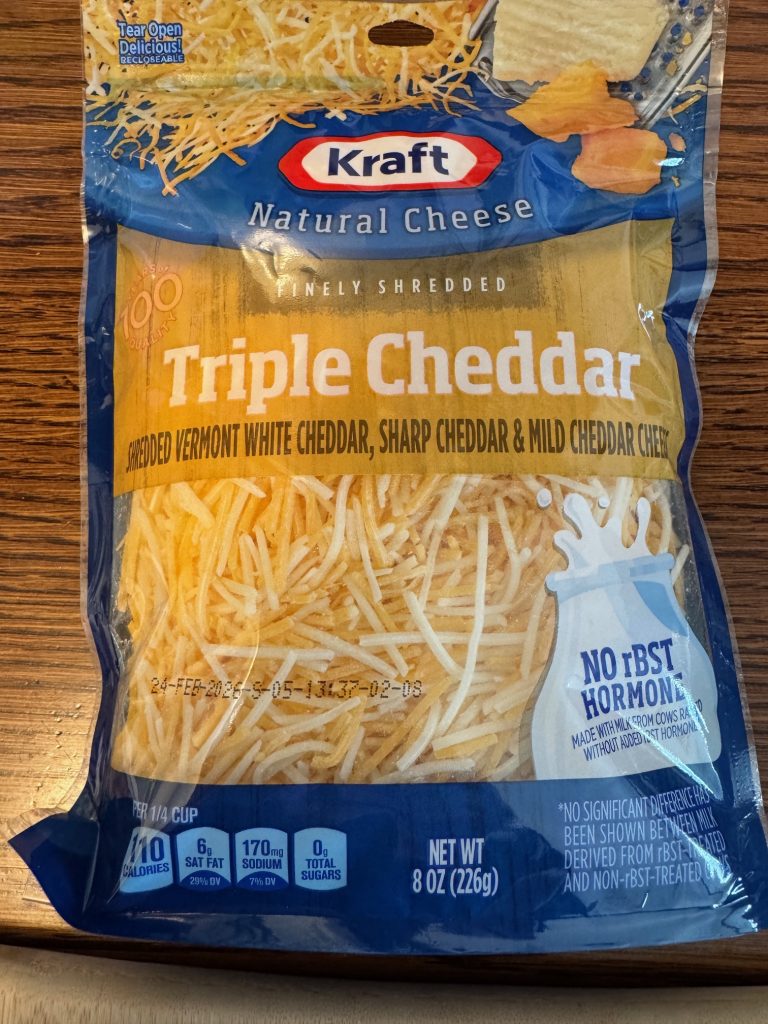
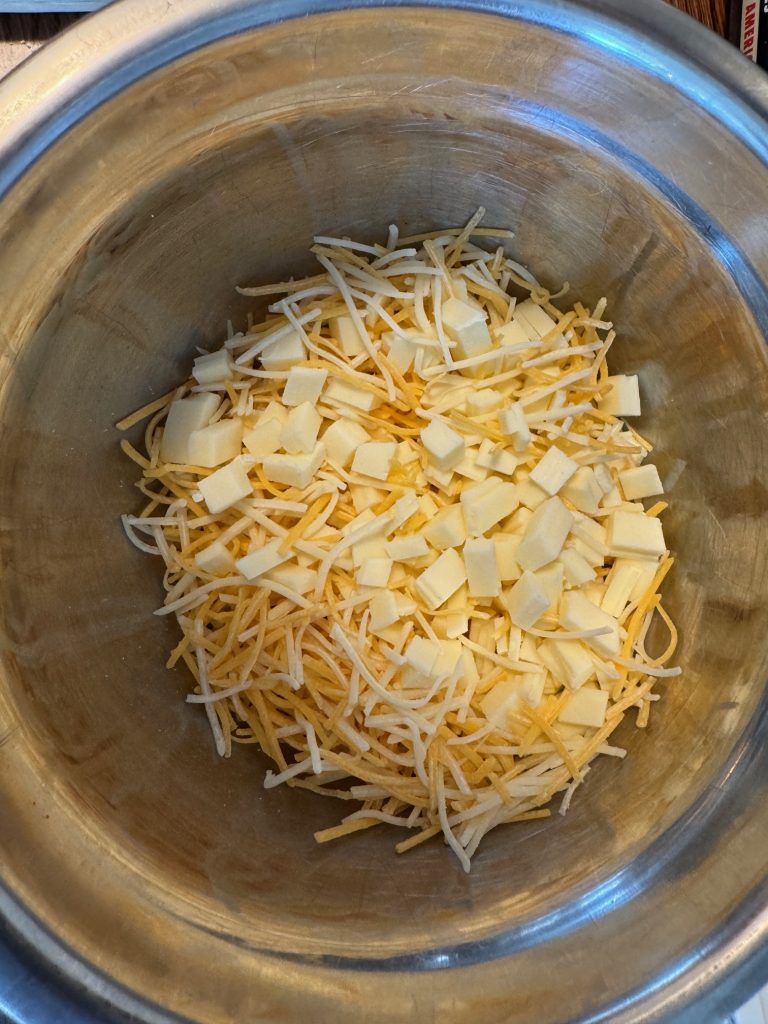
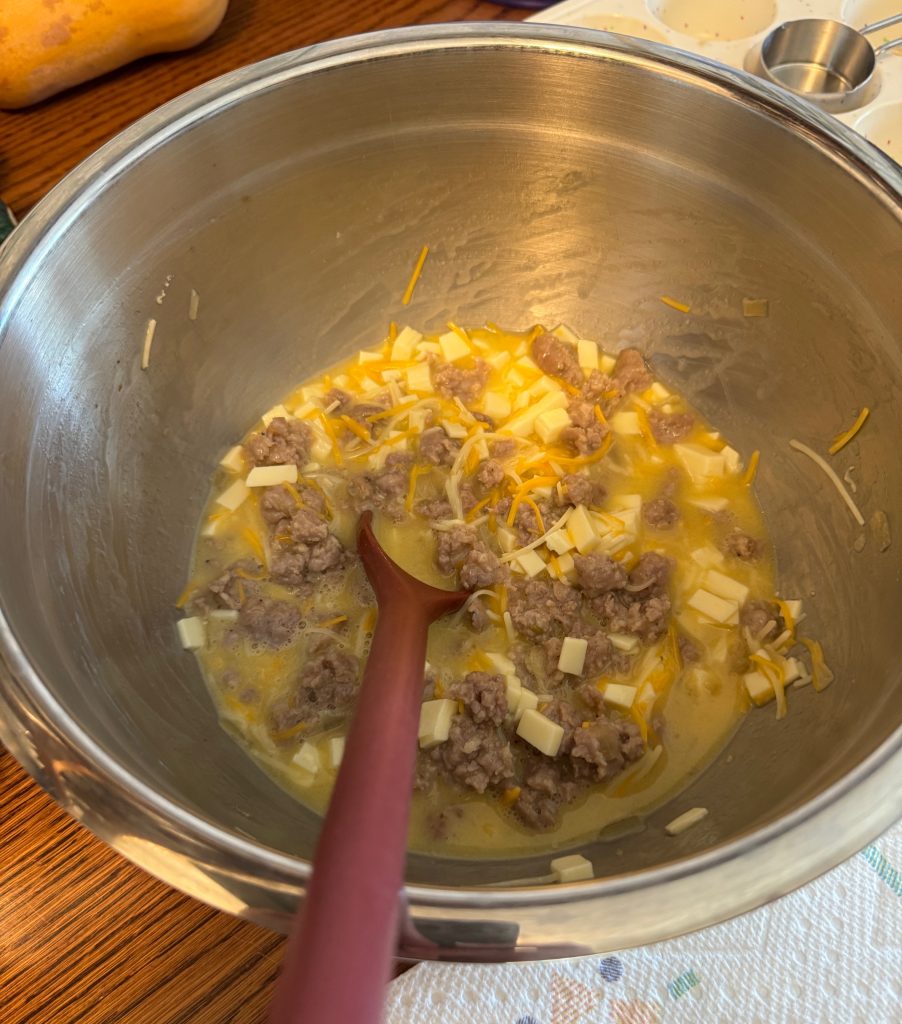
Of course, we didn’t have Monterey Jack cheese, so again, we improvised. I chopped up some slices of American Cheese and added the shredded Cheddar cheese to make 1 1/2 cup of cheese.
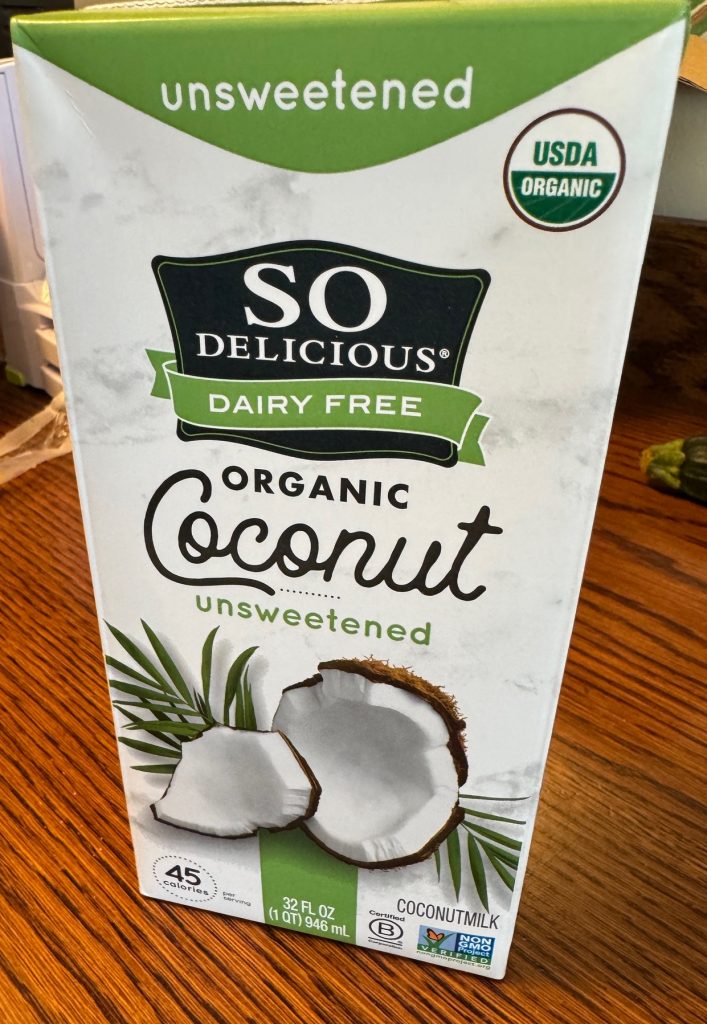
Then we added the eggs and milk (in this case we used my Coconut milk) and mixed it all up.
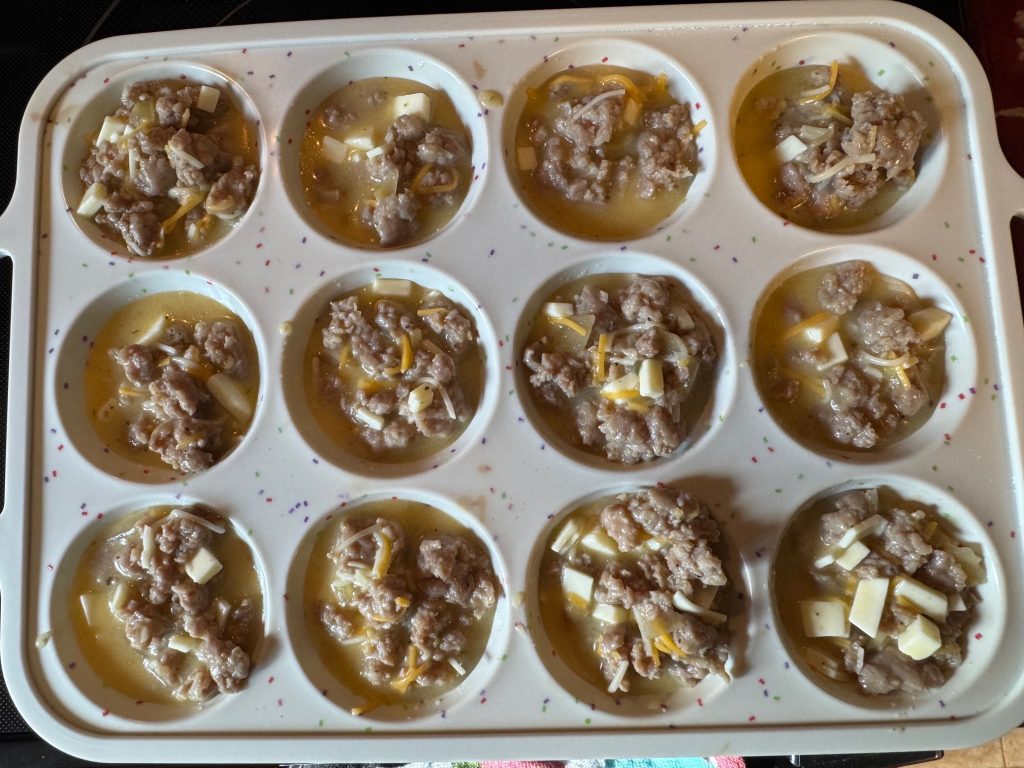
Finally, we scooped the mixture into the muffin pan. Each cup held about 1/4 cup of the mixture.
Muffins ready for the oven:
You can see they bubbled up and left a mess. However, the silicone pan is so easy to clean and the bits of cheese mixture that bubbled out was pretty tasty too!
When they cooled a little I could lift them out of the pan with a tablespoon. They actually tasted GREAT! I think two would make a meal for me…Bert could handle three!
The carb count for the whole recipe was about 25g…mostly for the onion and milk. Divided by 12 muffins, each muffin was about 2g! Not bad!
Remember, I’d love to hear from you but my website can’t support all the spam comments I get so I had turn off that feature. Please contact me directly at maryjkisner@gmail.com if you have comments or questions. Thanks!
This post covers the last two weeks of craziness in my life. Writing it down has helped me let go of all the stress. Enjoy!
Garden Update
The garden is winding down. As we finish harvesting tomatoes, pumpkins and carrots, Bert will clean up the plants. I think the last thing before winter is to cut off the dried stalks of the echinacea and lavender.
Mary’s Health Update
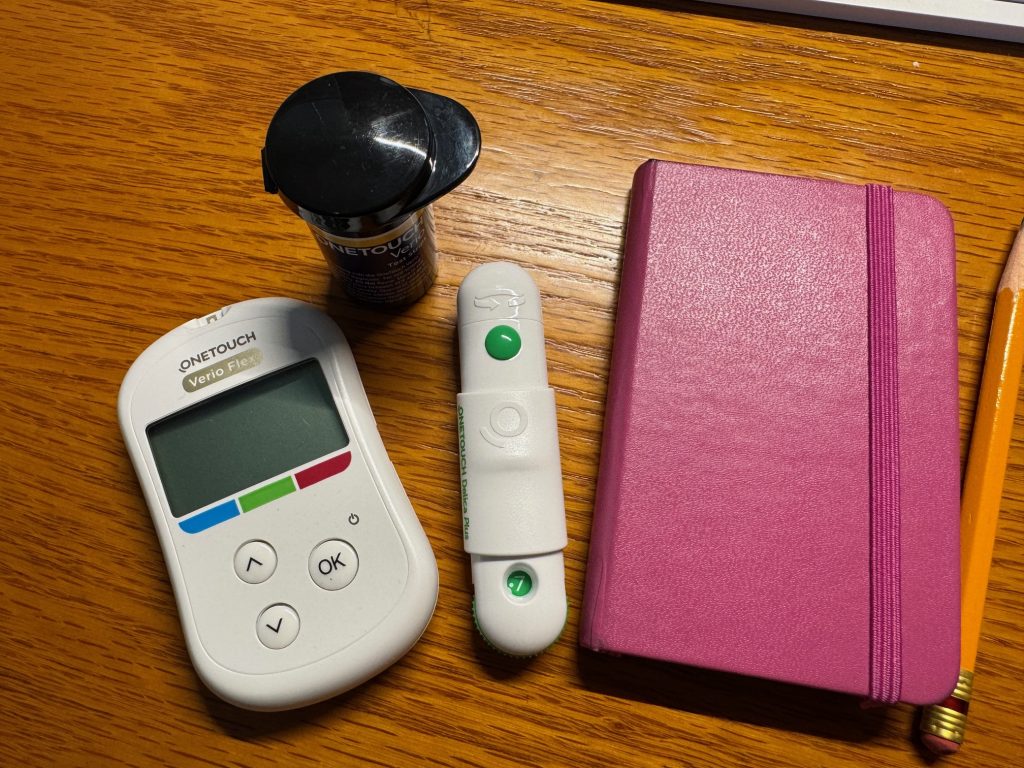
I’m pretty recovered from my lumpectomy and radiation. Apparently, the cancer was sensitive to estrogen so I’m on an estrogen-blocking pill for the next five years! I recently had a bone scan and of course, I’m at high risk for fractures, so now I’ll start Prolia shots every six months and take extra calcium. Geez! It never ends.
And then there’s my blood sugar! The Dr. increased my meds and I’m back to testing one or more times a day. Joy. Combined with low-carb meals, I’m hoping things get back to normal. So, I’ll not mention my health issues again, but just know that the low-carb recipes I post will be part of my learning process.
My goal was to encourage our members to donate baked goods to the sale. We are a very small group and we’re all getting older. Many in our group don’t bake anymore. By providing an assortment of cake mixes and a recipe to make cookies using the mixes, along with disposable foil pans for breads, etc. our group came through with a nice collection of baked goods at the sale. I was so proud of our members! We’ll be writing a nice check to the Fire Company with our profit!
Oven Update
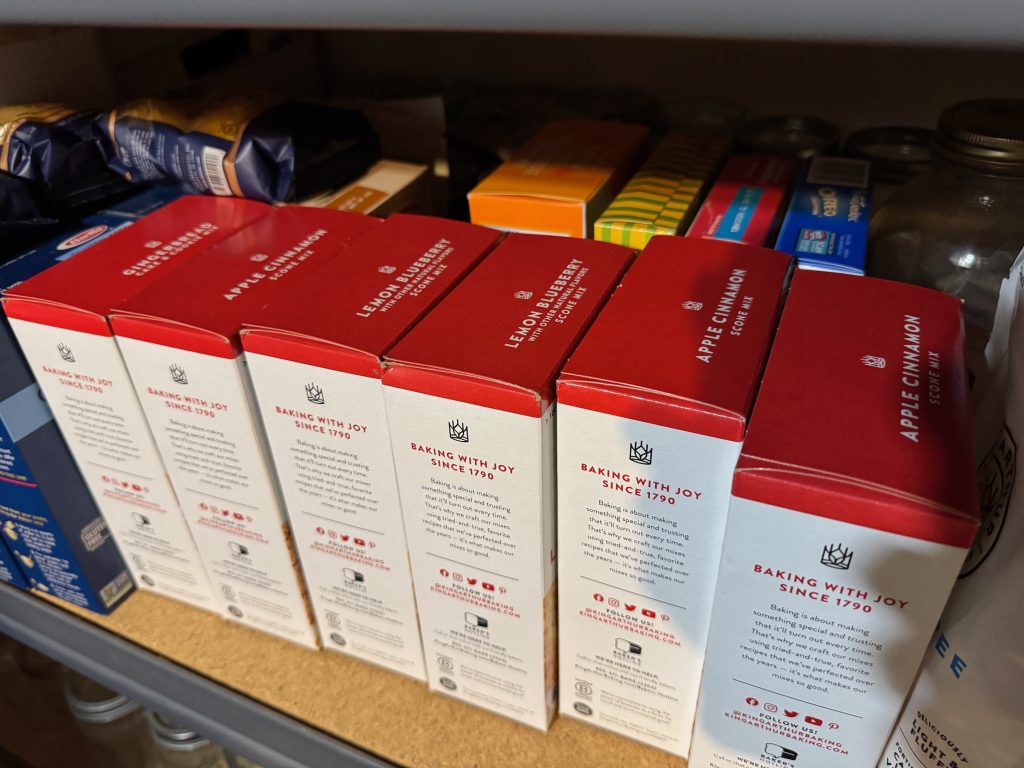
I was really organized the week of the sale…I was baking 2+ box mixes of scones every day for several days. I was having trouble getting the scones to bake thoroughly…the oven was just unreliable! And then…it wouldn’t heat right at all! On Tuesday of the week of the Bake Sale, I stopped baking and gave up! What a disappointment! Bert immediately ordered a new stove, but of course it would not come for over a week…after the bake sale! Thank goodness the other members of the Auxiliary came through with more items to sell. Of course, I now have a shelf of mixes available for the next sale in the spring…or even Christmas! The only problem is that I won’t be able to eat them! Way too many carbs. Oh well!
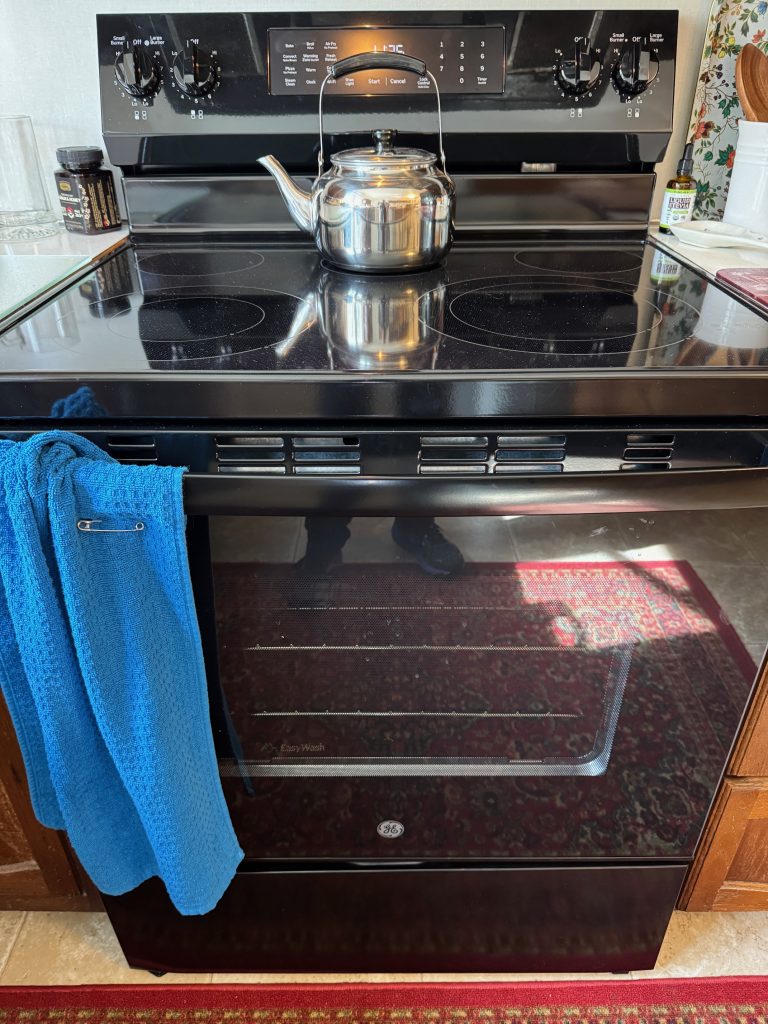
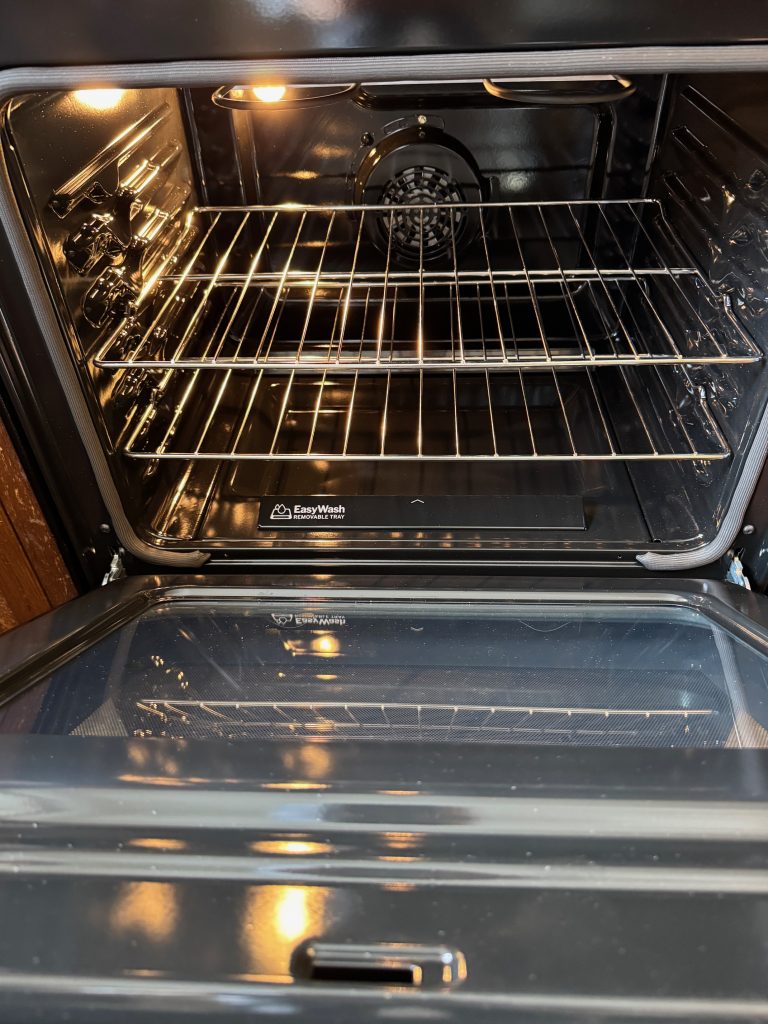
My new oven is beautiful! Even the inside is shiny! It’s been 23 years since I saw such a shiny oven! So, I’m back in baking business…but now I’ll have to change what I bake!
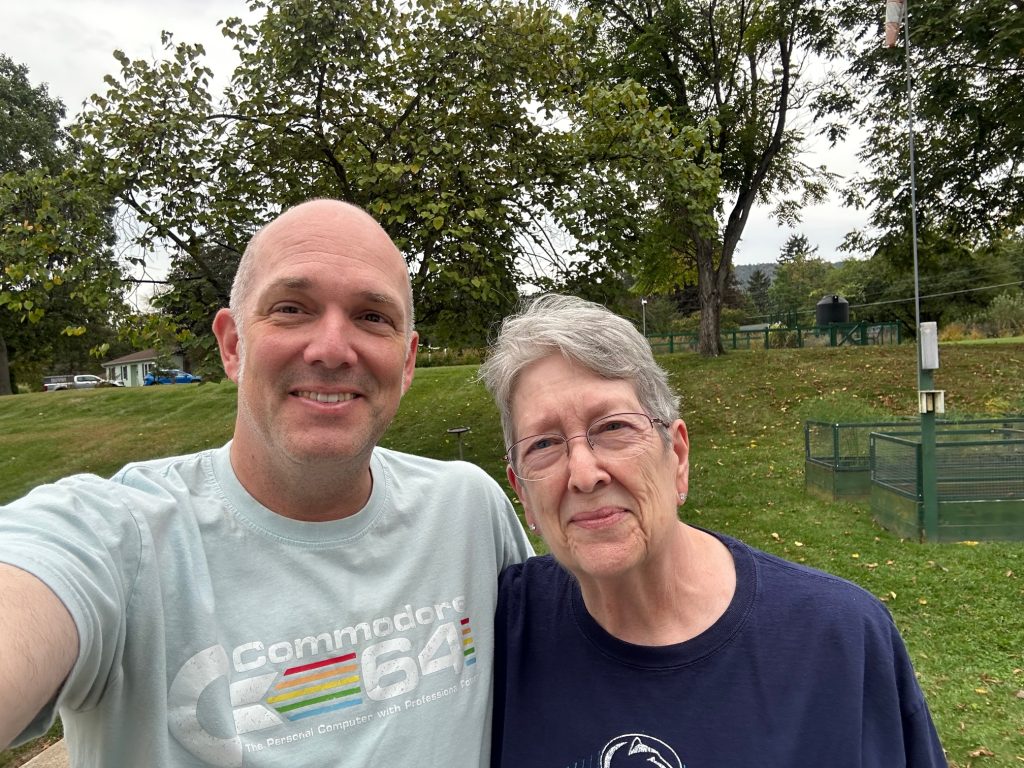
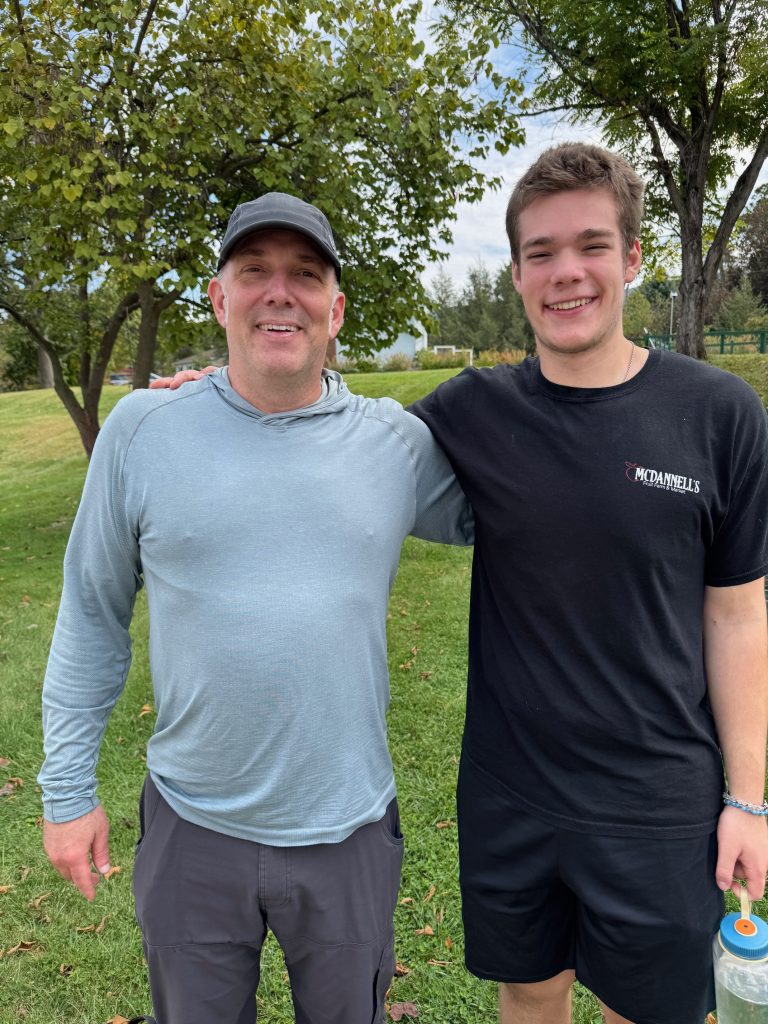
Ted’s Visit
During the week when I had no oven, Ted came to visit! So wonderful to see him after a year of emails, texts and phone calls. Luckily, he wasn’t craving home baked goodies…no oven, no baking!
He managed to connect with Ben, our grandson, who started at Penn State this fall. They hiked up to a nearby fire tower and then stopped to visit with us on the way back. Hugs all around!
Recipes to Come
(Remember, all the recipes I’ve written over the last 4 years can be found in the PDF on the Welcome page. When you find one you like, you can click on the hot link and go directly to the article.)
I’m already researching how I can eat low-carb and be satisfied with little to no bread or desserts. If you’re not interested in the recipes, go back to the PDF list of articles. I’m aware not everyone will care about low-carb recipes, so I’ll make sure I share other projects I’m working on that have nothing to do with food!
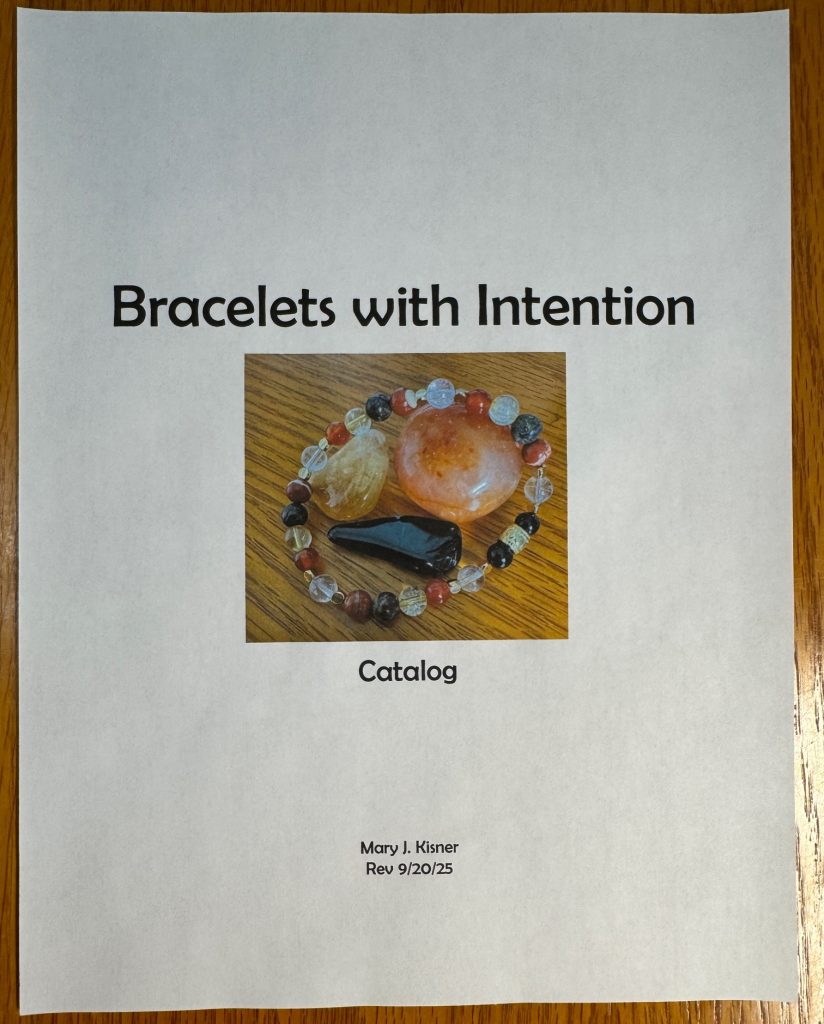
Bracelet Catalog
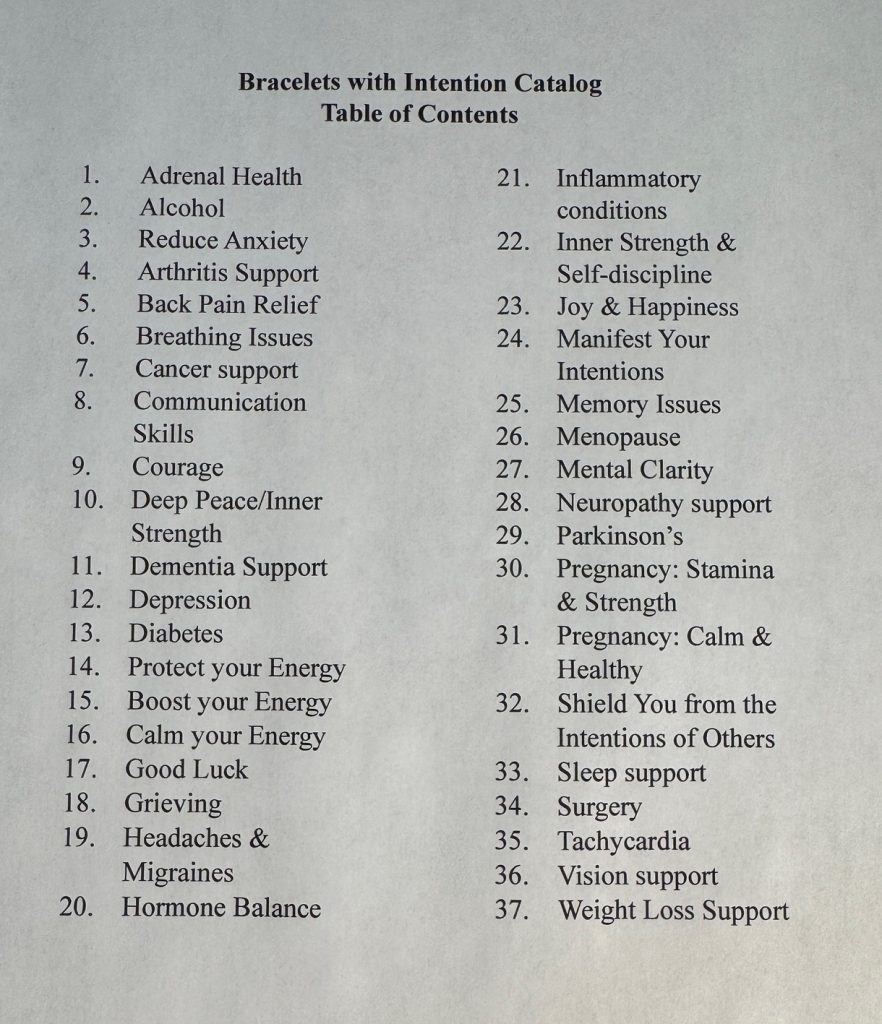
I seem to be getting deeper into making specialty and custom bracelets. I don’t need a huge inventory of bracelets until next summer so I’m focused on researching, designing and making bracelets that might help specific issues. When I make a bracelet for a specific request, I add it to my catalog…in case someone else could benefit. The catalog is a work in progress and not ready for distribution, but I will post the cover and the Table of Contents here. If you look through the list and don’t see a specific issue that you are interested in, please let me know. That might be the exact thing I should add to the catalog!
I’ve added this disclaimer to my business cards and to each bracelet description:
Each of the beads in your bracelet have meaning and together support each other for your well-being. You can wear the bracelet or carry it in your pocket. Each time you wear it or handle it remember its intention. Reminder: This bracelet is not medical device. Its purpose is to help you focus and send positive energy to your mind and body. Mary Kisner
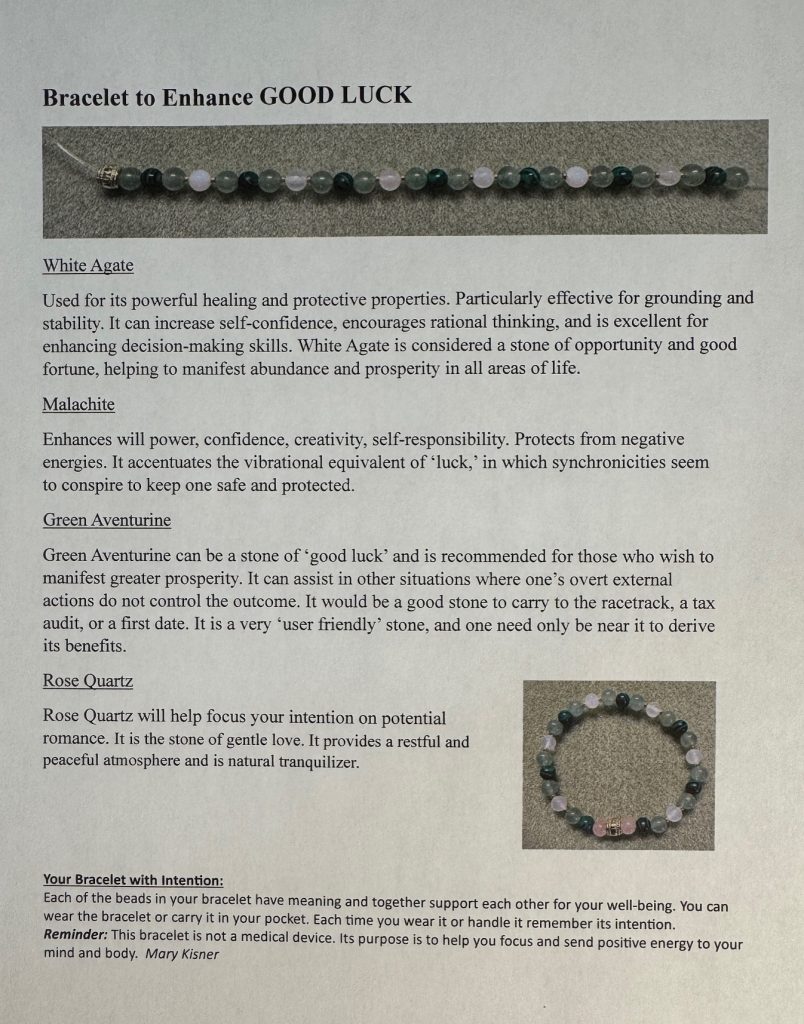
Here’s an example of a custom bracelet I just finished:
*The person requesting this bracelet wanted the Good Luck bracelet focused on finding romance (not winning at the Casino). I started with my GOOD LUCK bracelet, with White Agate, Malachite and Green Aventurine. I added Rose Quartz to the bracelet to give the intention a nudge in that direction.
Looking Ahead
So that’s what’s been happening over the last two weeks. I’m exhausted just writing about it all! I’m looking forward to having all my medical issues settle down. I hope I can find good recipes for low-carb cooking/eating. Finally, my bracelet research is giving new meaning to my life. I’m not sure which bracelets I’ll be taking to the festival next July, but I’ll have fun figuring it out! Enjoy!
I would love to hear from you if you have comments, suggestions or questions. (Remember, I had to disable the comments feature in this blog because of all the spam “comments” that I’m sure are not from actual people.)
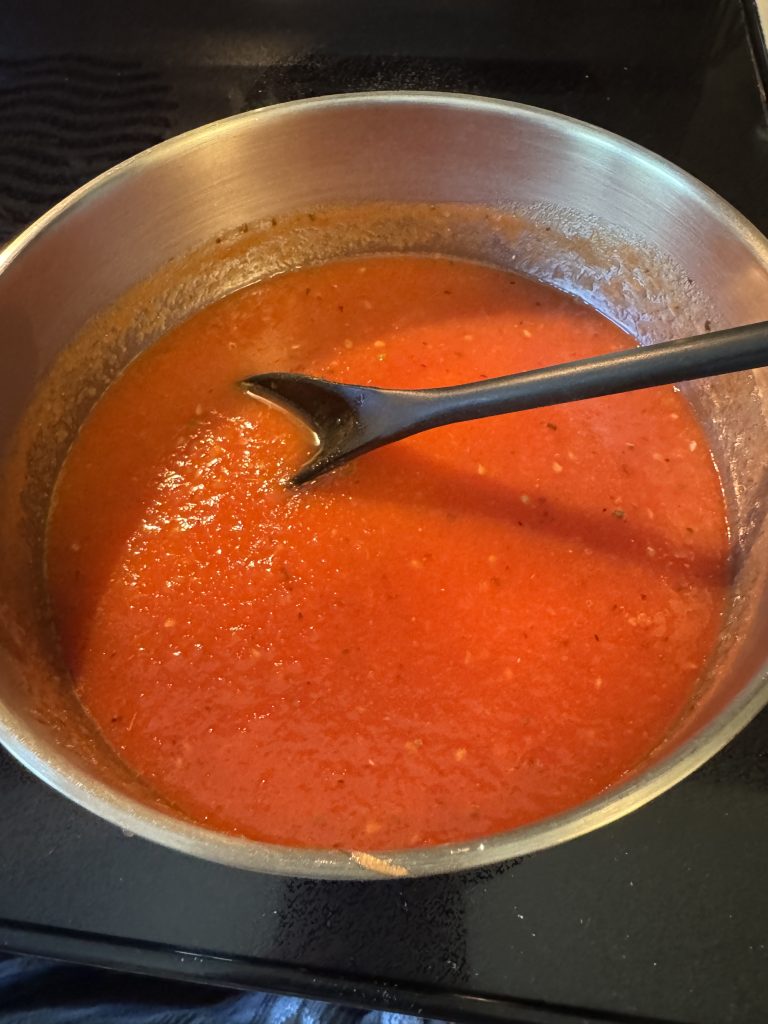
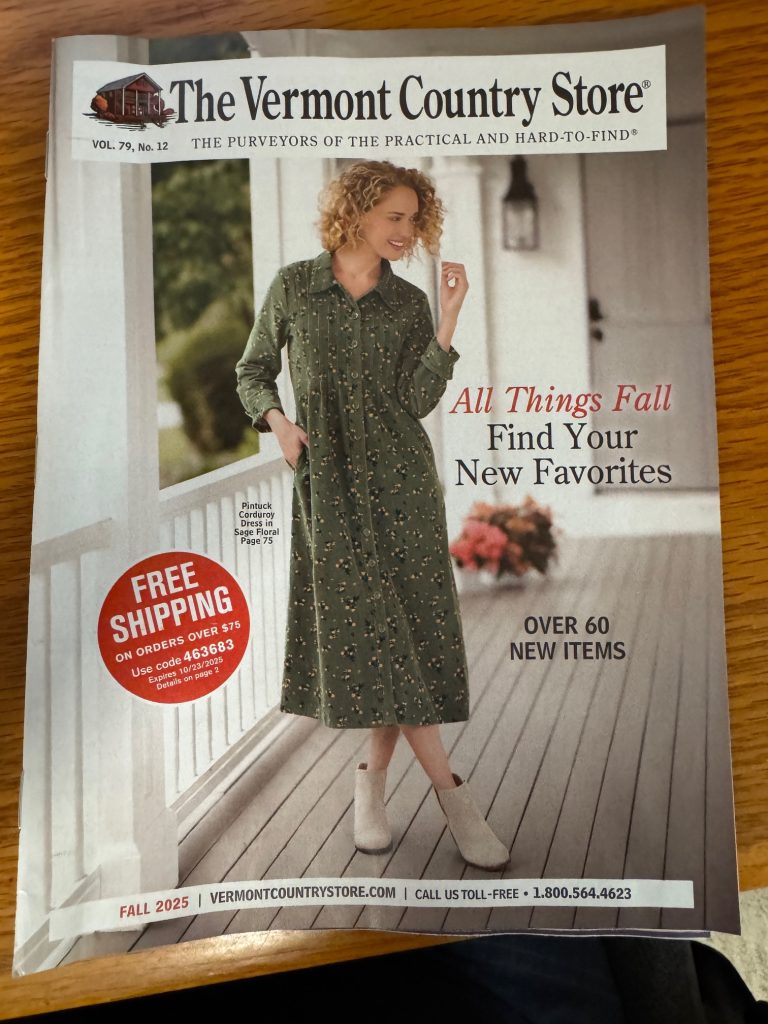
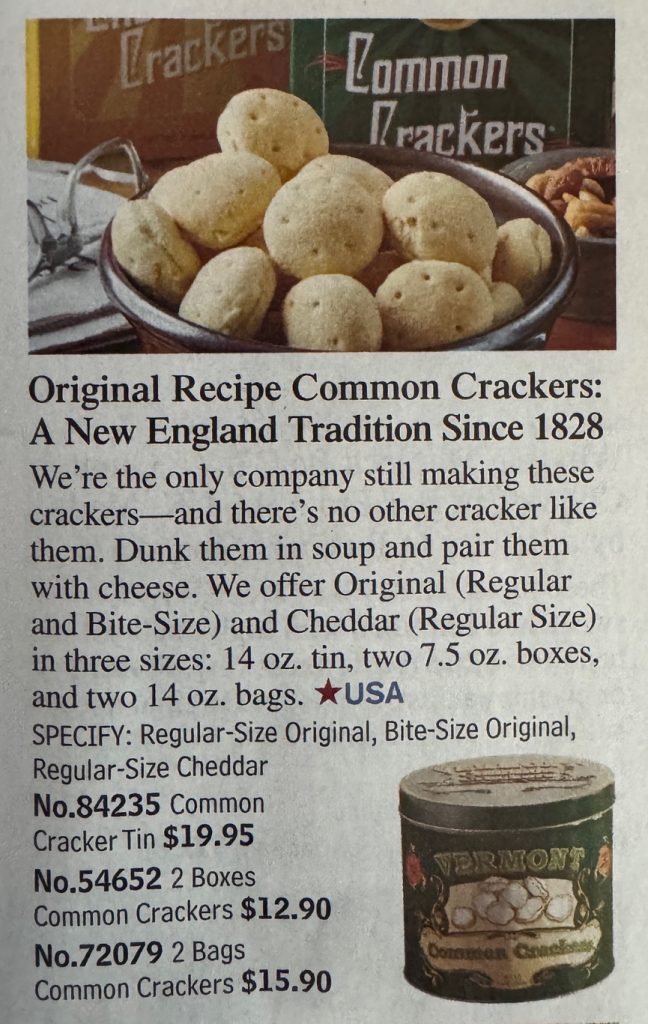
It really is a thick tomato sauce flavored with onion. From that, we each season the soup to our liking. I add salt, pepper and some coconut milk. Bert adds salt, more pepper and regular milk. When we have soup, we often comment about the big crackers we remember having with soup…oyster crackers. I have not looked for them lately in the store, but I have seen the “common crackers” sold through Vermont Country Store. I think they are pretty big.
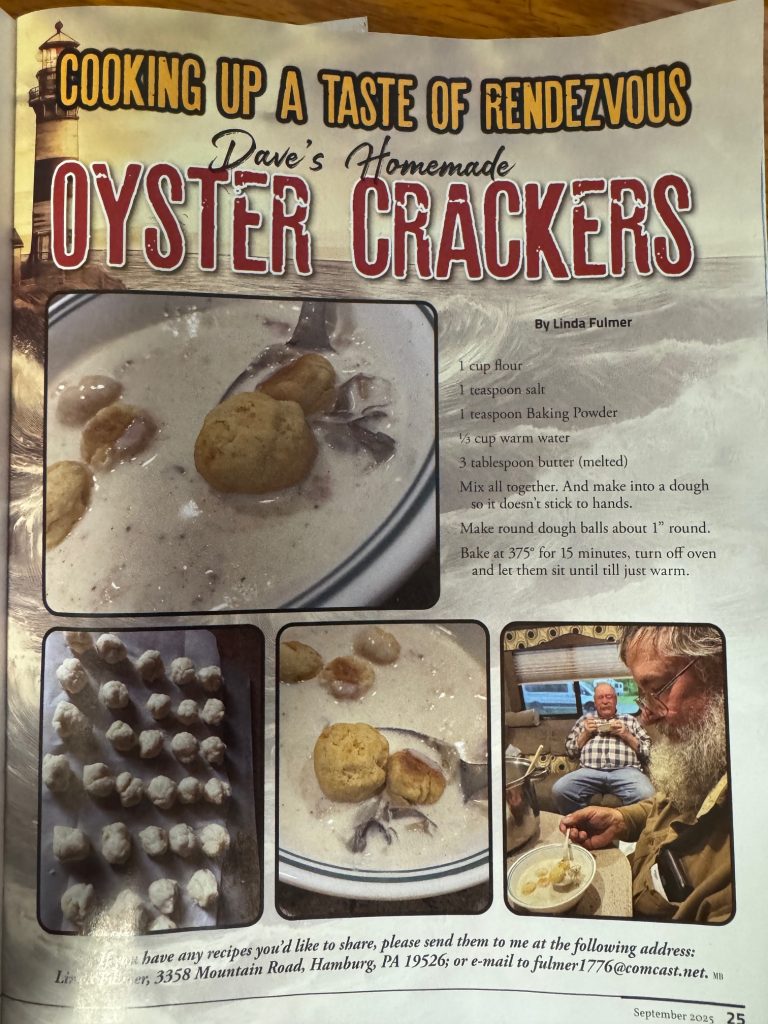
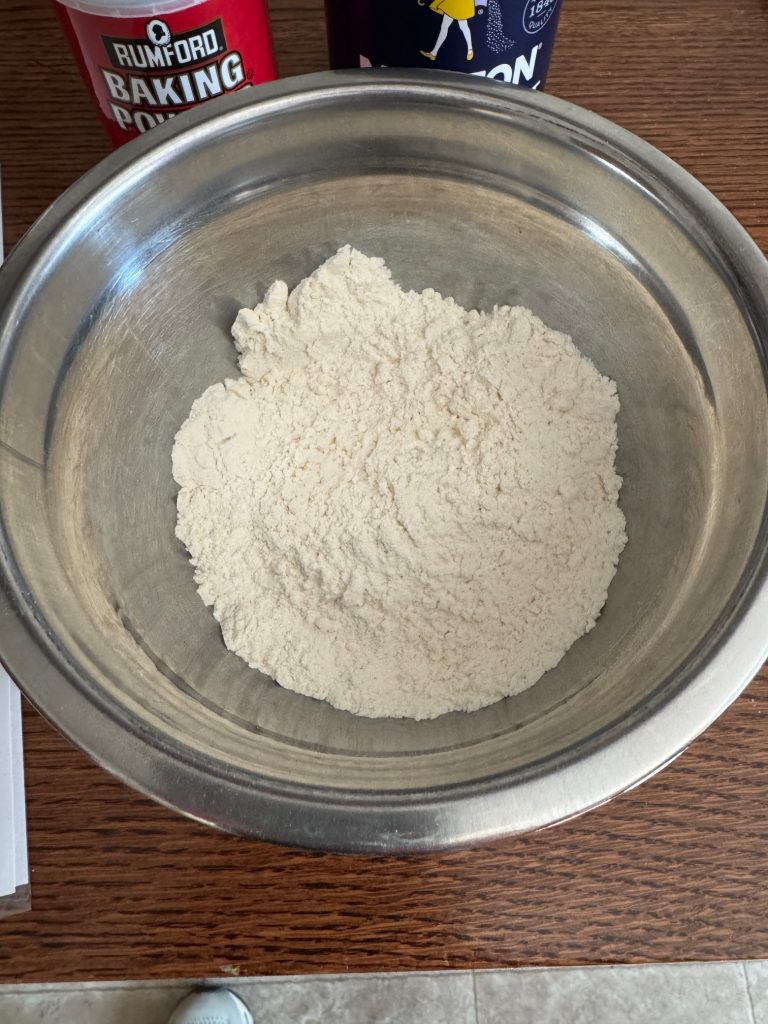
Recently, I found a recipe in Bert’s muzzleloading magazine, “MuzzleBlasts” to make oyster crackers. I gave it a try and ended up with some really nice crackers for soup.
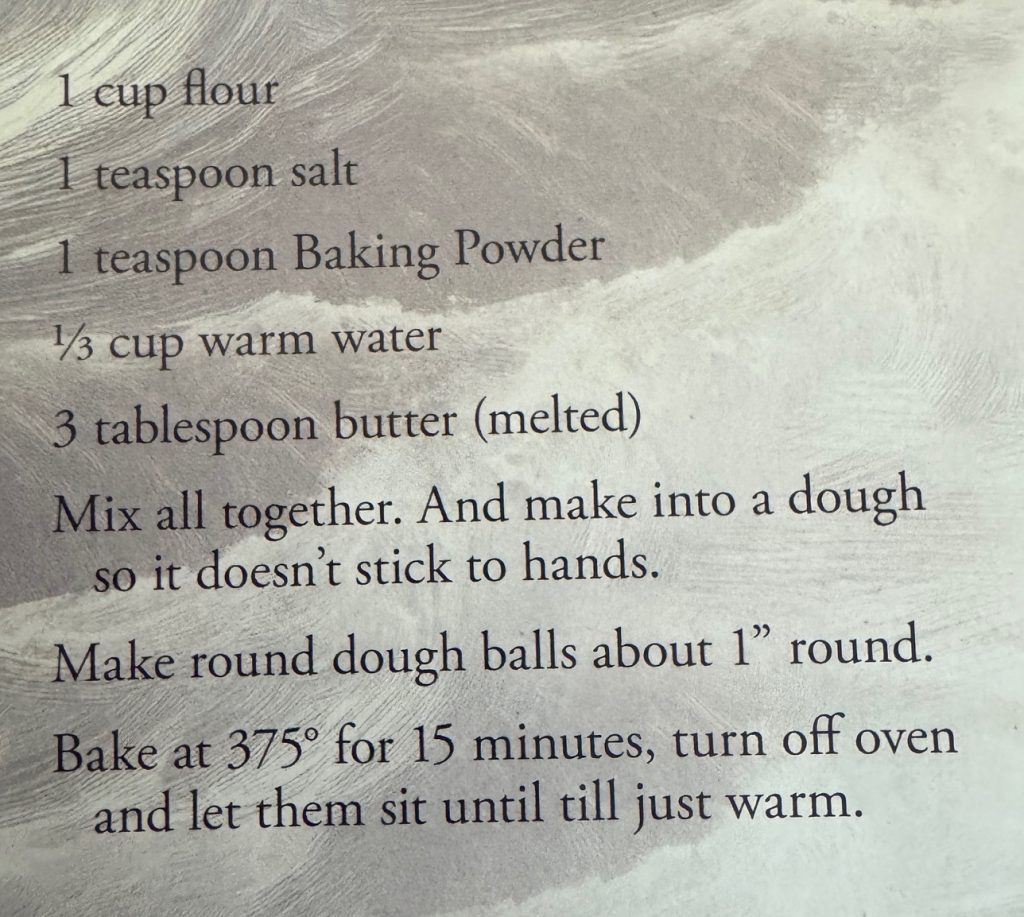
The ingredients are pretty simple:
Flour, Baking Powder, Salt, water, melted butter.
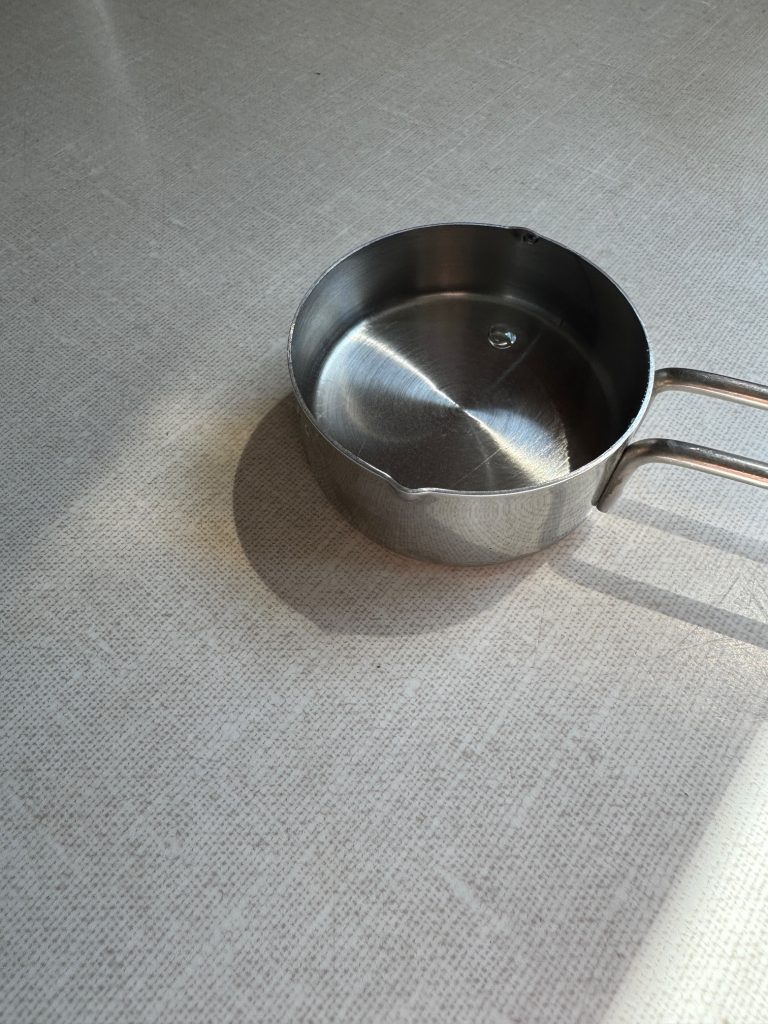
Warm water
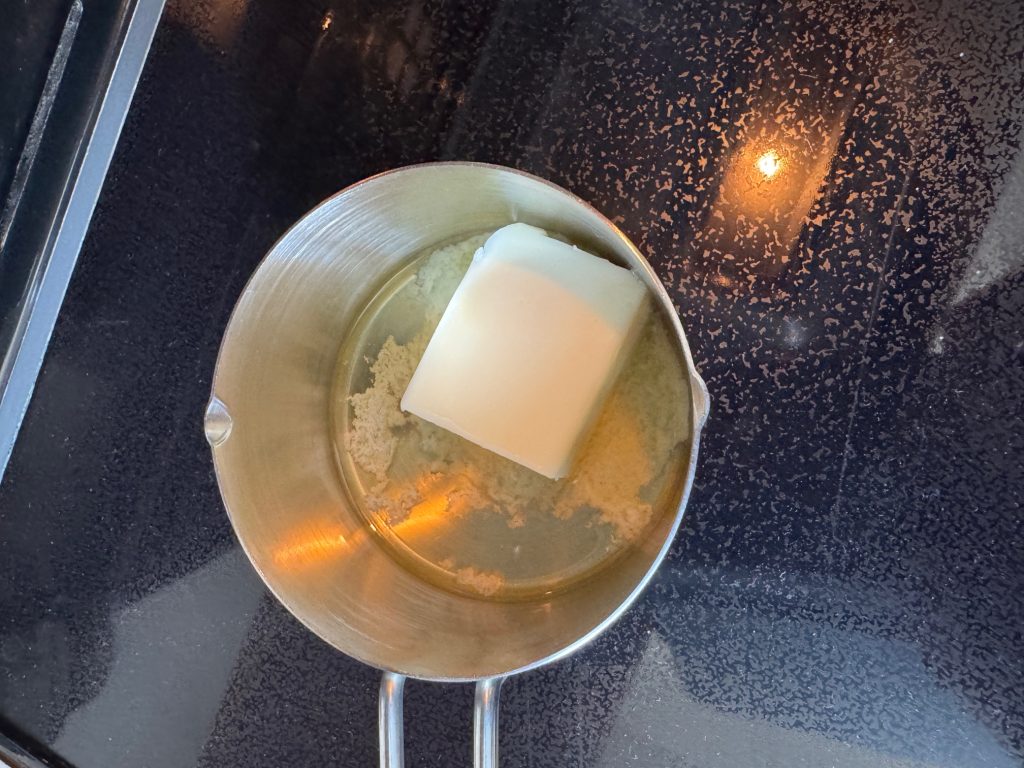
Melted butter
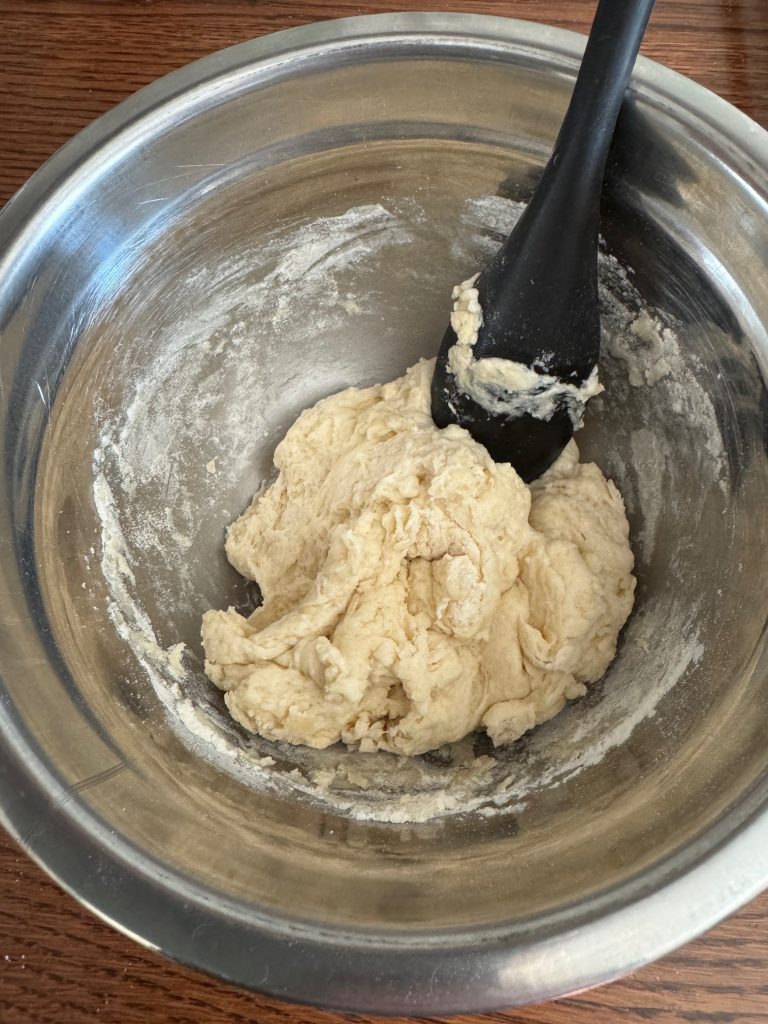
Mix all ingredients together to make a soft dough.
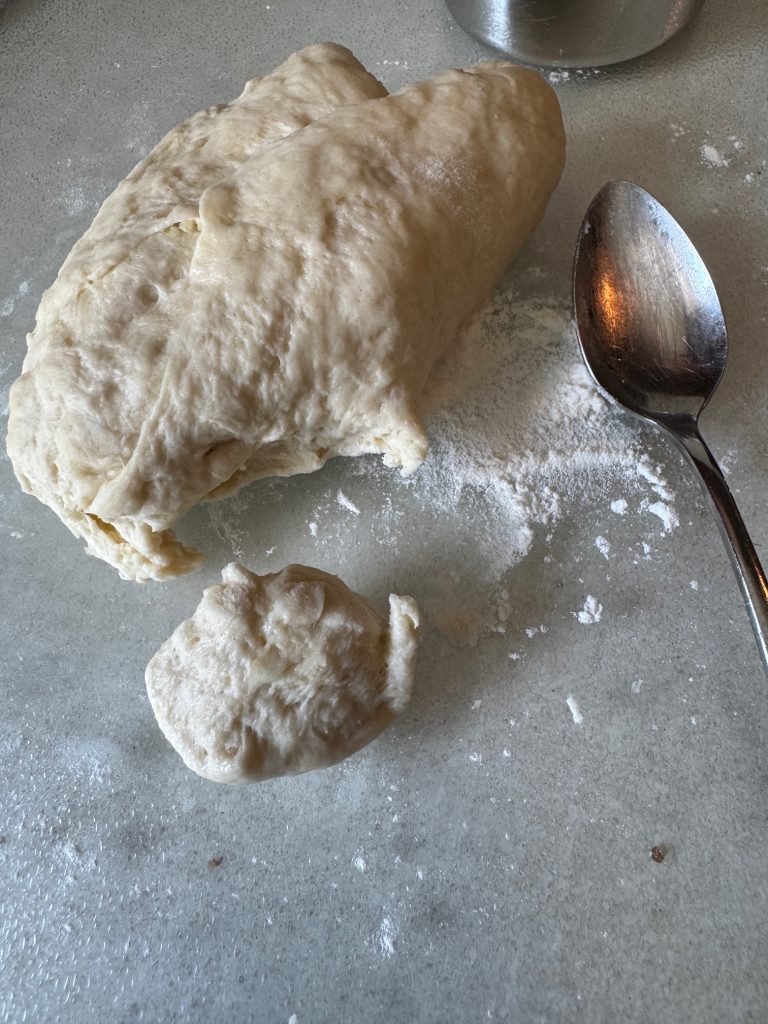
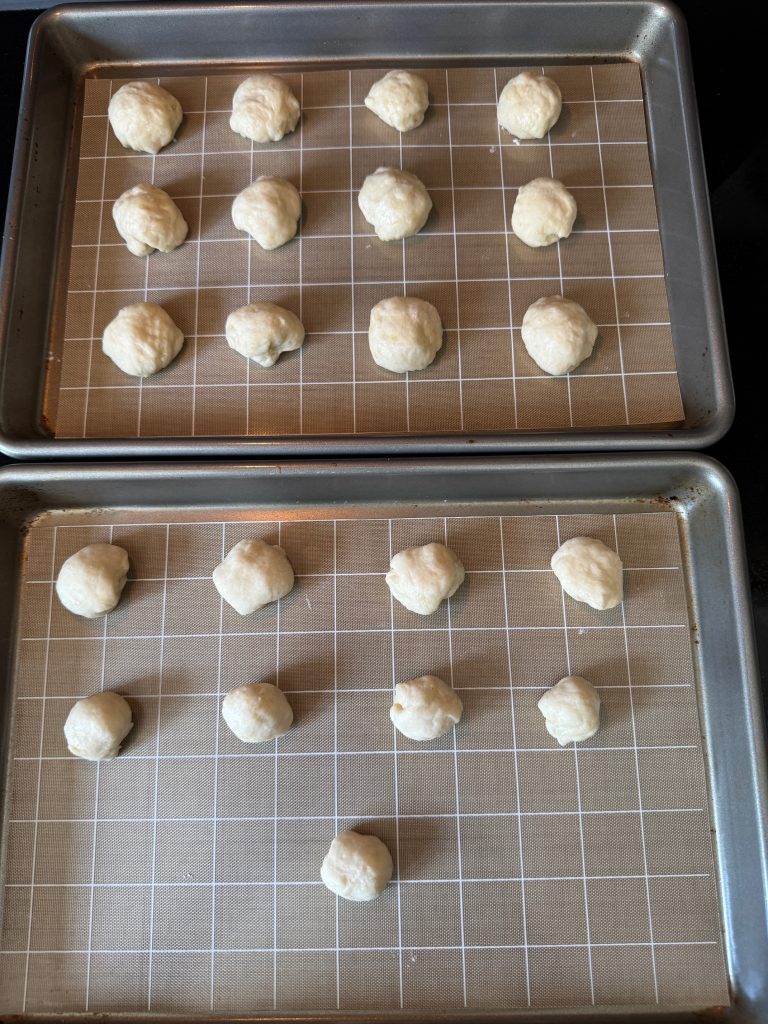
Scoop out spoonfuls, roll into small balls of dough and put them on a cookie sheet. They rise a little but the next time I might make them a little bigger.
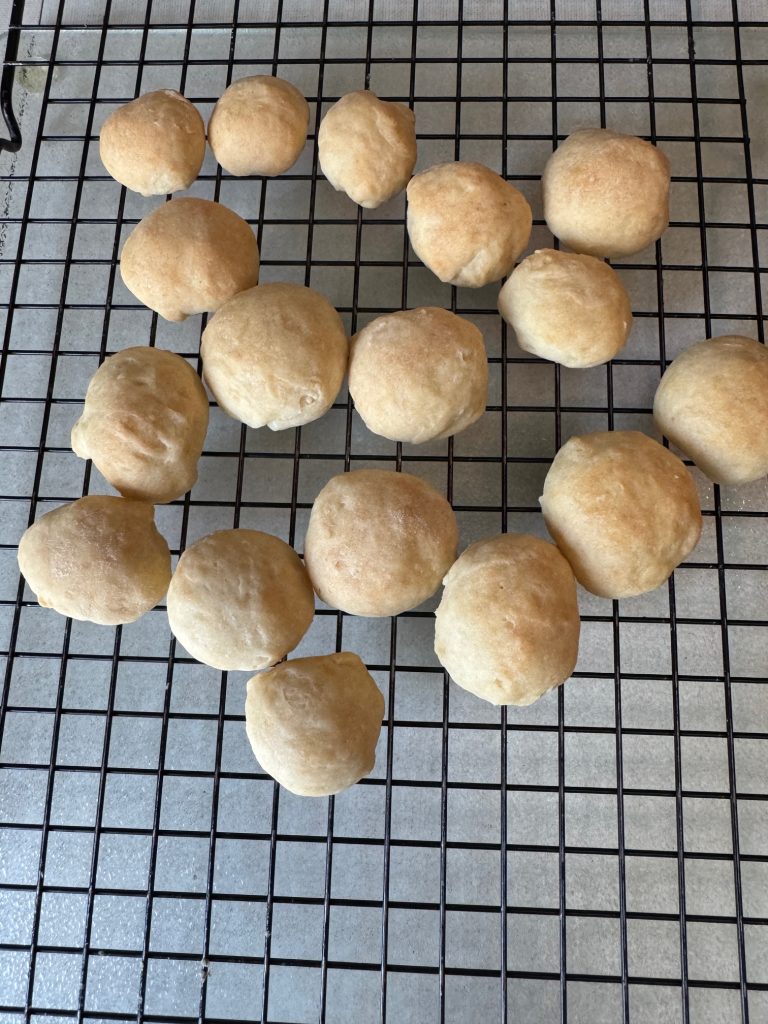
Bake in preheated oven 375 degrees for 15 minutes. Turn off the oven and leave the crackers in the oven until just warm. They make crunchy little globs that work great in soup! Enjoy!
If you have questions or comments, please email me directly at maryjkisner@gmail.com.
This year the garden seems to be winding down earlier…probably because of the lack of rain! Bert waters the plants that are left every day, but a good dose from Mother Nature would sure help! I just wanted to show you how the garden looks in mid-September.
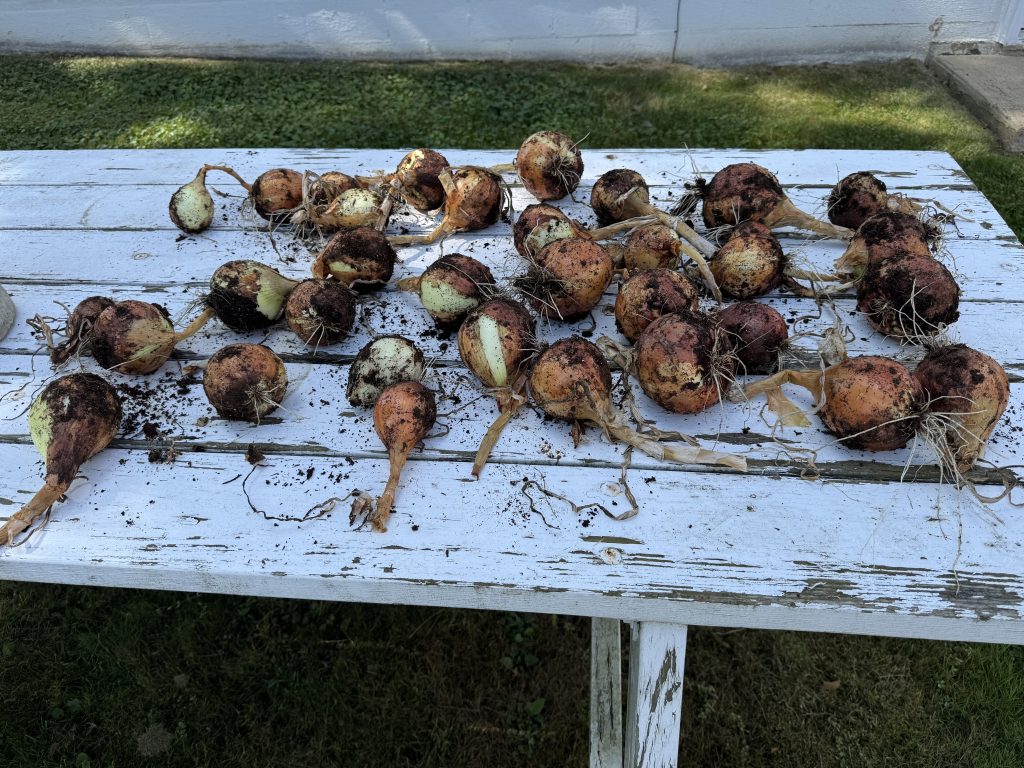
On the patio, the onion planters were finally emptied. Bert took the onions that were left and spread them out on the picnic table to dry. I’ll have enough to cook with for a month or two!
The radishes and lettuce just gave up and those planters are now empty, ready for spring!
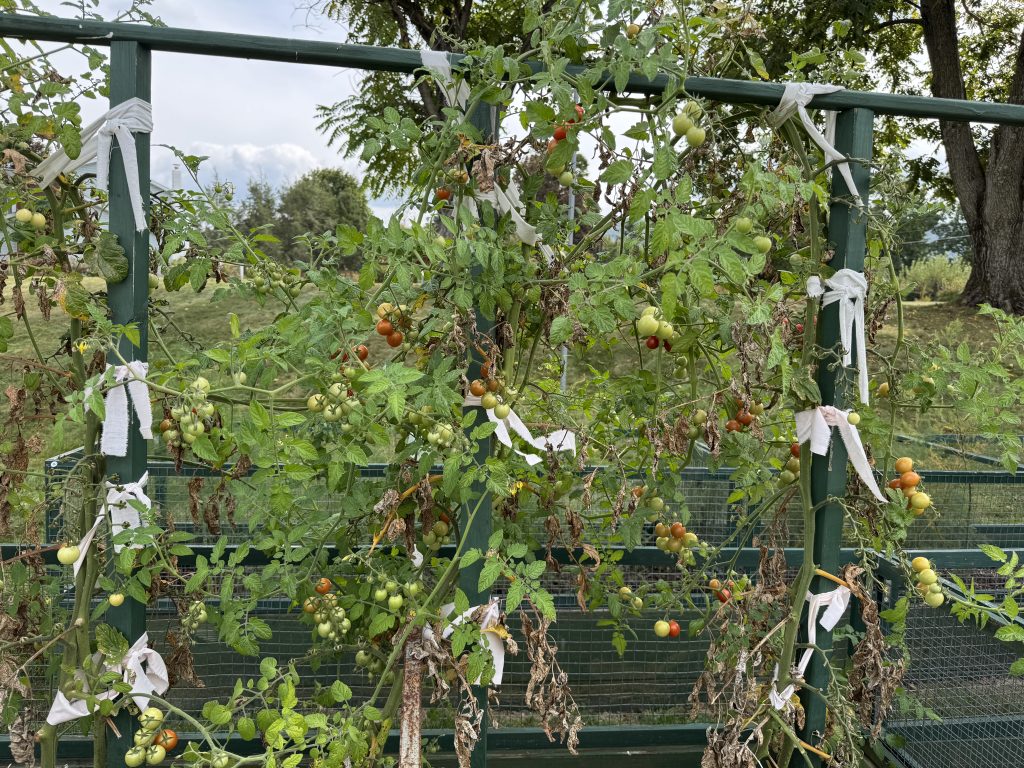
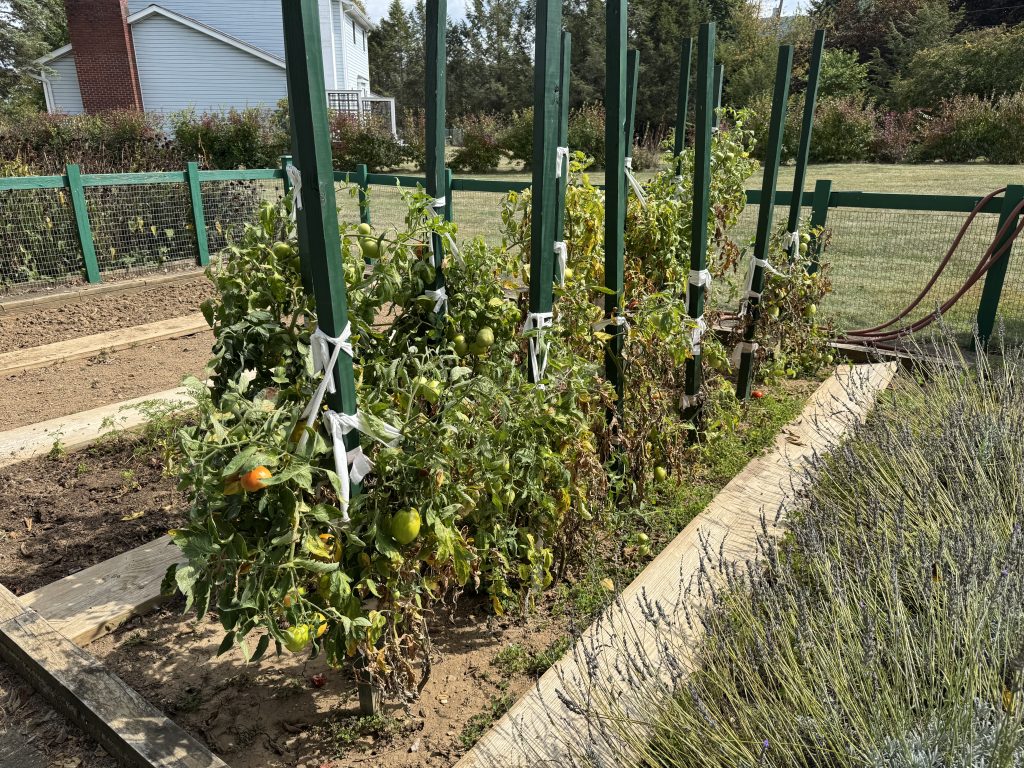
The Raindrop tomatoes, amazingly, continue to ripen, even though the plants look pretty sad.
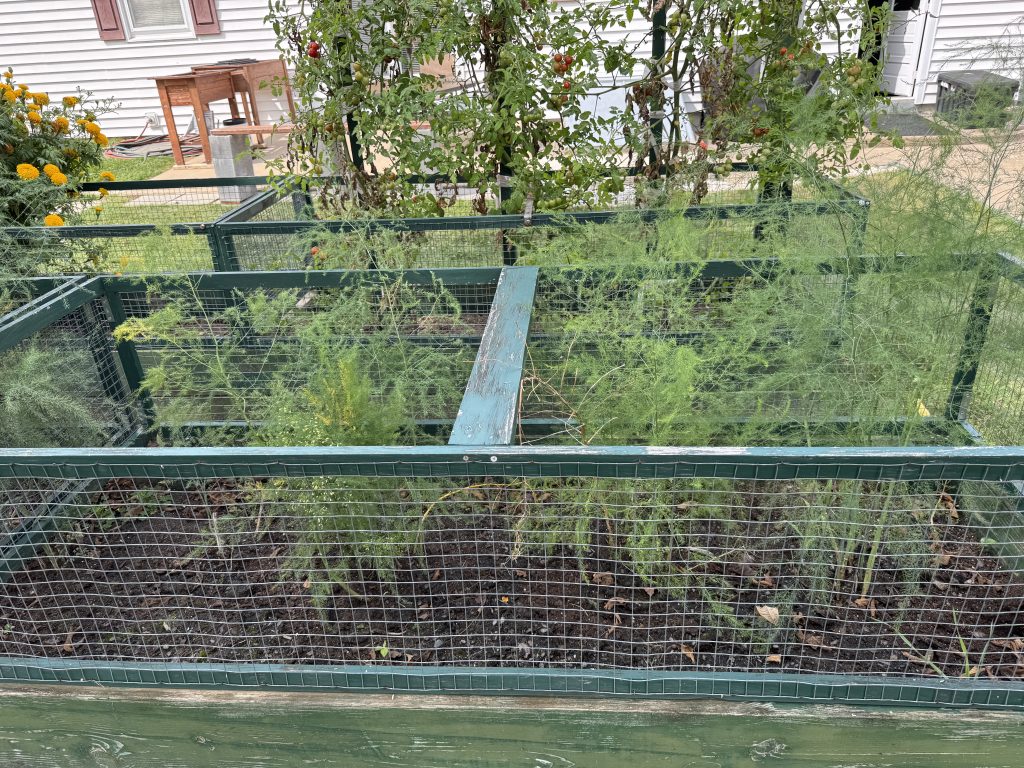
I haven’t talked much about the asparagus. We planted the roots in the spring and just left them alone. They’ve been growing fine, so hopefully next spring we can enjoy a meal or two from them.
The pumpkins are turning orange and I’m surprised how many there are in the patch. Of course, we won’t know until we actually pull them out of the patch if roaming critters have taken bites out of them.
Moving up to the garden on the hill…the lavender continues to entice the bees but I didn’t try to cut any to dry. They didn’t make nice flowers.
The tomatoes are ripening slowly. We pick them as they look ready. I still have trays of tomatoes on the dining room table, so we’re eating at least one a day!
The carrots have struggled all summer. Many were just too small or deformed. Bert sorted out the good ones in the first batch and shared the rejects with a friend’s rabbits! They loved them!
Here’s the first batch. We’ll dig up more as we need them!
The zucchini is finally DONE! I think I’ve tried enough recipes so I can say we missed only one zucchini that got too big. The rest were baked into cookies, casseroles and bread OR they were shredded and are now in the freezer! Success! These beds are ready for next spring!
And finally, the Echinacea looks pretty ugly. Bert will cut it off at ground level after the first frost and the patch will be ready for next spring!
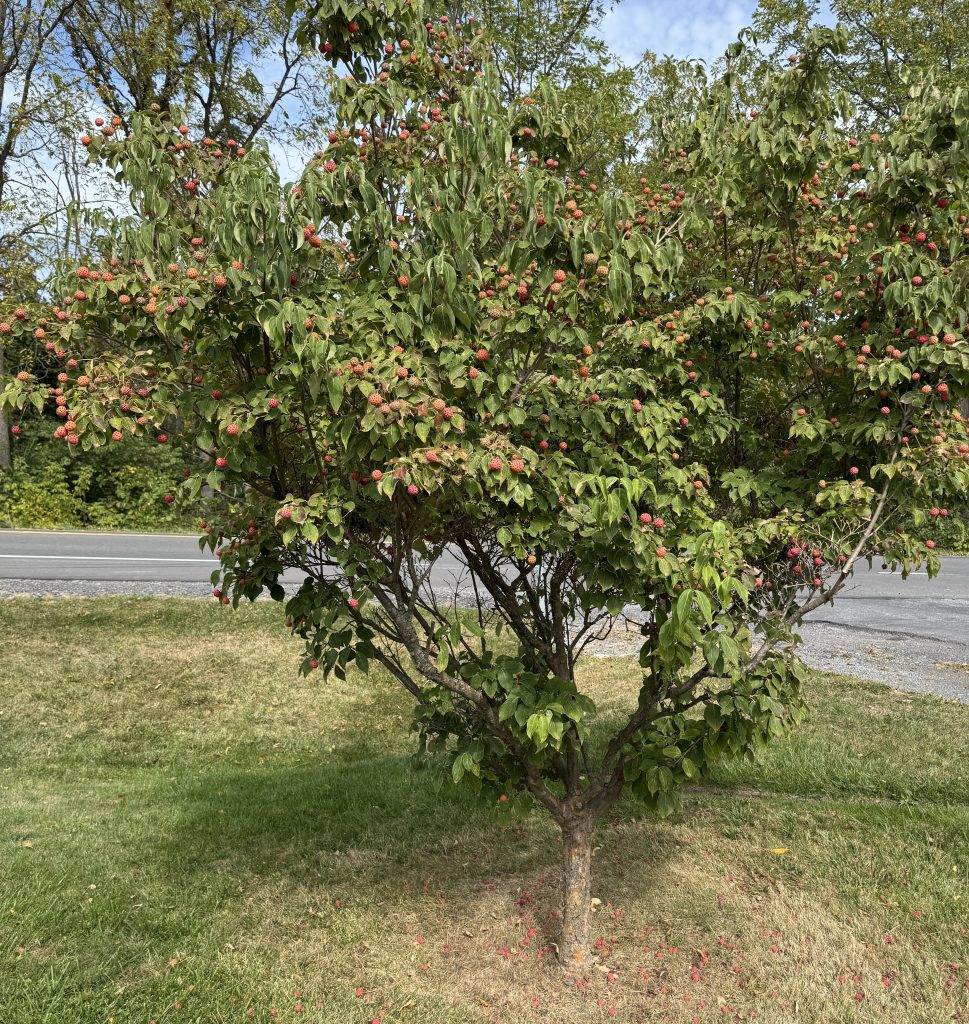
One last indication that fall is here…the Japanese maple trees in the front yard now have their orange seed pods all over! I call them my pumpkin trees for a month or two…just in time for Halloween! Enjoy! Remember, if you have comments or questions, please email me directly at maryjkisner@gmail.com.