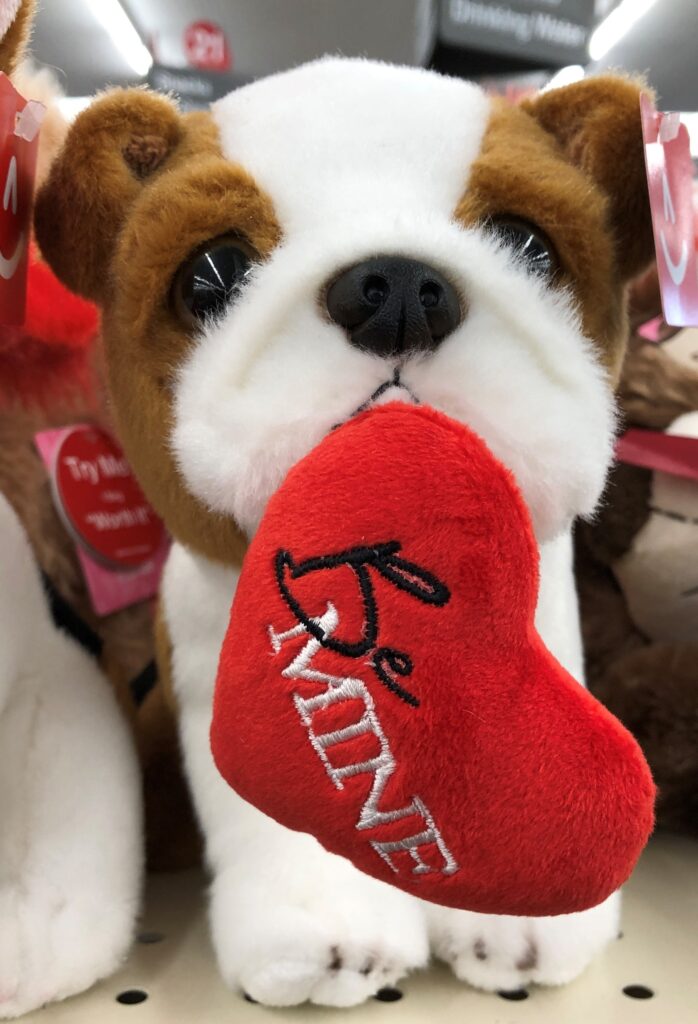
I’ve had it! There is a reason why I wear dark or black blouses and t-shirts…I will inevitably spill or drip something right in the middle no matter how careful I try to be. I recently bought several lovely blouses in bright blue, purple and white. Of course, the first time I wore one my salad dressing dripped…just one drop…right in the middle of the front of my new blouse! Grrr! I had to spray and wash the blouse twice to get the stain out. I needed a solution or go back to my navy and black tops.
Some of you may remember last September I wrote about making an adult bib for a friend (https://marykisner.com/adult-bibs-are-not-just-for-nursing-homes/). At the time I was surprised to see the many variations of ways to protect your clothing from food spills. Some were standard bibs; others were clever cover-ups. I had never thought of a solution that could protect my clothing and still look nice out in public.
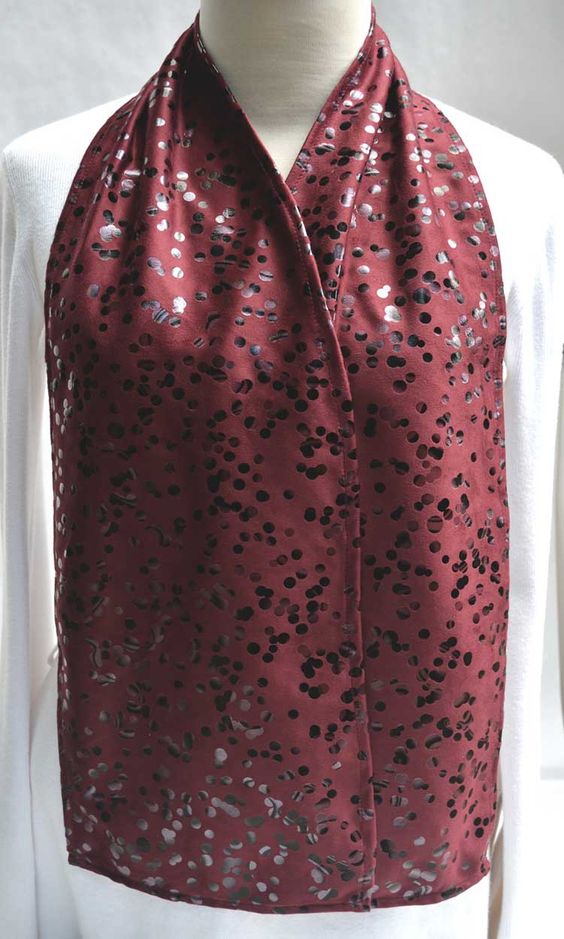
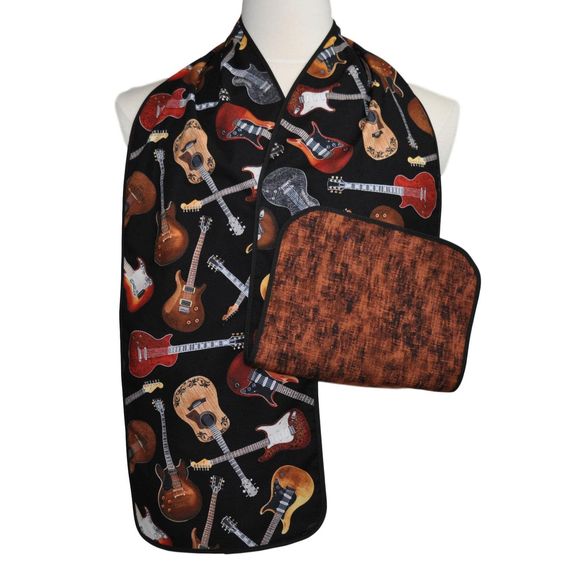
These two pictures (from a Pinterest search for “dining scarves”) caught my attention:
This one looked really dressy and slippery. I think it would need a snap, Velcro or dressy pin to hold it together.I can imagine all the novelty fabrics that could make something like this!
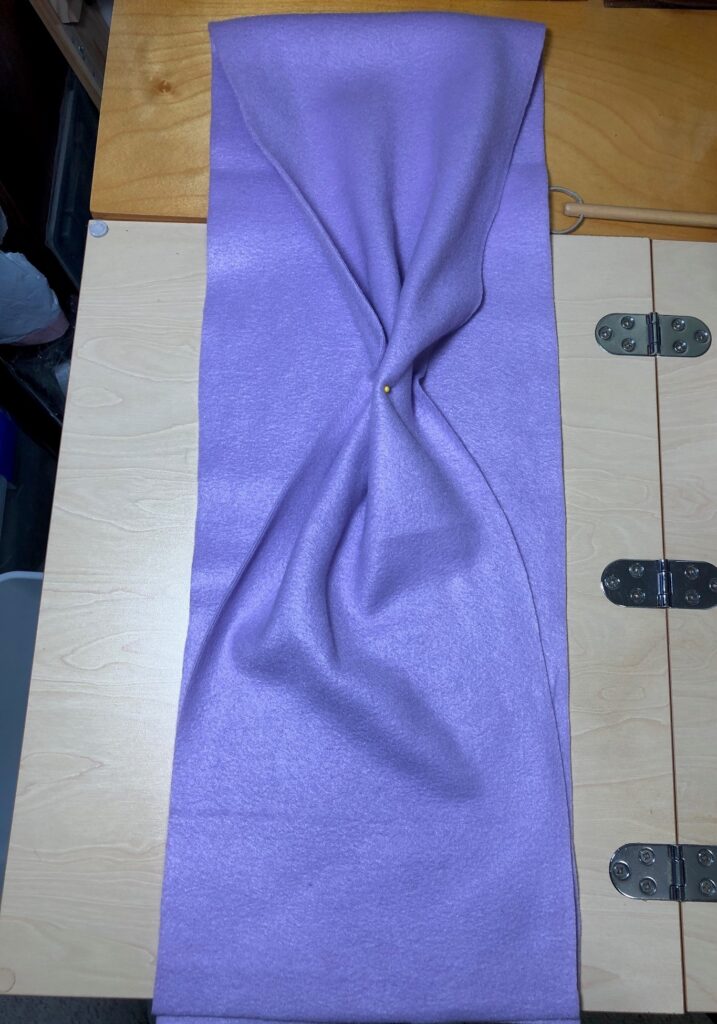
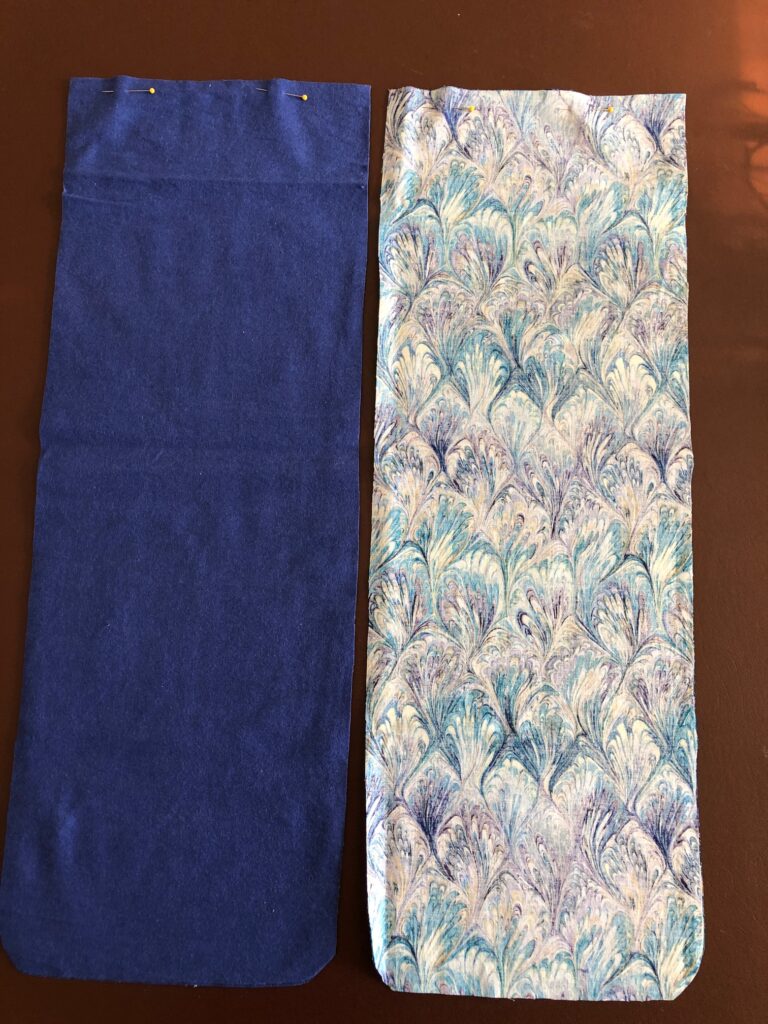
Time to experiment! I took a fleece scarf and put it around my neck. I pinched it about where it needed to start getting skinnier to wrap more closely around my neck.
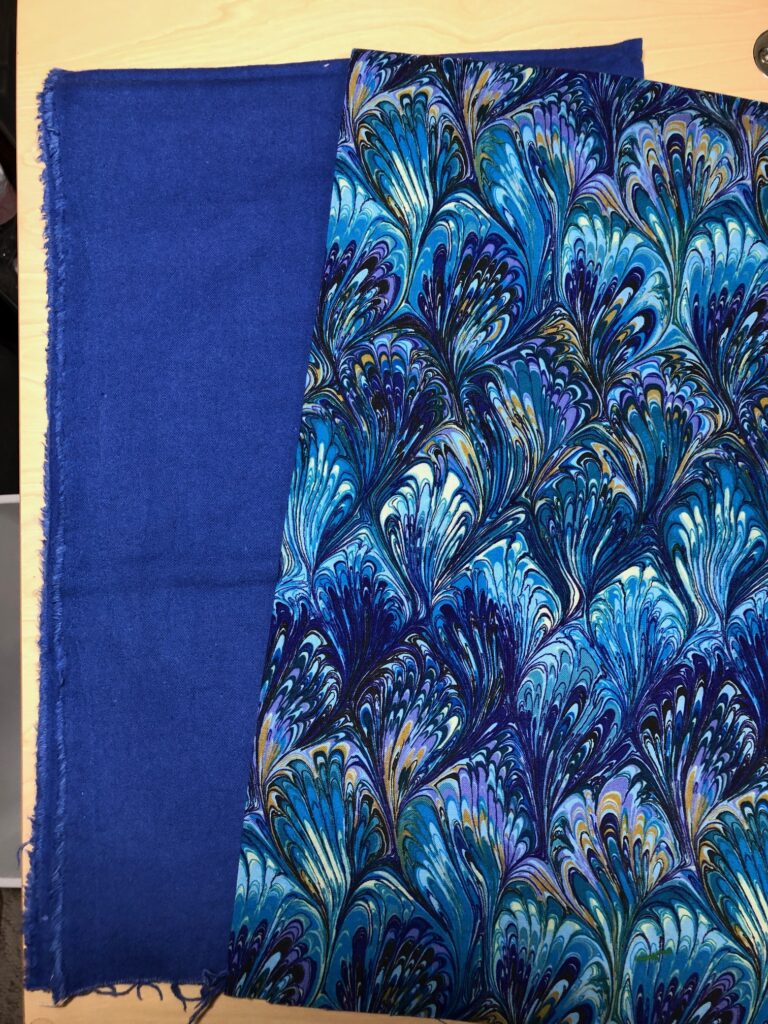
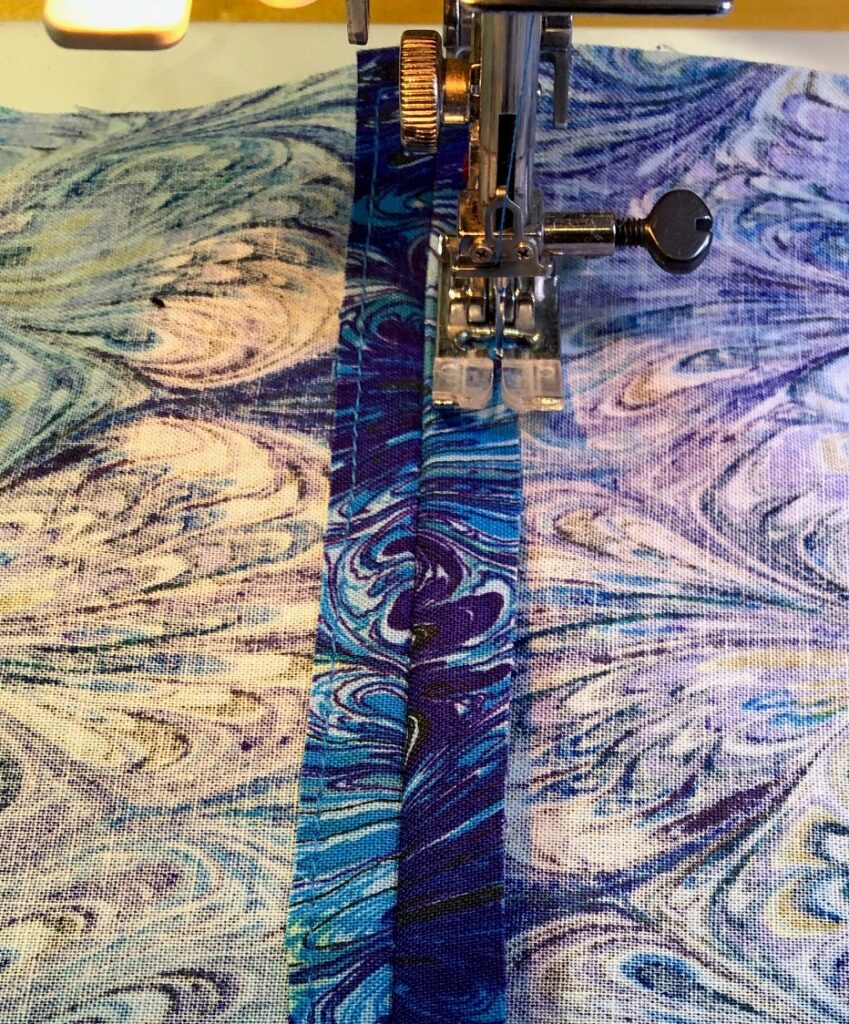
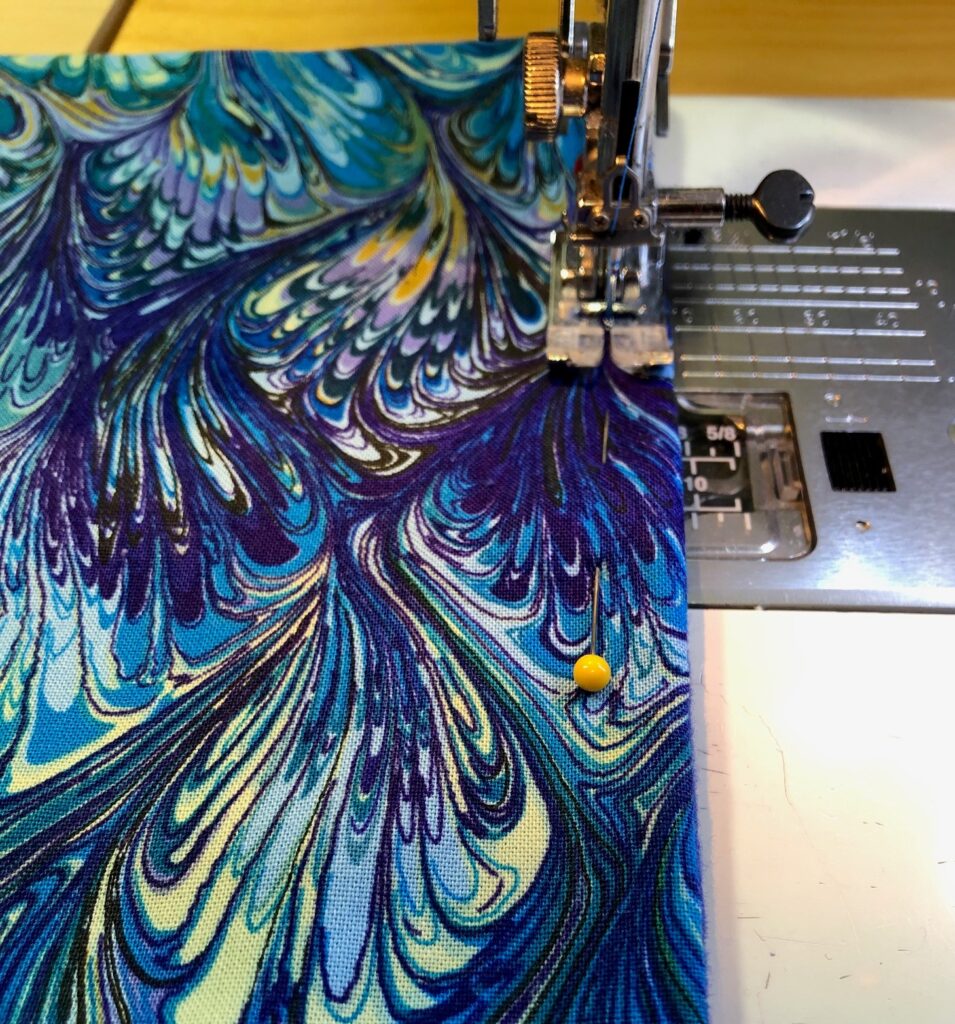
Since I was going to use fabric I had available, I knew I would need to seam the scarf at the center back.
I figured this print would hide all kinds of spills!
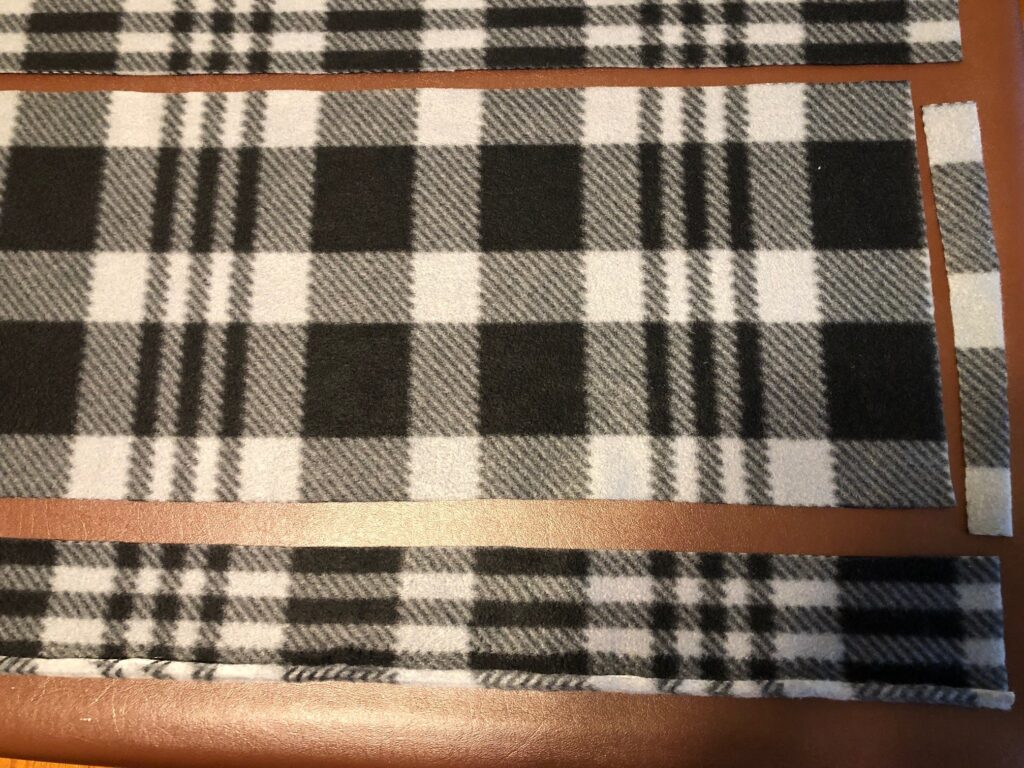
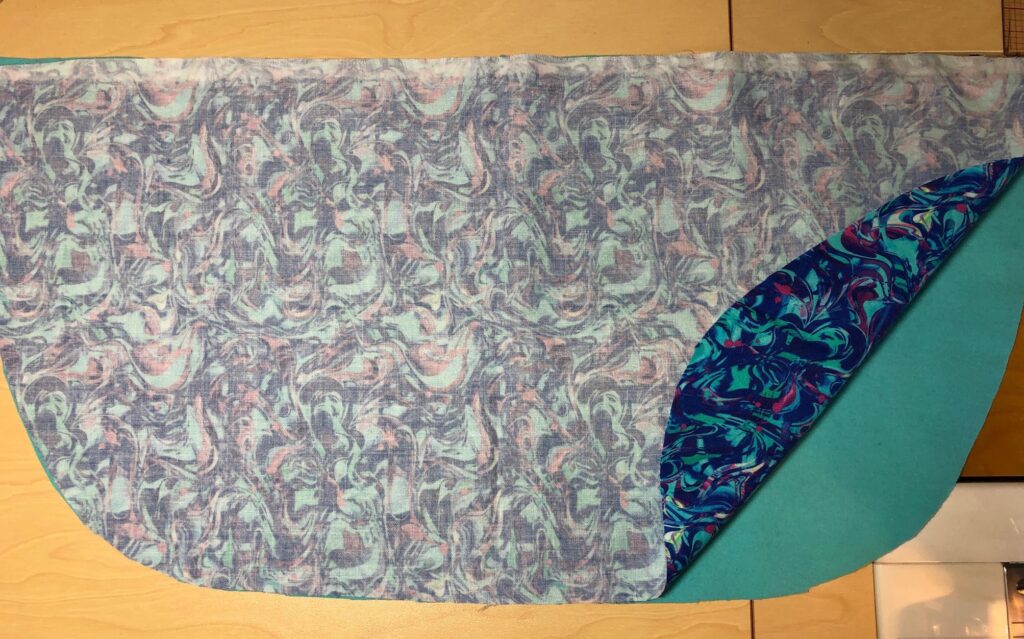
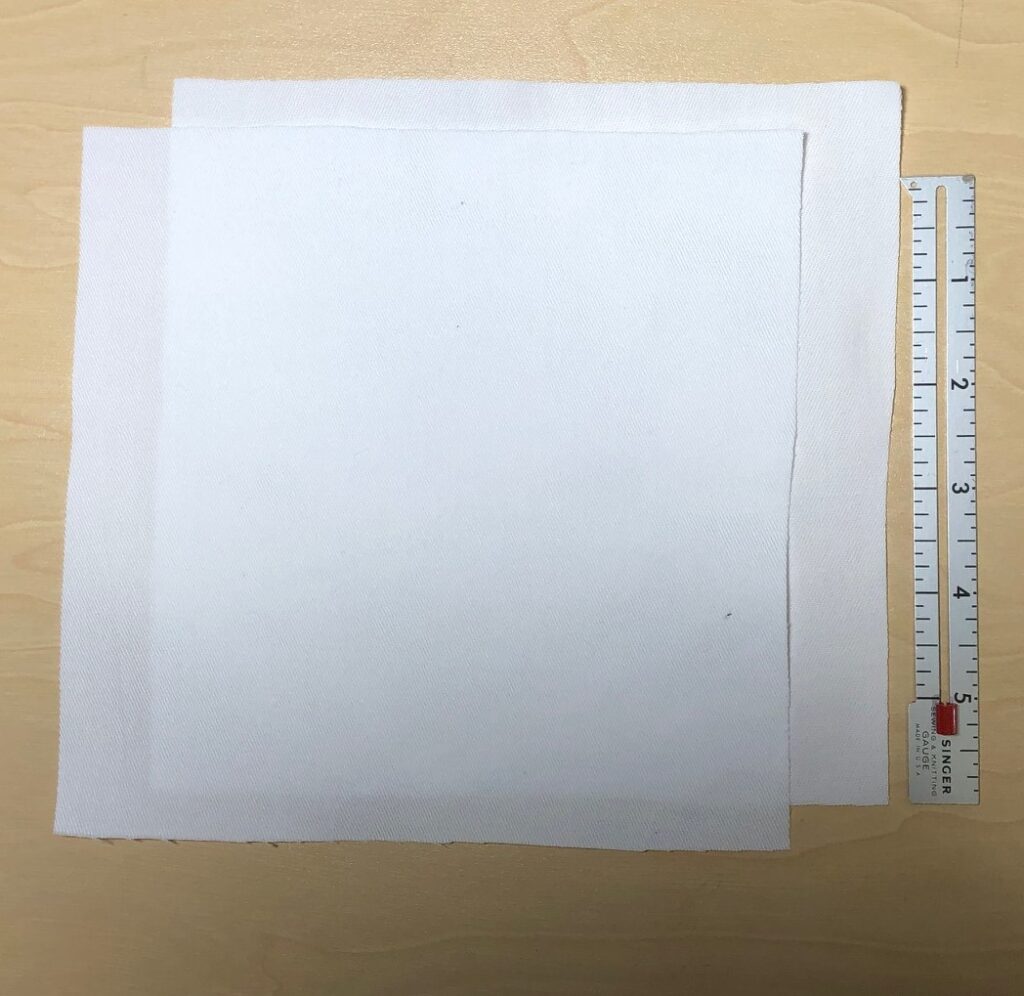
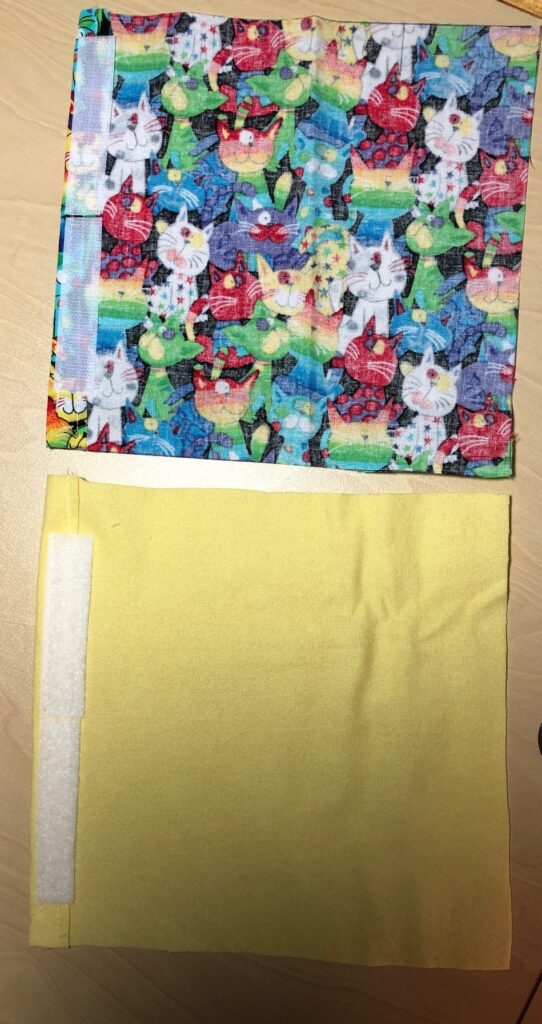
Using the fleece scarf as a pattern, I folded it in half and cut two pieces of the outer fabric…about 10″ by 27″. I then cut matching flannel for the lining. I’m hoping the flannel back will sort of cling to my shirt underneath so it wouldn’t need a fastener to stay put.
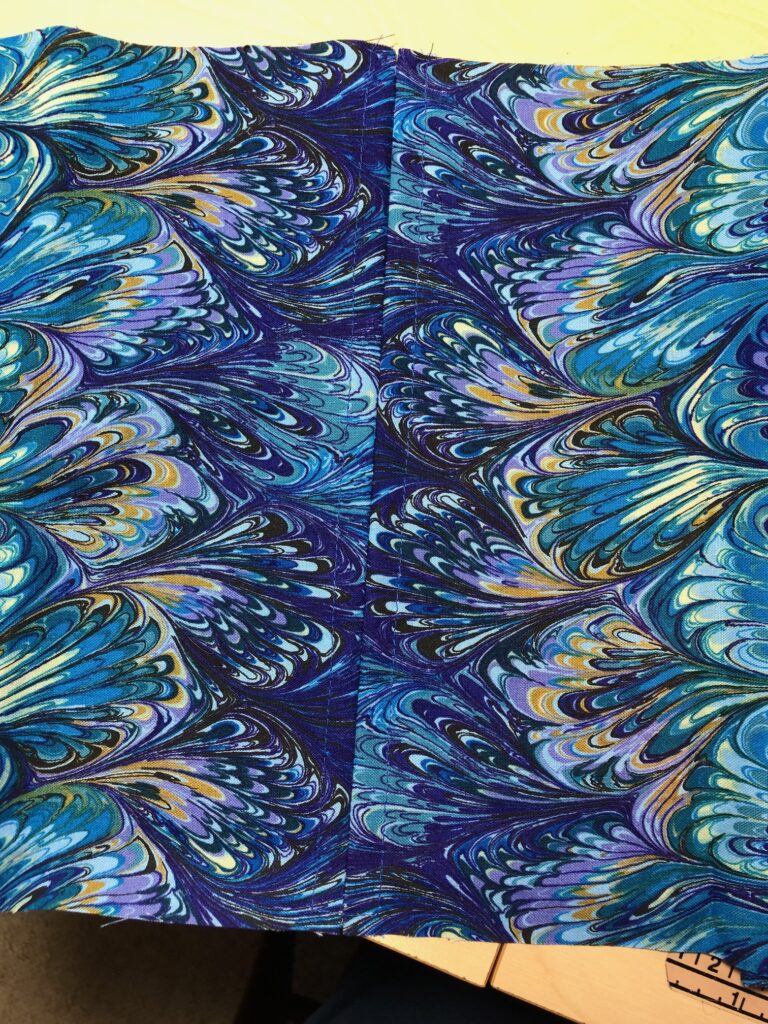
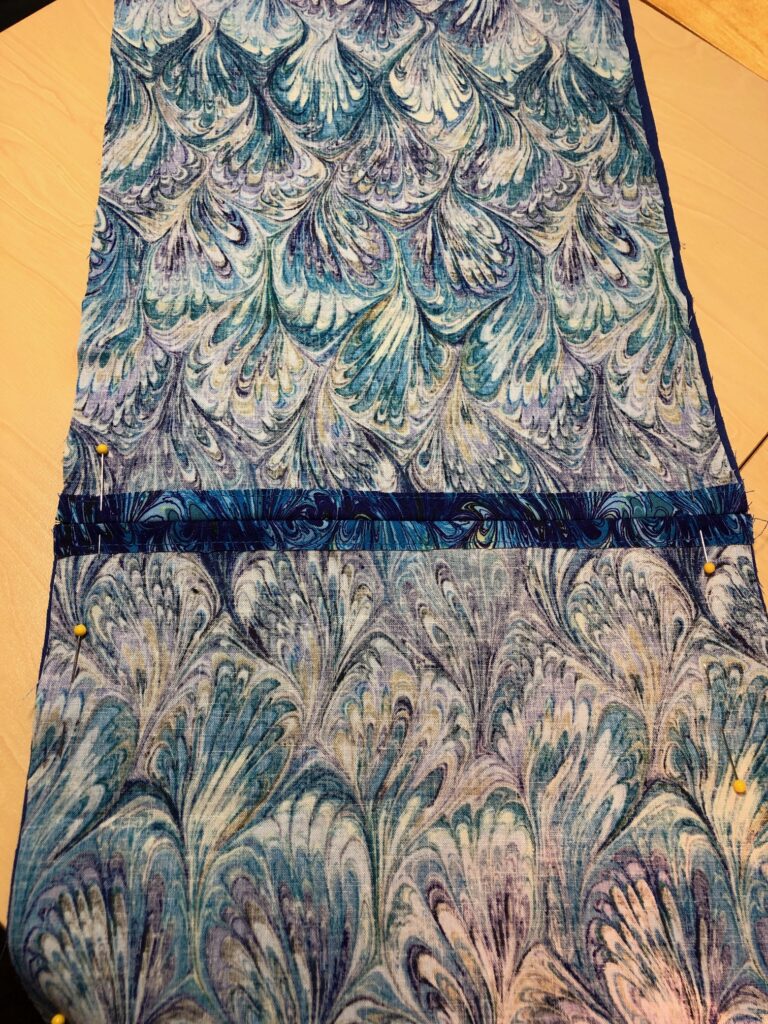
Two pieces of outer and lining fabric, right sides together, ready to stitch together at one end to make one long scarf.I sewed the scarf pieces end to end and then stitched the seam down.Here is the seam that will be at the back of the neck when finished.The scarf and lining, right sides together.
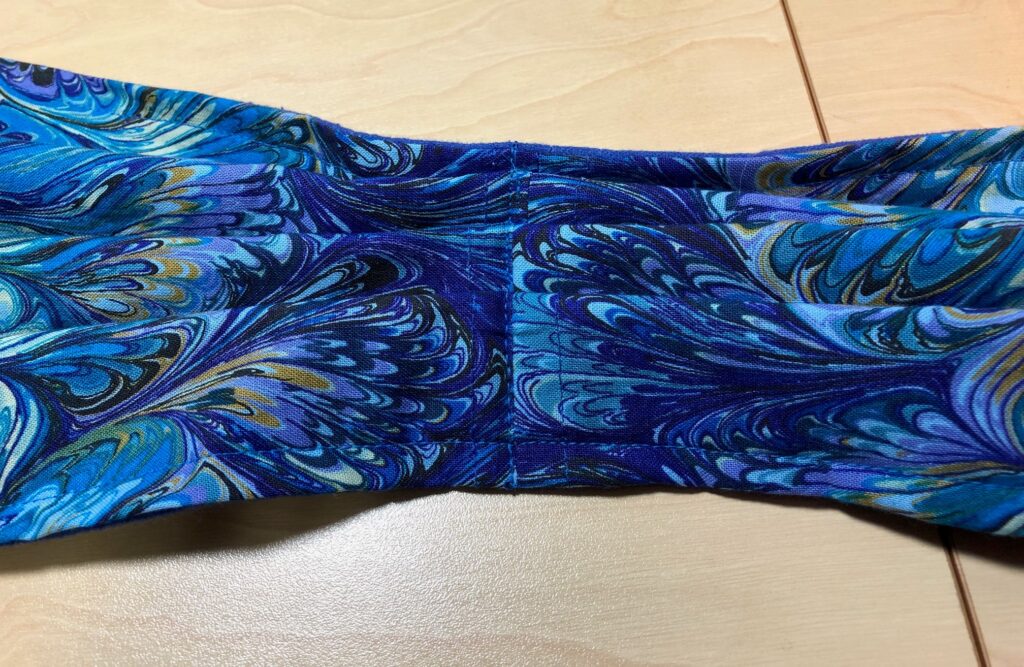
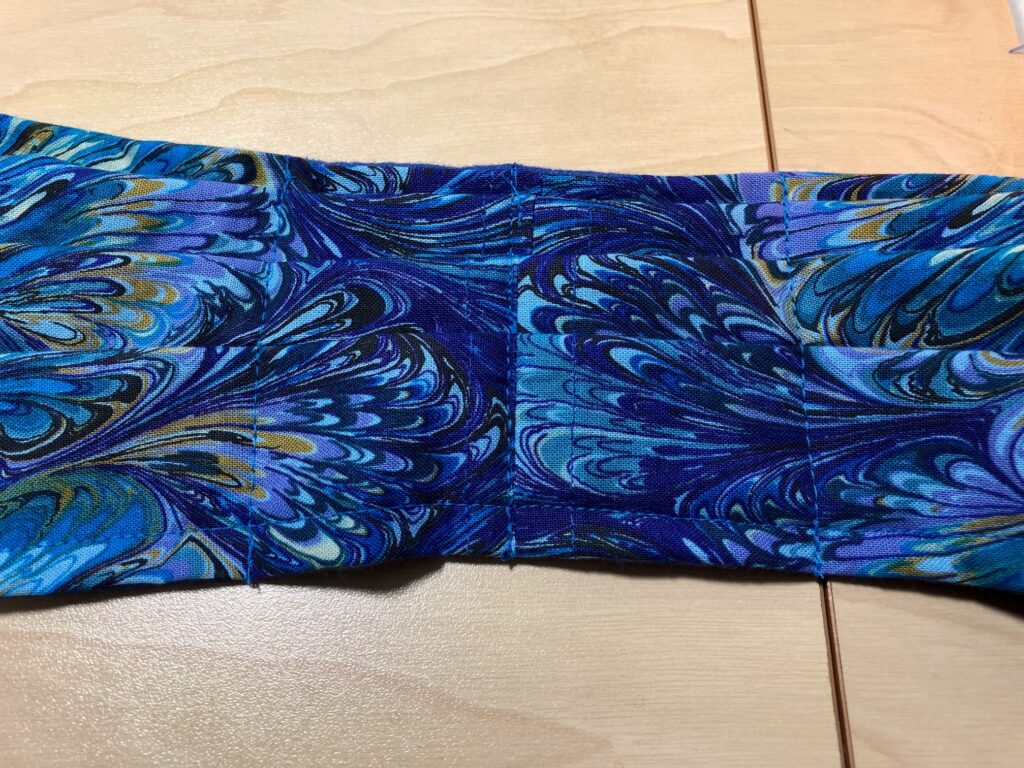
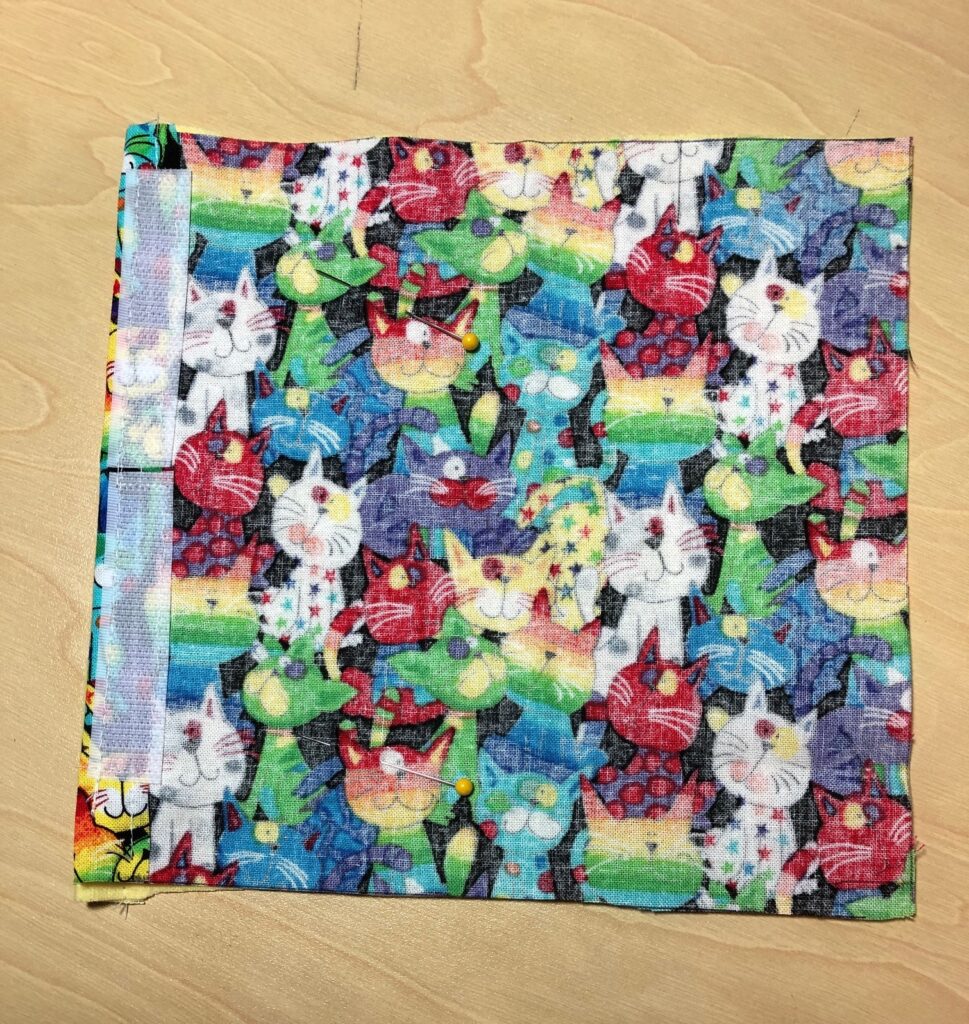
Leave a 5″ opening close to the back center seam for turning right side out.
Turn right side out and finger press the seam all around the scarf.
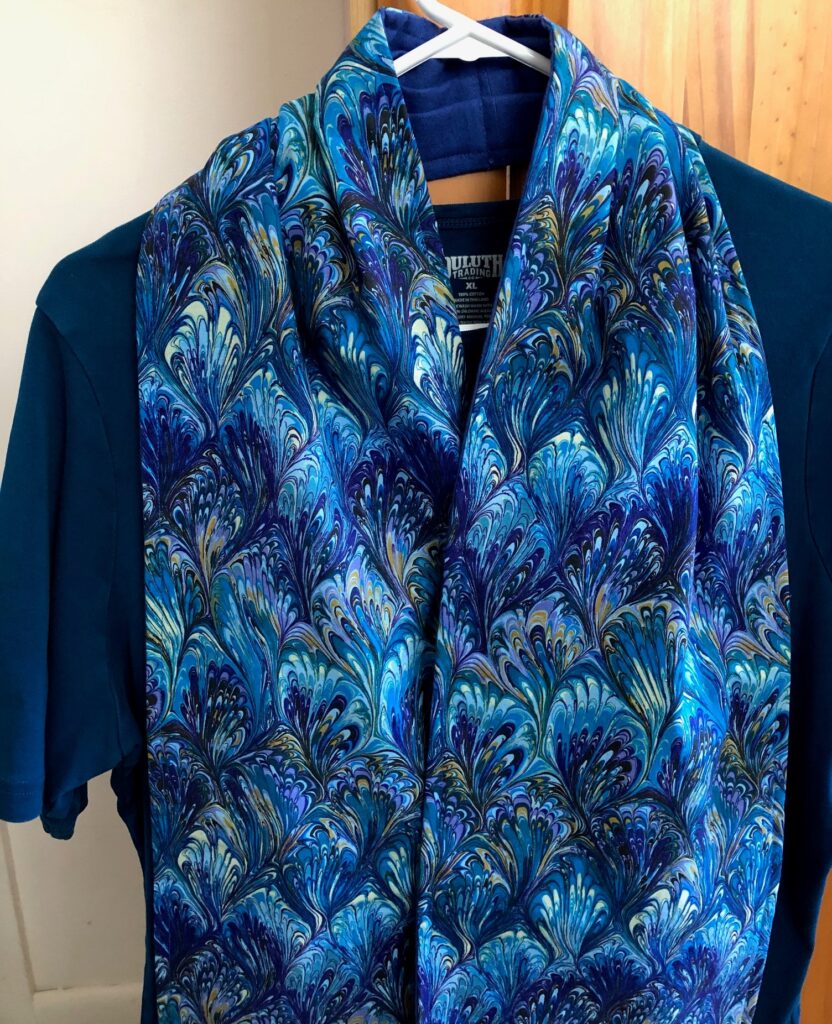
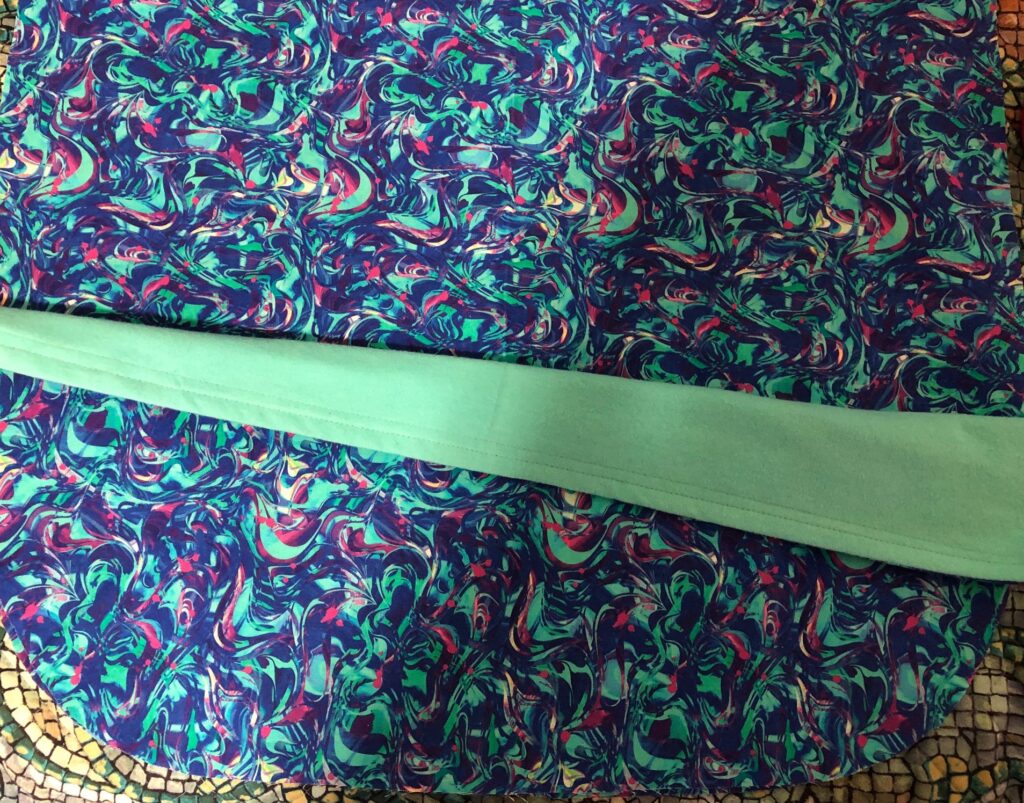
Top stitch 1/2″ all around the edge of the scarf.At the center back of the scarf, fold 3 pleats to reduce the bulk at the back of the neck. Top stitch the pleats down.About 2″ from the center seam on each side, top stitch the pleats down again.The scarf should lay smoothly over your shoulders. The flannel lining should make any kind of fastener unnecessary. A decorative pin could also hold it in place while dining.
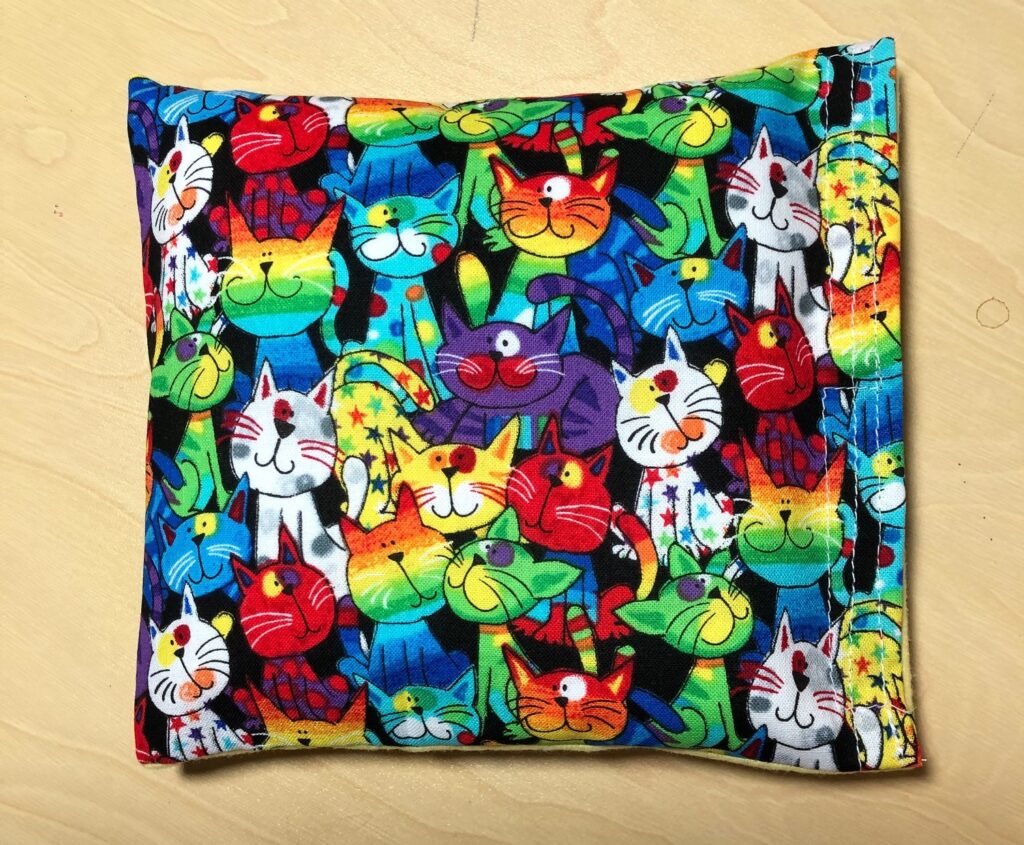
I’ll have to see how this scarf works the next time I eat out at a restaurant…it might be a good solution to avoid stained blouses! Enjoy!
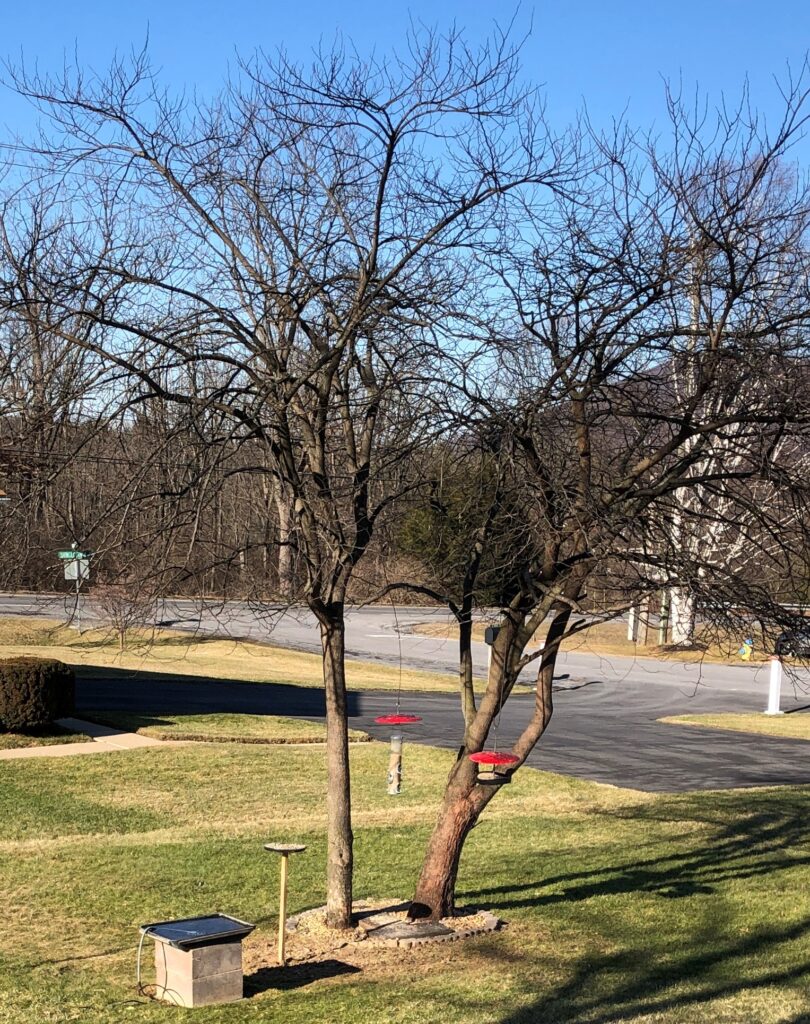
February is a month for hope…that Spring will come eventually! It stays light until about 5:30 p.m. and right now, in Pennsylvania, it is a cold 16 degrees with flurries in the air. However, the sun is shining! We’ll take it
Around our yard and garden things are pretty brown, so it’s no wonder the red bird feeder is noticeable!
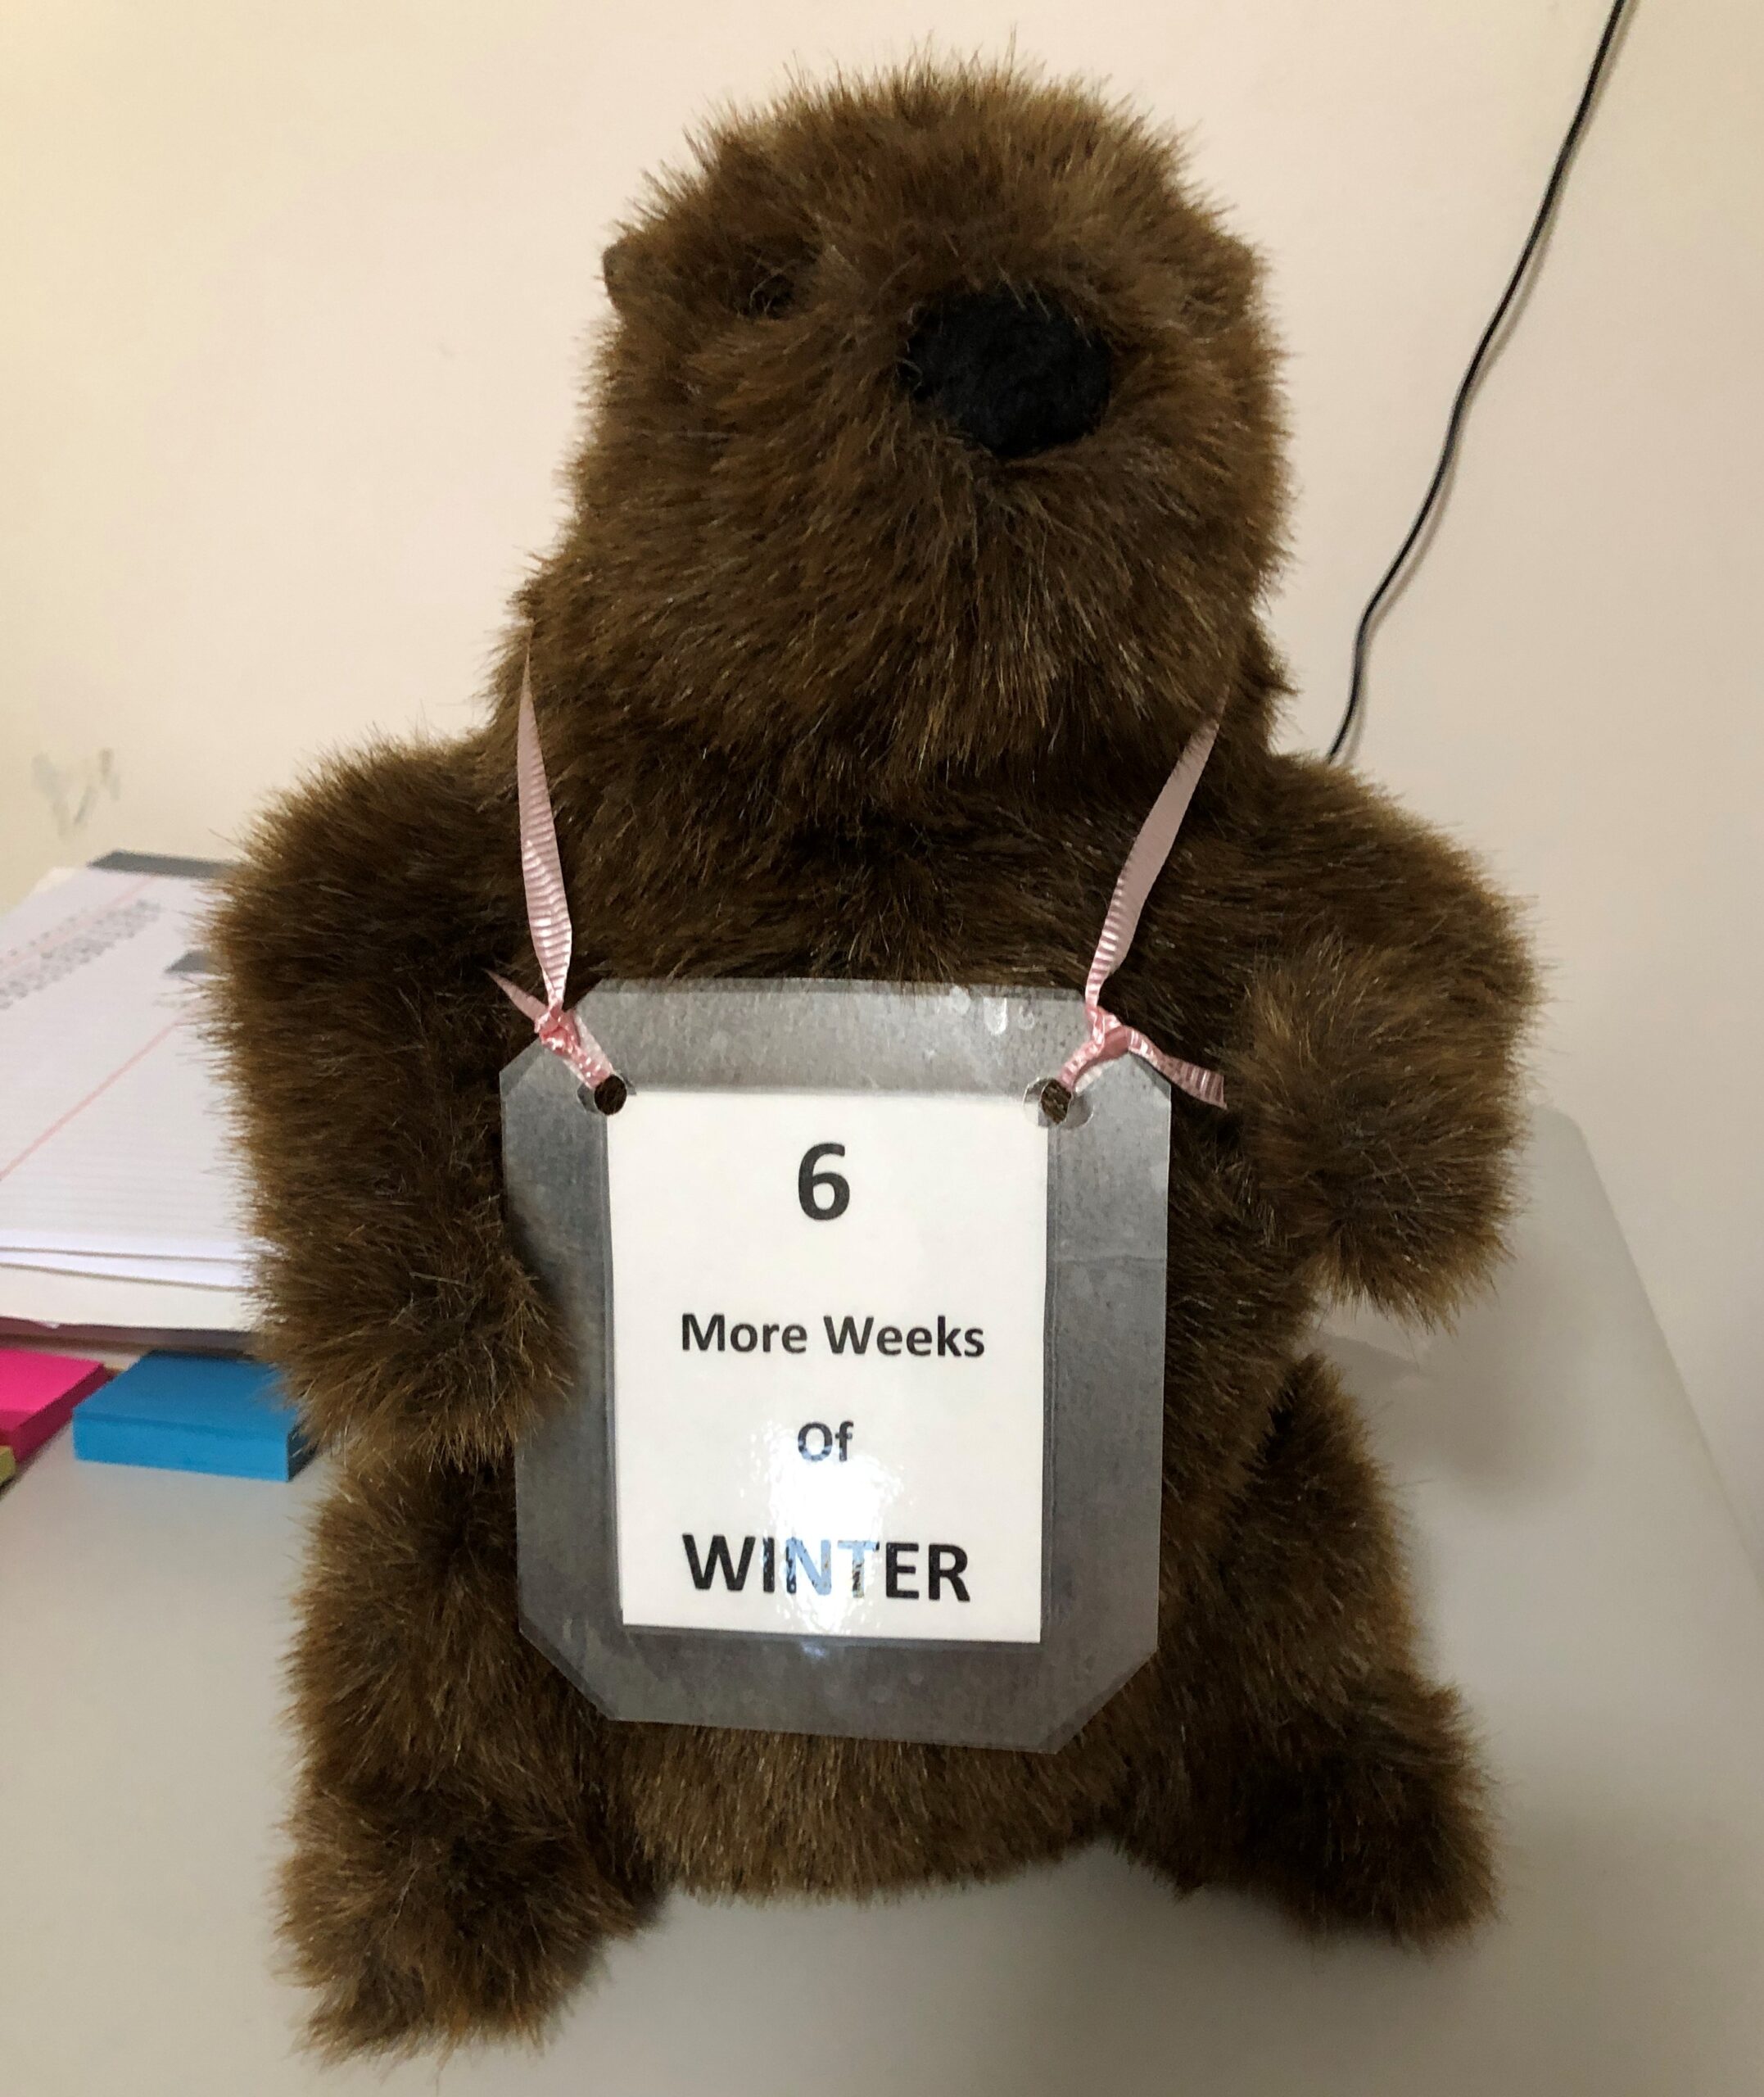
Yesterday, Punxsutawney Phil predicted 6 more weeks of winter (of course). It was 13 degrees outside his burrow and his handlers had to work to get him to even come out! Bert has a stuffed groundhog that appears each year to remind us about the rest of the winter. This guy provides a lot of chuckles when Bert takes him along to have a few beers.
Of course, the American Heart Association reminds us to get our hearts checked out this month!
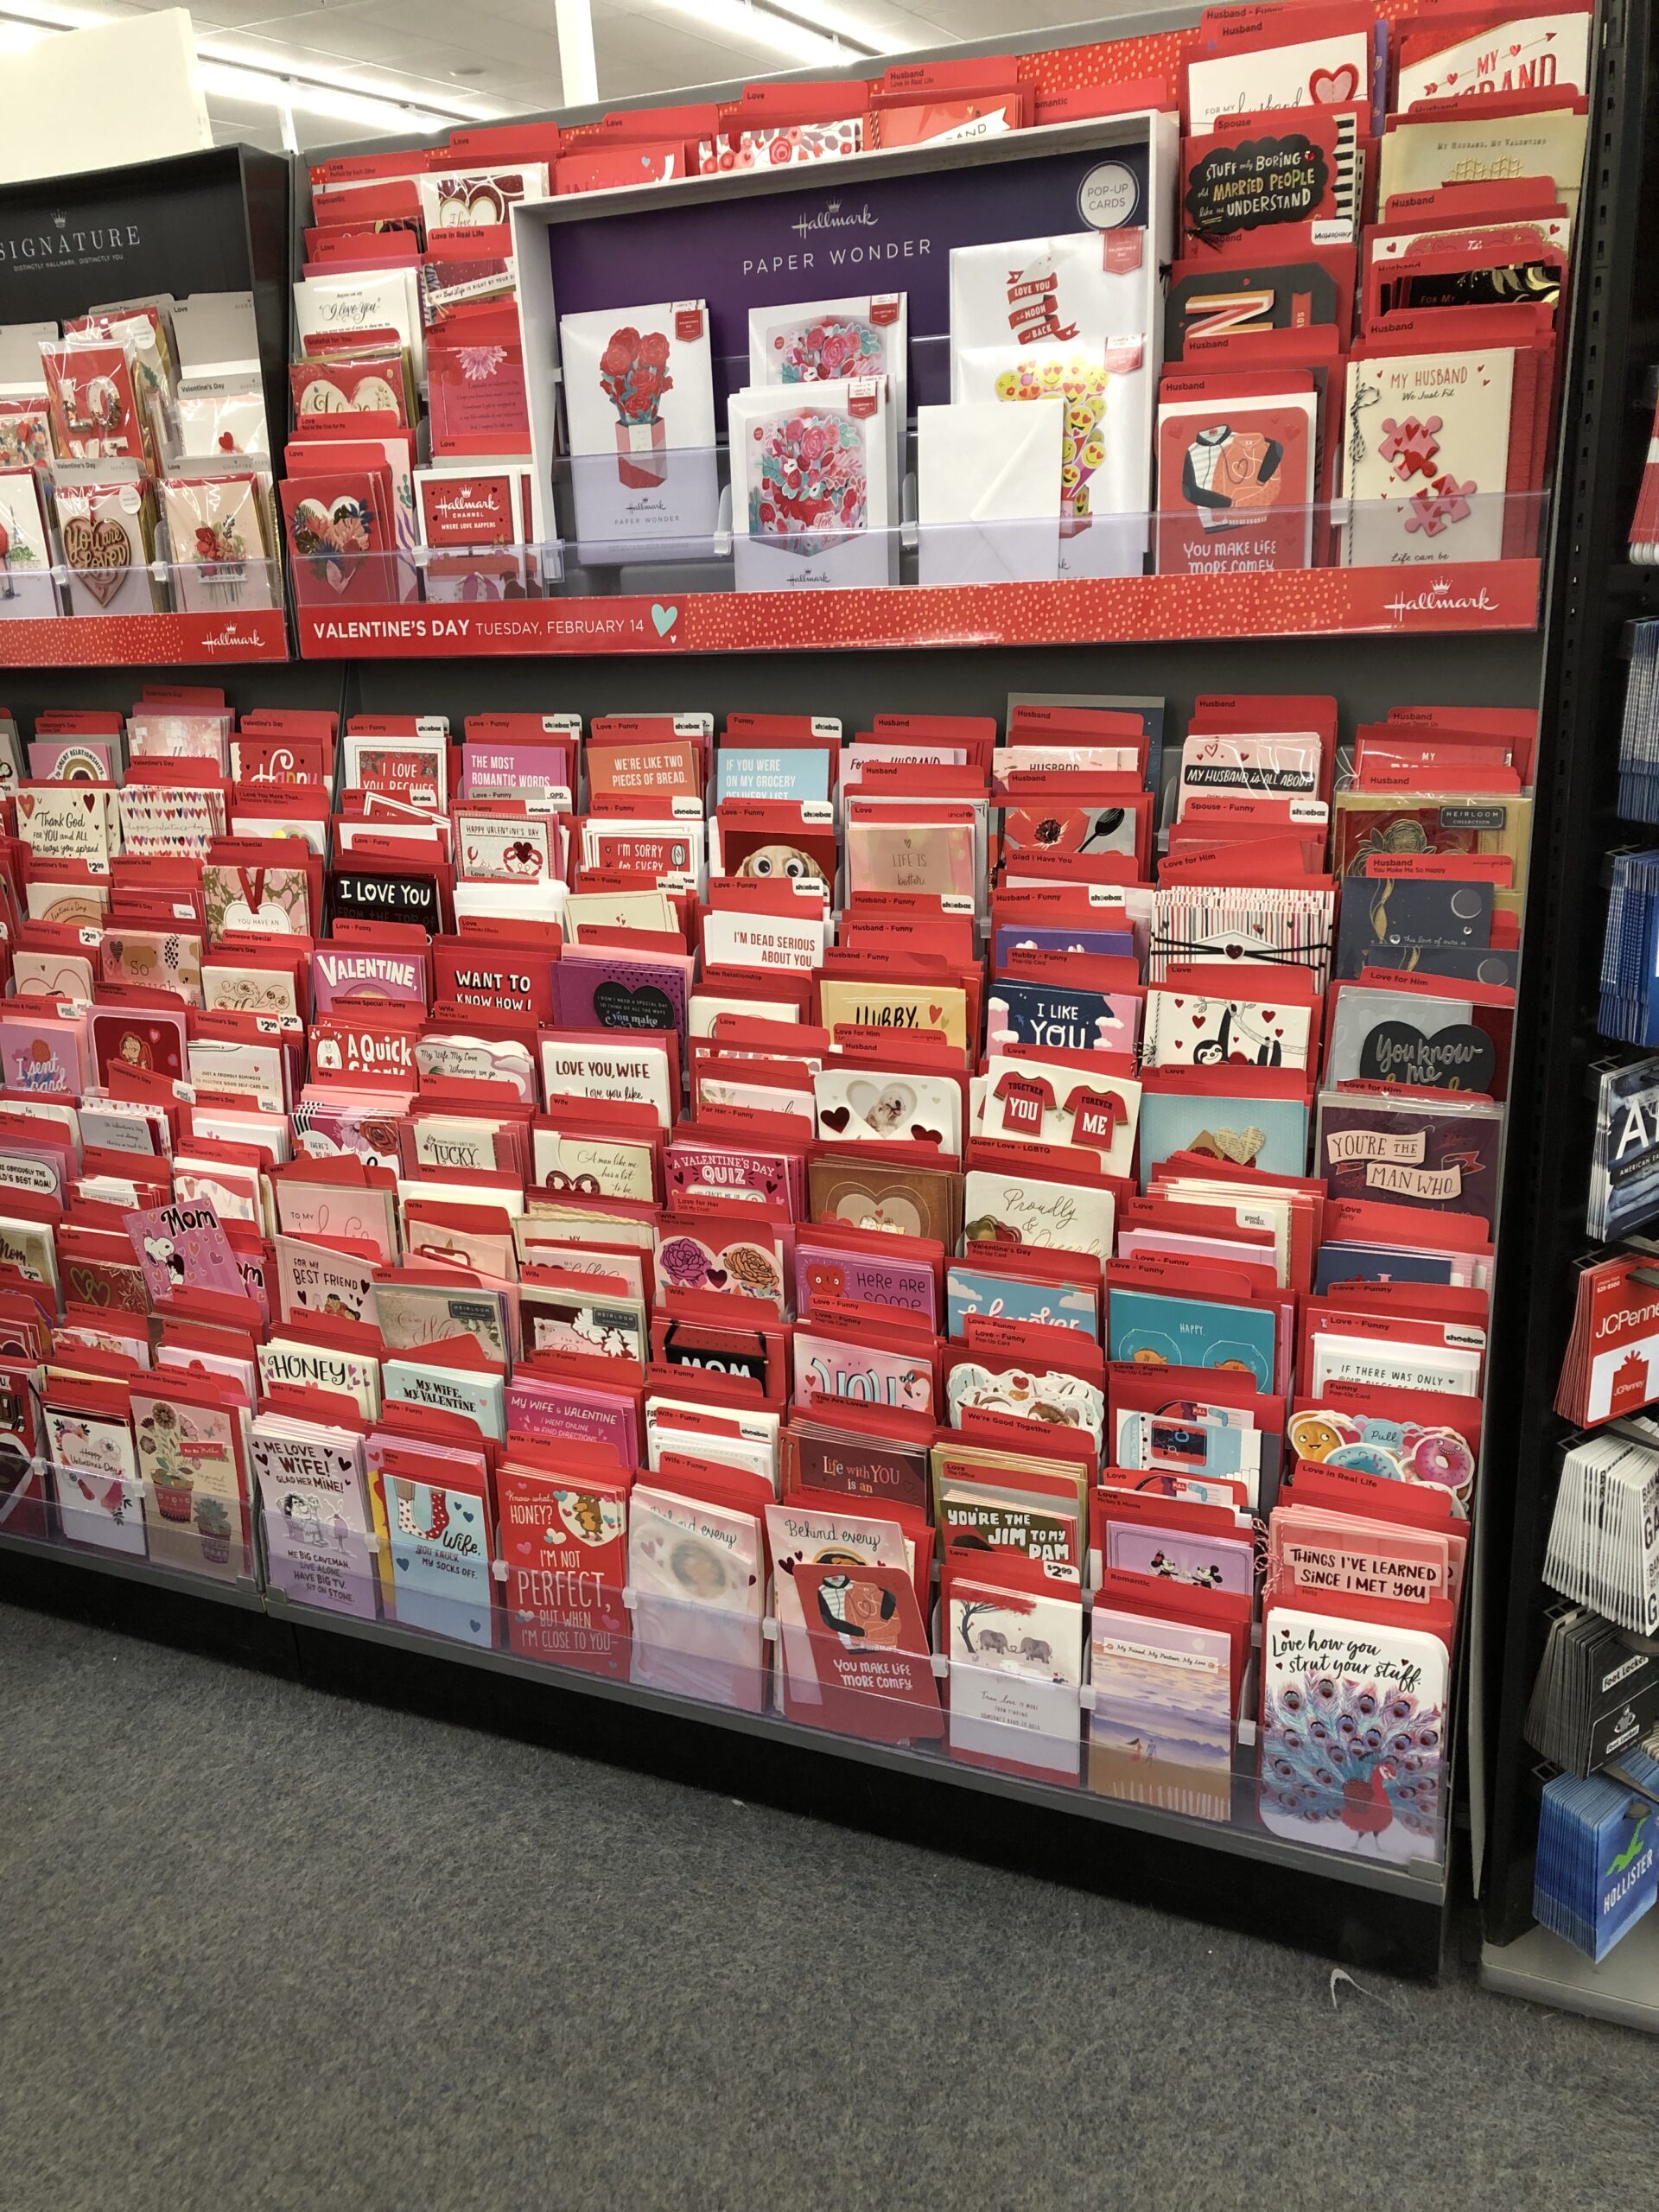
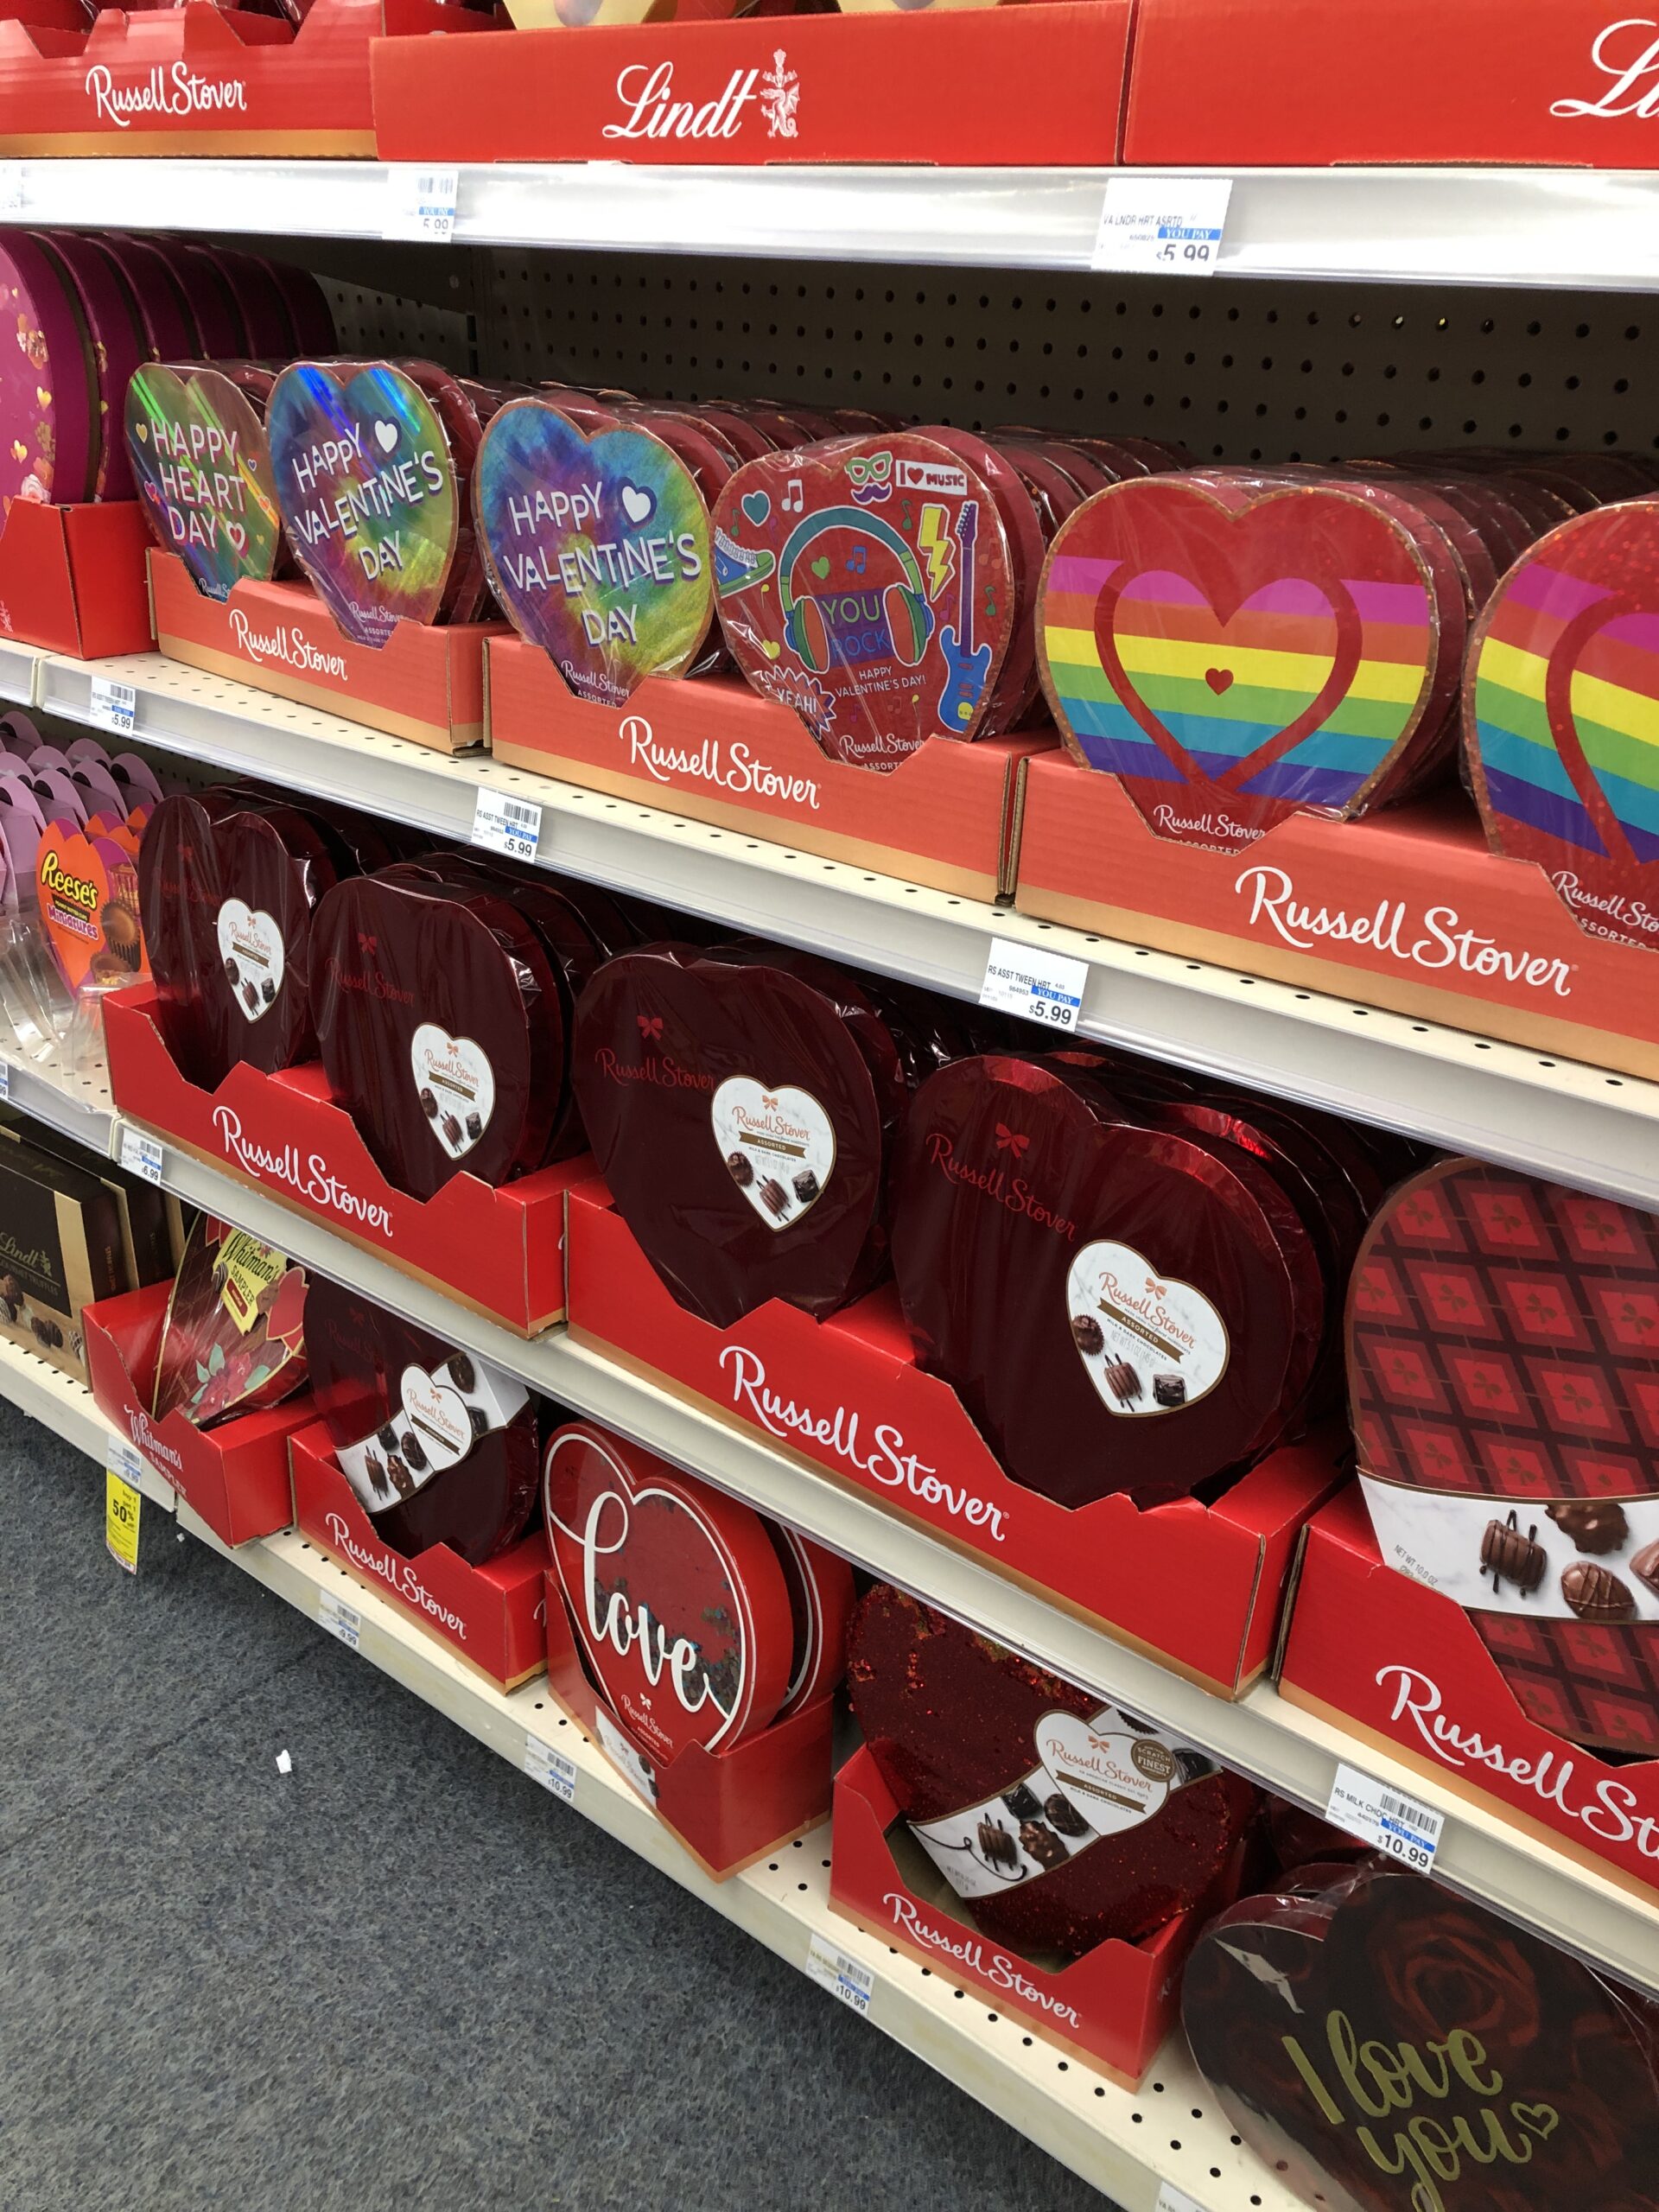
The stores certainly cooperate by giving us many options to celebrate the month of February!
Cards!Candy!Toys!
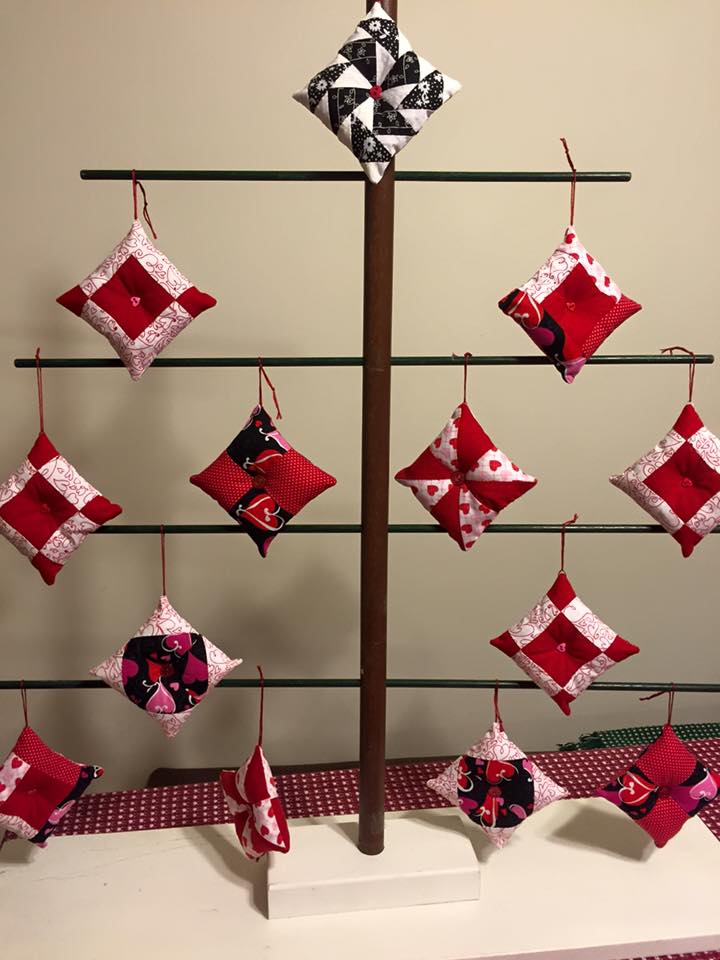
And around my house, I can add a little red with my Valentine tree:
This year I wanted to give a small gift to my group of High School friends who have been so supportive over the last several months with my health issues. I’ve already shared heart-shaped soaps so I wanted something different.
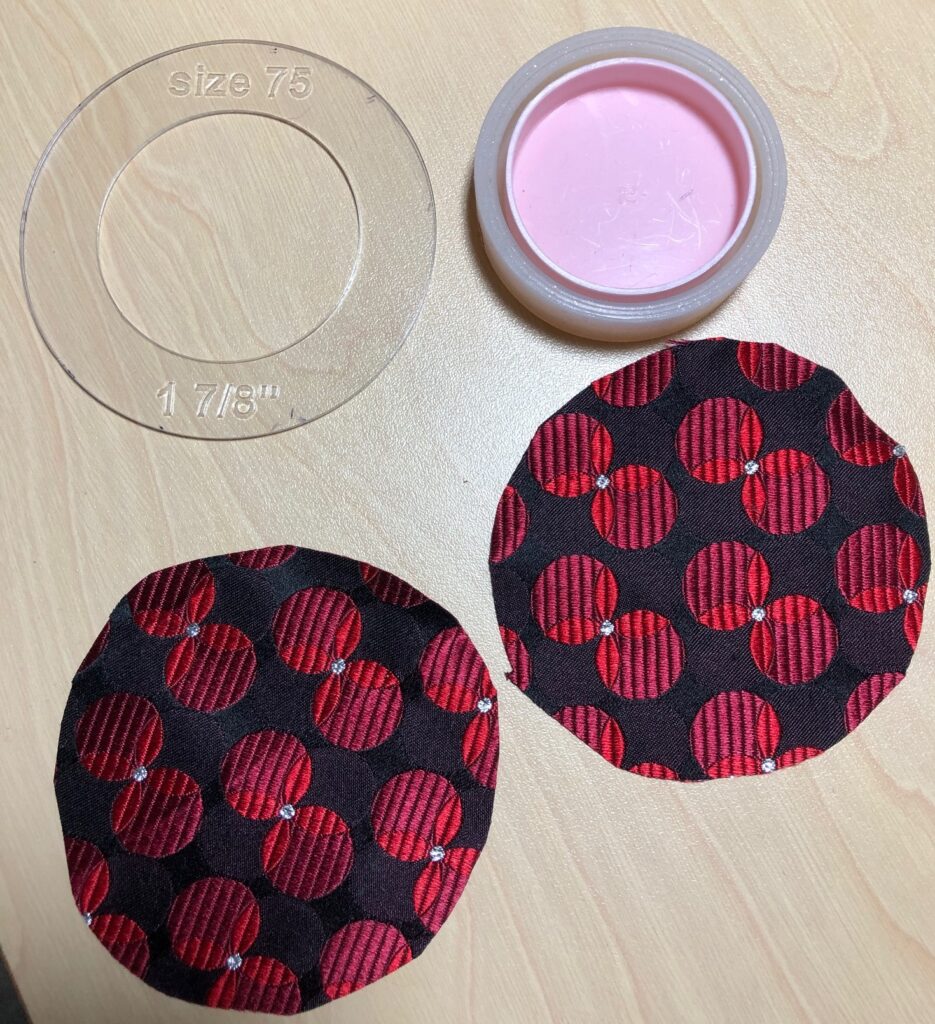
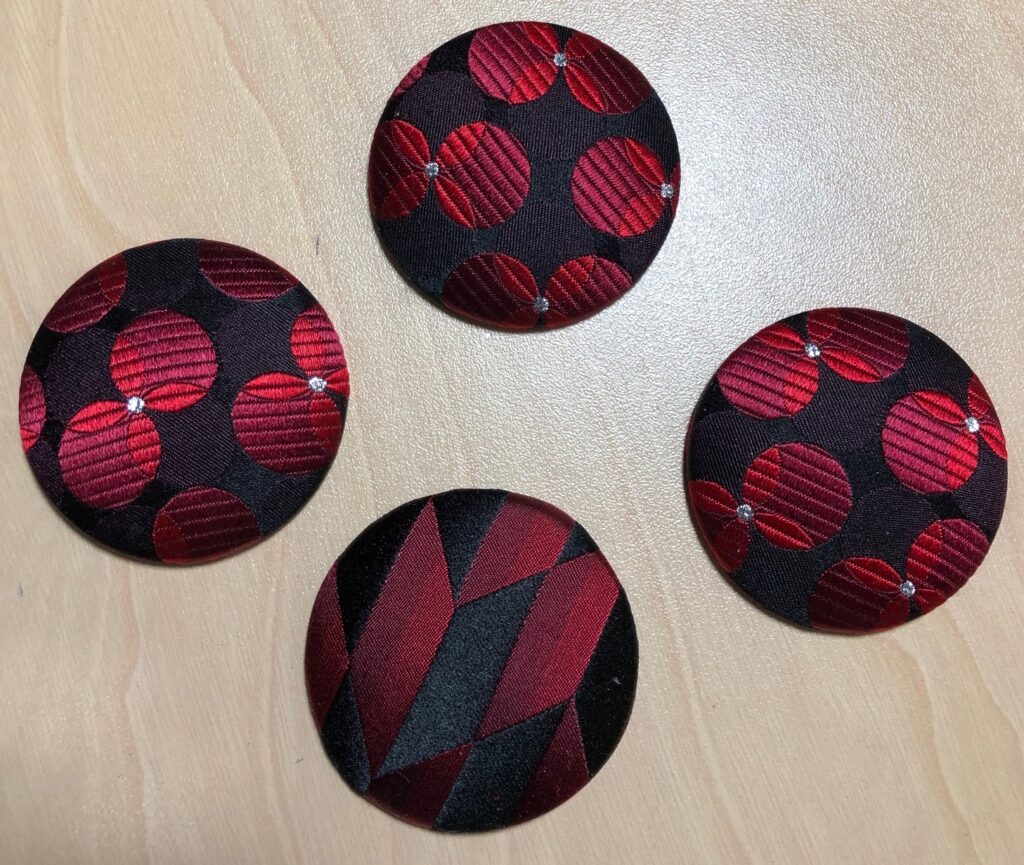
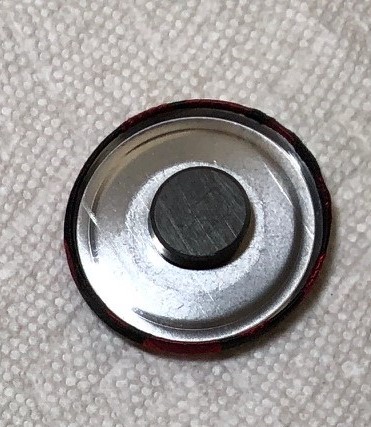
I came across my collection of fabric-covered button magnets and found I had quite a few that were made with red recycled necktie material. I decided to make a few more so the group had more choices.
I pulled out a red necktie from my stash of neckties to recycle, cut out a few circles, assembled the buttons and glued on a magnet. Now I have enough to share “red” magnets at our next luncheon!
I hope you have some cheerful color around you while you enjoy the last 6 weeks of winter!
I was recently asked if I could make a greyhound coat…with a matching scarf for the human owner! I love a challenge and I wondered if a matching scarf for any coat or outfit would be possible. Of course! One search on Pinterest gave me some ideas. Fleece is a great fabric to start with because it won’t unravel. The edges don’t need to be finished and it is washable. A plaid pattern on fleece was my starting point.
The last greyhound coat I made used this plaid, lined with light gray. I wanted to experiment and had enough left over to use this plaid.
I needed a strip of fabric about 12″ wide and 54″ long. This piece was left over from a dog coat I had just finished. I had a piece about 1/3 yard long (12″) and 54″ wide.
Note: I could buy just 12″ of fleece (since fleece is usually about 54″ to 60″ wide) or I could use a strip 1 1/2 yards long if I have extra along side my pattern pieces.
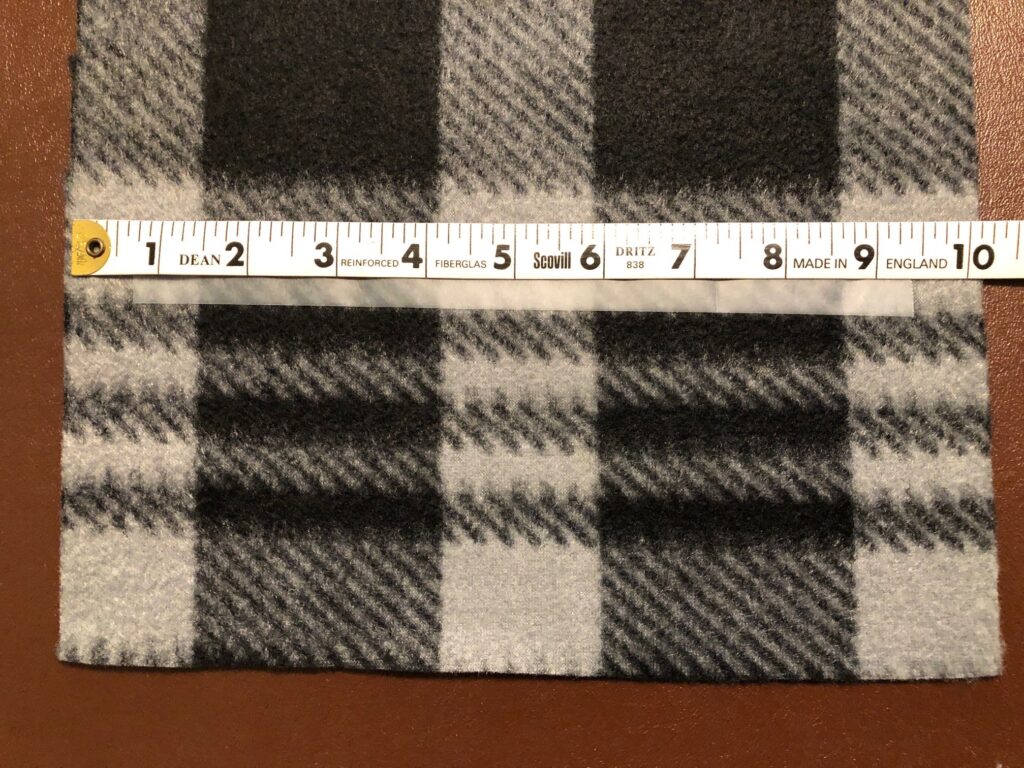
Fleece does stretch a little more in one direction than the other but in a scarf it really doesn’t matter. I let the plaid guide how wide the scarf ended up. Cutting on the lines made for a neater-looking finish.
I wanted a scarf about 10″ wide. I let the pattern of the fleece guide me…it could have ended up 9″ or 10 1/2″ wide depending on the pattern. Use the lines of the plaid to cut along.
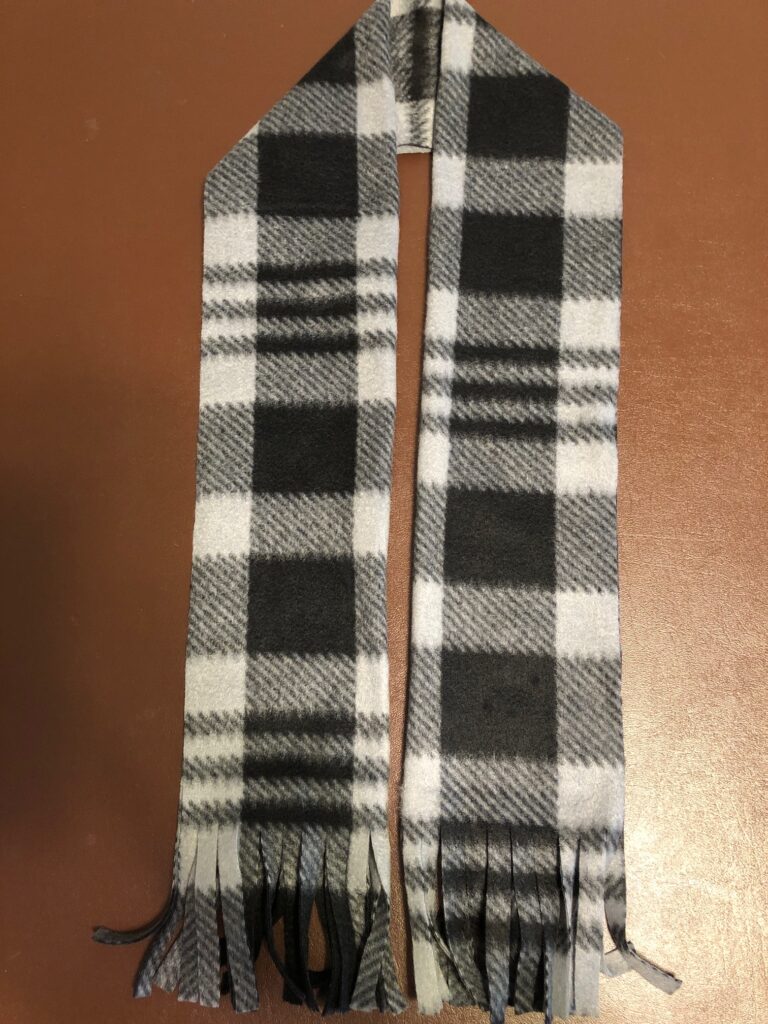
Next, to mark where the fringe should be cut, I measured 4″ from the end and put a strip of scotch tape. That helped me keep the fringe all the same length.
I first measured along the bottom edge and snipped every 1/2″. Then I moved the measuring tape up to the scotch tape and cut from my snip up to the scotch tape.The scotch tape comes right off.Now the human (owner) will have a matching scarf when walking the dog!
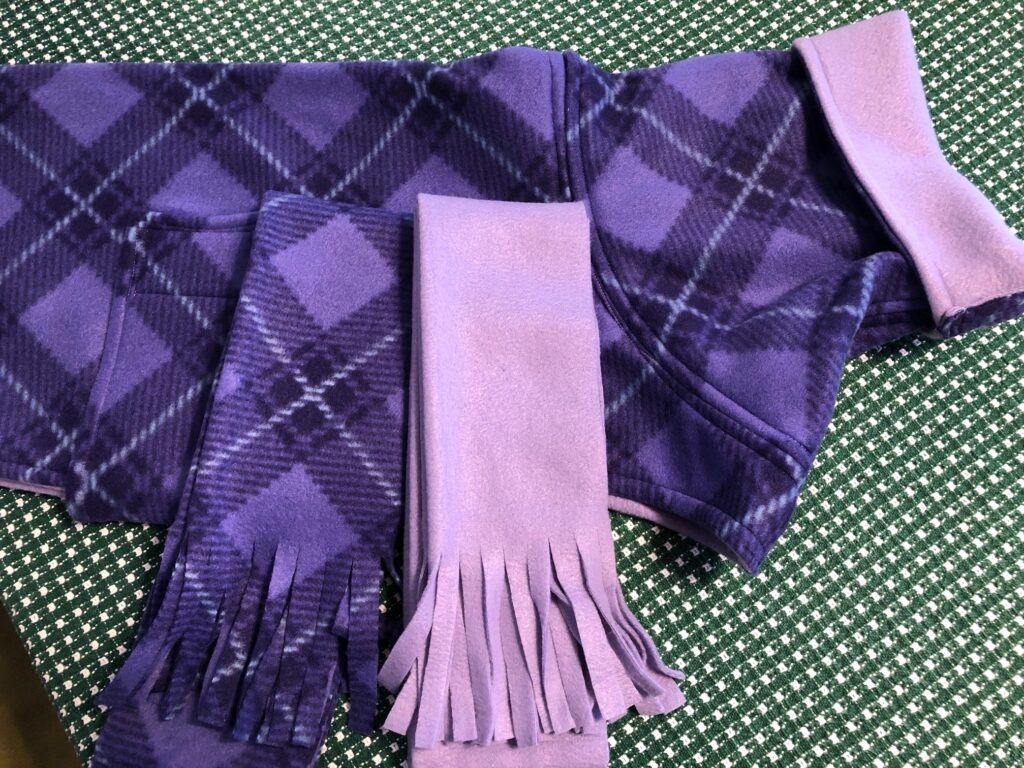
The next scarf I made was to go with this purple plaid coat with a lavender lining.
I used the black and white check scarf as a pattern, lining it up with the X’s of the diagonal plaid. Since I now had a pattern, why not a second scarf of the lavender fleece. This human will have two scarves to choose from! Such fun!
I can now see the potential with all the color choices as JoAnn Fabrics…maybe I can find something to go with my new winter coat! Enjoy!
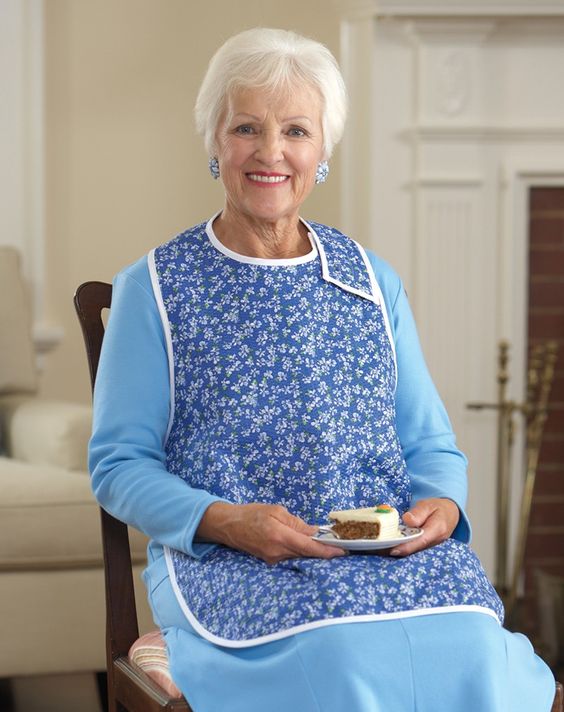
I never thought much about sewing an adult bib…but a friend asked if I could use one she had as a pattern and make another. Now at the moment, I don’t know anyone in a nursing home so it hasn’t occurred to me as a potential project. This is the bib she shared with me:
However, I do remember working with a female Professor at Penn State who spent much of her time traveling to Extension Offices around the state. She was always wearing a nice suit and always managed to show up for presentations looking very professional. I traveled with her once and was surprised she traveled with her suit on AND she stopped for fast food to eat on the way. She quickly grabbed something from the back seat and pulled a large bib-like towel over head. We continued on our trip while enjoying our lunch. When finished, she had hand wipes ready and removed the towel. Her suit remained spotless! What a good idea!
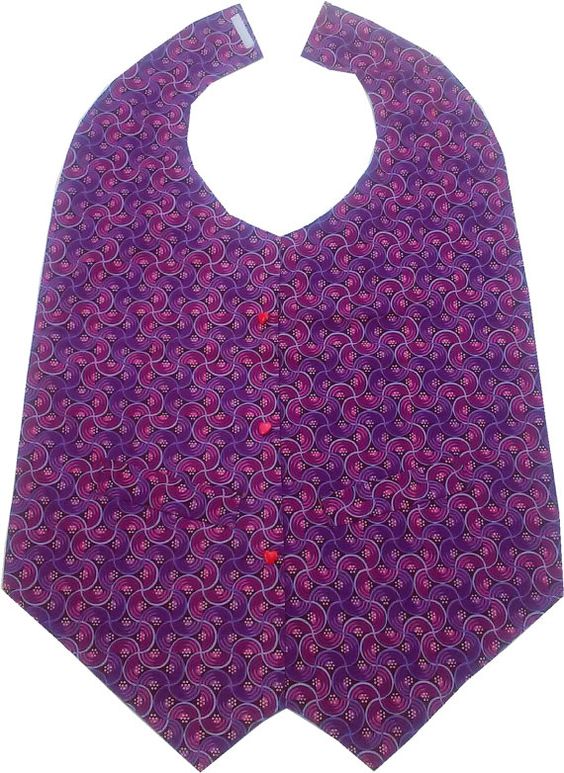
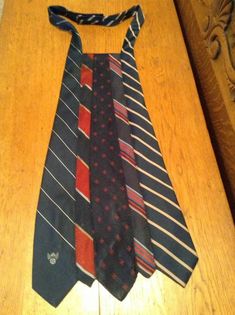
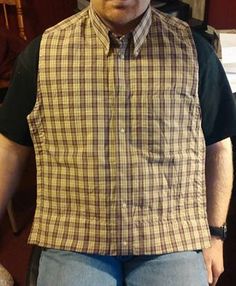
It wasn’t until I did a search on “adult bibs” on Pinterest that I found a whole world of ideas to make these bibs…or “dining vests” or “dining scarves.” Who knew! Here are some pictures of items others have made:
My professor friend had something like this!Clever!This is cool, but make sure the ties are washable…the inks often run when wet!No need for a pattern…just recycle the front of a favorite shirt!A dining scarf for your favorite guy!I’ve got to make something like this to keep in my purse!This is what I was expecting for an adult bib!
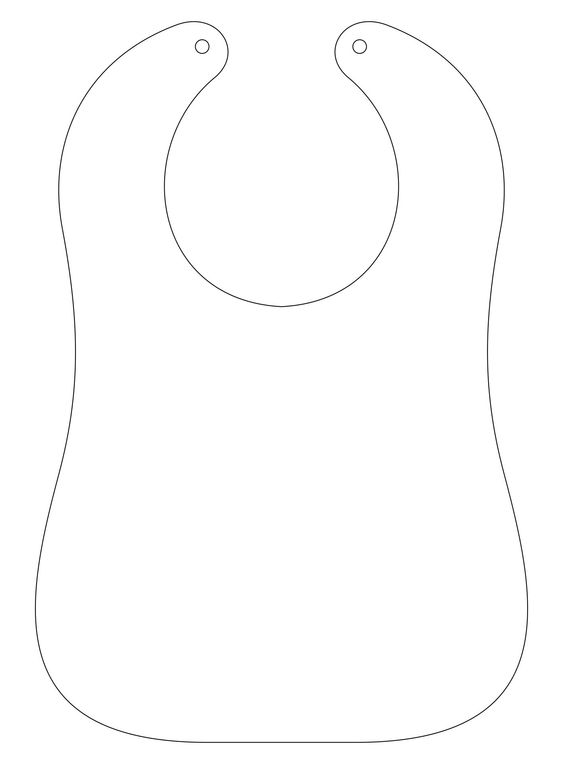
Well, almost too much information, but I sure got some good ideas for Christmas gifts! I did come across simple patterns like this one, which looked more like the one I was asked to make:
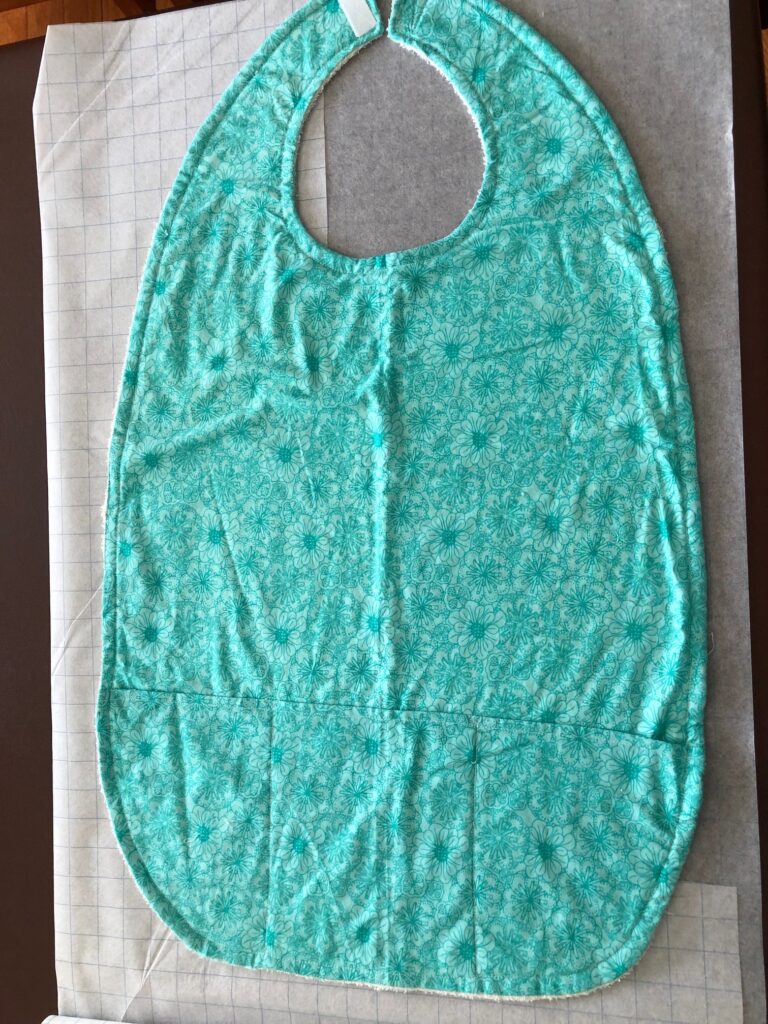
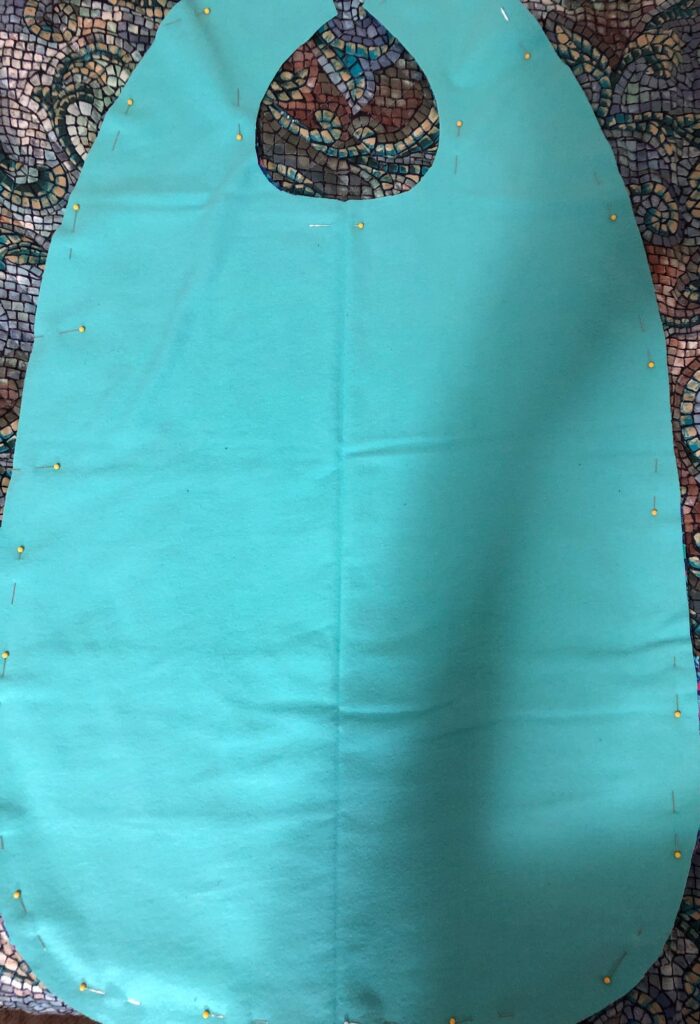
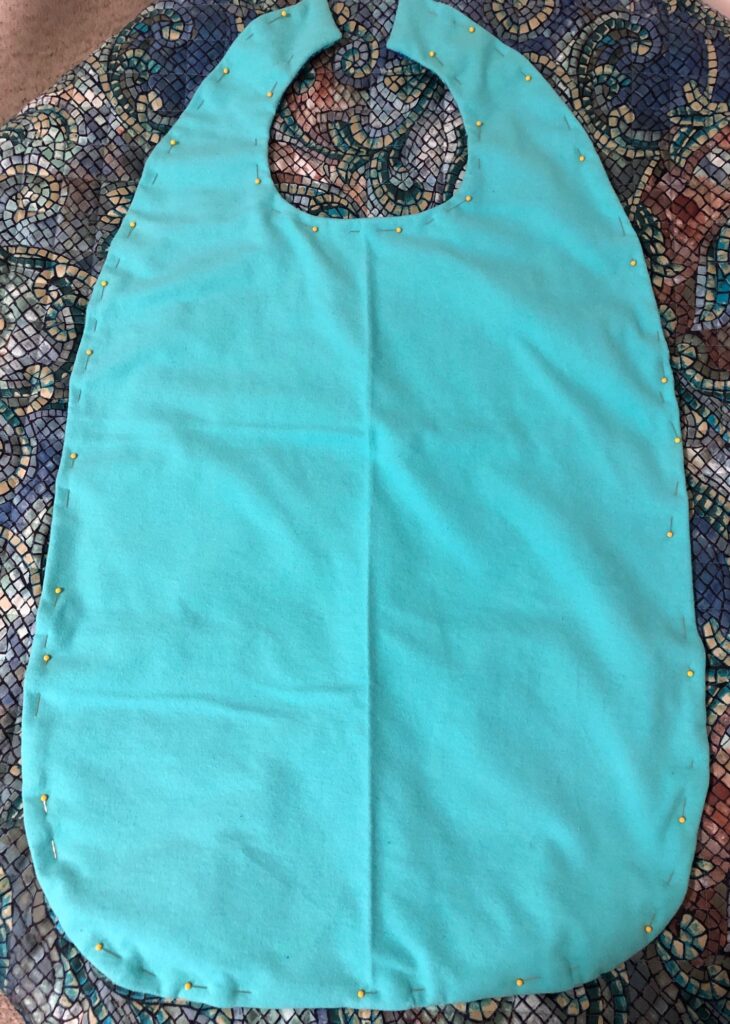
I started by making a pattern on quilting grid paper. This if very thin non-woven stuff with 1″ grid lines printed on it. I laid out the sample bib (see the first picture above) and basically drew around it, adding about 1/2″ for the seam allowance.
After cutting it out, I folded it in half lengthwise to trim it so the two sides are the same. Now I can lay the pattern on the fold of the fabric. Much easier to cut out. I copied the curve along the bottom to make a deep pocket pattern.
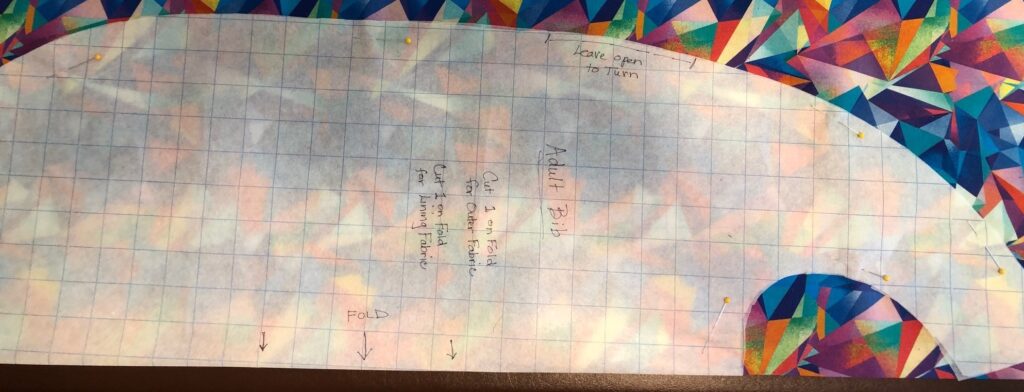
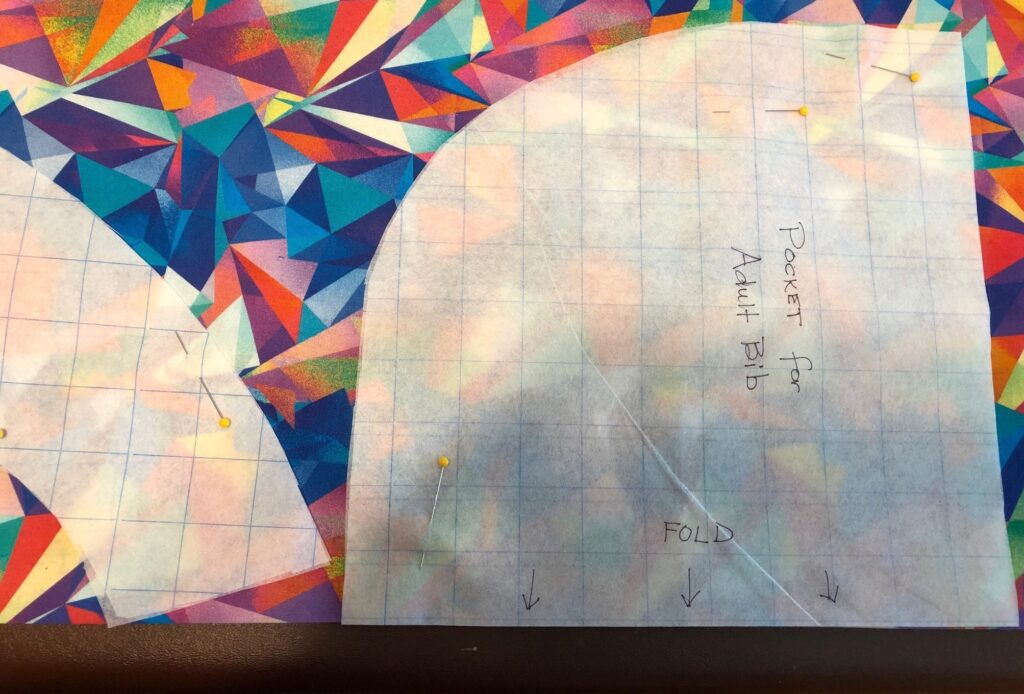
This is the pattern on one of the two fabrics I chose. Figured it wouldn’t show anything…from soup to spaghetti sauce!This is the pocket pattern…on the fold.
I cut out two bibs with linings of flannel in two colors. I will make one and have my friend try it before I make the other one. She may decide the pocket is unnecessary.
Making the Bib
Materials:
1 1/2 yards of washable fabric for the outside of the bib and pocket.
1 1/2 yards of washable fabric for the lining of the bib and pocket.
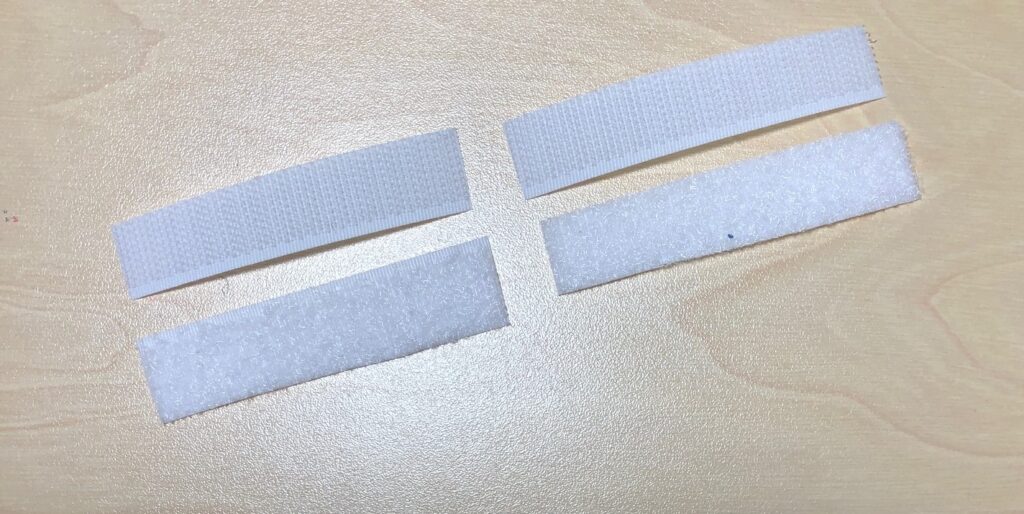
1 piece of Velcro hook about 1″ x 2″
1 piece of Velcro loop about 2″ x 2″ (or two 2″ strips of 1″ Velcro loop)
Thread
Step 1: Prep the Pocket. Place the pocket and lining pieces right sides together. Stitch the straight side using a 1/2″ seam allowance.
Step 2: Finish the Pocket: Turn right side out and top stitch along the straight edge. This is the top of the pocket.
Step 3: Place the pocket onto the right side of the bib fabric, matching the edges along the curve.
Step 4: Place the lining piece, right sides together, onto the bib outside piece (covering up the pocket). Pin around the edges.
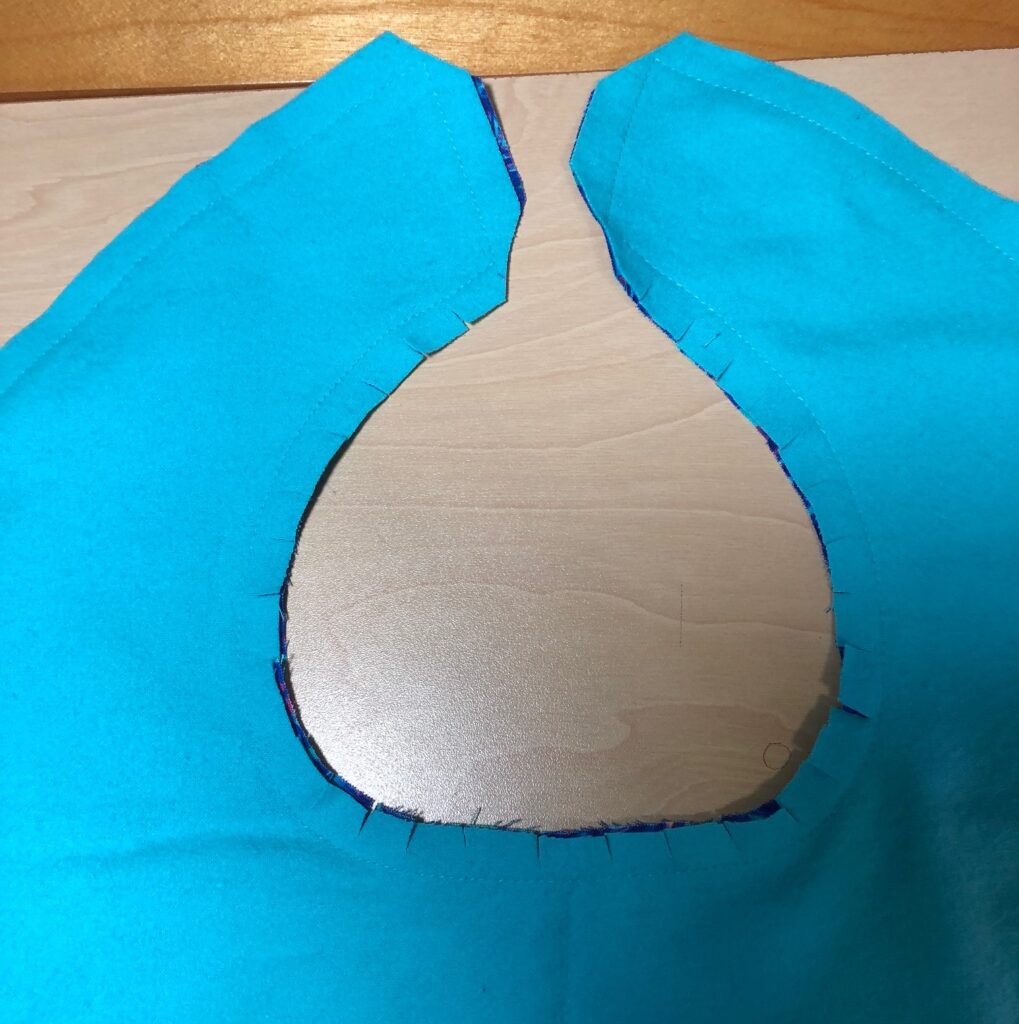
Step 5: Sew around the whole bib, leaving a 4″ space on one side (above the pocket) to allow for turning. Before turning, clip the neck opening to keep the seam lying flat after turning.
Step 6: Turn the bib right side out through the opening you did not stitch. Pin around all edges. Top stitch about 1/2″ from the edge.
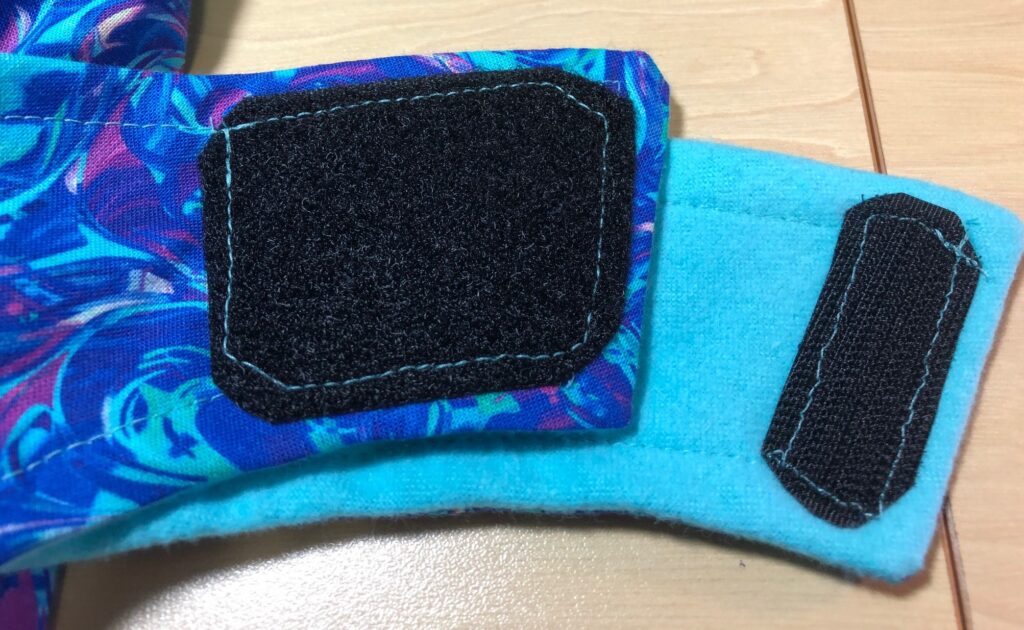
Step 7: Prepare the Velcro. I use 2″ wide Velcro, so I needed one piece about 2″ x 2″ of the loop, and 1″ wide piece of the hook.
Note: If you are using 1″ wide Velcro, use two pieces of the loop side by side to make a wider patch for the hook to find. Much easier to close the hook on a larger patch of hook.This is how the Velcro look sewed down.
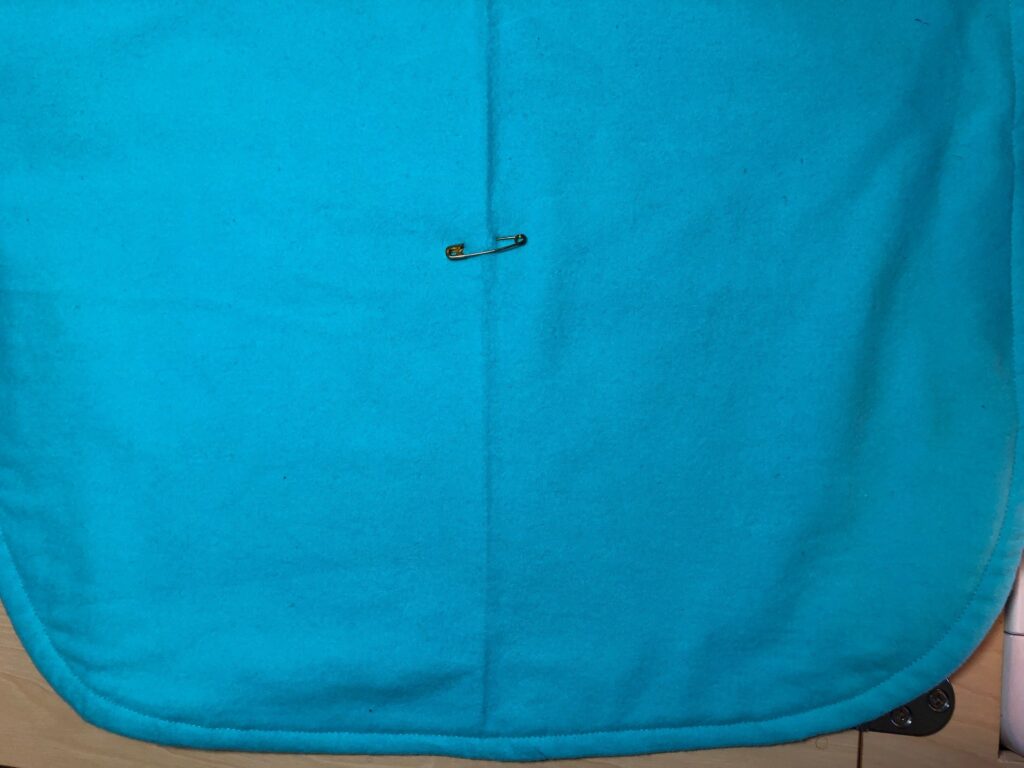
Step 7: When finished, hold up the bib and see if the pocket hangs open. You can top stitch sections to stabilize into small pockets. (See the original picture at the top.) I was asked to leave it open for now, so I added a safety pin through the back to hold the pocket snug to the bib. It could be removed for washing, or I can sew it down later.
It probably took me longer to make the pattern than to make the bib, so it’s pretty simple. Let your creativity make it special for the person you are giving it to! I’d love to see pictures if you try something unique! Enjoy!
This is my Grandpuppy Daisy. She doesn’t need a winter coat but she sure loves her toys.
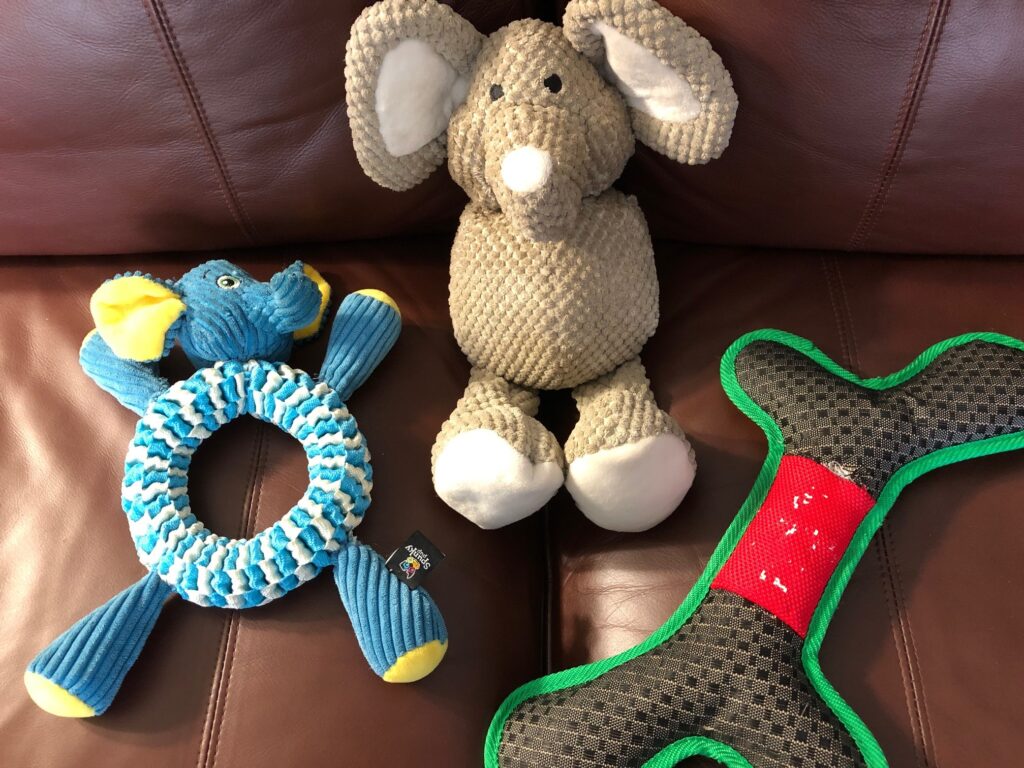
Each time I come to visit my daughter’s family I’m handed a bag of toys that have met their match with Daisy. She loves to chew them and rip them apart. Unfortunately, she sometimes eats the pieces…so the toys are put aside to see if Grandma can fix them. This last visit I collected three toys needing some TLC.
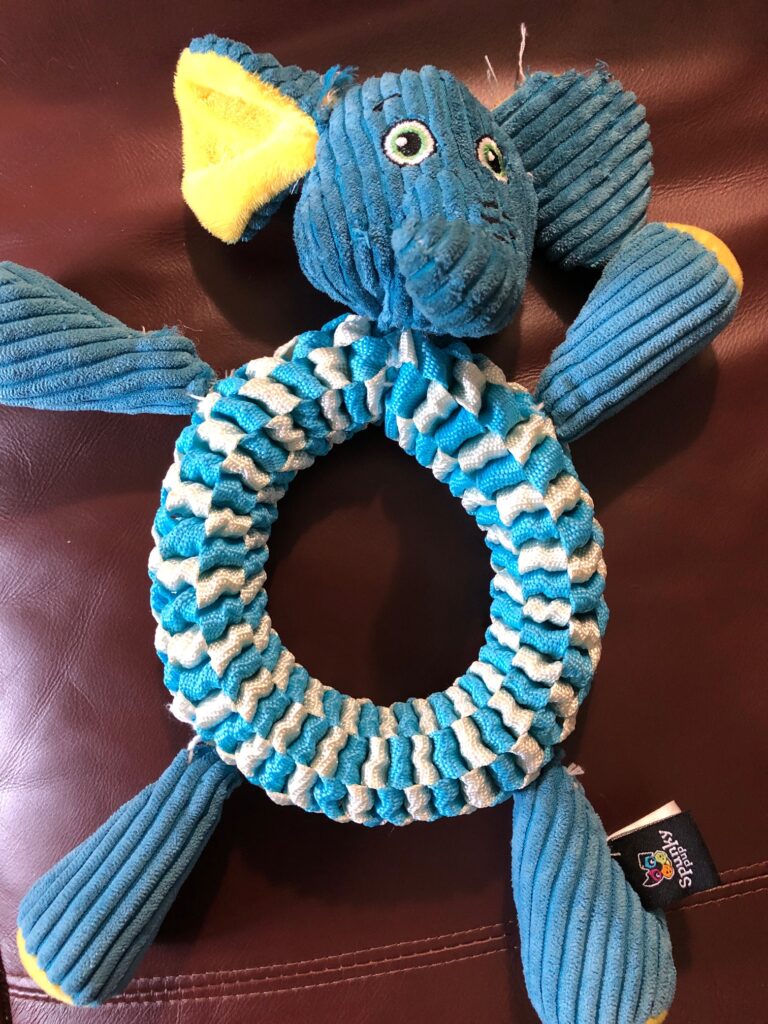
I’m amazed the variety of ways toys for dogs are made…some are like stuffed animals like a small child might enjoy. Others are tough and hard to destroy. The first one that needed help was both!
The center of the toy was very stiff and indestructible material. The head, arms and legs were soft and squishy. Of course, most of the damage was right where the soft pieces joined the tough center. One ear was also falling off. This was hard to sew by hand because while my needle would easily go through the soft material, I practically needed plyers to get the needle through the hard vinyl webbing that made up the center. I’m going to recommend when the pieces get pulled off again, they should just cut them off and Daisy will have a ring to chew on.
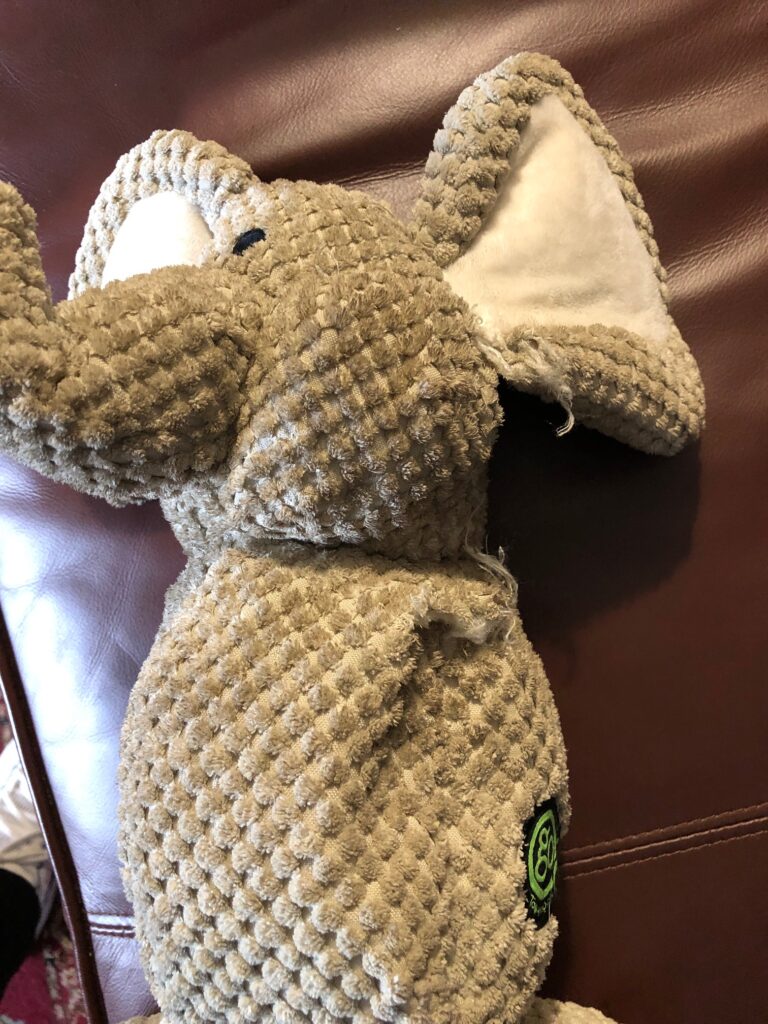
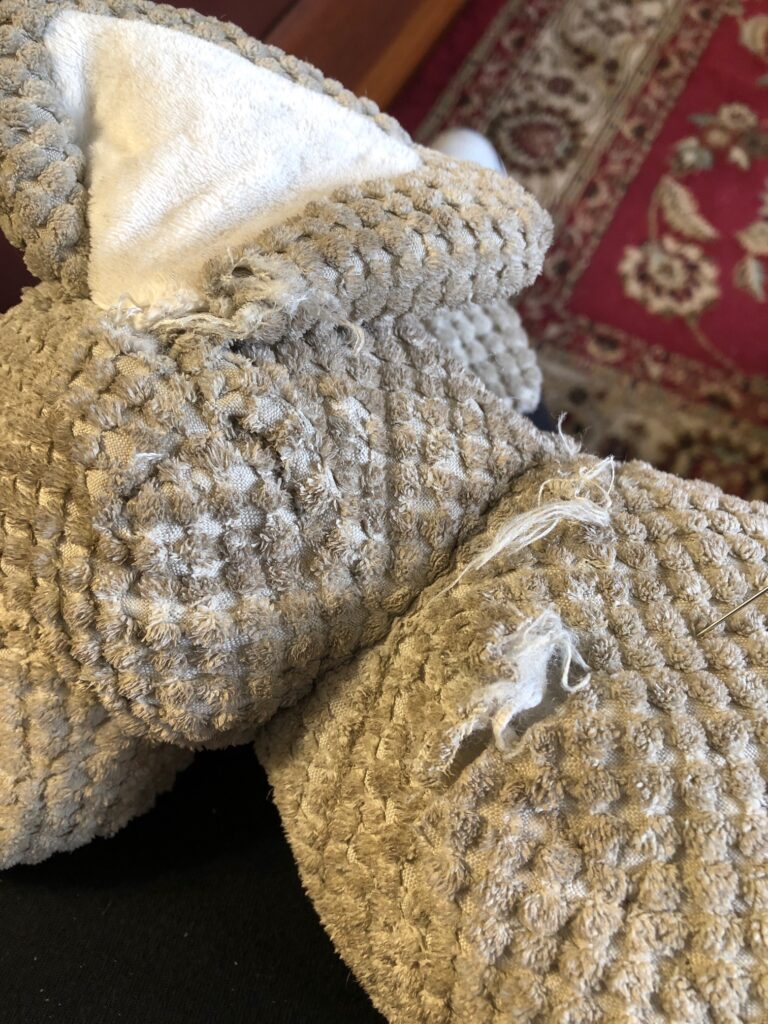
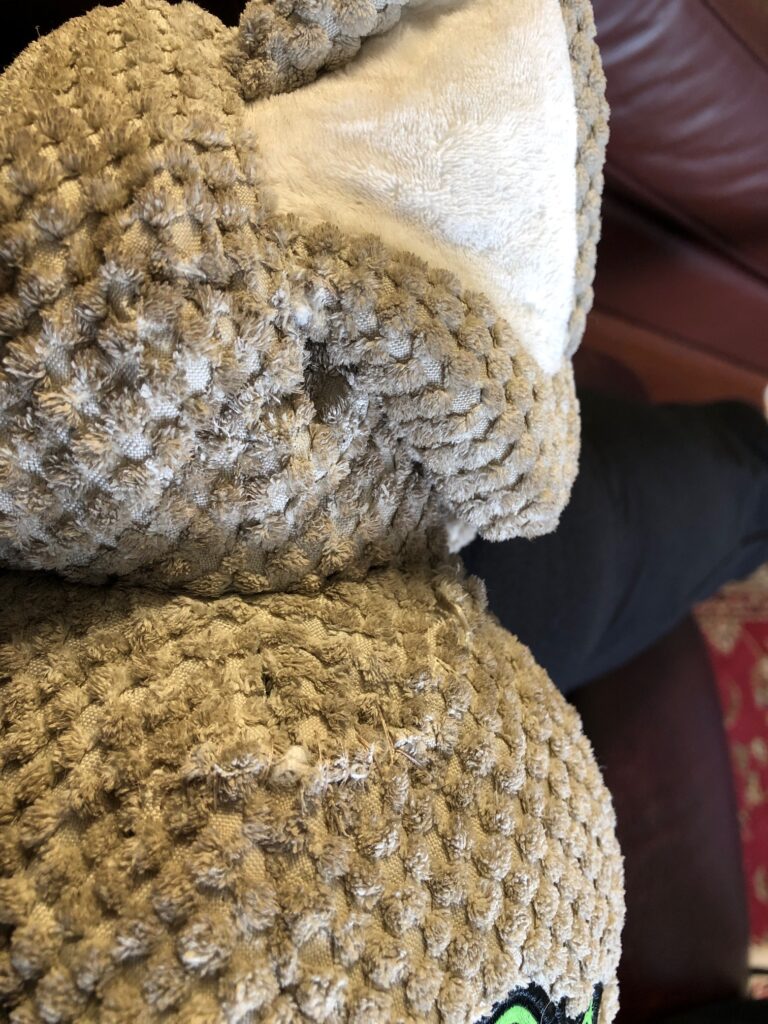
The second toy was one I’ve seen before! The arms are missing completely so the holes needed to be sewn shut. Then there were a few other holes evidently caused by Daisy’s teeth.
This animal just needed the ear reattached and the holes mended. It must be soft in her mouth because it’s well loved.
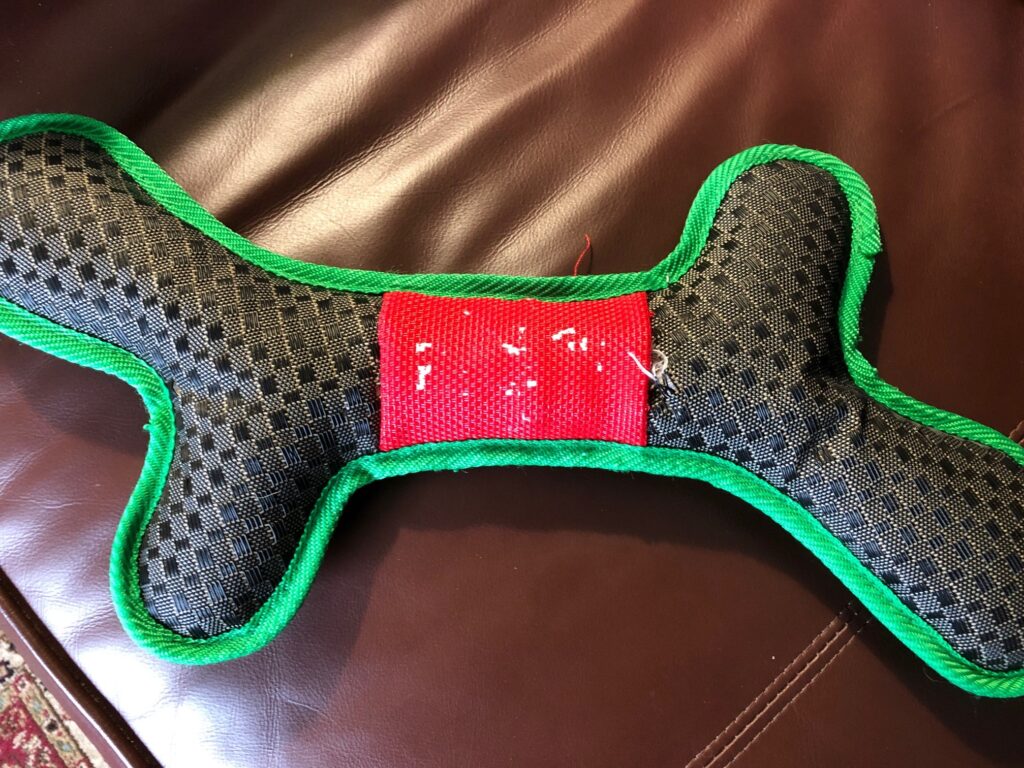
The third toy was a tough bone-shaped toy with an additional stripe of red across the middle. The fabric was like nylon webbing material that is used to make lawn furniture. That one little piece of red must have gotten caught by a tooth and pulled away…shredding some of the webbing material. This toy should also be discarded the next time it needs to be repaired.
When I finished, the toys looked better and they’re ready for Daisy!
Then, while I was watching TV to keep me entertained while sewing, I saw an ad for a new kind of toy for dogs where the ears, arms and legs of a toy were attached with Velcro. They are from Tearrible Instincts. I found them online. They are a new company, https://tearribles.com. I checked them out to see exactly how they attached the arms and legs.
They had 4 different “animals” for sale.
Here was a picture of how they came apart, but I really can’t tell how they attach. A short video is on the website showing how they are put back together…each arm fits into a pocket on the side of the animal, so the arms have to be tucked into the pocket where the matching Velcro piece is attached.
I ordered two of the toys and maybe I can figure out how to make them myself before I give them to Daisy for Christmas! Enjoy!
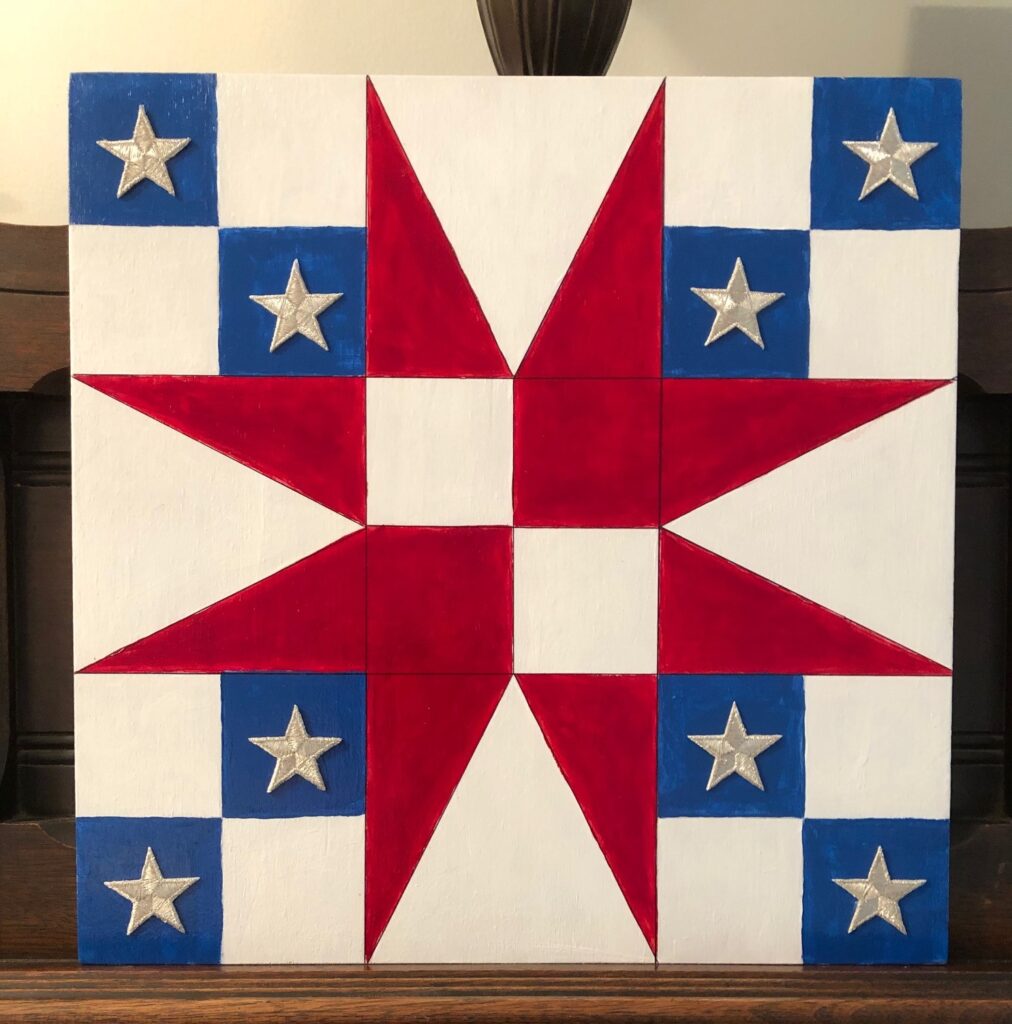
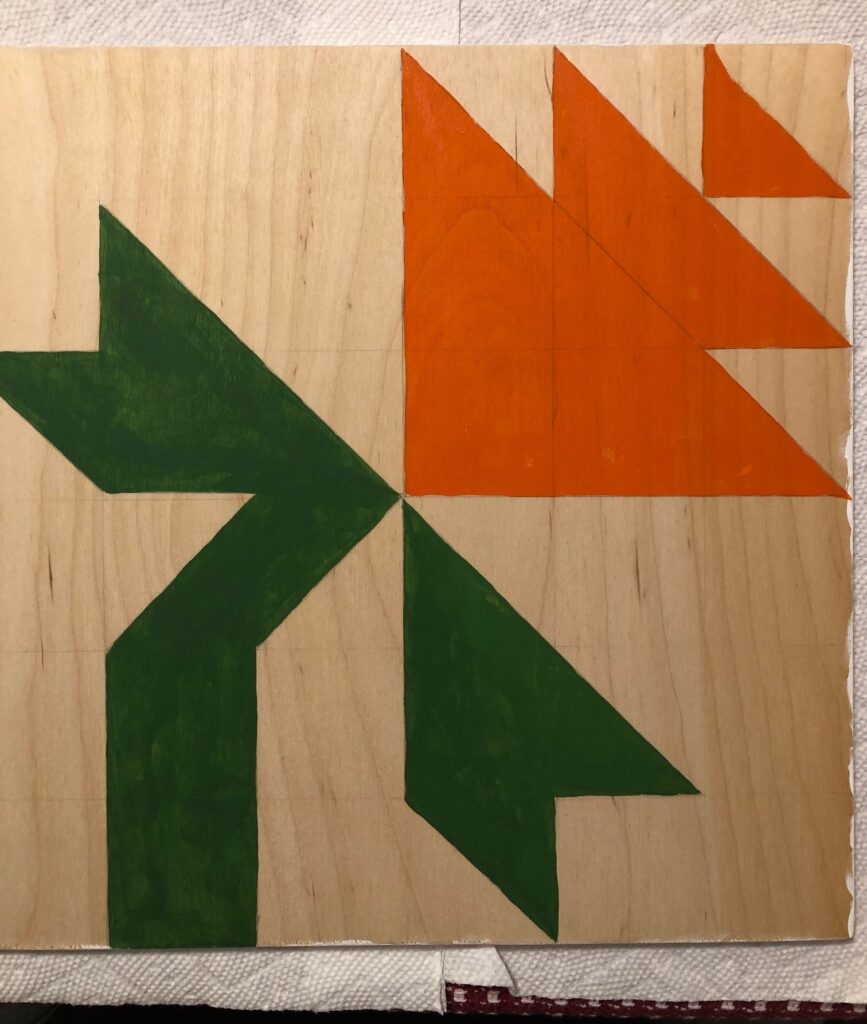
This week I was determined to choose a new quilt block that I could paint on wood. I wanted something different and colorful for Autumn. I enjoyed painting my first two blocks and you can see them below. If you want to read how I made them, click on the link under each picture.
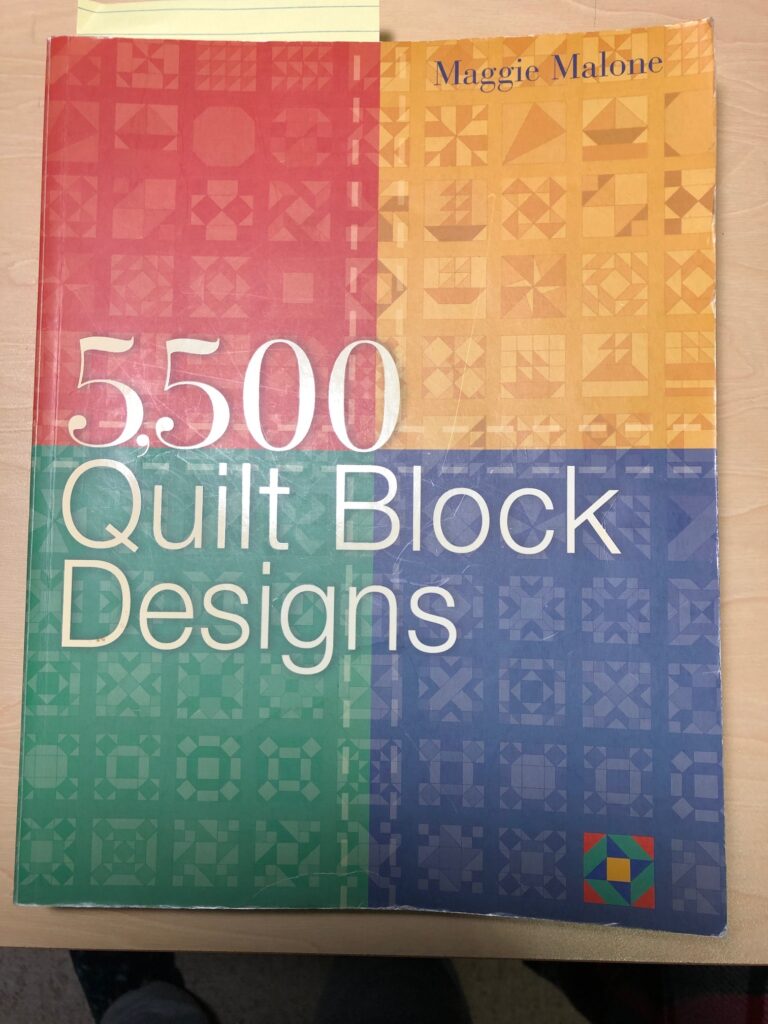
For the Autumn block I wanted something totally different. I pulled out my favorite book for ideas:
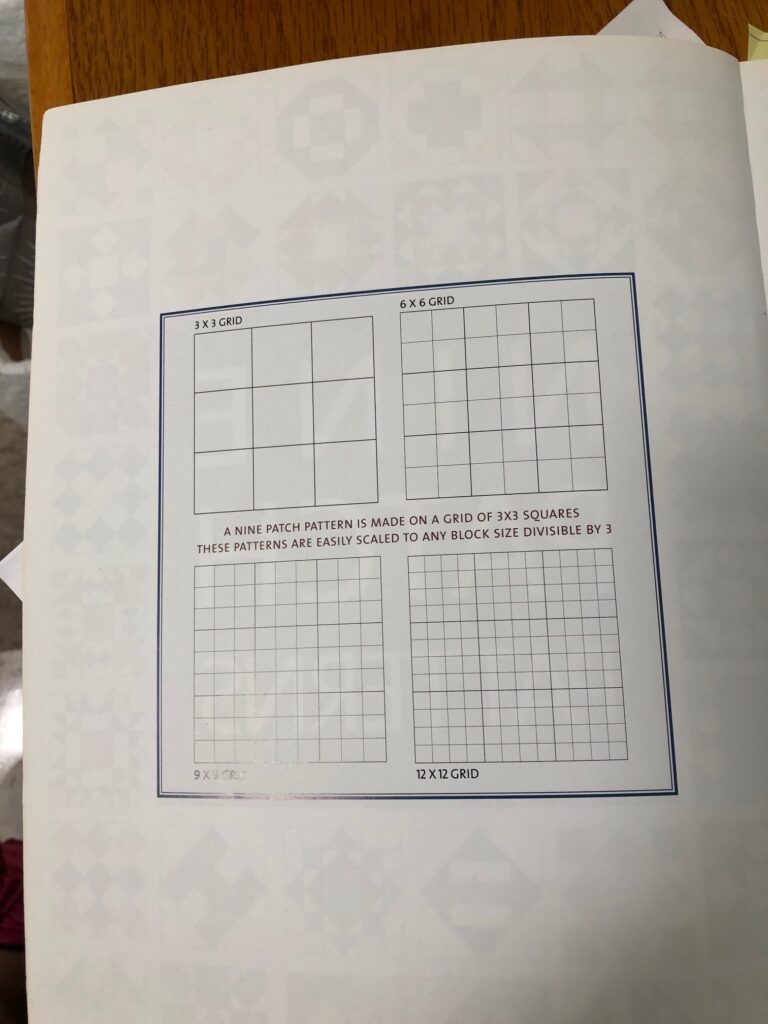
This book organizes quilt block designs by the grid they are based on:
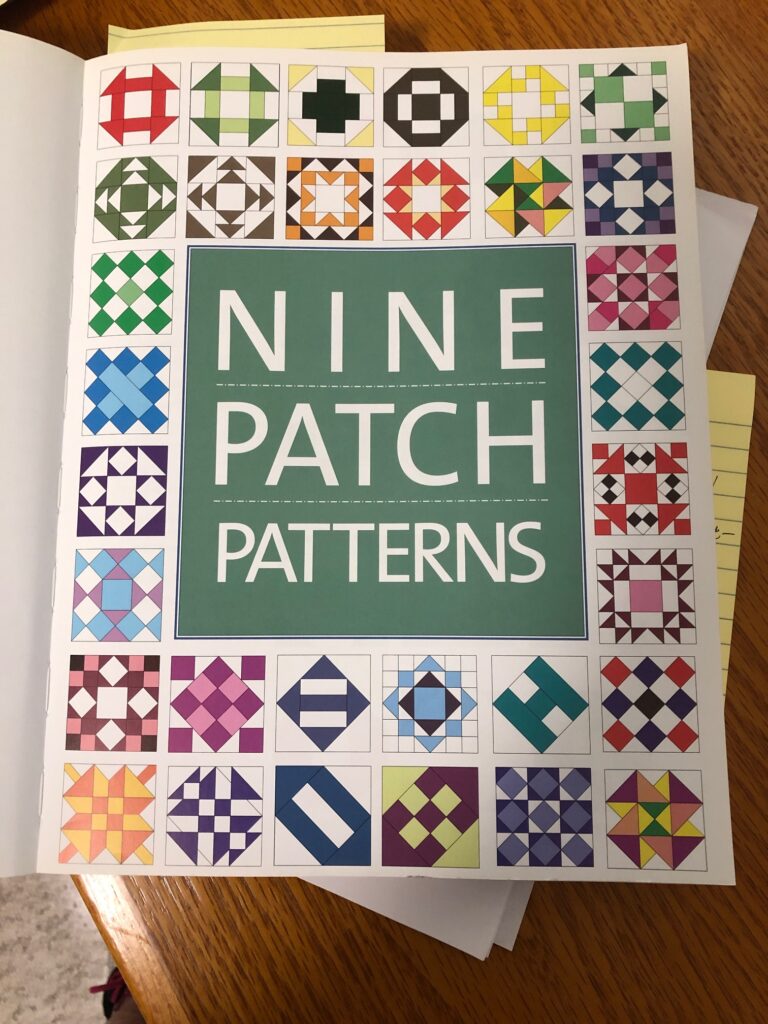
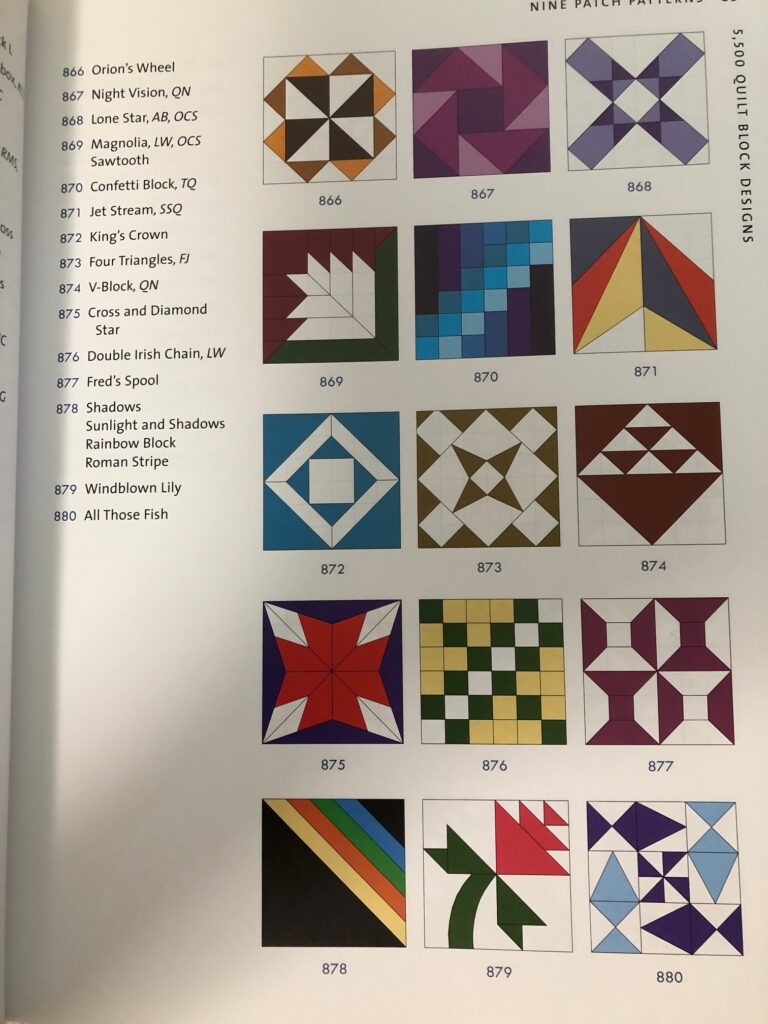
And followed by pages and pages and pages of sample blocks! Thank goodness there is an index, by names, of all the patterns. I usually start by just browsing through the book. So many choices!
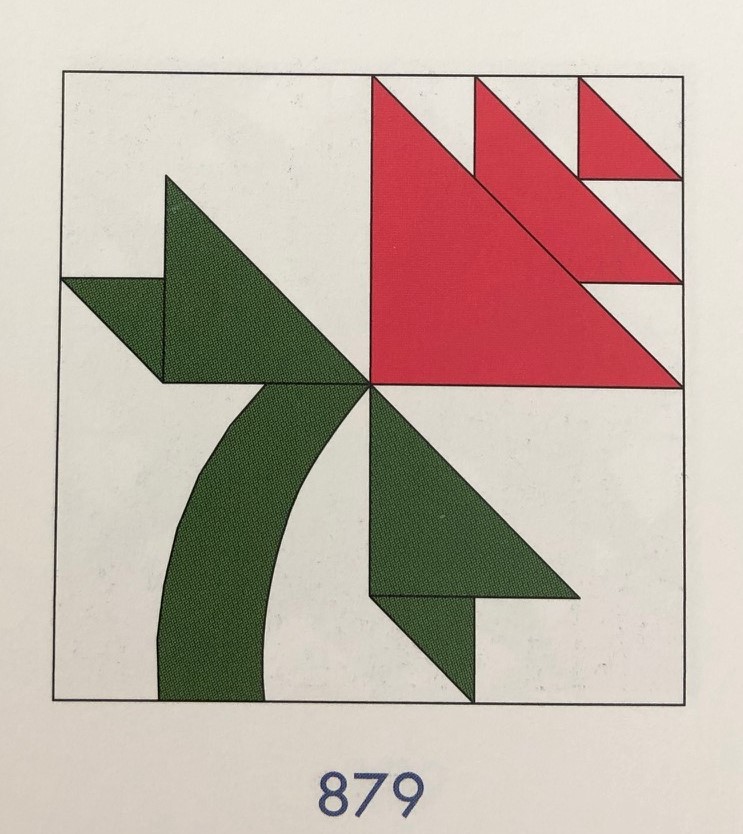
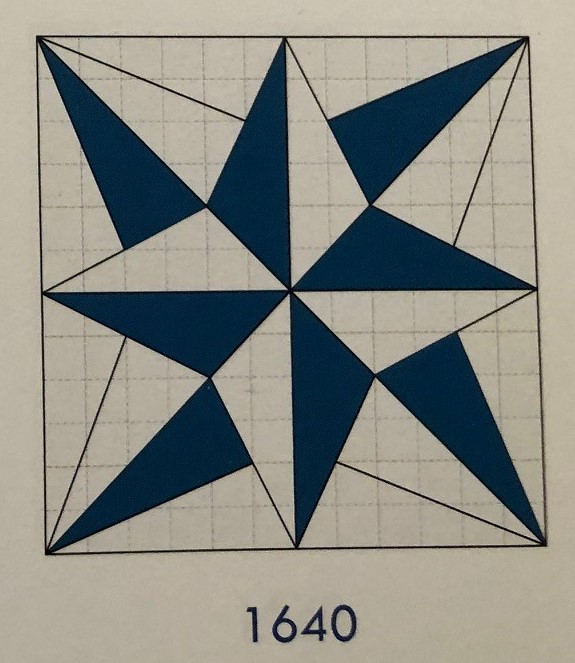
I ended up choosing this block:
This was based on a 4 x 4 grid.
Next to the picture was a number and the name was in the list to the left.
I really liked how different the block was and figured I could make the flower in orange, which would make me think of all the autumn flowers I see right now. I don’t think it matters that it’s called a “Lily”–I can call it anything I want!
Making the Sample Block
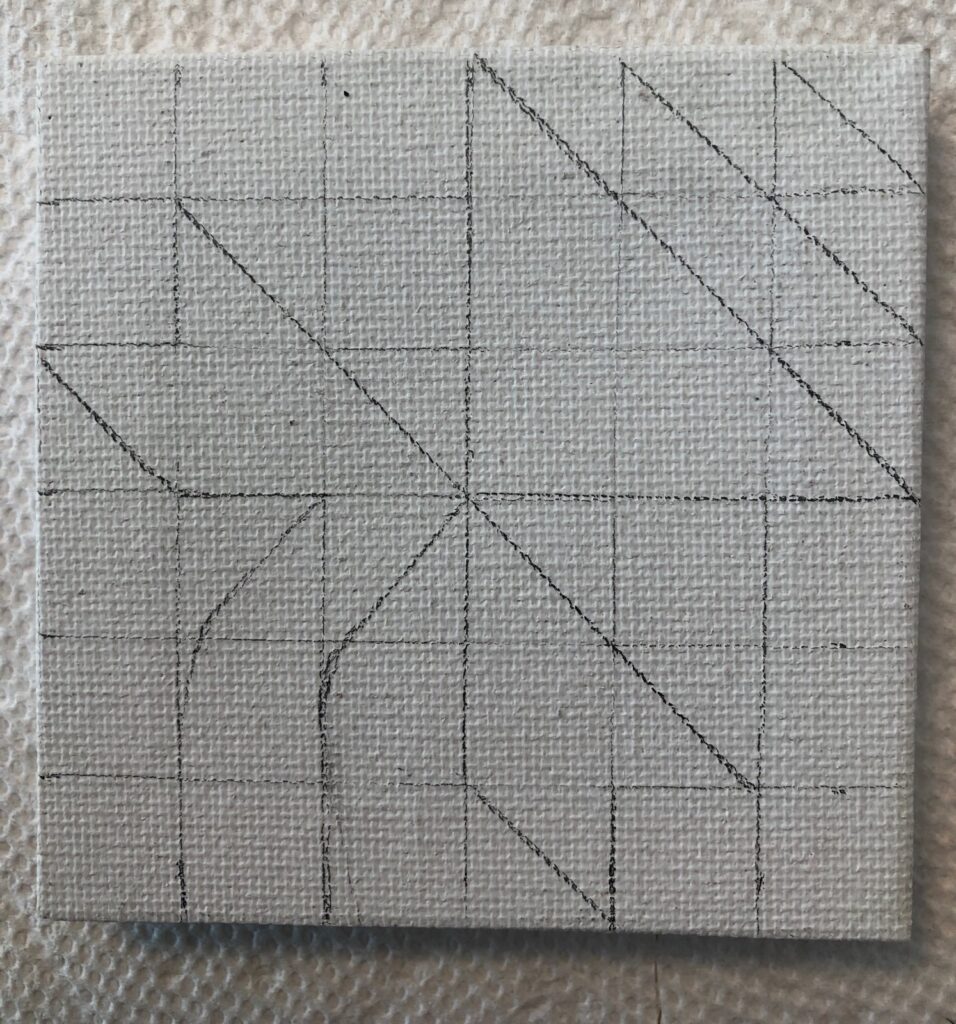
I like to start with a 3″ x 3″ tiny canvas. It helps me visualize the layout on a small scale. I don’t worry about making mistakes or erasing pencil marks. When I make this sample, I can decide if I like the colors I’ve chosen. It’s much easier to throw it away and start over if I need to.
I can see the extra internal lines are not necessary and distract from the pattern. I do like the orange and green.
Making the Full-Size Block
Step 1: I pulled out the 12″ x 12″ piece of 3/8″ plywood that Bert had cut out for me and sketched out the pattern with a pencil.
I did erase the internal lines because they will show through the white and orange paint.
Step 2: I flipped the wood over and painted the back and edges white just to protect the wood from the weather.
Step 3: I painted the first coat of orange and green. I can still see the internal lines so a second coat is necessary.
I used a fine point marker to outline the basic shapes. I like it!
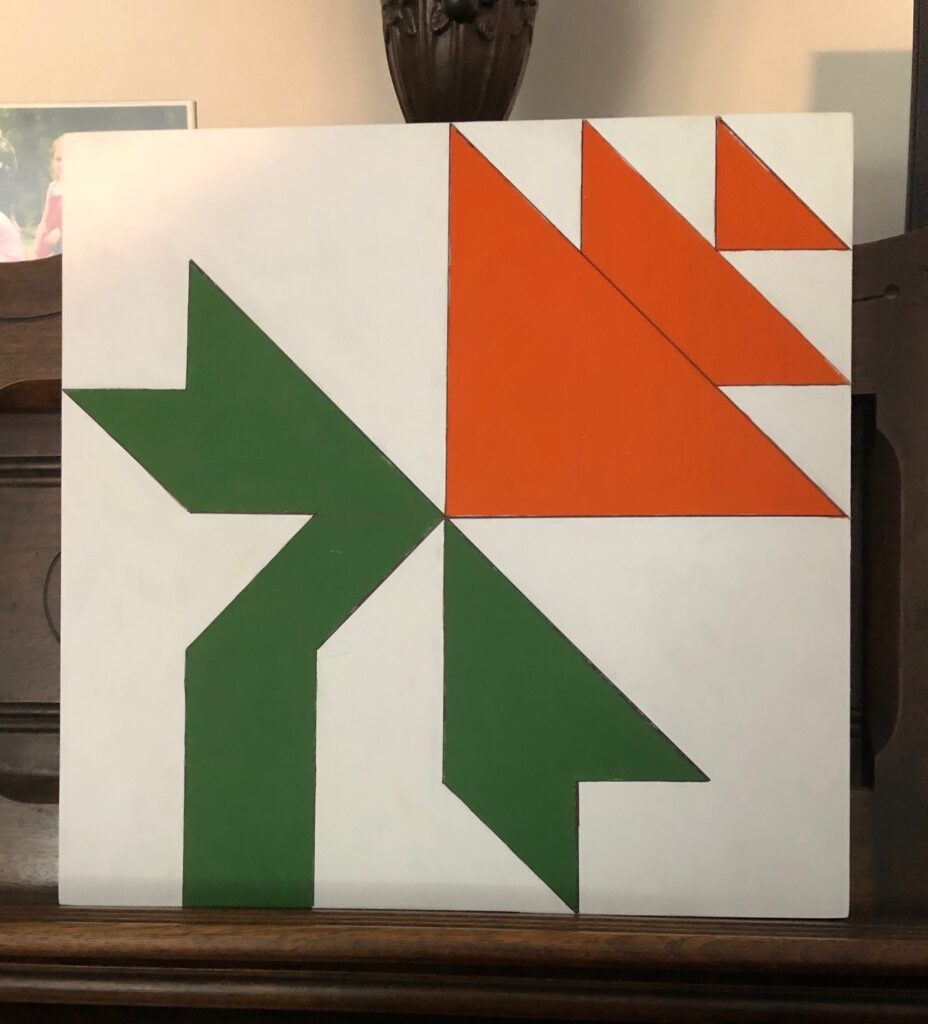
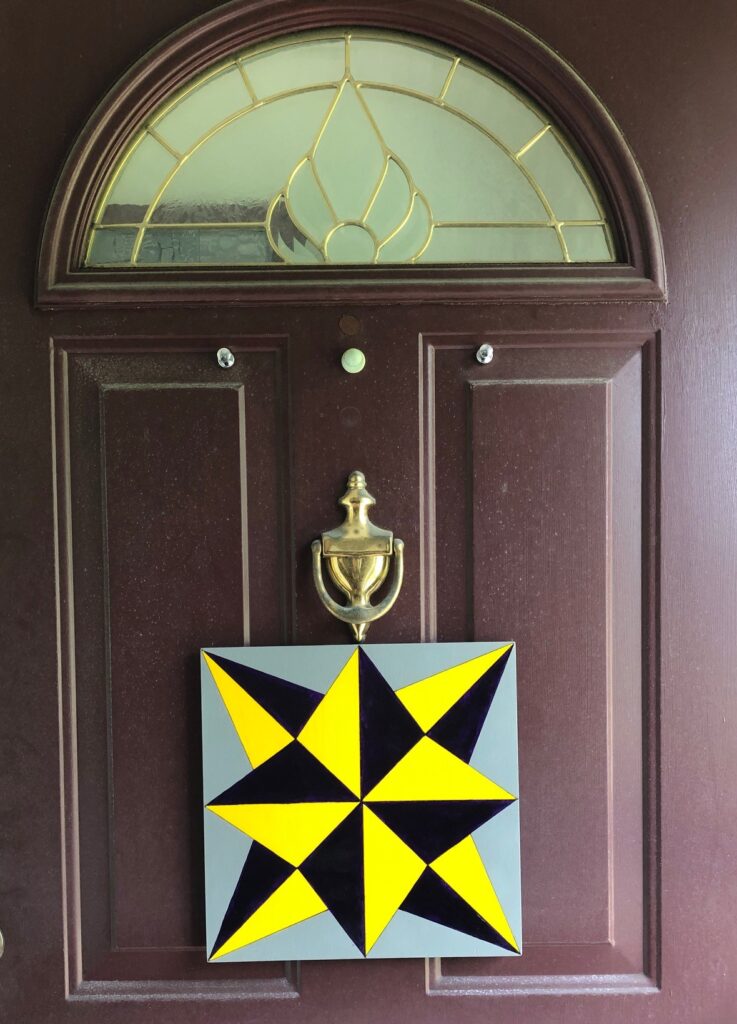
Final Step: I will spray both sides of the block with a clear acrylic spray so it can handle the weather on the front door. Finally, Bert will attach magnets to the back so it will stick to the front door! Yea!
I think this block will be cheerful this fall and will show through the screen door well. Don’t be afraid to experiment!
It seems I’ve been making several items that are dispensed with a roller ball…from perfume, to nail serum, to serum to soothe bug bites. I thought it would be easy to pull out my notes on making a roll ball holder to protect them. The notes were in the folder with my sketch of how to make a lip balm holder, so I pulled them out.
While the lip balm holder was pretty simple, and I managed to make a bunch at the time, the instructions were sketchy. Back in April of last year I did a post about it and had taken pictures so the instructions made sense (https://marykisner.com/how-about-a-holder-for-the-lip-balm/). At the time, I also made a few roller ball holder for a friend for her essential oil business.
However, when I pulled out the notes for the roller ball holder the instructions were VERY sketchy so I spent all day trying to reconstruct how to make them. In the end, it isn’t hard but things had to be done in a certain order or the finished product looked really messy. (The first attempt ended up in the trash!)
This time I took lots of pictures while I made the second one. When I was finished, I tossed my original notes and will file a copy of this post as my new instructions! Enjoy!
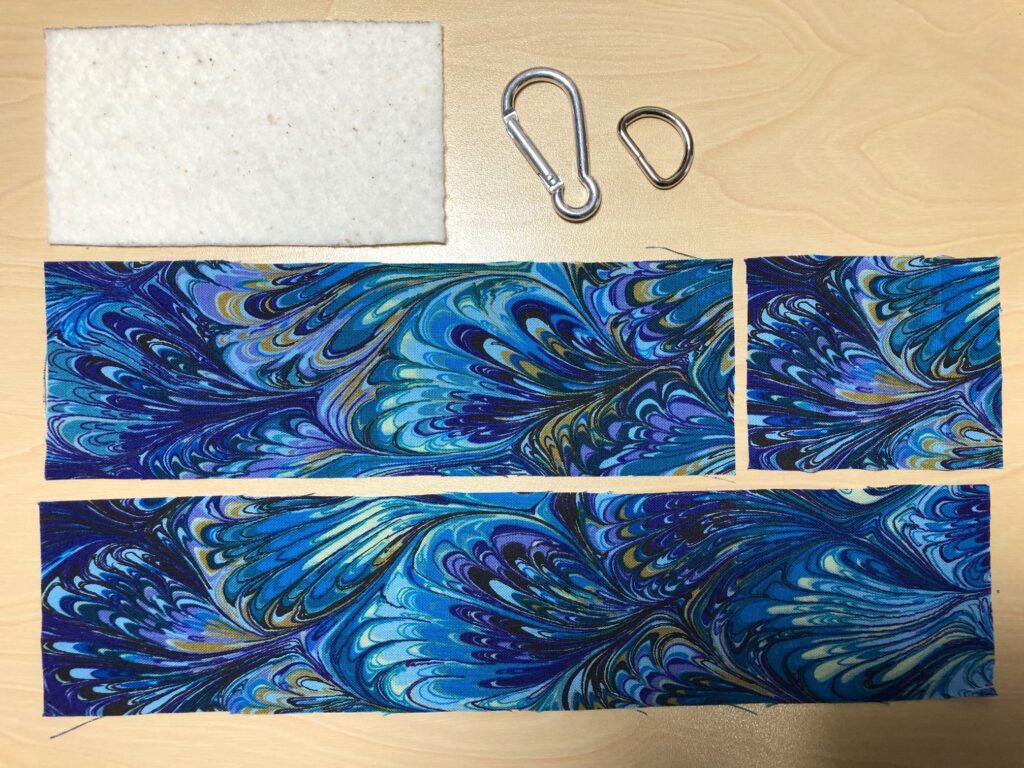
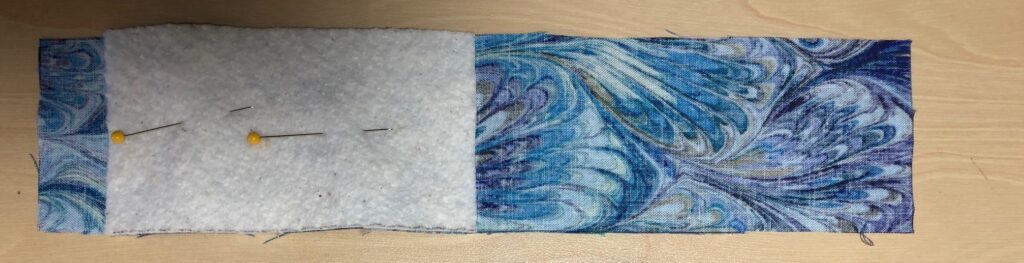
Directions to Make a Holder for a Roller Ball
Assemble Materials:
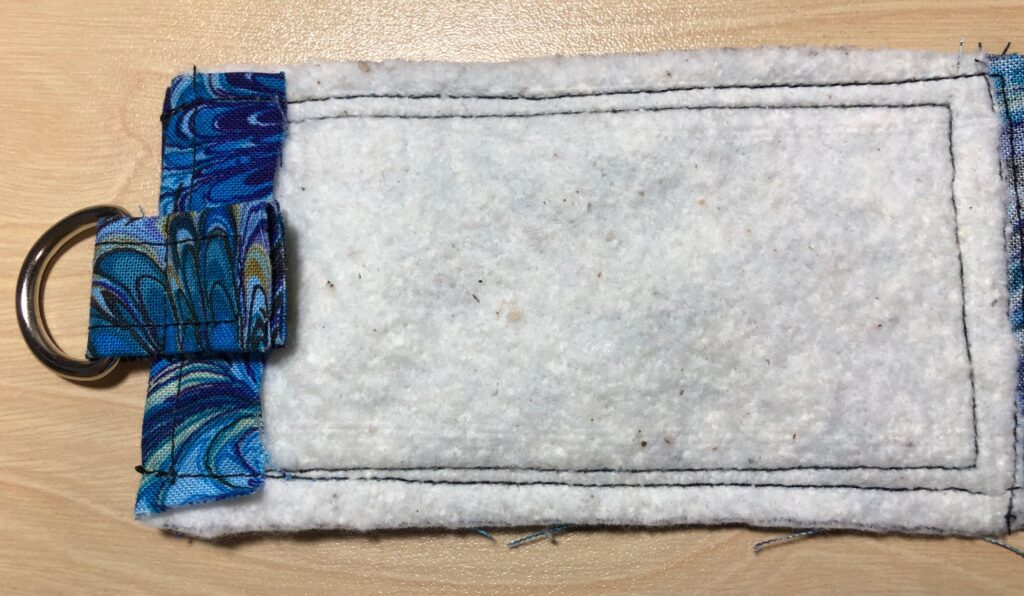
1 – 11″ x 2 1/2″ Cotton fabric: Outside fabric
1 – 8″ x 2 1/2″ Cotton fabric: Pocket fabric
1 – 3 1/2″ x 2 1/2″ Cotton fabric: D-ring strap
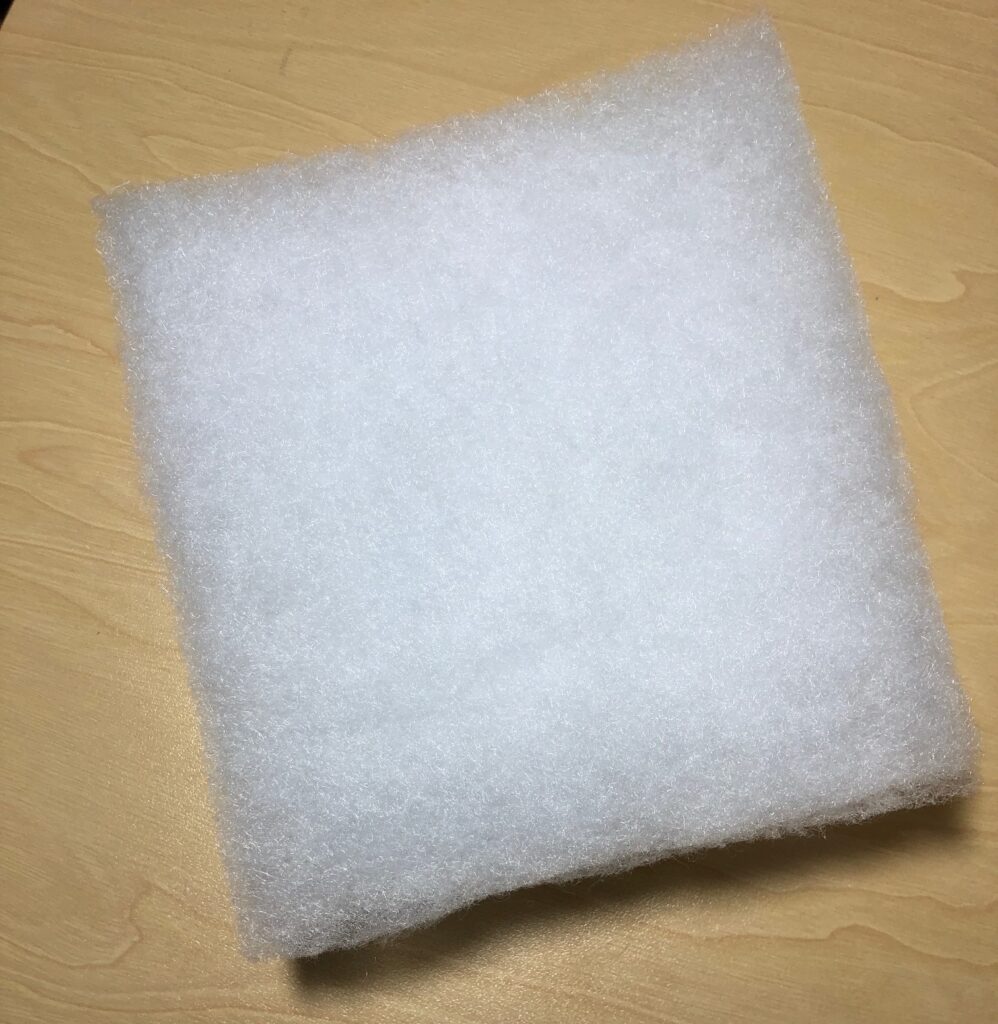
1 – 3 1/2″ x 2 1/2″ Thin batting
1 – 3/4″ D-Ring
1 – small carabiner clip
2. Sew batting piece to wrong side of outside fabric, lining it up with the center fold. Stitch in place.
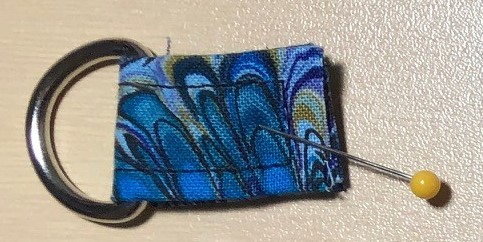
3. Fold D-ring strap fabric, long sides to the center, and stitch edges. Insert strap through the D-ring. Stitch close to the ring.
4. Fold down the top edge over the batting, apply D-ring strap and stitch to the folded edge.
5. Finish the opposite edge of the outside piece by folding the edge 1/4″ and stitching.
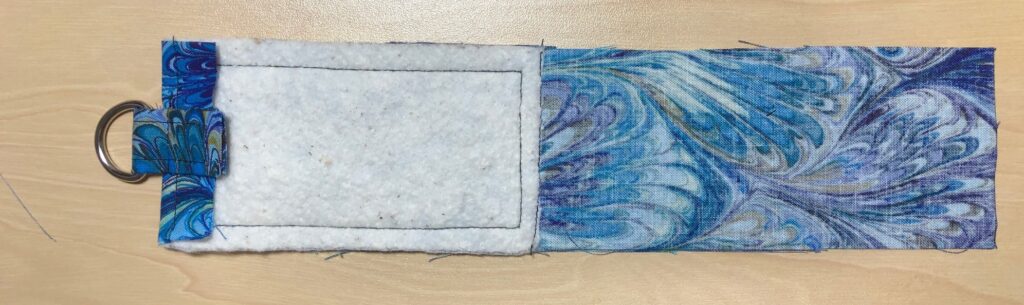
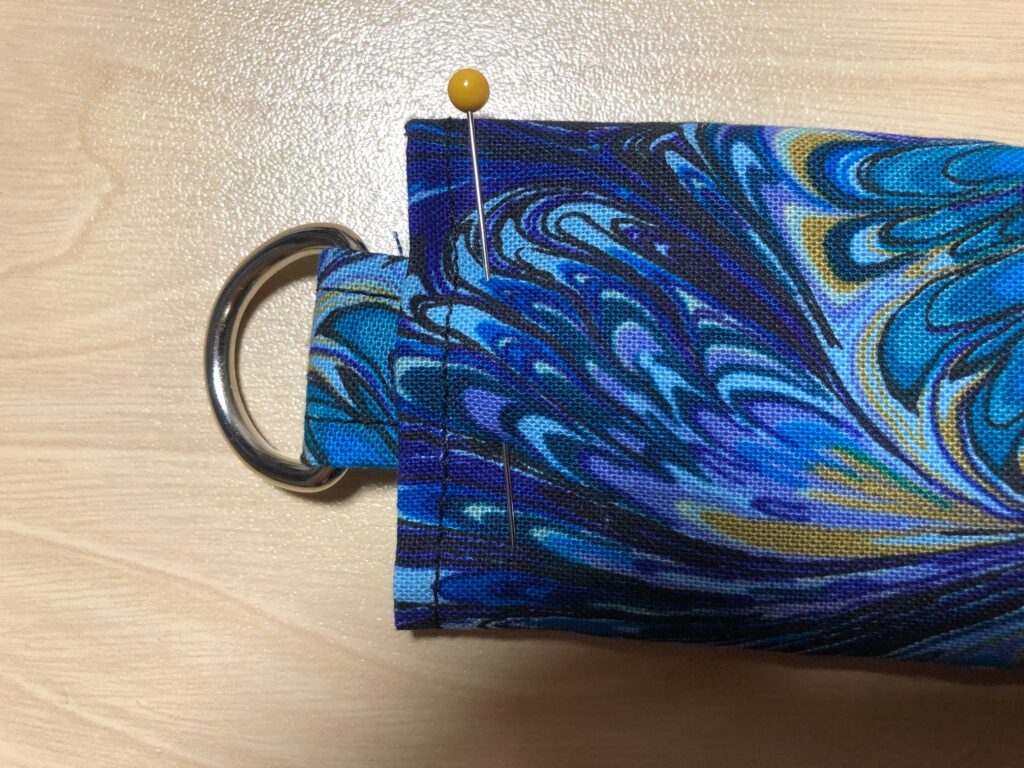
6. Turn the outside fabric piece right side up and apply pocket piece with folded edge toward the D-ring and the raw edges at mid-fold of the outside piece.
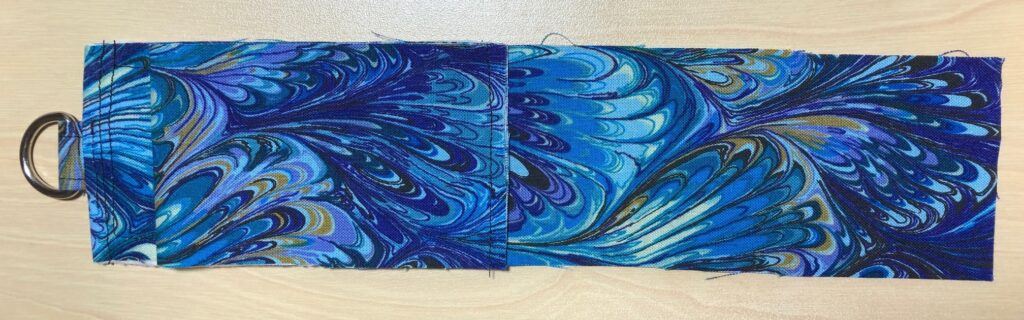
7. Fold the outside fabric right sides together, matching the hemmed edges. Stitch around 3 sides, leaving the edge near the D-ring open for turning.
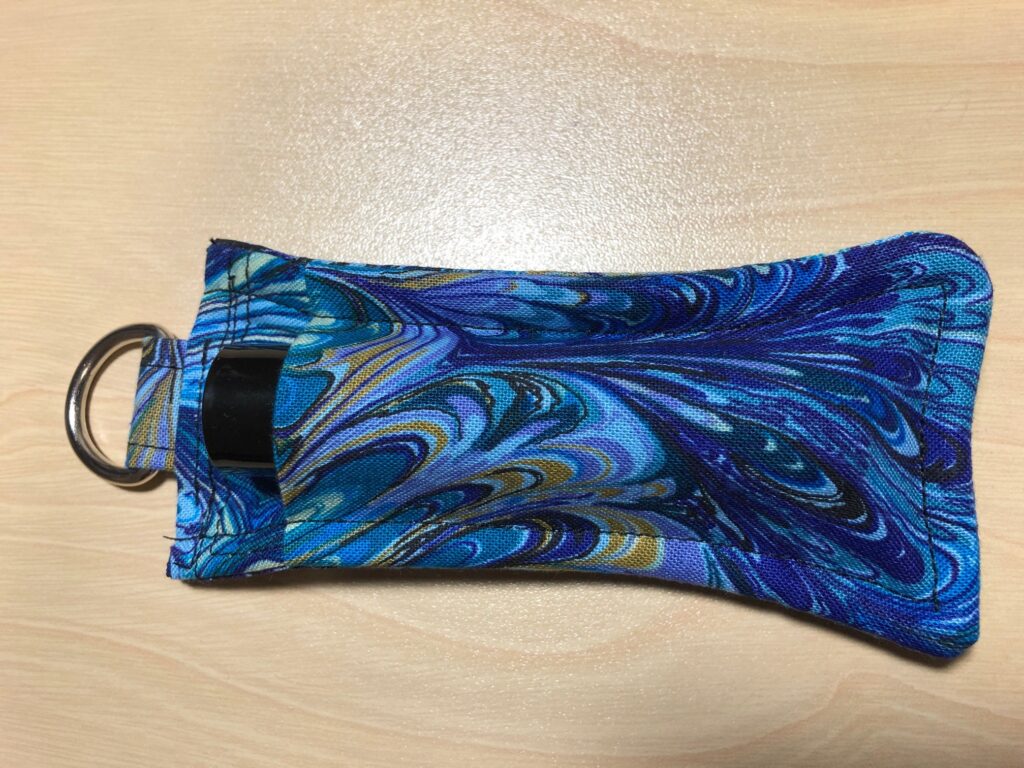
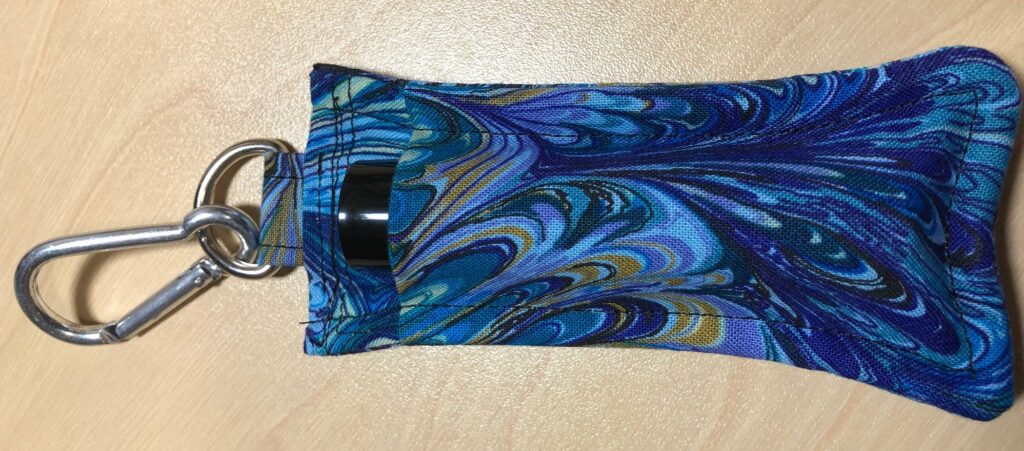
8. Trim corners. Turn right side out.
9. Top stitch around all four edges. Insert roller ball into pocket.
10. Attach carabiner clip.
So that’s how to make a roller ball holder…in case you want to make one yourself! See the link above for the instructions to make a lip balm holder.
Recently, I was asked about how I got involved with making memory bears; and then this morning, Facebook reminded me that one year ago I posted the story with instructions about making bears. If you did not have a chance to read that post, I thought I’d post the link to that story. (https://marykisner.com/making-a-memory-bear/)
Making memory bears is more about saving a memory than creating a fancy stuffed bear. Almost any stuffed pattern can be used…it’s the fabric that matters. This could be from a favorite shirt, pajamas or bathrobe worn by a loved one.
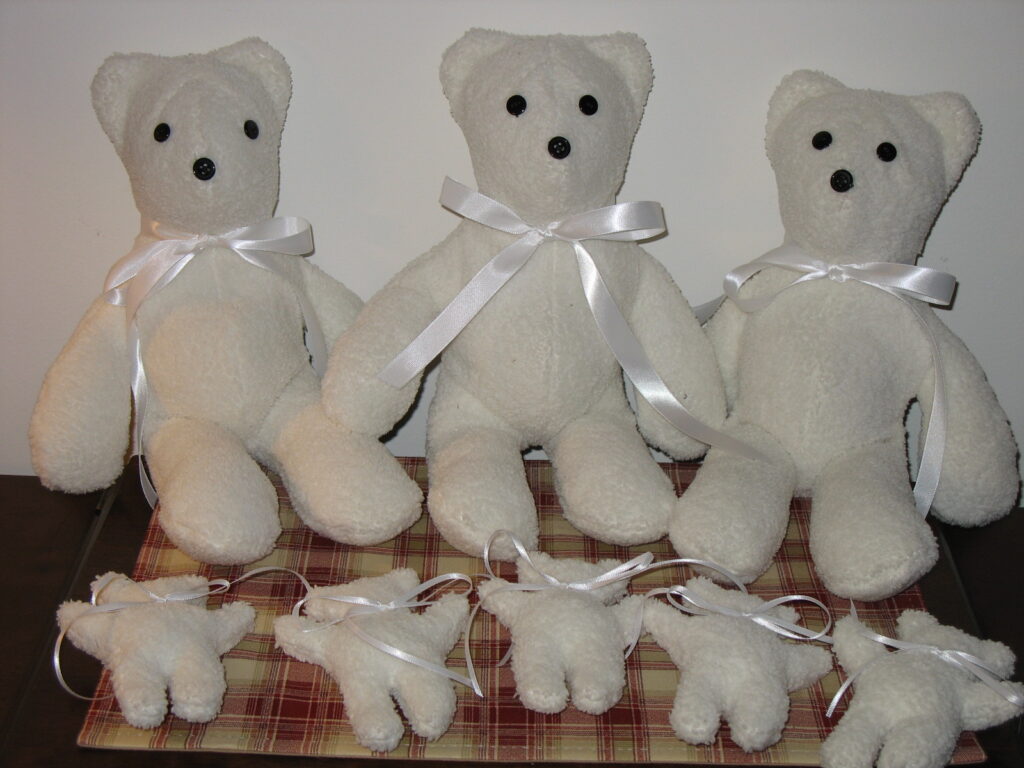
This is the first set of memory bears I made from a young mother’s bathrobe. Really touched my heart!
My first bears were made with a simple pattern. Then I chose a different pattern that gave a little more shape to the bear. I love being able to add a little heart button to the foot of a bear, and simple buttons for the eyes and nose keep it looking homemade. I have had to be mindful to ask if the bear will be used as a toy by a small child considering the risk of a child choking on a loose button. Sometimes I have had to use no buttons at all so it’s safe.
Please enjoy a few of the many pictures of bears (and dogs!) I’ve made over the years and see the instructions how to do it yourself. It has been a while, but I have fond memories of making memory bears. Enjoy!
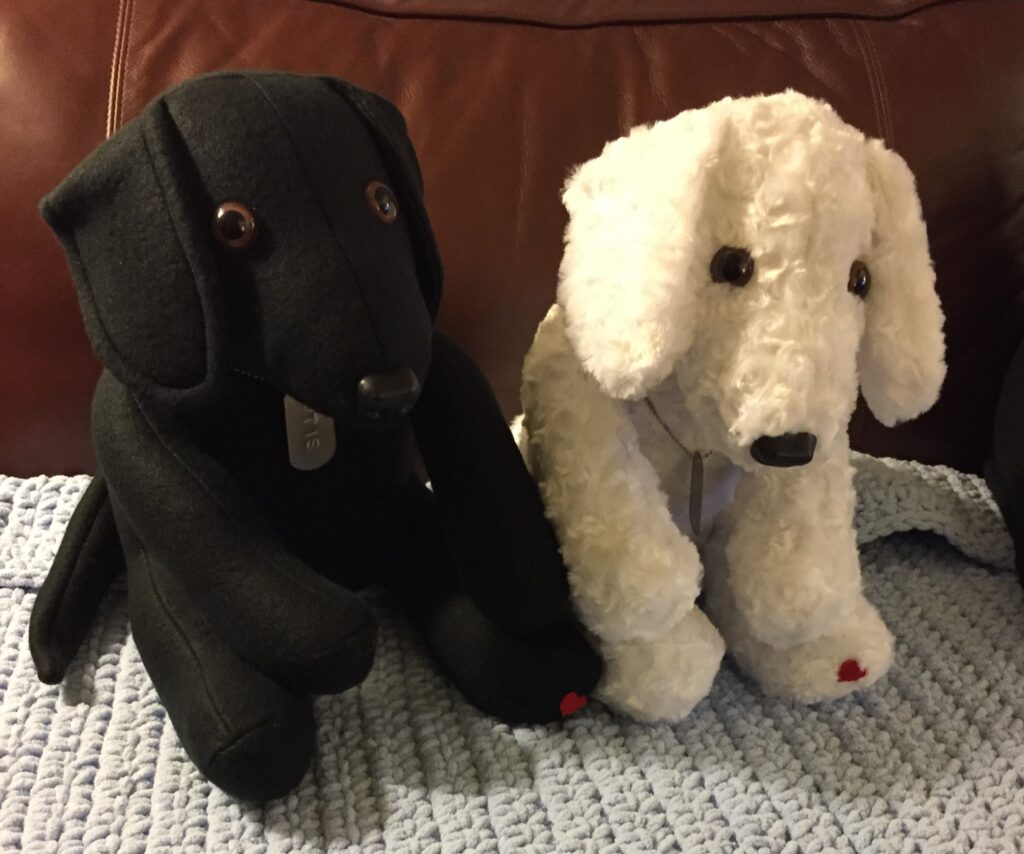
I adapted a pattern for a stuffed dog so I could honor my daughter’s dog Otis and his best friend Max. Bert also stamped “dog tags” with their names.
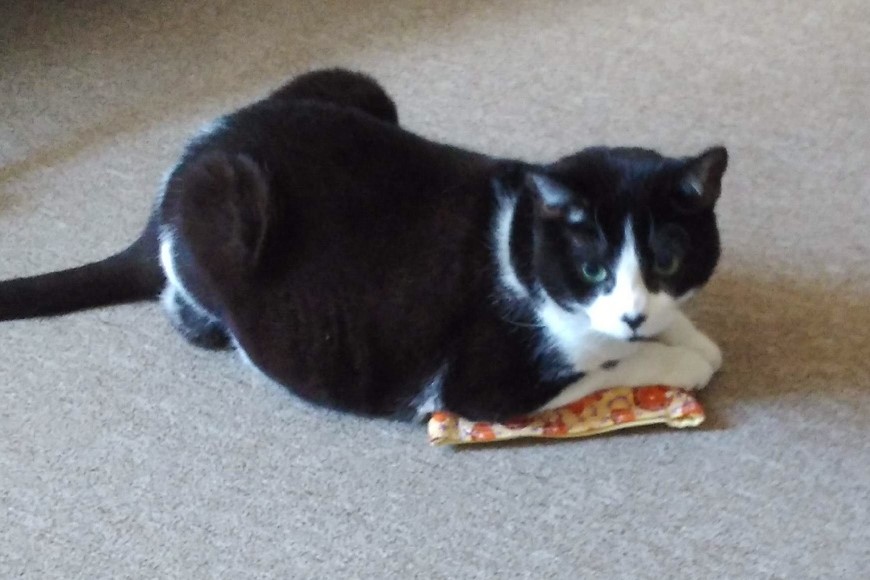
To give my hands a rest from peeling apples, making pizza sauce and canning relish this week, I worked on a simple sewing project for a friend’s cat. I don’t have a cat and can barely pet them because of allergies, but I can sew for them!
One thing my friend discovered was that her cat was endlessly entertained with a little catnip in a toy. A few years ago I made a small pillow with a removeable cover so a little catnip could be tucked between the pillow and the cover. More can be added as needed and the cover can be washed separately. It was time to make a new one!
Here is Purrs with her favorite pillow.
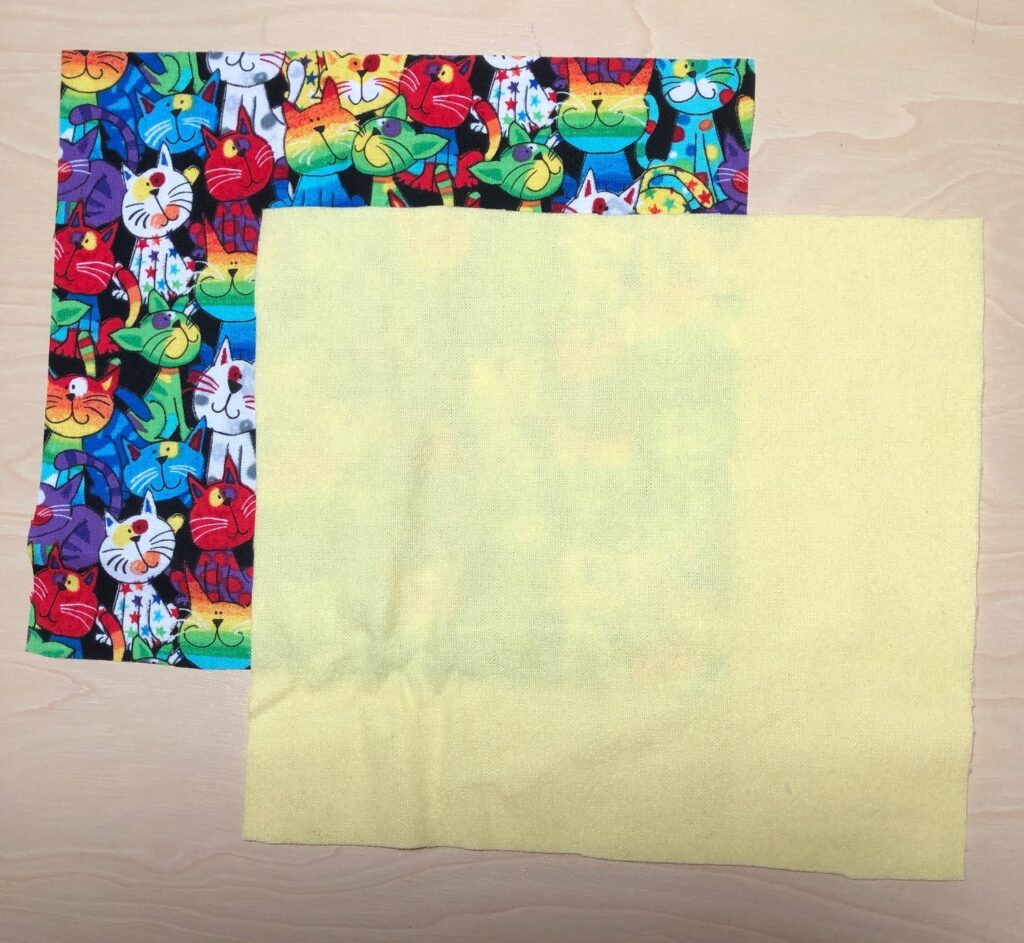
I never had a pattern when I made the original one, so this time I actually measured and took pictures in case you’d like to make one yourself!
Making a Catnip Pillow
Materials
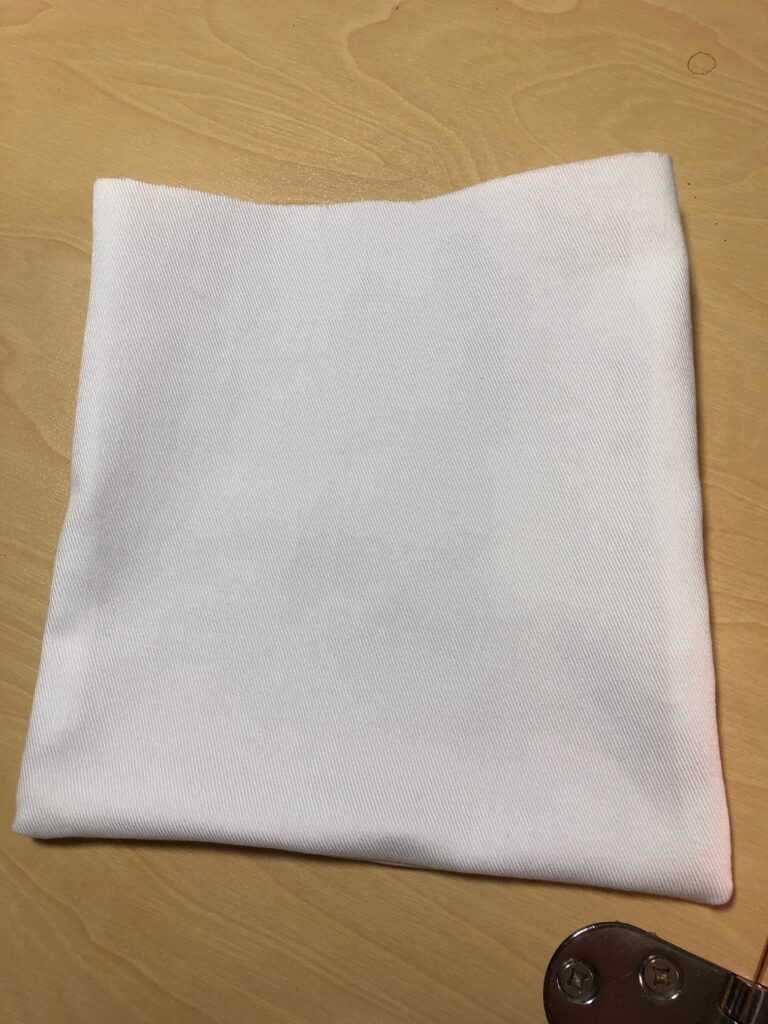
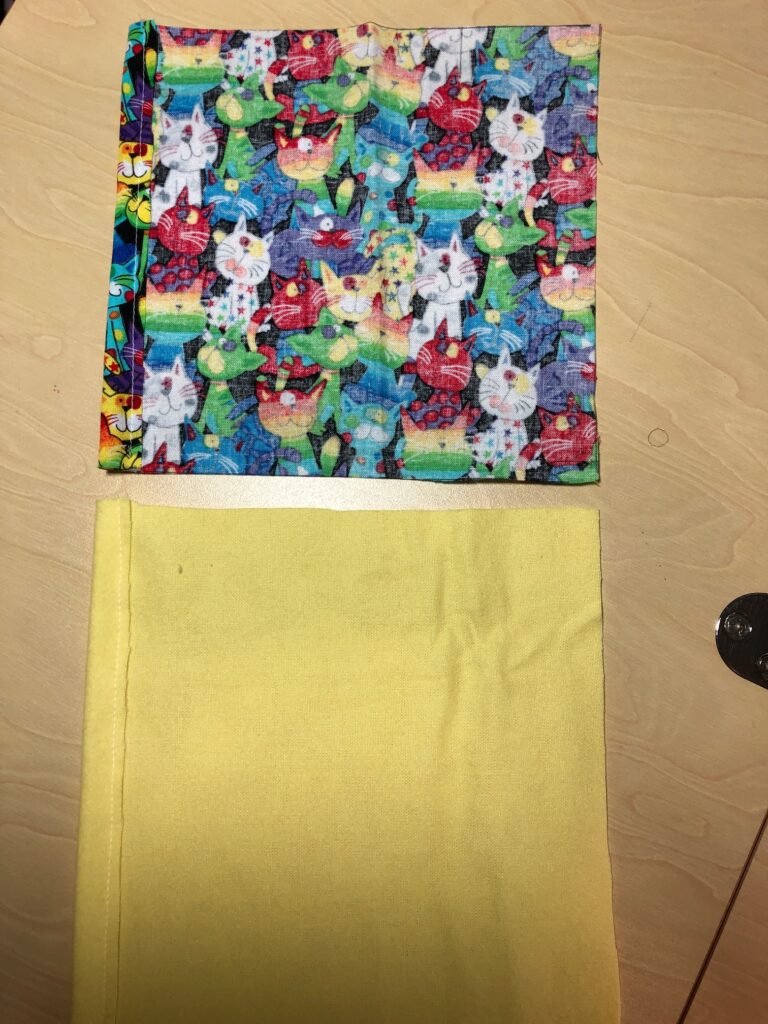
1. Two small pieces of cotton fabric, one made of flannel to make the cover; each 7″ x 8″.2. Two pieces of cotton fabric (any color) to make the inner pillow; 7″ x 8″.3. One strip of hook/loop fastener, about 1/2″ x 6″. (My picture shows two 3″ pieces…it’s what I had!)4. Stack of 3-4 quilt batting pieces, each 6″ square, or poly stuffing to fill the small pillow.5. Small amount of powdered catnip. (Catnip can be purchased at Amazon.com.)
Making the Pillow
Step 1: Sew the pillow pieces, right sides together, leaving one end open. Turn the pillow right side out.
Step 2: Insert the stack of batting pieces or poly stuffing to make a soft pillow. Turn the raw edges and sew the pillow shut.
Step 3: Set the small pillow aside.
Making the Case
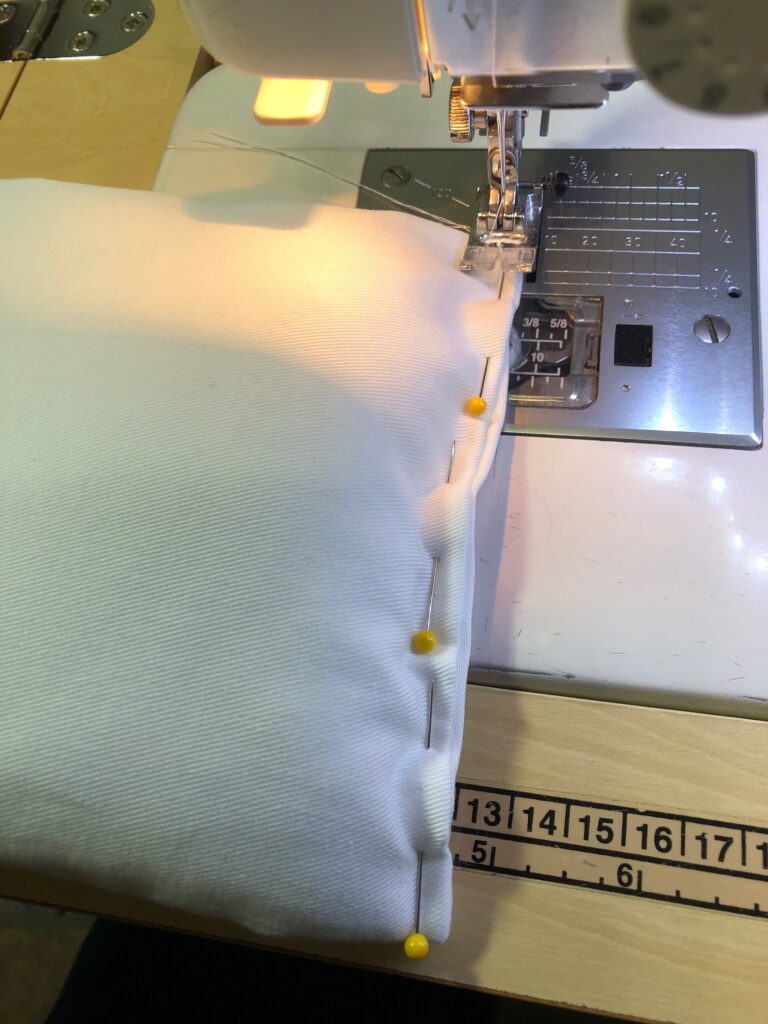
Step 4: On the short ends of the case fabric, fold 1/2″ and stitch.
Step 5: Sew the Velcro strips on the wrong side of each piece…on top of the finished edges.
Step 6: With the case pieces, right side together, sew around the three sides, leaving the Velcro edges open.
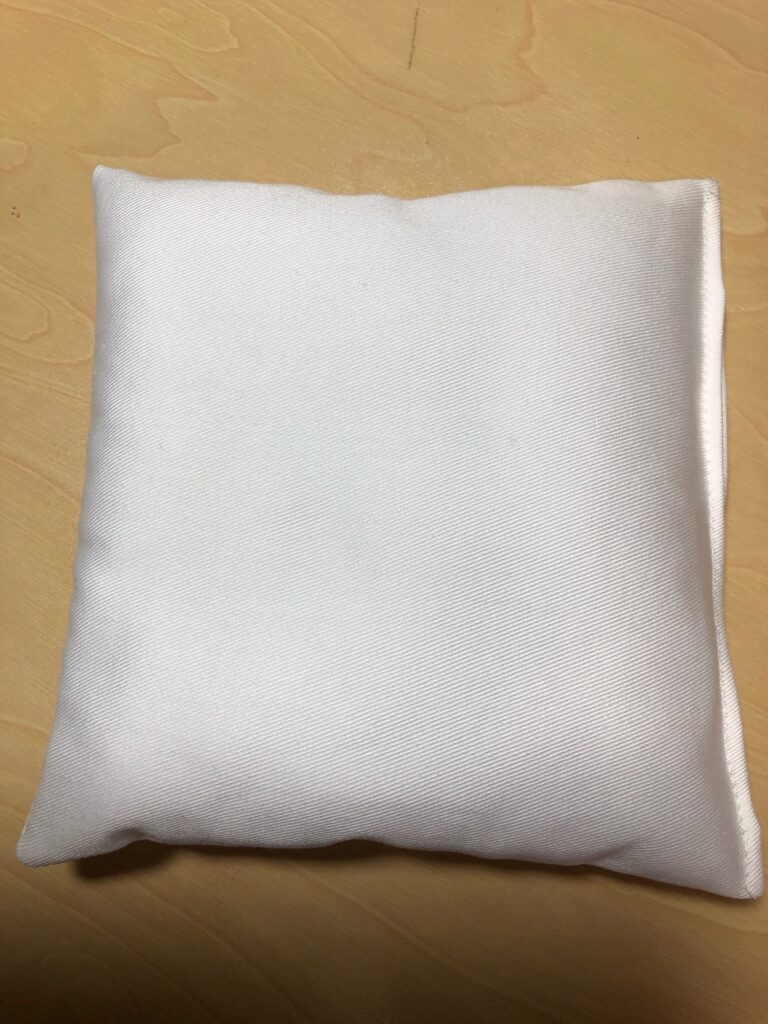
Step 7: Turn the case right side out. Insert the pillow.
Step 8: Insert a small amount of powdered catnip between the case and the pillow, press the Velcro together and share with your cat!
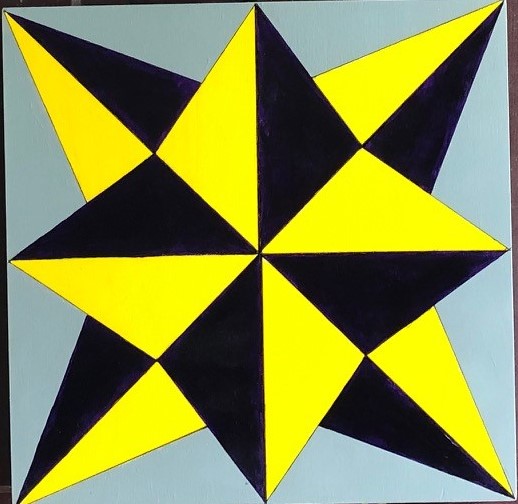
The next one I chose has several names. In one book it’s called Blazing Star, and in another it has had 5 other names!
I guess I’ll go with Blazing Star or Flaming Star. It appealed to me in its simplicity and made me think of all the stars on a summer night!
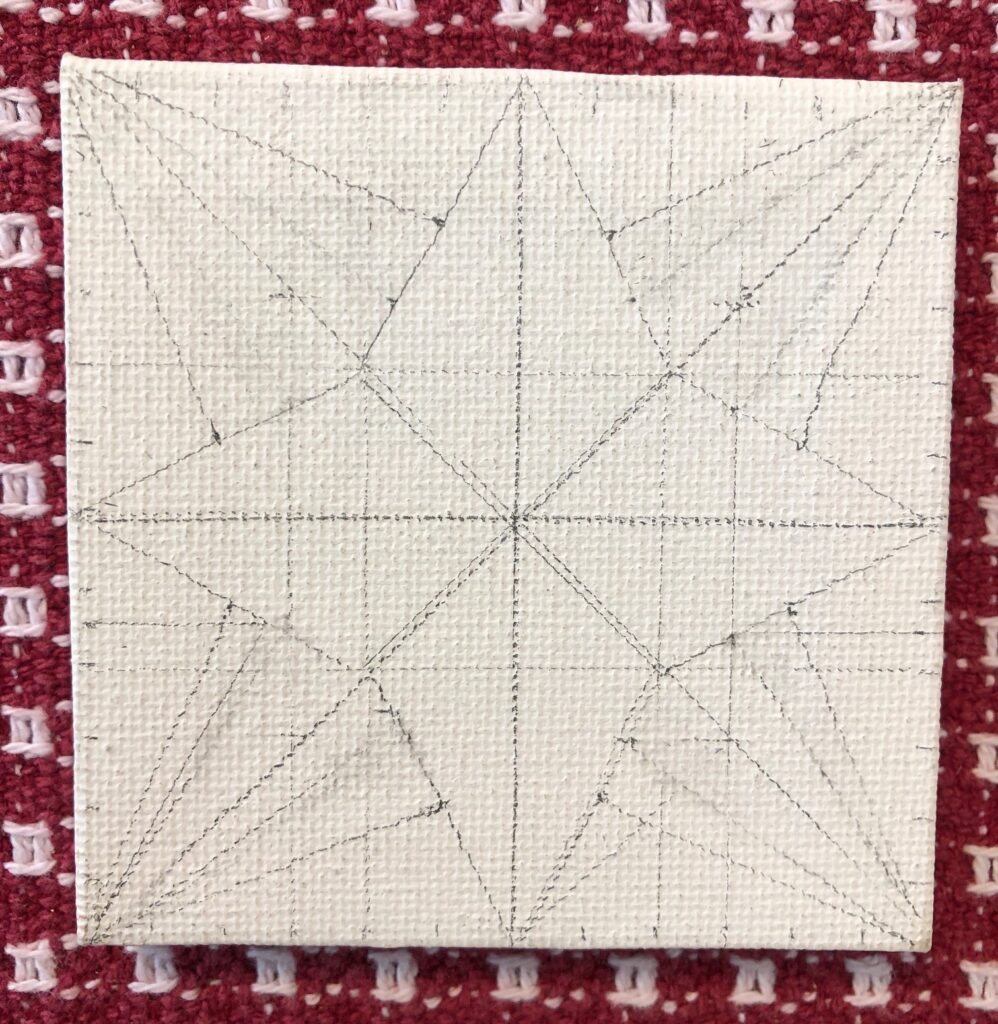
Since I don’t have an actual pattern, it helped to have it identified as being on a template of a 4-patch quilt block.
Making the Small Sample Block
I have learned to always make a miniature block first so I can figure out the dimensions of the sections. Painting the block also helps me visualize the colors better before I actually start on the 12″ x 12″ block of wood.
This is a 3″ square miniature canvas. I marked it into smaller squares each 1/4″. On the larger block of wood, each 1/4″ will be equal to 1″.
This took me a little while to figure out the angle for the star points in the background…as shown by all my pencil lines and erasures! That’s why I do this in pencil on a small one first!
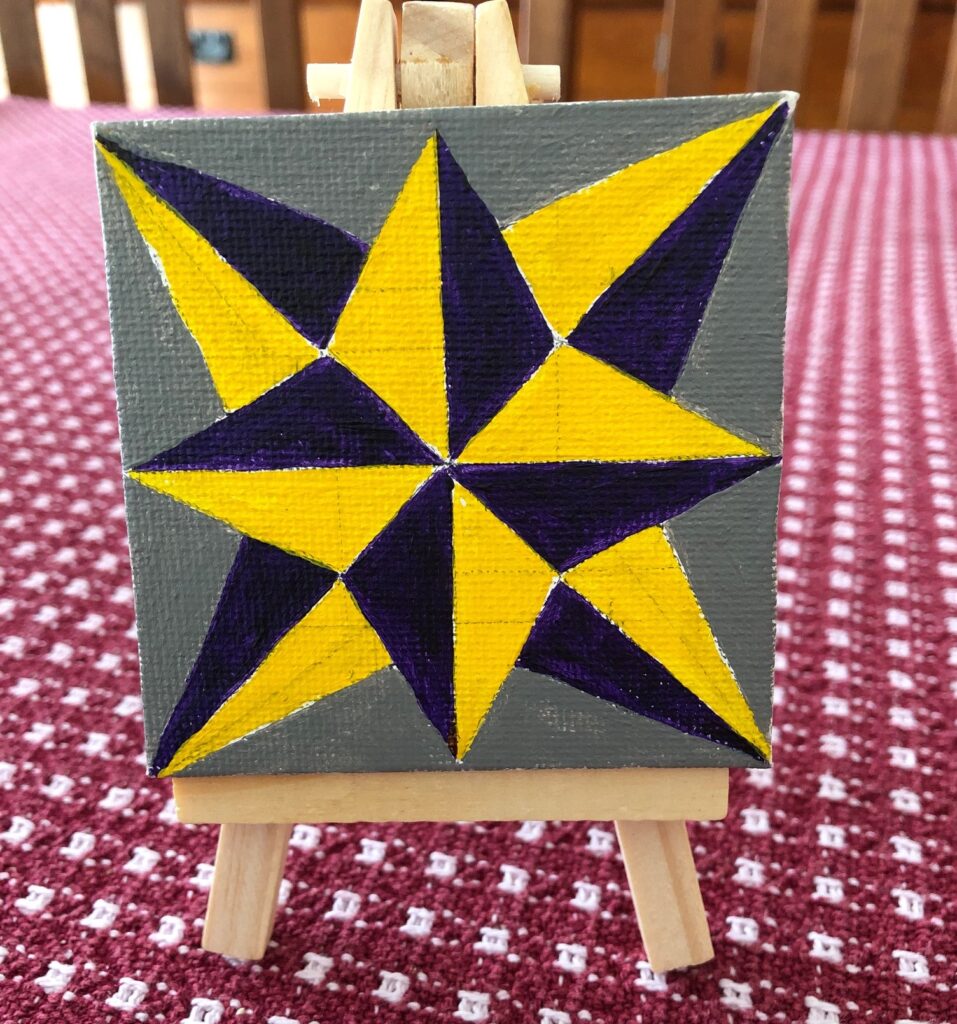
And then I tested my color choices:
I started with the darkest color (that really is purple!), then yellow, and finally the gray background. Not very exciting but it reminded me of a night sky with all the stars out.
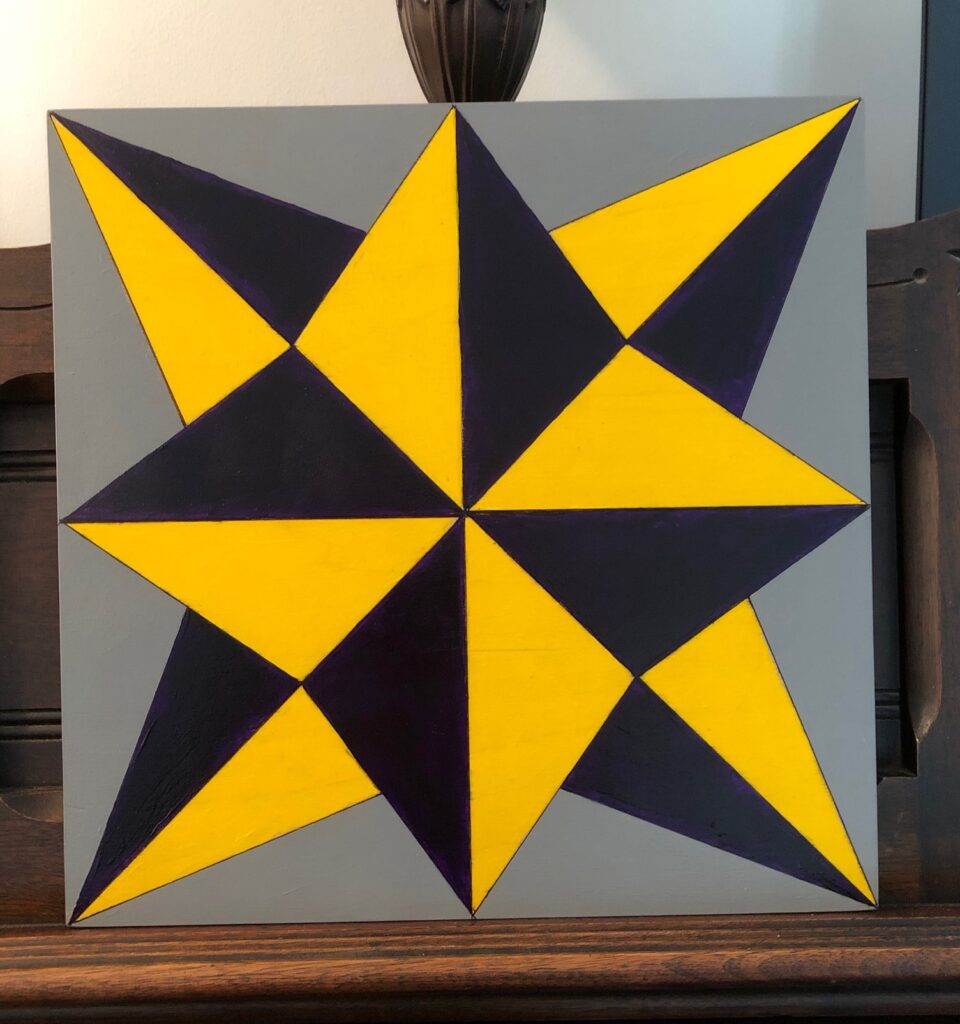
Making the Larger Block
With my shapes determined I shouldn’t have any pencil lines showing through the yellow paint.First two colors.Finished block…waiting for Bert to put the magnets on the back!And of course, the yellow looks totally different in daylight! I like it!
It’s been fun to try this new kind of quilt block. Now I have a month or two to figure out what pattern to do next. I’m probably good until Labor Day now!
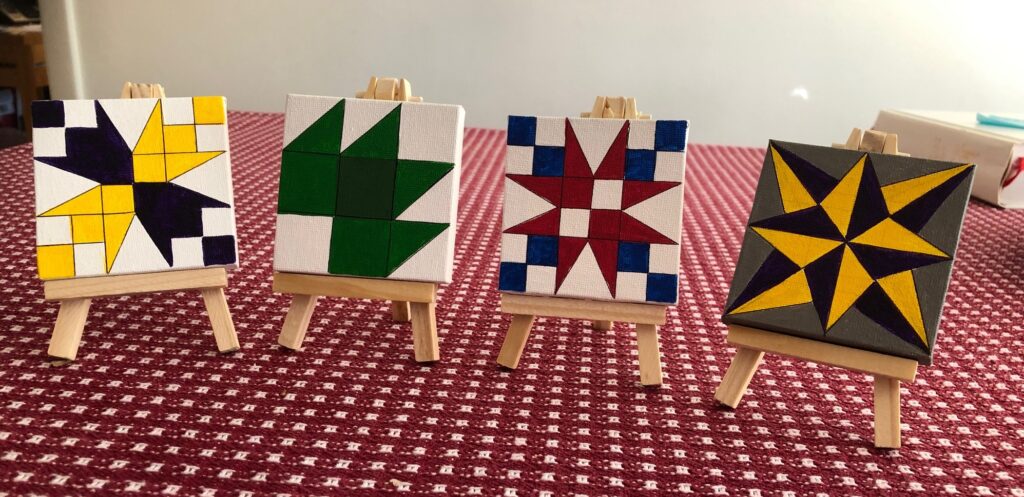
My miniatures are also reminding me what I’ve already done…my own little art gallery! Enjoy!
I may still do the two on the left on larger wood. So many patterns to choose from!