After suffering all weekend with a sore tooth, I finally made it to the dentist to find out, YES, I need a root canal! Phooey! Of course the first available appointment is June 11! It’s going to be a long three weeks!
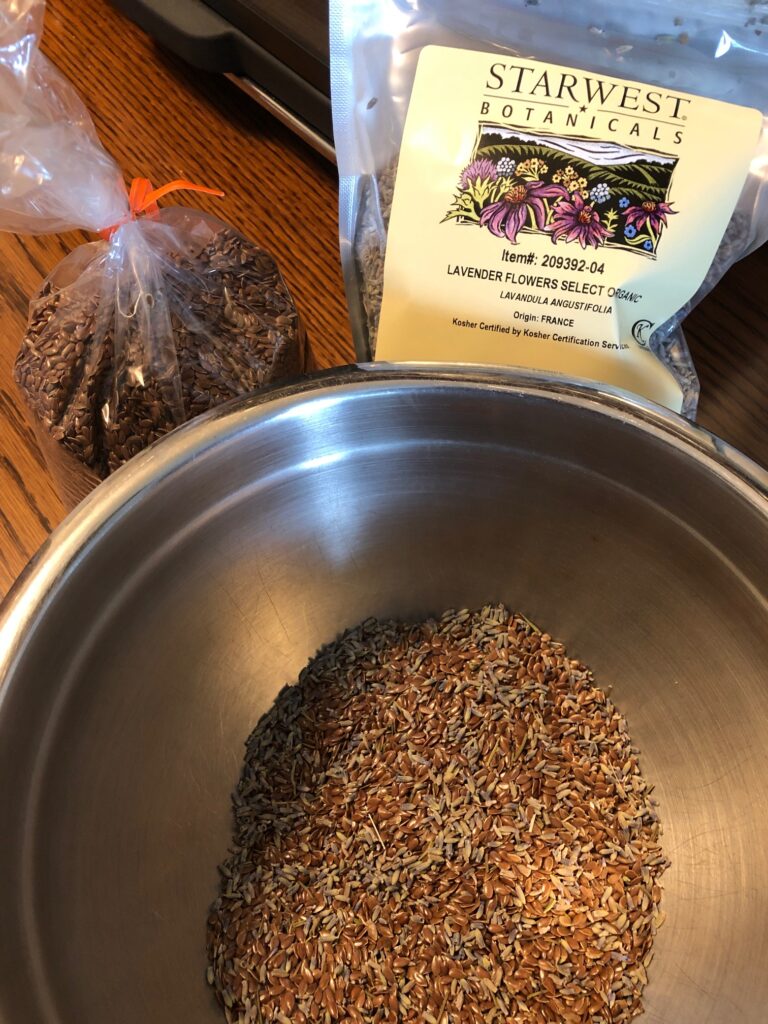
With a swollen gland, a sore tooth and puffy face I was reaching for a cold damp washcloth just to ease the discomfort. I decided it was time to find a different solution. I had seen many versions of a small pillow stuffed with various things, from popcorn to rice to flax seeds with lavender buds mixed in. Some of those things work well in the freezer but not so much in the microwave (like popcorn!).
I had a bag of flax seeds ready for just such a project and I had ordered some fresh dried lavender buds recently, so I thought I’d give it a try.
Materials:
1 cup flax seeds
1/4 cup lavender buds (optional)
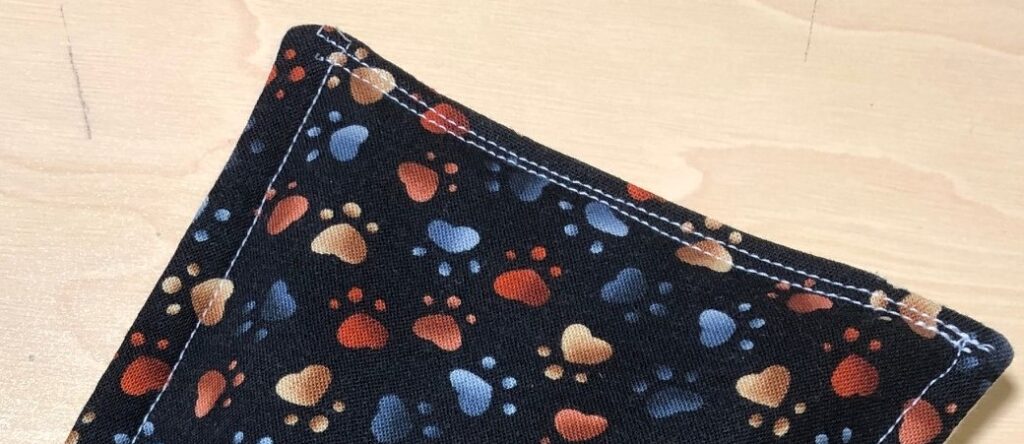
1 piece of cotton fabric…9 1/2″ by 5 1/2″
2 layers of cotton flannel…9 1/2″ by 5 1/2″. Treat as one piece of fabric.
Instructions:
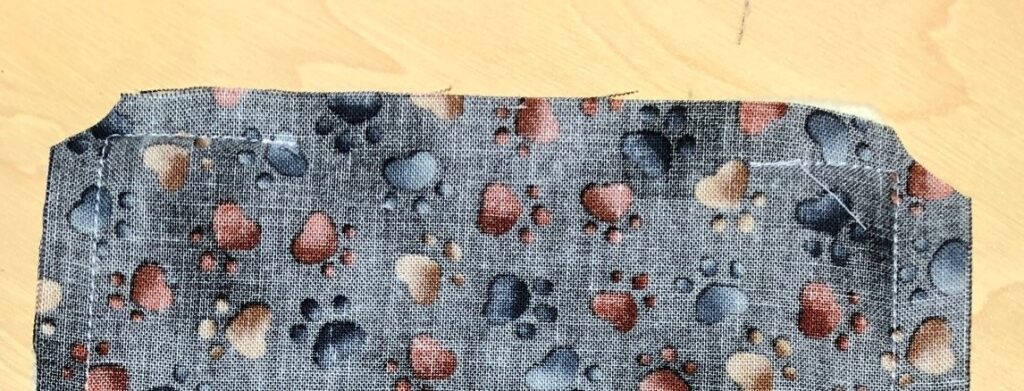
Make a pouch by sewing the fabric and flannel pieces right sides together, leaving a 3″ space to turn right-side out. Trim the corners.
Close up of the opening.
When turning the pouch right-side out use a stuffing stick or pencil to poke the corners out completely.
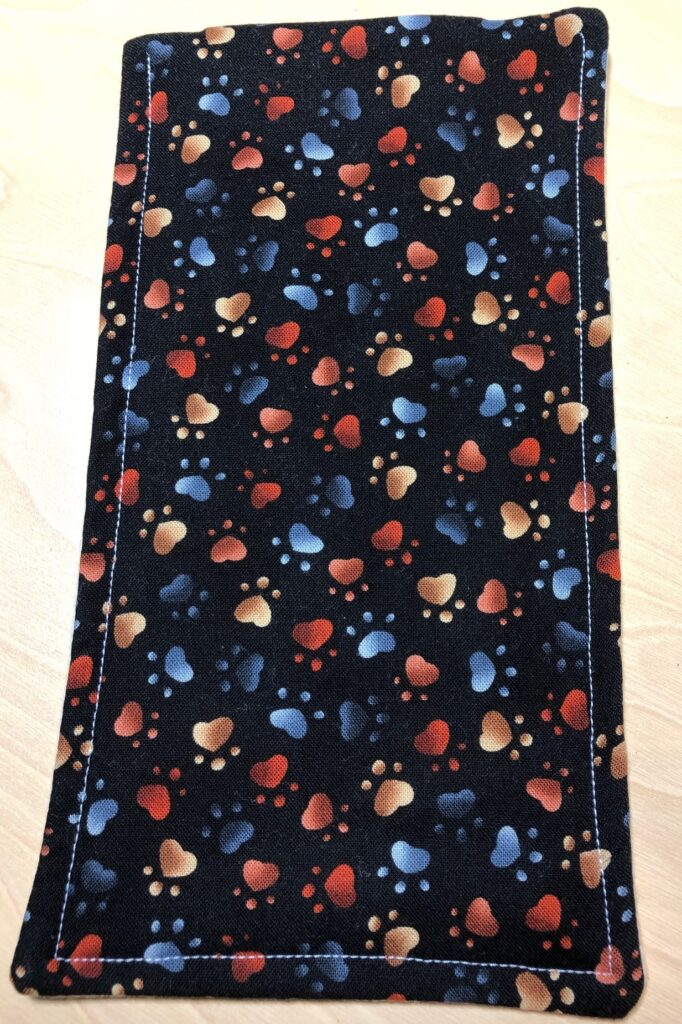
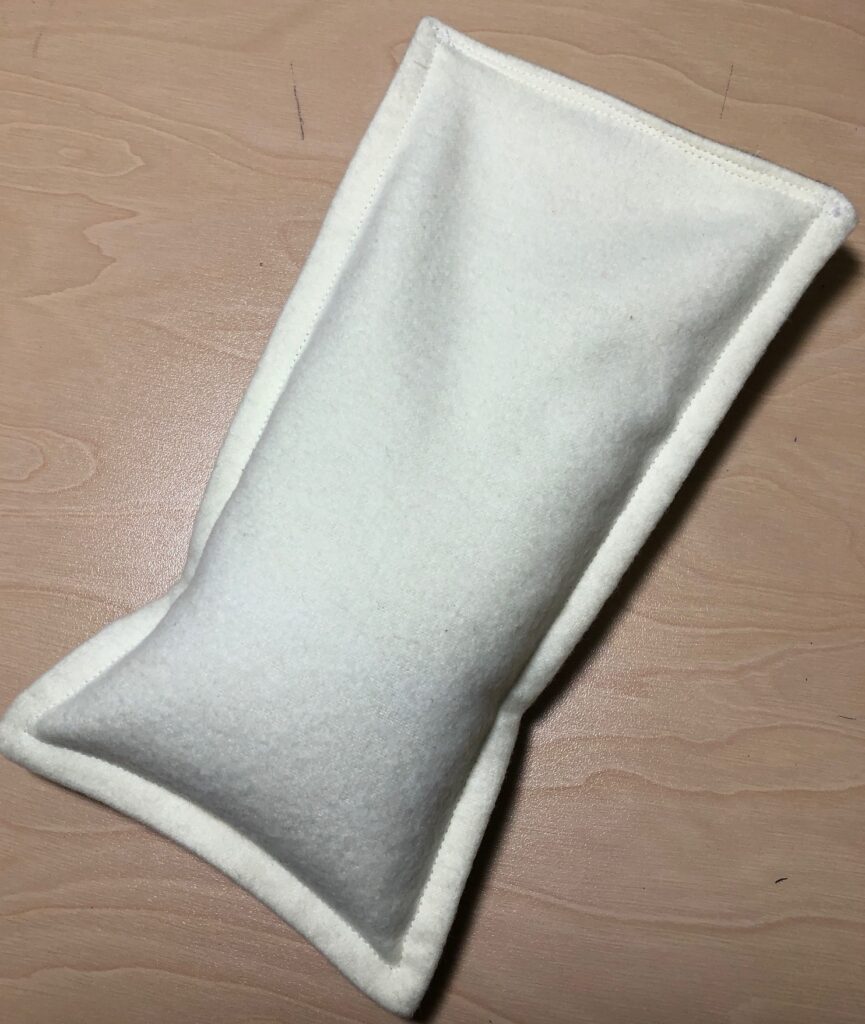
Top stitch on three sides to reinforce the seams…don’t want those flax seeds to poke through the seam. Top stitch the top edge after stuffing.
Close up of top stitching before stuffing.
Put 1 cup of flax seeds in a bowl. Add 1/4 cup of dried lavender buds and mix them up. If you don’t care for the smell of lavender, use less or skip them and use a drop or two of your favorite essential oil directly on the fabric bag. No scent at all is fine too.
Use a funnel poked into the opening of the bag and scoop the seed/lavender mixture into the bag (oops…no picture of the funnel).
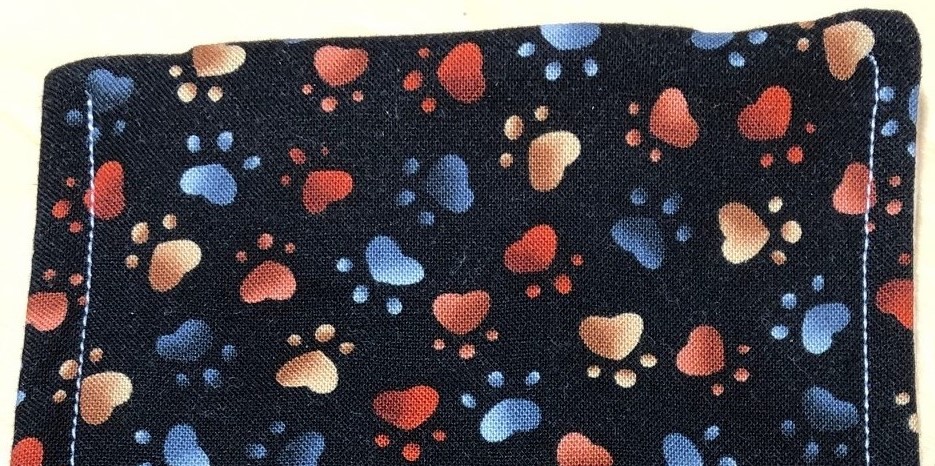
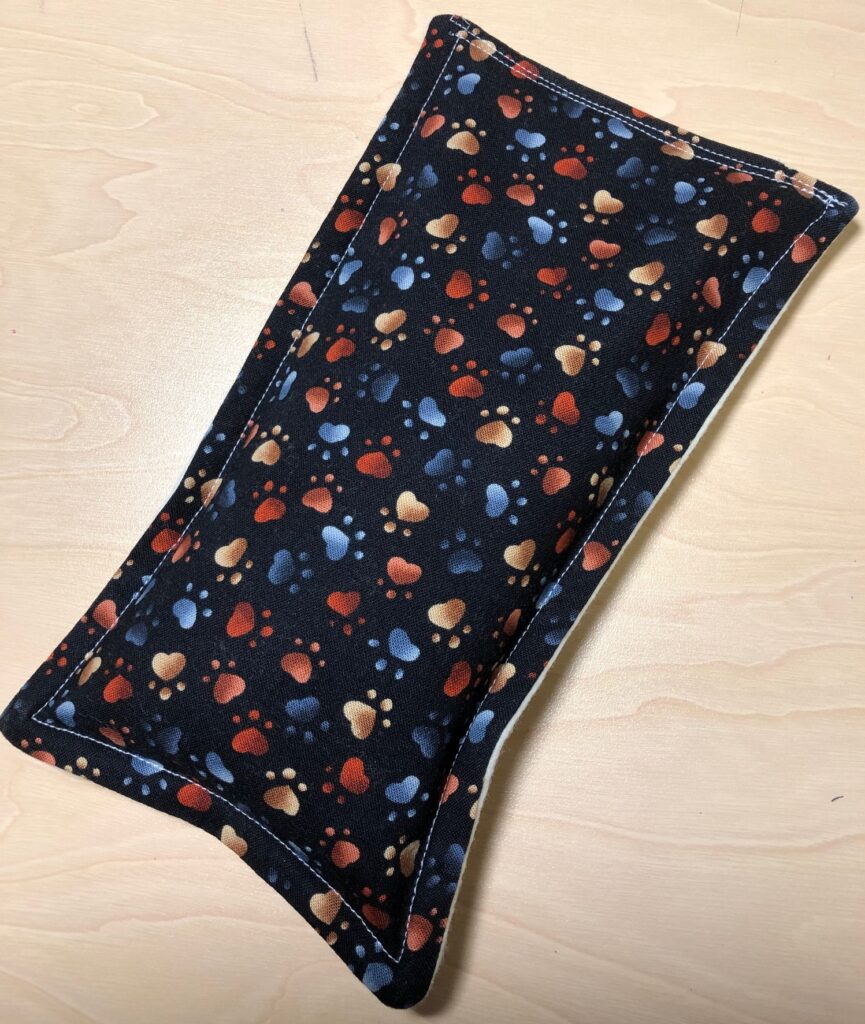
Stitch the bag closed with two rows of stitching just for reinforcement.
Close up of top stitching after stuffing.
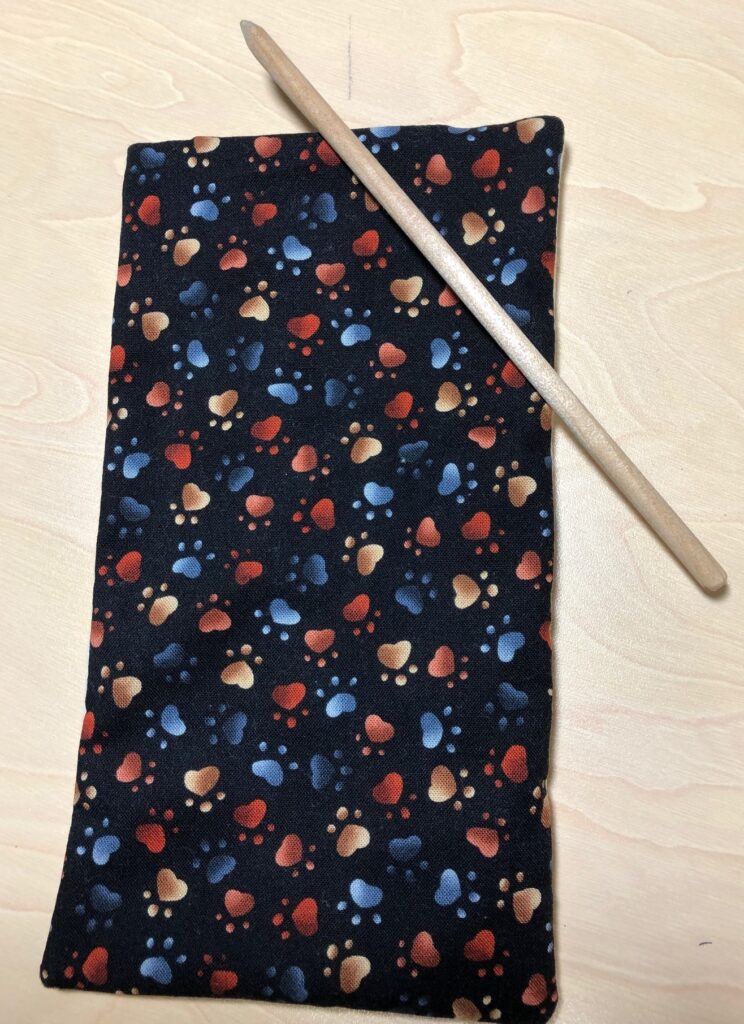
That’s it! The bag is only about half full so it’s flexible and easily molded to my eyes (for sinus pressure) or in my current case, my jaw!
I’ll put this into a zip bag and put it in the refrigerator (or freezer). I’ll enjoy it later this evening!
If I decide I need it warm instead, I’ll let it warm up naturally and then pop it in the microwave…maybe 10 seconds at a time at first. Flax seeds are supposed to hold the warmth quite a while. On the other hand, I may have to make a second one just for the warm version!
I’ve always said most of my projects are inspired by a need. I certainly had a need today! Enjoy!
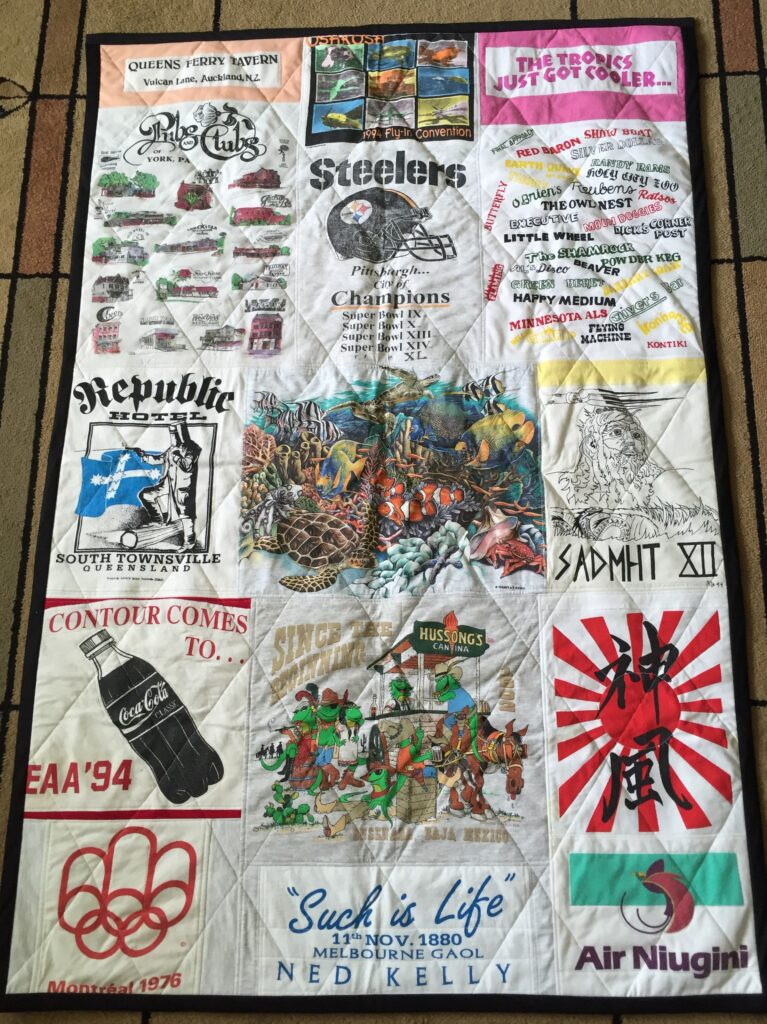
Do you find yourself collecting t-shirts with pictures of the places you visit? Or maybe you’ve saved t-shirts that your child has outgrown that just have special memories? Working with t-shirts presents a few unique issues that are not found in regular quilt-making.
First, t-shirt fabric is usually soft and stretchy. Second, the pictures are not all the same size. Sometimes the picture is small, like on a pocket. Sometimes it is huge, covering the whole front or back of a shirt. So, before you can begin putting the puzzle pieces together, you have to make the puzzle pieces!
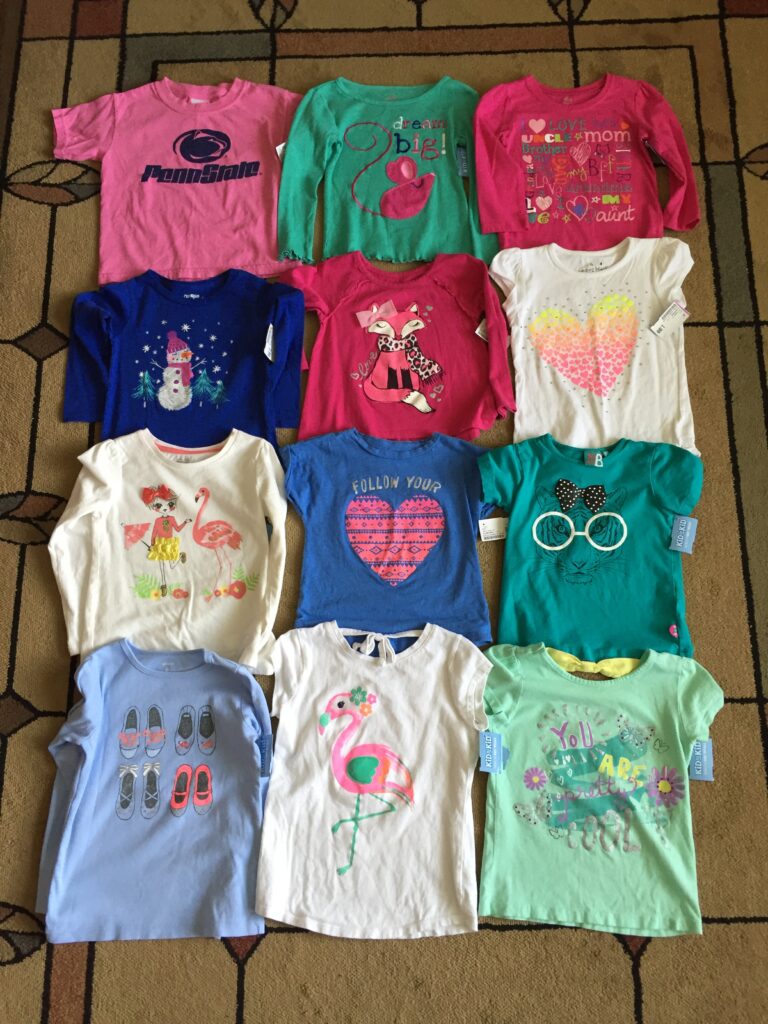
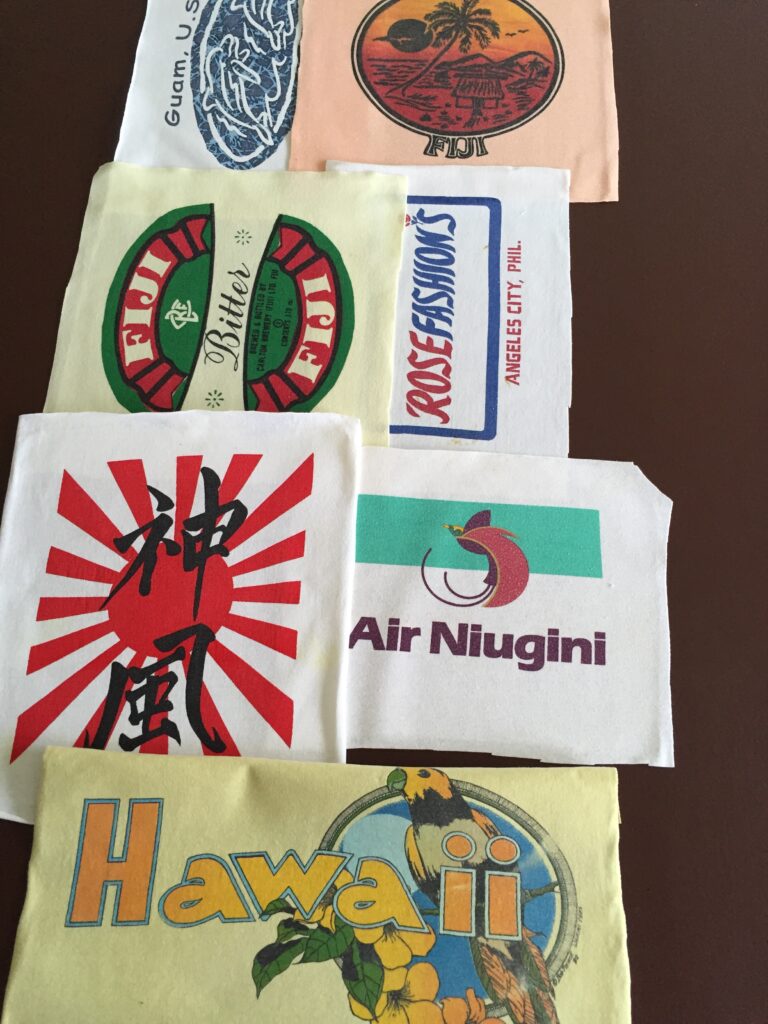
The first time I was asked to make a t -shirt quilt it was with a box of shirts a friend had saved from a career in the military…a mix of shirts from bars, world travel and military mementos…63 in all! Every picture had already been trimmed and the rest of the shirt was pitched so they wouldn’t take up so much space in storage. It was very overwhelming, since I had never attempted to make even a small t-shirt quilt.
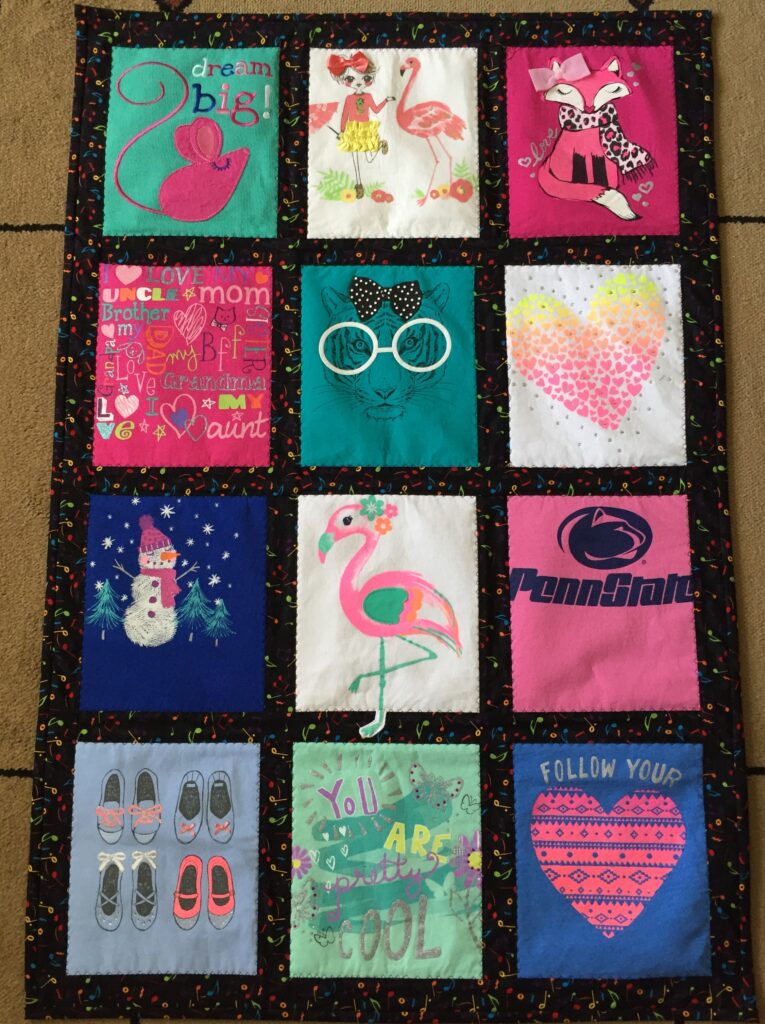
I decided I’d better try a small version before I cut into someone’s precious memories. I went to a local children’s resale shop and picked up a dozen cute t-shirts with interesting pictures on them.
I laid them out to get an idea of how they might look together.
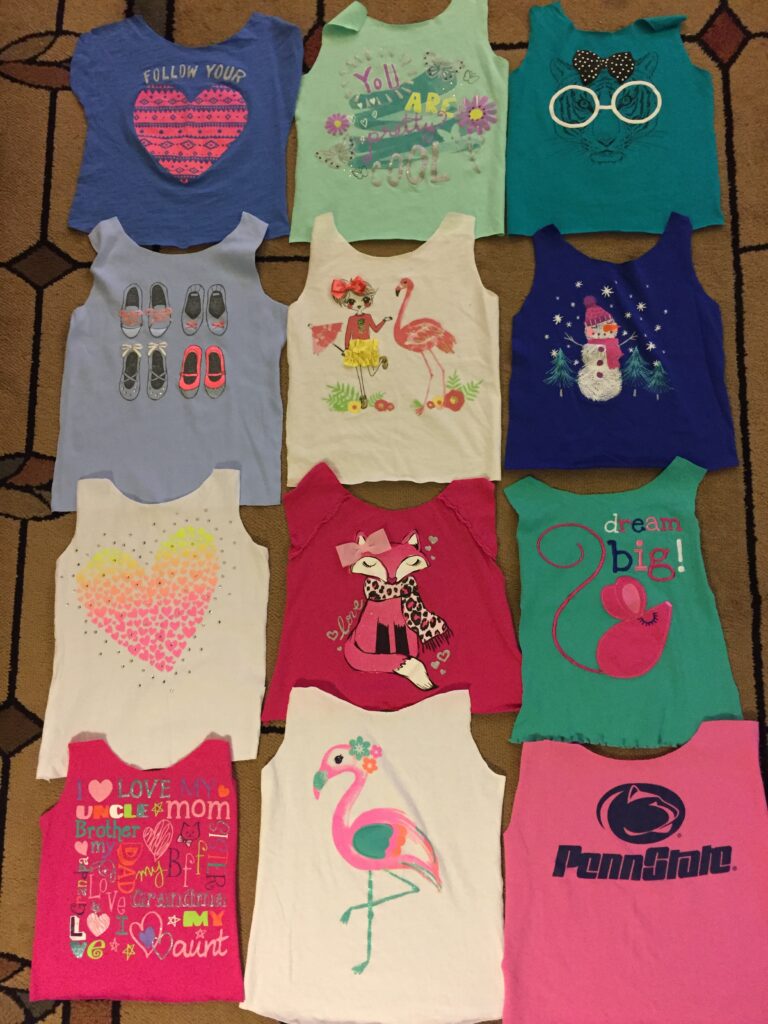
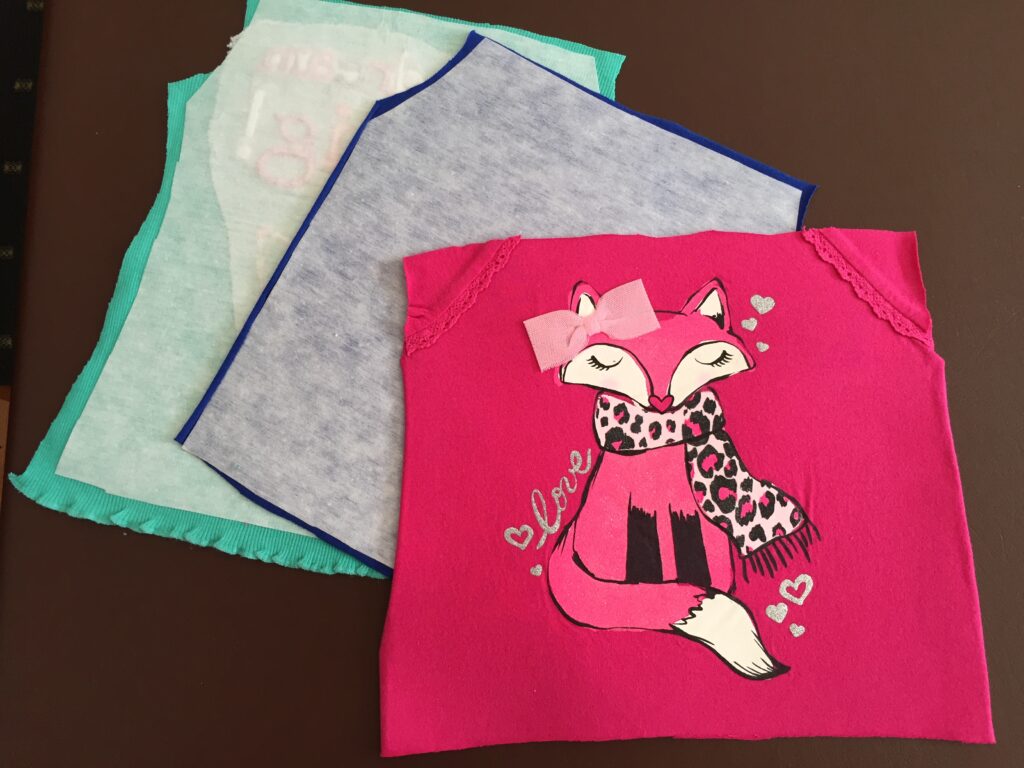
I ironed and trimmed each shirt, leaving just the picture with as much fabric around it and still lay flat.
I used a lightweight non-woven iron-on interfacing and ironed a piece to the back of each shirt front.
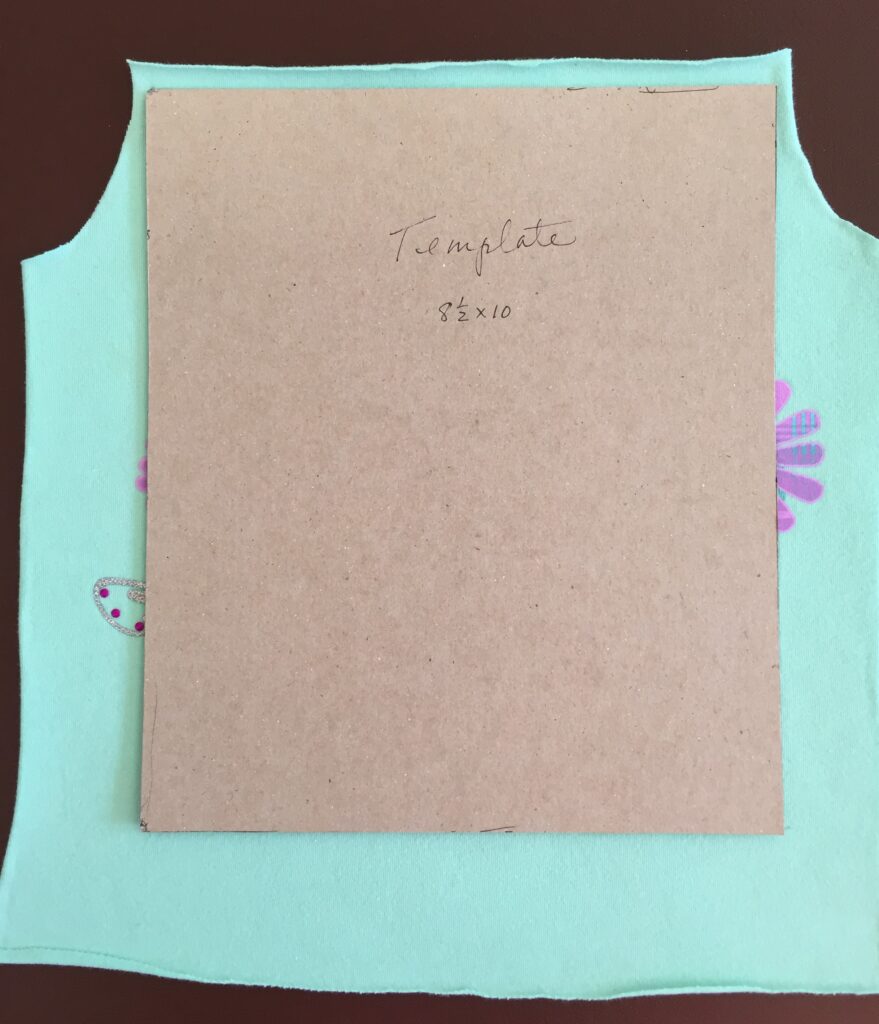
I had to decide on the size of the blocks that would allow most of each picture to be shown. The pink shirt above had raglan sleeves, so I left the pretty seam as part of the design. I ended up with a template 8 1/2″ by 10″.
Once the fabric had been stabilized so it wouldn’t stretch, the blocks are assembled like any quilt top would be. I used strips as shown below for the inner borders. Of course, the flamingo’s foot was going to be cut off, so I cut around it and appliqued it to the border.
I ended up printing out the directions and offered the quilt to the resale shop for them to use as a display in case other mothers would like to try it.
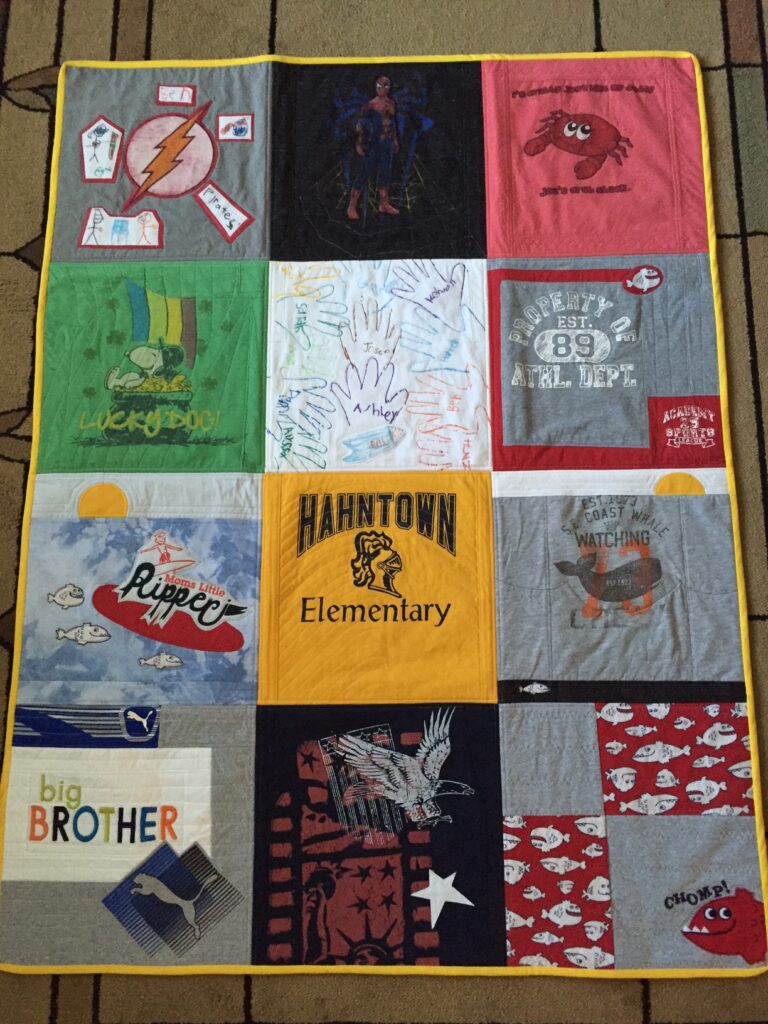
Next, I offered to make a memory quilt for my daughter. She had saved a pile of t-shirts from my grandson’s elementary school years. This time I decided to not separate the blocks with an inner border. A few blocks had to be pieced or small pieces were appliqued to other blocks to make the size consistent and to make use of some smaller pictures.
Finally, I felt ready to attack the huge box of career-long memory t-shirts. I consider this a major accomplishment that took over a month to assemble. Because the pictures had already been trimmed it was impossible to make a design with consistent-sized blocks. After ironing the lightweight interfacing to each picture, I worked with long strips of backing material and arranged the various sizes of blocks down the strips. Starting at one end I methodically stitched each picture to the backing material…kind of like doing a crazy quilt…one piece at a time. As I worked, the pictures were rearranged multiple times until I got them all in!
I sewed the strips together to make one large quilt, one smaller quilt and two giant floor pillows. I especially loved the one from Bali! I was sorry to give that one back! Whew! Quite the learning experience!
A word of advice, if you are asking someone to make a memory quilt for you…don’t trim the shirts before handing them over! The extra fabric can be useful in piecing odd size pictures.
When finished, the extra t-shirt material can be disposed of (actually the soft knit material is great to make tiny doll clothes!)
Save those memory t-shirts, or start a new collection! A t-shirt quilt is a great way to preserve those memories! Enjoy!
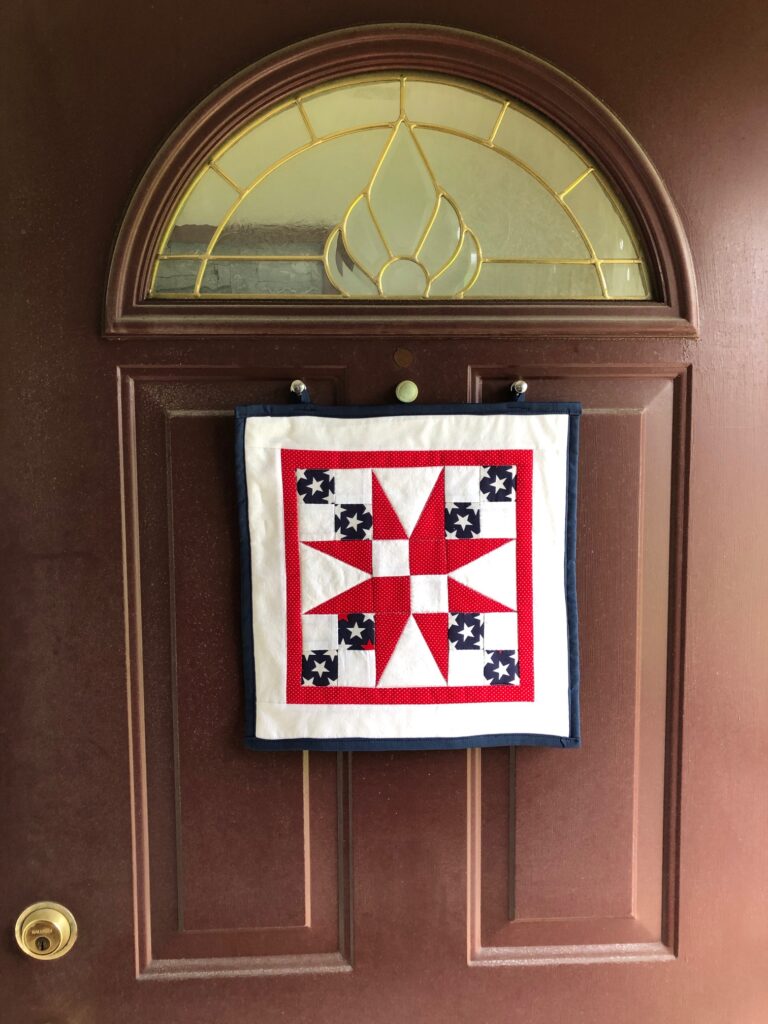
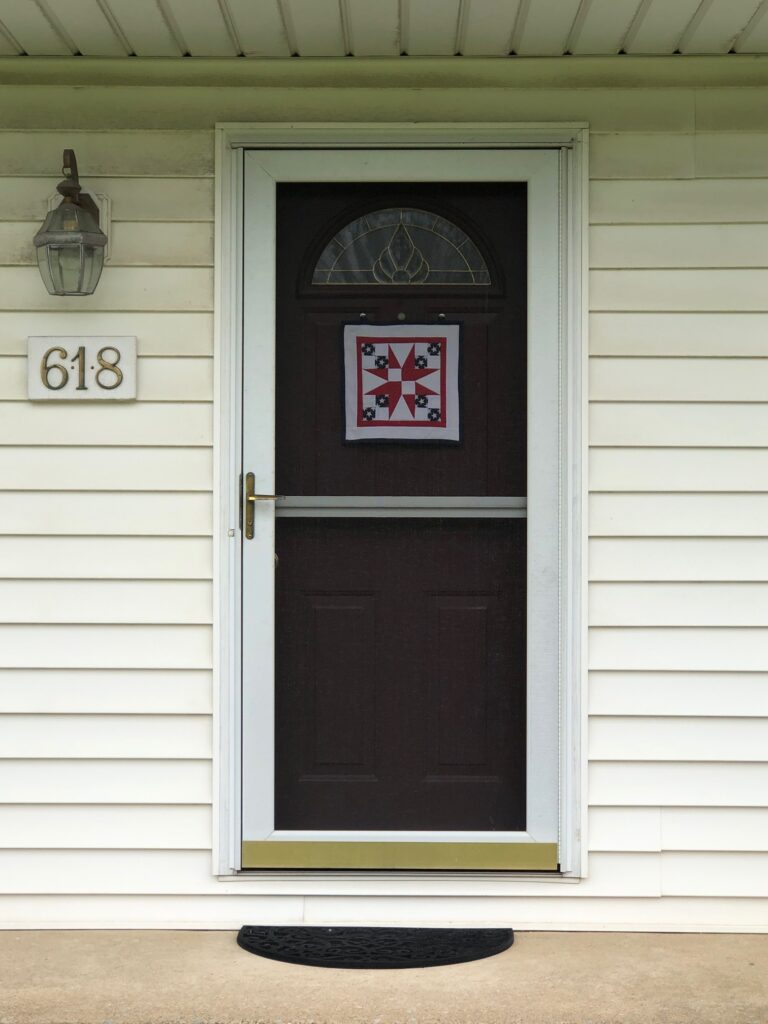
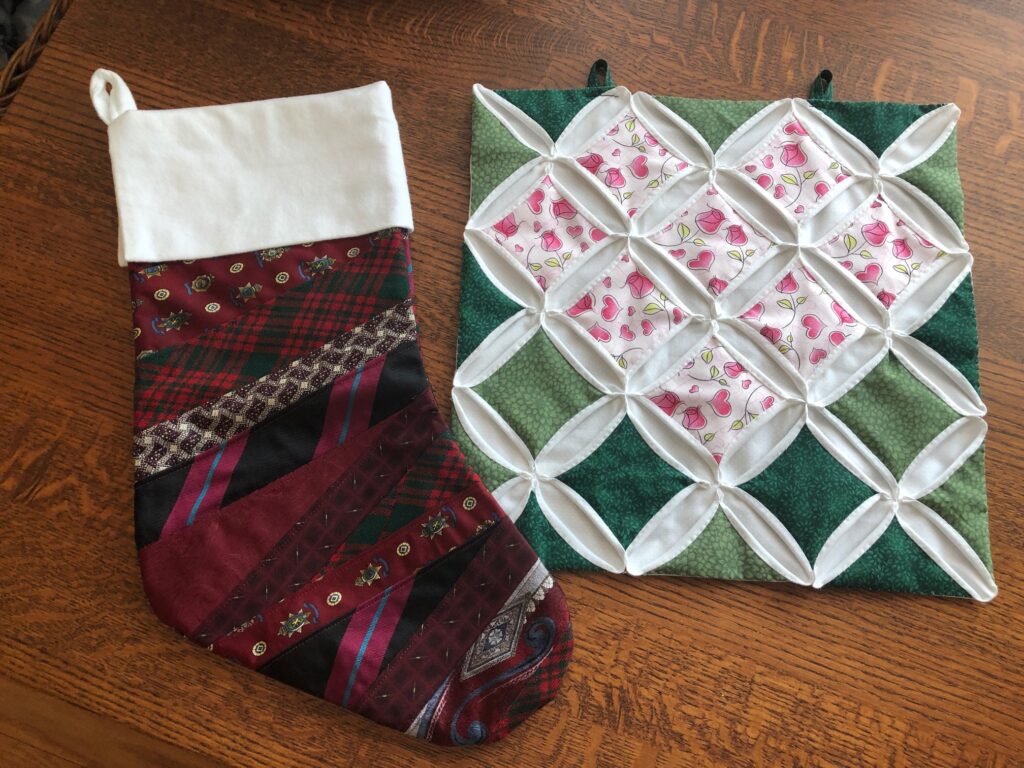
Time for a new door quilt. As you might recall from my earlier posts, I needed to find a solution to the problem of putting a wreath on my front door and then squashing it when I closed the screen door; not enough clearance. Flat door quilts have solved the problem. Here are the previous ones I’ve made (starting with the Christmas stocking, the Heart in a cathedral window pattern and the spring quilt in the Dutchman’s Puzzle pattern).
I seem to be continuing with a seasonal quilt about every three months. I have also discovered that three months exposed to the sun has faded the fabric some so it was time for something new.
With some major patriotic holidays coming up like Memorial Day and the 4th of July, it was time to try a patriotic theme.
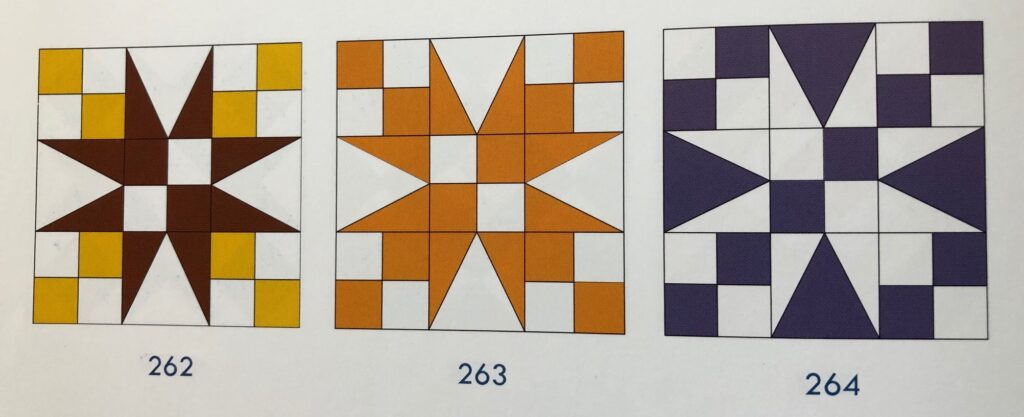
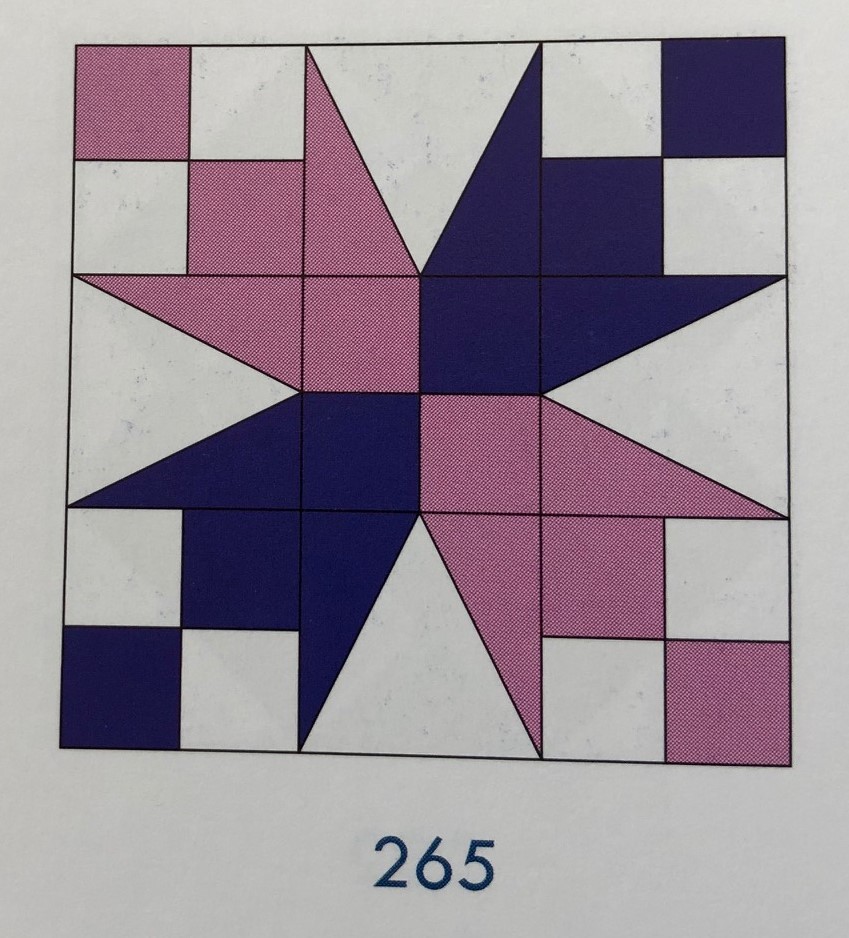
This quilt pattern is called Fifty-Four Forty or Fight. You’ll see several color variations below.
This phrase was the famous 1844 presidential campaign slogan of James Polk that contributed to his unexpected victory. The slogan was named after a line of latitude that served as the northern border of Oregon at 54 degrees 40 minutes. The slogan was not actually coined during the election but appeared only by January 1846 and was promoted and driven in part by the press. Women often stitched their political views because they weren’t supposed to voice them. That’s where this block comes from.
By altering the color arrangement of the pieces it has also been called Grandma’s Star, Railroad Quilt, Nine Patch Star Quilt, Garden Walk, Garden Patch and An Old-Fashioned Pinwheel.
When colors are arranged like in #265 below, it has been called Bird of Paradise.
As you can see, the same arrangement of blocks and triangles can be called something else if changing the colors gives a different impression.
I always want to check from the front yard to see if I have the colors right (meaning, light around the outside so it can be seen through the screen door). I think it works!
If you would like to be notified when I post, sign up on the Welcome/Home page and you’ll be sent an email automatically by this wonderful program. Your email will never be shared! Thanks!
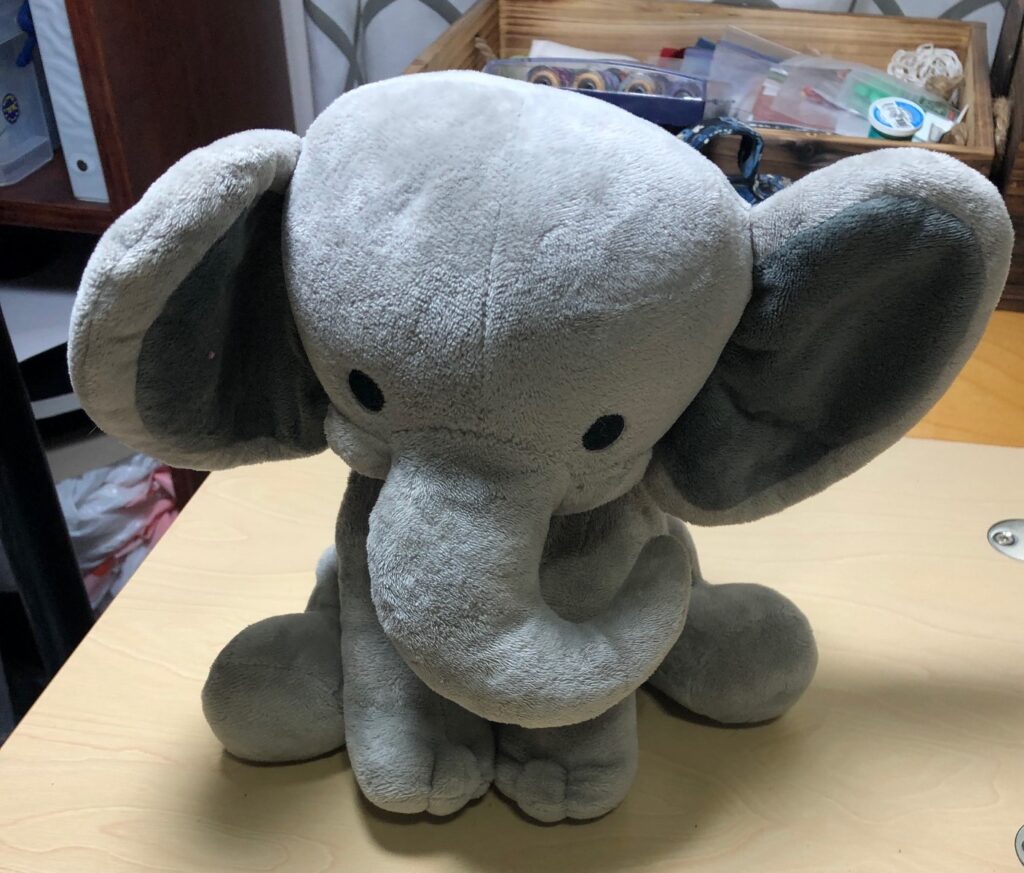
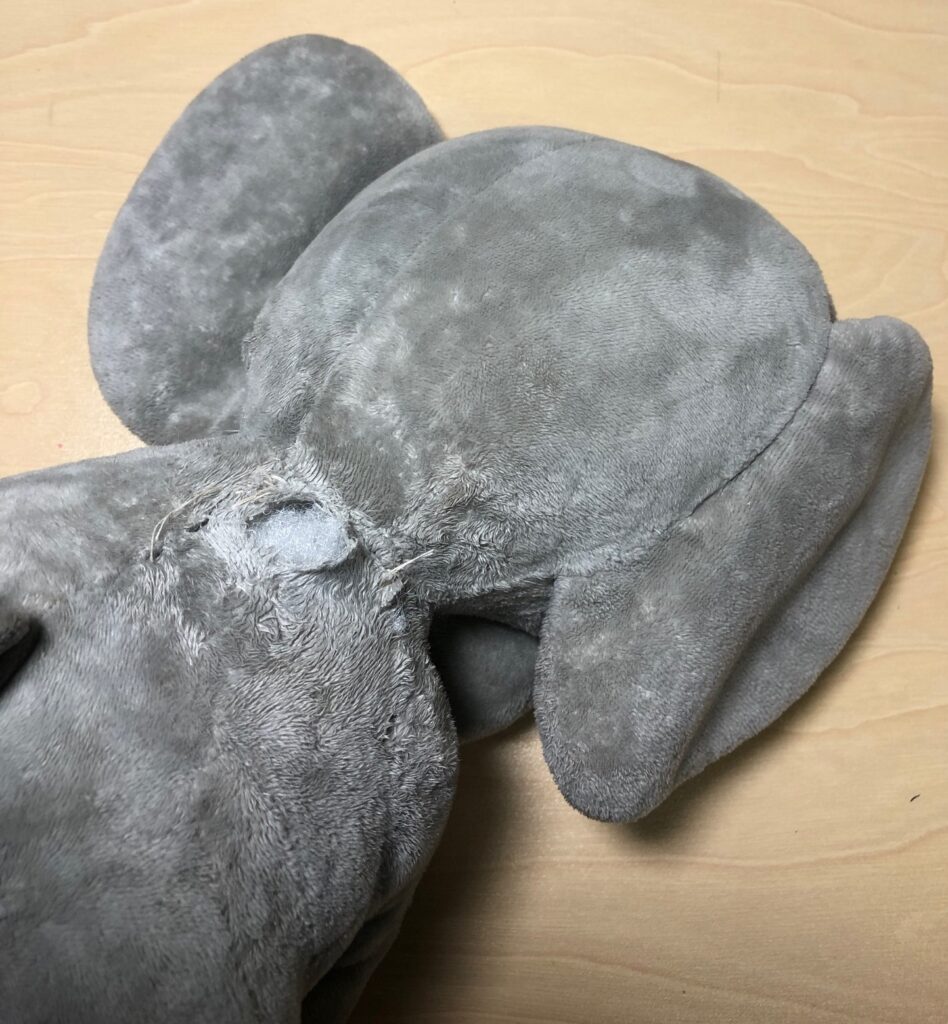
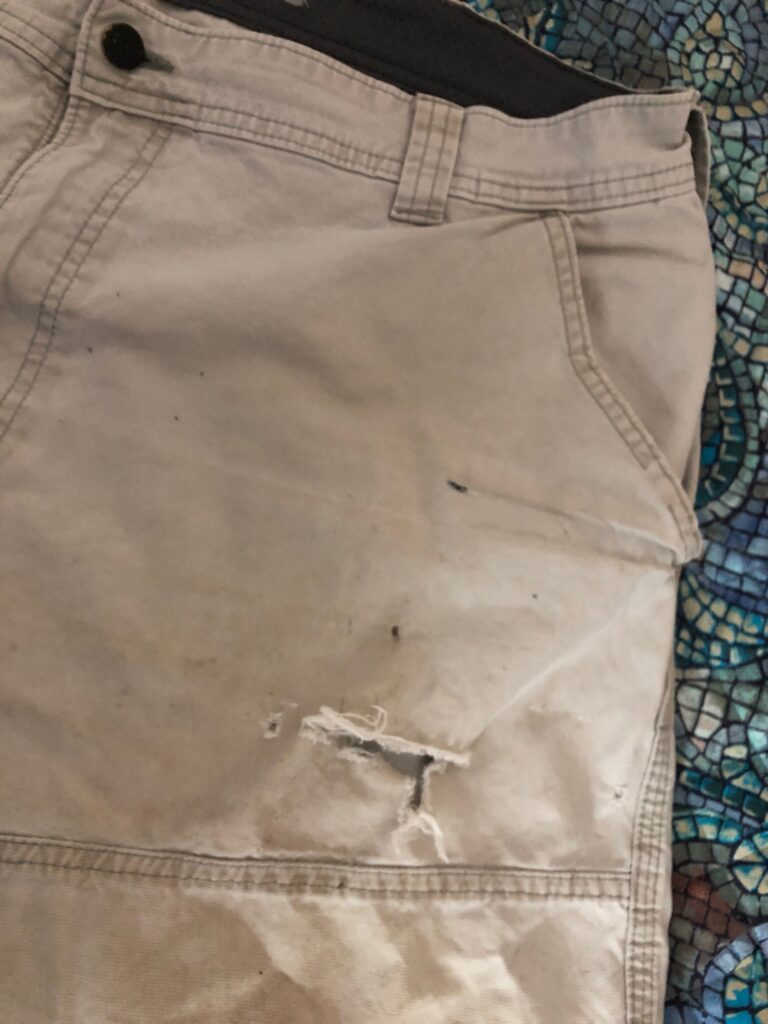
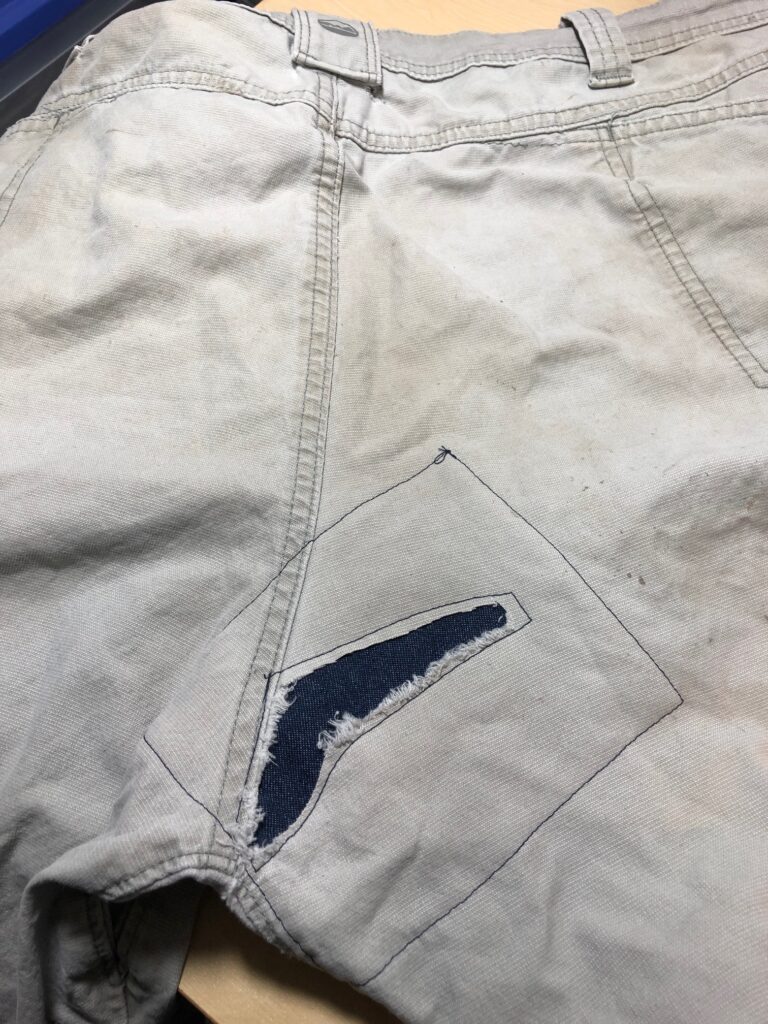
Frequently when I visit Kathy and family, I come home with some interesting mending projects. I think our son-in-law enjoys providing me with a sewing challenge…just because he knows I’ll humor him and produce something different! I’m up for the challenge!
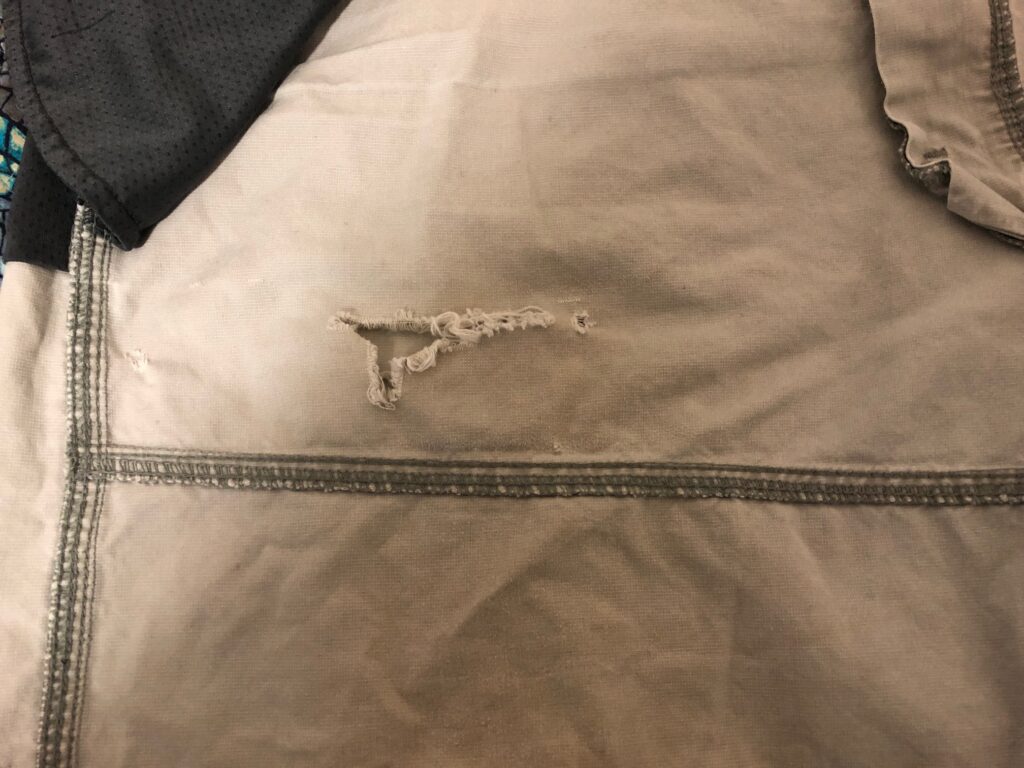
He works very hard with his contracting and landscape business and his work clothes show it. This time, I came home with three items…a stuffed toy their dog Daisy had ripped with her teeth (obviously not related to his work) and two pairs of work shorts with rips in embarrassing places.
First, I worked on the dog toy. This elephant is really not a dog toy, but Daisy loves it and really doesn’t shred it; her teeth just seem to catch on the soft fabric.
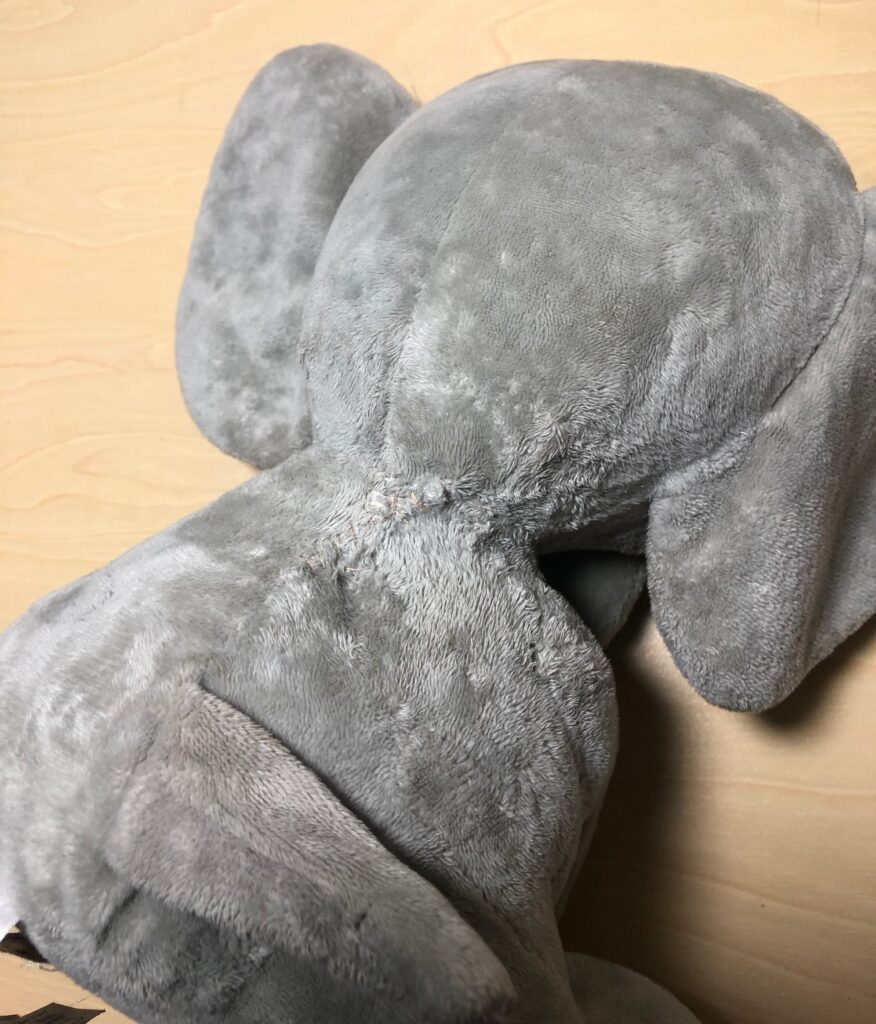
The damage seemed to be right at the back of the neck. It looks like I had mended this item several times already!
First, I just pulled the sides of the hole and sewed it shut…again…with some strong thread.
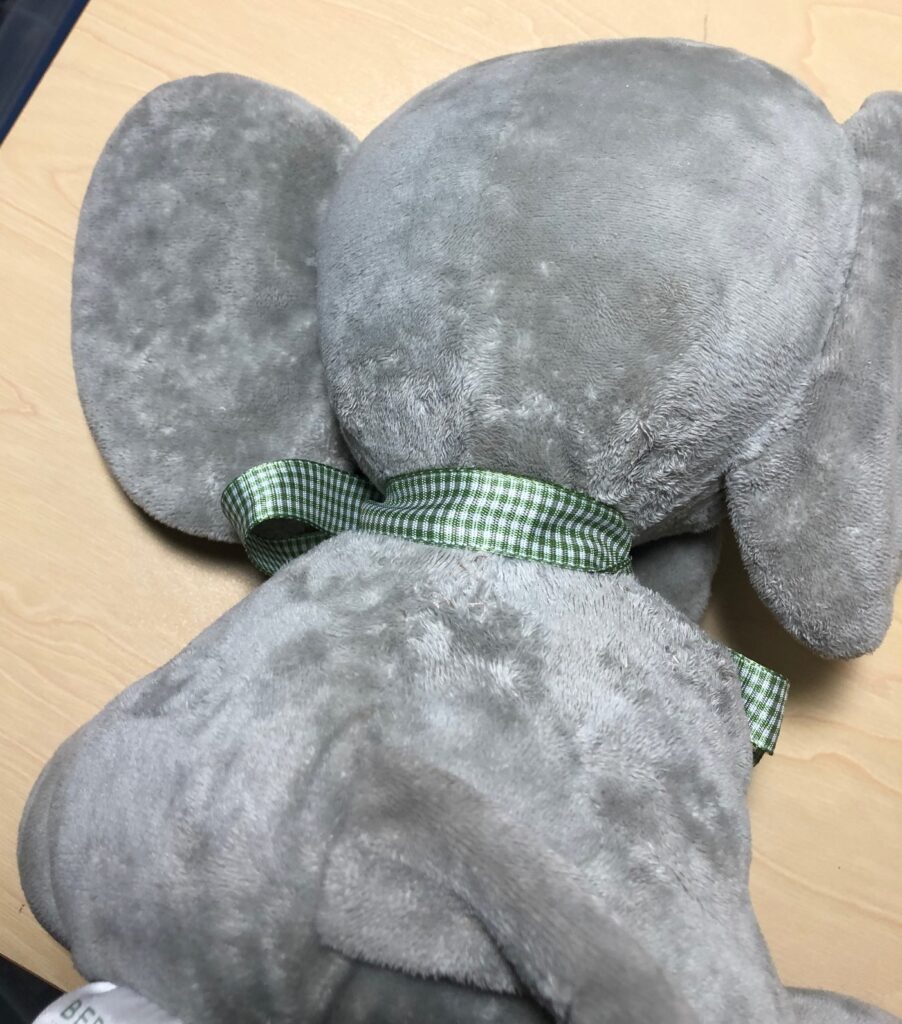
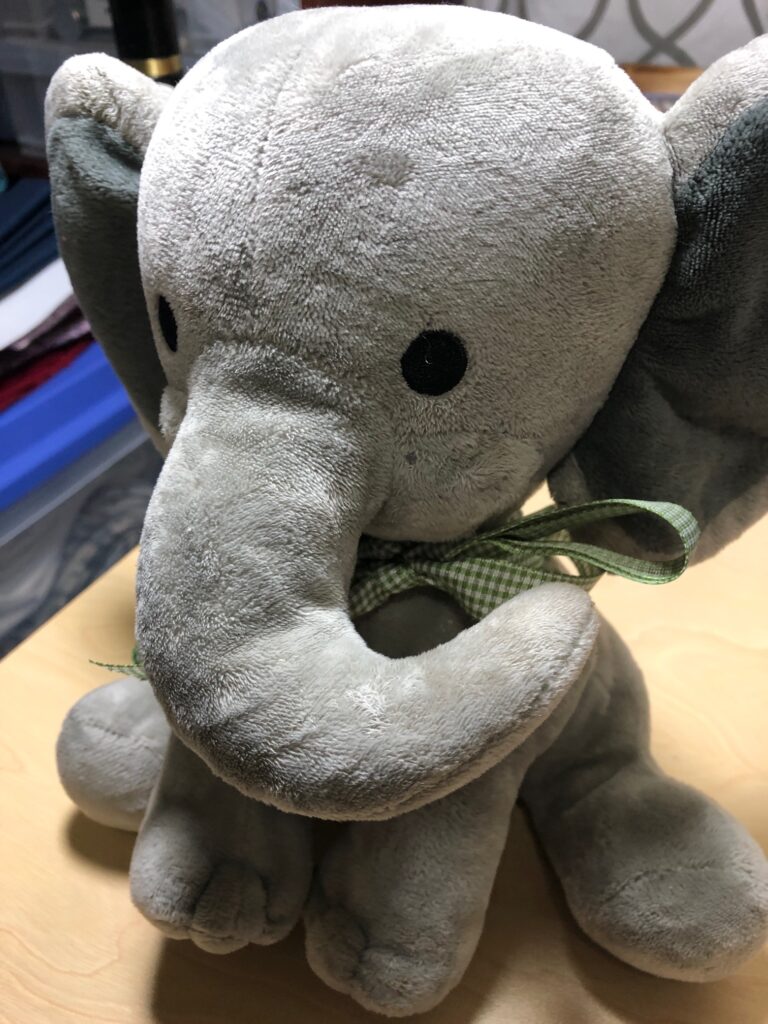
Then I added a double layer of pretty hefty ribbon around the neck, right over the repair. With double knots in the ribbon, the bow might come untied but the ribbon should protect my repair. Maybe the ribbon will give Daisy something new to play with.
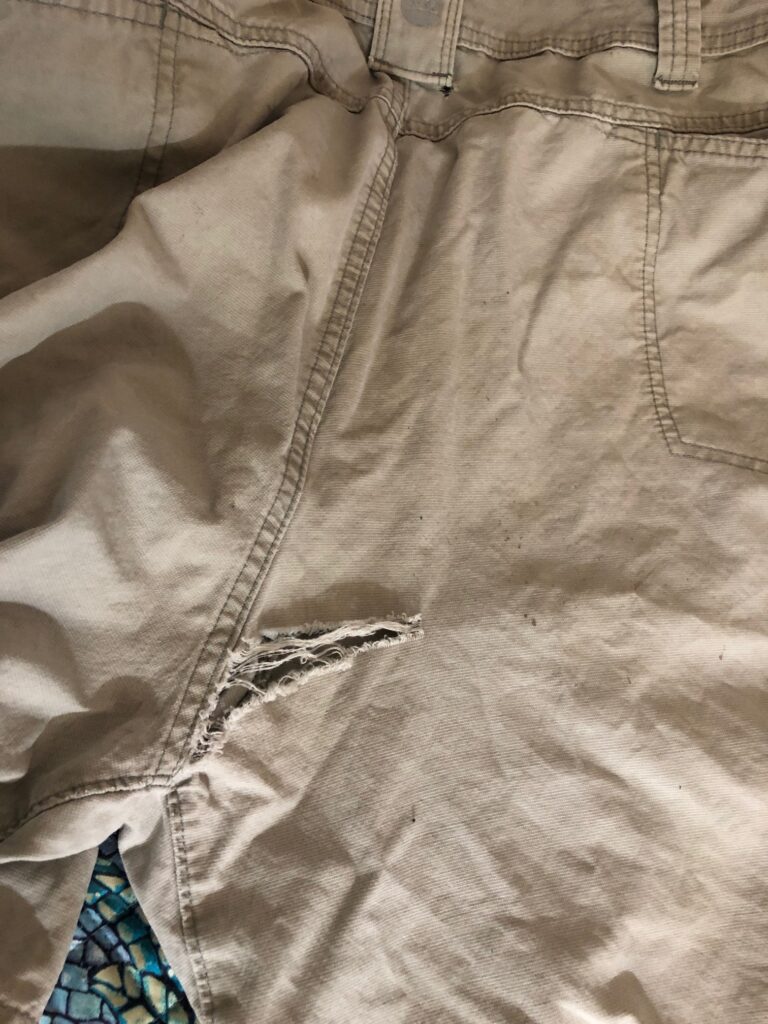
Now, on to the work shorts. The first pair had a big rip right in front.
Pair number 1
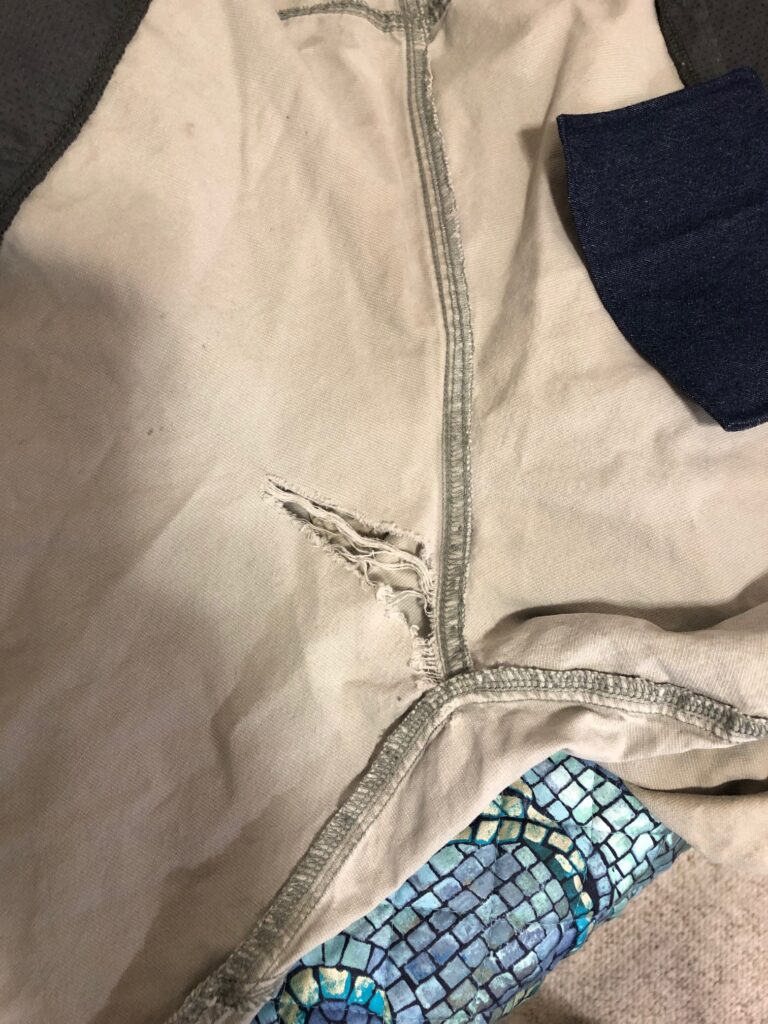
The second pair was pretty shredded through the crotch!
Pair number 2
PAIR NUMBER 1
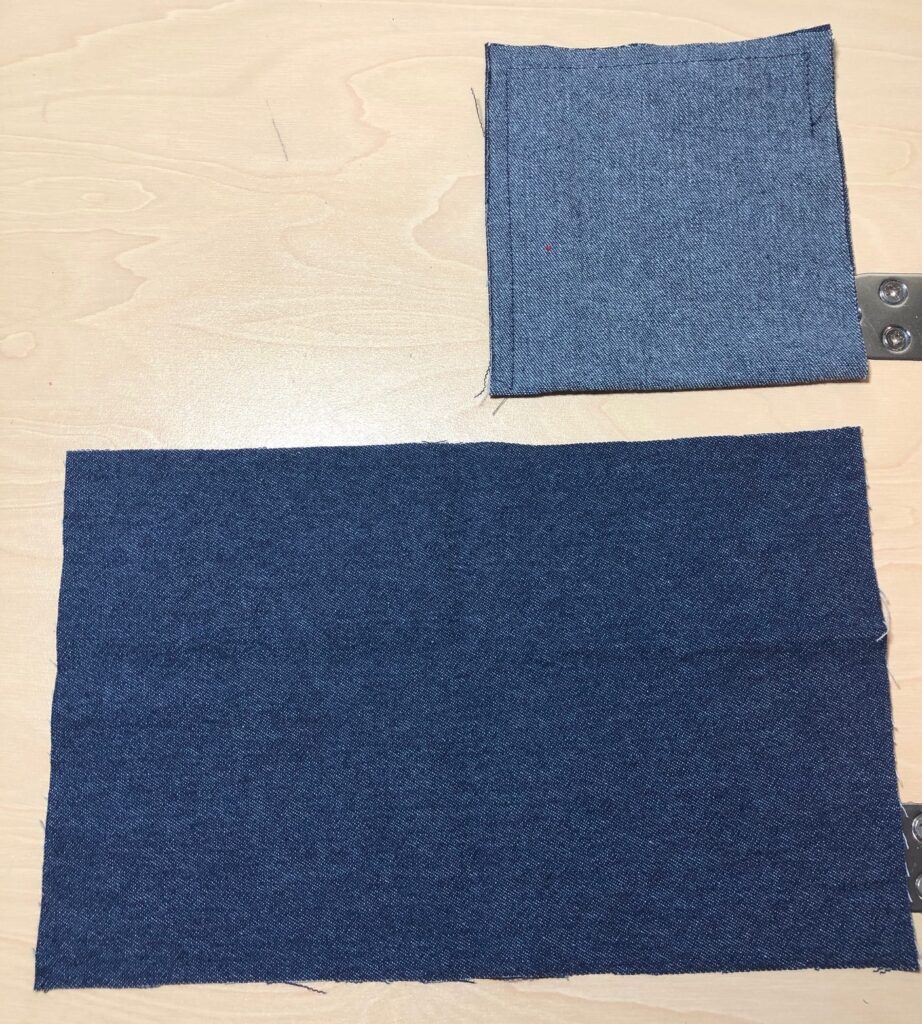
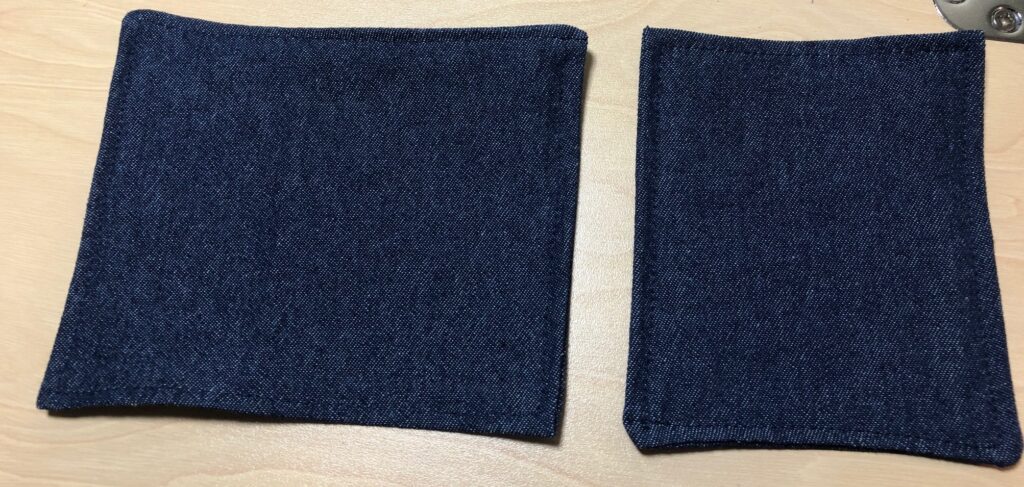
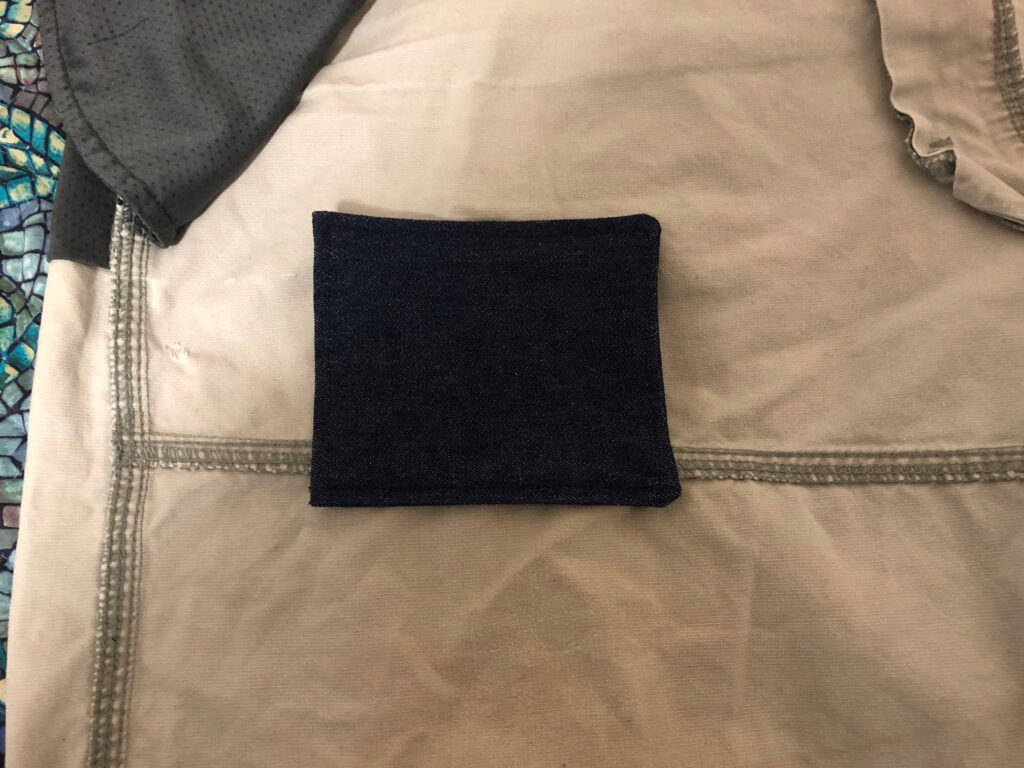
First, I prepared two patches that would cover the holes. I cut two pieces of lightweight denim, folded them in half (right sides together) and stitched around the open sides, leaving about 3 inches to turn them right side out.
I turned them right side out and top stitched around both patches. Now the edges of the patches are finished and will not unravel when washed.
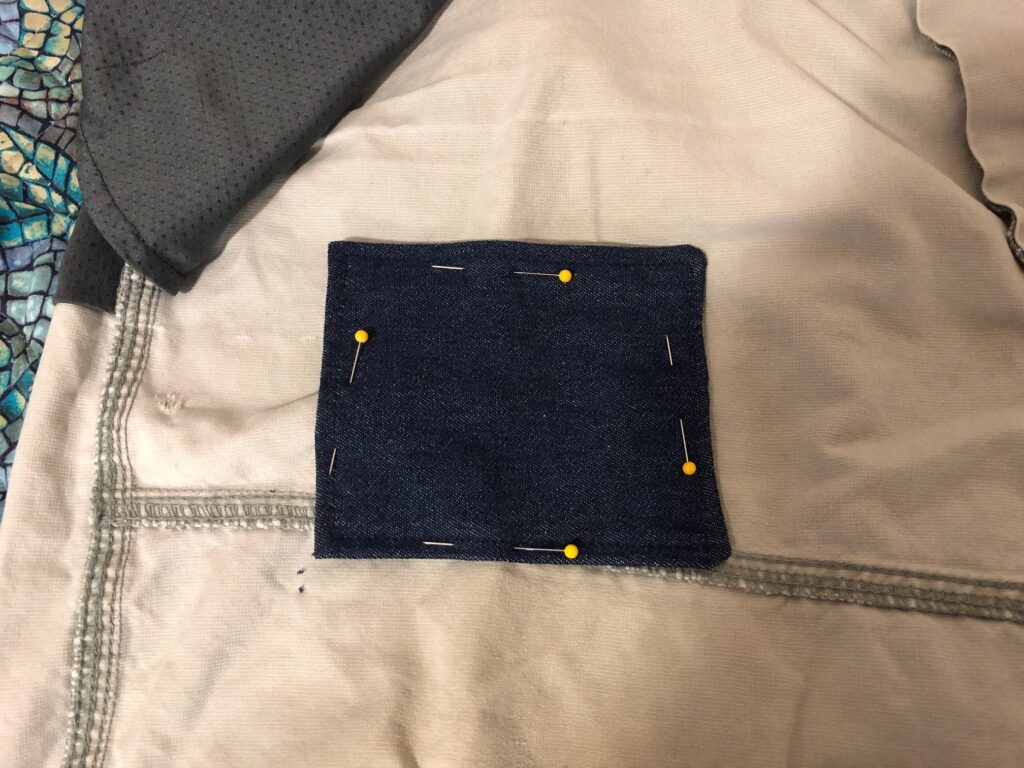
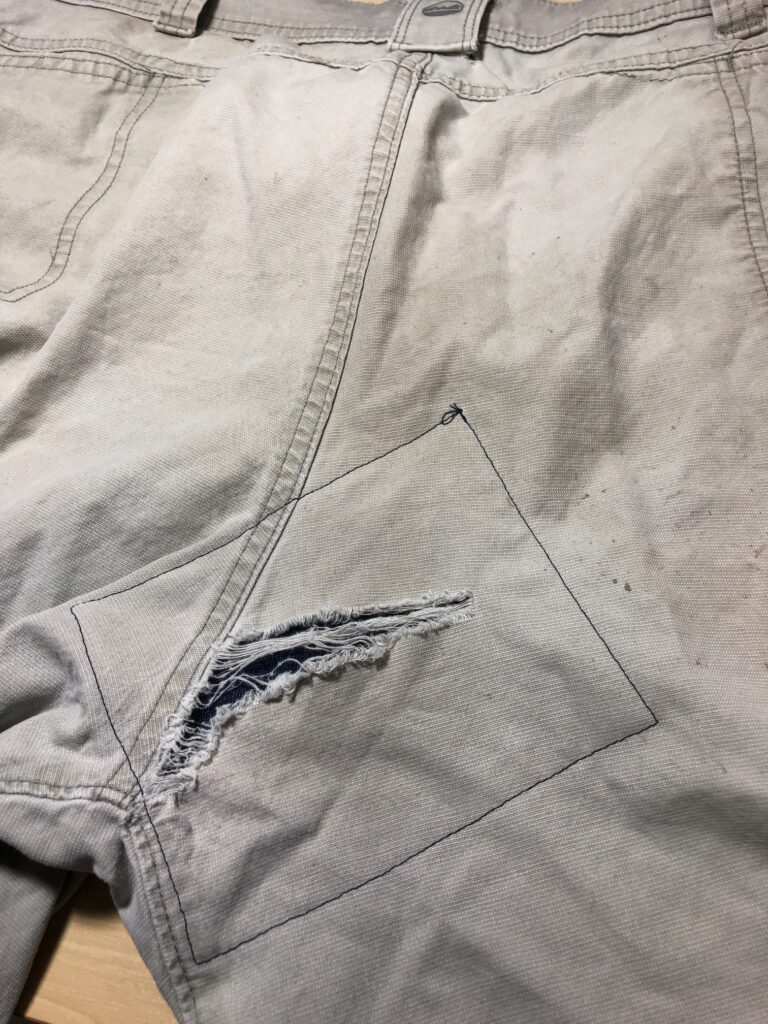
Starting with the smaller patch, I turned the shorts inside out and placed the patch over the rip, making sure it was covered by the patch.
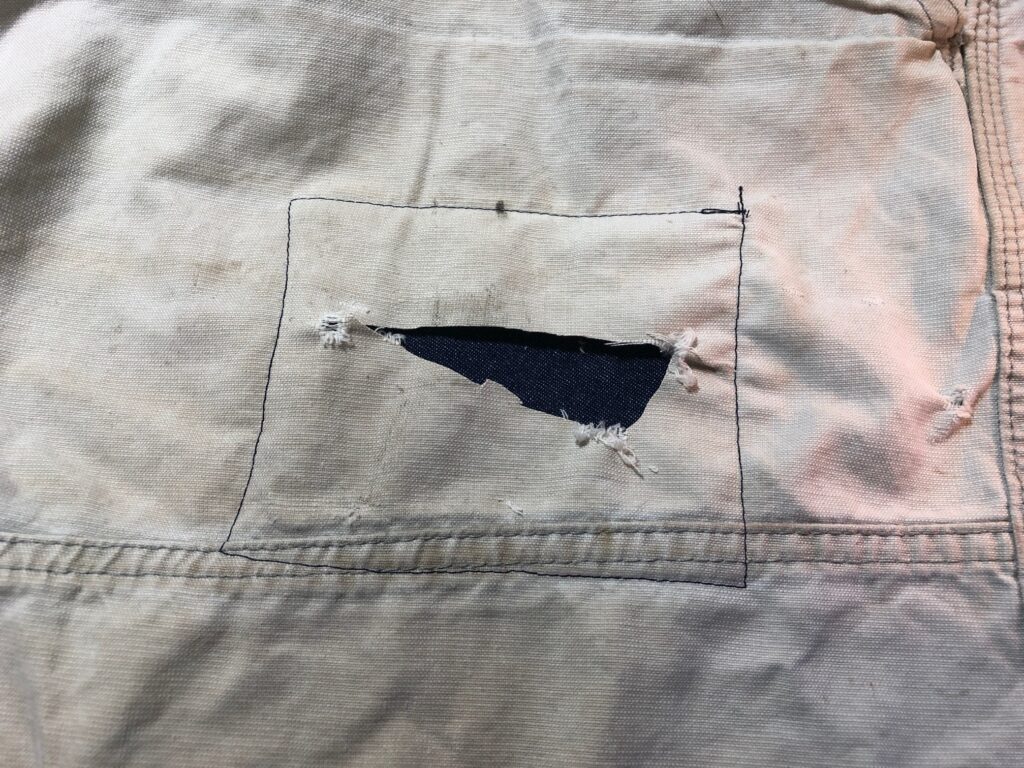
From the outside, you can see the patch through the hole. I trimmed the ragged edges around the rip so they wouldn’t bunch up under the outer patch.
Then I stitched around the hole.
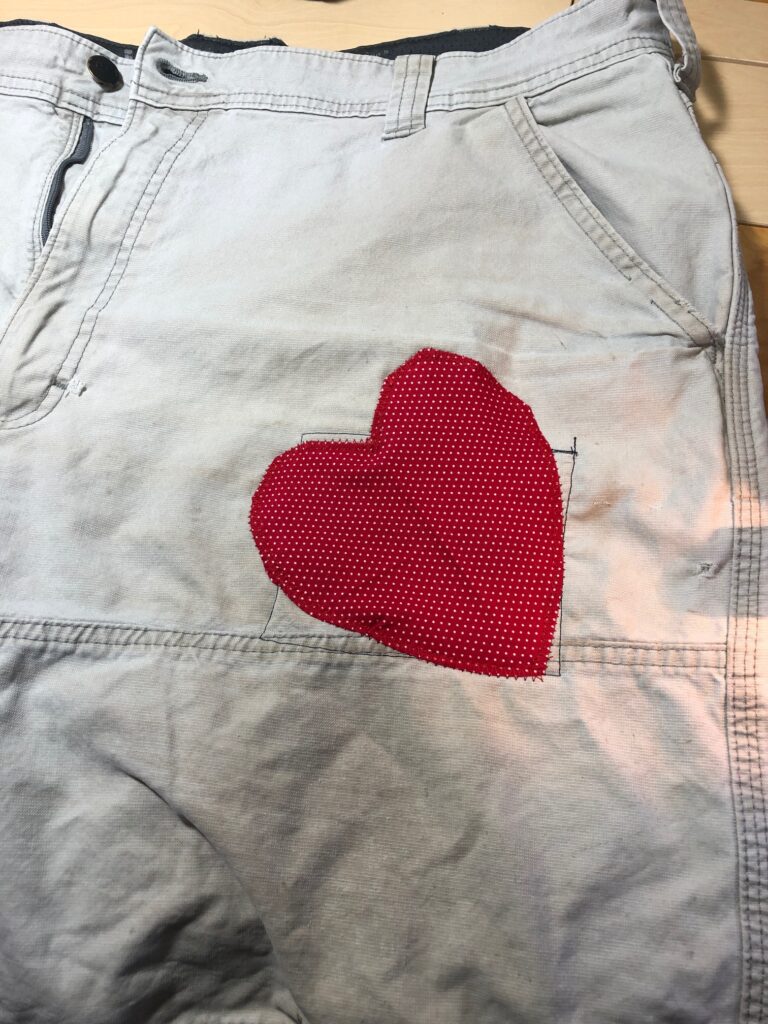
Now it’s ready for the outside patch. I could have just put another plain patch to match the shorts. However, where’s the fun in that! How about a big red heart! I turned the edge of the heart and stitched it before putting it on the shorts.
As long as it covers the hole it’s just fine.
Do you think he’ll know I love him now?
PAIR NUMBER 2
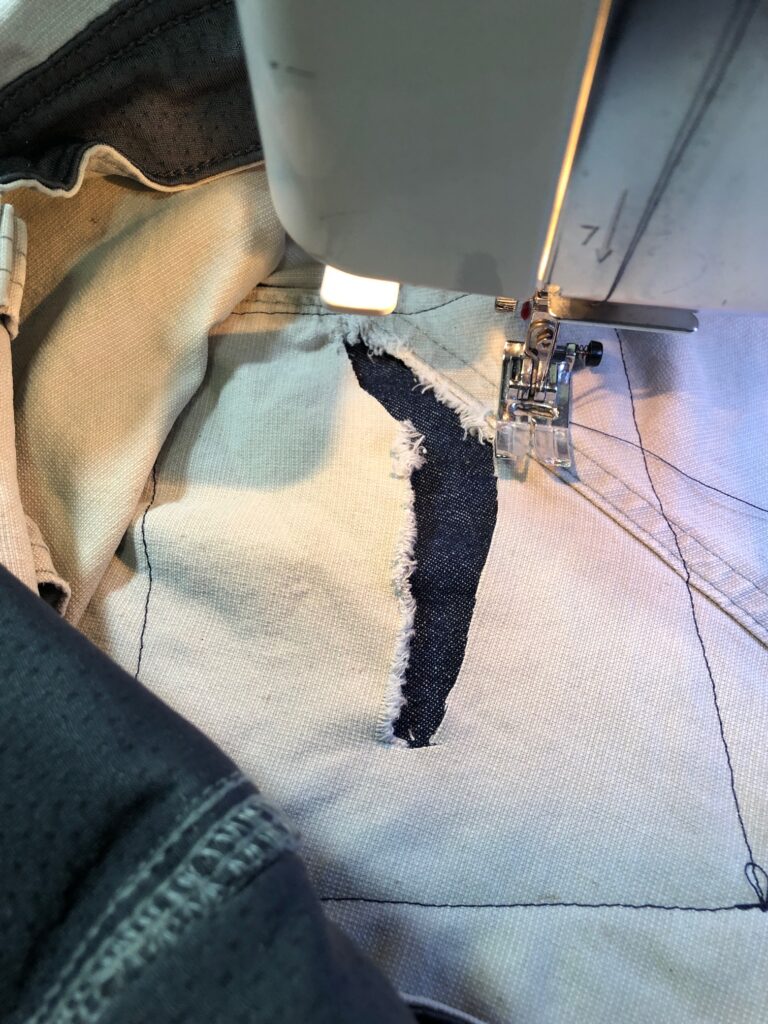
On the second pair of shorts, I follow the same procedure. It’s a little more awkward getting the patch and shorts under the sewing machine.
After sewing the patch on the inside, turn the shorts right side out and clean up the rip by trimming the shredded fabric.
Then add a top patch of your choice (in this case, another heart!). I figure maybe it will embarrass him to go get some new work shorts! HaHaHa…actually he loves them and shows them off on the job! Go figure!
If these were good shorts, I would have used thread that matched the garment and I would have chosen a matching fabric for the patch. I guess I could have just thrown them away, but where’s the challenge in that!
So, that was my mending challenge of the week! Hopefully everyone will be entertained on the job!
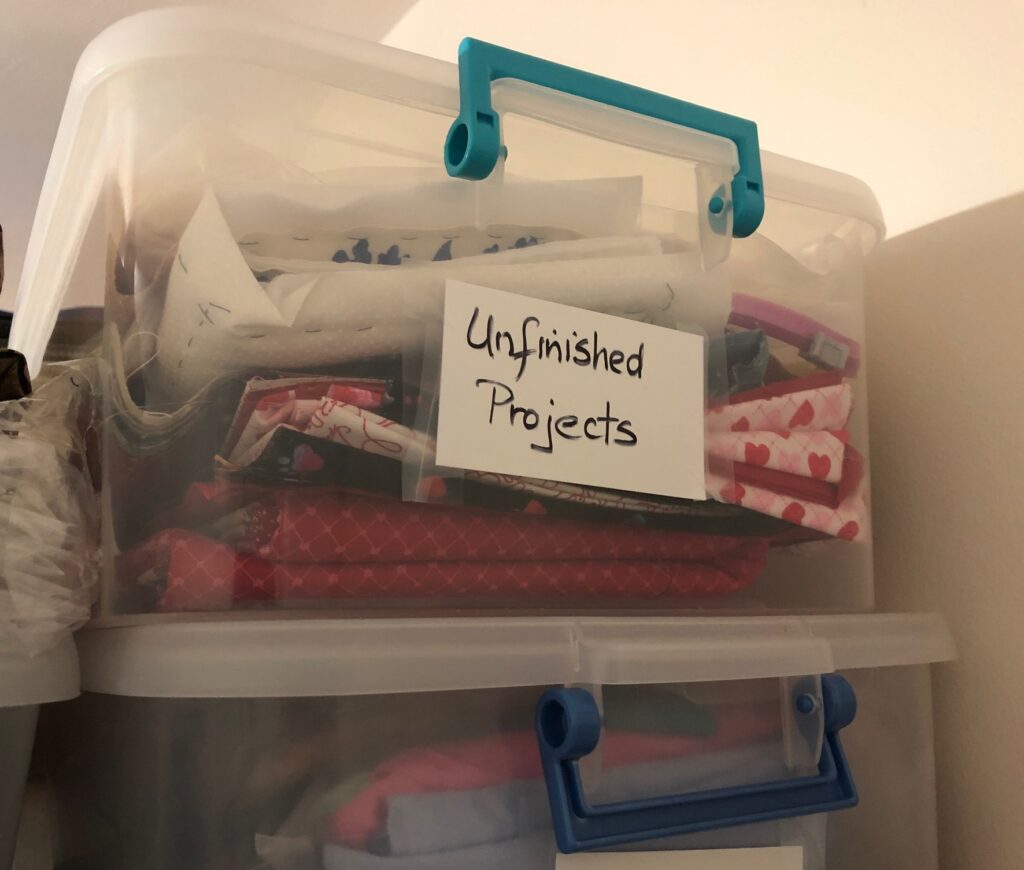
I seem to have collected an assortment of unfinished projects. I don’t notice them because they are stuffed into a bin waaaay up high on a shelf!
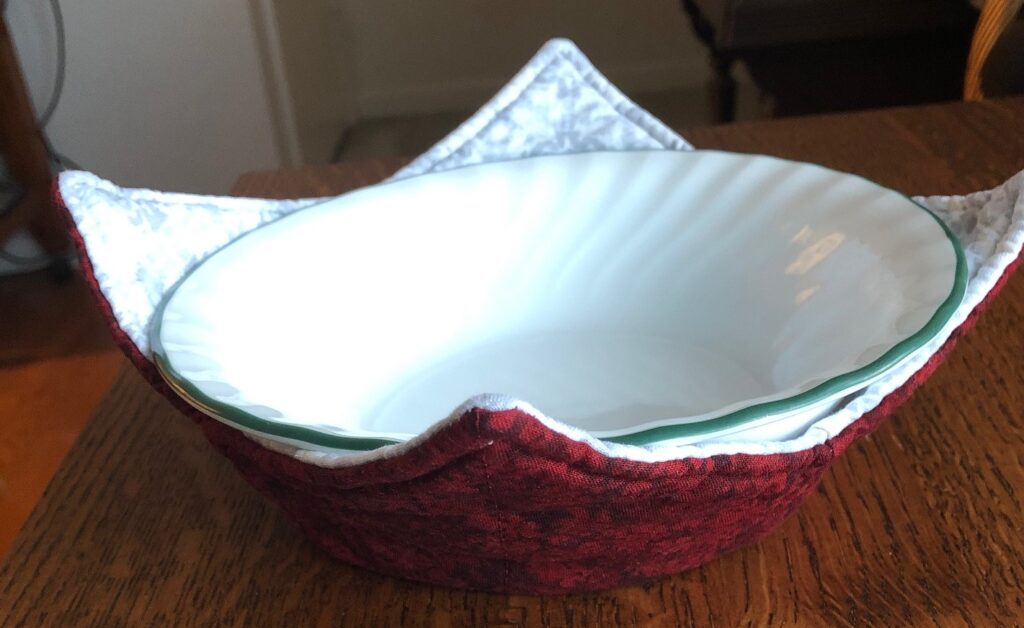
However, I needed another bowl cozy and remembered to check that bin today. Imagine that! I have several already cut out, ready to sew!
Several years ago, I was on a roll and made dozens in these colors for my high school friends (maroon and gray were our high school colors). Obviously, I had a few extra cut out.
These shaped potholders are great when I want to reheat a bowl of soup in the microwave. I lay a paper towel on top to catch spatters. When I take the hot bowl out of the microwave, I have a potholder already in place! It has saved me a lot of spilled soup and burned fingers. I have other friends that have discovered they are great to hold their cold bowl of ice cream!
You may have seen stacks of these potholders at craft fairs…all sizes. The larger ones are great for hot dishes. This size fits a standard cereal bowl.
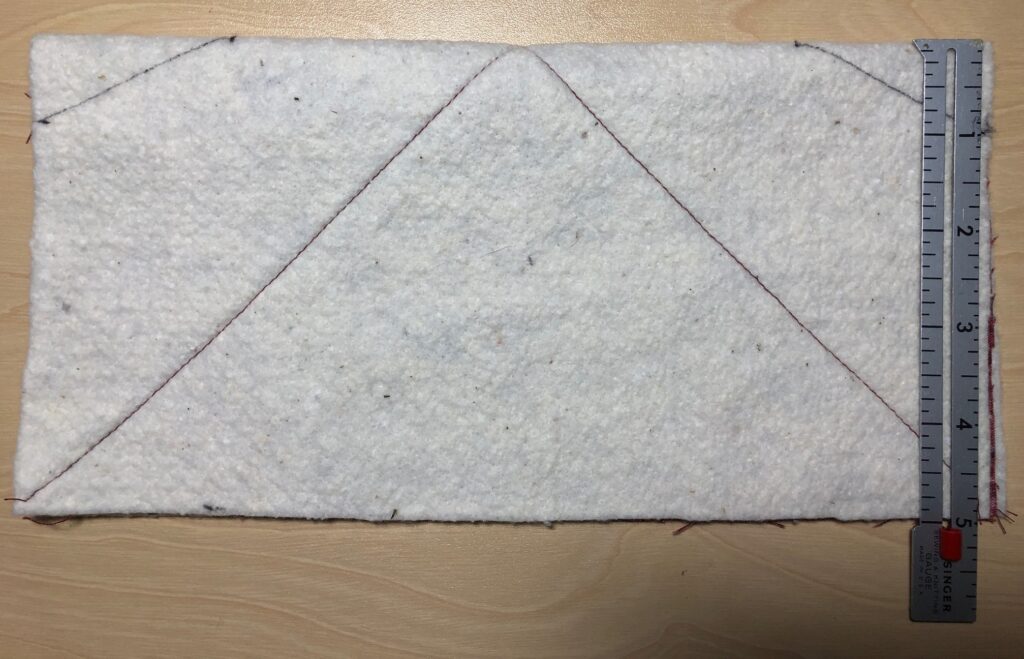
Here are the instructions:
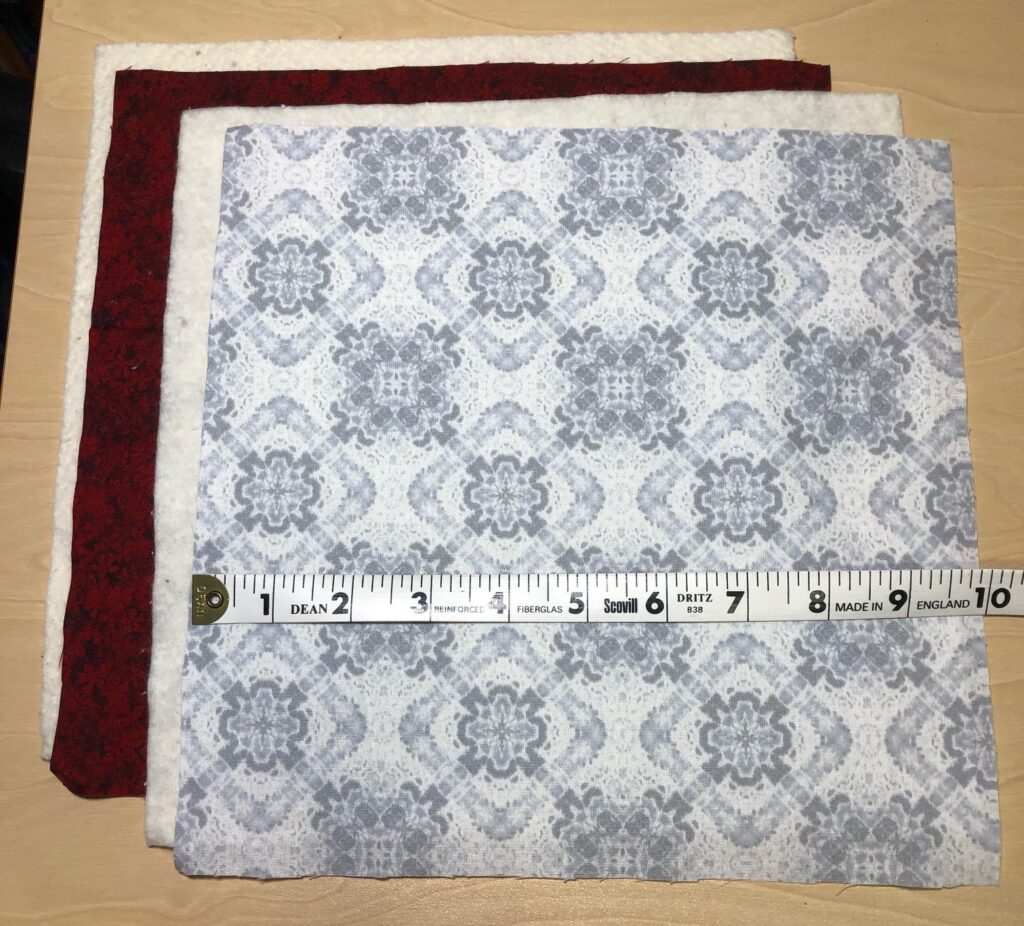
Step 1:
Cut out two 10″ squares of cotton fabric (not polyester…it may melt in the microwave).
Cut out two 10″ squares of lightweight cotton batting.
Step 2:
Place each square of fabric on top of a square of batting, right side up.
Stitch on the diagonal on both pieces of the fabric/batting sandwiches. I stitch with the batting on top to decrease the amount of lint that goes into the machine.
Step 3:
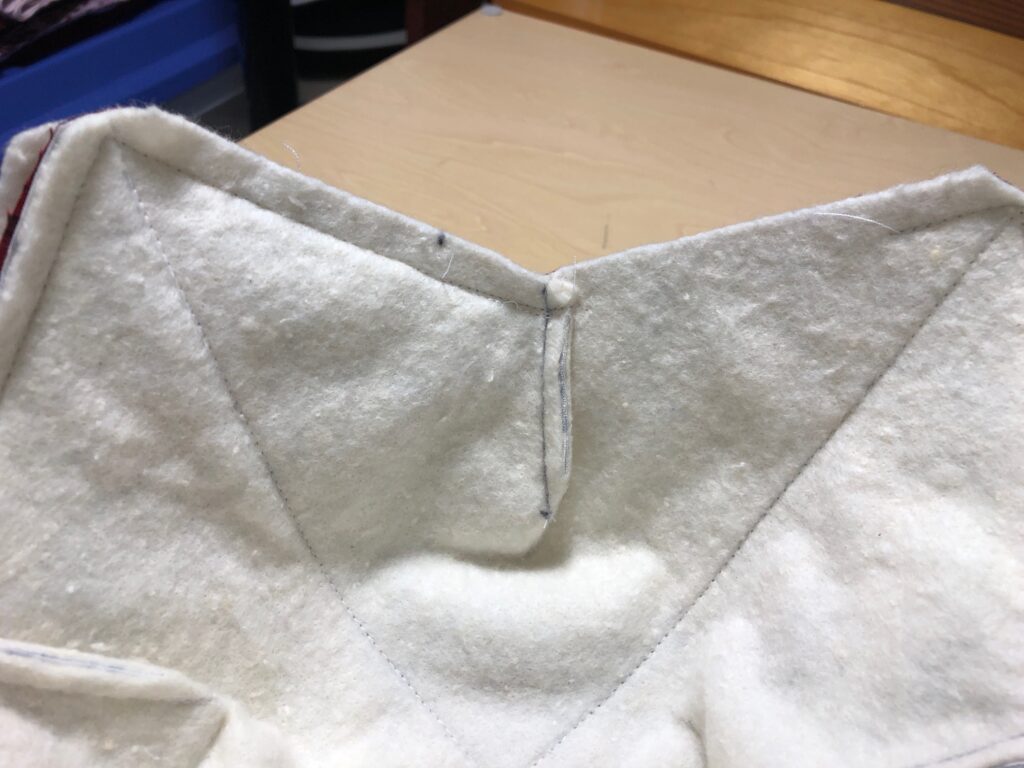
Fold each piece in half, right sides together.
Mark a stitching line, 1″ from the fold, and 2″ along the fold, as shown below.
Sew along both lines, on both pieces.
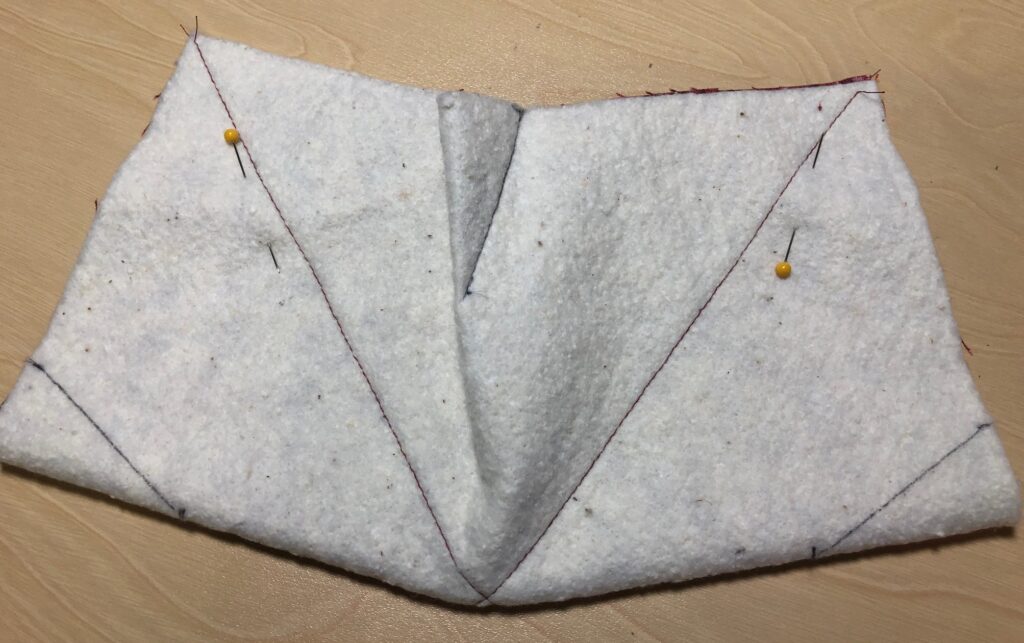
Step 4:
Open the squares and fold the other way. Mark and stitch again.
Step 5:
When you open the squares, they will sit like a bowl.
Trim seam allowance to 1/8″ to decrease bulk of darts.
Step 6:
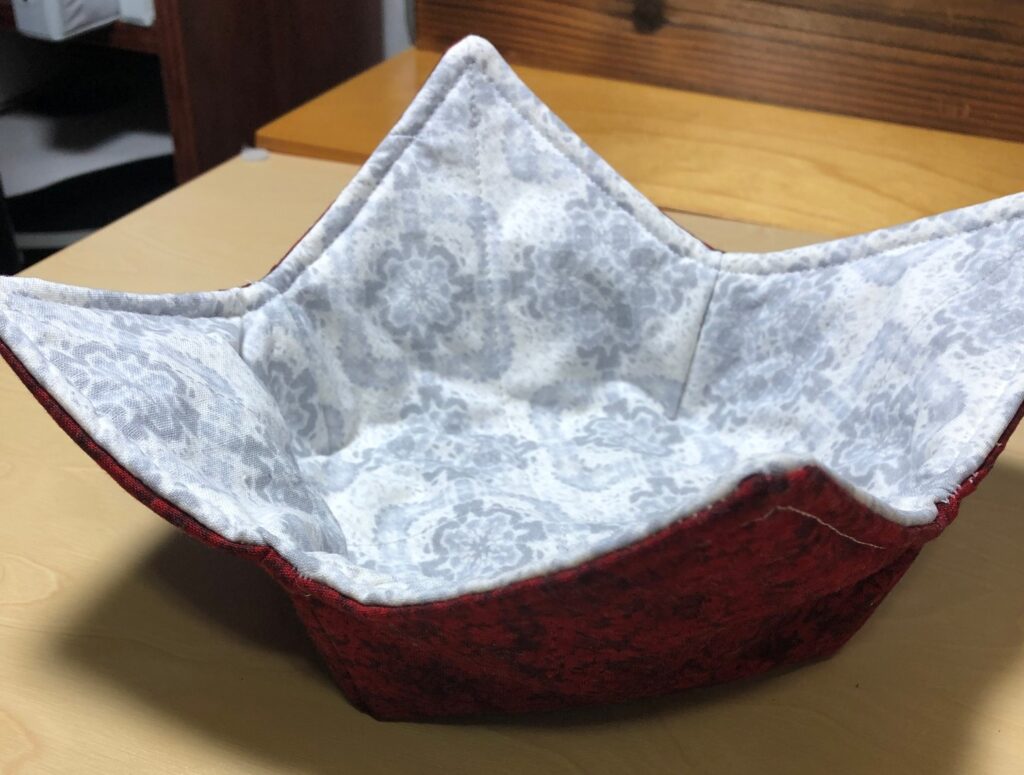
Turn one piece right side up and the other right side down.
Pin the two halves with right sides together, lining up the darts.
Sew around the edges with a 1/4″ seam, turning your needle at the corners and the darts.
Leave about 3″ open for turning right side out.
Oops…in this picture I hadn’t trimmed the darts yet!
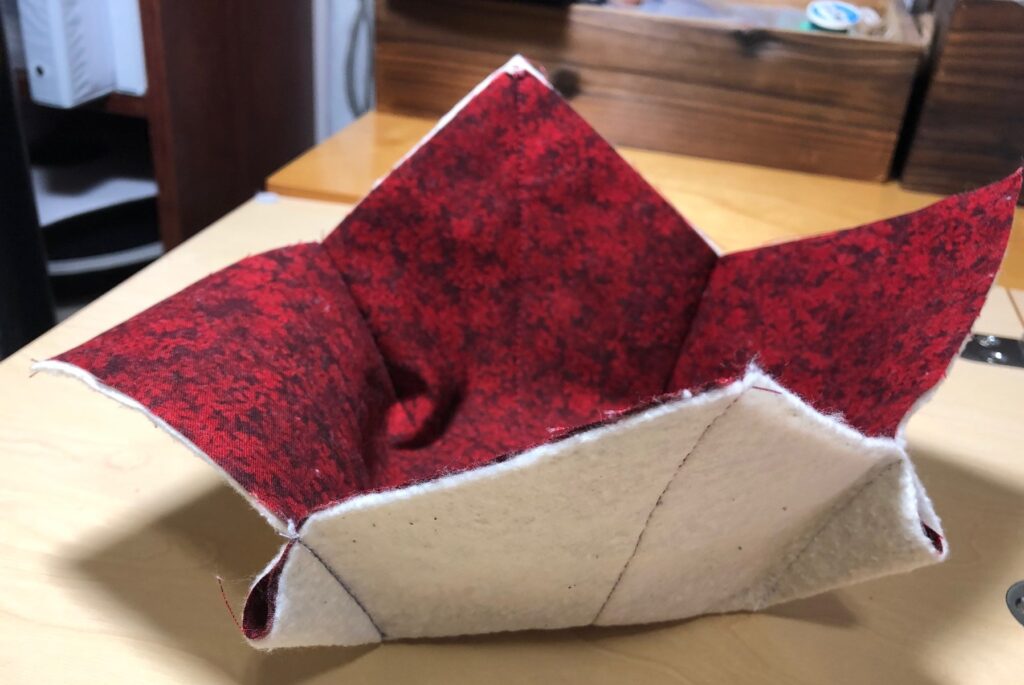
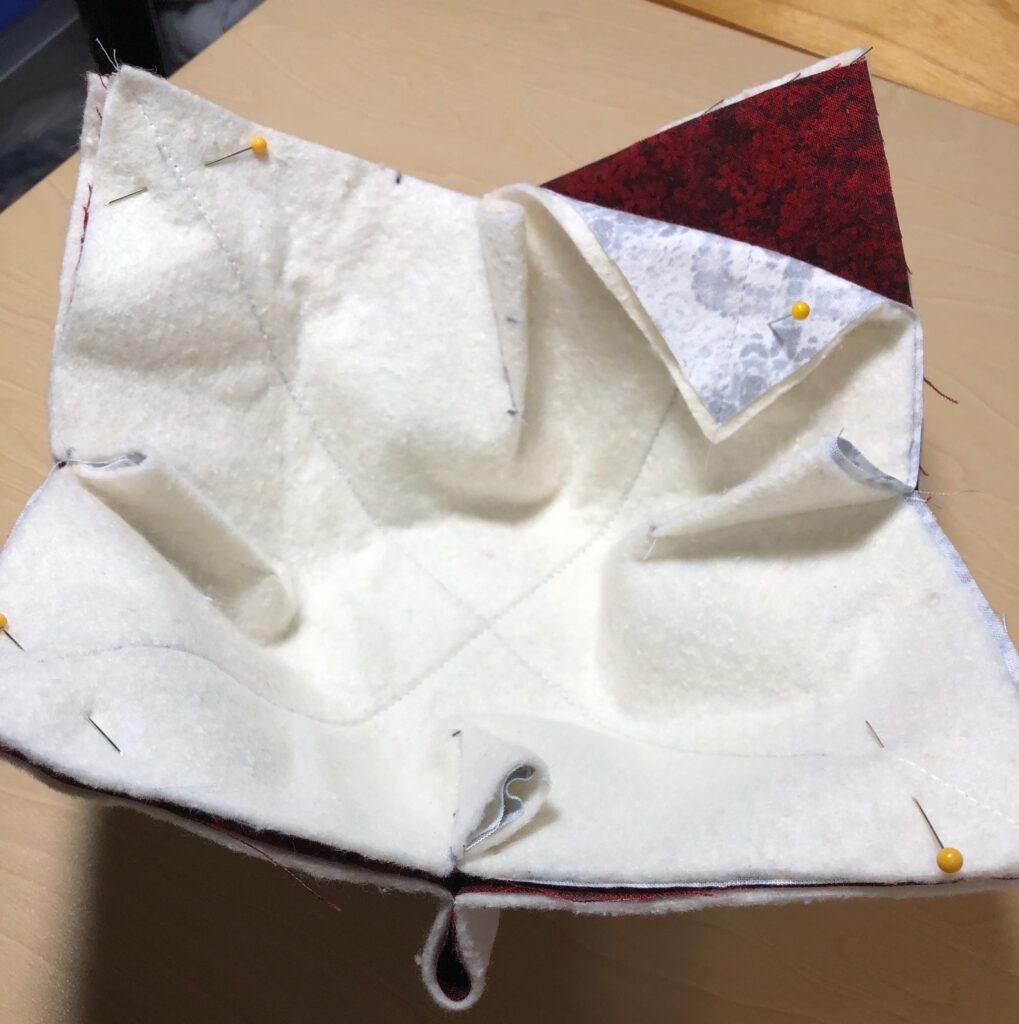
Step 7:
Trim corners. Turn cozy right side out, pushing corners out and nesting the two halves.
Step 8:
Top stitch around the edge of the bowl, folding in the opening 1/4″ to close. The cozy is reversible.
If you want a larger cozy, start with a larger square…11″, 12″, etc.
And that’s it! Enjoy your next bowl of soup or ice cream!
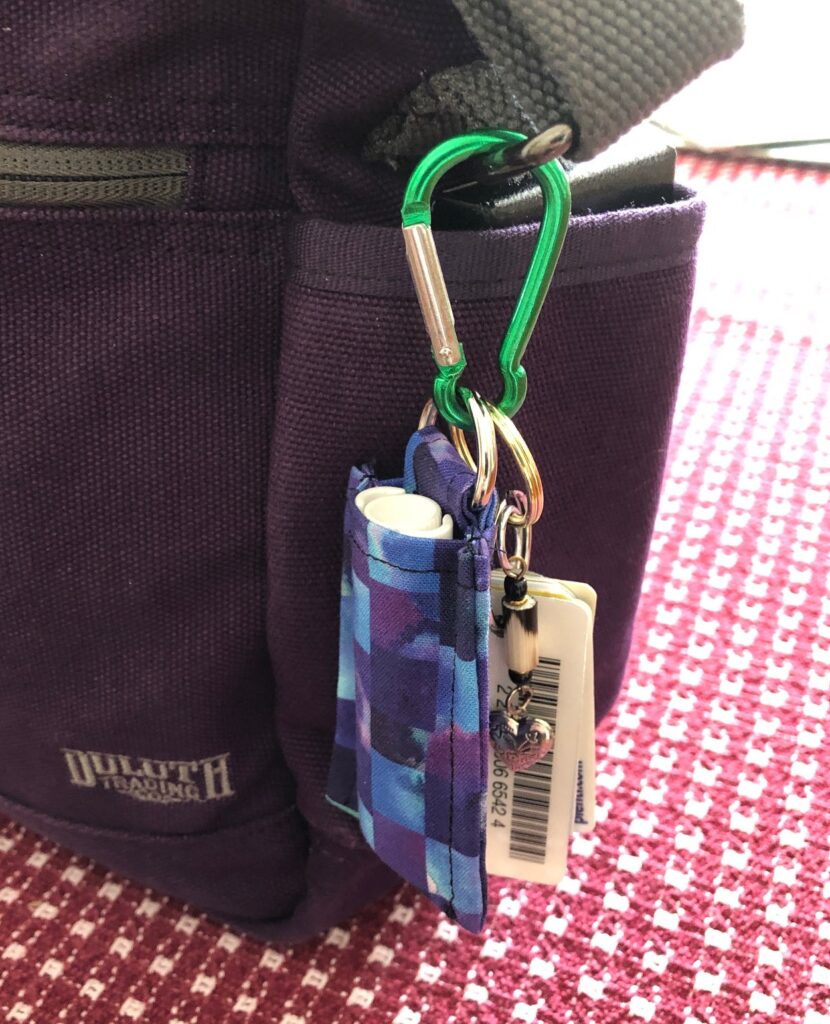
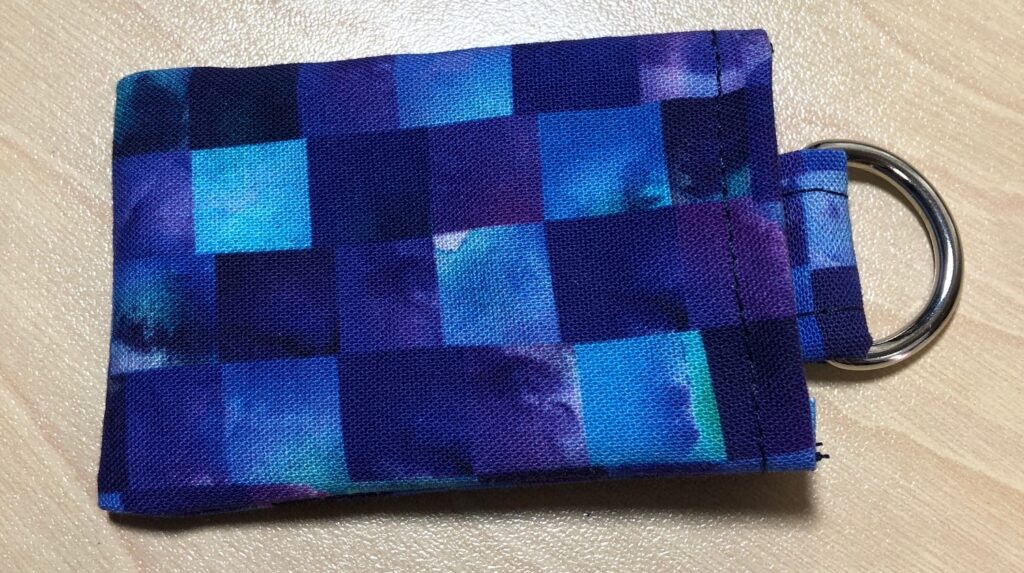
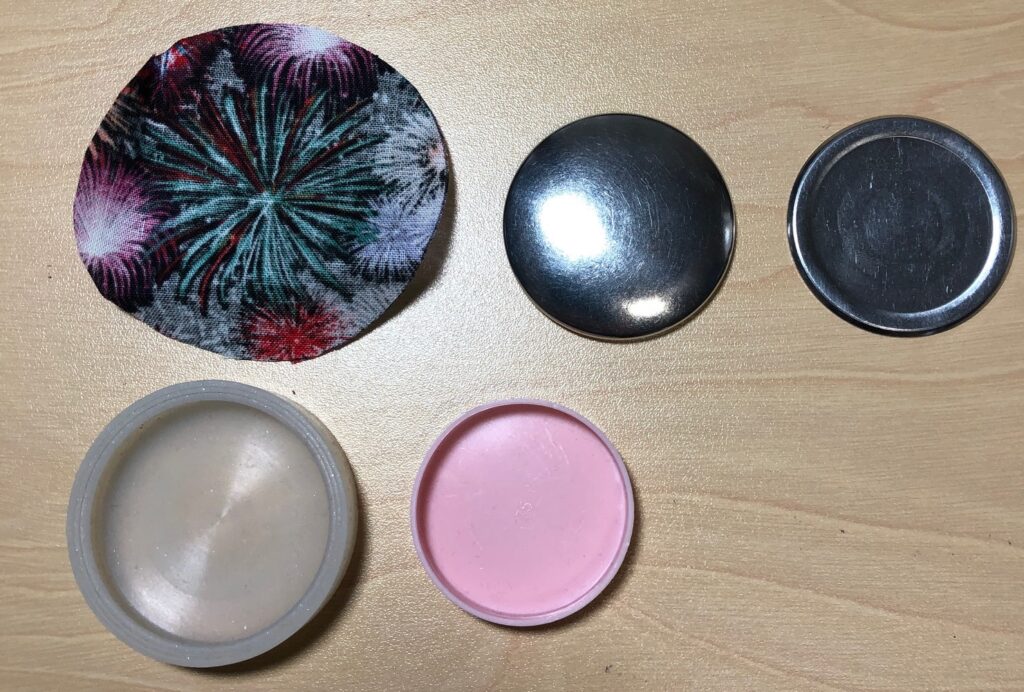
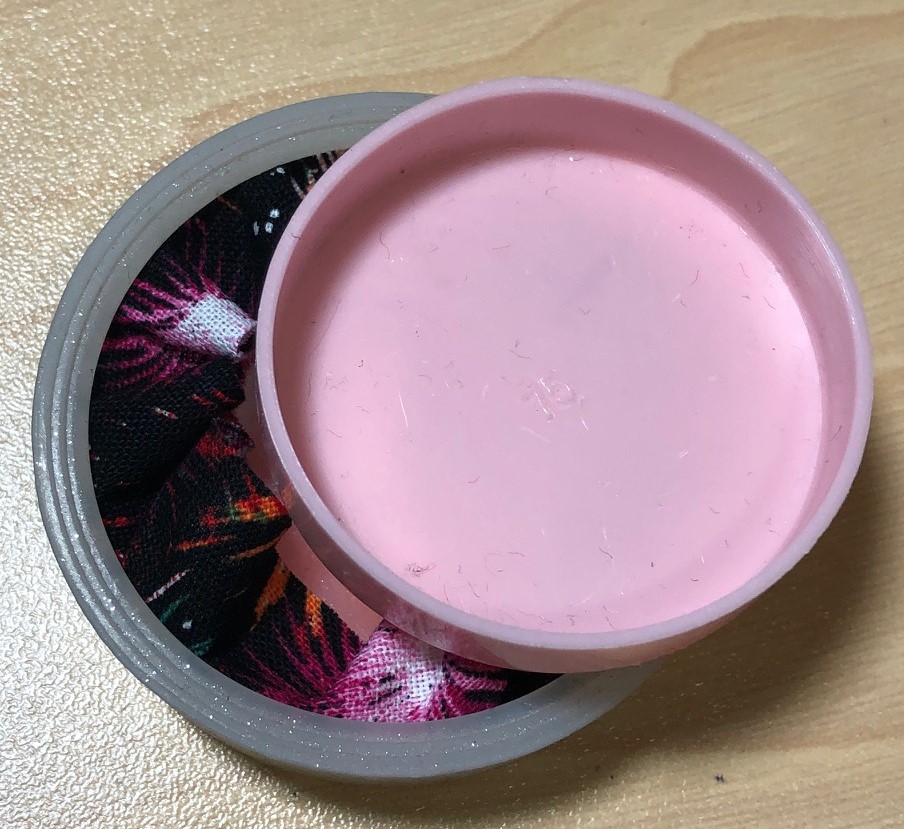
Now that I have a handful of lip balms to give away, I like to also hand someone the holder to put it in. I carry mine on my purse so I never have to dig for it. My grandkids have fastened them to their backpacks!
I first went to WalMart and Pinterest to get ideas. I bought a few to take apart. I basically experimented to find ways to end up with all the seams turned to the inside and still be possible with my sewing machine. After taking a few apart, I sketched out my pattern.
You might think I have a special pattern to make this holder. Ha! Let me show you what I use:
As I made a few samples I refined the process. So, here are the steps with pictures:
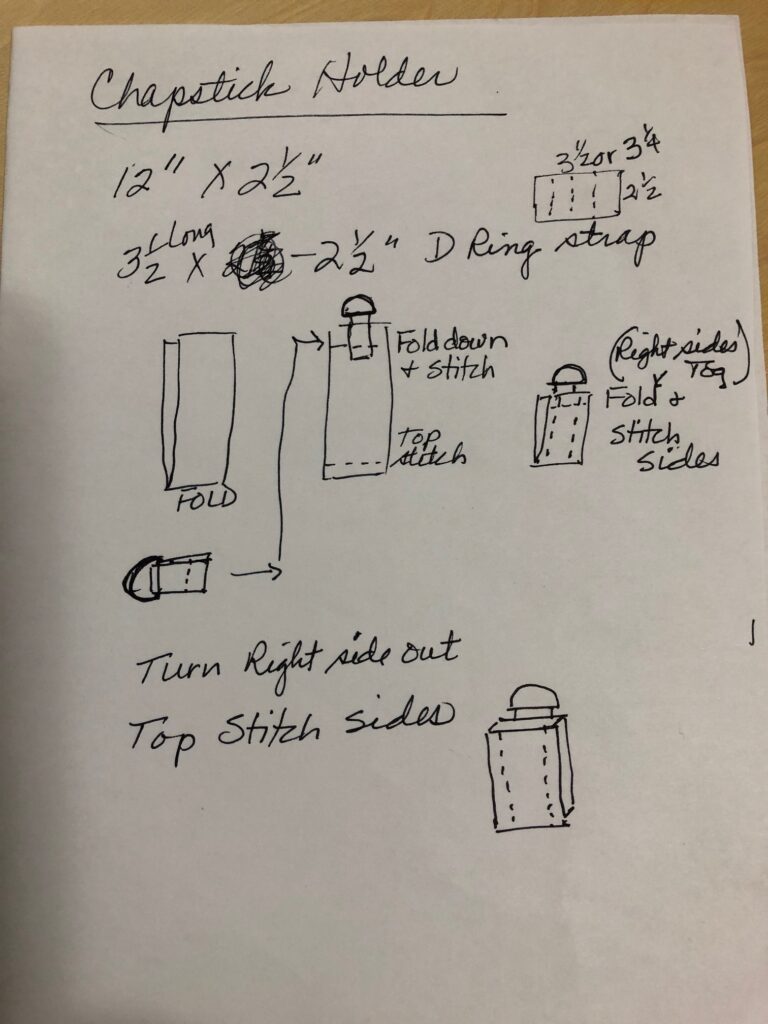
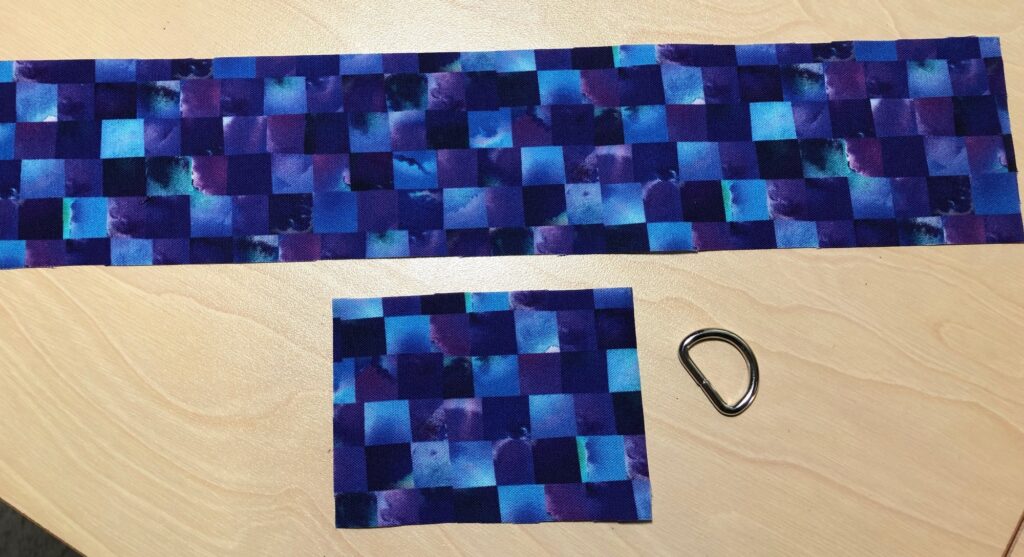
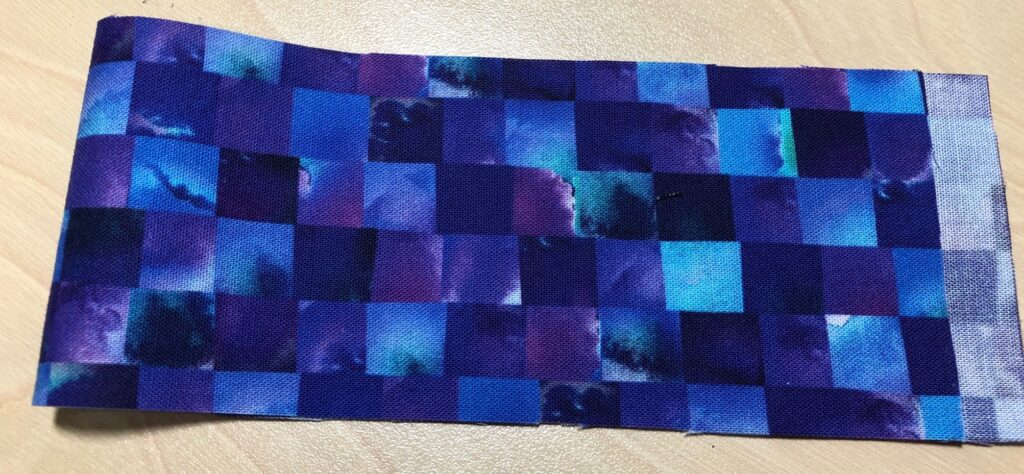
Step 1: Your materials
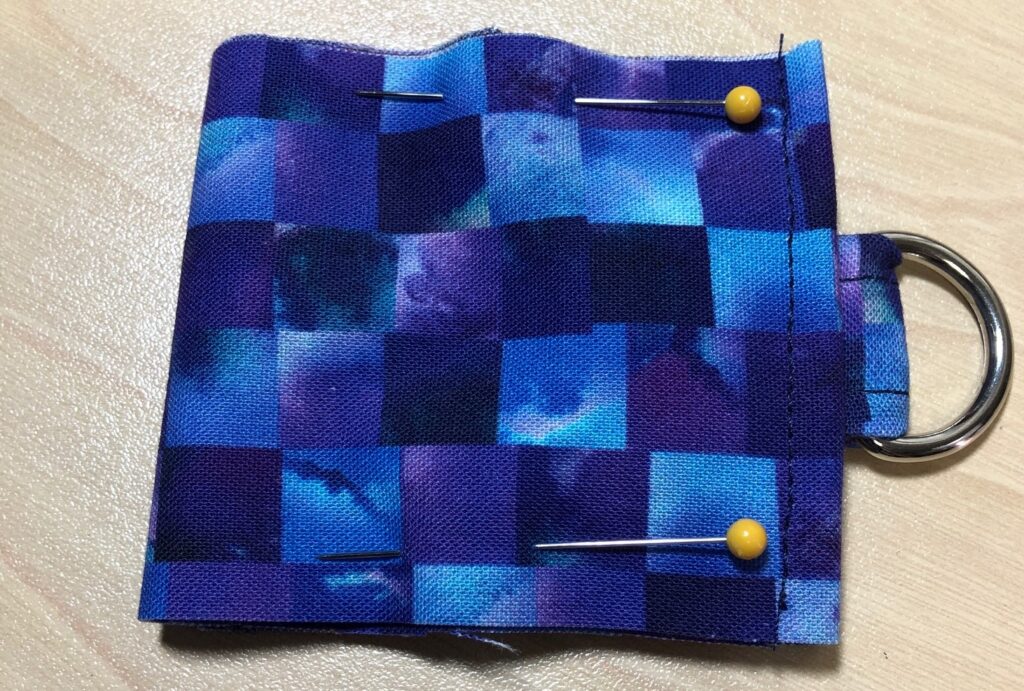
A piece of fabric 2 1/2″ by 12″; a piece of fabric 2 1/2″ by 3 1/2″; a 1/2″ D-ring
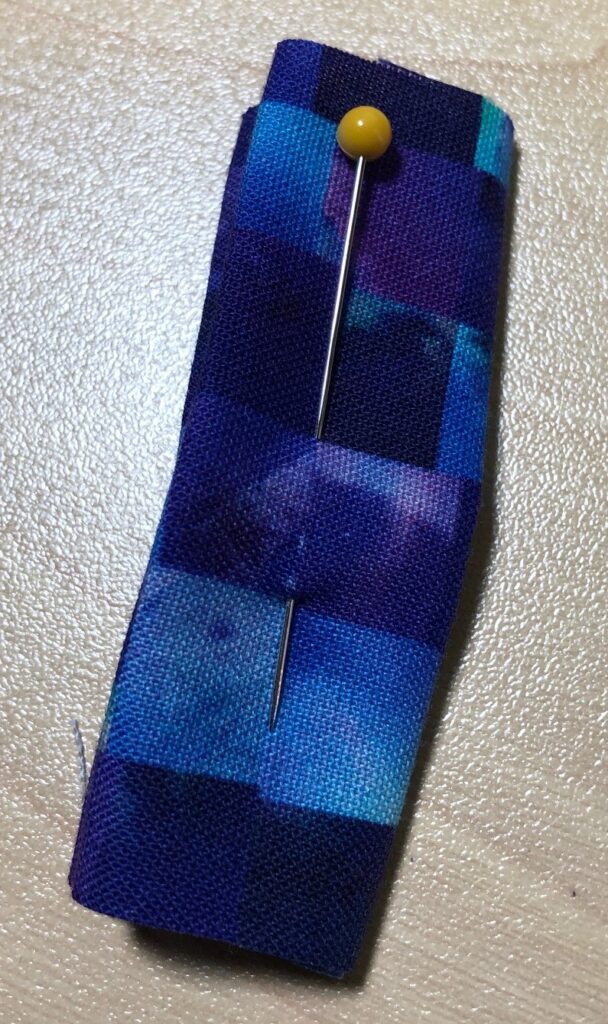
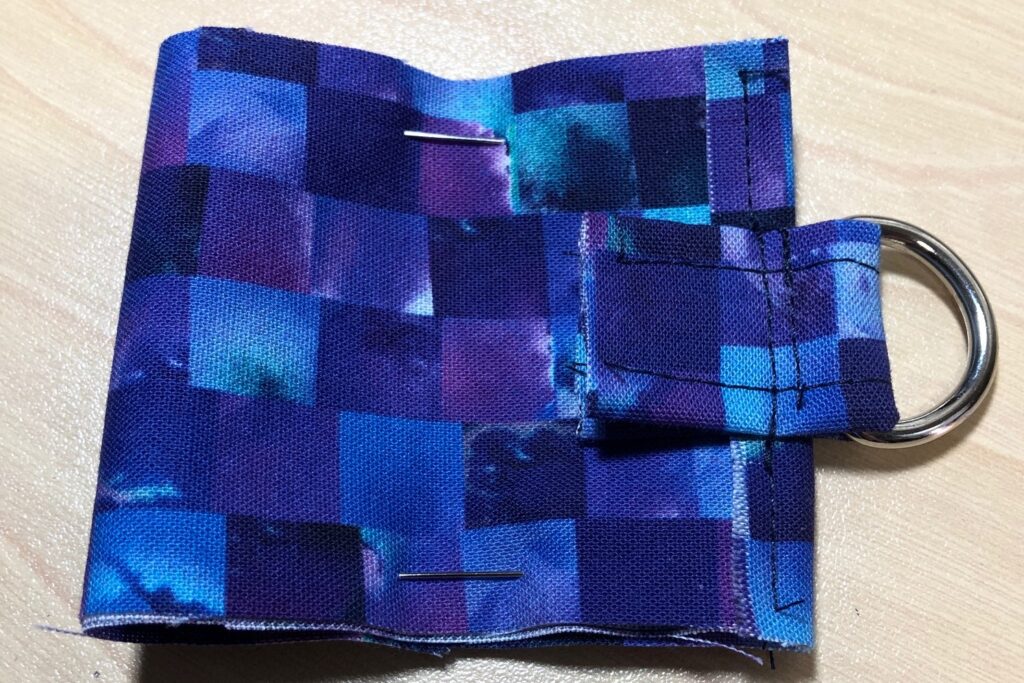
Step 2: Make the D-ring attachment
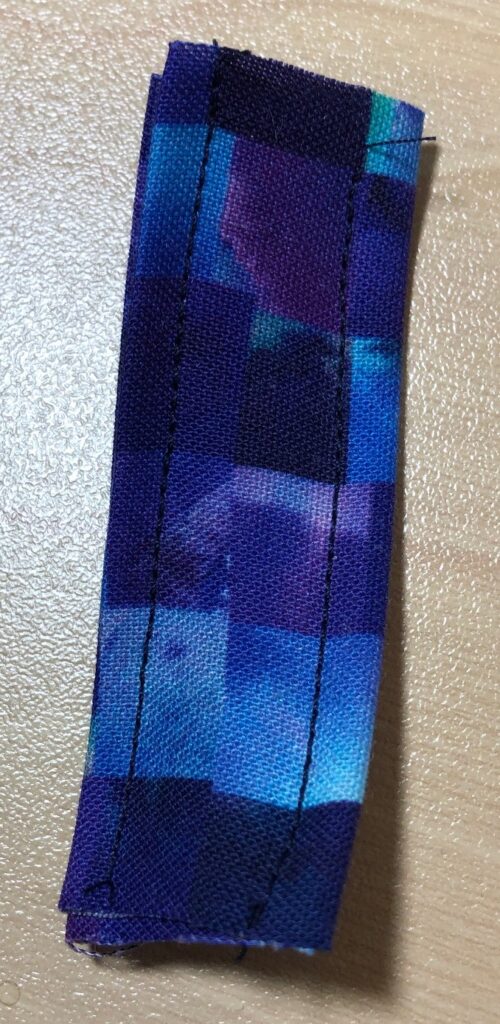
Using the 2 1/2″ by 3 1/2″ piece of fabric, fold the two ends to the center, then fold the piece in half. Top stitch the edges together.
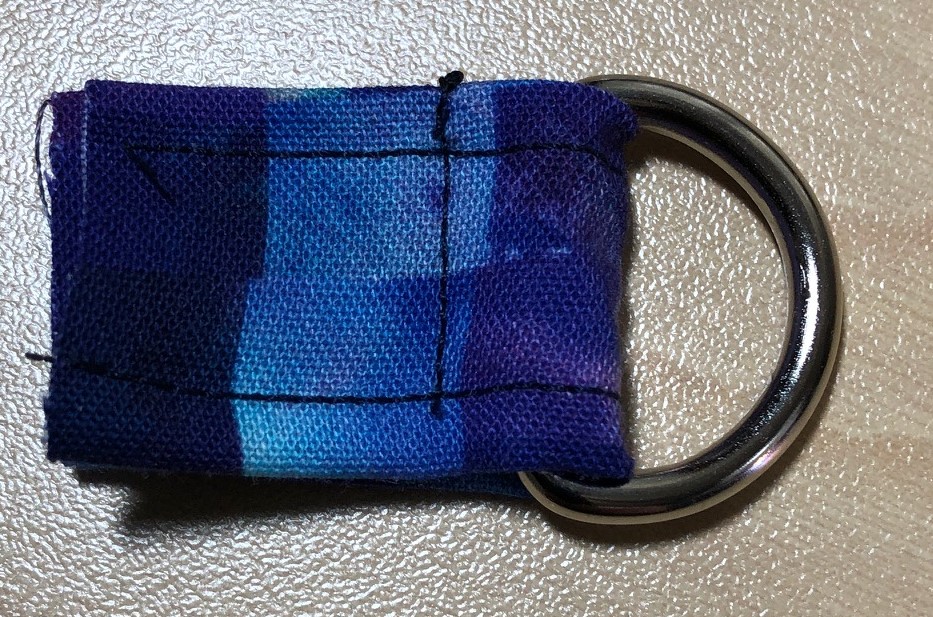
Step 3: Attach the D-ring
Insert the tab through the D-ring and fold in half. Stitch close to the D-ring (I had to use my zipper foot to get close enough).
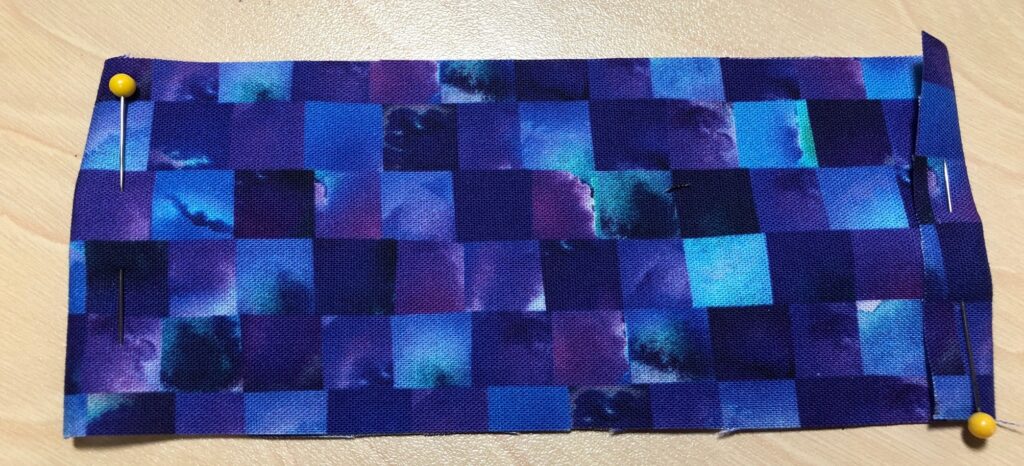
Step 4: Fold the 2 1/2″ by 12″ piece almost in half, leaving 1/4″ to fold over. Stitch the edge folded over and top stitch along the other folded edge.
Step 5: Attach the D-ring tab to the folded edge (on the right, above), stitching close to the D-ring. This is the inside of the holder.
Step 6: Fold the holder in half, right sides together. Stitch the sides with a 1/4″ to 3/8″ seam.
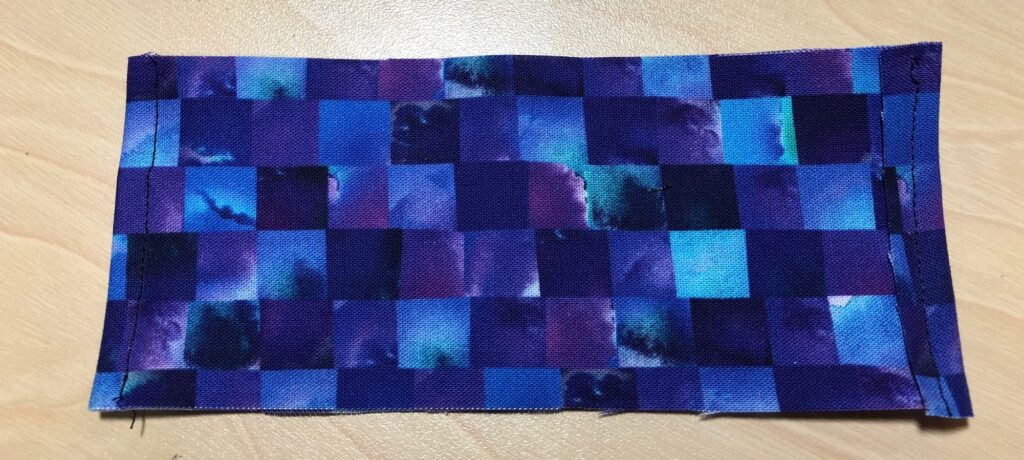
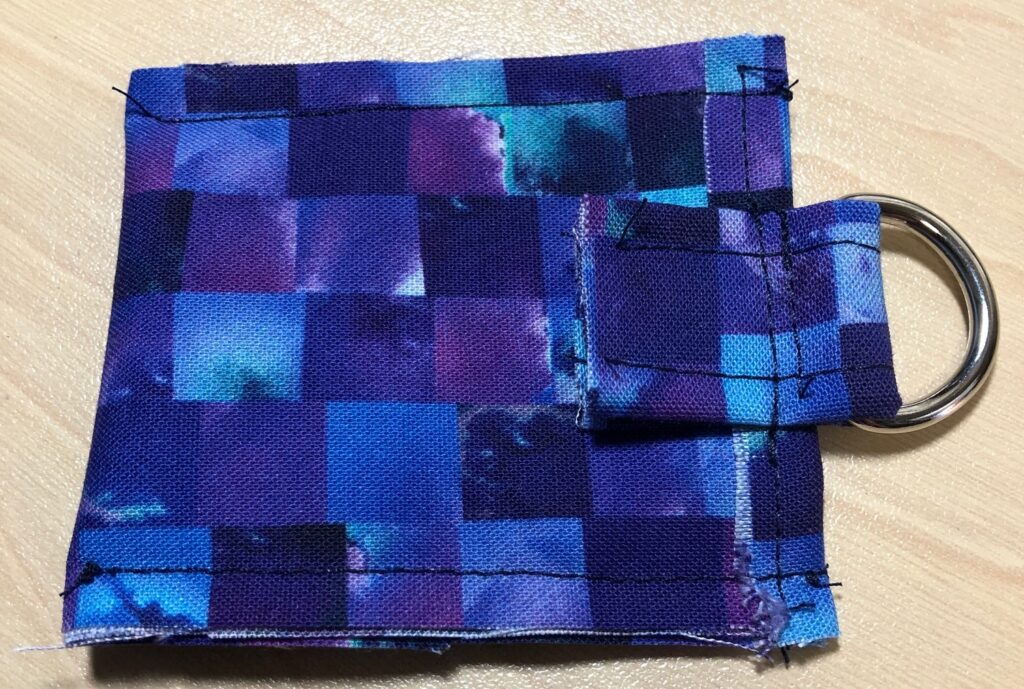
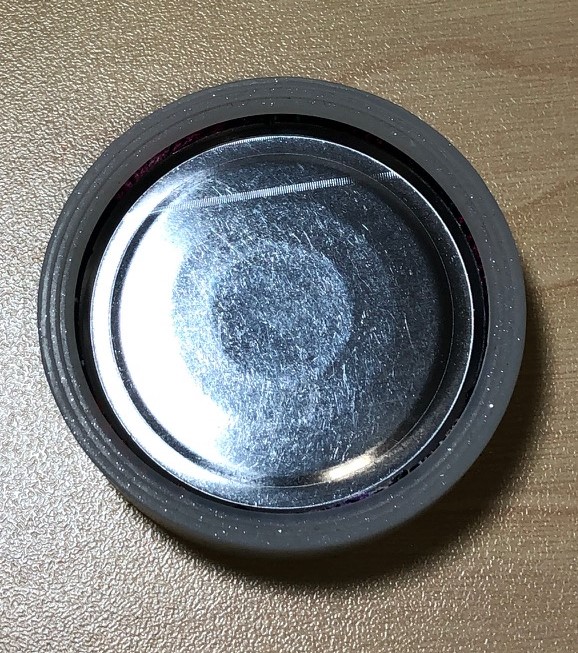
Step 7: Turn the holder right side out. I use a stick that came with my stuffing to help poke out the corners.
Step 8: Top stitch the sides with a 1/4″ to 3/8″ seam. (Depends on how big your lip balm is. Some lipsticks are larger around so the smaller seam is necessary).
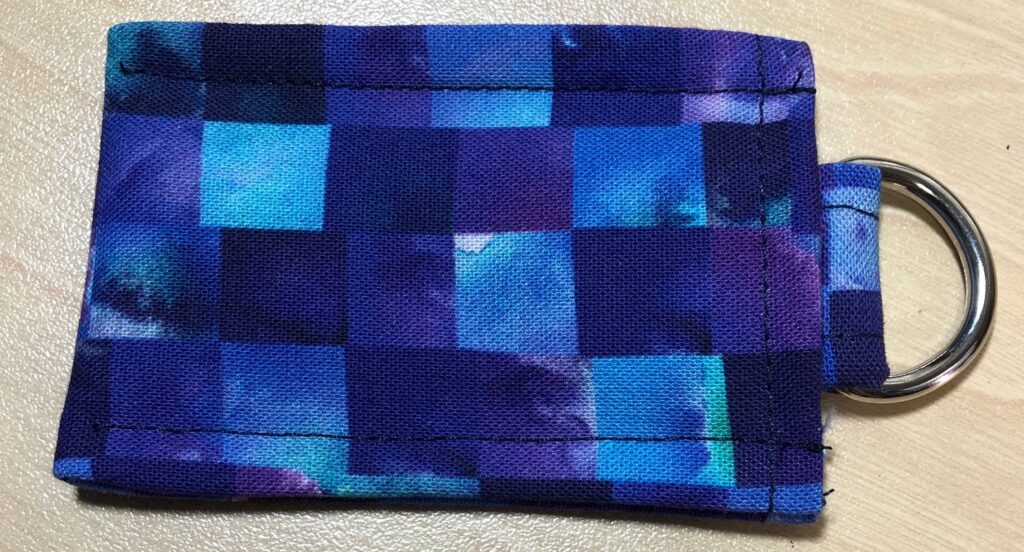
I use a carabiner clip to attach my holder to my purse, and I include one with each holder I give away.
This works great to fasten my holder and all my grocery tags to the outside of my purse so I don’t have to hunt for them!
This same holder pattern could be enlarged to handle an essential oil roller ball or a small flashlight. Experiment!! Have fun! Enjoy!
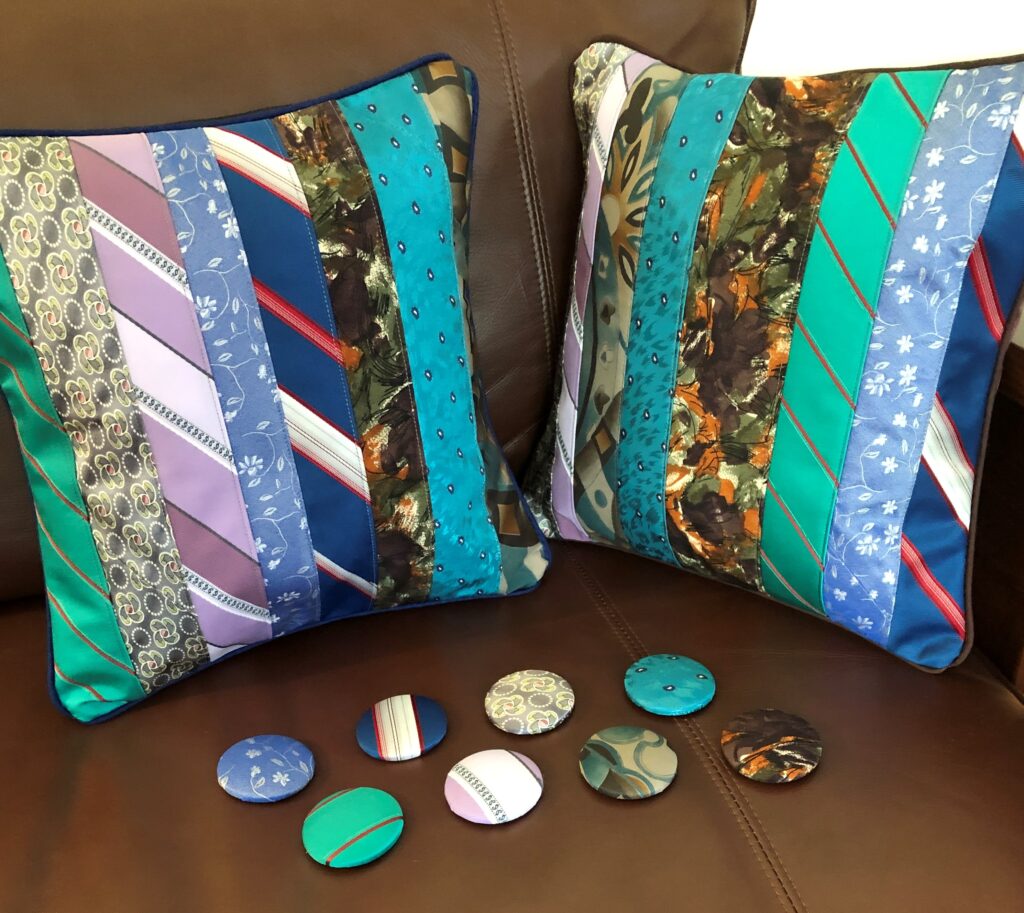
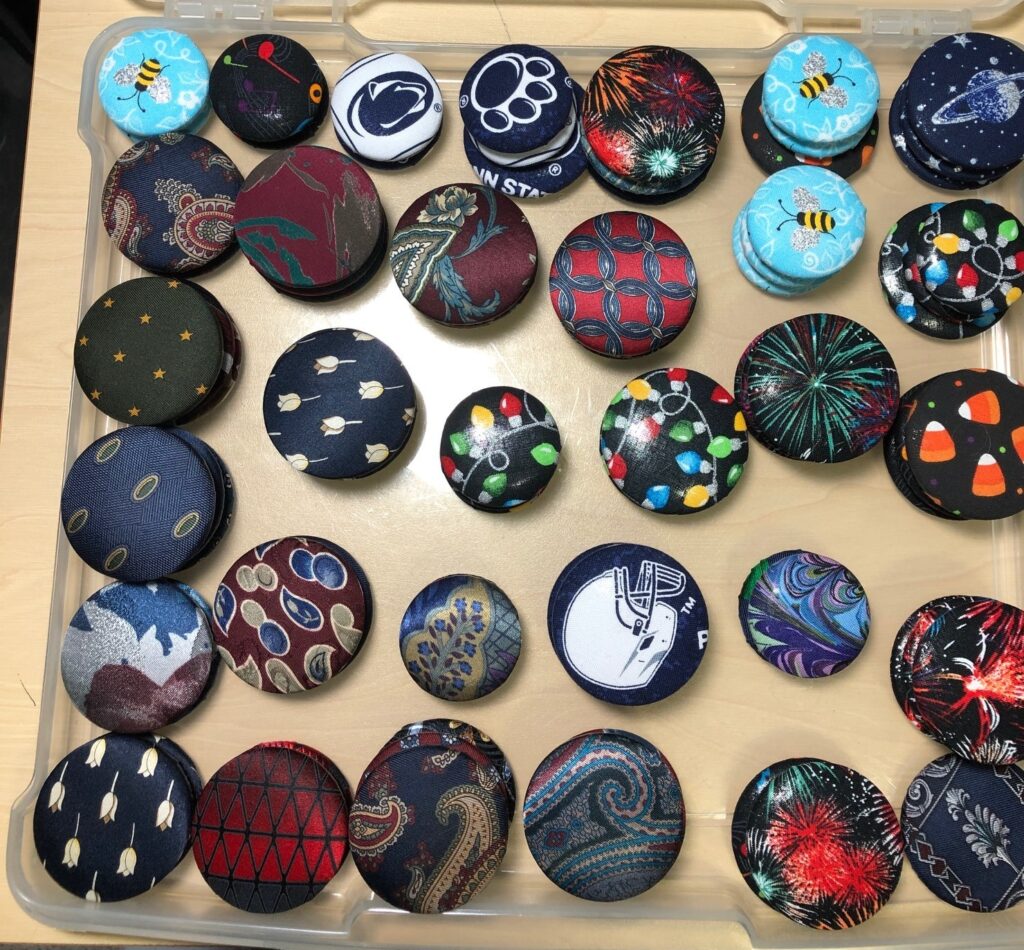
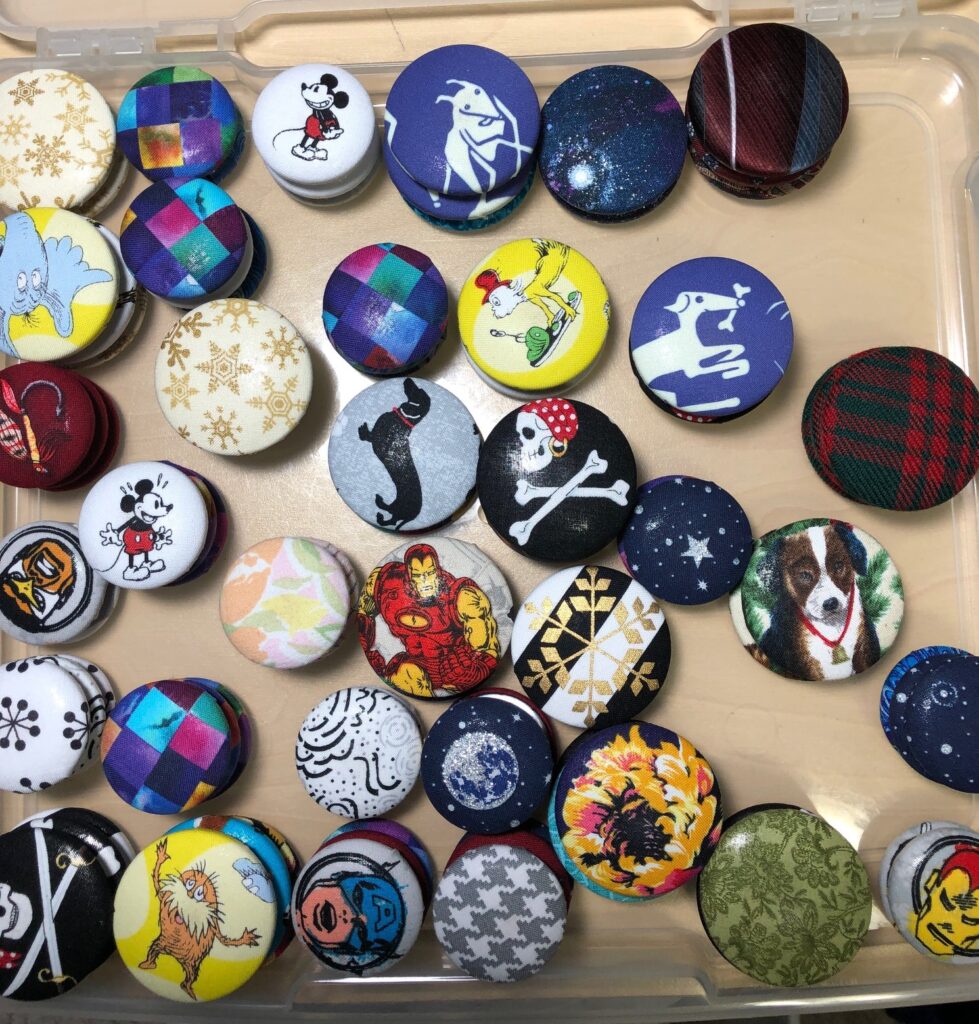
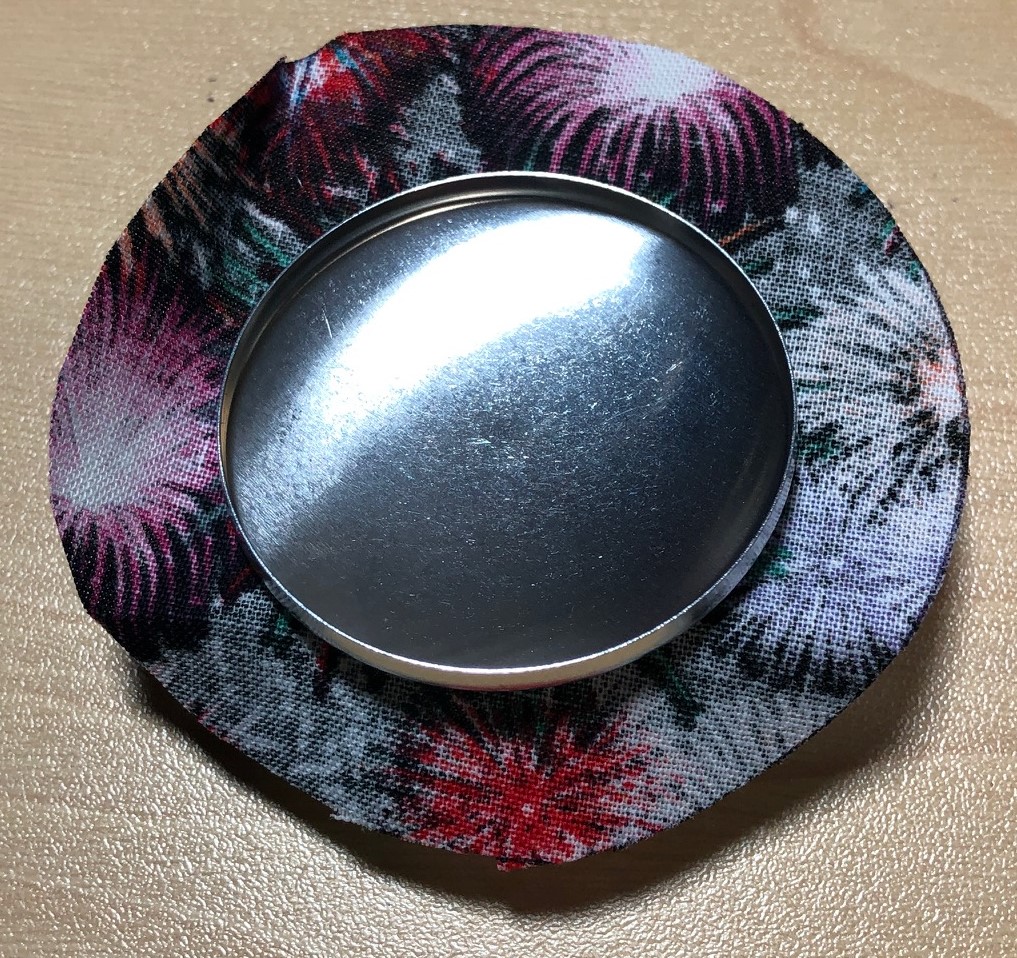
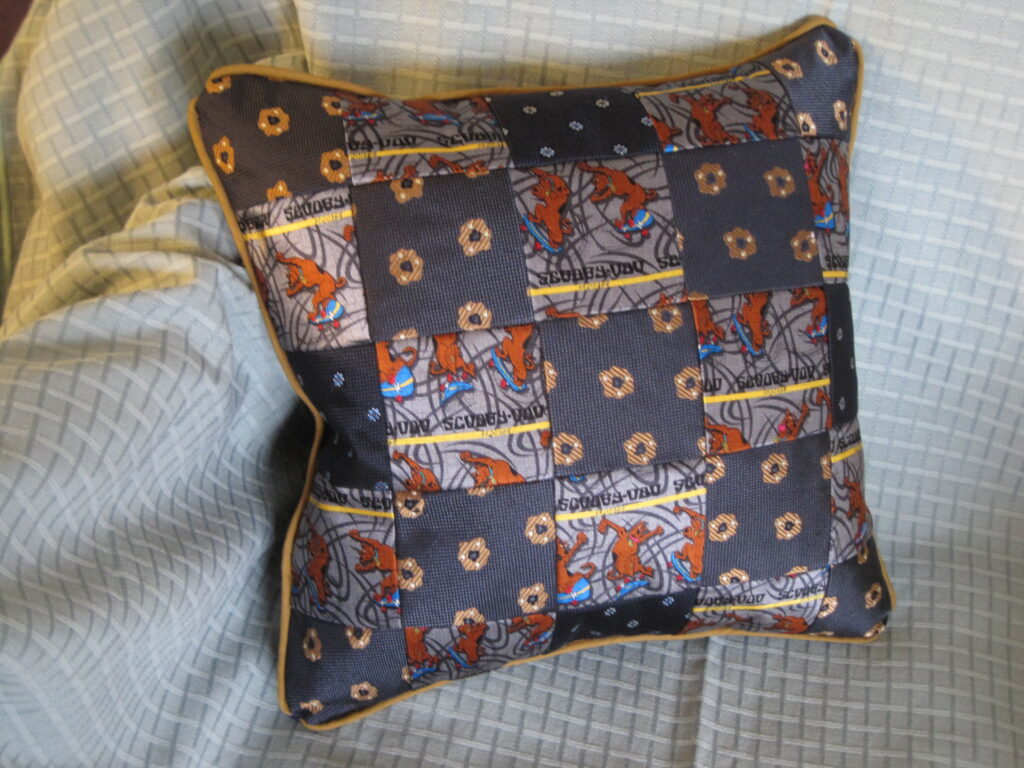
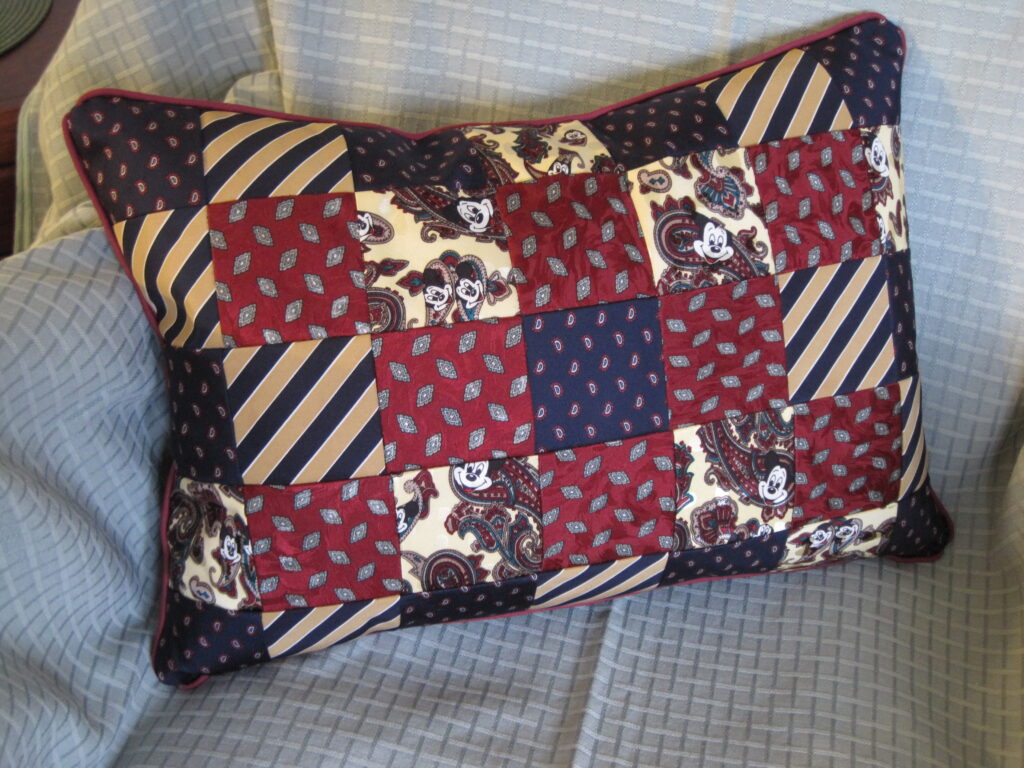
Several years ago, I discovered the fun of making covered button magnets. The fun was in the making! Transforming a piece of fabric into a neat useful item appealed to me. I ended up making hundreds of them! Yikes! I put them on my refrigerator and file cabinet. I sold them at yard sales and flea markets. I gave them away to anyone that looked interested. With every memory bear, necktie pillow and necktie wine bag I made, I also made a few magnets to match!
Magnets to match the memory necktie pillows!
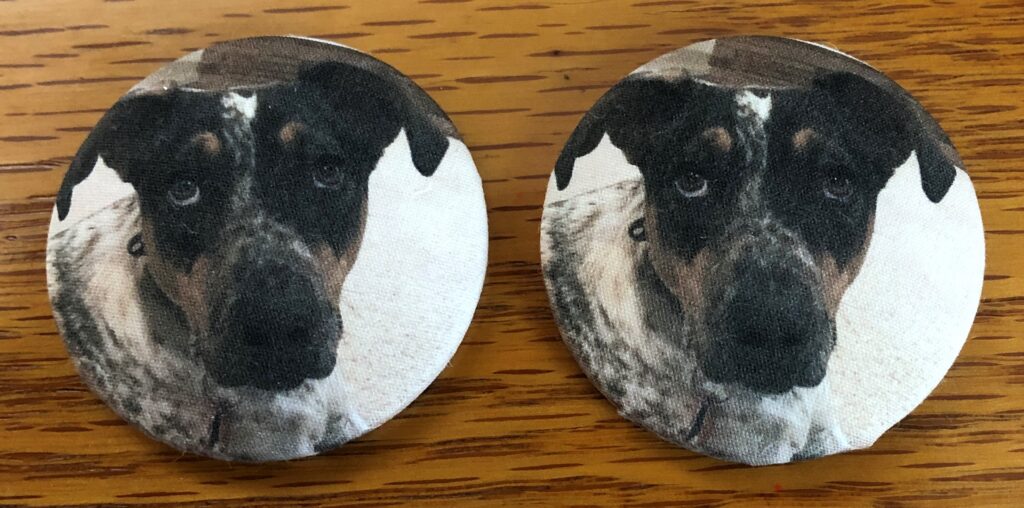
I even took photographs of favorite pets and printed them on fabric…and made them into magnets.
Who me? Am I in trouble? But I’m so cute!Daisy looks so innocent!
Needless to say, I still have many magnets left to do something with, mostly because I keep making them! Did I tell you they are fun to make? At the end of this post are detailed instructions if you’d like to try this yourself!
I came across my left-over pile of magnets yesterday and decided I needed to try to find a way to incorporate magnets into other projects.
Many of these are from leftover necktie material.Finding fabric with small individual prints of characters make these magnets unique!
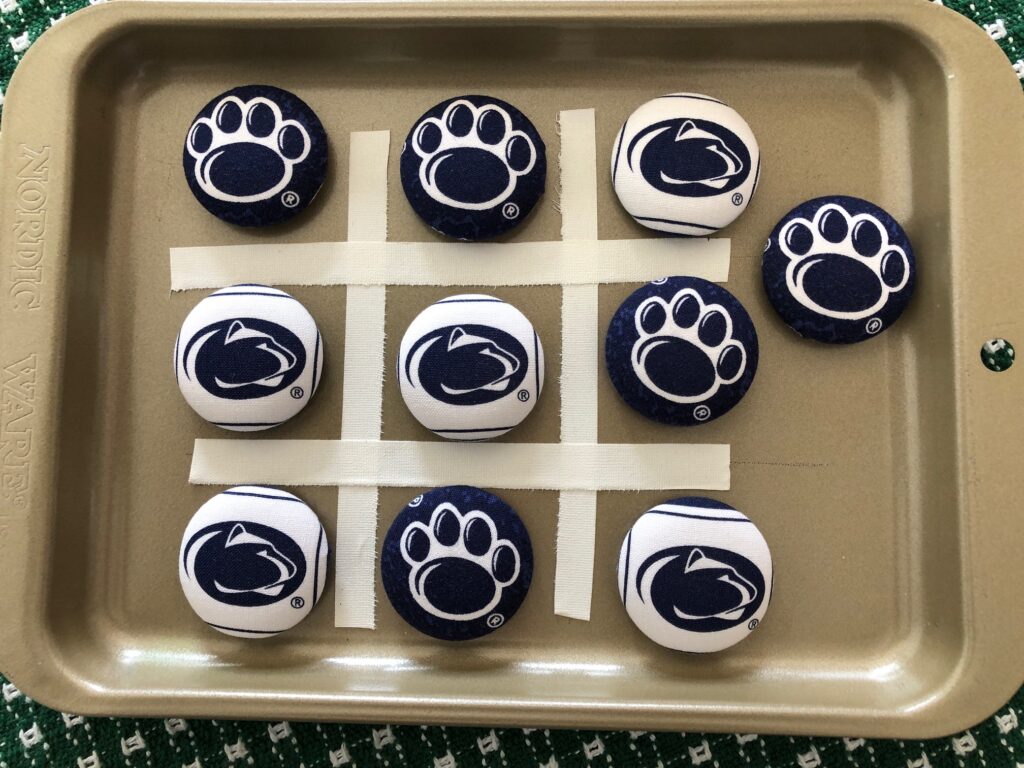
TIC-TAC-TOE Game
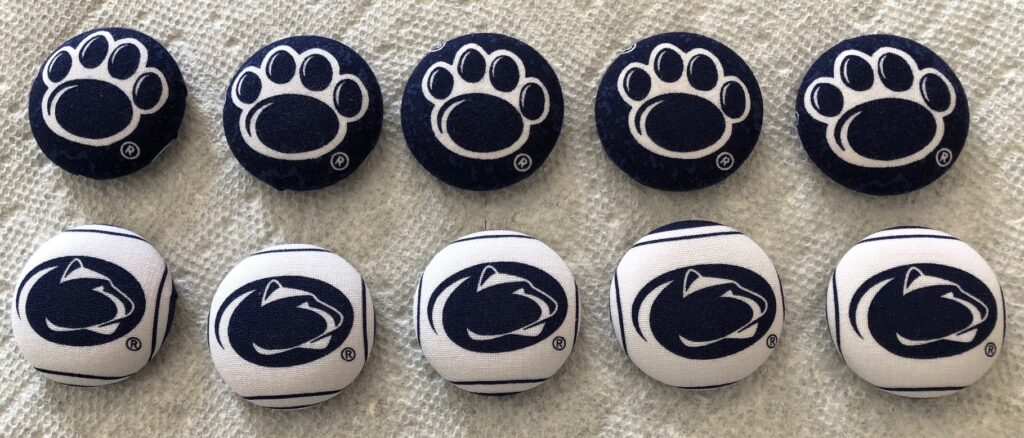
I started with the idea that magnetic game pieces might be useful for kids when traveling in the car (hopefully soon that will be possible!). In the pile of magnets I found enough Penn State magnets in two colors that could make a simple tic-tac-toe game.
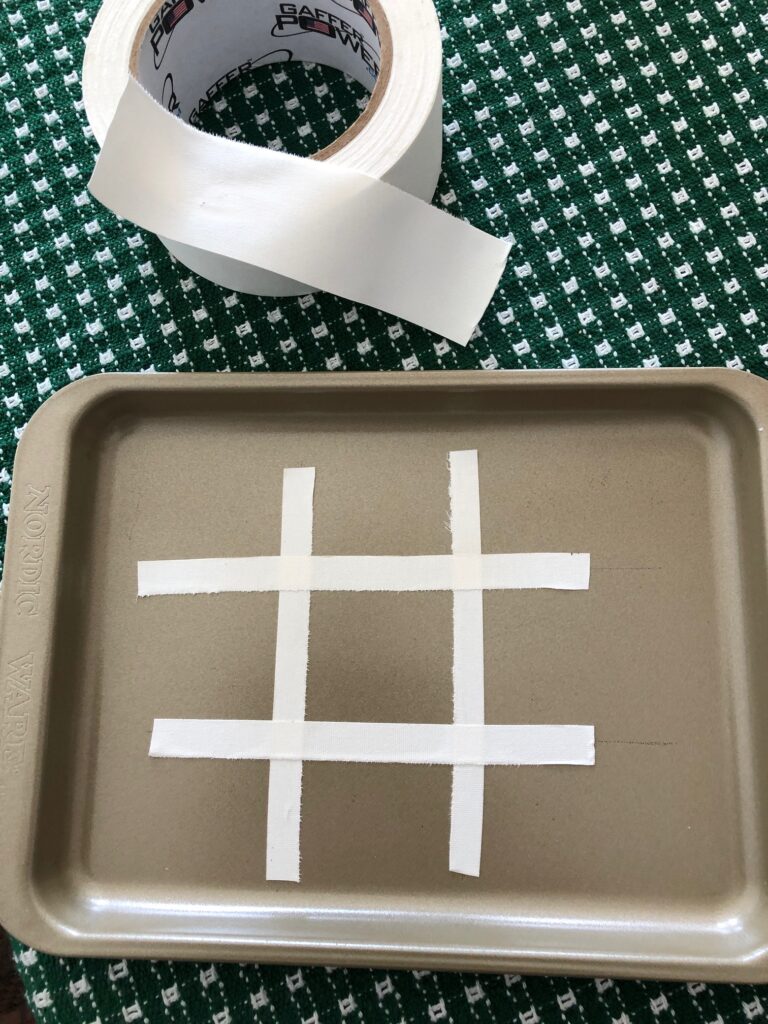
Then, in the cupboard I found an unused toaster oven baking sheet. Bert located some tape for me. It was so sticky I couldn’t cut it with scissors; however, I found I could make a snip on the end and rip the tape in strips. Not very professional looking, but it worked for me!
Who knew tape could rip like this?
And now I’ve made a travel tic-tac-toe game!
Tic-Tac-Toe anyone?
Sewing Case
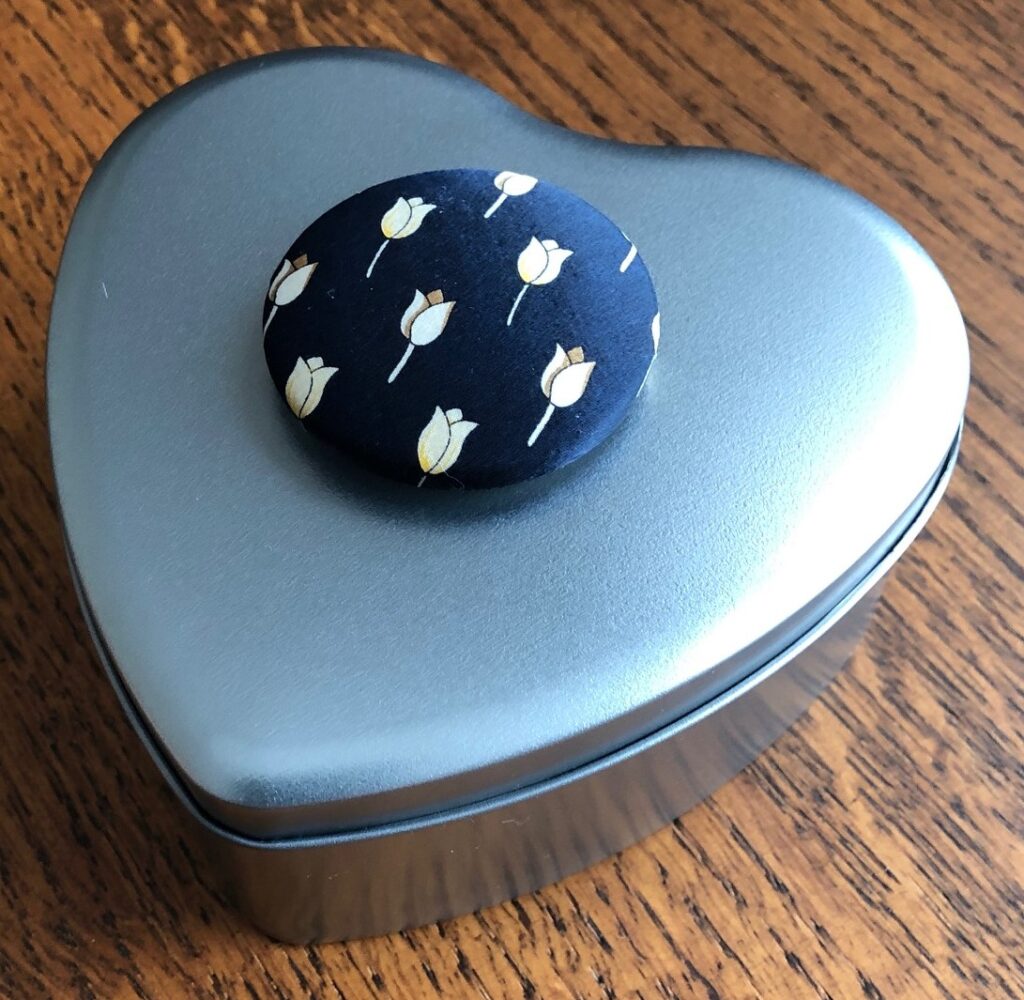
Next, I had seen some fellow quilters with small metal boxes that had a magnet in the lid. That provided a place to secure the needle when handling fabric pieces. I had a few heart-shaped metal boxes that could work. Of course, one magnet could decorate the top! This one was made from a very classy silk necktie.
This heart-shaped box is about 4″ long, 4″ wide and 2″ deep.
Then I put two plain magnets inside the lid (no glue needed). Now I had a place to rest my threaded needle and extra pins. This looks so much better next to my chair in the living room where I do hand sewing.
A safe place for my pins and needle!
Now to find more ways to use these magnets! If you have any suggestions, please let me know! Send me suggestions at marykisner@comcast.net. If you see me at the next yard sale at the Boalsburg Fire Hall (and I know ahead of time) I’ll even hand you a few magnets for free!
NOTE: Do not place magnets on your computer or other electronic devices; Do not place magnets near your credit cards. Important data may disappear!
If you’d like to see how to make covered button magnets yourself, here are the general instructions:
How to Make a Covered Button Magnet
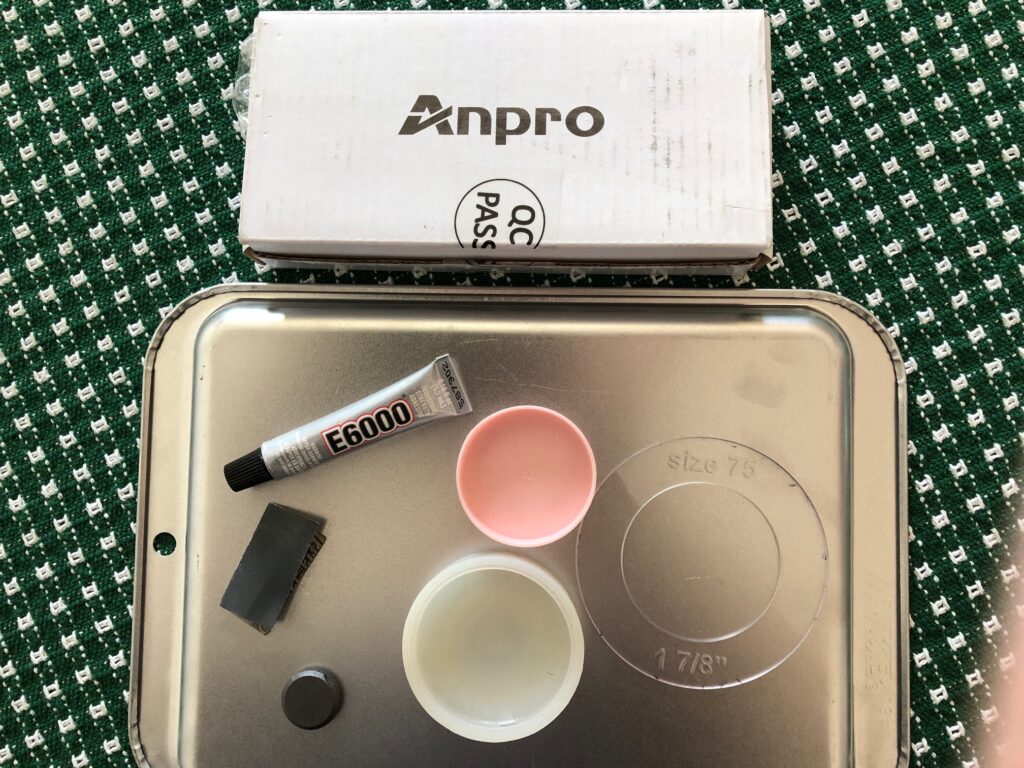
Supplies you will need:
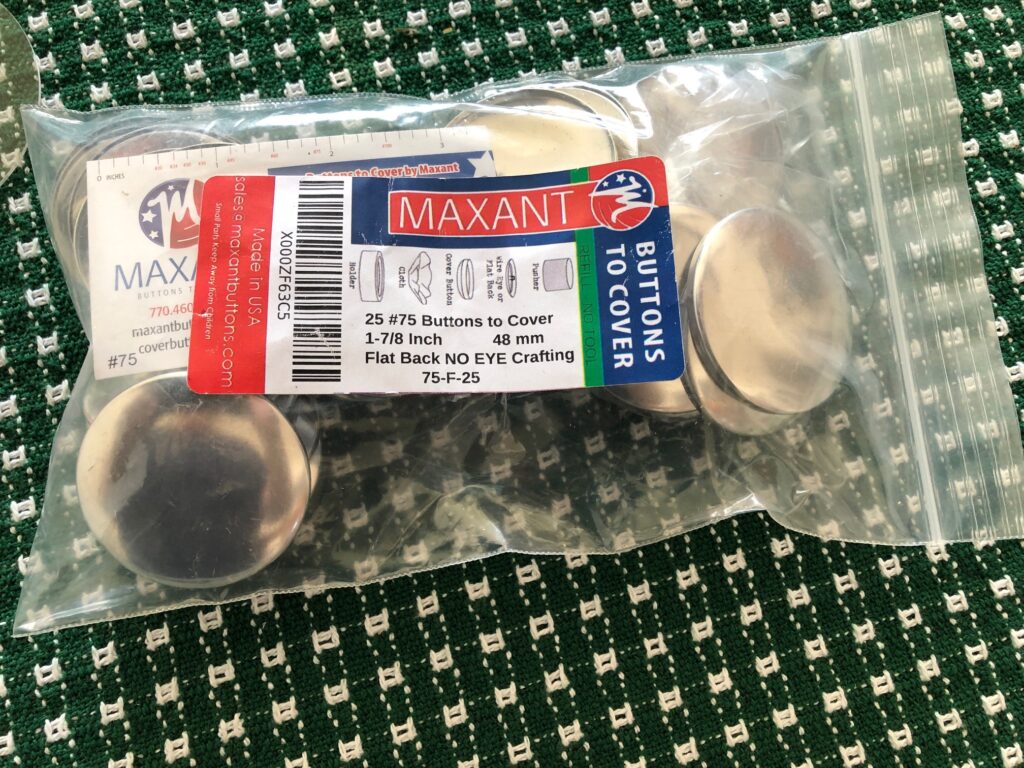
Buttons to cover. On Amazon this is how they are listed: 25 Buttons to Cover-Made in the USA-Cover Buttons with Flat Backs Size 75 (1 7/8″)
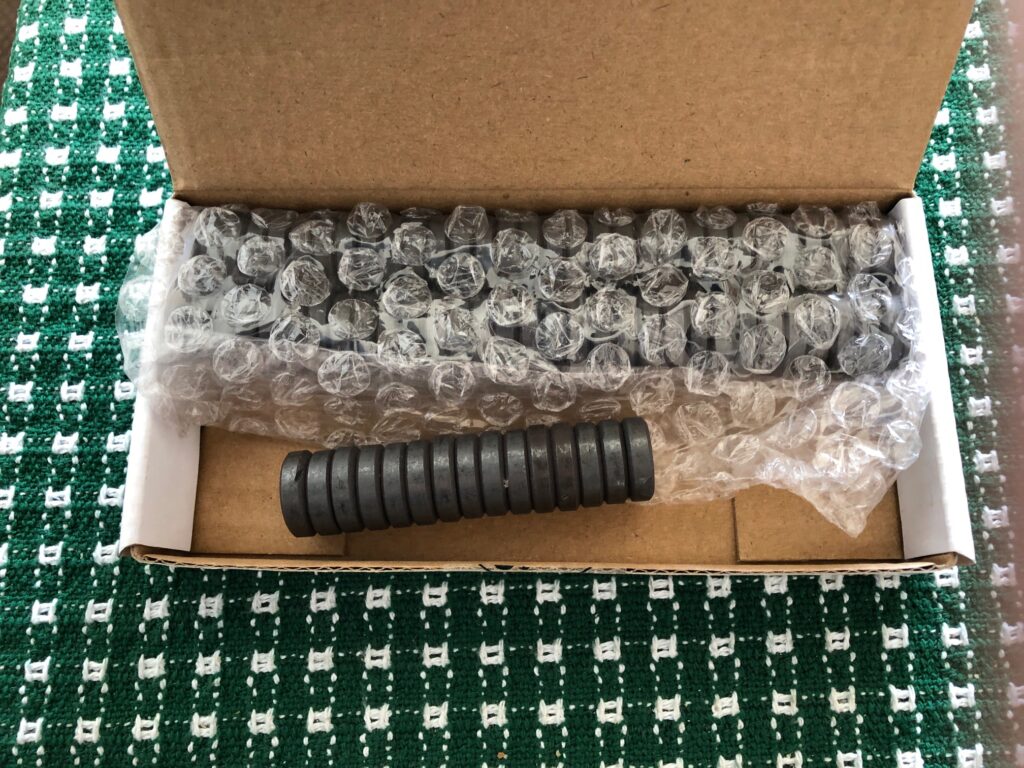
2. Small Disc Magnets. On Amazon, this is how they are listed: Anpro 120 Pcs Strong Ceramic Industrial Magnets Hobby Craft Magnets-11/16 Inch (18mm) Round Magnet Disc for Refrigerator Button
3. Tools to make the buttons:
Fabric Covered Button Template Set: On Etsy.com search for coverbuttoncity. The set of templates is $15.25 at this time.
Covered Button Assembly Tool: On Etsy.com search for everythingribbons. A single tool is $2.00 (I used the one for 1 7/8″ Buttons)
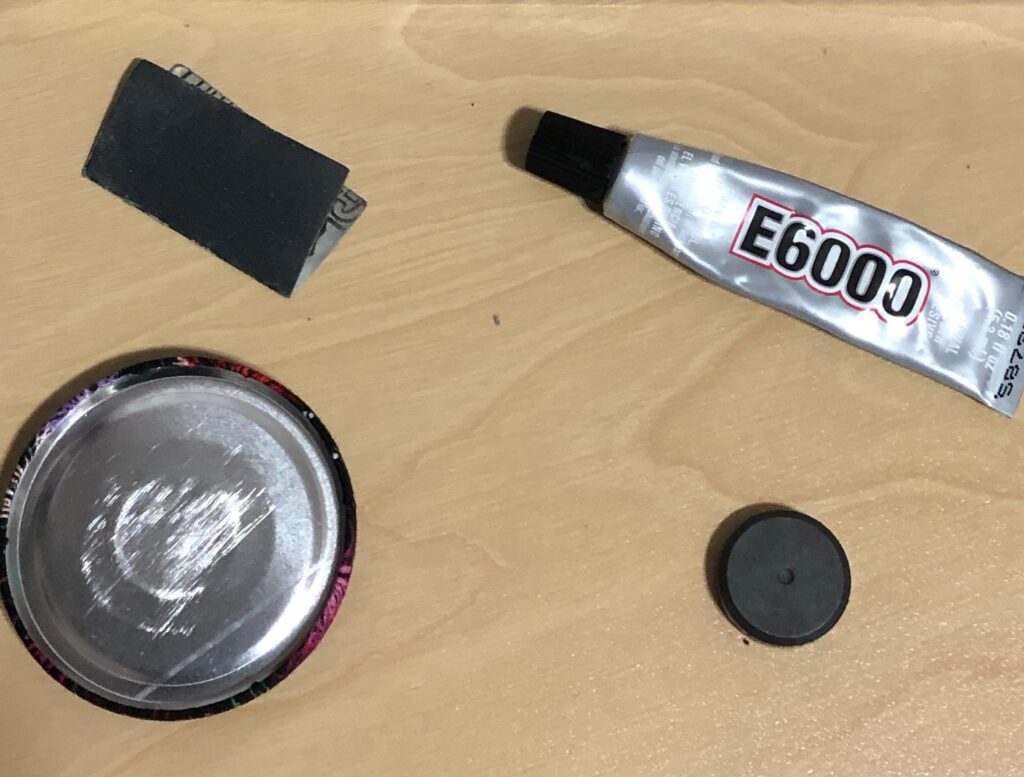
E6000 glue (tiny tubes work great!)
Small piece of sandpaper to scratch the back of the button so glue sticks.
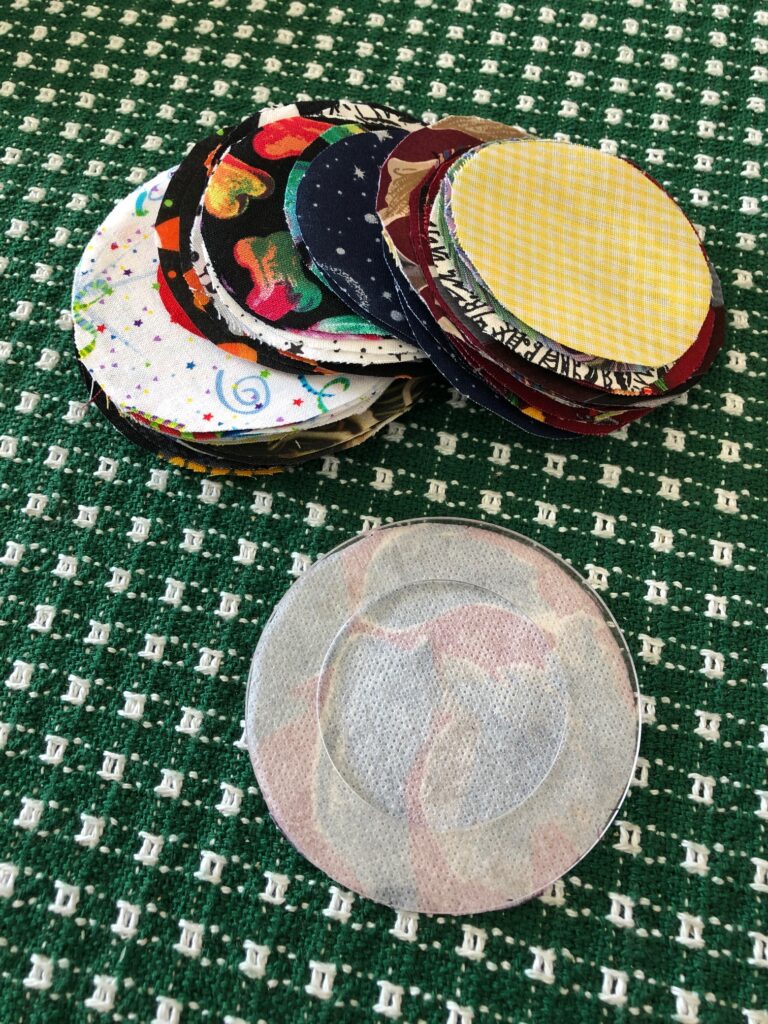
4. Circles of fabric (your choice) made with the 1 7/8″ template.
Steps to make the covered button magnets:
Place the fabric circle right-side down, centered over the clear plastic tool.
2. Place the button blank (face down) on top of the piece of fabric and press on the button blank to squash the fabric into the tool.
The clear plastic tool is under the circle of fabric. Button blank is face down over the center of the fabric.
3. Use the pink tool to flatten all the fabric pleats down. Flip the button over (still in the tool) and make sure the picture on the fabric is where you want it. If it off center, you can push the button out of the tool and arrange the fabric again.
The pink plastic will press down the pleats.
4. Place the button back on top of the fabric and press firmly into the fabric covered button. It should hide all the pleats and snap into place.
Ready to snap the button back on.Finished button ready to pop out of the clear plastic tool.
5. Now push the button out of the holder.
Finished button!
6. Using the small piece of sandpaper, gently scratch the surface of the button back where the magnet will be glued. This helps the glue adhere better to the shiny button.
Button back ready for glue.
7. Put some glue on the back of the magnet. (I consider the side of the magnet with the tiny hole as the back.) Place the magnet on the back of the button. Watch it for a minute to make sure it stays centered. The magnet tends to drift if the table surface isn’t quite level. Within a minute you’ll know if the magnet will stay put. You can adjust the location for the first 30 seconds or so by just pushing the magnet carefully to the center.
8. Let the magnet sit for an hour or longer to let the glue dry.
HINT: If you are gluing multiple magnets at the same time, space them at least 2-3 inches apart. The magnets will attract each other and pull them off center before they dry.
WARNING:
Do not place magnets on your computer or other electronic devices. Do not place magnets near your credit cards.
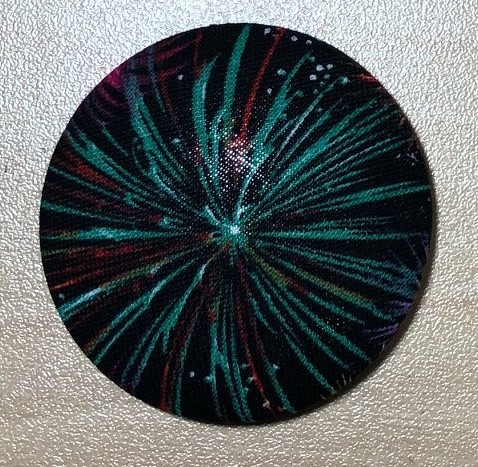
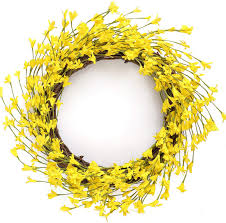
I know it’s still snowing but this is the time of year I need a touch of Spring color in my life. Usually I pull out a forsythia wreathe that has seen better days. It looks similar to this one, except mine has been squished between the doors over the years.
I learned with my first two door quilts that because my door is a dark red, the decoration needs to be light. Thus, on the Christmas stocking the only thing that showed up a distance was the cuff. However, on the Valentine one the heart showed up beautifully from a distance. See the difference?
So, since I decided to decorate with small quilt blocks, I chose a yellow background for the Spring quilt. The quilt pattern is called Dutchman’s Puzzle,Dutchman’s Wheel, or sometimes Wild Goose Chase.
When seen from a distance, the shape really stands out. Take notice, Mr. Snowstorm…your days are numbered!
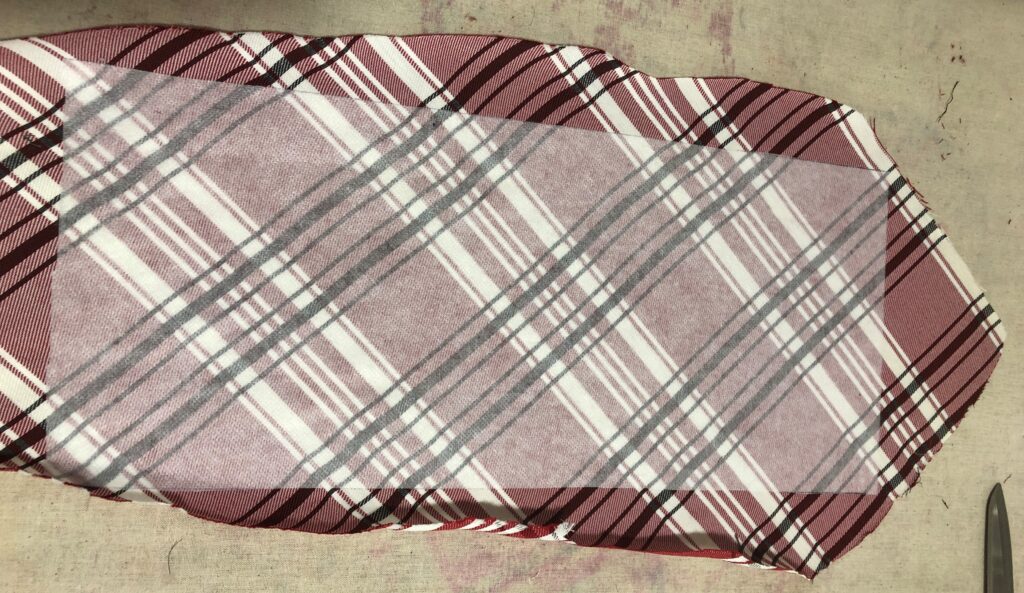
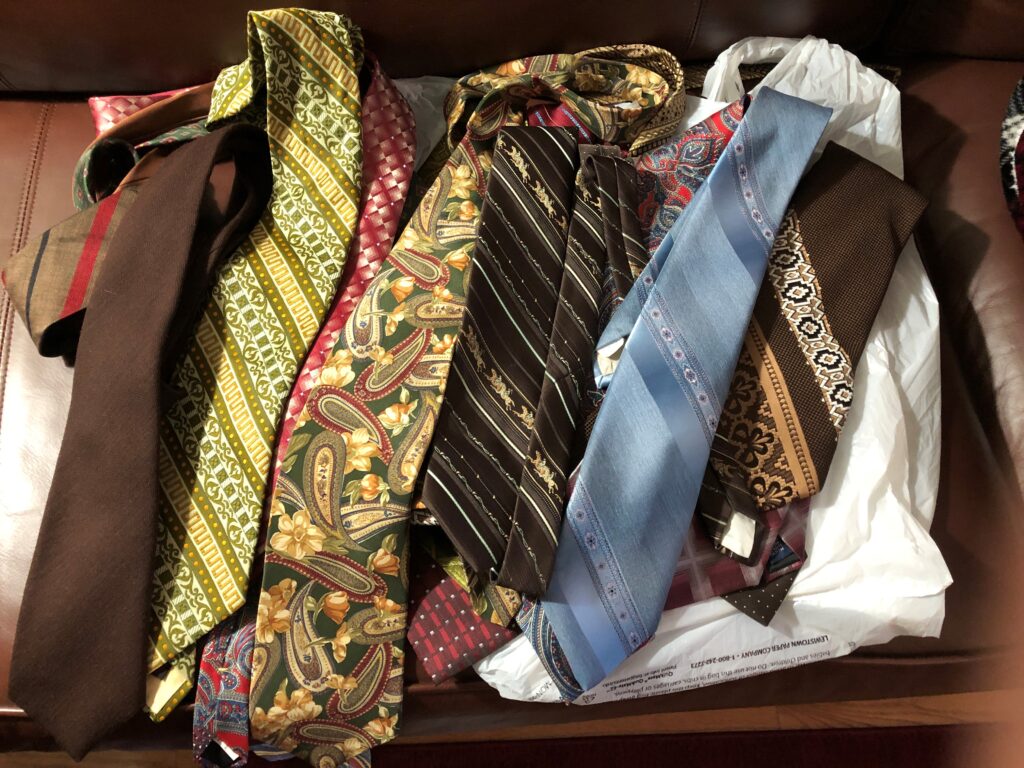
Recycled neckties that have been prepared by opening them up, removing the inner padding and pressed flat can now be treated as small bits of beautiful fabric. Remember, necktie fabrics are usually not color-fast so while you will not be washing them be careful to not sew them into a project that will need to be washed.
However, you will need to reinforce each piece of fabric with lightweight interfacing using a steam iron and a damp pressing cloth. The colors won’t noticeable fade but your ironing board will be at risk of staining. Always have a piece of muslin or an old handkerchief ready to protect your ironing board!
This is one brand of interfacing that works!Necktie with interfacing ironed on.
You will probably want to cut the tie into 2 or 3 pieces to do this ironing, depending on the size pieces you need for your project. If you are making a 12″ pillow cut the tie into pieces about 14″ long. Once all your pieces are stabilized with interfacing you are ready to lay out your projects. Treat your tie pieces just as you would any other fabric!
Samples of projects
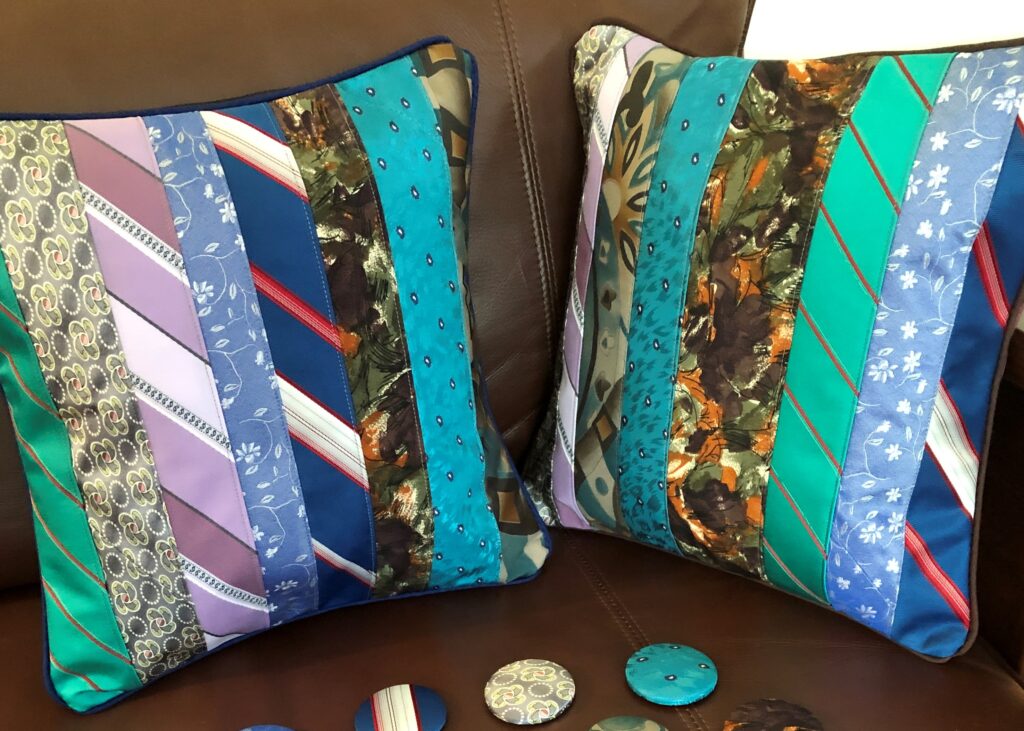
Of course, pillows are most common:
Pillow made with small squaresPillow made with strips
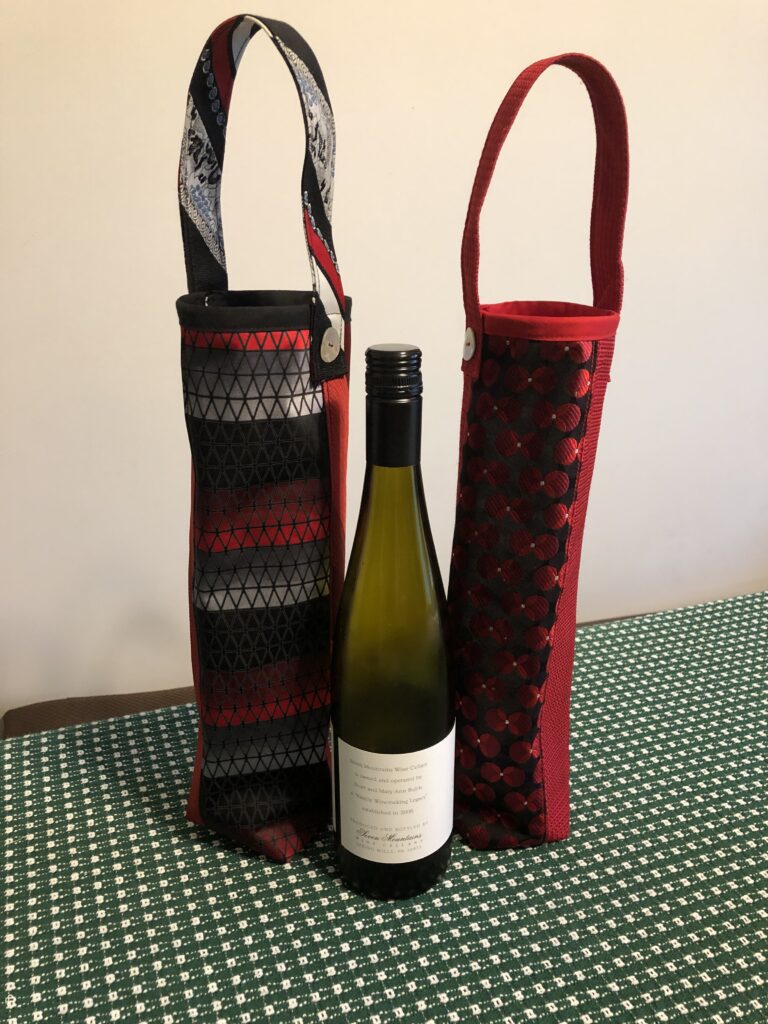
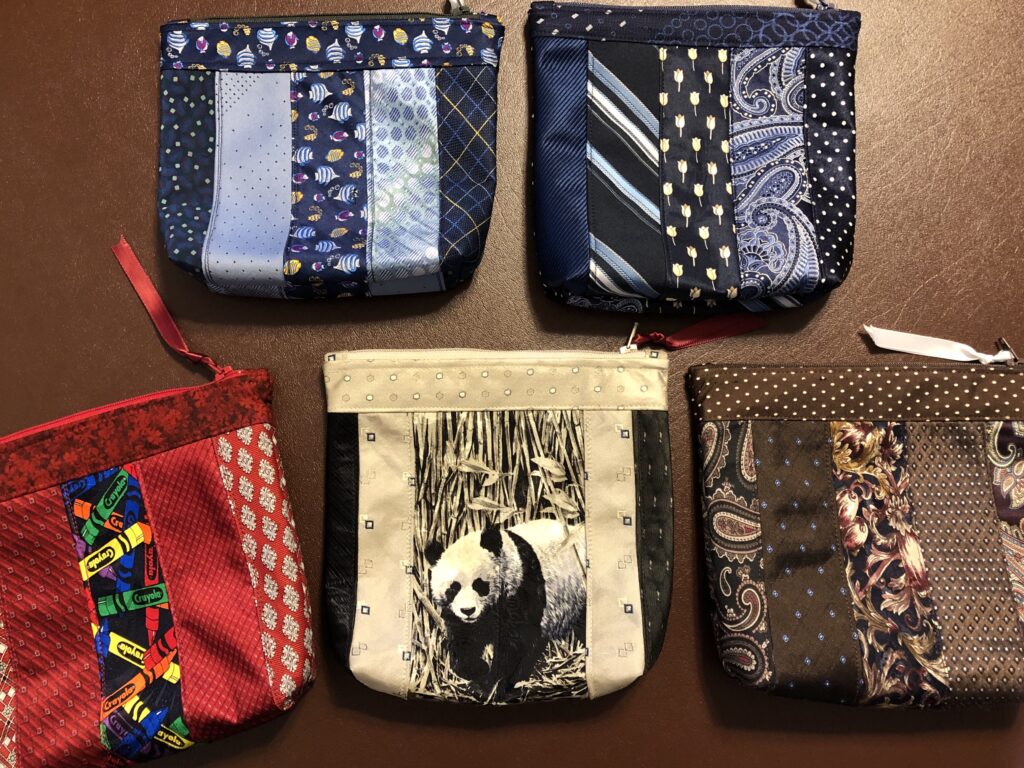
Wine bags and small cosmetic bags use the same principles:
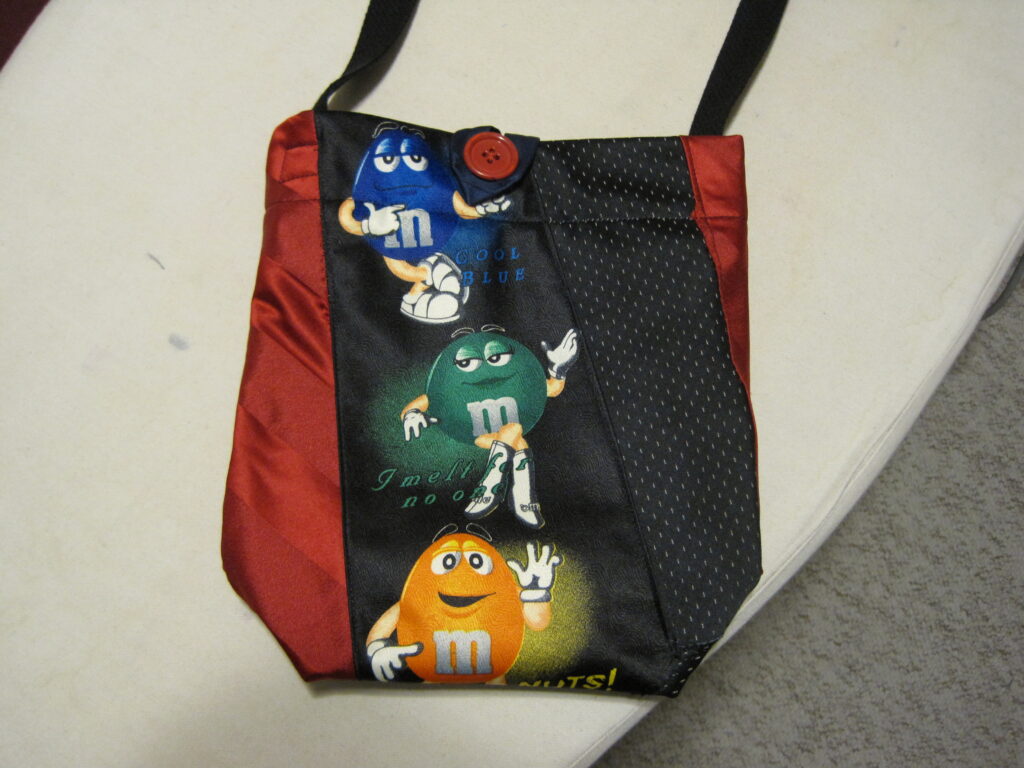
Four or five strips can make this wine bagOne novelty tie can make an interesting picture!
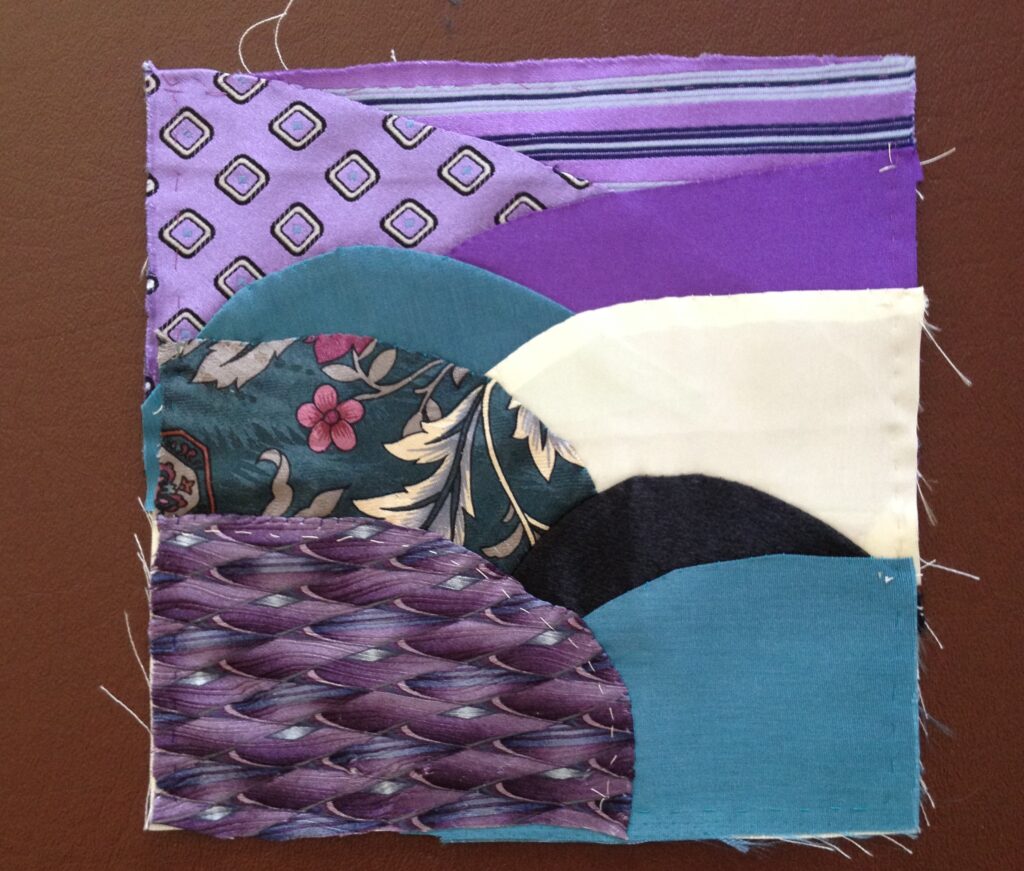
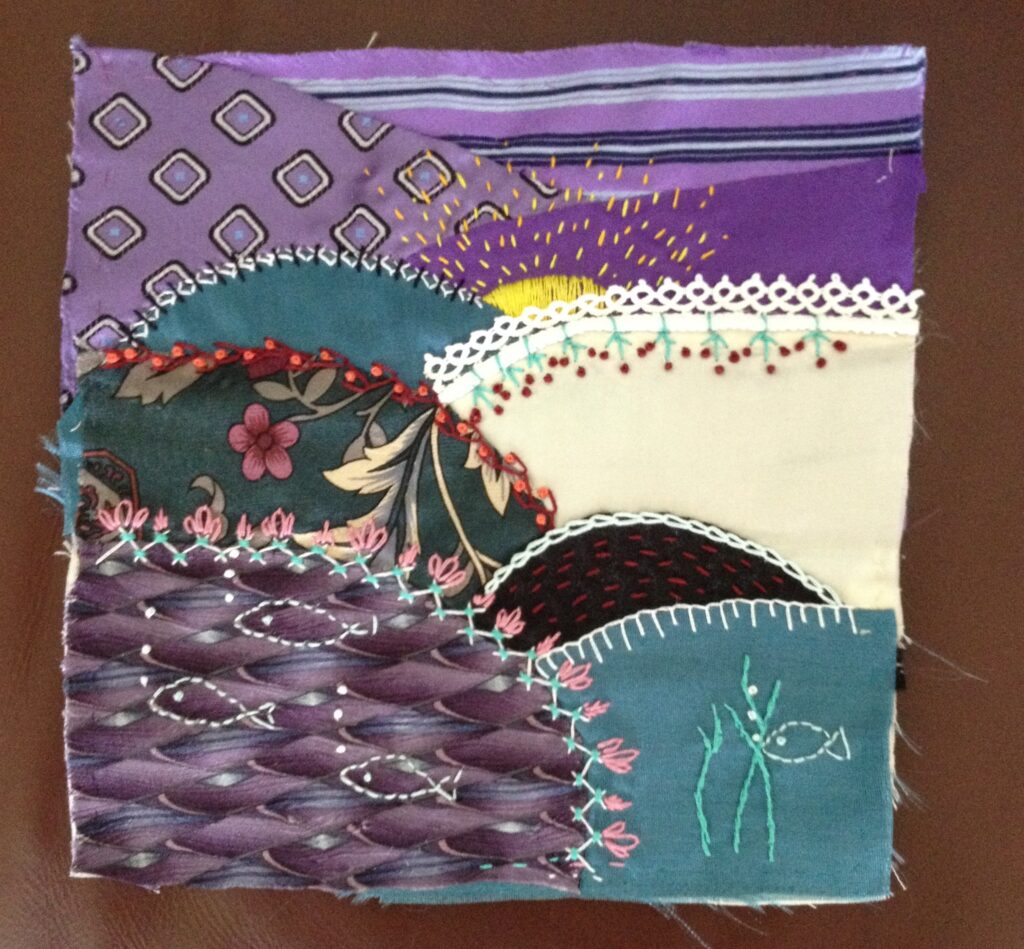
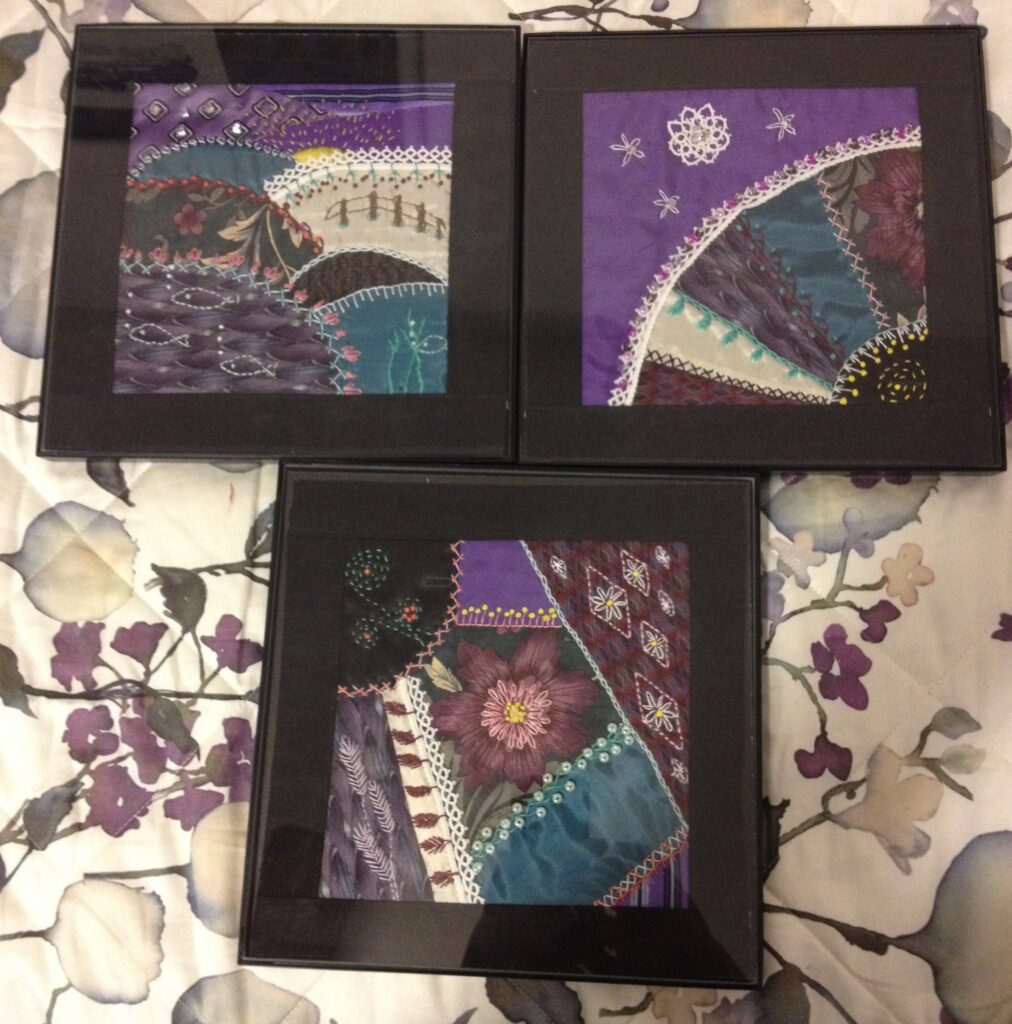
I’ve even explored using left over pieces in crazy quilt projects:
I ended up putting this in a frame!Three crazy quilt blocks from neckties!
Keep your eyes open for free collections of neckties…you never know what you might be able to use them for!
Better question…why would I want to do that? I might have had that question on my mind 10 years ago. I was volunteering for a local Home Health and Hospice organization. I was offering my services to make memory bears from a loved one’s clothing after they passed. I must have made over 100 bears during that time. However, one family asked if I could make something out of a collection of neckties and my quest to find an appropriate item began.
Some neckties can be very colorful and unique. However, there isn’t a lot of fabric in a tie. It is often not washable or colorfast. While some items are made with whole ties sewn together side to side, like a skirt or throw, they end up quite heavy. I did not get enough ties in that first batch to make anything large.
The inner lining of neckties tends to retain odors from the wearer or cleaning solutions. This is often a layer of wool felt or polyester fabric. I found it was just easier to take them apart and remove the inner lining that retained odors. This gave me tie-shaped fabric pieces about twice the width of the tie tapering to much smaller at the other end. Ties are cut on the bias (diagonally across the fabric) which makes them too stretchy to work with and is made in three pieces so two seams are about in the middle of the tie. Adding an iron-on interfacing was essential to use the fabric in other projects. To make something I was limited to small pieces or strips of varying weights and colors.
I knew I could not make a bear out of bits and pieces of fabric. A little research on Pinterest for memory items showed many folks had made pillows out of neckties, along with other small items composed of strips, squares, or freehand shapes. The photo below shows a pillow made from four neckties. The back of the pillow was a piece of polyester satin. This made a very nice memory pillow for the widow.
Pillow made from neckties
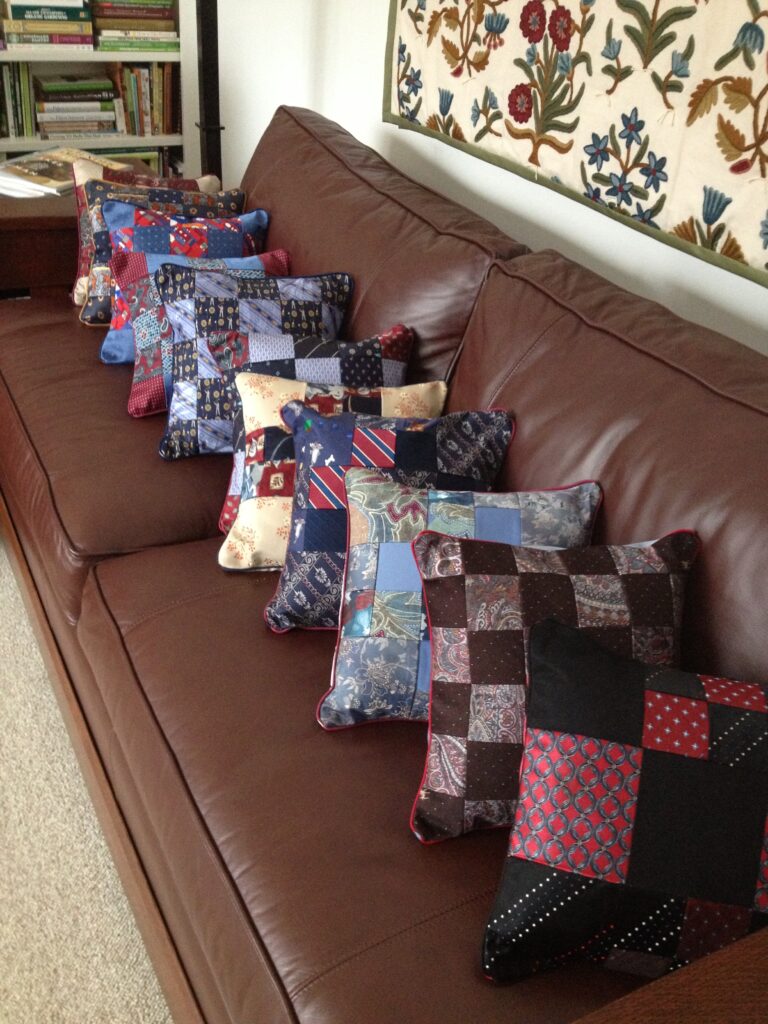
Once I figured out the process to convert a necktie into small but useful pieces of fabric, I was challenged to find other ways to use neckties. First, of course, I cranked out a bunch of pillows just for fun! This pile I mailed to a niece in California who works as an Activities Director at a gated community. She used them as prizes and gifts in her activities. Obviously, I was focused on making squares from the neckties at the beginning!
Too many pillows!
Where do I get neckties to recycle?
I have obtained neckties from friends and acquaintances who have cleaned out attics and closets. Sometimes garage sales have a few for sale. Thrift shops, like St. Vincent DePaul’s, and Goodwill usually have a collection. I have paid as little as $1 to as much as $4 per tie. That can be very expensive if I’m not careful. Sometimes specific name brands are worth much more. Check eBay to search for specific names if you find something you like. Used Jerry Garcia ties often cost $15 or more (in a Thrift shop!) so if you find one in a pile of free ones, you might want to consider donating it back to the shop so they can benefit from the sale. I hate to cut up a collector’s tie!
Sometimes one novelty tie can make an ordinary bag really different!