I was reminded (by Facebook no less) of a post I wrote one year ago today. It was a great reminder for me because I’m still making and gifting these items…but since I already posted about each project, I usually don’t post about it again. I’d like to share it here to give you some ideas for a handmade Christmas by giving you the link to the original articles:
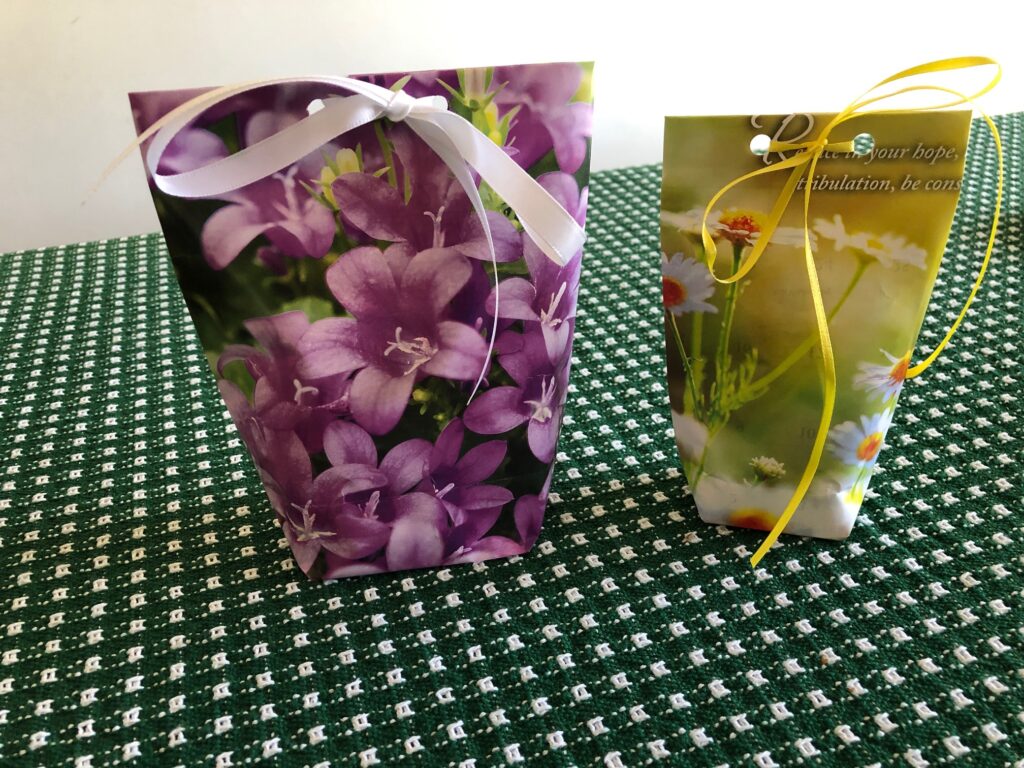
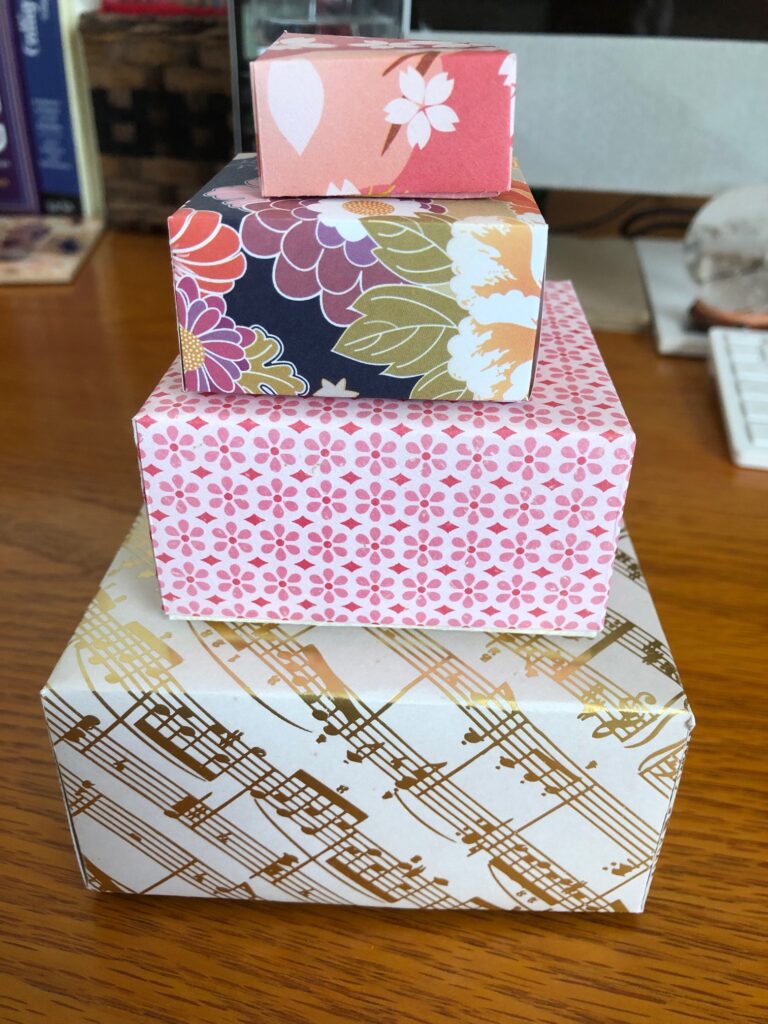
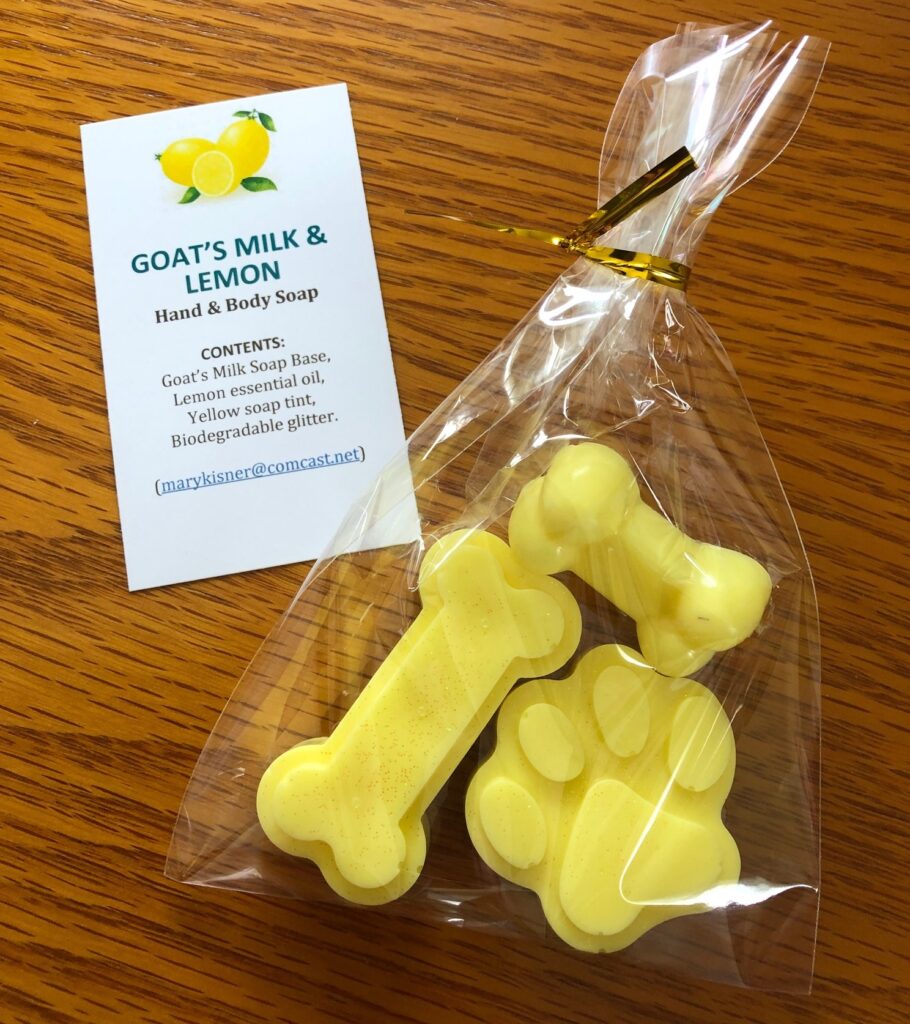
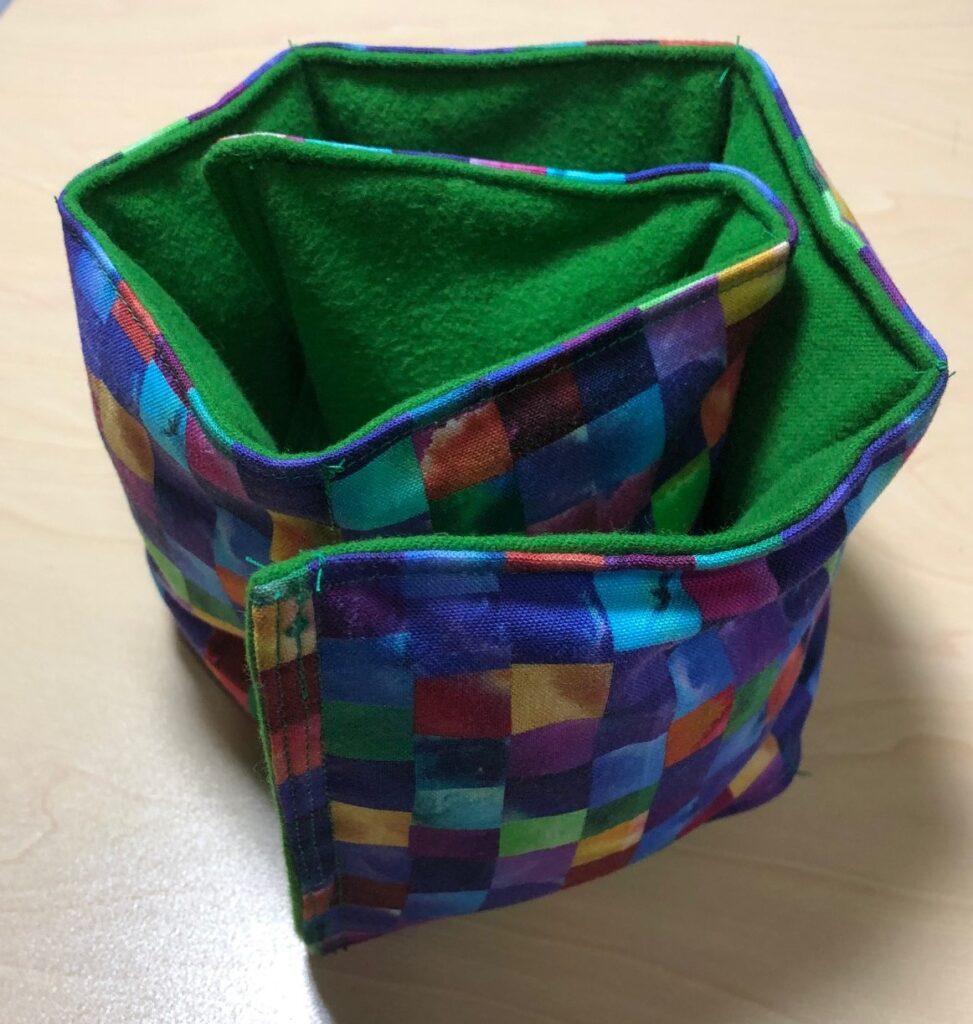
The first post describes (and links to the original posts) how to make gift bags and boxes by recycling pictures from calendars, guest soaps from melt and pour soap bases and making hot or cold neck wraps from fabric. The second post deals with polymer clay projects. If you’re looking for ideas for a homemade Christmas, give some of these a try. Enjoy!
This post is a continuation of Part 1 (See https://marykisner.com/tis-the-season-part-1-paper-soap-and-fabric/) Keep in mind that making gifts or decorations for the holidays is a great way to involve the whole family. Using clay (polymer or air-dry) is familiar to most folks. The youngest have used some kind of play dough since preschool. Older folks may not have worked with clay, but the physical manipulation of soft moldable stuff is similar to working with bread dough in the kitchen or even putty in the workshop.
The two kids of clay I’d like to share are Polymer Oven-Bake Clay and Air-Dry Modeling Clay.
Polymer Oven-Bake Clay
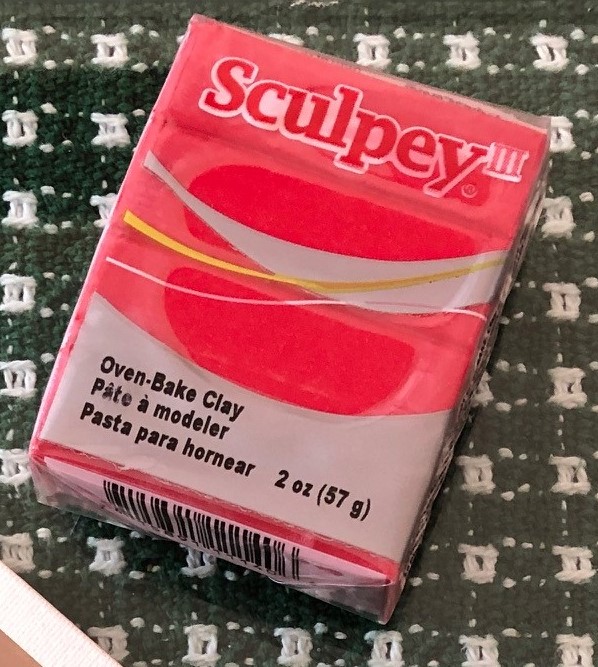
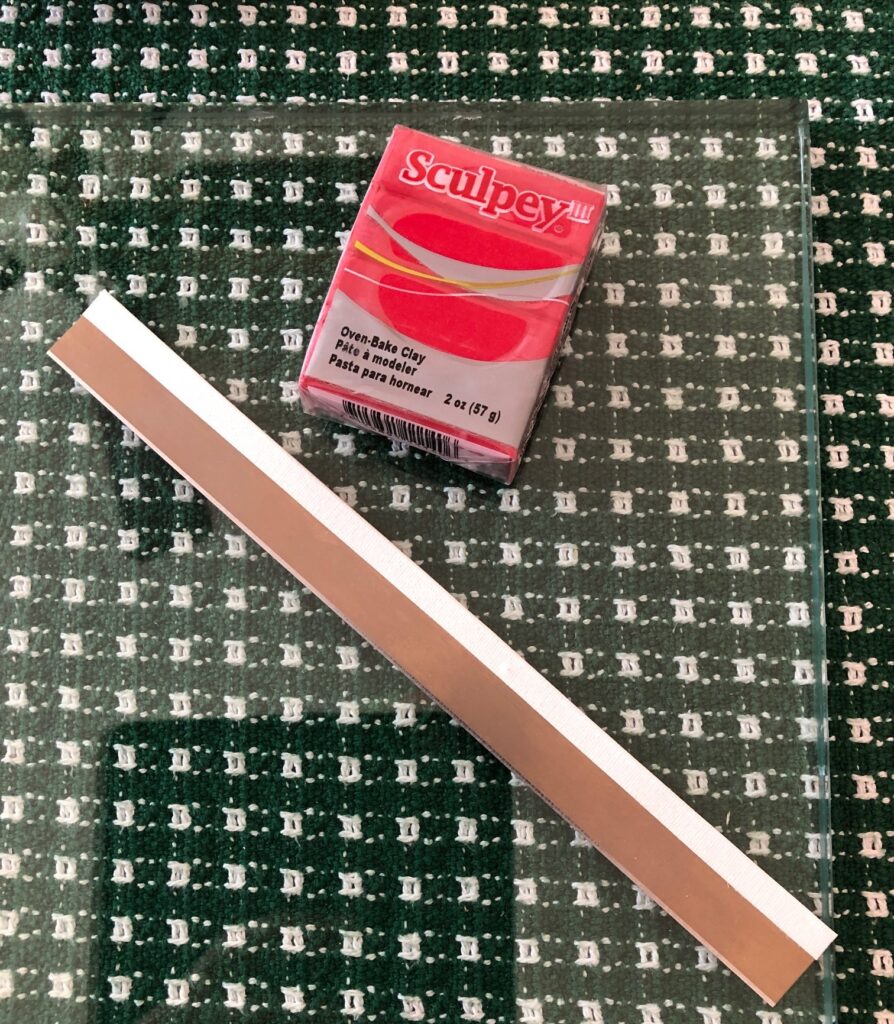
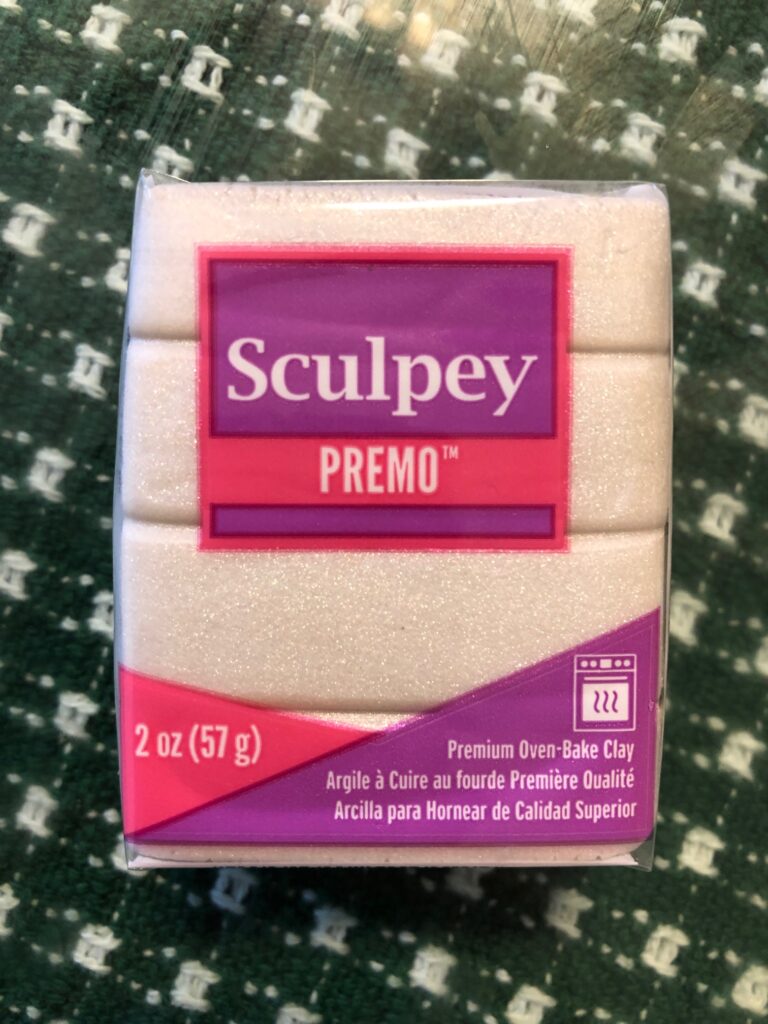
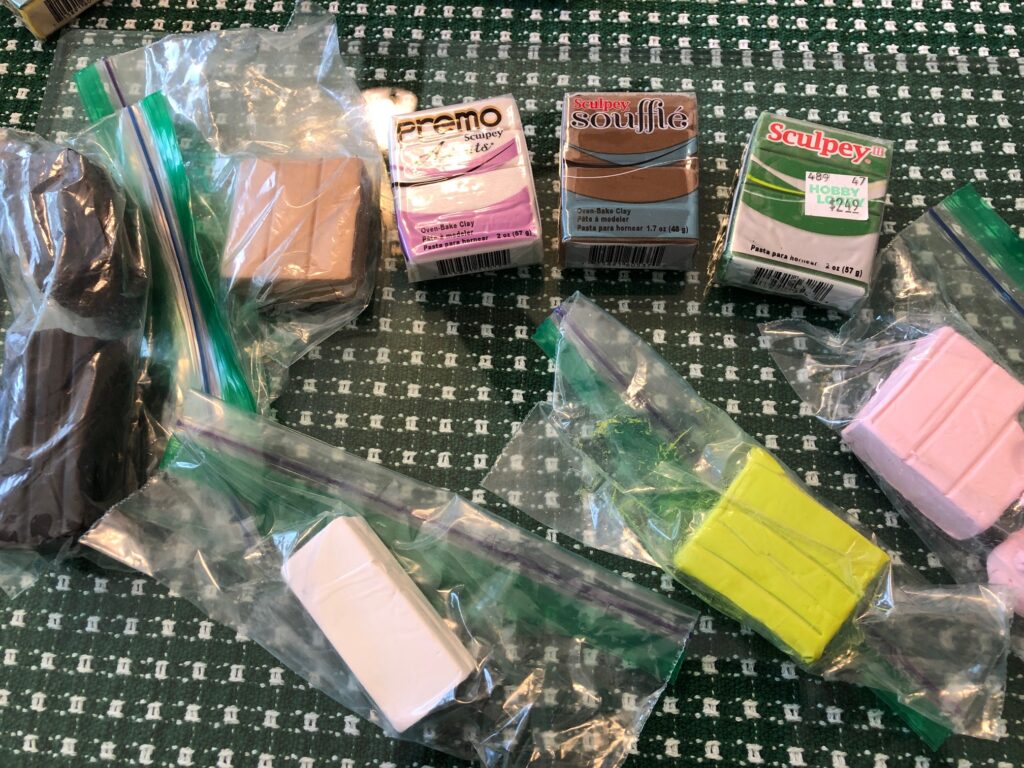
This clay comes in small, 2 oz. packages. There are several brands available and many colors. The Sculpey brand shown above is my preference because it’s a little softer to work with. The best thing about oven-bake clay is that it can be molded and remolded as desired until you like the finished product. Unused pieces of clay can be stored in a zip lock plastic bag and easily used another day. Once you have determined you are done making something, then it is baked in the oven (or toaster oven). When completely cooled, it is firm and unbreakable. At that point it can be painted or shined with mica powder as desired.
Young children can enjoy working with this clay and the final process of baking can be handled by an adult.
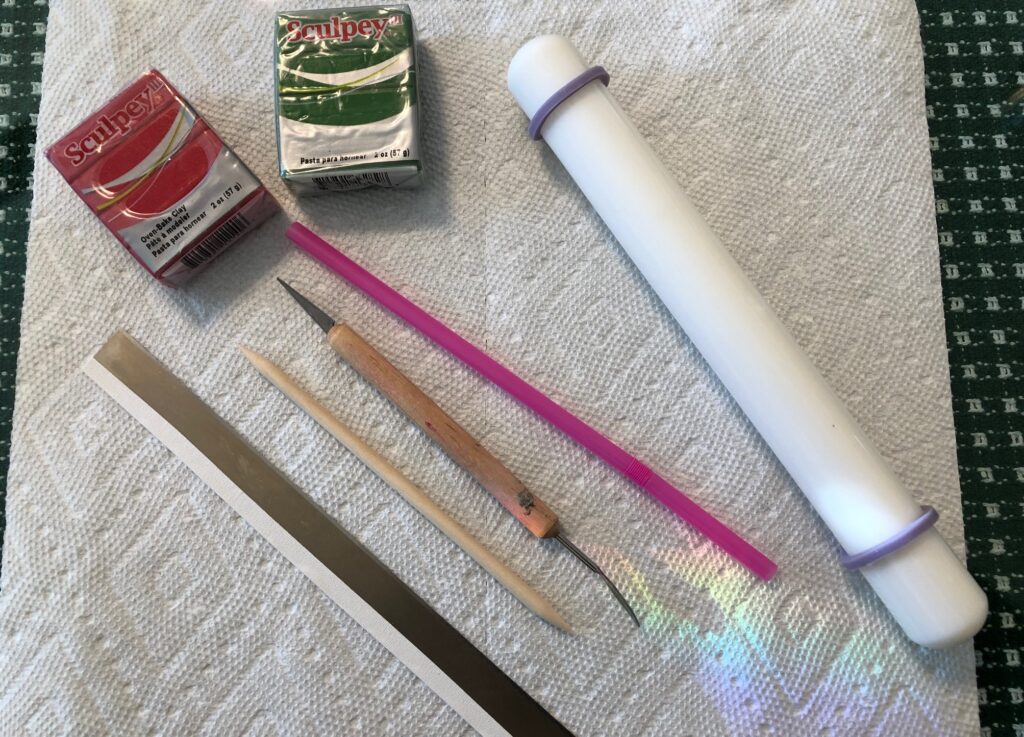
Basic Tools to Work with Polymer Clay
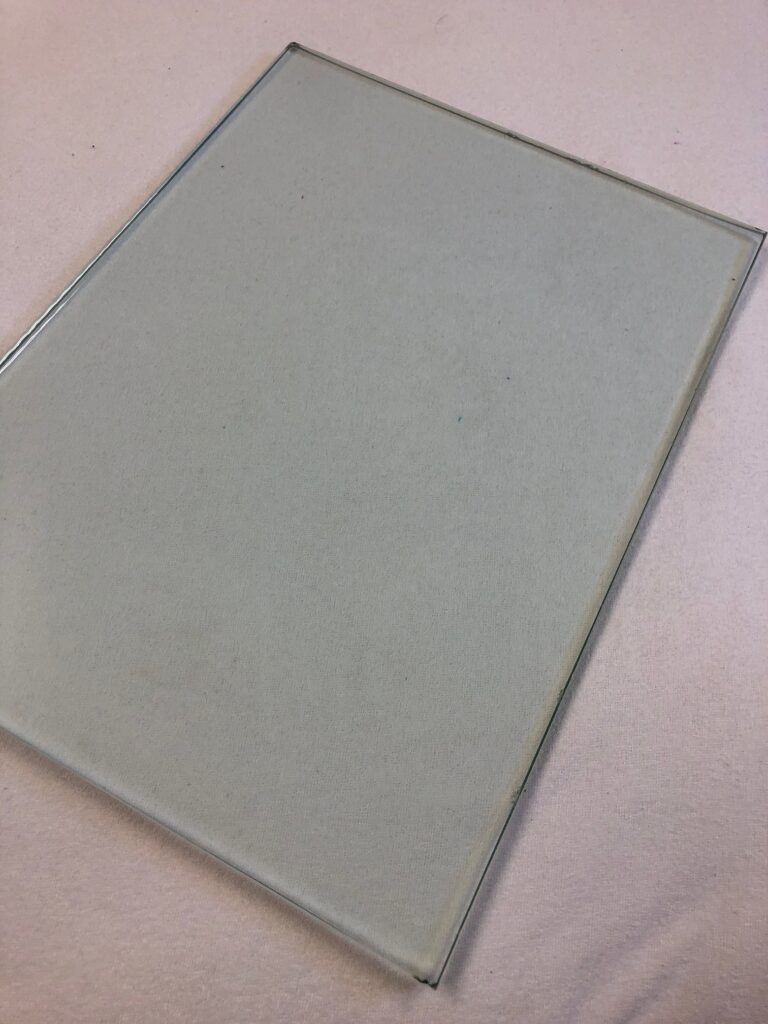
This clay will need to be worked on a firm surface. I have a piece of thick 3/8″ class that Bert got from the local glass business. I can use it right on top of my tablecloth. It gives me a firm surface that is easy to clean after working with the clay.
These are the basic tools you will need:
–a rolling pin or something easily washable
–a long blade to slide under pieces of clay to remove them from the work surface
–assorted hand tools to mark, poke or cut pieces of clay
–a plastic straw to make a hole just the right size to hang your project, if desired
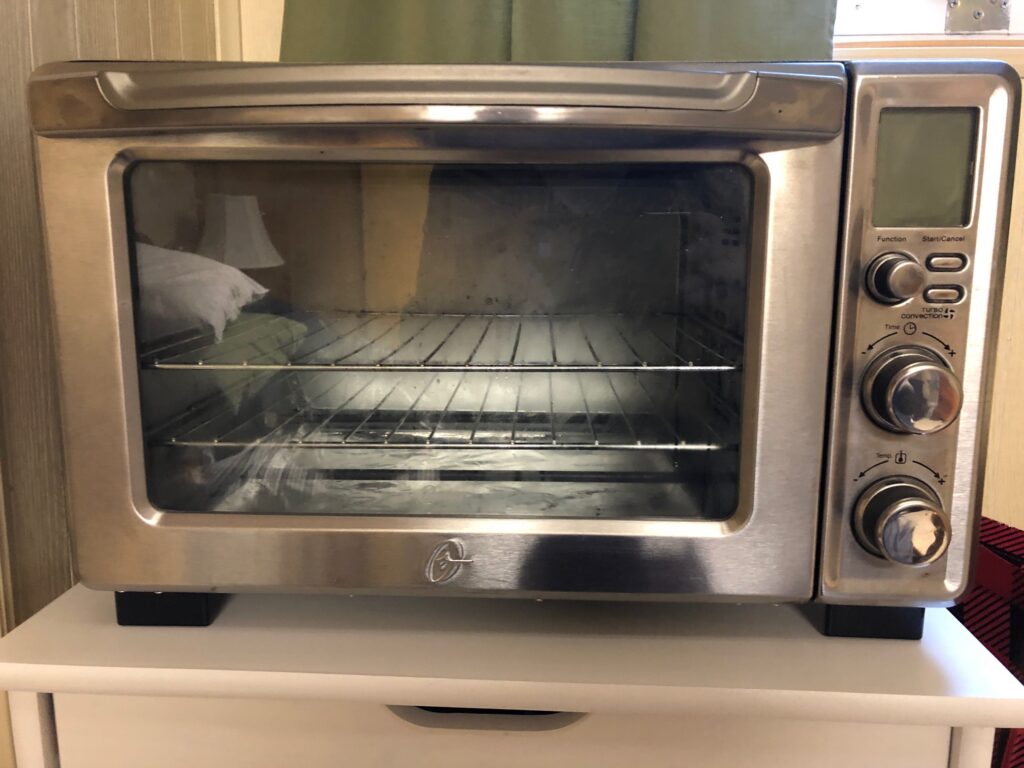
–an oven or toaster oven to bake the finished project. (I have an old toaster oven that is dedicated to baking this clay)
Note: If you will be using your regular oven, consider making a smaller “oven” space with disposable foil roasting pans. The clay will emit fumes that you might not want on the next meal you bake. Just take two large roasting pans, make one the lid and clip them together with binder clips. Objects will need to bake for about 30 minutes at 265 degrees F.)
Making Flat Objects with Polymer Clay
To make flat objects with this clay, you will need to flatten it out with a roller of some kind. Then you may want to press a design into the clay. Almost any item with an interesting texture can be used to make a design. Here are just a few ideas:
Interesting designs on rollers that are used in working with fondant are available in the cake decorating section of a craft store. Many stamps that are also used with ink can press a design into the clay. Acrylic shapes often come in craft magazines. They can be peeled off the plastic and placed into an acrylic block. This is then used to press the design into the clay.
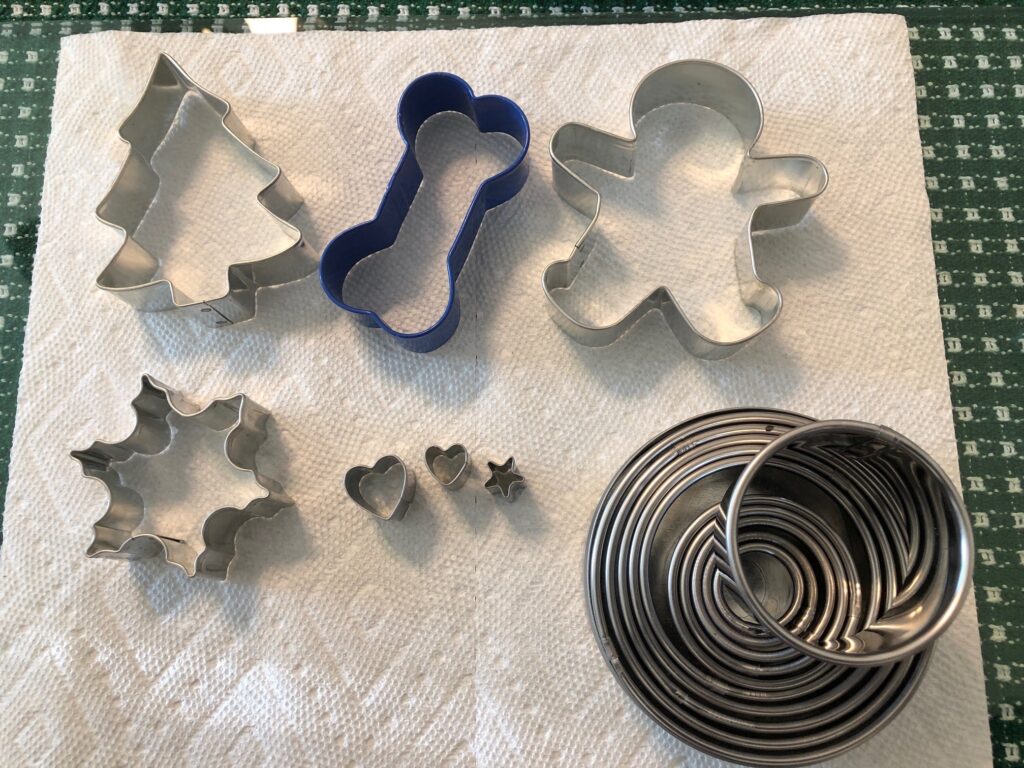
Cutting Out Shapes in Polymer Clay
Once you have a design pressed into the clay, choose a shape to cut out the final piece. (If you cut out the shape first, pressing the dough may change the shape…so press designs first.)
Now is a good time to pull out any cookie cutters you have. The metal ones are sharper and will give you a clean edge. The tiny cutters above can be used to make decorative holes…or cut clay pieces in a different color to glue on to the finished product after baking.
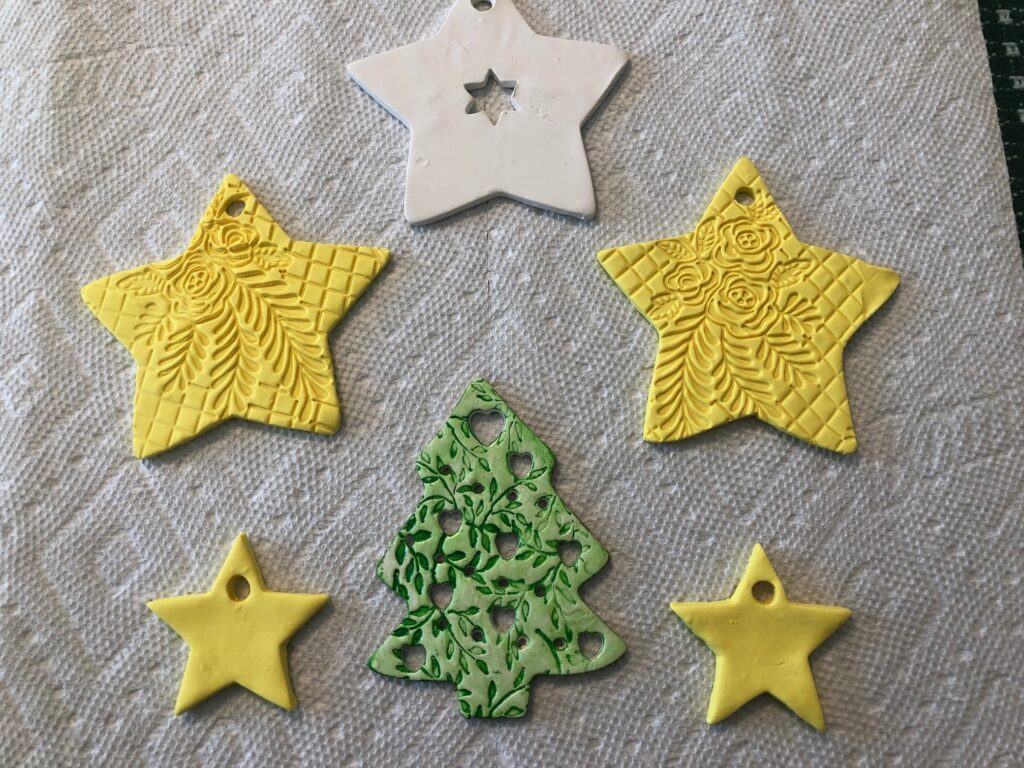
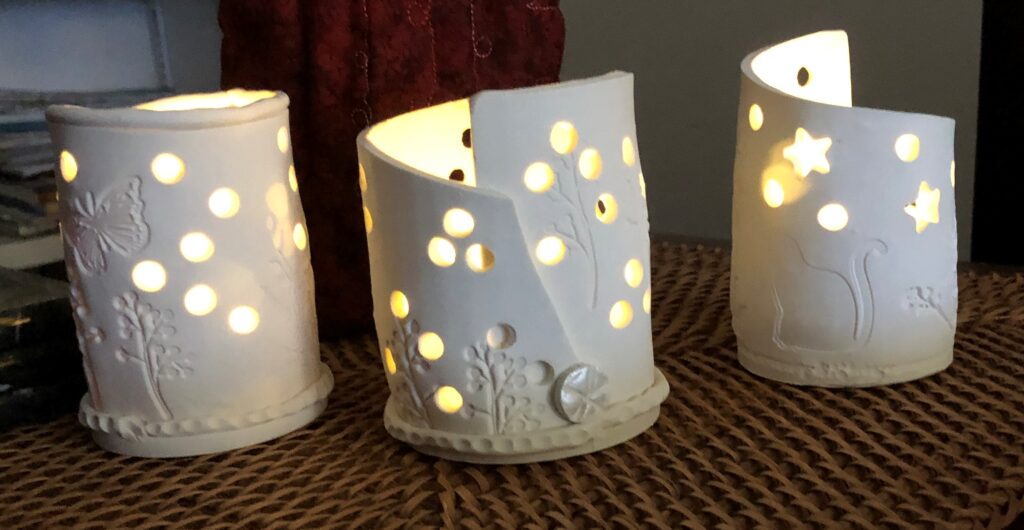
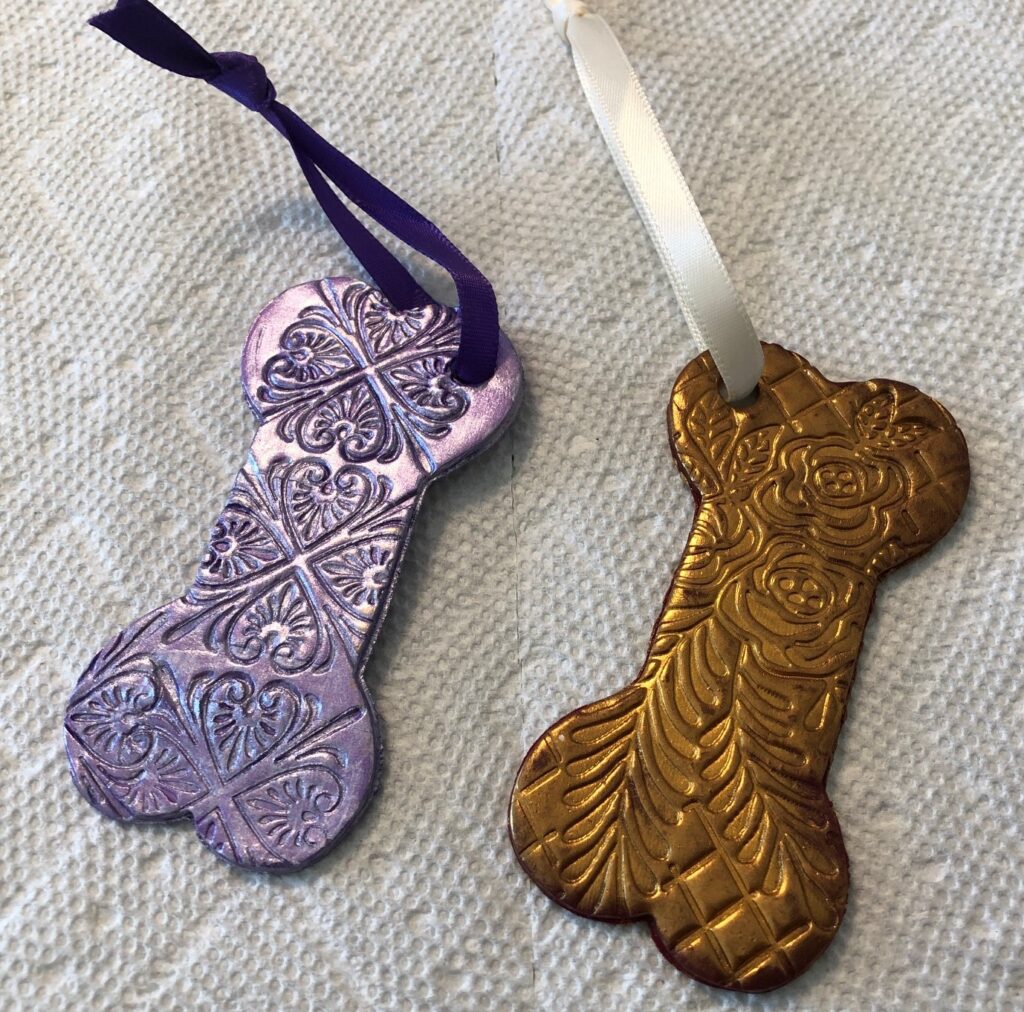
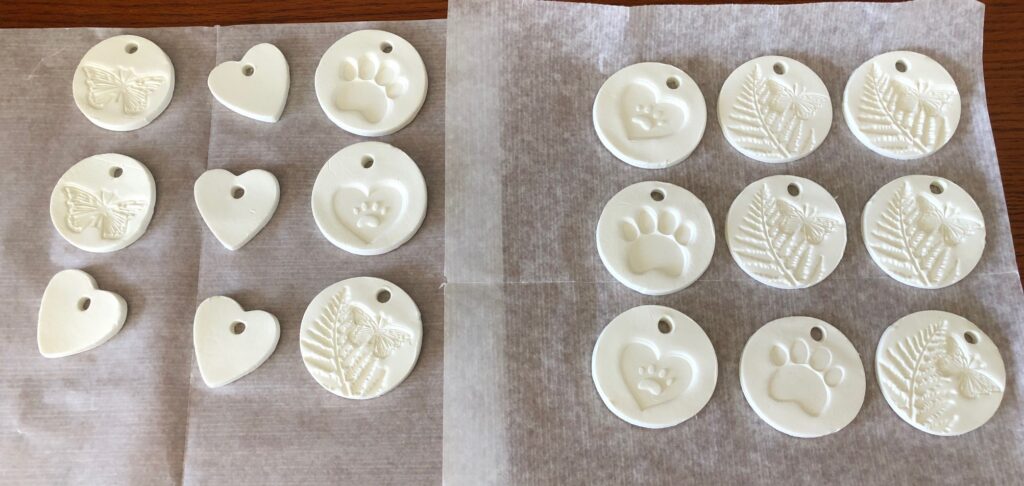
Samples of Flat Objects
Here are some examples of things I’ve made over the years. Most seem to end up as ornaments for Christmas.
I used several colors of clay and rolled and folded them together before rolling the clay out to cut out the circles.These were basically flat pieces when I pressed designs and cut holes. Then I stood them up and anchored them to a flat round base of clay. They couldn’t be any taller because of the size limits of the toaster oven. The little LED lights were just perfect!
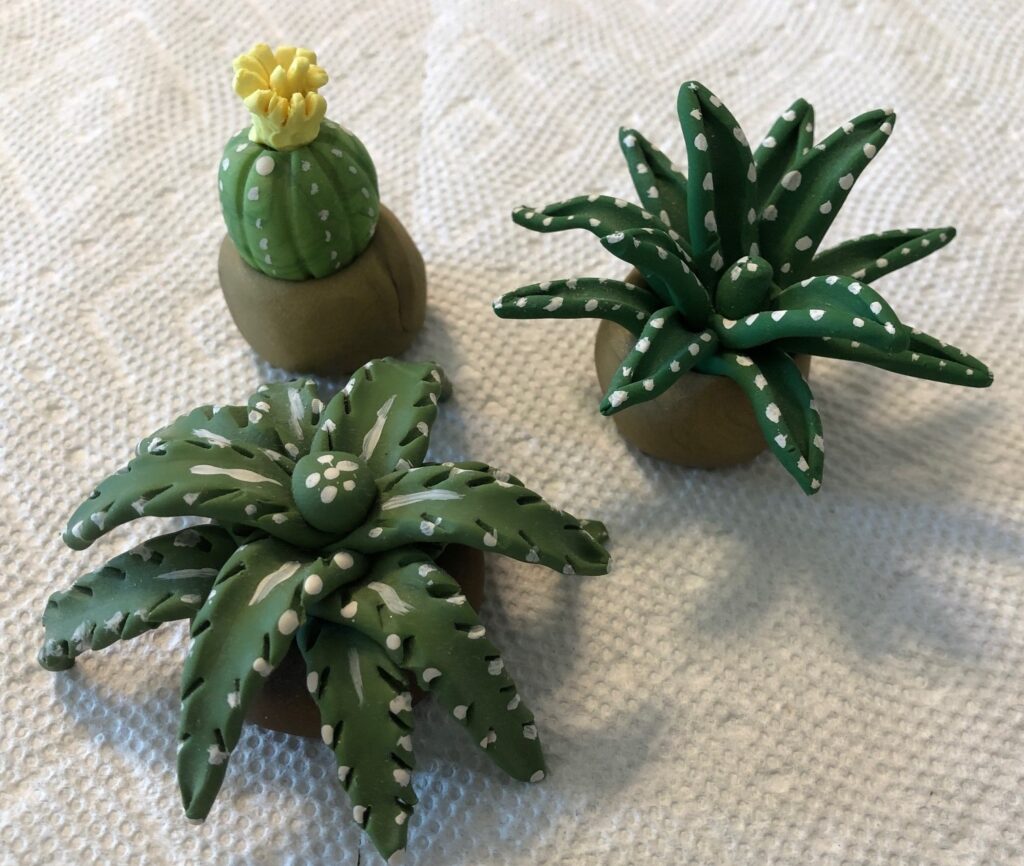
Free Hand Clay Objects
When I first started working with polymer clay, I found many ideas on Pinterest. I started with miniature plants. It looked so easy…not! My first few plants were probably all I’ll ever make, but they’ll last forever!
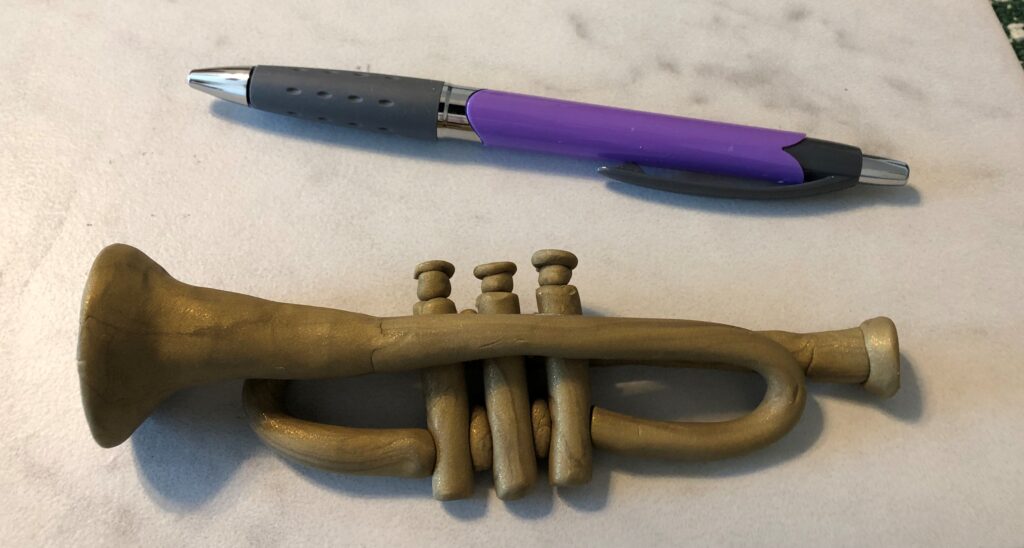
Then I thought I’d try a tiny trumpet and drums for my grandkids.
Making objects in the shape of an animal is definitely not my strength. However, if you can follow directions, you will find many great ideas on Pinterest. These step-by-step instructions will appeal to a generation of folks that were raised on LEGO instructions! Check out how to make a Turtle!
From Pinterest.
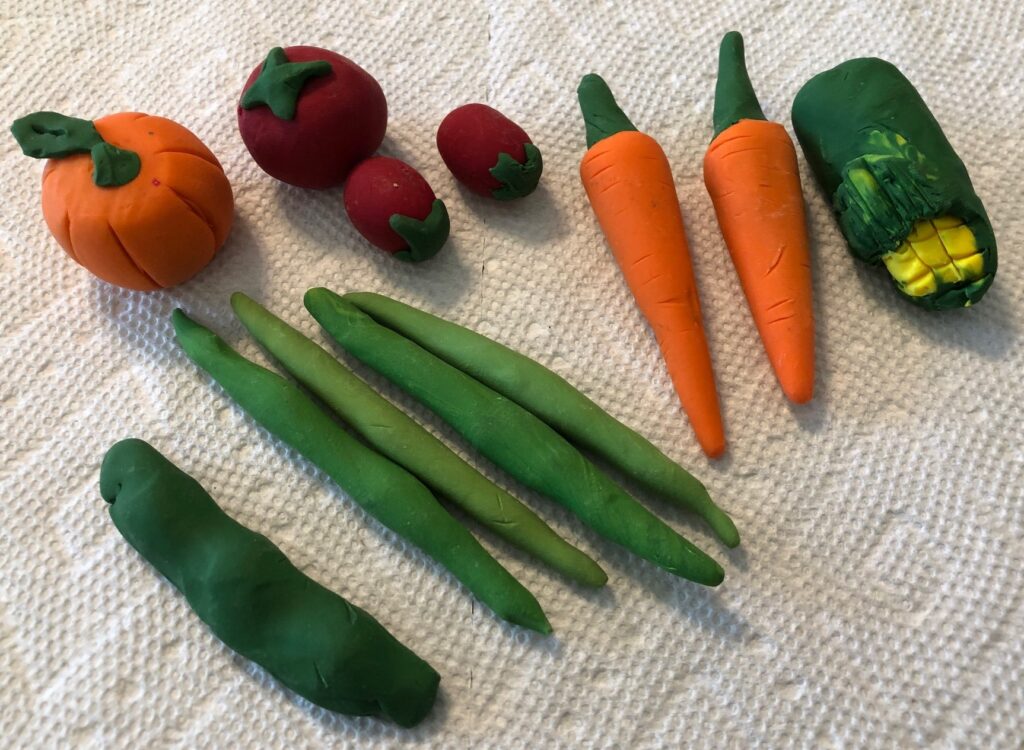
The best surprise was my Christmas present from my grandkids the year I was working with all this clay. I had given them an assortment of clay and tools and we had fun playing with them When Christmas rolled around, they gifted me my own crate of clay vegetables…perfect for a gardening grandma!
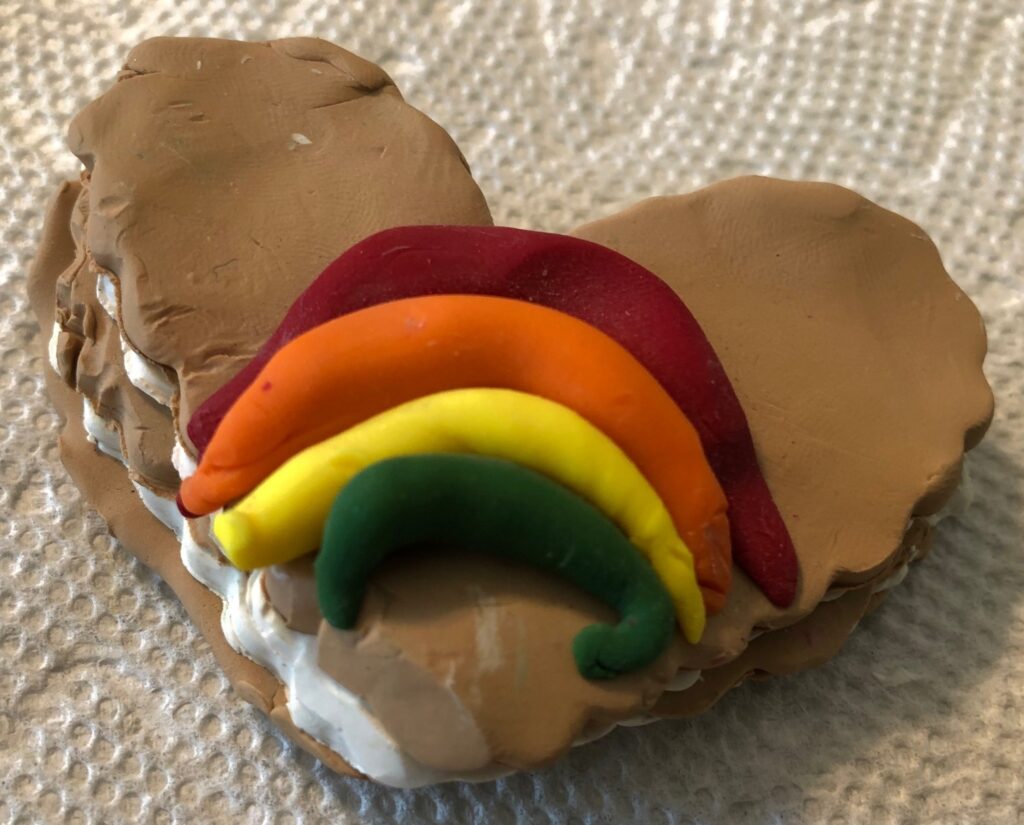
I think my grandson, age 12 or 13, had fun making the garden produce!And my very own rainbow heart from the youngest granddaughter!
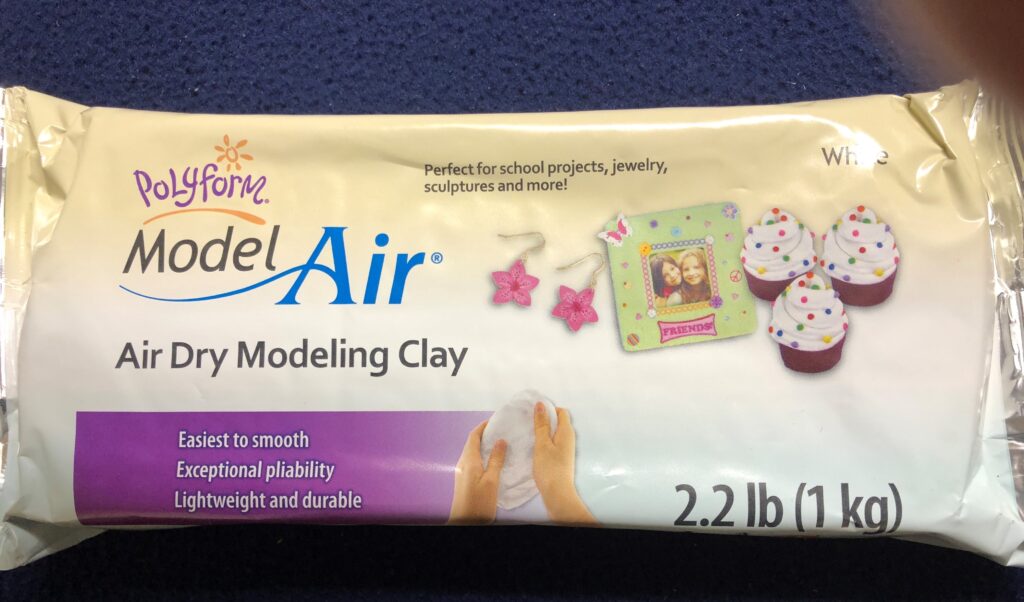
Air-Dry Modeling Clay
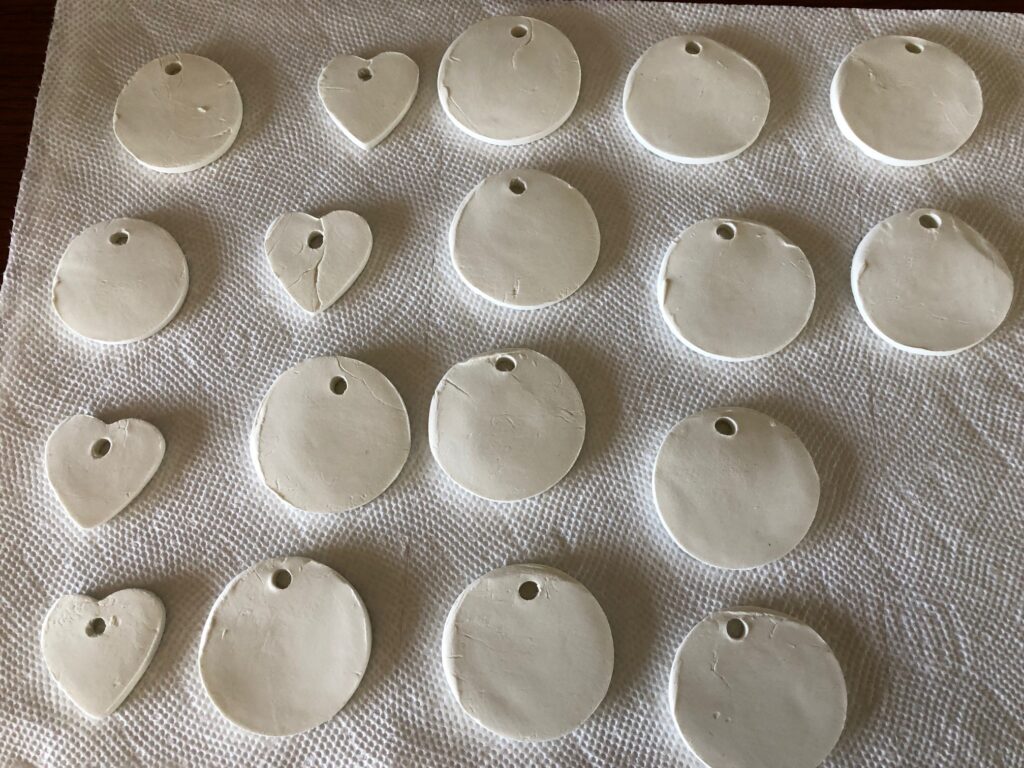
After working with Polymer Oven-bake Clay, I found working with Air-Dry clay difficult. It was not as forgiving and started to dry very quickly. It tended to crack easily, so pieces had to be thick enough. Solid objects took forever to dry completely.
So, my work with this clay focused on smaller circles of clay that could be quickly pressed with a design and left to dry. I did find that pieces had to be at least 1/4″ thick or more or they would not dry flat. I spent the day carefully turning each piece over as they dried.
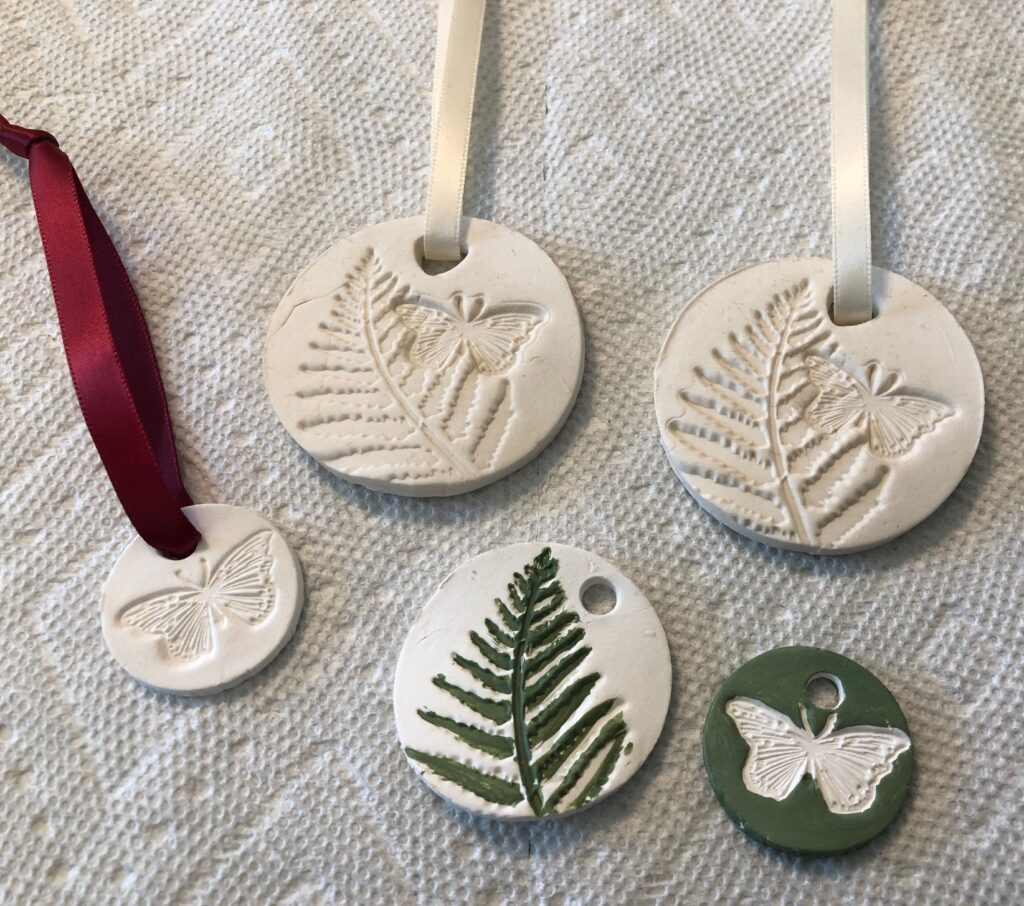
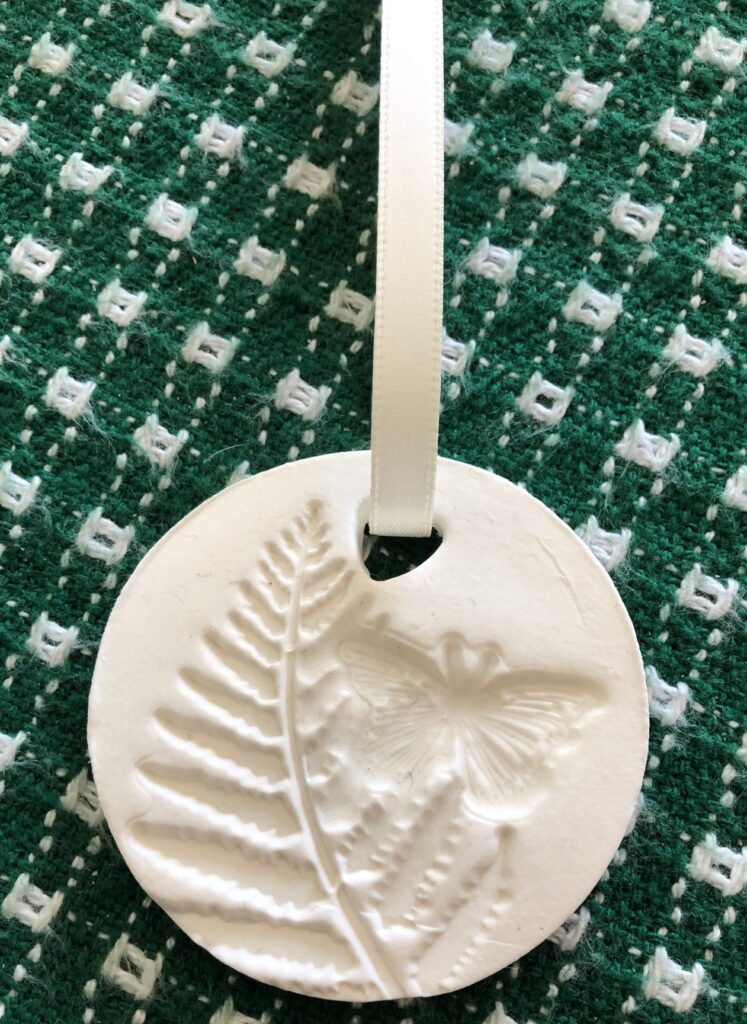
The best advantage of using air-dry clay, was its ability to absorb essential oils. Now I had a way to capture my favorite oil scent to make my drawers and closets smell good. I also made a bunch of Christmas ornaments that could be soaked with the scent of the holidays to add to the Christmas tree. So, this clay has its uses.
Making clay objects or holiday decorations with kids and grandkids can be a fun way to get everyone involved. Skill levels can vary and everyone can participate. Enjoy!
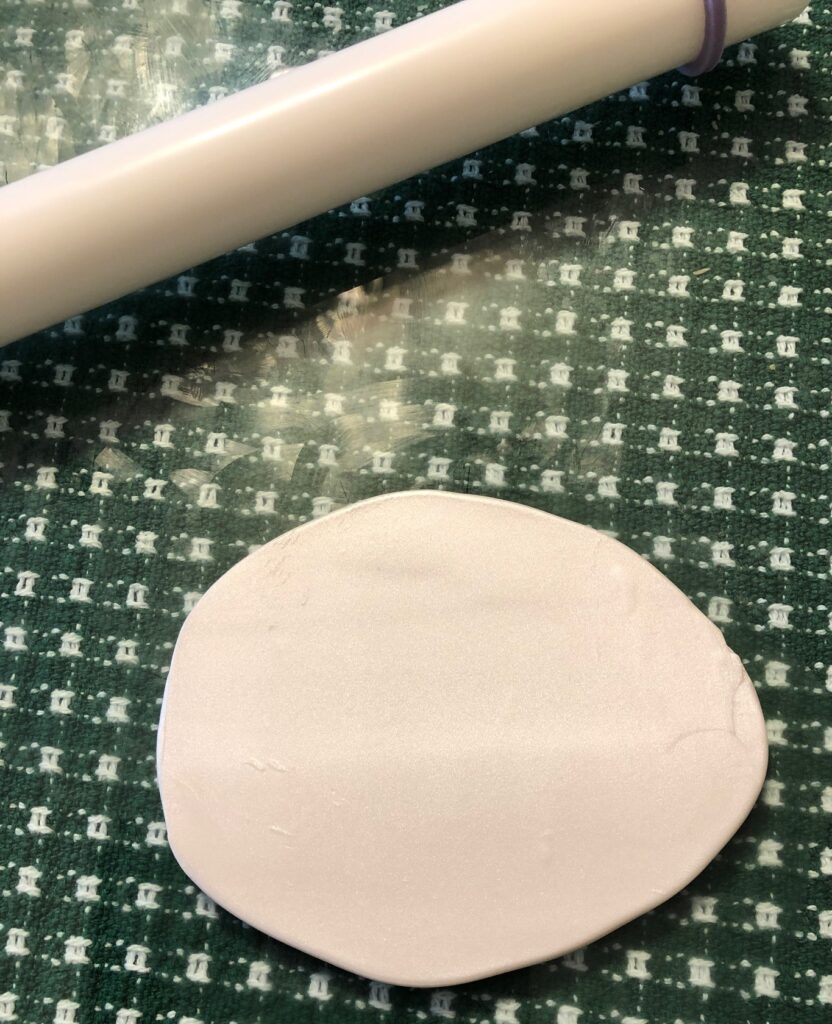
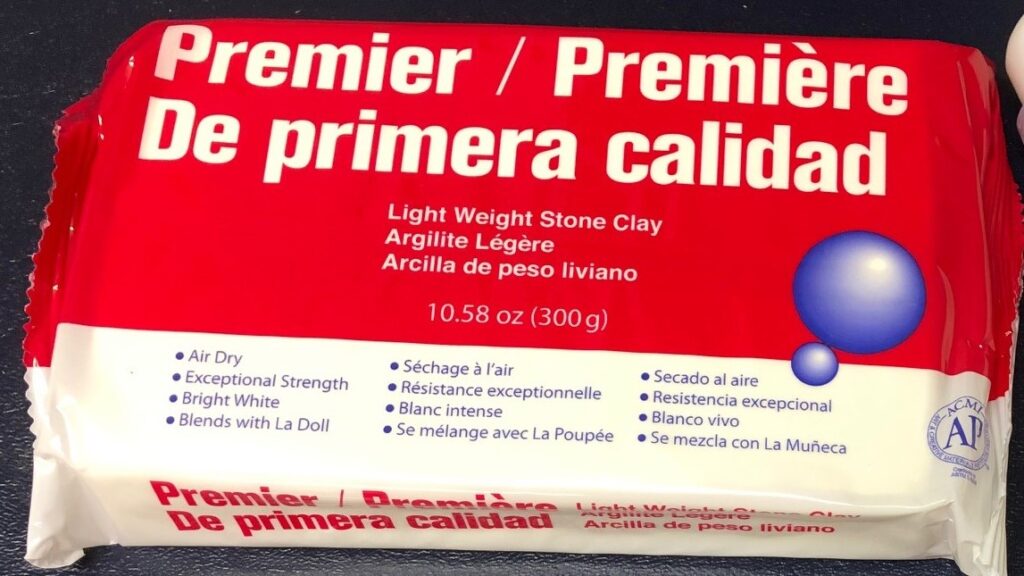
I was not happy with the colors of clay I used and the shapes I experimented with in that previous post. So, I pulled out the Pearl clay I had and started over.
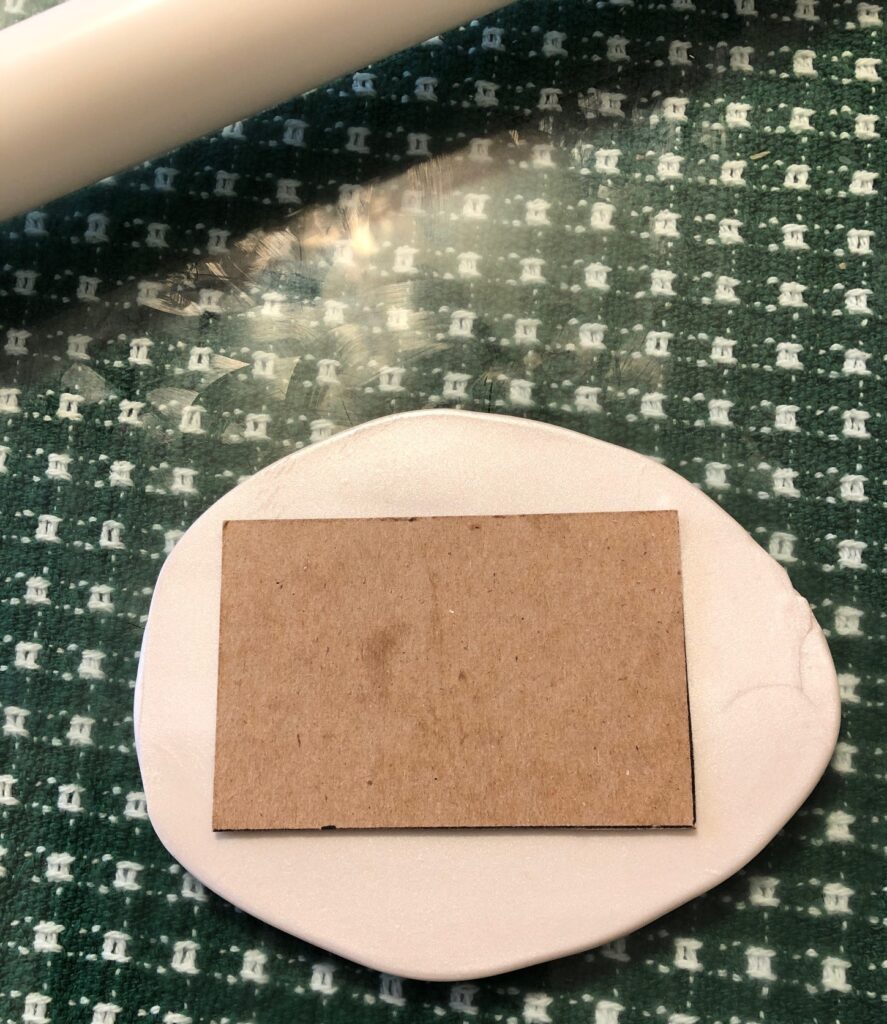
I decided to make rectangles that were 2″ x 3″. I did not have a cutter that size so I made a cardboard pattern from an old tablet back.
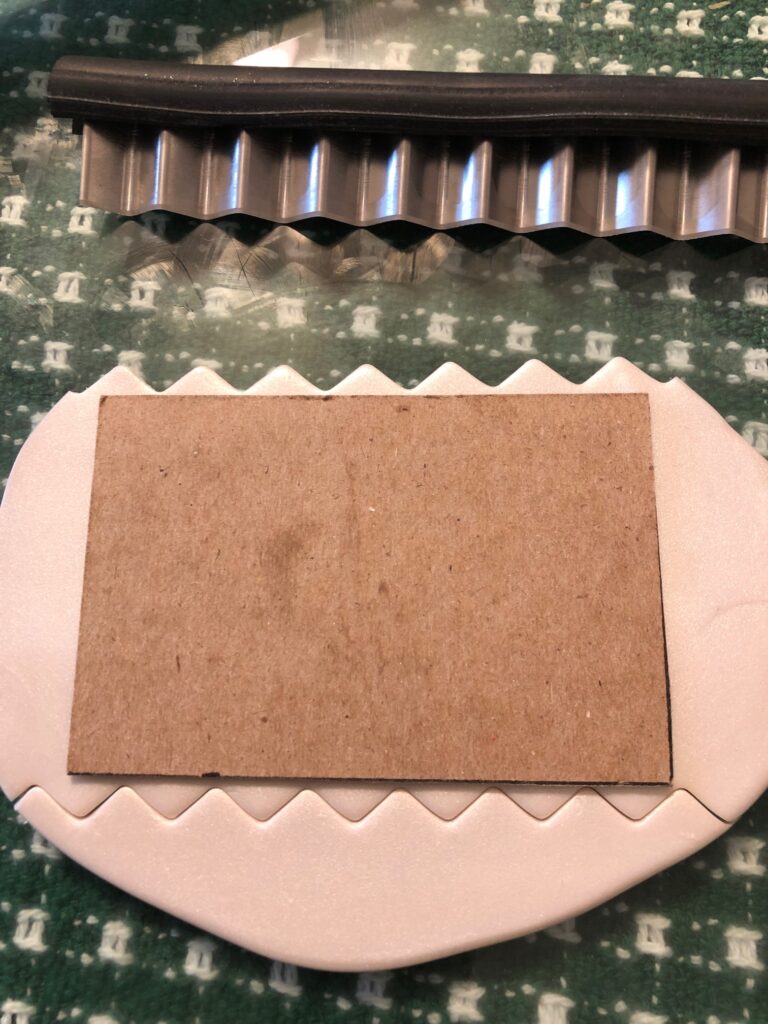
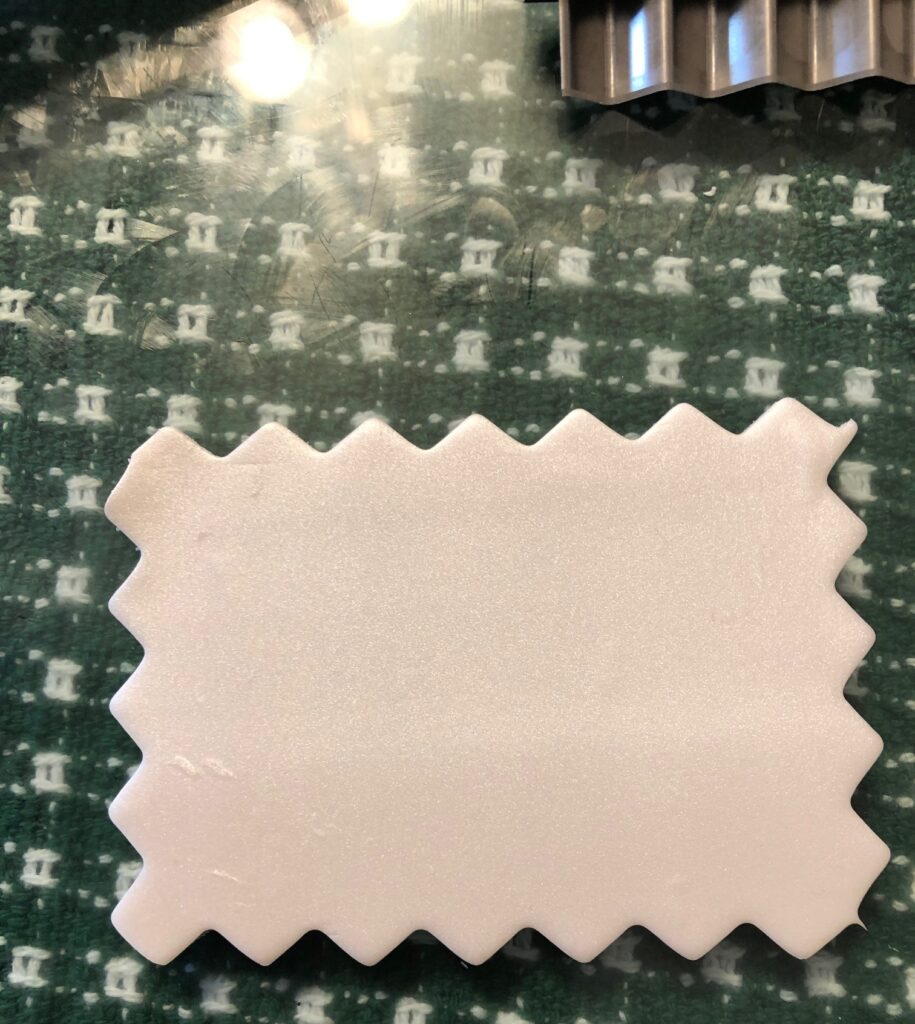
I rolled out a ball of clay and placed the pattern on it. Then I used a zig zag cutter and just cut around it, like this:
I made about 20 of these rectangular shapes. Some ended up closer to 1 1/2″ x 3″ and a few were round circles. They baked for 50 minutes at 265 degrees in my old toaster oven.
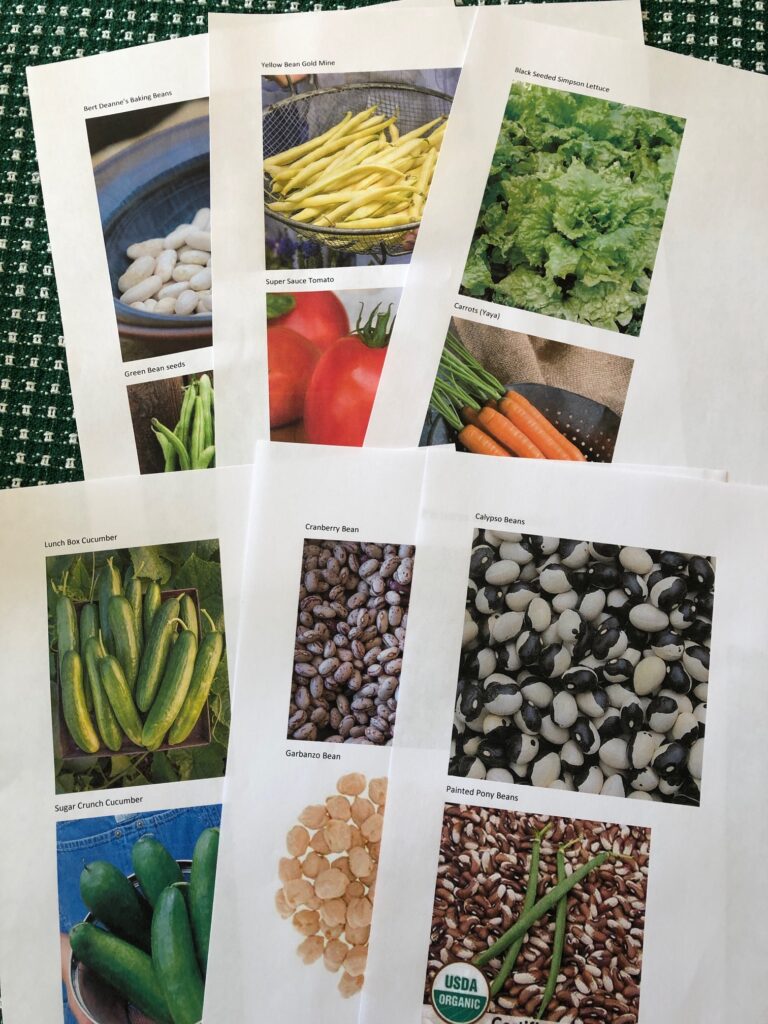
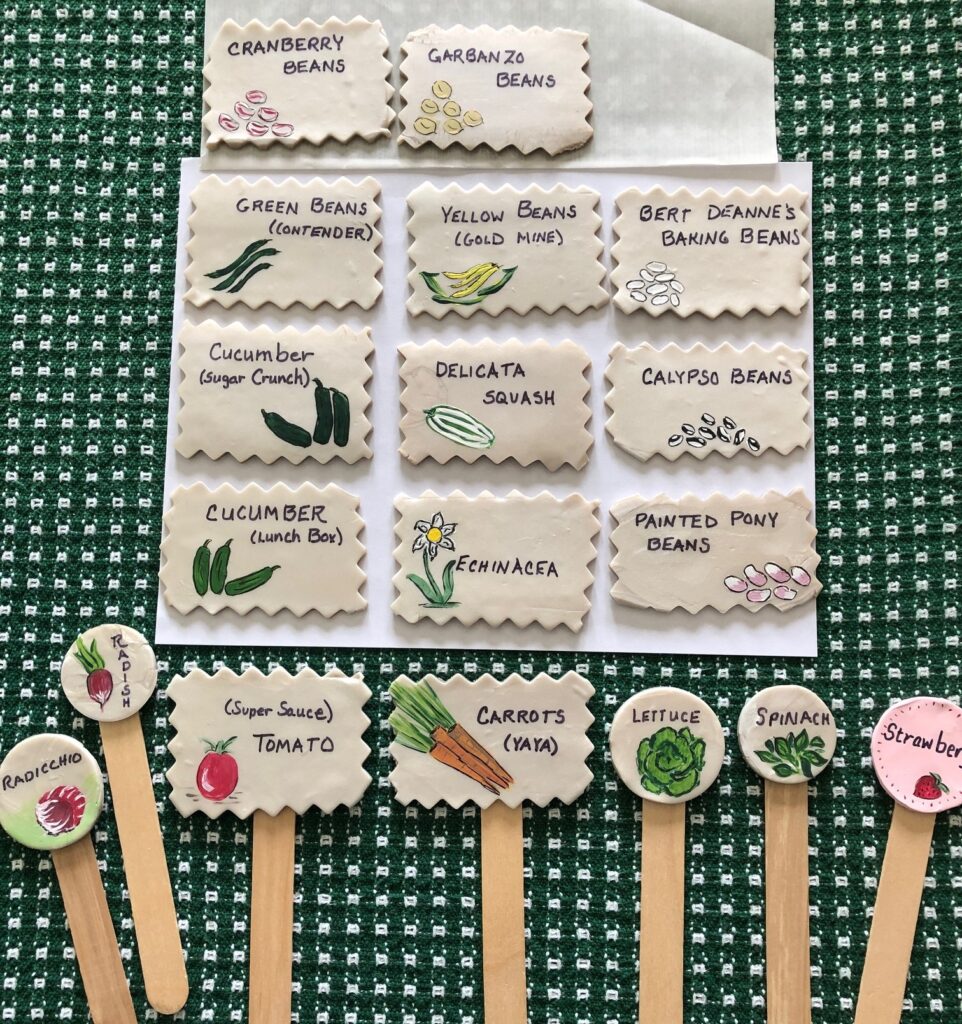
Next, I printed out pictures of the vegetables we are going to grow. Even though I know what the common vegetables look like, I wasn’t sure about the various beans we were going to try.
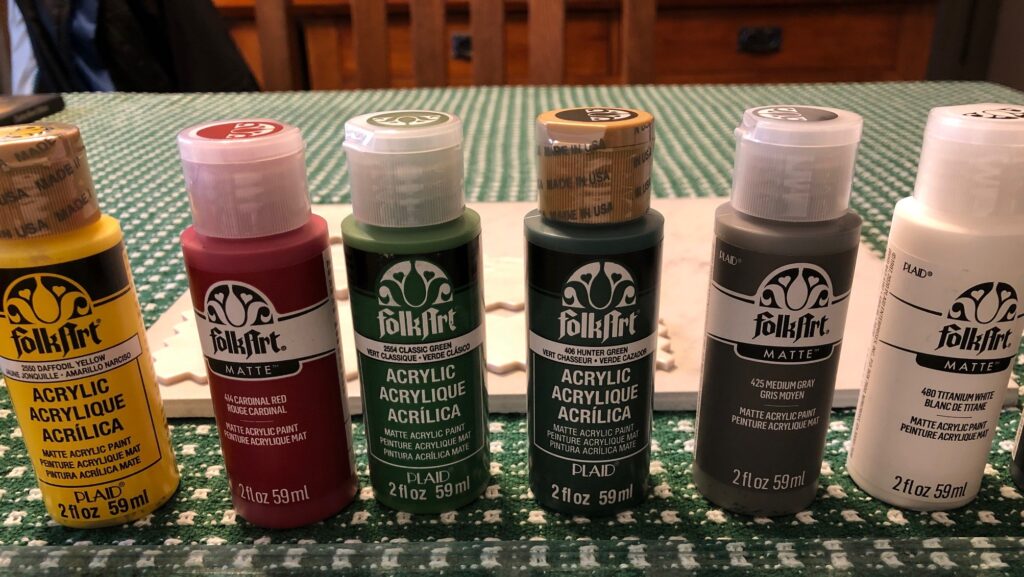
Then, I pulled out my various bottles of acrylic paint and brushes.
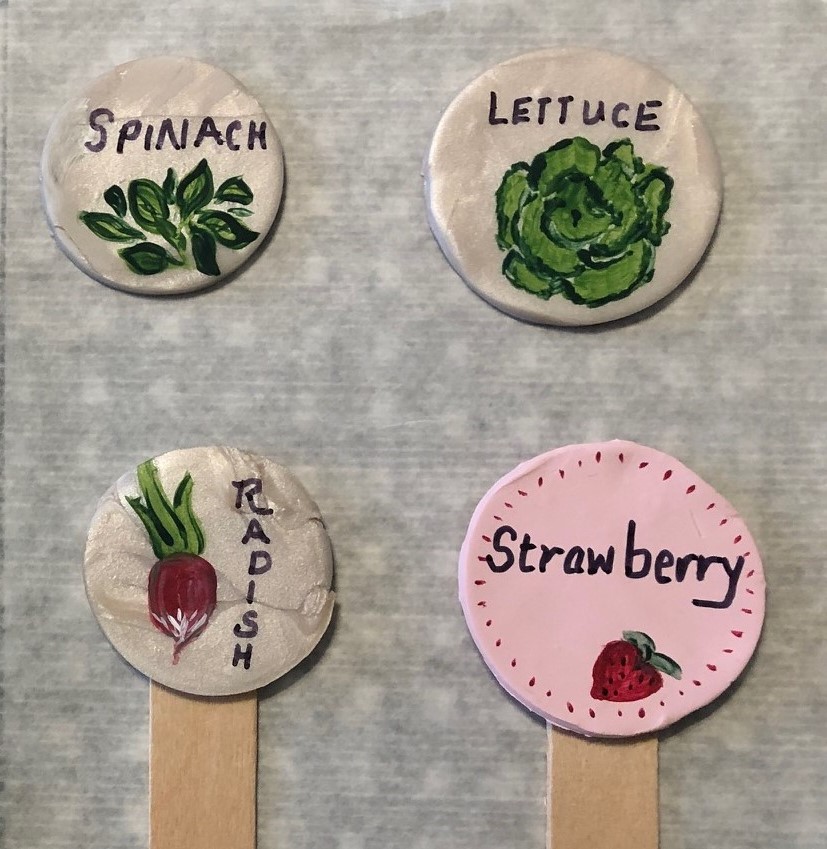
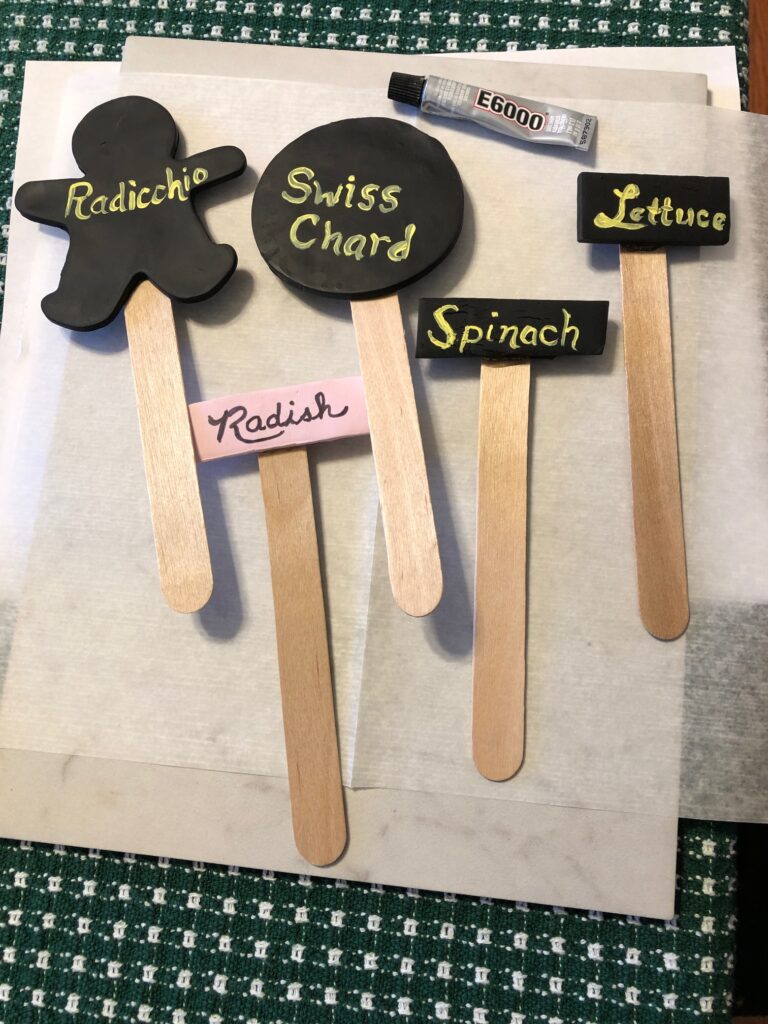
I started with two of the round circles to see if I could make a representative picture of a radish and a strawberry. Those two, plus the lettuce and spinach, will be in the planters on the patio so they didn’t need huge signs.
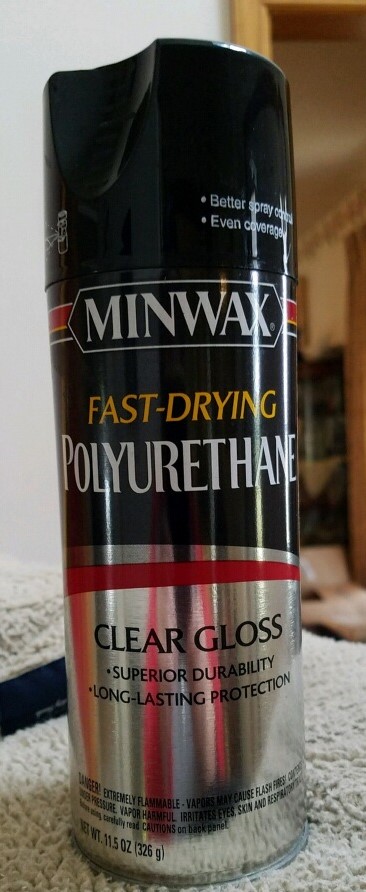
Luckily the paintings are pretty small, so they didn’t have to be perfect! I’ll glue the signs to the wide craft sticks and then spray them all with a polyurethane spray. Hopefully, that will help them weather the outside summer temperatures and moisture.
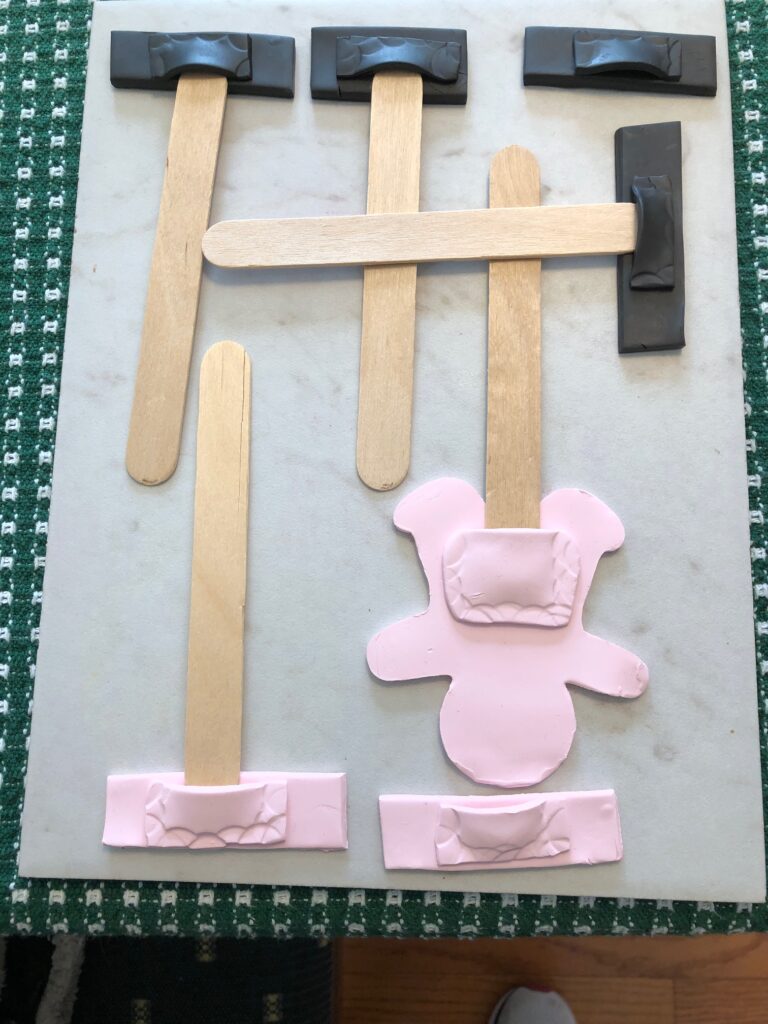
Before I invest in more polymer clay to make my garden signs, I thought I should figure out if it will even work. I collected up my pile of partially used bits of clay leftover from other projects and spent the day making some samples.
I haven’t worked with clay for many months but the clay seemed to survive just fine in plastic bags. My first goal was to see if one color worked better than others and how I should write on them. My second goal was to figure out what shape worked best and how to attach the stick that will go in the ground.
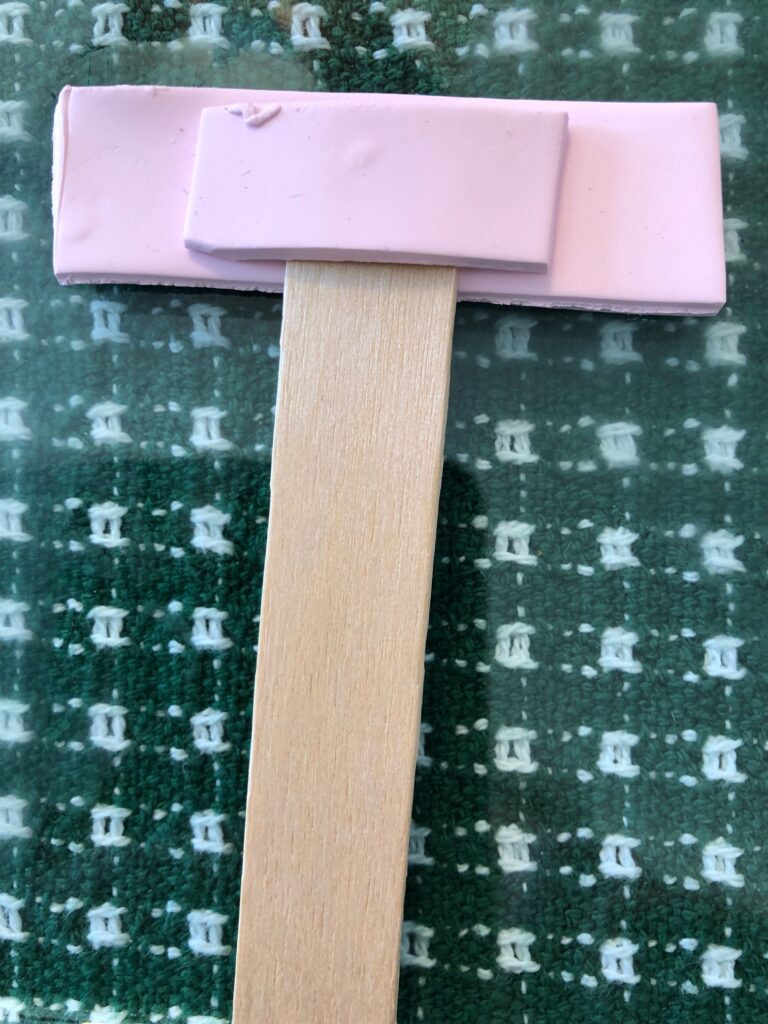
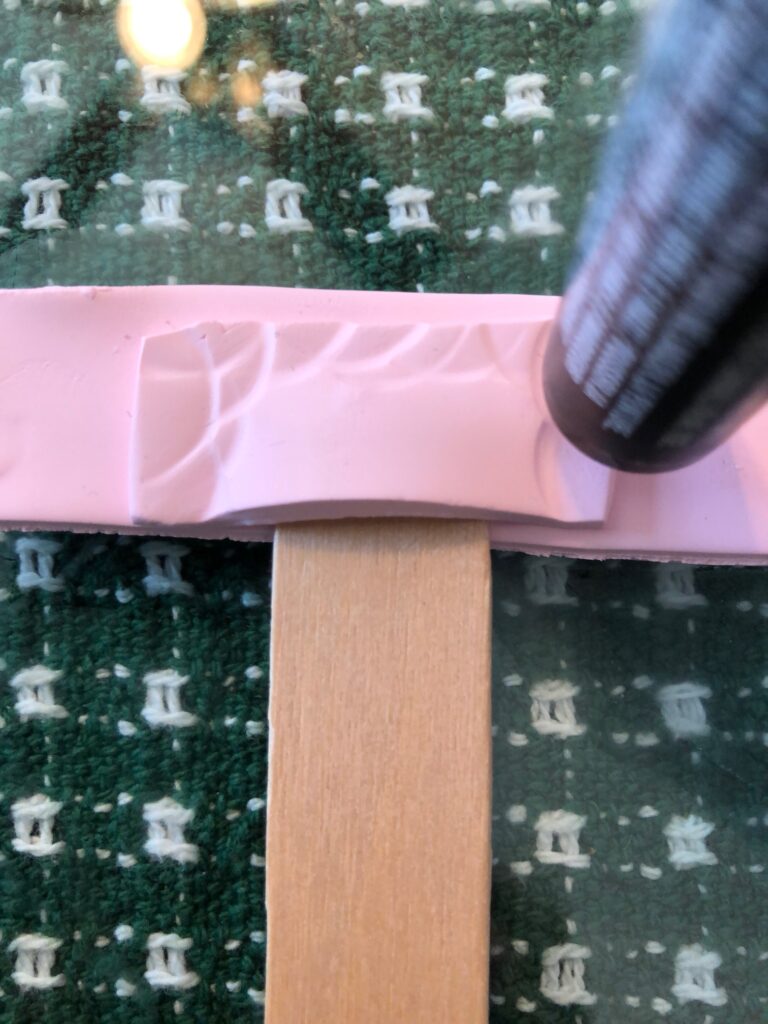
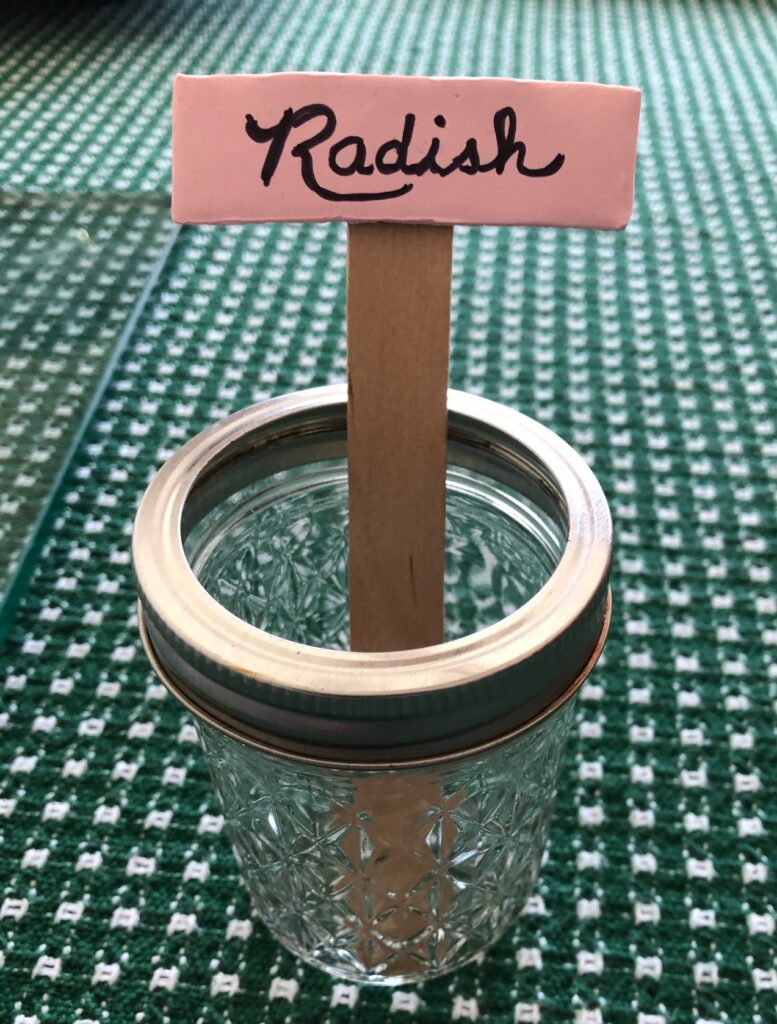
The first color I chose was a pale pink. I thought I could write on it with a black marker. I also didn’t need anything too large because five of the signs could be small…they will be in the smallest planters on the patio. These small signs would be for the Radishes, Lettuce, Spinach, Radicchio and Swiss Chard. I put a piece of clay on the back that would make a pocket to hold the stick.
Back of the small sign.I used the flat end of a marker to tap down the edge of the pocket…hoping it would stay put after baking. I left the stick in the pocket while it baked to keep the pocket from collapsing.
After baking in my toaster oven (275 degrees for 30 minutes), I wrote Radish on the sign with a permanent marker. The sign looked like this:
I added glue to the end of the stick and stuck it in the pocket to harden.
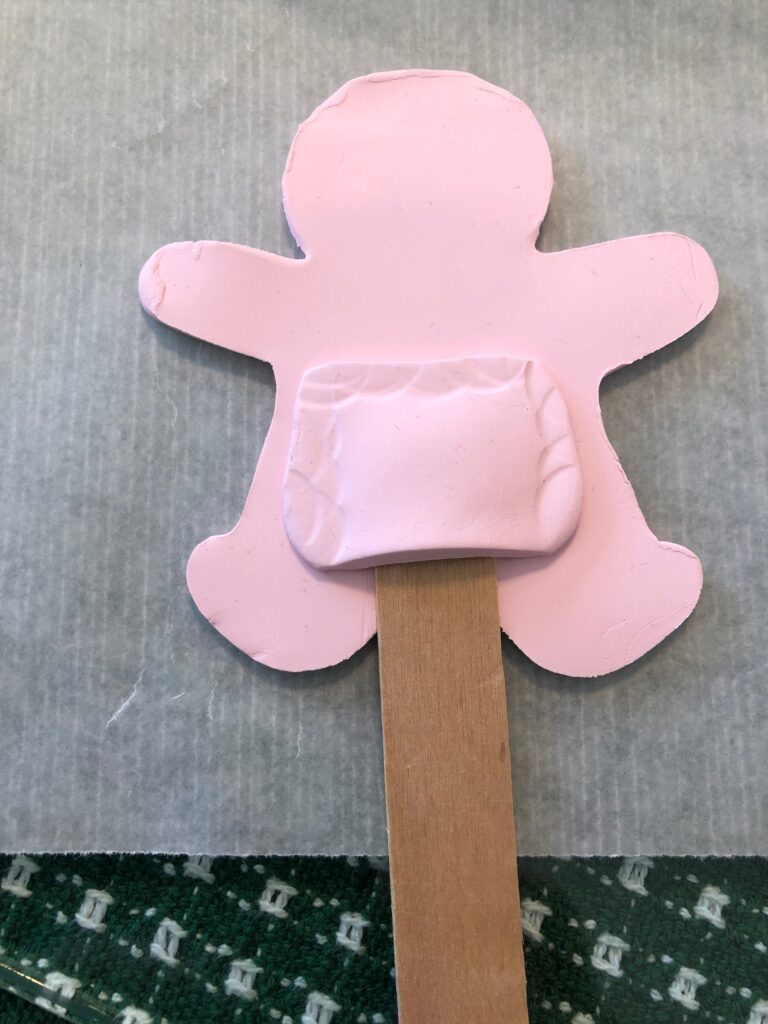
Just for fun, I chose a cookie cutter of a gingerbread man to make a larger sign. I added the pocket piece to the back and tapped the edge down.
After baking, I glued the stick into the pocket using fast-drying E6000 glue. These are the ones I made today:
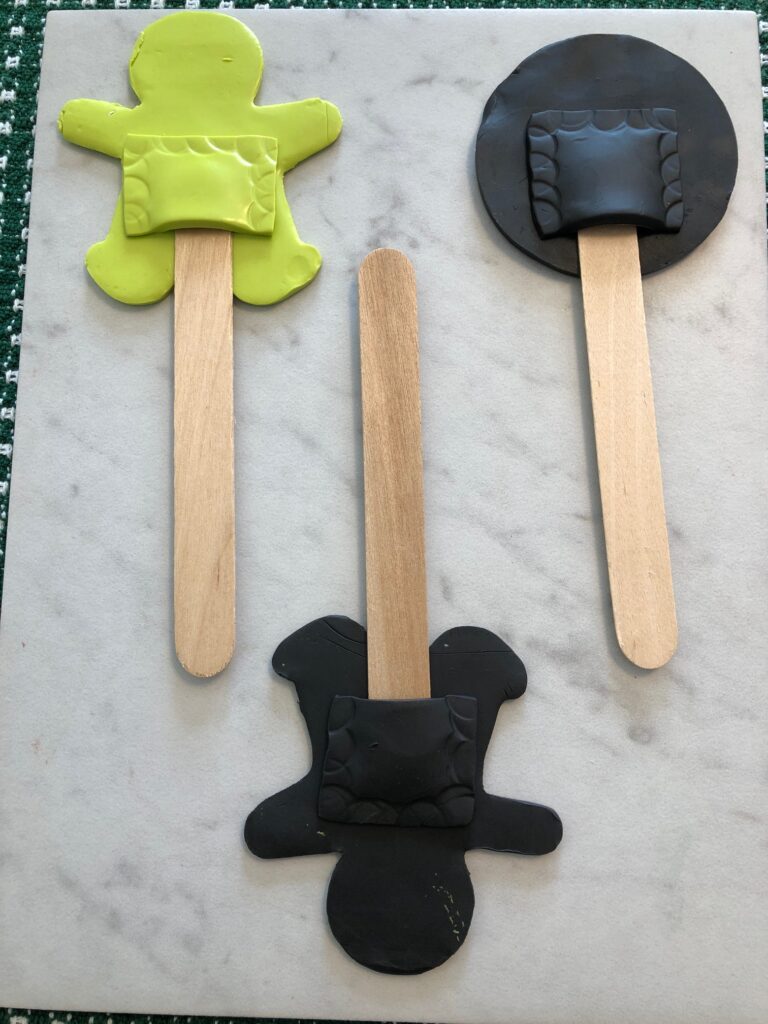
When the signs were cool, I turned them over and wrote on the black ones with yellow paint. I may have to make the rest larger than the round one above…too much to write so they need to be bigger.
After writing all the words with yellow paint on black I think I like the light color clay with writing in black marker. It’s much easier, especially as the number of letters increase.
When they are all done, I’ll seal them with an acrylic spray to make them waterproof. I’m sure they could also be more decorative too! I’ll have to look up some ideas on Pinterest! Enjoy!
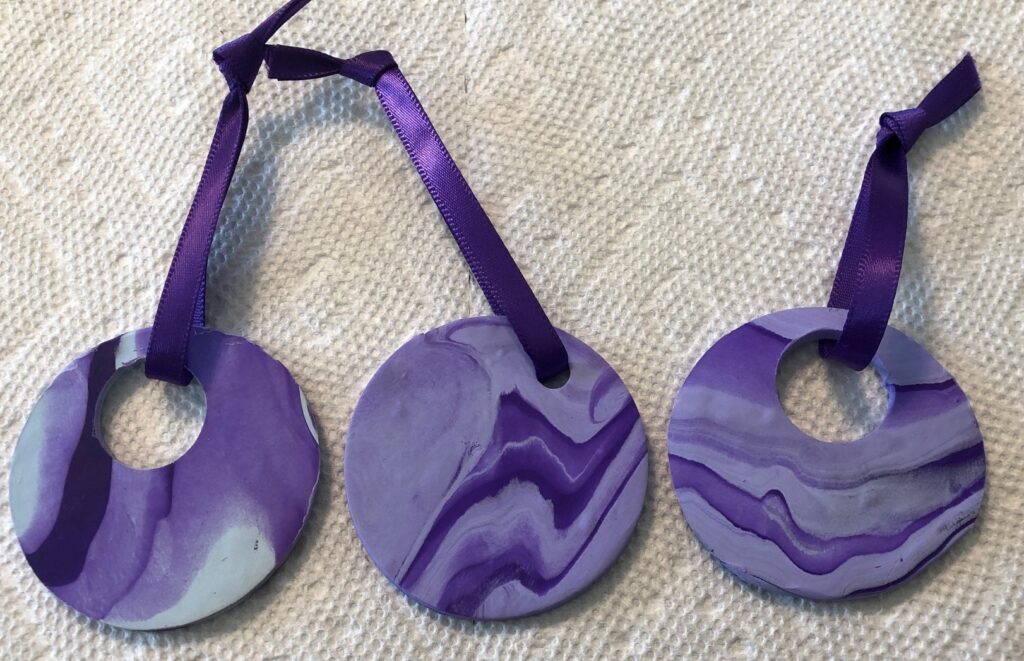
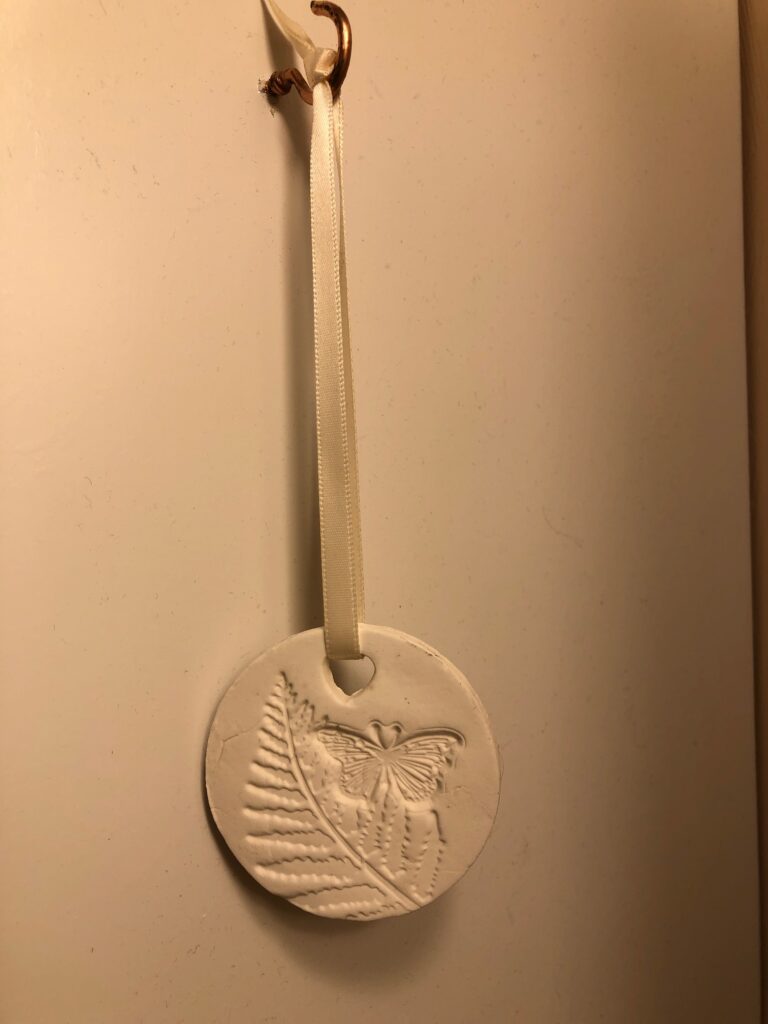
I have spent a lot of money trying to find an air freshener for a small room like a bathroom or closet that I like. Sprays sometimes leave a residue on surfaces. I don’t want that on the bathroom floor or my clothes. Some fresheners need to be plugged in, which ties up a plug. I know I like the essential oil fragrances like lavender, vanilla and lemon. There are many others to choose from. However, which fragrance will last the longest? Here is a quick project using air dry clay that has solved my problem. Give it a try! This would make a great project for kids and grandkids too.
Let the ribbon color remind which oil you used on which freshener!
First, some basic supplies:
Air dry clay: This can be found at craft stores, Walmart or Amazon. It comes in multiple colors. I prefer white, however kids might enjoy making other things besides air fresheners! (How about an animal with lavender essential oil sitting by the bed…could help them sleep!)
Work surface: I’m using a piece of heavy glass (3/8″ thick) that is about 10″ by 12″. Bert found it at a glass contractor’s supply business. Glass out of a picture frame works, just put some masking tape around the edges. A vinyl tablecloth works too!
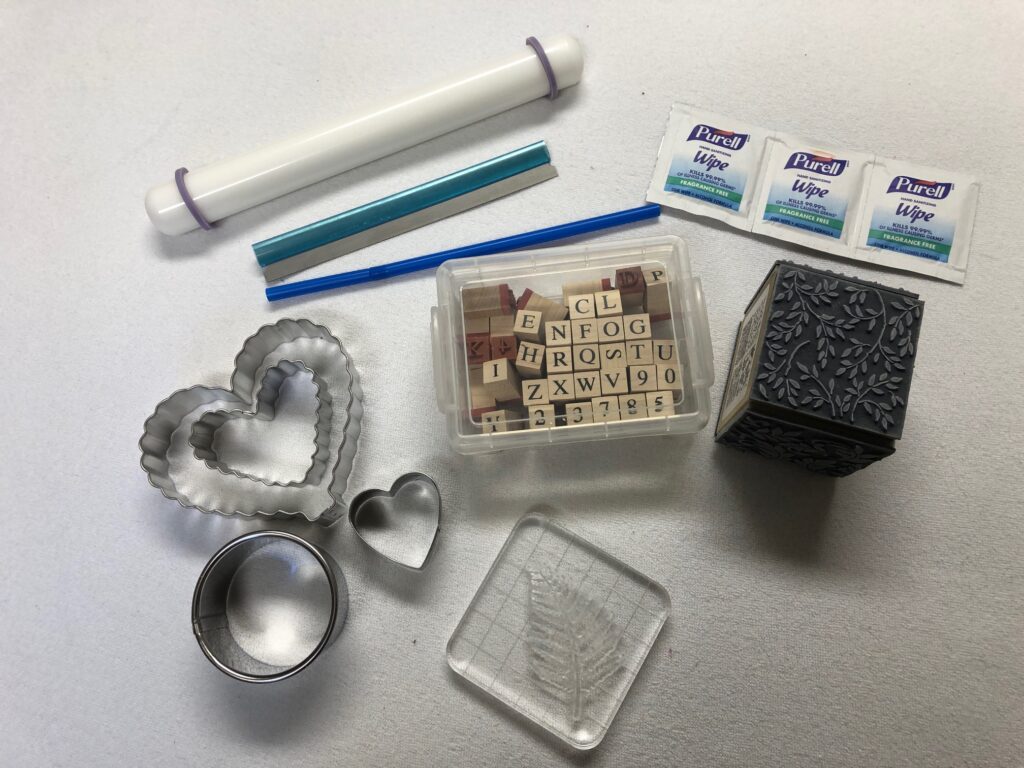
More supplies:
More supplies described below.
A clay rolling pin or large dowel rod.
Razor cutting tool. Perfect for getting the clay off the work surface. The one in the picture next to the rolling pin has a guard that serves as a handle. Then it can be removed and slid over the razor when not in use.
Disposable straw to make the holes to hang the item.
Cookie cutter (thin metal works best in cutting out shapes from this clay.)
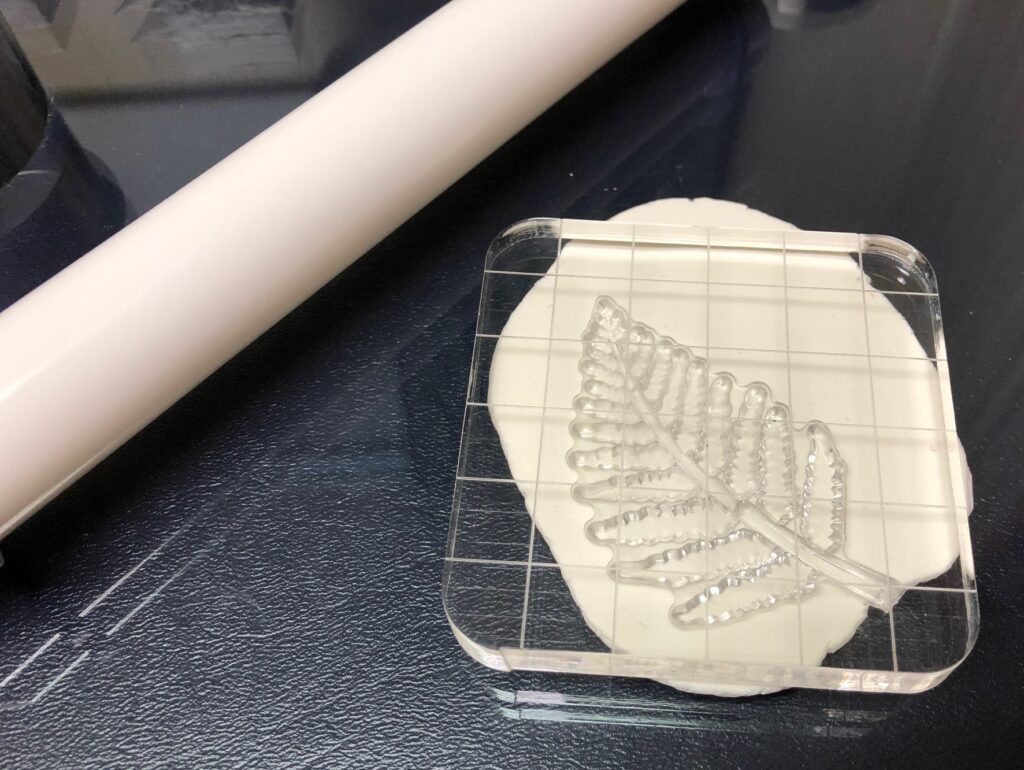
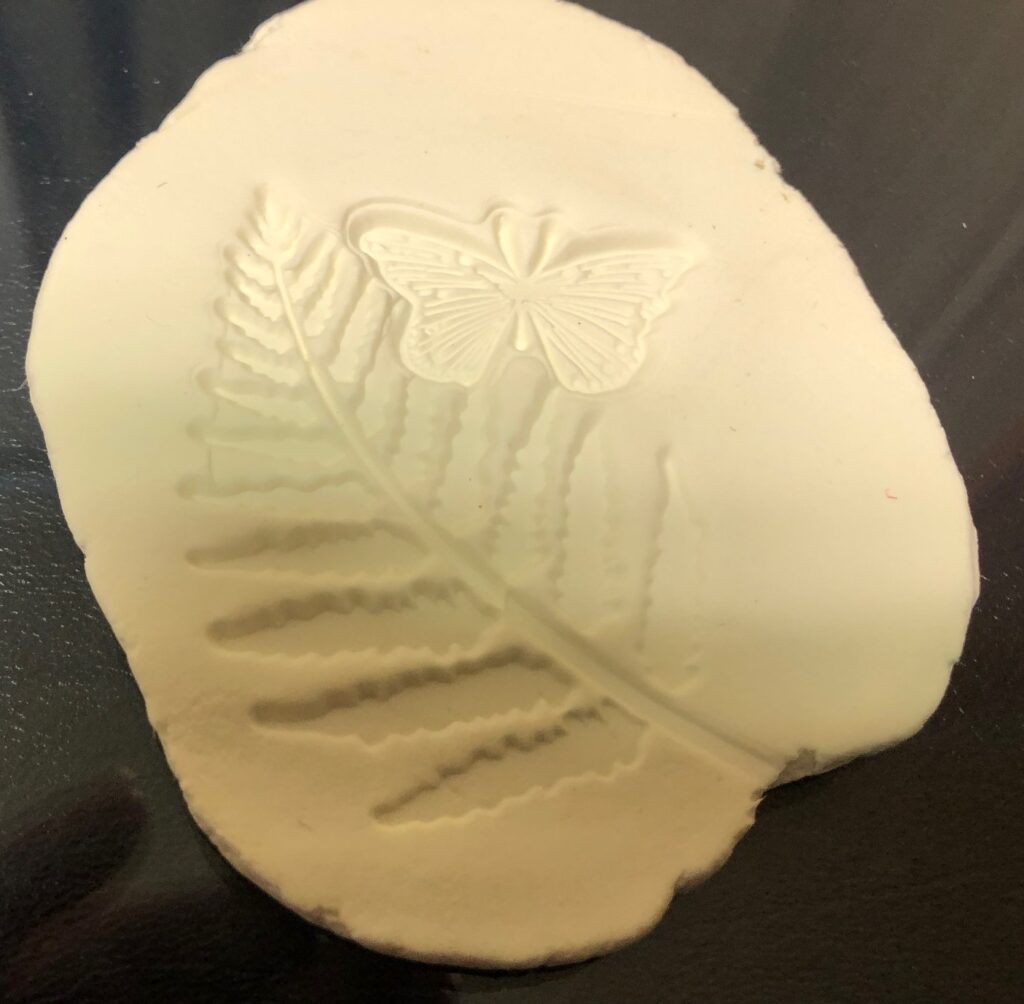
Anything to make impressions in the clay. This could be as simple as your thumb. Leaves make interesting impressions. Some rubber stamps (usually used with ink) make great impressions. I am using clear flat rubbery shapes that stick to a hard plastic base. They make an impression but don’t go too deep.
Wax paper or paper towels to put the finished pieces on to dry.
Wet wipes. Air clay leaves a chalky residue on your hands and tools. These make clean up much easier.
Essential oil or fragrance oil of your choice.
Here are the steps to make this air dry clay freshener:
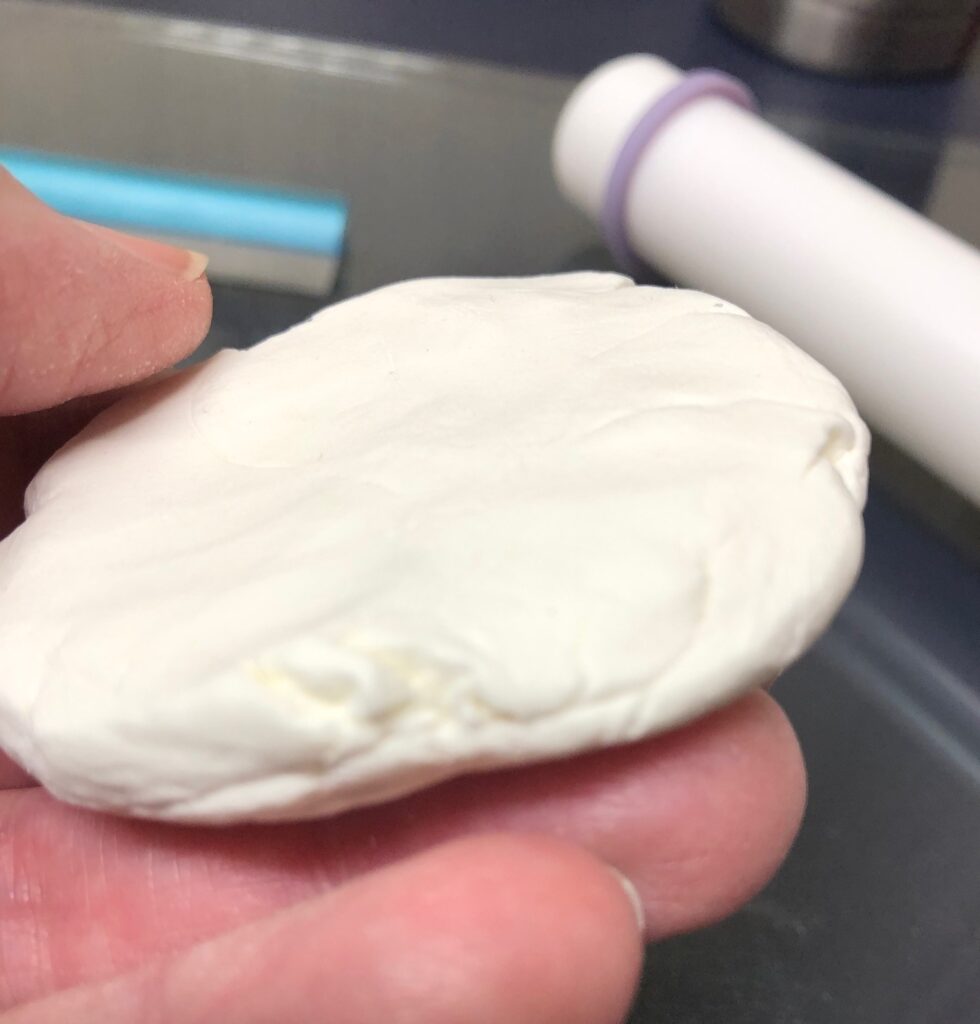
Step 1: Take a piece of clay and work it into a ball. Flatten the ball with your fingers.
Step 2: Roll the clay flat with the rolling pin or dowel rod to about 3/8″ thick. The edges will tend to crack a little, don’t worry about that!
Step 3: Make impressions in the clay.
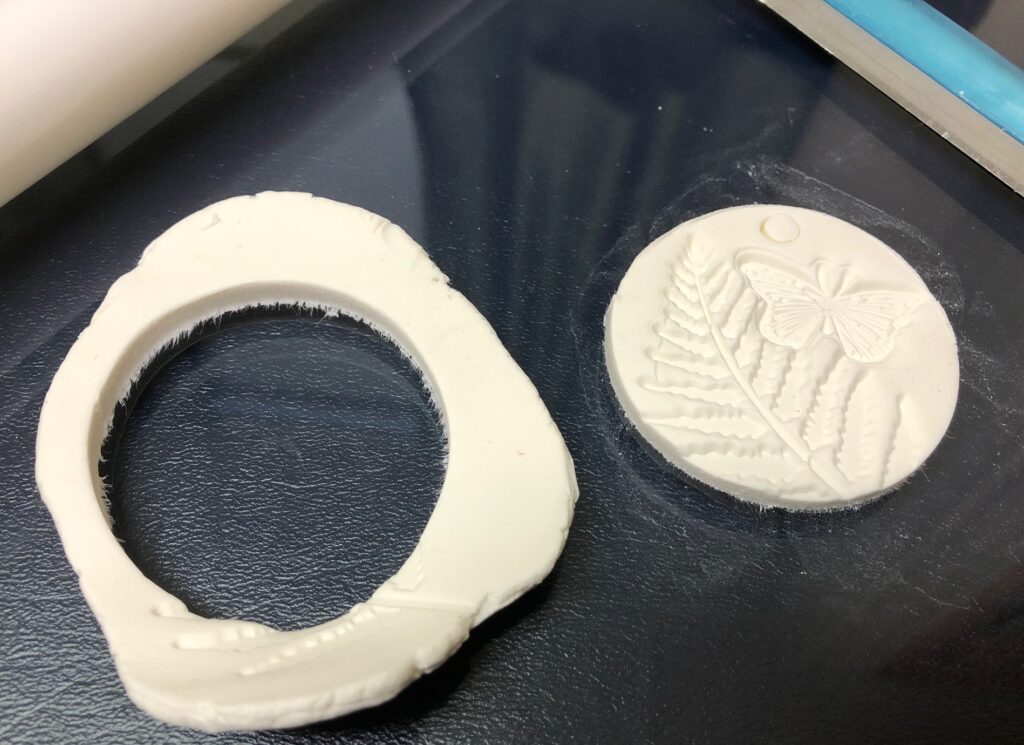
Step 4: Use the cookie cutter to cut out your shape. Small Christmas trees or stars at Christmas time make good ornaments and gifts!
Step 5: Make a hole with the straw and twist it a little to loosen it.
Step 6: Use the razor to gently lift the edge of the clay. Peel the outside clay off the item. Save this extra clay and work it into the next item.
Step 7: When you lift the item off your work surface with the razor, you can gently smooth the cut edge with your finger. Place the cut items on wax paper or paper towel to dry.
Step 8: As this clay dries, it will often dry faster on the top. For the first few hours after making them, I watch when they curl and turn them over several times until they stay flat.
Step 9: Thread ribbon or string through the hole.
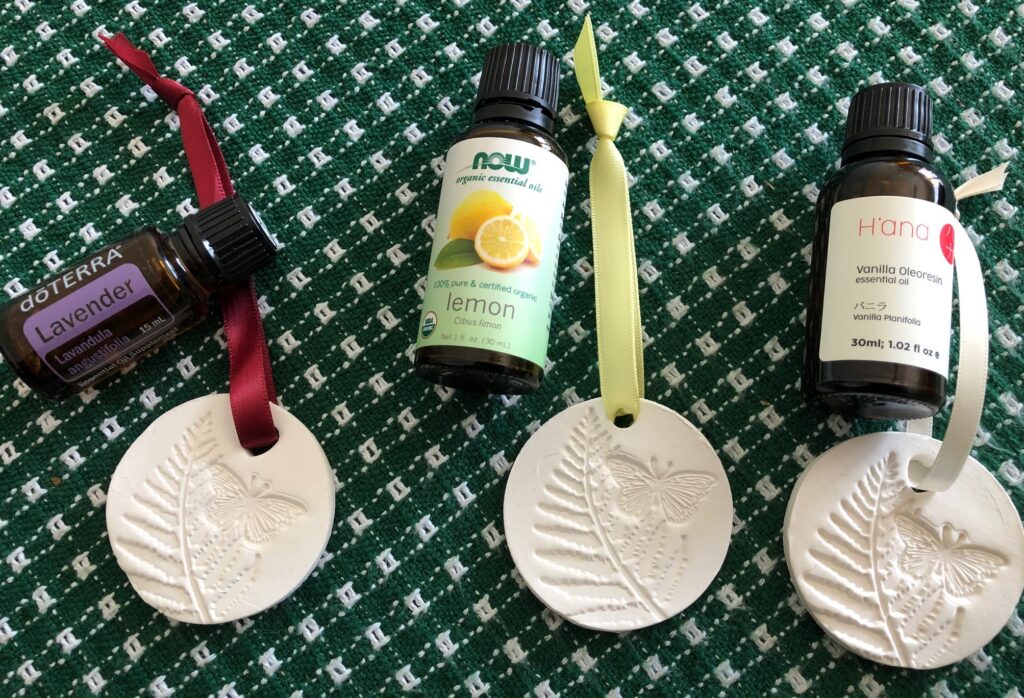
Step 10: Add essential oil. About 4-5 drops of oil is enough to start. Lay the item flat. Place the oil into the pressed design so it doesn’t run off the surface. Let the oil soak in. Use only one scent at a time. Add more essential oil one a week or as needed.
I made three items with different color ribbons. I will use lavender on the item with the burgundy ribbon; lemon on the one with the yellow ribbon; vanilla on the one with the white ribbon. I’m testing (one at a time) to see which scent I like best and which lasts the longest.
When dry, hang your freshener. Bert put hooks on the side of the bathroom cabinet for me. It looks pretty and smells great!