New Spring Door Quilt on Wood

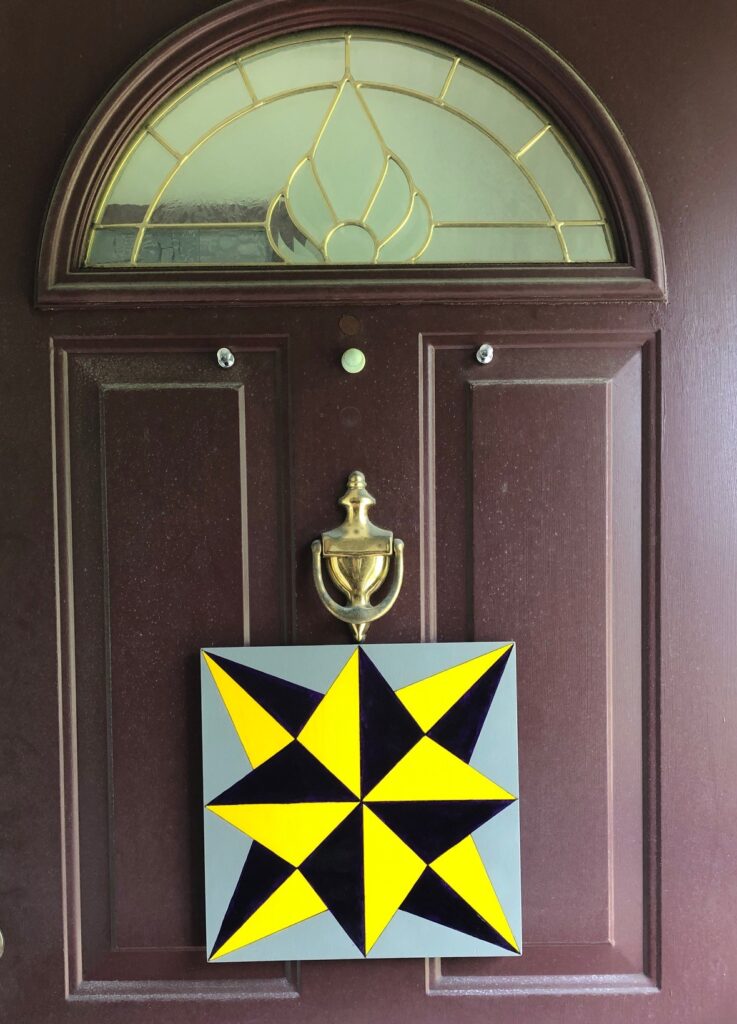
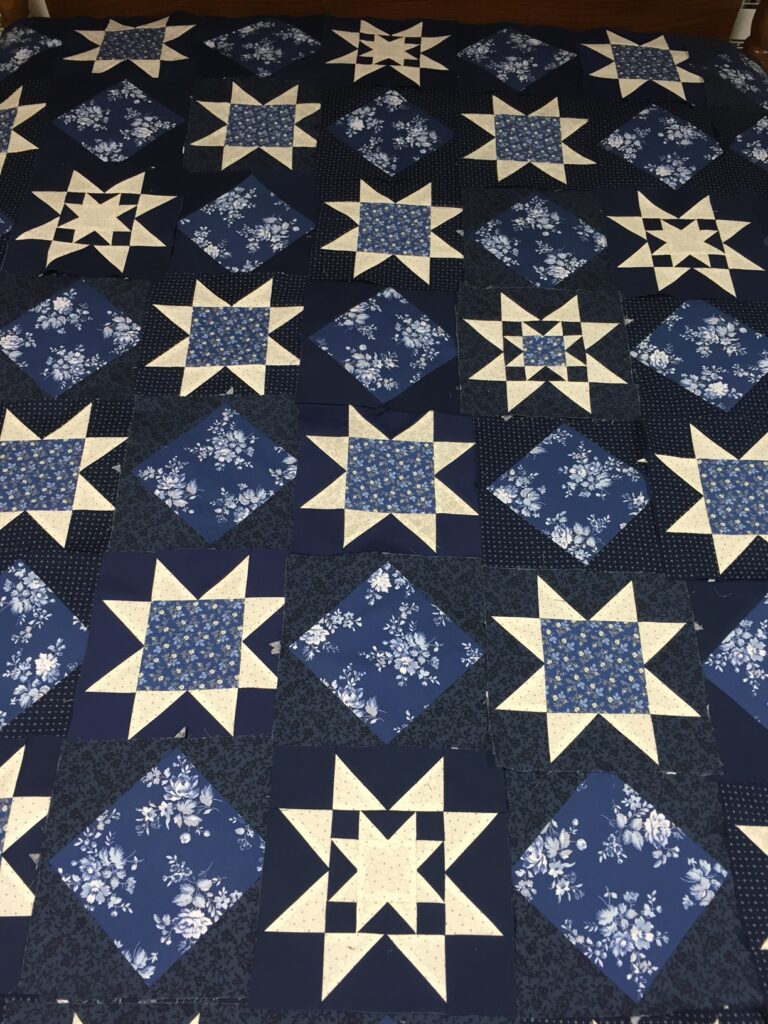
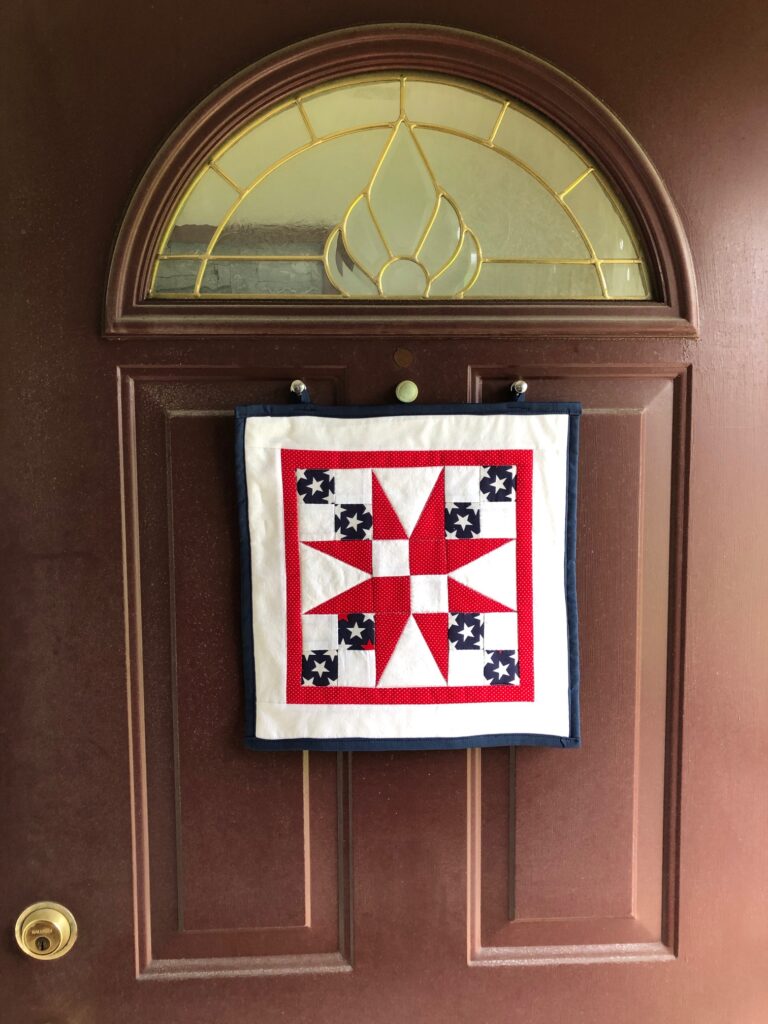
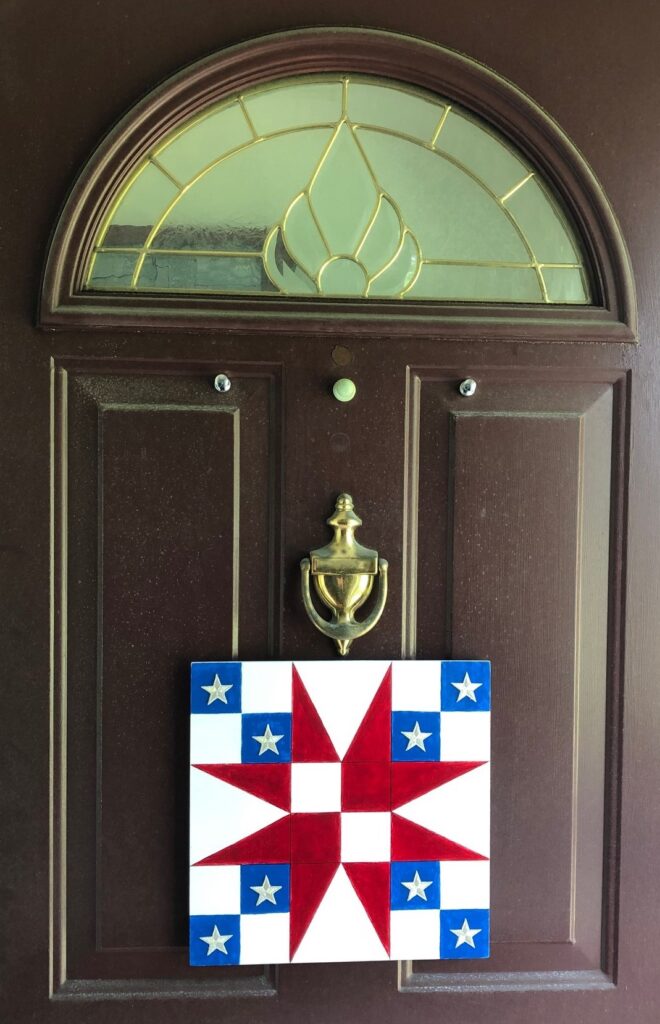
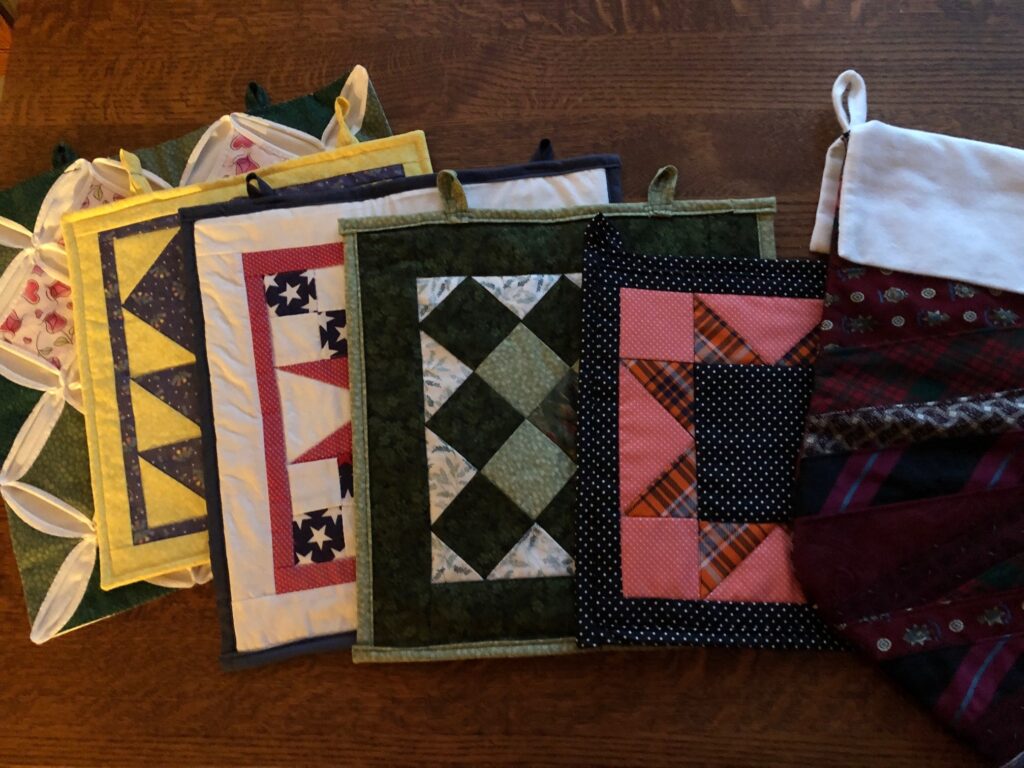
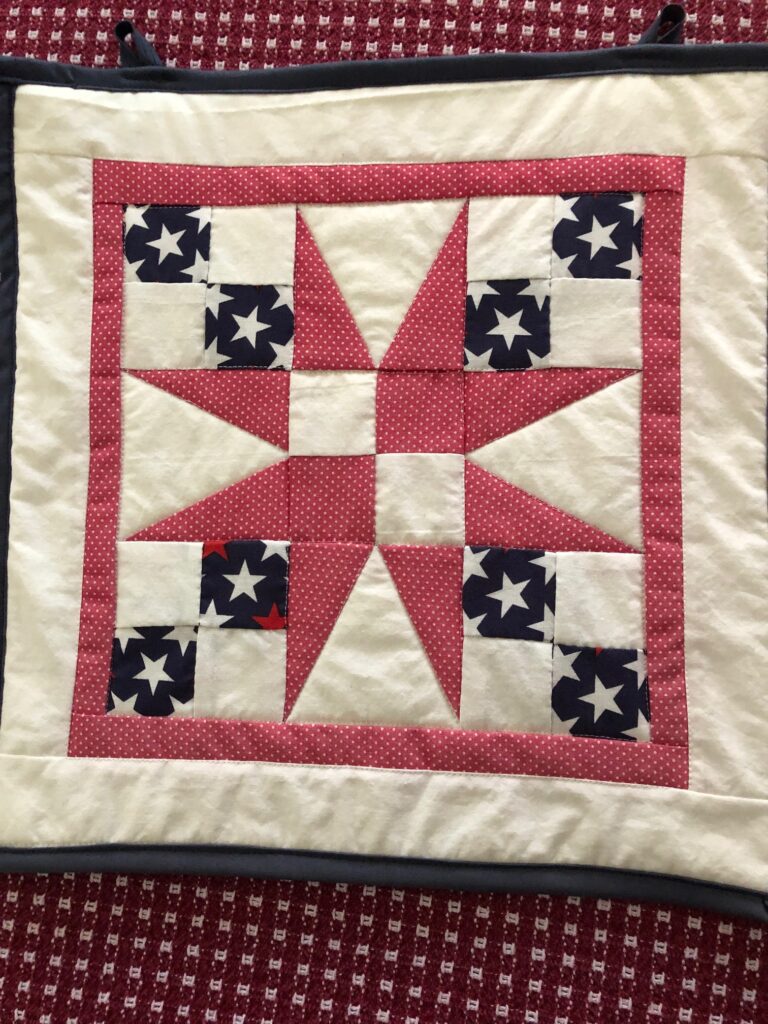
Over the last 3 years I’ve been making assorted quilt blocks to decorate my front door. I started with actual fabric quilt blocks. They solved my dilemma of the small space between the door and the screen door that routinely smashed any wreathe I tried to hang on the front door. With 6 quilt blocks, I could change them out about every two months.

Unfortunately, after two months in the sun their color faded and by the second year, I was a little disappointed with using them. You can read more about my transition to painted quilt blocks on wood here: https://marykisner.com/lavender-inspired-quilt-block-on-wood/

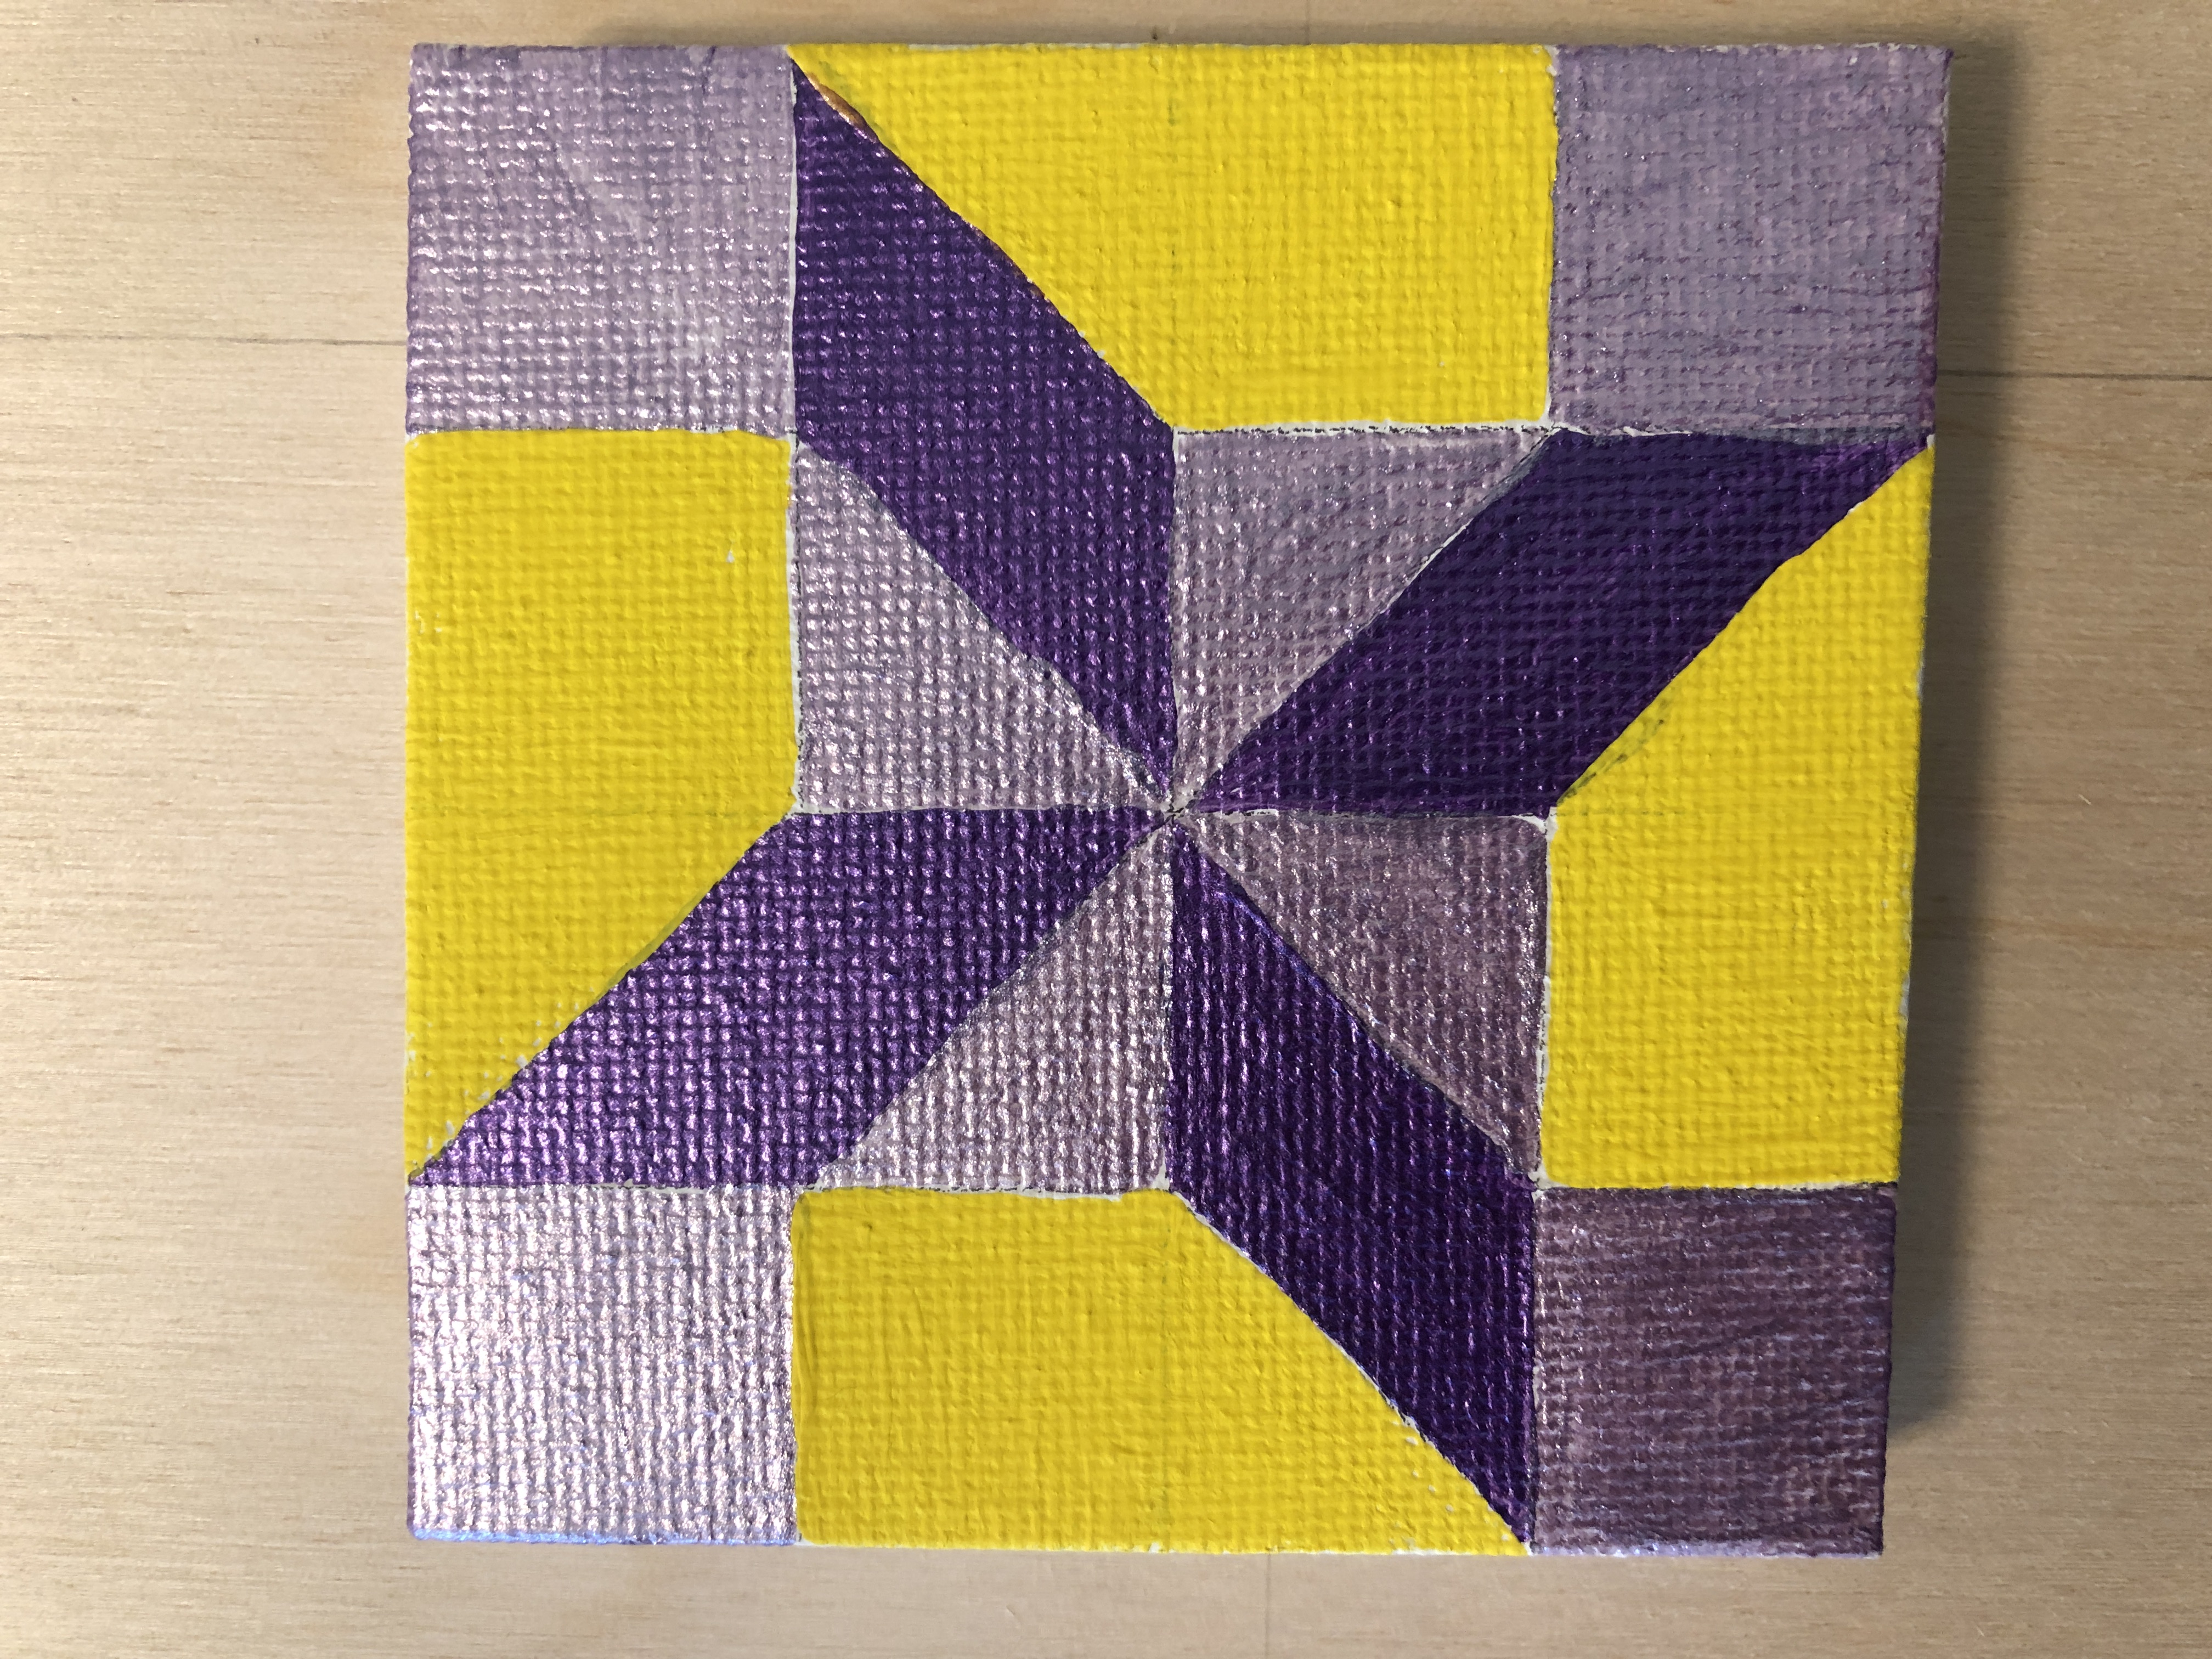
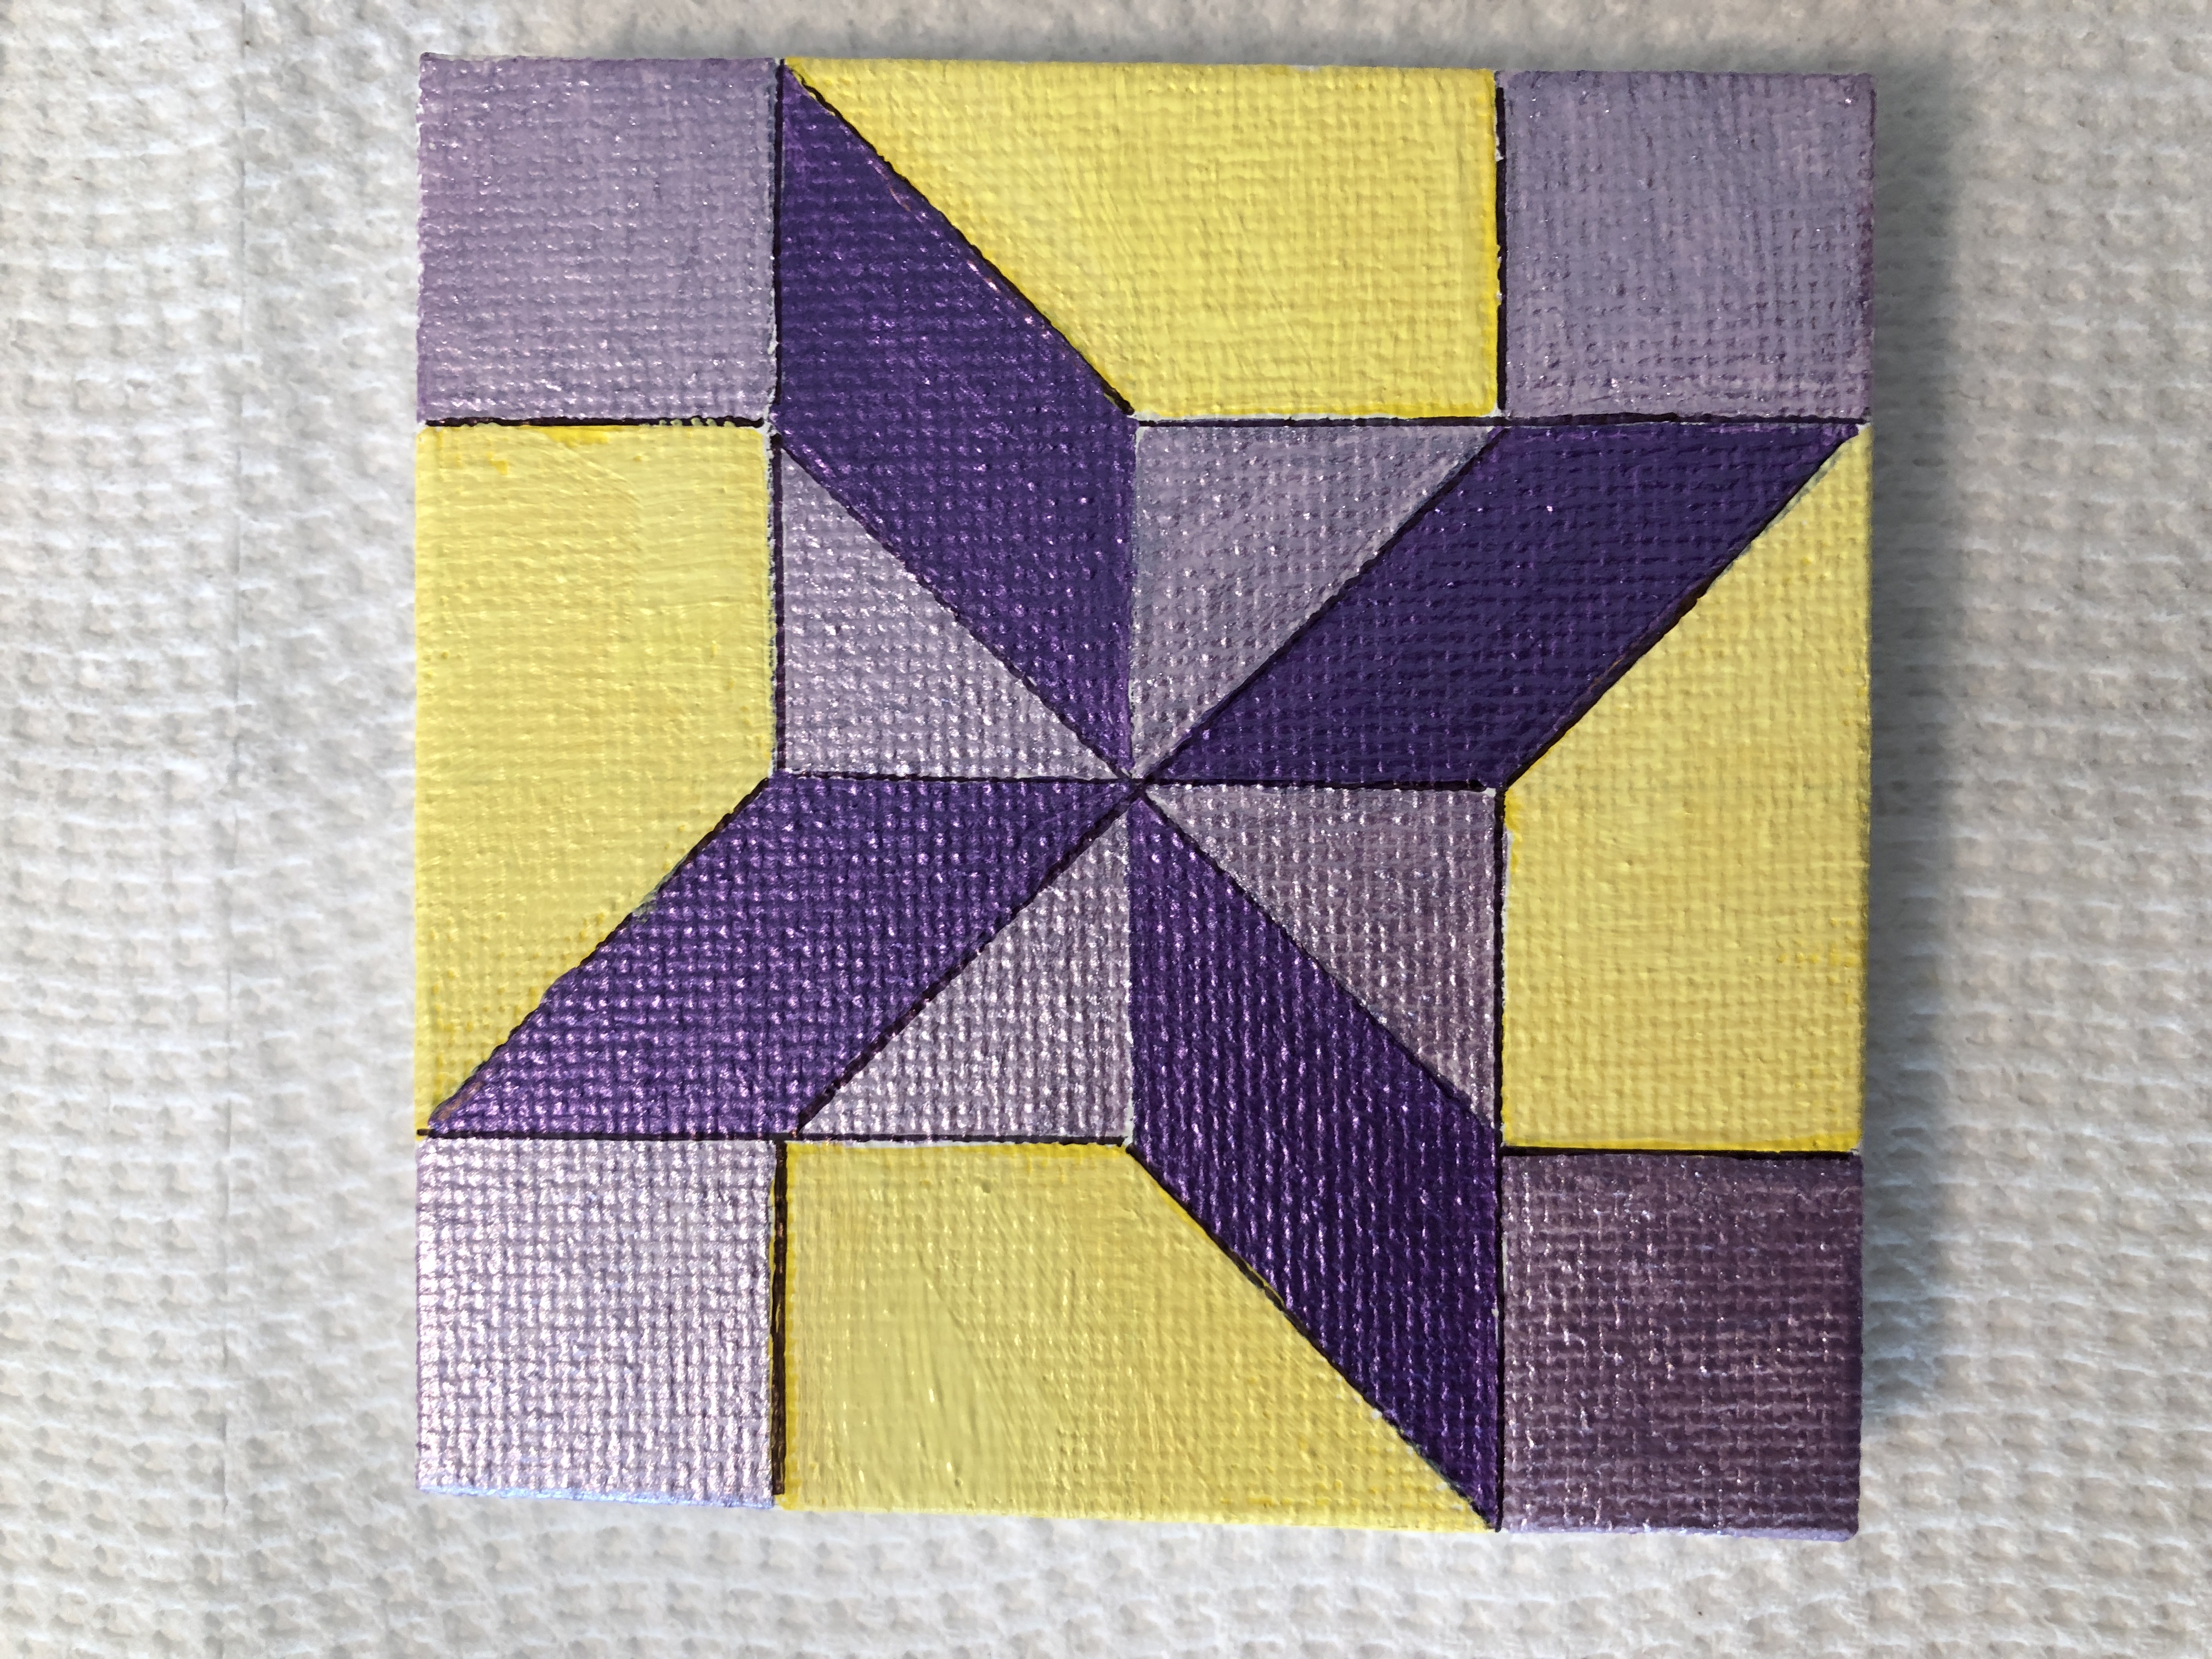
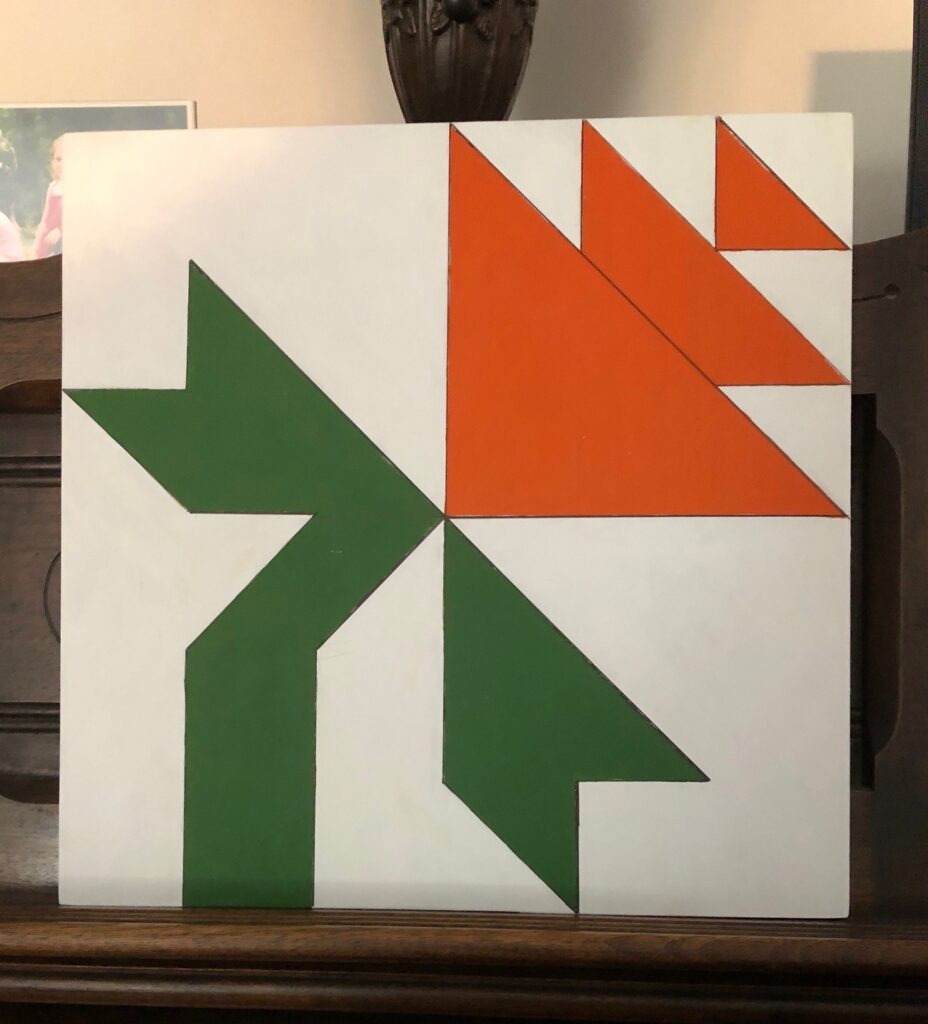
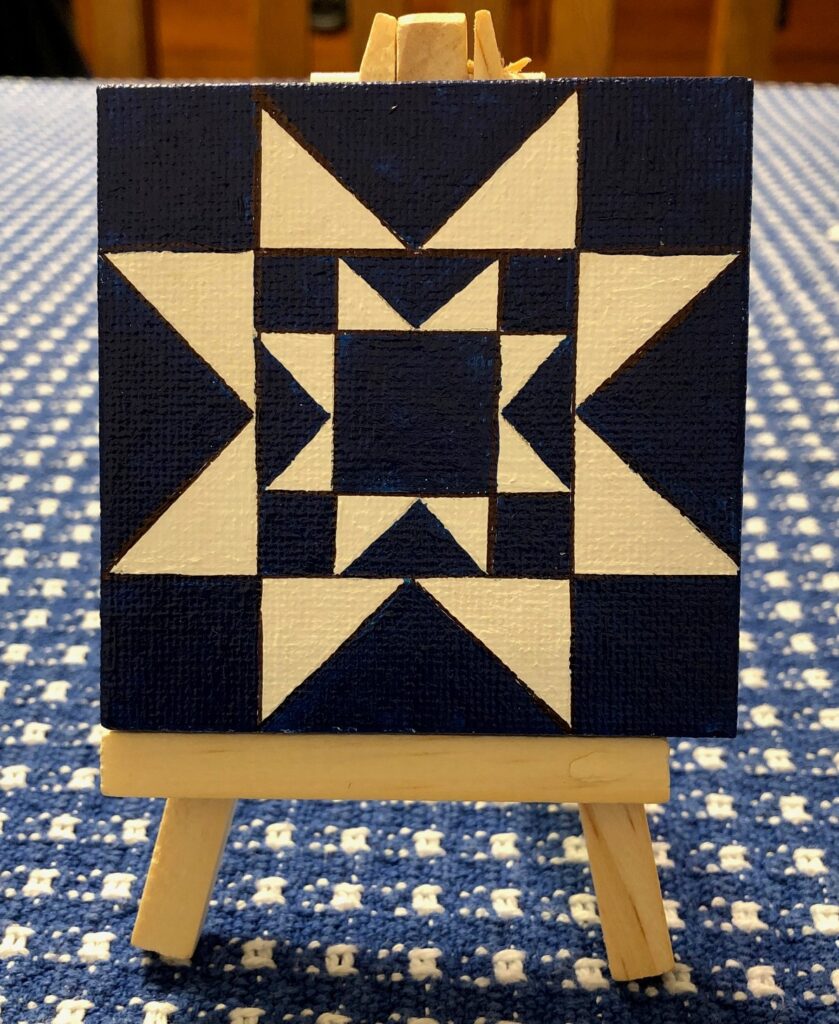
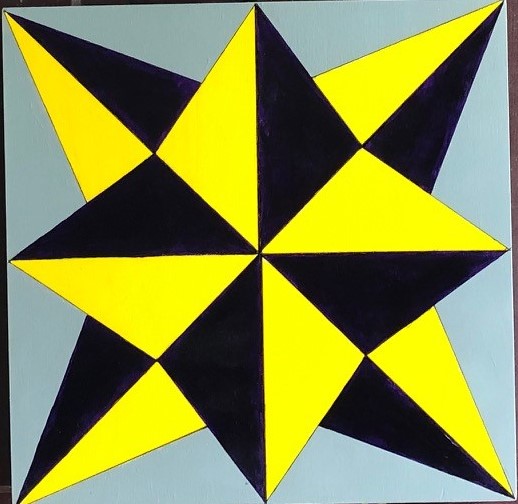
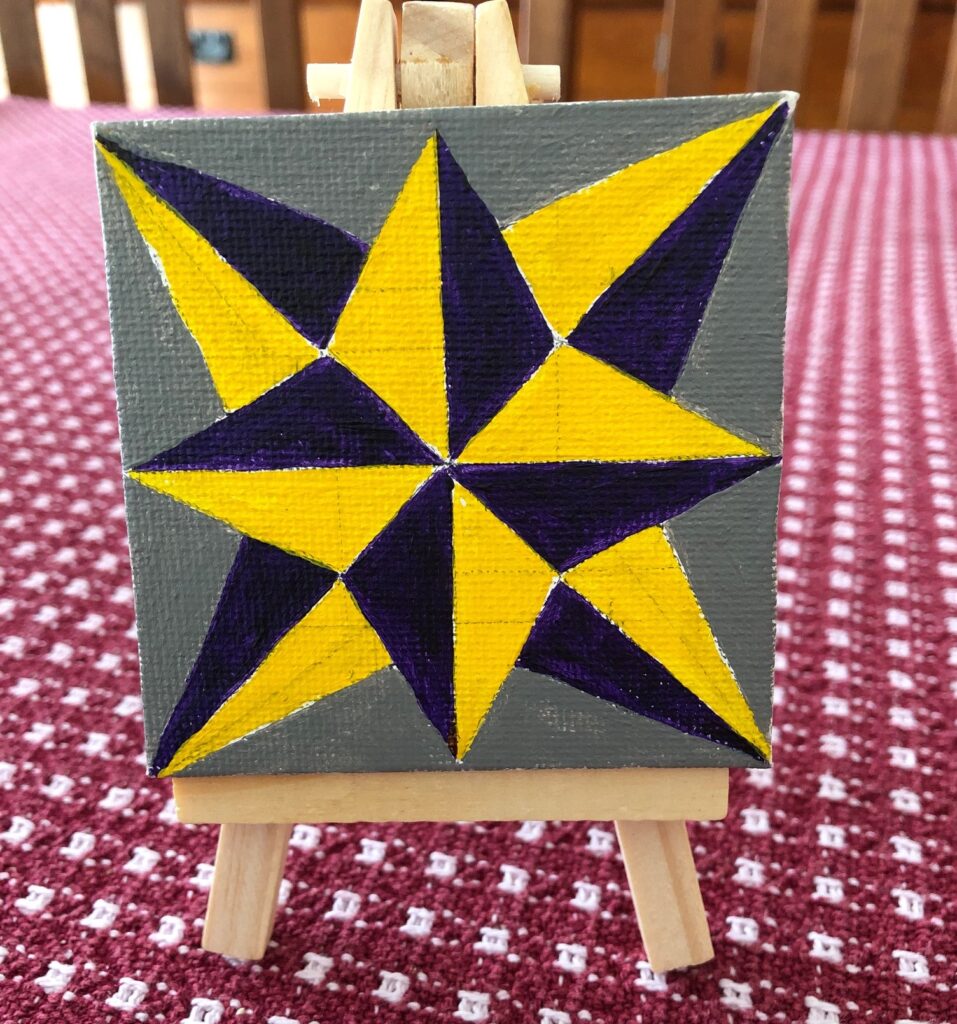
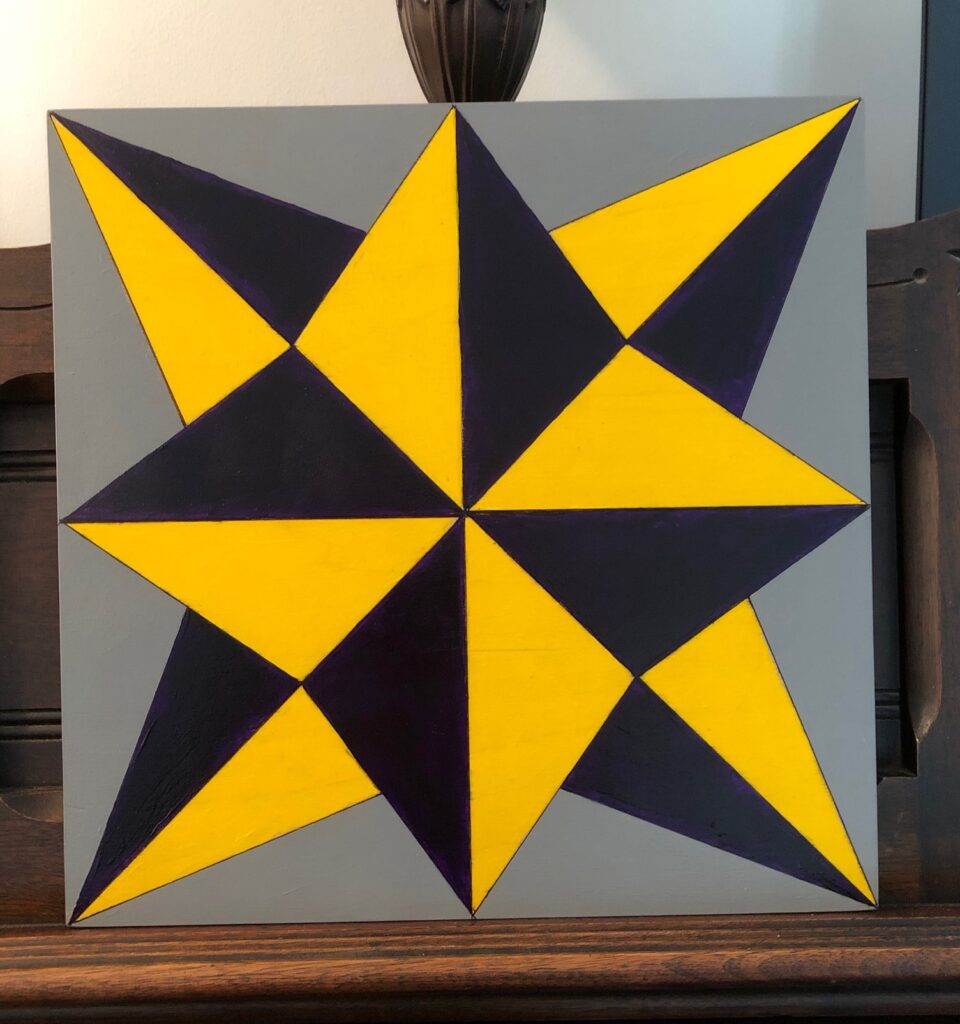
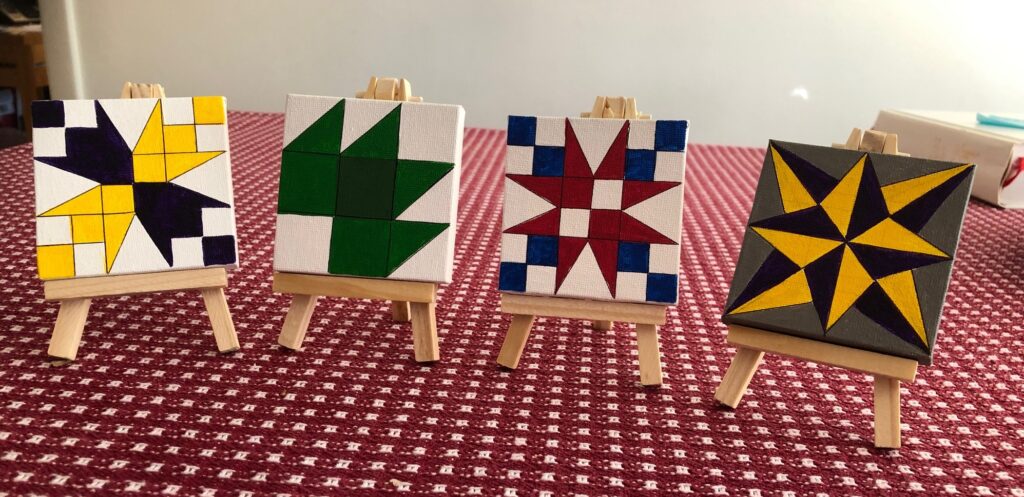
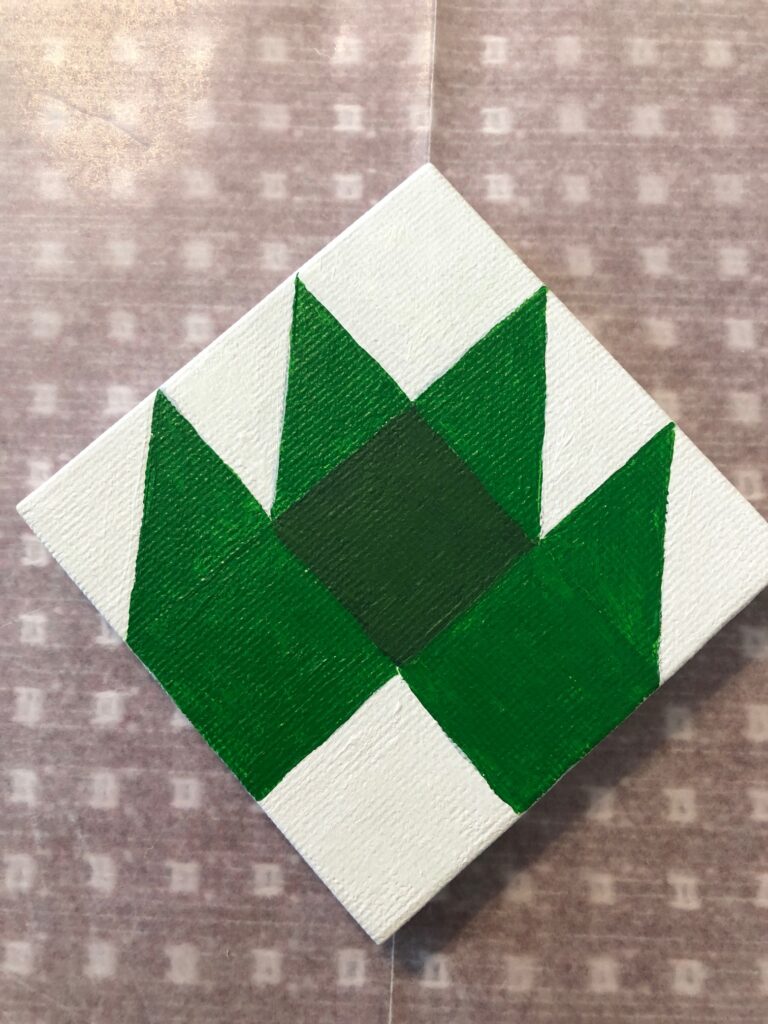
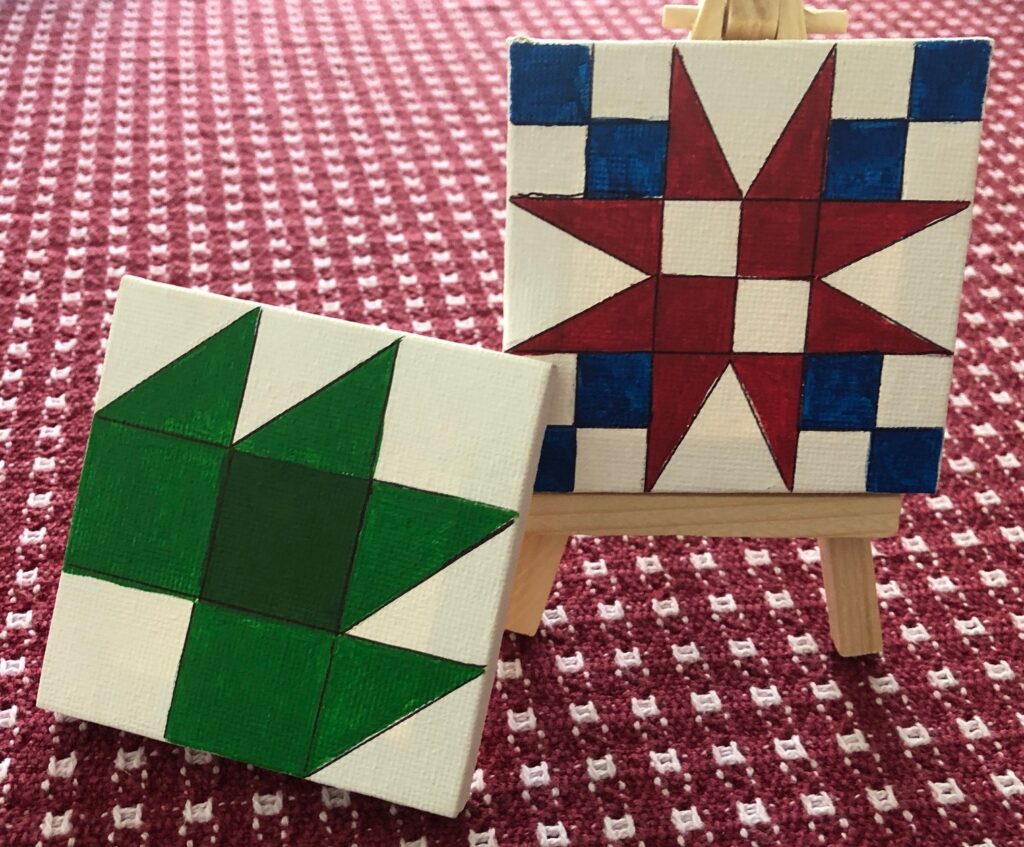
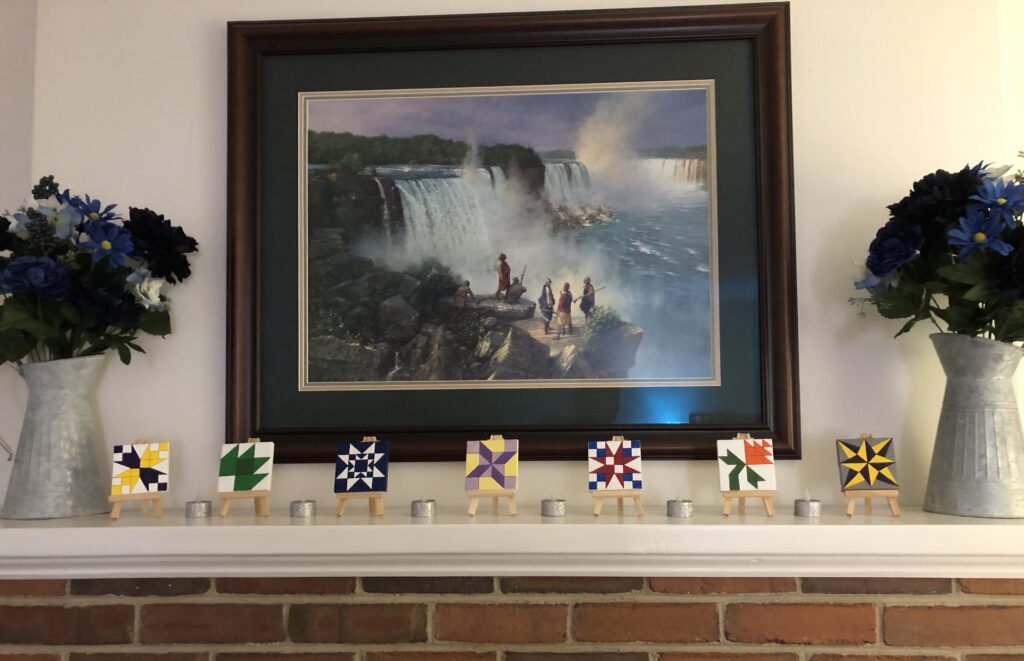
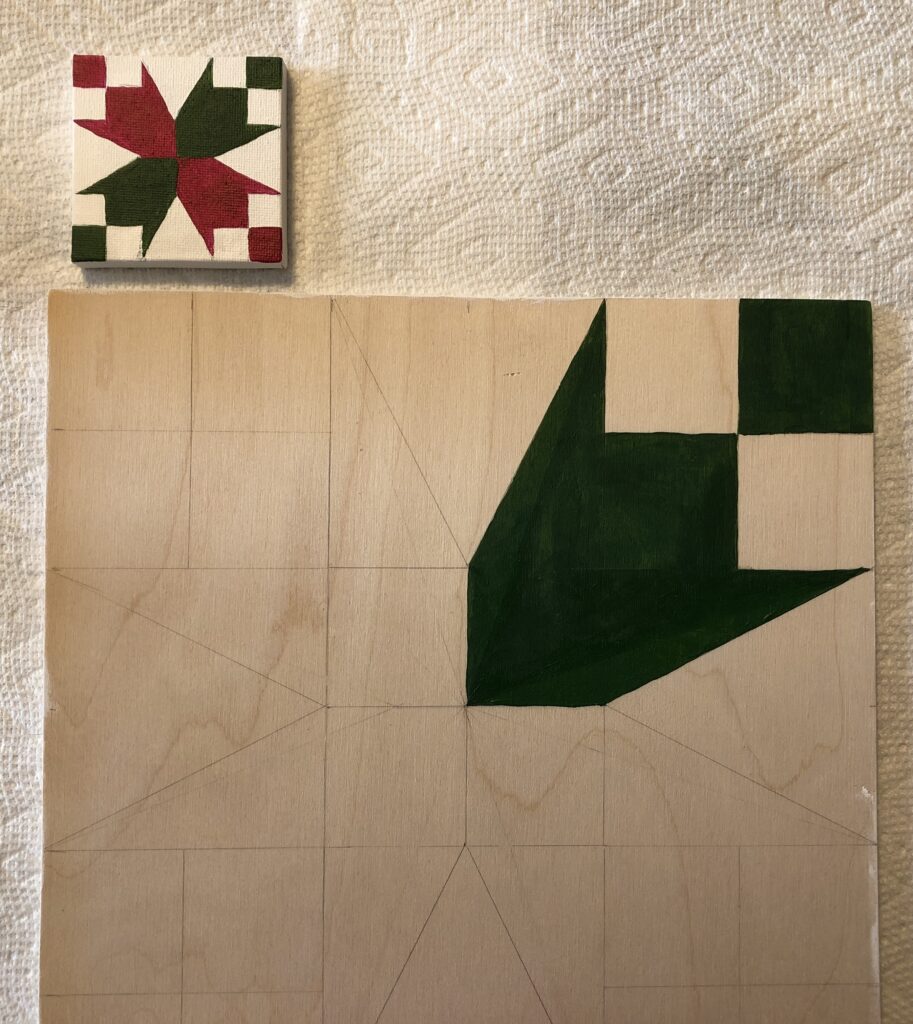
The process of painting a quilt block on wood involves first painting a miniature of the chosen quilt block before starting on the full-size (12″ square) block. While the full-size blocks decorate my front door, one at a time, the miniatures are an interesting decoration for my mantle.

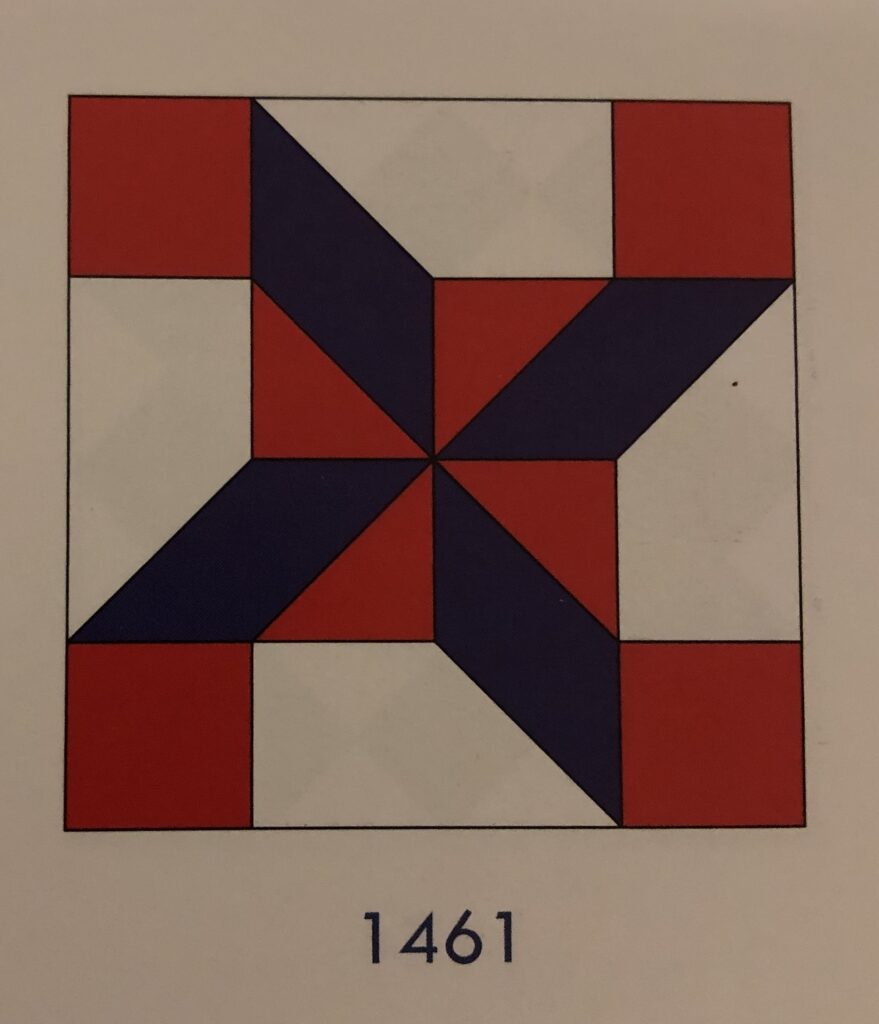
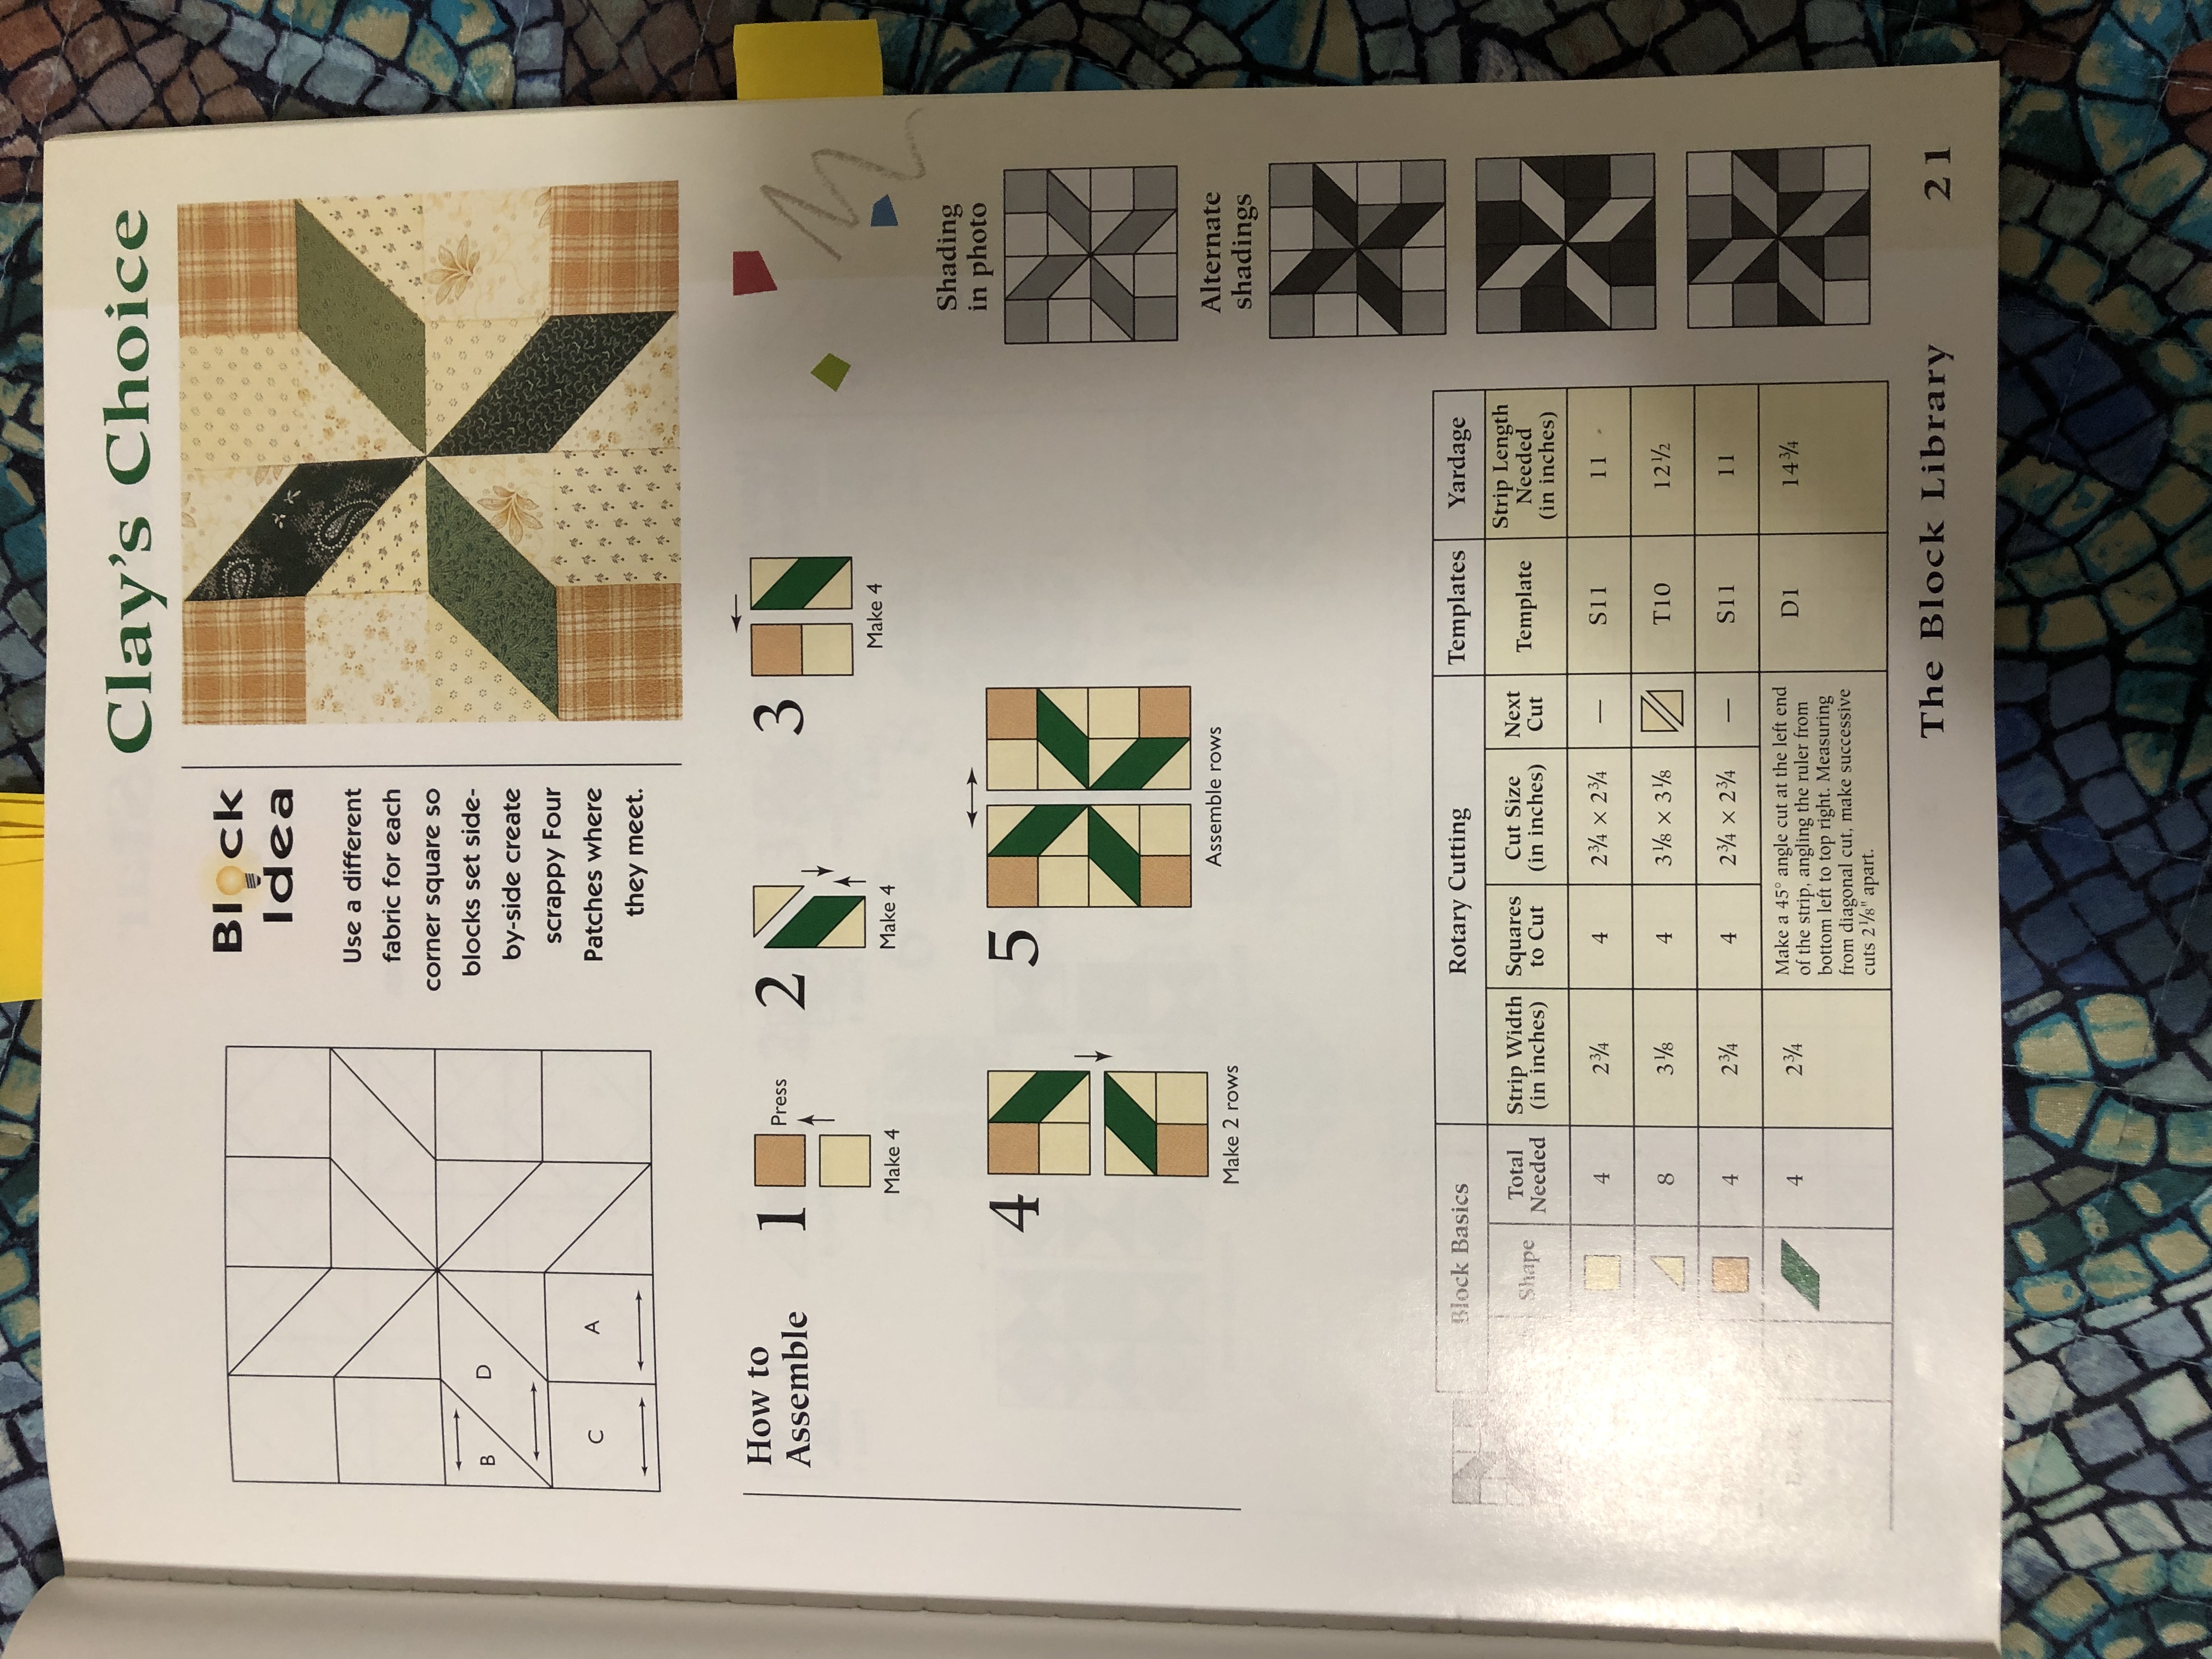
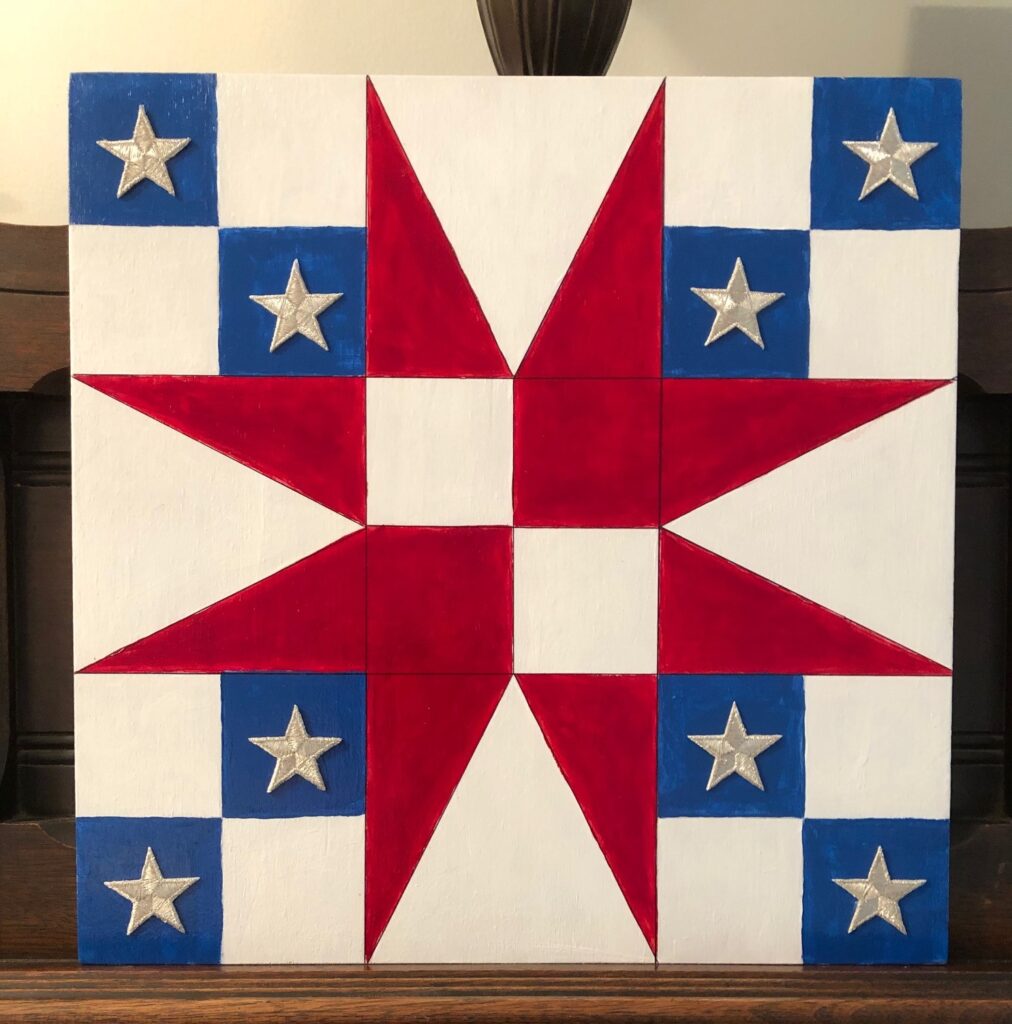
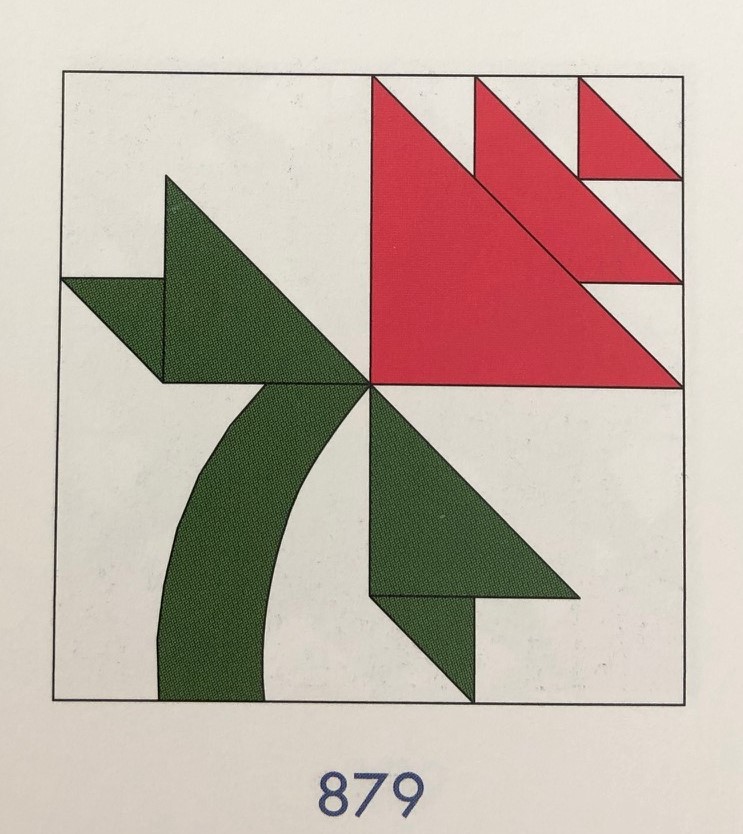
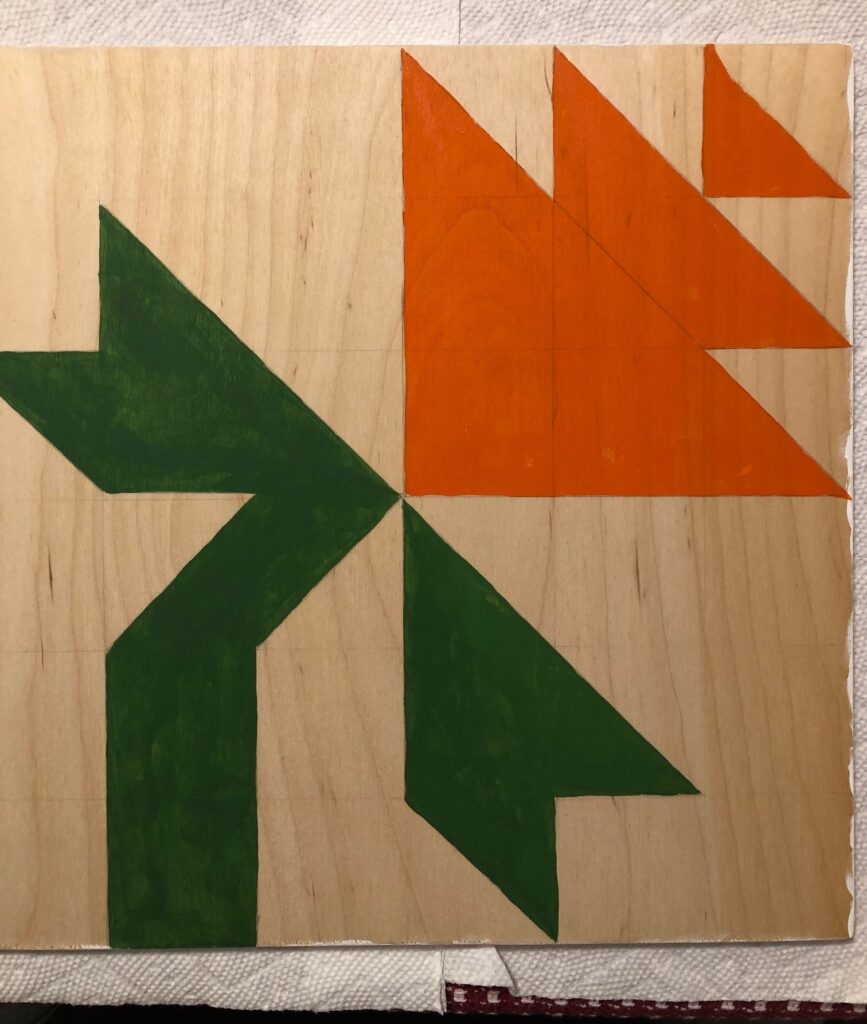
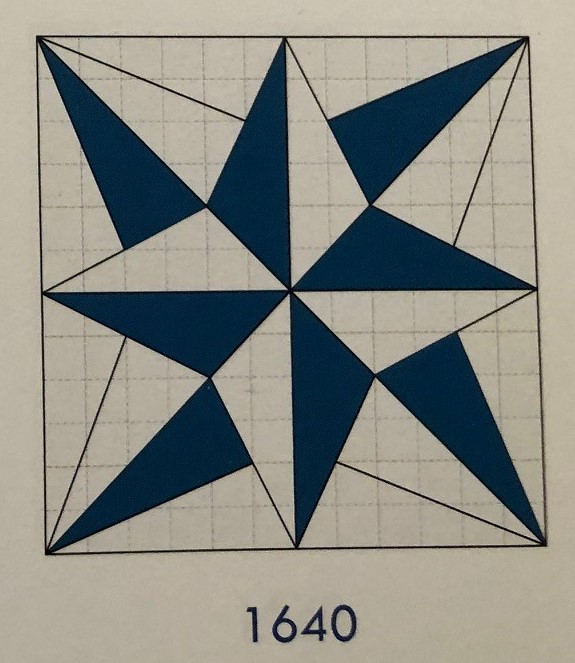
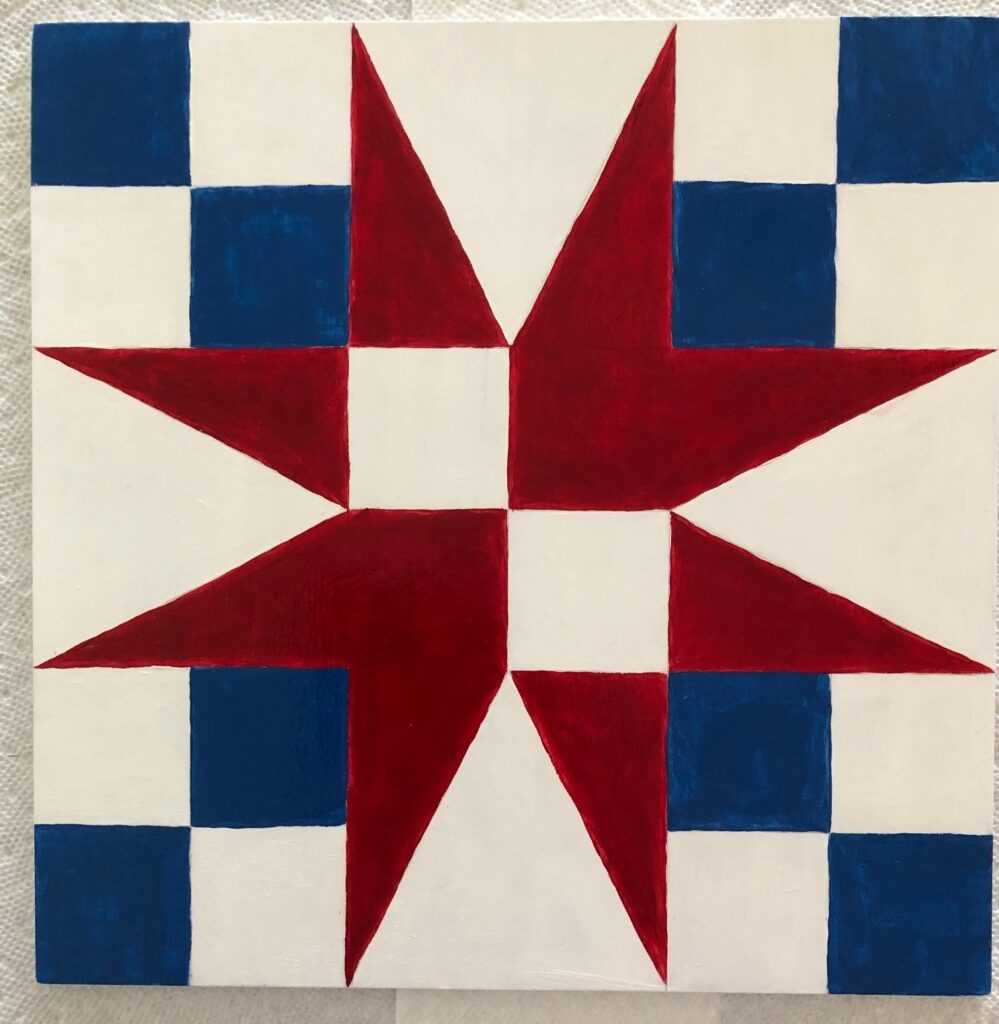
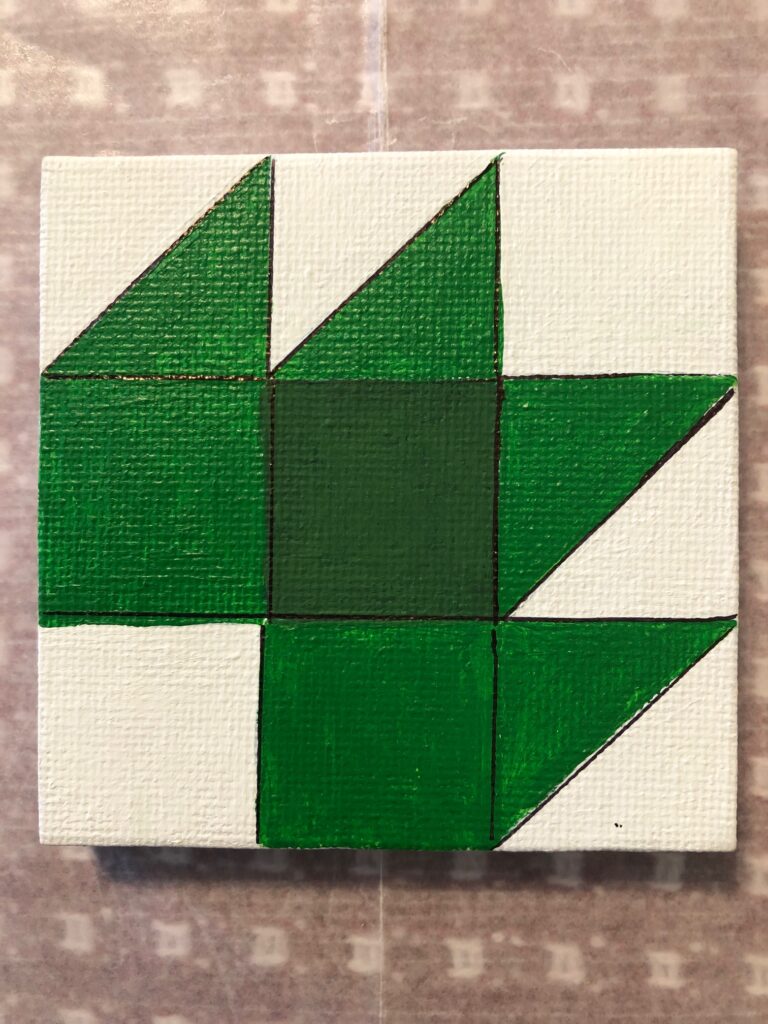
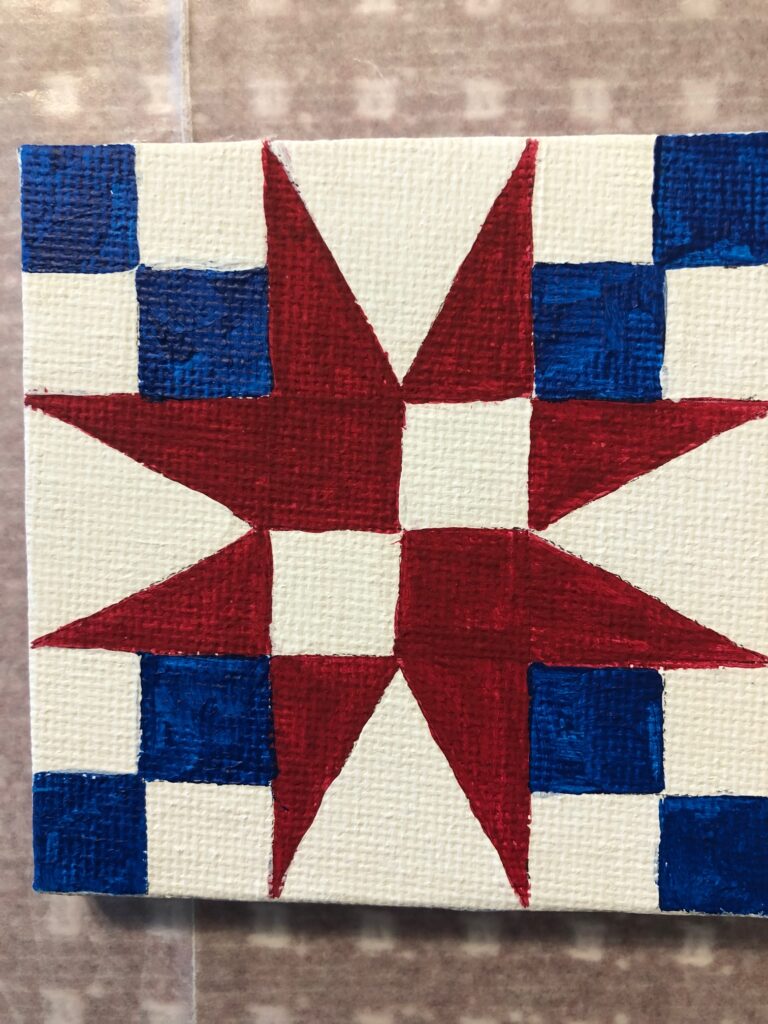
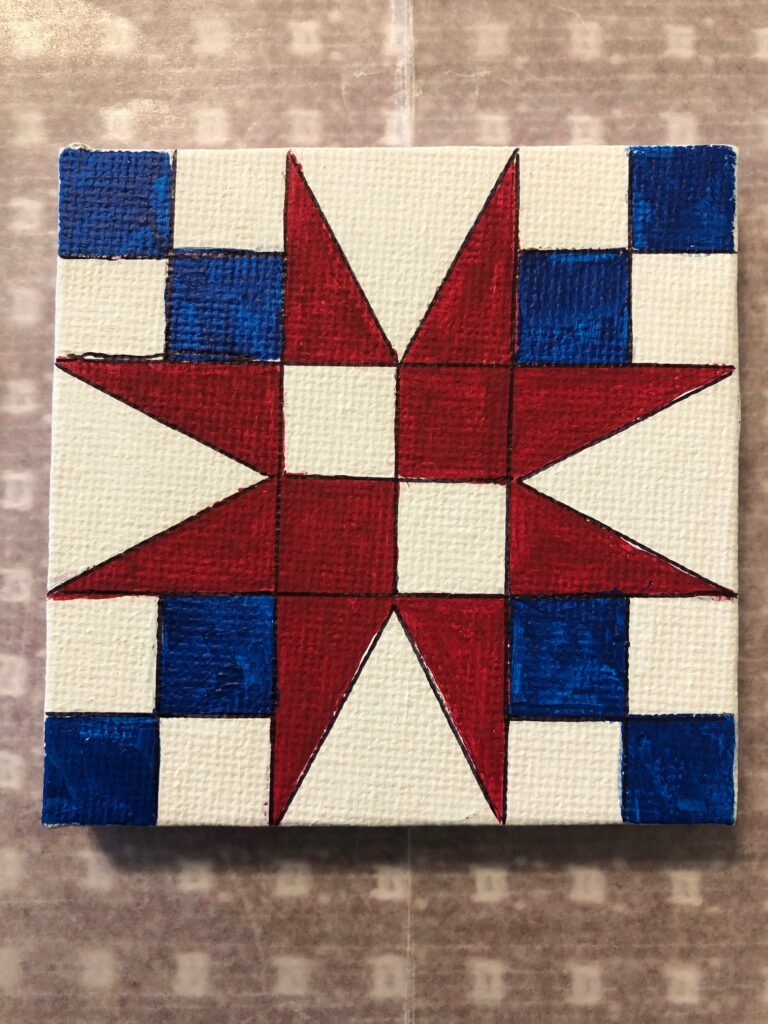
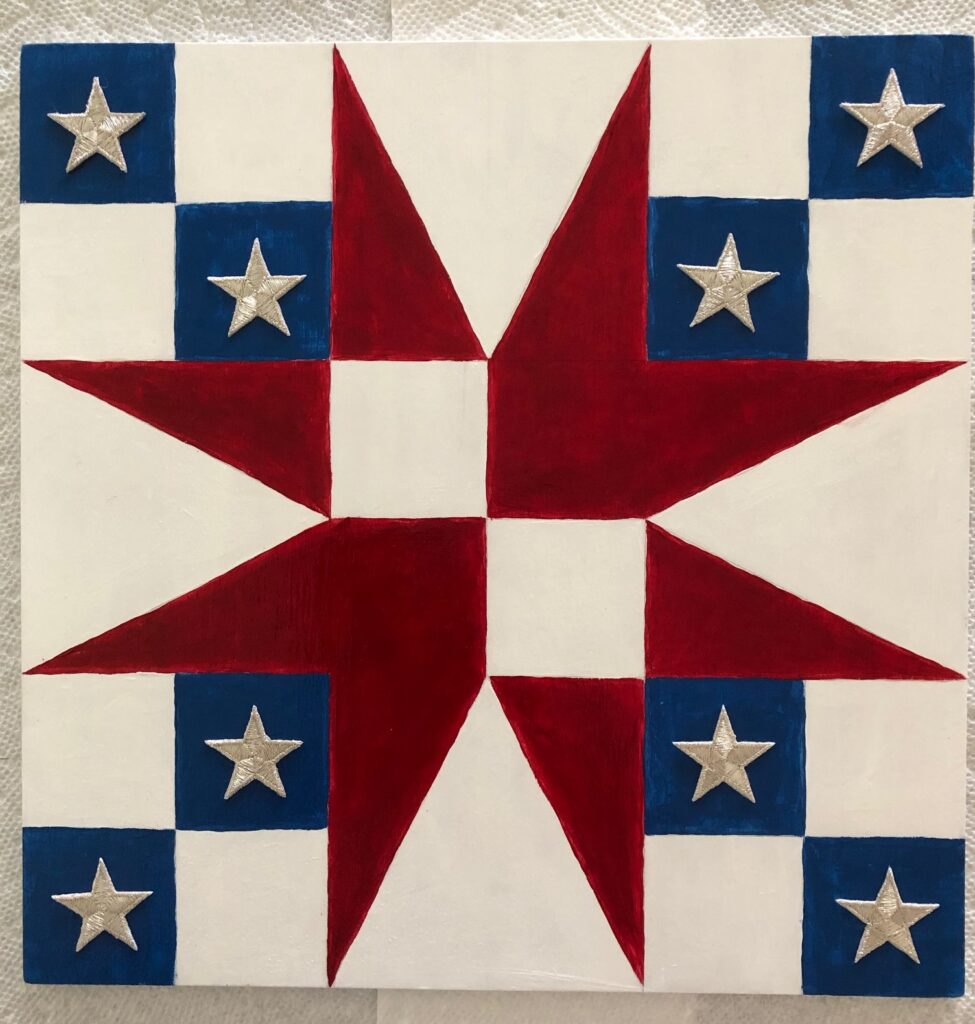
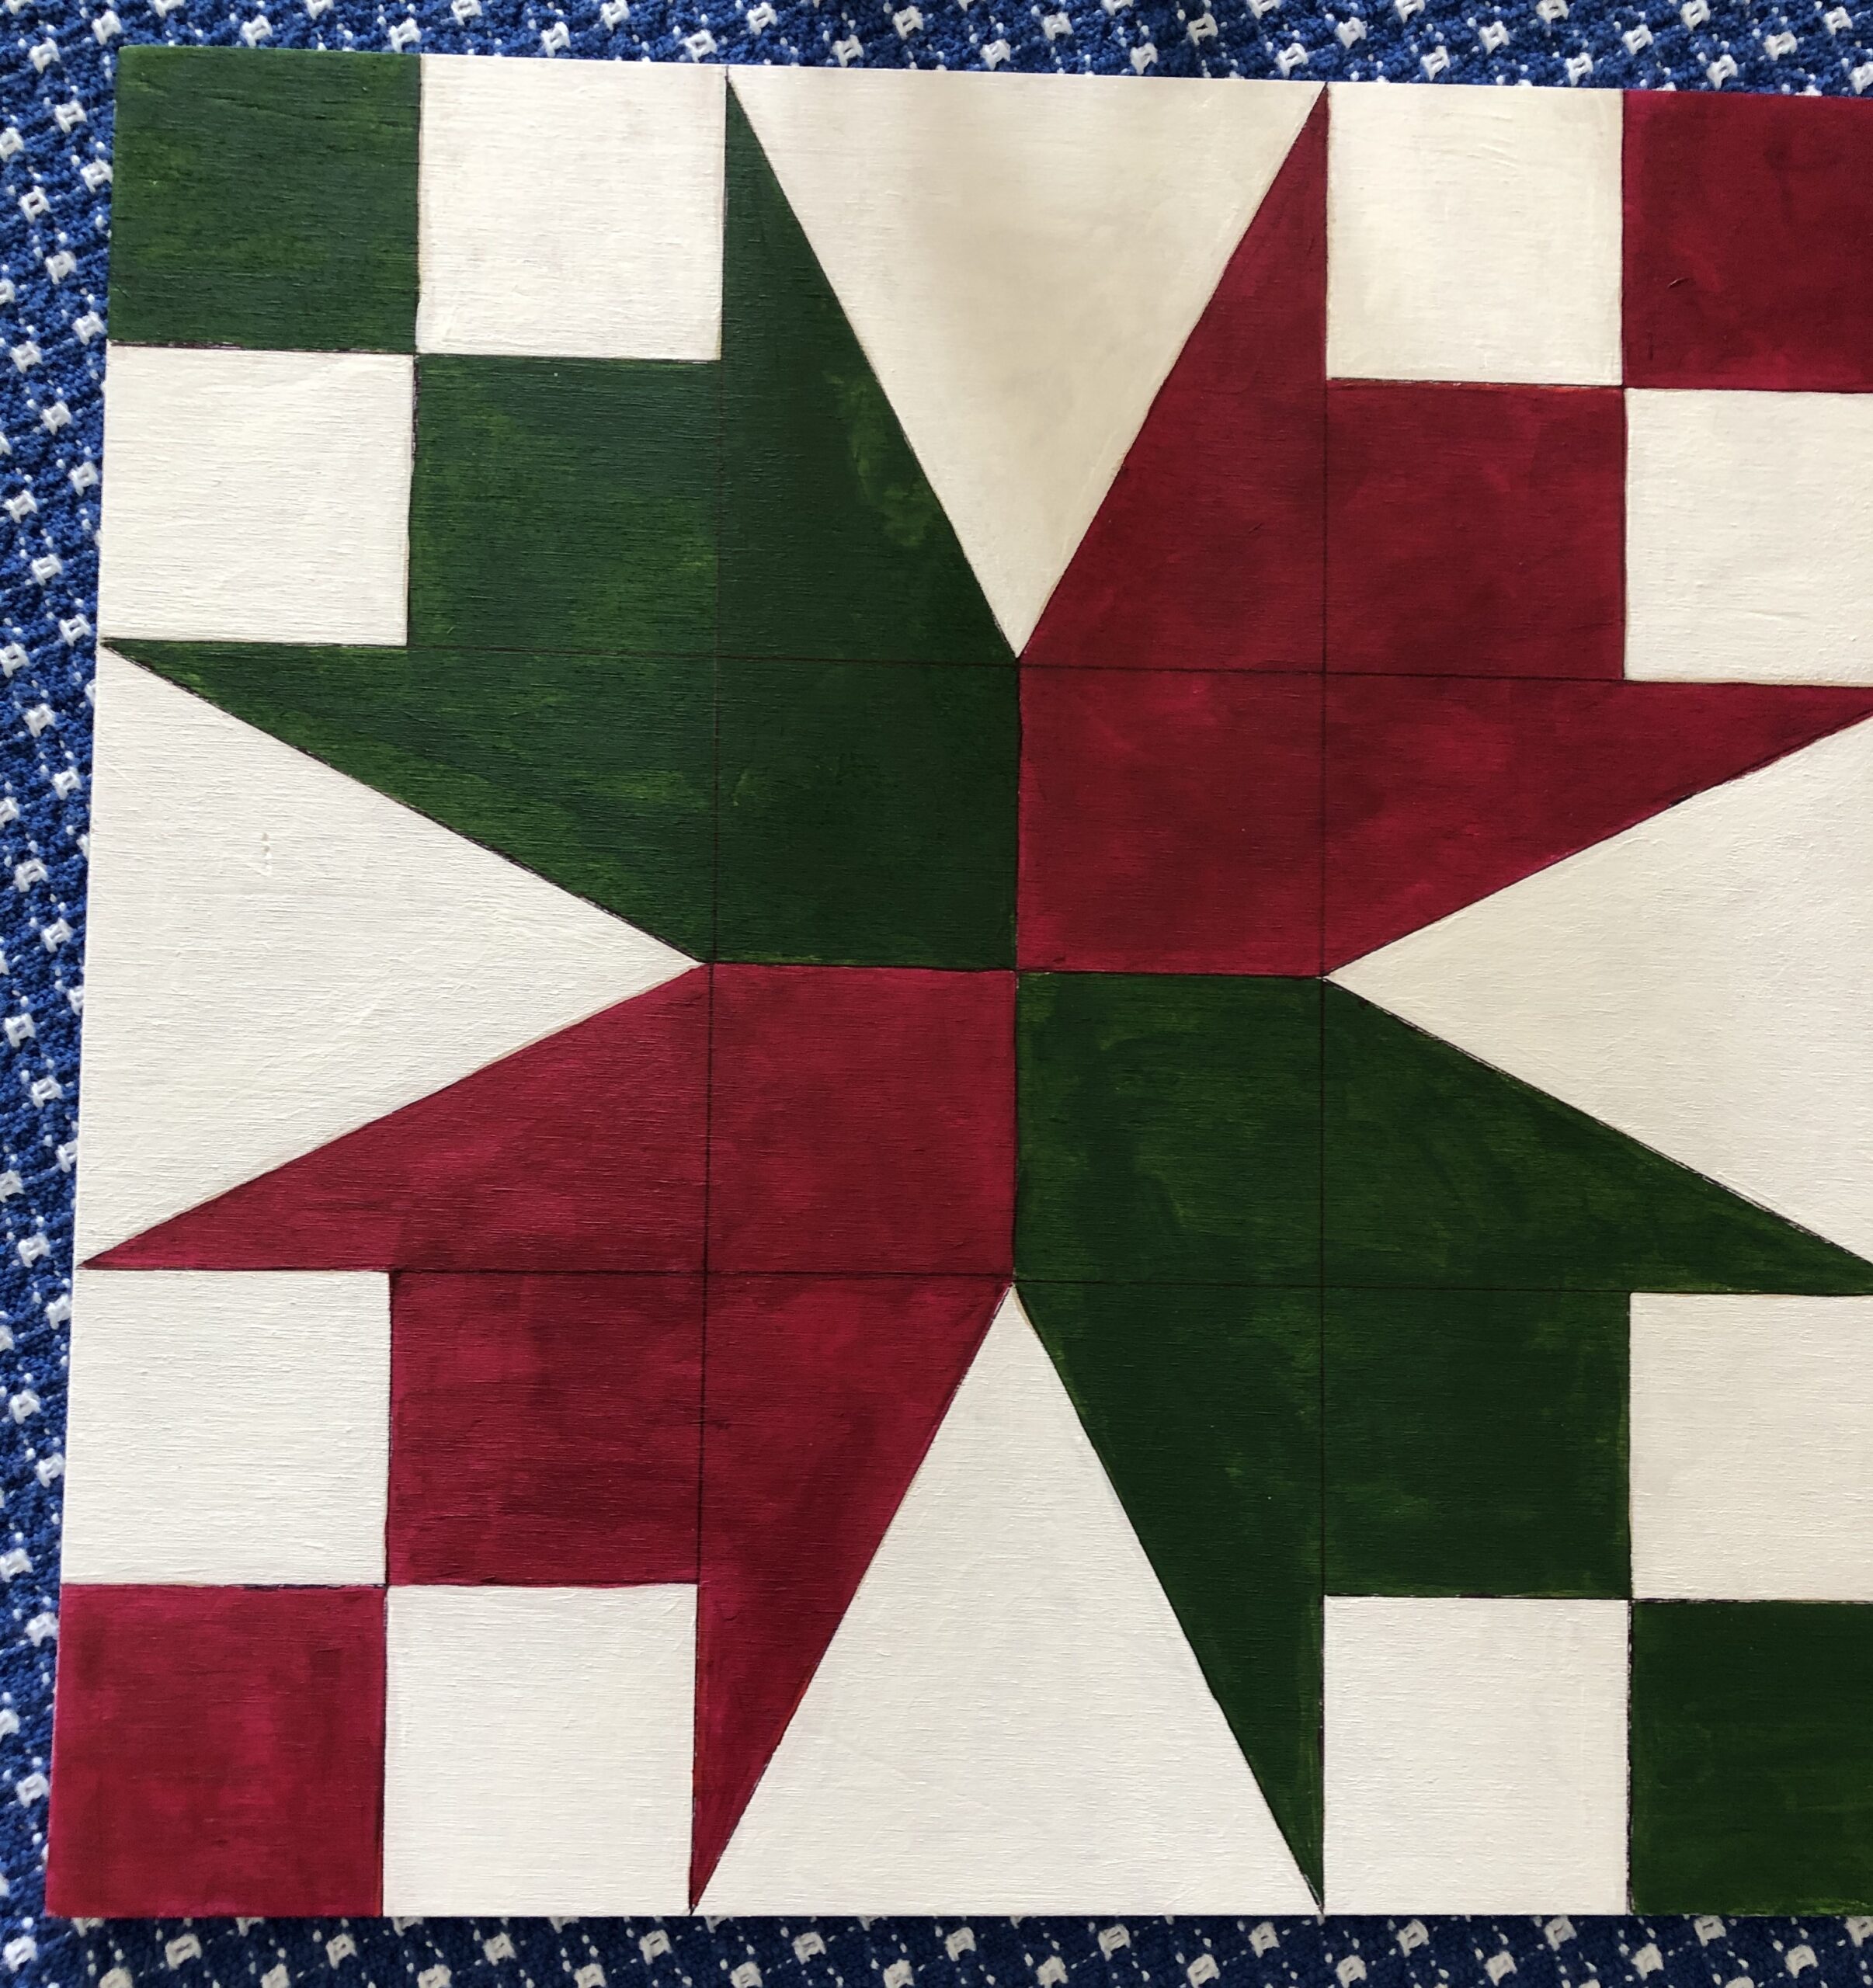
To make my new spring quilt block on wood, I first chose a pattern. I have used this same pattern several times…by changing the colors and their placement I was able to use the pattern below (called Fifty-Four Forty) that I made with patriotic colors and change it into the variation that almost looks like tulips!

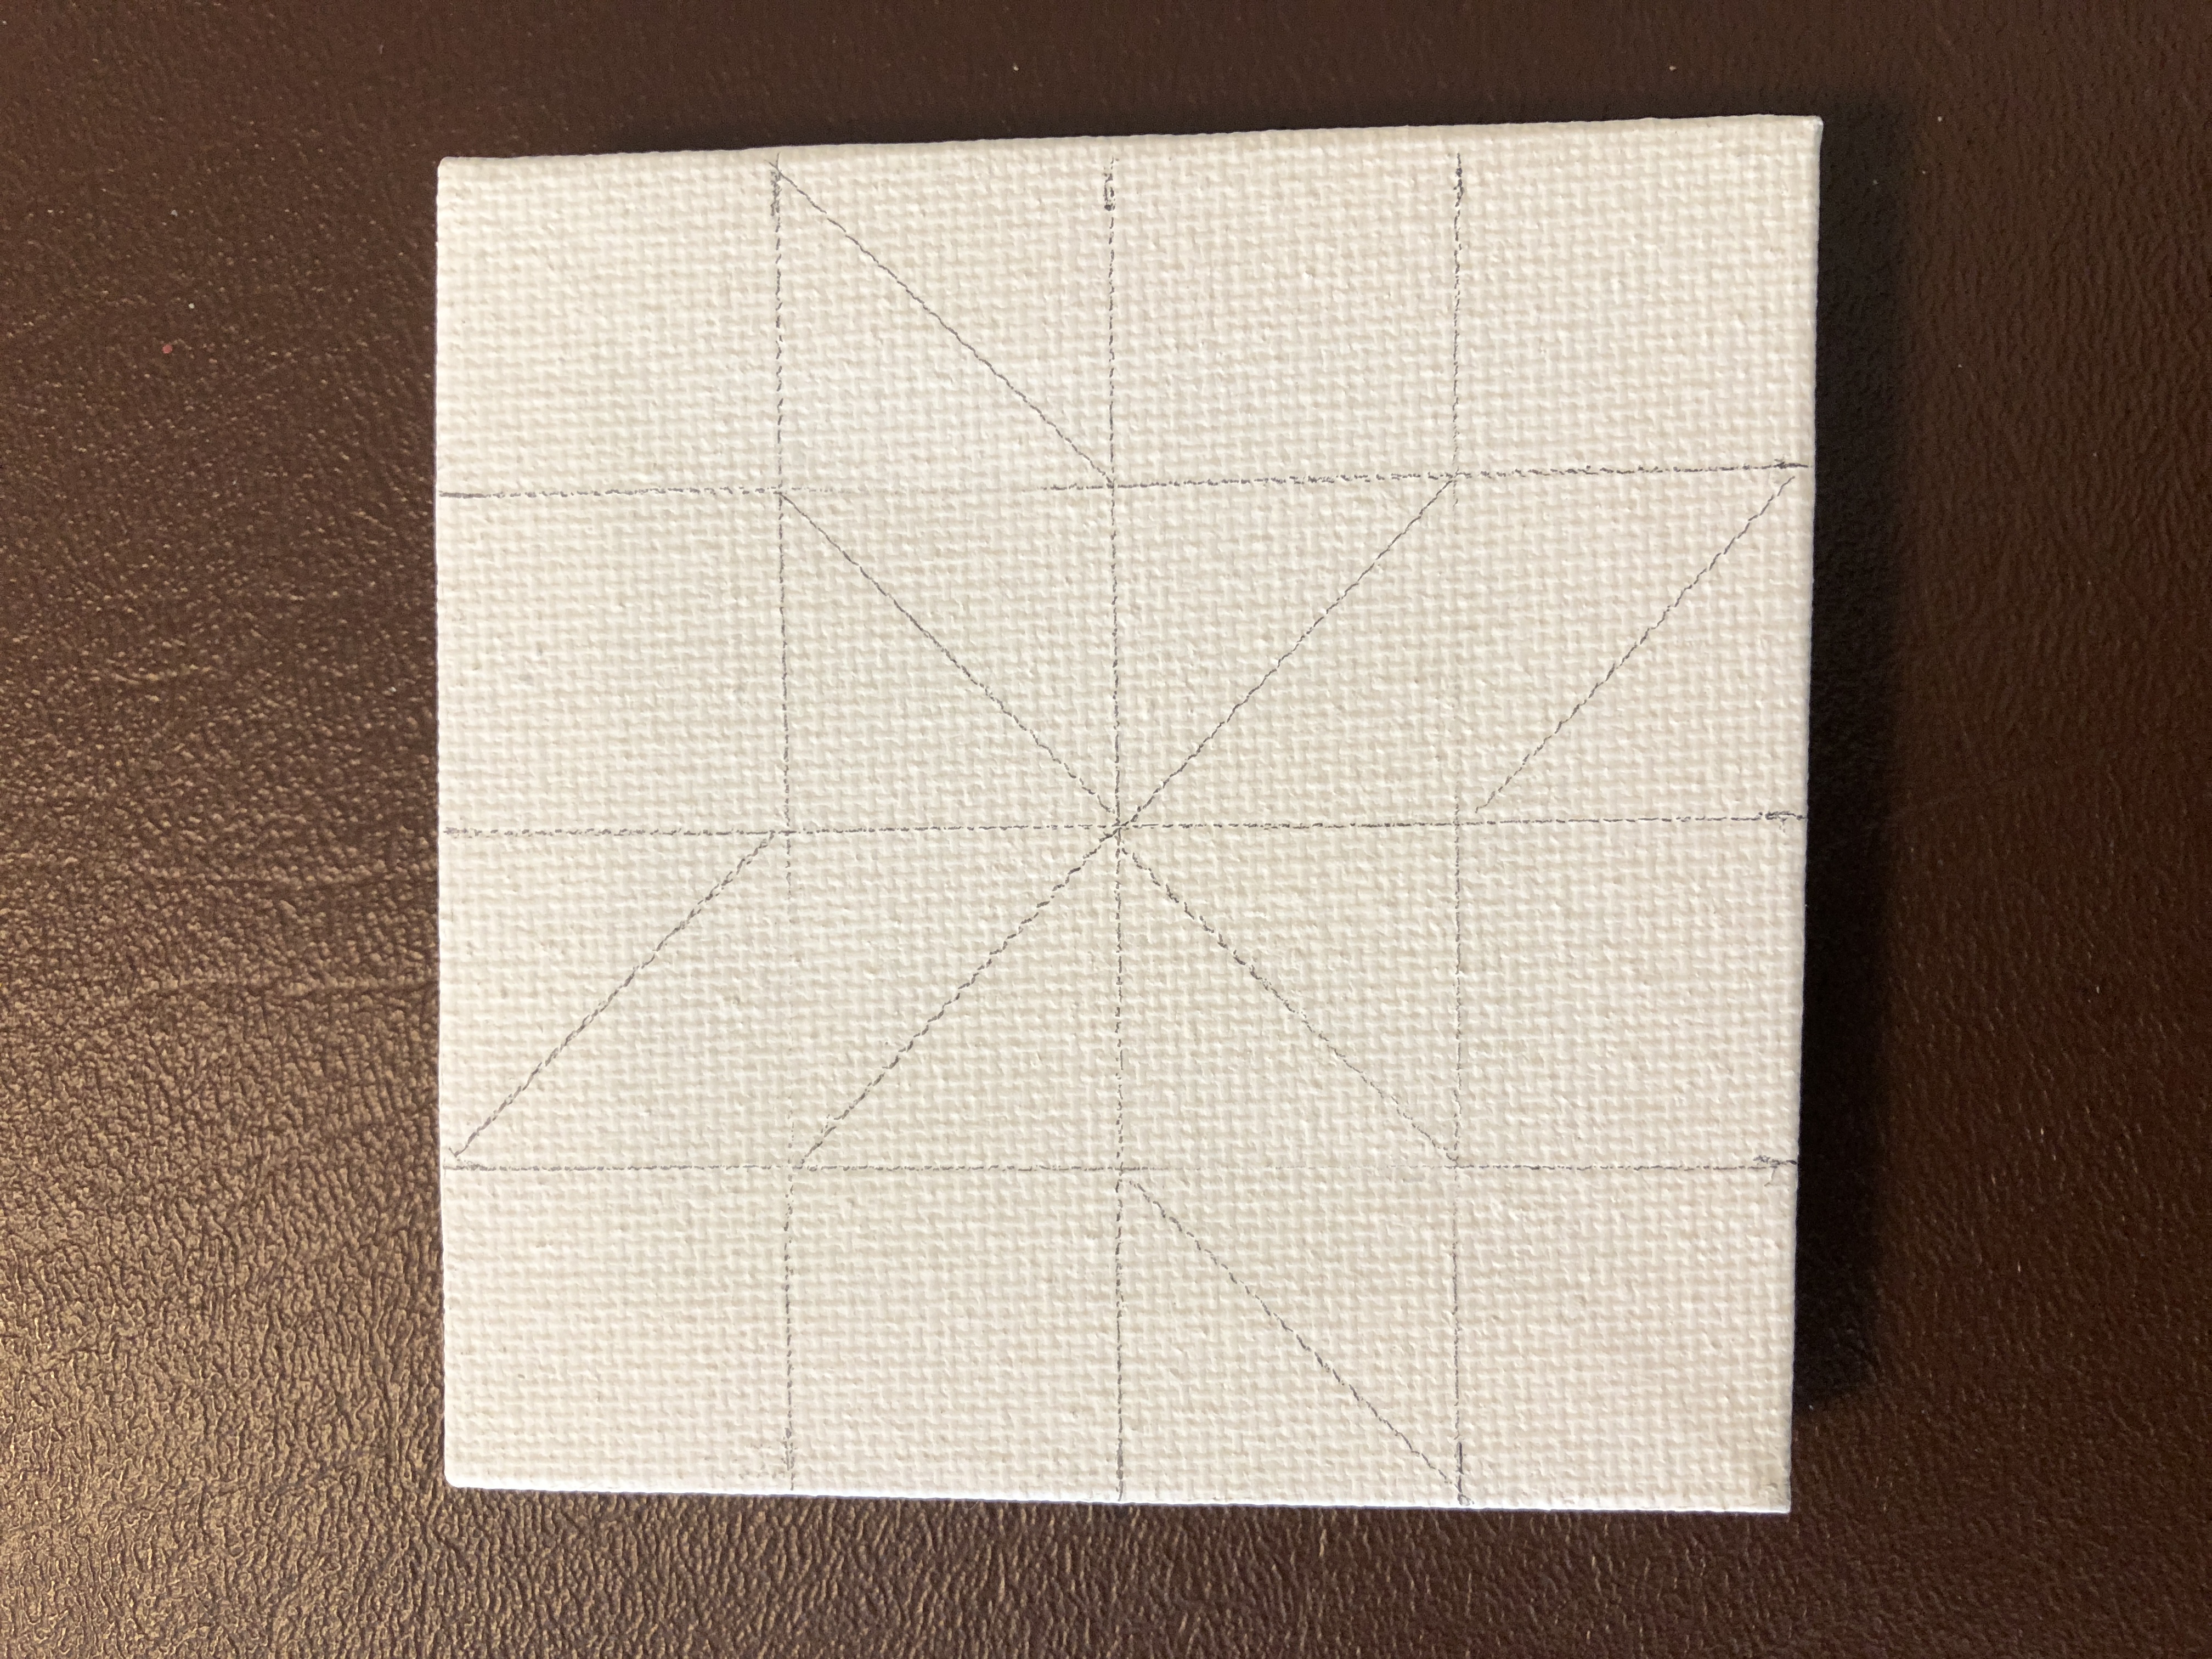
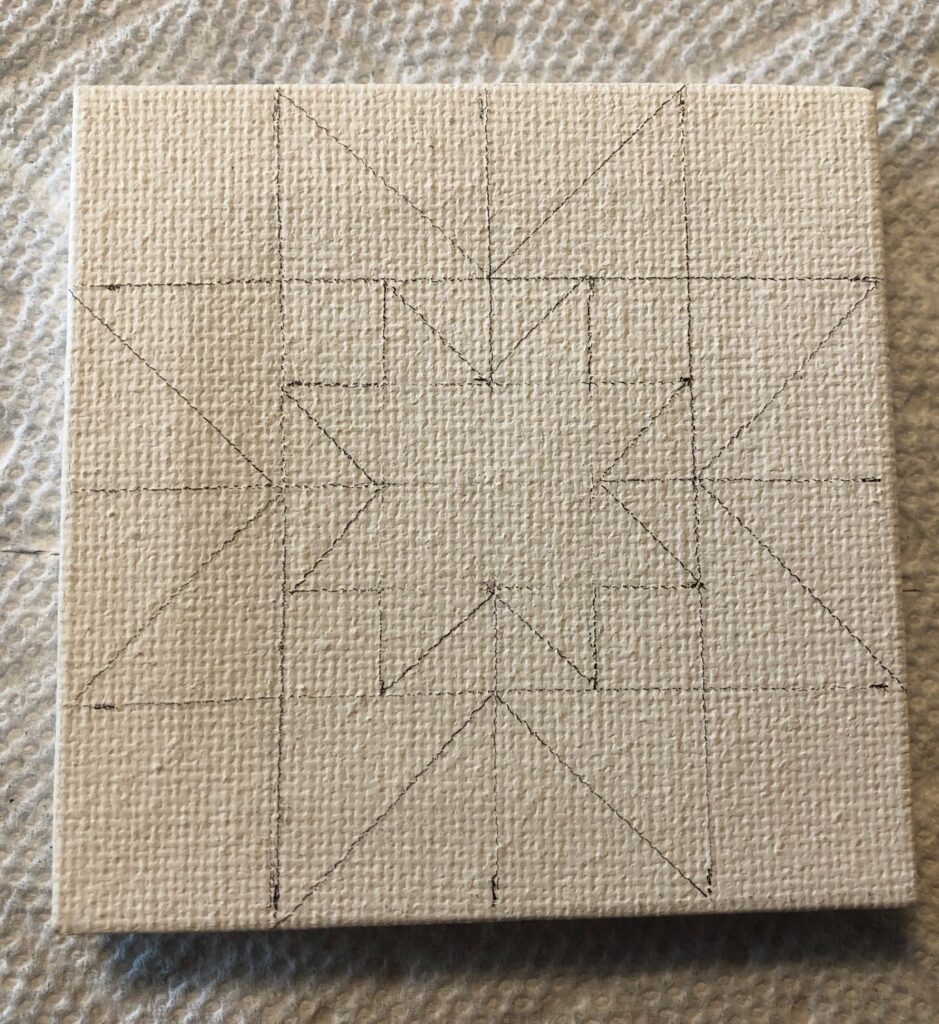
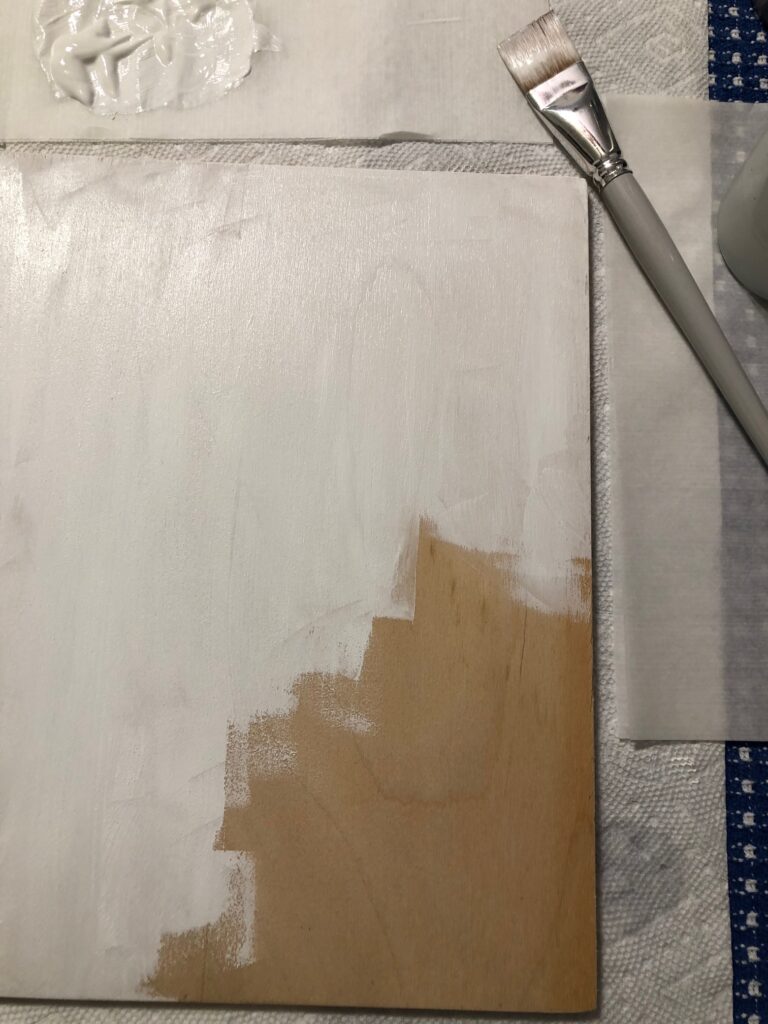
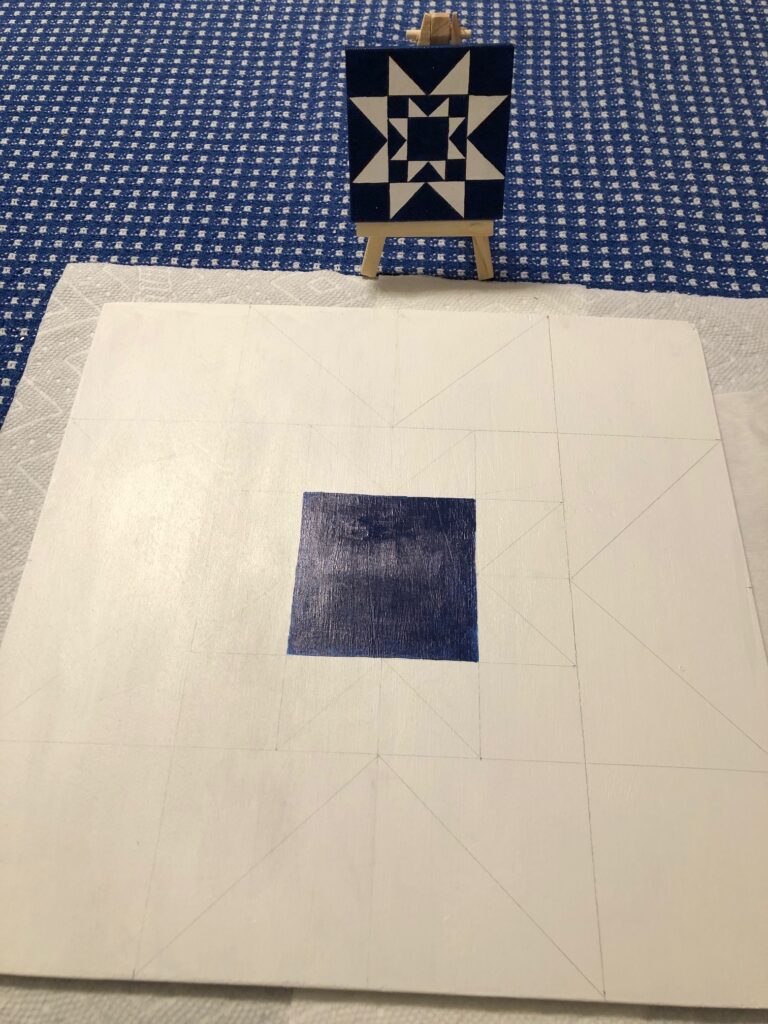
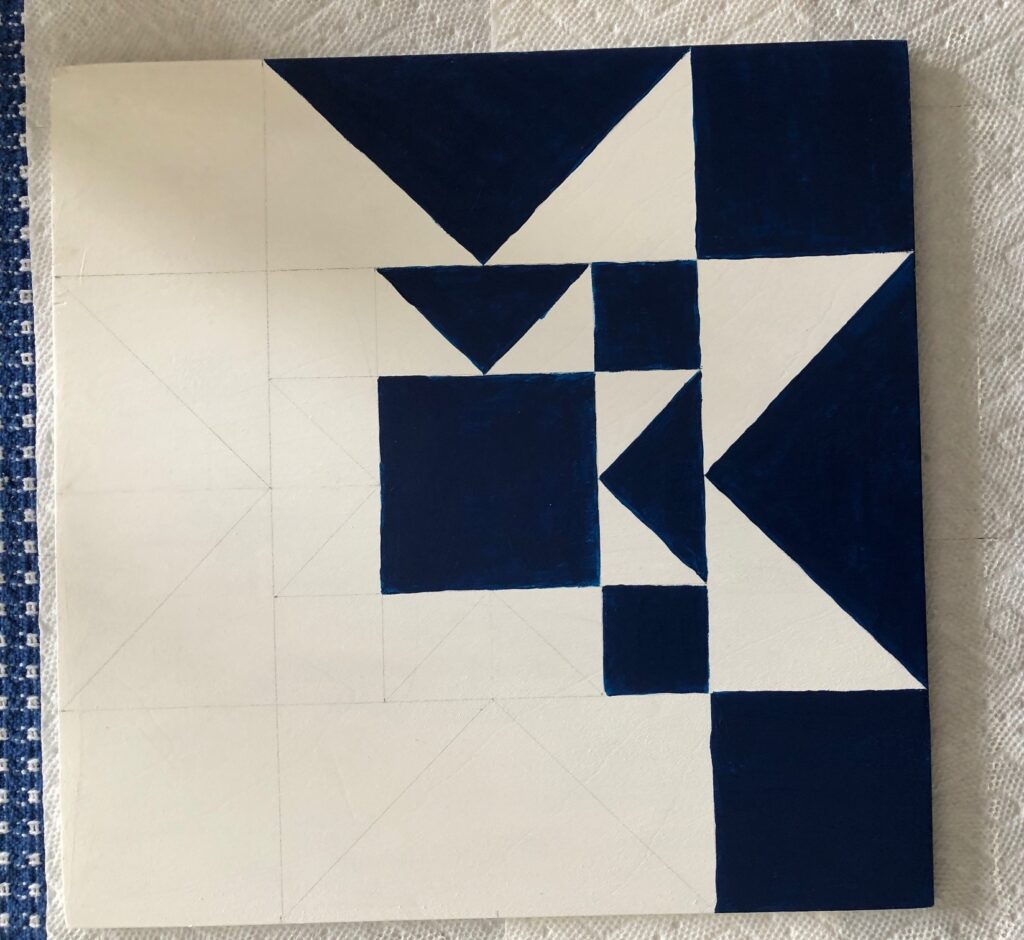
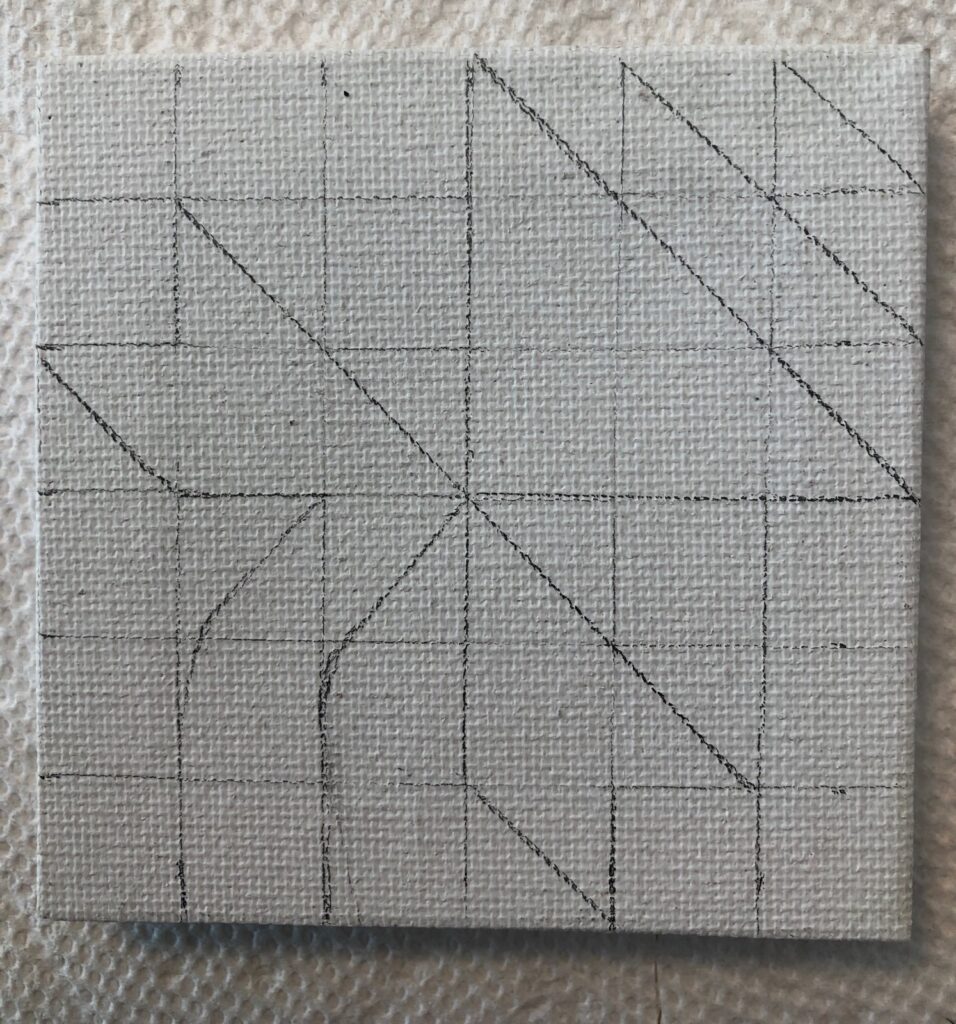
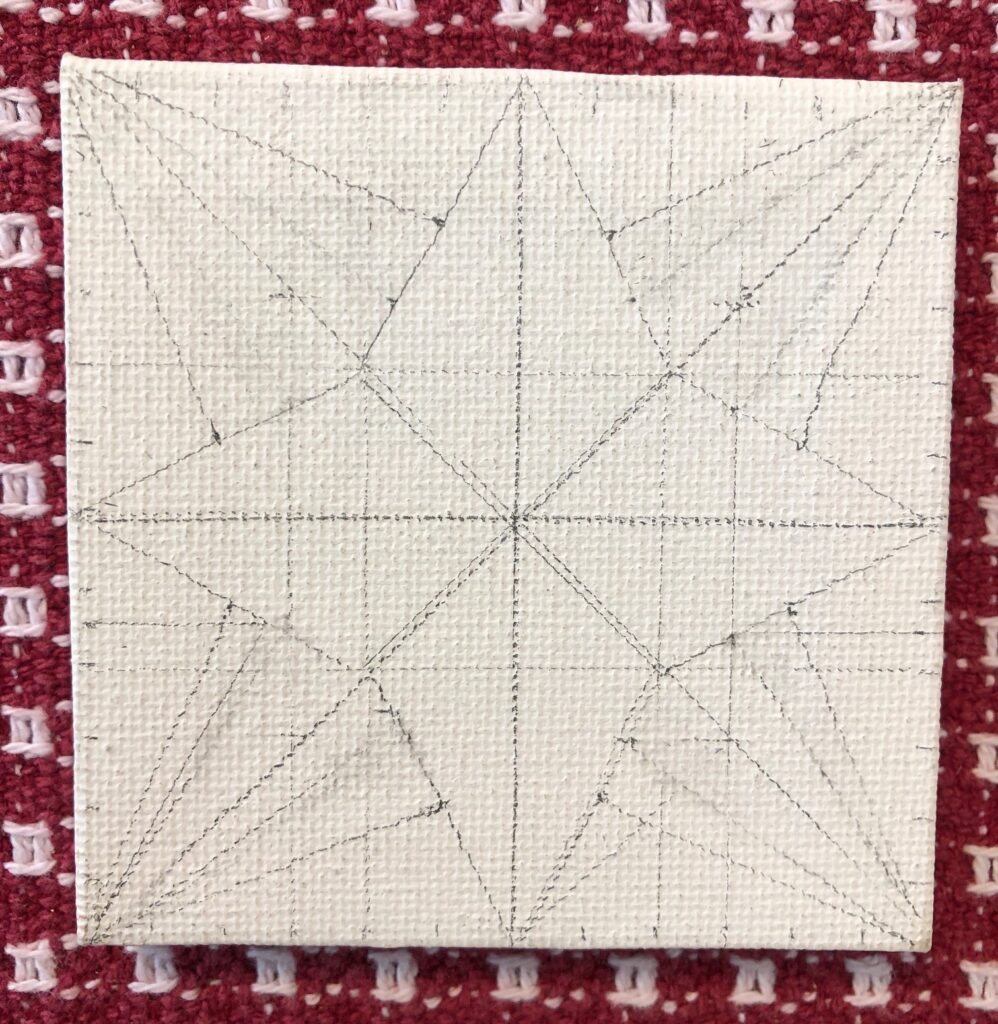
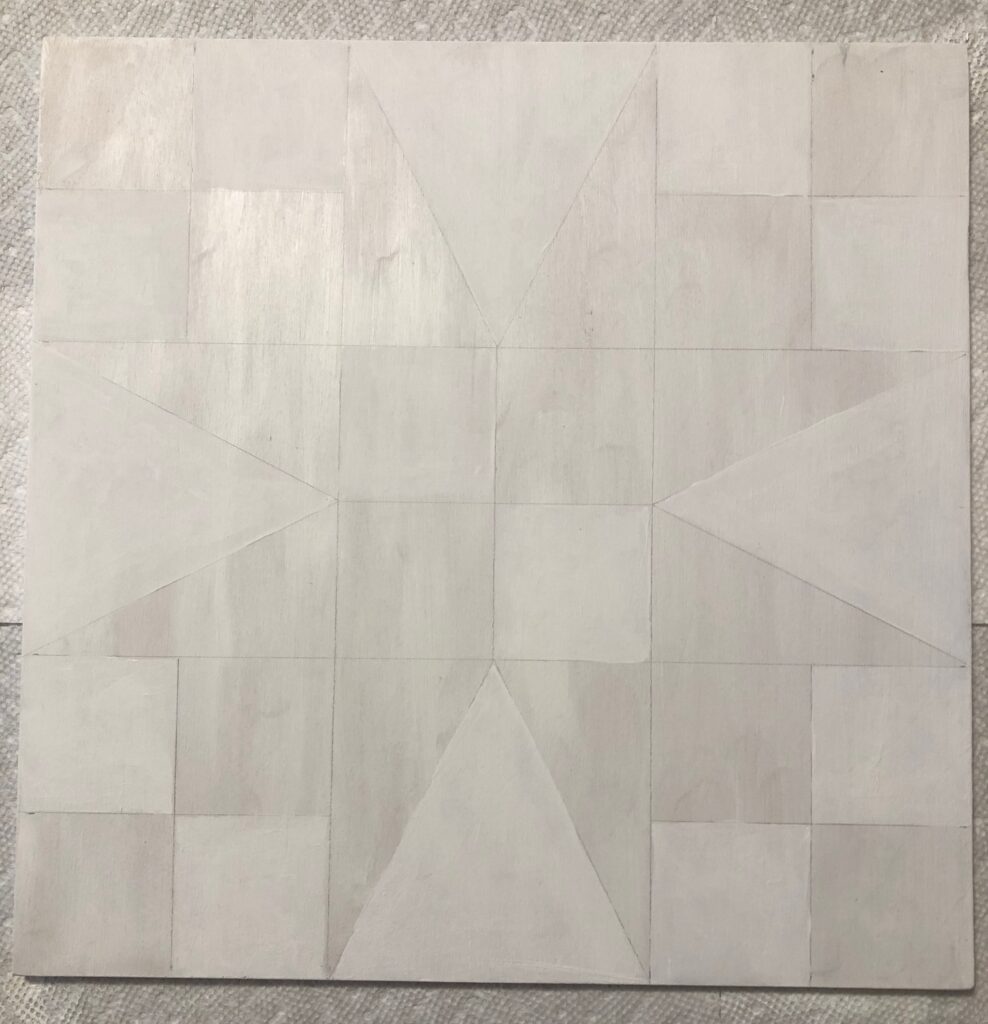
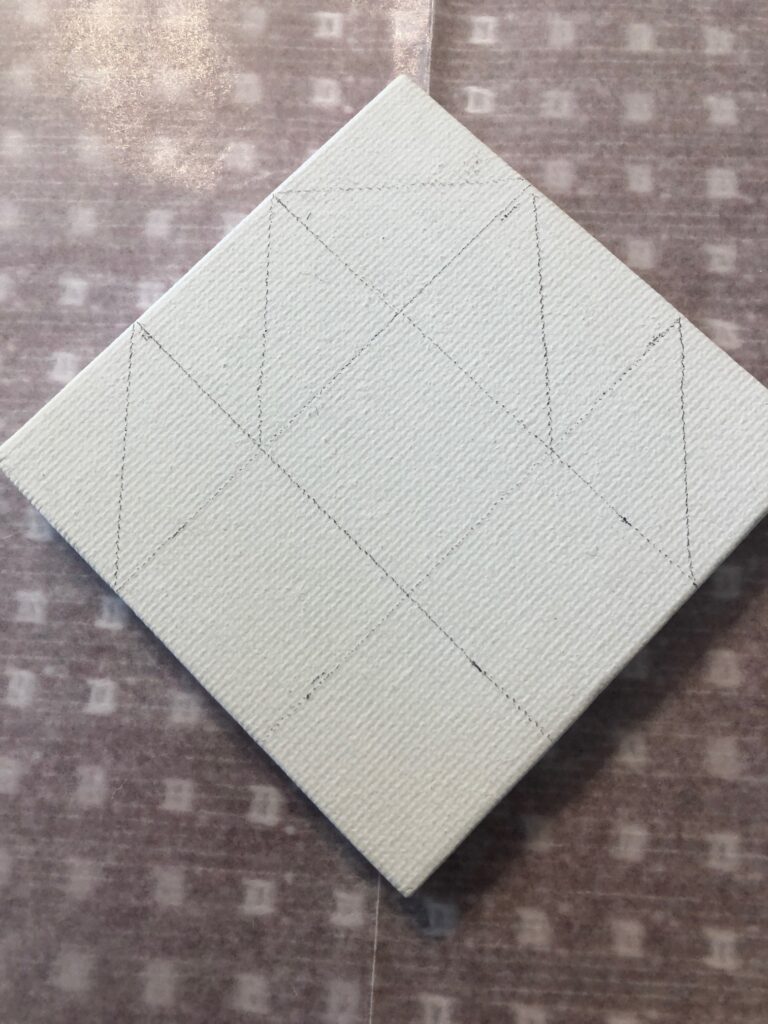
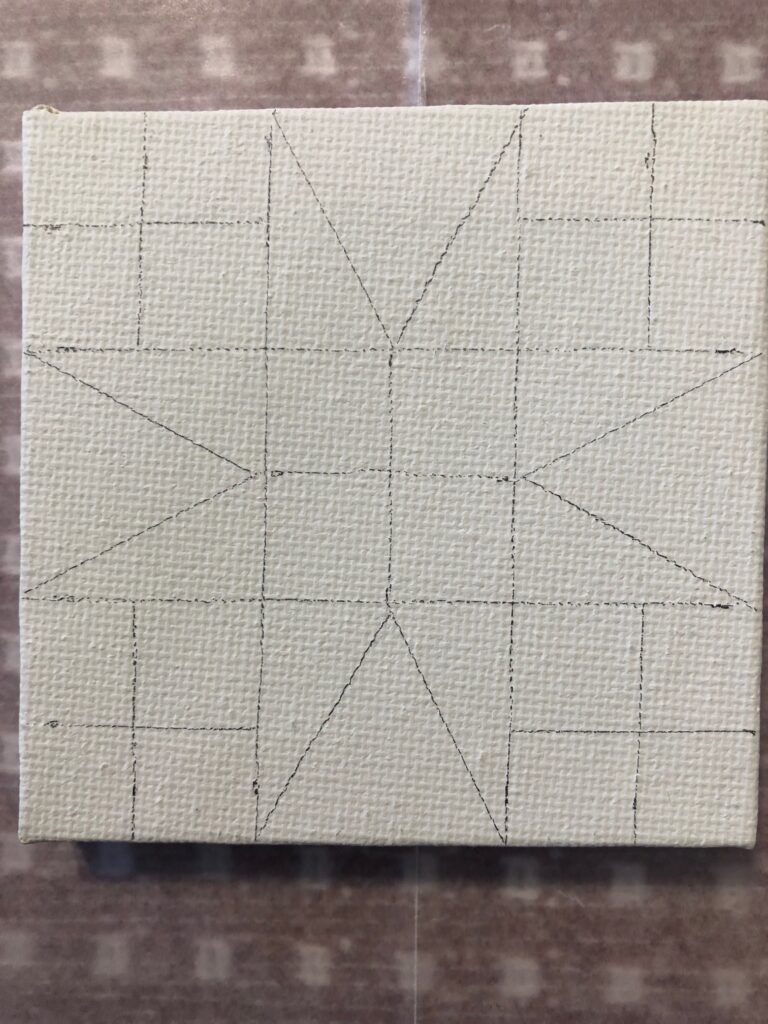
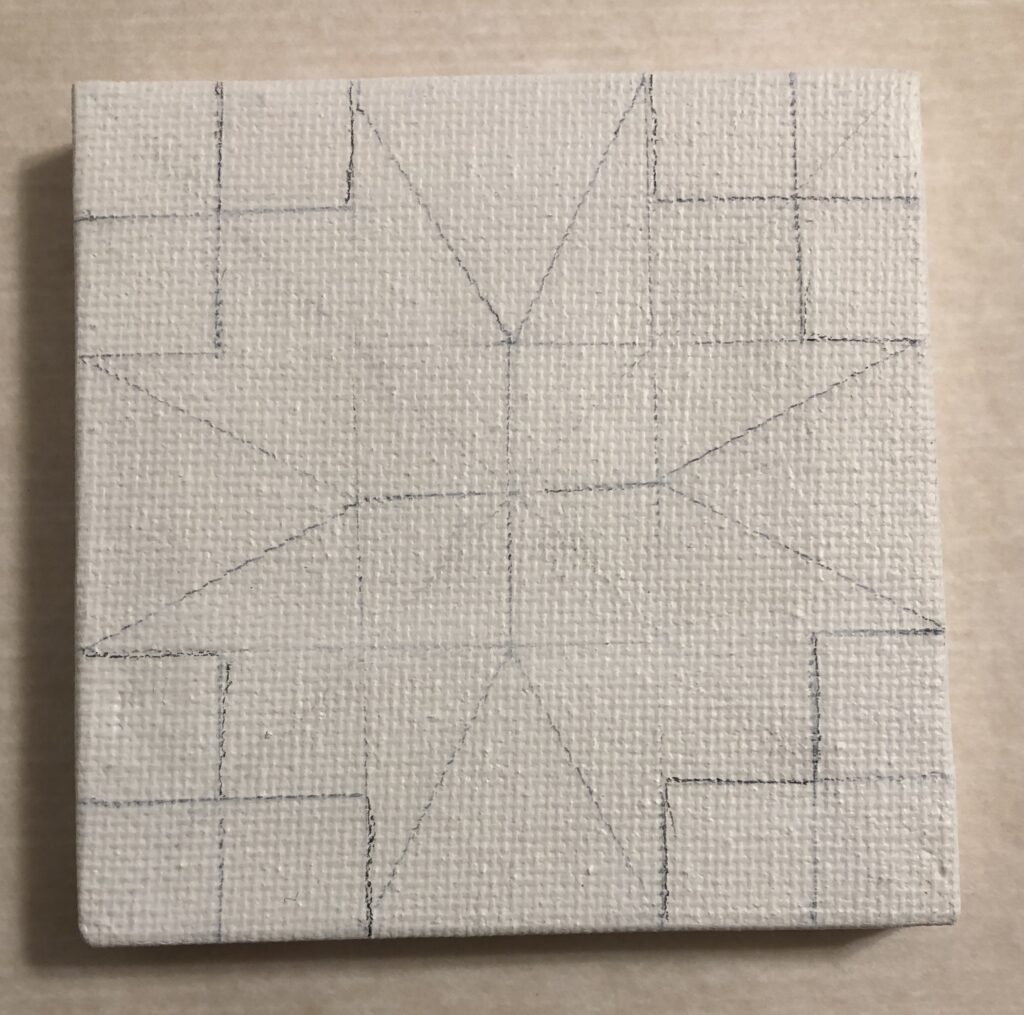
I always start with sketching the design on a 3″ x 3″ canvas. That lets me see which lines should be erased so the pencil doesn’t show through the paint. Then, I’m careful when drawing on the wood so the pencil lines are faint and won’t show through.

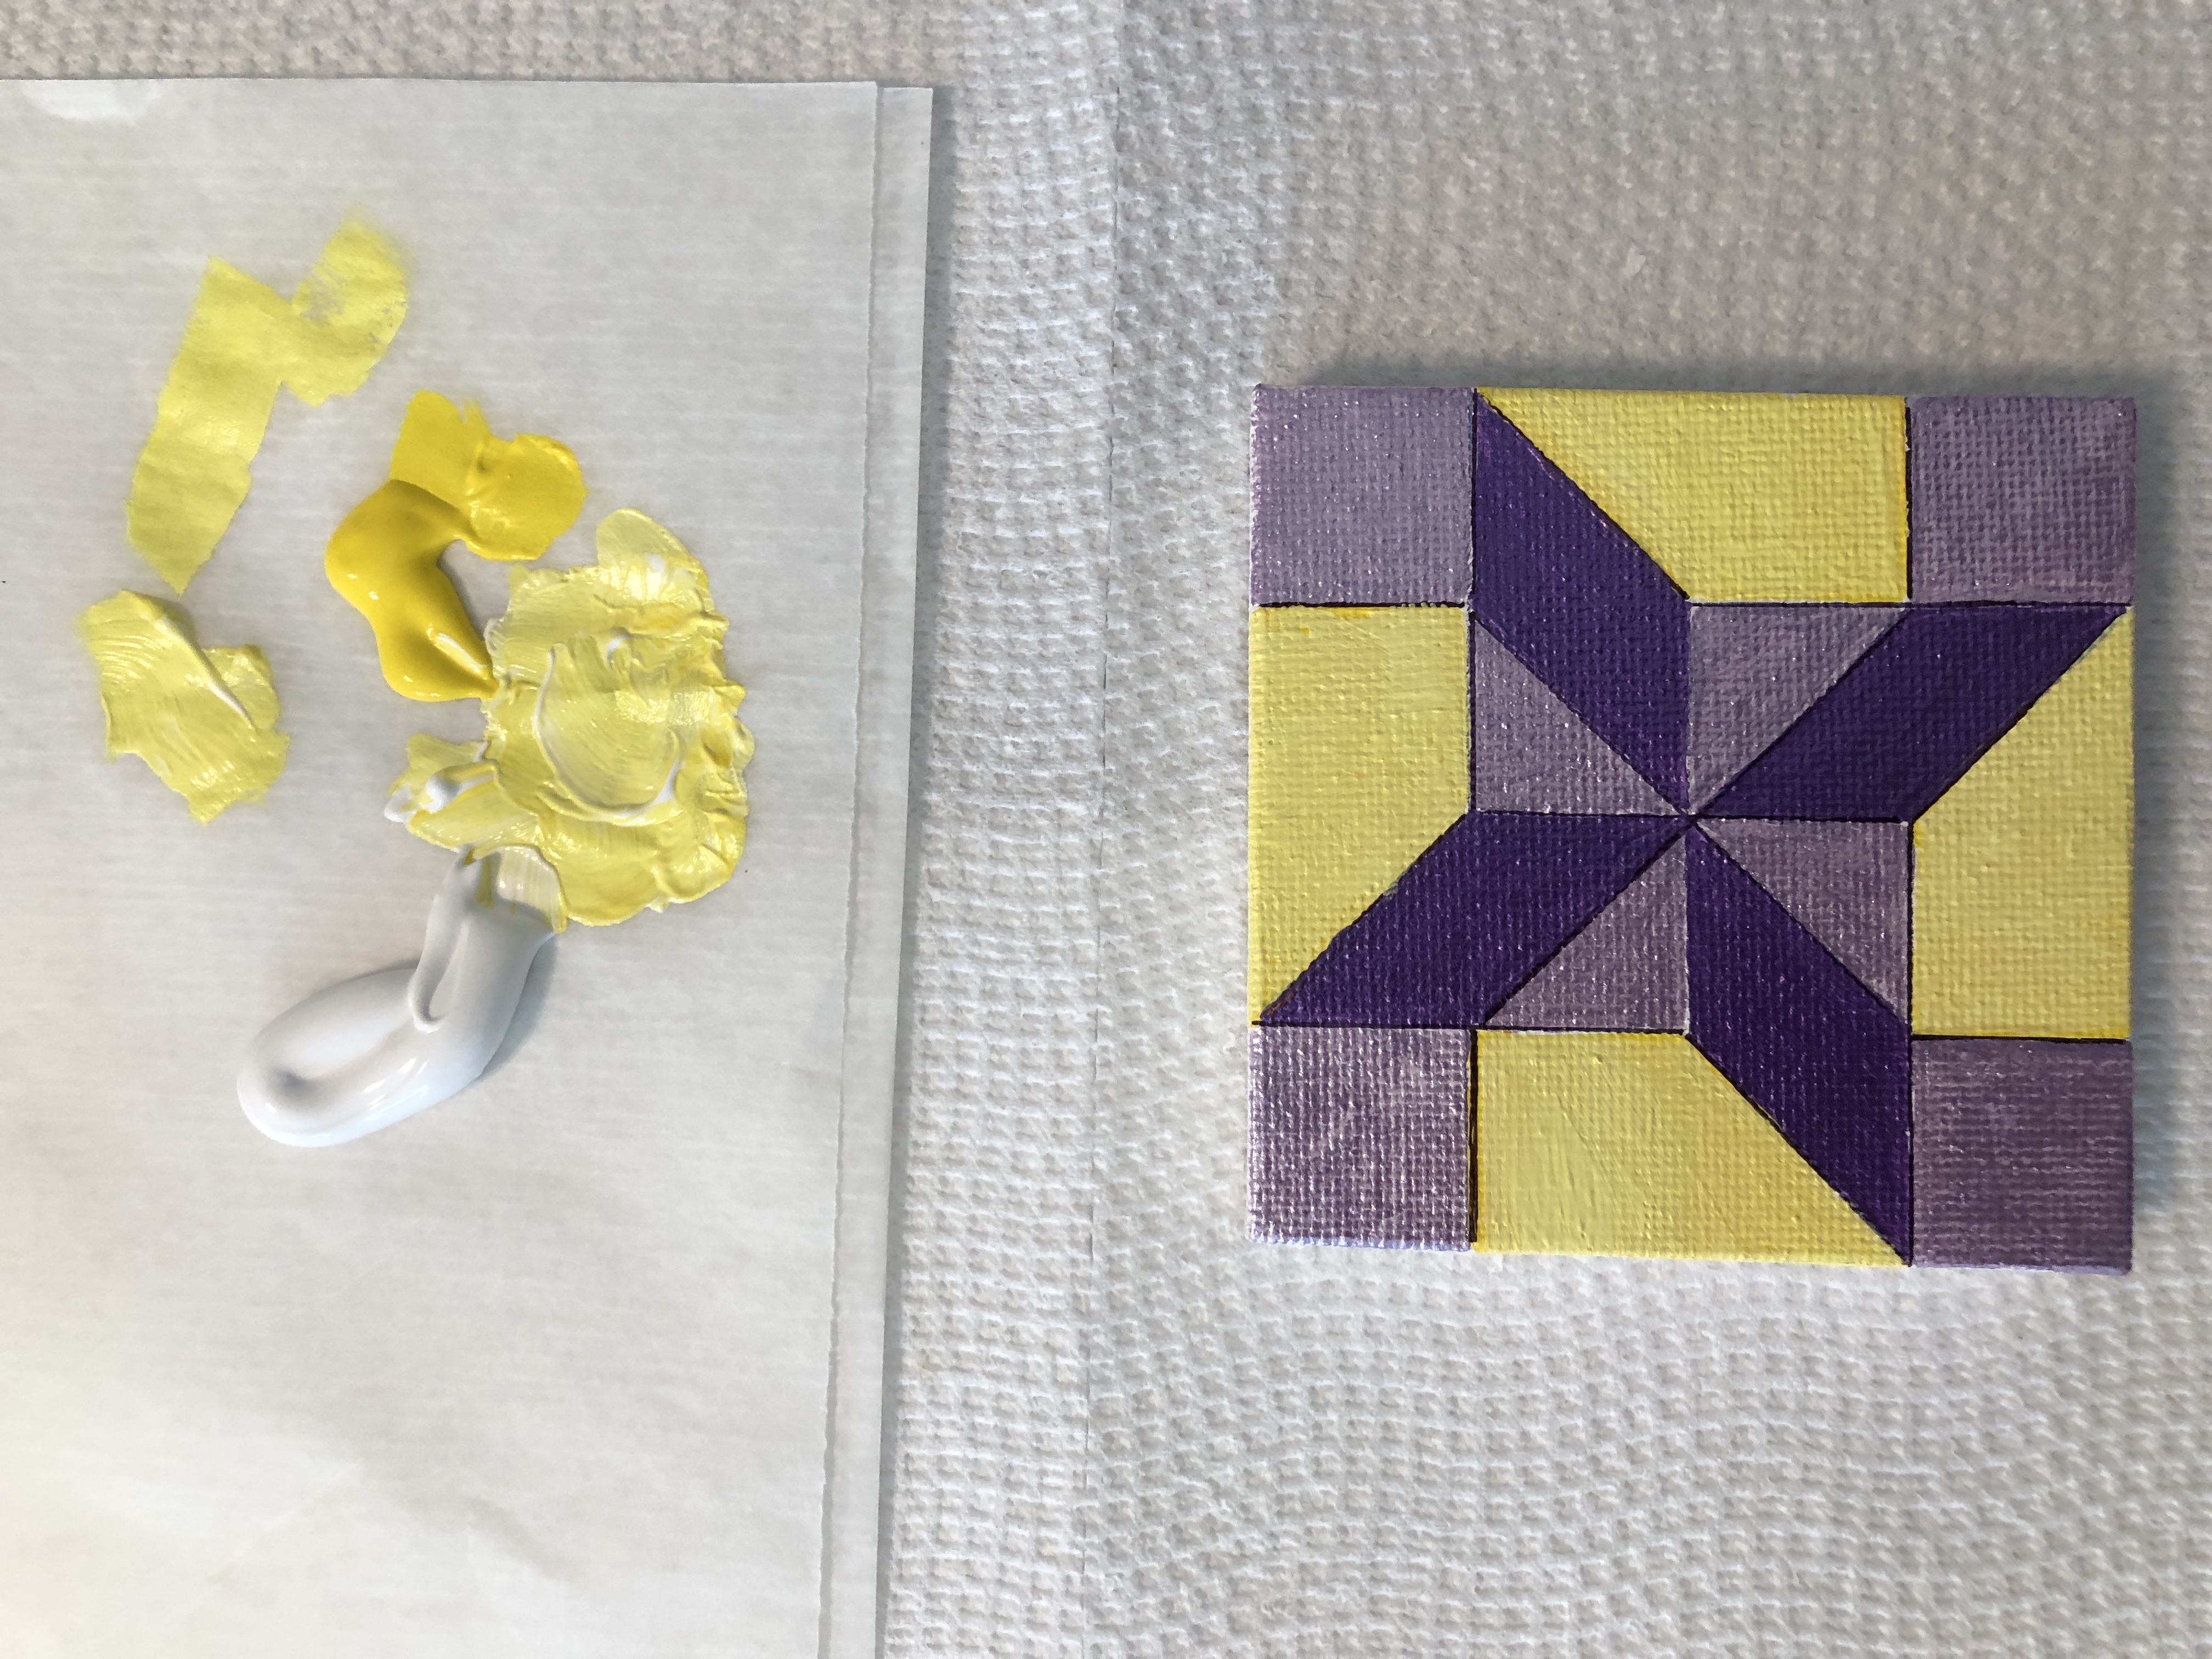
Let the painting begin:

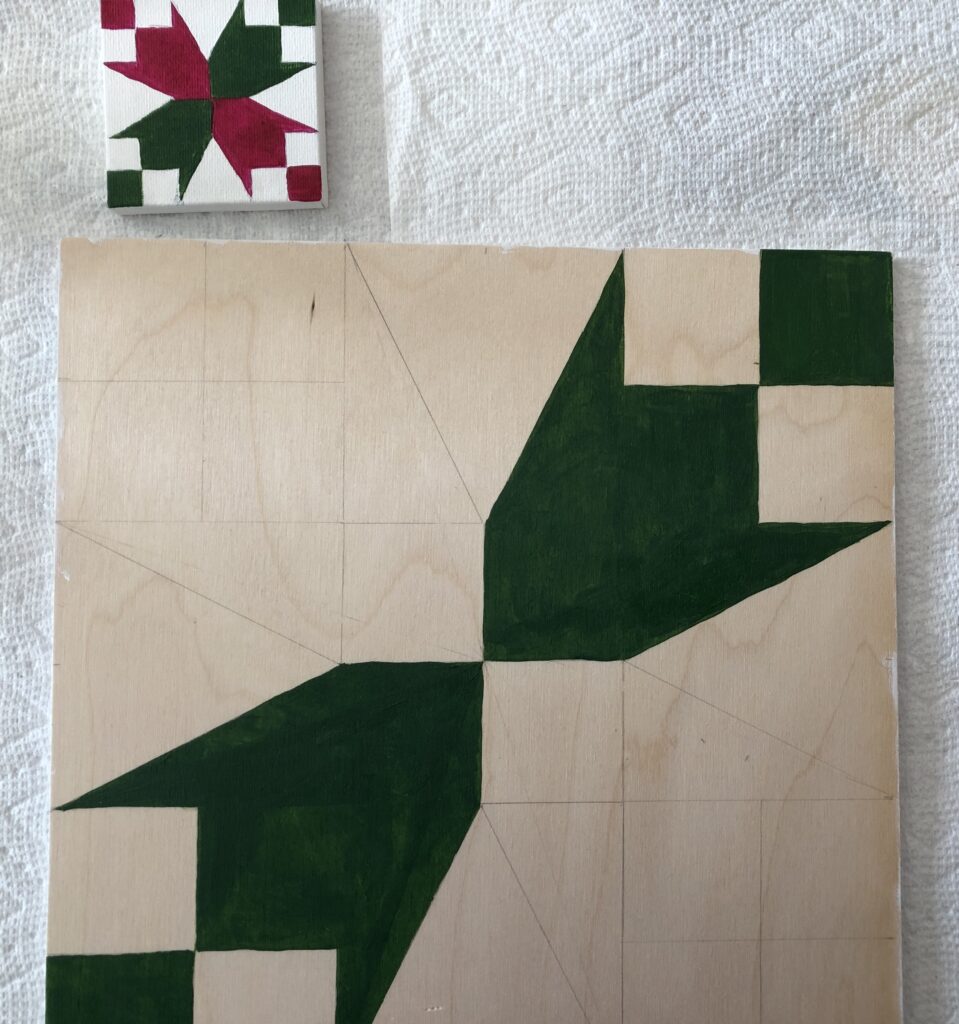
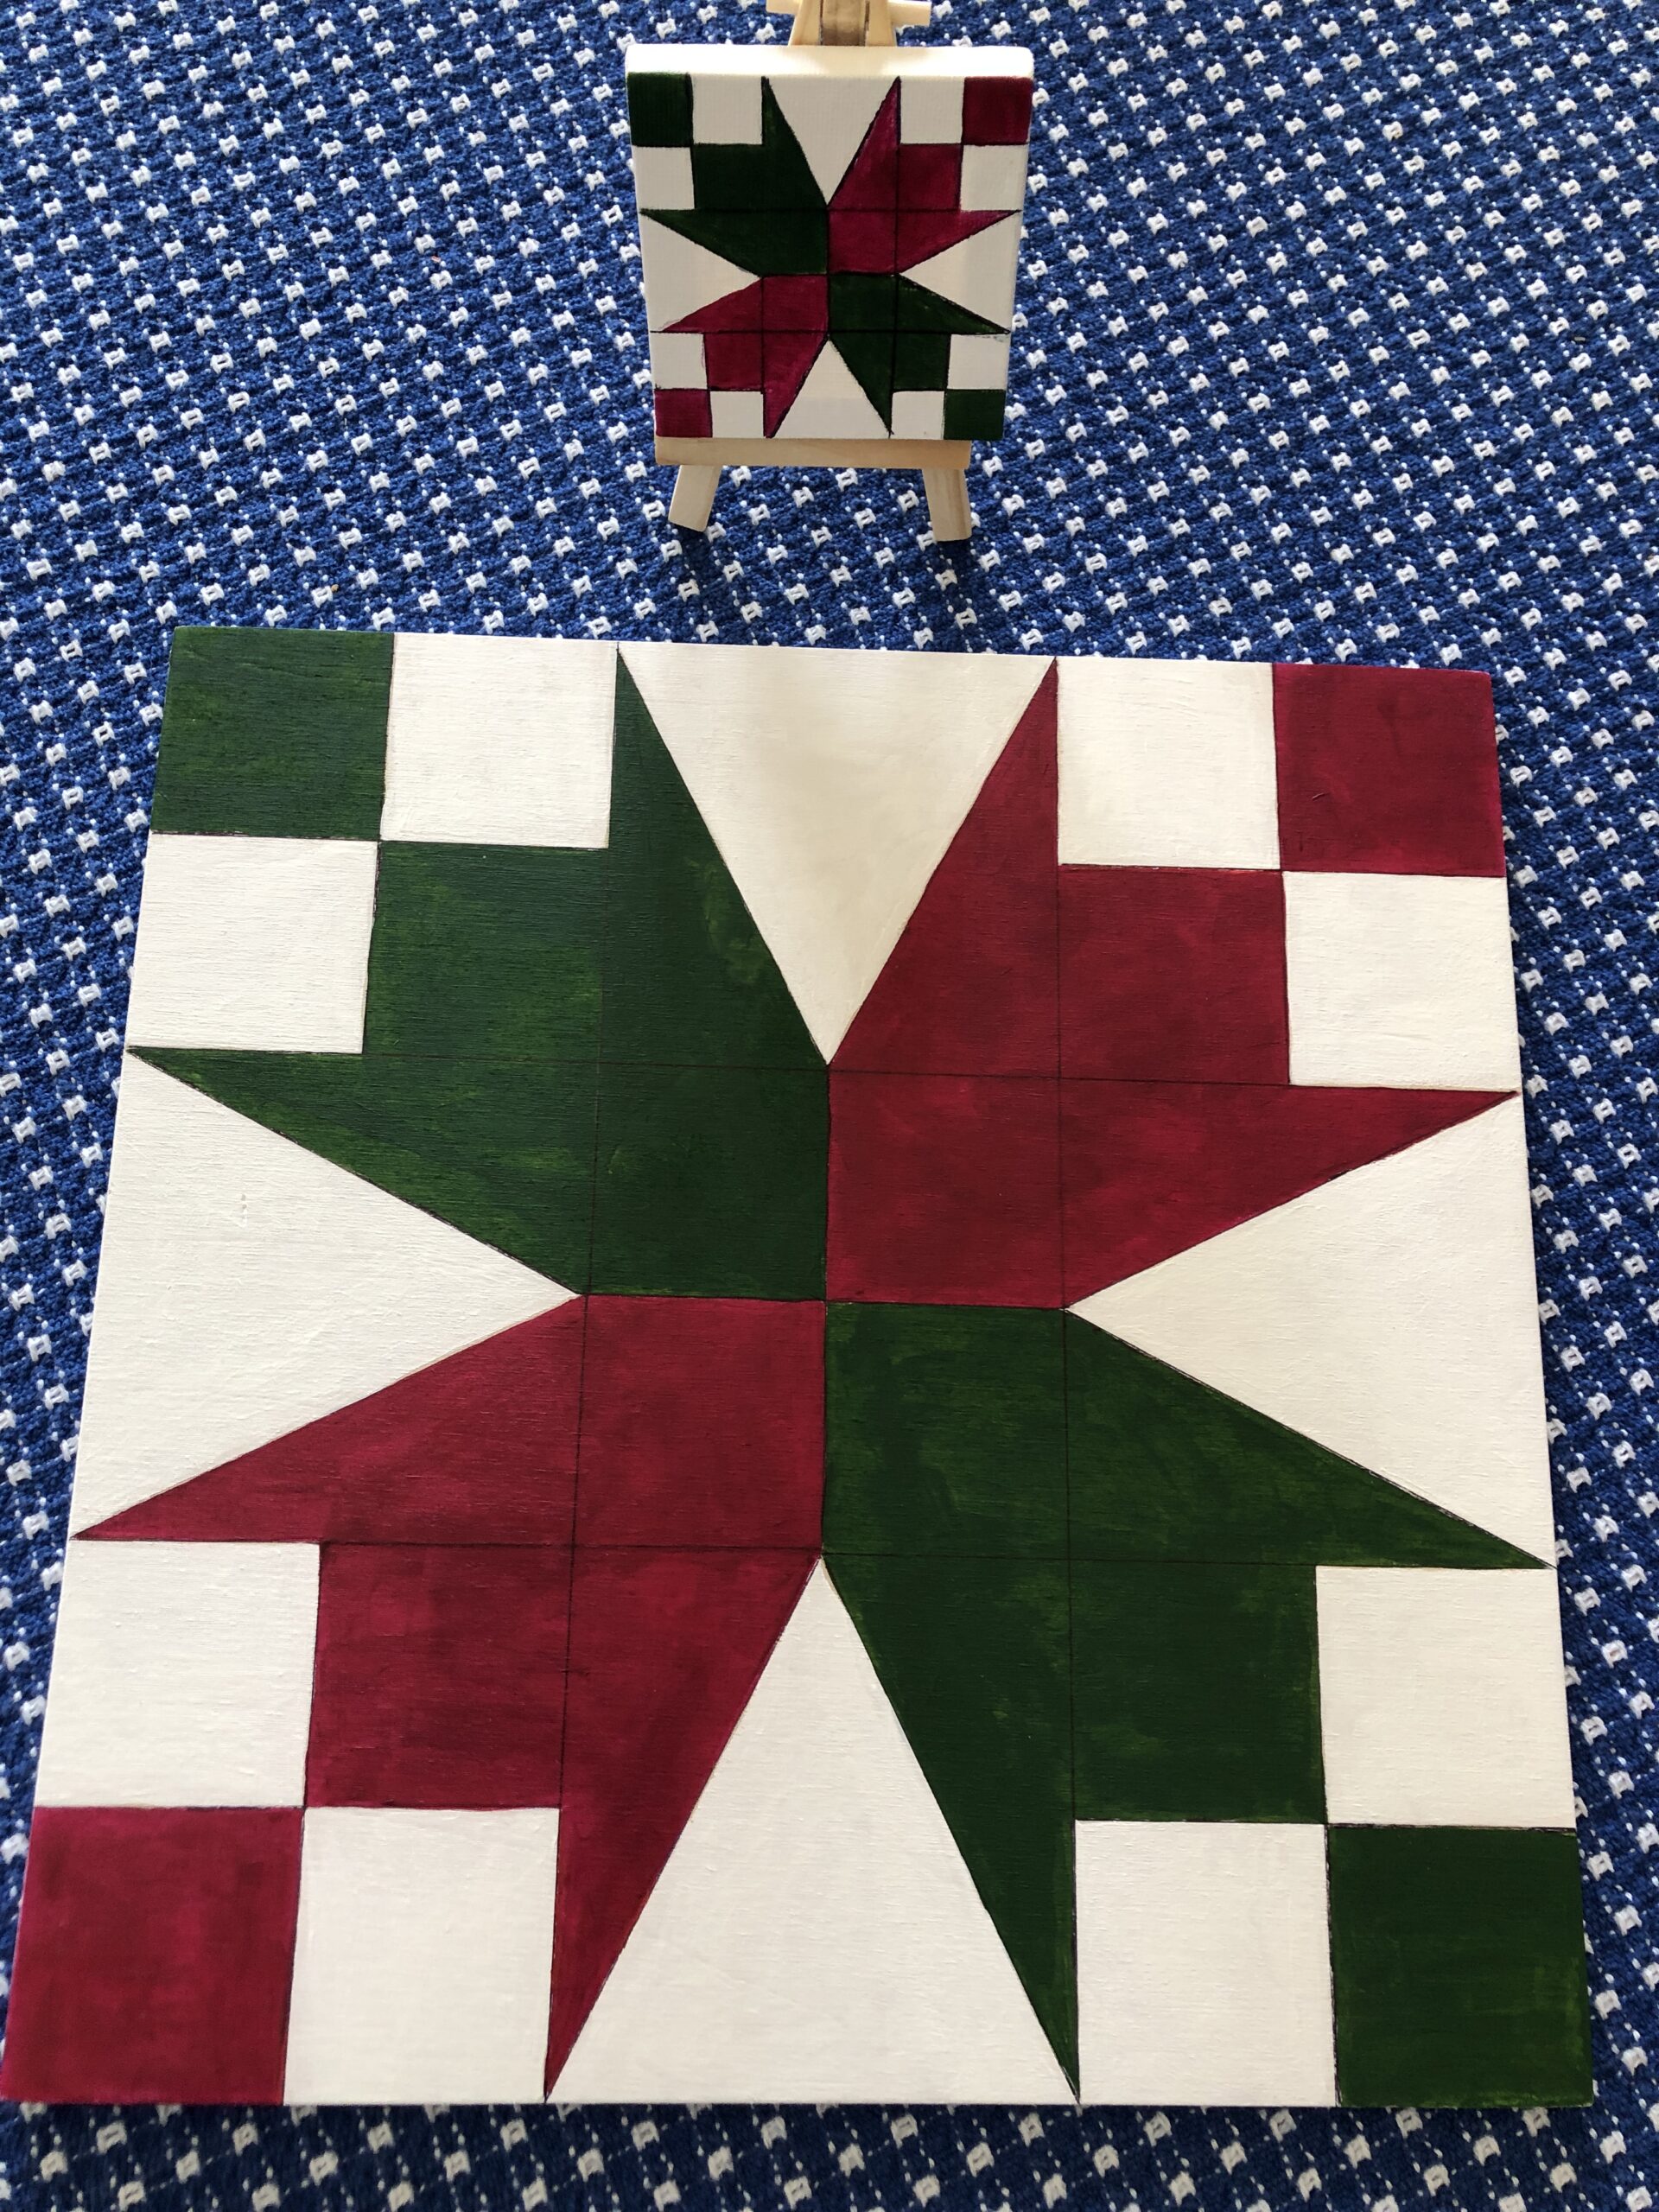
It takes several days to finish a project like this. The final step is to take clear acrylic spray and give it a nice weather-proof finish…all with waiting times between coats. Bert will attach magnets to the back that will stick to our metal front door. In the end, I’ll have a new spring door quilt and a new miniature for the mantle!

Lavender-inspired Quilt Block on Wood

About every month or two I get in the mood to make a new door quilt for the front door. Several years ago, I managed to make 6 quilt blocks to hang on the front door, about one every other month:

https://marykisner.com/a-year-of-door-quilts/

Basically, I’ve never been happy trying to put a wreathe on the front door because it has a screen door that gives me only 2-3″ of clearance between the doors. Finding a flat wreathe was tough. So, I started sewing these quilt blocks to use as door decorations.

I thought I could just rotate the blocks each year, but after two years on the outside door…exposed to the sun and weather…the colors faded. I was ready to try something new.

I pulled out my acrylic paints and had Bert make me some 12-inch square pieces of thin plywood. I started with my favorite fabric block…the patriotic red, white and blue one…that I had made in fabric.

Two years later, the block is faded.

I had to improvise the paint to be solid colors, and added star appliques right to the painted wood. Here are links to the door-quilts on wood I’ve made so far:

https://marykisner.com/new-patriotic-door-quilt-on-wood/

https://marykisner.com/summer-door-quilt-on-wood/

https://marykisner.com/autumn-door-quilt-on-wood/

https://marykisner.com/a-winter-star-quilt-block-on-wood/

Making a New Door Quilt on Wood

Lately, I’ve been inspired by the lavender fields you’ve seen in photos and my plants in the garden:

Choosing a pattern:

Bert had just received his latest copy of MuzzleBlasts, that always has a page or two with a quilt block suggestion:

First, I needed to find this block (called Freedom’s Star here) in my favorite books that will tell me other names for the block. I found it in this book by Maggie Malone, with 7 other possible names:

Then I found the block in another book, that gives me ideas for balancing the colors (light and dark):

Finally, I knew I wanted to use light and dark purple/lavender paint.

Making a Miniature Block First

For each 12″ x 12″ square block I paint, I first make a miniature block on a 3″ x 3″ canvas (available from Amazon). That lets me test the pattern and the colors.

So, I draw the guidelines to make a 4 x 4 block:

…and start filling in with color:

I wasn’t sure about the yellow paint…seemed too bright. I waited until the next day to see if it looked better. I decided the yellow overwhelmed the purple, so I mixed up some lighter yellow by adding white. That seemed to help.

The final colors felt better:

I continued with the 12″ x 12″ piece of wood and drew the pattern:

After painting, I use a fine point black marker to sharpen the design (mostly because my painting skills are not as steady as I’d like!).

Ready to get a spray of satin finish to protect it from the weather. Bert will glue three magnets to the back so it sticks to the front door (which is metal).

What to do with all my miniatures?

So far, I’ve been able to line them up on the mantle. One or two never made it to the final stage of painting on wood. That’s OK. They aren’t perfect, but it’s sort of a record of what I’ve done so far! Give it a try!

A Winter Star Quilt Block on Wood

A few weeks ago I was ready for a new quilt block on my front door, but I had to wait until after cataract surgery so I could actually see well enough to paint! The quilt blocks on wood are similar to the door quilt blocks I’ve made from fabric. You can check out those at https://marykisner.com/time-to-bring-out-the-spring-door-quilt.

These blocks lie flat against the front door and do not get squashed between the door and the screen door the way a wreathe might.

Then I started painting a quilt block onto a 12″ x 12″ square of thin plywood. They attach to the front door with magnets (obviously the door under the paint is metal!) Here are the three I’ve already done:

https://marykisner.com/new-patriotic-door-quilt-on-wood/
https://marykisner.com/summer-door-quilt-on-wood/
https://marykisner.com/autumn-door-quilt-on-wood/

Painting a quilt block is certainly a different experience from sewing. I’m working with solid colors in paint. With fabric I can vary the print to make the block more interesting.

This time I wanted to recreate my favorite quilt block. It is called a Double Star in one book and Rising Star in another. I used it in a full-size quilt that I made for my son and his wife a few years back. I’ve called it my Southern Cross Quilt because I chose 5 blocks to represent the stars in the constellation, the Southern Cross. He had recently finished graduate research in Antarctica and I was missing him. Can you see the blocks that represent the stars?

The four major stars in the constellation have white double stars; the smaller star close to the white one on the right has a print center.
Here’s how another quilter represented the Southern Cross in her quilt.

Making the Winter Star Block

I start each painted block by first choosing a pattern. This star block is called Double Star in one book and Rising Star in another. It’s based on a 4 x 4 pattern so it was pretty easy to sketch out.

I use a tiny 3″ x 3″ canvas to practice. It has a little easel so I can look at it while I work on the 12″ x 12″ plywood.

First, I paint the back of the wood to seal it from the weather.
Then I pencil out the pattern I will paint.
I’ve learned to work from the center out and rotate the wood so I don’t smear my hand through the wet paint.
The finished block is ready for a final spray of satin finish acrylic spray. Bert will then glue magnets on the back so it will stick to my front door.

I’ll enjoy this door quilt for a month or more this winter. It won’t get squished and it won’t fade like the fabric blocks do…and the quilt pattern makes me smile! Enjoy!

Please comment or email me directly at marykisner@comcast.net.

Autumn Door Quilt on Wood

This week I was determined to choose a new quilt block that I could paint on wood. I wanted something different and colorful for Autumn. I enjoyed painting my first two blocks and you can see them below. If you want to read how I made them, click on the link under each picture.

https://marykisner.com/new-patriotic-door-quilt-on-wood/
https://marykisner.com/summer-door-quilt-on-wood/

For the Autumn block I wanted something totally different. I pulled out my favorite book for ideas:

This book organizes quilt block designs by the grid they are based on:

And followed by pages and pages and pages of sample blocks! Thank goodness there is an index, by names, of all the patterns. I usually start by just browsing through the book. So many choices!

I ended up choosing this block:

This was based on a 4 x 4 grid.

Next to the picture was a number and the name was in the list to the left.

I really liked how different the block was and figured I could make the flower in orange, which would make me think of all the autumn flowers I see right now. I don’t think it matters that it’s called a “Lily”–I can call it anything I want!

Making the Sample Block

I like to start with a 3″ x 3″ tiny canvas. It helps me visualize the layout on a small scale. I don’t worry about making mistakes or erasing pencil marks. When I make this sample, I can decide if I like the colors I’ve chosen. It’s much easier to throw it away and start over if I need to.

I can see the extra internal lines are not necessary and distract from the pattern. I do like the orange and green.

Making the Full-Size Block

Step 1: I pulled out the 12″ x 12″ piece of 3/8″ plywood that Bert had cut out for me and sketched out the pattern with a pencil.

I did erase the internal lines because they will show through the white and orange paint.

Step 2: I flipped the wood over and painted the back and edges white just to protect the wood from the weather.

Step 3: I painted the first coat of orange and green. I can still see the internal lines so a second coat is necessary.

I used a fine point marker to outline the basic shapes. I like it!

Final Step: I will spray both sides of the block with a clear acrylic spray so it can handle the weather on the front door. Finally, Bert will attach magnets to the back so it will stick to the front door! Yea!

I think this block will be cheerful this fall and will show through the screen door well. Don’t be afraid to experiment!

Please comment or email me directly at marykisner@comcast.net.

Summer Door Quilt on Wood

Now that we’re into summer, I can put away my first door quilt on wood. See how I made it at https://marykisner.com/new-patriotic-door-quilt-on-wood/.

The next one I chose has several names. In one book it’s called Blazing Star, and in another it has had 5 other names!

I guess I’ll go with Blazing Star or Flaming Star. It appealed to me in its simplicity and made me think of all the stars on a summer night!

Since I don’t have an actual pattern, it helped to have it identified as being on a template of a 4-patch quilt block.

Making the Small Sample Block

I have learned to always make a miniature block first so I can figure out the dimensions of the sections. Painting the block also helps me visualize the colors better before I actually start on the 12″ x 12″ block of wood.

This is a 3″ square miniature canvas. I marked it into smaller squares each 1/4″. On the larger block of wood, each 1/4″ will be equal to 1″.

This took me a little while to figure out the angle for the star points in the background…as shown by all my pencil lines and erasures! That’s why I do this in pencil on a small one first!

And then I tested my color choices:

I started with the darkest color (that really is purple!), then yellow, and finally the gray background. Not very exciting but it reminded me of a night sky with all the stars out.

Making the Larger Block

With my shapes determined I shouldn’t have any pencil lines showing through the yellow paint.
First two colors.
Finished block…waiting for Bert to put the magnets on the back!
And of course, the yellow looks totally different in daylight! I like it!

It’s been fun to try this new kind of quilt block. Now I have a month or two to figure out what pattern to do next. I’m probably good until Labor Day now!

My miniatures are also reminding me what I’ve already done…my own little art gallery! Enjoy!

I may still do the two on the left on larger wood. So many patterns to choose from!

Please comment or email me directly at marykisner@comcast.net.

New Patriotic Door Quilt on Wood

I finally finished my first attempt to make a door quilt on a piece of 12″ x 12″ plywood. I was determined to make this painting on wood that hopefully would maintain it’s bright colors. Fabric quilt blocks were my original solution to needing a door decoration that would fit in the flatter space between the front door and the screen door. Last year I managed to make six quilt blocks that solved the problem, but when I started pulling them out this year the colors had faded and looked pretty sad. (See https://marykisner.com/prepping-for-new-door-quilts/).

So, I had Bert cut two pieces of 12″ x 12″ plywood for me to play with (just in case it didn’t work, no point in having a bunch cut out!). First, I wanted to replace the fabric patriotic quilt block that was on the door right now:

This picture was taken when I first put it up last year…nice bright colors.

I first painted the block, both sides, with a base coat of white. When dry I sketched out the pattern and put a second coat of white paint on the corresponding white sections:

This looked pretty easy but I was re-learning how to use various brushes. Not as easy as I thought it would be!

Then I started with the red paint and filled in those sections. It took a second coat to get the solid color.

I’m certainly not as steady as I should be to do those straight lines!

Then I filled in the blue sections:

Now the dilemma…the original pattern had white stars on the blue squares. I did that with some fabric that had stars in the pattern and managed to get at least one white star centered in the block. However, how to do that with paint? After seeing how unsteady I was with a tiny brush, I did a quick run to JoAnn Fabric Store and picked up some embroidered appliques of stars. Perfect!

After finishing the block with a satin finish acrylic spray, I just glued the stars to the blue squares!

Funny how different light made the colors brighter!

The block sat on my old organ by the front door for a week until Bert had time to figure out how to hang it on the front door. It couldn’t be hung the way the fabric blocks were because we have a door knocker right in the middle. The fabric blocks just draped over that with no problem.

Bert finally had to put magnets on the back (the door is metal under the paint!).

Now the block has to sit below the door knocker.

Oh well…now to see if the paint fades over time. This block should be appropriate through the 4th of July holiday. I’ll have to think about whether it’s worth it to make more in wood. Enjoy!

Please comment or email me directly at marykisner@comcast.net.

Prepping For New Door Quilts

As you may know by now, most of my projects revolve around filling a need and making something practical and useful. If you’ve been following my posts about Door Quilts, you’ll know I have made six nice 12″ stand-alone fabric quilt blocks to hang on my front door. They lie flat and don’t get squished like a wreathe does between the front door and the screen door.

However, when I pulled out the Patriotic Door Quilt last month, I noticed it’s really faded from the sun. Here’s how it looked when new…

…and now it’s really bleached out from the sun:

Rather than make a bunch more fabric quilt blocks, I thought if I painted a quilt block on wood and coated it with an acrylic spray it would last better in the sun (kind of like the huge barn quilts you see across the country).

While I’m waiting for Bert to cut 12″ square boards for me, I thought I’d see if I could make miniature ones to satisfy my need to practice with paints. So, eventually, my fabric door quilts will evolve into wooden quilt blocks that will also hang on the front door and solve my problem just fine!

It’s been a long time since I painted anything. I’m not especially creative with paint, put I enjoyed playing with a few paints to make my garden stakes a few weeks ago (https://marykisner.com/final-garden-signs-for-2022/).

It helped that the pictures were tiny and didn’t need to be too detailed!

Twenty years ago, I spent hours painting small houses based on photographs. They were also not “creative” but instead were mostly straight lines and the photographs showed me shadows.

This is the house I grew up in, from an old photograph.
The camp was fun to paint because I could add the tiny outhouse!

So, after making the garden stakes, I thought I’d try some miniature flowers:

This tiny canvas is 3″ x 4″

Even though I copied the daffodils from a photograph, I had to really struggle to get the petals turned right and getting the color right. Very frustrating. The point of painting was to do something fun, not frustrating! It seemed like I needed to paint something with straight lines. Quilt blocks would be perfect.

First Attempt

I started with a set of 3″ x 3″ square tiny canvases and some tiny easels to go with them. So cute!

This block is called Vermont Maple Leaf.

Adding the lines with a fine black marker seemed to help it look more finished.

Second Attempt

This block is called Fifty-four Forty or Fight. It’s the same block I made in fabric.
I must say it’s a challenge to get in those tiny points!
The fine black marker helped it feel finished.

While I’m waiting for my 12″ wood squares, I’ll experiment with tiny ones to see which patterns would look good on the front door! I must be nuts! Enjoy!

Please comment or email me directly at marykisner@comcast.net.