Garden Update: June 29, 2021

By this time in the garden…about 5 weeks after planting everything…we are seeing some successes and some failures. Frustrating, but totally expected. Between the weather and the bugs, it is almost guaranteed that some plants do very well and others don’t. Things can change even in few days. Ahh, the adventure of gardening! Thank goodness for the Farmers’ Market and even the produce in the grocery store.

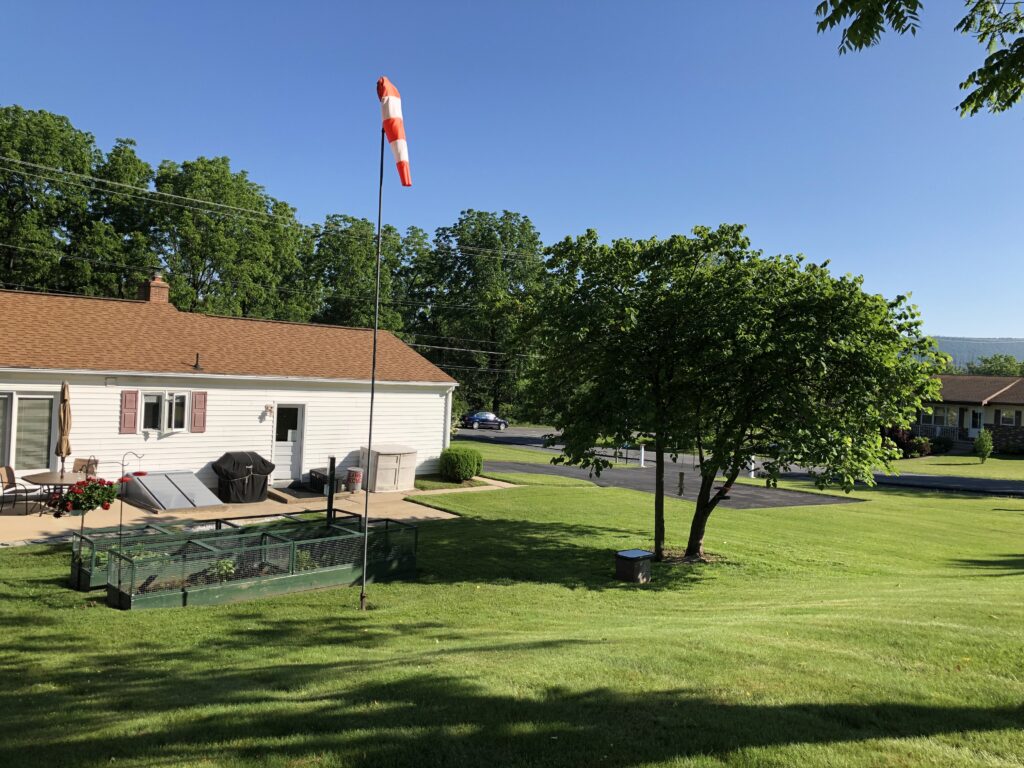
It has been 15 days since our last measurable rain. We’ve had some dark and cloudy days, a little sprinkle now and then. We know this because Bert has tracked our rainfall for over 20 years, every day from March 1 to November 30. Our rain gauge measures to the 100th of an inch. Remember, Bert’s an engineer!

We’re grateful for the rain barrels to keep everything watered.

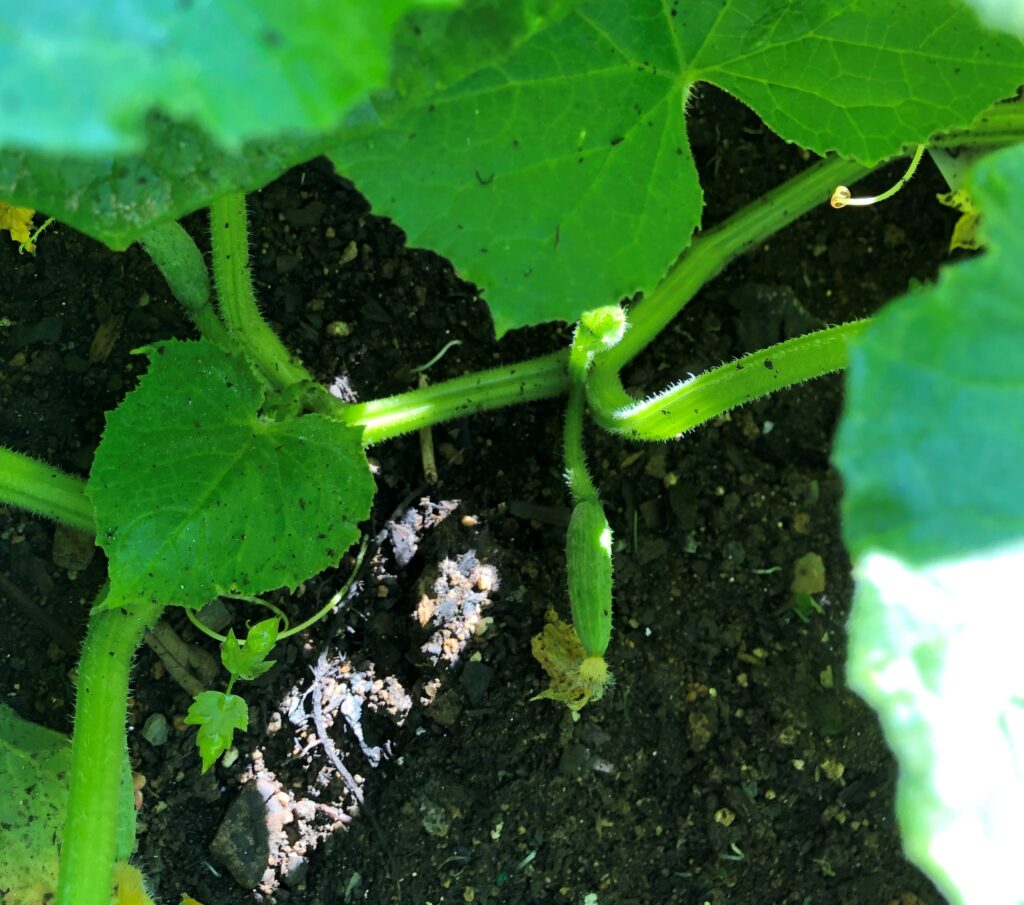
Two weeks ago, the cucumber plants that Bert started indoors back in April were doing very well.

Two weeks ago, these were the cucumber plants.

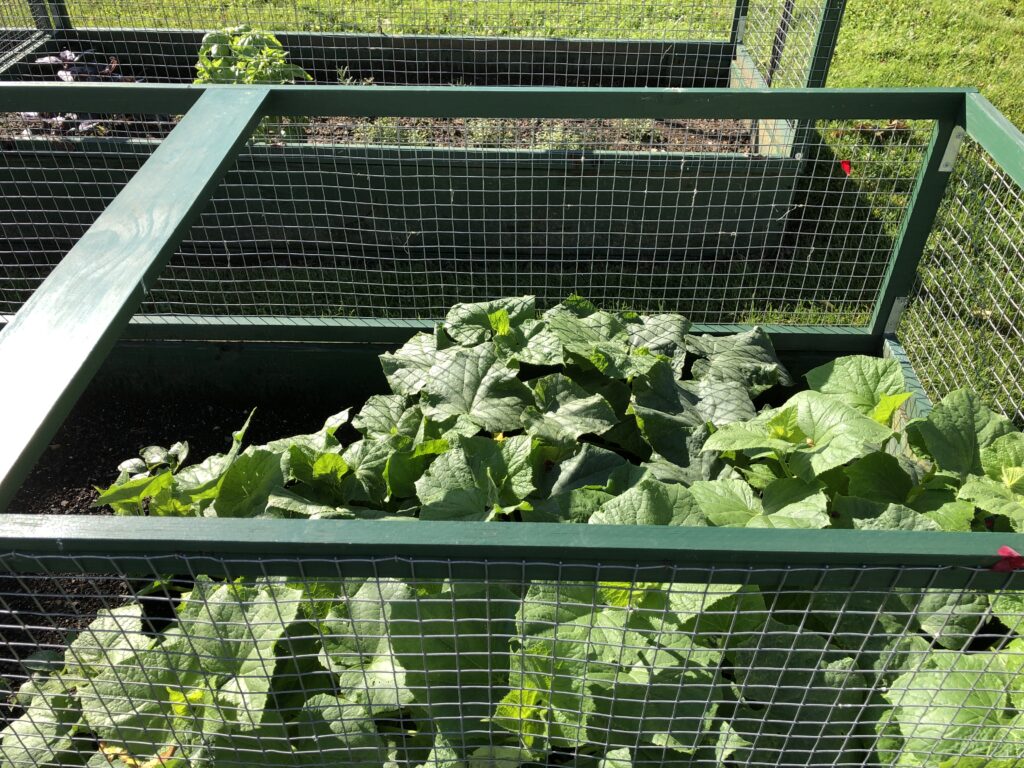
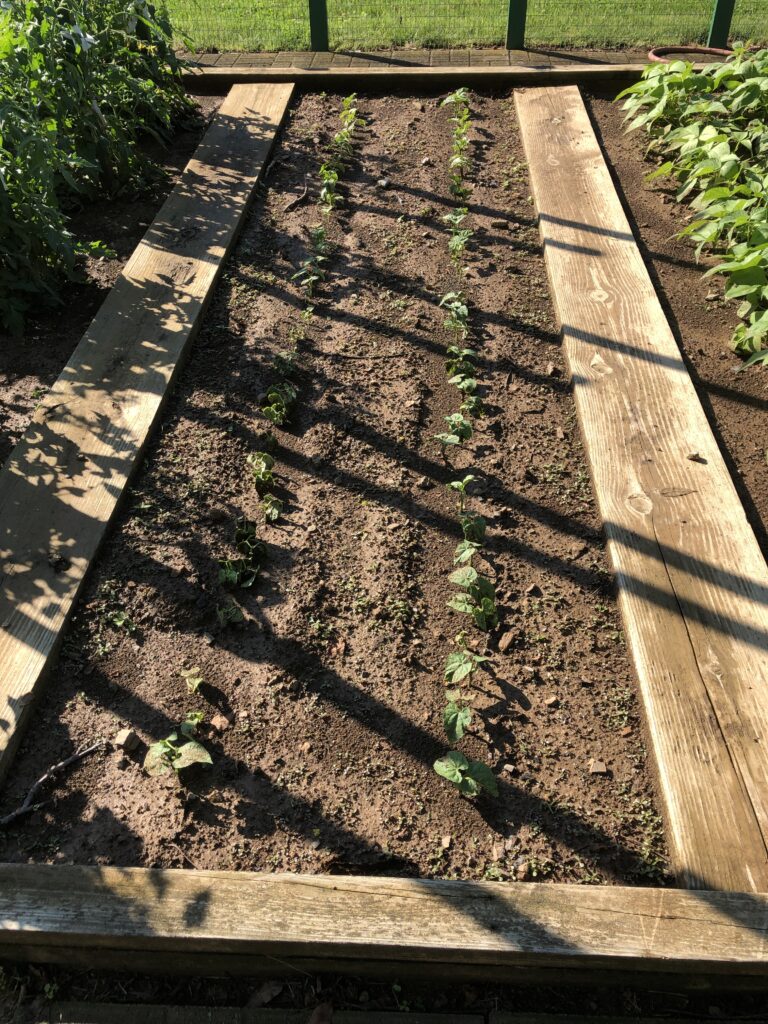
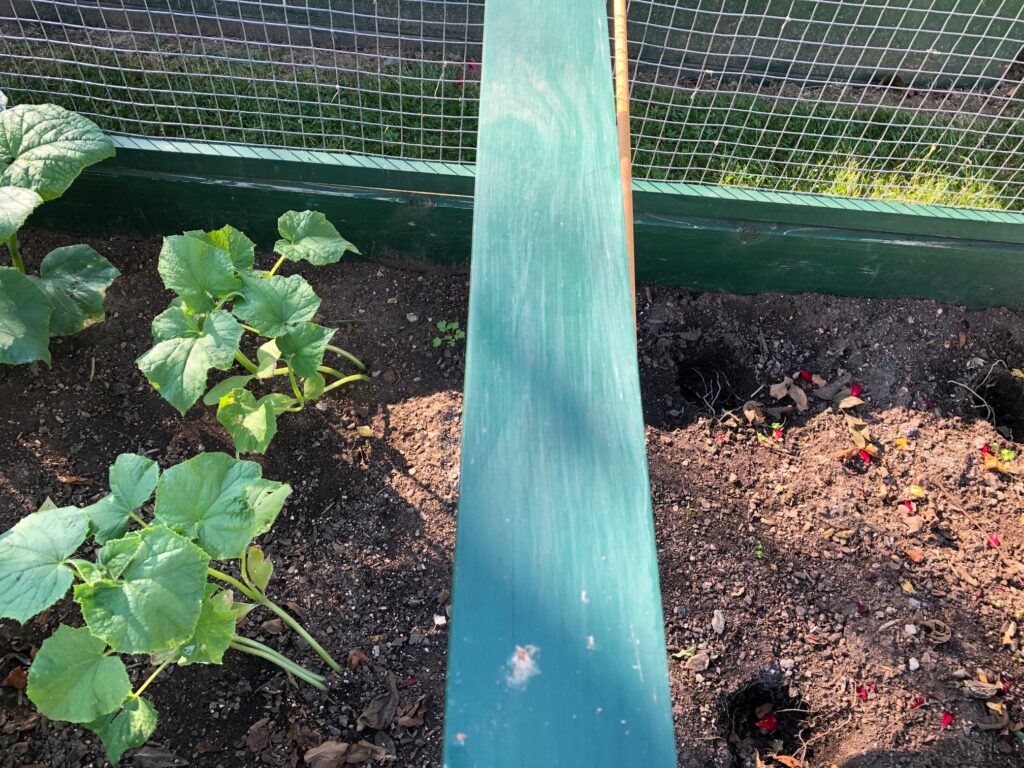
Over the last few days, I even found 4 small cucumbers that I ate immediately! Yummy! Yesterday the plants were wilting and even with watering they did not perk up. Absolutely dead! With a little online research, Bert found that the culprit was probably a bacteria in the soil. That particular raised garden has had the same problem over the years…first with strawberries and last year with cucumbers. Looks like we need to try to find seeds/plants that are resistant to that issue, or at least plant something else there. Anyway, Bert pulled out the dead plants.

Now we’re left with the plants that we planted directly in the garden from seed. So far, they are doing well but I’m not optimistic that I’ll get any cucumbers! We’ll see.

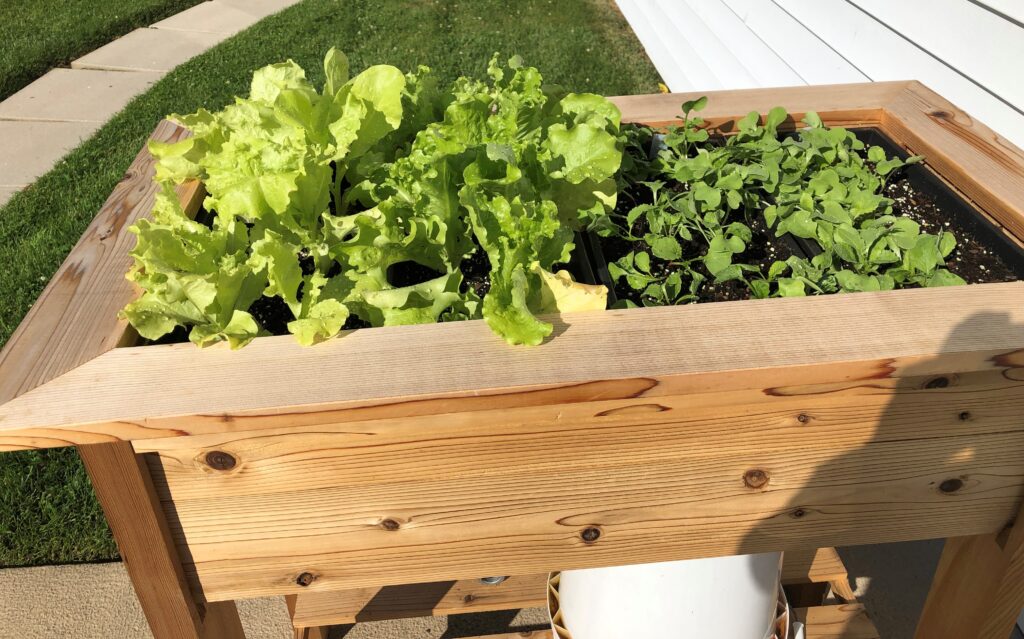
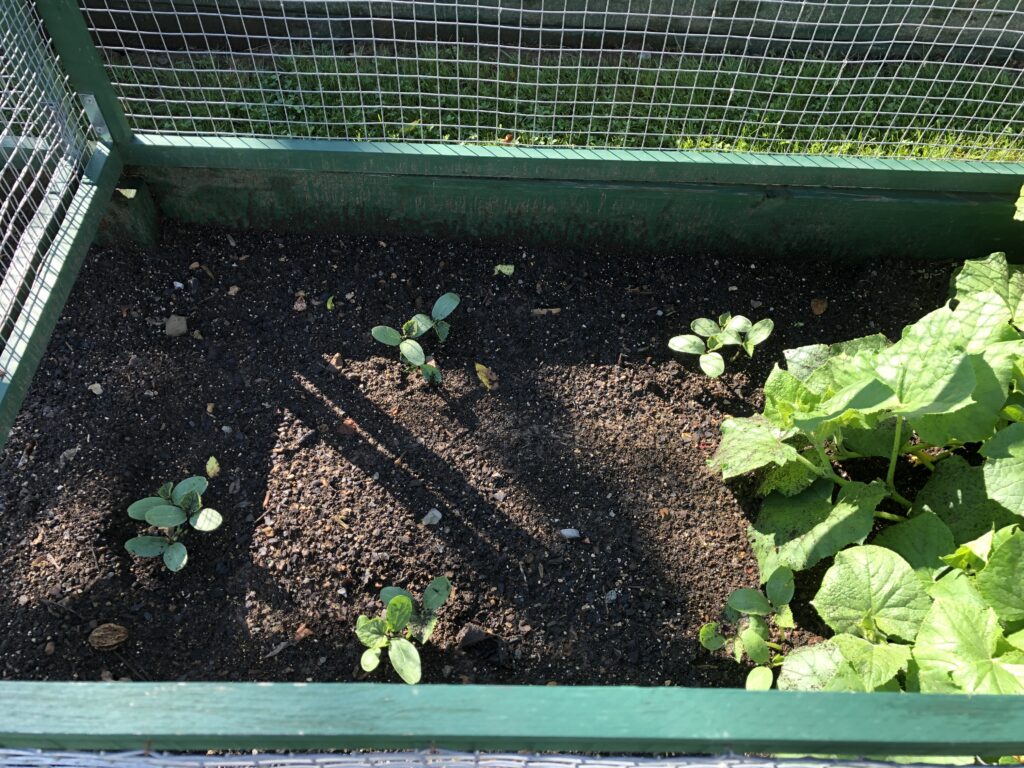
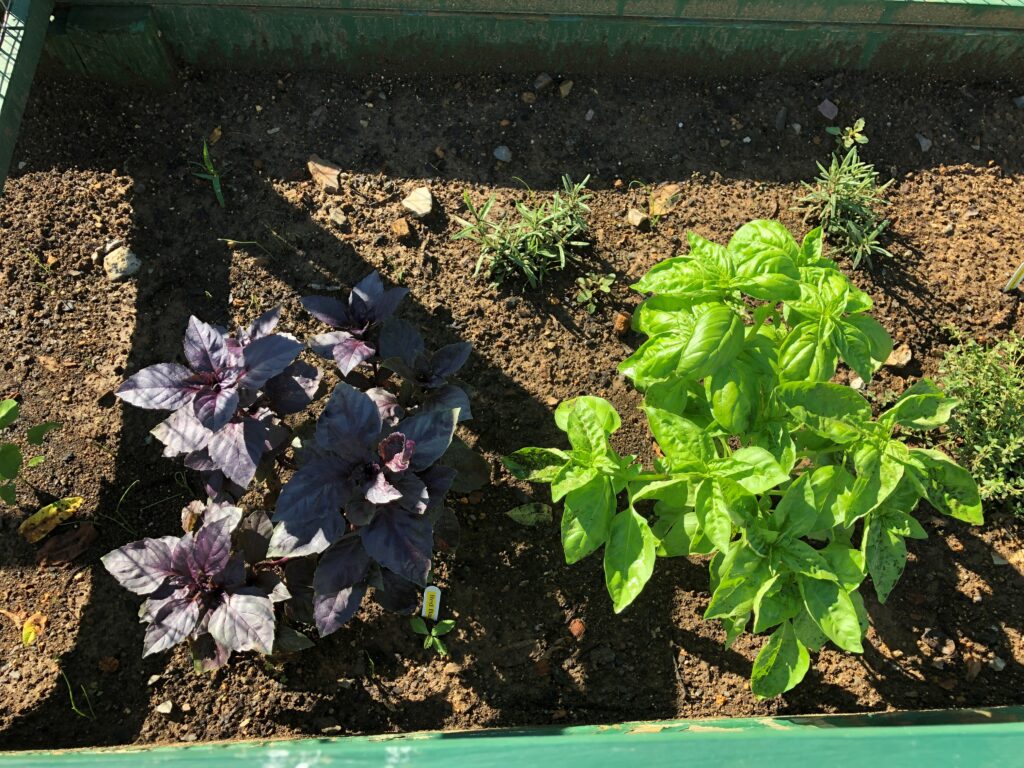
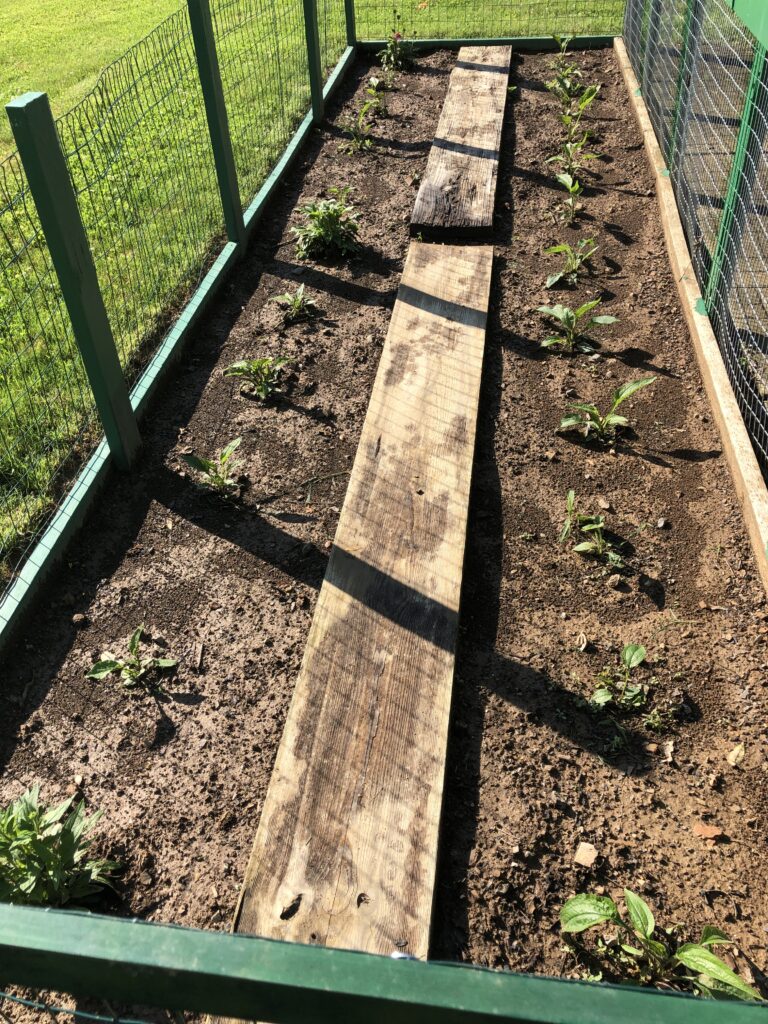
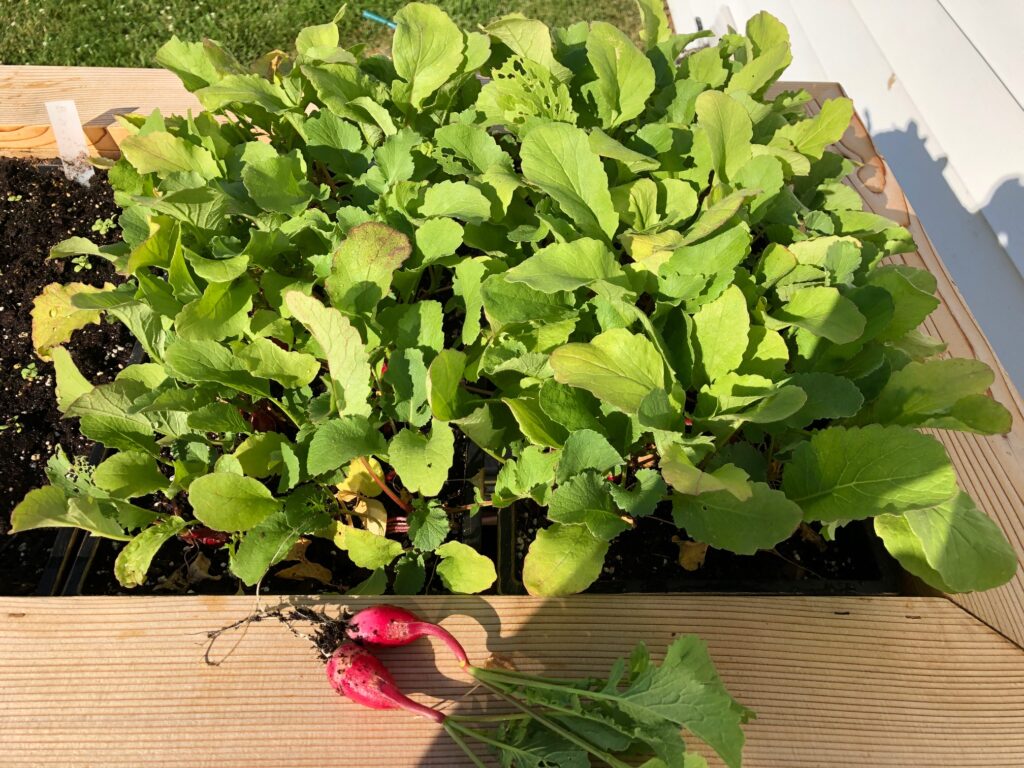
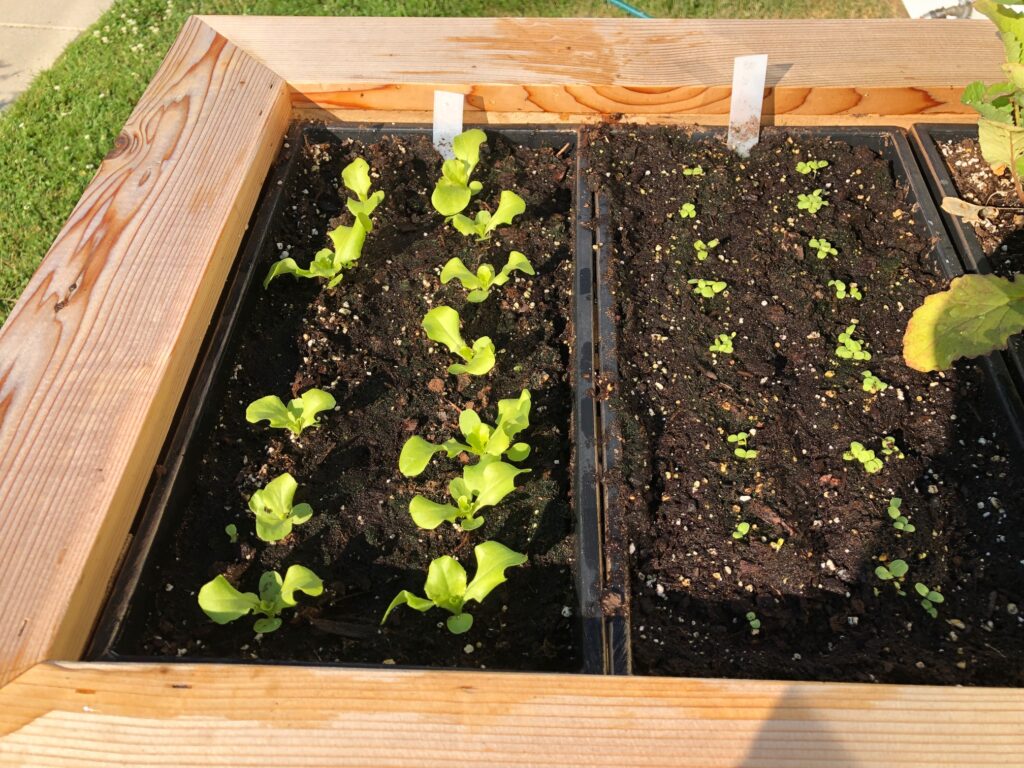
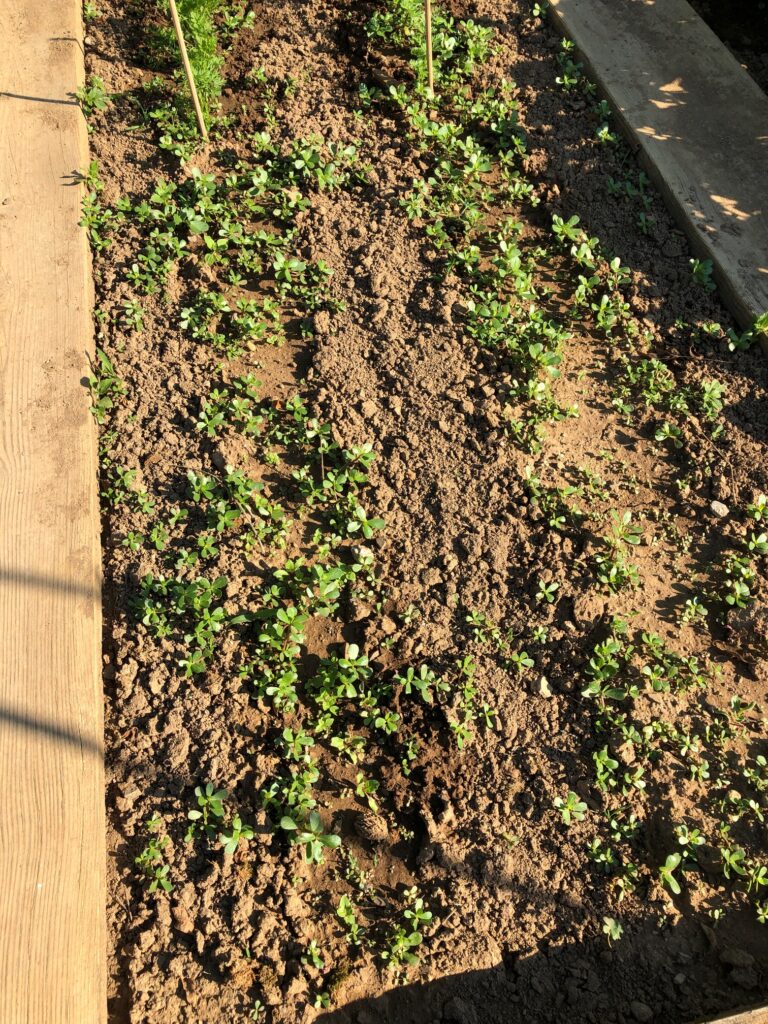
Now how about the rest of the garden! My raised planter is doing well. My second batch of radishes are almost ready and the lettuce has been picked and replanted.

Radishes almost ready to pull.
Second planting of lettuce…only Black Seeded Simpson this time.
Chamomile…flowers ready to pick!
Lemon Balm and Stevia.
Basil…ready to pick and dehydrate.
Thyme and Rosemary.
Carrots and Lavender. Looking healthy!
Carrots looking good…however, the beets (at the top, two partial rows) didn’t even come up at all!
No beets…just weeds!
The first tiny bean! Yea!
Lots of green tomatoes. These are Burpee’s Super Sauce tomatoes. Should get twice this size before ripening.
However, Bert found these aphids on the back of all the tomato leaves! Time to spray!
Echinacea plants finally look healthy. Even some flowers are starting! I sure thought they would be much taller by now.
And of course, the Spearmint is doing well. I plan to use some of the leaves fresh for infused water and dehydrate some for tea.

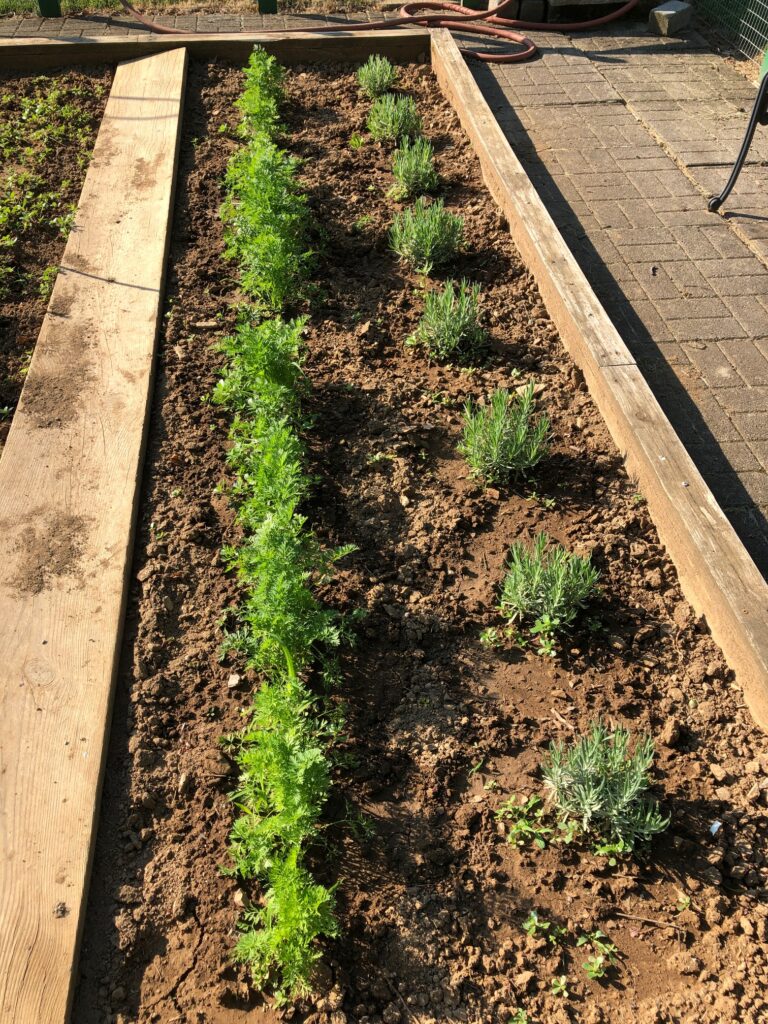
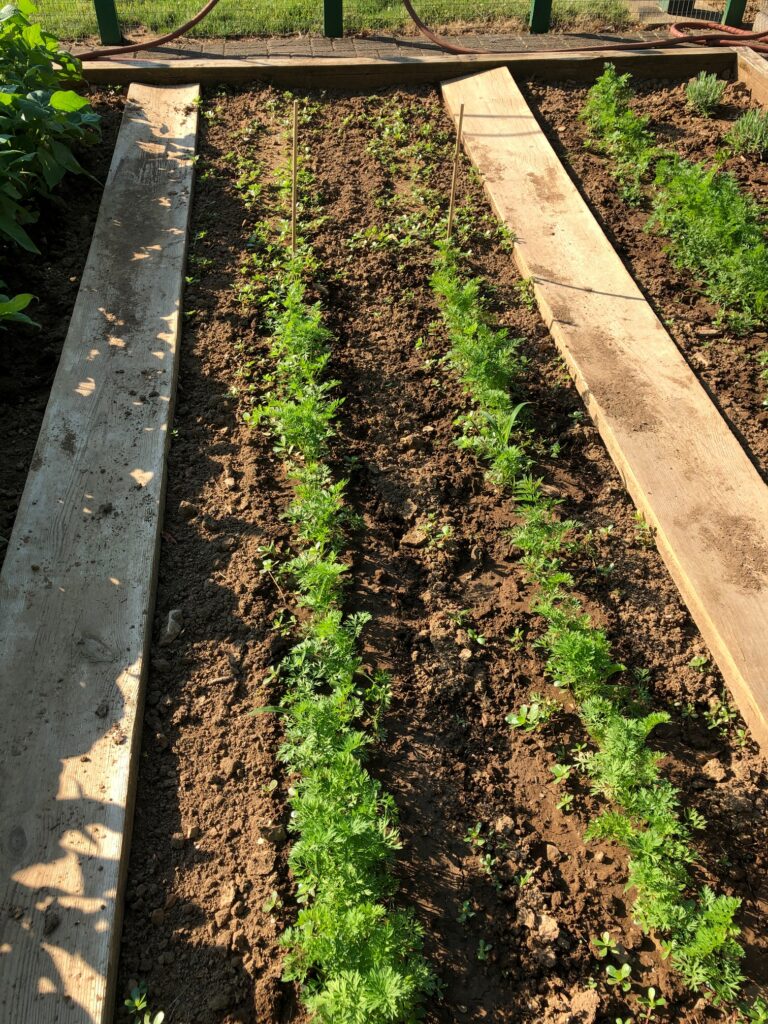
That’s the tour. We certainly don’t grow all the vegetables we like to eat, but over time we’ve decided to let local growers handle the things we don’t have room for (like corn) or the things we don’t eat very much of (like squash and potatoes). Every other year or so I’ll go to the Farmers’ Market at the end of the season and pick up a pile of cucumbers to make relish, or even tomatoes and make ketchup. Our carrots will stay in the ground until probably Thanksgiving and we’ll just dig them up as we need them.

The older we get we know which vegetables are labor intensive and which we don’t want to mess with anymore. As the season goes on, I’ll start preserving any abundant vegetables by canning, freezing or dehydrating. More on that as I do it!

Please comment or email me directly if you have questions at marykisner@comcast.net.

Difference Between Essential Oils and Fragrance Oils

Essential Oils

Many of the projects I’m working with now include at least one essential oil. These oils impart a subtle scent to the products I’m making with added benefits like being soothing to the skin, or especially healing to damaged skin. Many essentials oils can be taken internally or can be used in aromatherapy.

Essential oils are extracted from different parts of a plant, such as flowers, stems or roots, usually through the process of steam distillation and are not cut with a type of carrier oil. Essential oils are difficult to reproduce synthetically since they can be made up of 50-500 different naturally occurring chemicals found in the plant. Many of these chemicals have not even been identified.

Most of the oils I use are essential oils. With a few exceptions, my products are meant to be soothing or healing to the skin…whether human or canine! For example, my lotion bars and soaps often include Lavender and Manuka Essential oils.

The Flea and Tick repellent includes Lemongrass, Eucalyptus, Rose Geranium and Lavender essential oils. This mixture needs to be safe for the dog’s skin.

Oils used in the flea and tick repellent.

Fragrance oils

Fragrance oils are created in a laboratory. One of the main benefits of using these oils is that they are are non-volatile and the scent generally lasts longer than essential oils. However, they don’t provide the same health benefits as essential oils. They are designed purely for the purpose of mimicking a scent. Fragrance oils are problematic because these synthetic compounds are drying and irritating to the skin and can cause many other health problems. These compounds are hard to get away from as they’re found in most commercially offered cleaning products, room fresheners, personal care products, laundry soap, baby diapers, toilet paper, food, drinks, candy, toys and so on! If you have allergies, you have already learned how to read the fine print on products you buy.

A benefit of fragrance oils is their cost! They cost about half as much as the essential oils. Taking advantage of their long-lasting scent, I use fragrance oils in a few products. In my air-dry clay air freshener, I’ve found the essential oil lasts about a day. The fragrance oil will last for several weeks. In an air freshener, the scent is what matters to me.

Before I realized the cost difference, I used Citronella essential oil in my beeswax candles. I could have saved some money with the fragrance oil…although I don’t know if that scent would still repel mosquitos or if it’s something in the components of the oil that is given off when the candle is burned. We’ll see this summer!

Read Labels Carefully!

I can see it would have been very tempting to use a Lavender Fragrance Oil instead of Lavender Essential Oil in my products, since I use so much of it, but I think I would not have been able to say my products are good for your skin. However, they might have had a nice strong scent of Lavender for a longer time.

Read labels carefully on the products you buy. If it is supposed to be soothing to your skin, make sure it says Essential Oil! Enjoy!

Please comment or email me directly if you have questions, at marykisner@comcast.net.

Natural Bug Repellent for Dogs

All my work with essential oils has been geared for human use. I’ve been asked if this salve or that lotion can be used on their dogs and cats for their skin issues. (At the end of this post is an article from a veterinarian about which essential oils are safe for dogs and cats. This helped me a lot in choosing which oils would be safe in my spray.)

Today was my “chemistry experiment” day…where I experimented with making a Flea and Tick Repellent for dogs (but not cats). Here are two books I just got that have lots of recipe ideas.

The recipe I’m using today came from a website on the internet. Most of the recipes are pretty similar, with water, essential oils and something that serves as an emulsifier to disperse the oils in water.

Forgot to add the 1/4 teaspoon of Polysorbate 20 to the recipe. It was the emulsifier.

Last week I prepared to make this spray by ordering the 8 oz. spray bottles, the Lavender Hydrosol (basically lavender-infused water) and Rose Geranium essential oil. I already had the other oils. Then it was recommended I include an “emulsifier” to help the various essential oils disperse in the water. So, I ordered the Polysorbate 20.

I chose 8 oz. spray bottles because I was planning to give these to several folks that would test it for me.

I did not have enough Lavender Hydrosol to use only that instead of plain water, so I portioned it out so each spray bottle had 2 ounces. It smells really good!

Since the total amount of drops of essential oils measured to about 1/4 teaspoon, I added 1/4 teaspoon of the Polysorbate 20 that would help disperse the oils in water.

Then I filled the bottle the rest of the way with filtered tap water, screwed on the spray top and shook it up. Looks like the oil is dispersed just fine!

This spray is just for dogs. My research into which essential oils are safe showed that this will work for dogs, but NOT for cats. See the information below:

What Veterinarians Say About Essential Oils

I’d like to share what various veterinarians have recommended for which essential oils are safe for dogs and cats. There are many long lists of essential oils that are BAD for your pets. It’s easier to show you the list of oils that are SAFE for your dogs and cats.

This list came from Dr. Maranda Elswick, who is a licensed Veterinarian in Florida and Virginia:

Essential Oils Safe for Dogs include:

Cedarwood oil, Chamomile oil, Citrus oils (including lemon oil and orange oil), Eucalyptus oil, Fennel oil, Frankincense oil, Helichrysum oil, Lavender oil, Lemongrass oil, Certain mint oils (peppermint, spearmint), and Rose oil.

Essential Oils Safe for Cats include:

Chamomile oil, Jasmine oil, Lavender oil, and Rose oil.

So you can see, it matters what your pets are exposed to.

If you find your dogs or cats are experiencing mild respiratory irritation after inhaling an essential oil, move them to an area with fresh air.

If an essential oil causes irritations after contact with your pet’s skin or fur, wash the area with a pet-safe dishwashing liquid, such as Dawn.

If your dog or cat ingests an essential oil, consult with your veterinarian or poison control center immediately. Do NOT induce vomiting.

Good advice from Dr. Elswick!

I will make sure that the label on the final spray bottle will say NOT FOR CATS! I may also print out the list of safety warnings above on how to help your dog or cat if they have a reaction to this spray.

That was my chemistry experiment of the day! Enjoy!

Please comment or email me directly if you have questions at marykisner@comcast.net.

The Best Vegan Muffin

I finally found a recipe for a Vegan Banana Blueberry Walnut Muffin that actually rises and tastes good! I’ve tried adapting regular recipes by removing the eggs and substituting the milk with almond milk, but for some reason that just doesn’t work.

When I find a recipe online, I’ll print it out, put it in a plastic sleeve in a notebook. As I experiment with the recipe I’ll write directly on the printout and even write comments like I did on this one (Tasty).

Once I’ve made the recipe several times and like how it turns out, I’ll retype the recipe into the format I’m most comfortable with (see below). This format seems to be common with the Joy of Cooking cookbook that I’ve been using for years. I can glance down the bold-typed list and easily see the ingredients I will use.

This morning, after I retyped the recipe I decided to make a batch.

First, I preheated the oven to 400 degrees. Because I could see (down the list of ingredients) that I needed bananas and blueberries, I got them out of the freezer first to let them thaw. Then I chopped the walnuts so they were ready to go.

Step 1: I put all the dry ingredients into a big bowl:

Step 2: In the small bowl with the smashed banana I put the oil and the almond milk and mixed them up.

Step 3: Then I added them to the dry ingredients and stirred them up.

Step 4: I folded in the walnuts and the blueberries.

Step 5: I divided the batter into the muffin cups.

Step 6: I put them in the preheated oven for 23 minutes. They needed that extra minute because the bananas and blueberries were still pretty cold when I mixed them in.

They are a perfect mid-morning treat! Enjoy!

Please comment or email me directly at marykisner@comcast.net.

A Dog Shampoo for Fleas and Ticks

Now that I’ve fallen in love with making my own soap and learning about the uses of essential oils in skin care products, why not think about making a shampoo bar for dogs that would help with fleas and ticks? While I don’t have a dog to care for, my greyhound connection is always giving me great ideas about products I could make.

Usually, I start collecting ideas by going to Pinterest. That always gives me ideas about what other folks have tried. Lots of folks have dog shampoo bars for sale or recipes to make your own. They are “all natural” and “safe” and cute!

I guess a dog’s needs are becoming just as important as they are to their owners. The chemicals in commonly used treatments for fleas and ticks are pretty strong and frequently systemic.

“Give your dog this pill and fleas and ticks will die if they bite your dog.”

“Put this chemically-laced collar on your dog and the chemicals will be absorbed into their skin…and the fleas and ticks will die if they bite your dog.”

Then dog owners are faced with the side effects of the chemicals…skin irritation, vomiting or even respiratory problems. Just like with people, sometimes the side effects of a treatment are not worth it!

Basically, you want to remove the fleas and ticks before they bite your dog. Any soap and water will do the trick. Often Dawn dish washing liquid is used as the base for a liquid shampoo. Shampoo bars start with simple soap bases, like Goats Milk or Shea Butter soap bases. Then essential oils can be added that naturally repel fleas and ticks.

CAUTION: Do not apply essential oils directly to the skin. Essential oils are extremely potent and can cause irritation, itchiness, redness and other side effects when applied undiluted. Always use a neutral, plant-based oil that is safe for the skin (like coconut oil, sweet almond oil or jojoba oil) to dilute essential oils before applying them to your pet’s skin.

Just as burning a Citronella candle will keep mosquitos away, essential oils like Lemongrass, Eucalyptus and Neem oil have strong scents and will serve the same purpose.

The scent of Lavender oil naturally repels fleas and ticks, making it unlikely that any will burrow into your animal’s fur. It also prevents tick eggs from hatching, so if they did make it onto your dog’s skin, they would not be able to reproduce and would quickly die off. Lavender oil is extremely soothing and has antibacterial properties to help prevent infection.

Fleas hate the scent of Lemongrass oil and will generally stay away from it. The active ingredients, citral and geraniol, are natural repellents.

Cedarwood oil, Rosemary oil, Clove oil and Manuka oil are some of the others that are effective.

Basically, you can mix 5-10 drops of these oils to your dog’s regular shampoo and it will keep the pests away. In a solid shampoo bar, the oils are added after the soap mixture is melted and before pouring the mixture into molds.

You can also mix the oil with water and make a spray for your dog’s coat or pet bed. Adding essential oil to a diffuser is another great way to debug your house.

I made up a simple batch of a dog shampoo bar with Goats Milk and Shea Butter soap bases, Vitamin E oil (for a preservative), and Lemongrass, Lavender and Manuka essential oils. Amounts of each are still being tested with a pet groomer.

Now we’ll wait and see if the bars are the right size and shape for the groomer to use. My experiment of the day! Enjoy!

Please comment or email me directly at marykisner@comcast.net.

Garden Update: June 14, 2021

We had over 2 inches of rain last night and I thought I’d better see how beat down the garden was. Luckily, there are no puddles in the gardens so it looks like the garden beds are draining well.

The dogwood tree blossoms are still looking good, but I don’t know how long they will last.
The radishes on the right in the raised planter look pretty beat down. The lettuce looks ready to pick!
The geranium flowers always need to be trimmed after a heavy rain.
The Spearmint looks a little bedraggled. It will perk up!
Cucumber plants are starting to spread out.
The first cucumber!
Just planted more cucumber seeds two weeks ago so maybe we’ll have cucumbers later in the season.
The Chamomile always looks like it took a beating after a rain, but you can see the beginning of flowers.
Lemon balm and Stevia. Time to pick and dry some lemon balm leaves.
Basil and Rosemary. I’ll snip a few basil leaves today when the plants dry out a little.
The Thyme is finally starting to perk up.
Carrots and Lavender. Even after 2 inches of rain, wet but no puddles…good drainage! Right now we need sunshine!
Green and yellow beans.
Second planting of beans.
Tomatoes.
Blossoms galore!
And then there’s our diehard Echinacea! Come on guys…let’s get going! We have faith you can do it!

I must say, it’s days like this that give me hope that everything is right with the world…well, at least in my little corner of it! Enjoy!

Please comment or email me directly at marykisner@comcast.net.

From a Collection to a Collage

Profile of an Artist: Toni Duchi

Today I’d like to tell you about a very talented and artistic friend of mine: Toni Duchi. She also happens to be my connection to Nittany Greyhounds and has been a friend for over 30 years.

While she has many creative talents, I think her current endeavors in making mixed media pieces (also called Assemblage Art) have produced some stunning pieces. I call them collages, which is defined as…an artistic composition of materials and objects pasted over a surface. Let me share an example of one she made specifically for me.

The Collection

Two years ago, Bert and I drove across the country to visit Ted’s family in California. We planned our trip to go through many National Parks along the way. As we traveled, I tried to NOT collect tacky t-shirts that I would never again. Instead, I picked up some books about the parks we were visiting and a few postcards that did the views justice. I did take a lot of pictures, but nothing was as good as the professionally done ones that got chosen to be on a postcard. At gift shops there were some tiny medallions representing each park, and even some polished rocks from the Petrified Forest. I wasn’t sure what I would do with these things, but they fit in my suitcase!

Books and pamphlets.
Postcards
Rocks and shells

When I got home, I had a pile of stuff (called a collection) that was fun to look at, but eventually ended up sitting on a shelf.

Making a Collage with my Collection

Finally, I begged for help. Toni told me to choose a section of the country or part of the trip that had special meaning to me. It was obvious most of the stuff I had saved was from the Southwest; the landscape was so different from what I saw here in Pennsylvania.

I picked out an assortment of items from postcards, medallions, rocks, fossils and a Native American symbol (the metal hand below):

Part of my collection

I handed this stuff over and had no idea what she would create with it. Several weeks later, this is what she brought me!

My collage of the Southwest.

This shadow box collage is 12 1/2 inches by 7 1/2 inches. It beautifully represents my memories of the Southwest. The postcards became the background and the three-dimensional pieces built up the scene. She added a few pieces of driftwood she had on hand to pull it all together. Amazing!!!

This now sits on my desk and I’m reminded every day of the places we visited. The guide books are nearby if I want to read more. I still have more postcards and rocks leftover of the many other places we visited, but his collage pulls together a whole host of memories.

With all the various projects I enjoy doing, designing scenes like this is NOT one of my talents. Thank you, Toni!

A Second Request for Toni

I recently had another design dilemma that Toni helped me with. I was working on a new wall hanging for my living room. It will be a sampler quilt wall hanging using new colors for the room…silver and burgundy. Here are the blocks laid out on the floor to show the colors:

These quilt will have burgundy inside borders between the blocks.

I showed these blocks to Toni and asked if she’d make me something to go on the wall by the front door. Using her talents with polymer clay, she made me a framed collage made of individual tiles in silver and burgundy. Here are some pictures!

This piece is 16 1/2″ by 20 1/2″.
A close-up of the saying and the tiles. The pattern on each separate tile has been pressed into the clay.

Amazing! I will treasure this picture forever! Thank you, Friend!

If you’d like to see more of Toni’s work, her store on Etsy is called the PaisleyArtStudio. Her work often has tiny hidden greyhounds or inspirational sayings added to the collage. I really appreciate her ability to visualize and create such stunning works of art! Enjoy!

Please comment or email me directly at marykisner@comcast.net. Thanks!

This Monkey Was NOT My Friend!

In 1955-56 my family spent a school year in the Philippines. My father was on a sabbatical and taught at the University of the Philippines near Manila. My sister had just graduated from high school, my brother was 15 and I was turning 9.

Many animals in the Philippines were different from what I saw every day here in State College, Pennsylvania. Instead of tractors in the fields (or even horses like the Amish) the rice fields were being plowed by Carabao, or water buffalo.

Chickens were wandering near homes in our neighborhood and the roosters woke us up each morning. I remember my brother having fun fashioning a trap with a box, a stick attached to a long string, and some bait to try to catch a chicken. As I recall, he was successful, but the neighbors were not too happy. Of course, he had to let them go and the chickens continued to wander the neighborhood.

We were offered the opportunity to “adopt” a pet monkey while we were visiting in the Philippines. This monkey had been living at a nearby lab and was probably used in experiments…who knows (remember, this was 1956)! She was being “retired” and we could have her for a pet for a few months.

She lived outside our back door and was chained just like a dog. Her sleeping area was a box high off the porch. She had a bar to run across and could reach the ground with the chain on. She would leap off the bar and then climb back up the chain to her perch. My brother loved putting her on his shoulder and walking around the house.

When we were first introduced to this monkey in the living room, she looked so sweet. Her long arms could wrap around your neck like a big stuffed animal. I was sitting on the couch with my legs crossed and we watched her explore.

As she moved around, I uncrossed my legs and ACCIDENTLY bopped her on the head! She instantly leaped on me in anger and started pulling my hair! Yikes Not fun!

She finally calmed down, and everyone felt that she would be OK, I had just surprised her. From that day forward, she did not like me. She was smart and knew when I was around. I stayed out of her way!

Several times over the next few months, she would get loose and run to the roof of the house. It was hard to get her to come back. Soooo…Mary became the bait!

I would stand on the porch and call her. She would come running across the rooftop, jump onto my shoulders and start pulling my hair, screeching all the time. Mark would quickly grab her off of me and take her away.

Needless to say, I was not sorry to see her go back to the lab when we were getting ready to leave. My brother had a nice pet for a few months, but I don’t have fond memories of the animal. I hope she had a good life…someplace else!

I’ve been told that the memories that “stick” are ones with strong emotions attached…good or bad. I guess that’s why this one stuck with me all these years!

Healing Lotion Bars with Manuka Essential Oil

A lotion bar is a convenient way to have hand lotion nearby. They are easy to make, easy to carry in your purse or briefcase and safe to put in your carry-on luggage without worry about restrictions on liquids.

I’ve been making lotion bars for several years and I was interested in making them not only convenient but also healing for your hands. I tried to incorporate Manuka honey into the mix, but it doesn’t incorporate easily and I couldn’t add enough to make a difference. I tried using Aloe Vera gel, but that posed a similar problem. The heavy gel would sink to the bottom of my mix and the last bar I poured was big glop of Aloe Vera gel! Very frustrating!

I often start with Calendula-infused olive oil (see my post from April 7, 2021) and calendula has healing properties of its own, but I have a few folks that can’t use that herb. Lavender also has healing properties so I decided to use that.

About Manuka Essential Oil

Then I discovered Manuka Essential Oil was on the market. This essential oil has been found to have many of the same healing benefits of Manuka honey, and does not have the issue of being a bee product. The oil is made through steam distillation of the leaves, branches and other parts of the tree…no bees involved! That’s good, because folks who are very allergic to bee stings could also be triggered by honey and other bee products.

Manuka essential oil, like Tea Tree oil, possesses antifungal and anti bacterial properties. Unlike Tea Tree oil, Manuka oil is non-toxic and non-irritating. It is 20-30 times more active that Tea Tree oil against certain bacteria and more effective against strains of fungi and viruses. It is safe and soothes symptoms of itching skin, rashes and exzema.

Essential oils also do well when added to hot oil/wax mixtures. A small amount can make a difference. Now I had a better way to enhance the healing properties of my lotion bars.

(Please note: Do not use Manuka Essential Oil directly on your skin…always mix it with a little carrier oil like almond or olive oil.)

First Make Lavender-infused Olive Oil

Most lotion bars start with a good olive oil infused with herbs. Instead of using dried calendula flowers, I decided to use dried lavender buds. This would be better for some folks.

Infusing olive oil with lavender is the same process I used to infuse calendula (see the recipe below). I basically did the quicker method.

I started with a 1-quart canning jar and used about 2 cups of lavender flower buds. I simmered the oil/flower mixture for about 6 hours. Once I strained the flower buds out of the oil, I had about 2 cups of oil. I stored this oil in the refrigerator until I was ready to make these lotion bars.

Making the Lotion Bars

Now that I had the oil prepared, I was ready to make the lotion bars. Here’s the recipe:

You can see, the recipe is the same whether you are making Calendula-or Lavender-infused oil. The rest of the ingredients are shown below.

I measured and/or weighed out the ingredients into a glass heat-proof measuring cup, set the cup into a saucepan with water and slowly brought the water just to a boil. Then I reduced the heat until everything melted.

After removing it from the heat, I mixed in the Vitamin E (which acts as a preservative), the Lavender essential oil and the Manuka essential oil.

I poured the now clear, hot mixture into molds. This time I chose the paw print mold.

Your choice of mold will depend on what you plan to put them in and how many you want to make…the smaller the mold, the more you make. These bars do need a container of some kind. To take up less space they could be dropped into a zip lock bag, but the tins really are easier. I used 2 oz. tins with a clear window in the lid. I put a sticker/label on the back so folks know what it is (you may laugh, but I also make small soaps like this and it pays to label everything). When the bars are cool, I like to wrap them individually in clear plastic wrap so they look nice until I give them away!

When I package them, I include a card with the ingredients. On the back I’ve pasted a paragraph describing how to use them. The card says they will melt at temperatures above 75 degrees, but while they may soften, I haven’t found that to be a problem.

Now I’m ready to have lunch with some high school friends! Maybe they’ll agree to test these lotion bars! Enjoy!

Please comment or email me directly at marykisner@comcast.net.

Freezing Bananas

Just a quick post about freezing bananas. Why would you even want to do this? I use half a banana and a handful of frozen blueberries in a breakfast smoothie. Since it’s a real pain to keep ahead of bananas to use them before they spoil, I’ve found that if I slice and freeze them, they make the smoothie even better!

I try to buy bananas that are about the same ripeness so I can cut them up all at once. Folks must think I run a restaurant or have a big family!

I get the small snack-size Ziplock bags and start slicing.

I have a bowl ready for all the peels and an extra paper towel to put all the stickers on. Since I will add these peels to the compost bin, the stickers need to be removed. One year I did not remove them and after we had put the compost into the garden, I was finding the stickers intact years later!

I slice the bananas into 3/4″ slices and lay them flat in the bag; one banana will fill two bags (approximately).

When finished, the stickers go in the trash, the peels go into the compost bin and the bags of slices go into the freezer!

These slices are great for my smoothies and they also can be used in other recipes that call for mashed bananas. They thaw quickly and are easily incorporated into baked goods…and no over-ripe bananas sitting around my kitchen! Give it a try! Enjoy!

Please comment or email me directly at marykisner@comcast.net.