Ongoing Work with Greyhound Coats

With the temperatures hovering near zero degrees at night around here, I’m motivated to keep working with greyhound coats. I thought I’d let you know some of my thinking about why the coats are made the way they are and where I get my supplies. When making one of something, it’s easy to source materials from the local fabric store. When making four of something a week, every week, it’s annoying to pay retail prices.

The Design of the Pattern

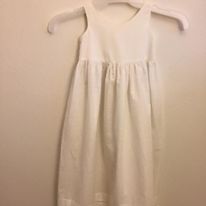
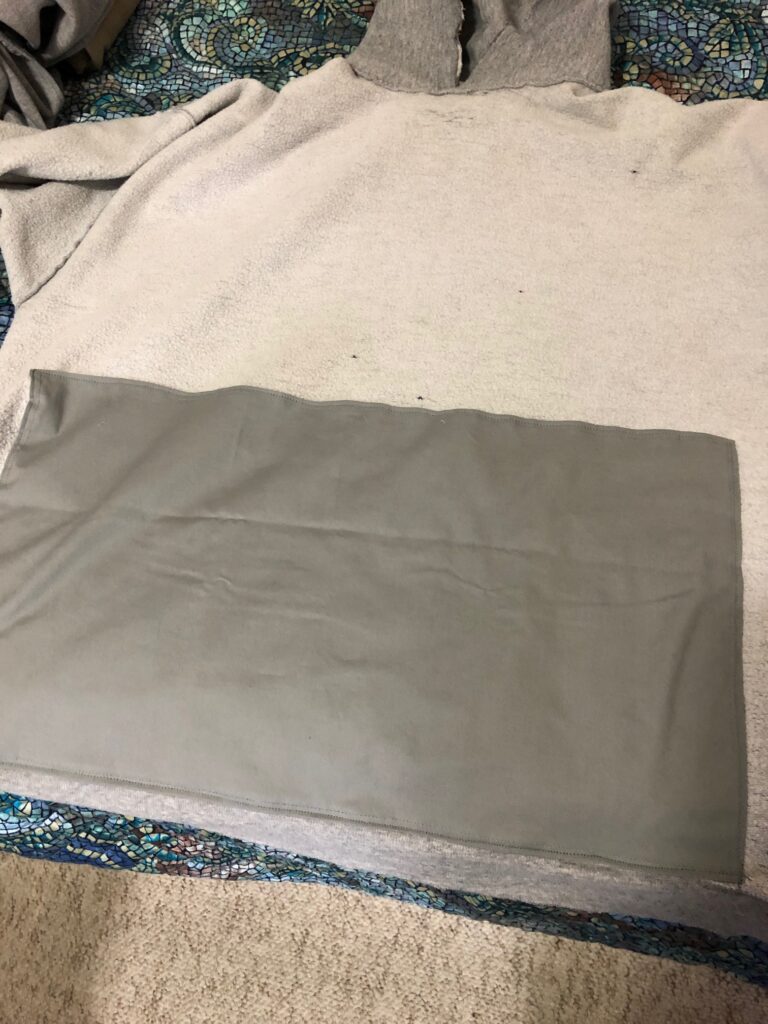
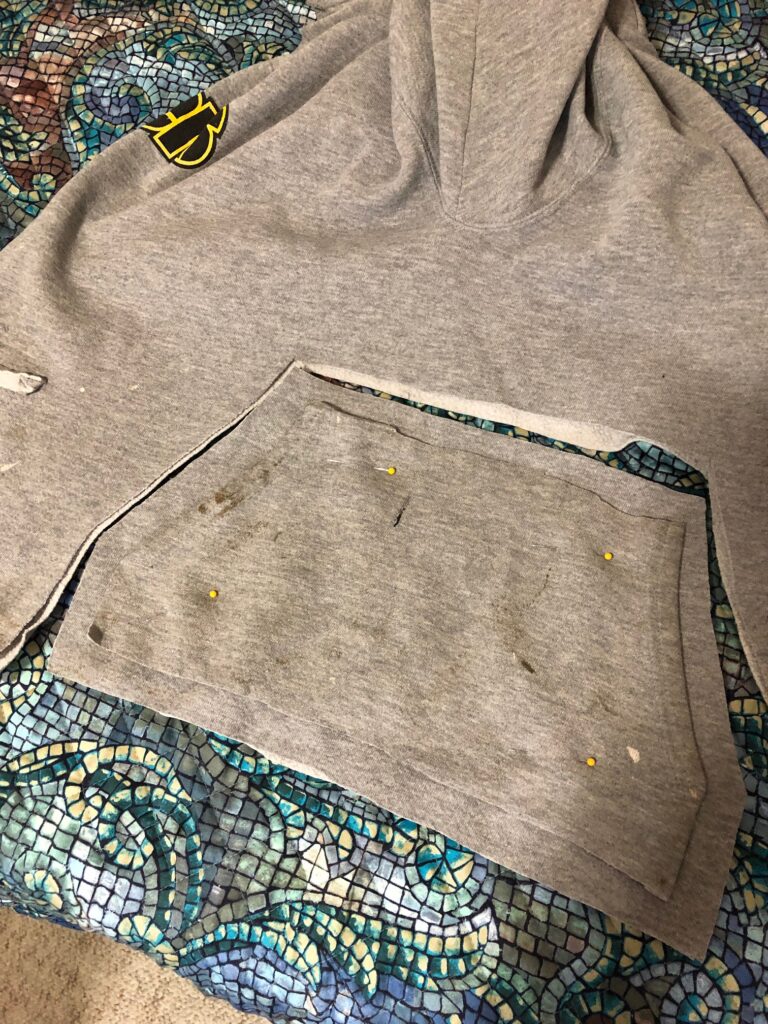
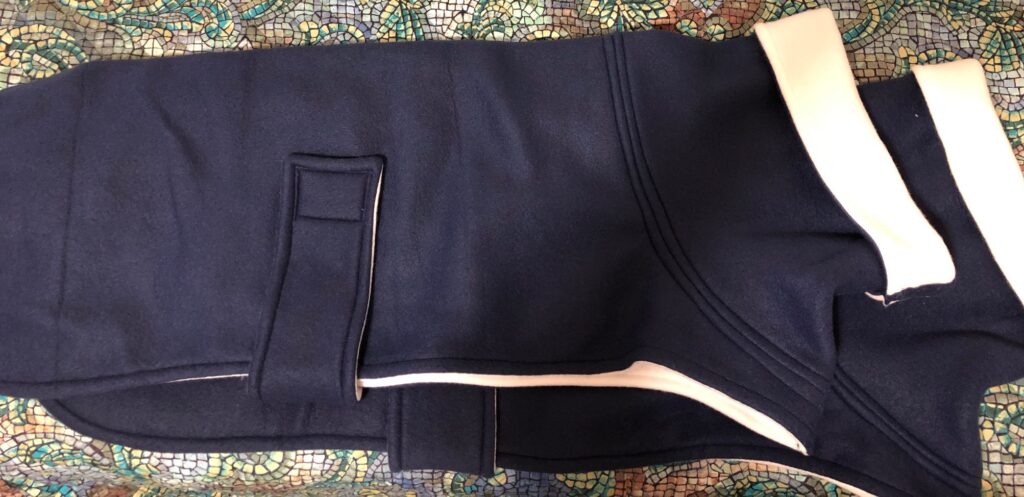
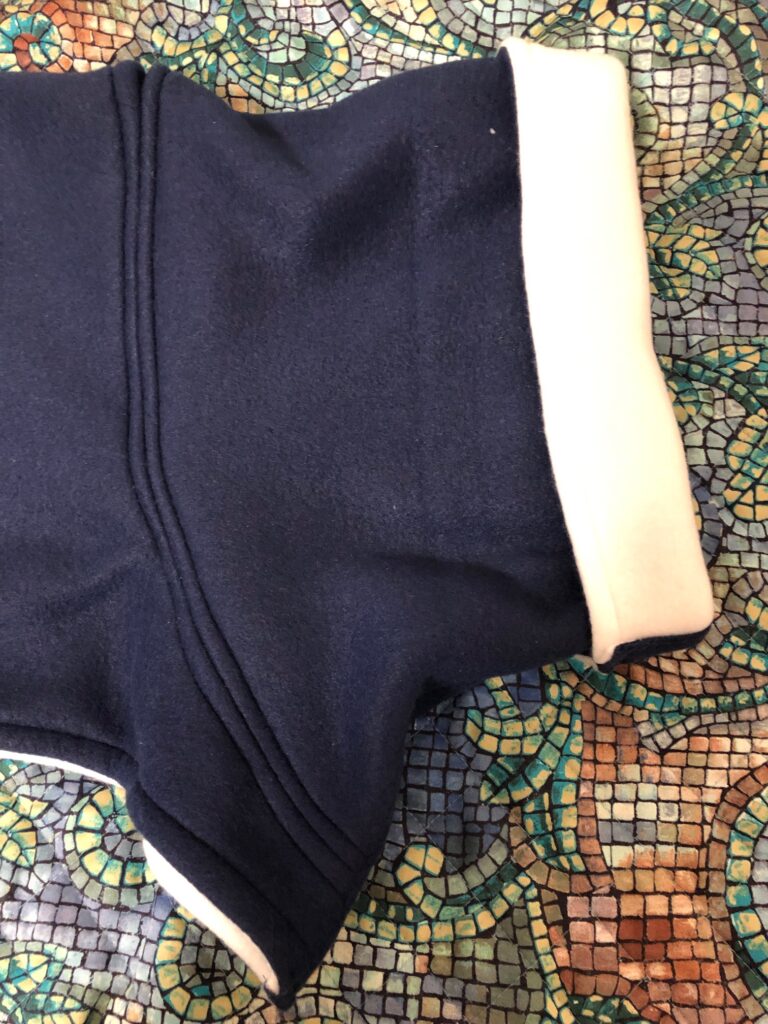
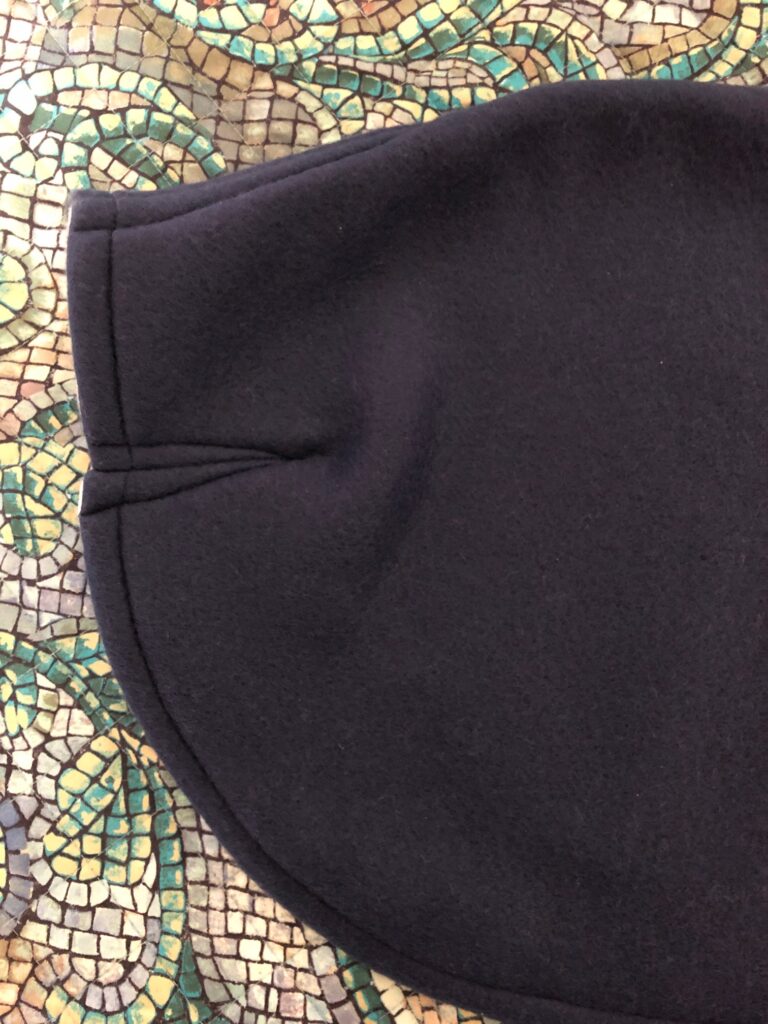
The coat is designed to use as little Velcro as possible, especially at the neck area. I don’t want the Velcro to touch their skin and cause irritation. The dogs have long necks and need the benefit of a “snood” or turtle-neck shape that could even cover their ears if necessary. The coat also needs to cover their rear end. This helps keep the coat positioned on their bodies and helps to keep them warm.

Look how long the neck is.
This dog is ready for a Pennsylvania winter!

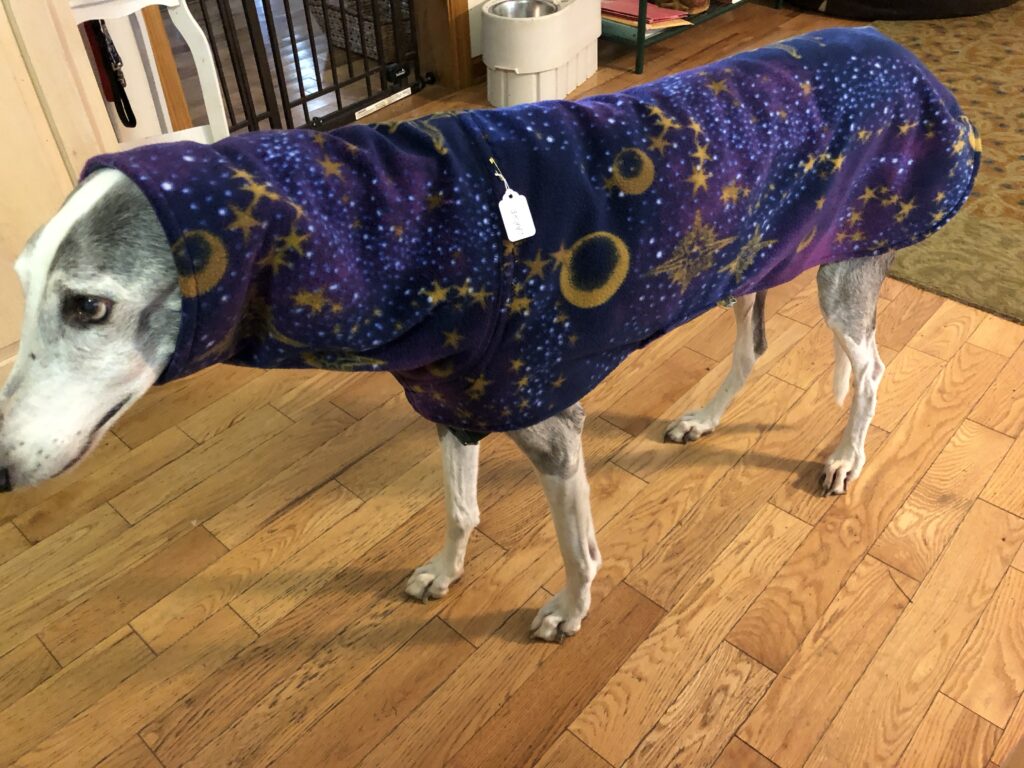
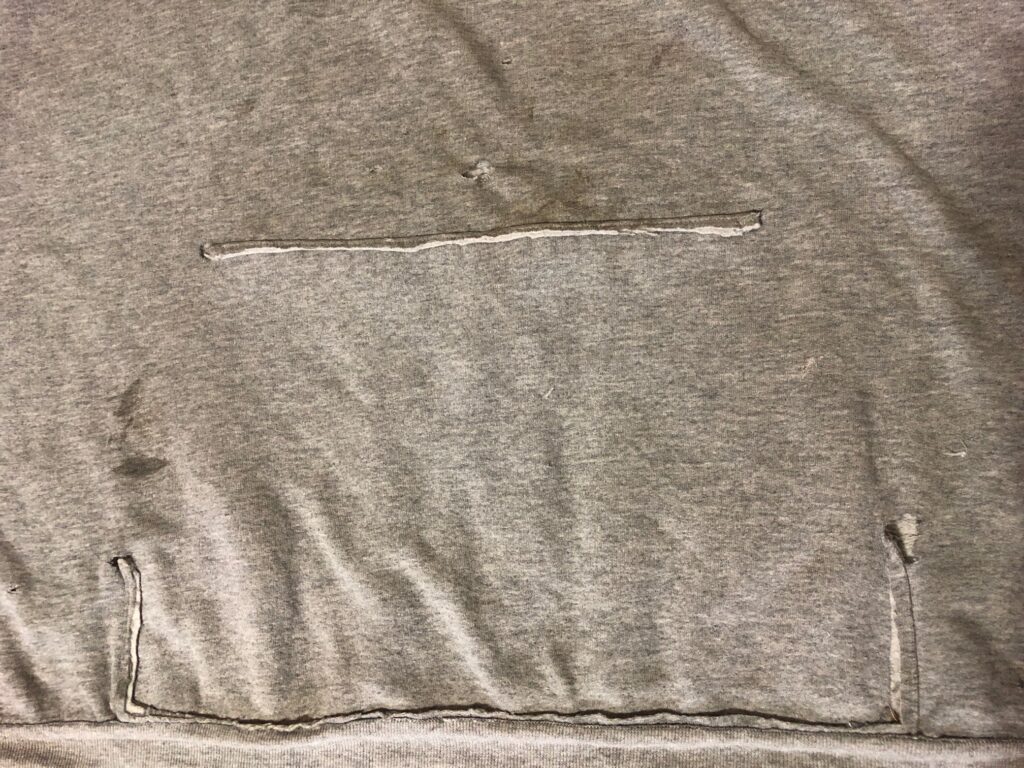
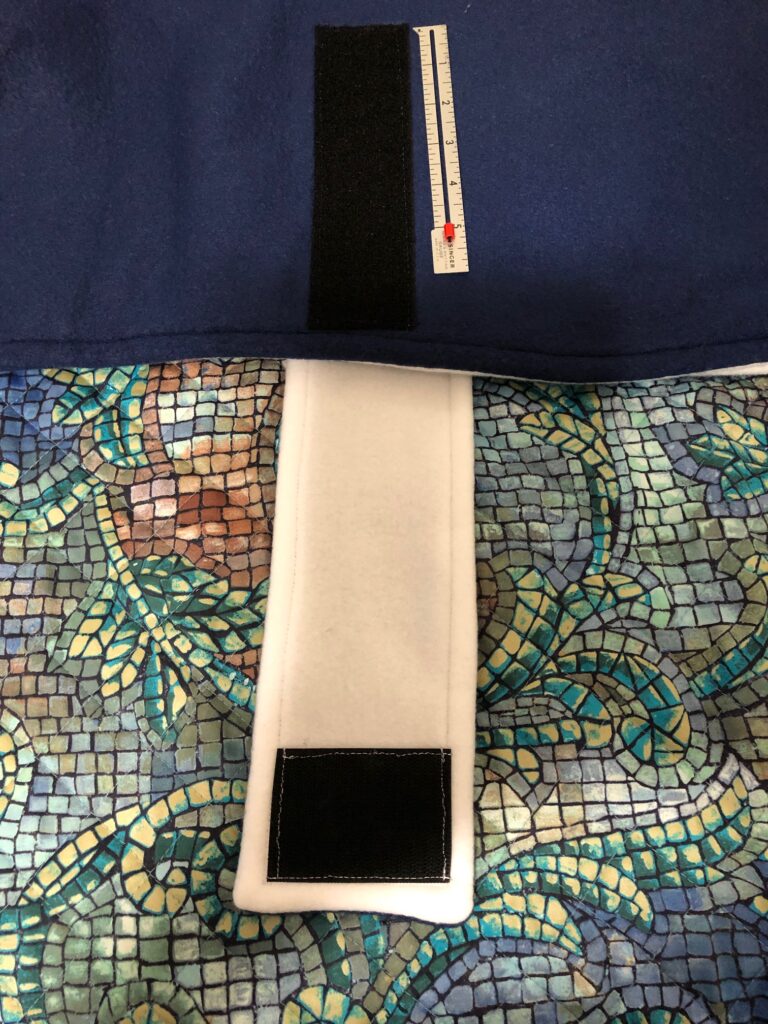
When you look at the coat flat, you can see the basic shape, including the long neck and the darts at the back end to give it shape. Finally, the strap needs to be adjustable, because these coats are made for an unknown dog, not a specific dog. If it were my dog, I could make the strap and Velcro the right length.
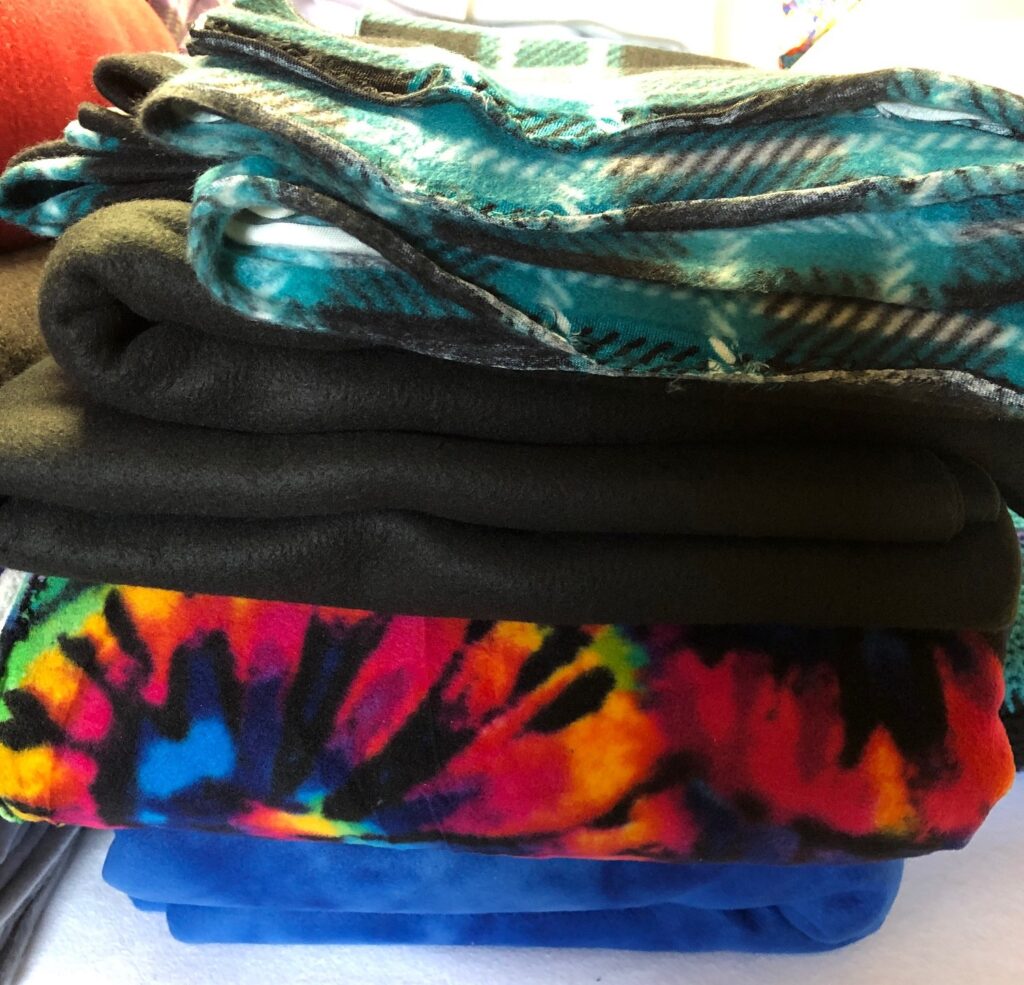
Close up of the neck piece.
The darts at the back give the coat some shape.
The length of the strap and the Velcro on the coat are more than enough to accommodate most dogs.

The Fabric

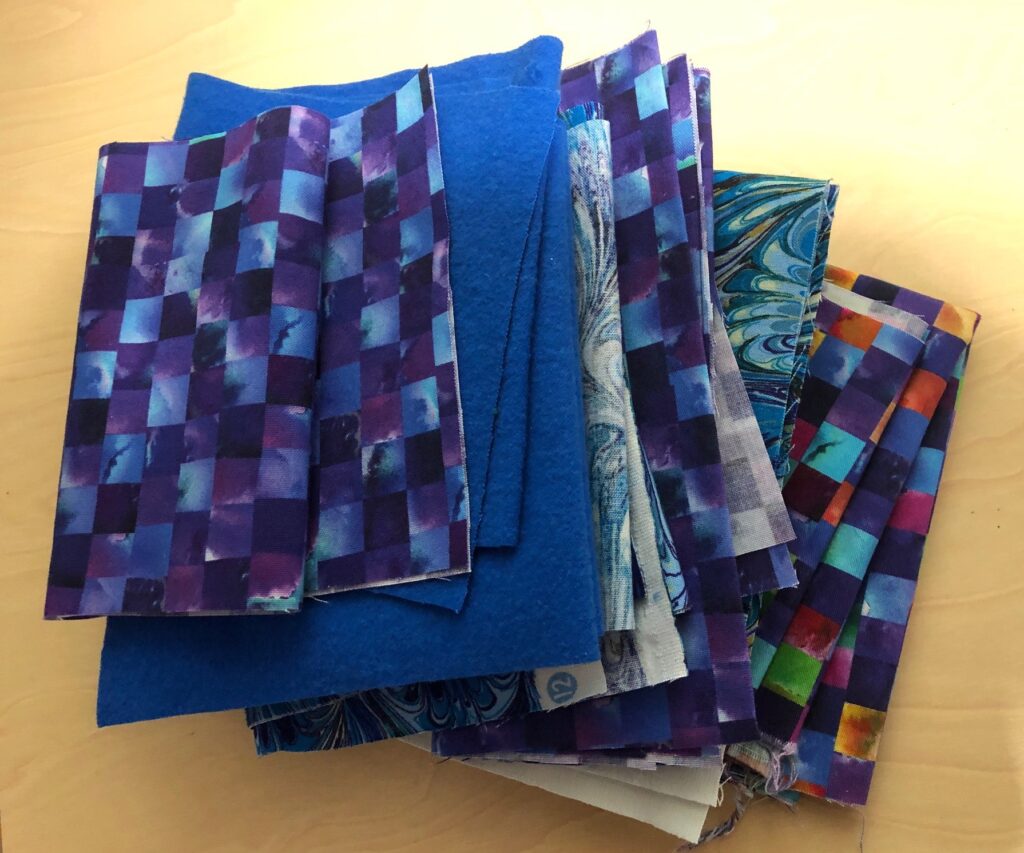
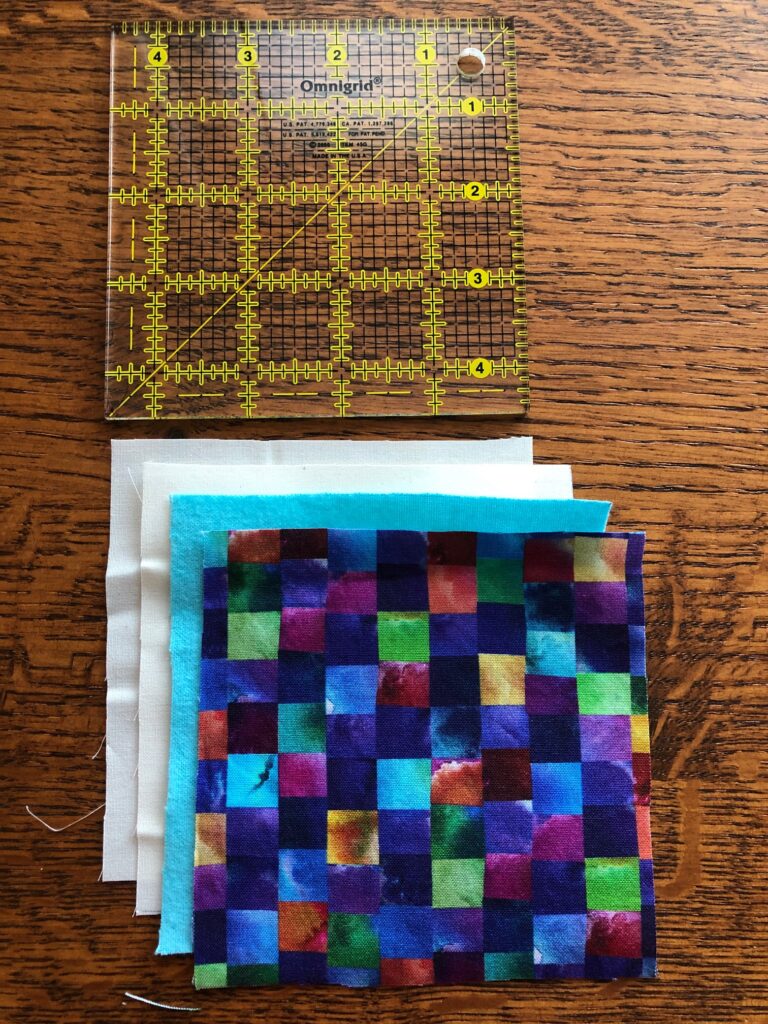
Each pair of greyhound coats (1 large and 1 small) takes 1 1/2 yards of fleece for the outside; another 1 1/2 yards for the lining. Most of the time, fleece is on sale at Joann Fabrics. If I pay attention, I can use a coupon that gives me an additional 20% off so I don’t feel so bad shopping there. I try to coordinate colors for the outside and lining. With three yards of each, I can make 4 coats (2 large and 2 small). I bring it all home and begin!

A few colors waiting for me!
I think the tie-dye fabric should be striking against the snow!

The Velcro

The Velcro is the weak link in supplies. It is hard to find 2″ Velcro, and I need twice as much loop version as hook version. Years ago, I found a wholesale company where I could buy it online from California. I believe their materials are all made in the USA. You can buy Velcro (1/2″ to 6″ wide), elastic, thread and more at their site. It’s a great resource if you are involved in any kind of bulk sewing, like for a scout troop or a church group. Their website is: https://www.calthread.com.

The Labels

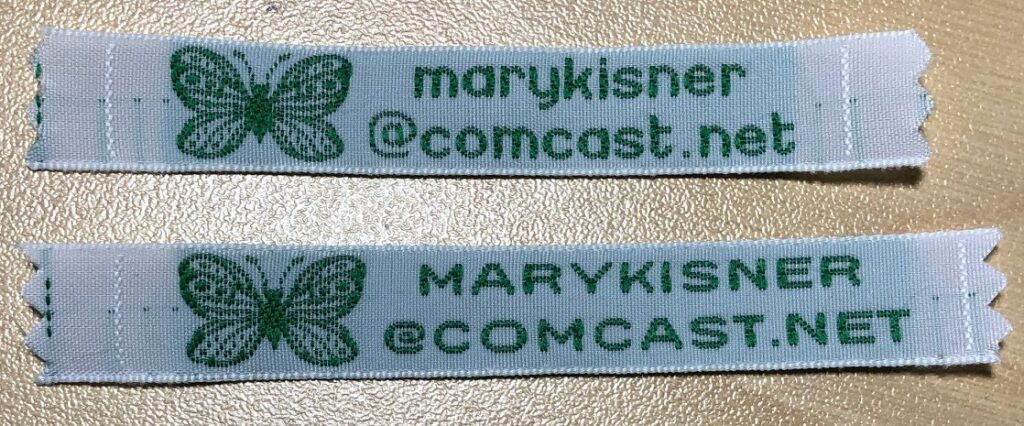
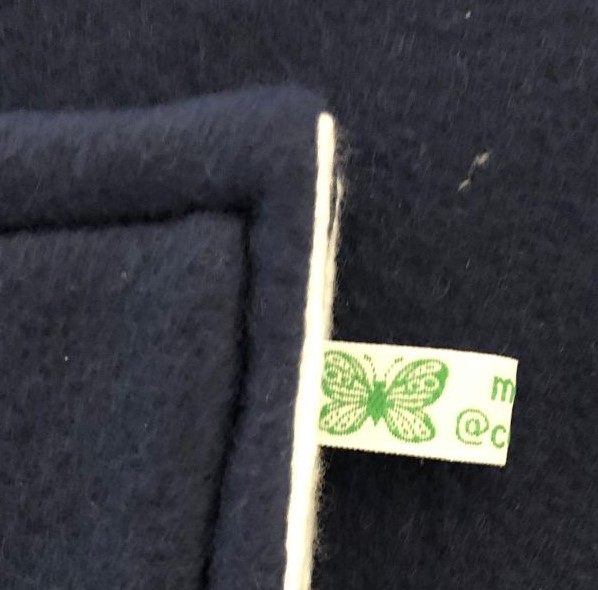
I also want to identify that I made the coat and how to contact me in case it needs a repair. To do this, I’ve begun using cloth labels from a site in New Jersey (https://heirloomlabels.com). It’s easy to order, affordable and doesn’t take long to receive. This last time, I didn’t get my order quite right…but I think it’s OK. People should still be able to find me. When I got my new order, I realized I had forgotten to make the text all lower case! So, of course, they did exactly what I asked for! Proofread carefully!

My original order.
My new order. All CAPS. Oops!

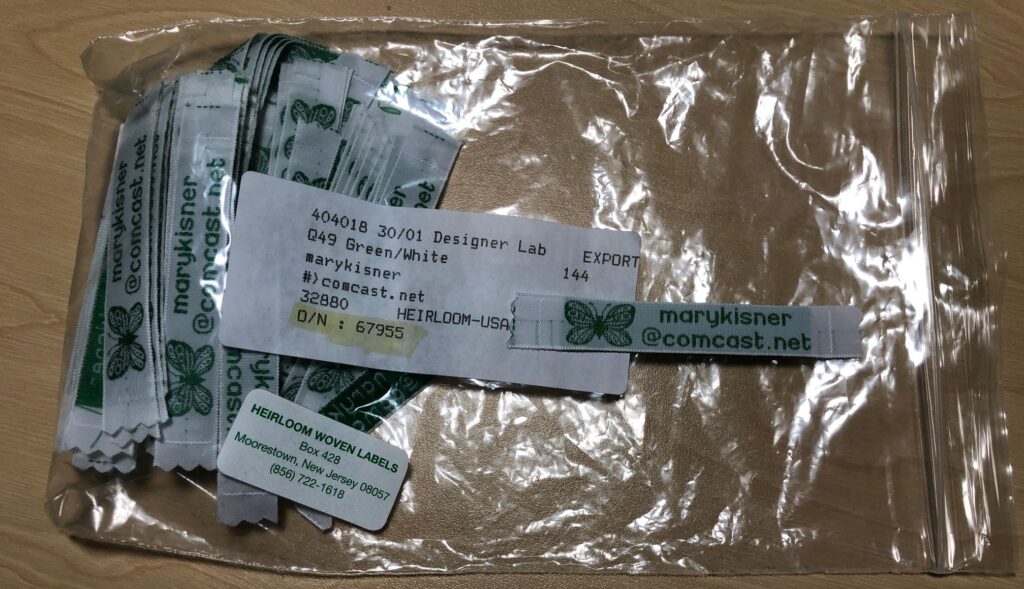
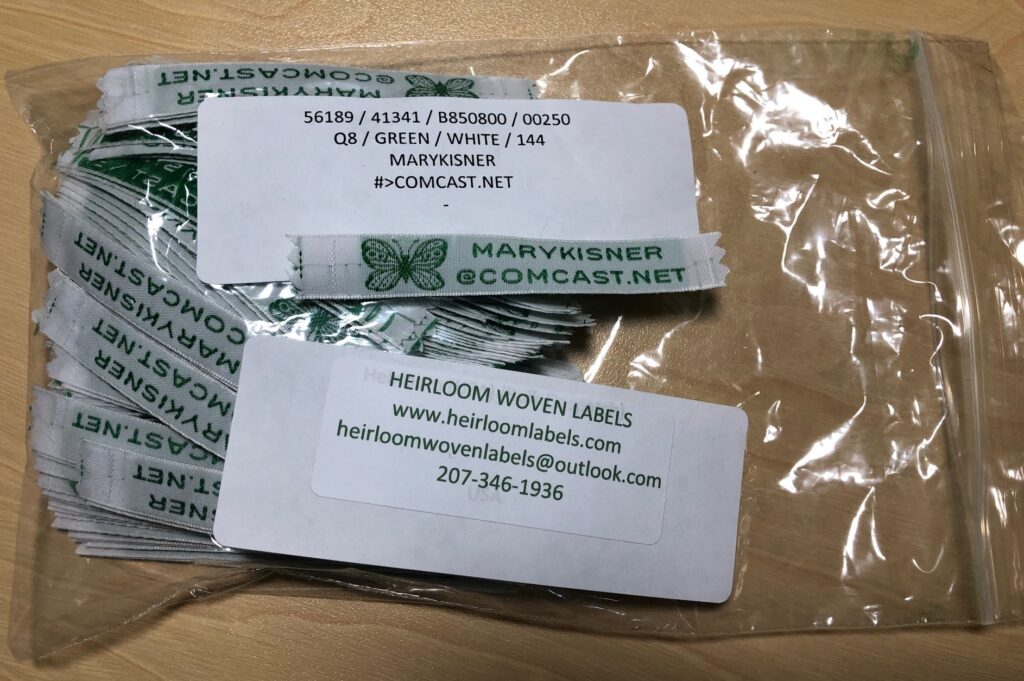
I attach the label to the base of the strap.

It wasn’t until I took this picture, that I realized I had forgotten to sew the labels to the strap on the coat I just finished! (Look at the pictures on the navy coat above!) Grrr!

In case you were wondering what I was doing between making stuff with essential oils and beeswax, this is it! Got to keep those dogs warm this winter! Enjoy!

Please comment or email me directly at maryjkisner@gmail.com.

Brainstorming Ideas: What to do with Empty Tins

I’ve been staring at two boxes of metal tins that have been on my shelf for over a year. I thought I was going to make tiny travel sewing kits, but never quite got around to make them. Was I really going to buy a bunch of tiny scissors? Would anybody need such a thing? Since I couldn’t decide, nothing happened and I put them on a shelf.

I finally took them down off the shelf today to see if I was any more insightful about what to do with them. I have two sizes of tins.

Box #1

One box contains 4 sets of heart-shaped tins with lids. The largest is about 4″ across and 1 1/2″ deep. The lid is not attached. Two smaller hearts are stacked inside.

I thought I could use my covered button magnet for decoration on the top of the largest heart, and with additional magnets inside things like a needle and pins could be secured…but that’s as far as I got.

I ended up putting the heart-shaped tins aside for now.

Box #2

The second box has 28 rectangular tins, 3 1/2″ by 2 1/4″ and 3/4″ deep. The lids are attached. (Originally it was a box of 30…I must have used two for something!)

I still couldn’t decide what to do with them, so I took myself out to dinner at Cracker Barrel to think about it! While I was eating, I pulled up Pinterest on my phone and searched DIY Projects with Tins. Wow! What a treasure trove of ideas! Here are few ways folks have used the tins:

A sewing kit (from Pinterest)
Another sewing kit (from Pinterest)
A travel game (from Pinterest)
A jewelry box (from Pinterest)
A miniature doll house (from Pinterest)
A travel coloring box (from Pinterest)
Decorated lids of gift boxes (from Pinterest)
An Advent Calendar. Each tin could hold a surprise! (from Pinterest)

After dinner, I wandered around Cracker Barrel to see all the cool stuff for sale. Guess what I found!

A travel nail kit (from Cracker Barrel)
A travel trivia game (from Cracker Barrel)

O My Goodness!! Now I have so many ideas swirling around in my head I’m going to just have to let them simmer for a day or two. Be careful with brainstorming…you may be sorry you asked for ideas! If you have any ideas that I should try let me know! Or try them yourself!! Enjoy!

Please share your ideas here or email me directly at marykisner@comcast.net.

Garden Dreams 2022

Right after Christmas the garden catalogs started to arrive. With the snow on the ground, it was easy to start dreaming of the garden of 2022.

This is the time to reassess what worked and what didn’t last yer. The plants in one of our garden beds closer to the house seemed to have trouble all summer…no matter what we planted. Years ago, that bed held strawberries. The first and second year they were terrific. After that, the soil did not cooperate. We had a year or two of great cucumbers, and then we couldn’t get anything to thrive in that bed. We might have to stick with flowers there.

We’ve decided to stay with the Burpee Company for seeds. It is a Pennsylvania company and hopefully, seeds will be appropriate for our area. Their catalog featured the SuperSauce tomato that we grow each year. It has been great for slicing and cooking.

So many beautiful pictures of vegetables!

Then we focused on the seeds we had decided did well in the past for us. The beans were prolific, the lettuce was yummy and the last of the carrots stayed in the ground until Christmas. We still have some in the refrigerator! We’ll try cucumbers someplace else in the garden and hope they do well.

Yesterday I had a chat with our son-in-law Steve, to see if he could make us another raised planter. It worked so well for the lettuce and radishes. I’d like to add a few other greens, like Swiss Chard, Spinach and Radicchio for salads.

And then he mentioned he was going to try to make a strawberry planter…and I love strawberries…so I ordered some plants too. Hopefully, I can figure out a place to plant them if his planter doesn’t work out!

Dreaming of the future garden is a great way to spend a cold January day! Enjoy!

As always, please comment or email me directly at marykisner@comcast.net.

The Travels of the Lowry Baptism Dress

An heirloom baptism dress has been in our family for over 100 years. It was worn by my mother, who was born in 1912, and most recently by my niece’s daughter, born in 2016. It is made of very delicate fabric and has a matching slip.

I do not know where the dress was stored or who used it before 1977, when my mother offered it to my daughter to wear. After that, the dress stayed in my collection.

Before passing the dress on to others in the family, it needed to be cleaned. I did some research on washing vintage fabric and found this washing powder that said it would lift stains and not harm the fabric. It has been useful on all sorts of vintage fabric, from delicate handkerchiefs and linen table cloths. It worked fine for the baptism dress

Once the dress was cleaned up, I offered the dress to any of the girls being born in the family. I guess the boys could have worn it too, but no one showed an interest.

Here are the pictures of the babies born in our family over the years that wore the dress. (Family…if I have missed any, and you have photos to add to my documentation, please let me know.)

Ruth (my mother) (b. 1912, Minnesota)
Kathy (b. 1977, Pennsylvania)
Ashley (b. 1988, California)
Quinn (b. 1997, Texas)
Luca (b. 2003, Pennsylvania)
Aislinn (b. 2006, California)
Anna (b. 2012, Pennsylvania)
Nora (b. 2016, Illinois)

You can see the dress has been shipped back and forth across the country for over 30 years! One of the challenges has been to get it shipped in time to be worn when the child is about 3-6 months old. All I asked was for a photo to be taken. The dress did not need to be worn for an actual Baptism ceremony. I wasn’t sure the fabric could handle the motions of a small child.

Now the dress is wrapped in a pillow case and filed away until the next generation needs it. I’ll pass it on…probably to my daughter…to share with her cousins as their children reach the right age. For now, it is safe and documented so far. Like all heirlooms, who knows what adventures it will have!

Please comment or email me directly at marykisner@comcast.net.

Preserving Old Photos and Slides

I have been fortunate to have inherited my grandfather’s collection of photographs and various stories about the Bixby side of the family. He wrote many stories about his experiences growing up on a farm in Minnesota in the early 1900’s for the local historical society in his town. These stories have been edited and typed up by my cousin so they can be distributed around the family. Many of the old photographs, often glued or printed on heavy cardboard or card stock have been laid flat on a scanner to be preserved as a digital file. Yet, the old photographs continue to survive tucked into filing cabinets ready to be scanned again. There are not as many photos as today and most are formally posed instead of informal shots.

The Jacob Bixby family. My grandfather, John, is the tall boy in the back row.

Photos taken in the last 15 years or so have been taken with digital cameras and more recently iPhone cameras. They have been shared around the family, printed and framed and even printed on the side of mugs and coffee cups! They are less often formally posed to commemorate a wedding or a birthday. We have collected huge piles of photos and only a select few get preserved.

My granddaughters Aislinn and Annika.
My daughter and family…Steve, Ben, Anna and Daisy

In between the photographs from my grandfather’s generation and my children’s the most common way to document with photographs was with slide film. We have thousands of slides from family vacations, our first apartment, our first dog, etc. My Dad used slide film to document our travels to the Philippines in 1955-56. I have boxes of his slides that I would love to view and share…if I could just get them digitized (we don’t even have a slide projector any more). Another issue, he used a mix of Ektachrome and Kodachrome film and the former did not hold true colors over time. Those slides are not worth trying to save.

Just a few of my Dad’s slides.

To the rescue…an app for my iPhone! I found an ad for the SlideScan app ($29/year). If you look it up at the App Store there is a nice video about how it works. It looked pretty simple…hold a slide in front of a white screen and using the app, press a button on my phone and it will scan the slide and save it digitally.

I found a few challenges in using the app. One, I couldn’t figure out how to get a white screen on my computer; two, I couldn’t hold the slide still enough; three, I couldn’t hold my phone still enough while pressing and holding the button for three seconds with one hand!

With Bert’s help, we found a very affordable light board. It plugs right in with a USB to a regular plug or to the computer. Here’s the box it came in (from Amazon, of course!):

That took care of the light. Then, I needed a way to hold my camera steady while I held the button for three seconds. Bert found this CamStand that looked sturdy and adjustable:

Here’s the assembly sheet, because of course it came as a pile of screws and rods:

So, once everything arrived and was set up, I could put the light board on the stand, put my phone in the holder, put a slide on the light board and press the button for 3 seconds to scan a slide.

Now, I could work with the digital picture! I can hardly wait to capture more photos!

Here’s our family sitting on a rocky hill (called Mars Hill) at the base of the Acropolis in Athens (1956).
Mary by the columns of the Acropolis in Athens, Greece (1956).

The digital photos are stored in the app on my phone. I can email them to myself, name them and organize them. Yea!! A solution to a problem that’s been bothering me a long time. Stay tuned for more stories about our travels way back then! Enjoy!

Please comment or email me directly at marykisner@comcast.net.

Time to Make Pizza

Many of you know that I can’t eat eggs or dairy products. However, I can still eat meat…so I’m a vegan that can eat meat! Go figure! Commercial pizza is out of the question because of the cheese restriction. I’ve tried pizza without cheese and it just doesn’t taste right. So, we basically avoid buying it. I’ve tried making my own pizza, but still…no cheese makes it a boring meal.

If you recall, back in August when we were blessed with an overabundance of lovely tomatoes (see https://marykisner.com/time-to-make-pizza-sauce/), we made a big batch of sauce and labeled it pizza sauce knowing it could be used with many other recipes. I was always hoping I would find a good substitute for the cheese.

We were cruising Trader Joe’s last week and found a bag of vegan shredded mozzarella style cheese…a “cashew cheese alternative.” The description on the back of the bag sounded interesting. Time to give pizza another try!

I really do hate to waste my time making pizza crust from scratch if I won’t be able to eat it. Unfortunately, the prepared pizza crusts found at the grocery store (the brand is Boli…or something like that) say they have “milk” in them…which usually means they’ve seasoned it with Parmesan cheese and Italian seasonings. However, we found these Mediterranean Flat Breads that baked like a thin crust pizza shell! They worked great!

Bert likes cooked meat on his pizza so he cooked hamburger with onions. We opened a can of sliced black olives and a can of sliced mushrooms. Bert used regular cheese and I tried the new stuff. One half-pint jar of our pizza sauce was just enough for both pizzas.

Here’s my pizza ready to go in the oven.

After 15 minutes at 365 degrees, my fake cheese looked sort of melted. However, it tasted GREAT!! I consider this a win! Boy am I glad we made all that sauce. Now it would be worth it to make my own crust…or not! The flat bread came out crunchy and was delicious.

Almost forgot to take a picture before I polished it off!

Now I’ll be excited to take good care of next year’s tomatoes, knowing we’ll put the sauce to good use! I can see t his fake cheese being useful in many dishes where cheese is used as a topping or minor ingredient. I’m not sure I’d like a whole dish of macaroni and this cheese. It tasted good but the mouth-feel was a little different. However, this pizza was a great success. Give it a try! Enjoy!

Please comment or send me an email directly at marykisner@comcast.net.

More Creative Mending

My dear son-in-law gave me a new challenge at Christmas time. He is in construction and landscaping and his hard work is reflected in these sweatshirts! (I do suspect he asks me to try to mend things just for fun.)

This particular challenge involved two hooded sweatshirts that probably should be thrown out, but the main issue was the pocket pouch on the front of each. They were ripped and shredded because he shoves his keys and tools, etc. into them. He also gave me a third sweatshirt that I could use as replacement fabric. Apparently, he wants to have his company logo visible, not a football team. I offered to buy him a new sweatshirt, but noooo, he thought I should try to fix these! See what I mean…he’s teasing me!

Here are the steps I followed to mend them:

First, I cut the damaged pocket pouches off the shirts.

Note the stress holes where the old pocket was attached.

Next, I prepped the inside front of the shirt with a large piece of sturdy cotton so the pocket would have a stable base to be sewn to.

Then I used the old pocket as a pattern on the extra sweatshirt to cut two new pockets. I used the fabric under the arm because it didn’t have much wear and tear.

I sewed a hem on the curved sides of each pocket and placed them on the front of the shirt. I was not about to try to unstitch the leftover pieces of the old pocket. They aren’t pretty, but don’t affect the new pocket’s use.

I pinned and sewed the new pocket down.

The inside looks like this.

I also took the ribbing off the bottom edge of one of the old shirts because it was shredded. I used the ribbing off the replacement shirt and fixed that too.

If either of these sweatshirts end up back in my mending basket, I guarantee they will be disposed of! However, each time I take on a job like this, I learn something new! Enjoy!

Please comment or send me an email directly at marykisner@comcast.net.

Pocket Hand Warmers

After making hot or cold neck wraps last week I was left with assorted scraps of fabric.

I started cutting some of the scraps into 4 1/2″ squares. I made little pouches (like a bean bag) and filled them with 1/4 cup of flax seeds. They can be warmed in the microwave and placed in your pockets when you head out on a cold day.

To make two pocket warmers, you’ll need 1/4 yard or one fat quarter or scraps of:

cotton fabric, cotton flannel and muslin; cotton thread; and 1/2 cup flaxseeds.

Here are steps to make one pocket warmer:

Step 1: Cut out two 4 1/2″ squares: one of cotton and one of cotton flannel fabric. Cut out two 4 1/2″ squares of cotton muslin.

Step 2: Stack the squares with the fabric pieces right sides together and the muslin pieces on each side.

Step 3: Stitch around the edge, leaving a 2″ gap so it can be turned right side out. Trim the corners.

Step 4: Turn the pouch right side out and top stitch around the edge, leaving the gap open for filling.

Step 5: Fill the pouch with 1/4 cup (plus a little more if desired) of flax seeds.

Step 6: Top stitch the gap closed.

To Use the Pocket Hand Warmers:

Place two hand warmers into the microwave and heat for about 15-20 seconds. Put them in your coat pocket. They should stay warm for 15-20 minutes and leave behind residual heat for about 30 minutes.

This was a great way to use up fabric scraps and doesn’t take very long. Enjoy!!

Update on Several Projects

Many of the projects I write about are experiments and represent the first time I make something. After I’ve made something several times my techniques get more consistent. Sometimes the project is a total bust…it doesn’t work like I thought it would. Other times, because I made a dozen of something, you did not see the final result. I’d like to update you on a few of the projects I’ve made over the last several months.

This post will share 6 project updates:

  1. The car air freshener…does it work?
  2. A better way to store the lotion bars.
  3. The DIY perfume experiment…which formula worked?
  4. The finished ornaments made with recycled vintage lace.
  5. A tool to keep the roller balls from falling over.
  6. Using a pipette to transfer hot liquid instead of pouring into tiny containers.
  1. The car air freshener…does it work?

Here is the original post: https://marykisner.com/make-a-simple-car-air-freshener/

Quick answer…YES! It worked great. After soaking the wood several times with essential oil I put it on the vent in the car. the first day it was quite strong (probably because the oil was freshly applied) but once it dried out a little it was perfect. The scent lasted over 3 weeks. I started a second one with a different scent and stored it in a zip lock bag until I needed it. I will keep them in labeled bags so I don’t mix them up.

2. A better way to store the lotion bars.

Here is the original article: https://marykisner.com/healing-lotion-bars-with-manuka-essential-oil/

The lotion bars store well in the 2 oz. tins that I’m using…EXCEPT…they tend to stick to the smooth inside of the tin. After using the plastic grid squares that I used for the travel soap (https://marykisner.com/travel-soap-that-works/) I thought I’d try it in the lotion bar tins. It worked great! It kept the bar from sticking to the tin. A simple solution to an annoying problem!

I cut this 12″ x 18″ sheet into 2″ squares and trimmed the corners.

3. The DIY perfume experiment…which formula worked?

Here’s the original post: https://marykisner.com/diy-perfume/

I ended up making only the roller ball perfume and the solid formula perfume. The spray will have to wait for now. The solid perfume was harder to apply and the scent did not last. The roller ball perfume was OK but applying it was much easier. HOWEVER…after a few weeks of just sitting on my dresser, I shook it up and tried it again. Amazingly, it smells wonderful and lasts all day. I was so surprised! I had read that the scents would blend and mellow over time…and they did! I guess the roller ball perfume, made of just grapeseed oil and three scents, will be something I’ll use more frequently!

4. The finished ornaments made with recycled vintage lace.

Here is the original article: https://marykisner.com/adding-vintage-lace-edging-to-ornaments/

I worked on the ornaments for a month or two and by early December, they were all done. Before I gave them out as gifts at a luncheon, I displayed them on my “ornament tree” so I could take a picture of them. They did not all fit but enough did to show you the variety. I have a few left over, so I’ll add them to my stash of homemade ornaments.

5. A tool to keep the roller balls from falling over.

Here is the post about using the roller balls: https://marykisner.com/essential-oils-and-nail-care/

It wasn’t until I was trying to make more than one roller ball at a time that I realized it was important to find a way to keep them from falling over while I carefully dropped essential oils into them. When making the nail serum I finally used one of the tiny cardboard boxes they were mailed in to keep them upright. That worked, but they were not very durable. Bert to the rescue! He had just made me a holder for the lip balm tubes. The holes were too small for the roller balls. So…he made another one with bigger holes. I think I could use it for the lip balm tubes too. They don’t have to be held tightly, they just have to not fall over if I bump them. Problem solved!

This small divided cardboard box worked but the tubes were almost too close together.
The roller ball holes were just a little bit bigger. I think I could use this for the lip balm tubes also.

6. Using a pipette to transfer hot liquid instead of pouring into tiny containers.

Here is the first attempt to pour into 5 ml containers: https://marykisner.com/essential-oils-and-nail-care/

When I melt ingredients I work with heat-safe glass measuring cups. They work great to pour into large molds, but pouring into tiny tubes or containers is impossible. You saw the evidence of that when I tried to pour hot melted mixtures into tiny 5 ml containers or lip balm tubes. I discovered some recipes suggested using a pipette, which looks like a tiny turkey baster! What a great solution! I ordered a bag of 100 disposable tubes and I’m no longer afraid to try to fill tiny containers.

What a mess!
The disposable pipette shown at the bottom of the picture solved the problem!

That’s an update on a few projects. Every time I try something new I learn something about my ingredients and my tools. If nothing else, I’m having fun! Enjoy!

Please comment or email me directly if you have questions: marykisner@comcast.net.