Making Your Own Raised Pretzels

Looking for a fun activity to do with a group of people…kids, teens or adults? Making raised pretzels is pretty simple and you end up with a snack to share! Here’s one of my favorite recipes to make that is sure to get everyone involved!

This is a simple yeast bread recipe…great for new bakers to start with. It is a small batch recipe and can be mixed up by hand. My directions are pretty detailed because this recipe will be used by a few young people in the family that are new to baking yeast bread.

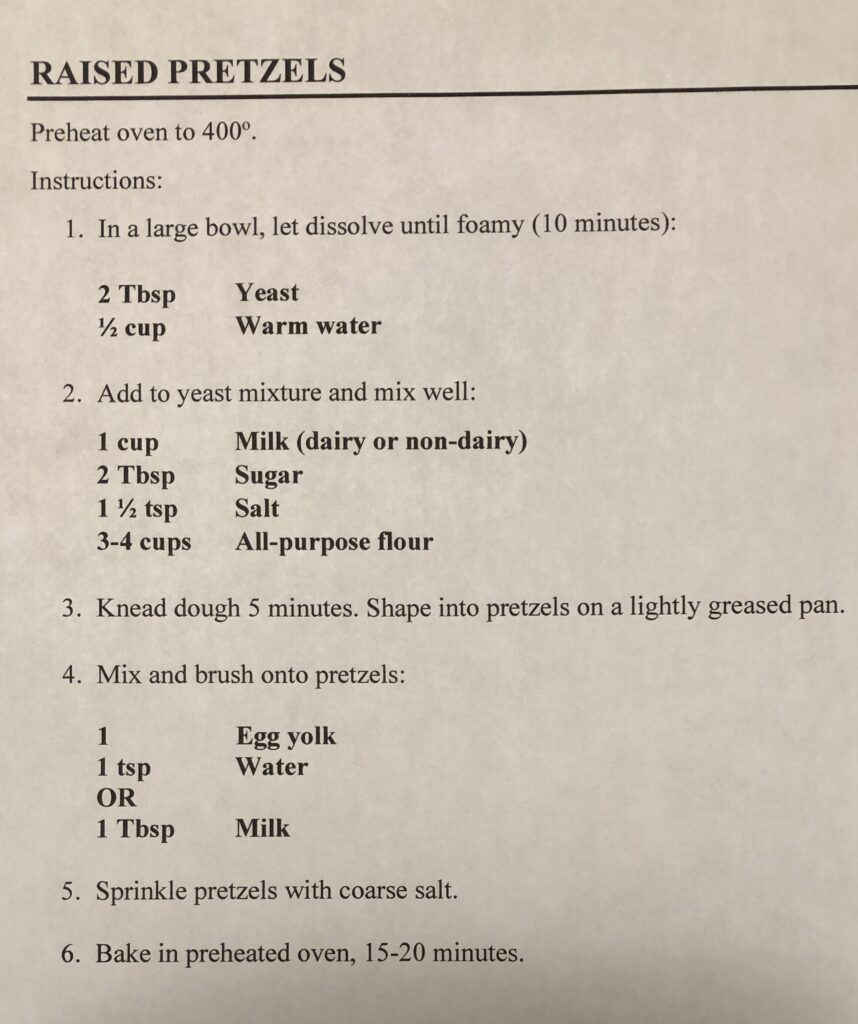
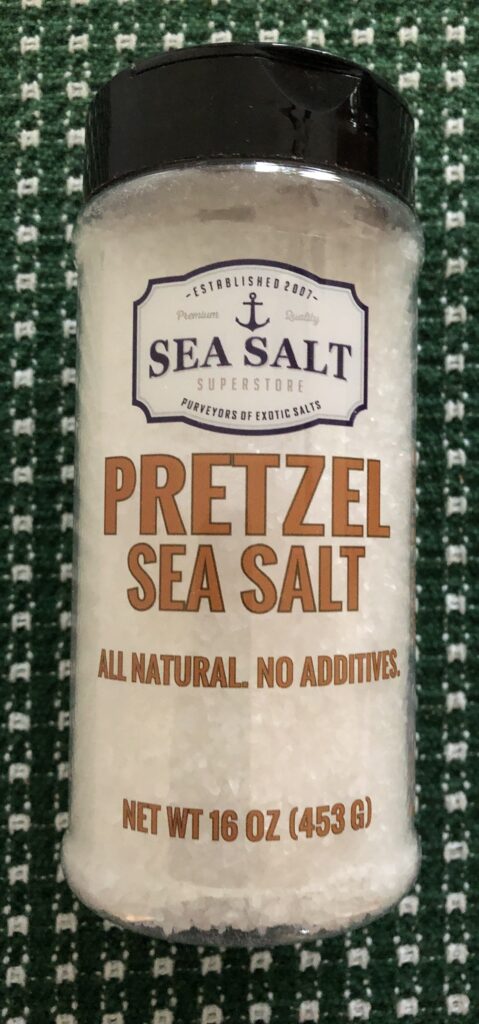
Most of the ingredients are pretty standard to have around, except maybe the Pretzel salt. I recently ordered some from Amazon just to have on hand.

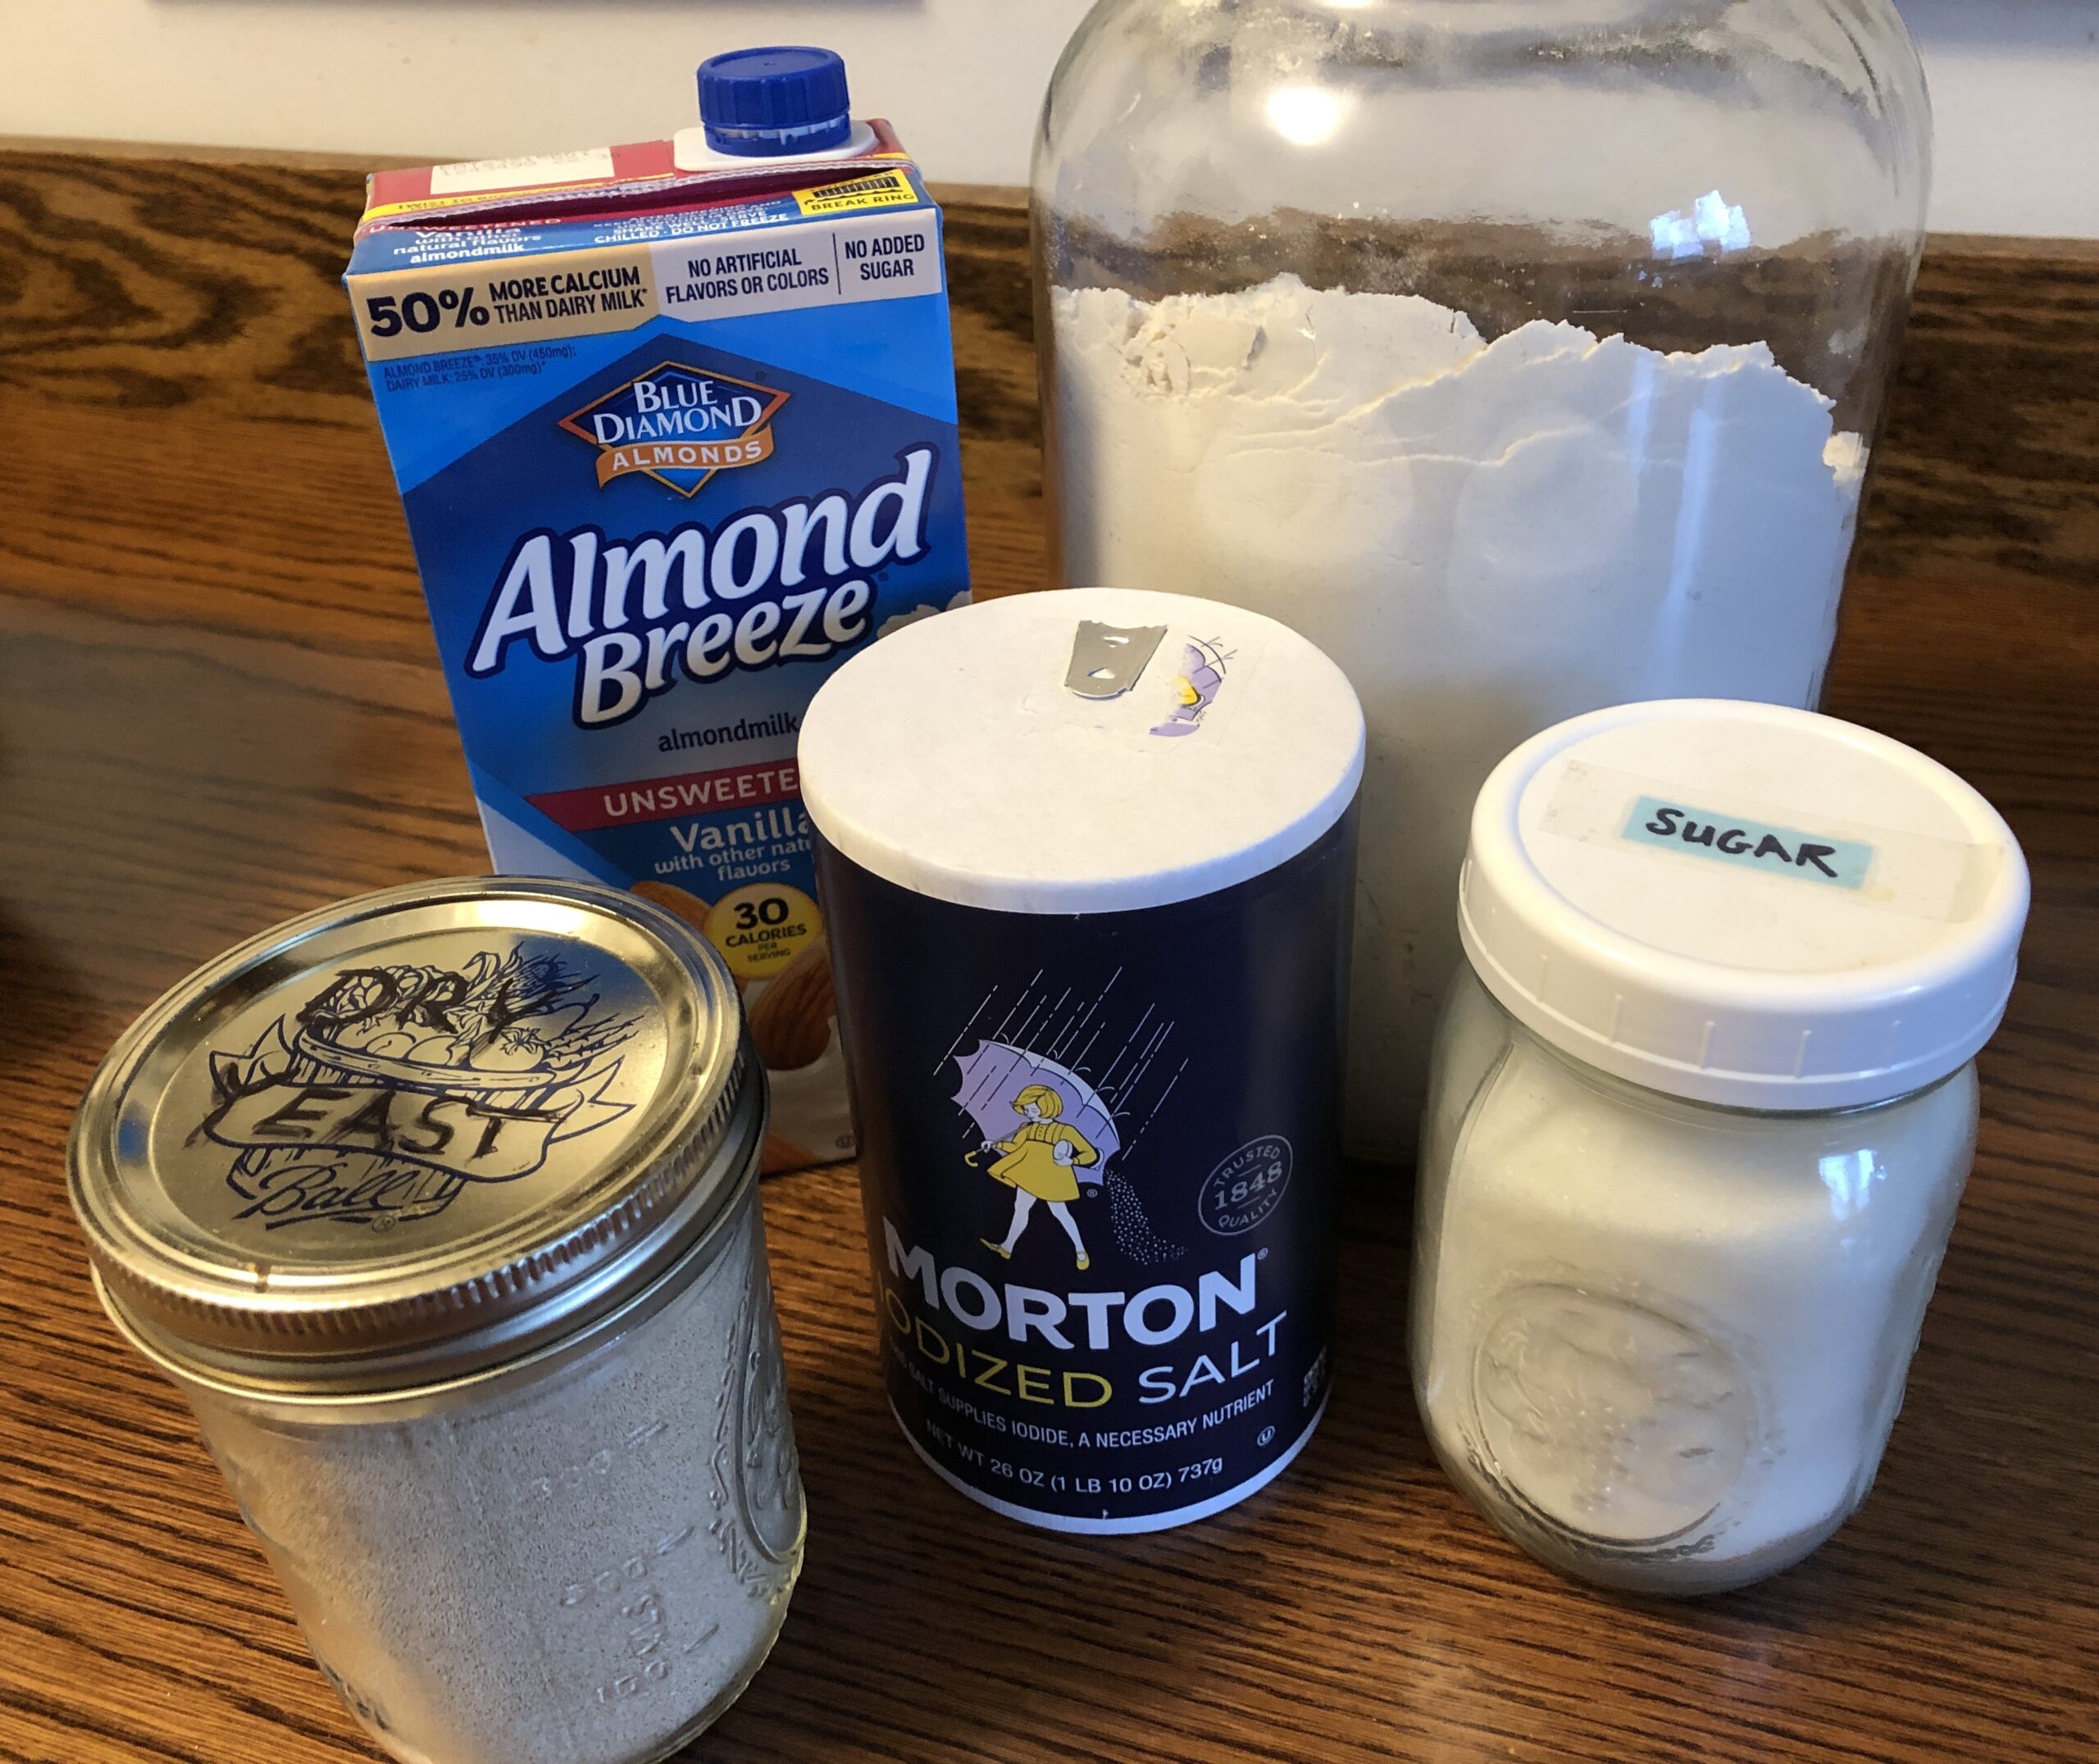
Collect the rest of the ingredients as shown below:

Making the Raised Pretzel Dough

Step 1: Preheat the oven to 400 Degrees F. Spray baking sheets with oil (or use parchment paper or a silicon mat).

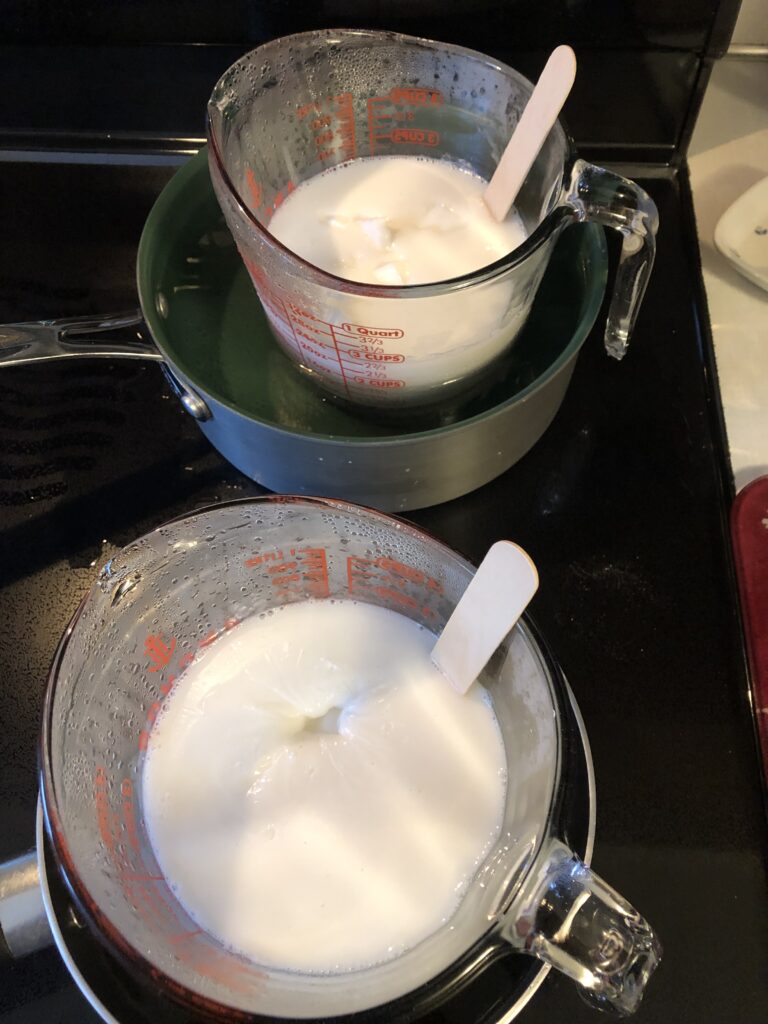
Step 2: In a medium bowl, measure out 2 Tablespoons of yeast (or 2 packages). Add 1/2 cup of very warm water and stir. Let it stand until dissolved and foamy (about 10 minutes).

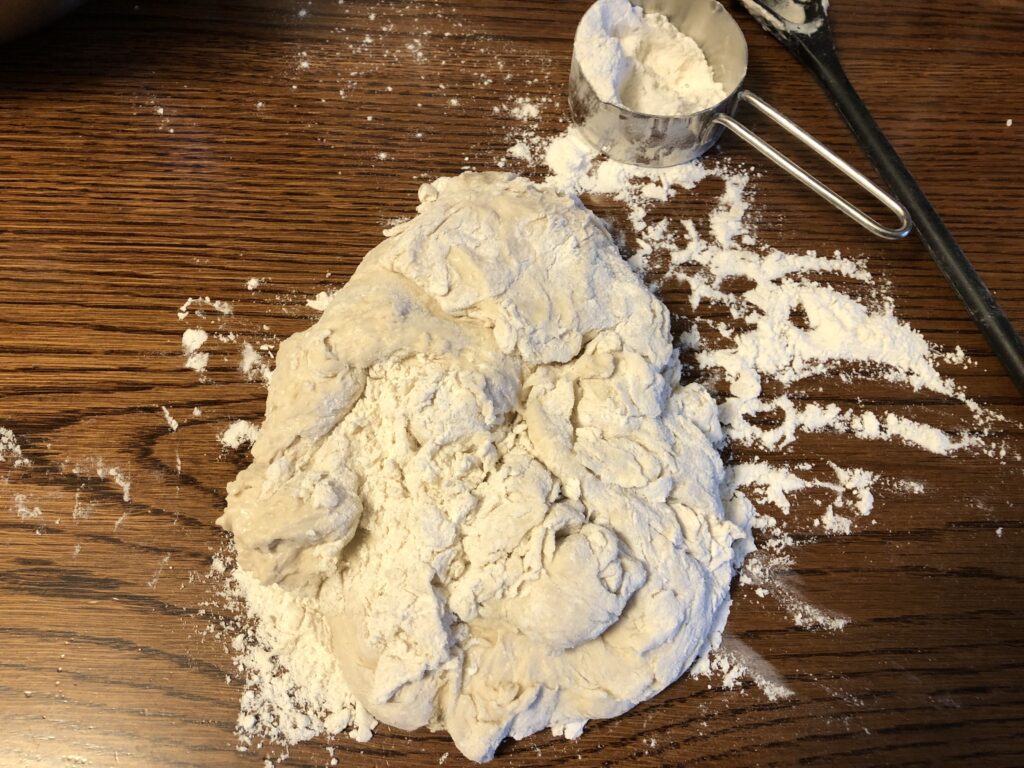
Step 3: Add the milk, sugar, salt and gradually add 3 cups of flour, mixing after every 1/2 cup.

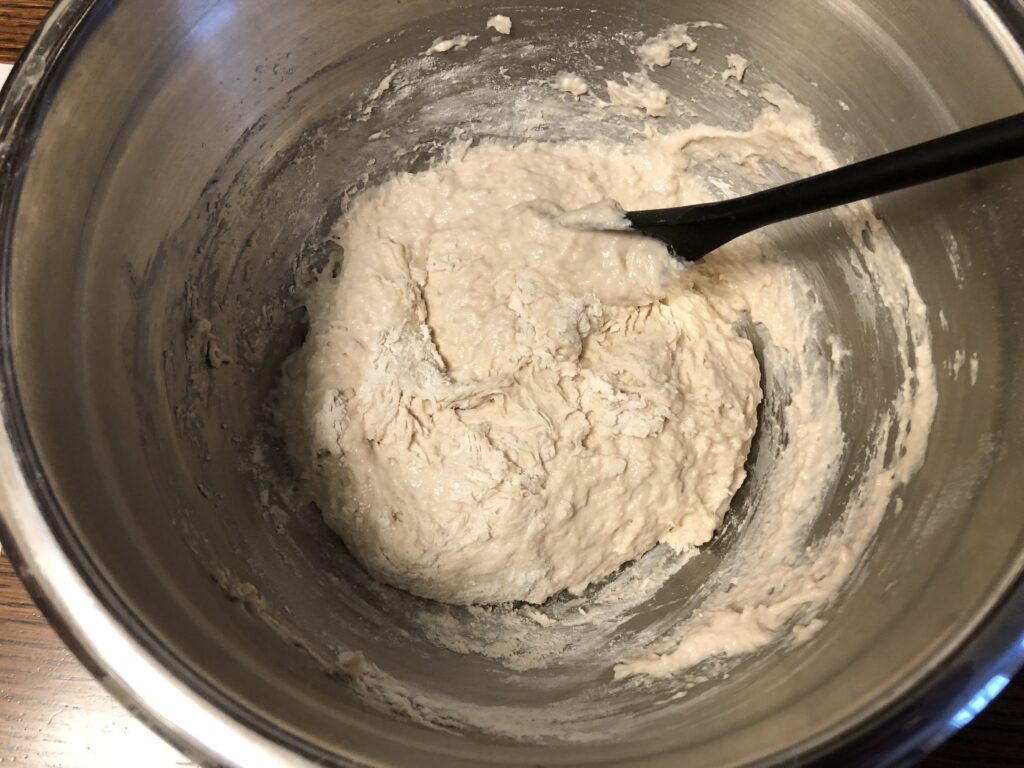
When the dough is too stiff to mix with a spoon, it will still be pretty sticky. Scrape it away from the sides and dump the whole pile out onto the floured surface. You will use about another cup of flour to knead the dough.

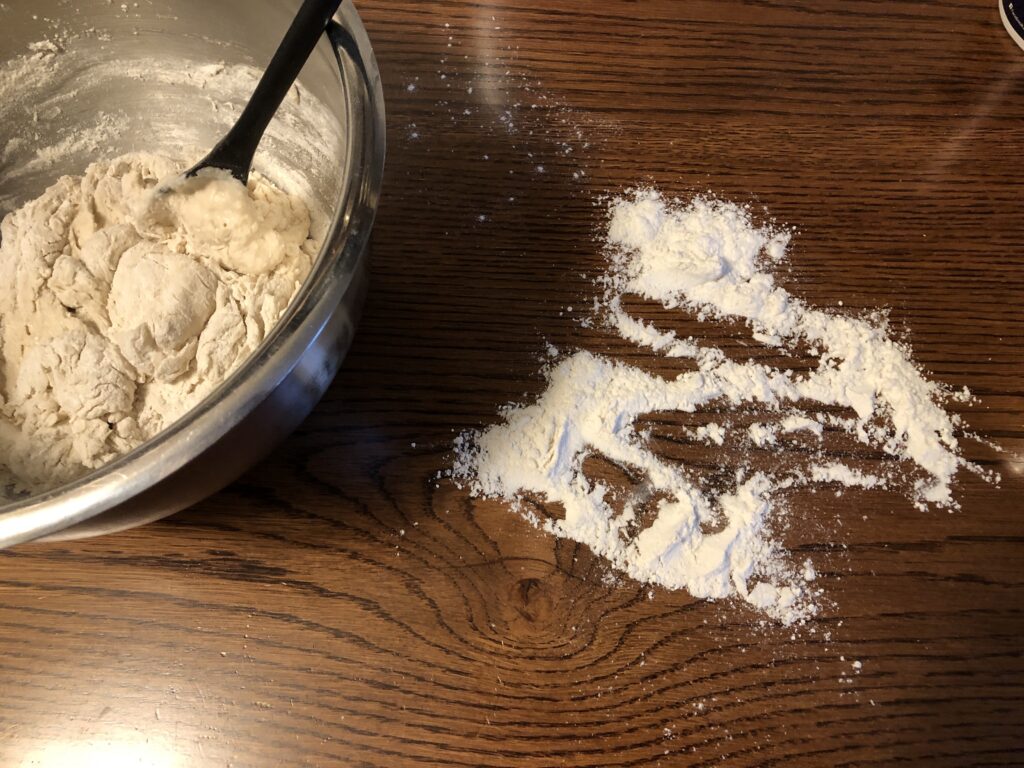
Step 4: Knead the dough. Make sure the pile of dough is sitting on about 1/2 cup of flour. The flour will be incorporated into the dough as you work with it. You can add more flour under the dough as needed to keep it from sticking to the table.

Carefully lift and pull the outer edges toward the center of the pile using the flat of your floured hand. Don’t poke into the dough…it will be too sticky.

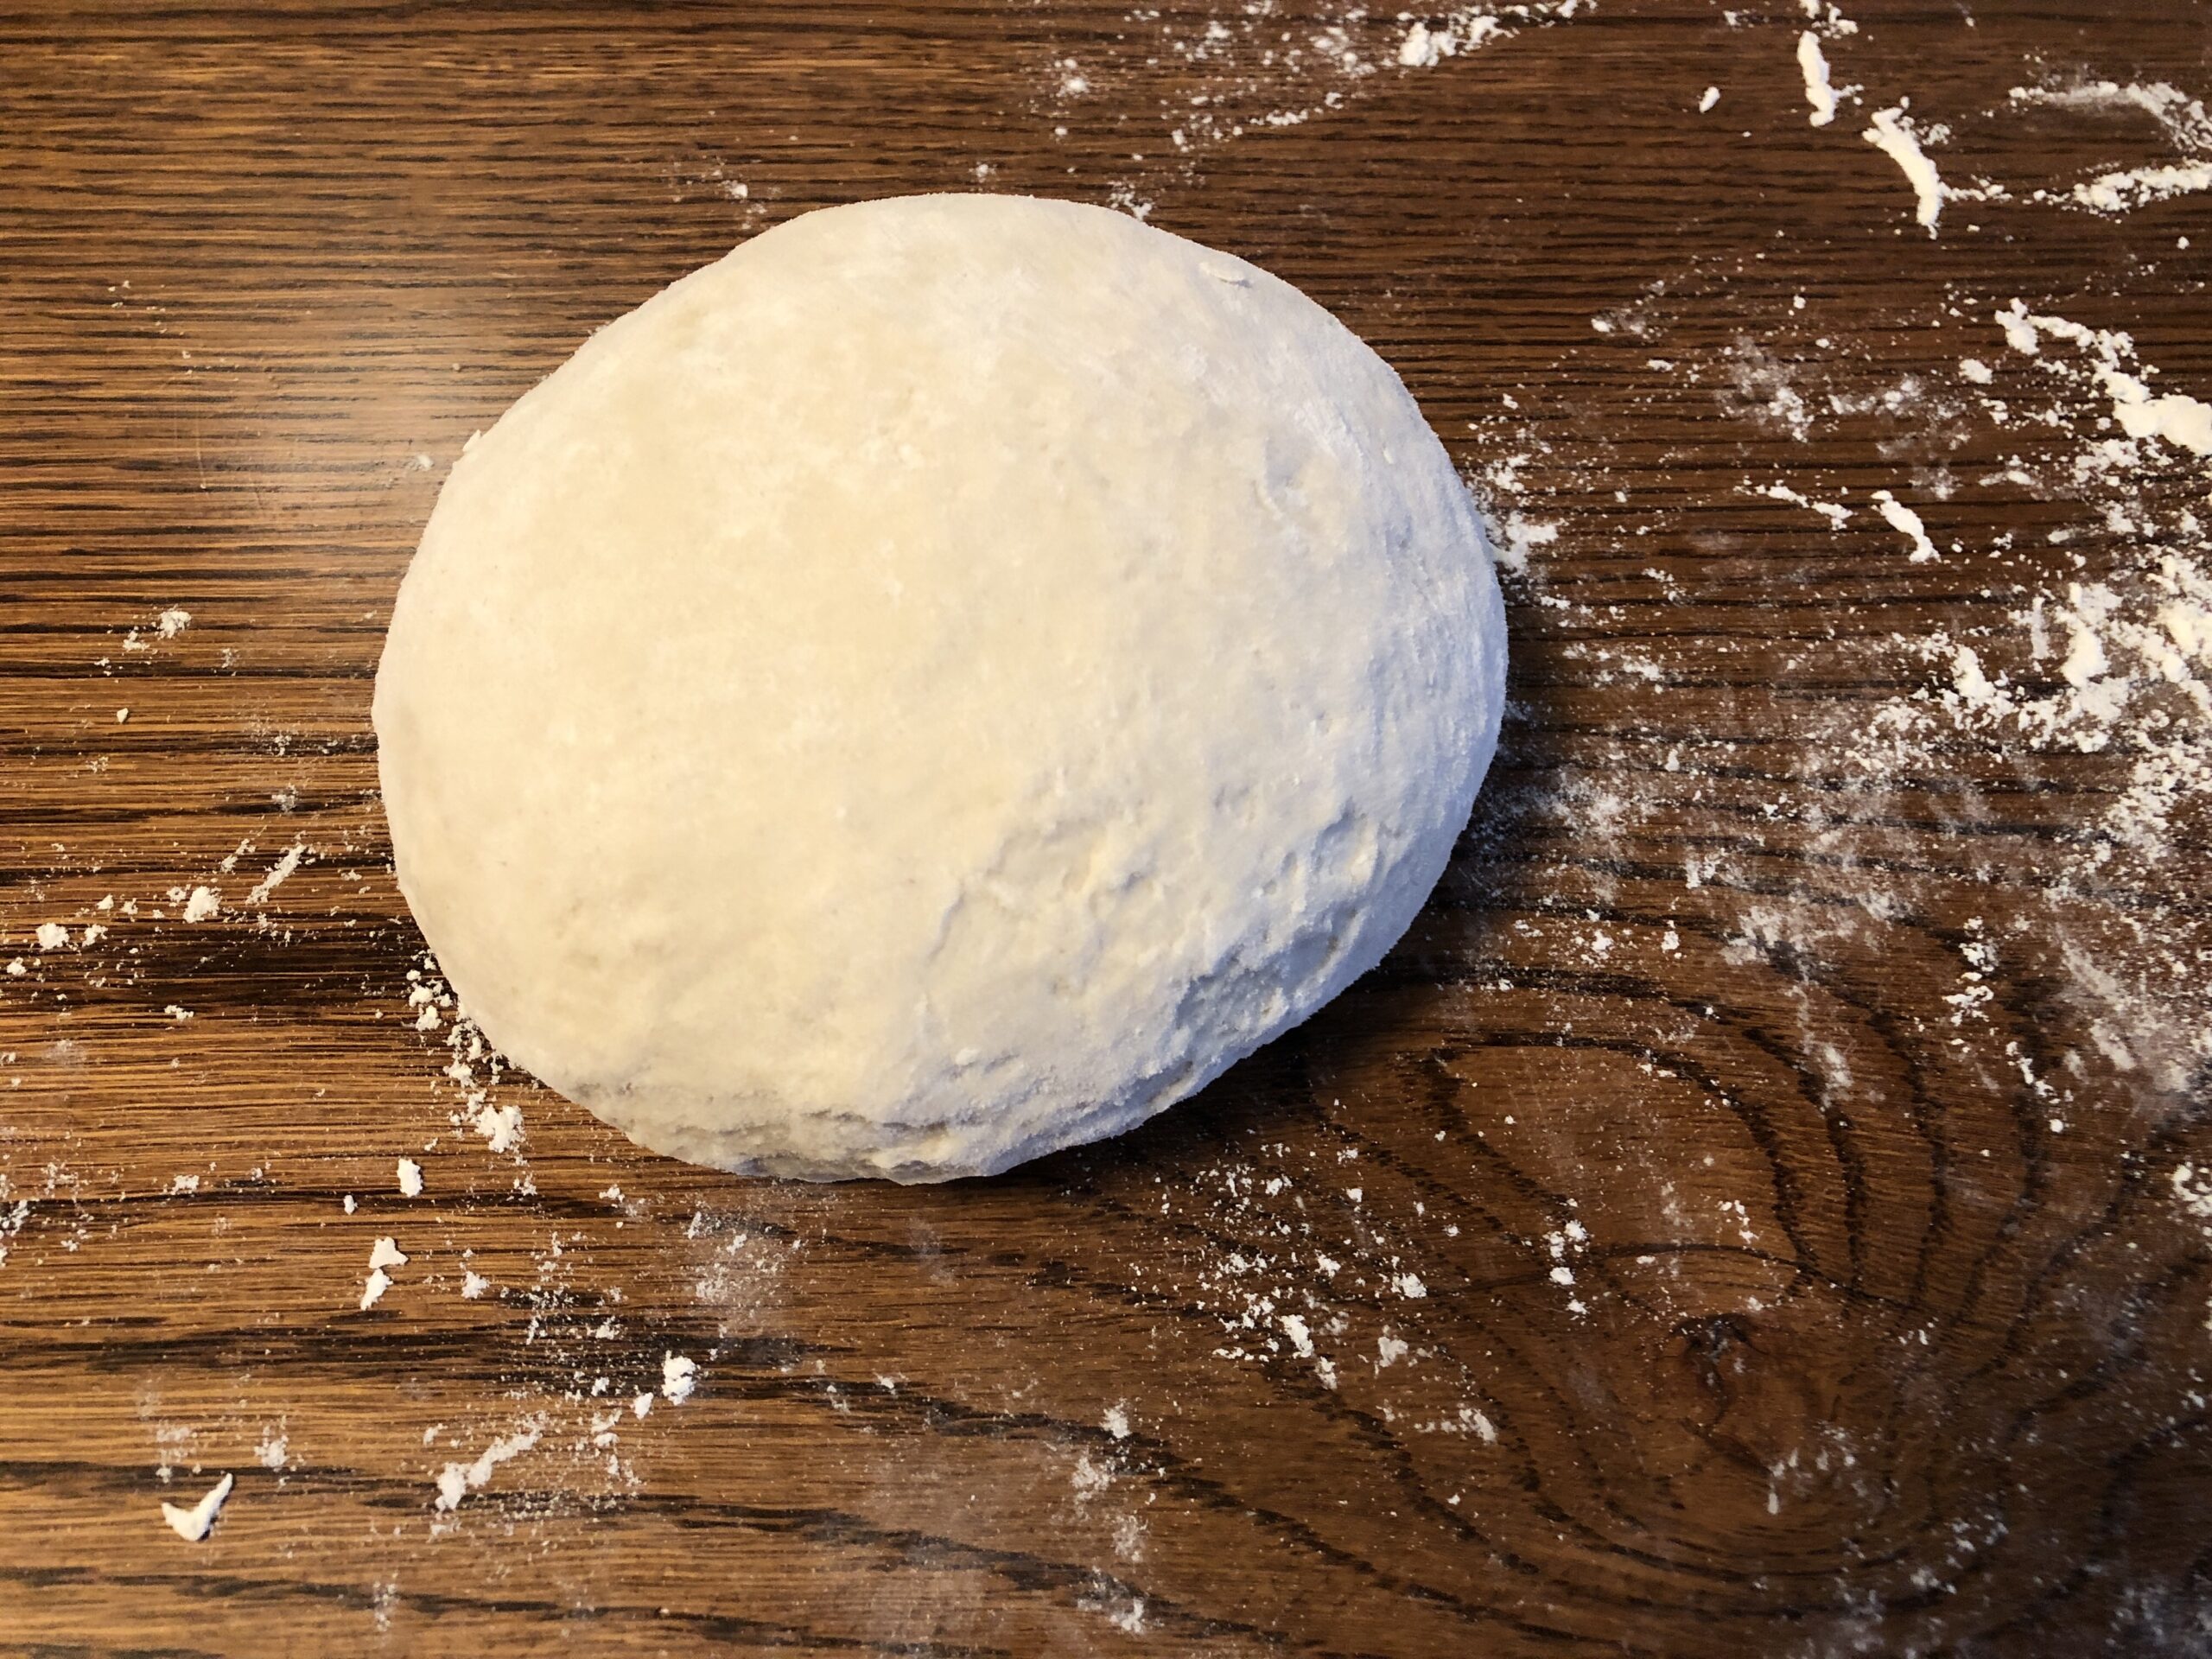
Continue to pull and press the edges of the dough into the middle of the pile, pressing down with the heel of your hand. You will be working your way around the edge. Soon the dough will look smoother, although it will still feel sticky if you poke your finger into the dough. Knead the dough like this for about 5 minutes.

After 5 minutes of kneading, tuck all the edges into the center and turn the ball of dough smooth side up. Let it rest on the table a few minutes.

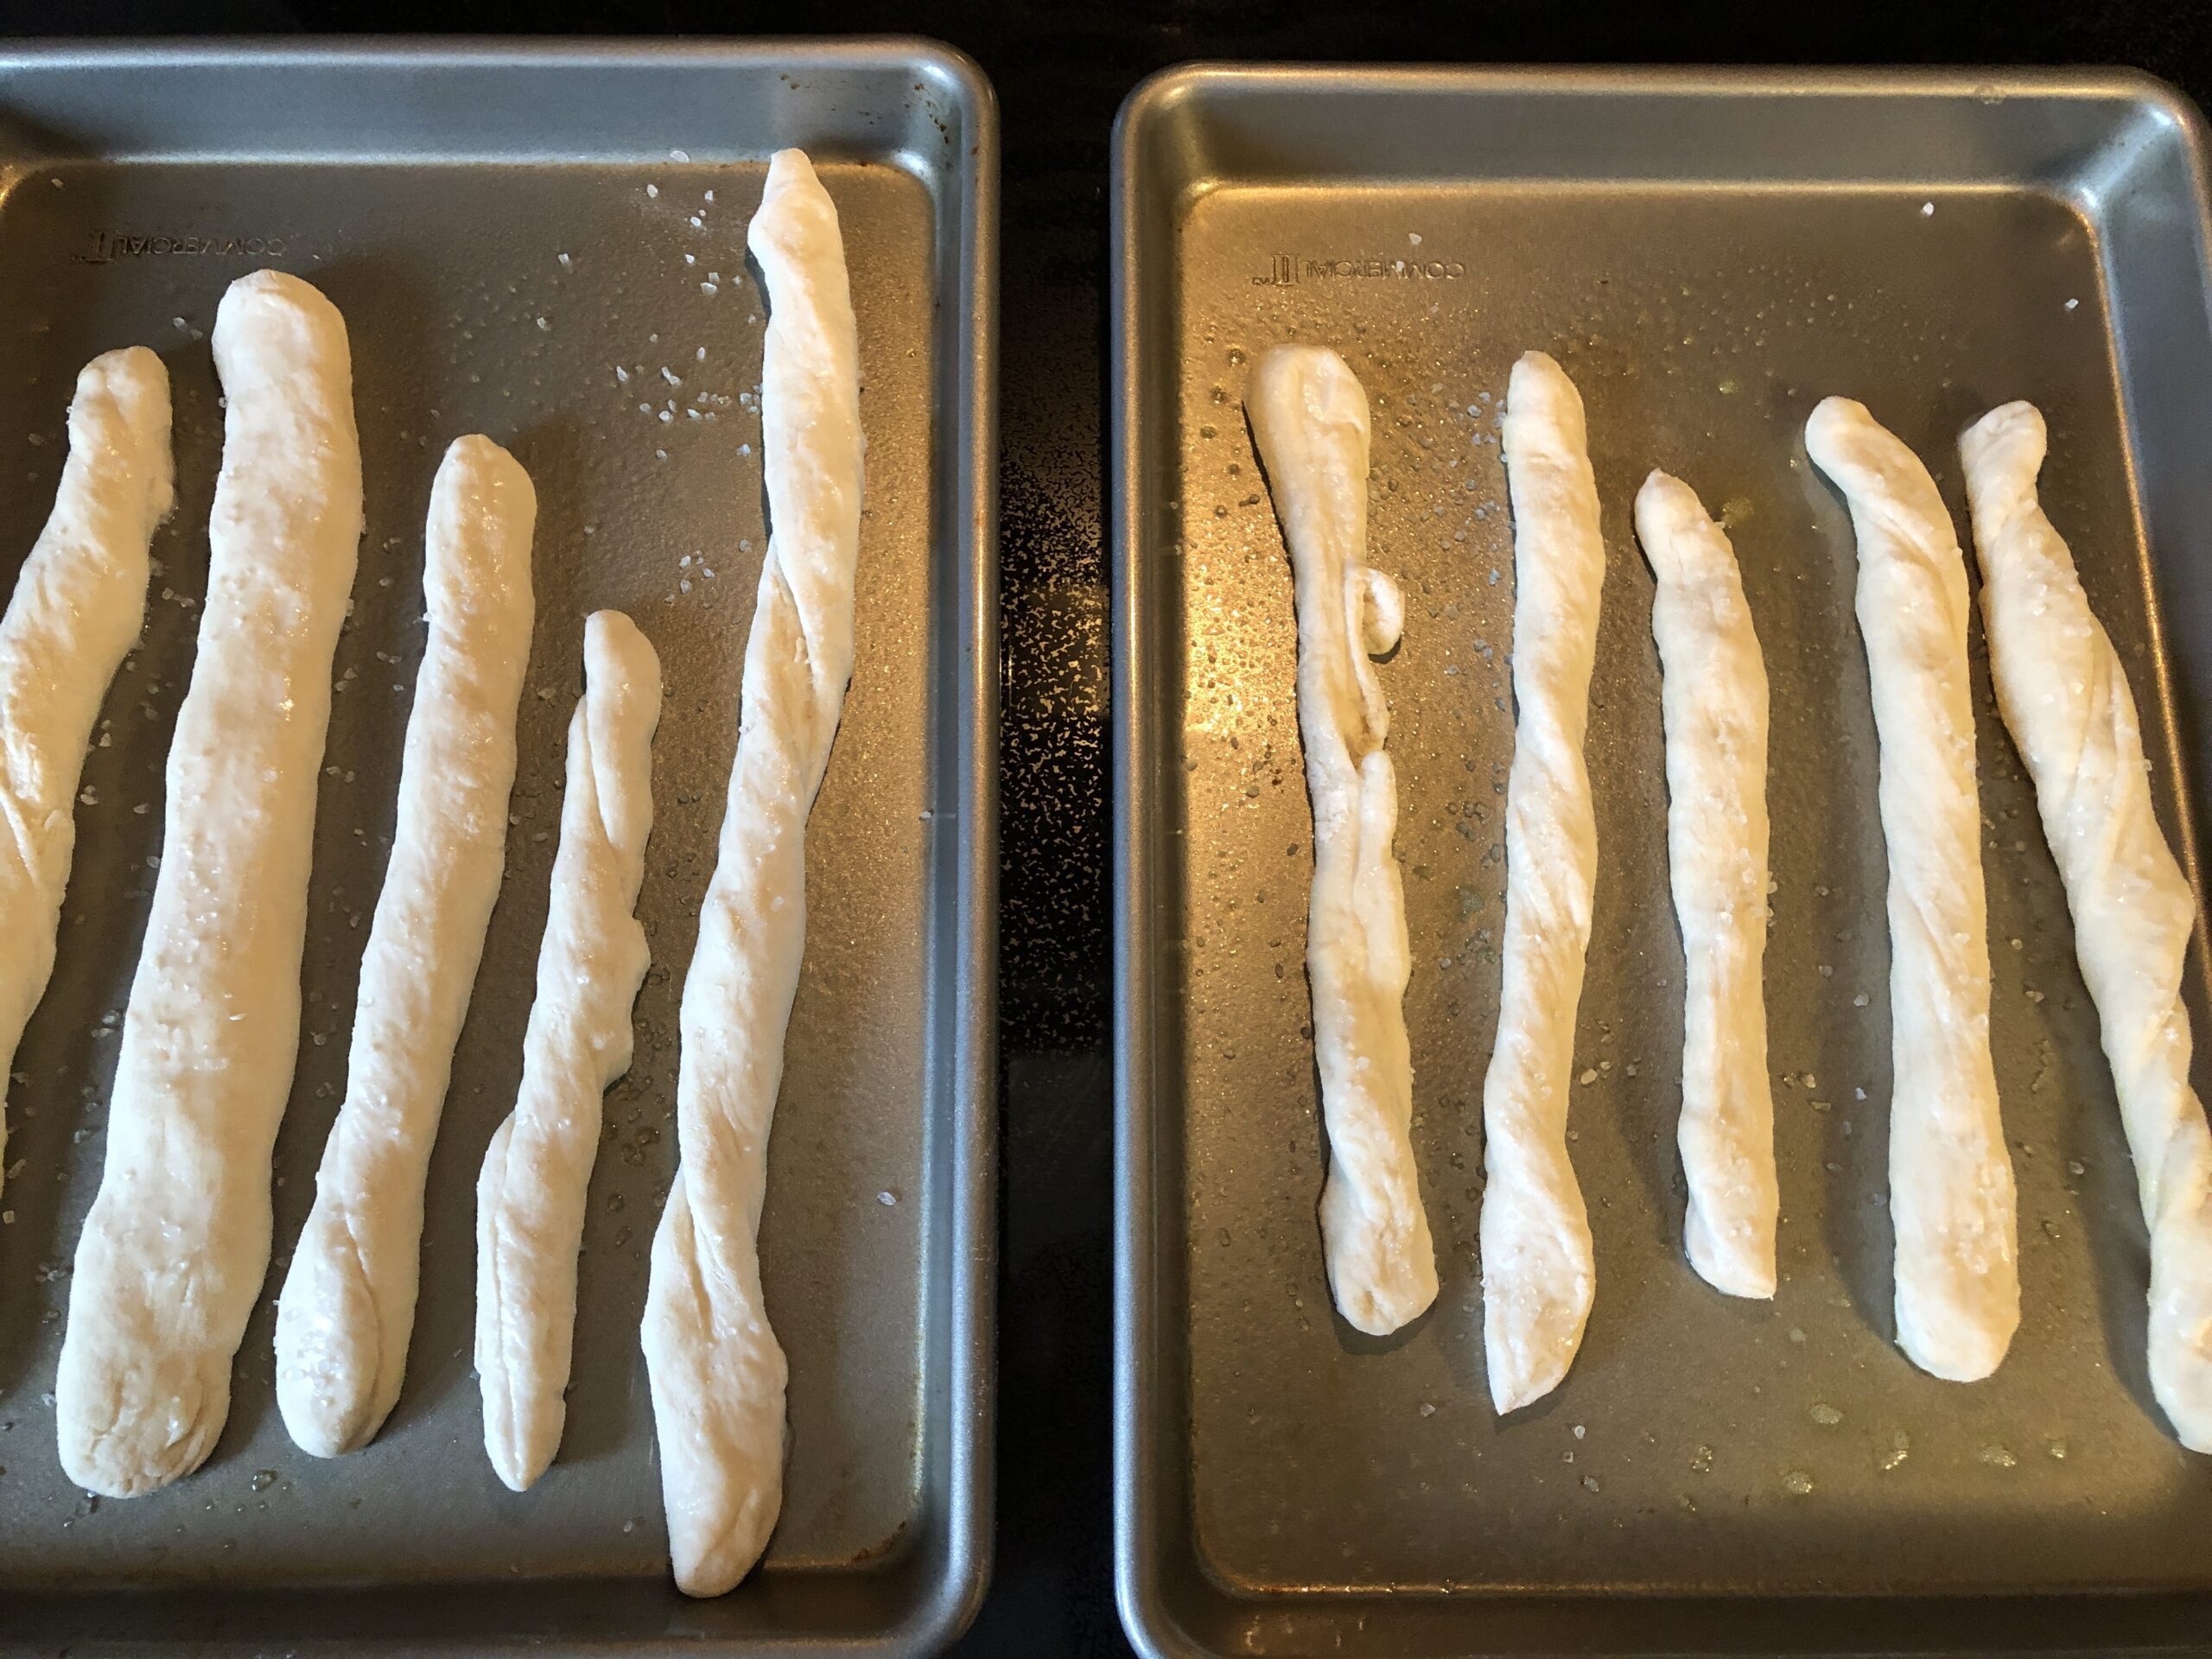
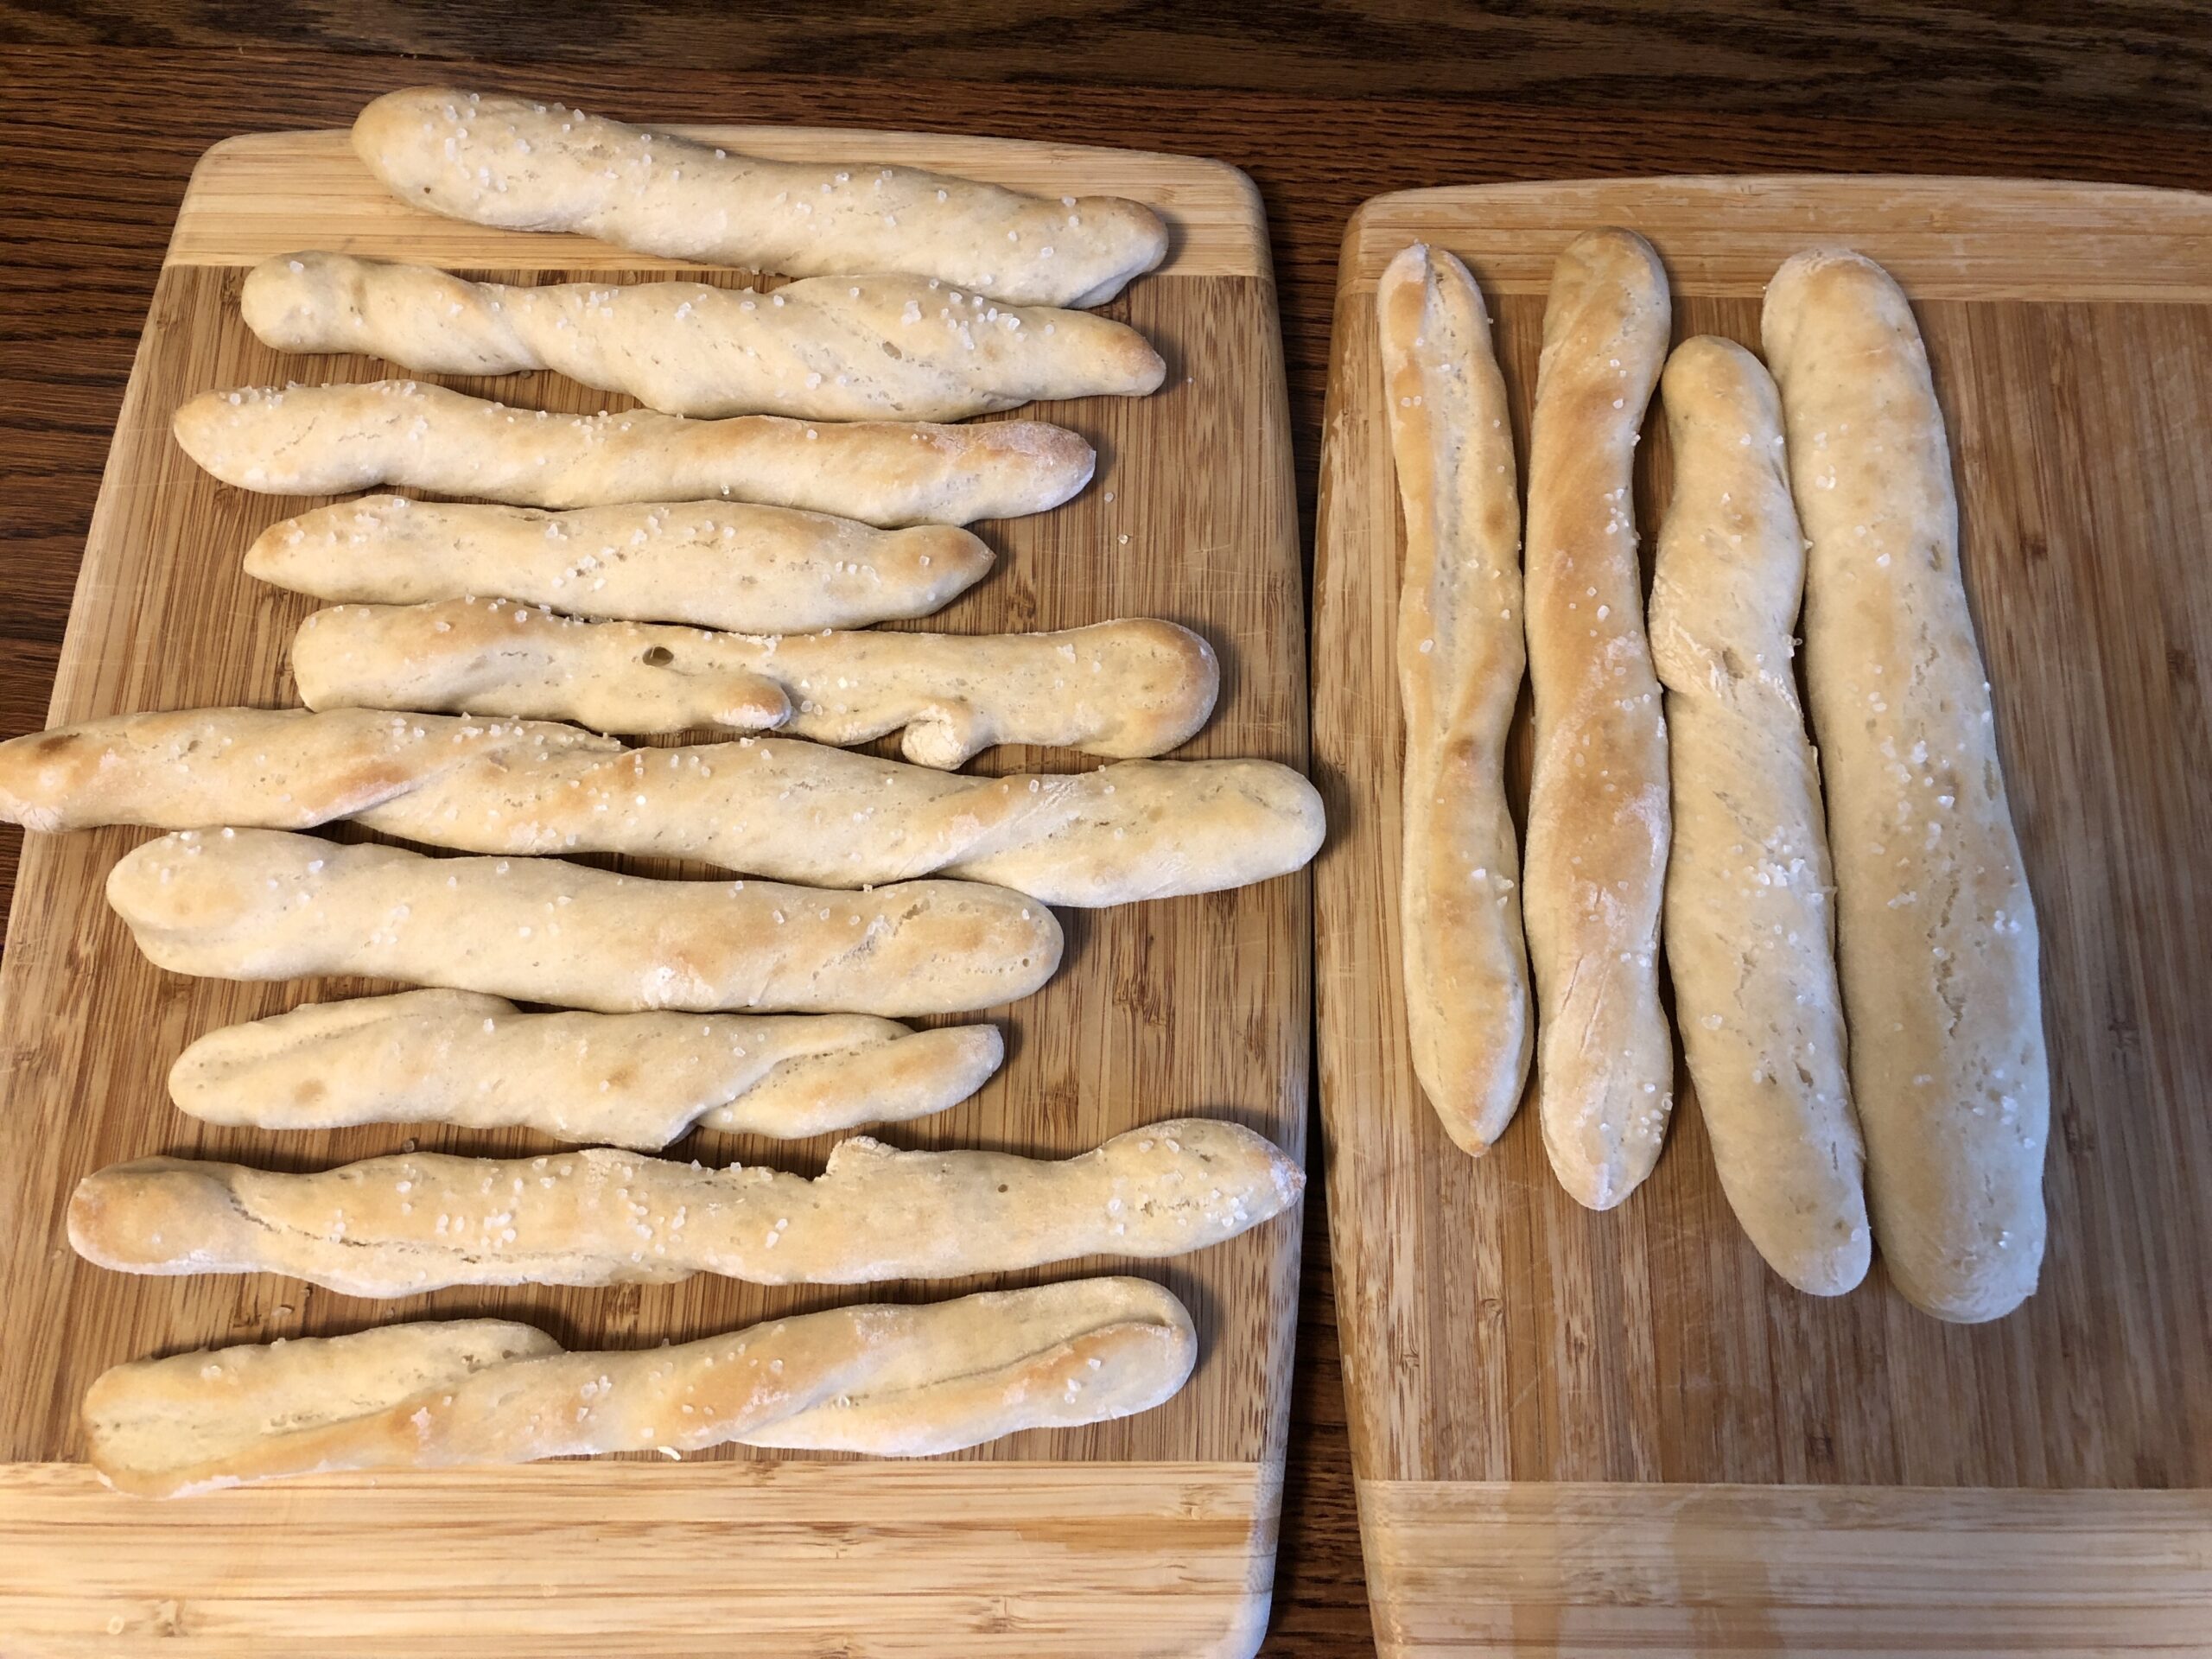
Step 5: Shape the dough. For this batch, I just made pretzel sticks. You could call them bread sticks. After cutting off chunks of dough, I gently stretched each piece, rolling them to make a long stick that fit on my baking sheet. After I made about a dozen sticks, I made a small round loaf of what was left of the dough.

Step 6: Finish the pretzels, by brushing them with milk and sprinkling salt on them. I did the same with the small loaf of bread.

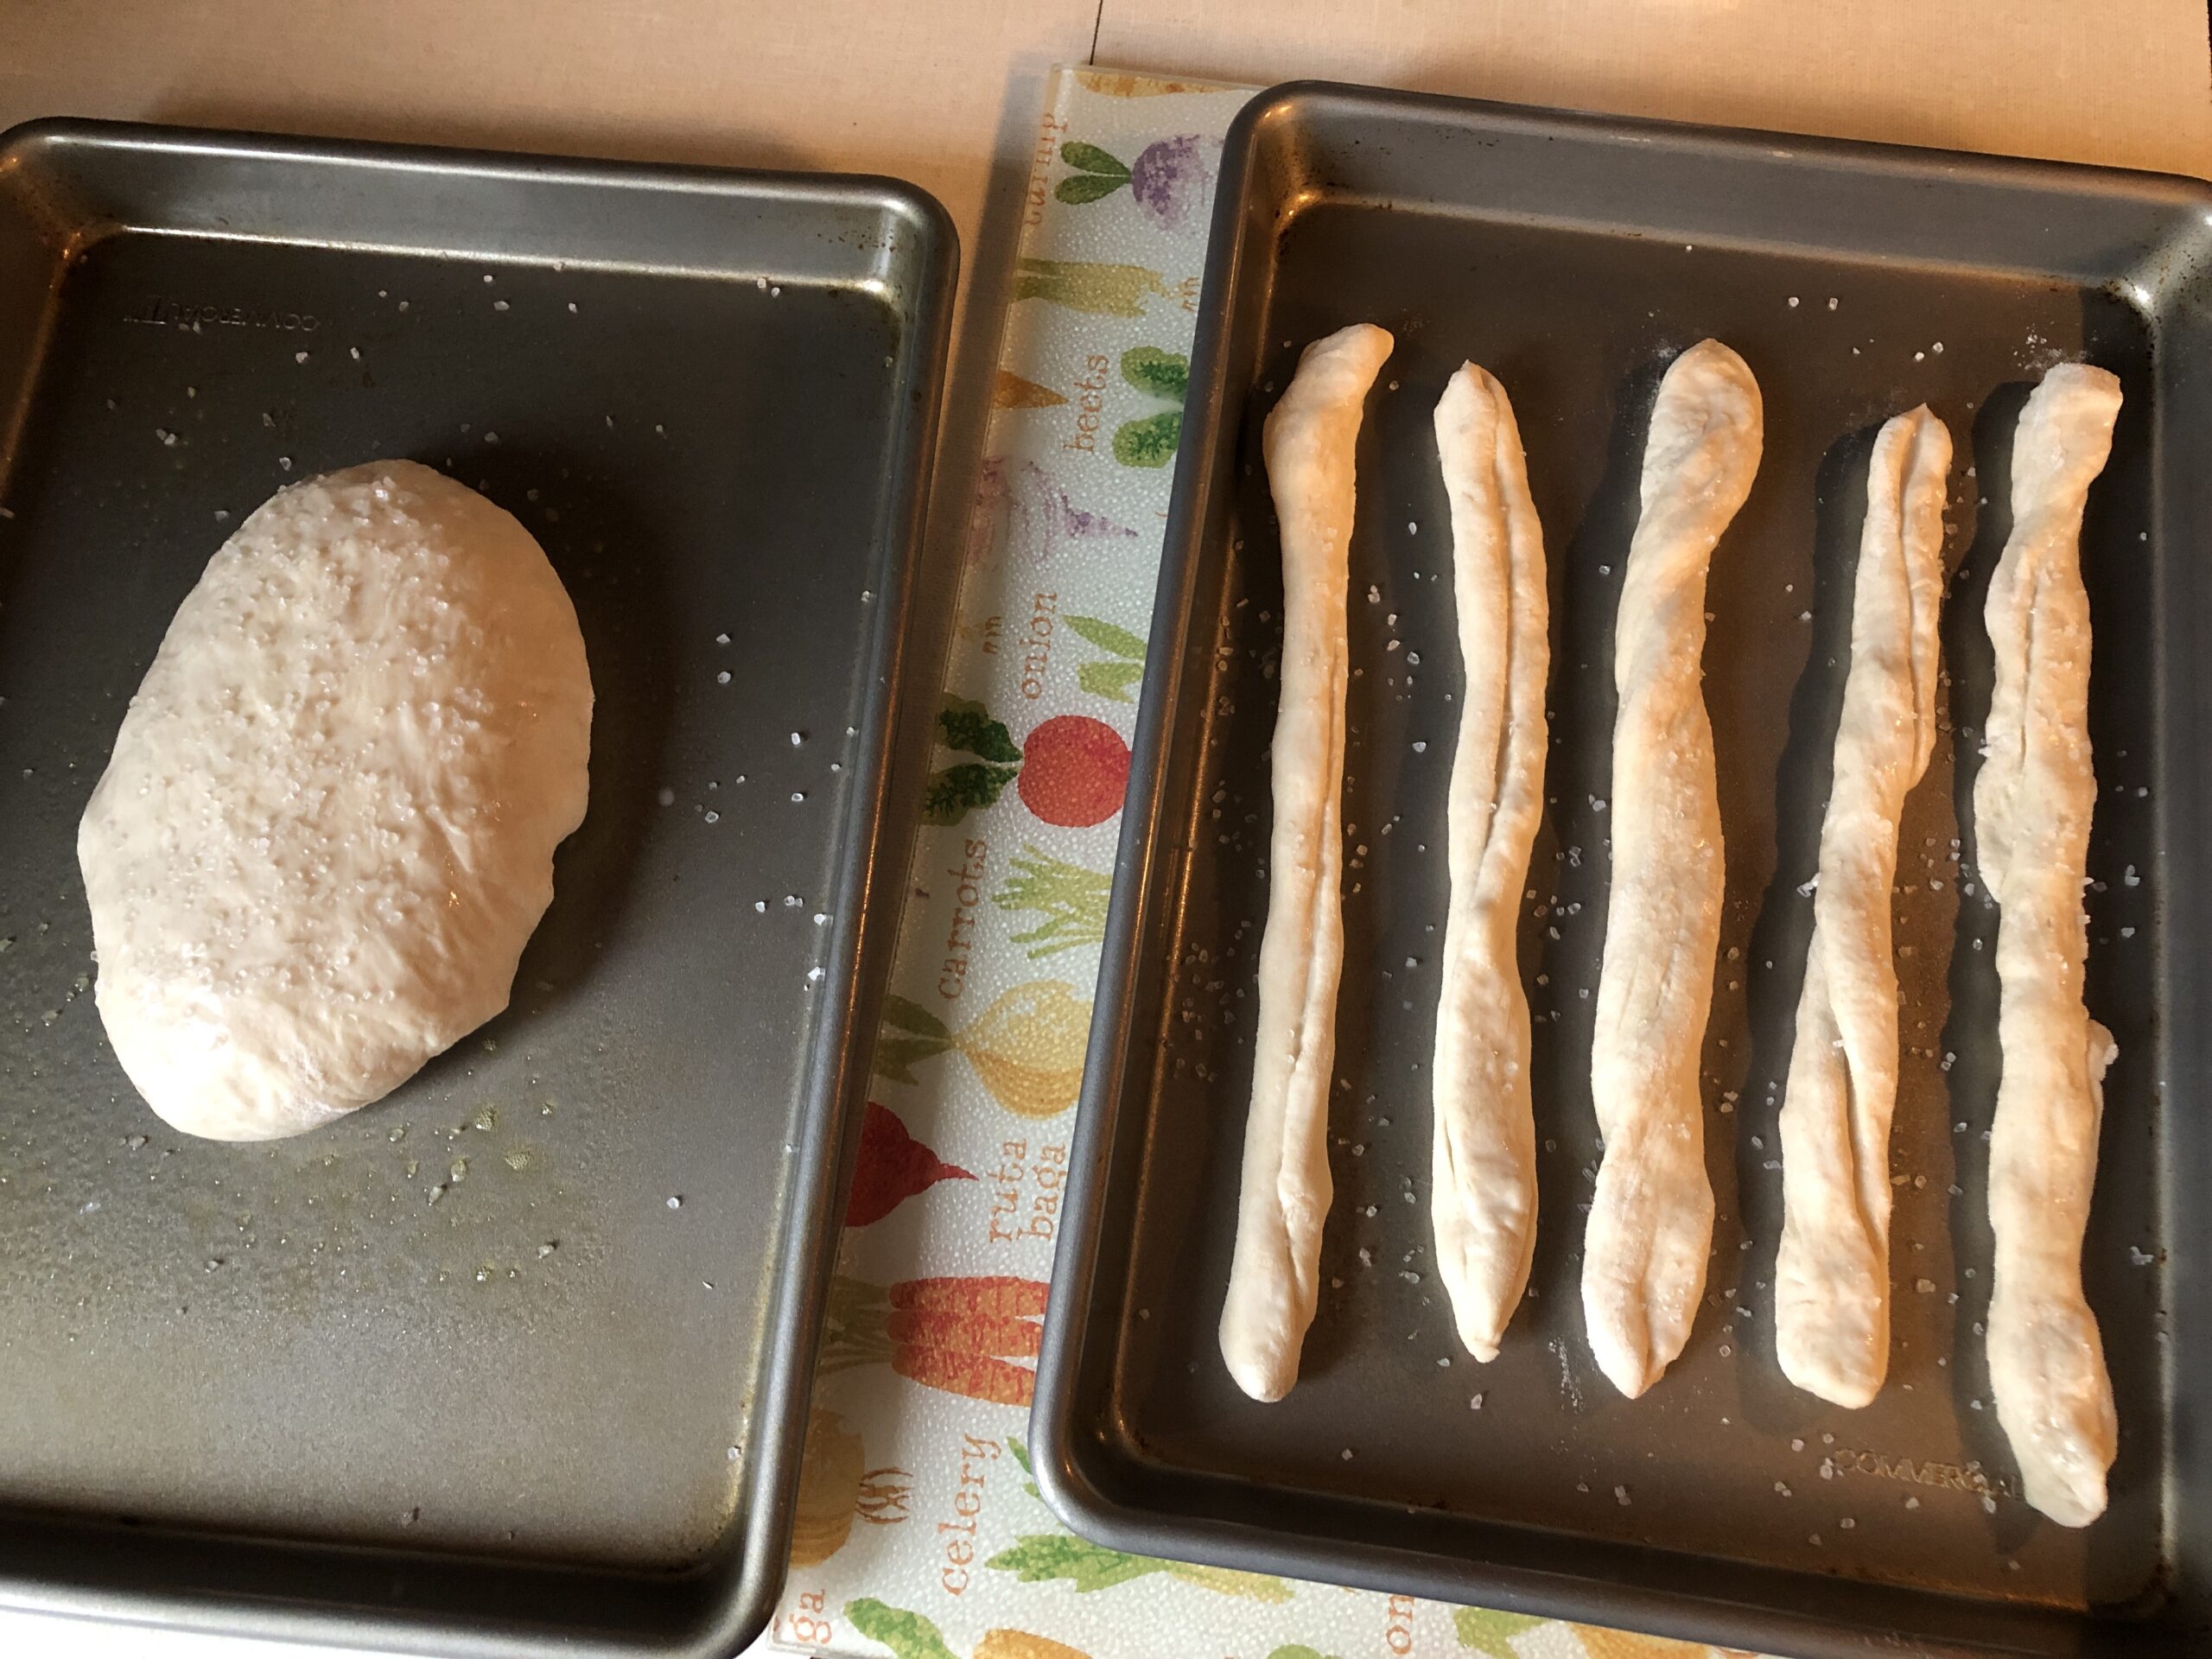
Step 7: Bake 15-20 minutes until golden brown.

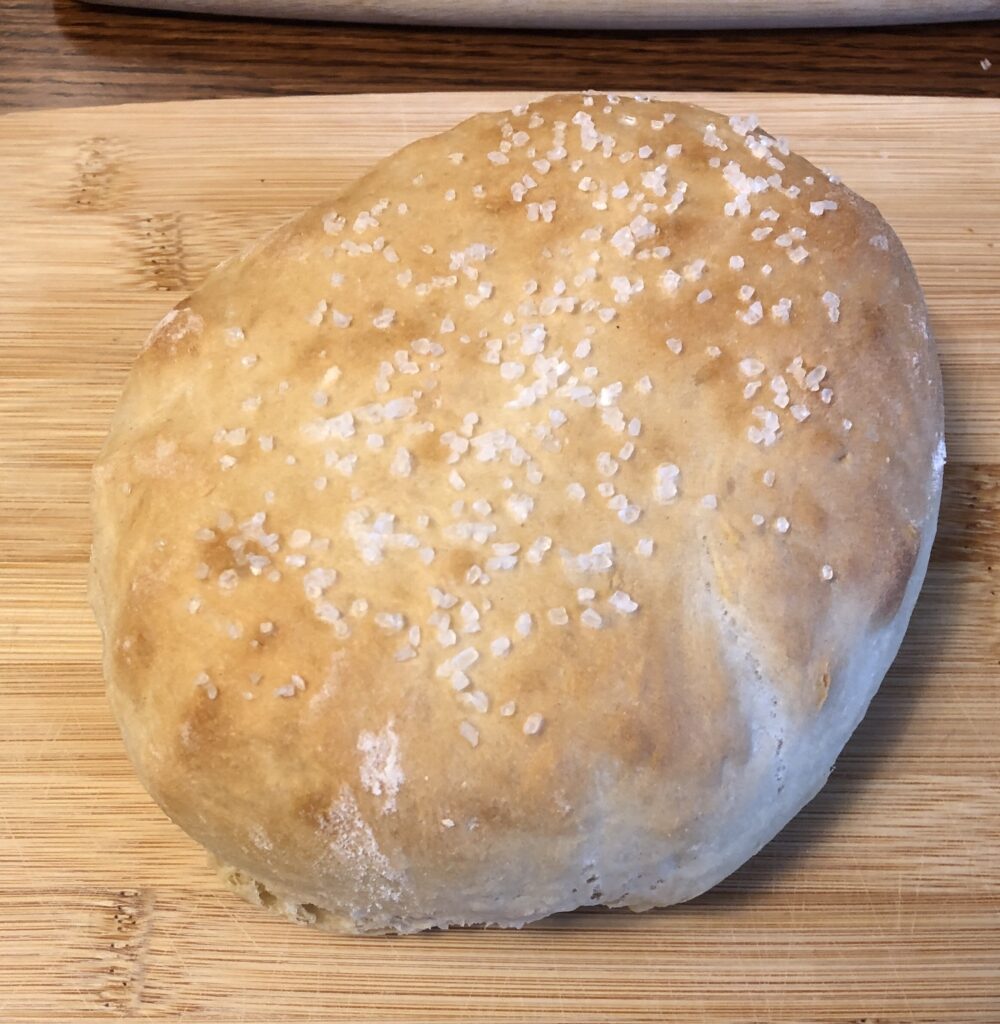
I’m sure anyone could do a better job of making pretzel shapes than me, but I think the “pretzel bread” could be interesting toast!

I hope these instructions are useful for Emily, Anna and others as a simple yeast bread recipe. Enjoy!!

Simple Christmas Joy

Christmas celebrations this year were spread out over several weeks with luncheons with my Fire Company Auxiliary friends and a group of my High School friends. Decorations in the neighborhoods were either understated or “over the top.” Ours were pretty simple outside:

Even our inside decorations were understated:

When I’m asked if I decorate for the holidays, I usually mention that during the month of December I’m often sewing greyhound coats and other assorted Christmas gifts. I have the Hallmark Channel on while I sew. That means every two hours I have a chance to watch folks decorate a tree, sing Christmas carols and eat Christmas cookies. By the time Christmas rolls around, I’m decorated OUT!

Ted’s family didn’t travel east this year because he had a 3-week opportunity to fly to the Atacama Desert in Chile to help set up a telescope at the Simons Observatory. It’s at 17,000 feet, so everyone had to wear “oxygen concentrators” mandated by Chile’s equivalent of OSHA. Quite the adventure!

This year we drove to Kathy’s home on Christmas Eve day and enjoyed 24 hours with her family.

Anna was almost awake to notice her new bike!

My notebook of Favorite Recipes was a hit!

Kathy managed to capture “selfies” of us!

Of course, photobombed by Ben!

Perfect gifts for Grandma! New scissors and a gift card to JoAnn’s!

My usual request for a photo desk calendar came through!

An adorable tiny arrangement with wood flowers from Anna!

And of course, my Christmas card from Bert…plays the song from “A Charlie Brown Christmas!”…with cash inside…so it could be my favorite card!

I hope you had a wonderful time with family and friends!

Rest up for 2024! It’s predicted to be a wild ride!

Inventory of Skin Care Products I’ve Made

I’ve managed to give away most of the stuff I’ve made so it was time to see what I should make next. Here’s how I check my inventory…very low tech!

I basically have three bins on my shelf, one for lotion bars and sunscreen salve; one for assorted other stuff, like lip balm, cuticle butter, bruise balm and healing salve; and one bin for soap. When laid out, here’s what I have at the moment:

Bin #1…Lotion Bars and Sunscreen lotion

Looks like I have 9 lotion bars and three tins of sunscreen lotion. The sunscreen lotion will need to be pitched and attempted again…it was too firm to apply.

Bin #2…has assorted stuff:

Eye cream (5 tubes)

Lip Balm (7 tubes, Peppermint; 4 tubes, Orange/Vanilla; 1 tube, Maple/Coffee; none, tinted Lip Balm)

Cuticle Butter (8 small, 1 large)

Nail Serum in a roller ball (none)

Bug Bite Serum in a roller ball (none)

Bruise Balm Salve (19 small, 3 large)

Calendula Healing Salve (none)

Bin #3…Soap

Aloe Vera Healing Soap (6 bars)

This is my favorite soap and a complicated soap to make so I’m pretty stingy with it.

Assorted individual soaps to share. These seem to be individual large and small soaps that I use for gifts when needed.

What to make next?

Now that I see what I have, after Christmas I’ll want to make some tinted lip balm, cuticle butter, nail serum and bug bite serum.

After I did my inventory, I had a request for some of my Calendula Healing Salve so I thought I’d make a big batch today. Bert took the time this week to make me a wooden holder to hold the small oval shaped containers I use. It sure made the process easier so the tubes didn’t fall down as I filled them. After Christmas I’ll post the details how to make the Healing Salve…great stuff!!

I sure hope everyone has a wonderful Holiday weekend with lots of hugs from family and friends! If you are traveling, I hope your travels are smooth and safe!

Merry Christmas!

Taking My Granddaughter to a Lady Lions Basketball Game

My dear granddaughter, Anna, is in 5th grade and plays basketball with a team from her school. A month or so ago, I attended one of her games and was impressed with all the girls who were learning the rules of the game. I suggested we try to get tickets to one of the Penn State Lady Lions basketball games.

Yesterday, was the day! Kathy’s family, plus her mother-in-law, came for the day and we drove u p to the Bryce Jordan Center on campus. I had a few things to learn, since I had not attended any events there for many years. Clear totebags, only credit cards for food and drinks, and airport-level scanning as we entered the building. Those of us with metal knees got “wanded” of course! Times have changed!

Getting to our seats was interesting (in section 105L). I wanted Anna to be close to the action so I managed to get tickets right behind the team seats. So happened…not very crowded anyway! Of course, that sent us down a flight of steps to floor level. Not too bad…until it was time to hike back up!

As we sat down…I realized I had left my phone at home! Luckily, Kathy took lots of pictures so I have some documentation that we were actually at the game! Kathy is the master of “selfies” so that was the first picture I wanted!

Anna had a chance to smile with the stand-up Nittany Lion!

Online there was information about a Kids Zone area at one end of the court with activities for kids before the game. Kathy and Steve took Anna down to check it out. She had time to make two big posters and two beaded bracelets…one she hoped to give to one of the players who was on crutches from an earlier injury. I wasn’t sure about the purpose of the posters until later in the game.

The arena was not crowded but the teams played hard.

Our seats put us right in the action when the refs had to check out an instant replay:

At half-time Anna was invited to try to win a prize by making three baskets in 30 seconds. She was brave enough to say, “Yes, I’ll try!” She took off her Penn State sweatshirt and she had her school t-shirt underneath…NORWIN in bright yellow! Great advertising!

She was able to make 1 basket in 30 seconds and won a t-shirt and a $20 gift certificate! We were so proud of her!

Roving cameras were occasionally focused on folks in the audience…that was the purpose of the giant posters Anna made before the game! Kind of hard to capture a picture of us holding the posters:

The final score was 119 to 43!

I’m so glad Anna could experience such an exciting game. She certainly got to see many of the “drills” the team goes through. She commented how fast the game was. Who knows, maybe someday I’ll be able to attend one of her high school or college games!

A Christmas Surprise in 1955

(This story was posted in December 2022)

My family spent a year in the Philippines when I was 9 years old (1956-1957). When we returned and I went to 5th grade in our neighborhood school, I wrote this story about my Christmas in the Philippines. I think I was still learning how to write dialog!

By Mary Bixby

          “Whoever heard of a hot Christmas?” moaned Mary. “Christmas just won’t be Christmas without cold snow and a Christmas tree!”

          Mary and her family were spending a year in the Philippines because of her father’s work. Christmas came right in the middle of that year—when everyone, especially Mary, was quite lonesome for home.

          They lived in a house that was much different from the one at home but was still nice. The weather was the one thing that made home seem so far away. It was so hot that Mary had school only in the morning and had to take a nap in the afternoon. This was very hard for Mary, because she felt that a grown-up 9-year-old shouldn’t have to take naps. But it was so hot that by afternoon she didn’t really mind.

          As Christmas came closer Mary got more and more unhappy. She kept on complaining about what a silly Christmas it was going to be. It didn’t help that her older sister and brother had been invited to join other college students to spend Christmas on a southern island in a track and field competition. Mary was very sad to watch the inter-island boat leave that day.

Finally, Mary’s father had an idea. Since they couldn’t have cold snow and a live Christmas tree, why couldn’t they make some other family happy by surprising them with a Christmas basket!

          Mary had never thought about that since she always had most any toy she wanted. The family they decided to surprise lived just down the hill and there were eight children in the family.

          “With that many brothers and sisters I bet I wouldn’t get very many things for Christmas at all,” said Mary, thoughtfully.

          “No, you probably wouldn’t,” said her mother, “but maybe we can help those children have a few new things to play with on Christmas morning.

          So, Mary and her mother went to the store and picked out some toy trucks, a few dolls, coloring books and crayons, and candy, On the way home Mary had a special feeling inside, that was different from the lonesome feeling she had had before. When they got home, they started wrapping up all the presents. That took quite a while because there were so many little ones.

“When will we take the presents to the family?” Mary asked.

          “Why not Christmas Eve after dark,” suggested Mary’s father. “That way they won’t see who you are.”

          Mary could hardly wait until Christmas Eve, and the days went by much faster than they ever had before. She was so excited that the rest of her family started feeling the Christmas spirit, too.

          Finally, the day arrived. Christmas Eve!

          “Oh! It’s so hard to wait,” Mary said.

          Right after supper, Mary and her mom and dad put all the presents into a big box and as soon as it was dark, they carried the box down the hill. Mary was so excited she would have run all the way, but the box was too heavy for that!

          As they got close to the house they didn’t talk and tried to walk very quietly.

          “Let’s put it on the front steps,” whispered Mary’s mother.

          Mary nodded and carefully put it down. She thought how nice it was that they didn’t have to worry about snow getting the packages wet. Then she knocked on the door as hard as she could and ran up the hill.

          “I hope they heard my knock,” Mary said when they reached the top of the hill. “Oh, I wish I could see their faces when they find it!”

          They walked home and went inside. Imagine Mary’s surprise when she saw a little Christmas tree all decorated with presents underneath it. It wasn’t a live tree, but a wire one. But it was green and it did remind Mary her of home. Then she heard carolers outside and the whole family went to the porch to hear their own familiar carols…although none of them were about snow!

When Mary went to bed that night she could hardly go to sleep. She was thinking how happy the children would be in the morning.

          Then she thought of the Christmas tree out in the living room, and the carolers they had heard, and she said to herself, “I guess Christmas just wouldn’t be Christmas if you can’t make someone else happy, and Christmas can still be Christmas no matter where you are.”

          And she fell asleep a very tired but happy little girl.

Almost THE END…

Epilogue:

The next Christmas Mary’s teacher in the Philippines sent a letter to Mary’s family in Pennsylvania. Some of the children from the surprised family were in her class that year. She had asked the children to write about their most memorable Christmas. Those children described that someone knocked on their door on Christmas Eve and when they opened the door a huge box of presents was on their doorstep. The whole family had the best Christmas EVER!!

THE END!

P.S. I have posted three other stories about my memories from that year. You can see them here:

https://marykisner.com/trying-to-sneak-into-air-conditioning/

https://marykisner.com/this-monkey-was-not-my-friend/

https://marykisner.com/camel-ride-in-egypt-1956/

Learning How to Mend My Socks

Never in a million years did I think I would want to learn how to mend my socks! Now that I’ve finally found the perfect socks (from https://maggiesorganics.com) I was very distressed to find I had worn a hole at the toe. So sad…both my mother and Bert’s mother passed away over 30 years ago and I couldn’t ask them how they did it! Believe it or not, I found dozens of articles and YouTube videos with instructions online!

I realized I needed a “darning egg” that would fit inside the sock to stabilize the place I wanted to sew. I remembered seeing such a thing in one of the drawers of my treadle sewing machine. It seemed small…like it would work in a child’s sock.

Then I realized I needed appropriate thread! So, I headed to JoAnn’s to see what they had. Lo and behold…they also had a new (larger) darning egg!

The smaller “darning egg” above is old and used. The new one is larger and made of hardwood. On the back of the packaging for the new one, were these instructions:

Looks so simple, right? Besides needing a magnifying glass to read the instructions, somehow the actual sock wasn’t so precise!

At JoAnn’s I also picked up thread (called “Button & Craft” thread) in four colors, I don’t actually have socks in red or lavender, but I thought it didn’t matter…my socks are usually inside a shoe!

Then I grabbed a packet of needles, with larger holes just in case my regular hand sewing needles were too small:

Sock #1

This was an older sock that I felt I could practice with. The first set of instructions I read told me to put the darning egg inside the sock…so I did.

Next, I was to make a row of running stitches around the hole. I used red thread on purpose so it would show up in these pictures. I made a knot at the beginning, before the first stitch. I planned to cut off the knot when I was done.

Then I read the instruction that came with the new darning egg and it said to turn the sock inside out before starting!! Of course! So, I removed the egg and carefully turned the sock inside out…and got the needle to the outside. Geez!

OK…continuing on the inside of the sock…I started making long stitches to create the beginning of the patch.

Then, I tried to weave stitches across the long ones going perpendicular to the first stitches. Then I just went over the whole pile on the diagonal.

Looks crazy and messy, I know! But it did look like I had covered the whole from the inside.

Time to turn the sock right side out to see what I had!

Now the proof of success will be to wear the sock and see if it’s comfortable!

Sock #2

One more time. Here is one of my favorite socks…organic cotton from Maggies Organics. I really didn’t want to throw it away!

With the sock turned wrong side out I dropped in the darning egg. I started with the row of stitches around the hole. Then I started filling in with long stitches across the hole. I pulled the sides of the hole together a little as I snugged up the stitches. Finally, I wove stitches across the long stitches.

And the final result from the right side:

I hope my mother would have been proud that I saved a sock! Bert and I both remember our mothers darning socks. I probably wouldn’t have bothered this time, but I really like these socks and they were expensive! Now I’ll see if the repair patch is comfortable! At least now I have the right supplies to fix other socks!

Making Christmas Soap for the Holidays

Very soon I will need to get out of the kitchen! This weekend Bert will begin his marathon chocolate chip cookie baking, so I need to be done baking bread and making soap favors for several of the groups I will see next week. When Bert brings in the big mixer, my kitchen-based projects need to be DONE. His cookies will tie up the kitchen for over a week!

I now have bread in the freezer and yesterday I spent the day melting “melt-and-pour” soap to make enough small soaps so I could share with about 40 people. Three things make the soap useful as a gift soap for others: 1) a gentle soap that feels good after use; 2) a scent that isn’t too strong, but is appropriate for the season; and 3) a color and shape that reflects the season.

I started with choosing the soap components. I’ve been happy with how the Oatmeal and Shea Butter soap bases work together. It’s almost as soothing as my favorite Aloe Vera soap.

For the Christmas season, I chose the scent of cinnamon. Then I used a soap tint that said, “Red” but it really turned out a solid pink. I added some red sparkly biodegradable glitter that looked really nice.

My final decision was shape. I started with the molds of tiny gingerbread men, candy canes and snowmen. Those would be good for guest soaps or children.

For the majority of my friends, my preferred shape is the heart. It’s just about the right size for a gift and makes about 24 hearts per batch.

Finally, a larger bar of soap is just right for a few people for Christmas gifts.

To make this much soap, I spent the day in the kitchen…measuring, melting, pouring, etc. There is a lot of wait time. My phone is handy so I can take pictures and read a novel while I wait!

Making this Christmas soap, I followed the same procedure as always. Melt the soap chunks, remove from heat, add Vitamin E oil (as a preservative), add essential oil and soap tint. Finally, stir in biodegradable glitter, if desired. When all mixed, pour into preferred molds. Let sit until hard.

When the soap is firm, I remove them from the molds and wrap each piece in plastic wrap. Finally, I print cards to include with each soap. I want to make sure folks know what is in the soap. (I have even saved out 4 heart shaped ones before I added the scent, knowing one friend prefers things unscented!)

Unscented hearts…only your nose would know the difference!

Here are the the final soaps, ready to put in a small gift bag:

I’ve written many posts about using melt-and-pour soap, you can read more at these posts:

https://marykisner.com/simple-guest-soaps-for-gifts/

https://marykisner.com/the-unscented-choice/

https://marykisner.com/aloe-vera-gift-soaps/

https://marykisner.com/making-soap-with-an-embedded-toy/

https://marykisner.com/making-soap-with-an-embedded-coin/

https://marykisner.com/lego-shaped-soaps-for-fun/

https://marykisner.com/gardeners-hand-soap/

https://marykisner.com/discovering-there-are-two-kinds-of-oatmeal-soap/

Enjoy!