Garden Update April 30, 2024

It’s finally time to start getting the garden ready for this year! We’ve had so much rain that it really kept us from playing in the dirt! The grass has benefitted from all the water and is a lush bright green.

Garden beds have just been too soggy until today. We still may have a frost at night so sensitive plants need to wait a few more weeks indoors.

The three kinds of tomatoes Bert started from seed are doing well in the shop under grow lights. First, we have our standard SuperSauce tomatoes:

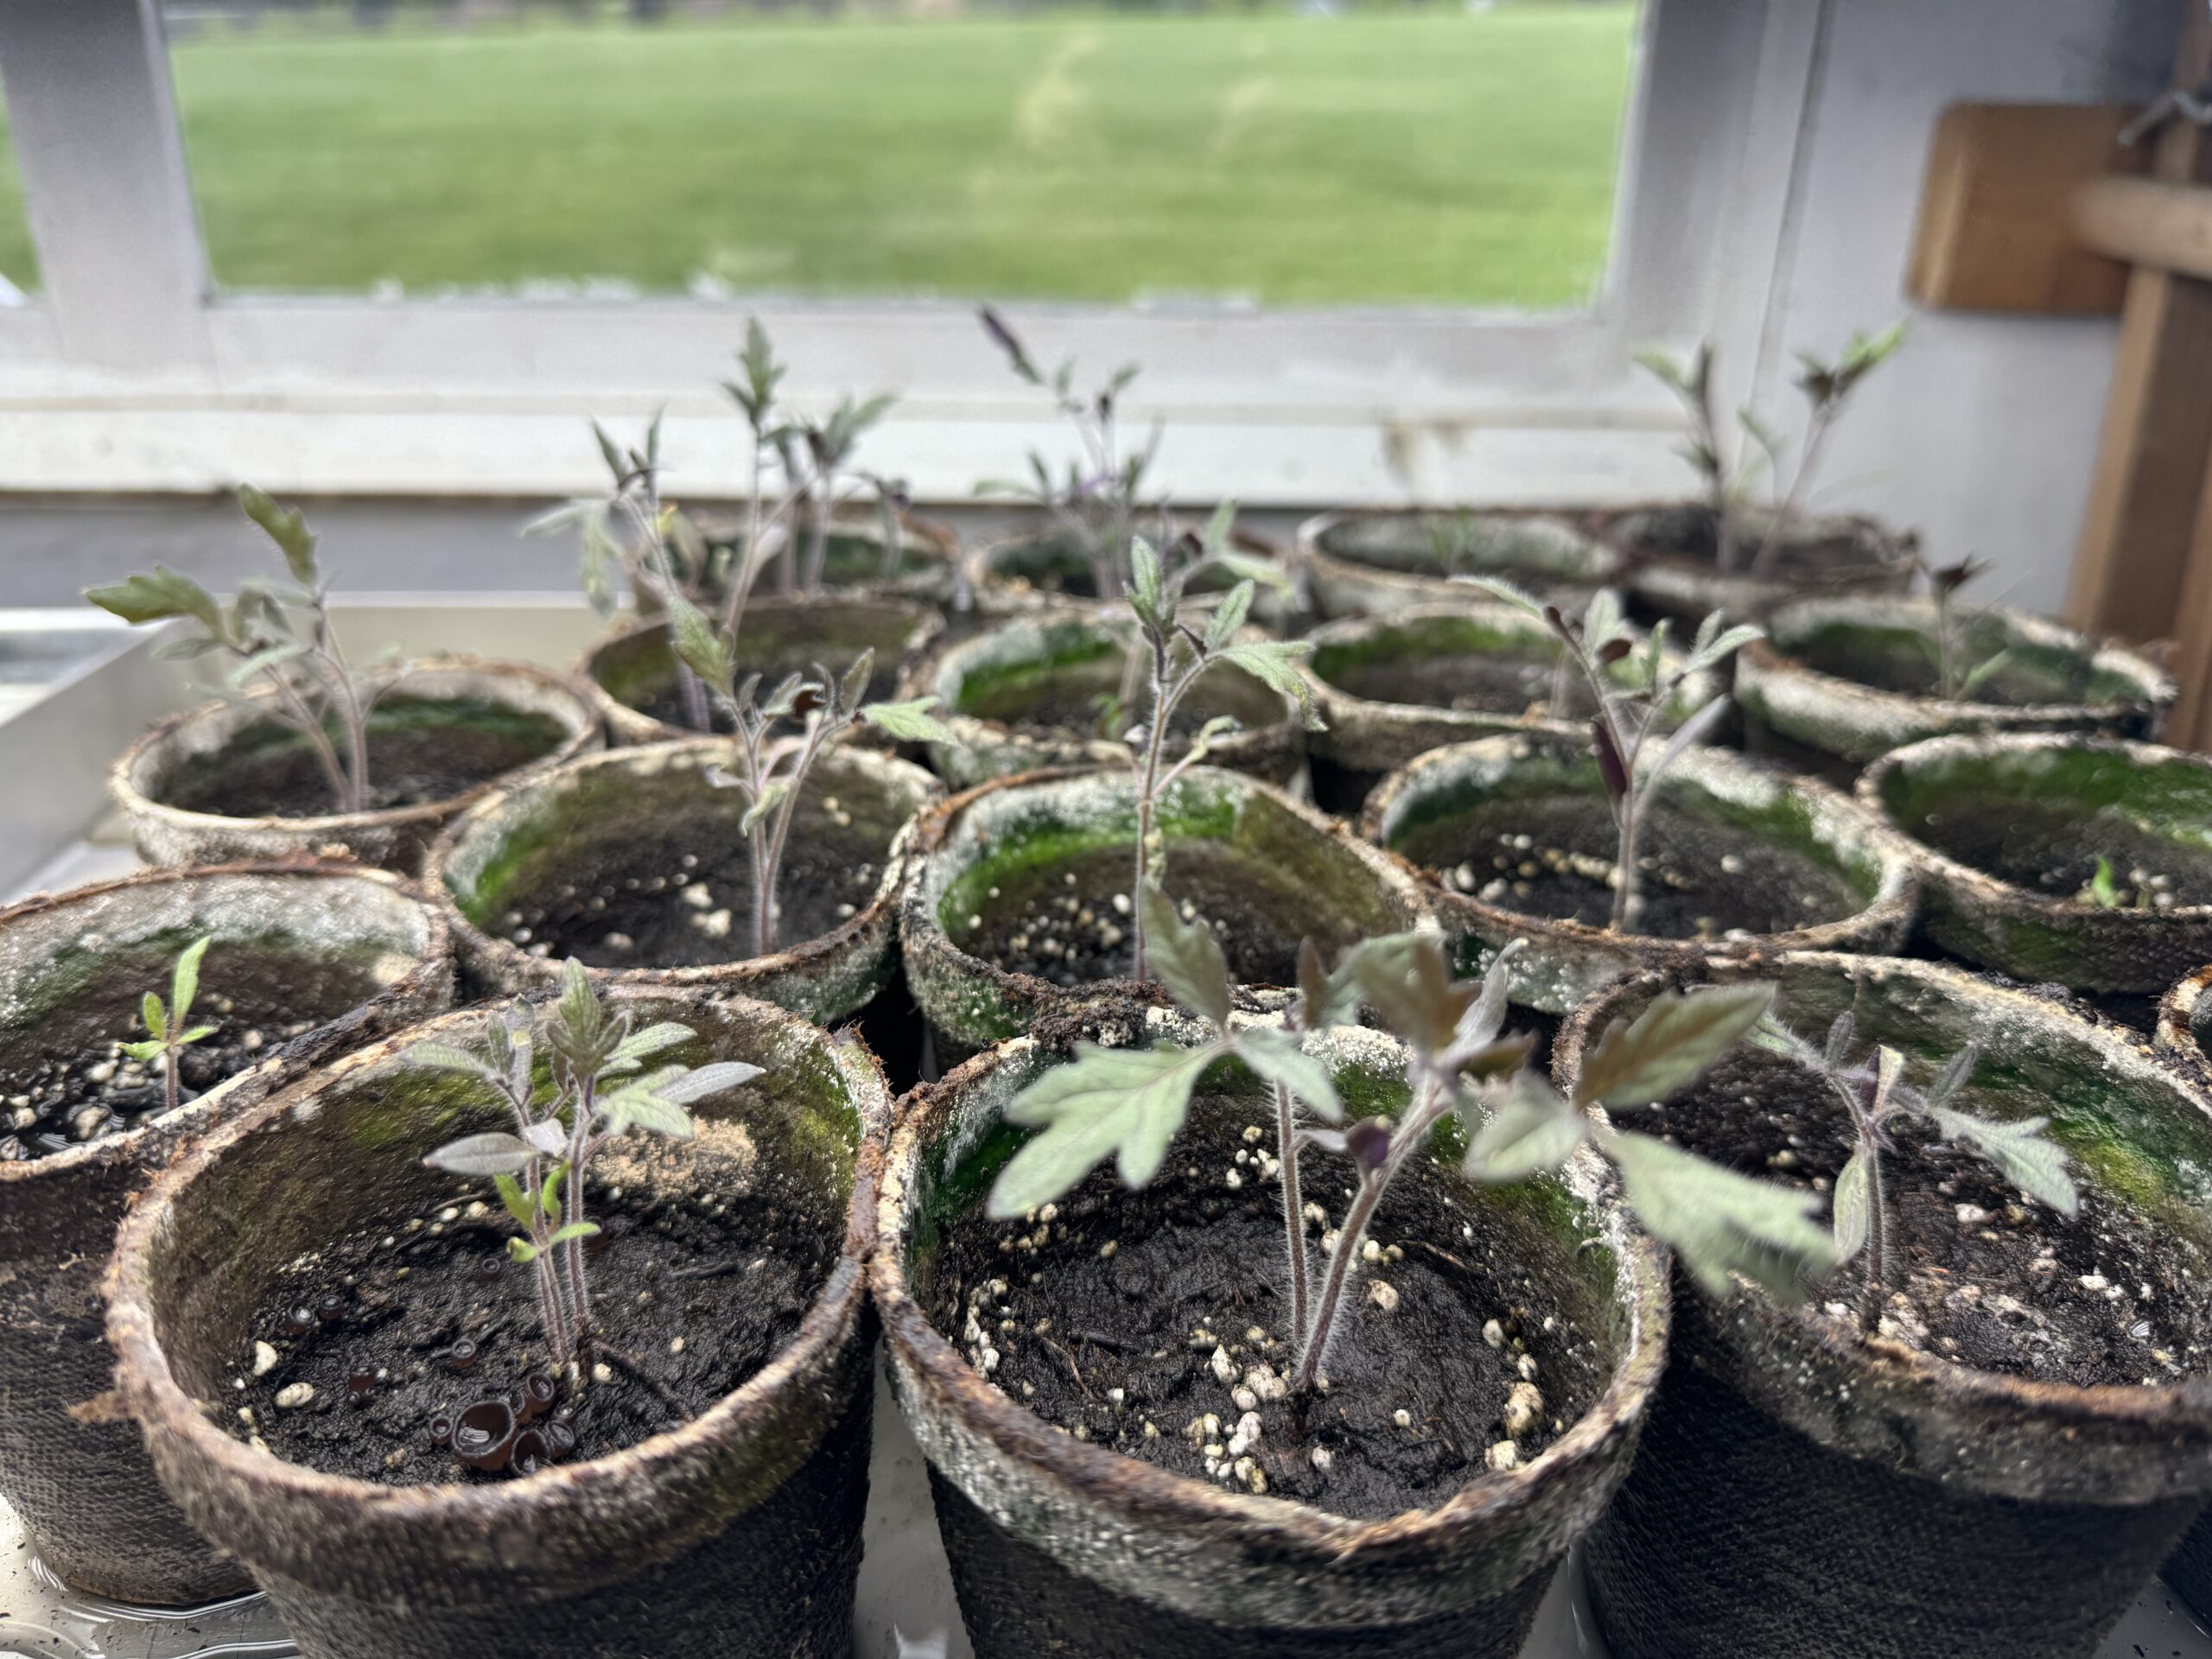
Then Bert thought he’s try something called “Bodacious” Tomatoes from Burpee…supposed to be a huge, solid tomato:

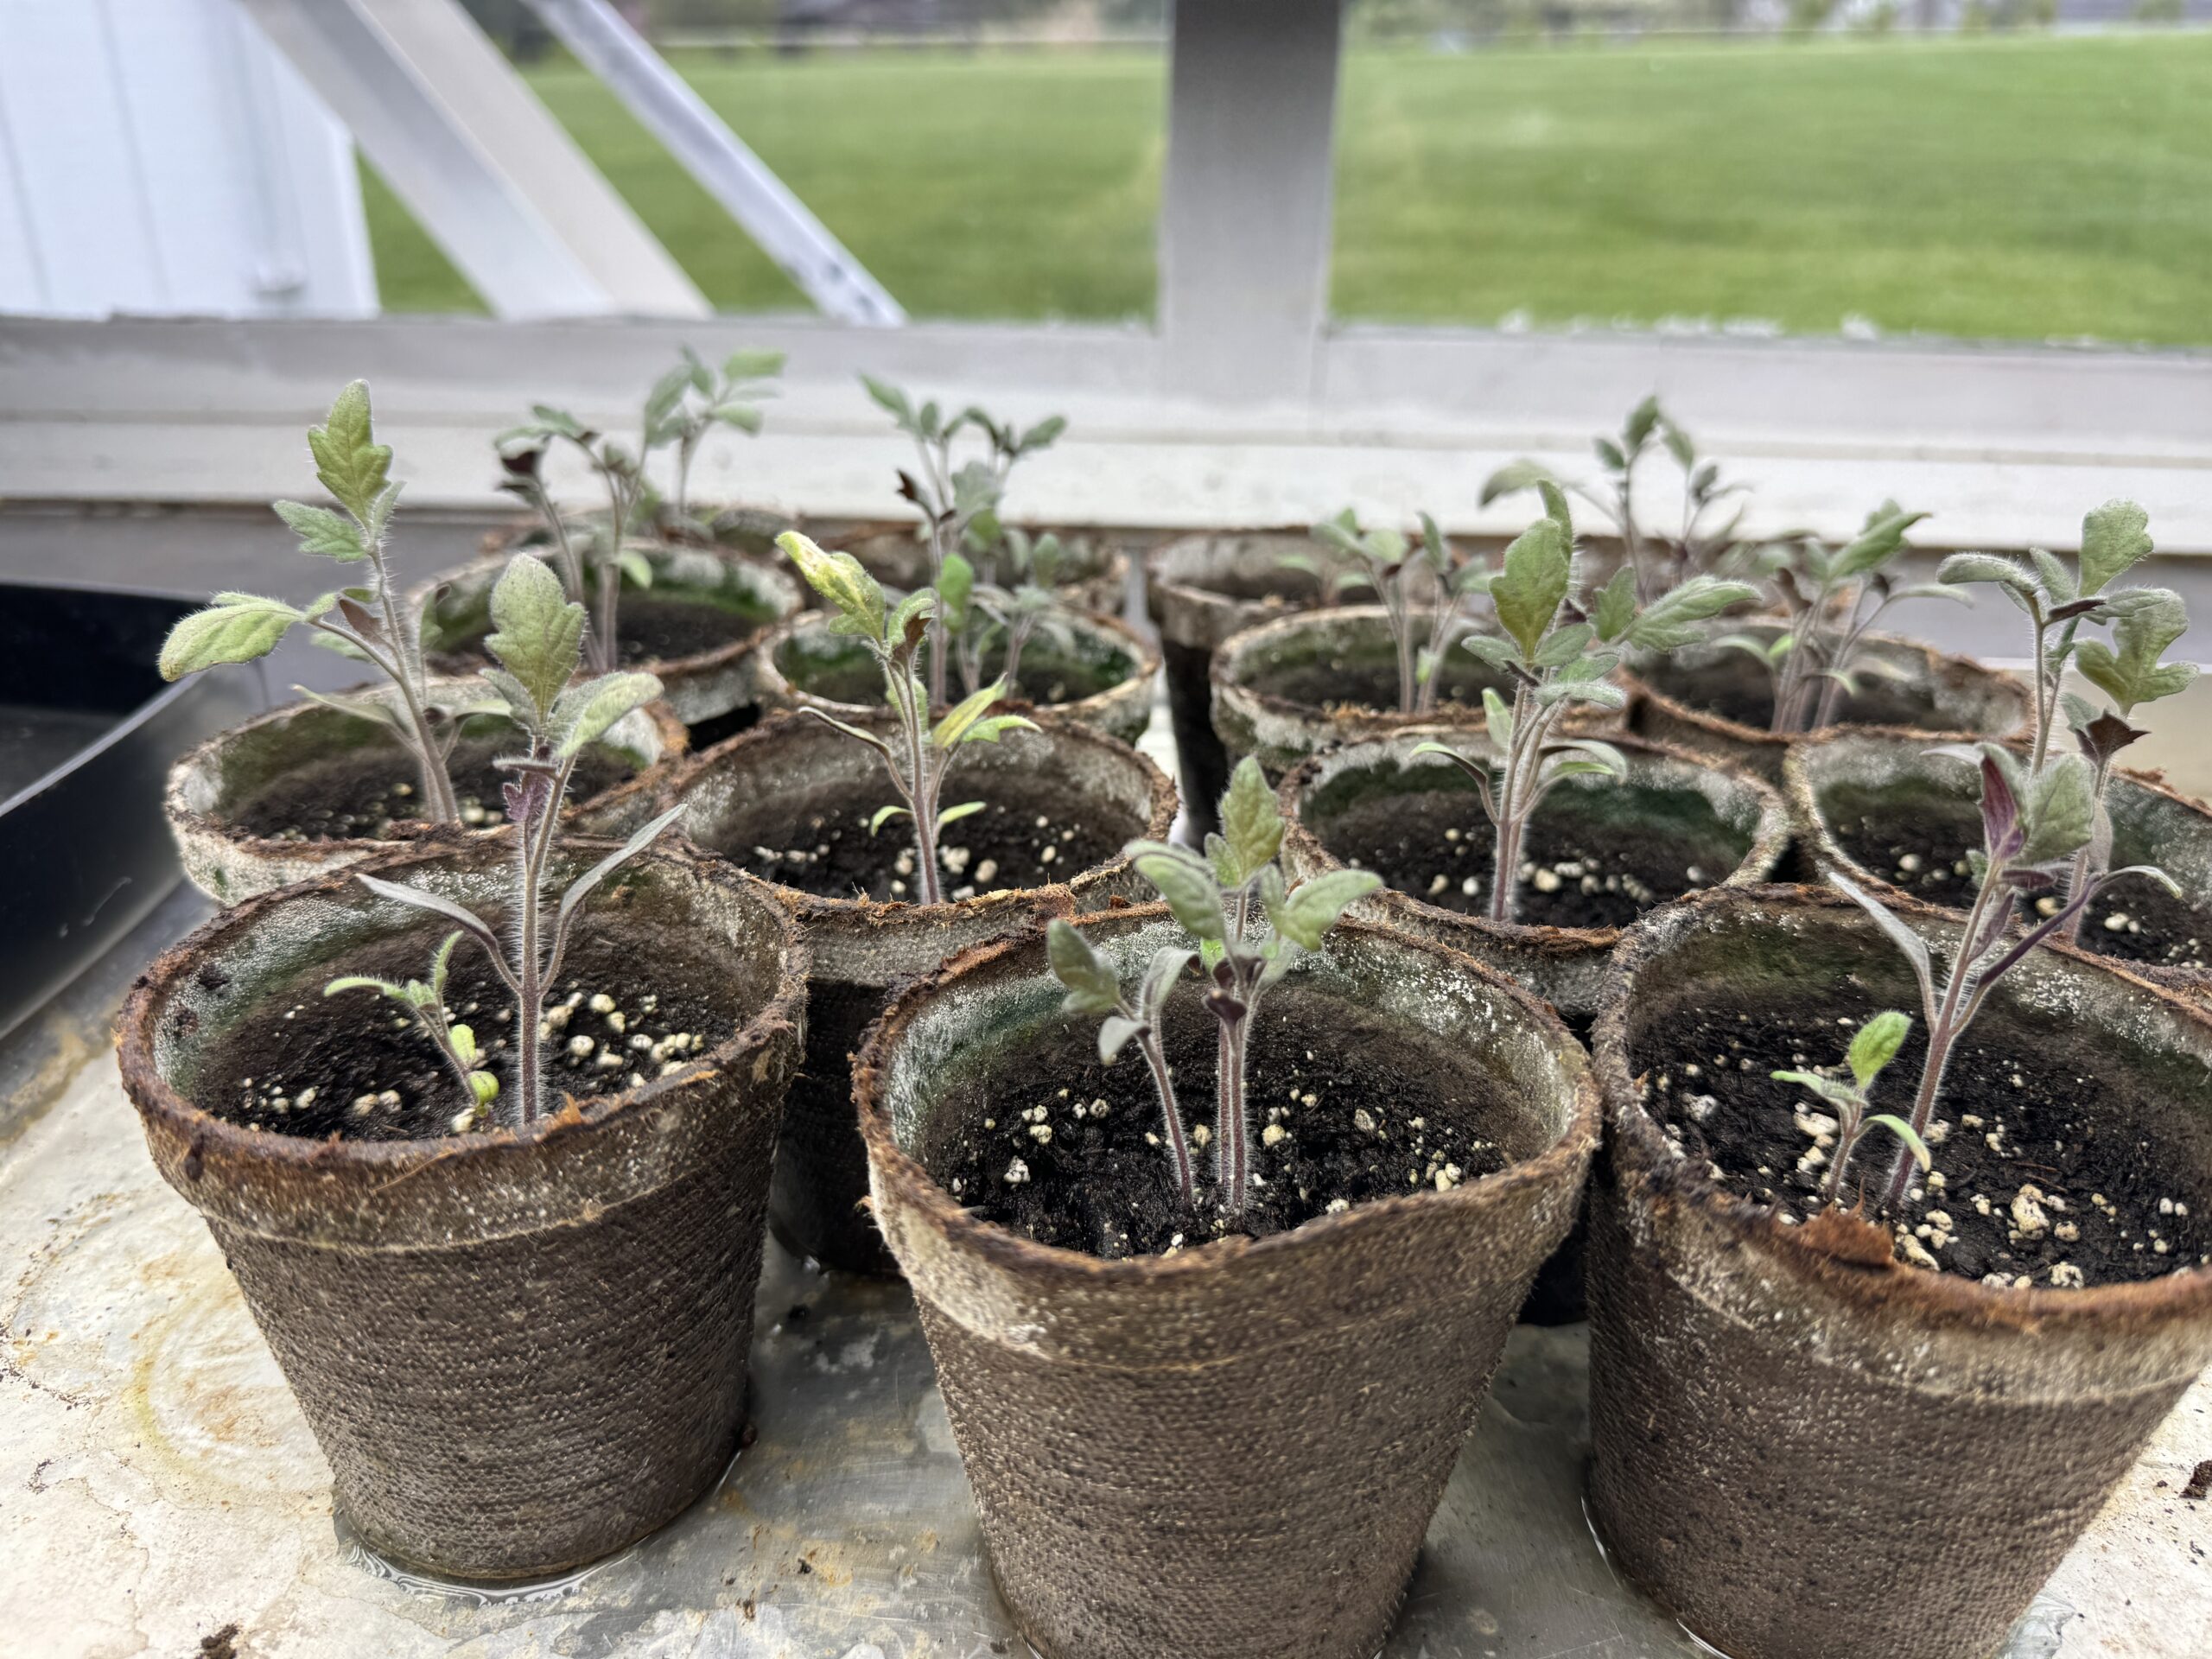
Finally, I requested a Yellow Pear tomato…hopefully will be good in salads. I’m hoping I can share a few plants with my daughter or the neighbors…we certainly don’t need that many little tomatoes!

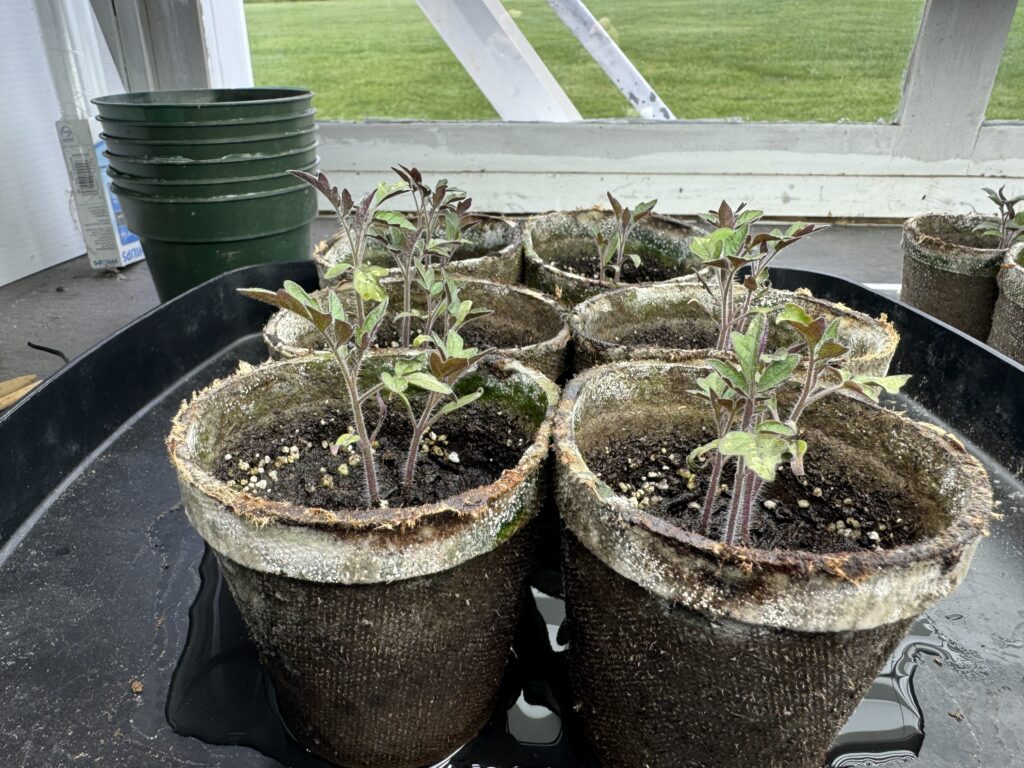
Frankly, right now they all look like generic tomato plants!

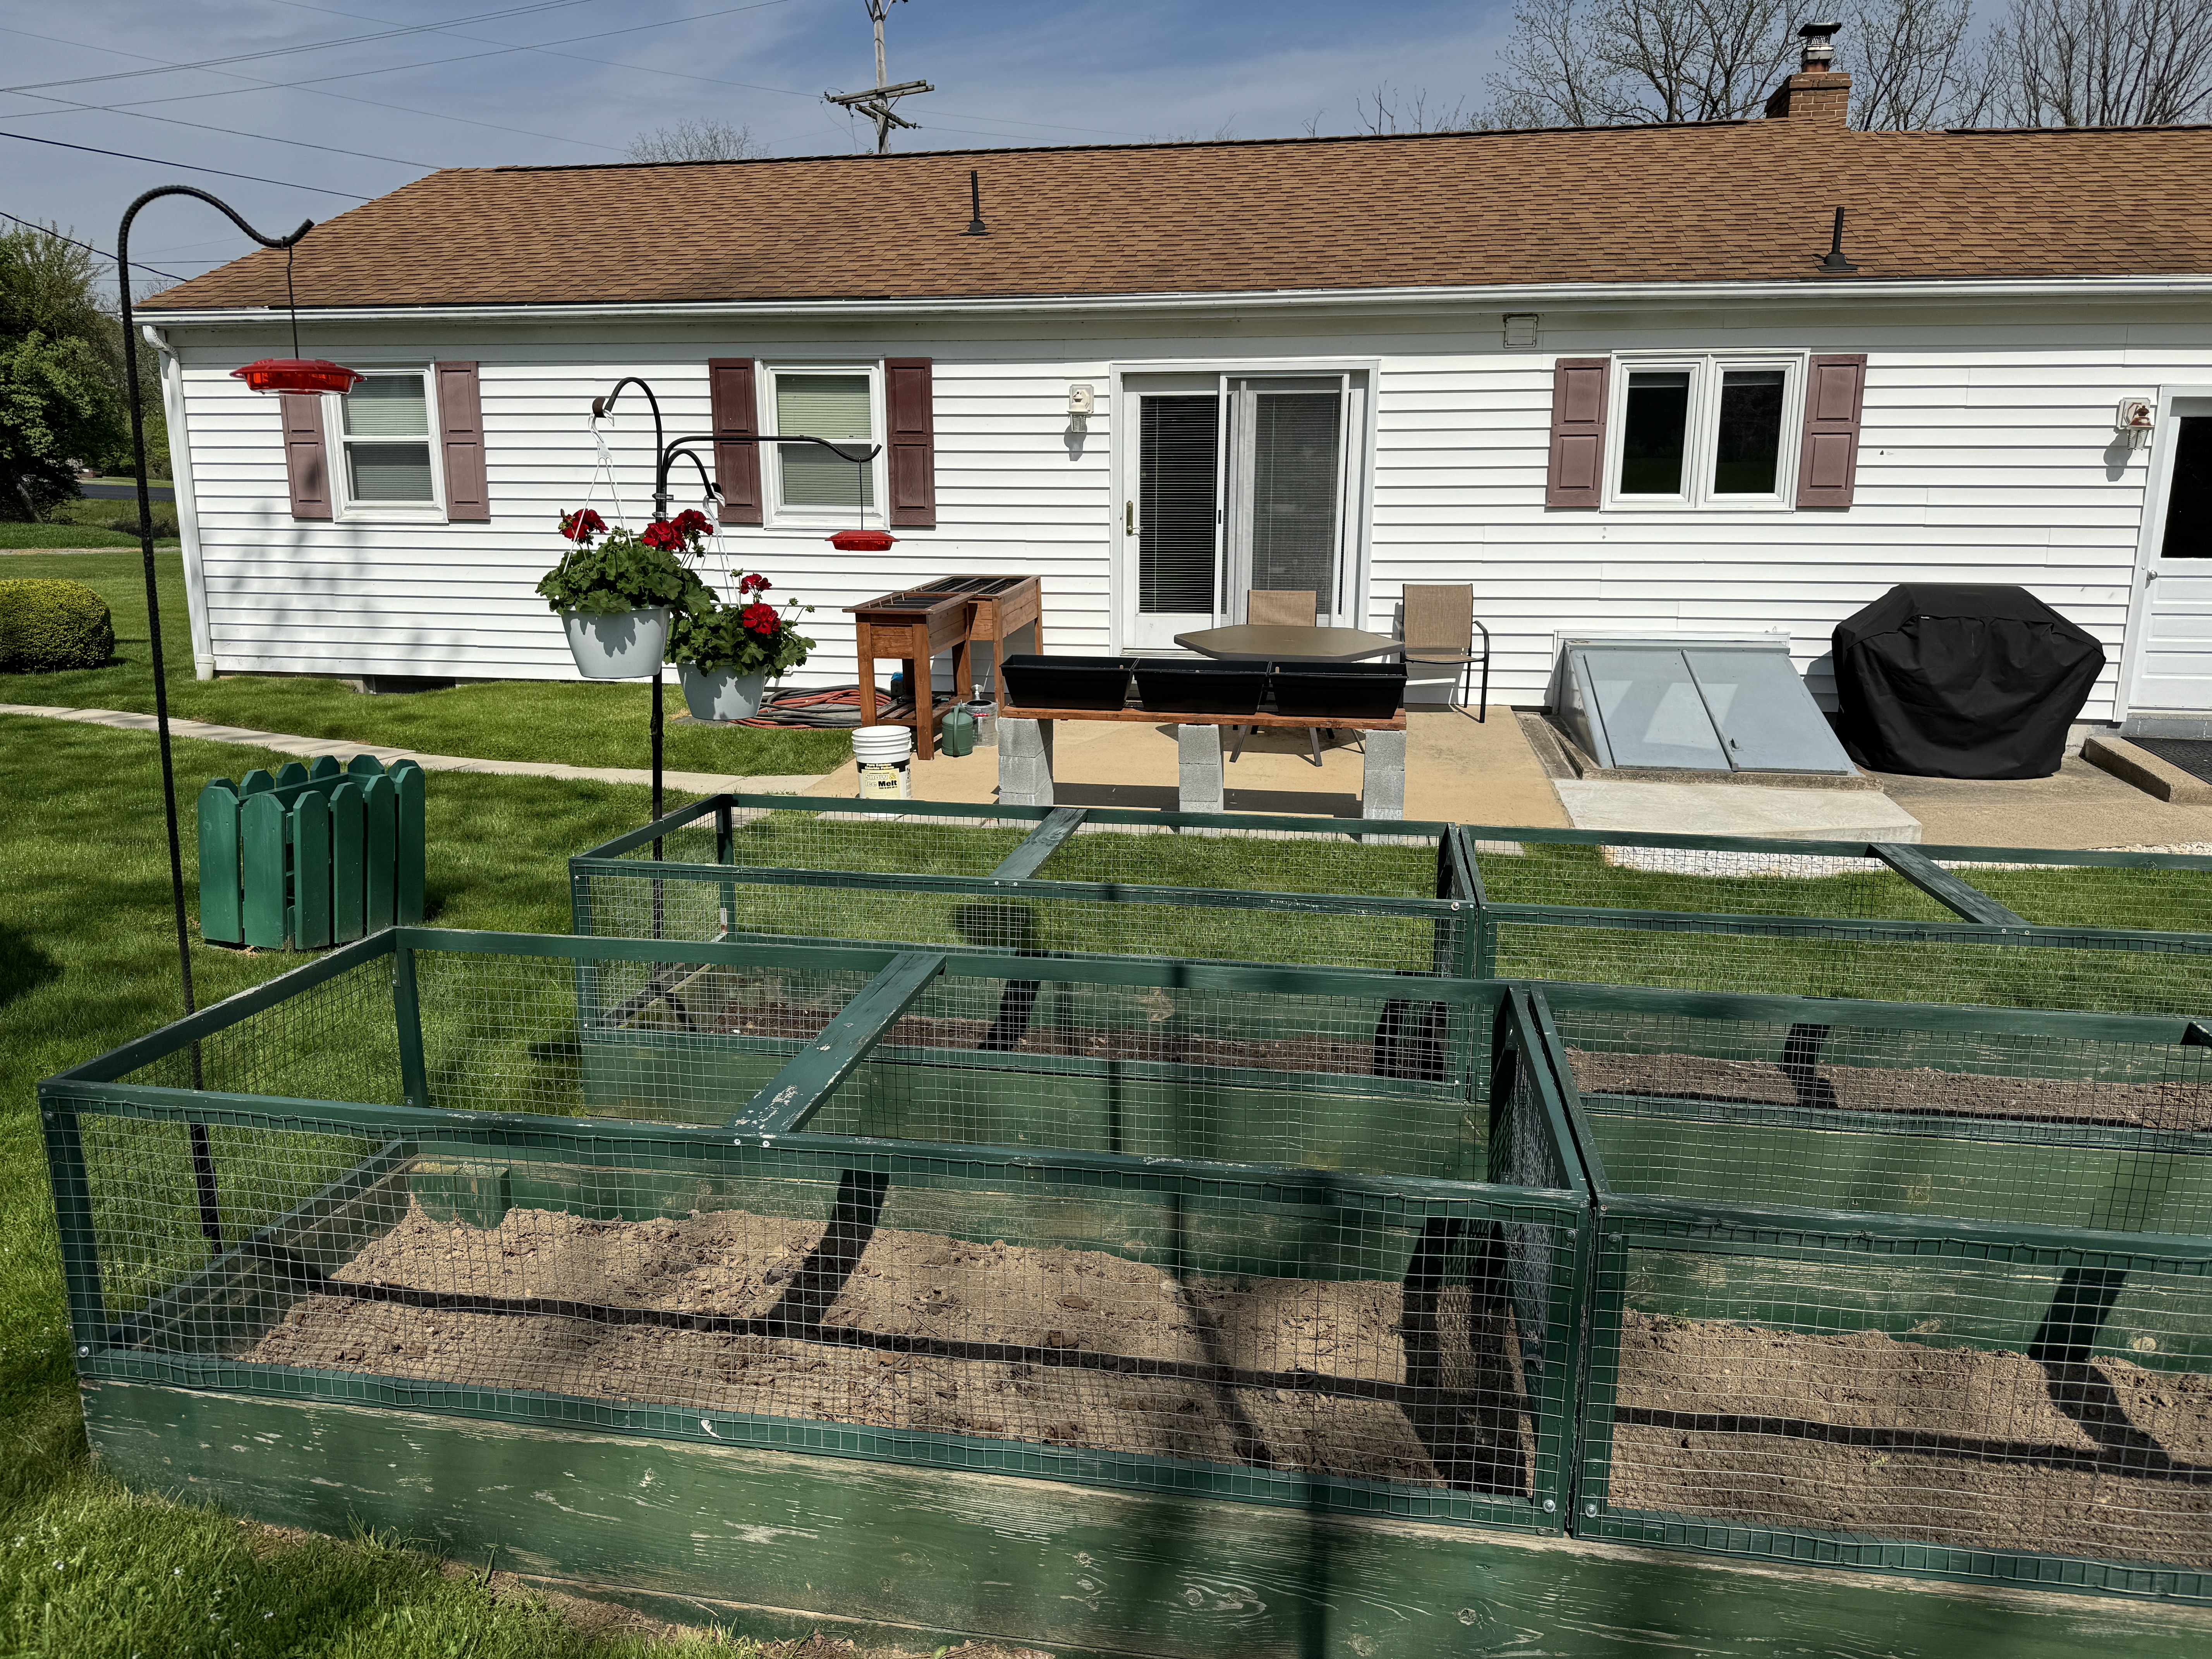
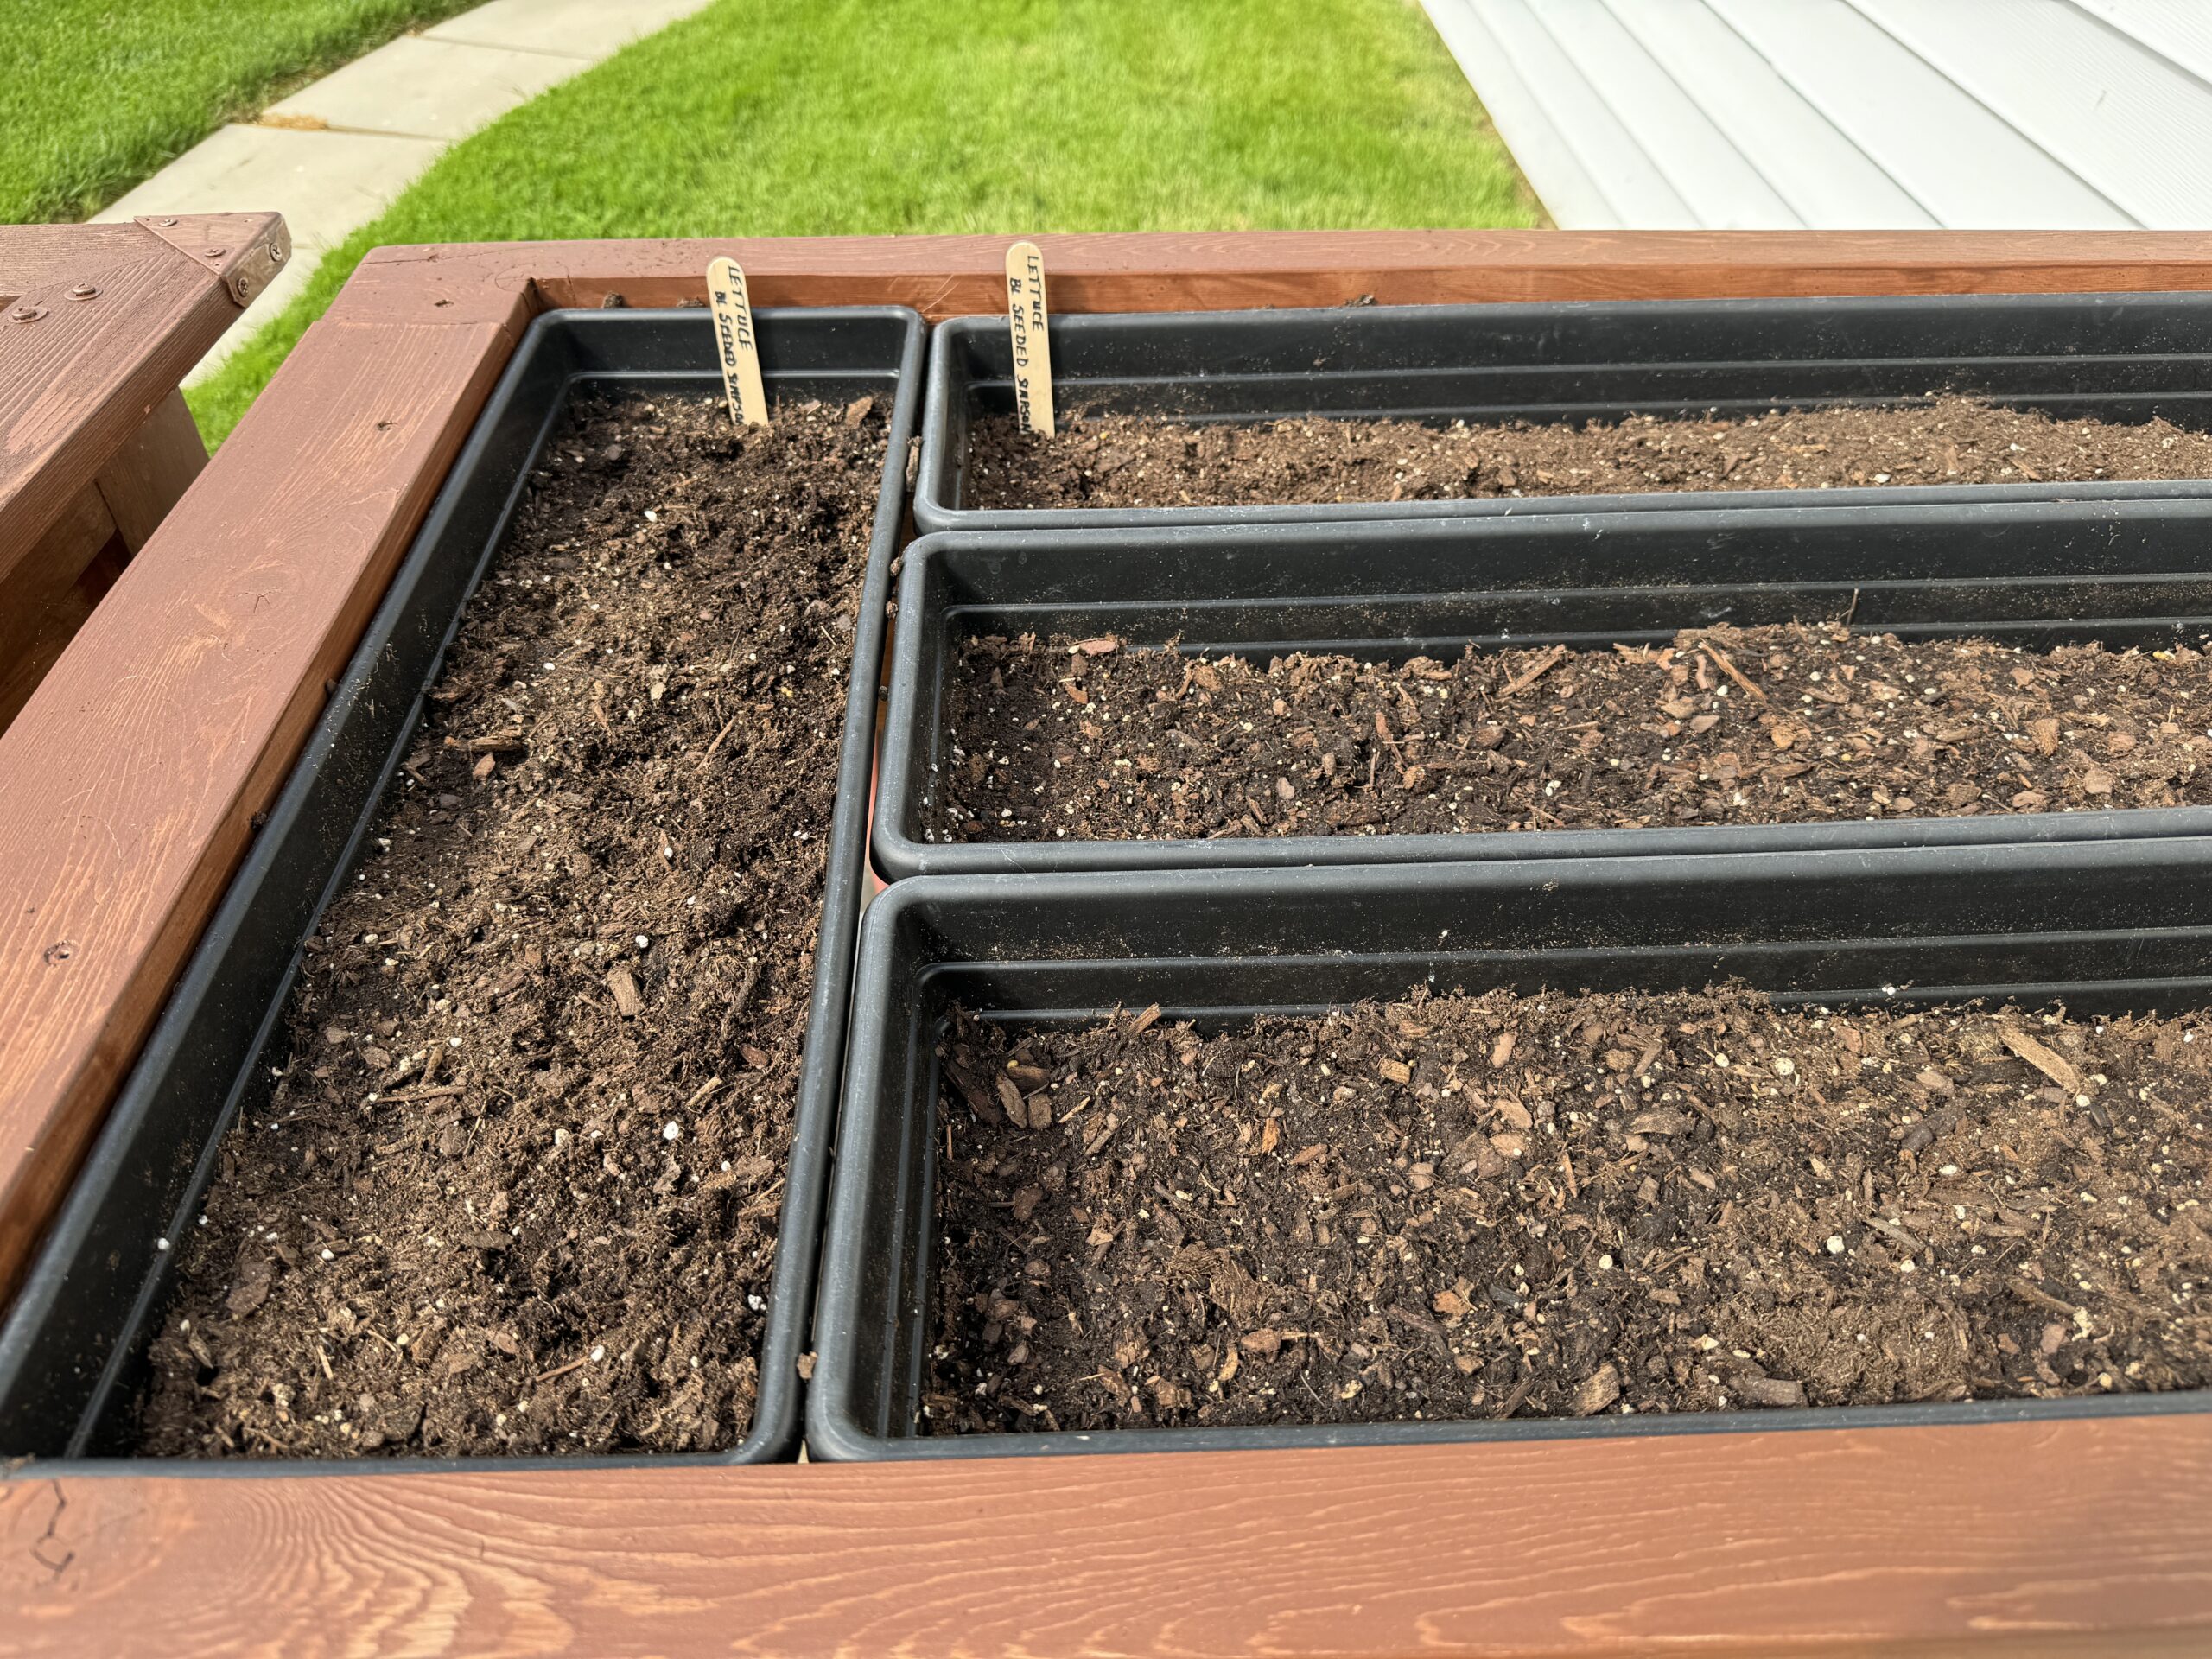
Today, I got out the seeds I’ll put in my planters right by the patio:

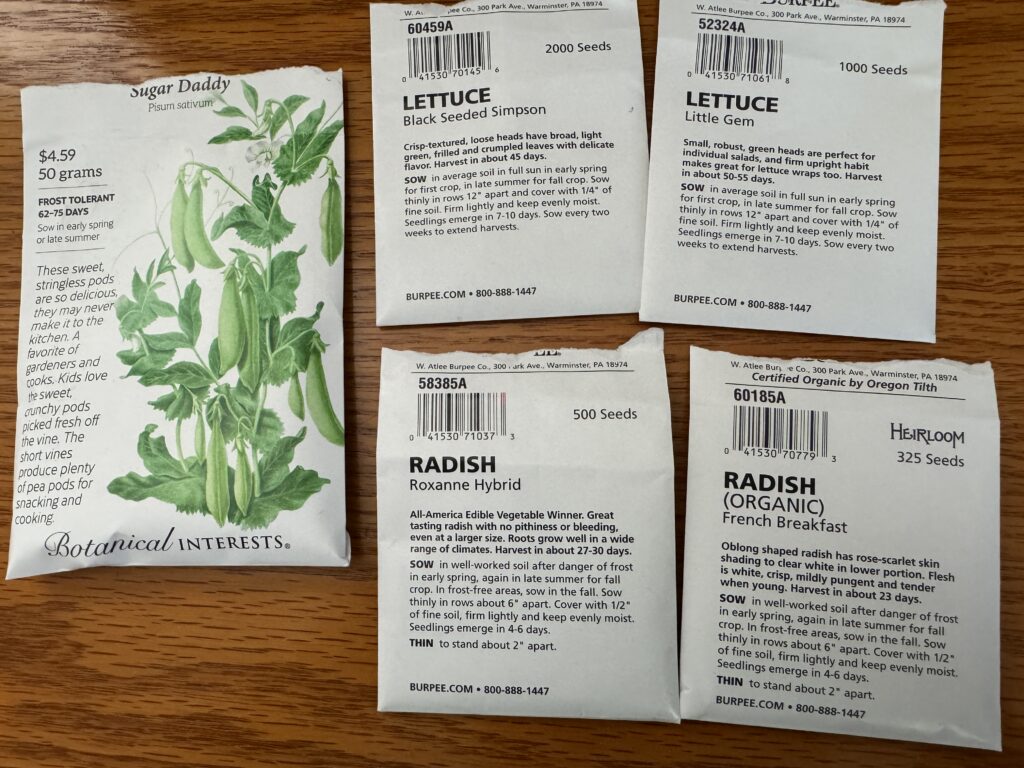
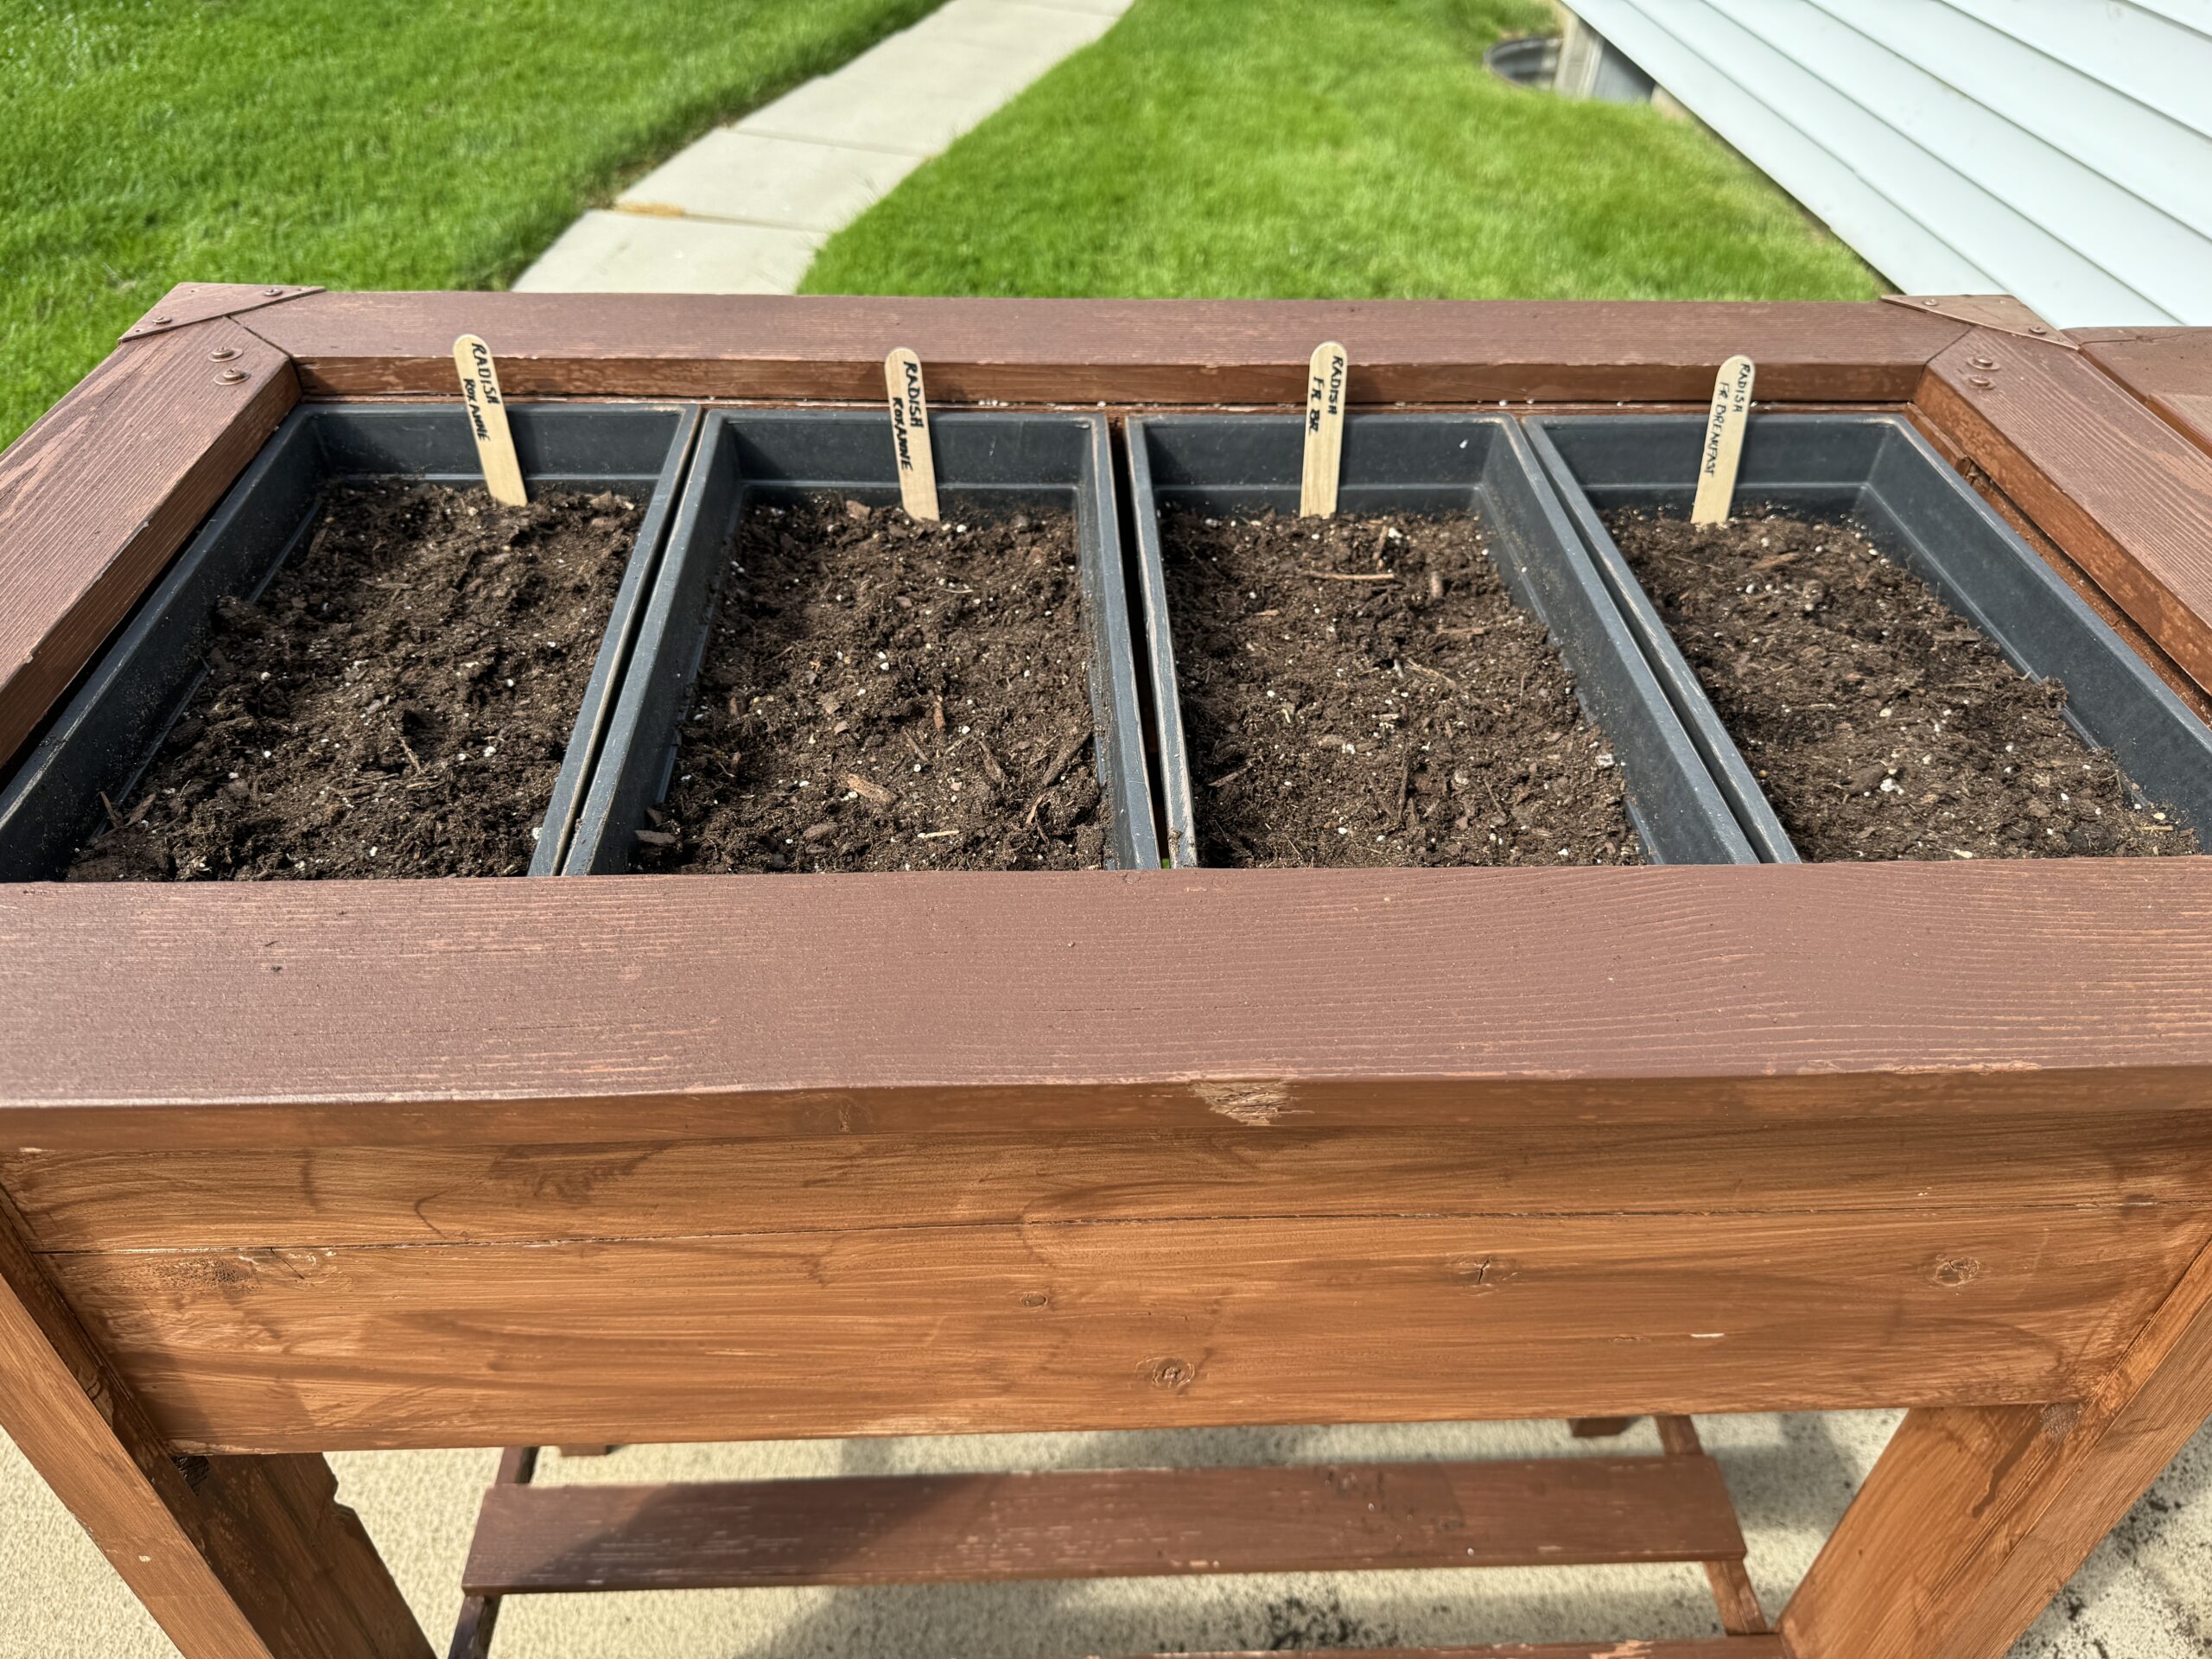
These planters will hold two kinds of radishes and the Black Seeded Simpson Lettuce:

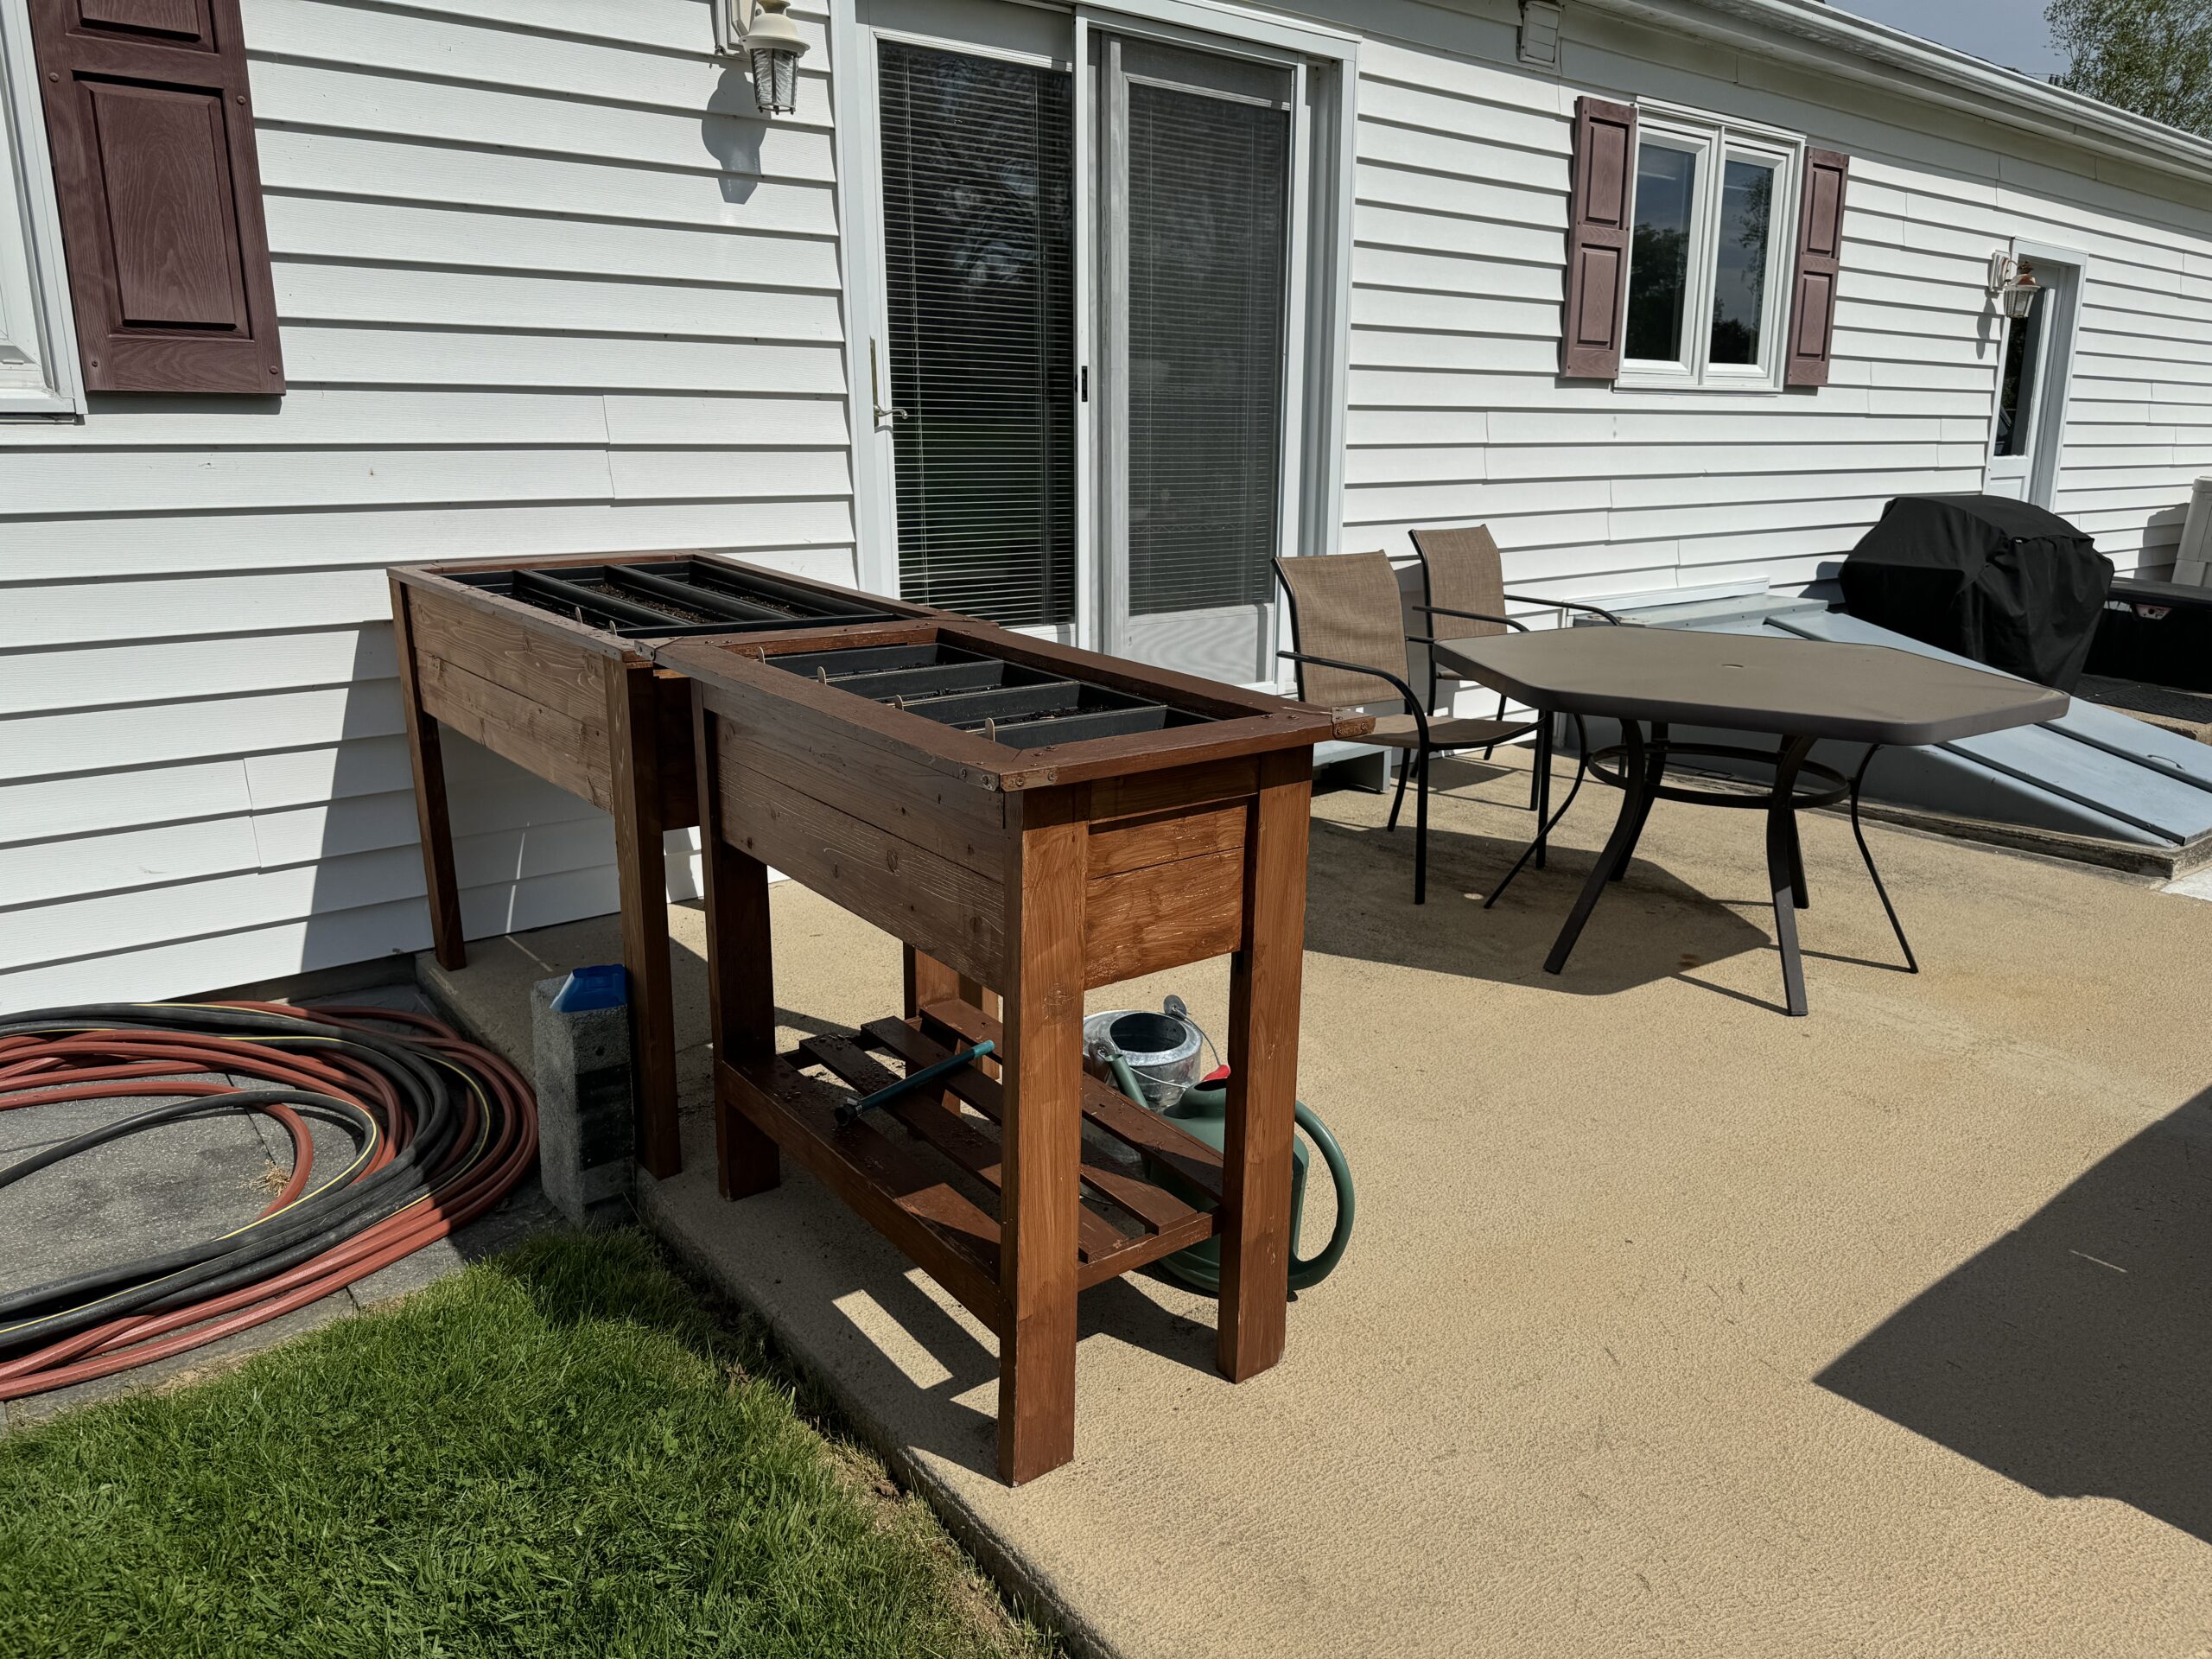
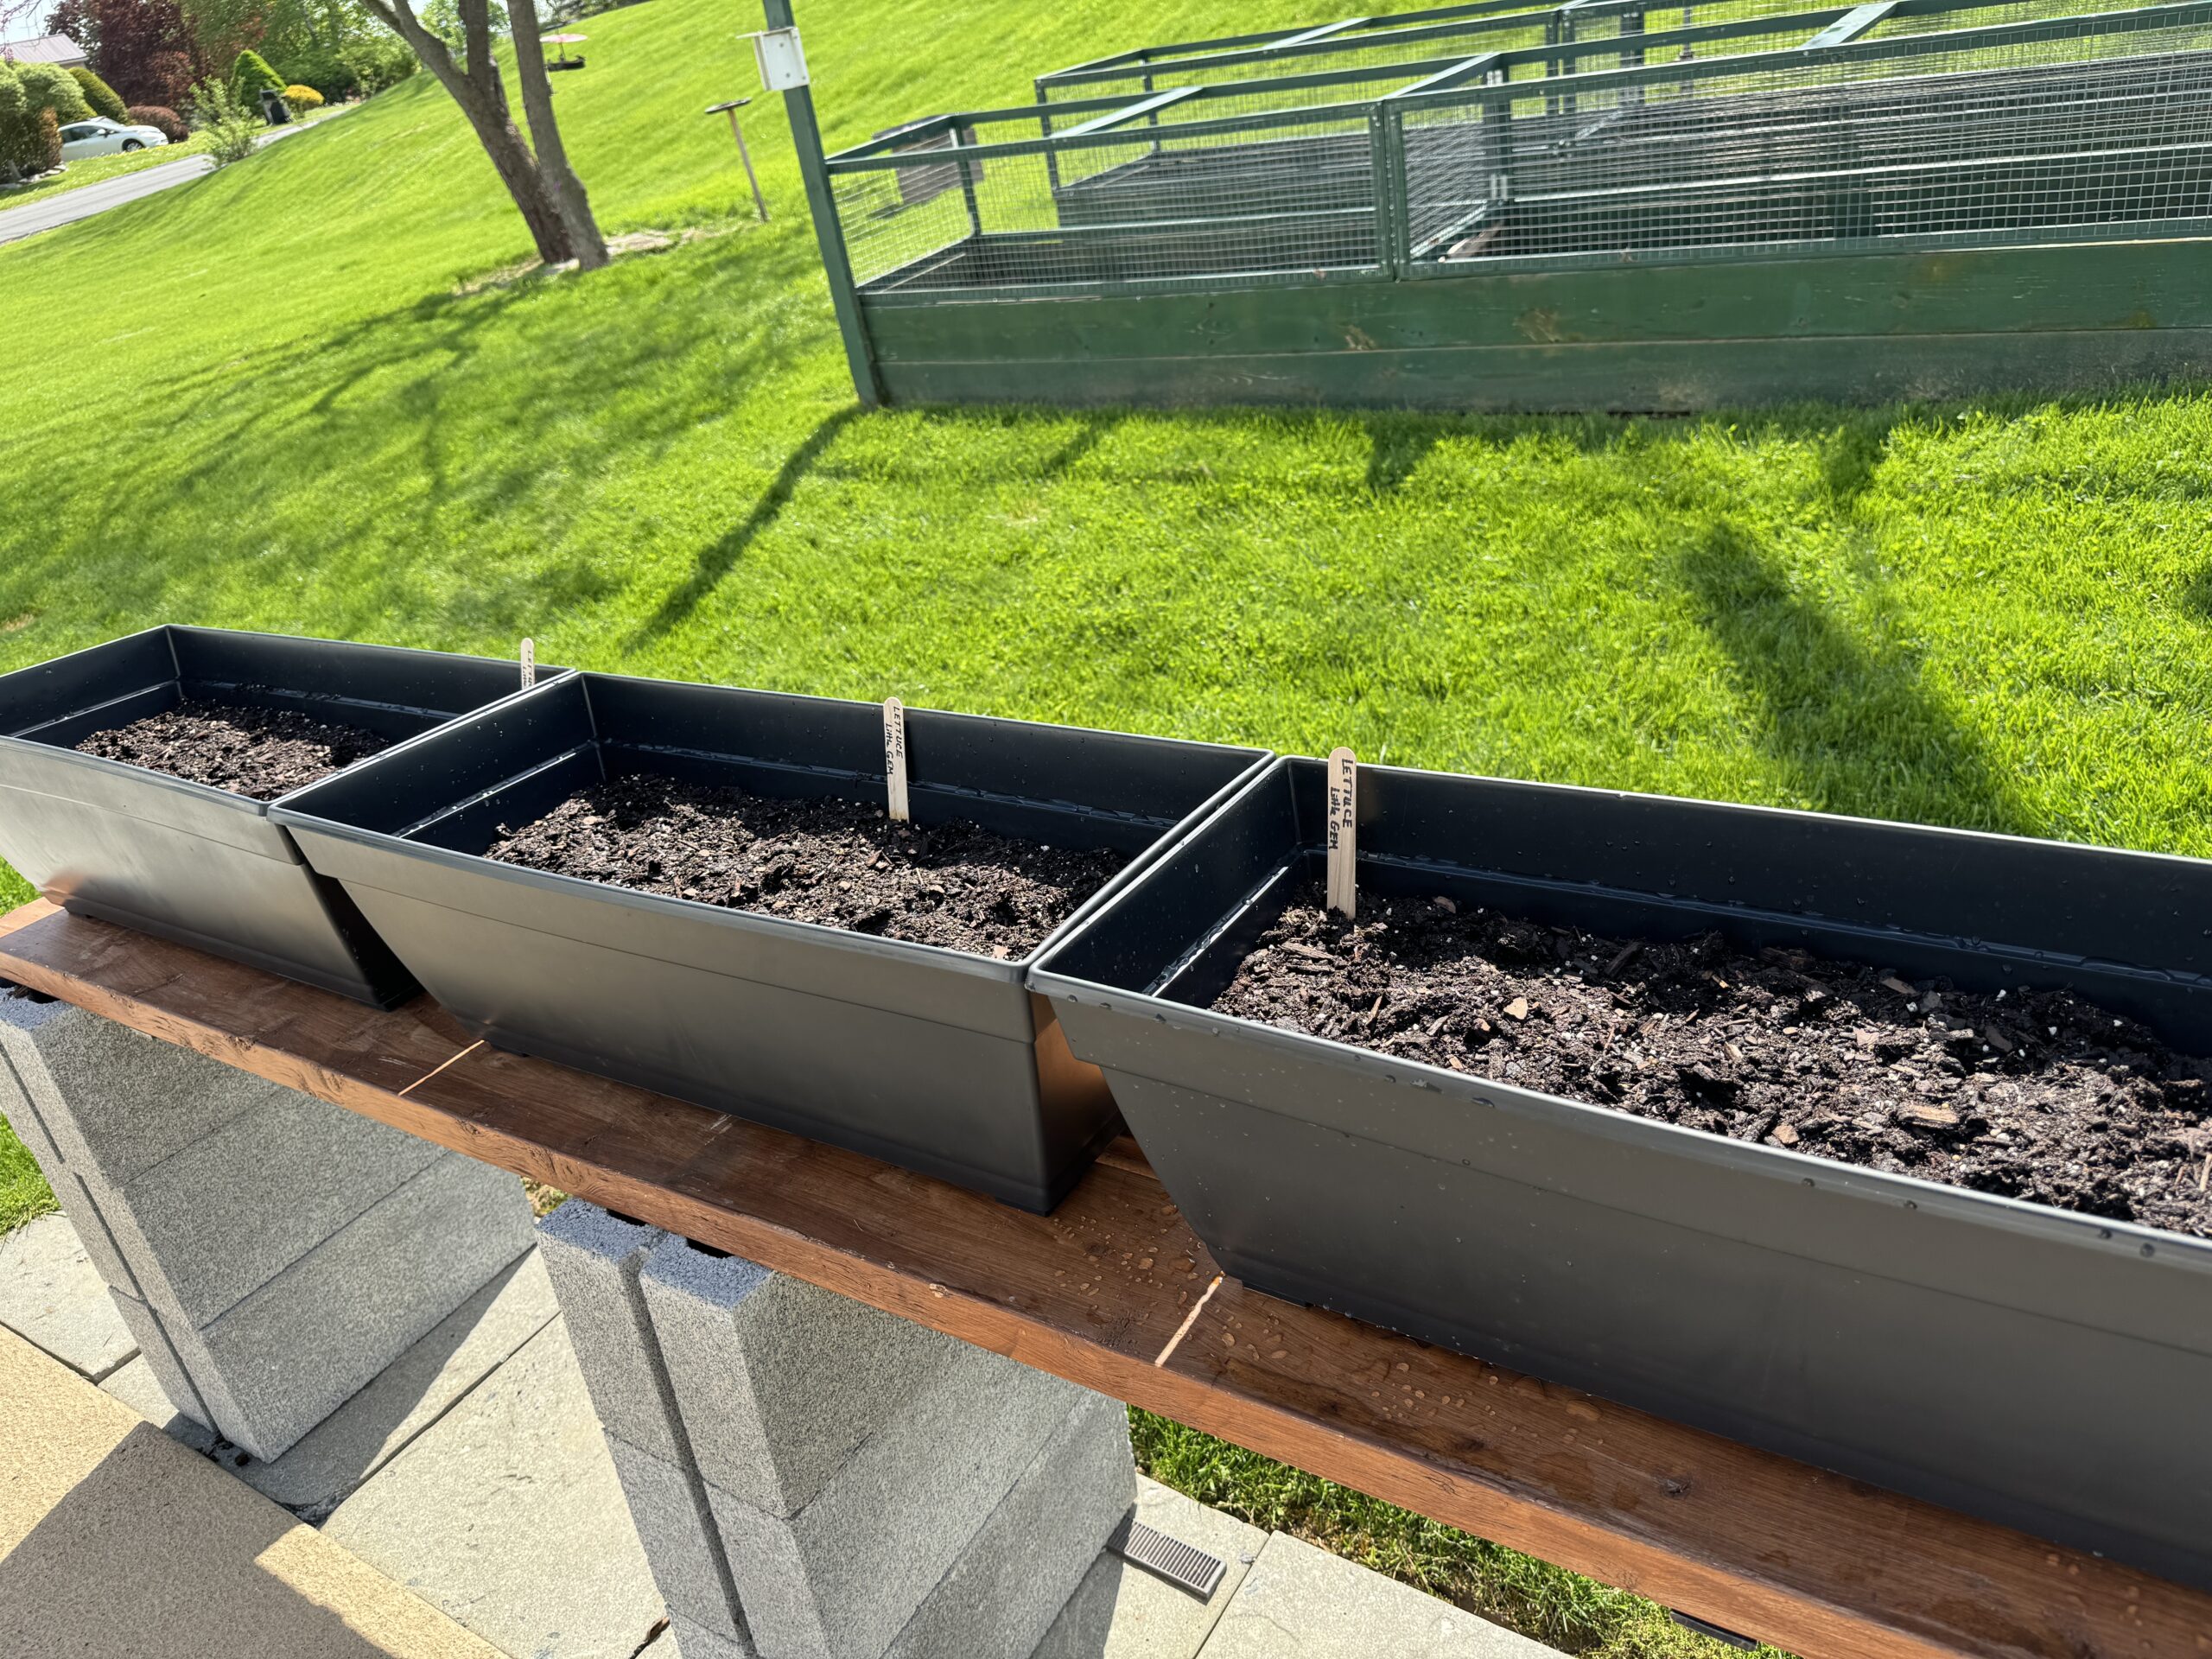
Along the outside edge of the patio, I’ll plant Little Gem lettuce…it’s supposed to make little heads so I tried to put just 1-2 seeds in each hole and spaced so I don’t have to thin them out. It doesn’t look very exciting right now, but these planters keep everything up and away from roving bunnies looking for a snack!

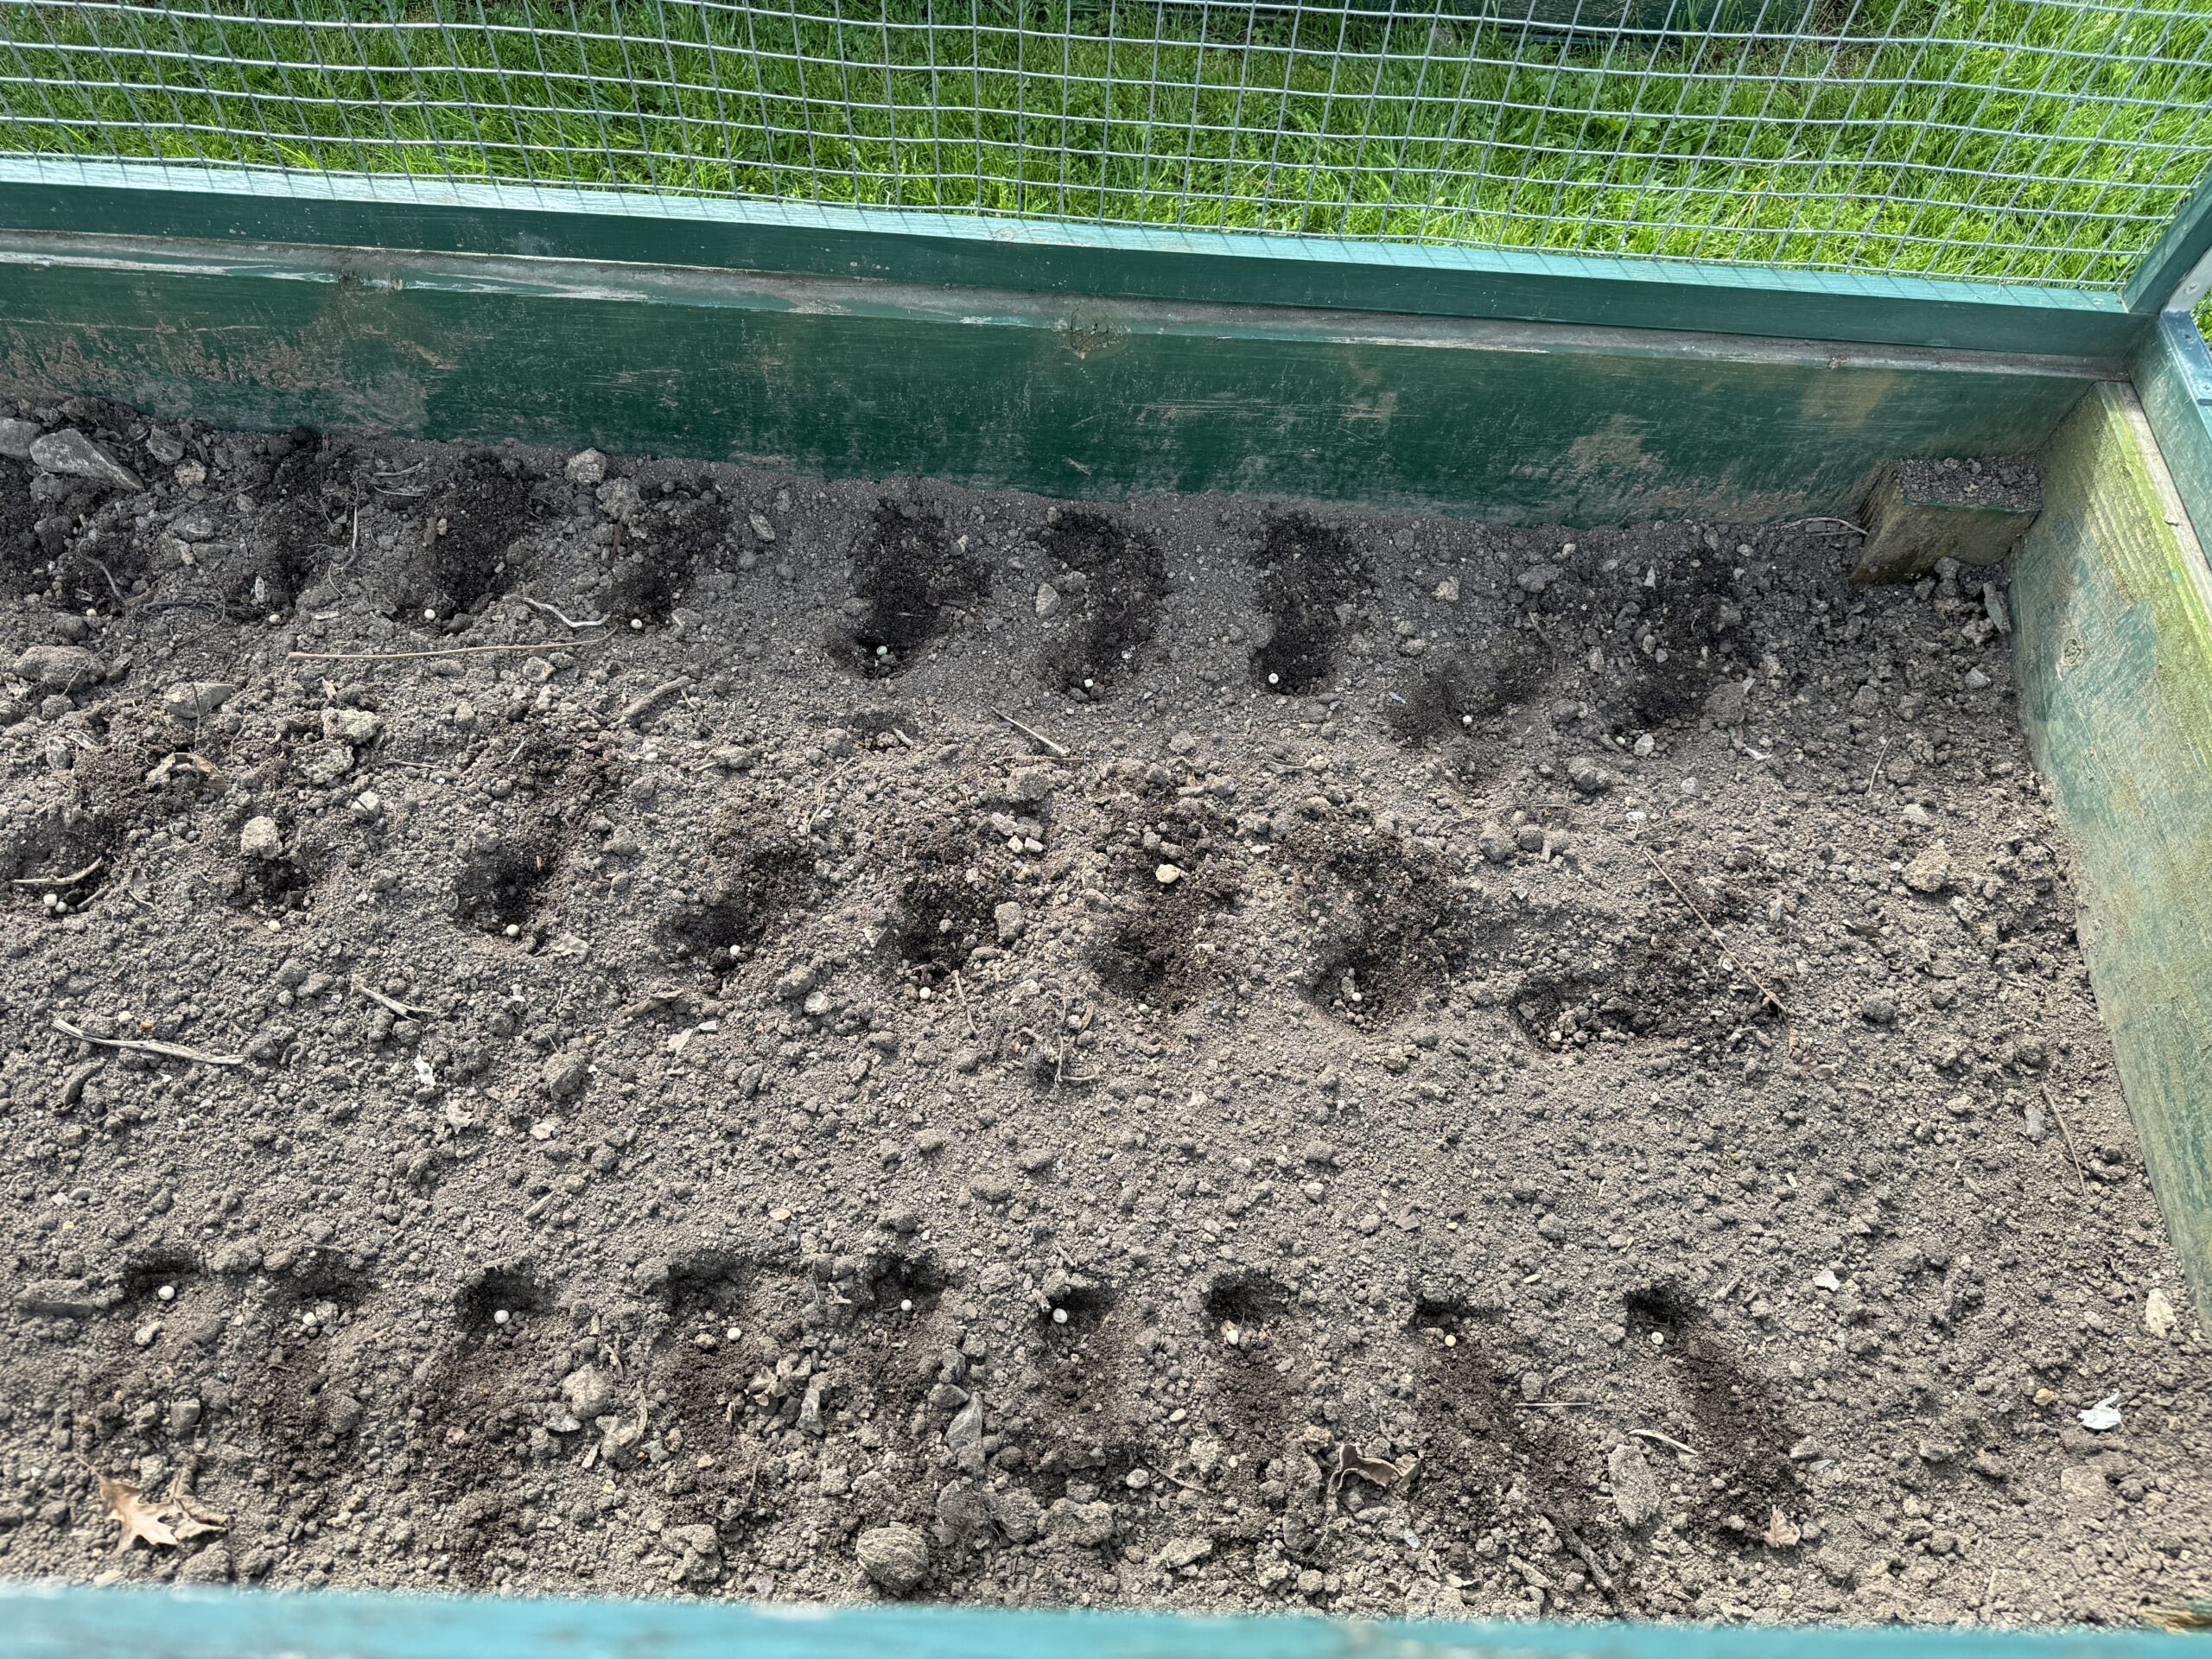
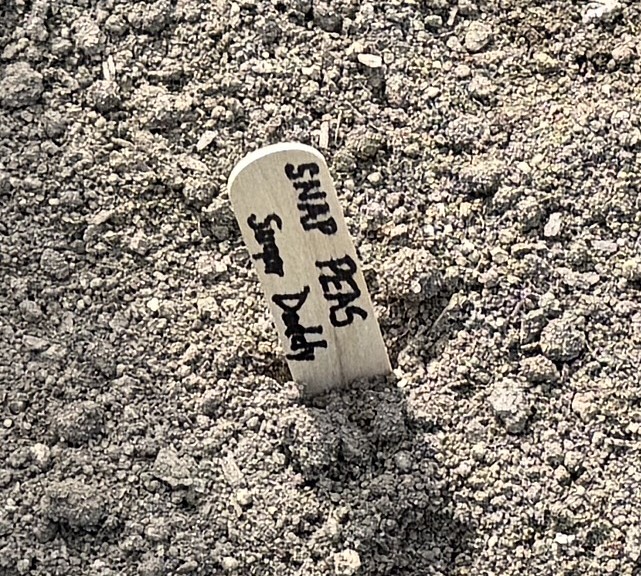
Then, in the fenced beds just off the patio, I’m trying Sugar Snap peas so they can use the fence to climb up. I haven’t done peas for quite a while, so we’ll see if it’s worth the effort!

Bert has the upper garden tilled and ready to go but it will be the middle of May before those seeds and plants go in the ground. Next is probably setting up the rain barrels.

So, there is the beginning of our 2024 garden. Hopefully, everything will be more colorful in the next month! Enjoy!

Spring Flea Market Will Be Held April 26 & 27

Twice a year the Ladies Auxiliary to the Boalsburg Fire Company has a flea market/yard sale in the Boalsburg Fire Hall. This is a major fundraiser for our group. The table spaces are rented for others to use so it’s like any other yard sale…but no one person has to fill up the yard. Unless you’re having a moving or estate sale, it’s hard to assemble enough stuff to do it by yourself!

The best part is it’s indoors, restrooms are handy, lunch items are for sale and everyone is especially friendly! Check it out on Friday, April 26 and Saturday, April 27, 2024 from 9 a.m. to 2 p.m. each day!

If you’re in the area, check out the flea market/yard sale at the Boalsburg Fire Hall this Friday and Saturday…April 26 & 27, 2024!

Support the Mission of the Boalsburg Village Conservancy

The Village of Boalsburg, Pennsylvania, has a rich and varied history. The Boalsburg Village Conservancy (BVC) was formed to help preserve the historical and cultural resources of the Village and the Township, and to stimulate awareness and interest in this area’s historic past.

Have you ever visited Boalsburg on Memorial Day and wondered how many folks were involved in setting up all those town-wide activities for over 25,000 visitors for 5 days? Do you live nearby and make the Memorial Day festivities part of your weekend fun? Have you moved away and plan a visit each year around Memorial Day to see family and friends? Do your out-of-town friends and relatives ask to come visit around Memorial Day…just in case you have a spare bedroom, or you happen to live within walking distance from the festival?

The volunteers on the Boalsburg Village Conservancy committee work hard all year to make sure the vendors, the musicians and the local museums have everything they need that weekend to be successful.

The infrastructure for the 5-day event involves obtaining permits and paying for Emergency Services on-site, renting porta-potties and advertising. Volunteer are great, but they can do only so much. The hope is that money from vendor’s fees, memberships and donations from the public will be enough to pay for the infrastructure expenses. Of course, as everything else, costs are rising. We need your help!

Even if you don’t live nearby, you can support the efforts of this volunteer organization so in the future the history of Memorial Day is not forgotten. You can read more about the BVC at www.historicboalsburg.com. You can take a virtual tour online of the more than 70 homes and buildings that have been restored and preserved in the town.

Your dues will go far in helping to pay for infrastructure to support the next Memorial Day celebration. An additional tax-deductible donation will make an even bigger impact.

Please consider supporting the efforts of the BVC. The membership form can be found at www.historicboalsburg.com.

See you for the “Day in Towne” activities, May 23 to 27, 2024!

From Experimental Bread to Croutons

My Oatmeal Bread is my go-to favorite recipe…to make, to eat and to share! I have never had a bad batch of this bread (that I can remember!). You can read about my recipe in this previous post (https://marykisner.com/marys-oatmeal-bread/).

In the last several months I’ve been unhappy with texture of the bread. At least it still tasted OK but the bread was a little dry and crumbly when sliced. Each time I tried a batch I changed something, hoping to hit on the magic ingredient or process. I started making batches of only two loaves. We ate one and froze the other. I now have 5 loaves of bread in the freezer that are just experiment rejects!

I started with the knife. Maybe the serrated knife we used was not as sharp and seemed to shred the bread instead of cutting it. We switched knives…made no difference.

Time to investigate the ingredients. This recipe is simple…flour, rolled oats, yeast, olive oil, honey, sugar and salt. So, one at a time, I substituted ingredients.

Then I used the original recipe, but changed the flour from King Arthur All-purpose flour to Pillsbury All-purpose flour. The new flour felt “thicker” or more compact. This made a heavy loaf and tasted fine, but it still made crumbs as it was sliced. The next batch I added Vital Wheat Gluten to the mix…this changed the taste a little but didn’t fix the crumbling texture.

Next, I went to the local Health Food Store and picked up a small bag of organic rolled oats. They appeared to be smaller and softer than the ones I was using. I also picked up a 5 lb. bag of Organic All-Purpose flour. Finally, I brought out a fresh package of Dry Yeast from the freezer.

Finally, the new ingredients seemed to make the difference! At this point I’m going to say the new rolled oats incorporated better into the dough when mixing.

Now that I have a freezer full of 5 loaves leftover from my baking experiments, all labeled OATMEAL BREAD, for the last loaf that turned out right I made a different label:

Nice rise!

Great texture!

Now, what to do with 5 loaves of bread in the freezer that need to be recycled into something else? How about croutons!!

Making Croutons

I did a search for “How to Make Homemade Croutons” and found a simple recipe. This link has lots of information about making croutons:

https://www.delish.com/cooking/recipe-ideas/a33462622/homemade-croutons-recipe/.

I simplified the recipe for my use:

I pulled my loaves of Experimental bread out of the freezer and let them thaw enough to cut them into cubes. Because it’s homemade bread, I kept the cubes a little larger and let them finish thawing after cutting. I was crumbling enough!

I put 1/4 cup of oil in a larger bowl and dumped in the cubes. I tossed the cubes in the bowl to coat them with oil and sprinkled herbs on the pile and tossed them again.

I spread the cubes out on two baking pans and baked them for 15 minutes at 350 degrees. I let them sit on the tray until they were coo. They turned a golden brown, crunchy on the outside, but soft enough inside so they would work on a salad. Some commercial croutons are so hard they can’t be stabbed with a fork! As I make more, I think I’ll store them in zip bags in the freezer.

I feel so much better about my Oatmeal Bread! I counted it to be the bread I could take as a gift…now I can!! Enjoy!

How Long Does It Take to Make One Greyhound Coat?

That’s a question I have not been able to answer over the last 20 years I’ve been making coats for Nittany Greyhounds. Usually, I make 4 coats at a time… occasionally two at a time. Because the way the pattern is laid out on the fabric, I can make two coats with 1 1/2 yards of fabric.

If I have a special order for 1 coat, large or small, I make two and give the other one to Nittany Greyhounds.

So, to answer the question of how long it takes to make one coat, first I had to think about how I make four coats.

Cutting out the Coats

I start with 3 yards of fleece for the outside of the coat and 3 yards of coordinating fleece fabric for the lining. That means I’m cutting out 8 coat shapes. I can do that in about 4-5 hours with breaks to let my cutting hand rest. My daughter have me the best scissors to cut out the bulky fabric, but of course my weak link is my hand!

I do all the cutting in one day and then put the assembling aside for another day. Even if I’m making only one customer coat, I cut out the second one at this time. What I’m left with is a stack of pieces ready for assembly.

Assembling the Straps and Snoods.

The straps need to be stitched along three sides, turned right side out and top stitched while attaching my label. Then a piece of Velcro Hook is sewed on one end (a piece about 3″ long of 2″ wide Velcro).

The snoods are next. They must be sewn right sides together at the neck edge, turned right side out and top stitched. Then the bottom edge that will attach to the coat is sewn and trimmed (it took me a long time to figure out that it was easier to trim at this stage, rather than when it’s attached to the body of the coat.)

Prepping the Body of the Coat.

The coat is sewed to the lining right sides together along the outside edge; then turned right side out and top stitched. The neckline of the coat is stitched and the lining is trimmed away from the seam.

To give the flat coat some shaping I make three darts along the back edge so it will drape better over the dog’s tail. The coat is pretty long but does not seem to get in the way while the dogs run and poop (smile!). It does seem to keep them warmer in the winter.

Assembling the Coat

To assemble the coat, I sew the snood to the body of the coat (leaving a 3″ slot in the seam for the leash to go through) and stitch down the sides of the seam. The neck seam is done the same way. The strap is attached along the side of the coat.

Finishing the coats involve sewing the Velcro Loop to match the location of the Velcro Hook on the strap. It needs to be long enough so it’s adjustable to any size dog. This is usually a piece about 6-7″ long of 2″ wide Velcro.

Occasionally, there is enough fabric at the end of cutting to make on matching scarf (for the human). Not enough to make four, but someone might find it fun.

And the Answer Is…

OK, to answer the question, “How long does it take to make one greyhound coat?” It depends. If I’m up to it and I can focus on just one coat, I can finish it in about 4-5 hours. Of course, that assumes there is something interesting on TV to watch while I sew!

Beyond that, if there is anyone out there interested in volunteering to make coats, I’d be glad to share the pattern and walk you through how to make them. It is a well-appreciated volunteer activity!

You can contact me at marykisner@comcast.net or email Nittany Greyhounds at toni@nittanygreys.org.

Roasting Vegetables

Every time I roast vegetables, they come out differently. After this last batch, where I thought I understood how to get them tender in the middle and crunchy on the outside, I decided it was time to do some research!

The first article I found online was, “Everything You Need to Know About Roasting Vegetables.” Of course, after I read the article and took notes, I was unable to find it again! Phooey! However if you type that title into your search engine, you will find many more articles to search through!

This article was a good review of things I already knew, like how to cut the vegetables, what temperature to roast the vegetables (400 to 425 degrees) and how to not crowd the baking sheet. That third suggestion seemed to be the crux of my problem! When I chopped up vegetables the other night, I did separate the potatoes from the vegetables. They came out great!

I found a great YouTube video from a woman in Australia (I think) with details about what kind of potatoes work best, the benefits of parboiling, and what kind of oil (or butter, lard, duck fat) gave them the best flavor. It was a very informative video! (See https://www.youtube.com/watch?v=pigPB9xE4j4)

But then I chopped a whole bowl of assorted vegetables…kind of like I do when I’m making vegetable soup! I ended up with a bowlful of “assorted vegetables” that were too thick on the baking sheet.

The vegetables could not be separated from each other (too crowded) and so some steamed while others burned at the tips!

I can see I need to work a little harder to roast fewer kinds of vegetables at once. My mindset that I can combine vegetables on one tray needs to change! I finally found a chart that could help me remember. I think I’ll post this someplace handy:

________

How Long to Roast Vegetables at 425 degrees/F

Root vegetables: 30-45 min. (beets, white and sweet potatoes, carrots)

Winter squash: 20 min. (cubed) 45 min. (halved) (butternut squash, acorn squash, spaghetti squash)

Cruciferous vegetables: 15 to 25 min. (broccoli, cauliflower, Brussels sprouts)

Summer squash: 10 to 20 min. (Green & yellow zucchini)

Thin vegetables: 10 to 20 min. (asparagus, green beans, snap peas)

Soft vegetables: 15 to 25 min. (Cherry tomatoes, eggplant, bell peppers)

(From: https://www.thekitchen.com/roasted-vegetable-cheat-sheet-2655019)

_______

Obviously, my major issue is that I try to do more than one kind of vegetable in the same pan. Of course they don’t all turn out great!

I’ll try to roast vegetables in groups with the timing suggested above. MAYBE my next batch will be more successful! Enjoy!