This last week has been intense while I’ve been tracking all the food I’m eating and testing my blood sugar four times a day! Next week I meet with a specialist to discuss everything about the meds I’m taking and the food I should be eating to manage my blood sugar. So far, I’m doing well at tracking and I can see the immediate results of the benefits of low-carb eating on my blood sugar. My health care providers (April and Laura, who both read this blog…smile) would be very proud of me! You are my inspiration to tackle this issue!
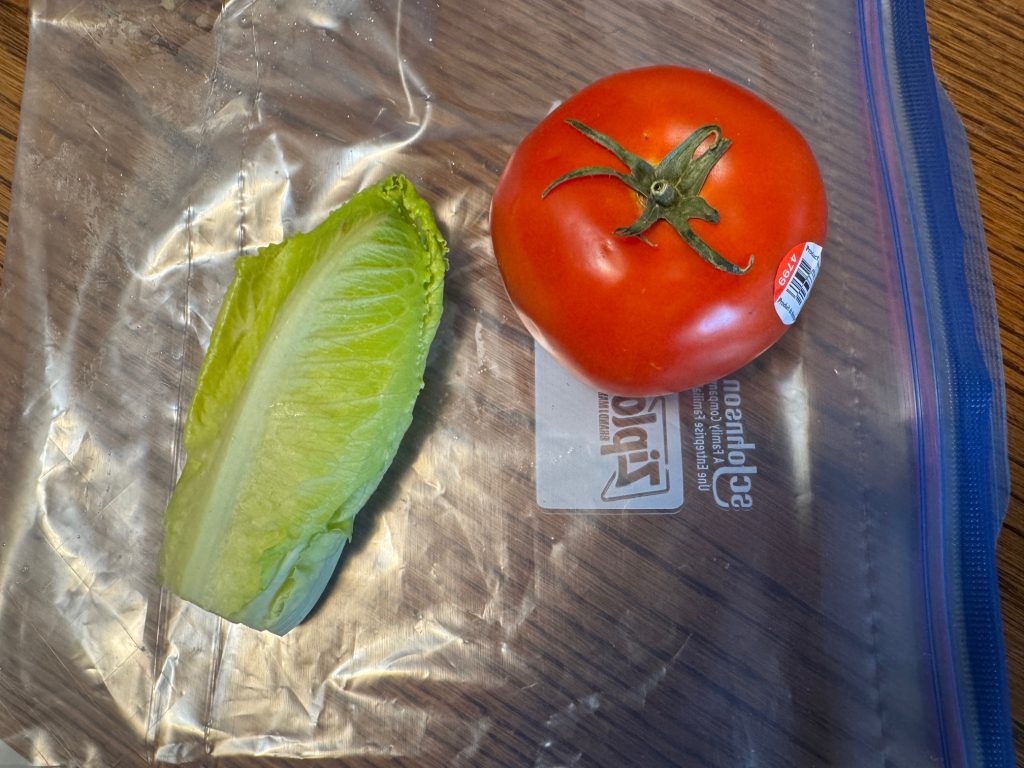
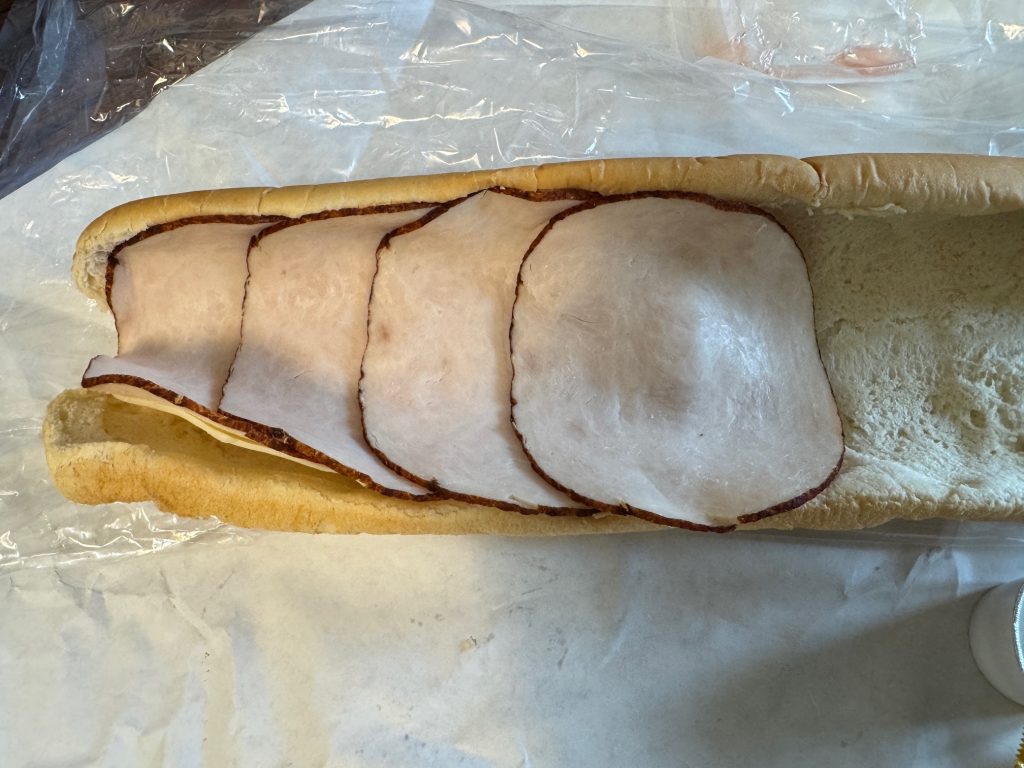
Several weeks ago a young neighbor girl came to our door selling hoagies as a fund-raiser for her school. We always try to help. Of course, the hoagies arrived yesterday afternoon! I knew I could not consider the bun part of my new food plan! So, I opened the package to see what I could salvage for supper.
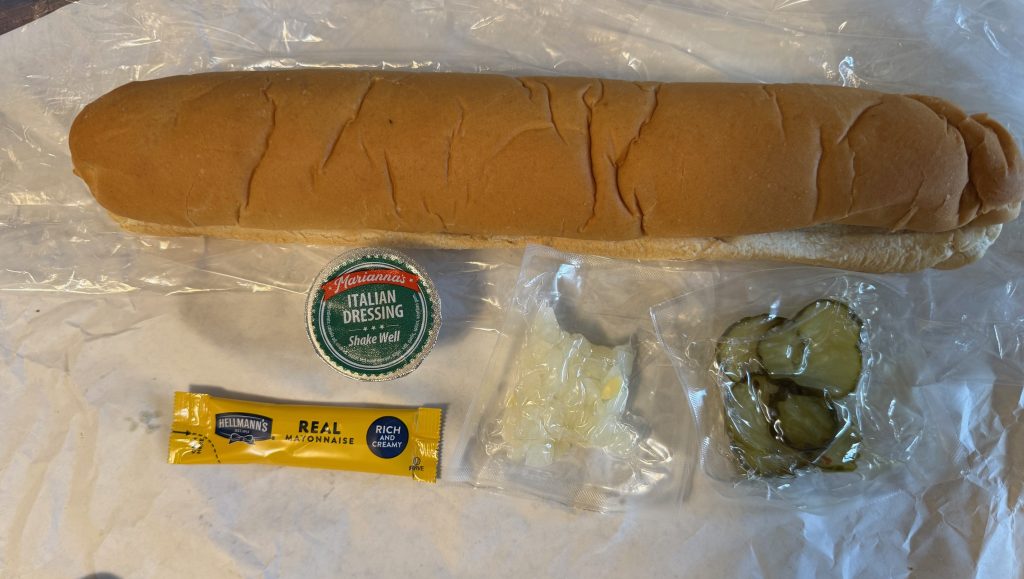
The meat and cheese were in the bun, with all the other components shrink-wrapped and laid inside. Very easy to deal with.
I started by putting the lettuce and tomato slices in my salad bowl. I usually like more tomato and lettuce in a salad, so I added some:
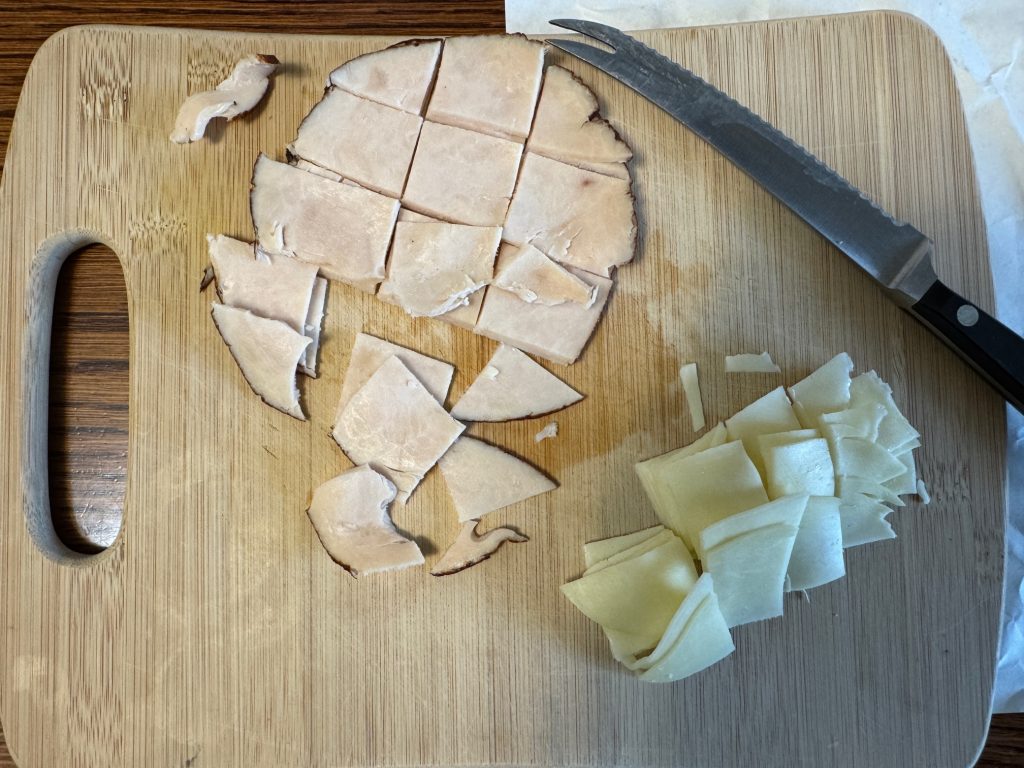
I set aside the mayo, dressing, pickles and chopped onion…Bert often uses my onions! Then I chopped half of the turkey and cheese. The other half went into the fridge for my next salad!
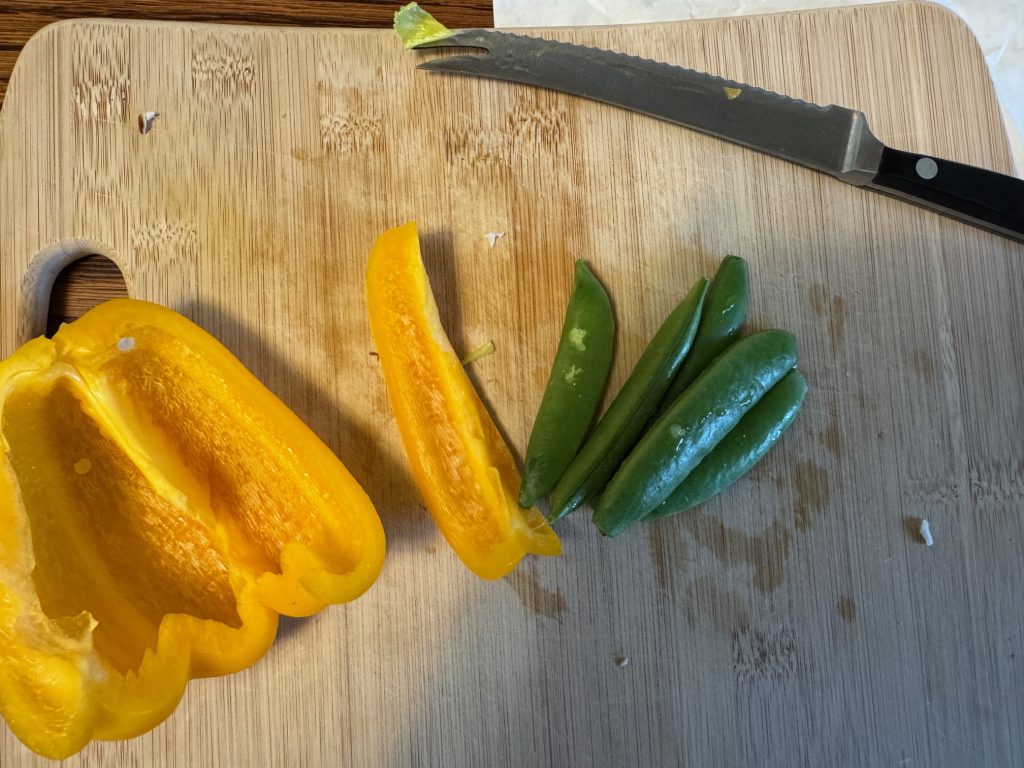
Finally, I wanted more vegetables in my salad, so I added some chunks of yellow sweet pepper and a few sugar snap peas.
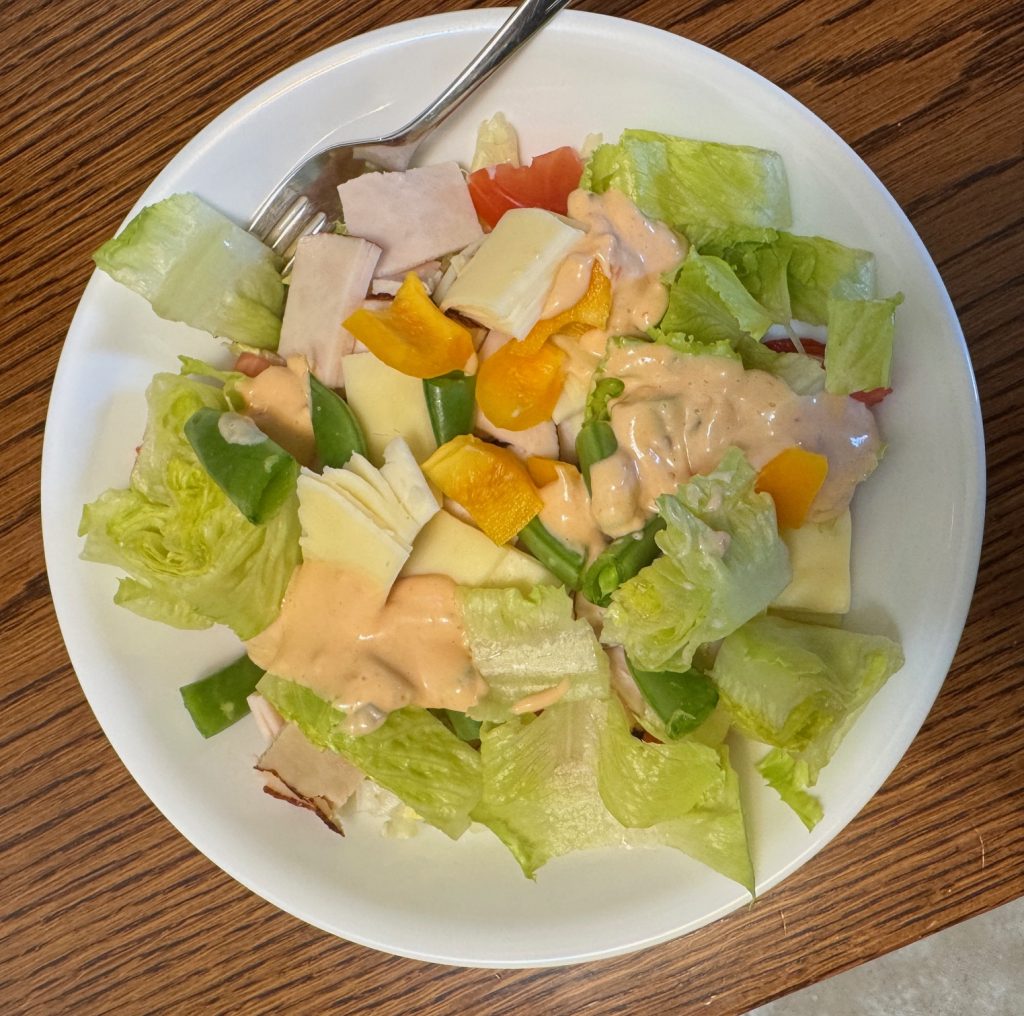
This all made a great salad!
So, what happened to the rest of the hoagie? The other half of the meat and cheese went into the refrigerator.
The mayonnaise also went into the refrigerator. Bert liked the idea so he deconstructed his hoagie and added my onions, pickles and dressing to his salad. We were left with two buns. Bert ripped them apart and put them near the bird feeders. They are visited by various animals during the night. So, no waste!
This is helping me think about the challenges of eating at a restaurant. Most places have some kind of garden salad. I should be able to order a plain hamburger or meat entre and put it on top of a salad, right? I usually bring my own dressing so that works!
Anyway, while I’m staying out of the kitchen, I seem to be able to really crank out greyhound coats. It keeps my hands busy and Nittany Greyhounds is grateful for the coats! Enjoy!
If you have comments, questions or ideas for low-carb meals, please email me directly at maryjkisner@gmail.com.
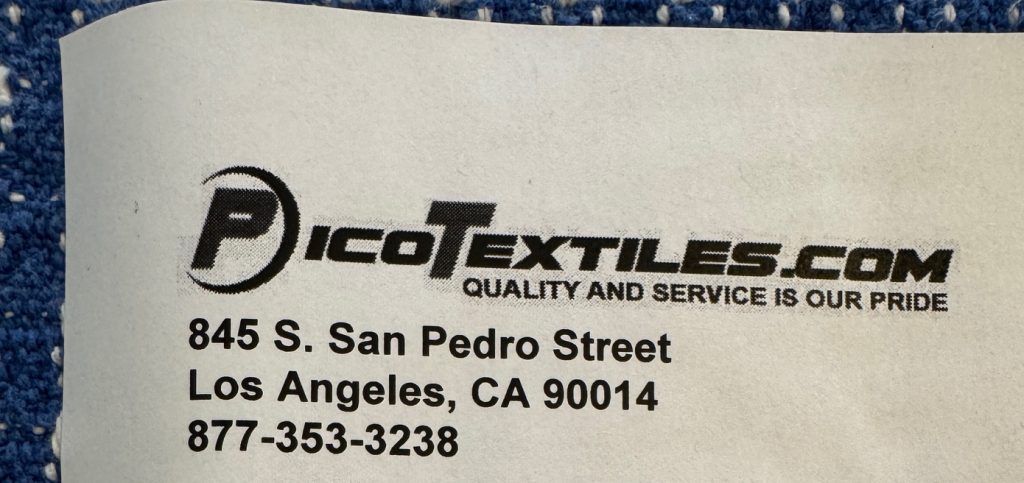
I’ve finally found a great source of fleece fabric to make greyhound coats! Check out: https://picotextiles.com.
This site has a variety of very affordable fleece, along with many other kinds of fabric like flannel and cotton broadcloth. The price per yard for fleece ranges from $7.95 to $12.95 with many on sale. Their website says:
We offer exceptional wholesale discounts on fleece and other fabrics for various organizations and their associates: charities, schools, hospitals, churches, temples, Project Linus, Soldiers Angels, Boy/Girl Scouts, wholesalers and more.
Receiving your discount is simple; just contact one of our customer service representatives before placing your order and let them know about your affiliation.
So, the next time, I’ll figure out how to have Nittany Greyhounds qualify for wholesale discounts!
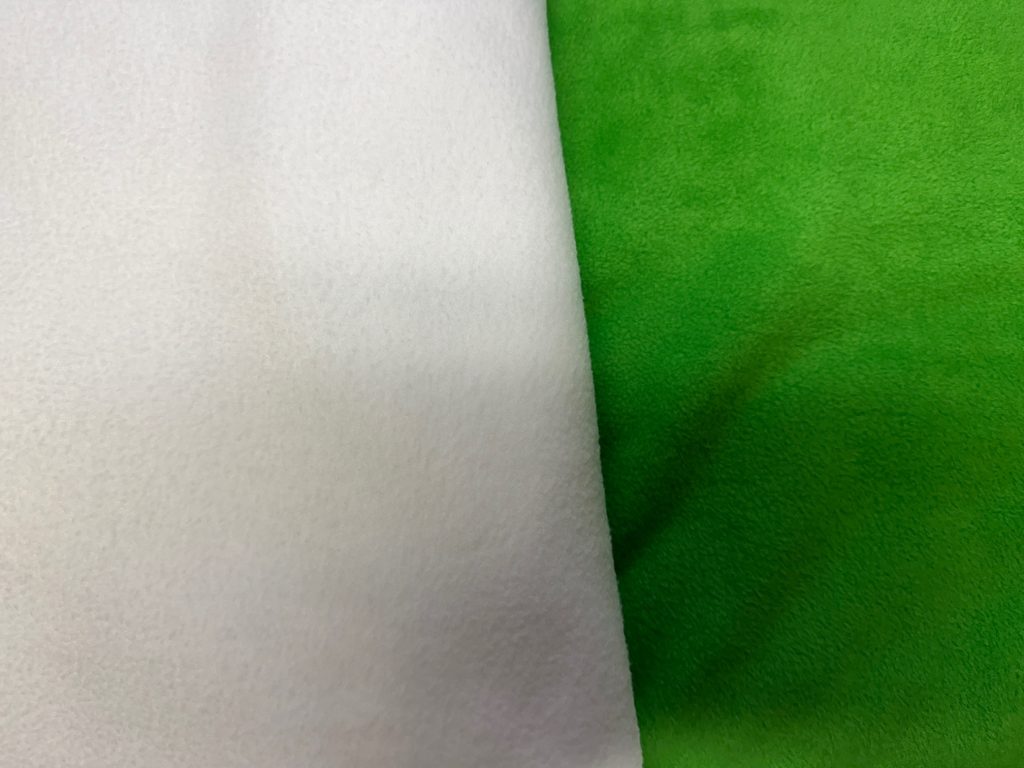
Of course, ordering online has the same issues as in a store with bad lighting…you really can’t see the true colors. For example, I ordered 3 yards of ‘kelly green’ thinking it would go with plain white. The green is quite bright and will probably glow in the dark! When I paired it with the white fleece it was quite stunning!
Green and White
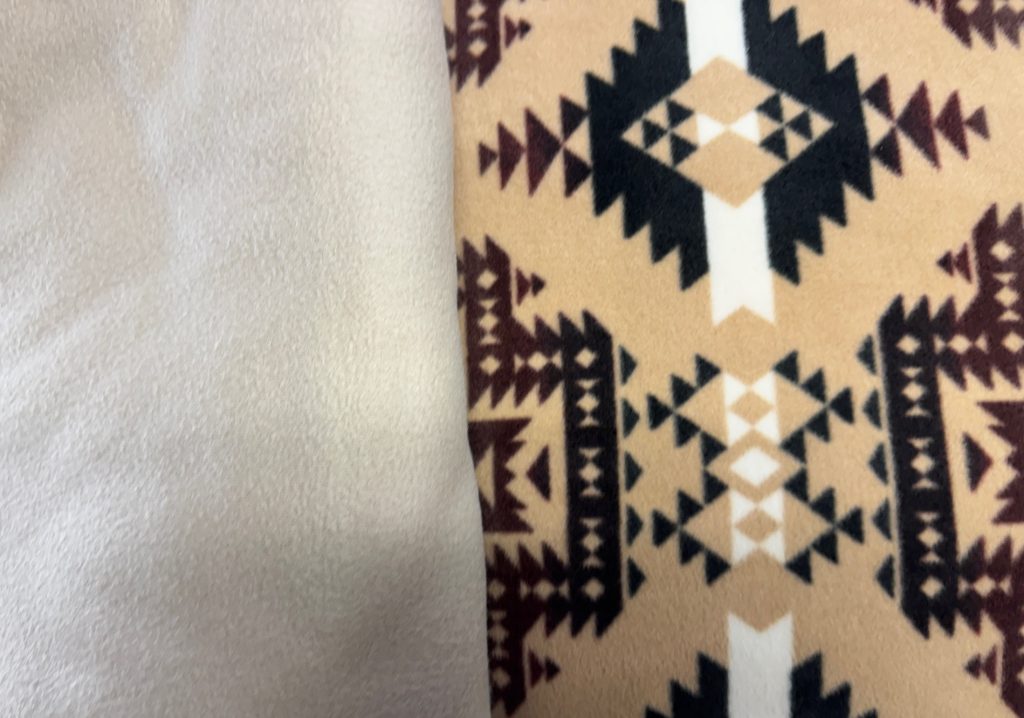
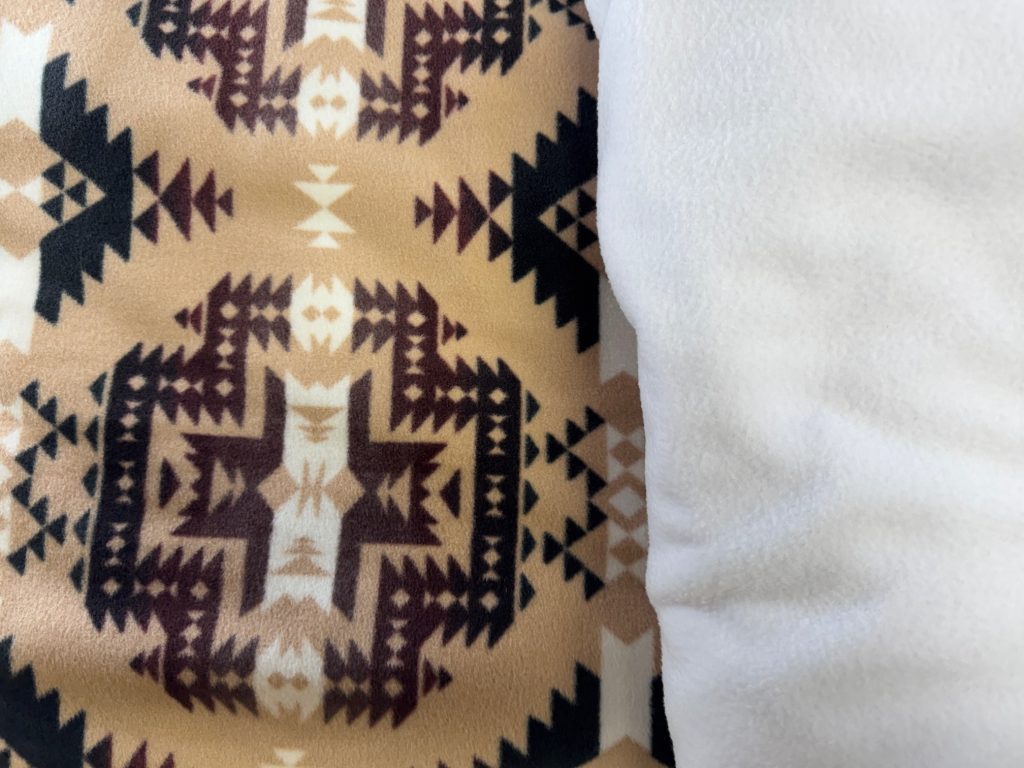
I also ordered a Native American print with a beige solid:
When I unpacked the fleece, I realized the beige really didn’t go with the tan and brown print, but the white looked much better. The beige seemed to tone down the bright green so I switched them around. With 3 yards of each color, I can make four green coats with a beige lining and four tan and brown print coats with a white lining! Yay!
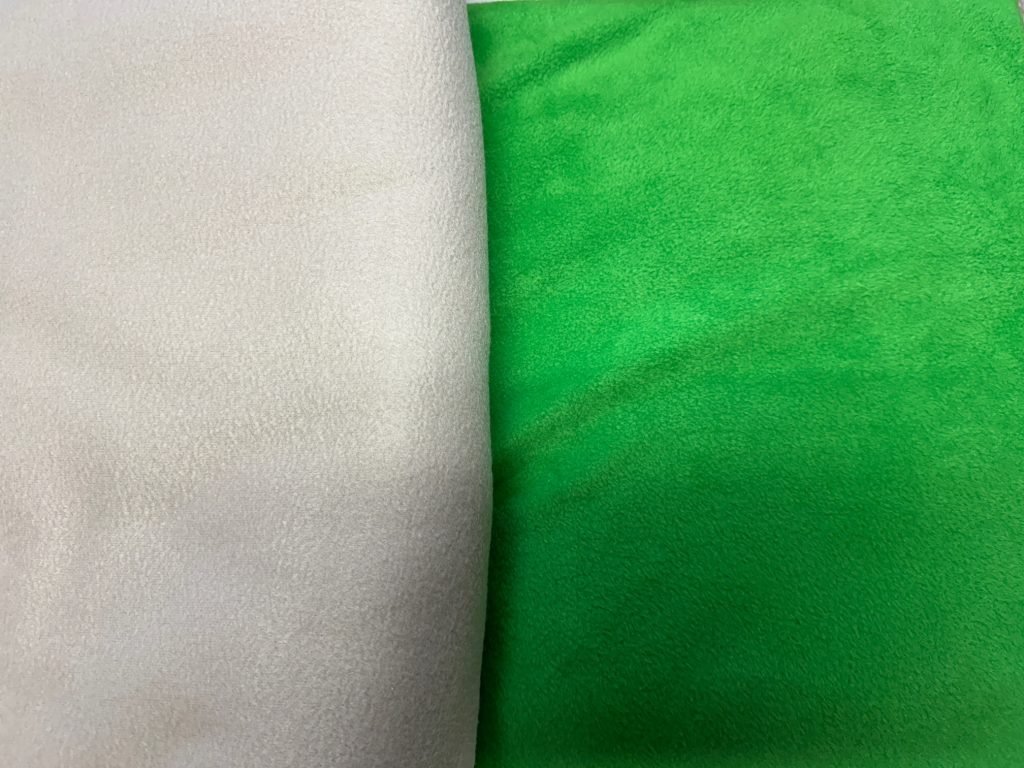
It might not look much different here but the green and beige look good:
…and the white looks good with the tan and brown print:
I’ll show you the finished coats in a week or two!
If you have comments or questions, please email me directly at maryjkisner@gmail.com.
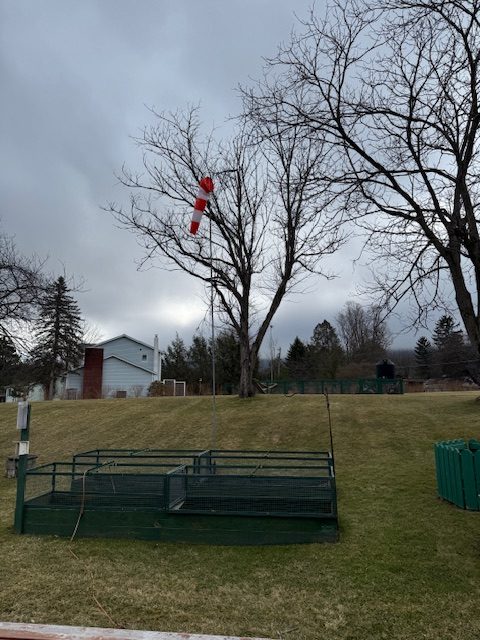
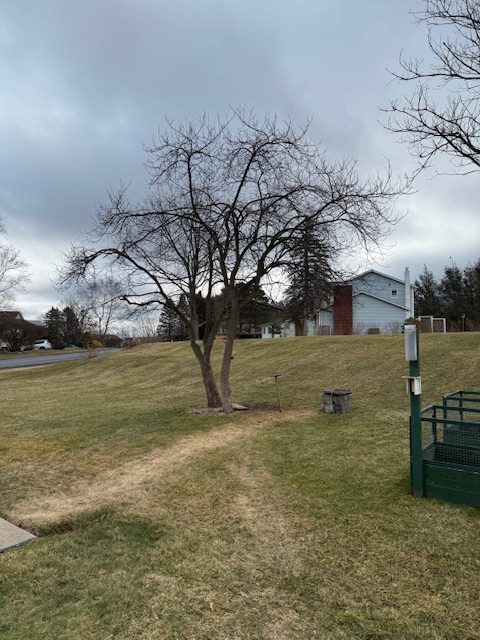
Take a walk with me around our property. I think spring is holding her breath right now! We are finally free from snow piles, but the grass is just waiting to see if it’s safe to turn green. I walked up the hill to see if the forsythia was starting to bud out. From a distance, the plants have a slightly yellow cast, but the buds are still pretty tight.
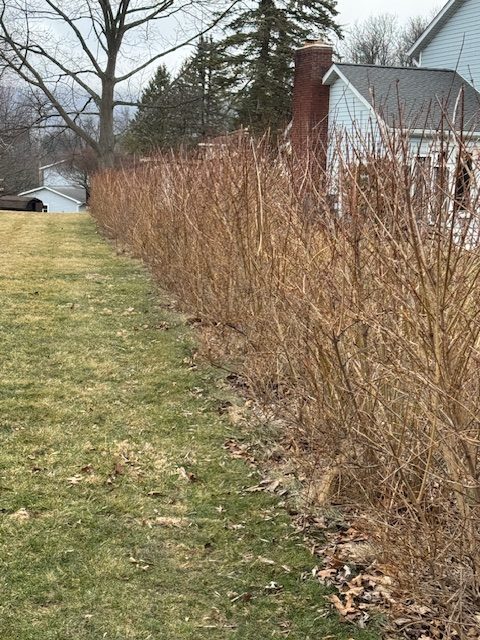
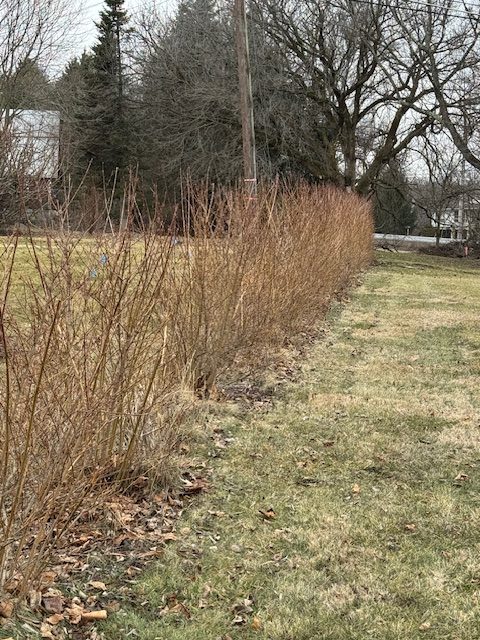
The garden on the hill is also waiting…no new green shoots yet for the echinacea or the lavender. They are my bookends for the garden.
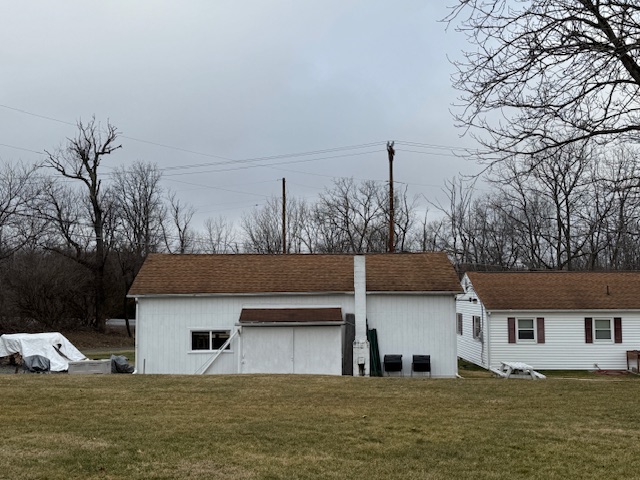
From the hill, I wanted to document the two Butternut trees. From this view, the tree on the right is the one that is dying. Last year it barely had leaves. Every time we have a windstorm limbs come down. It really looks pretty sad in the summer. In the next month or so, when it isn’t so muddy, Bert will cut it down and use the wood in the shop stove. When he does that, I’ll try to document the process.
You can see the various planters near the patio just waiting for spring planting!
The back of the shop has our compost tumblers. One is in active use and the other just gets tumbled. Bert will add that compost to some of the garden soil. It’s amazing how much stuff we put in there and at the end of the season there’s hardly anything in it but black ‘gold.’
The space to the left of the shop under the spouting is ready and waiting for Bert to set up the rain barrels. He waits until we stop having freezing weather…frozen water in the plastic barrels could crack the plastic. Without plants in the garden, we don’t need that water yet anyway.
Here’s another view of the Butternut trees. You can see the one on the left looks pretty straggly.
And finally, our group of Red Bud trees struggle every year but Bert keeps trimming the dead limbs. I’m sure the birds would not be happy if we lost those trees…it houses our bird feeders and bird bath that the deer also visit every night.
Not much to see yet, but plan to follow along with my posts about our Garden of 2026. We are ready!
If you have questions or comments, please email me directly at maryjkisner@gmail.com.
I could just share with you the recipe to make Rye Pocket Pita Bread and pictures of the final product. However, I thought you might enjoy reading, or seeing pictures of, how it took three tries to get it right! Never be afraid to try something more than once (even if you set off the smoke alarm!). I now have a simple recipe to make sandwich buns, an old recipe for Rye Pocket Bread (which I will not use again!), and a great recipe that makes a delicious Pocket Pita Bread that uses Rye flour. Whew!
Finding a New Recipe
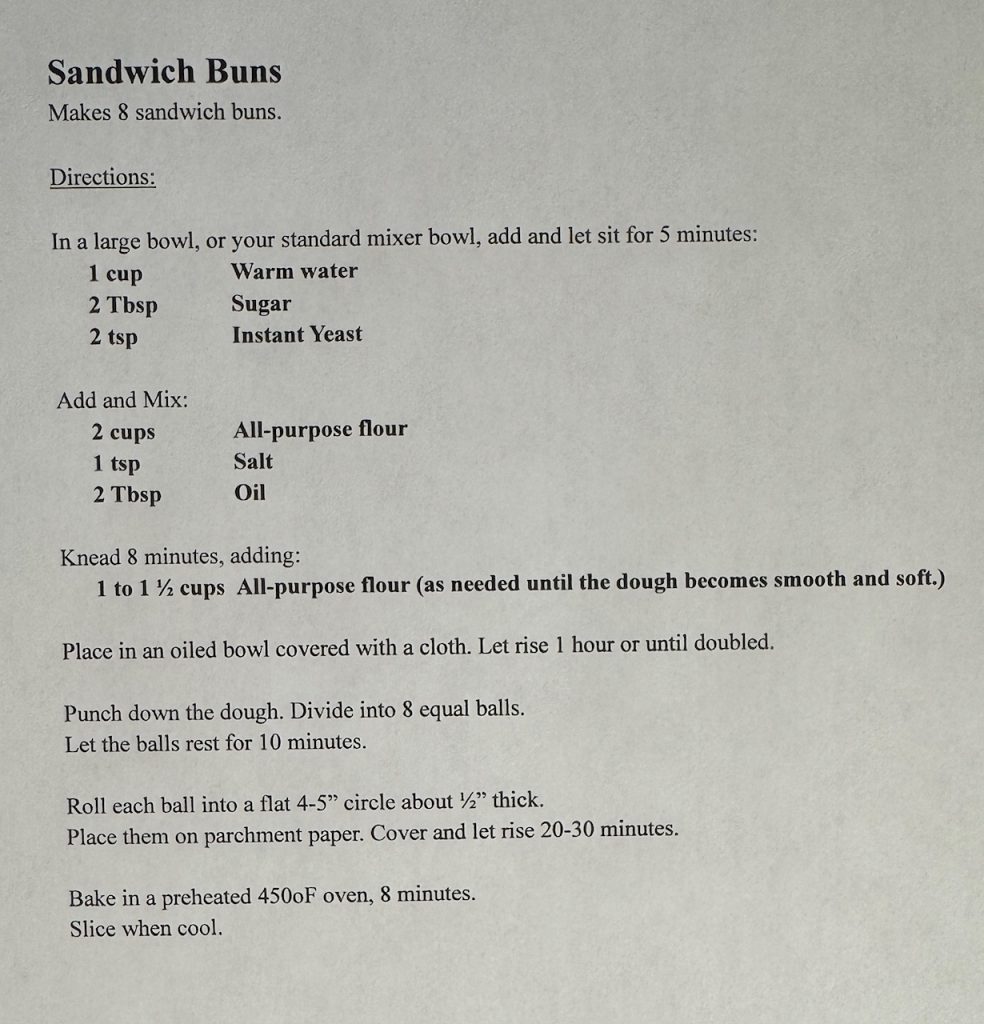
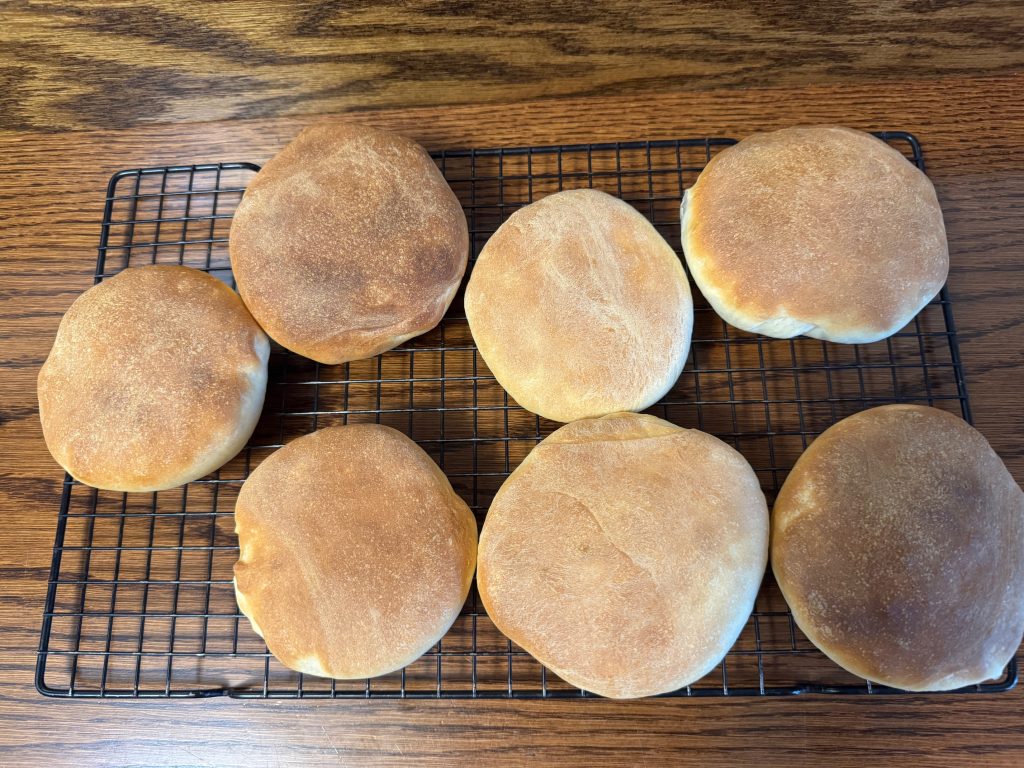
It all started with a recipe I found online called, ‘Soft & Fluffy Homemade Pita Bread.’ It sounded pretty easy but the layout of the ingredients list was awkward. I went ahead and mixed up a batch in my mixer. It was a pretty dry mix. I should have started with less flour and added more as needed. My mistake. Anyway, the finished rolls were tasty but did not make a ‘pocket’ when baked. The rolls were delicious and soft, so I revised the format of the recipe and renamed it, ‘Sandwich Buns.’ Below are pictures of the buns and the recipe so you can try it yourself. I did take pictures along the way, but I’m not going to post them all here…my goal was to find a good recipe to make flat breads that make a pocket.
Sandwich Buns
Finding an Old Recipe
I had remembered that about 45 years ago when my kids were little (1980 or so) I met a woman in a mother’s group. She was from the Middle East and was in State College because her husband was studying at Penn State. She graciously offered to show me how to make pita bread with pockets. I spent an afternoon at her apartment while she whipped up a huge batch of rye pocket bread. She was making enough to last her family for a week…it was their bread of choice. By the time I left I felt confident I could make them myself…and I did for quite a while.
Of course, time passed, the recipe stayed in my notebook and my life got more complicated. Needless to say, I had to really hunt to find the recipe again yesterday. The recipe called for plain yogurt and rye flour. I had neither! I knew I had some whole wheat flour that could substitute for the rye flour. I picked up some yogurt at the grocery store.
This time I decided to mix the dough up by hand…big mistake! My hand/arm strength could not mix the flour in well enough so I had to do most of the kneading by hand. Next batch…use the mixer!
It was a very soft dough, thanks to the yogurt. Everything worked well except…I tried to lay the circles of dough on cornmeal on the cookie sheet. Might have worked if I hadn’t made the oven too hot. The old recipe called for 500 degreesF and it was just too hot for the loose cornmeal on the cookie sheets. Just as I was taking the cookie sheets out of the oven the cornmeal was smoking hot and of course the smoke alarms were set off! Geez!
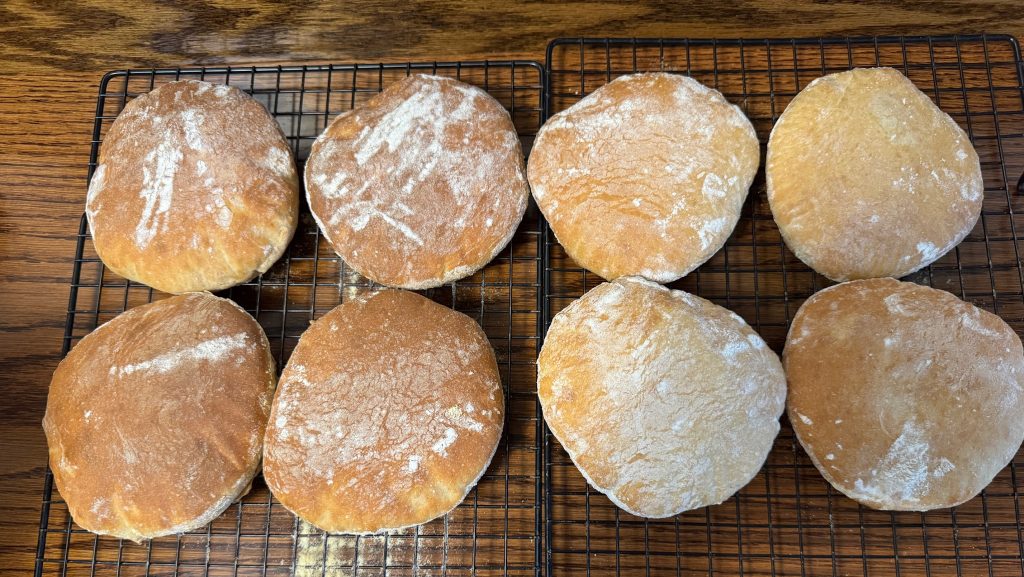
In the end, the pocket bread made fairly nice pockets but I’ve now revised the old recipe and will try it again tomorrow. I now have a small bag of rye flour, enough yogurt to make the recipe again, and will make the oven temperature only 425 to 450 degreesF.
So, here is the revised Rye Pocket Bread recipe and a picture of the finished products.
Rye Pocket Bread
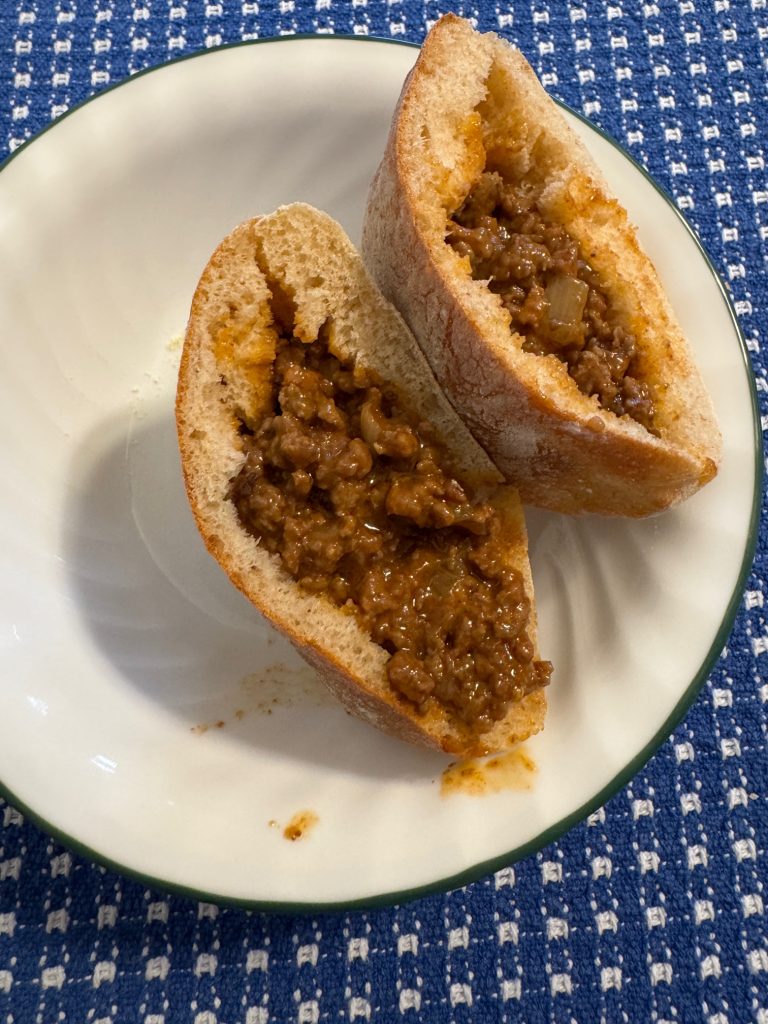
Pocket Bread with Sloppy Joe
Sometimes, making a new (old)recipe leads to some changes. In this case, I ended up with two good recipes and one old recipe that got ‘retired.’
If you have comments or questions, please email me directly at maryjkisner@gmail.com. Let me know if you’d like me to post the step-by-step to make this recipe!
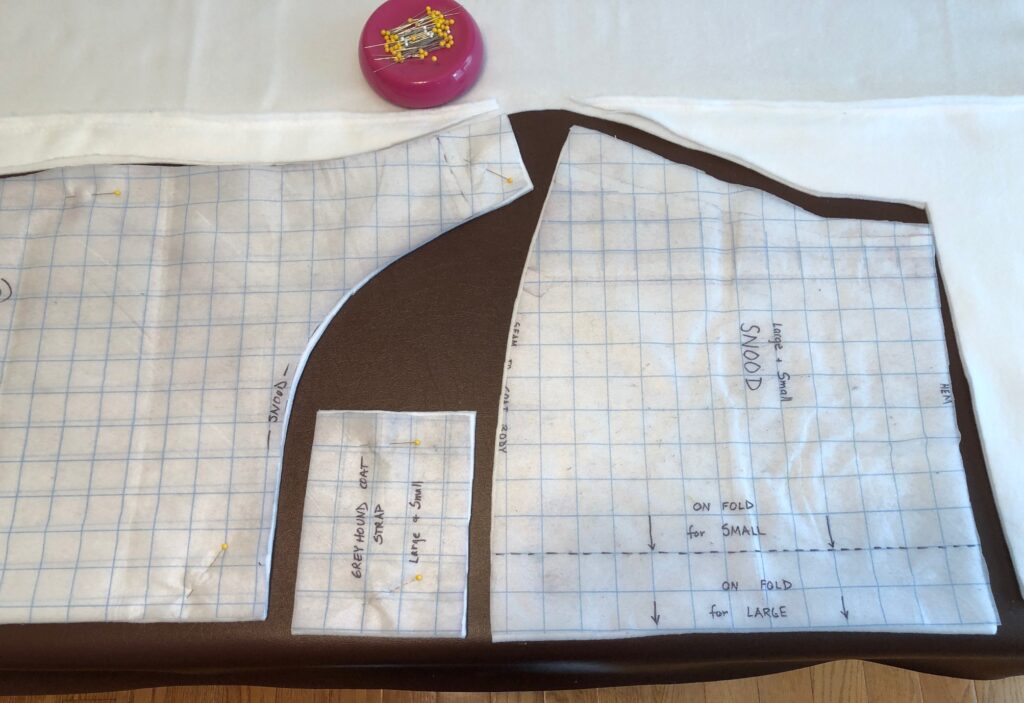
This has been a quiet week spent making a batch of greyhound coats. It has been over a year since I made even one coat and while I have a great set of patterns, I do not have written-out instructions. Over the years I’ve perfected some short cuts that made assembling the coats so much easier. I’m going to include a few of those short cuts with pictures so I can capture them for future reference. I’ll file this post with the patterns so I don’t forget!
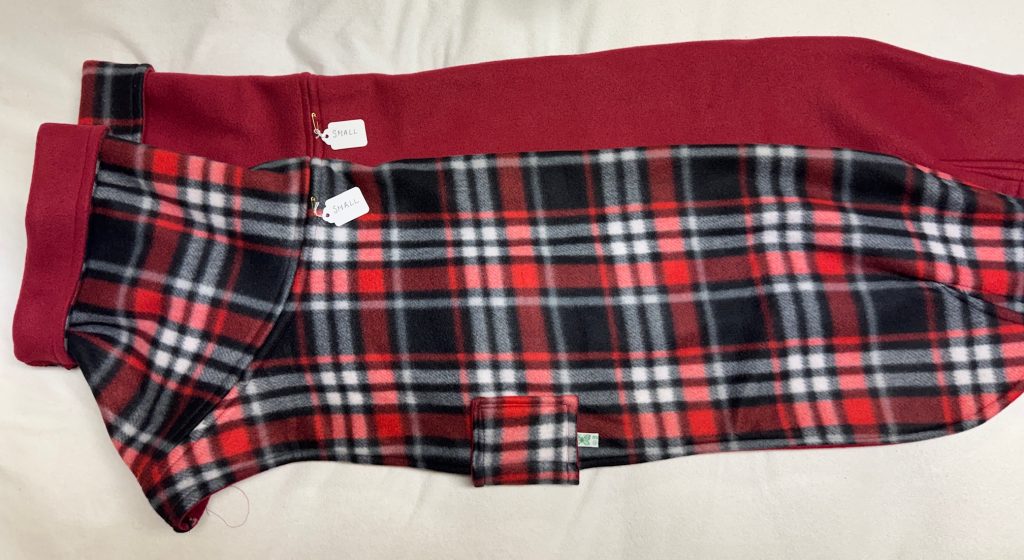
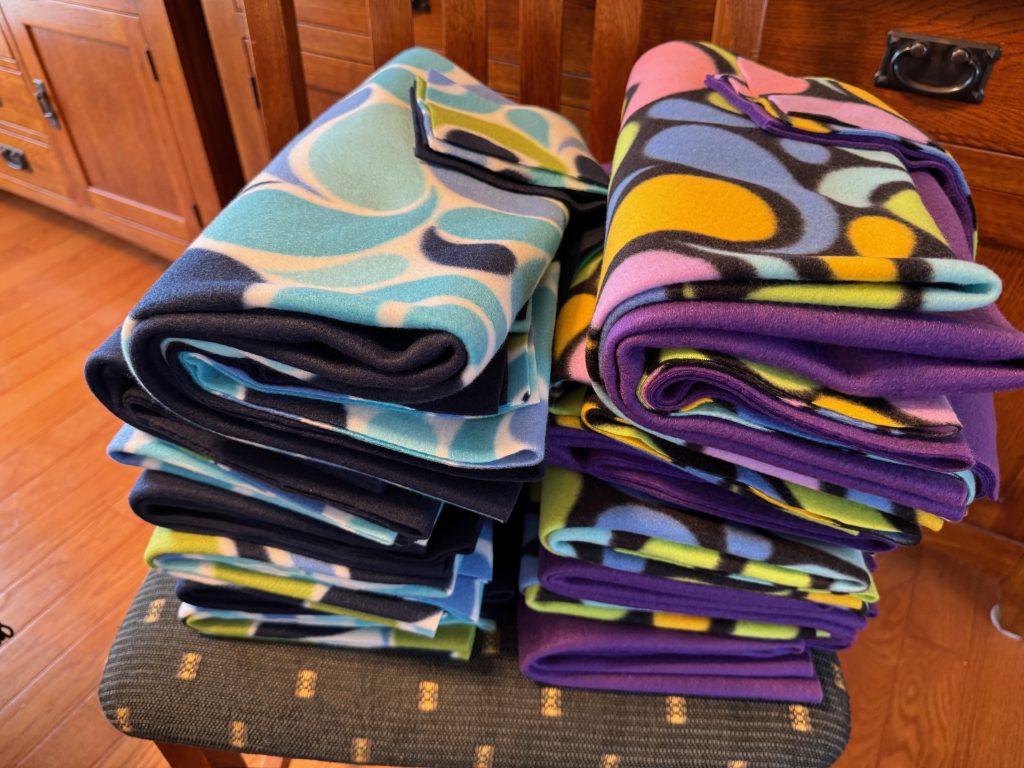
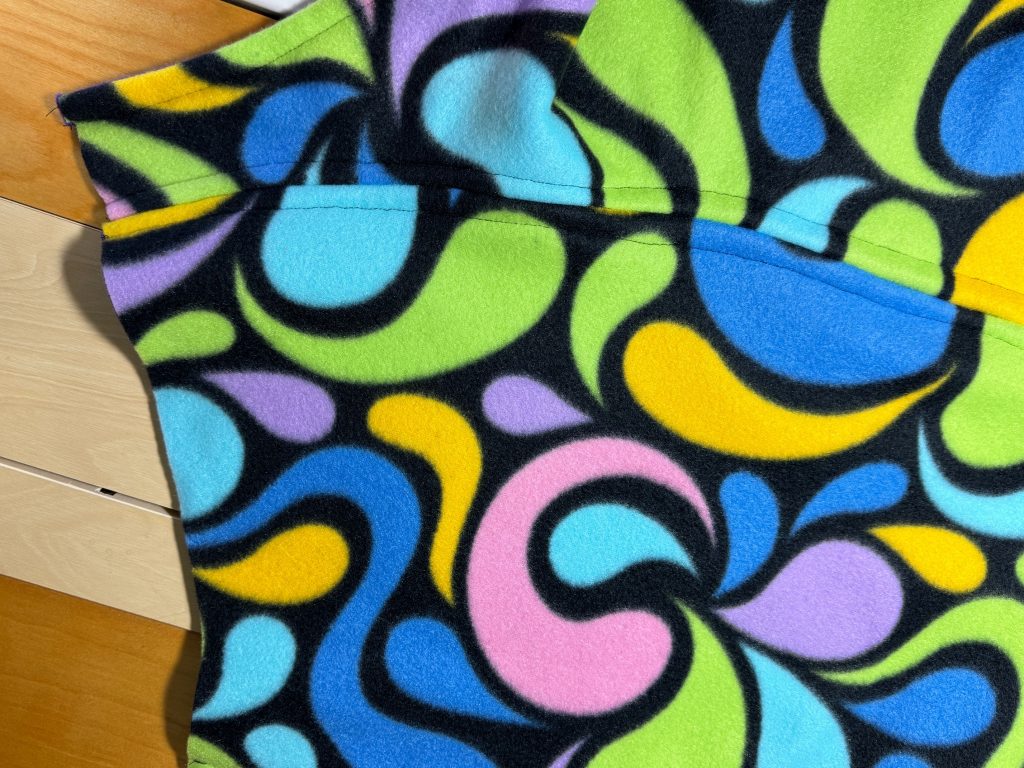
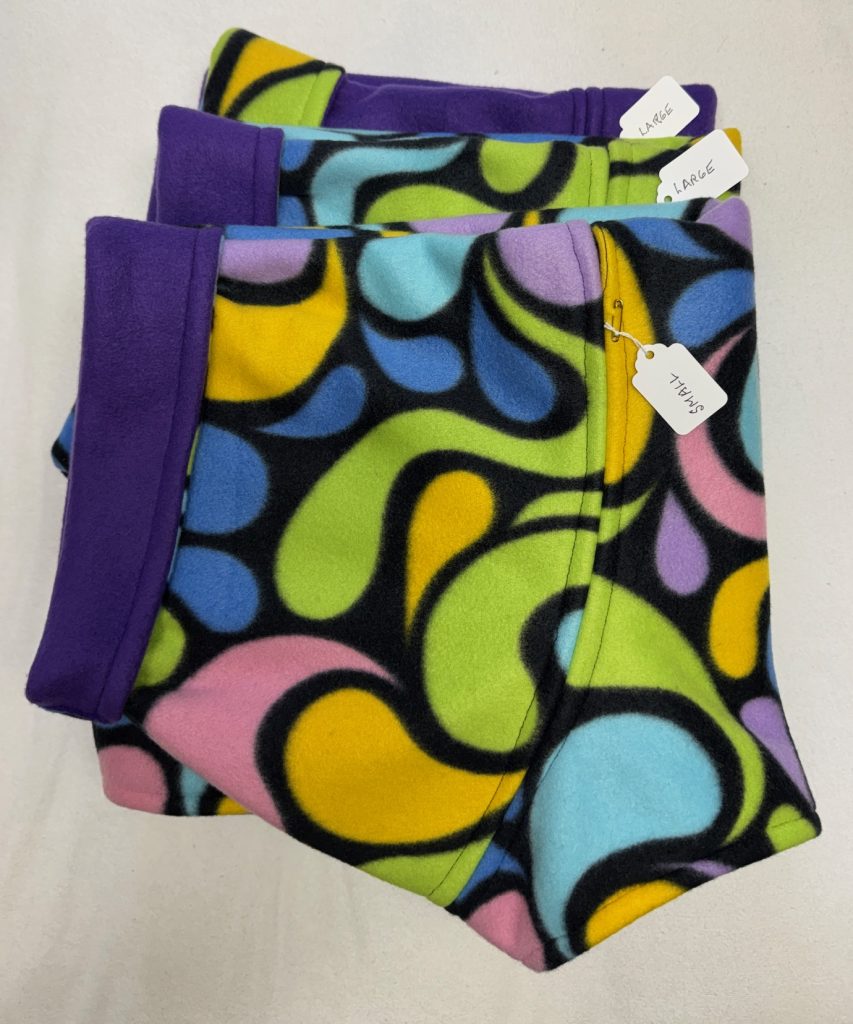
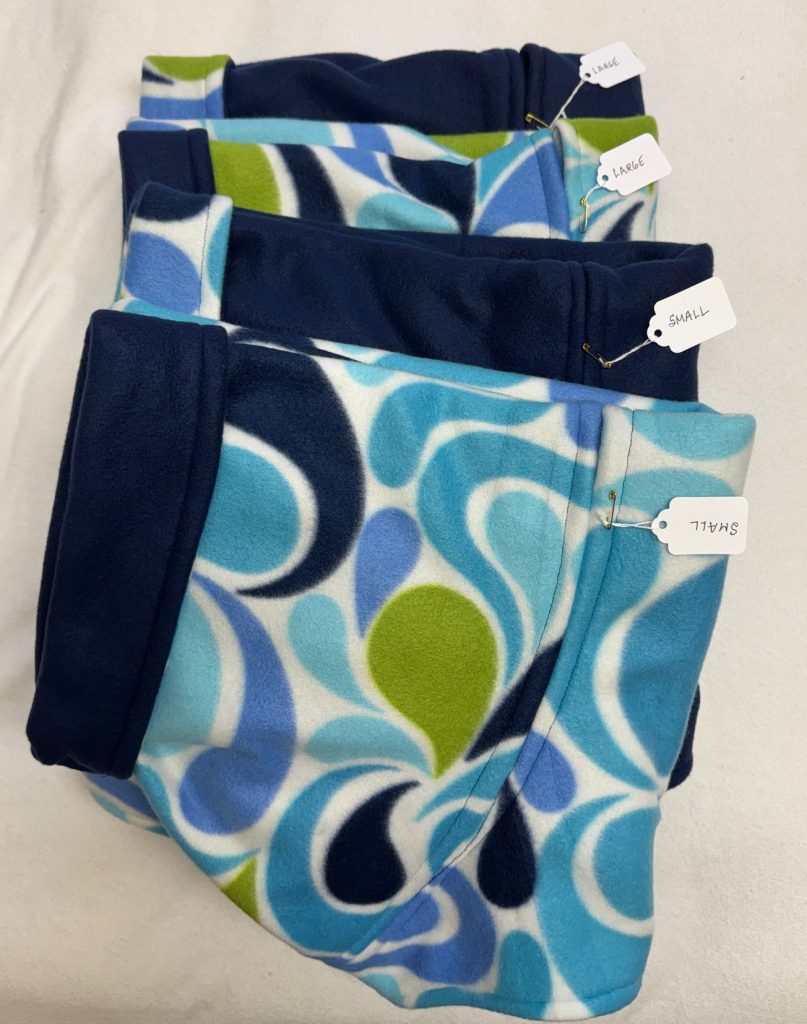
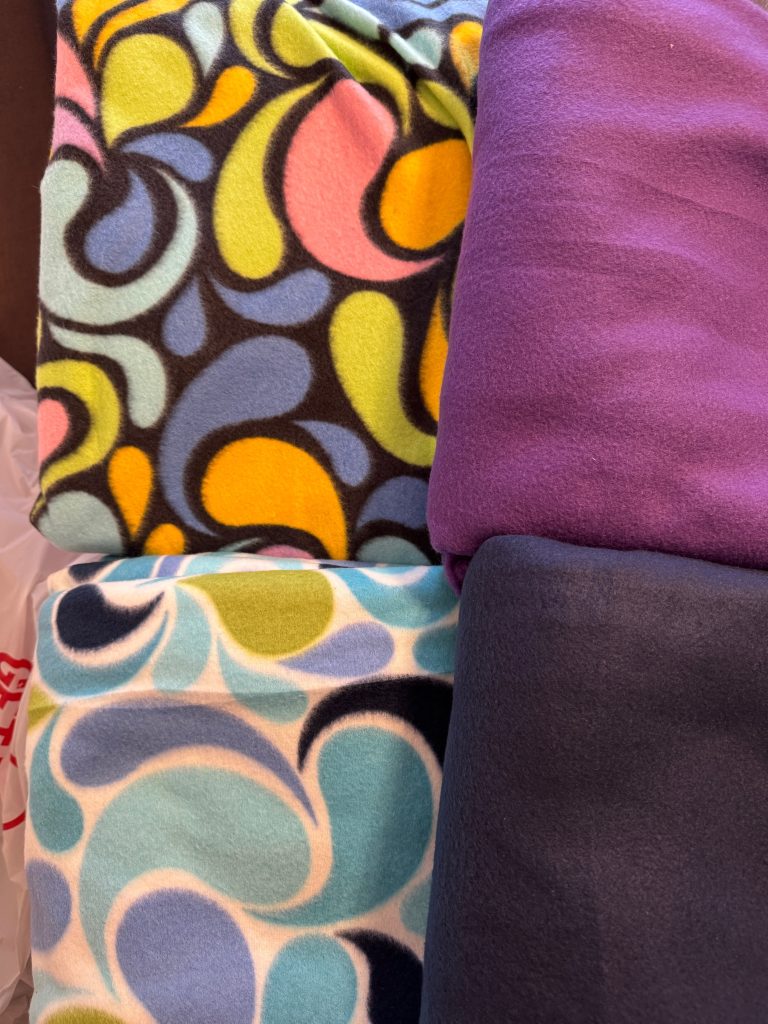
Here are the four colors of fleece I purchased at Surplus City last week…described in my last post at
Considering my fabric options, the solid purple went OK with the paisley at the top. Dark navy fleece looked good with the light blue paisley at the bottom. I decided to make 4 coats of each pair of colors…some with the paisley design on the outside and some with the solid color on the outside.
Cutting out the coats
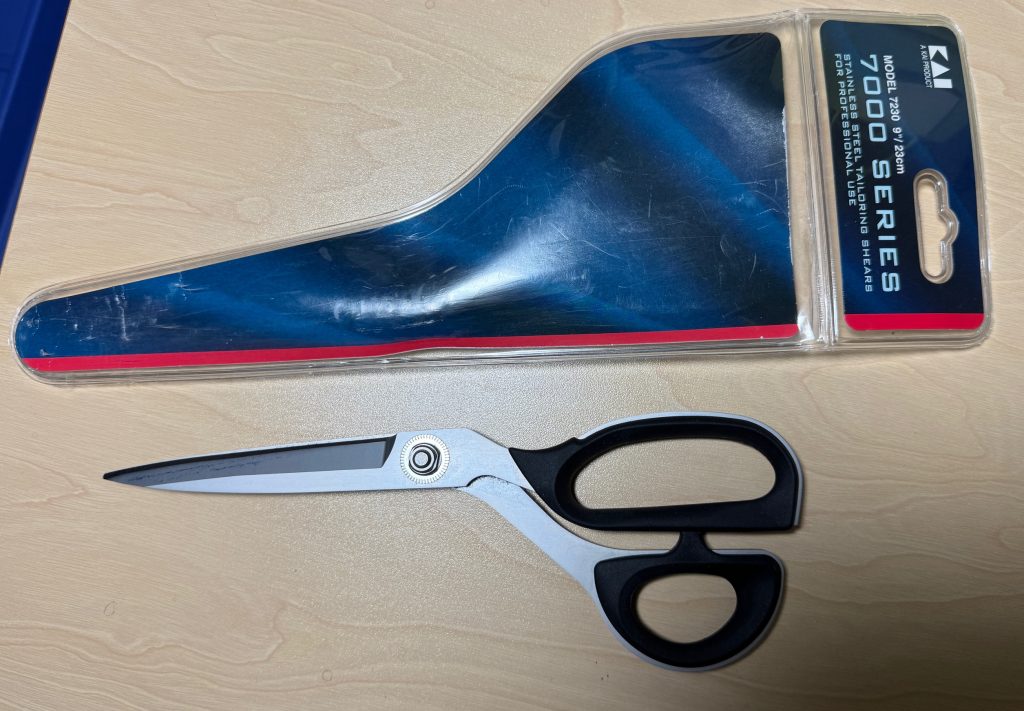
Cutting out the coats is a tedious process and cutting out 8 coats and 8 linings is just about the limit for my hand in one day. Thank goodness my daughter gave me a wonderful pair of scissors for Christmas a few years ago. They are a little larger and very sharp. They cut through the fleece like butter!
After cutting out all the pieces (16 times!) I stacked the pieces for each coat. Here’s a picture of how I lay out the pattern pieces (shown on a different fabric). By folding the fabric selvedges to the center, I can cut out a large and a small coat on each 1 1/2 yard of fabric:
ASSEMBLING THE COATS
(This includes more detailed pictures for my file. Scroll ahead to see the finished coats!)
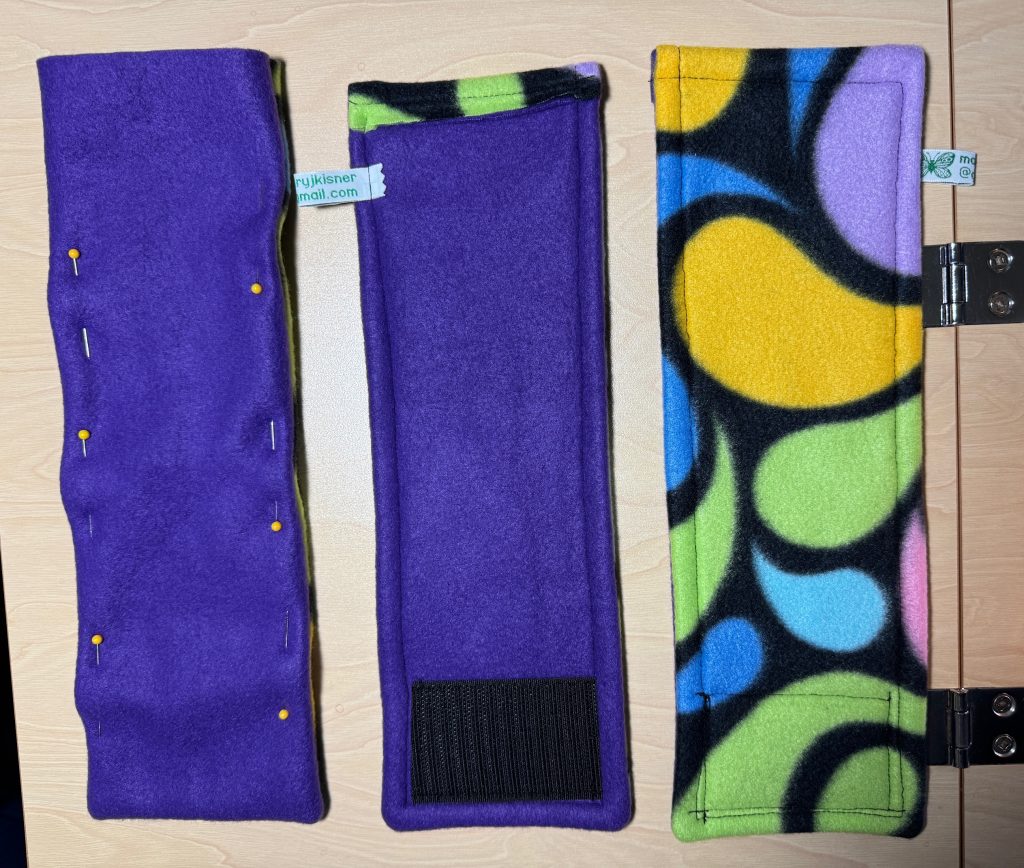
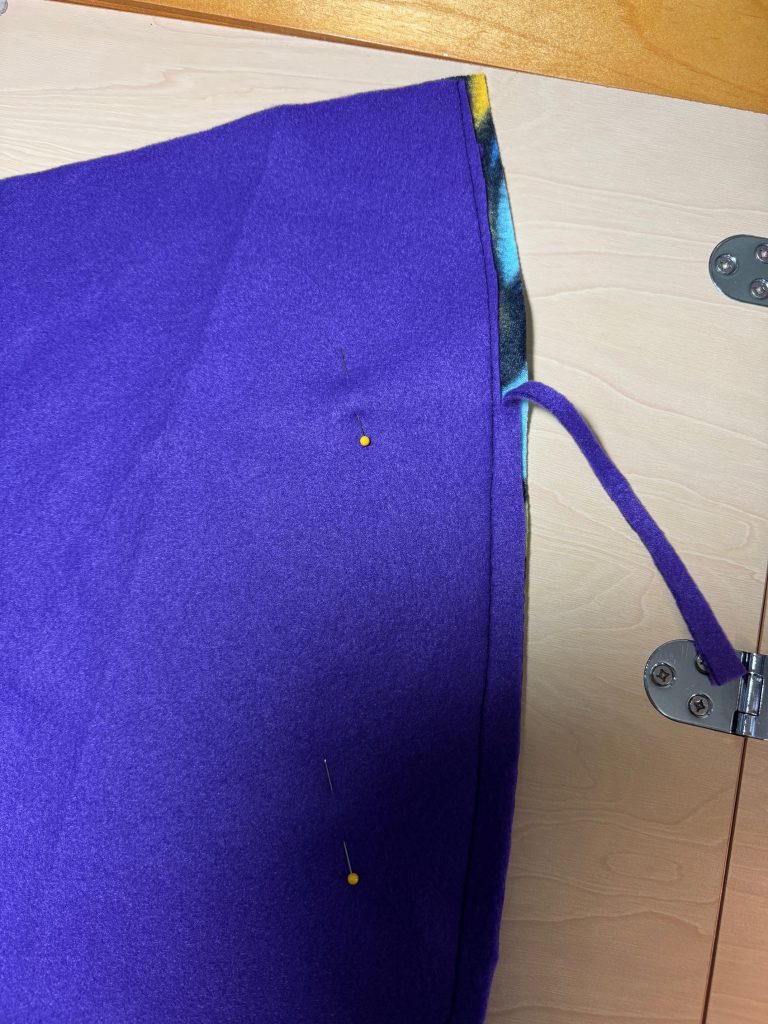
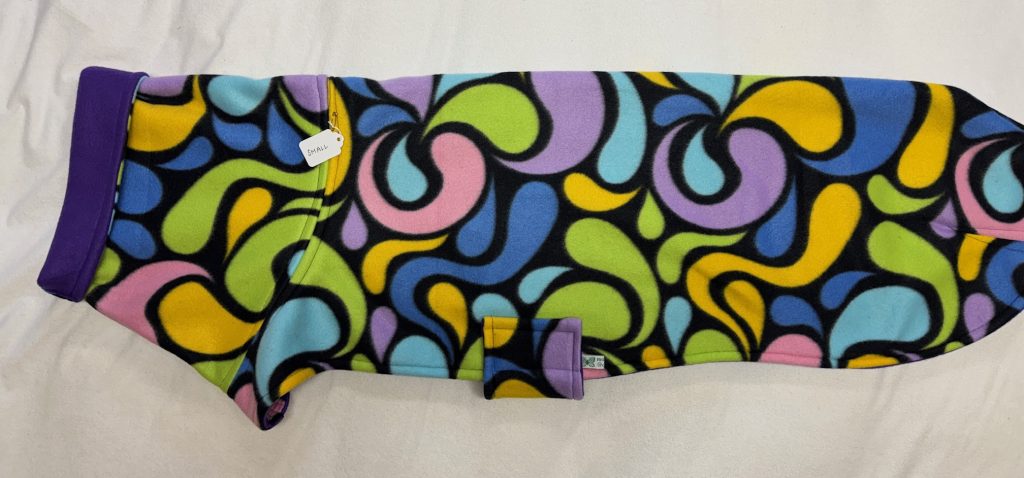
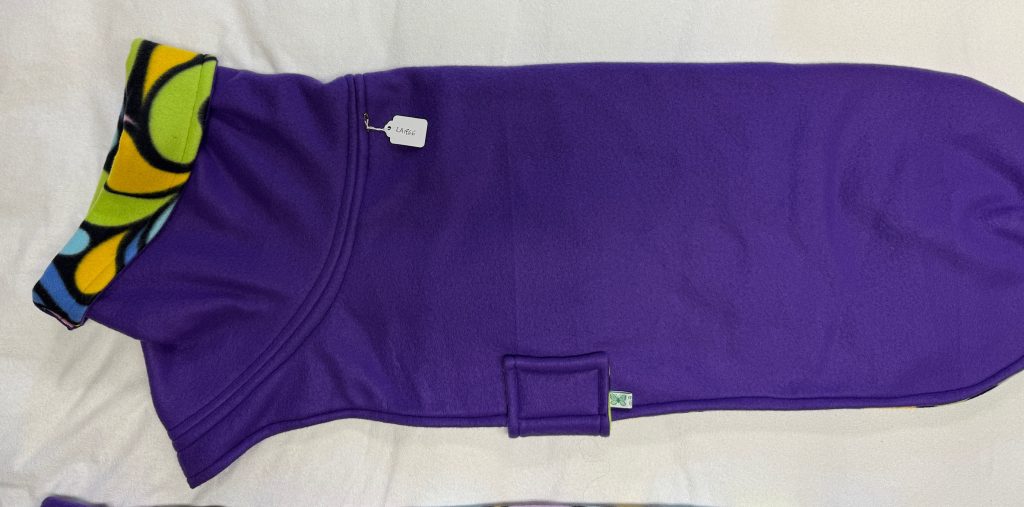
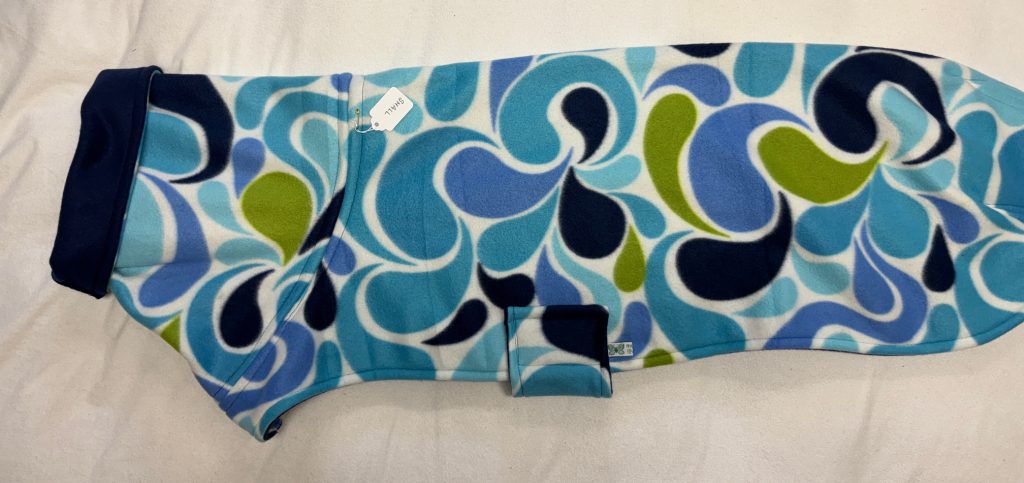
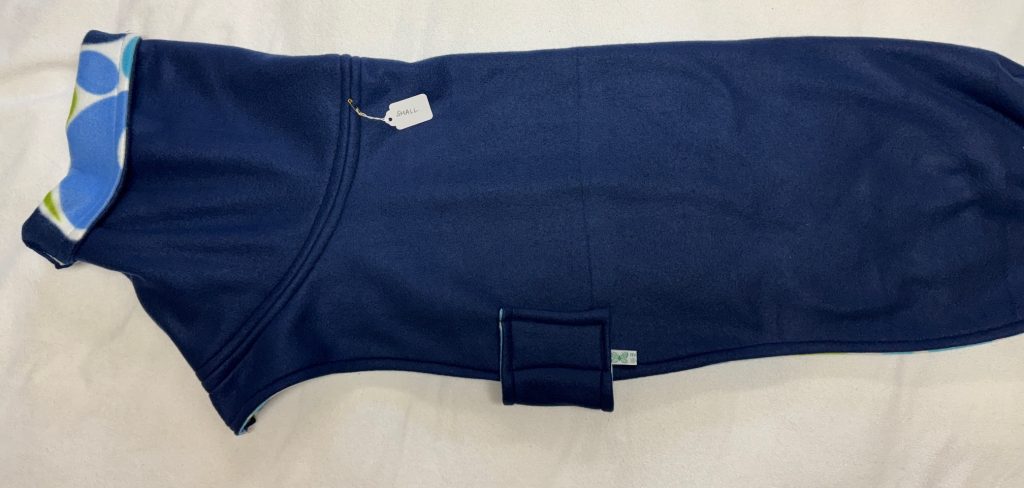
Making the Straps
I always begin by making the straps. This includes sewing my label and the Velcro hook piece to each strap. These will remind me what color is the outside of a particular coat! The paisley has become the outside of this first coat. (I can’t figure out why the purple fabric photographs as blue sometimes!)
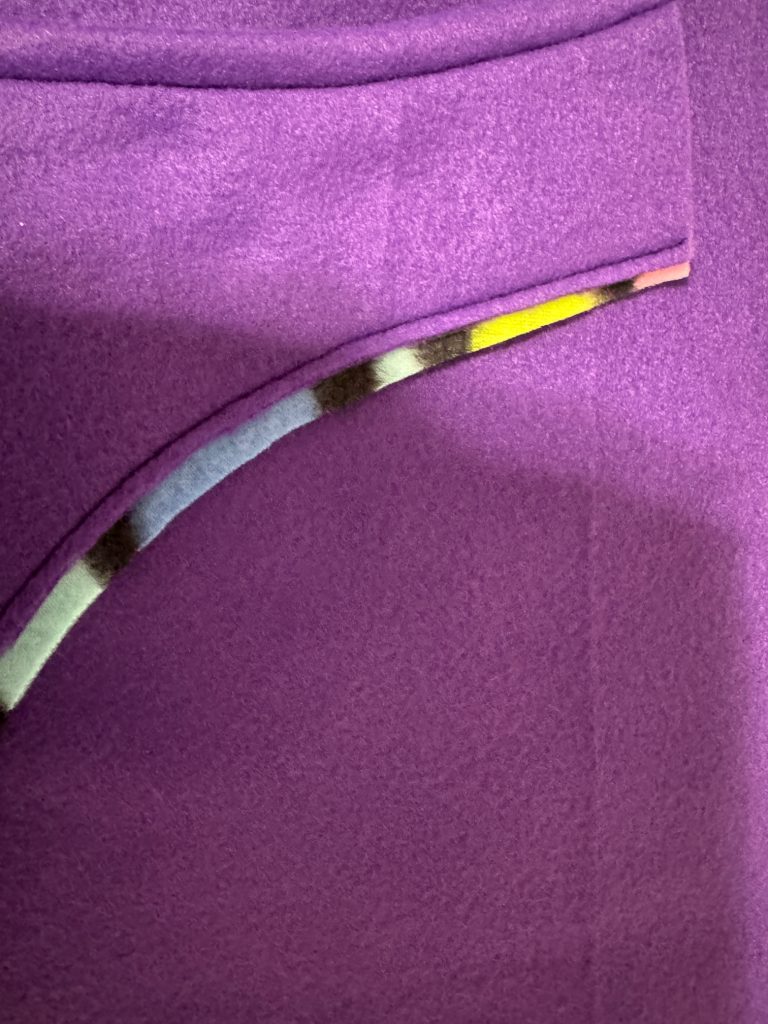
Making the Snood
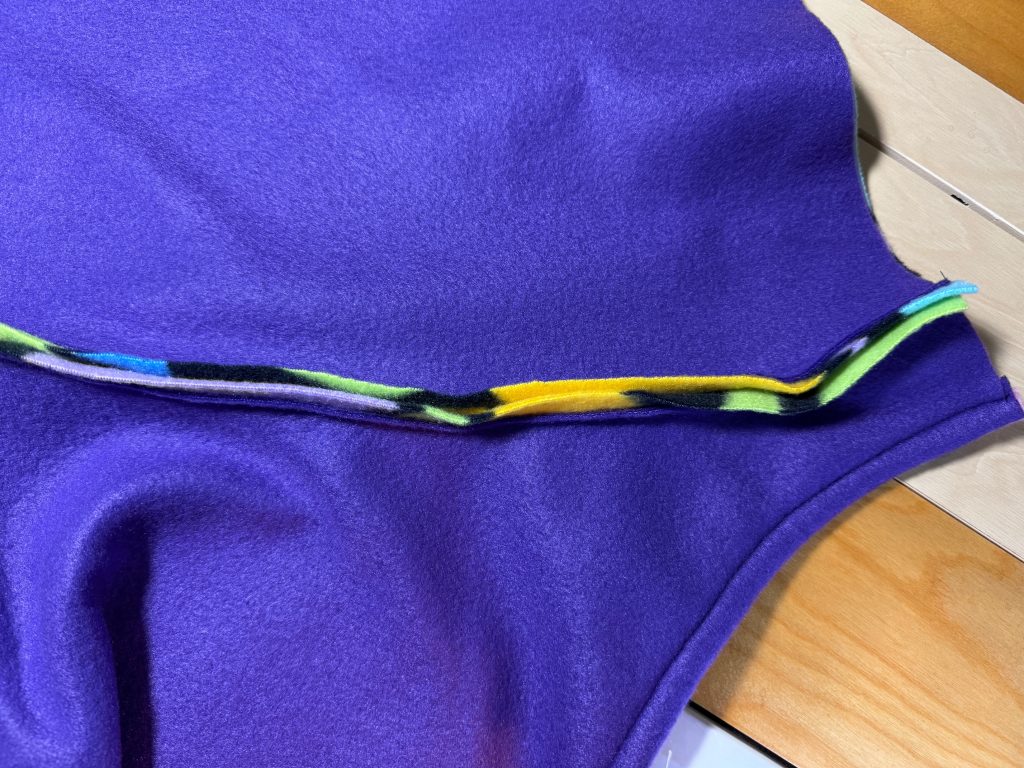
Working with just the snood pieces, I sew them together at the top, wrong sides together:
Then I turn the snood right side out and sew the bottom edge together. When I trim the seam, I have finally made the commitment to which side is the outside and which is the lining. Trimming the seam is one of my short cuts to make finally assembly much easier.
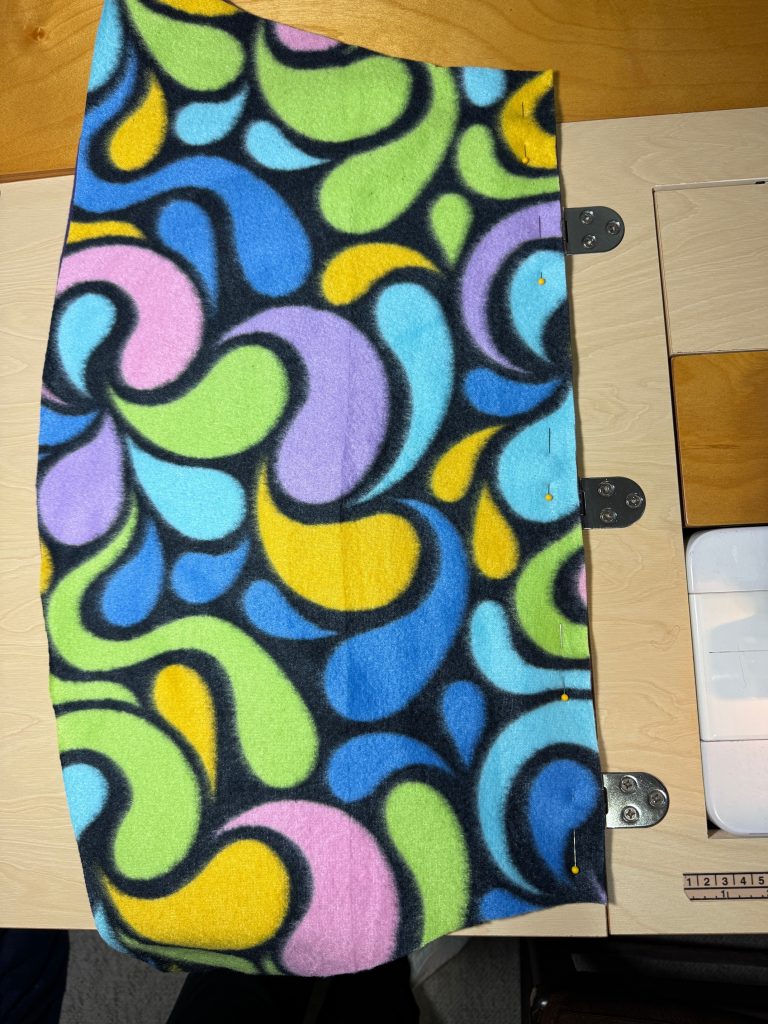
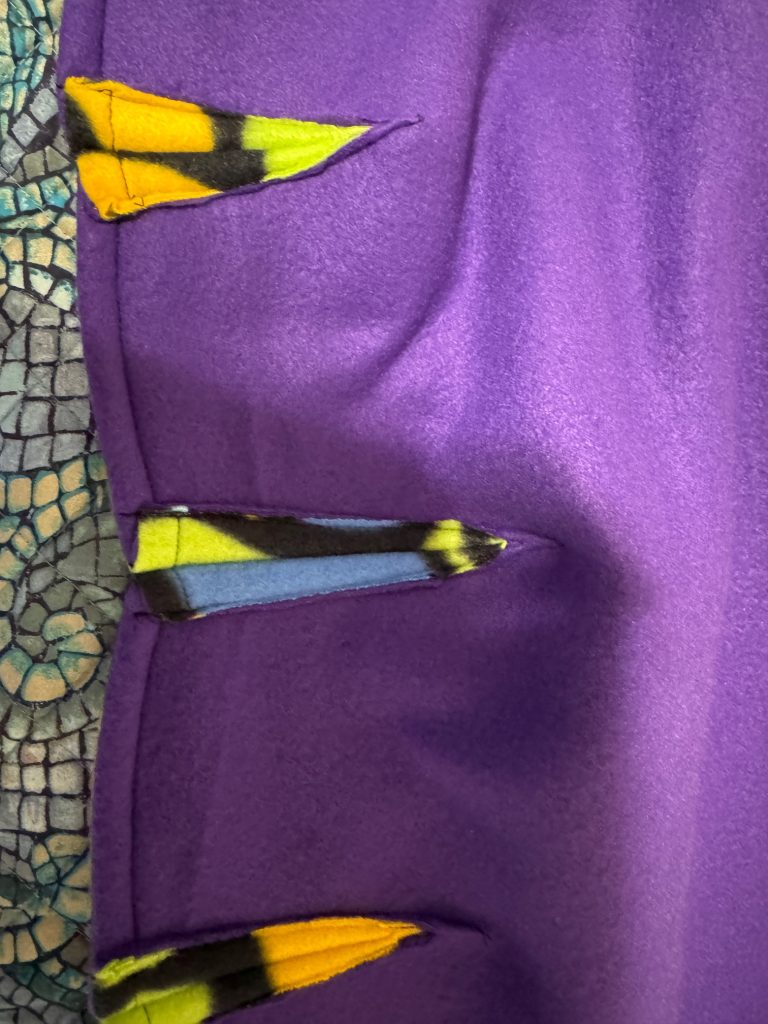
Making the Body of the Coat
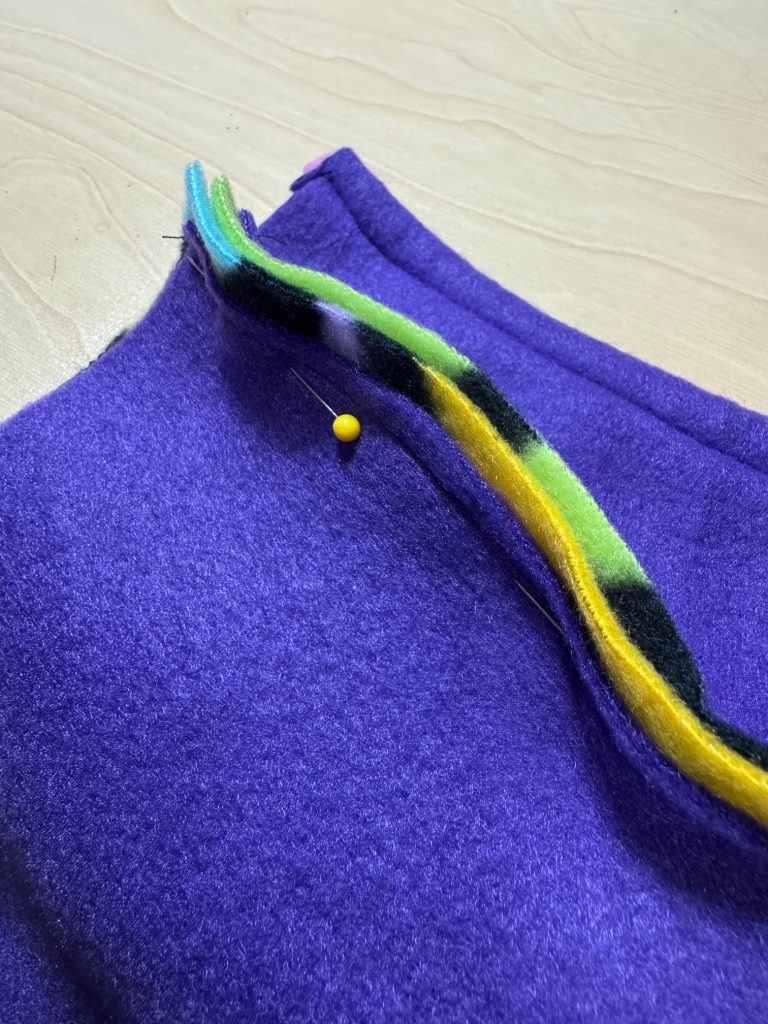
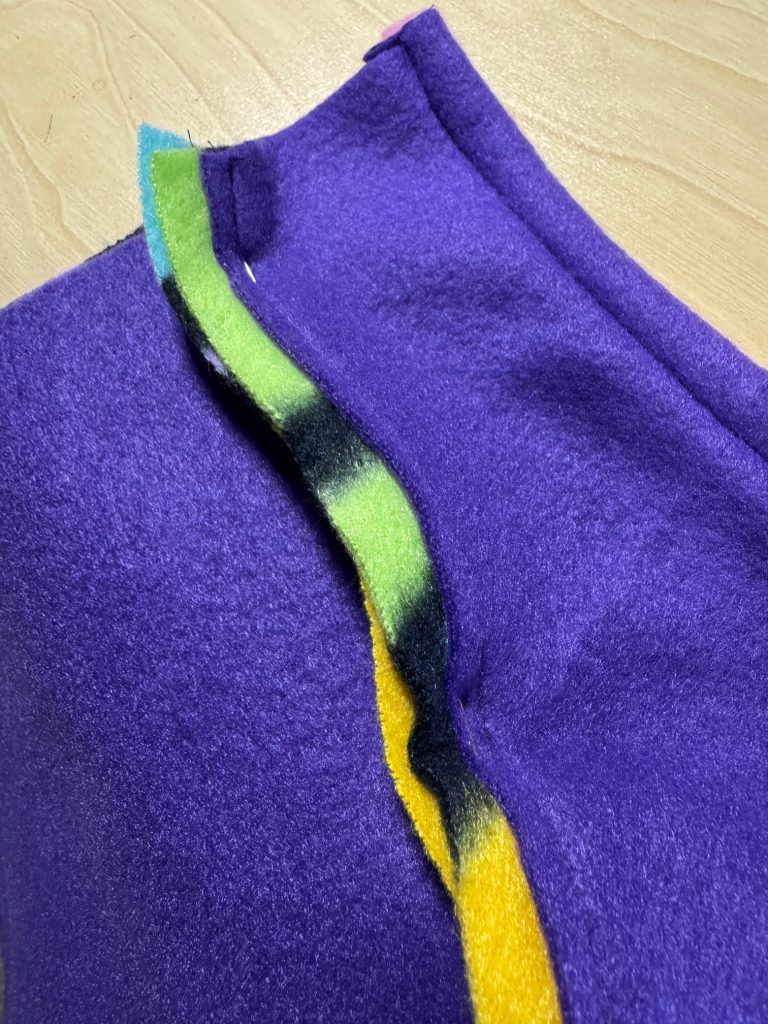
Sewing the body pieces, right sides together and then turning the coat right sides out, the ‘outside’ has not yet been determined. After I sew and trim the neck seam, I have finally committed to which side is the ‘outside.’ Trimming the neck seam is another short cut to make final assembly easier.
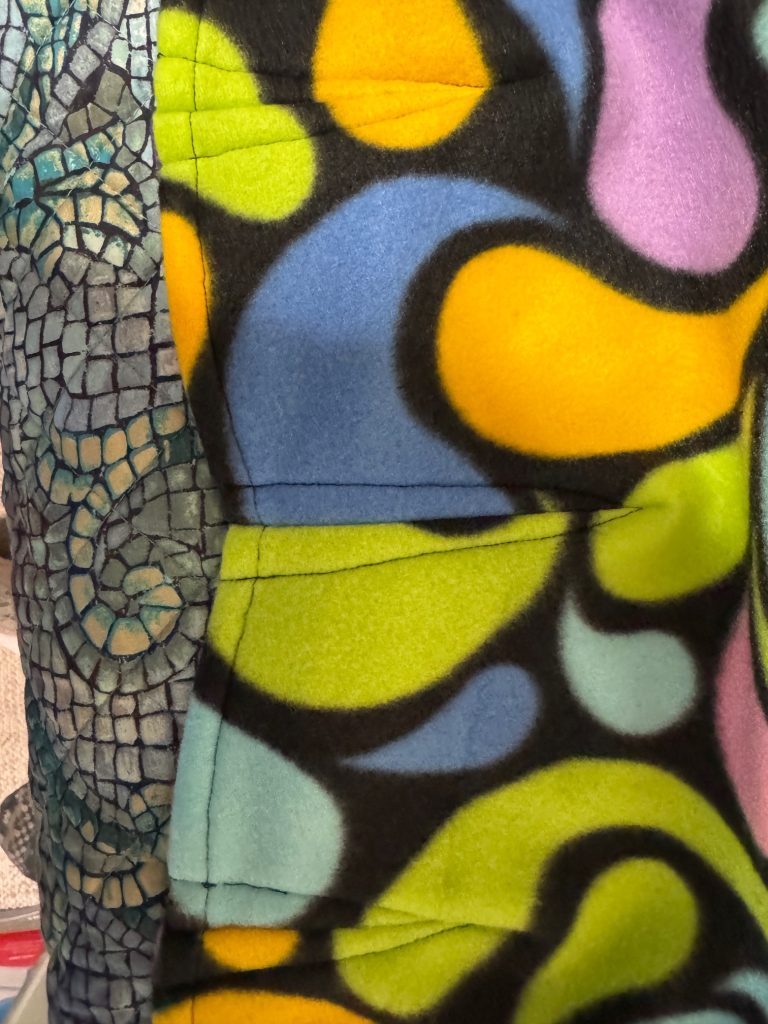
Making the Darts
Before I attach the snood to the body of the coat, I need to make the darts that shape the back end of the coat. This is why it matters that I don’t make a mistake and put the darts with the wrong side out!
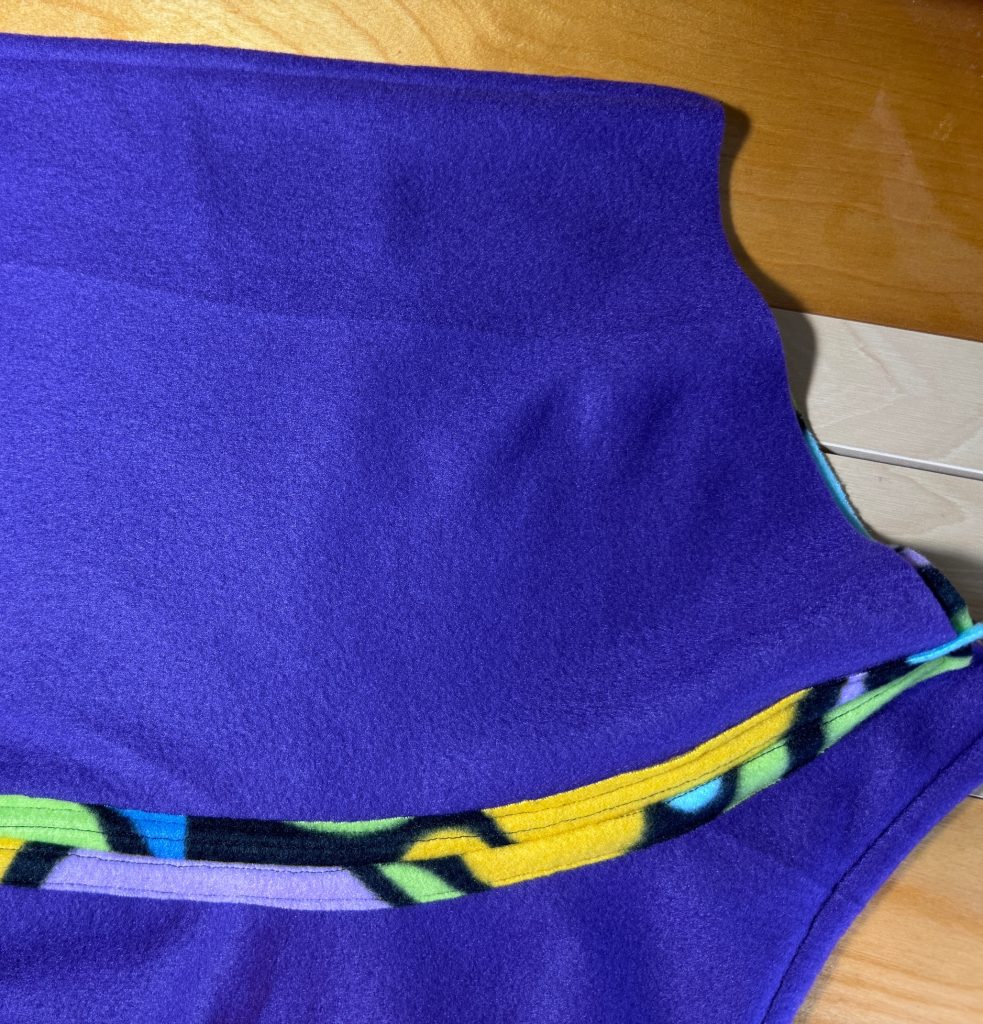
By the time I sew the snood to the body of the coat, I have stabilized and trimmed both edges and assembling the coat is so much easier.
I will keep a copy of this post handy with the patterns for the coat. You never know when I’ll need to refer to it in the future.
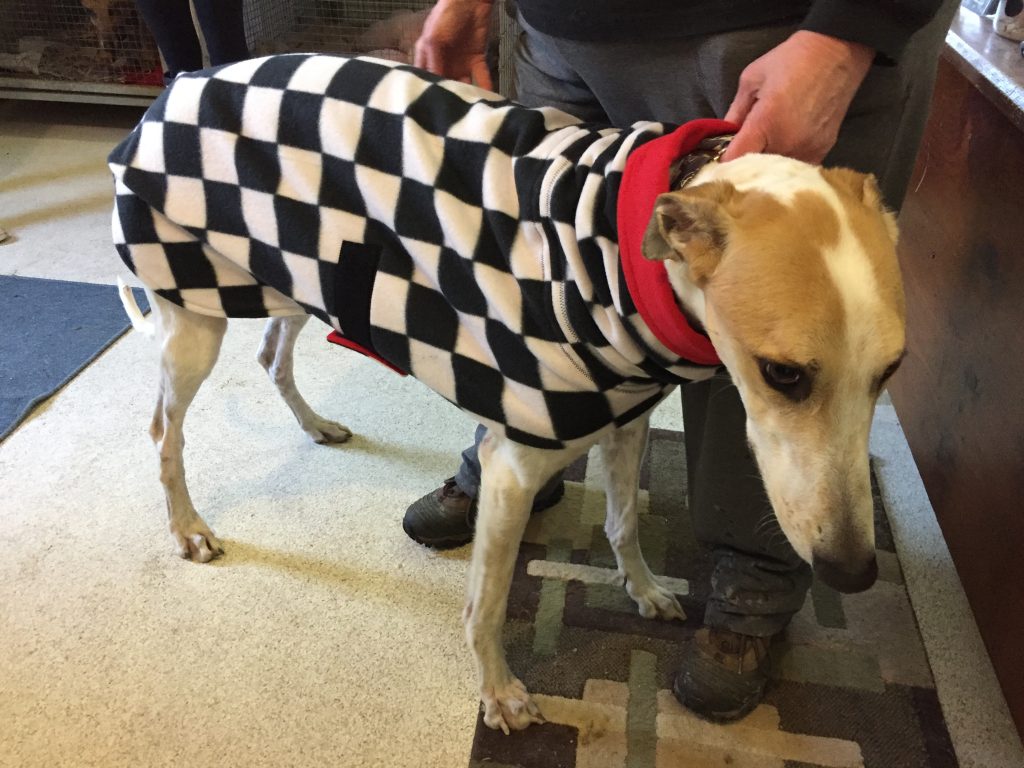
Take a Look at the Final Coats
Here are the coats, stacked and ready to deliver to Nittany Greyhounds!
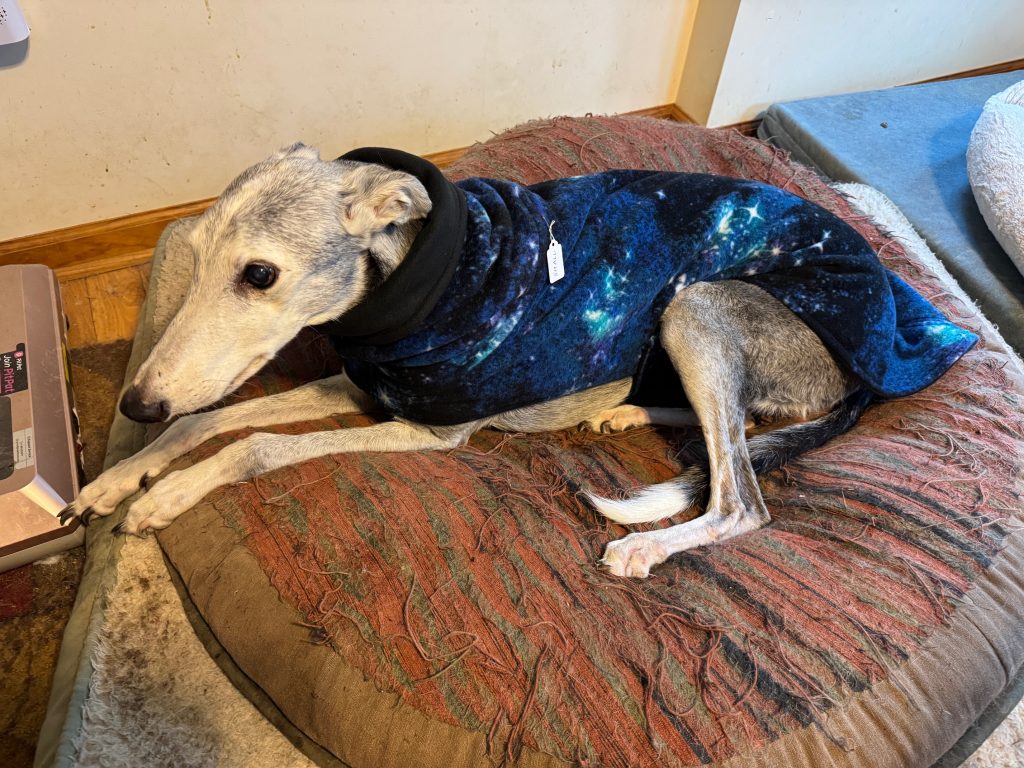
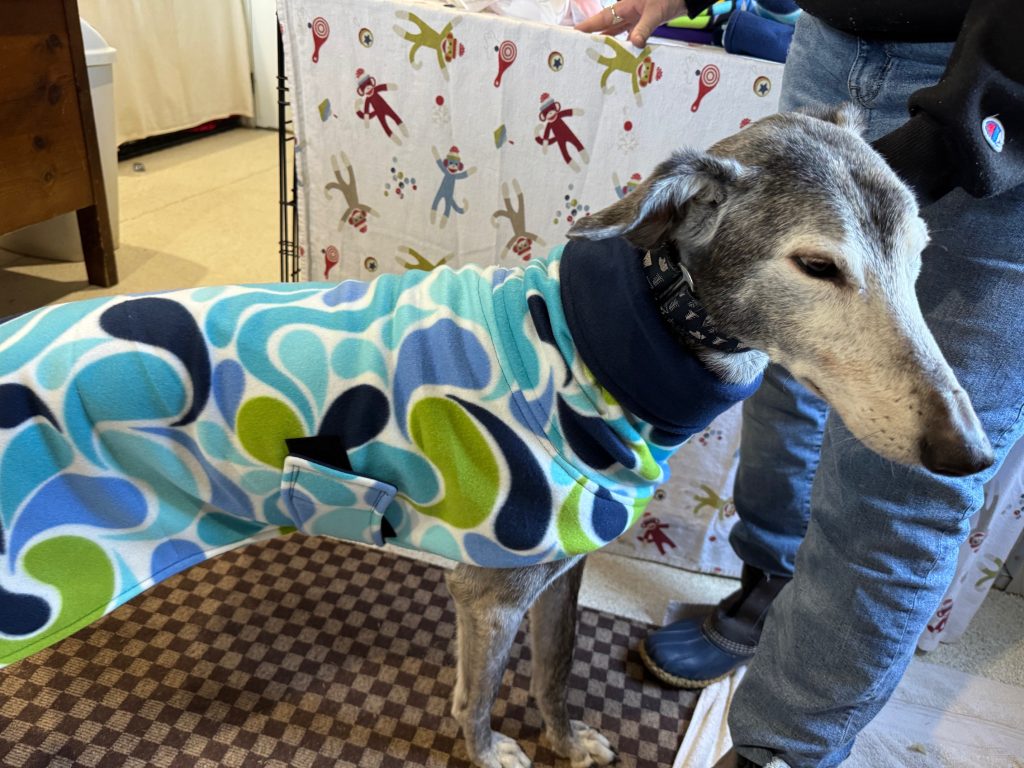
And finally, I found a model at the kennel to try out a coat!
That’s what I did this week. I hope a few greyhounds are cozy and warm! Enjoy!
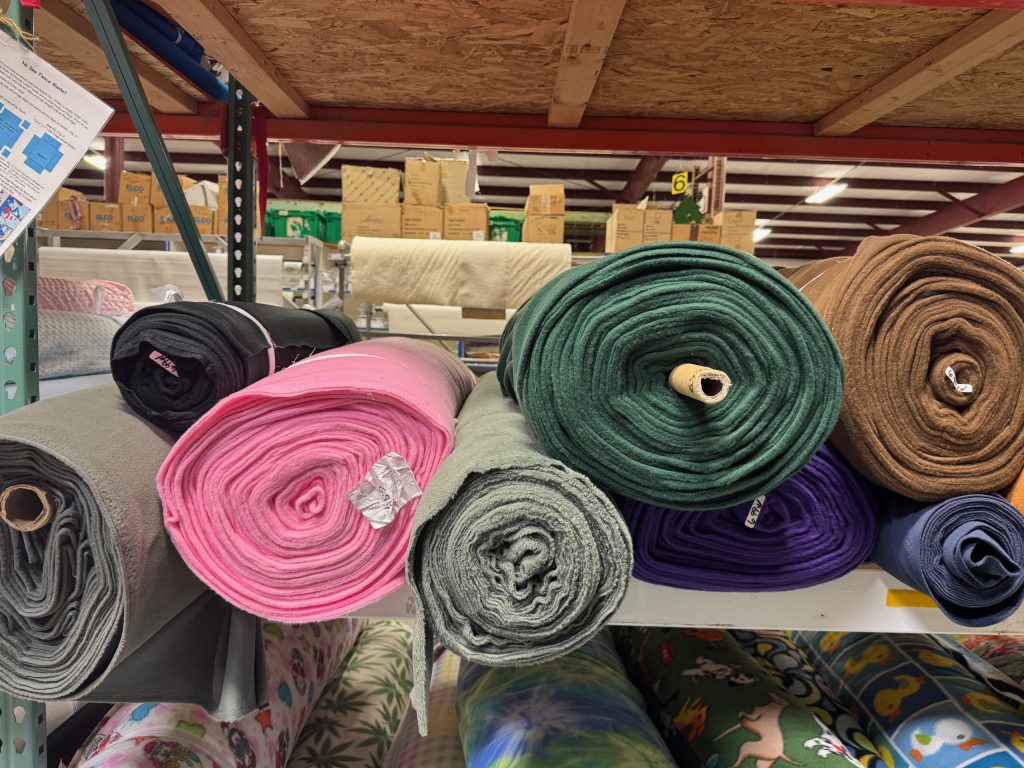
My volunteer work making coats for adopted greyhounds has dwindled over the last year to an occasional special-order coat. Fleece fabric by the yard has been difficult to find, now that JoAnn Fabrics is out of business. Making many greyhound coats required an ongoing source of affordable fleece. Of course, Amazon has fleece fabric by the yard, but at $16.90/yard it’s incredibly expensive. To make 4 coats I need 6 yards of fabric, 3 yards for the outsides and 3 yards for the linings. It would cost over $100 just for the fabric alone!
Recently, I had an email from a greyhound owner asking if I still made coats. I had to share my difficulty finding fabric. Finally, today Bert and I took a drive to Surplus City…about 40 minutes from here…down I-99 toward Altoona, PA. They used to carry lots of giant rolls of fabric, many of them fleece. I was hoping to see what was available and how much it would cost. I figured I’d pick up some fabric…if it was available and affordable!
The rolls of fleece were limited, compared to how much they had several years ago. The fleece was pretty thin but at $6.99/yard I could at least make a few lightweight coats. They would work for spring or fall weather but would not be warm enough for a cold Pennsylvania winter! Here are the shelves of fleece rolls:
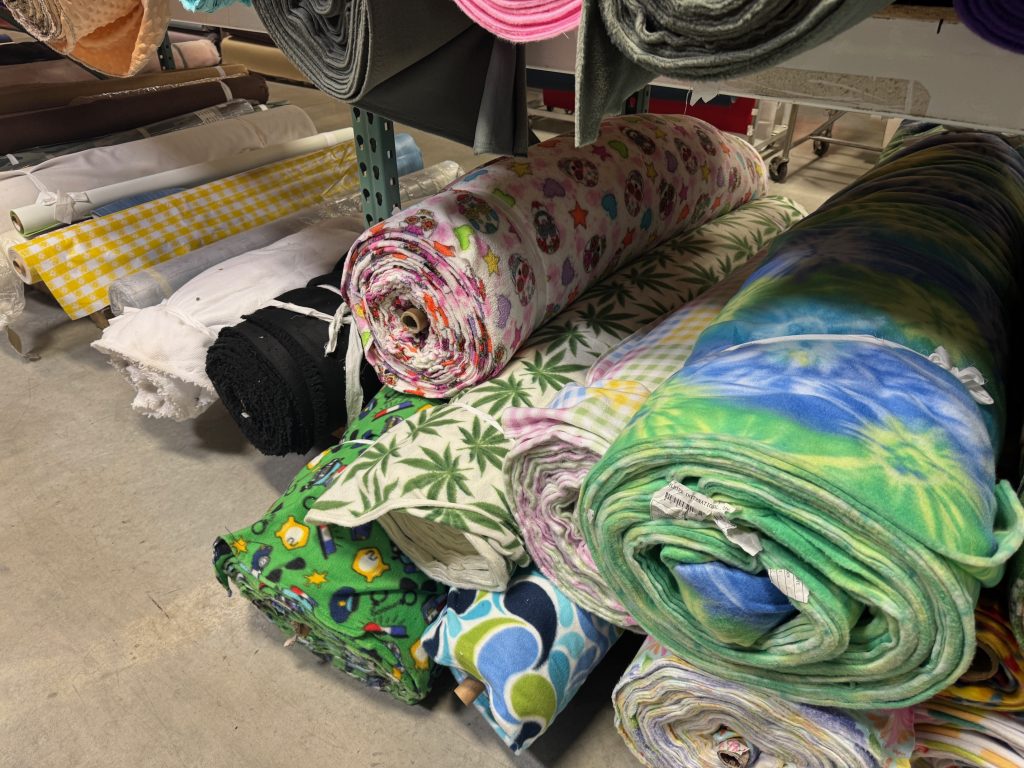
Some pretty weird colors, but I finally decided to buy 3 yards each of these colors:
I really thought I was picking colors that would go well together, but the lighting was not very good. I think the prints could be the outside or the lining of the solid colors. I’ll have to wash them before working with them…they were pretty dusty.
So, at $6.99/yard I bought 12 yards of fabric…enough to make 8 coats! How about that! I’ll offer to make one for the person inquiring about a coat and make the rest for Nittany Greyhounds. That made me happy today!
Maybe there’ll be a few cozy greyhound coats for spring!
If you have comments or questions, please email me directly at maryjkisner@gmail.com.
I apologize for my silence for the last two weeks! It’s been a long slog of VERY cold weather and the lack of sunshine has been tough. We’re finally getting a few 20-degree days and occasional sunshine, so things are looking up. I have not been very motivated to do much except make bracelets and listen to music.
I wanted to share how my own blog posts have helped me think about projects I’ve done and what I’d like to try next. I also realized how nice it was I had pictures to remind me HOW I did things and if the results were worth it! I’d like to share 5 projects I worked on these last two weeks and how they pulled me through my mid-winter funk!
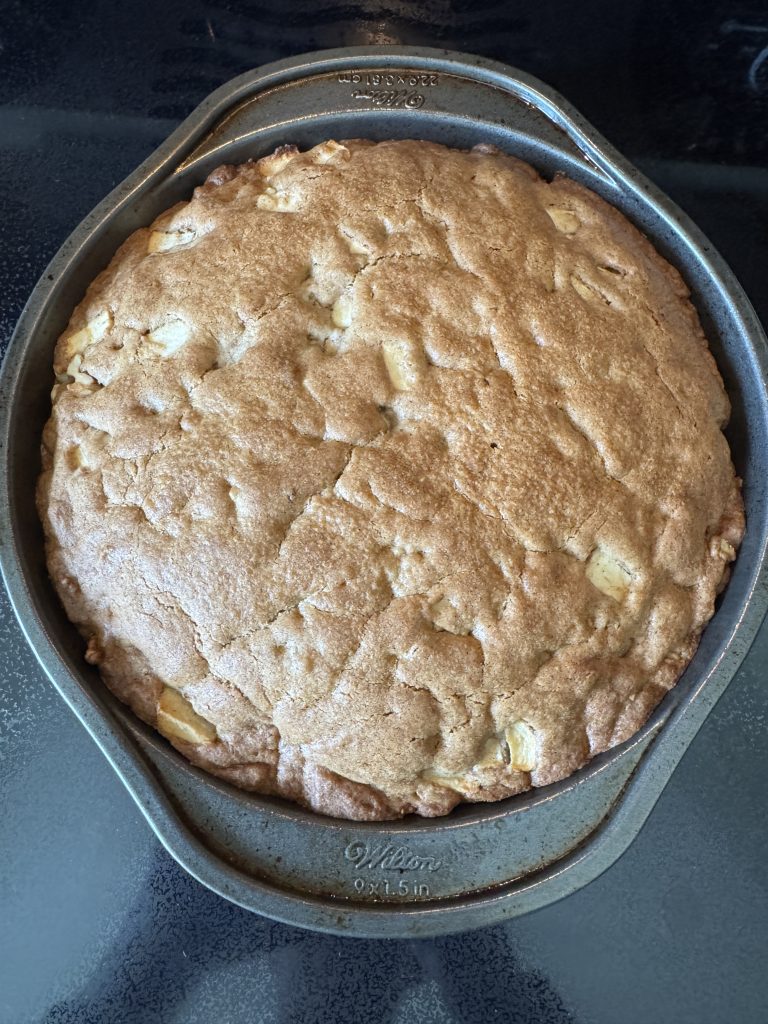
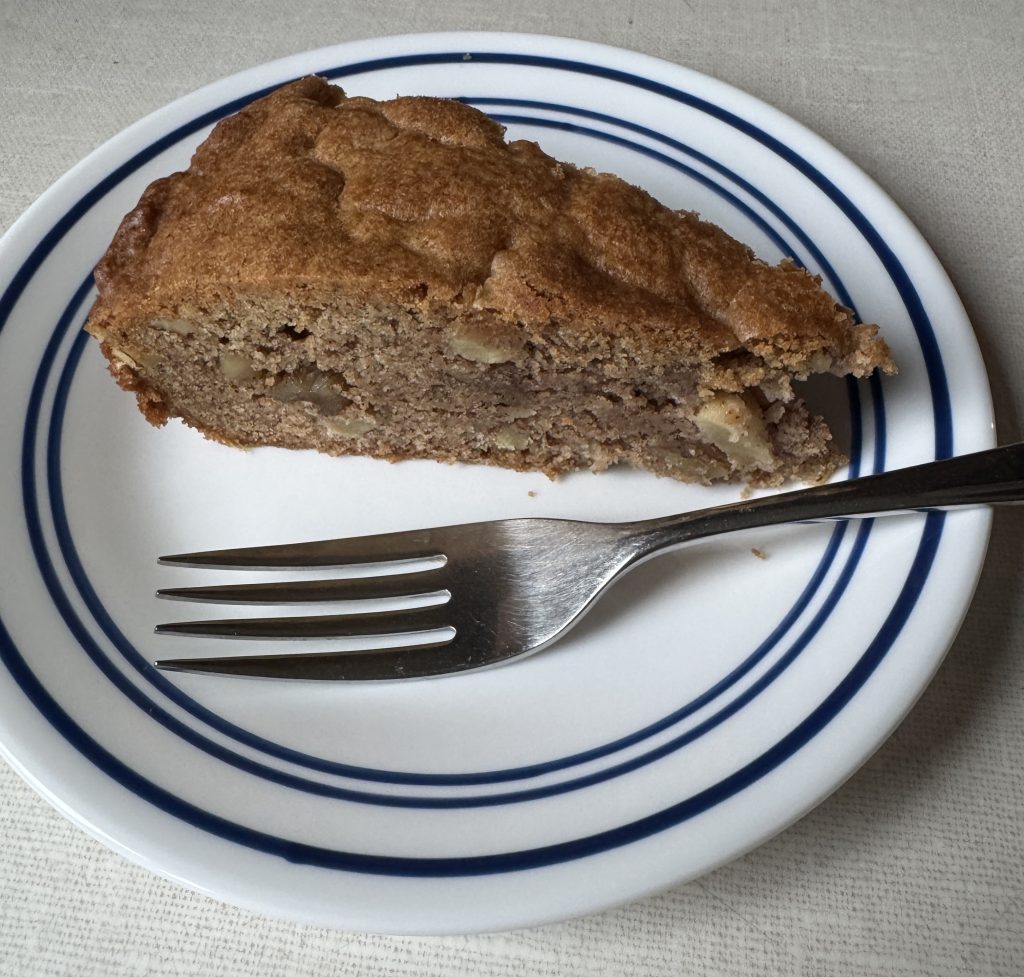
#1: Making Cinnamon Apple Cake
I had a few apples that needed to be eaten, cooked or pitched soon. Bert suggested I make an Apple Cake…but if you’ve followed along, I’ve made 4 different cakes and not all have been delicious. So, to help me remember, I looked up the four posts that described them. You can see them here:
After reading those four posts and looking at the pictures, we decided we liked the cinnamon apple cake the best, so that’s what I made last week.
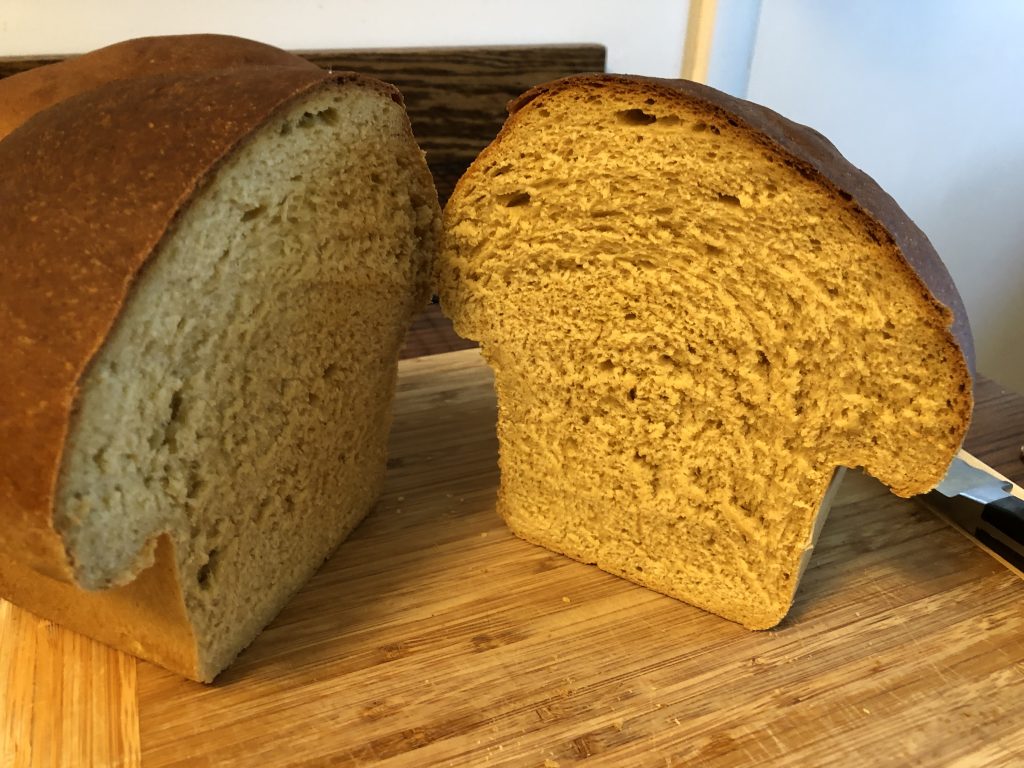
#2: Making Sweet Potato Yeast Bread
Next, I wanted to bake bread…my go-to-activity when it’s really cold and snowy! In the freezer I found mashed sweet potato (in a 1-cup container) and a bag of whole wheat flour that I had ground a few months ago. I found my post about making Sweet Potato Yeast bread (https://marykisner.com/making-sweet-potato-yeast-bread/). It made 3 small loaves…just right to go with homemade soup during the snowstorm!
When I got done, I remembered I had earlier made Vegan Sweet Potato Buns and could have made them instead. I’ll do that next time I feel like baking! Check out that recipe here: https://marykisner.com/making-vegan-sweet-potato-buns/
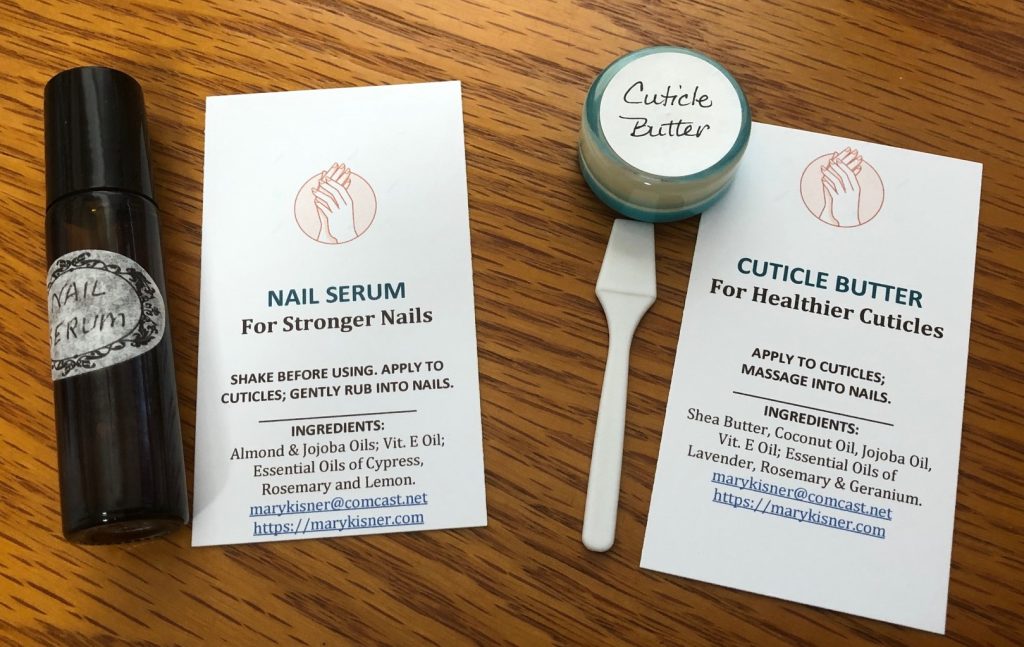
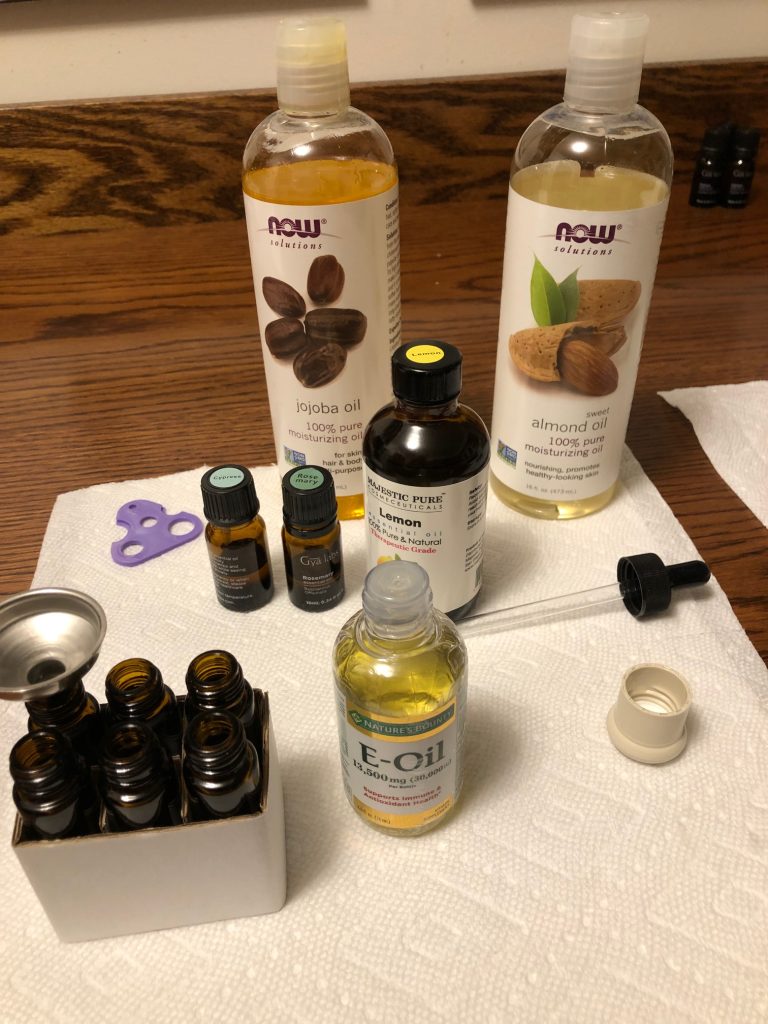
#3: Making Nail Serum for a Friend
While we were snowbound, I had a text from a friend who asked if I still had any of my nail serum and cuticle butter left. It’s been a while since I made both, so I sorted through my bins of stuff to see if I had any left.
I did have a bunch of tiny cuticle butter containers left but no nail serum (in rollerball containers). I pulled out the blog post for the recipe to make more nail serum. I ended up making a few. You can read about it here: https://marykisner.com/essential-oils-and-nail-care/
#4: Sharing Links about the Greyhounds
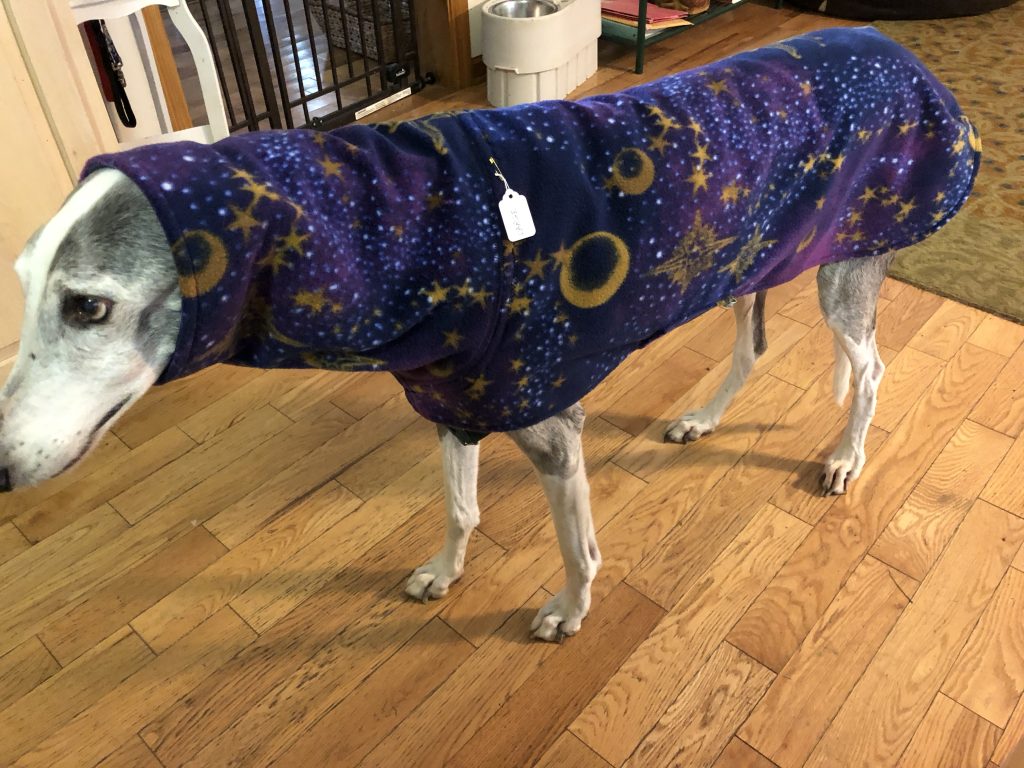
This last week I also had a query from a greyhound owner about whether I still made coats for greyhounds. I had to explain my dilemma about making the coats. I have not made coats for at least a year. I was basically burned out and was turning my attention to my bracelets. I am still able to do custom orders for coats, but now that JoAnn Fabrics is out of business, affordable fleece fabric is hard to find. I have found a few offerings on Amazon, but they are mostly solid colors and very expensive. To buy the fabric (in one color) to make one coat could cost $45-60. Then, my time to make the coat and mail it to a customer is another $50. I just don’t see that being feasible.
I ended up sharing with the greyhound owner the six blog posts I’ve written about my work with the greyhounds:
As I’ve mentioned many times, I’m willing to share my patterns for the coats and teach someone else how to make them. We worked hard to design them so they fit well. I’m proud of how cozy they are. Of course, my work with Nittany Greyhounds was a volunteer job so there isn’t much money in making them although Nittany always paid for the fabric. I have seen coats being sold on Etsy for $75-100. I just can’t see it’s a lucrative activity without a good source of affordable fleece. So far, I have found few people who even know how to sew.
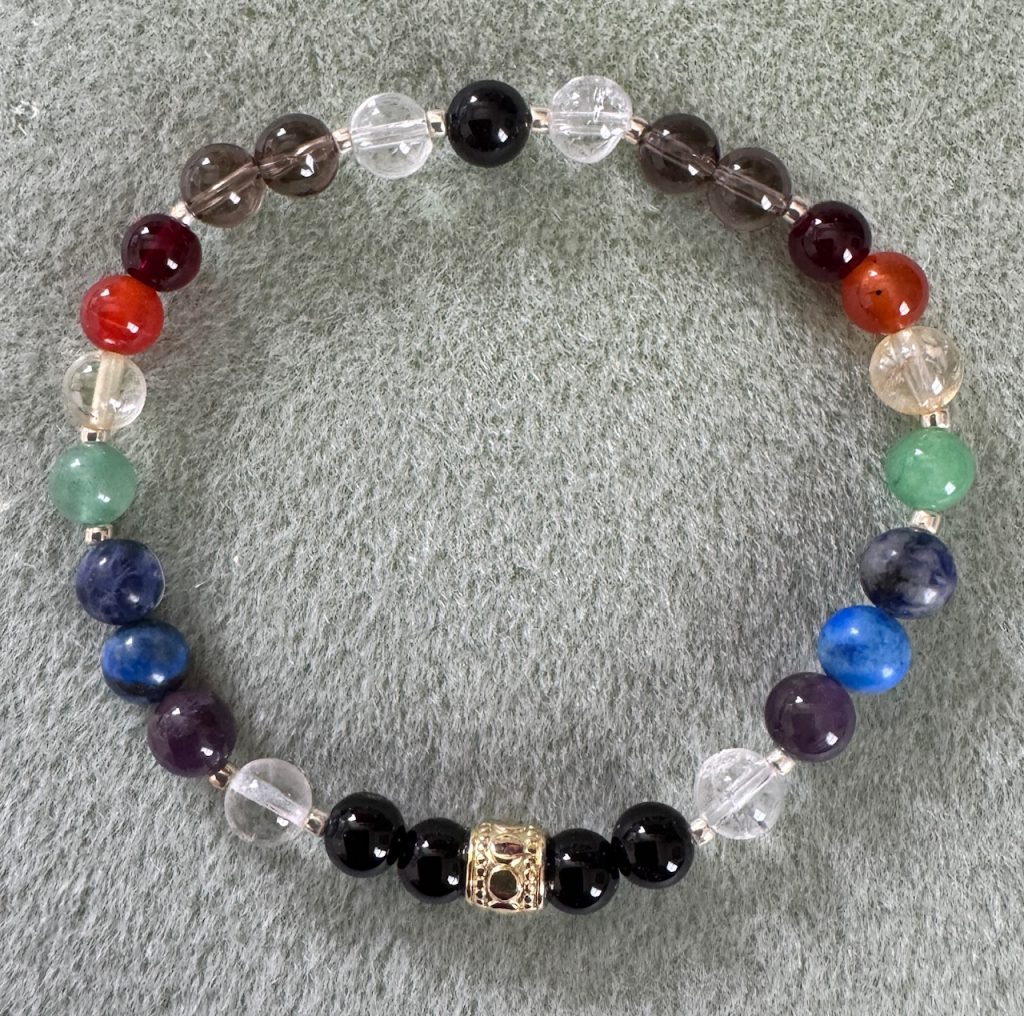
#5: Designing a New Bracelet for Well-Being
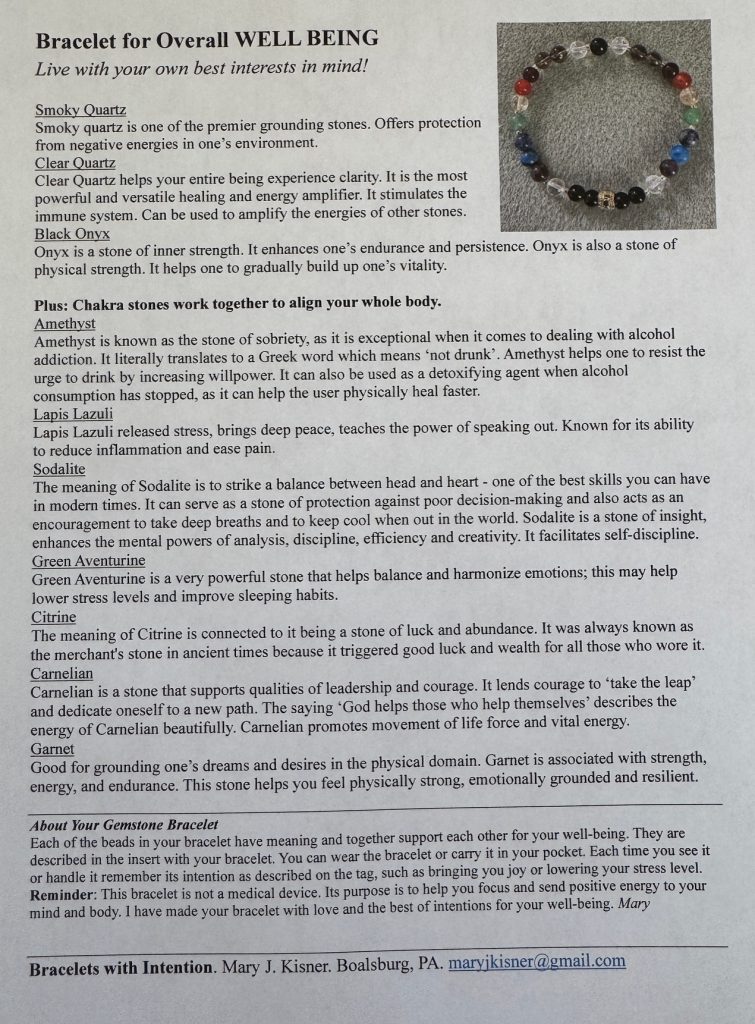
Finally, around all the baking, nail serum making and greyhound conversations I was thinking about designing a new bracelet for general well-being. Most of my specialty bracelets start with the idea that the best thing I can make will help a person stay balanced and is focused on keeping their chakras strong and aligned. The chakras are the energy centers in the body and when one is blocked or weak from illness, stress or environmental conditions my focused intentions always target bringing a person’s energy back into balance. The various stones have their own vibrations that help that intention.
The latest bracelet I’ve made is based around two sets of the chakra stones, plus smoky quartz, clear quartz and black onyx. Those last three stones provide grounding, clarity and inner strength for whatever issue a person is facing.
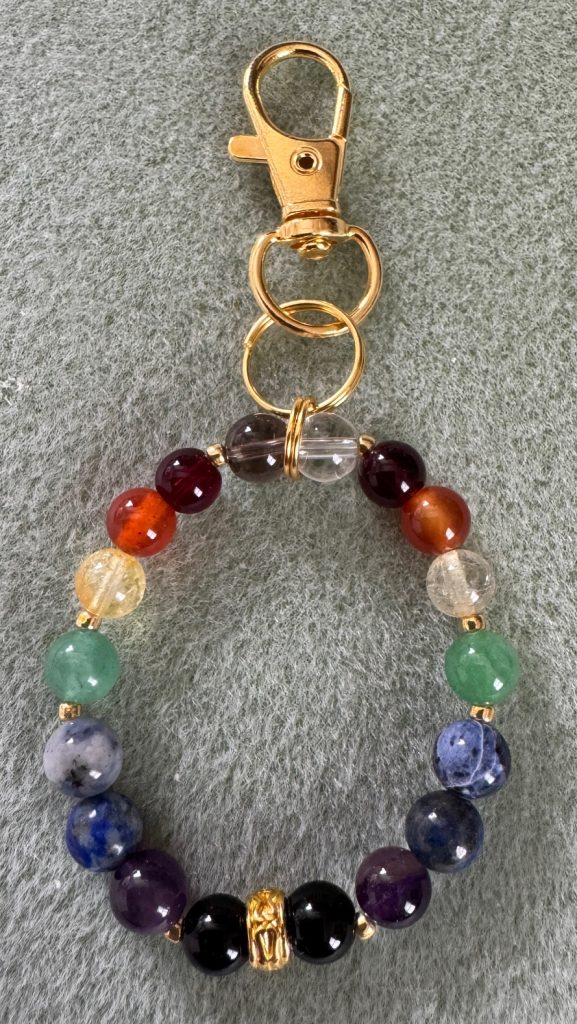
Then I made a key chain accessory to go with the bracelet so well-being can be carried with you. Making that set was fun and kept my mind busy as the snow piled up!
Here is the description that I include with each bracelet. The key chain accessory just has fewer beads but still has the two sets of chakra stones.
So, that’s what I’ve been doing! Silence doesn’t mean I’m not doing stuff. I may just be revisiting posts to try something again. I hope you are staying warm (or cool) depending where you live!
If you have comments or questions, please email me directly at maryjkisner@gmail.com.
Yesterday I wrote about how the charms on a charm bracelet could prompt recall of memories. I truly think I should consider making a new charm bracelet for myself…just in case my memory slips a little. I might be about to jog my memory by thinking about individual charms like my sewing machine, a kitchen mixer or my greyhound charm. You can read about the charms at https://marykisner.com/preserving-memories-with-a-charm-bracelet/
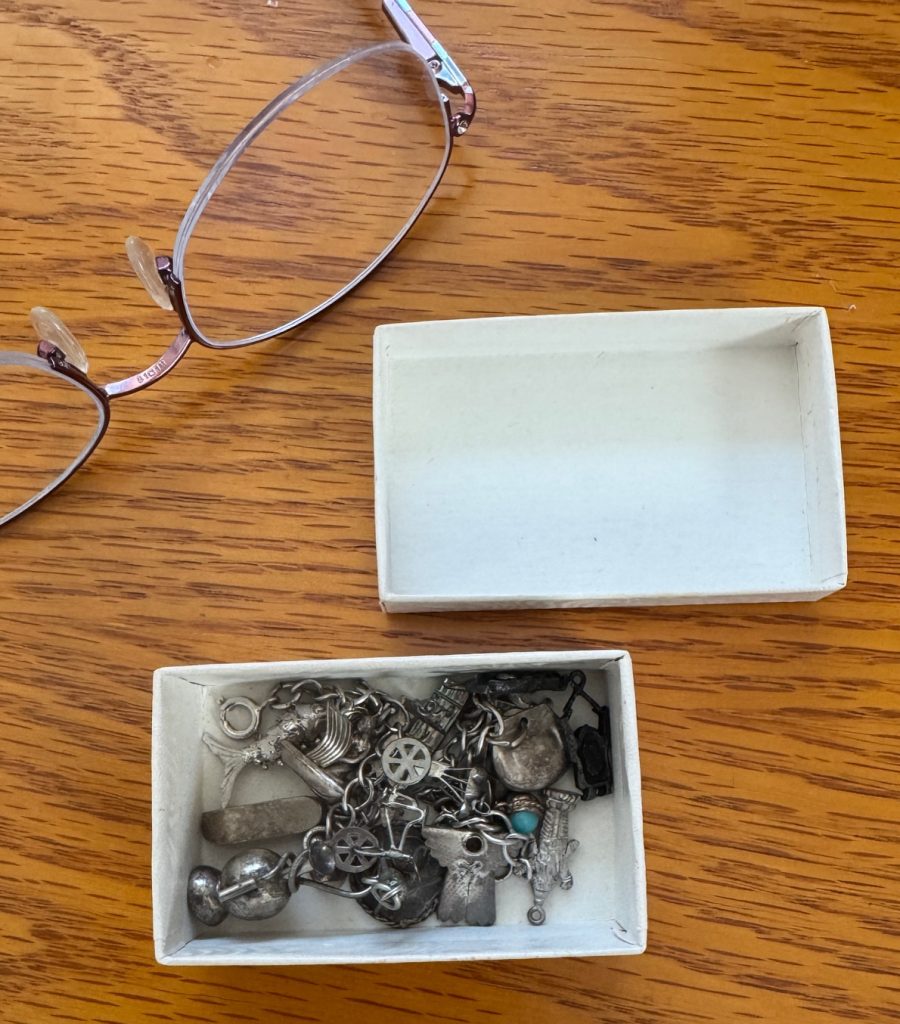
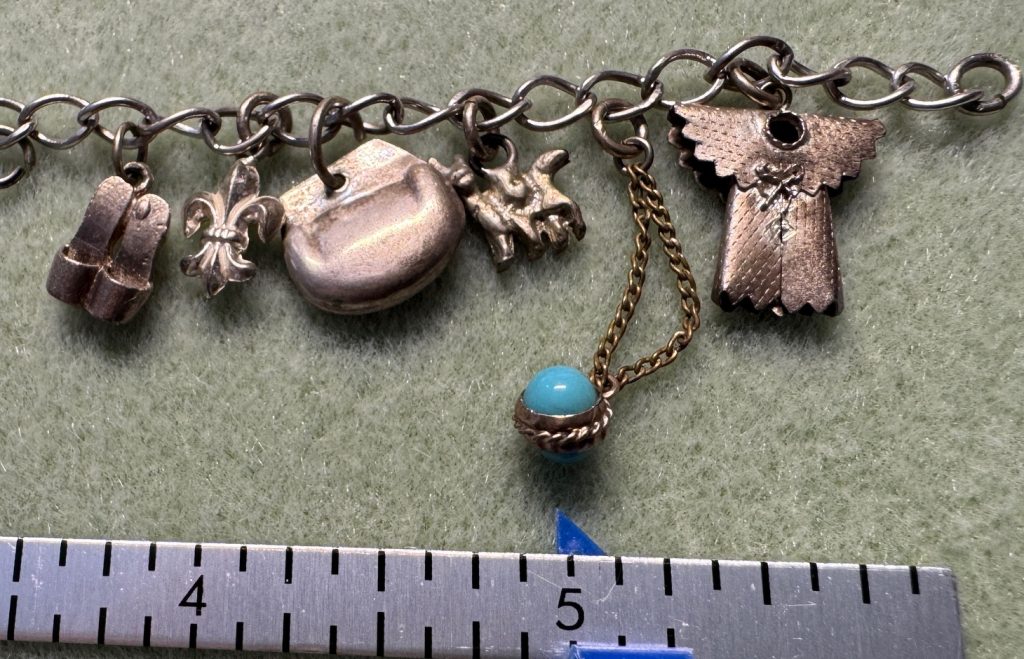
While I was thinking about various charms for that post, I remembered a charm bracelet that had been tucked in with my mother’s jewelry. I hadn’t thought about it in years, and she passed away in 1988. the bracelet and charms fit into a tiny box. I vaguely remember she picked up these charms on one or more of my parent’s overseas trips…one charm in each place/country they visited. She never really told me about them, plus I was home with two toddlers and just couldn’t relate at that time. When she passed, all chance of asking about them was gone. Of course, my dad lived another 22 years, but of course that little box was tucked away…out of sight, out of mind! The lesson here is…if you have an assortment of charms in your jewelry box that have a memory attached, consider writing down what they mean to you…otherwise, you’ll be passing on a mystery to someone else!
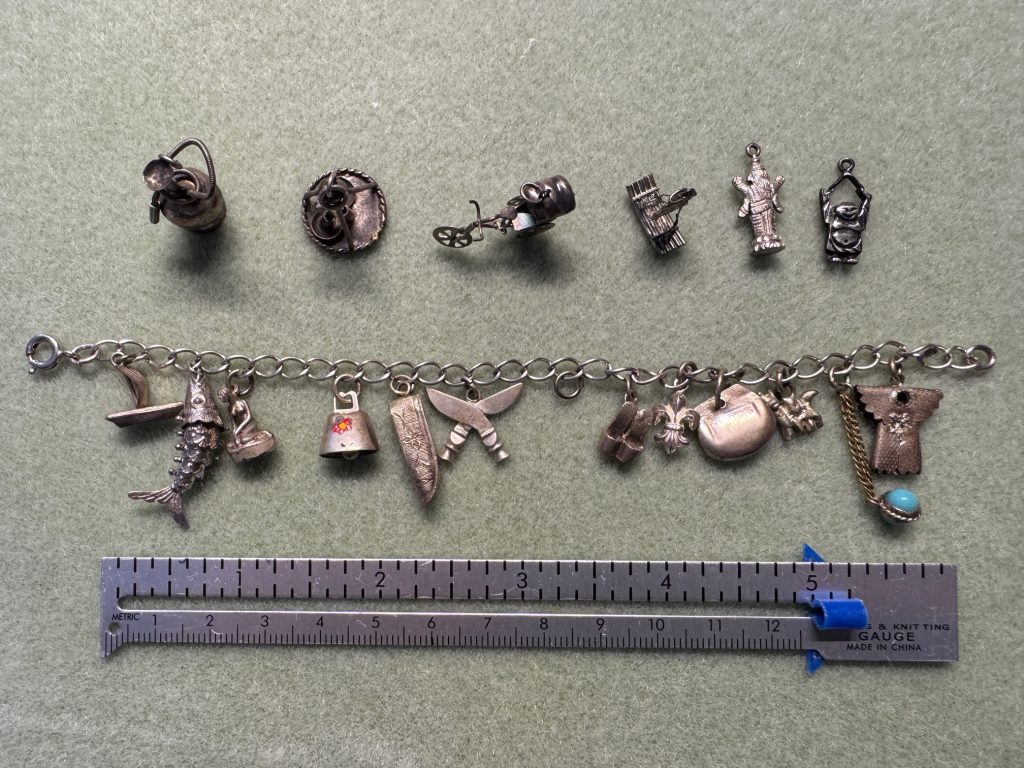
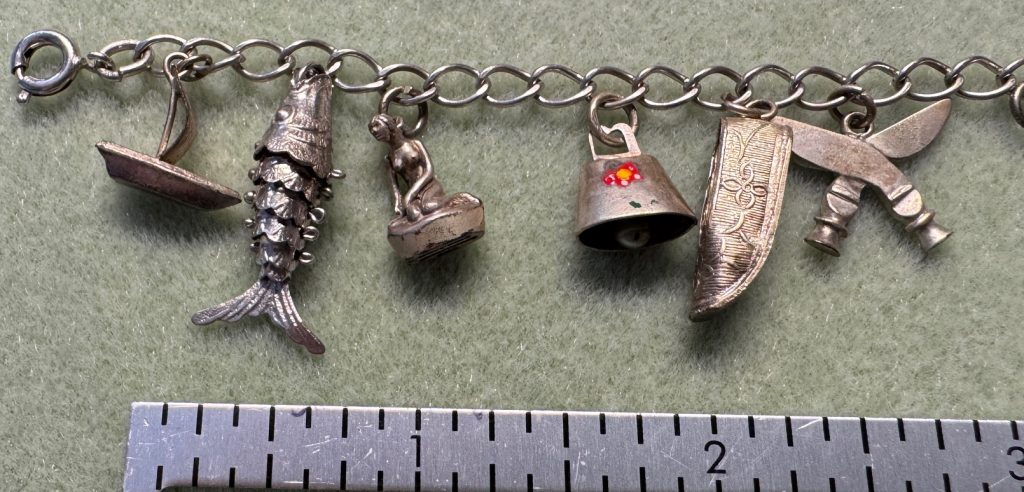
I carefully emptied the box to take pictures of the charms. I know most of their travels were to and from Southeast Asia, but I’m sure they had stops along the way. These charms were silver (or tin?) and many were quite delicate. I don’t know if they were arranged in any specific order or if she had a favorite.
The mystery is…I have no ‘stories’ or ‘memories’ to go with the charms. I don’t know what countries they are from. I’ll share the pictures below. If you recognize a charm that represents a specific country I’d love to hear about it! Otherwise, imagine the stories I could make up using these charms to tie an adventure together! Any fiction writers out there?
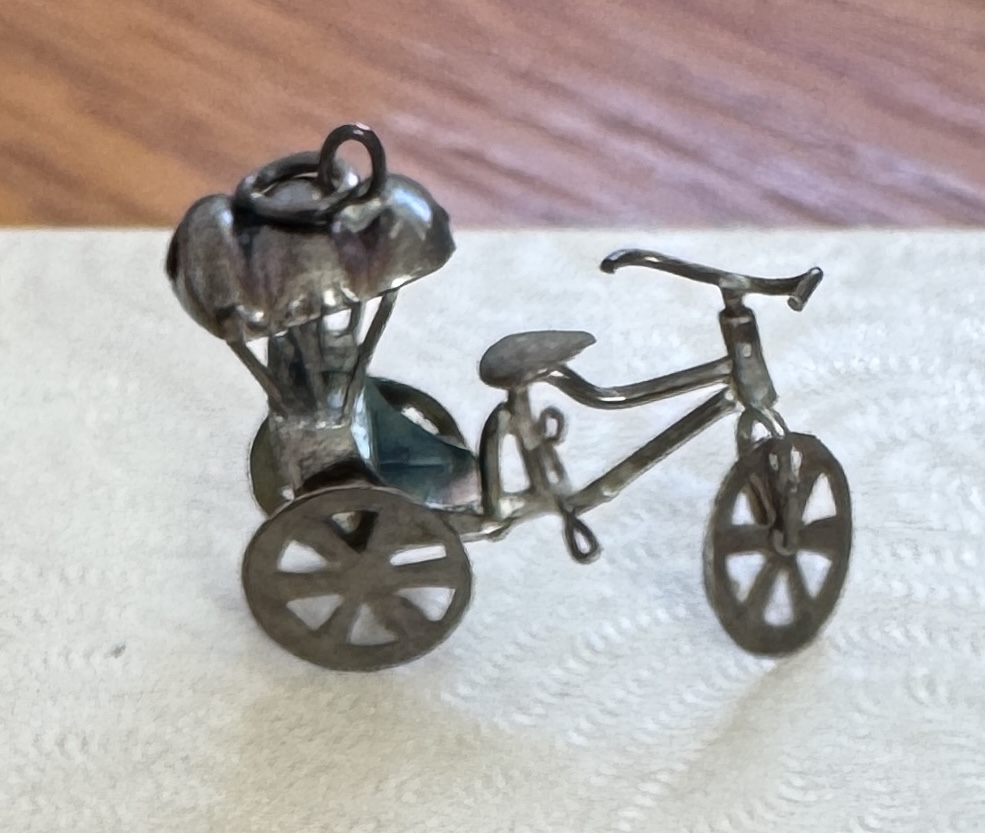
My favorite charm in the whole pile…this very delicate bike with a seat for a passenger! I know I saw those in the Philippines…in 1955-56!
Please email me directly if you have comments or questions (maryjkisner@gmail.com) I also post links to this article on Facebook and you can comment there. Enjoy!
I just finished reading a heart-warming novel by Pamela Raleigh entitled, “The Memory Bracelet.” The story follows a grandmother who is suffering with Alzheimer’s and her granddaughter. The story is summarized on Amazon as follows:
‘When college sophomore Tessa Wilde visits her Alzheimer’s-stricken grandmother Esther, a shocking secret slips out, one that threatens Tessa’s identity and raises old feelings of betrayal and rejection. The only way to pursue the truth, though, is to explore those unreliable memories.
But can she separate Esther’s ramblings of a storied past from the effects of Alzheimer’s?
Relying on Grandmother’s stories that live in the charms of her beloved bracelet, Tessa pushes her grandmother to reveal the truths that have been hidden for too long. As Esther’s health deteriorates and communication fails, Tessa faces the ultimate question: can she forgive Grandmother for half-spilled secrets and an unreconciled relationship? And face the fact that they’re more alike than they are different?
Perfect for fans of Barbara Davis and Kristan Higgins, The Memory Bracelet is a gripping yet heartwarming novel about the pain resulting from complicated relationships, carried from one generation to the next, and the fierce determination to heal them.’
The story backflashes are triggered by the charms on the grandmother’s bracelet. While the reader can follow the various experiences prompted by the charms, the granddaughter does not know the whole story. The grandmother struggles to share what lessons were learned made even more difficult with her inability to speak clearly and coherently thanks to the influence of Alzheimer’s.
It was a very touching story and had me thinking about charms that would trigger my memories of things I’ve done in my life…sort of a tangible resume. If I were to build a charm bracelet for myself, what would I include?
I started making a list of charms that would represent my life. Then I went to Amazon to see if they had charms to fit. I’m sure I could find fancy, expensive gold and silver charms, but since this was just for fun, I just did an easy search.
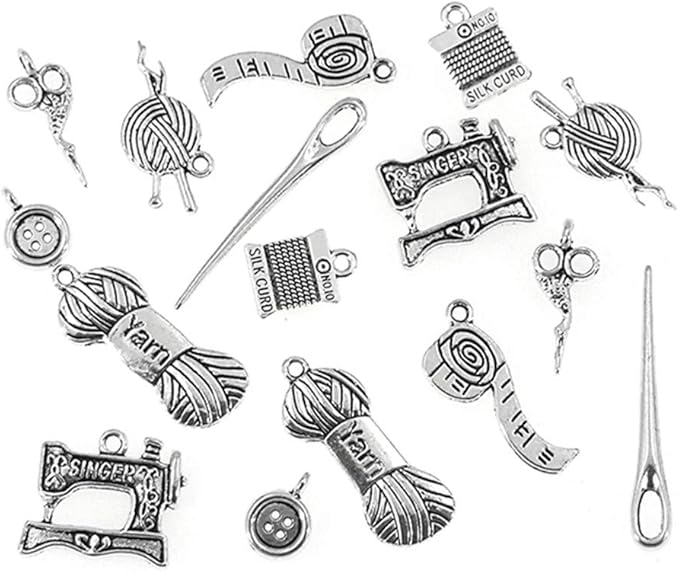
For example, I’ve been sewing since Junior High School. How about a sewing machine charm?
Cute! My first machine was my mother’s Singer Featherweight machine…black just like this!
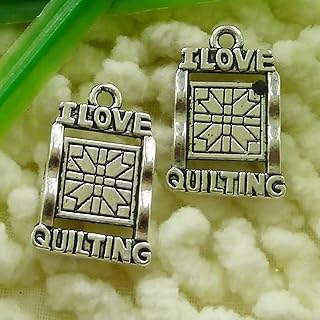
If I wanted to remind myself of my quilting experiences, there’s a charm for that!
Or, I might find something in this assortment:
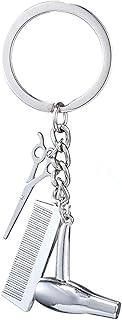
When I was first teaching, I also studied Cosmetology…to be a hairdresser. Of course, it was too much to do both, but I did learn to cut hair. (Yes…I’m a Beauty School Dropout!). However, I’ve been cutting hair for family for 55 years! And yes, there’s a charm for that!
How about all the writing I’ve done over the years…from curriculum materials to my blog! I did start with a manual typewriter! There’s a charm for that!
And then there are all the books I’ve read! Yes, there’s a charm for that!
When I think of all the love I’ve given to the Greyhounds, I realized I already had a charm for that!
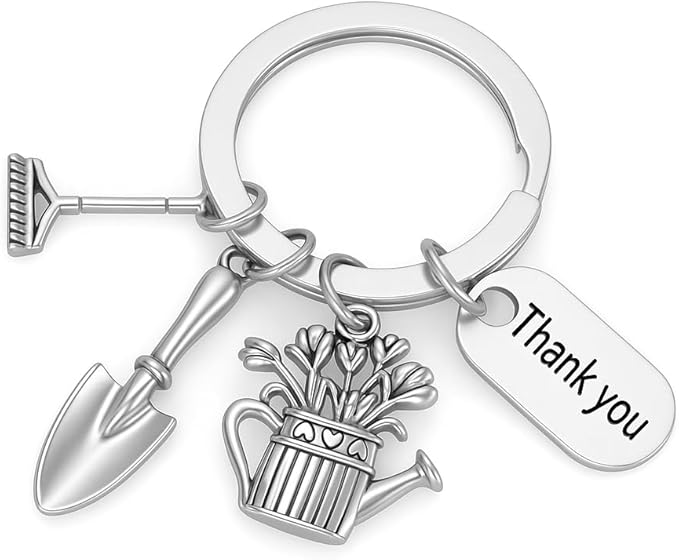
I can’t forget how much I’ve enjoyed gardening:
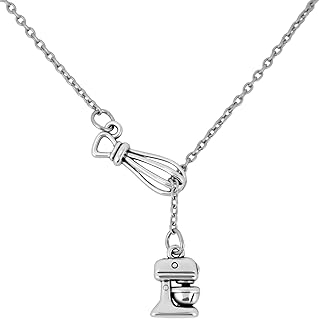
and Baking/Cooking (this one is just too cute!)
I’m sure if I wanted to do it, I could assemble quite a nice charm bracelet of my life. Since I really don’t like a noisy, clanking bracelet and would probably never wear it, I think these pictures would be enough to jog my memory of all the many things I’ve done, or made, or loved!
What pictures or charms would you assemble to represent your life experiences? It might be a way to start the conversation with our grandchildren about things we’ve done…or encourage them to start their own collection. Enjoy!
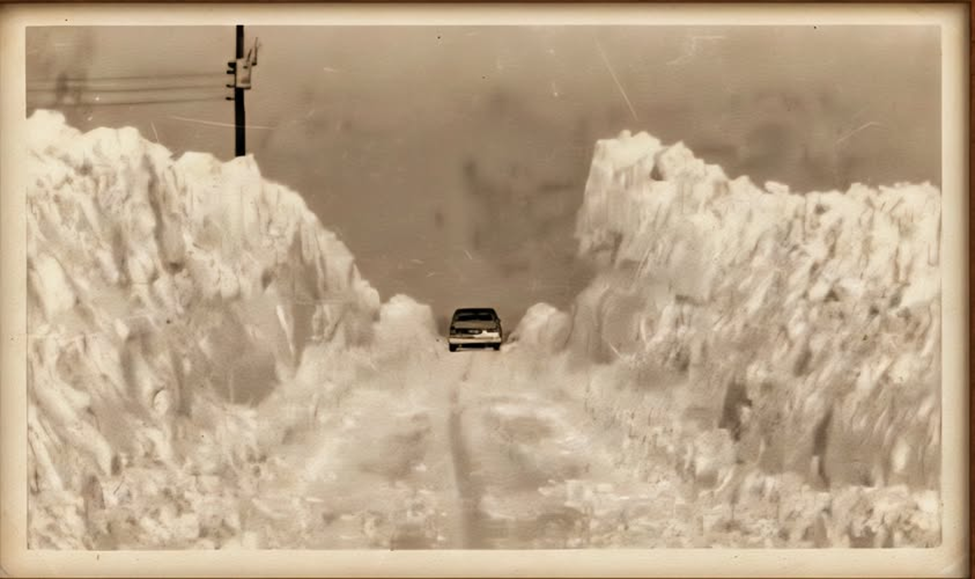
We anticipate that the predicted snow storm for this weekend will dump a significant amount of snow on us. I saw a picture on Facebook of the Blizzard of 1978. I remember that winter well…Ted was just turning two and Kathy was 3 months old. It felt like we didn’t go outside for a month! Our sidewalk looked like a tunnel, just like the street in the photo below:
Here is the caption for the photo:
Snowfall during the Blizzard of 1978 hit Pennsylvania with a wild regional split, backed by some eye-opening stats. Northwestern PA took the hardest punch, with Erie and the Lake Erie snowbelt piling up 20 to 30 inches, boosted by intense lake-effect bands. The Laurel Highlands and ridges of southwestern PA stacked 15 to 25 inches, with wind gusts topping 40 to 50 mph, creating drifts that climbed over 6 feet in spots. Central Pennsylvania averaged 10 to 18 inches, though open farmland saw whiteouts so severe that PennDOT reported hundreds of road closures. Southeastern PA saw lighter totals, generally 4 to 10 inches, but powerful winds and sub-zero wind chills created dangerous travel conditions and widespread disruptions. Overall, the storm remains one of the most chaotic and wind-driven winter events Pennsylvania endured during the late 1970s.
Hopefully, we have better methods of snow removal now but already various appointments are being postponed or cancelled for Monday!
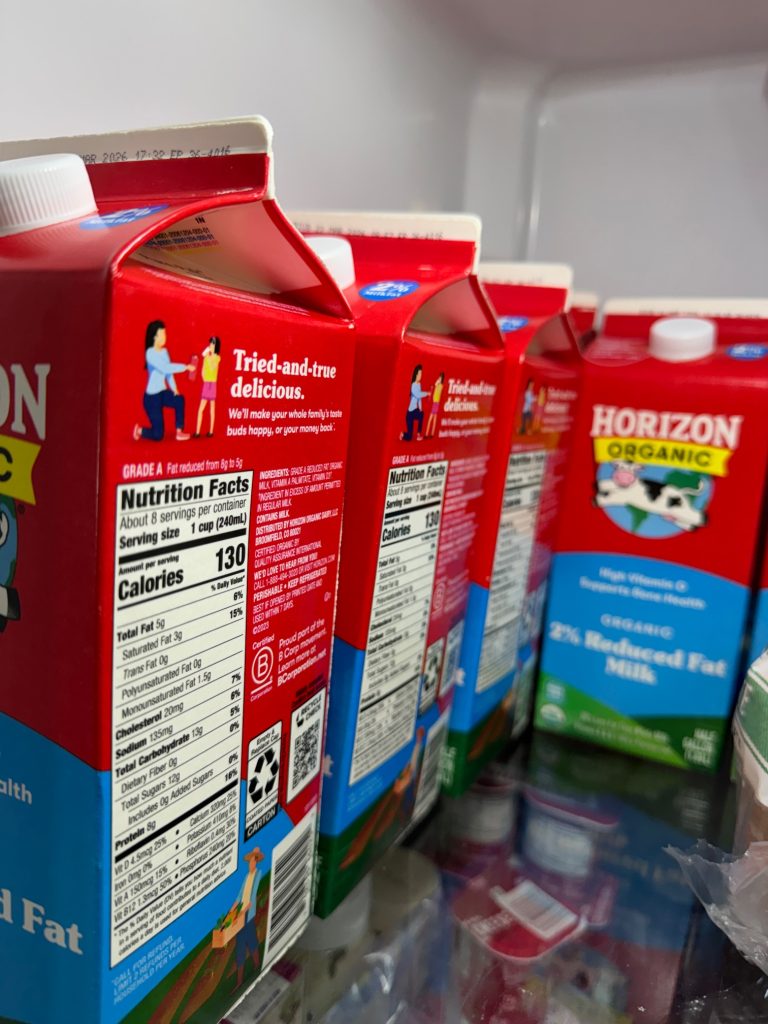
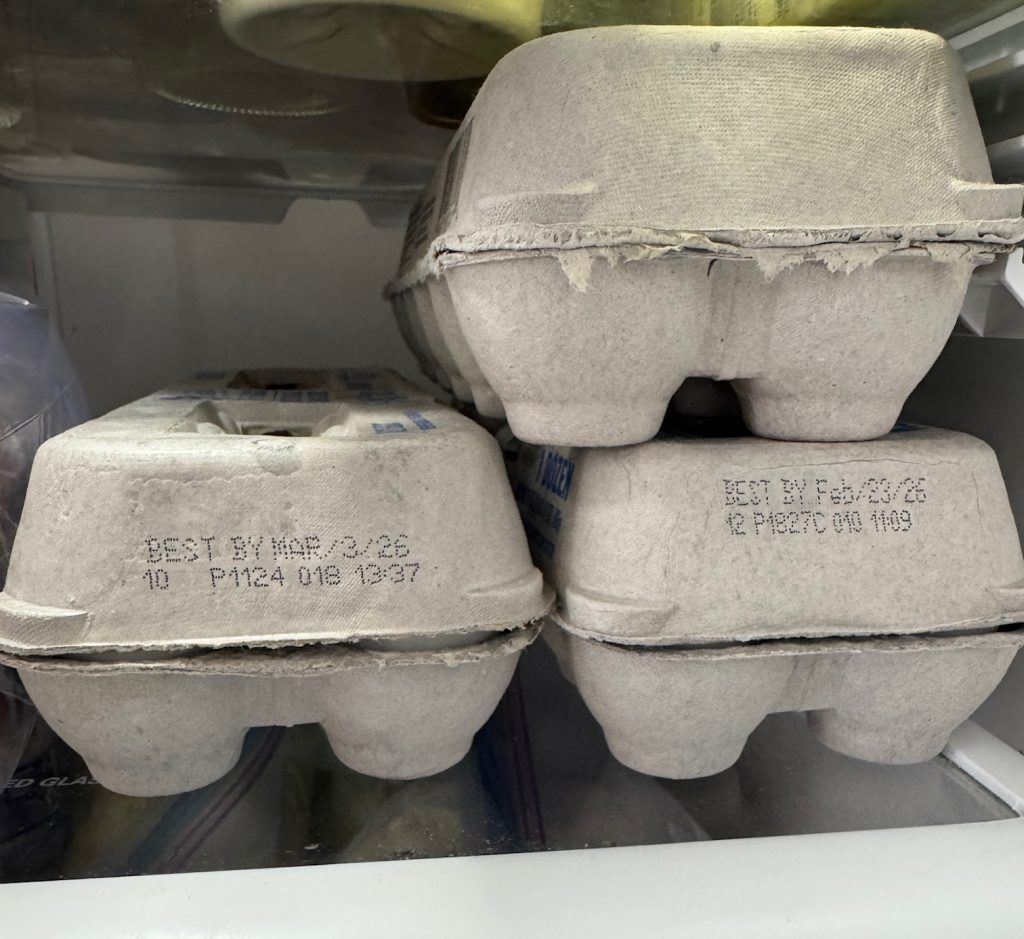
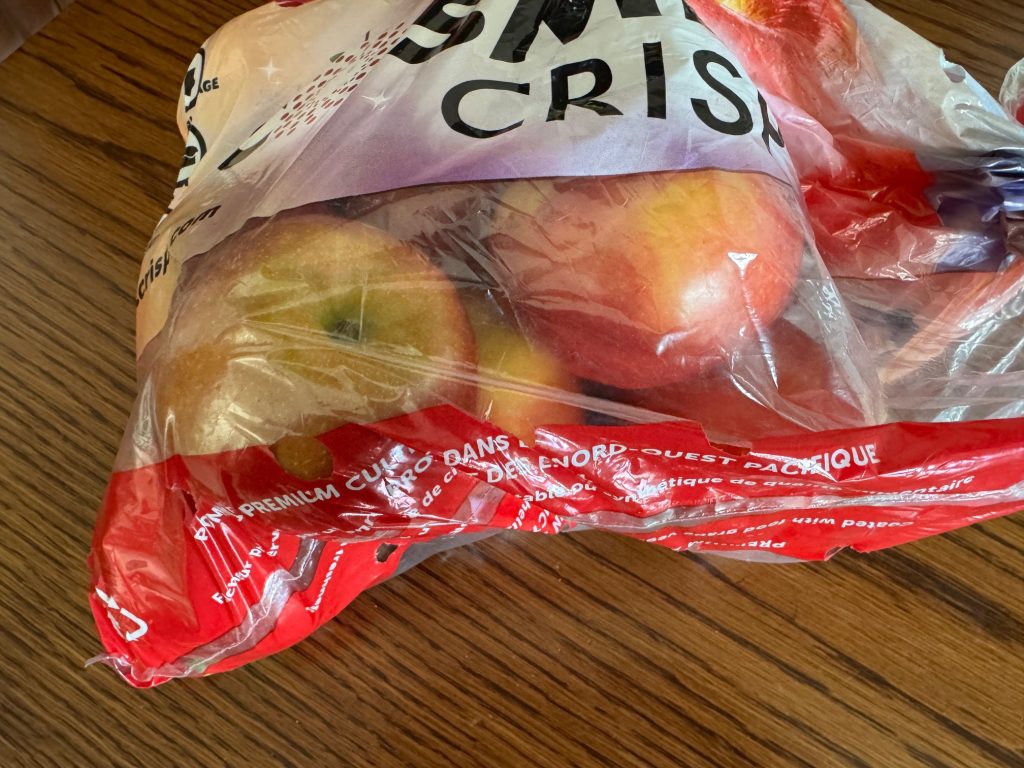
Our preparations for the snow storm are not too complicated…mostly because we are already prepared for the power to go out. Bert handles things like the generator, the wood stove in the basement and the snow blower. I ran a load of laundry and tried to make sure we have what we need for food…although, other than milk and eggs we could probably skip a run to the store. The sun is shining right now and I wanted some apples, so I did run to the grocery store and picked up milk and eggs! (smile)
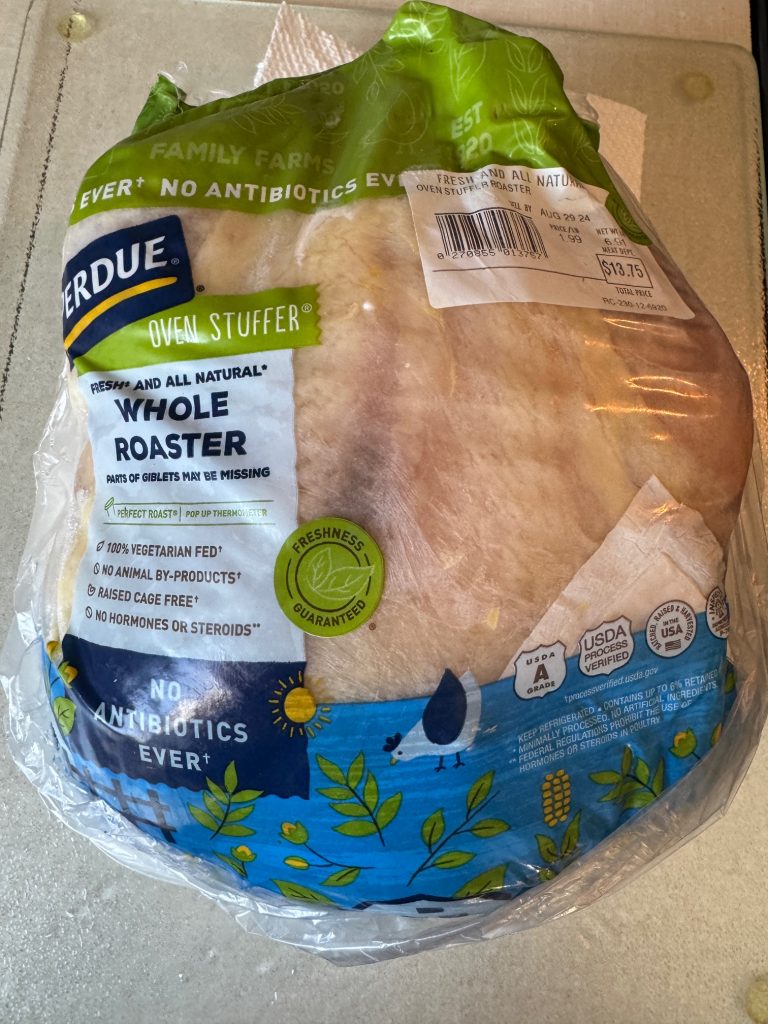
When bad weather is predicted, I seem to get in the mood to bake bread…but at the moment, I have enough homemade bread in the freezer. I did take a whole chicken out of the freezer and will roast it tomorrow. I’ll take the time to simmer the bones to make soup stock. Somehow, making soup stock feels like the right thing to do when we could be snowbound! Chicken noodle soup anyone?
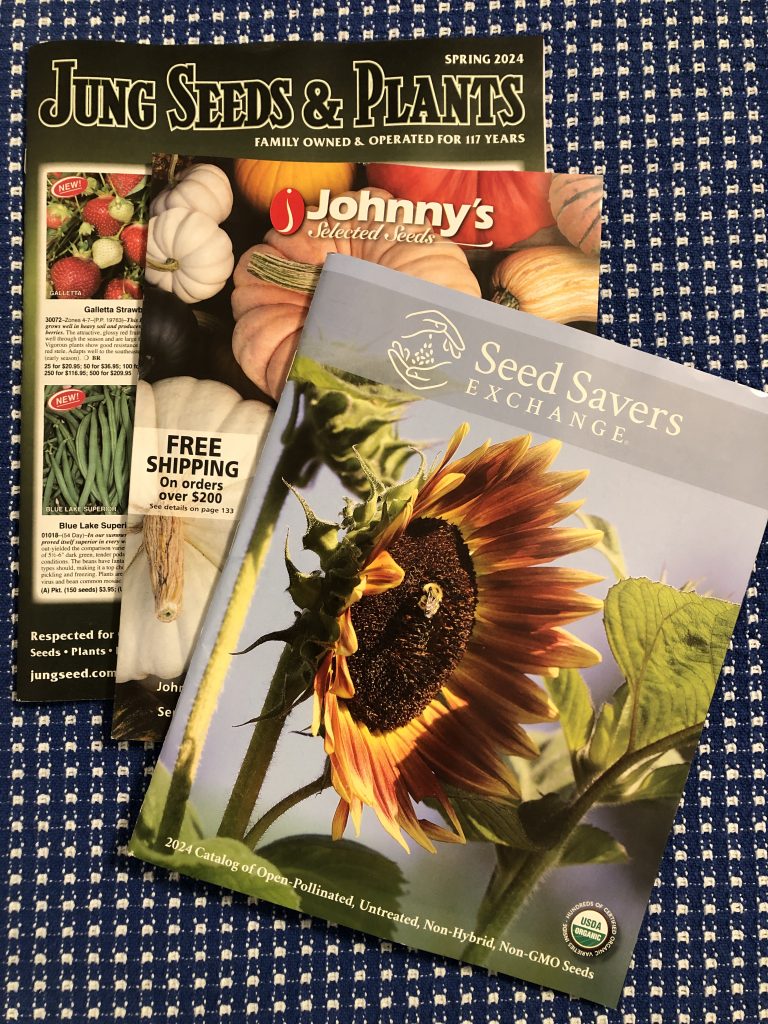
I’ve found the best thing to do during a snowstorm is to dream about our 2026 garden plans. This year we did receive assorted seed catalogs…this is a picture from last year:
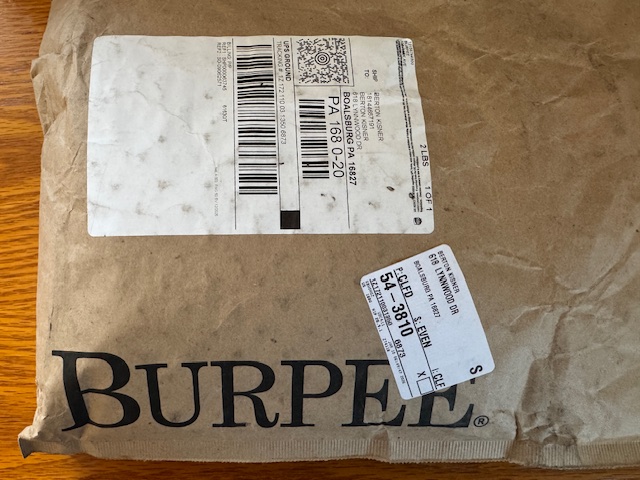
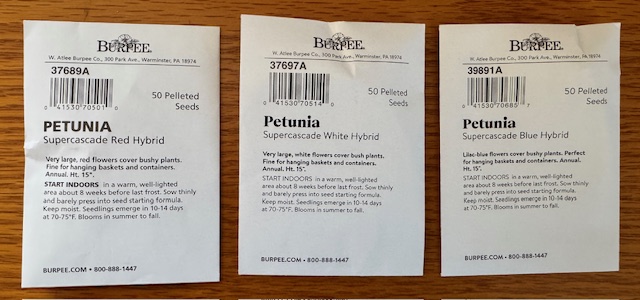
However, we did not get one from Burpee…our favorite Pennsylvania seed company. We kept waiting…but no catalog in the mail. It looks like we had to ‘request’ a catalog to be sent. Interesting. We ordered seeds online from them.
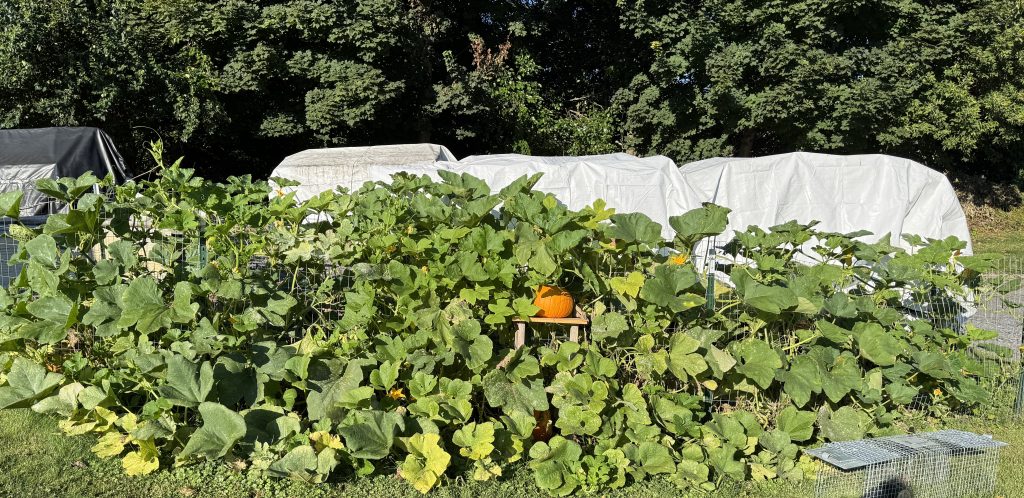
First, we had to consider our garden space, what we grew in the past and what worked. I know I have enough tomatoes and tomato sauce canned and will probably not need to do more this year so maybe fewer tomato plants. Our zucchini was fun but took up a lot of space. I can easily buy them at the Farmers Market when I’m in the mood. The cherry tomatoes were cute but the skins were tough (thanks to the weather) so we’ll skip them this year. The pumpkins were impressive but I think we fed all the groundhogs in the neighborhood!
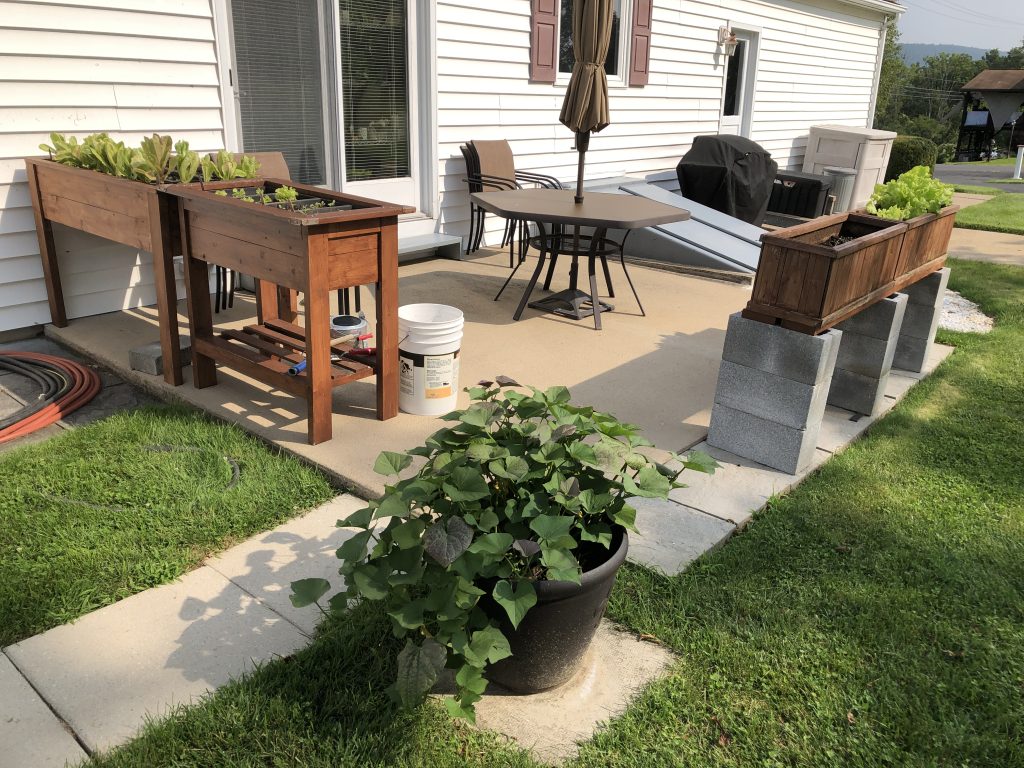
So, here are the spaces we have available:
Three planters on the patio and maybe a pot of something:
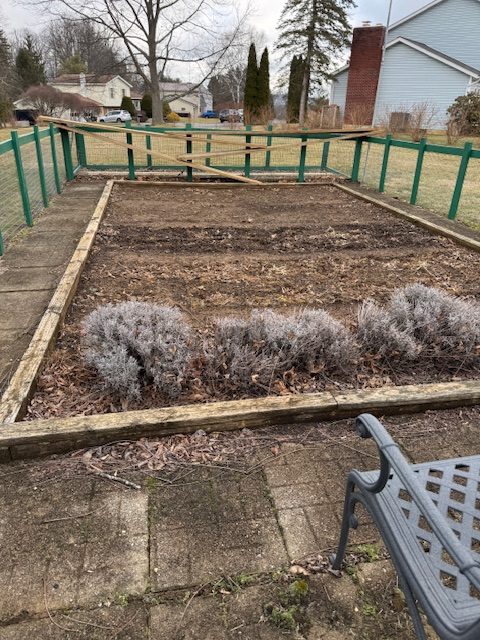
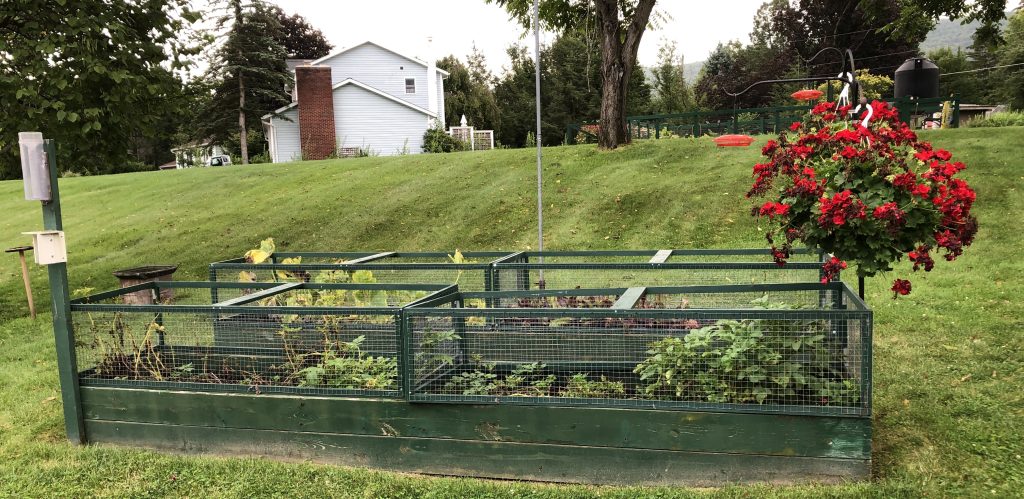
Two raised/fenced beds off the patio (the back one already planted with asparagus roots):
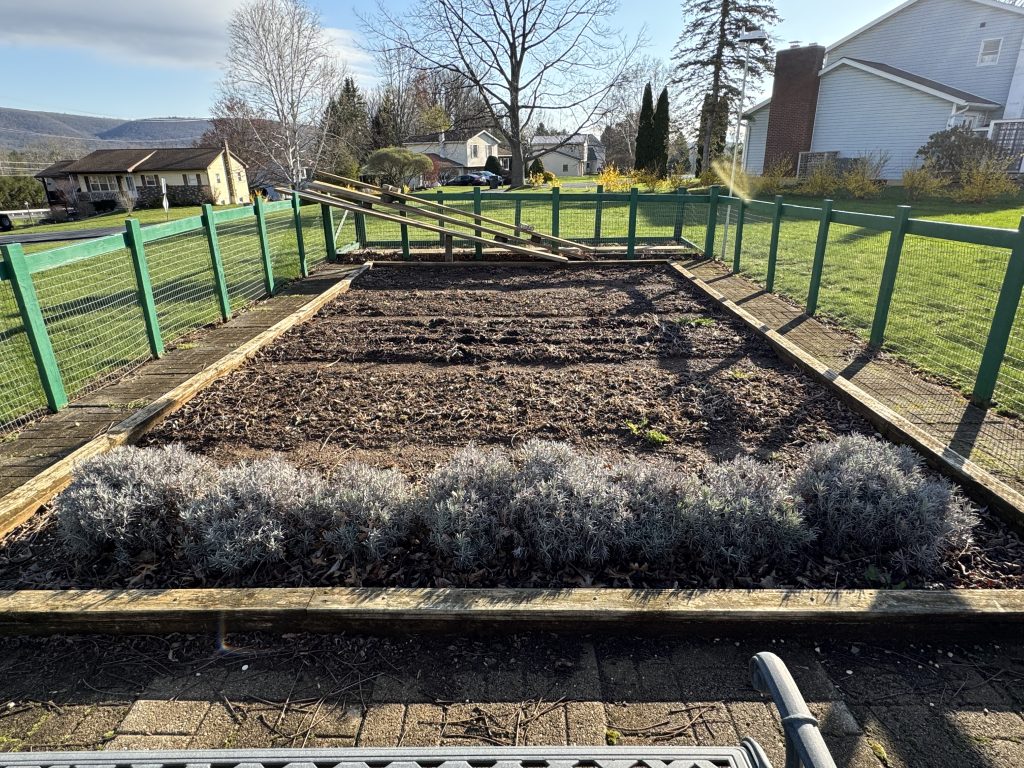
The fenced garden on the hill (already planted with lavender on one end and echinacea at the other end):
And of course, the space in front of the wood pile is available…not sure what will happen there!
It seems we have lots of room, but we’re certainly not a truck farm!
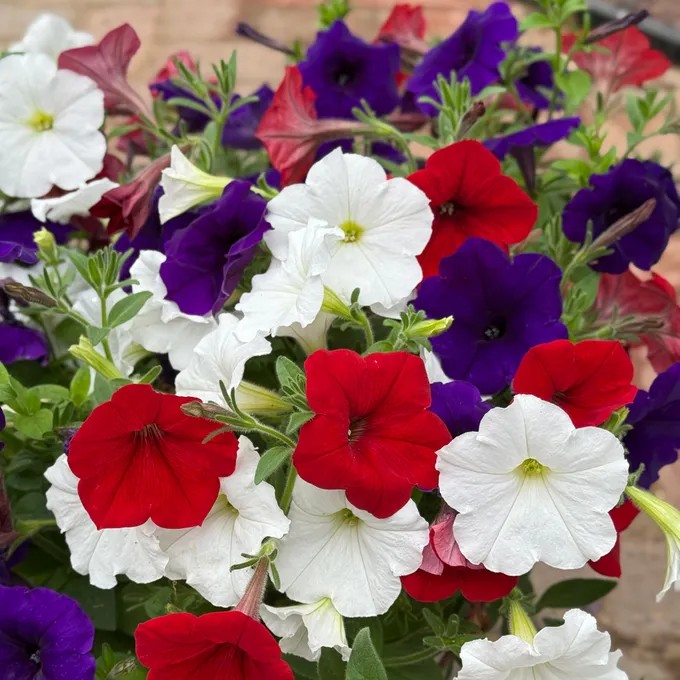
After much discussion, we decided to focus on what we know works and fill in with flowers.
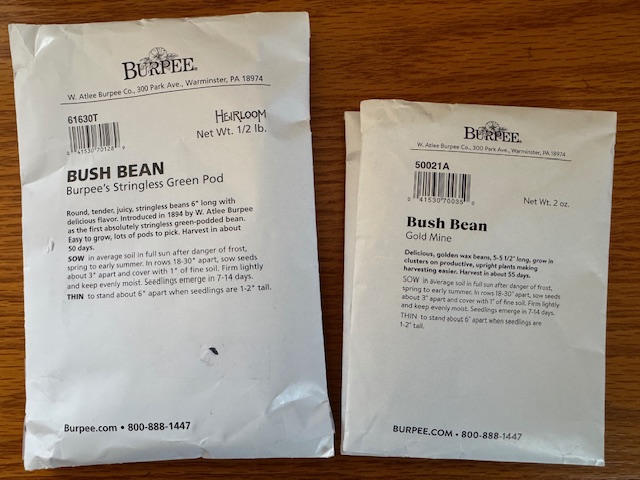
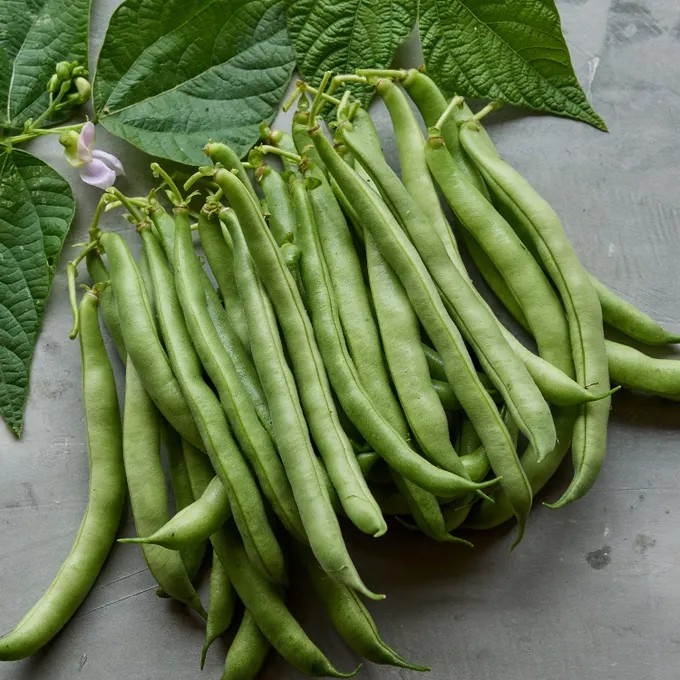
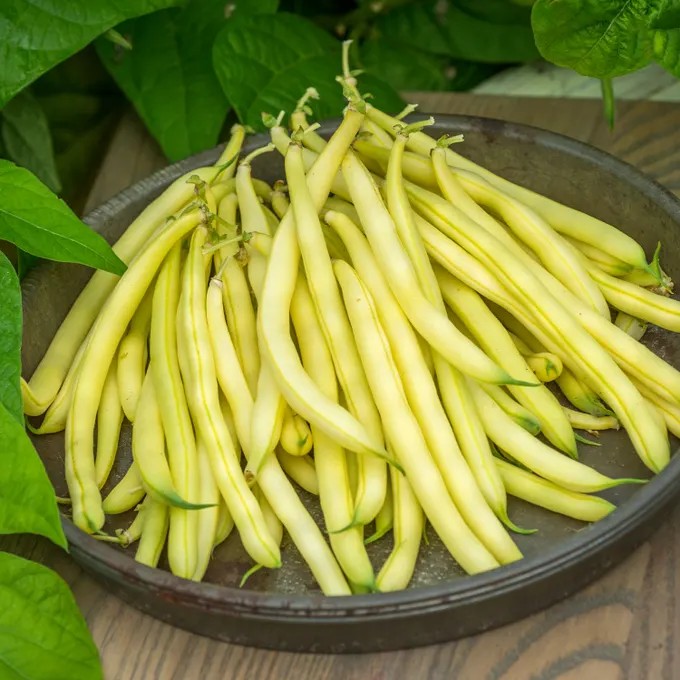
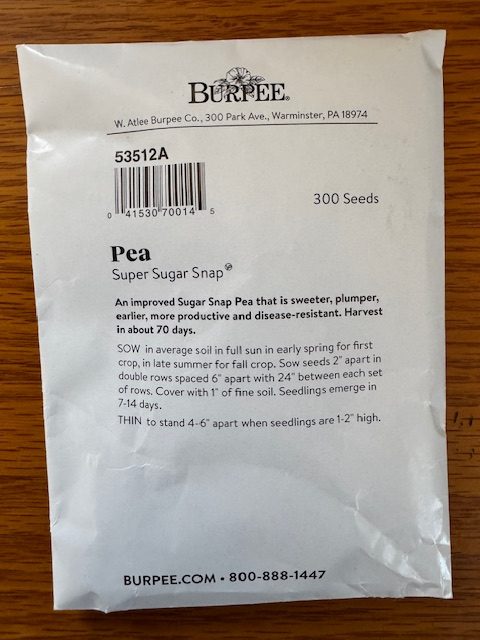
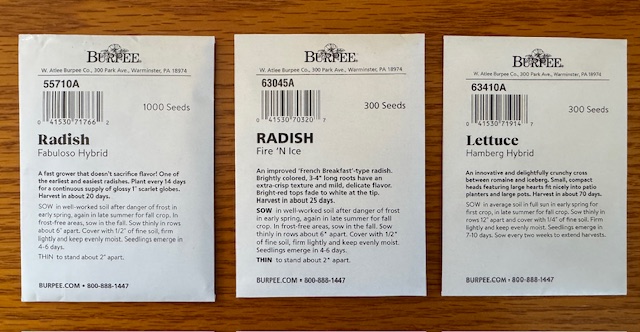
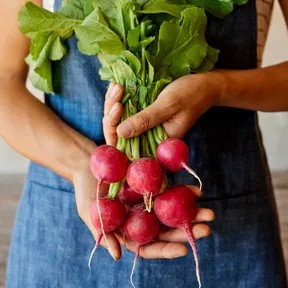
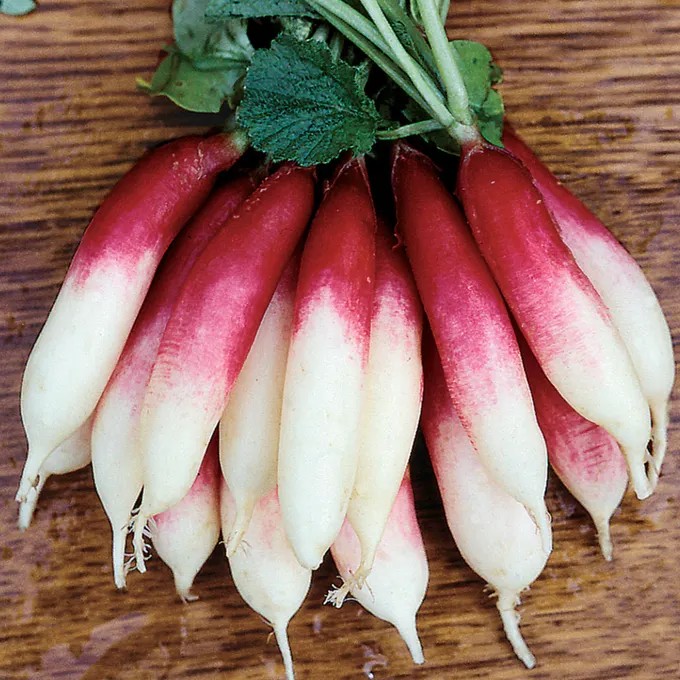
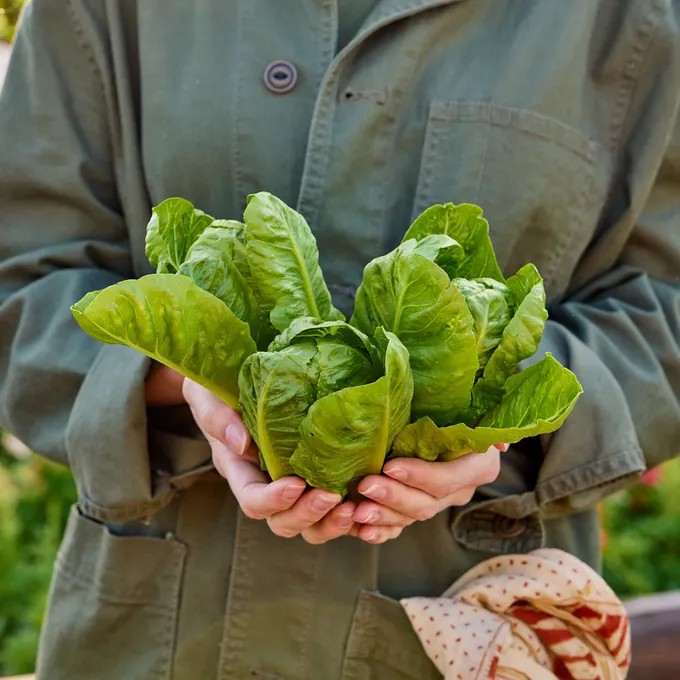
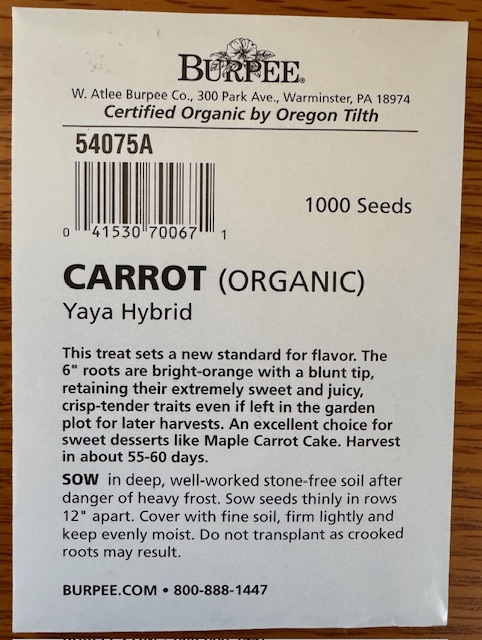
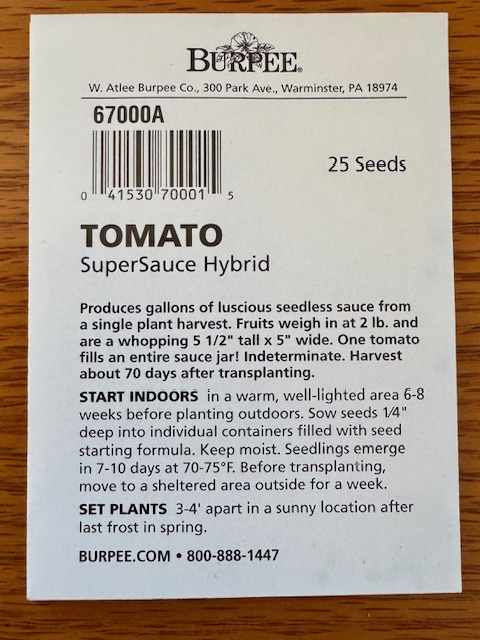
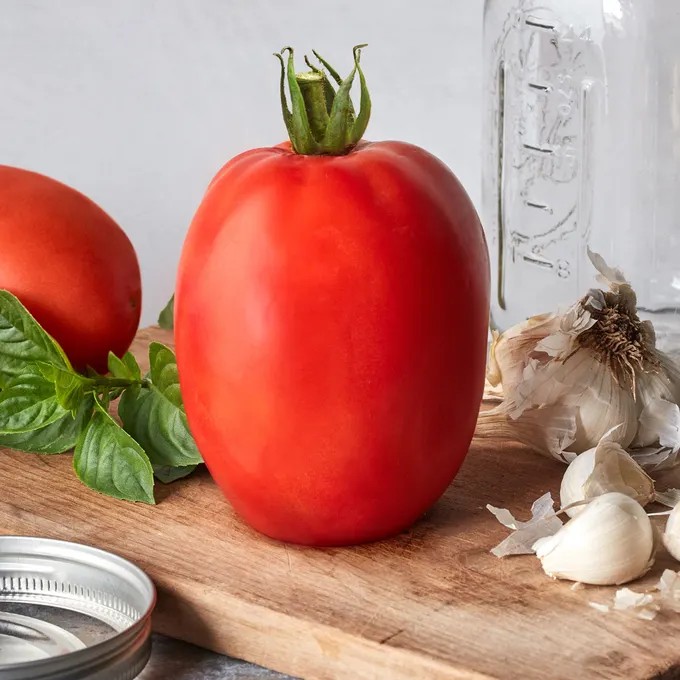
Our seed order arrived last week! I deliberately copied out the photos of the actual vegetables we ordered…just to see if what we grow looks like the picture. (Haha…never happens, but I can always dream!)
I hope that whatever weather you are experiencing now, you can take time to dream about what you are going to do this spring. I like to have a vision for the future to help me deal with what’s happening now! Enjoy!
Remember, if you have comments or questions please email me directly at maryjkisner@gmail.com.