Blog

Pumping the Rain Barrels

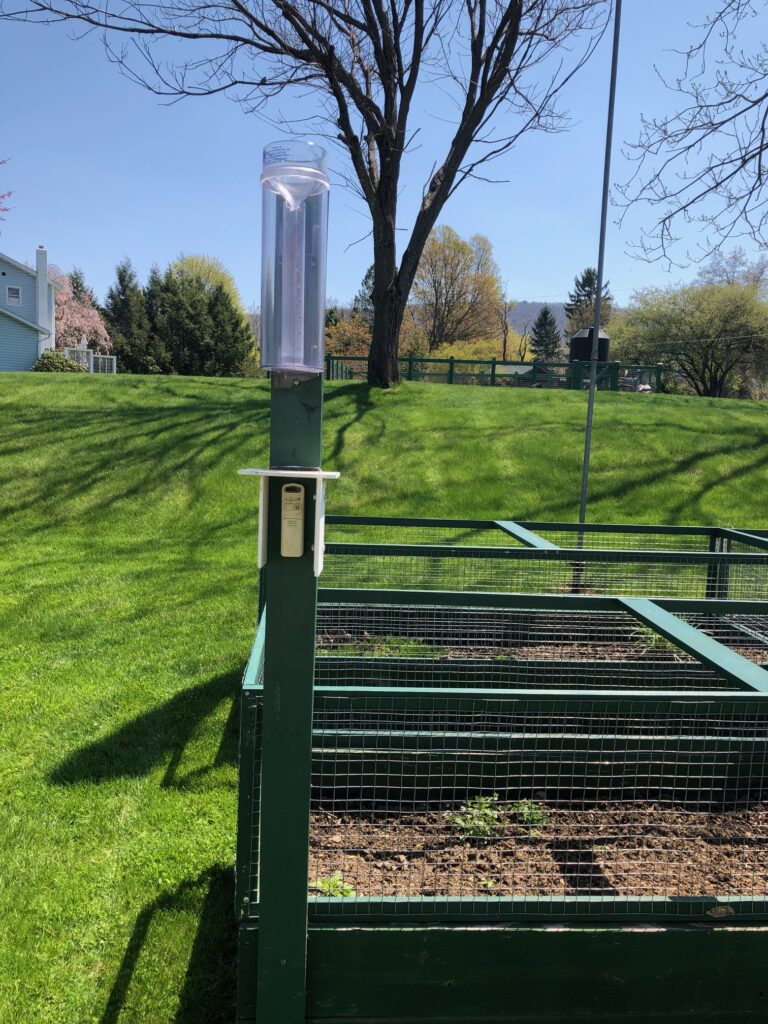
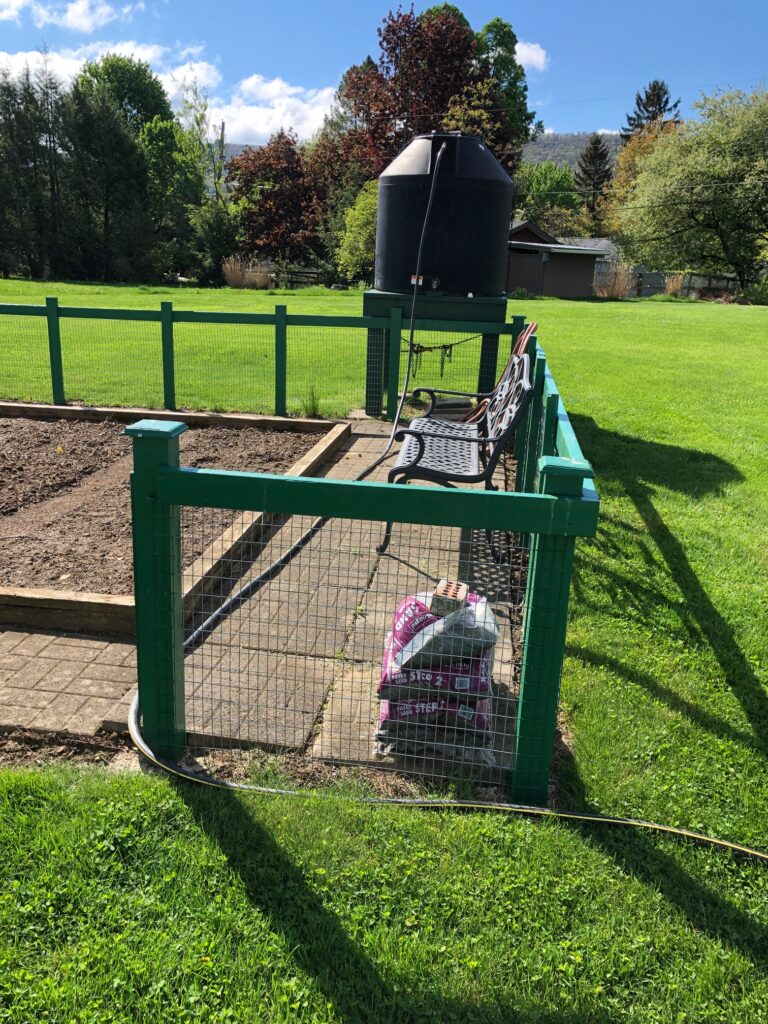
We’ve had over 1/2 inch of rain since we set up the rain barrels on April 27, 2021. That’s 10 days! The rain barrels were probably full after the first rainfall, but today was the day Bert got around to pump them up to the holding tank in the garden. I tried to document all the details of the equipment he used, but hopefully you’ll get the gist of the process.

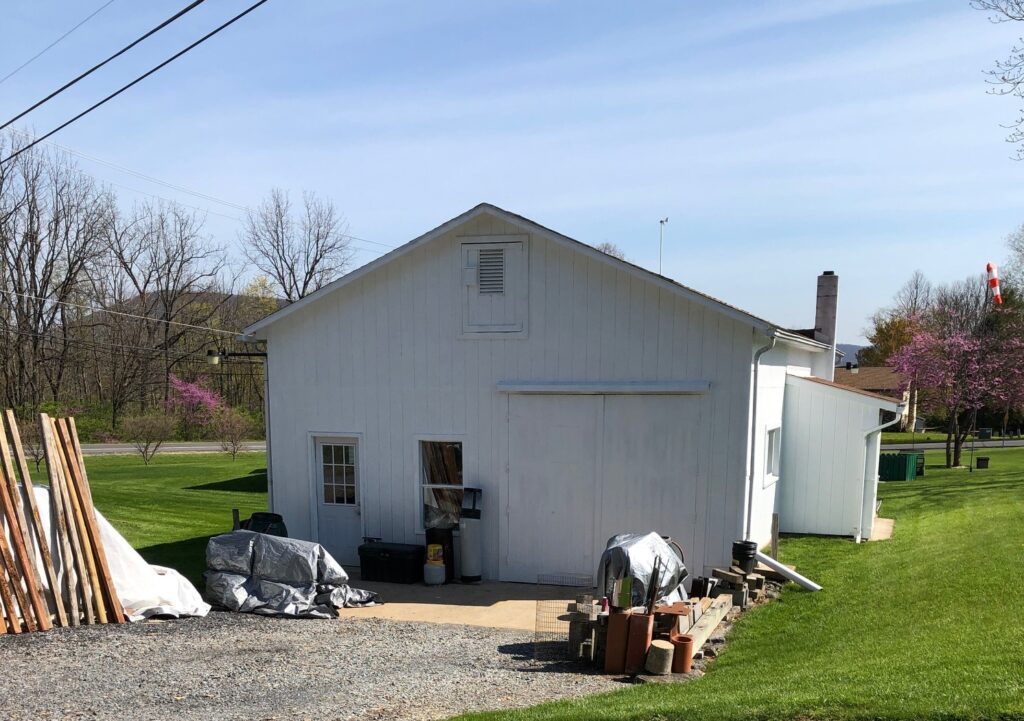
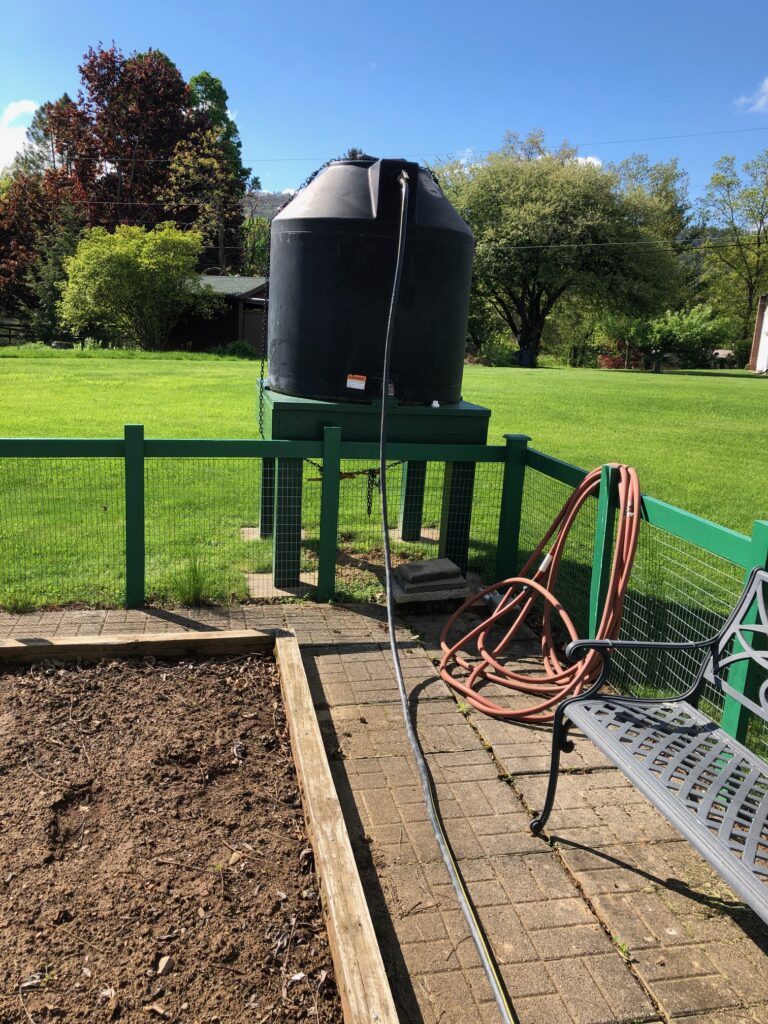
First, Bert put one end of a long garden hose into the holding tank in the garden. Then he ran the hose down the hill to the little pump sitting behind the shop. He says it’s about 100 feet.

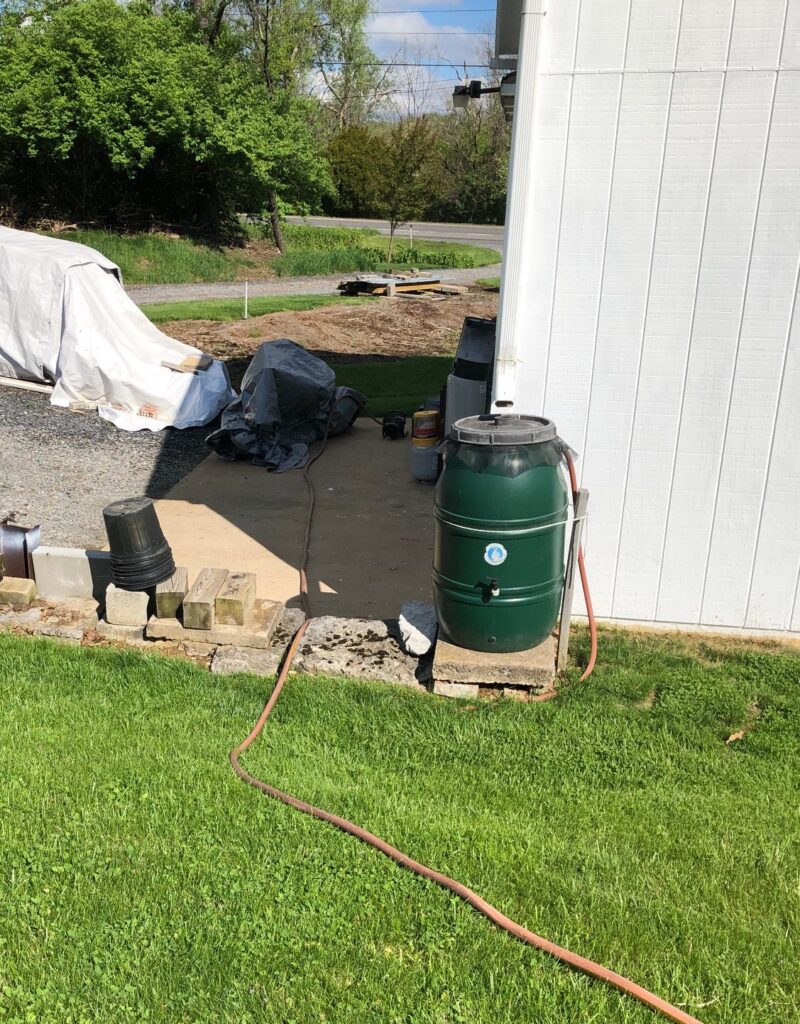
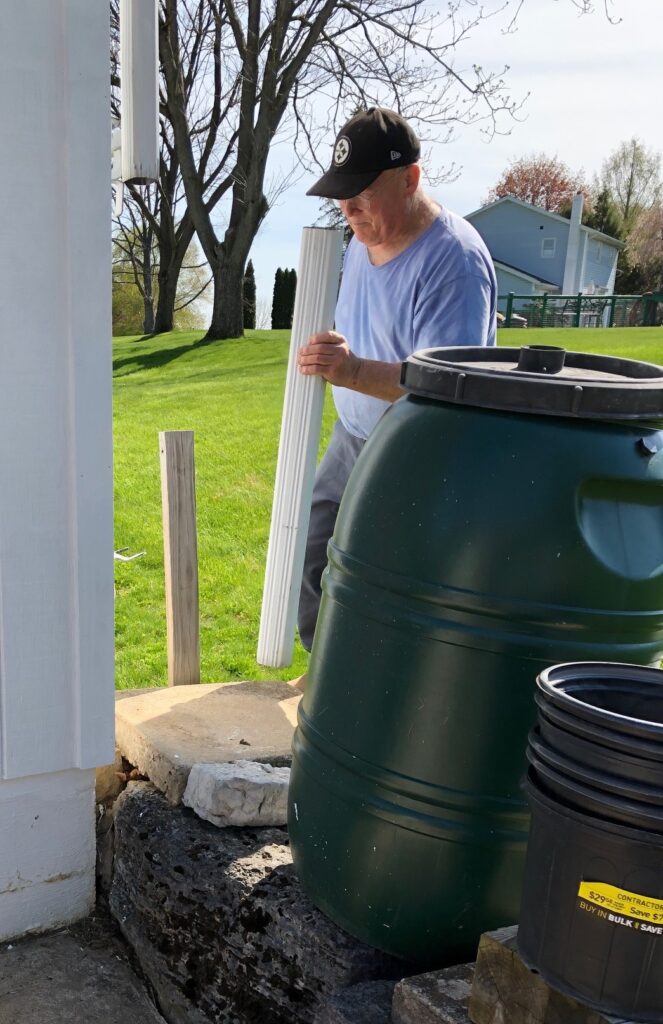
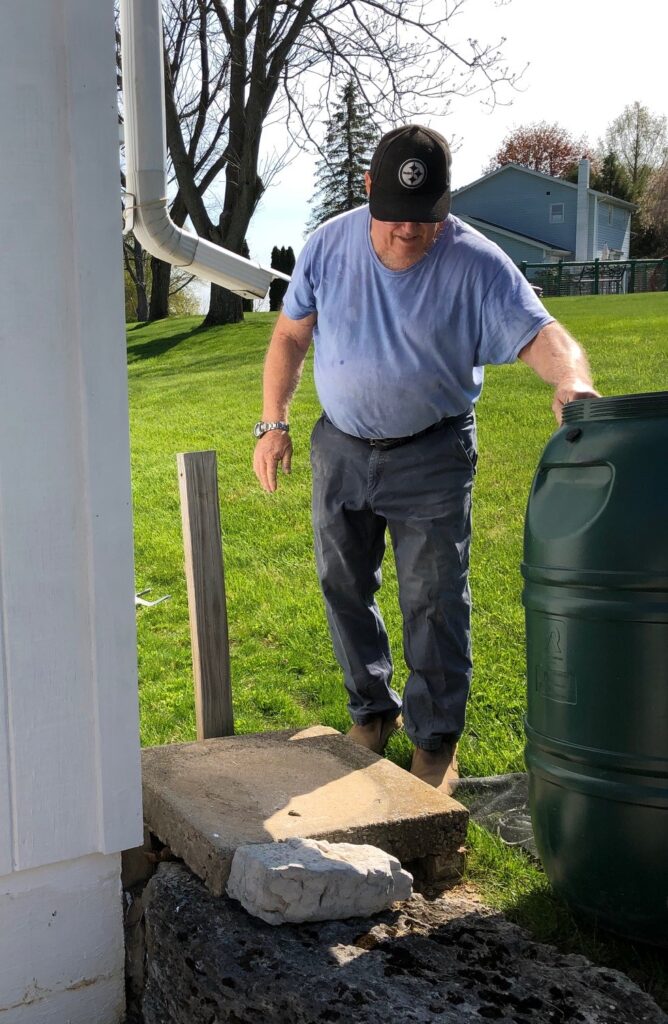
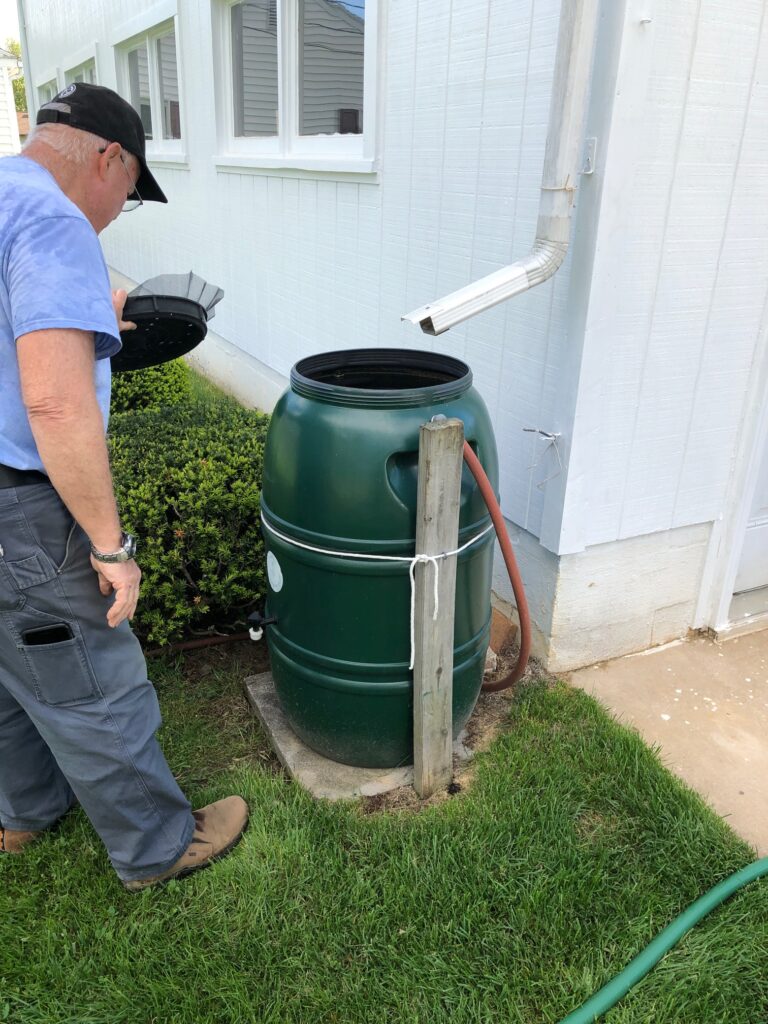
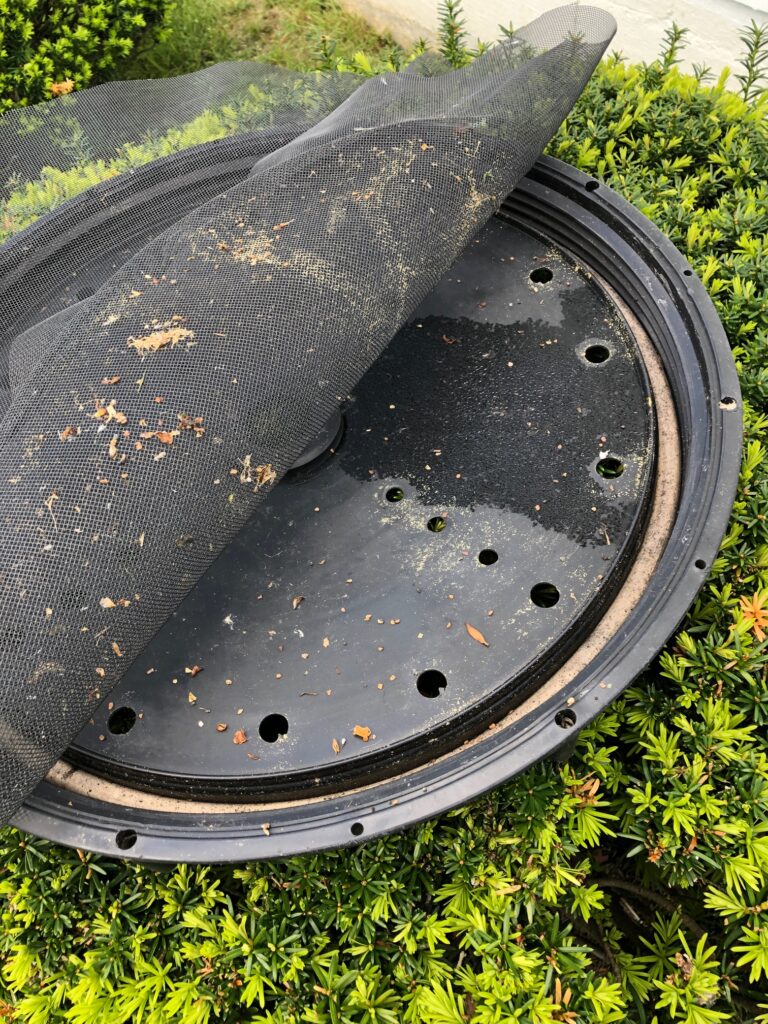
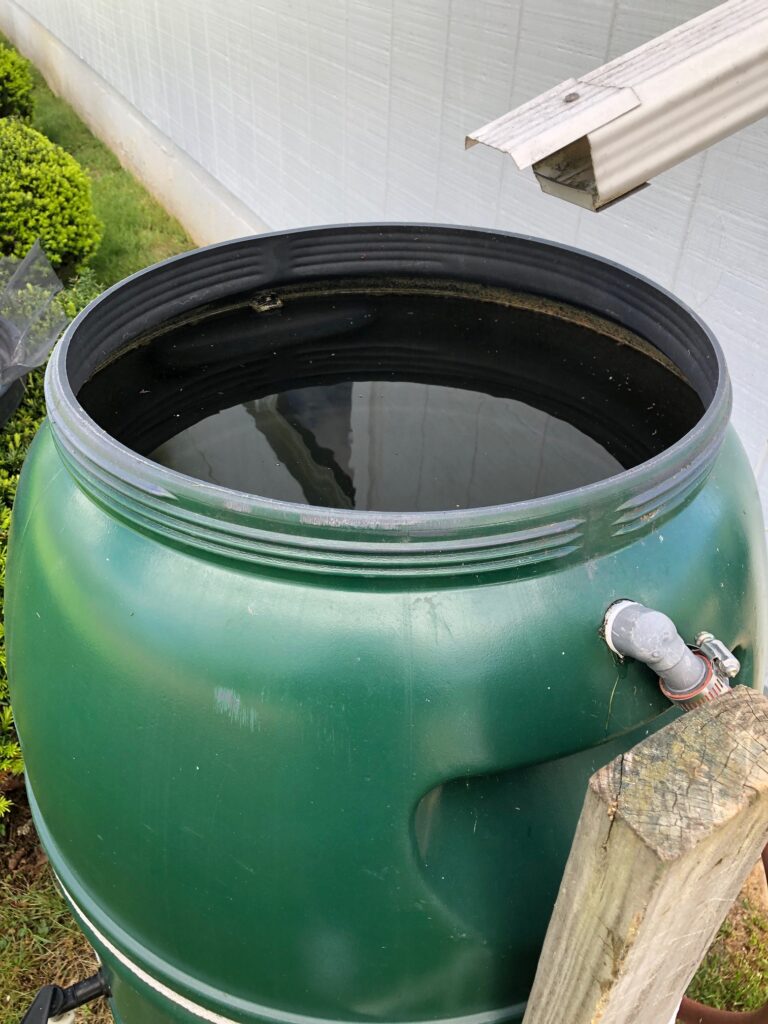
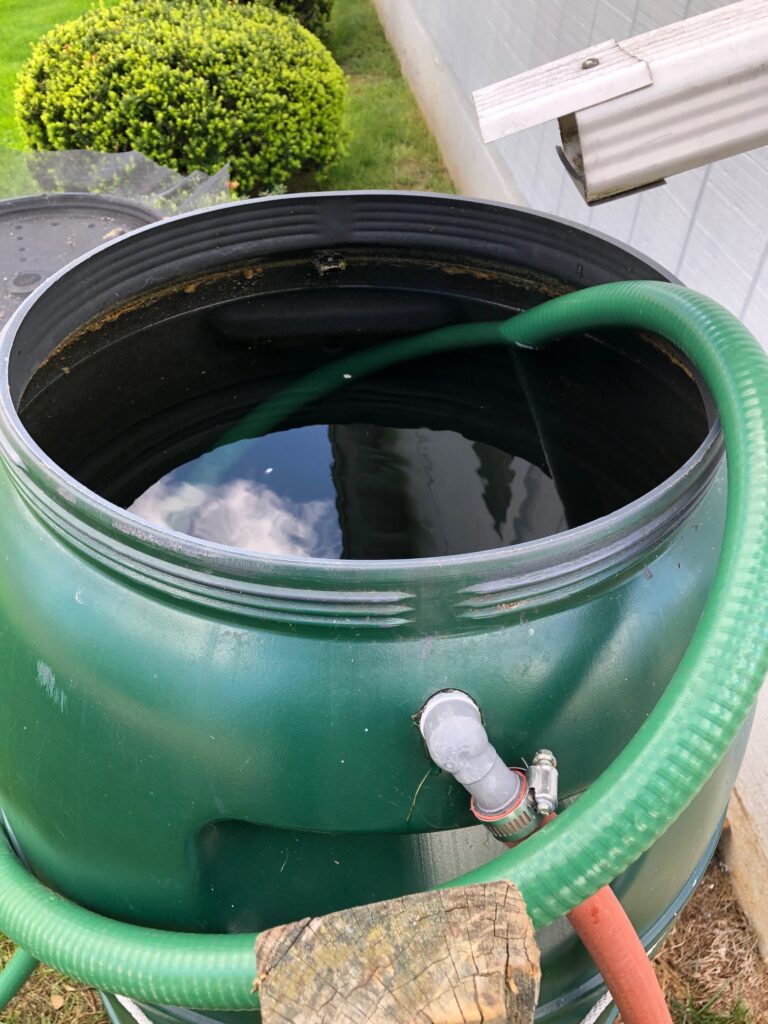
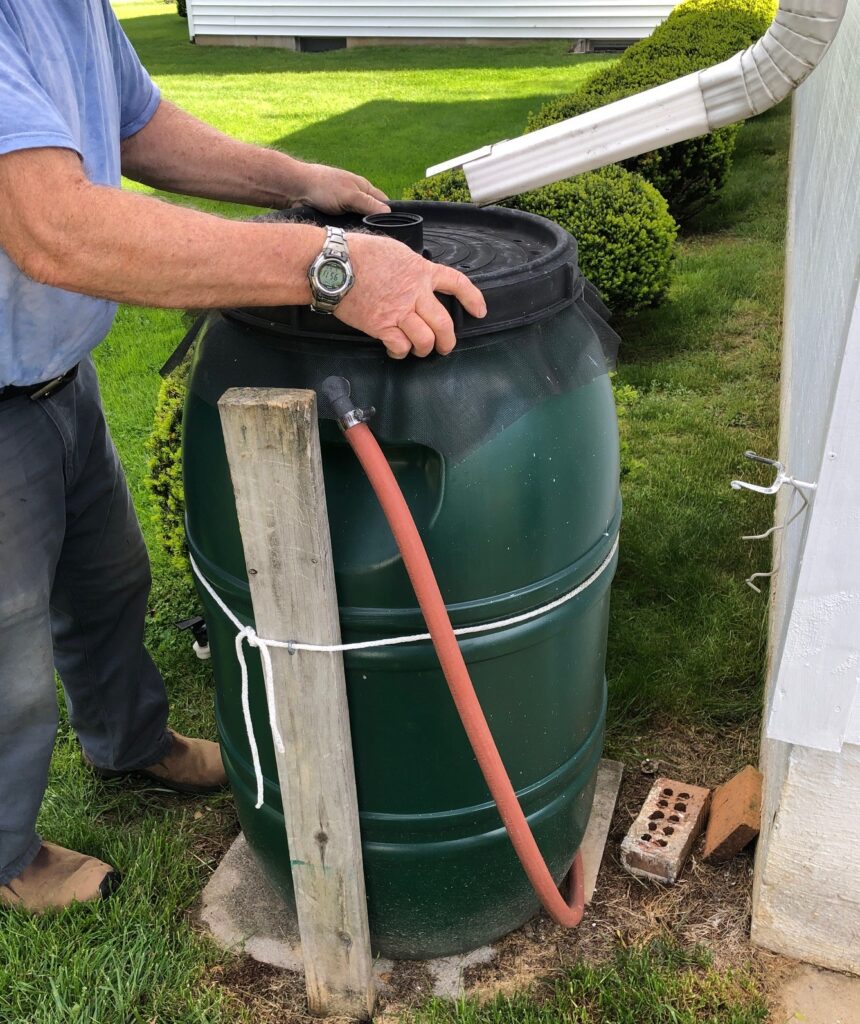
This is the first barrel he will pump. He removed the lid and screen. You can see how much pollen and junk the screen collected. The red hose on the side handles the overflow if the barrel is full

And the barrel is definitely full!

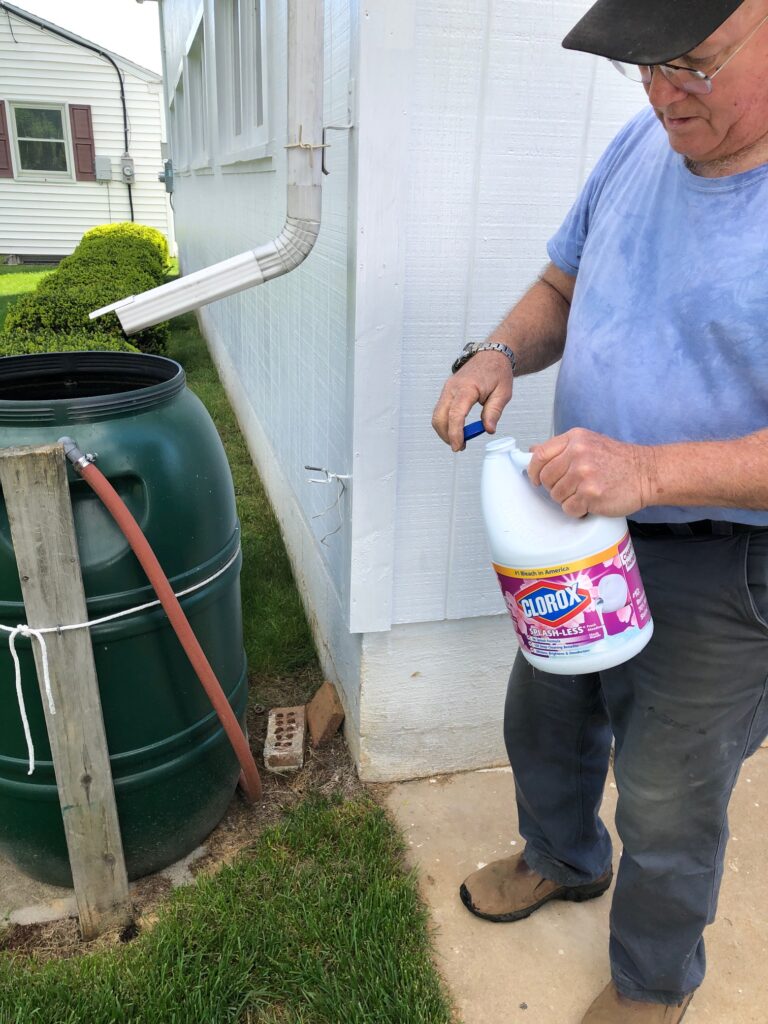
The first batch of water to go up to the holding tank gets about a cup of Clorox added to keep bacteria from growing in the tank.

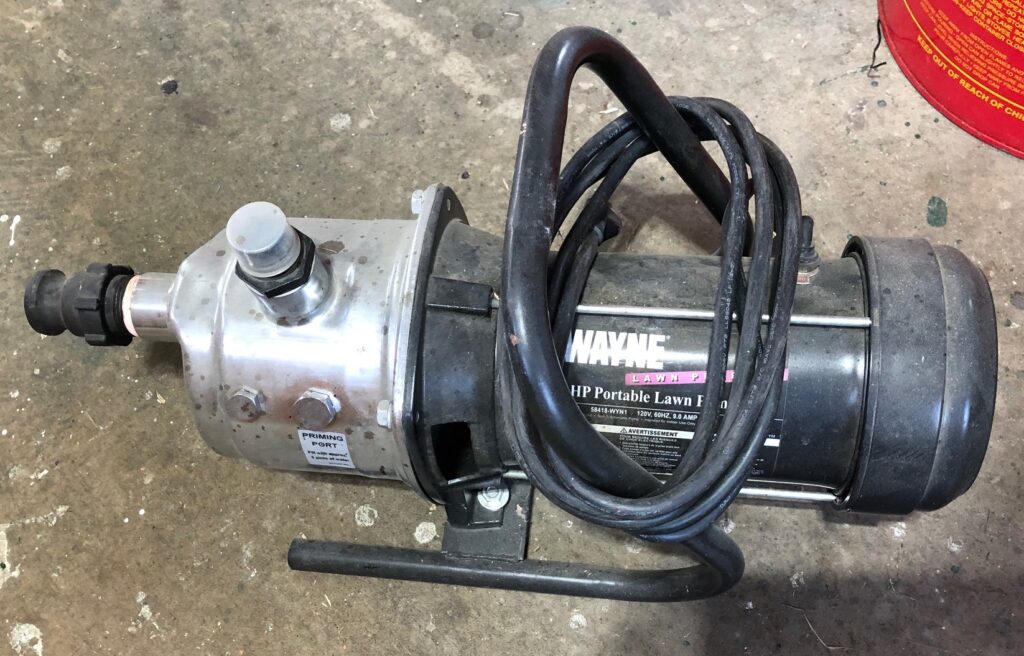
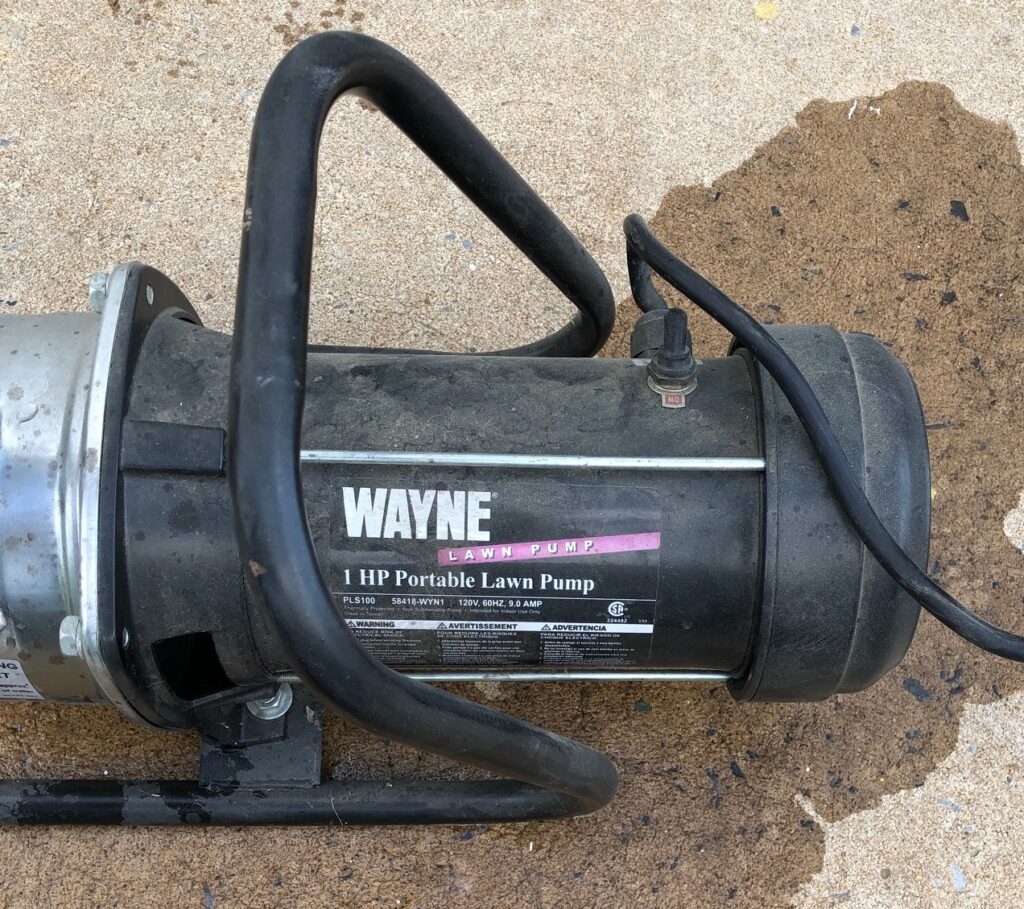
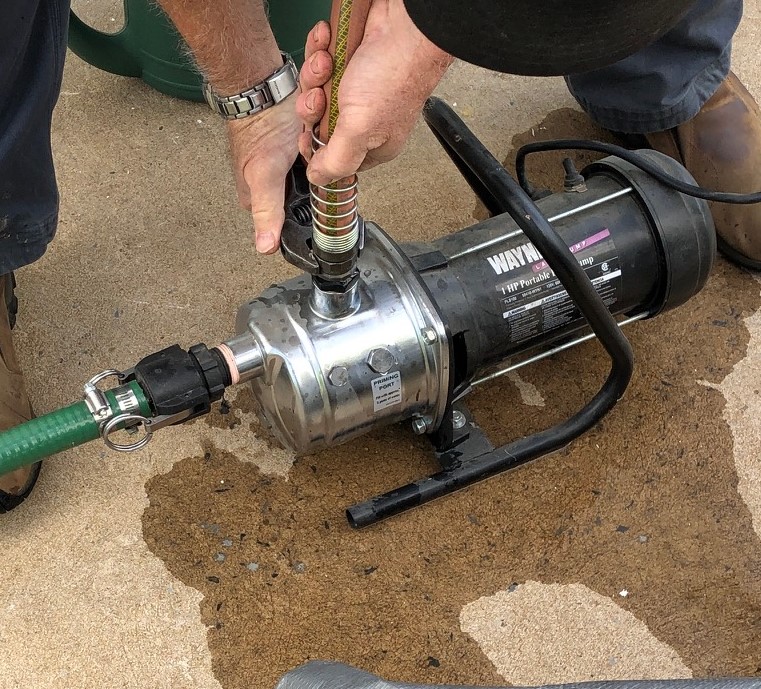
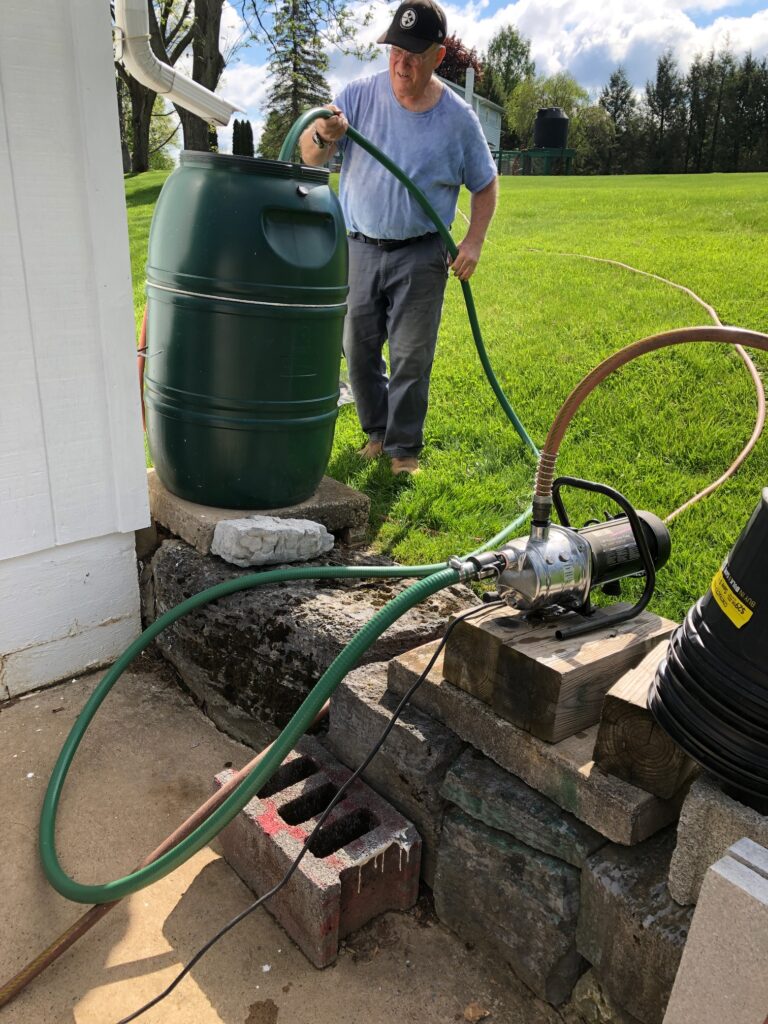
This is the motor he uses. It’s a 1 HP Portable Lawn Pump. It pumps the water about 100 feet uphill at 70 psi.

Here are the various hoses and cords ready to assemble.

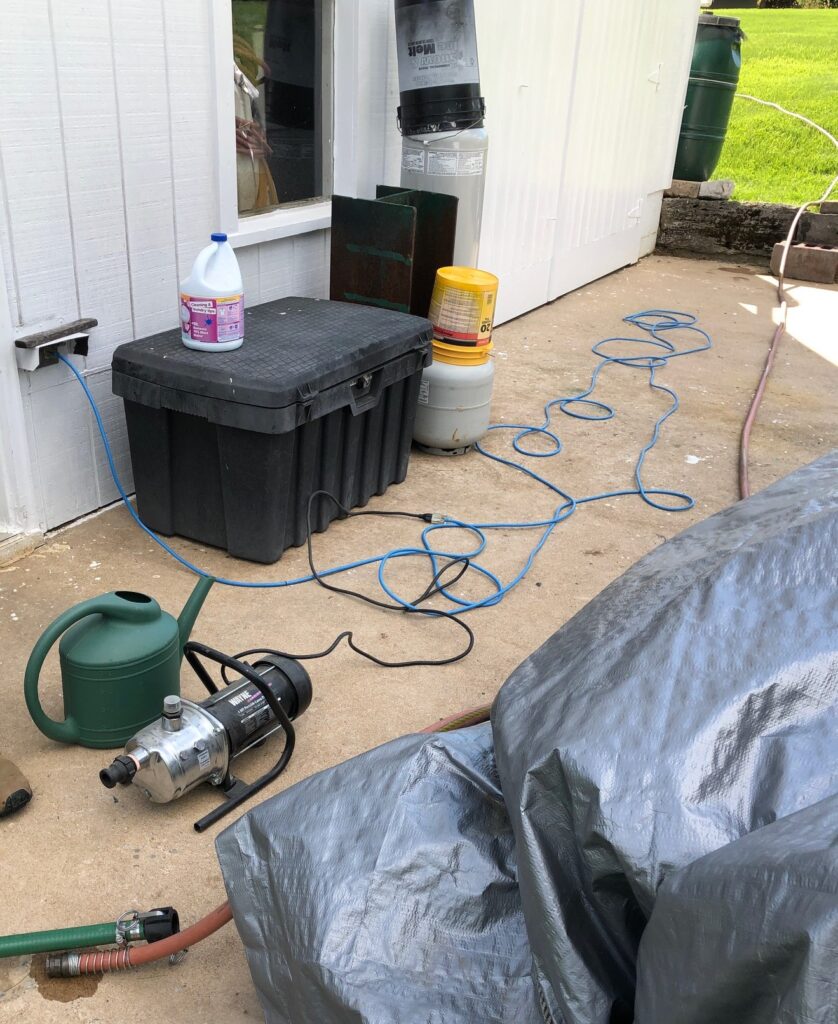
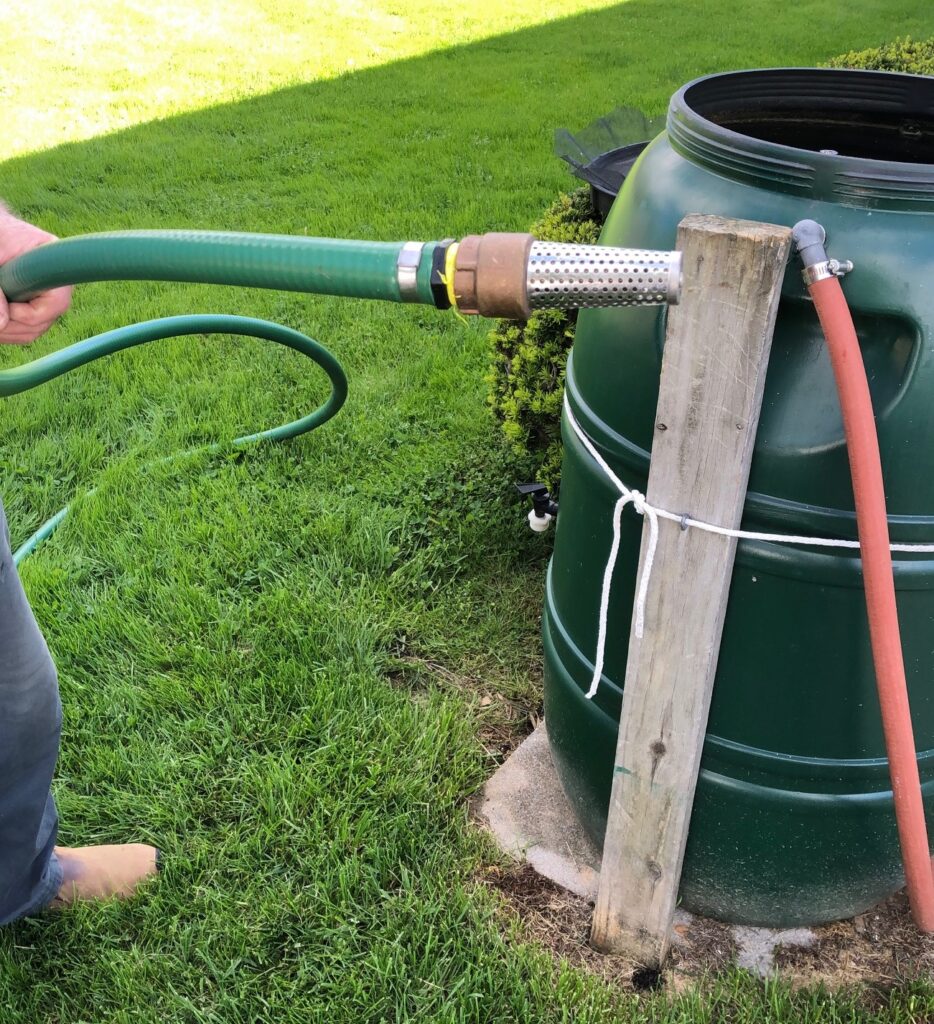
The garden hose (red) is in the foreground. Bert is holding a siphon hose. It is larger around than the garden hose and has a quick-attach adapter.

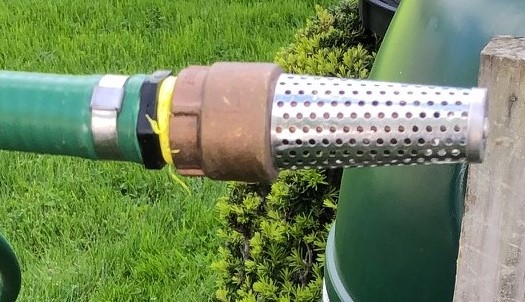
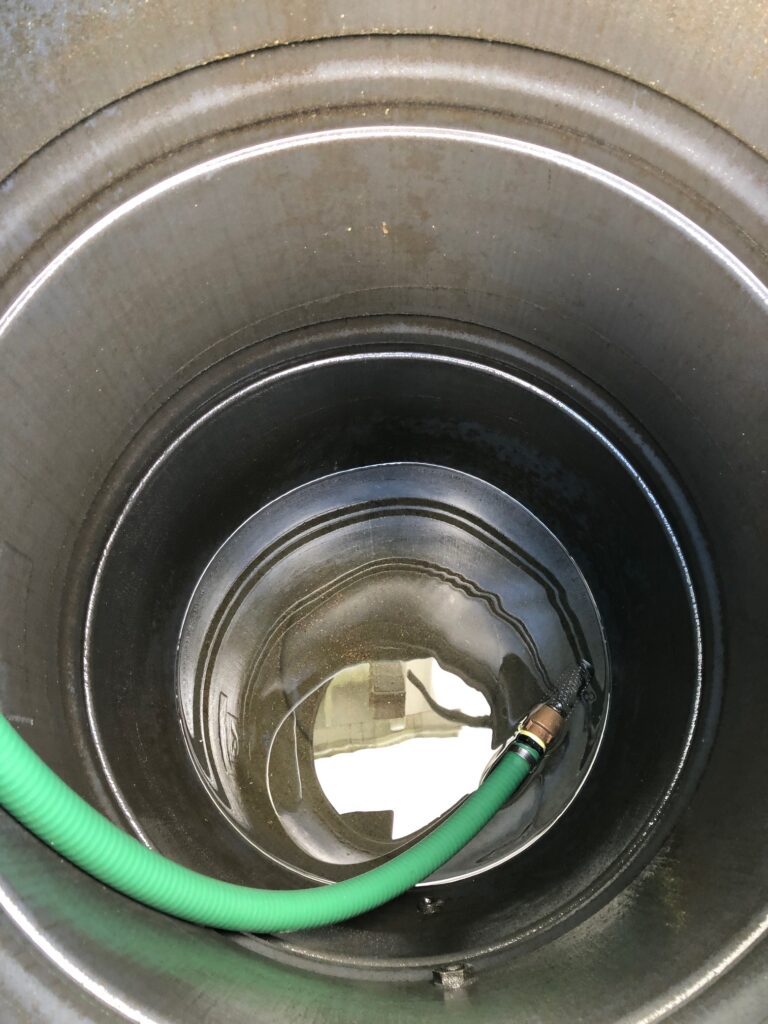
This is the other end of the siphon hose…called a foot valve.

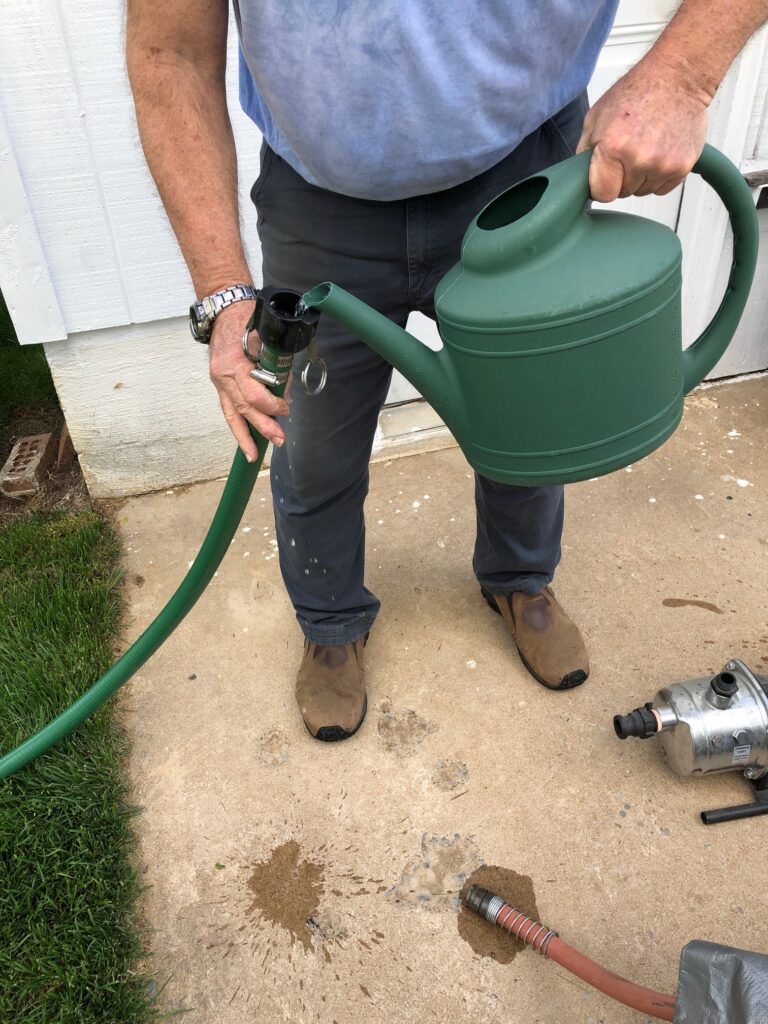
He fills up the siphon hose with water.

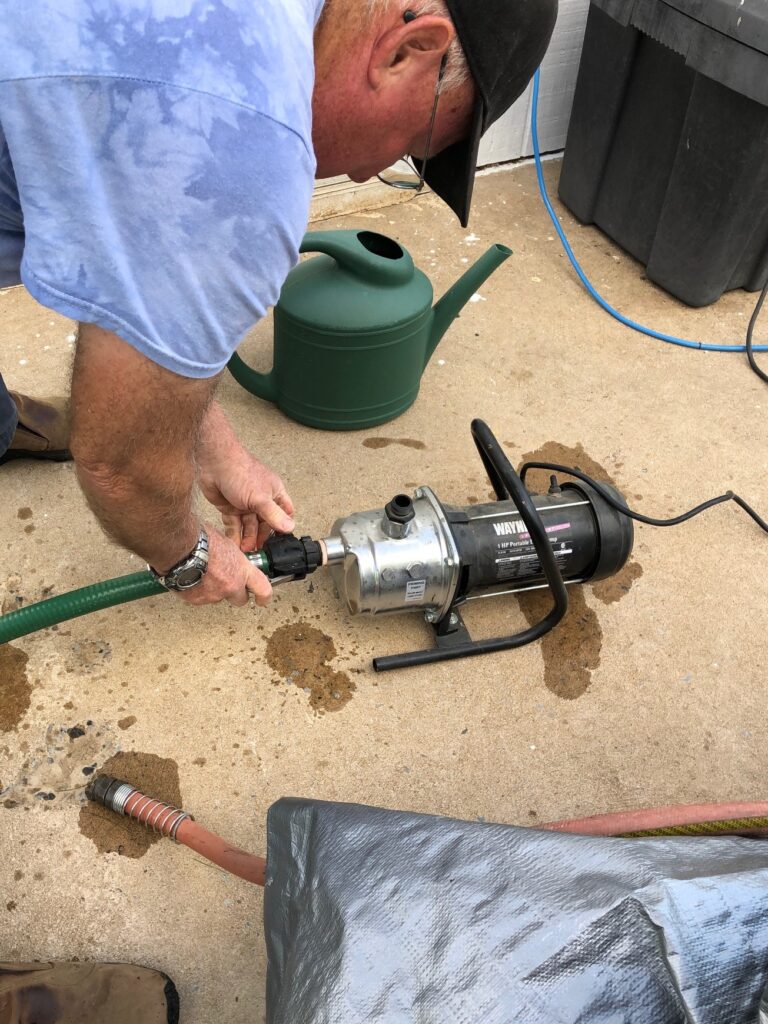
Once the hose is full, he quickly attaches it to the motor. He also adds water to the connector on top of the pump which primes the pump housing.

Hard to see in this picture, but then he loosens the bleeder valve to release any air in the pump.

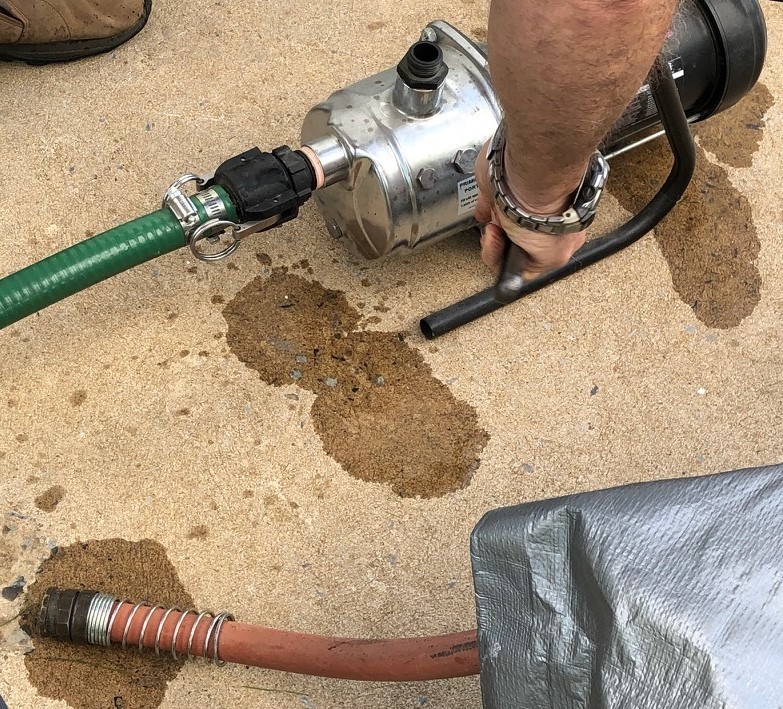
Next, he attaches the garden hose to the motor and tightens it. He also tightens the bleeder valve.

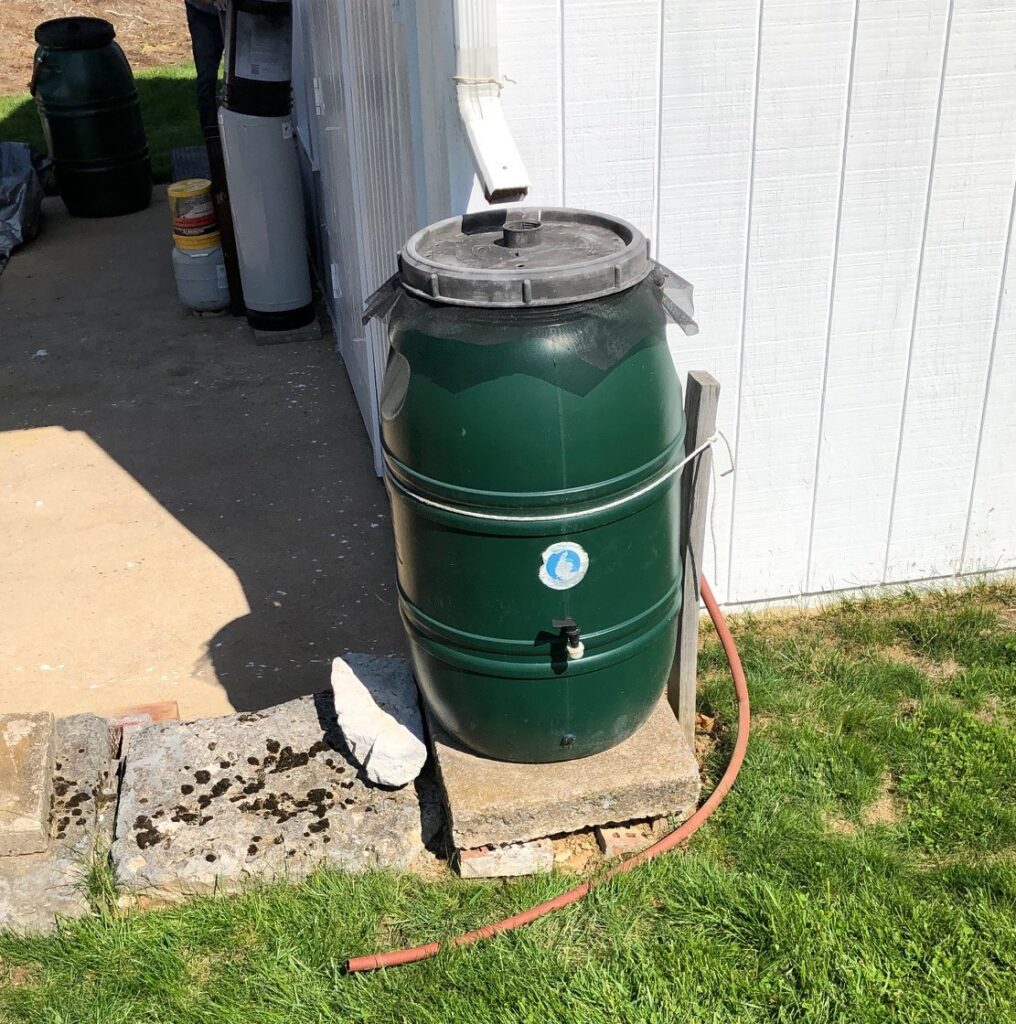
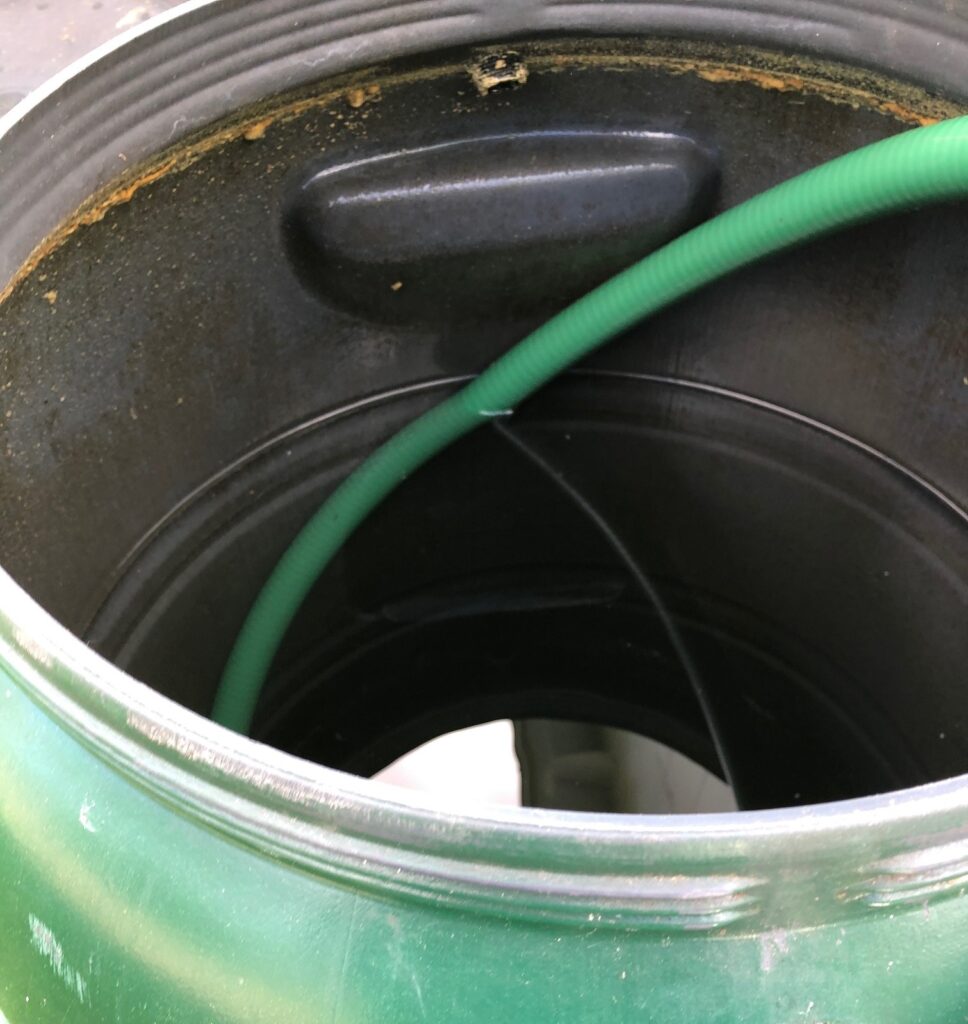
The other end of the siphon hose goes into the barrel. He tucks the hose between the barrel and the supporting wooden stake so it doesn’t come out while it’s working.

And then, he turns the motor on!

In 8 minutes or so, the barrel is almost empty. He quickly turns off the motor so it doesn’t suck air.

The lid and screen goes back on the barrel and it’s ready for more rain!

Bert picks up the motor and hoses and moves them to the other rain barrel to repeat the process.

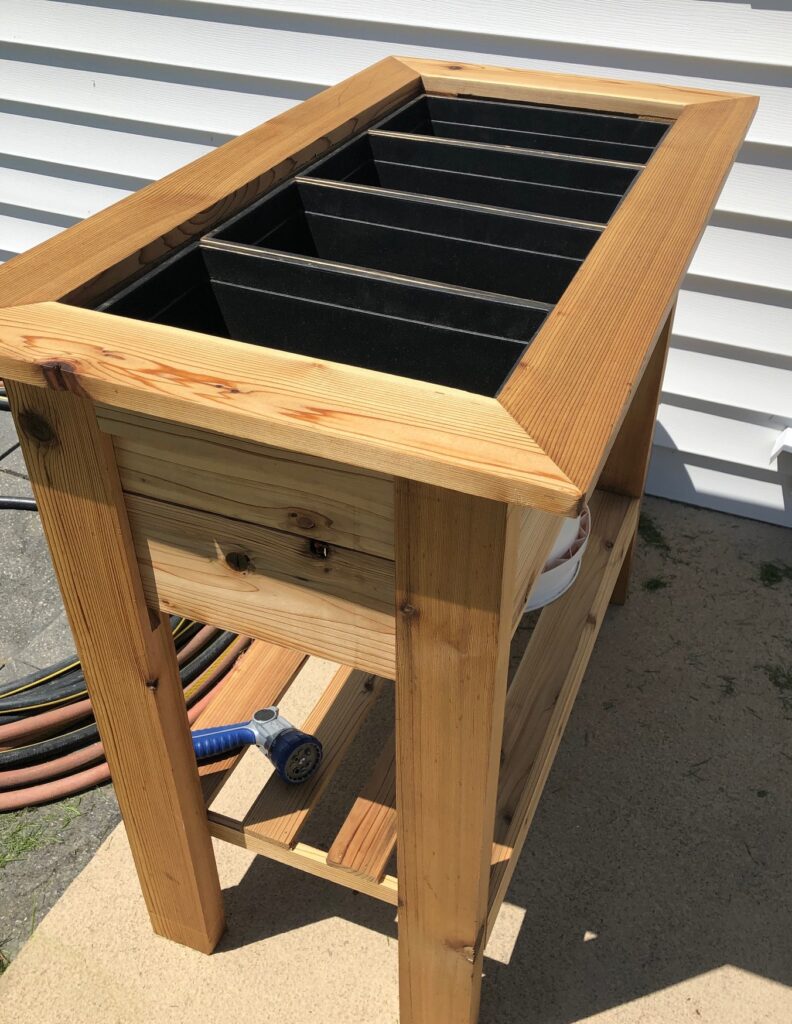
When he’s done with that, he goes up to the garden and removes the garden hose. The holding tank is now about 1/3 full (about 120 gallons). It holds about 360 gallons.

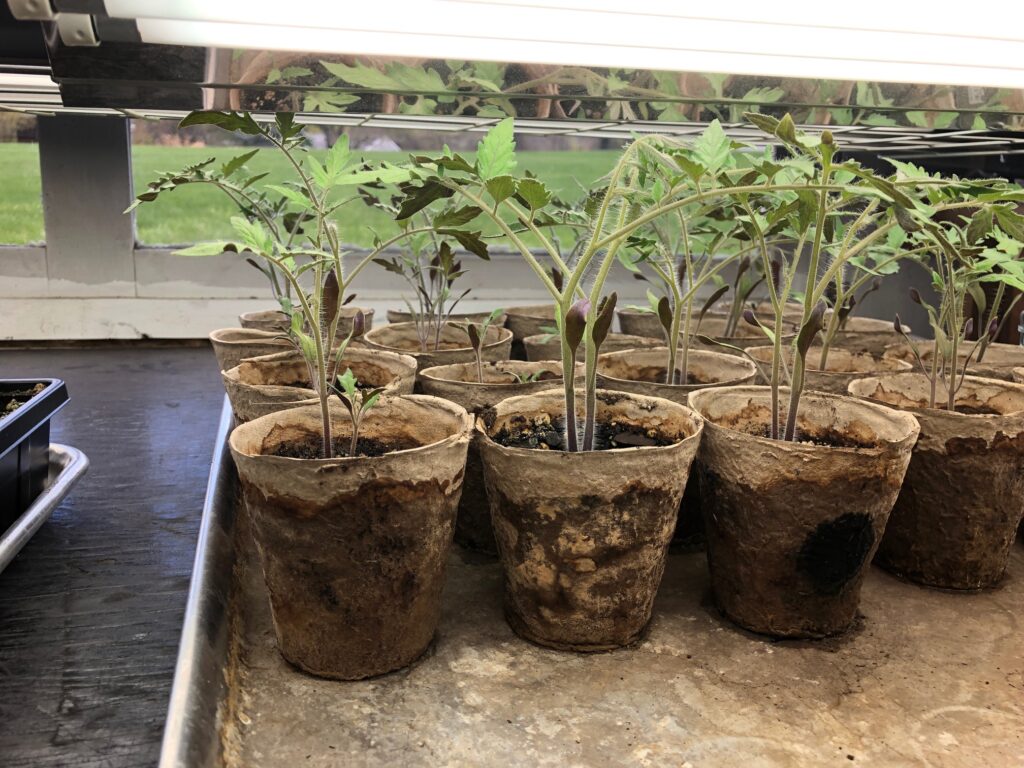
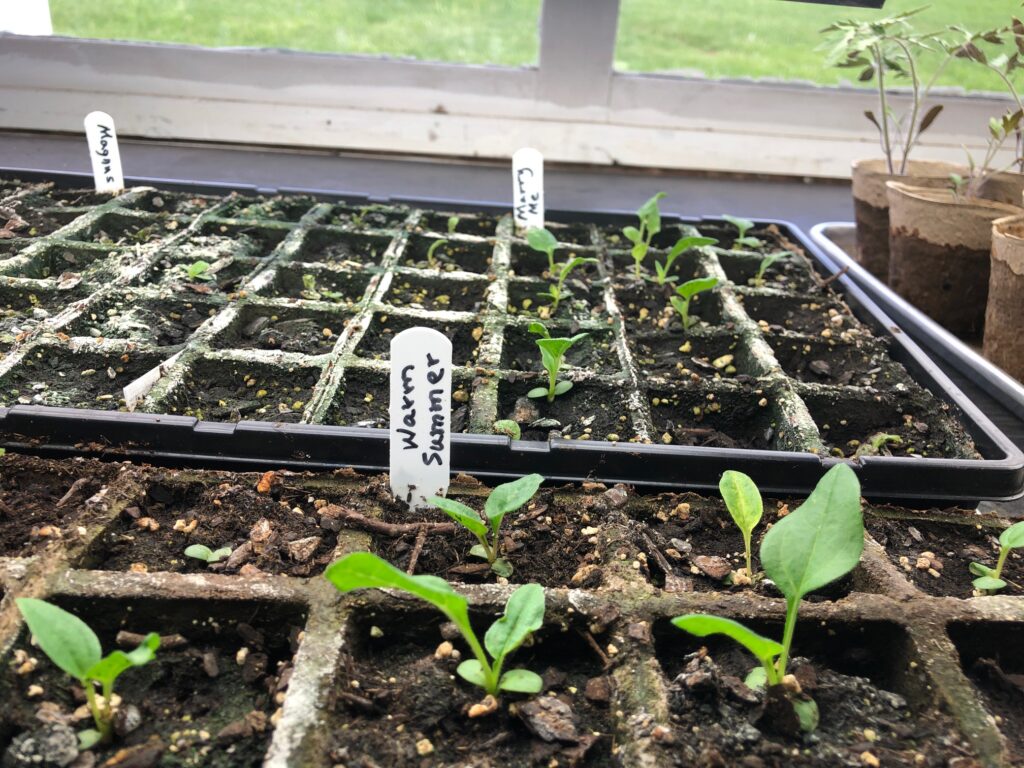
Whew! I learned a lot today. We should have a full tank by the time we transplant our seedlings.

Thanks for following this story. If you have any questions leave a comment or email me directly at marykisner@comcast.net. Enjoy!

Dehydrating Apples

Over a month ago, I bought a bag of nice small apples just to eat. The bag ended up in the garage temporarily while I was doing other things in the kitchen. I totally forgot to reach for them…out of sight, out of mind! Needless to say, they still looked OK but the they were getting soft. Before they were too soft to eat (that’s called rotten!) I thought I’d just dehydrate them. I know we’d eat them that way as snacks! Here are the 15 small apples:

First, I had to uncover the dehydrator. Most of the year I keep it covered and store it right outside the back door. It is already plugged in and ready to go. We keep a board on top to protect it from damage because that seems to be the place where we pile things…stuff to go out to the shop, packages delivered by UPS, etc. I went out to take a picture of it before I uncovered it…and sure enough, UPS had dropped off a package already this morning!

Then I pulled out the manual to check how long to dehydrate apples. They provide a color-coded map to help determine how long to dehydrate foods, based on location and season. Fruit should have 10 to 20% moisture content to store well.

For May in Pennsylvania, it said a range of 51 to 70% (indicated by yellow) or 71 to 80% (indicated by green) in the instructions. Then I look up Apples and find the yellow means 11 hours, and green means 13 hours. This is very important if I want to store them without refrigerating them.

So, curious challenge for today. It was already 2:00 p.m. when I finished peeling and I don’t like to leave the dehydrator running after I go to bed. At 9:00 p.m. I turned the dehydrator off and put the apples in a zip lock bag and put them in the refrigerator. They are still a little moist inside. In the morning I can always lay them out on the trays again and finish drying them for another 5-6 hours. I think we’ll just eat them!

Here’s the process to dehydrate apples:

After washing the apples, I made a bowl of lemon water to put the sliced apples into as I peel them. That will keep them from discoloring.

Then I laid the apples on the trays.

And put the trays in the dehydrator.

I set the temperature to 135 degrees.

After 7 hours, the apples were dry on the outside but still a little moist inside. They would need another 5 hours or so to be dry enough to store on the shelf.

Those 15 apples made a small pile of dried apples.

Next time I want to dehydrate apples, I think I’ll get larger apples and use the apple peeler/slicer attachment on my mixer…much easier! At least I didn’t waste this bag of apples and we have snacks for a few days!

Please leave a comment or email me directly at marykisner@comcast.net. Enjoy!

Camel Ride in Eqypt in 1956

One of the things I treasure from my parent’s generation was their foresight to save many written stories of their lives. Sometimes it was an envelope of letters from a loved one overseas, or stories they wrote for historical societies documenting life “back in the day” like my Grandfather did.

Sometimes, they specifically wrote “Autobiographies” with photographs, assembled in their later years. My mother had even saved a handwritten autobiography she wrote in high school (around 1926) that shared her life up to age 12 or so.

As I get older, I feel like I’ve let the next generation down. Somehow, I was never able to document my life adventures as it happened with daily journals. In 2013, I had written several letters to my grandchildren which summarized my early life. The first story, which I posted here on April 14, 2021, titled “Born in the middle of the story,” shared some of my earliest memories. This account of my visit to the pyramids in 1956, when I was just 9 years old, was the second story I wrote for them. After this, I’ll try to continue with more memories from years ago and build my “Book of memories from Grandma Mary.”

***

In 1956, when I was 9 years old, my family was visiting Cairo, Eqypt for a few days as we traveled from the Philippines to London. We had spent a year in the Philippines while my Dad worked at the University of the Philippines.

One of the places we visited was the pyramids and the Sphinx on the edge of the city of Cairo. I thought we were going to make a long drive out into the desert because in all the pictures I saw, the pyramids were way out in the desert. But the city had grown and was quite close by.

It was hot, noisy and unfamiliar. There were camels everywhere with colorful tassels, bells and blankets on them. When they walked the bells would jingle. The men leading the camels around offered to take us for a ride…for a price, I’m sure! My brother, Mark, wanted to take a camel ride. My sister, Jean, said she would sit on a camel. I wasn’t sure about it at all.

We went to some camels that were lying down on the ground. They didn’t look so big. First my brother got on the back of the camel. He didn’t seem scared at all. Then my sister tucked her skirt to look like pants (remember, in 1956 girls and women wore dresses not shorts in public) and got on another camel. Then I was lifted up to sit right in front of her. Much higher than I expected!

THEN the men had the camels STAND UP!

We were VERY high off the ground! The men holding the camels led us around a little. I held on tight but it felt like I was going to slide down the camel’s neck.

Finally, it was time to get off the camels. First, the men had to make the camels kneel down. The men took their canes and hit the camels in the back of their front knees to make them bend down. Of course, the camels didn’t like that! They made a terrible noise! It sounded like they had been hurt but the men didn’t seem to be worried.

Once their front legs were bent, they lowered their back legs to rest on the ground. Finally, I was lifted off the camel. What a ride!

Twenty years later I was teaching 5th grade in Boalsburg, Pennsylvania. That year we had a unit on Eqypt where we learned about the people who lived there long ago and built the pyramids. Most of the students had never seen a camel. In 1974 there was no zoo nearby. The students researched how big camels were and we built an almost-life-sized camel in our classroom. Bert helped by building a wooden frame. It was so big he had to build it in the classroom! Then we padded it with newspaper and covered it with paper mache’.

The students painted it brown and it was part of our class while we studied Eqypt. (I couldn’t find a picture of the finished camel.) We didn’t want to tear down our camel friend at the end of our studies of Eqypt so the floor under his belly became a cozy place to read. He kept us company the rest of the year!

***

Watch for more adventures from my past…posted under Around the Kisner Homestead: Memories from Grandma Mary.

Please leave a comment or email me directly at marykisner@comcast.net. Enjoy!

If you would like to be notified when I post, sign up on the Welcome/Home page and you’ll be sent an email automatically by this wonderful program. Your email will never be shared!

Lunch with my big brother!

Bert and I try to make an effort to meet my brother and his wife for lunch about once a month. They drive down from Wellsboro, PA and we drive northeast from Boalsburg and meet someplace in the middle. Because of so many restaurants being closed for the last year we haven’t been able to be very consistent. This week we were finally able to coordinate a day and we met them near Lock Haven to have lunch at the Restless Oaks Restaurant just off the McElhatten/Woolrich exit of Rt. 220. (Their address is 119 Pine Mountain Road, Lock Haven, PA 17748).

This quaint restaurant serves great diner food. The ambiance is homestyle and decorated with many old cooking and farming implements. They also have quite a collection of carved wooden statues…some impressively huge! Here are some pictures of the restaurant inside and out!

This handsome fellow greeted us near the entrance.

This lovely beast was right by the entrance door!

Here were the specials of the day!

Things like these decorated the walls and ceiling around the restaurant.

This huge carved eagle was suspended from the ceiling over our heads!

On the way out, we found wonderful porch swings for sale.

And quite a few smaller statues or lawn ornaments for sale also.

Of course, I had a chance to hug my big brother. It had been way too long! We’ll have to get back on a schedule!

I love hearing from you! You can leave comments or email me directly at marykisner@comcast.net. Enjoy!

If you would like to be notified when I post, sign up on the Welcome/Home page and you’ll be sent an email automatically by this wonderful program. Your email will never be shared!

Patriotic Door Quilt

Time for a new door quilt. As you might recall from my earlier posts, I needed to find a solution to the problem of putting a wreath on my front door and then squashing it when I closed the screen door; not enough clearance. Flat door quilts have solved the problem. Here are the previous ones I’ve made (starting with the Christmas stocking, the Heart in a cathedral window pattern and the spring quilt in the Dutchman’s Puzzle pattern).

I seem to be continuing with a seasonal quilt about every three months. I have also discovered that three months exposed to the sun has faded the fabric some so it was time for something new.

With some major patriotic holidays coming up like Memorial Day and the 4th of July, it was time to try a patriotic theme.

This quilt pattern is called Fifty-Four Forty or Fight. You’ll see several color variations below.

This phrase was the famous 1844 presidential campaign slogan of James Polk that contributed to his unexpected victory. The slogan was named after a line of latitude that served as the northern border of Oregon at 54 degrees 40 minutes. The slogan was not actually coined during the election but appeared only by January 1846 and was promoted and driven in part by the press. Women often stitched their political views because they weren’t supposed to voice them. That’s where this block comes from.

By altering the color arrangement of the pieces it has also been called Grandma’s Star, Railroad Quilt, Nine Patch Star Quilt, Garden Walk, Garden Patch and An Old-Fashioned Pinwheel.

When colors are arranged like in #265 below, it has been called Bird of Paradise.

As you can see, the same arrangement of blocks and triangles can be called something else if changing the colors gives a different impression.

I always want to check from the front yard to see if I have the colors right (meaning, light around the outside so it can be seen through the screen door). I think it works!

Please comment or email me directly at marykisner@comcast.net. Enjoy!

If you would like to be notified when I post, sign up on the Welcome/Home page and you’ll be sent an email automatically by this wonderful program. Your email will never be shared! Thanks!

Setting up the rain barrels

Today was a beautiful day to set up the rain barrels. Each rain barrel holds about 60 gallons of water. They collect most of the runoff from both sides of the shop roof so we put one on each far corner.

Bert stores the barrels in the shop in the winter. If water froze in the barrels they would crack so we don’t use them during the winter months.

Below you can see Bert has removed the bottom section of the spouting that runs out into the yard. The concrete slab is the base for the barrel. The post just behind it will be used to tie the barrel down…if the barrel is empty the wind can just blow it away!

The he adds a shorter extension up high that will funnel the water into the barrel. He said he had to add a little piece on the end to slow down the runoff so it goes into the barrel. Otherwise, it zooms straight past the lid of the barrel!

Here’s a close up of the extension. The small piece on the bottom edge is a flap that seems to do the job of slowing down the water.

Then there is a piece of screen that came with the barrel that is held down by the lid. This filters out big stuff like pine needles and bugs.

Then the lid (with holes in it) is screwed on to the barrel.

Finally, Bert ties a rope around the barrel and to the stake so it doesn’t blow away when empty.

He stores the spouting until fall.

This barrel is ready for rain!

On the other corner of the shop the steps are the same. Here’s the logo printed on the barrels.

Finally, when the barrels are full, he will attach a hose and use this little pump to get the water up the hill to the larger storage barrel. It holds about 360 gallons of water. Then we use that to water the garden.

Seems complicated, but we’re not hauling water to the garden and the plants seem to like the natural rainwater!

I’ll share more about the process of pumping the water when we do that. First…it has to RAIN!

Please comment or email me directly at marykisner@comcast.net. Enjoy!

I love hearing from you! If you would like to be notified when I post, sign up on the Welcome/Home page and you’ll be sent an email automatically by this wonderful program. Your email will never be shared!

Creative Mending

Frequently when I visit Kathy and family, I come home with some interesting mending projects. I think our son-in-law enjoys providing me with a sewing challenge…just because he knows I’ll humor him and produce something different! I’m up for the challenge!

He works very hard with his contracting and landscape business and his work clothes show it. This time, I came home with three items…a stuffed toy their dog Daisy had ripped with her teeth (obviously not related to his work) and two pairs of work shorts with rips in embarrassing places.

First, I worked on the dog toy. This elephant is really not a dog toy, but Daisy loves it and really doesn’t shred it; her teeth just seem to catch on the soft fabric.

The damage seemed to be right at the back of the neck. It looks like I had mended this item several times already!

First, I just pulled the sides of the hole and sewed it shut…again…with some strong thread.

Then I added a double layer of pretty hefty ribbon around the neck, right over the repair. With double knots in the ribbon, the bow might come untied but the ribbon should protect my repair. Maybe the ribbon will give Daisy something new to play with.

Now, on to the work shorts. The first pair had a big rip right in front.

Pair number 1

The second pair was pretty shredded through the crotch!

Pair number 2

PAIR NUMBER 1

First, I prepared two patches that would cover the holes. I cut two pieces of lightweight denim, folded them in half (right sides together) and stitched around the open sides, leaving about 3 inches to turn them right side out.

I turned them right side out and top stitched around both patches. Now the edges of the patches are finished and will not unravel when washed.

Starting with the smaller patch, I turned the shorts inside out and placed the patch over the rip, making sure it was covered by the patch.

From the outside, you can see the patch through the hole. I trimmed the ragged edges around the rip so they wouldn’t bunch up under the outer patch.

Then I stitched around the hole.

Now it’s ready for the outside patch. I could have just put another plain patch to match the shorts. However, where’s the fun in that! How about a big red heart! I turned the edge of the heart and stitched it before putting it on the shorts.

As long as it covers the hole it’s just fine.

Do you think he’ll know I love him now?

PAIR NUMBER 2

On the second pair of shorts, I follow the same procedure. It’s a little more awkward getting the patch and shorts under the sewing machine.

After sewing the patch on the inside, turn the shorts right side out and clean up the rip by trimming the shredded fabric.

Then add a top patch of your choice (in this case, another heart!). I figure maybe it will embarrass him to go get some new work shorts! HaHaHa…actually he loves them and shows them off on the job! Go figure!

If these were good shorts, I would have used thread that matched the garment and I would have chosen a matching fabric for the patch. I guess I could have just thrown them away, but where’s the challenge in that!

So, that was my mending challenge of the week! Hopefully everyone will be entertained on the job!

Feel free to leave a comment or email me directly at marykisner@comcast.net! Enjoy!

Beautiful April day at the Kisner homestead

Today was a beautiful day…gives us hope for more days like this in the near future! I wanted to share a few pictures.

The garden plants that Bert started several weeks ago are coming along. The tomato plants will soon need to be repotted into larger pots. We still have a month to go before we risk planting them in the garden. Soon he’ll set them outside when it isn’t too windy.

The echinacea plants are struggling. We planted four different varieties and many did not even sprout. We’ll see what we get a month from now.

I wandered the yard and wanted to share that the redbud trees are finally in flower. They are especially pretty with the yellow goldfinches for contrast…but of course they fly away when I get too close.

Across the street the wild redbud trees are one of the first to blossom in the spring. They really show up when everything else is still brown.

The dogwood trees…in the foreground…are still waiting. That’s a good thing. We’ve had two nights of freezing temperatures, so for now their pretty white blossoms are safe.

Our son-in-law has provided us with a nifty planter to try. He’s experimenting with making them to sell to a local nursery. They are great for older folks that don’t (or can’t) get down to garden down low. I’ll use this right by the patio door for lettuce and radishes. They are not in the ground for very long and don’t have deep root systems.

We enjoy having our wind sock in the back yard. It’s pretty and Bert likes to know which way the wind is blowing before he burns wood in the shop.

Unfortunately, the weather is pretty hard on it and we’ve had to replace it more than once a year. This year he finally decided to go with a REAL wind sock like they use at the airport. Hopefully it will survive better this year. The neighbors must wonder if we anticipate low flying planes!

Bert has also recorded daily rainfall for 20 years! Imagine that! He reads the gauge every morning from March 1 to November 30. It has been helpful to know when to water plants because even though the weather folks might say we’ve had substantial rain, sometimes our specific location has had more or less.

It was time today to empty the compost pail. I notice when I buy a lot of vegetables like cauliflower and broccoli, I have a lot of vegetable scraps. I think we avoid an extra bag of garbage each week by composting.

The composter is made by the YIMBY Company (Yes In My Back Yard…cute name, right!). We have two of them. When one is full, we let it sit and start on the other one. Bert will rotate them both every week or two.

You can tell by the color of the grass in these pictures we have a beautiful lawn this year. Bert is cutting it today for the second time this spring.

We got a postcard in the mail yesterday advertising a plant sale at the Centre Furnace Mansion, sponsored by the Centre County Historical Society. Just the right time to see what’s available for the garden!

I hope all of you are having a great April day too. We may not have the earliest spring around here, but we certainly appreciate it when it gets here!

Please leave a comment or email me directly at marykisner@comcast.net! Enjoy the day!

Make a Bowl Cozy for Soup or Ice cream

I seem to have collected an assortment of unfinished projects. I don’t notice them because they are stuffed into a bin waaaay up high on a shelf!

However, I needed another bowl cozy and remembered to check that bin today. Imagine that! I have several already cut out, ready to sew!

Several years ago, I was on a roll and made dozens in these colors for my high school friends (maroon and gray were our high school colors). Obviously, I had a few extra cut out.

These shaped potholders are great when I want to reheat a bowl of soup in the microwave. I lay a paper towel on top to catch spatters. When I take the hot bowl out of the microwave, I have a potholder already in place! It has saved me a lot of spilled soup and burned fingers. I have other friends that have discovered they are great to hold their cold bowl of ice cream!

You may have seen stacks of these potholders at craft fairs…all sizes. The larger ones are great for hot dishes. This size fits a standard cereal bowl.

Here are the instructions:

Step 1:

Cut out two 10″ squares of cotton fabric (not polyester…it may melt in the microwave).

Cut out two 10″ squares of lightweight cotton batting.

Step 2:

Place each square of fabric on top of a square of batting, right side up.

Stitch on the diagonal on both pieces of the fabric/batting sandwiches. I stitch with the batting on top to decrease the amount of lint that goes into the machine.

Step 3:

Fold each piece in half, right sides together.

Mark a stitching line, 1″ from the fold, and 2″ along the fold, as shown below.

Sew along both lines, on both pieces.

Step 4:

Open the squares and fold the other way. Mark and stitch again.

Step 5:

When you open the squares, they will sit like a bowl.

Trim seam allowance to 1/8″ to decrease bulk of darts.

Step 6:

Turn one piece right side up and the other right side down.

Pin the two halves with right sides together, lining up the darts.

Sew around the edges with a 1/4″ seam, turning your needle at the corners and the darts.

Leave about 3″ open for turning right side out.

Oops…in this picture I hadn’t trimmed the darts yet!

Step 7:

Trim corners. Turn cozy right side out, pushing corners out and nesting the two halves.

Step 8:

Top stitch around the edge of the bowl, folding in the opening 1/4″ to close. The cozy is reversible.

If you want a larger cozy, start with a larger square…11″, 12″, etc.

And that’s it! Enjoy your next bowl of soup or ice cream!

If you have comments or questions, leave a comment or email me directly at marykisner@comcast.net! Enjoy!

Have Projects, Will Travel

I spent the weekend with my daughter and family. When I visit, I try to bring along appropriate crafts for them to try. This time I loaded up my air dry clay and all the supplies to make air fresheners. I also wanted to try painting flat rocks like a Mandala. I assumed (never assume!) that they wouldn’t have any problem with those projects. Of course, my grandkids are almost 14 and almost 9 so I wasn’t sure if they would be interested either. I did discover that they loved working with clay and painting rocks, but didn’t necessarily make what I had in mind! Such fun!

Air Dry Clay

Anna faced with many choices!

We started with the air dry clay. I provided the clay and brought all my items to make impressions in the clay, round cookie cutters, and straws to make the holes for ribbon. I showed my granddaughter how to roll out the clay, make an impression and use the cookie cutter to make the finished circle cut out. Then I got out of the way. The hardest part for her was rolling the clay too thin. If the finished piece is too thin it will curl as it dries. So, I encouraged her to roll it thicker. She made some really cute items!

My grandson joined our project a little later and had his own ideas. He made two small pieces with impressions (one his own thumbprint) and then began working on his own idea…a skull, or head, with quite detailed facial features and hair. Quite the budding artist!

My daughter joined the party and enjoyed making some pieces also! She chose to leave two items without holes for hanging, suggesting she might put essential oil on them and slip them into a drawer.

Several things I learned, which will be added to my future instructions for the air dry clay…

…thicker pieces work better. The ones that were cut 3/8 inches to 1/2 inch thick dried fine and stayed pretty flat.

…as an alternative to hanging an essential oil freshener, you could slip a small disc with essential oil into a drawer.

…air dry clay can be fun for all ages no matter what they make!

Mandala Rock Art

The second project was to try to paint designs on some flat rocks. I purchased two kits at Barnes & Noble that had some rocks, some paint and an instruction booklet.

I thought the Mandala’s would be a good project for any age group. The rocks in the kits were not especially flat or smooth so I stopped at Michael’s and found a container of flat rocks for sale. I can’t believe I bought them…about 10 rocks ro $4.00! However, they were perfect!

I also picked up two sets of acrylic paint pens. This is what the pens looked like:

Before we started, I painted the rocks with some outdoor acrylic paint, thinking their designs would show up better on a white or dark background. I also wanted them painted ahead of time…waiting for paint to dry is tough!

Except for the three rocks painted with dots that my daughter and I tried, painting ahead of time was unnecessary. They ended up making animals or bugs, which involved painting the whole rock another color anyway.

So, what did I learn about painting on rocks?

…finding flat rocks that make good bases for paintings is tougher than I thought. Maybe I should find a better source if I’m going to do very much of this!

…the pens with acrylic paint worked very well but sometimes painting an all-over base coat works well. When the paint dried it was shiny.

…it works better to show lots of pictures of possibilities and let each person make their own design.

…I still think Mandala designs are fun. I’ll need to make more myself!

My weekend with the grandkids was fun. I wonder what I’ll try the next time?

Please leave a comment or email me directly at marykisner@comcast.net! Enjoy!