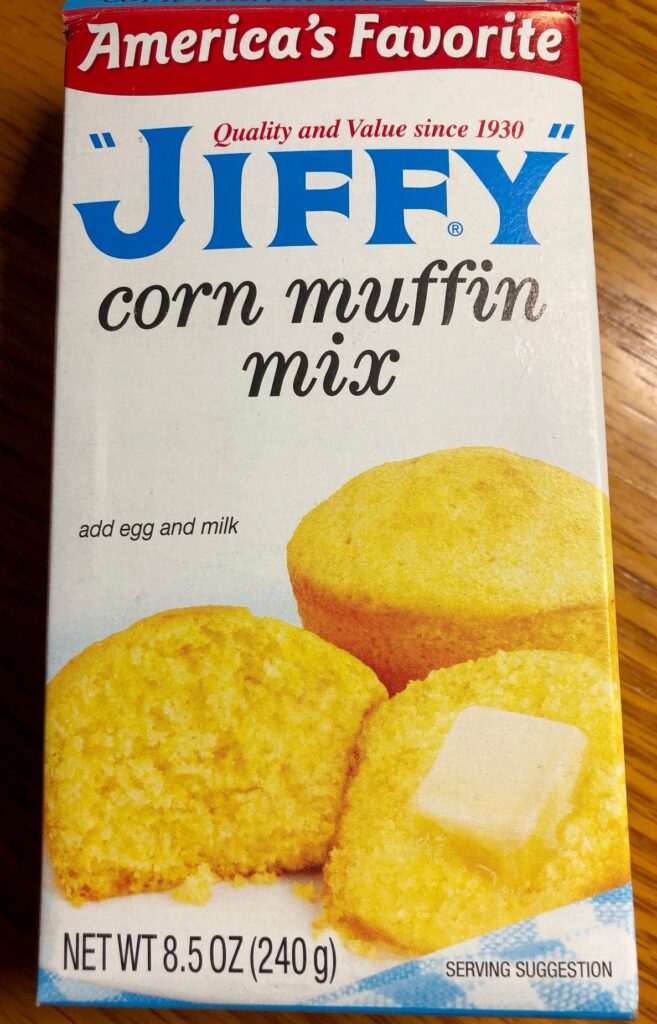
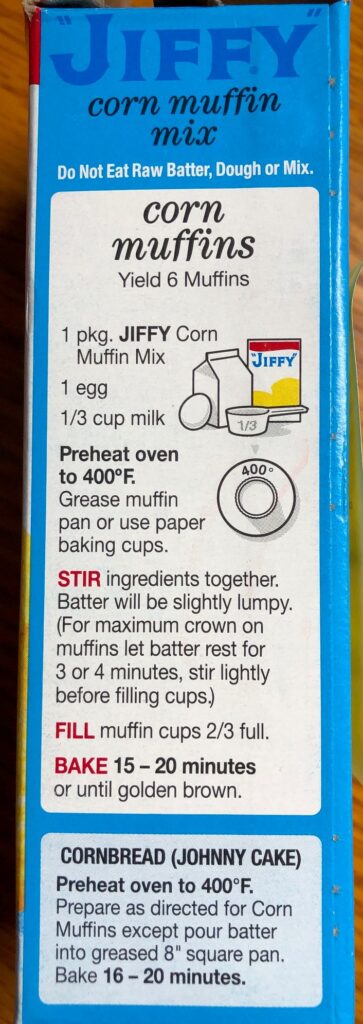
I was checking out recipes online the other day and came across an article with this title: 24 Things to Add to Jiffy Cornbread Mix to Make it Even Better. I remember loving those mixes and was so surprised that they were still on the shelf at the grocery store.
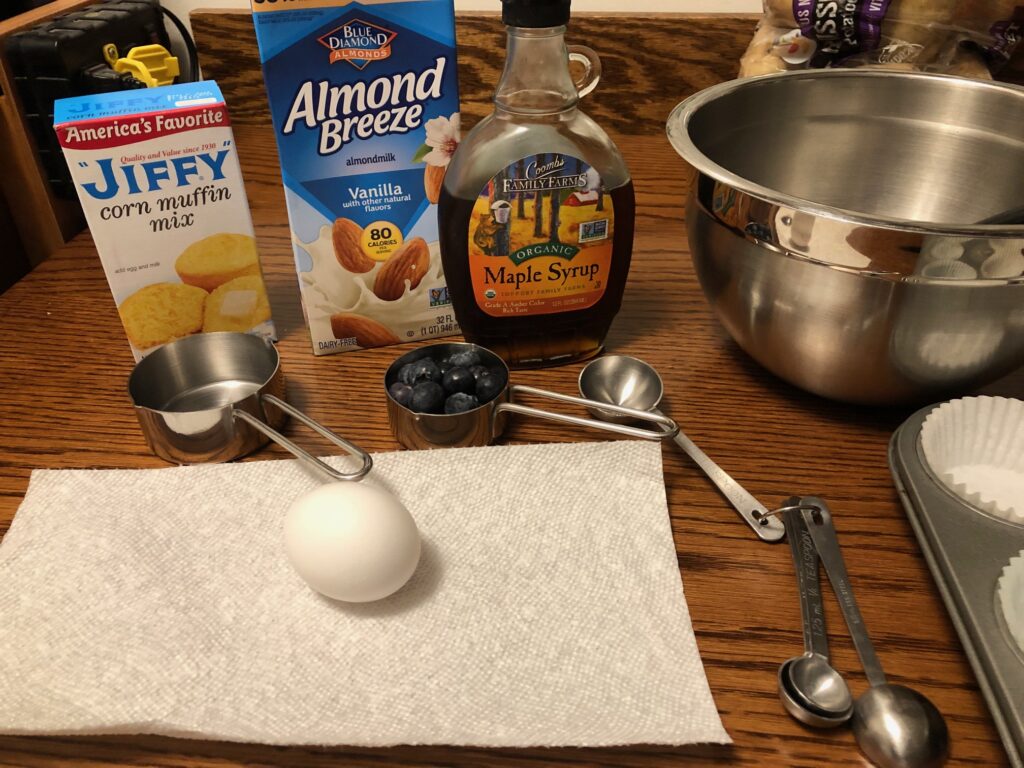
Now that I can have an egg here and there, all I had to do was substitute my almond milk for the regular milk. Then, in that article I mentioned above, I found an addition that might taste good: 1/2 cup of blueberries and 3 tablespoons of maple syrup. I picked up a box mix and some blueberries and thought I’d give it a try!
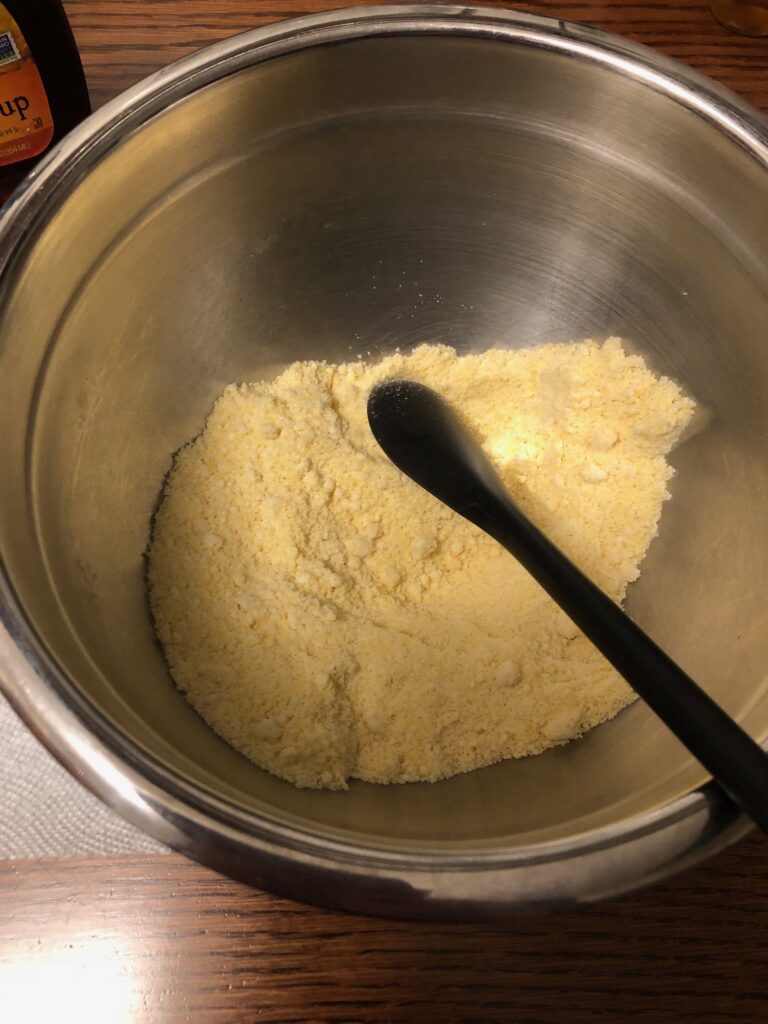
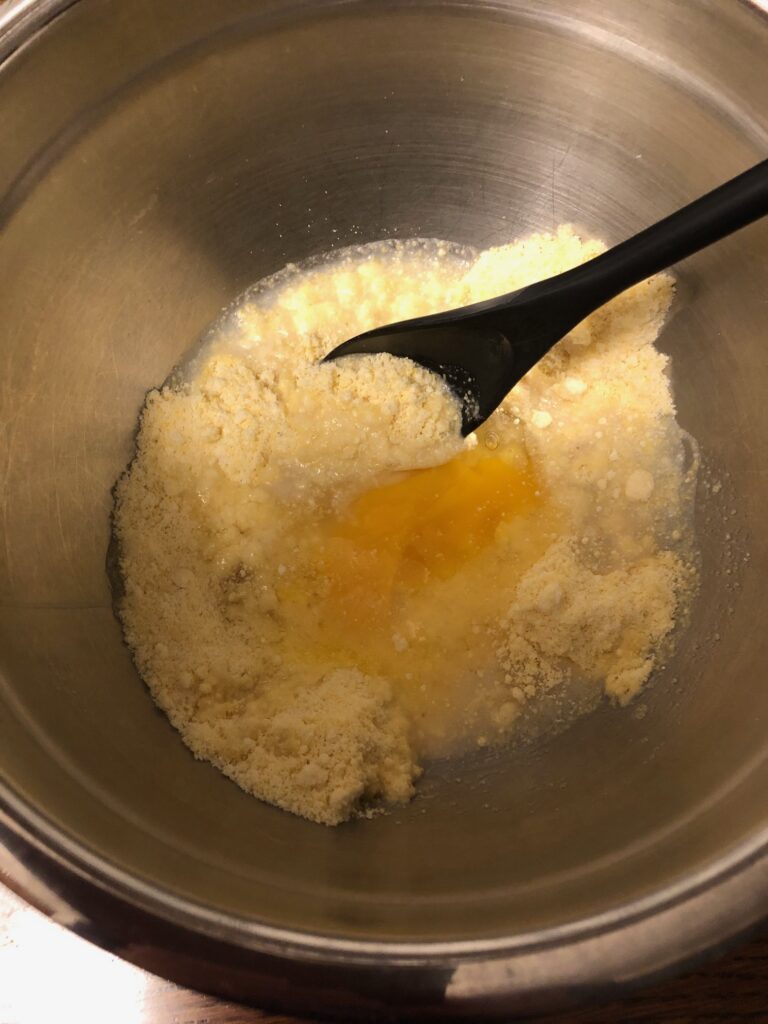
The dry mix was a little lumpy so I used a mixing spoon to break up the lumps. Then I added the almond milk and 1 egg.
After adding the blueberries and maple syrup I gave it a good mix. The batter was pretty runny…but I didn’t want to add anything more until I saw how it baked. Next time I think I’ll add a little flour to stiffen up the batter. The additions also meant I might be able to make 7 muffins…so I’d better use the full size pan!
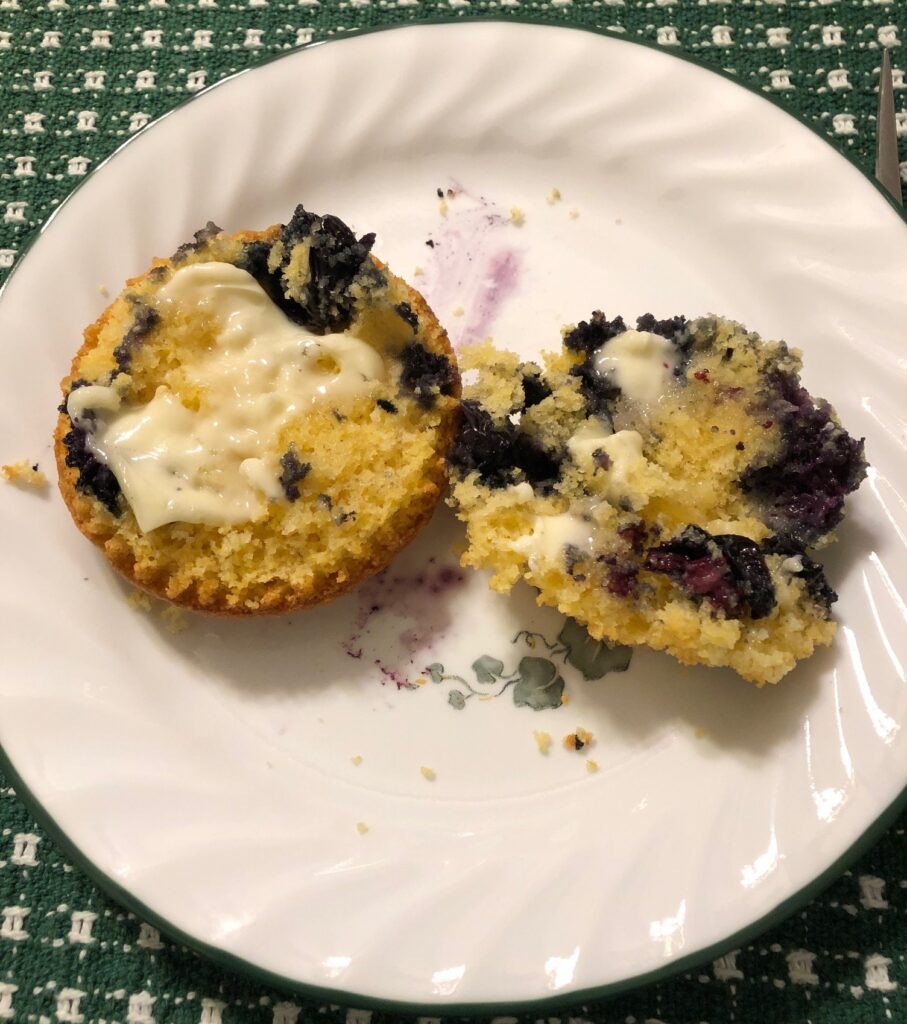
The muffins needed 20 minutes in the 400 degree oven and still looked a little flat. The extra flour would help that the next time.
However, they were delicious!! Very quick and easy. I think I’ll check out the other variations that were suggested in the article. I did another search online for “additions to the Jiffy Corn Muffin Mix” and found dozens of ideas! Since it only makes 6 muffins, I won’t have too many to deal with at one time. Give it a try! Enjoy!
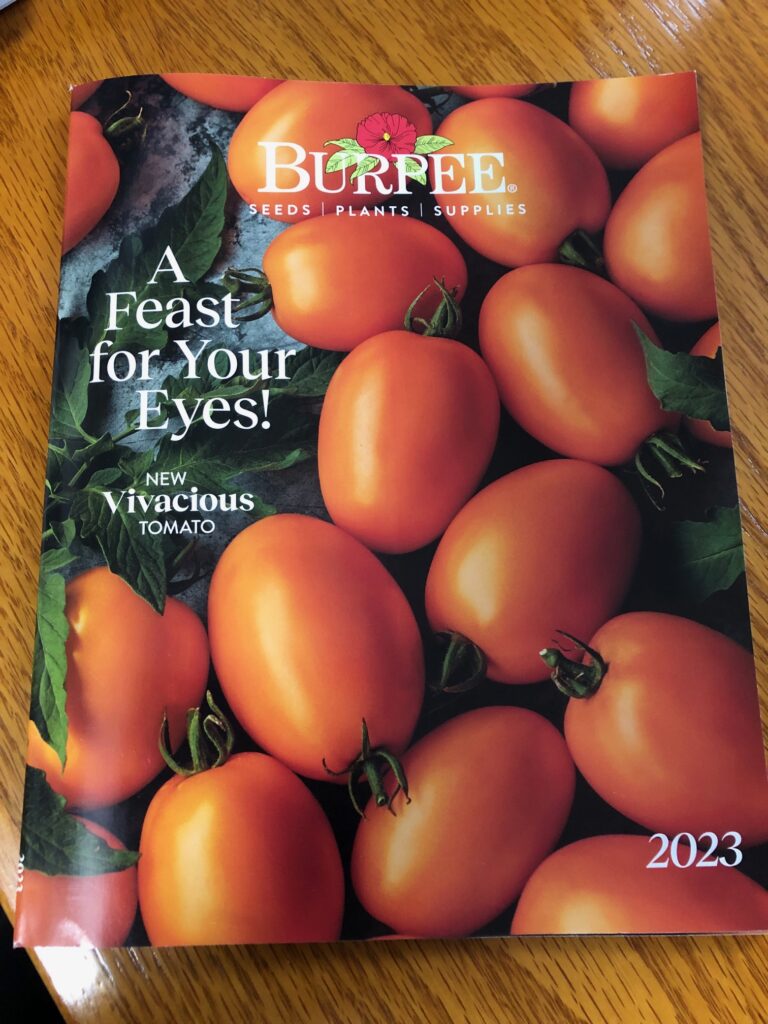
This is the time of year that we start planning our garden for the next growing season. Why? Well…the garden seed catalogs have arrived to entice us with beautiful photos of garden plants and produce, of course! It’s called “marketing!”
We’re sitting here while we watch the snow/drizzle/rain/sleet outside our windows and the mail arrives with catalogs like this:
Who could resist thinking about these lovely tomatoes!
We have gardened long enough to be mindful that not every plant in the catalog will grow successfully in our backyard. We also have tried many vegetables that did well…but we’d rather not eat a lot of them. As long as there are great Farmer’s Markets nearby, many of our vegetables can be purchased from accomplished growers.
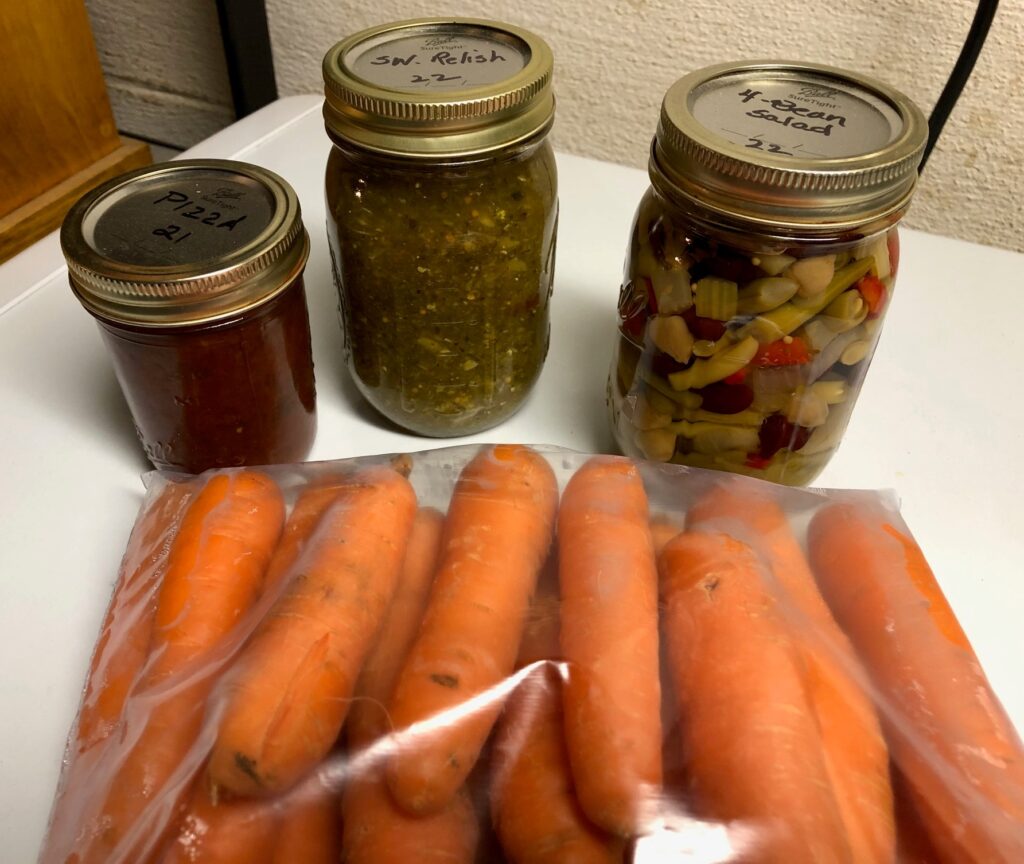
So, each year after we get the catalogs, I first check my shelves for the things I grew and preserved last year. I know we ate our share of fresh tomatoes, cucumbers and green beans. Lettuce and radishes were the base of many salads. Then, I preserved tomatoes as pizza sauce, cucumbers as pickle relish and beans as 4-bean salad.
Pizza sauce, sweet pickle relish, Four-bean salad and fresh carrots.
If you’ve followed along during the year, you’ve seen my posts about some of those crops. You know that we didn’t grow everything we needed but we grew the vegetables that did well for us and then filled in with vegetables from the Farmer’s Market.
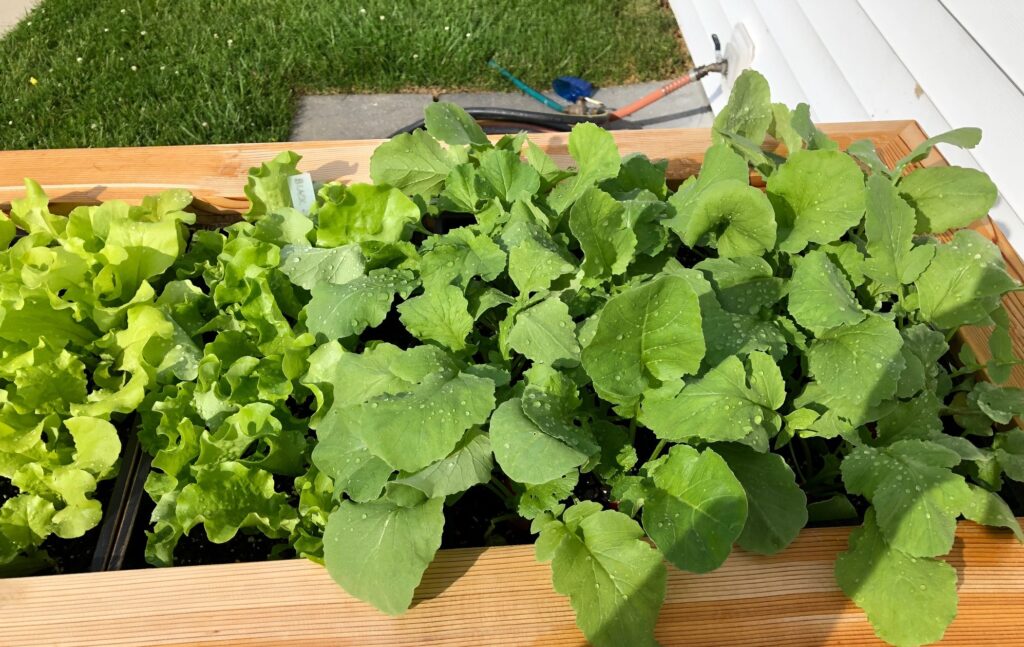
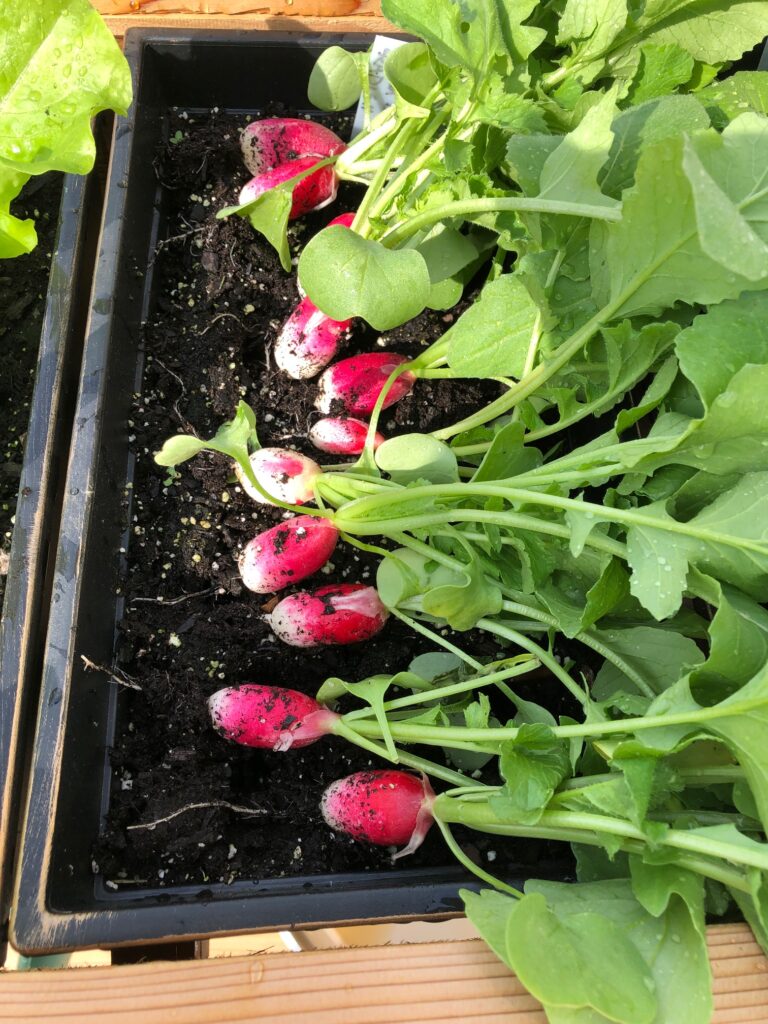
Lettuce and Radishes
We grew lettuce and radishes in a raised planter. They did beautifully and I had 5-6 plantings throughout the summer. We’ll make sure we order the seed that did so well! Watch for our Garden Updates throughout the summer.
Lettuce and radishes
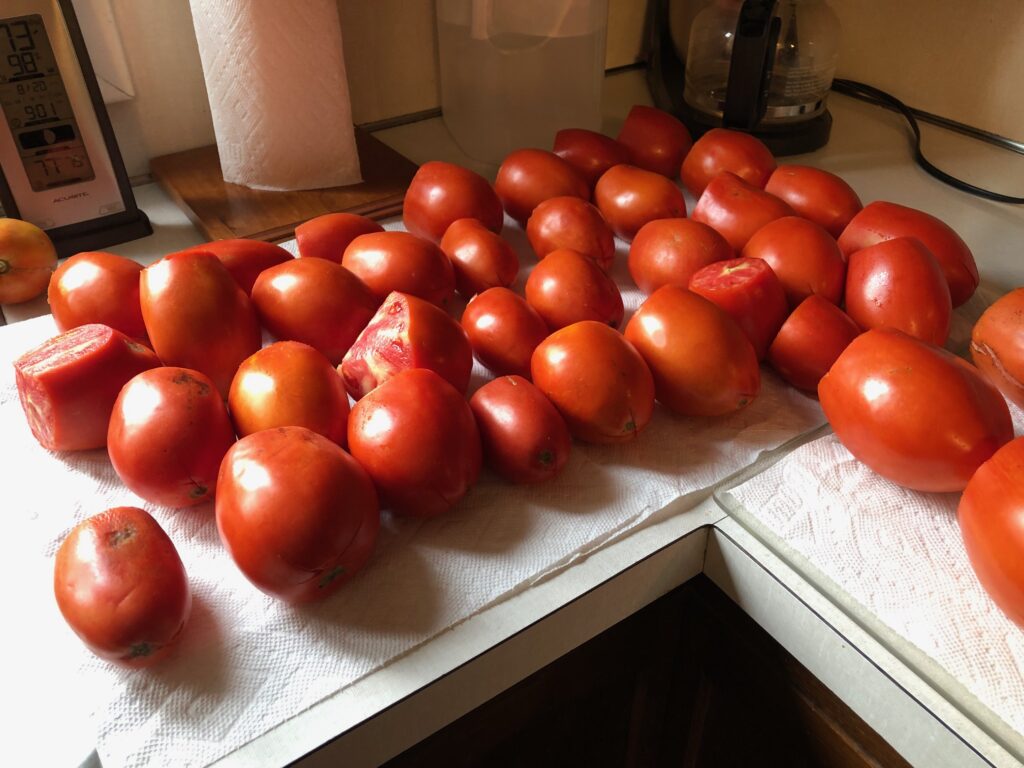
Pizza Sauce
We love our Super Sauce tomatoes from Burpee. Bert starts them in the shop under grow lights around the end of March. We plant about 10-12 plants in the garden and end up giving away the extra plants to neighbors. They do well for us and make great sauce. You can read about how I make pizza sauce at: https://marykisner.com/time-to-make-pizza-sauce/
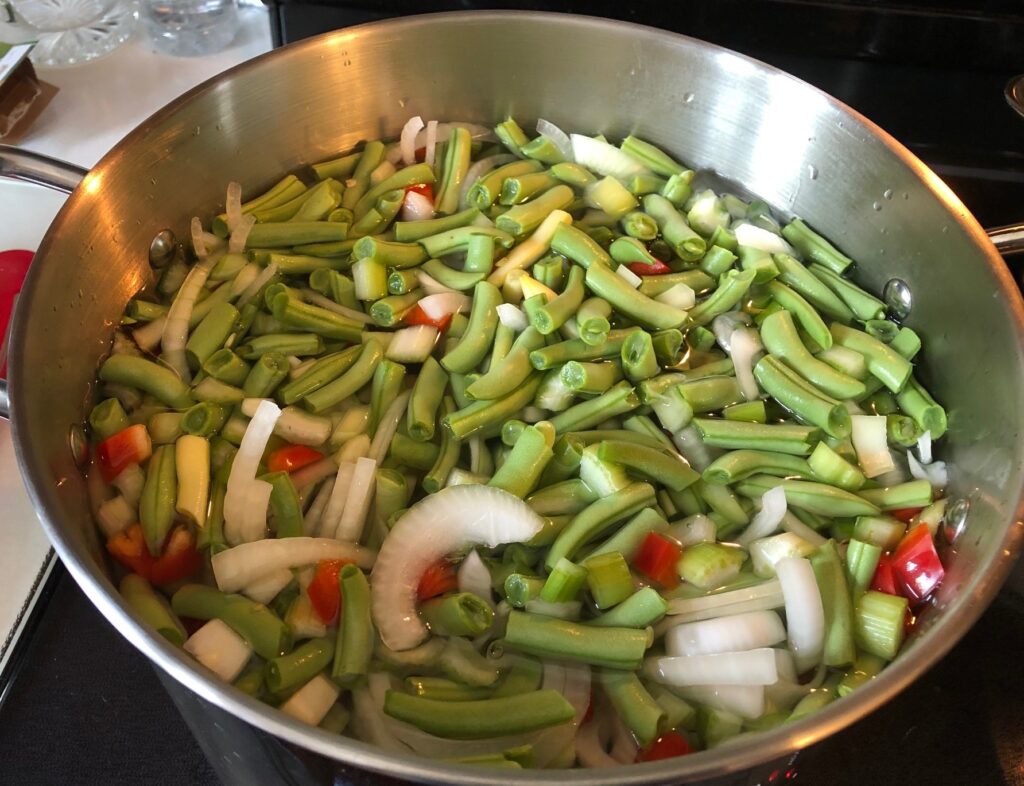
Four-Bean Salad
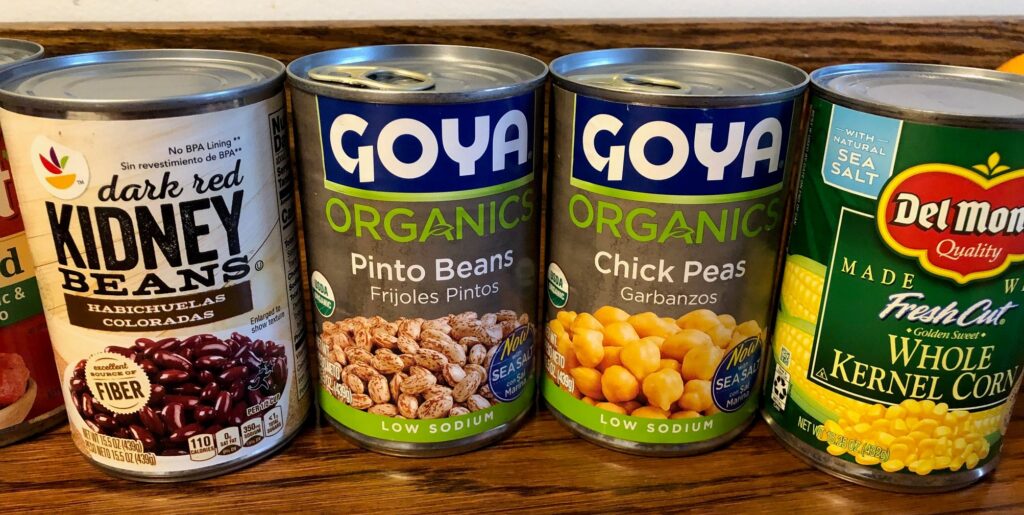
This pickled salad has our green and yellow beans, kidney beans and chickpeas. I can wait until I have picked enough green and yellow beans and then add canned kidney beans and chickpeas. Delicious all winter long! You can read about canning this salad at: https://marykisner.com/canning-four-bean-salad/
Four-bean salad ready to add the kidney beans and chickpeas.
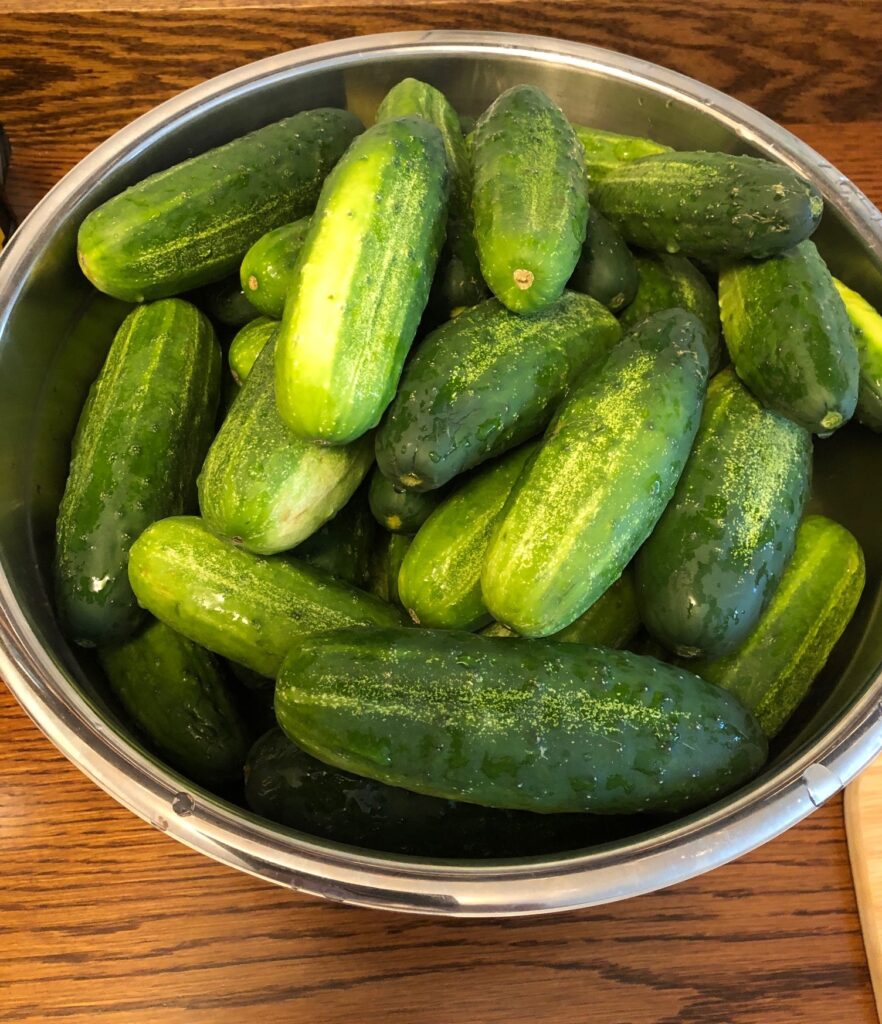
Sweet Pickle Relish
This last year our cucumbers did not produce well. I had enough to eat but not enough to make the relish. This is where the Farmer’s Markets come to the rescue. I was able to pick up a whole box of cucumbers for less than $20 at the end of the summer. You can read about making the sweet pickle relish at https://marykisner.com/canning-sweet-pickle-relish/
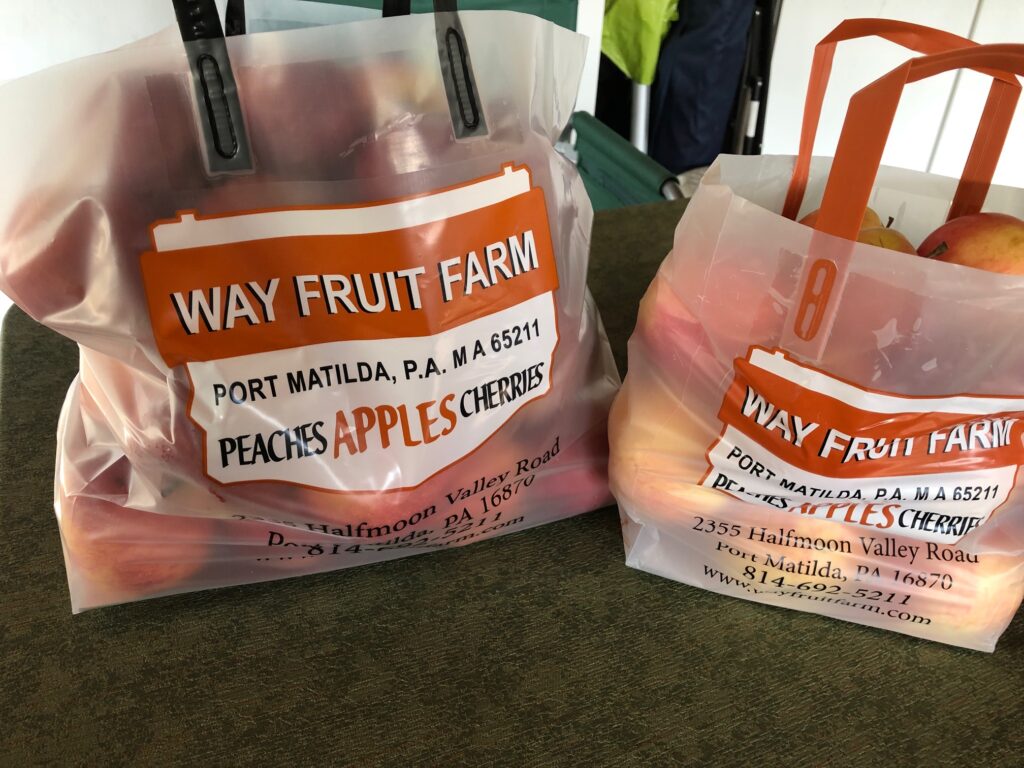
Applesauce
I love to have small jars of applesauce in my cupboard. I can regulate the amount of sugar added (usually not at all) and it’s just the right size for the two of us. Since we do not have apple trees, we head to Way Fruit Farm on the other side of town. I try to make applesauce in the early summer. Remember, the apples we buy here in PA in June were grown last summer. Then they were stored in a climate-controlled setting and by June they are much easier to peel. I think last year I purchased 3/4 bushel of apples. You can read about canning applesauce at: https://marykisner.com/a-fond-memory-while-canning-applesasuce/
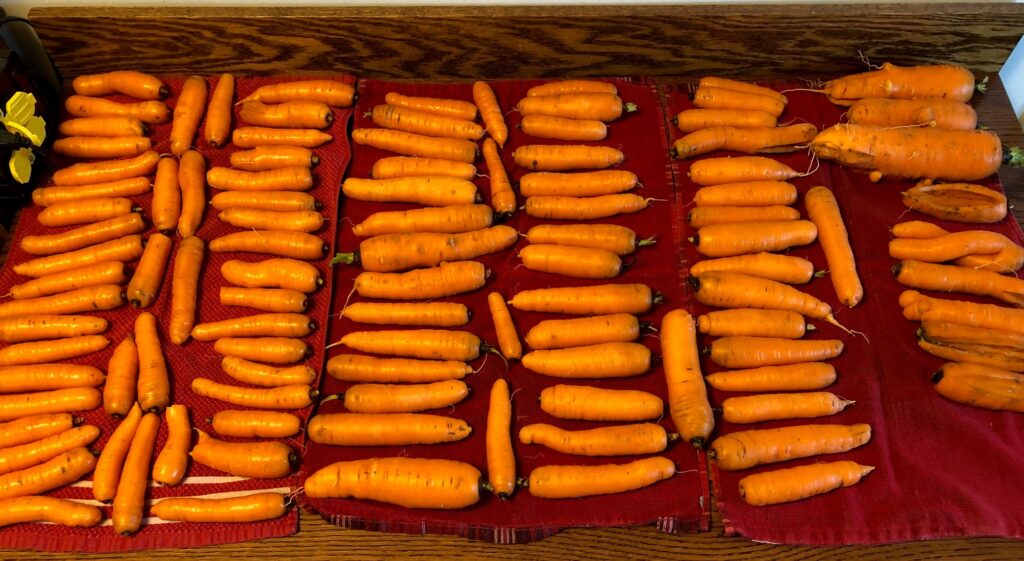
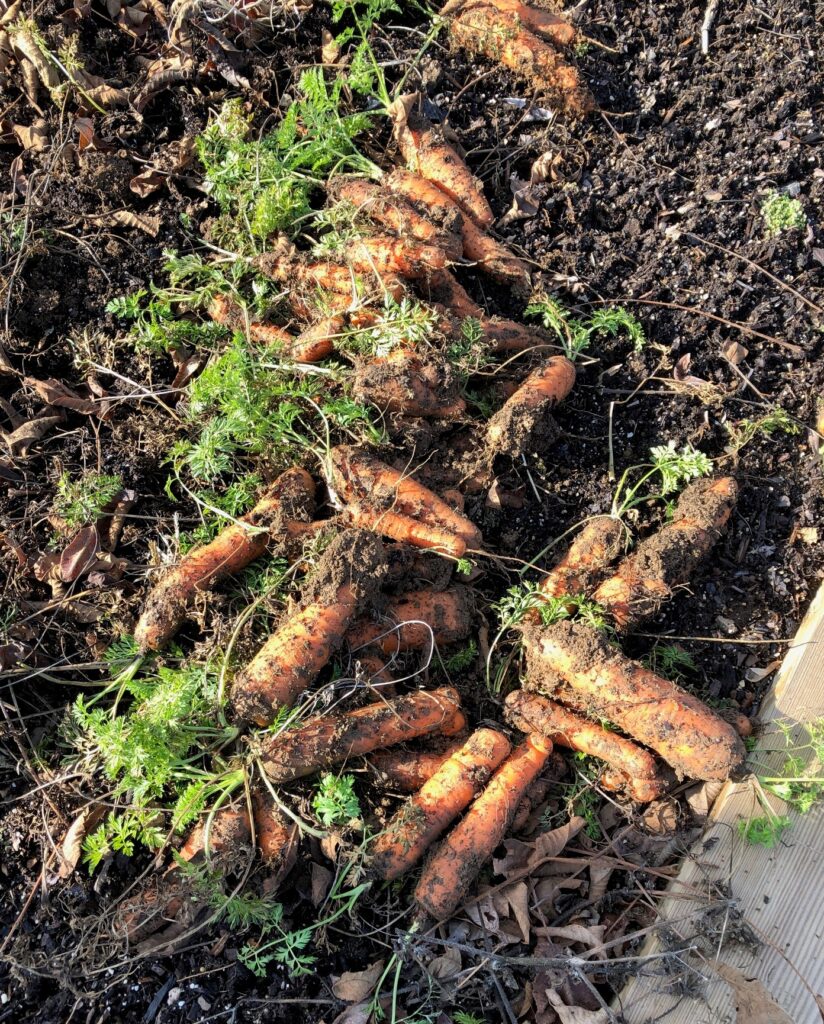
Fresh Carrots
We like our carrots fresh. Since we don’t have a root cellar that would control temperature and moisture for storage, we’ve discovered that we can leave carrots in the ground until late December. Then we clean them up and store them in the refrigerator. That way, we can have fresh carrots most of the year. You can read about our carrot crop at: https://marykisner.com/carrots-the-last-of-the-2022-garden/
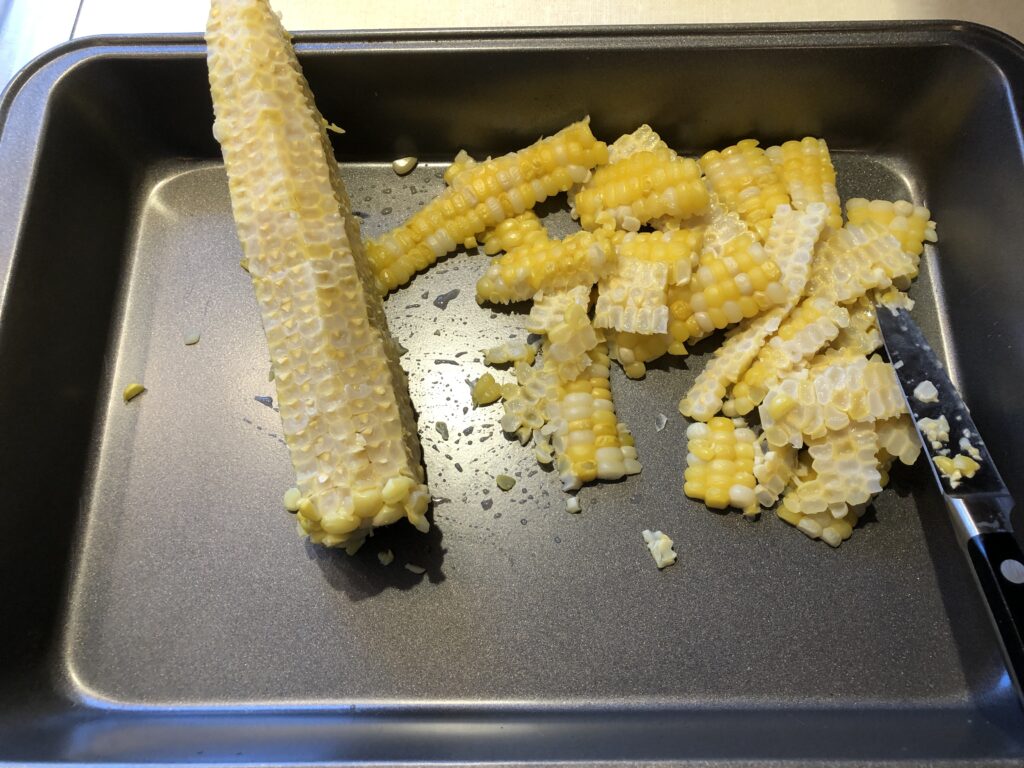
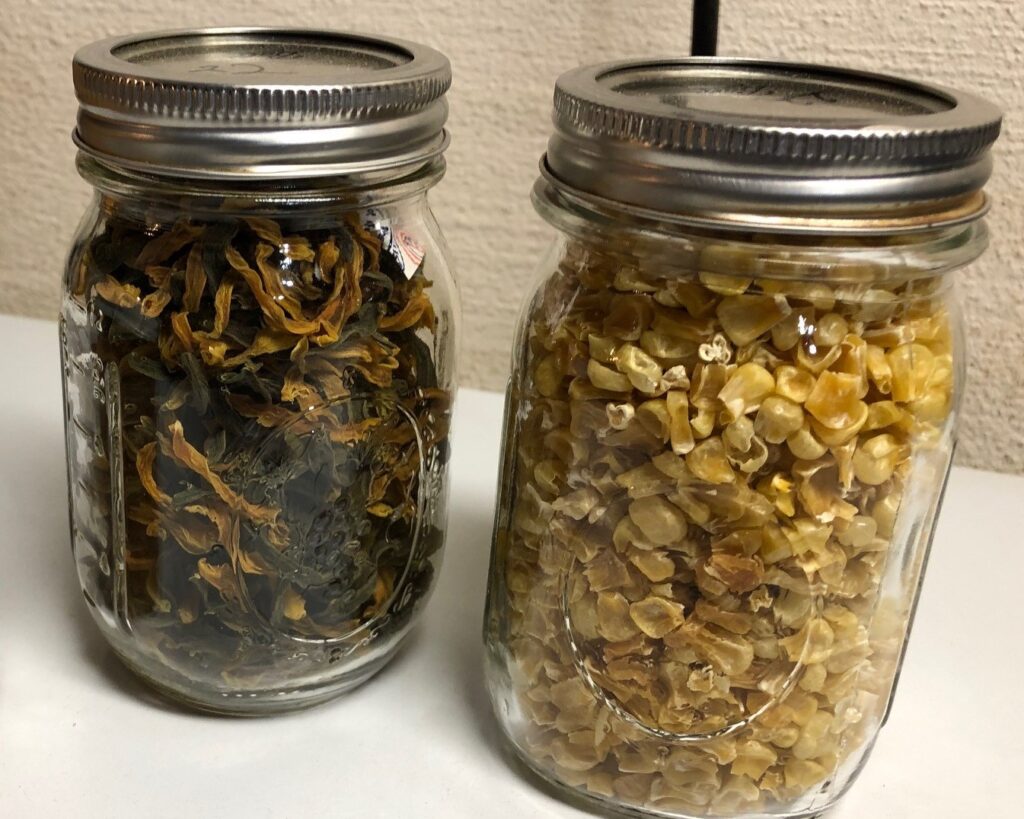
Dehydrated Green Beans and Corn
Throughout the summer I dehydrate small batches of vegetables like green beans and corn. I use them in vegetable soup all year. Snapped beans need to be blanched and chilled and then spread out on the dehydrating trays. It’s amazing how many fit in a jar when they are dehydrated!
Corn is available at the Farmer’s Market around the middle of August. I will buy 1-2 dozen ears, cook it for eating and whatever we don’t eat I’ll cut it off the cob and put it in the dehydrator. After 3-4 times, I have several jars of dried corn ready to throw into vegetable soup.
I’ll try to remember to post about dehydrating vegetables this year!
Corn cut off the cob, ready for the dehydrator.Green and yellow beans; corn cut off the cob and dehydrated.
Chicken Stock
The last thing I want to remember for this summer is to can chicken stock. I use a lot of it and last year I made stock and froze it. Big mistake! It takes up so much room in the freezer. If I wait to make it when all the canning equipment is easily, I think it will be much more practical. I could even make several pots over several days. You can read about making chicken stock at: https://marykisner.com/making-chicken-stock/
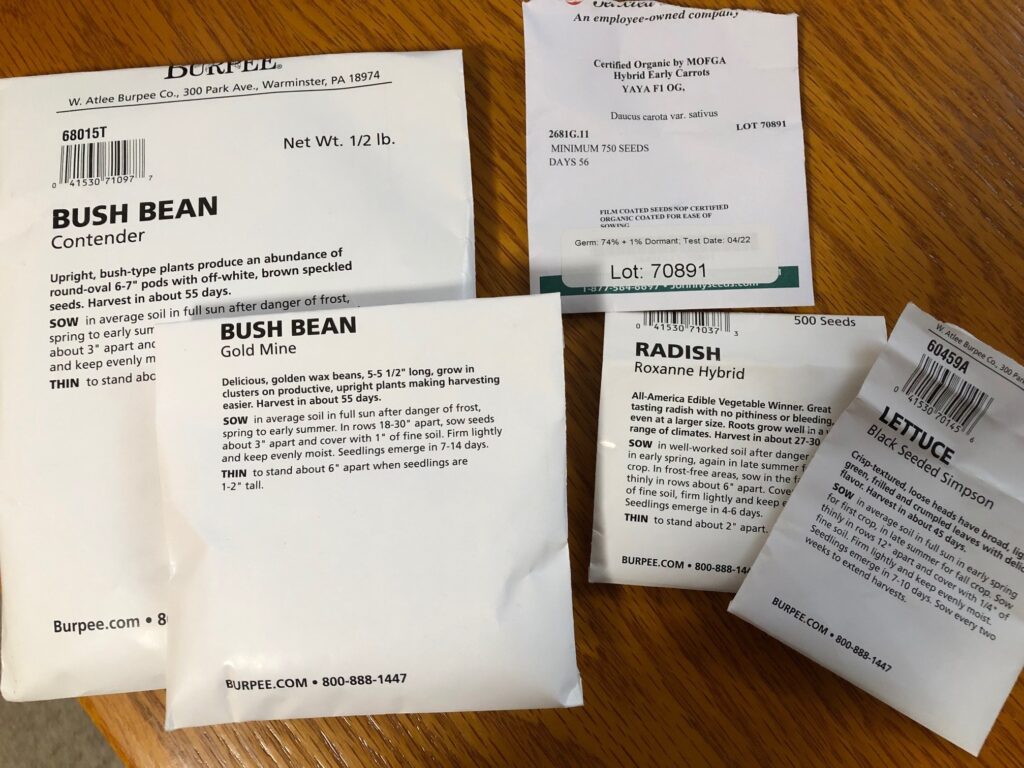
Garden Plan for 2023
Given what grows well here and what we like to eat…NOW we can look over the 2023 Burpee Catalog, see what seeds we ordered last year and order seeds for the coming growing season.
Seeds left from 2022. No tomato seeds were left!
We decided to NOT plant any shell beans or cucumbers, but we may add potatoes and Delicata squash in the spring.
Using last year’s order from Burpee, we know what we need for this year.
Finally, we’ve made decisions about this year’s garden! Seeds have been ordered! A great New Year’s Day activity!! Enjoy!
Planning ahead for family celebrations is always wise. Being able to roll with the punches is also ideal! This year involved unpredictable weather, ongoing health of family members, and of course reliable transportation.
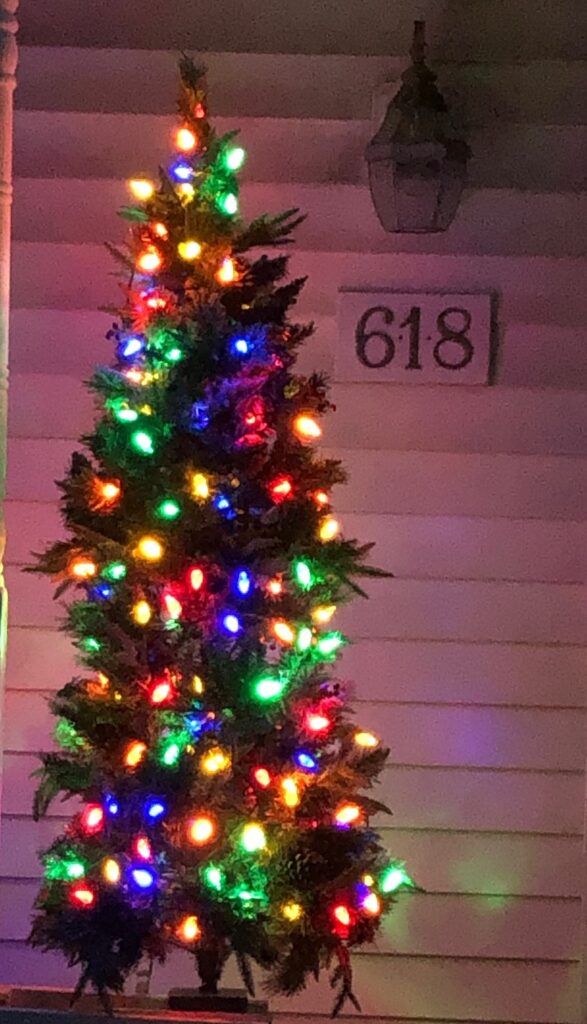
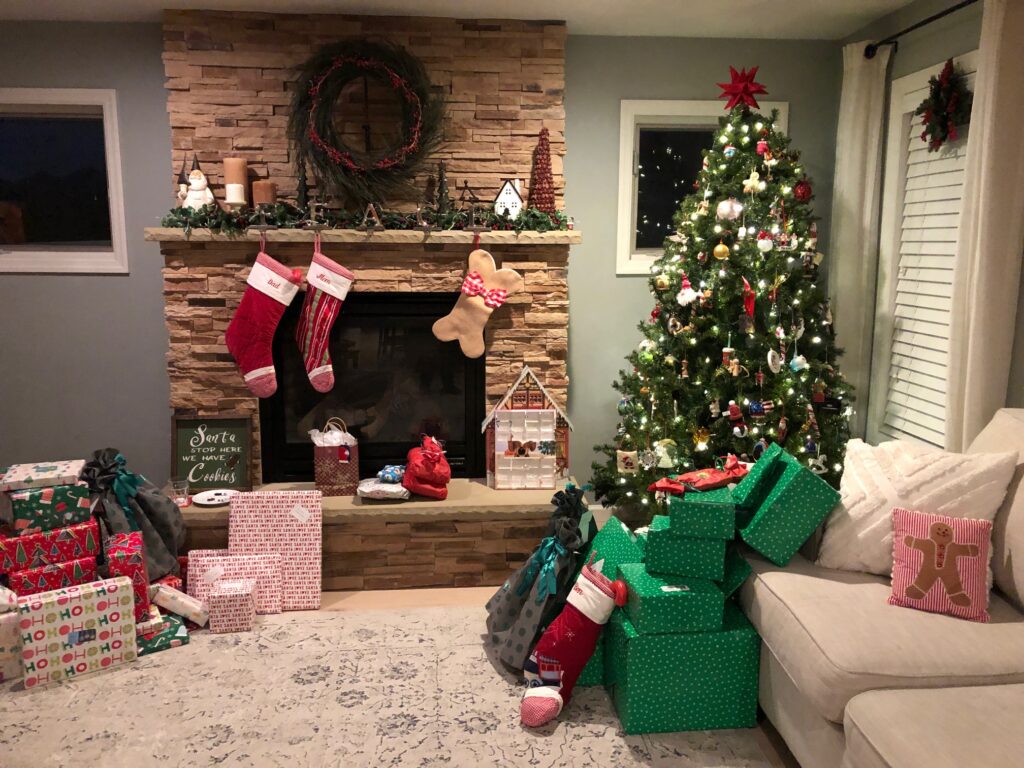
We do not make a big deal of decorating our home at Christmas because we usually drive to our daughter’s home on Christmas Eve and come home on Christmas Day. Just enough time to hug everybody, enjoy opening gifts and share Christmas eggnog.
This year we had the outside lights on one of our dogwood trees and a tree by the front door…perfect all month!
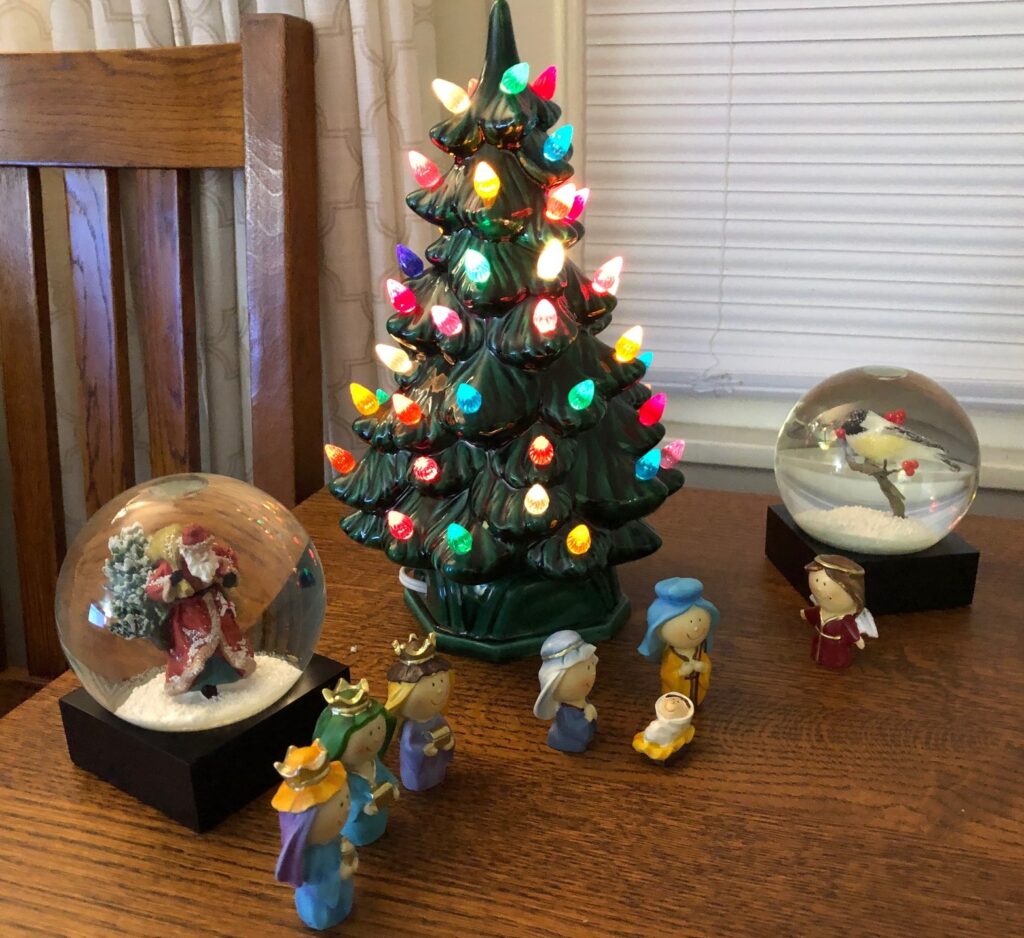
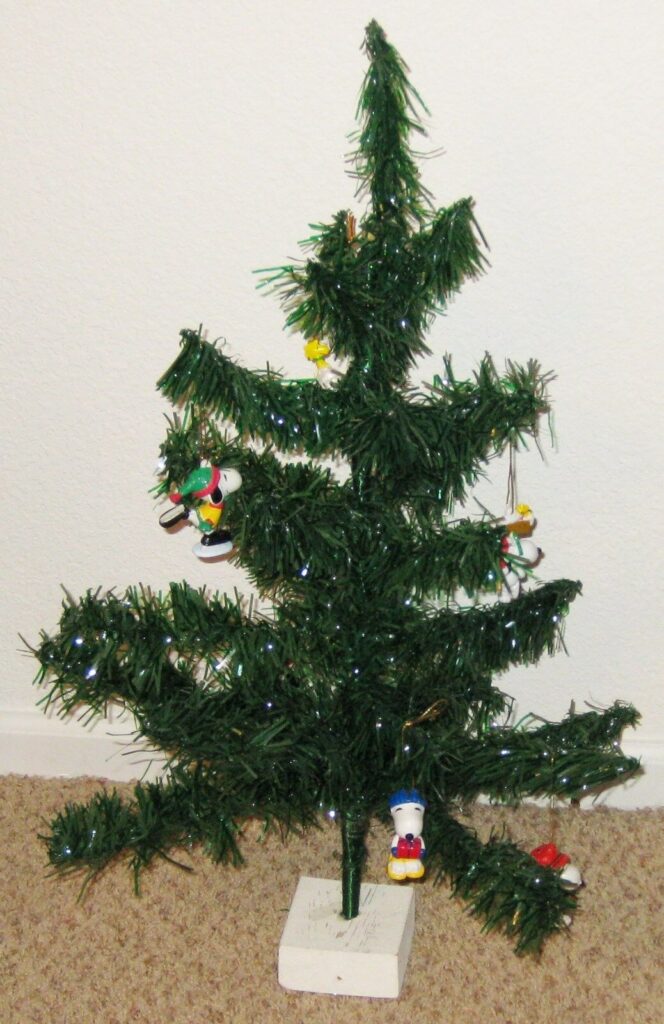
We plugged in a small ceramic tree that belonged to Bert’s mother many years ago. That, along with two special snow globes and a small creche scene was the focus at our house.
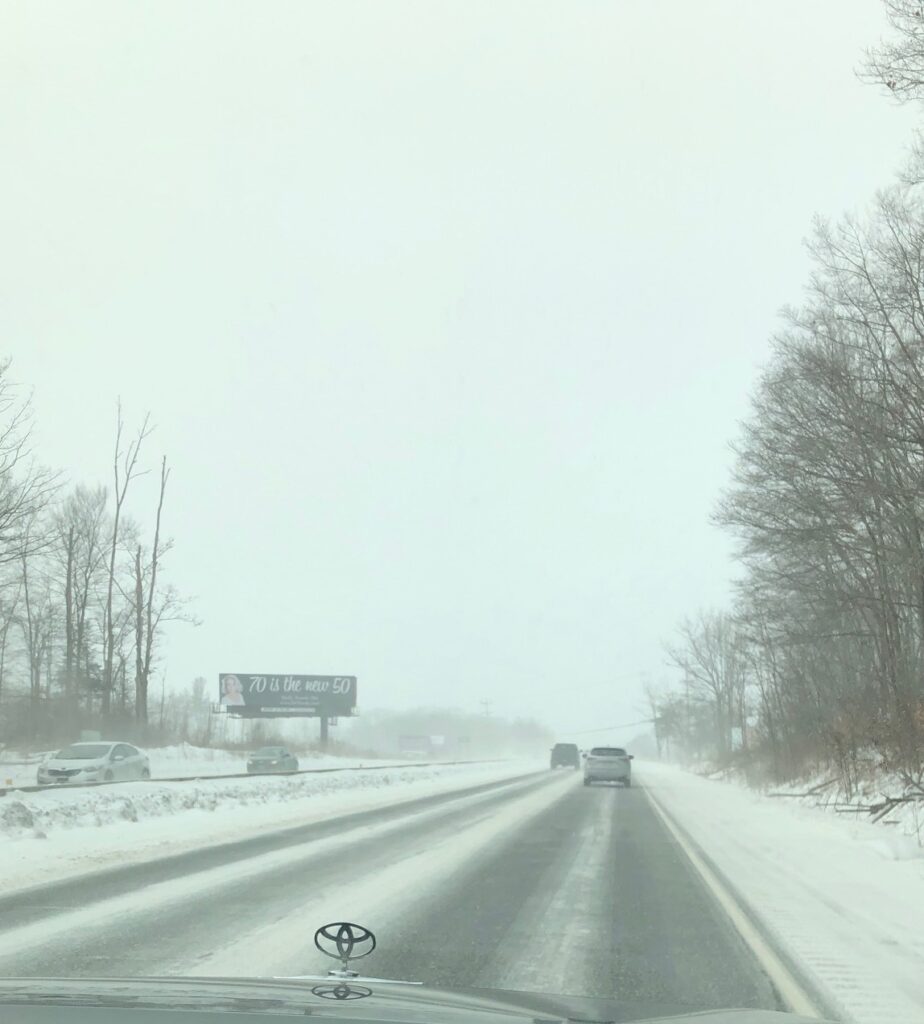
The two days before Christmas Eve, you may remember, was a big snow storm followed by a drastic drop in temperature…at least here in Pennsylvania. We had about 6″ of snow over two days and then the temperature dropped 40 degrees overnight. We did not lose power but Bert was kept busy over two days shoveling and plowing and then putting down anti-skid material before we hopped in the car to make the 2 1/2 hour drive to Kathy’s on Saturday.
Before we left the driveway, we got word that Anna (10) was sick with strep…but not Covid. We agreed to not hug much when we got there and we headed out.
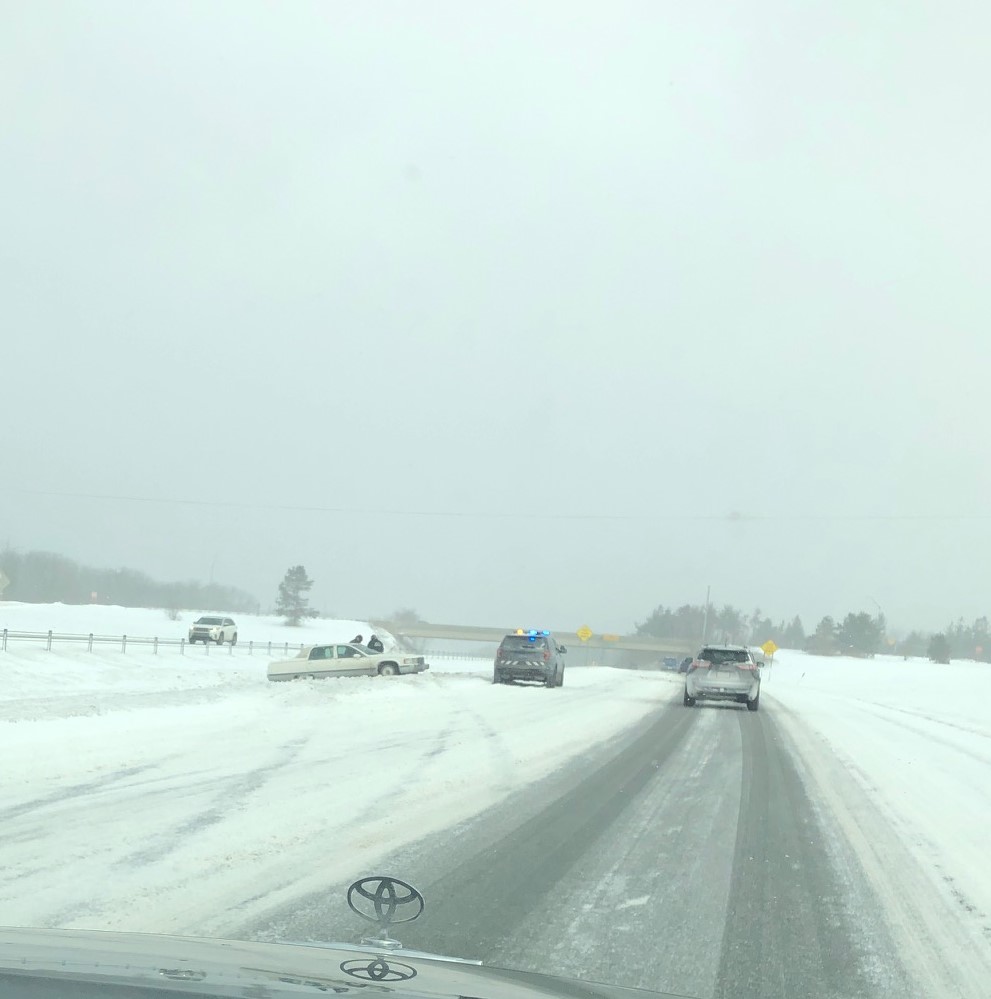
O my goodness! I could not believe the roads! It was a long slog over the mountains where it didn’t look like a snow plow had worked very hard to clear the road. Maybe it was Bert’s white knuckles on the steering wheel that was unsettling!
The wind was blowing snow around and luckily there wasn’t much traffic but it was slow going to get to Kathy’s.
Kathy’s house, as usual, was beautifully decorated for the holiday!
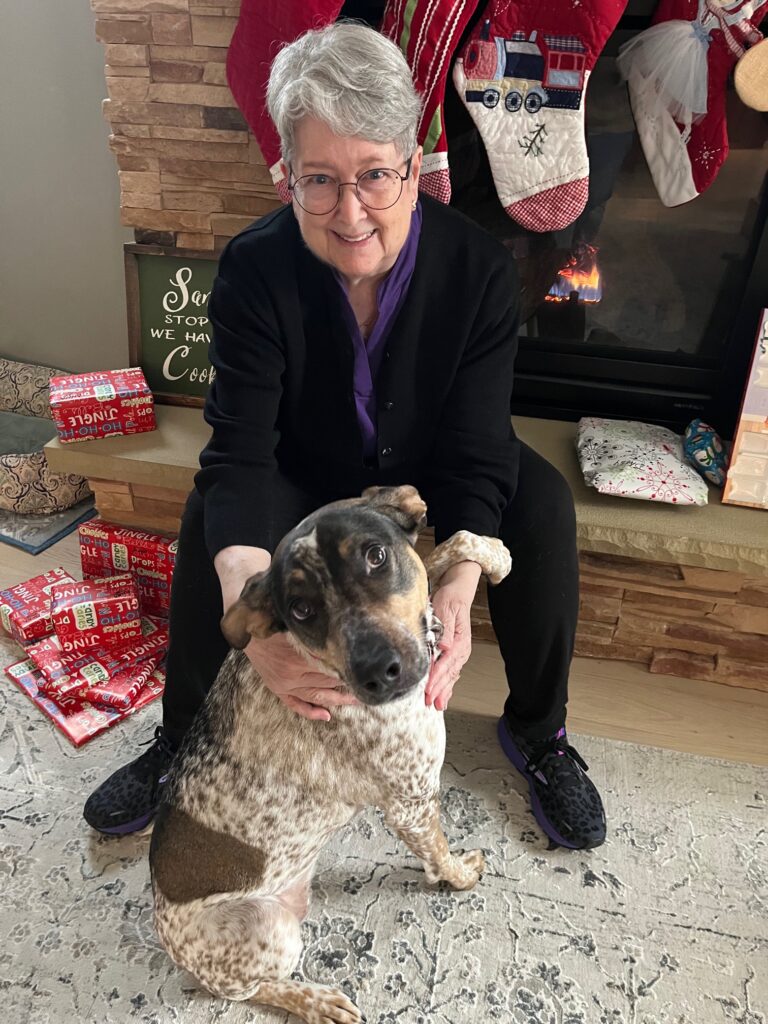
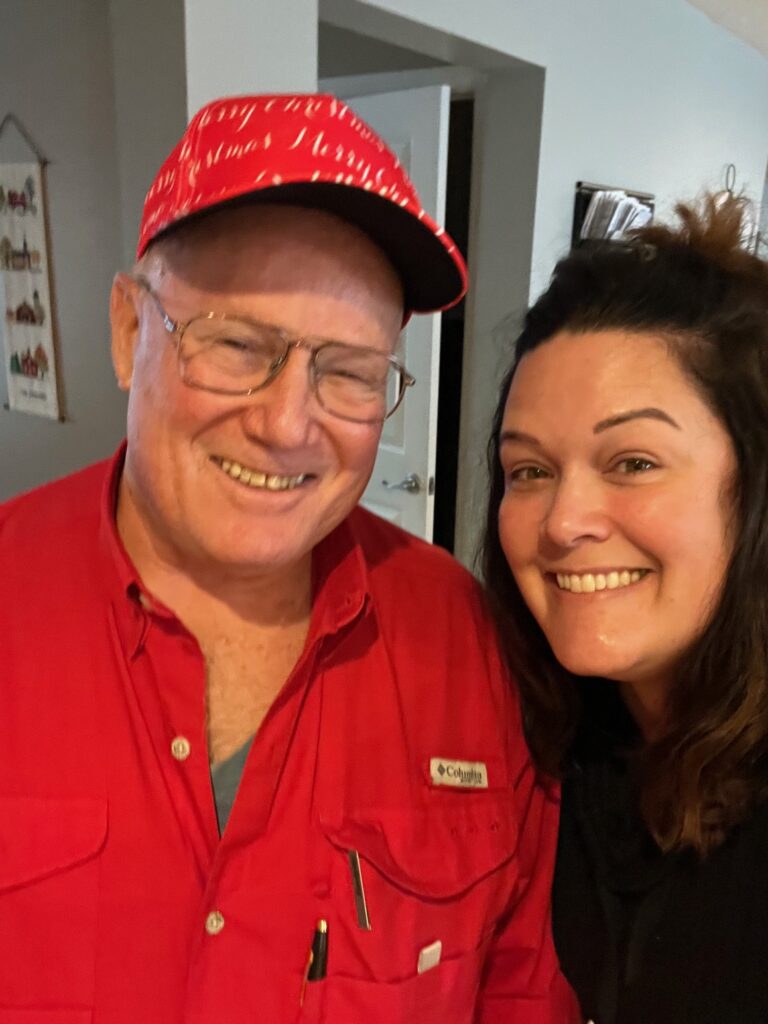
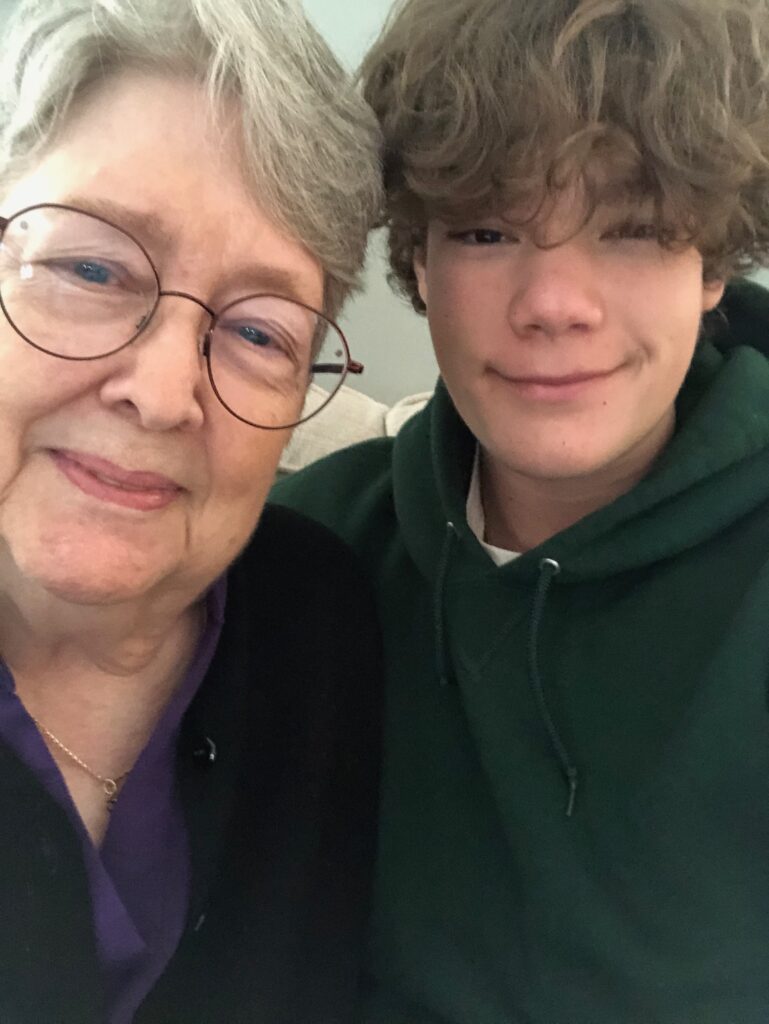
I really wanted pictures of the whole family but it just wasn’t appropriate to cram us all together to get posed pictures…so I managed to get a whole lot of selfies.
Merry Christmas from Daisy!Merry Christmas from Kathy, Me and Steve!Bert and Kathy were all smiles.By Christmas Eve, Ben (15) wasn’t feeling well.Anna was a trooper and had started antibiotics by the time we got there. She felt better on Christmas morning.
You would think by Sunday, Christmas Day, the roads would be much better coming home. In town things were wet and slushy. However, over the mountains…
Coming home we passed several folks off the road that reminded us to go slow. There didn’t seem to be any anti-skid material on the road.When we finally came down into Altoona on Christmas Day, the sky was lightening up and the roads were pretty clear.
I guess Kathy and Steve both were under the weather by Monday. Bert picked up a head cold that has lasted most of this week. So far…I’m fine (fingers crossed)!
So, we had a great holiday visit with the kids and grandkids, but getting there and back was challenging. Of course, this weekend the temperatures will be in the 50’s with rain! Go figure!
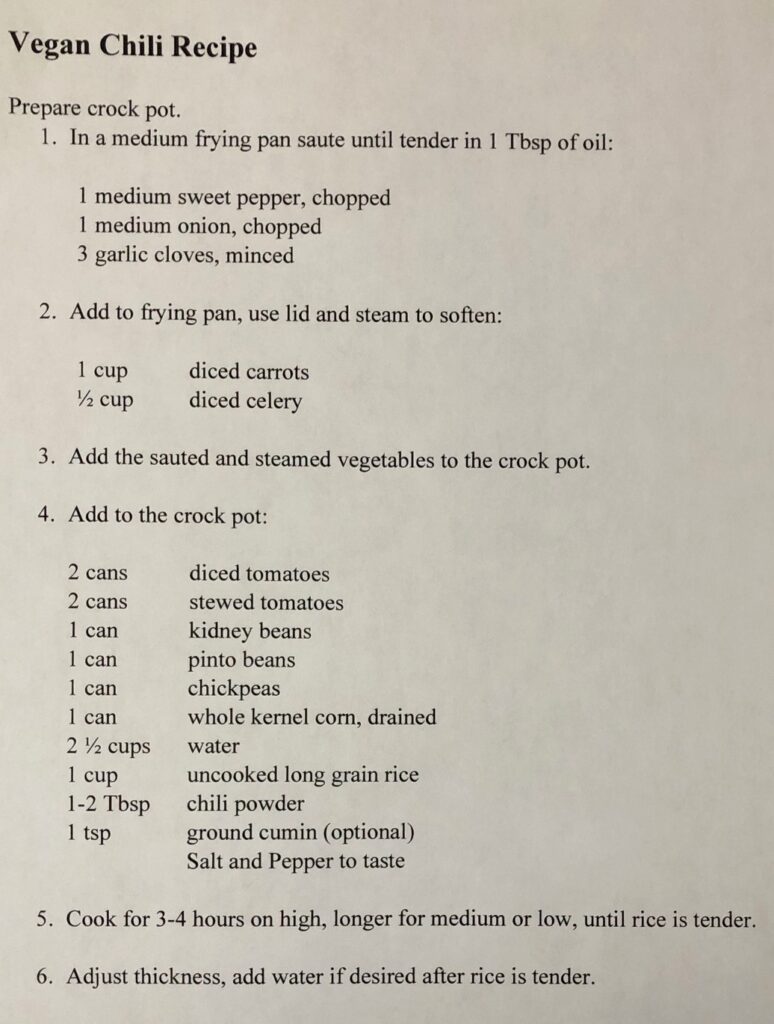
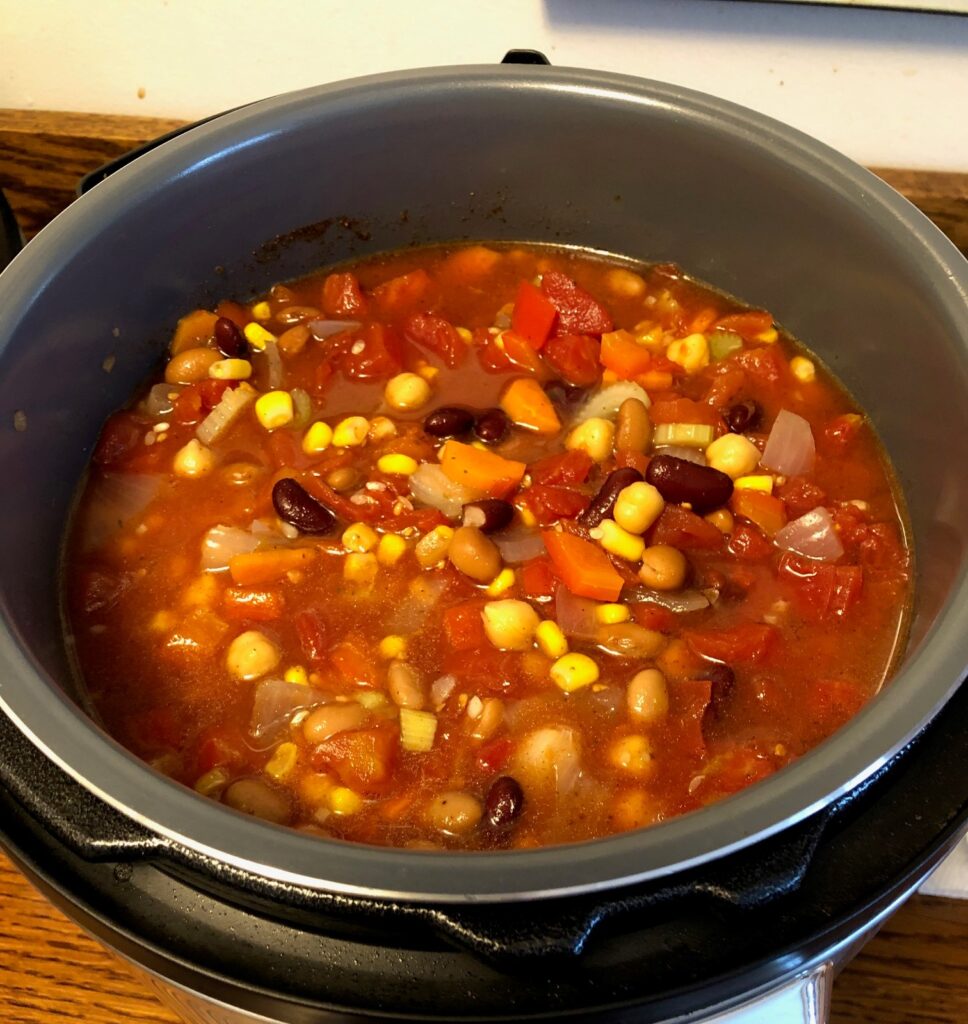
Yesterday, anticipating the snow that arrived today, I made a quick stop at the grocery store…along with many of my neighbors! I wanted to make a pot of vegan chili in the crock pot today and just needed a few ingredients. Here is the recipe:
Not a very complicated recipe and very adaptable to whatever you have available.
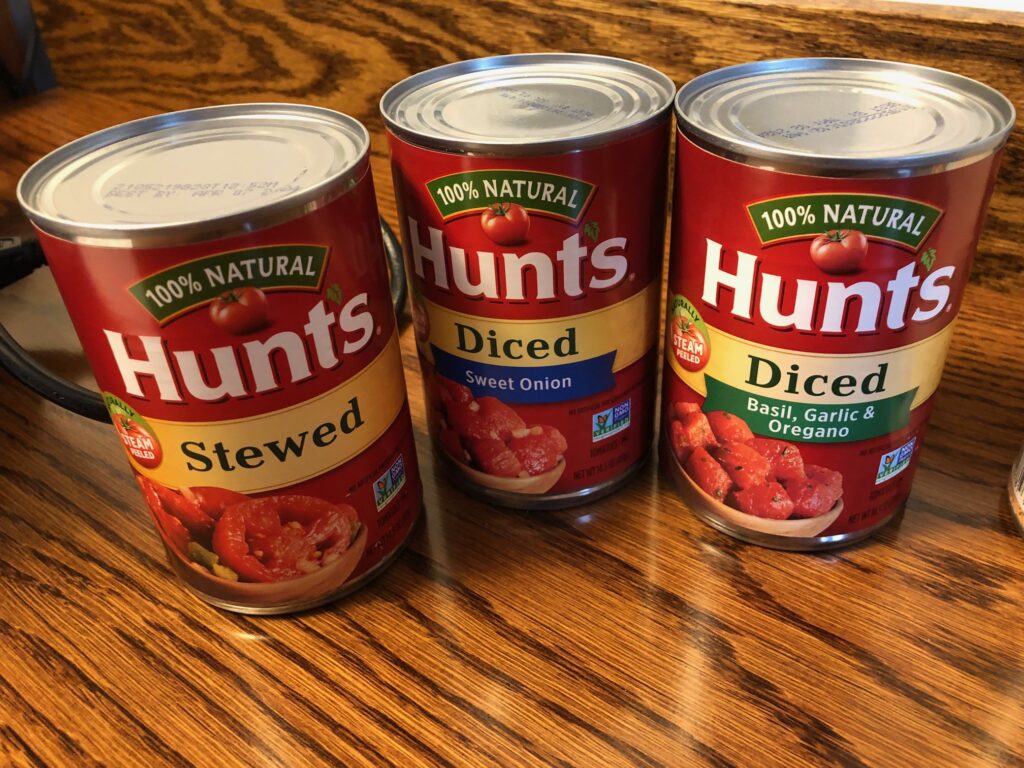
I picked up a red sweet pepper and some freeze-dried garlic. I don’t use a lot of garlic and this little jar is so easy! I had carrots, celery, and onion but I took a look at the canned tomatoes and found some interesting flavors. I started with three cans of tomatoes and ended up adding a fourth can of diced tomatoes just to fill up the crock pot.
After dumping everything in the crock pot, this is what simmered in my kitchen all day. Delicious!! Try it yourself!
My family spent a year in the Philippines when I was 9 years old (1955-1956). When we returned and I went to 5th grade at our neighborhood school I wrote this story about my Christmas in the Philippines (by Mary Bixby).
“Whoever heard of a hot Christmas?” moaned Mary. “Christmas just won’t be Christmas without cold snow and a Christmas tree!”
Mary and her family were spending a year in the Philippines because of her father’s work. Christmas came right in the middle of that year…when everyone, especially Mary, was quite lonesome for home.
They lived a house that was much different from the one at home but was still nice. The weather was the one thing that made home seem so far away. It was so hot that Mary had school only in the morning and had to take a nap in the afternoon. This was very hard for Mary, because she felt that a grown-up 9-year-old shouldn’t have to take naps. But is was so hot that by afternoon she didn’t really mind.
Mary with her sister Jean and her brother Mark
As Christmas came closer Mary was more and more unhappy. She kept on complaining about what a silly Christmas it was going to be. It didn’t help that her older sister and brother had been invited to join other students to spend Christmas on a southern island for a track and field competition. Mary was very sad to watch the inter-island boat leave that day.
Finally, Mary’s father had an idea. Since they couldn’t have cold snow and a live Christmas tree, why couldn’t they make some other family happy by surprising them with a Christmas basket!
Mary had never thought about that since she always had most any toy she wanted. The family they decided to surprise lived just down the hill and there were eight children in the family.
“With that many brothers and sisters I bet I wouldn’t get very many things for Christmas at all,” said Mary, thoughtfully.
“No, you probably wouldn’t,” said her mother, “but maybe we can help those children have a few new things to play with on Christmas morning.
So, Mary and her mother went to the store and picked out some toy trucks, a few dolls, coloring books and crayons, and candy. On the way home Mary had a special feeling inside, that was different from the lonesome feeling she had had before. When they got home, they started wrapping up all the presents. That took quite a while because there were so many little ones.
“When will we take the presents to the family?” Mary asked.
“Why not Christmas Eve after dark,” suggested Mary’s father. “That way they won’t see who you are.”
Mary could hardly wait until Christmas Eve, and the days went by much faster than they ever had before. She was so excited that the rest of her family started feeling the Christmas spirit too.
Finally, the day arrived. Christmas Eve!
“Oh! It’s so hard to wait,” Mary said.
Right after supper, Mary and her mom and dad put all the presents into a big box and as soon as it was dark, they carried the box down the hill. Mary was so excited she would have run all the way, but the box was too heavy for that!
As they got close to the house they didn’t talk and tried to walk very quietly.
“Let’s put it on the front steps,” whispered Mary’s mother.
Mary nodded and carefully put it down on the top step. She thought how nice it was that they didn’t have to worry about snow getting the packages wet. Then she knocked on the door as hard as she could and ran up the hill.
“I hope they heard my knock,” Mary said when they reached the top of the hill. “Oh, I wish I could see their faces when they find it!”
They walked home and went inside. Imagine Mary’s surprise when she saw a little Christmas tree all decorated with presents underneath it. It wasn’t a live tree, but a wire one. But it was green and it did remind Mary of her home. Then she heard carolers outside and the whole family went to the porch to hear their own familiar carols…although none of them were about snow!
When Mary went to bed that night she could hardly go to sleep. She was thinking how happy the children would be in the morning.
Then she thought of the Christmas tree out in the living room and the carolers they had heard. She thought to herself, “I guess Christmas just wouldn’t be Christmas if you can’t make someone else happy, and Christmas can still be Christmas no matter where you are.”
And she fell asleep a very tired but happy little girl.
Almost THE END...
Epilogue:
The next Christmas, Mary’s teacher in the Philippines sent a letter to Mary’s family in Pennsylvania. Some of the children from the surprised family were in her class that year. She had asked the children to write about their most memorable Christmas. Those children described the Christmas where someone knocked on their door on Christmas Eve and when they opened the door a huge box of presents was on their doorstep. The whole family had the best Christmas EVER!!
THE END!
ps: I have posted three other stories about my memories from that year. You can see them here:
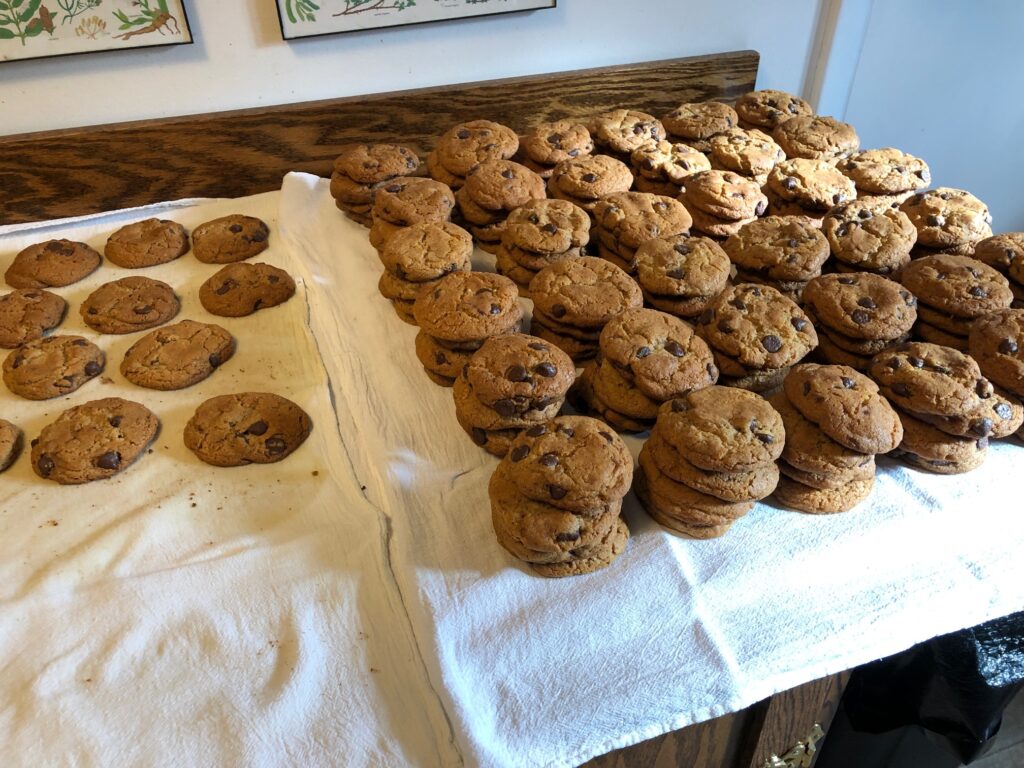
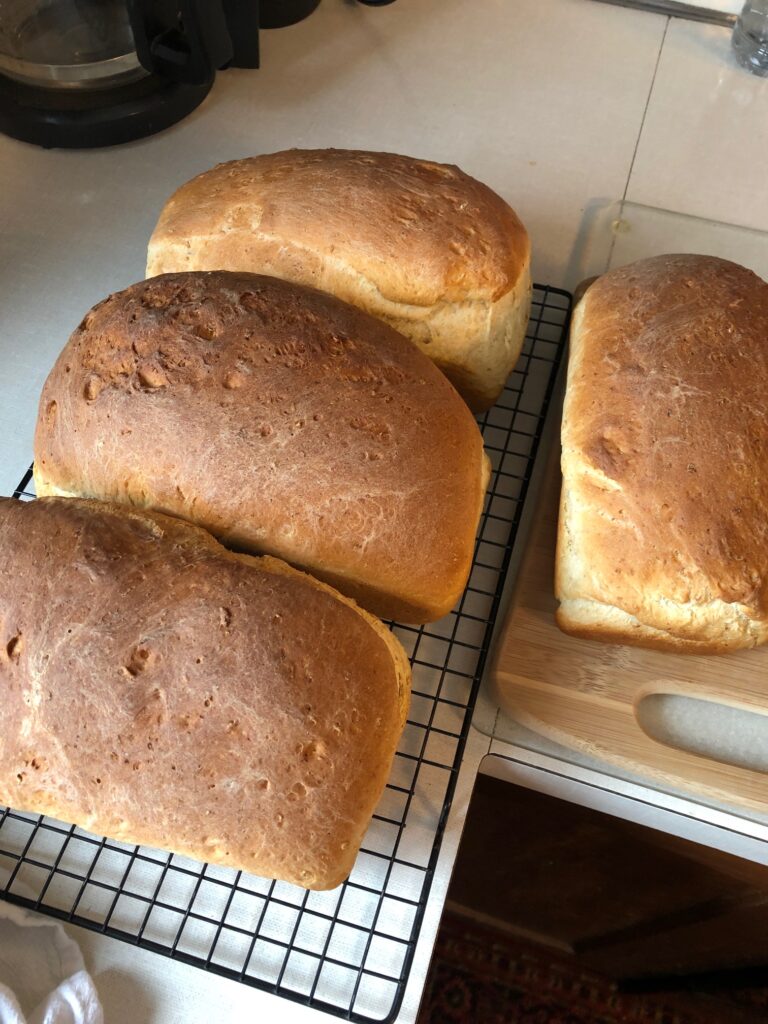
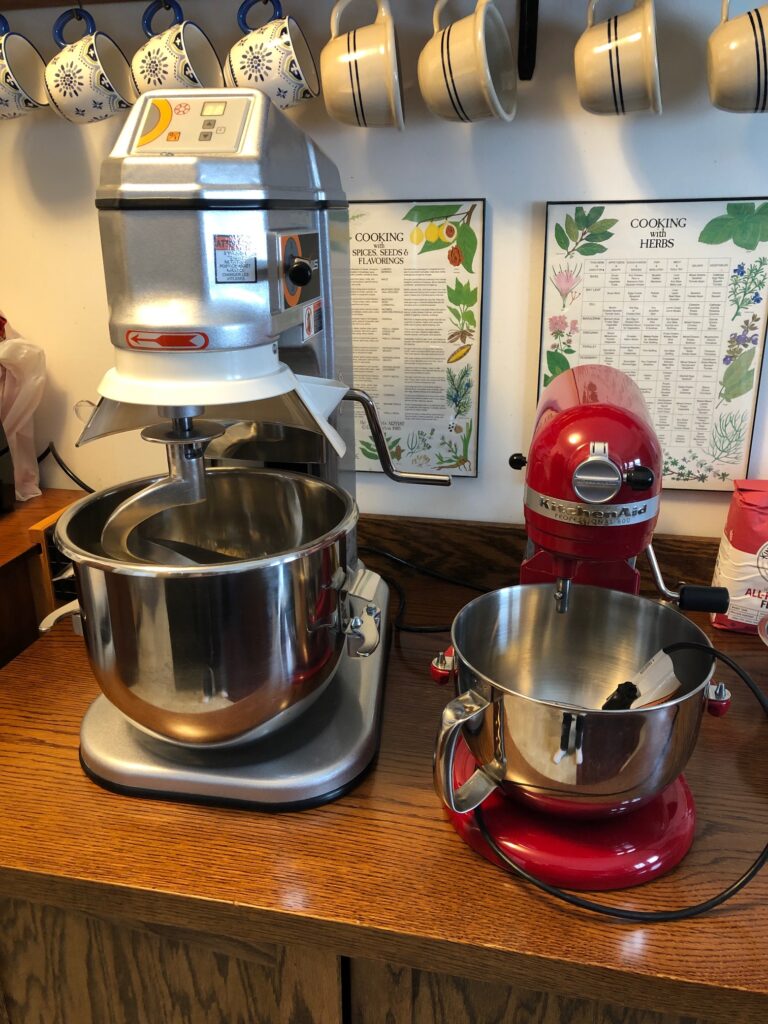
Right at the moment, my whole house smells great! Bert is cranking out the chocolate chip cookies and between mixing and baking I was able to use the big mixer to make my oatmeal bread.
Bert’s Chocolate Chip CookiesMary’s Oatmeal BreadThis is the big mixer compared to my KitchenAid mixer.
So for a few days, I’m also not able to do anything in the kitchen…no other meals, no skin care products, no cooking…just heating things up in the toaster and microwave! Of course, I haven’t bothered to take new pictures since I’ve documented both the cookies and the bread in other posts. Sooooo…let me give you those links here:
The main thing I can tell you is that the cost of making 170 pounds of dough into cookies has almost doubled. That doesn’t even count Bert having to figure out the change in ingredients when the cake flour boxes are no longer 2 pounds but 1 pound 10 oz. He’ll have to change the recipe to reflect that. At least this year he was able to find the ingredients he needed. Who knows what will happen next year!
Check out those links above for details about the cookies and bread! I’ll be at the other end of the house trying to not sneak into the kitchen to snag a cookie!
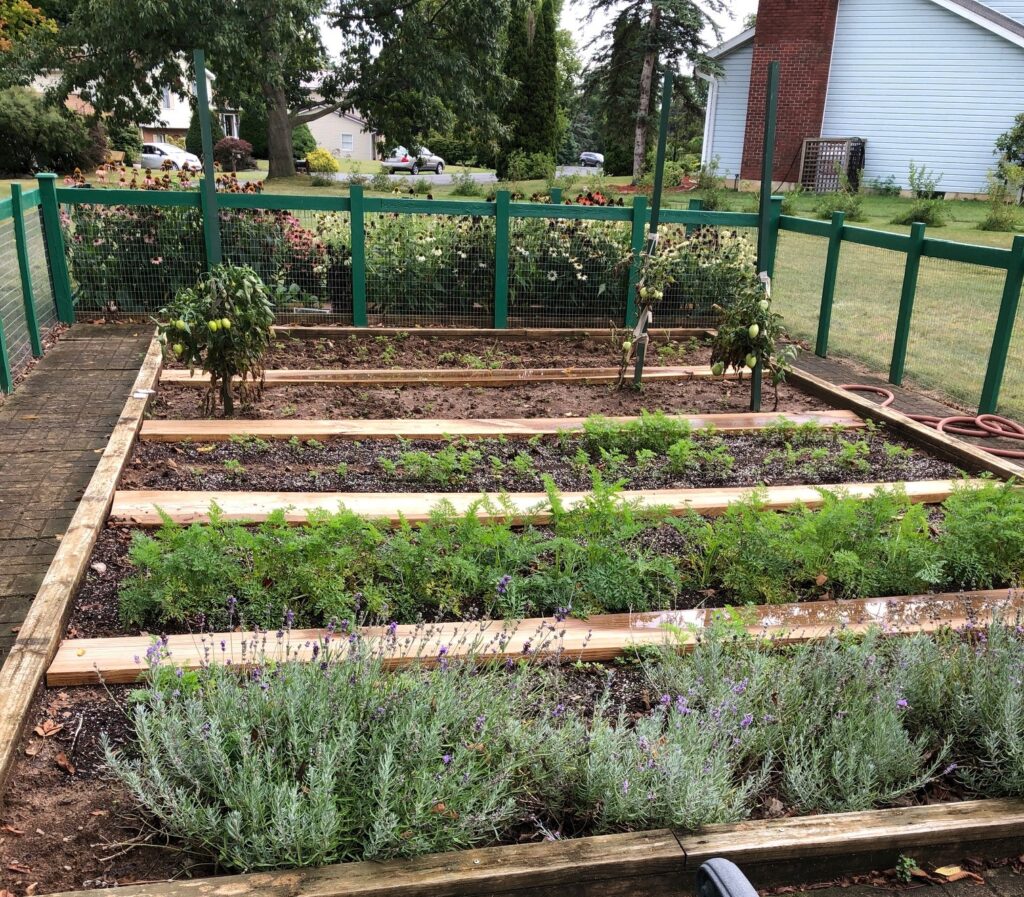
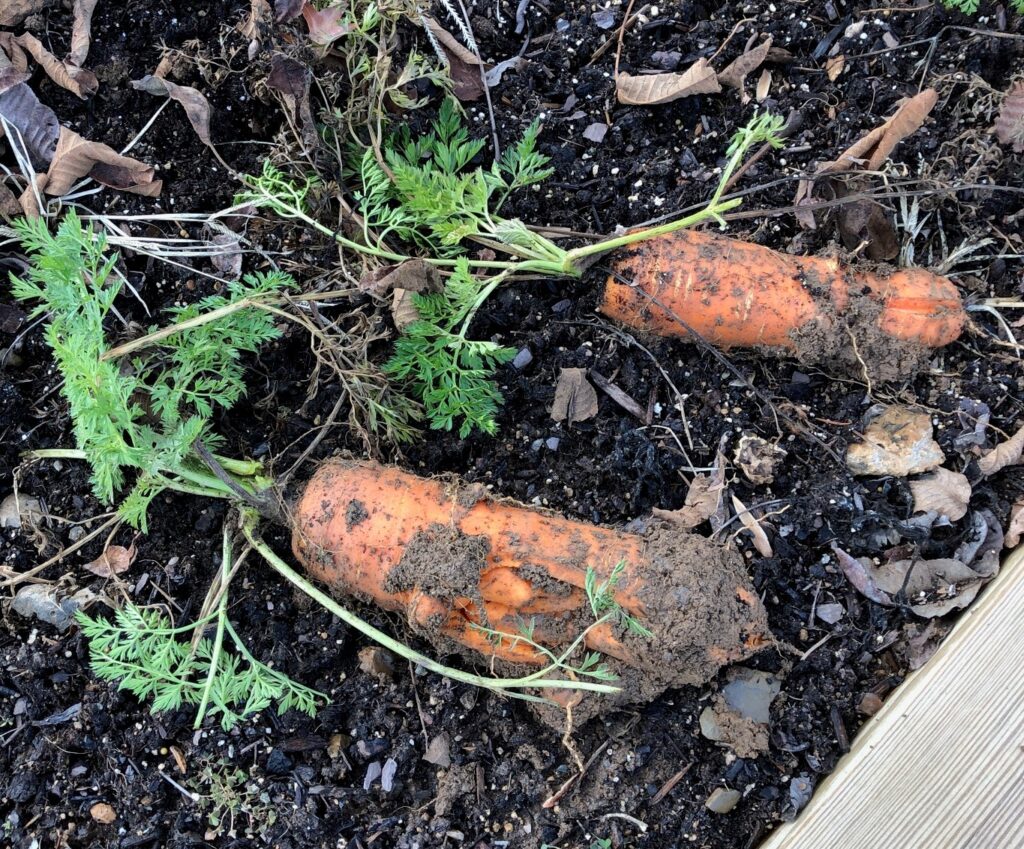
When I last posted about the garden, in late August I think, the only vegetable that was still in the ground was carrots. Our plan was to leave them in the ground as long as we could and around Christmas we’d dig up what was left. In the past, we dug them up in early September, cleaned them up and stored them in the refrigerator in the basement. They took up a lot of room and did not keep well. Last year and this year we figured they’d do just as well right in the ground.
This is what the garden looked like in early September:
The first row from the bottom is the lavender. The carrots are in the second and third rows. That third row looks pretty sparse because we planted so late but we wanted to wait to see what would actually grow in the fall.
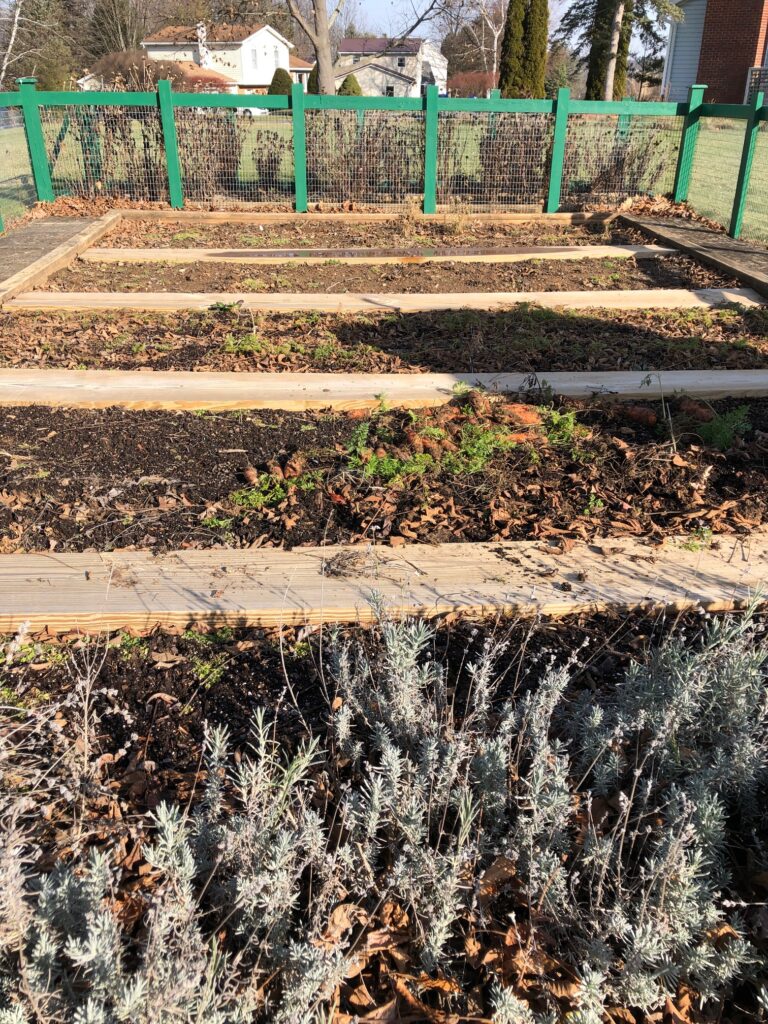
This is the garden now:
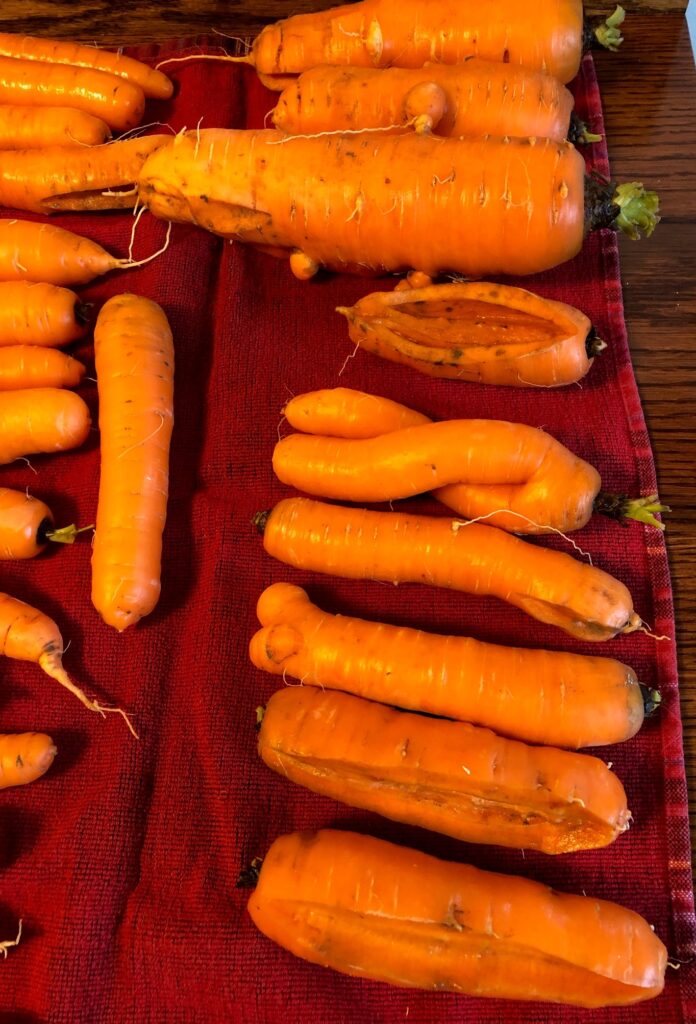
The lavender is resting and should come back next year. Bert has started to dig up the second row of carrots.Here is a close up of the pile of carrots.A few were really huge!Bert hosed them off and needed a scrub brush to get some of the mud off. The very tiny carrots got separated out for a friend’s pet rabbits.The rest of the carrots were laid out to dry on the kitchen table for a few hours.This row of carrots were extra large but were not perfect. I’ll clean them up and they’ll be just right for Daisy (see previous post https://marykisner.com/carrots-for-daisy/ )
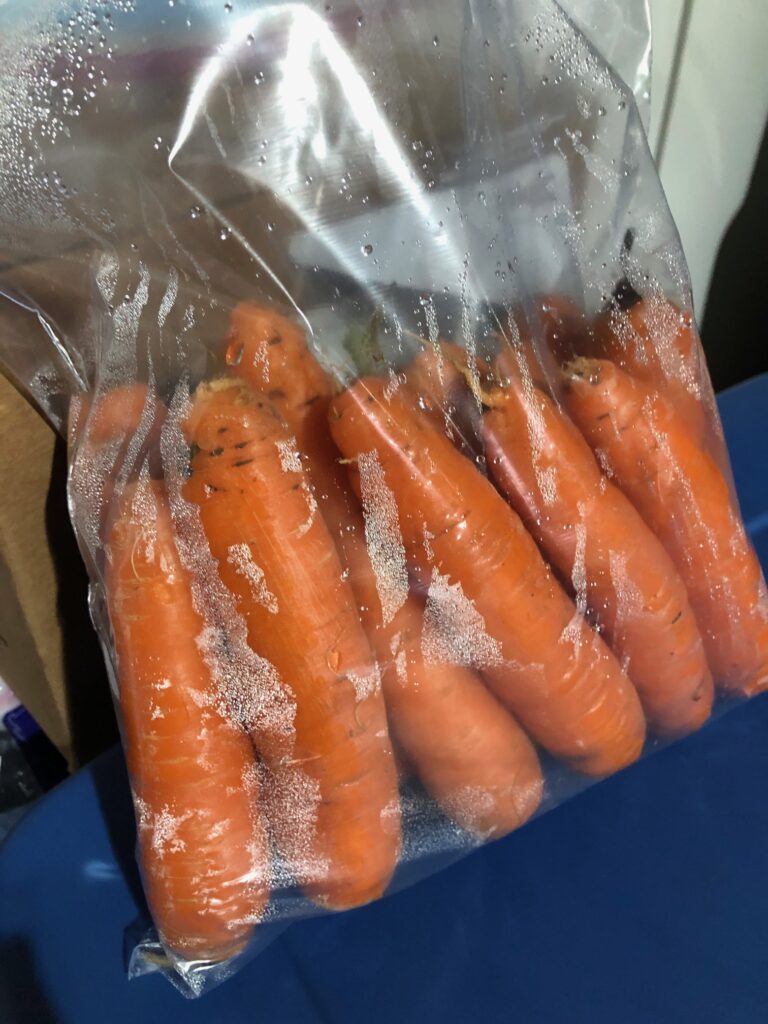
When they were finally dry and not so cold I packaged them up into Ziplock bags, standing upright. Then I put them down into paper bags from Trader Joe’s) and set them in the garage.
Overnight they still had lots of moisture in the bags so I opened them all up. They will keep better if they are dry.It will be easy to grab a few for dinner or a snack!
It’s too bad houses today don’t have root cellars, where the conditions are perfect for storing vegetables over the winter! Enjoy!
As a member of the “baby boom” generation, I will admit to growing up in a time of “plenty.” My parents were raised, married and had children during the depression and war years from 1912 through 1946. Their values and habits of “use it up, wear it out, make it do or do without” influenced how they handled their goods and money. My mother could make a meal out of the smallest pile of leftovers and as children we never noticed or felt deprived. It wasn’t until she passed away and I had to clean out her cupboards and closets that I realized how thrifty she was. I found things like extra thread and saved buttons; scraps of fabric ready to patch knee rips; recipes that started with leftovers; piles of delicate hankies, neatly pressed and folded; rags from used sheets and clothing ready to grab to clean up a spill. There was no stash of paper towels or Kleenex in her cupboards.
By the time I married and had children, those values of thrift had been overwhelmed by advertisements for consumables…don’t fix things, throw them out and buy this new model. Over the years, throwing things away became necessary…things were often made of materials that could not be fixed like plastic instead of wood or metal. Luckily, I married a man who can fix almost anything. His shop full of parts and tools along with his knowledge about how to use them has saved us from throwing things away that just needed an easy fix. While I realize my stash of supplies and tools solve other problems that deal with fabric and clothing, my habits have changed so I’m more dependent on consumables like paper towels and Kleenex. It wasn’t until the supply chain shortages of some items that I realized my behavior has strayed from the values of my parents. This was especially obvious in my use of paper towels. I use a LOT of paper towels in my day-to-day activities…when cooking, cleaning up the counters, preparing food, etc.
Needless to say, when shortages of paper towels appeared I panicked. My impulse was to stock up like crazy…so I’d never run out! The longer the shortages continued, the more I felt that I needed to change my behavior. Obviously, lots of folks manage to keep a neat and tidy kitchen without paper towels!
First Attempt
I was enticed by some ads on Facebook for various substitutes for paper towels made from recycled plastic water bottles (www.geometry.house). They looked pretty and they were washable. Why not?
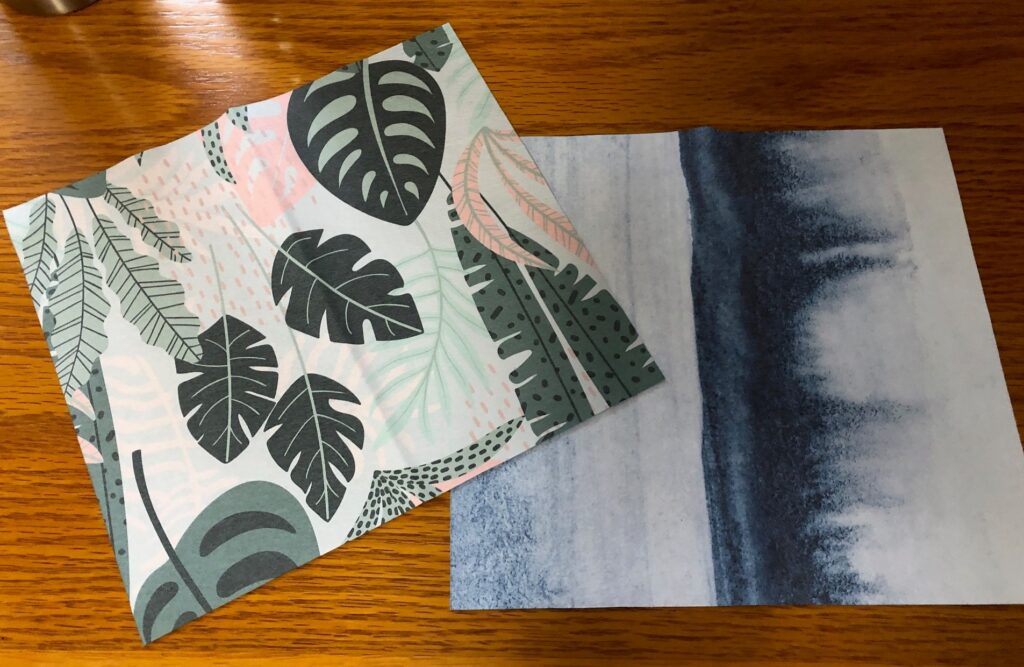
These sheets were about 8″ x 9″
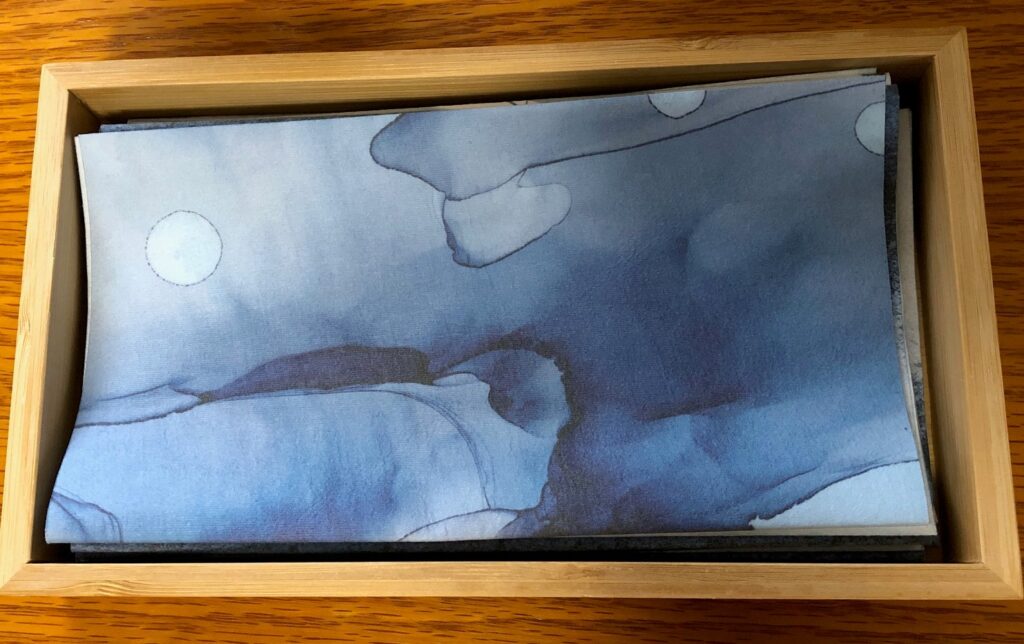
So, I ordered two sets of 12 and the wooden tray to store them in on the counter. The way I use paper towels it had to save money, right? When they arrived, I first put them in the wash. It was like washing pieces of plastic bag…they stuck together! I gently pulled them apart and put them in the dryer on low. Once dry I could fold them in half and stack them up in the wooden tray.
Now came the test. My counters were wet from placing rinsed dishes on the counter while I loaded them into the dishwasher. These cloths would not absorb anything, they just smeared the water around. I rinsed one out and hung it to dry. It took 24 hours to dry. So that experiment was a bust! What a waste of money. I’ll have to see if I can use them for an art project or something.
Second Attempt
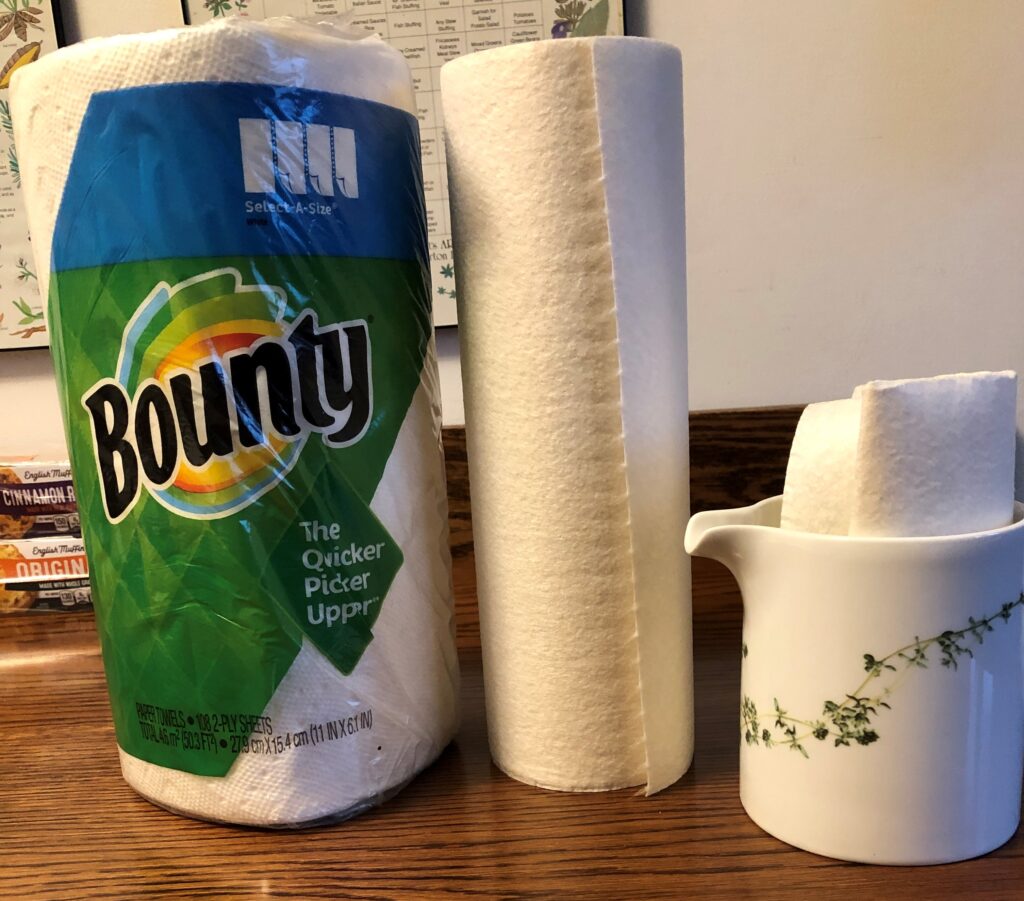
I had forgotten that I went through a phase 10-12 years ago of trying to do better about using paper towels. I found in the back of my cupboard a roll of “washable bamboo towels.” The company, www.bambooee.com, sold these rolls of towels, called The Un Paper Towel to save trees. They are made of woven bamboo fibers and are reusable, machine washable and bleachable. Each sheet is about 11″ square and rips off like a paper towel. It is basically a rayon fabric made from bamboo. This company is still in business too so check them out!
Here is the wrapper that was around the roll of Bambooee towels.
So, I pulled out the roll, tore off a sheet and gave it a try. The first swipe to clean up the water on my counter convinced me! It cleaned right up! Of course, next came the dilemma of how to let it dry. I didn’t want to drape it over the spigot or the handles that open the windows. Luckily, several years ago Bert made me a little drying rack in the kitchen that folded open to let things dry. It has been folded up for a while but it worked great to let the cloth dry.
Here the drying rack is closed and held by magnets to stay closed.Here is the rack open, supported with chains to keep it at the right angle.
I finally rinsed out the un-paper towel and hung it to dry. A few hours later it was completely dry. After a day or two wiping up water on the counters, I’ll throw it in the wash! Yea!
Now comes the test…can I change my behavior and grab the reusable bamboo cloth? It would be so great to not worry about shortages of paper towels.
So here is a comparison…a roll of paper towels, a roll of Bambooee towels and a clean Bambooee towel ready to grab for the next time.
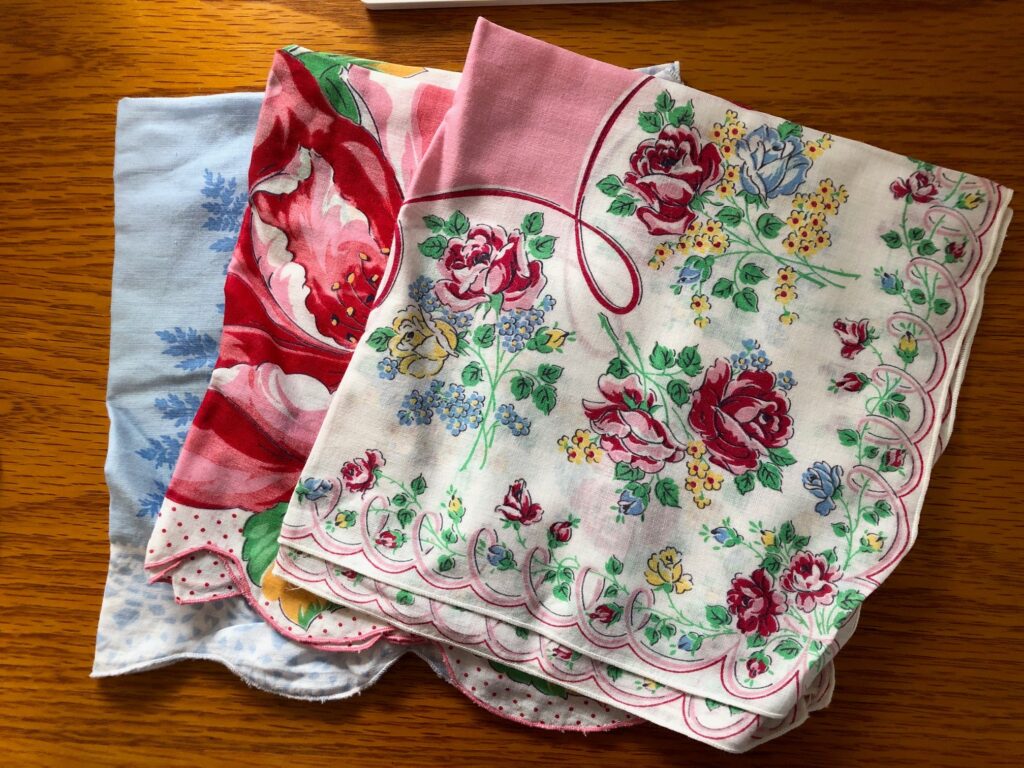
I’m not sure I’m ready to replace my Kleenex with cloth hankies but if shortages happen, I know I have a stack of pretty hankies ready to go! Thanks, Mom!
There are some events that we remember that aren’t written down or honored with a Hallmark card. We really don’t talk about our first date much, but we’ll always remember it. I can’t let today go by without thinking back about how momentous our first date was…of course it was special to us, but those of us of a certain age will remember November 22, 1963…the day President John Kennedy was assassinated…forever. We all know where we were when we heard the news, much like young folks today know where they were when they heard the news about the 9/11 disasters.
This year was our 55th wedding anniversary, but we’ll never forget 59 years ago when we had our first date.
President John Kennedy rides in a motorcade from the Dallas airport into the city with his wife Jacqueline and Texas Governor John Connally.We’re reminded that our 15 yr. old grandson doesn’t even remember 9/11! I’ll be interested to follow his memories into the future to see what speaks to him!
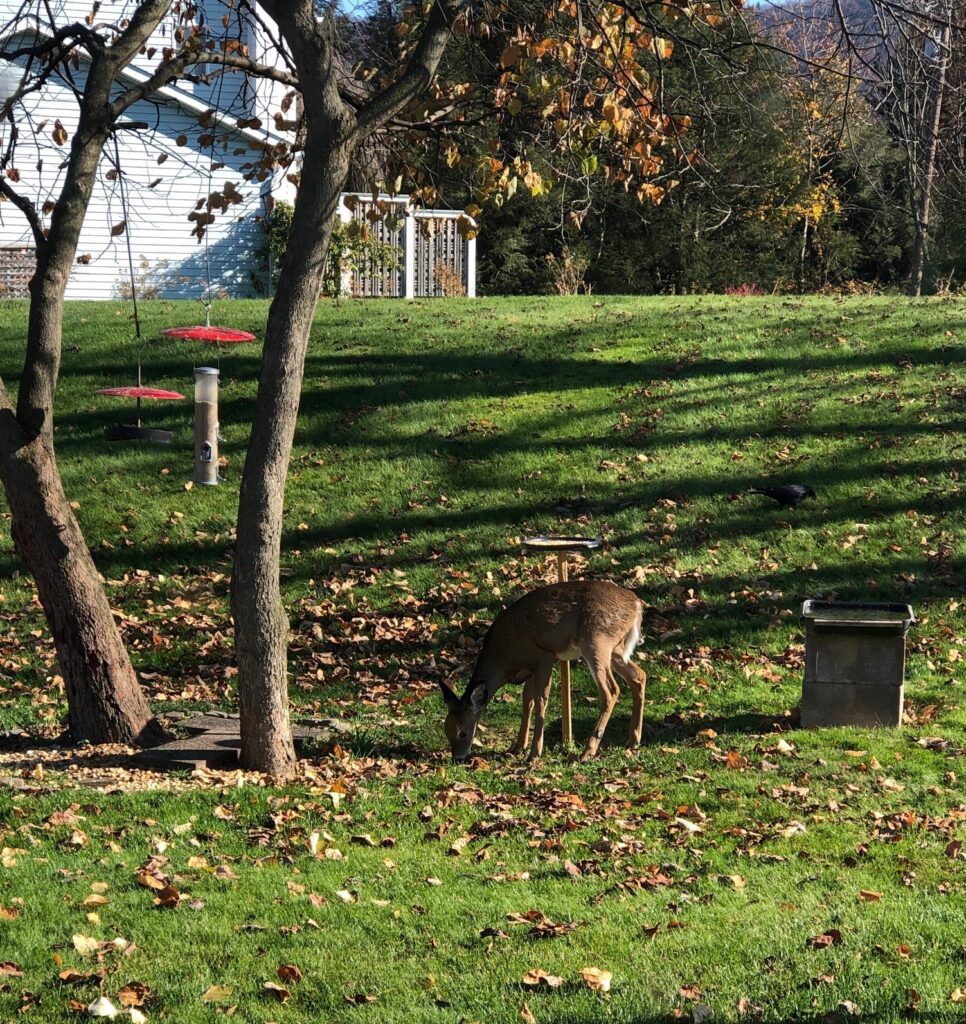
It’s hard to let Mother Nature be in charge with our wild animal friends. While we sure enjoyed watching our little deer friend over the last several months we wondered if he/she would make it through the winter. It was very small (about 35 pounds) and had an unsteady gait. It was always alone at the bird feeder and would spend an hour or more during the day just standing there, looking around, munching on spilled seed on the ground.
Bert had recently put out seed on a post that was just the right height for our little friend to just swipe its tongue across the seed.
Unfortunately, a few days ago Bert found it out on the busy road by our house. It looked like it had been bumped by a car but there were no damaged car pieces around. It was certainly dead. I wonder if someone even knew they had hit it. Bert dragged it off the road to rest among the trees on the far side of the road.
I can’t believe we’ve watched this deer for several months and just last week I thought to take these three pictures. So, thanks for the memories, deer friend. Rest in Peace!