Just a quick overview of how things are growing around here! We’re being cautiously optimistic because we could still have a killing frost. Luckily, Bert can move the tomatoes and hanging baskets inside if that’s expected!
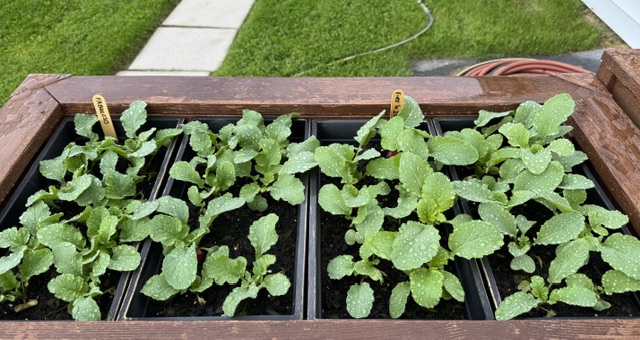
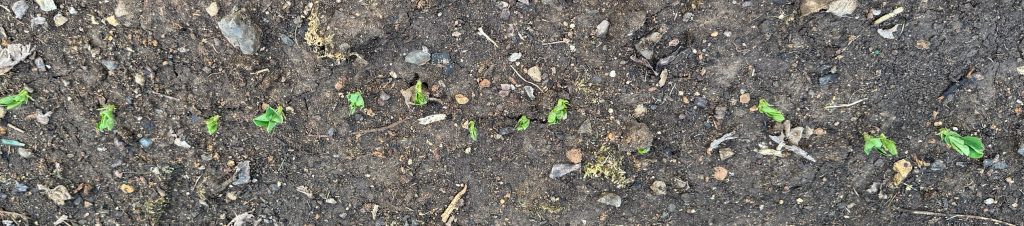
The Radishes are looking good!
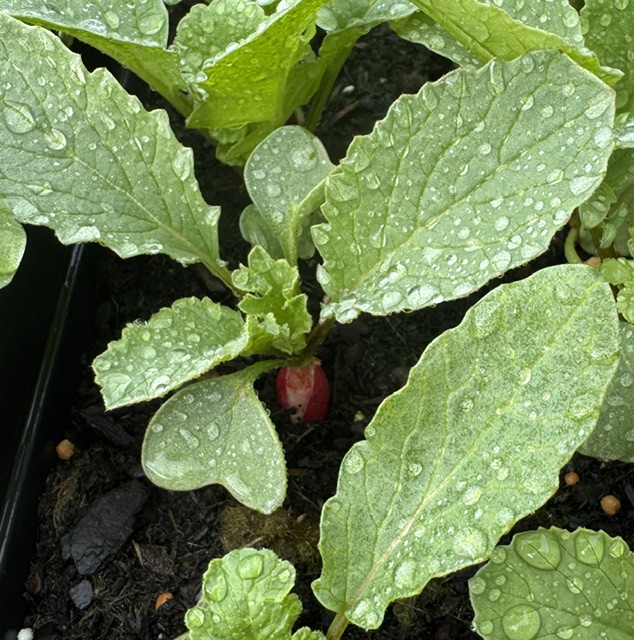
Can you see the red radish peeking out?
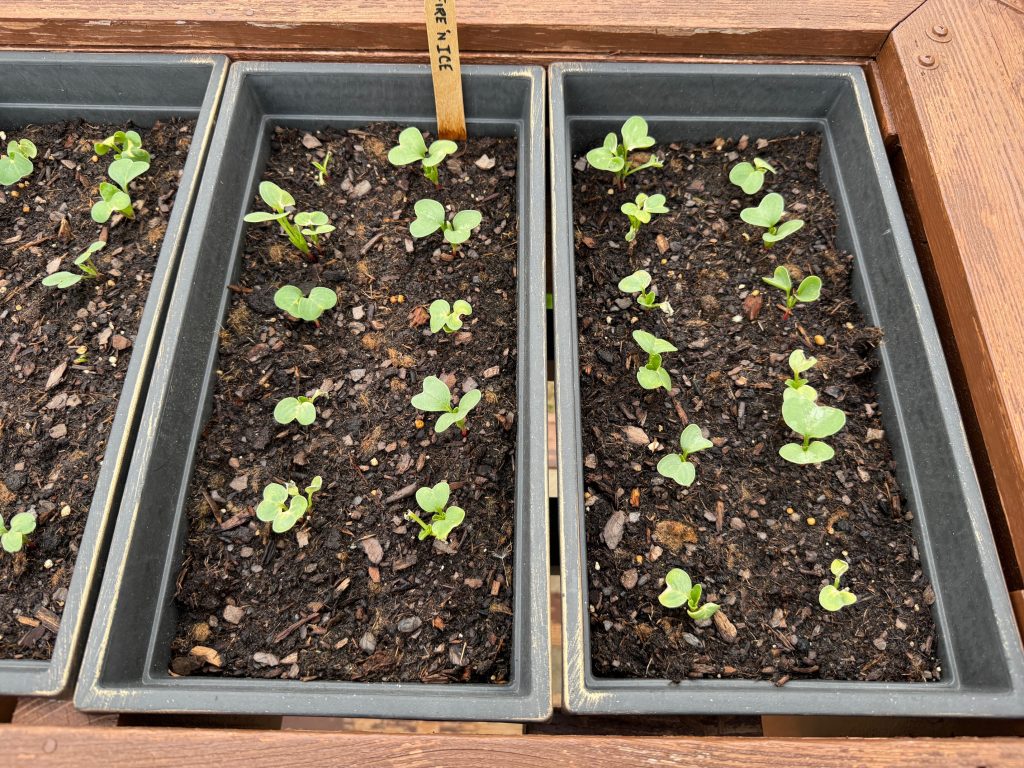
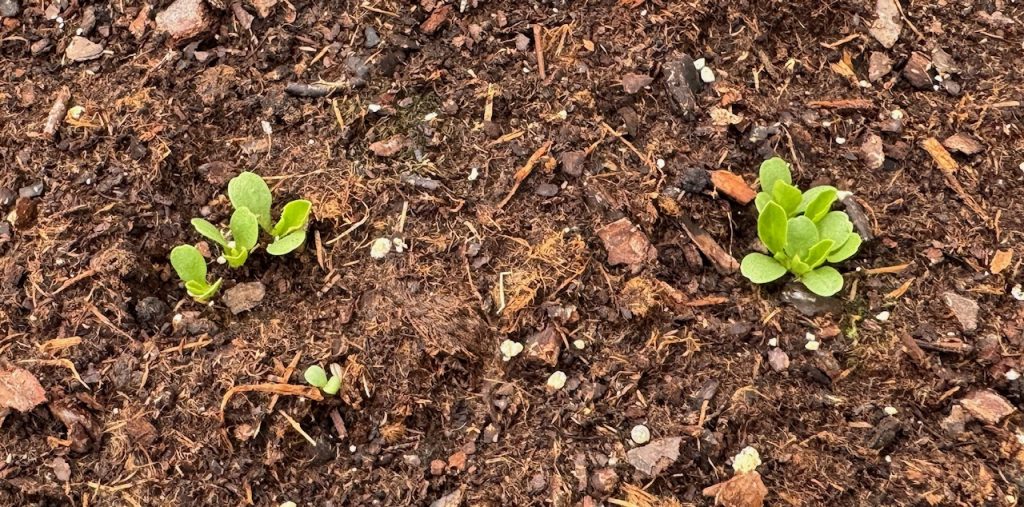
The lettuce is enjoying the sunshine! Almost time to start another row of seeds in the next bay.
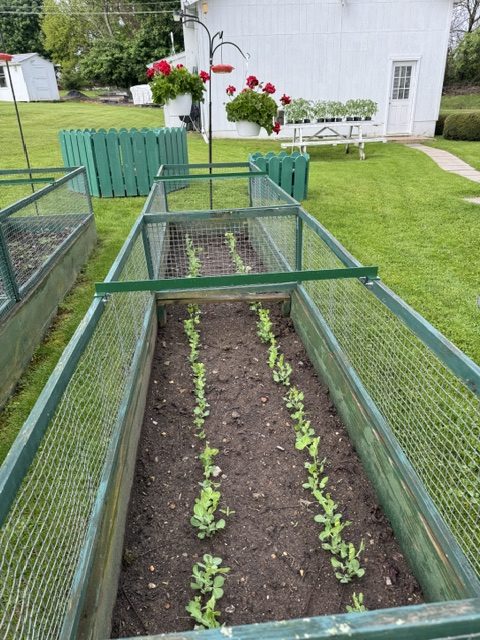
The Sugar Snap peas are sending out tiny tendrils, looking for a place to latch on. Hopefully, we can guide them to the fences on either side of the rows.
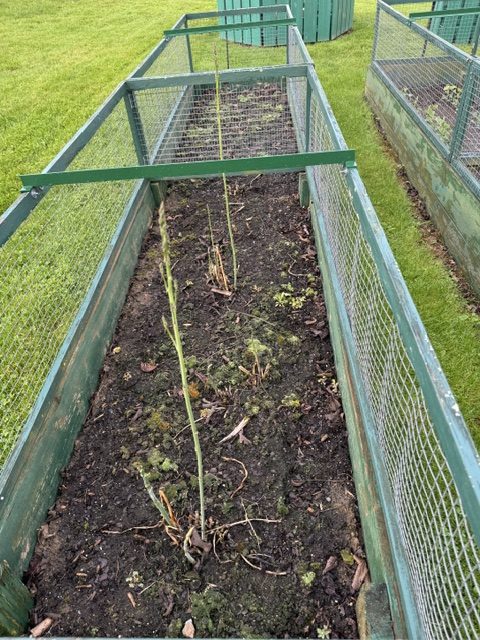
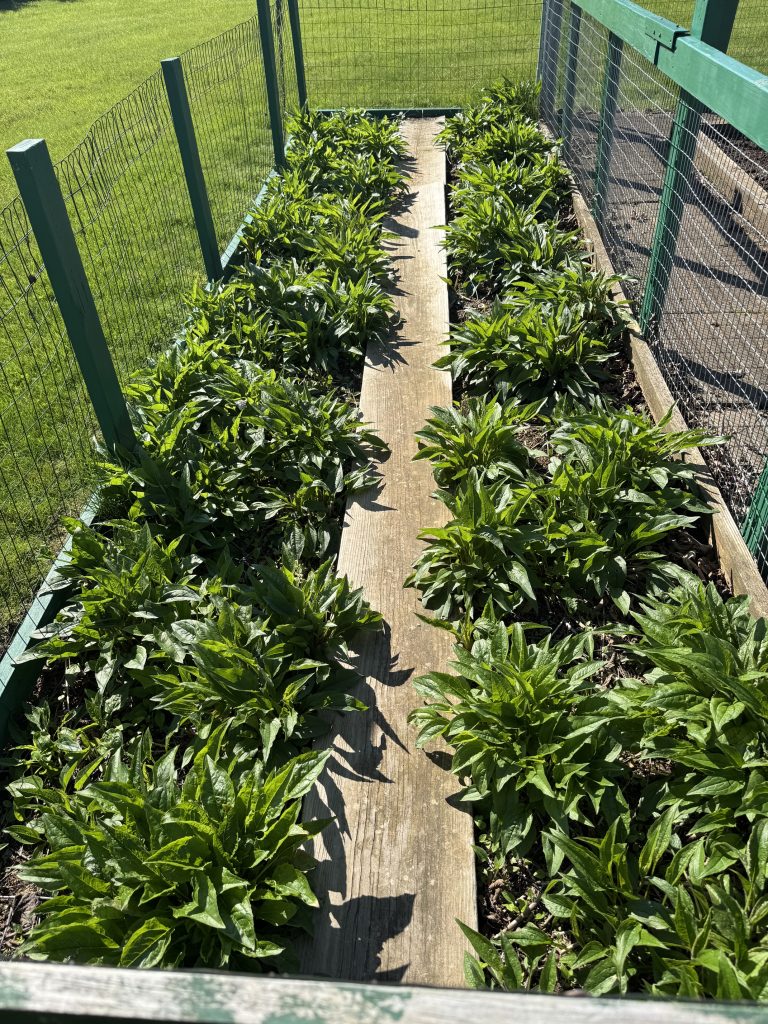
The Asparagus keeps trying. We’ve ordered more crowns/roots to fill this bed.
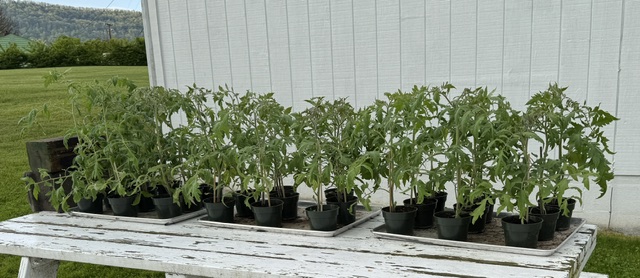
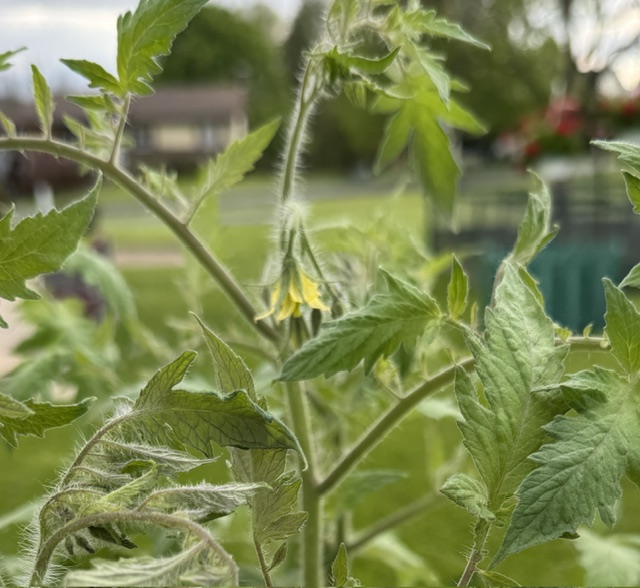
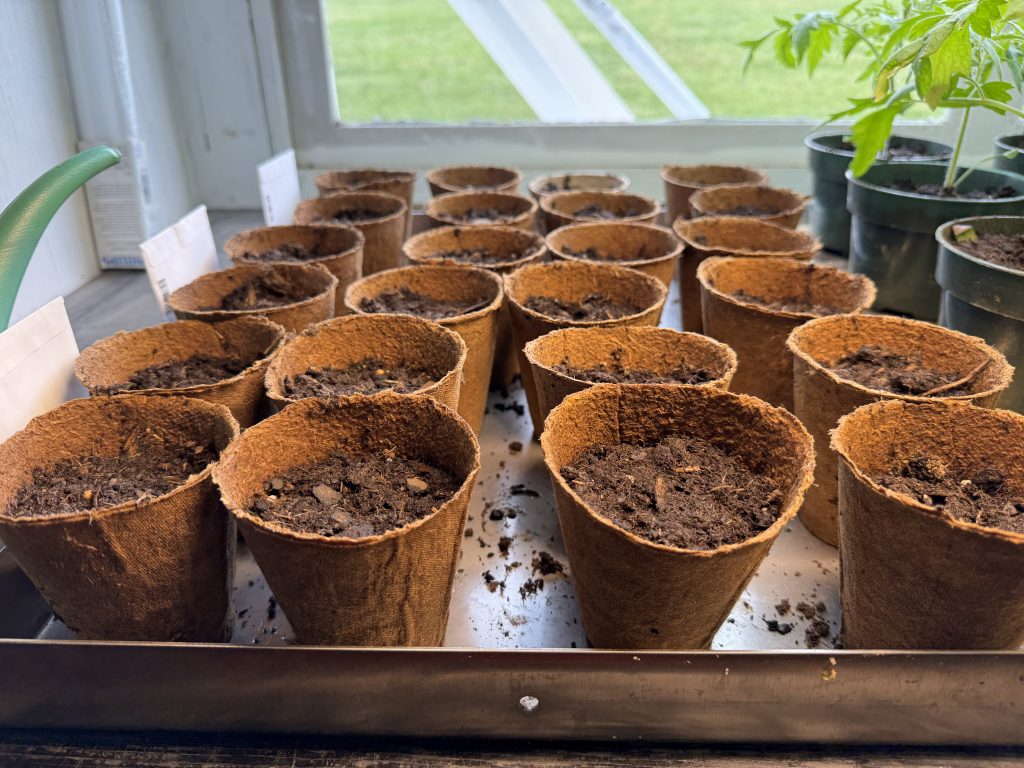
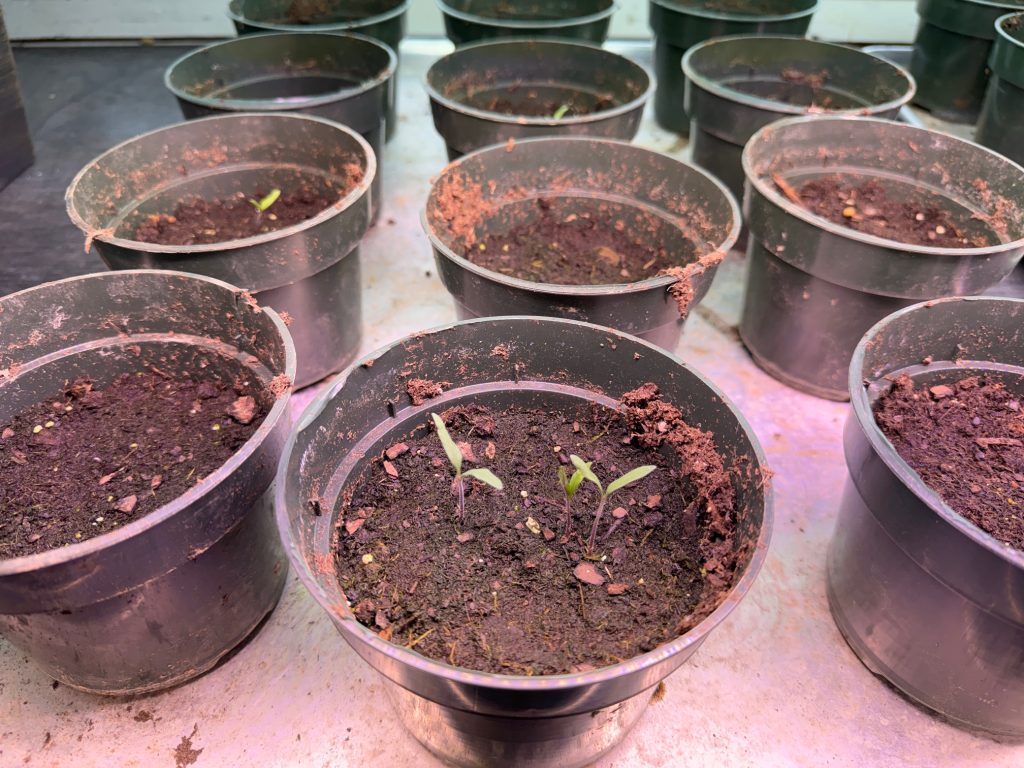
The Super Sauce tomatoes are spending some time in the sun each day to get stronger stems and roots.
We even have a few tiny flowers!
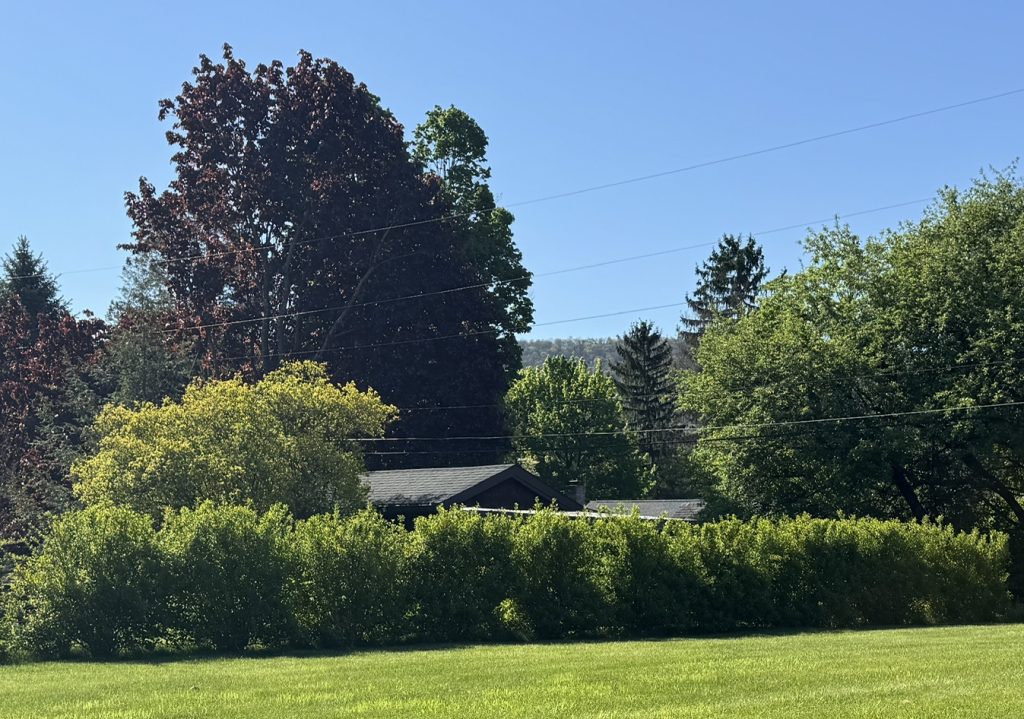
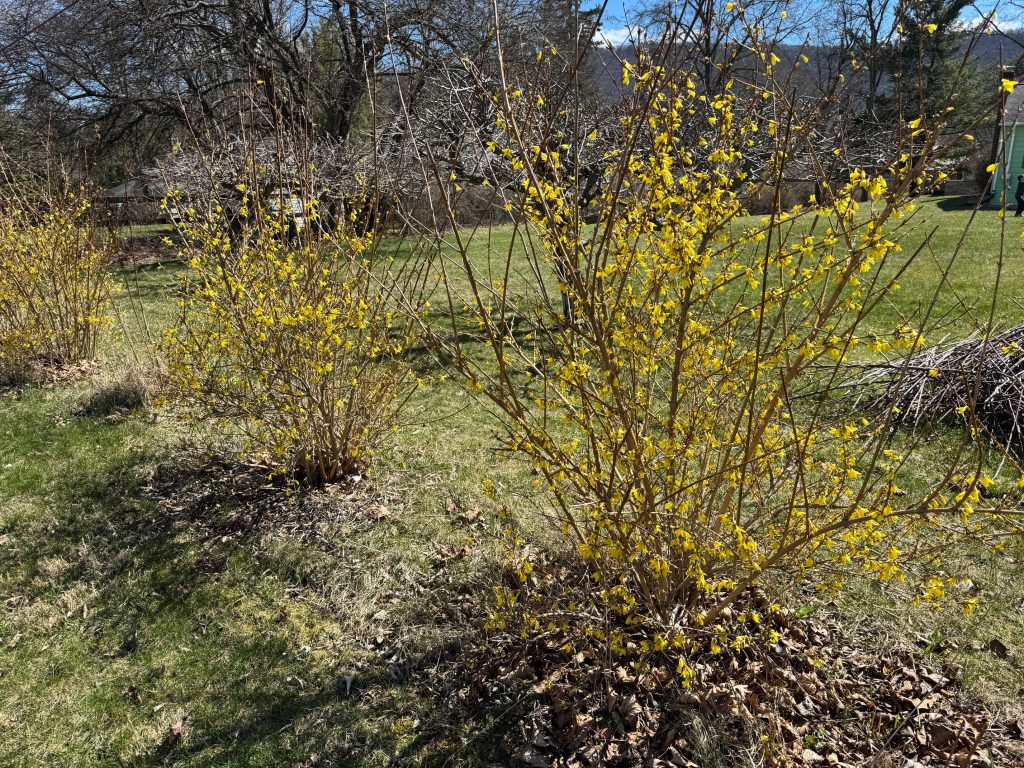
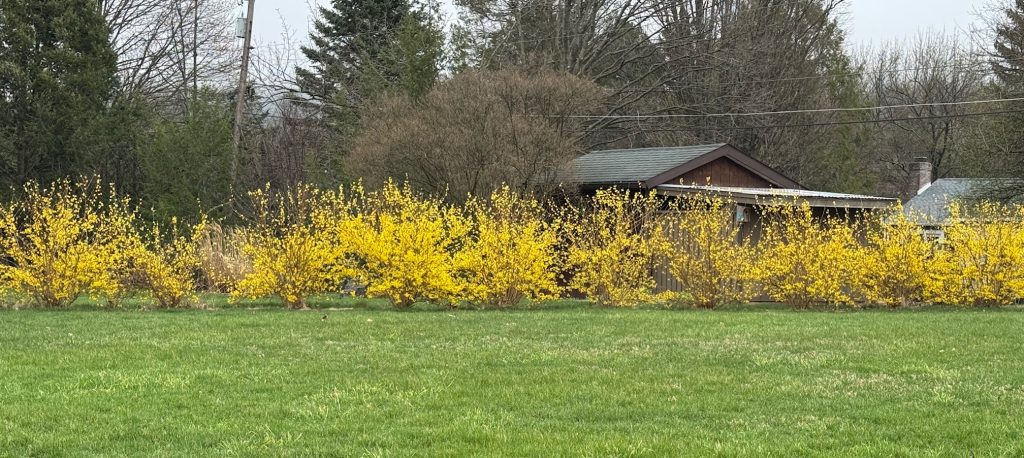
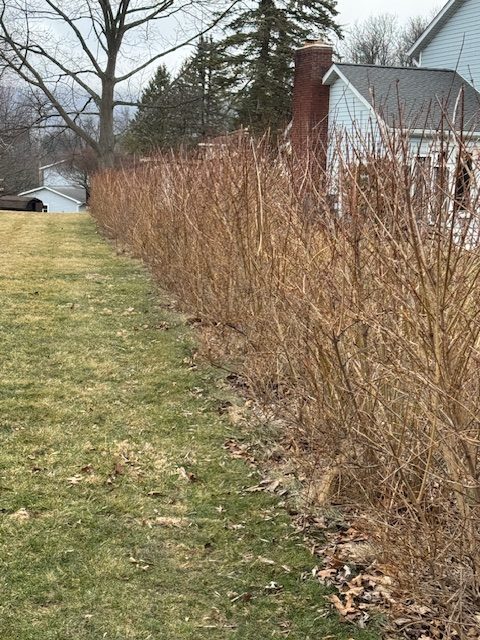
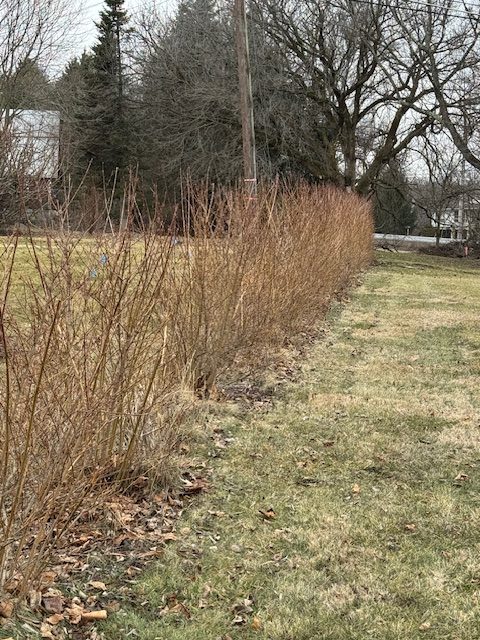
Up on the hill, you can see the forsythia is starting to make a hedge along our property line. Love them!
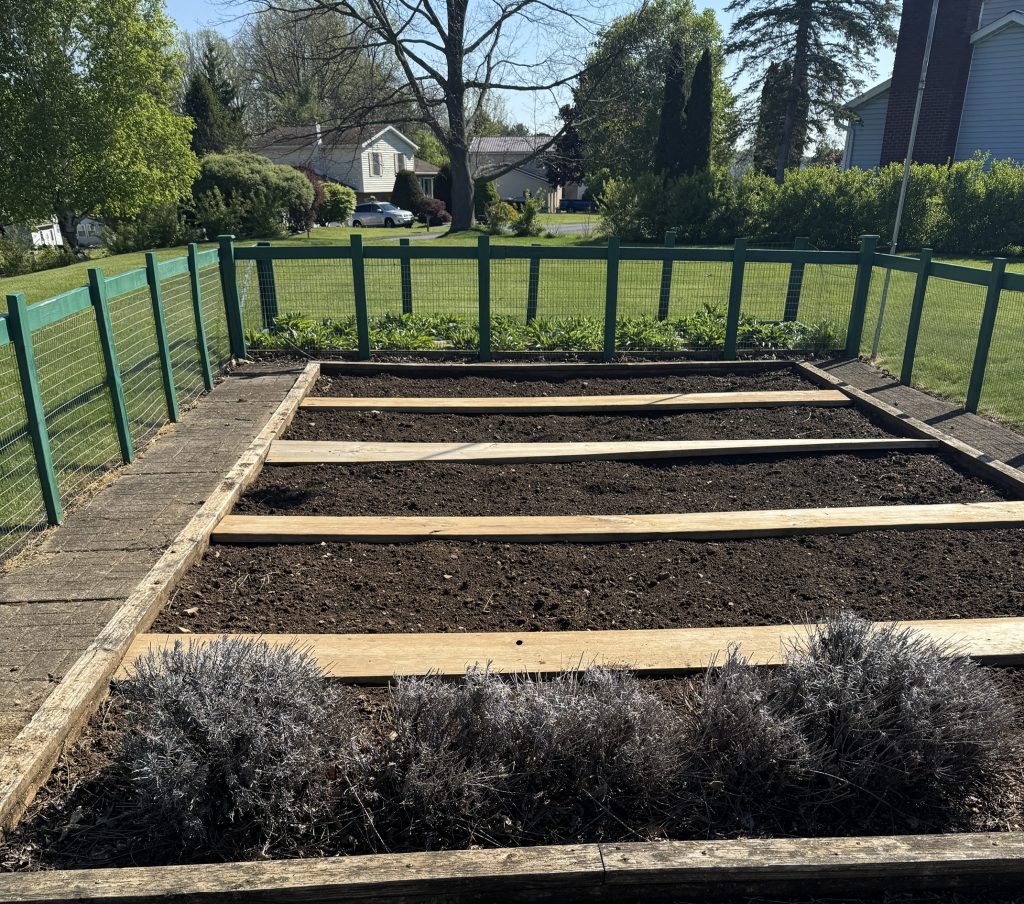
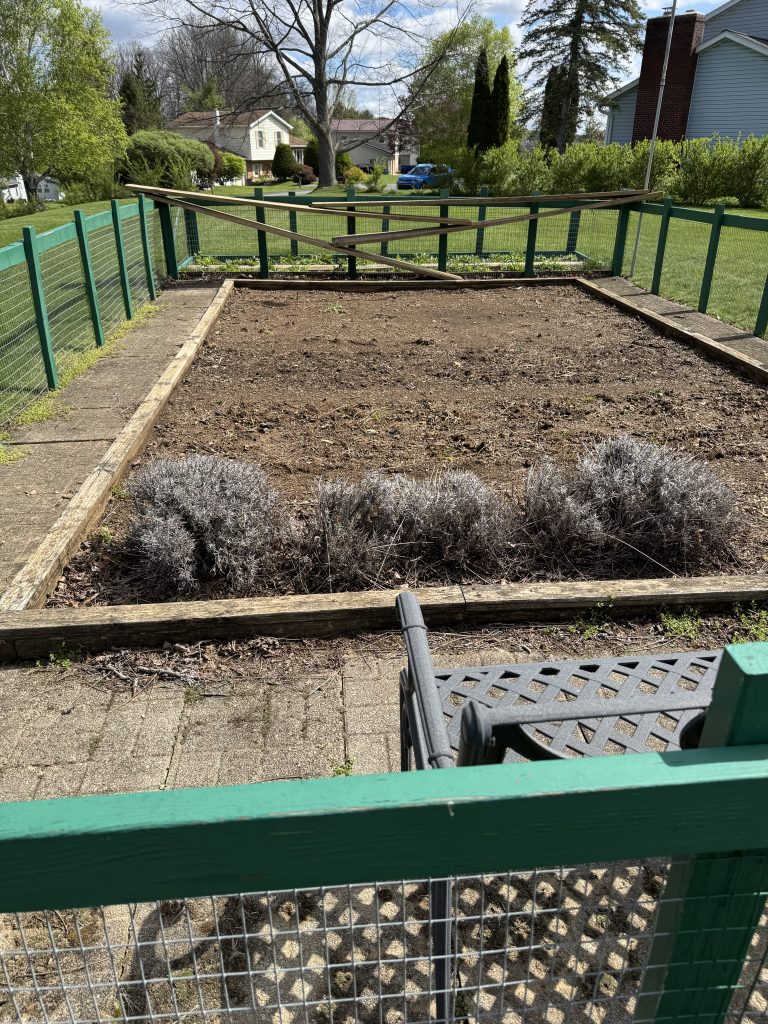
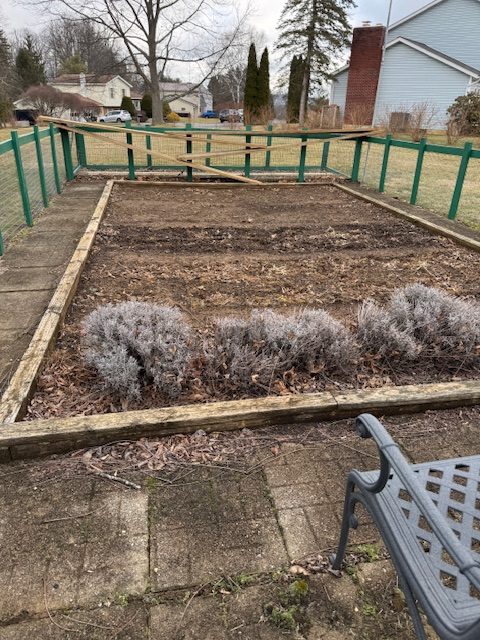
The fenced garden has been rototilled and is ready for tomatoes, green beans and carrots. I may use a section for some herbs like basil, parsley and chives. In the first bay, I think the Lavender is dead! No green shoots at all. I think Bert will remove them so I have room for the herbs. The Echinacea at the other end is growing like crazy!
Echinacea
So, little by little we inch towards the safe time to plant temperature-sensitive plants. Even with beans and carrot seeds we have learned the hard way…it’s always risky to put some seeds in ground too early. They don’t like the cool damp soil. We might as well just wait!
If you have comments or questions, please email me directly at maryjkisner@gmail.com.
Not a whole lot to show you with our garden at this time! We’ve had a few freezing nights over the last week or two, and the local fruit growers were worried about all the tree blossoms that were at risk. Bert is already cutting the grass, but we’ve still had to stoke the wood stove in the basement to keep the electric heat from coming on!
My radishes and lettuce that I planted two weeks ago (on a warm sunny day!) are doing fine. With the radishes, I make a point to put just one seed in each hole so I don’t have to thin the plants. If one doesn’t sprout, I don’t worry about it. The lettuce seeds are so VERY tiny that I can never put one seed at a time in the ground. At least I space out the holes so I’ll have to thin just a few tiny plants.
Radishes
Lettuce
We planted Sugar Snap peas in the beds with fences by the patio. They finally came up enough so I could actually take a picture of them.
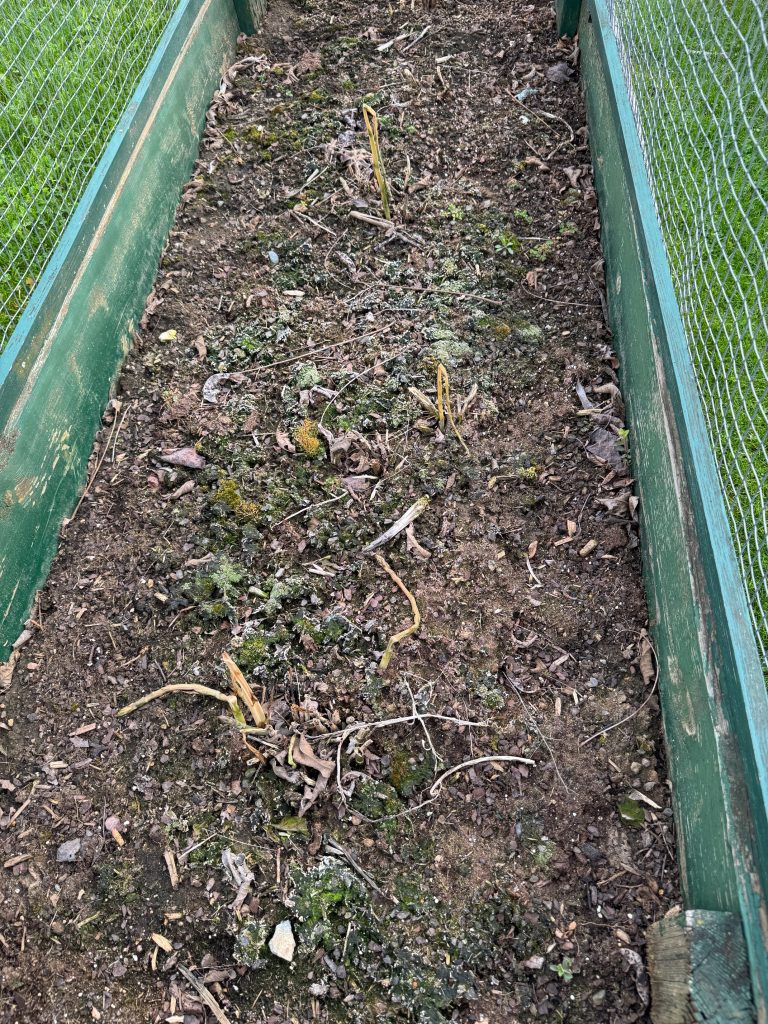
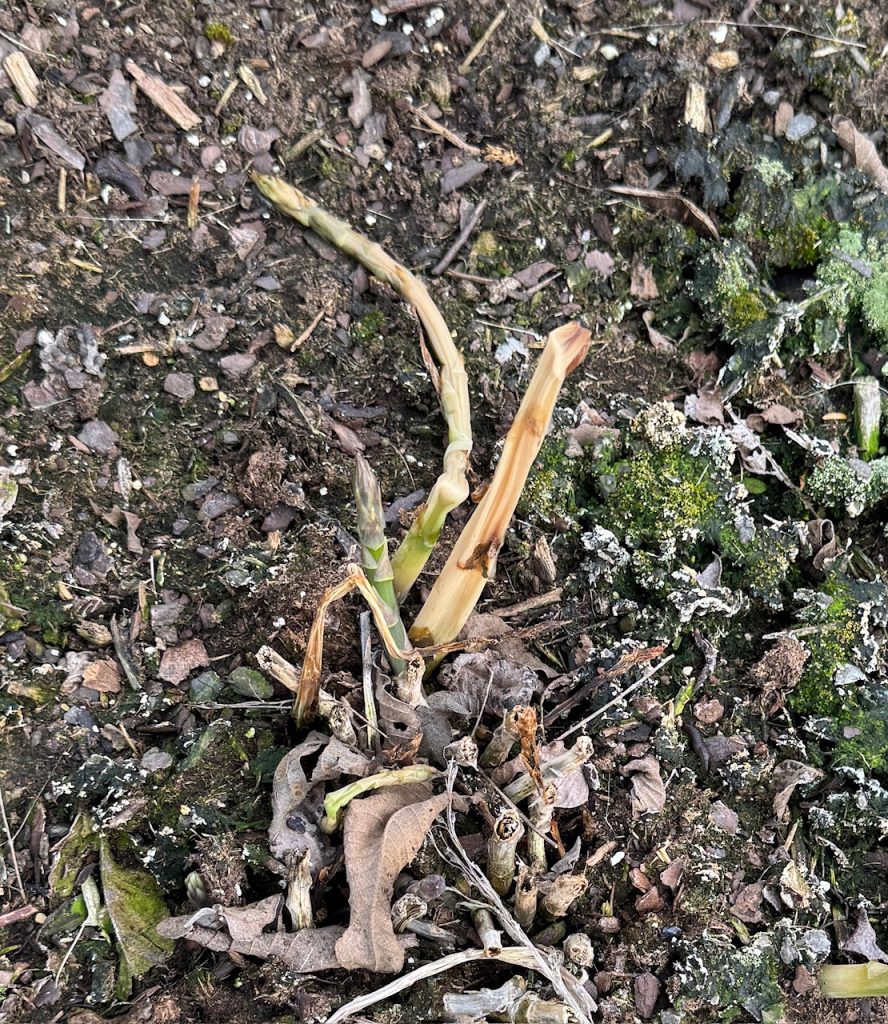
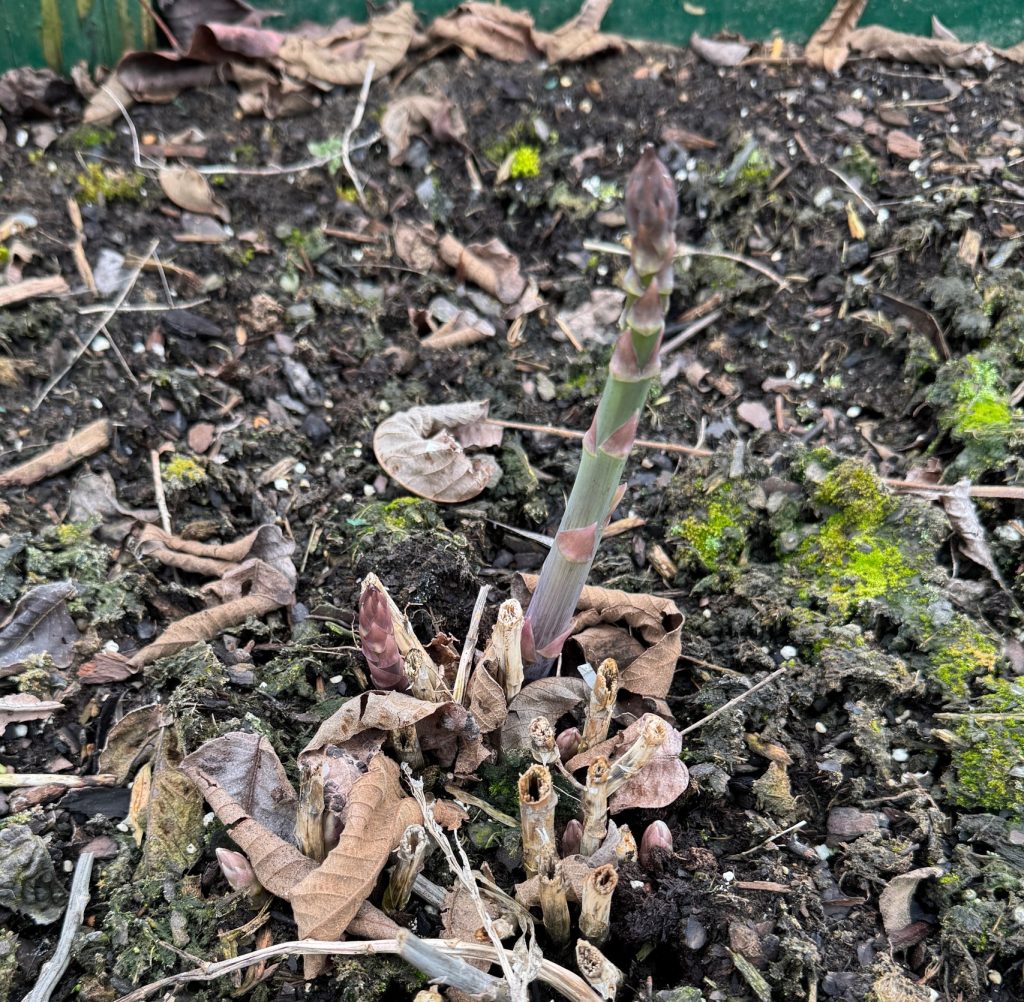
And then, there is my poor Asparagus! Last summer we transplanted roots from our daughter’s garden. A few stalks came up but we left them alone. I was so sure we’d have at least one meal this spring. It’s hard to tell, but there were 3 large roots spaced out in this bed!
Asparagus
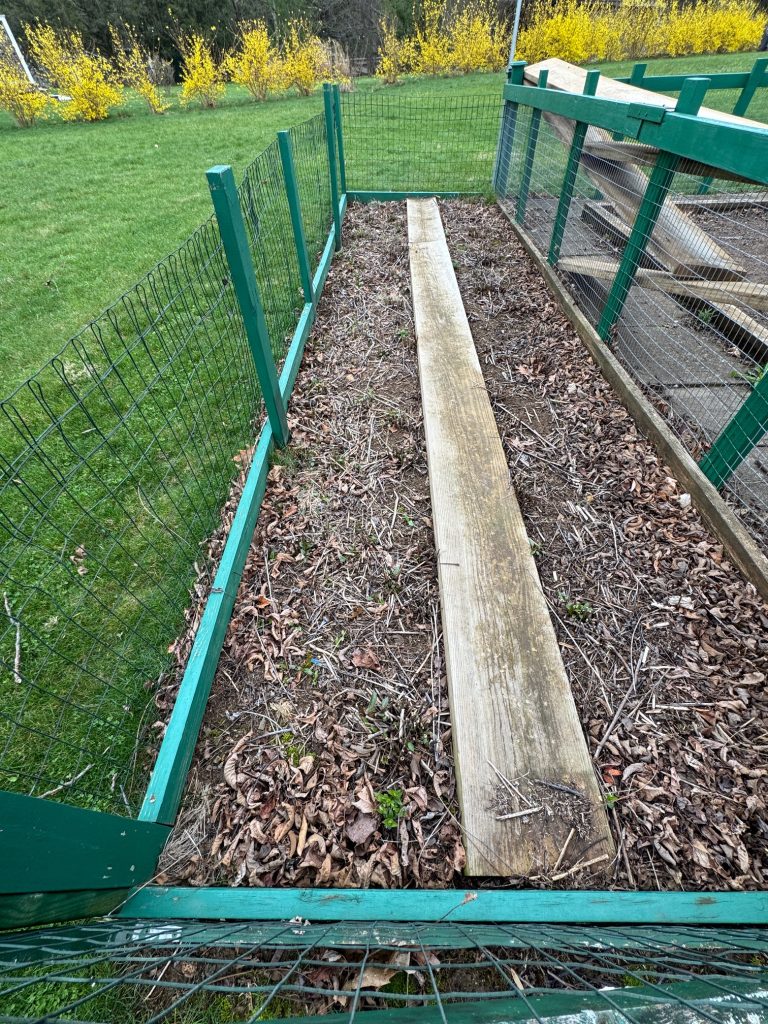
Not much happening in the fenced garden on the hill…
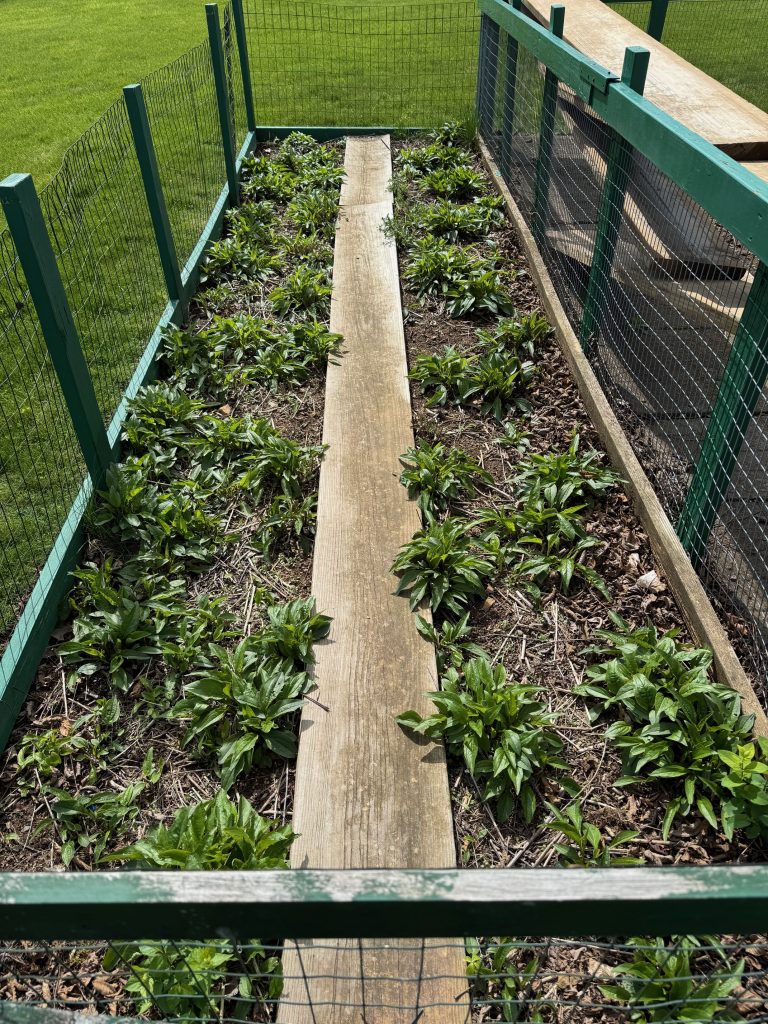
…but the Echinacea at the far end is bursting with energy!
Luckily, Bert has the Tomato plants safe in the shop under grow lights for another month!
He just started Petunia seeds today…they’ll be red, white and blue…and we’ll plant them in the boxes on the patio.
Nothing too exciting…yet! I’m certainly glad some of the local farmers use greenhouses and tunnels to protect their plants. Pennsylvania weather in April and May is certainly unpredictable!
If you have comments or questions, please contact me directly at maryjkisner@gmail.com.
I posted about making ANZAC biscuits last August, 2025 (see https://marykisner.com/making-anzac-biscuits/). I recently saw a note on my paper calendar that reminded me of this national day of remembrance in Australia, New Zealand and Tonga. It’s close enough to our Memorial Day festivities that I thought I’d revisit that blog entry from last year. Of course, it’s a reminder just in time in case I want to make these cookies for the Auxiliary Bake Sale next week. Enjoy!
Here’s a repost of that story!
Making ANZAC Biscuits
What in the world is an ANZAC biscuit? These cookies (or “biscuits” as they are called in the UK and Australia/New Zealand) are considered a traditional cookie to honor ANZAC day in Australia, New Zealand and Tonga.
Several sources online suggest wives and mothers would mail these cookies to their soldiers in ANZAC, because without eggs and being quite sturdy, they traveled and kept well. Other sources said, “Contrary to legend, Anzac biscuits weren’t sent to our troops serving overseas in WWI. However, they were commonly sold at church fetes and galas to raise funds for the war effort. They didn’t get their name until peacetime, with the first Anzac recipe appearing in about 1919.”
You can see, the history of the ANZAC biscuits has been around for over 100 years! Whether they were popular in Australia and New Zealand because they traveled well, or they made a good baked item to raise funds, I might have to bake some to sell at our Boalsburg Fire Company Auxiliary Yard Sale in a few weeks. If I include the recipe and a little history, they might generate some interest and sales!
Because they were popular in Australia, they are called biscuits…like cookies are called in the UK. However, they are basically a simple Oatmeal Coconut Cookie. They are sturdy and could travel well in the mail.
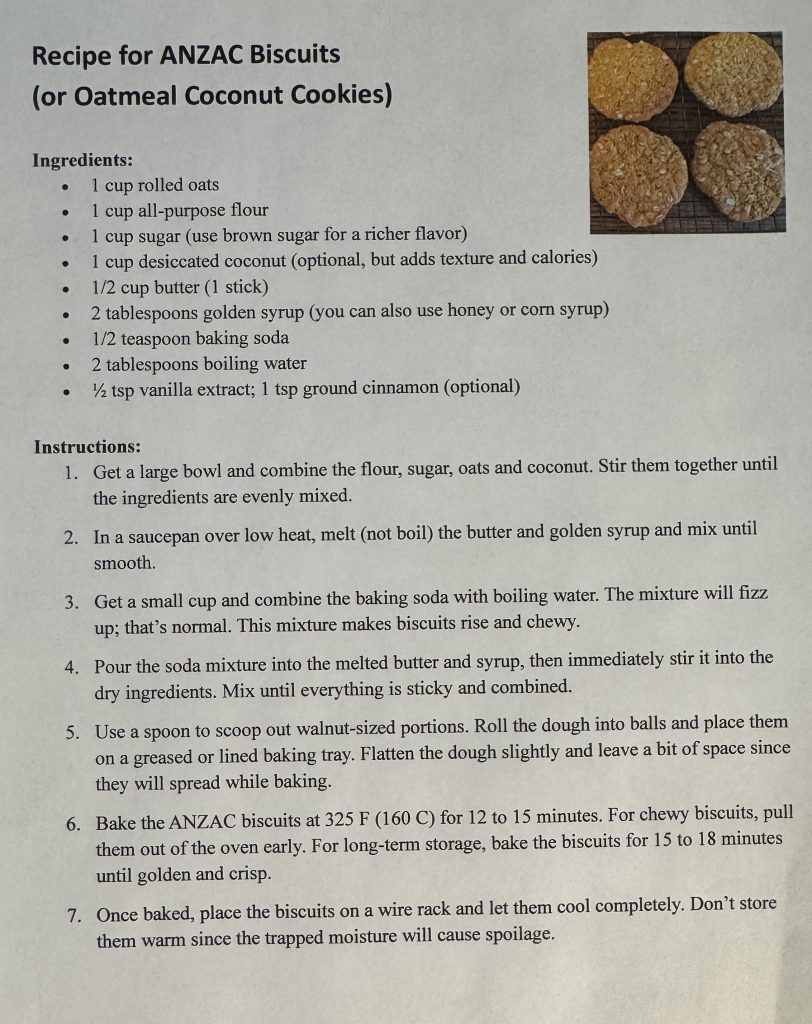
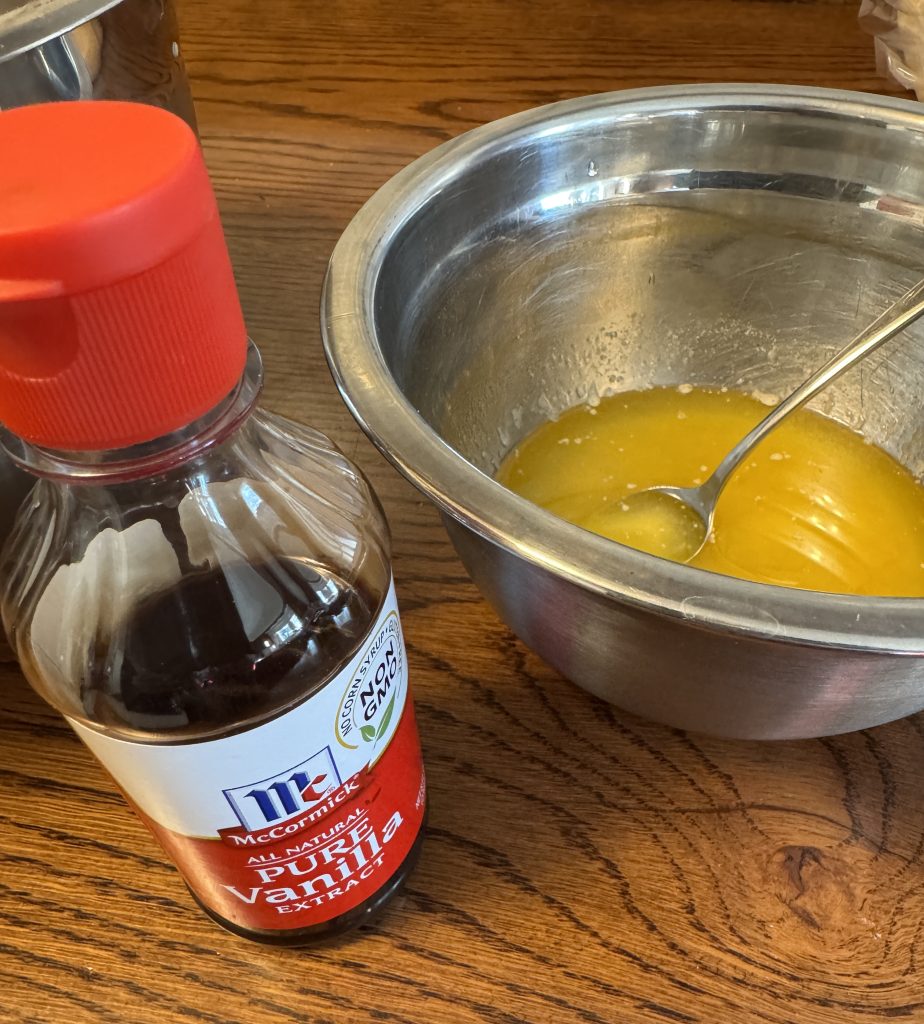
Here’s the recipe I followed. I added vanilla and cinnamon to my recipe just because!
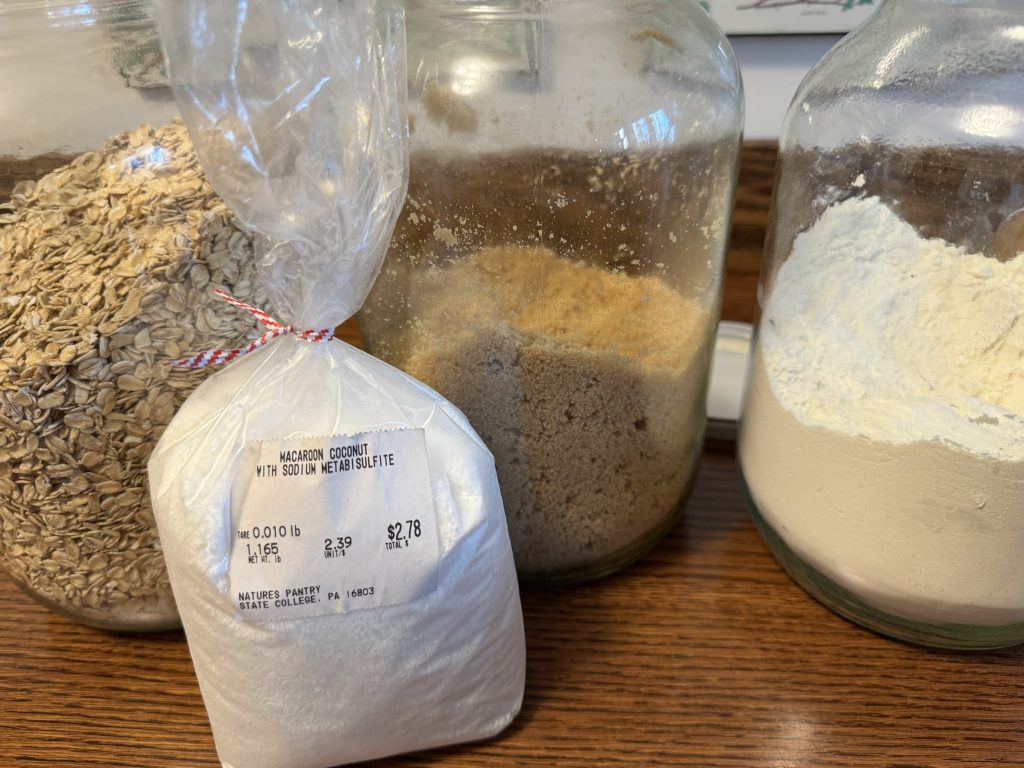
The ingredient list is pretty simple. After making 2-3 batches and reading several variations of the recipe at various sources, already I can see a few simple changes.
Making the ANZAC Biscuits:
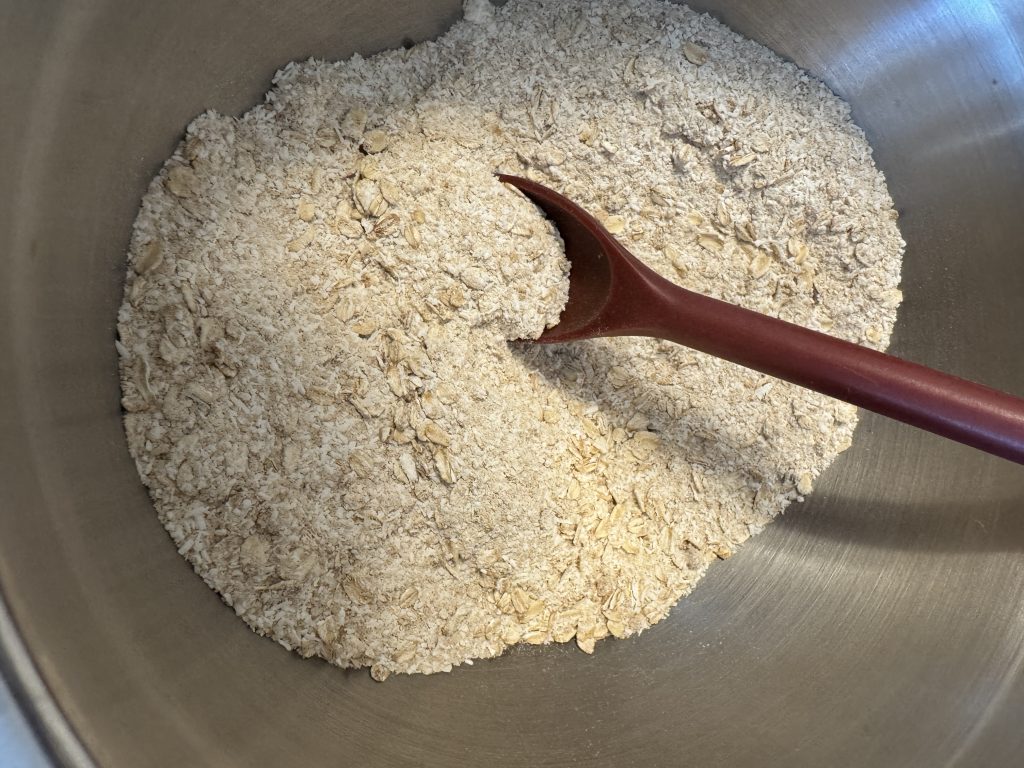
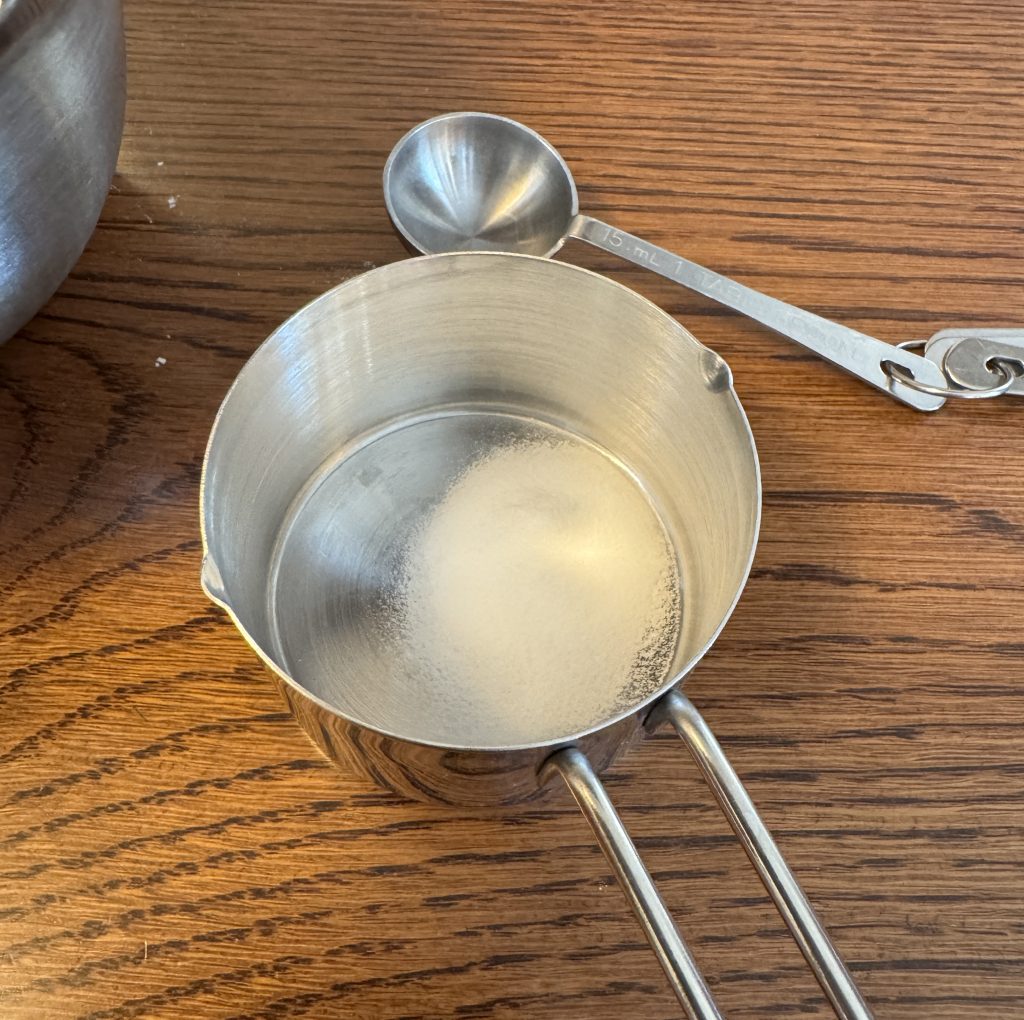
Assemble the dry ingredients in a bowl and mix thoroughly.
(This is when I added cinnamon…to the dry ingredients.)
2. Melt 1 stick of butter and add 2 tbsp of honey and mix well. (This is when I added the vanilla.)
3. Put the baking soda in a small cup and add 2 Tbsp. boiling water. This was a real pain in the neck…next time I’ll add the baking soda and water to the melted butter and just mix it up.
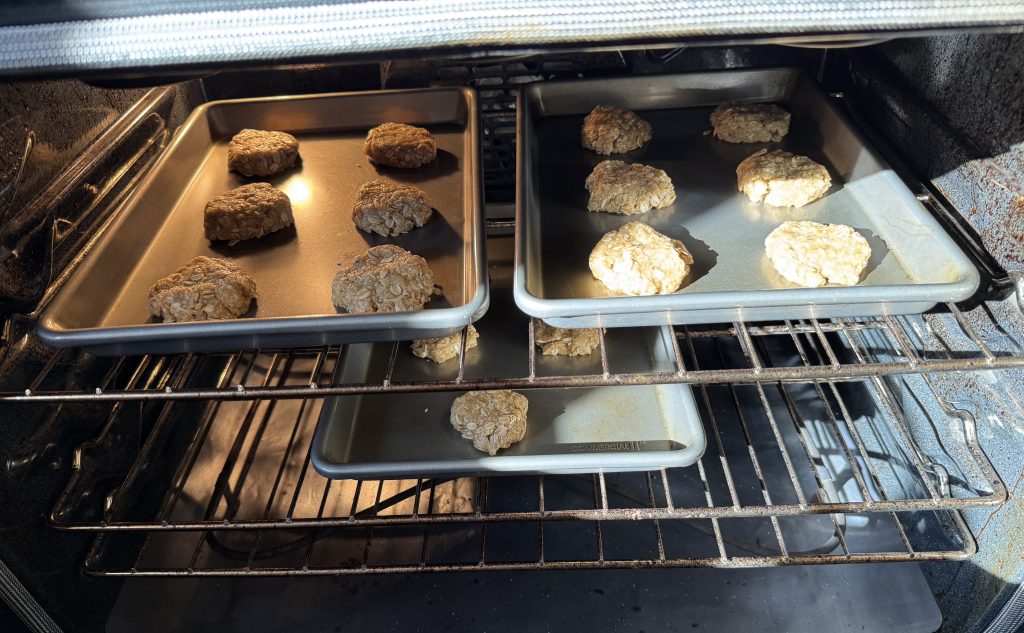
4. Combine the wet ingredients and the dry ingredients to make a moist batter. Scoop about a tablespoon or two into your hand and form into a ball. Place on cookie sheet and flatten gently with your hand. They will spread and flatten as they cook.
5. Bake at 325 degrees for 15 minutes (to make firm chewy cookies) or about 18 minutes to make them a little crunchy. Rotate trays as needed midway.
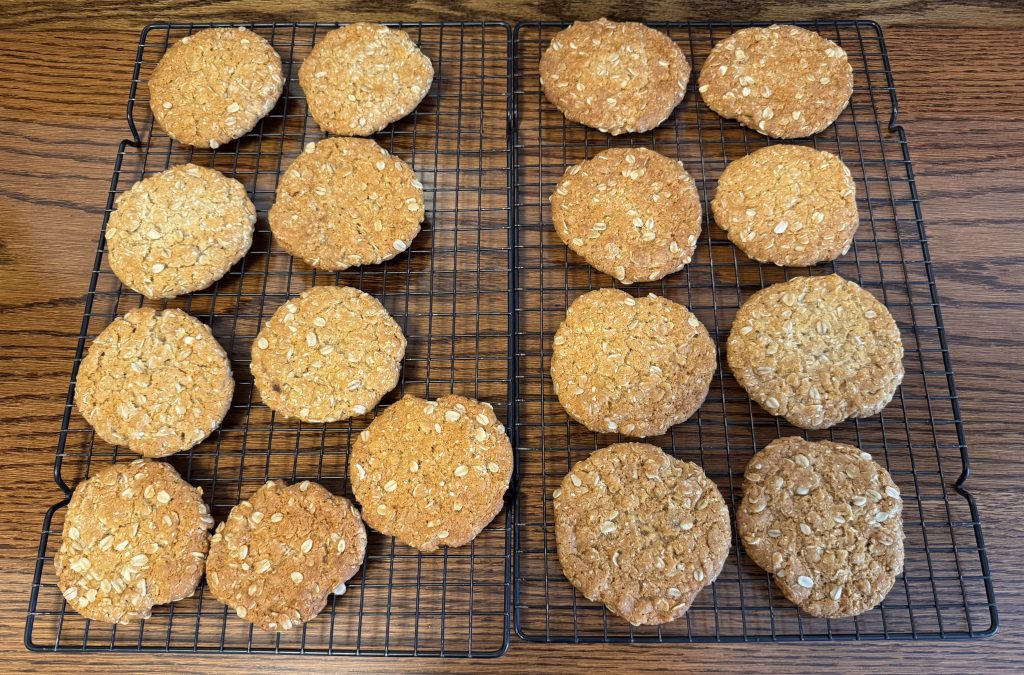
This made 14-16 cookies…each 3-4 inches across! They can be made smaller and the recipe can be doubled. Might be the perfect cookie to sell at our bake sale! Enjoy!
Over the last 5 years of writing this blog, I’ve tried to focus on the things I’ve made or learned how to make. My personal story continues around me while I’m making stuff, of course. I’d like to share my challenges with Type 2 Diabetes and how biofeedback is helping me meet those challenges. Currently, I’m taking three different meds to try to control my blood sugar. Decisions needed to be made about whether it was time to consider insulin to control things. Let me say…I was terrified I’d be stuck with daily shots for the rest of my life! Maybe that’s what it took for me to face things. While I was waiting for an appointment with a pharmacist/specialist to discuss all this, I started a very restricted low-carb diet. I also increased my blood sugar testing to 4x/day. Eating only protein and vegetables was tough but pricking my fingers 4x/day was very tough!
With that as the background, I had my appointment with the specialist. Discussion focused on my choices for the future. Luckily, before insulin, I was going to try a new med (new to me) called Glipizide XL. I was to continue eating the protein/vegetable diet and wear a Continuous Glucose Monitor called Dexcom G7. Here is the box:
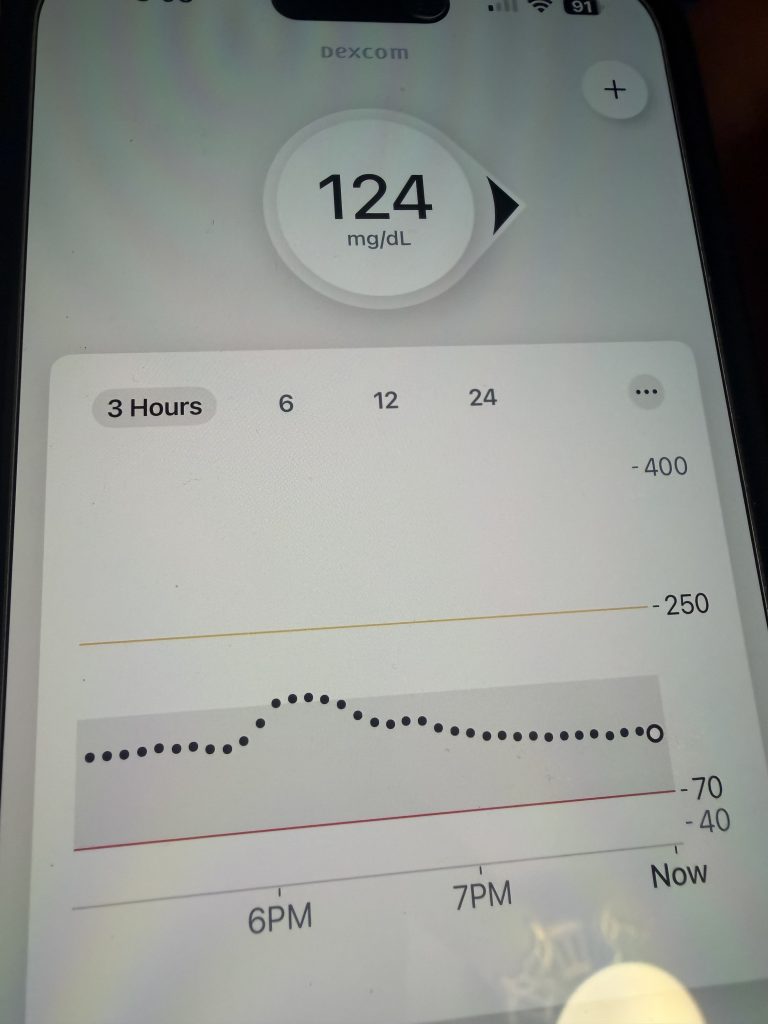
With Bert’s help, the monitor was stuck to my arm and covered with a patch. The device has a little needle in my arm that checks my blood sugar every 5 minutes! No pain! Amazing! Then I started the new meds. It took a day or two for the new meds to get in my system. I could watch how my body reacted to the foods I ate…in real time! What an eye-opening experience! The best part was I didn’t have to prick my fingers 4x/day! Made my fingers very happy. Here is what the read-out looks like on my phone:
Then, I can switch to another chart and see my average glucose # and the GMI…I think that’s equivalent to the A1c…maybe? Maybe the health professionals in my family can send me info about that (smile). Luckily, the specialist can also read my charts from his office so he knows how things are going.
Reading these numbers certainly keep me focused on what I’m eating every day and how my blood sugar responds overnight when I’m not eating at all.
This monitor lasts for 15 days. Since I’m not on insulin, my insurance will not pay for this device. However, with a prescription I can pay for it myself…about $40 each. I may consider wearing one for another 15 days, just to make sure the meds have stabilized and I can continue to keep track! Especially, since in the next 3 weeks I have major baking to do for the Auxiliary Bake Sale! I think the monitor will help keep me honest!
This whole experience has reinforced what I’ve read about biofeedback. The research shows when you’re tracking physiological functions like blood sugar, heart rate or pain perception, biofeedback can be used to improve health in conjunction with changes to thoughts, emotions and behavior. This experience has shown me how powerful biofeedback can be.
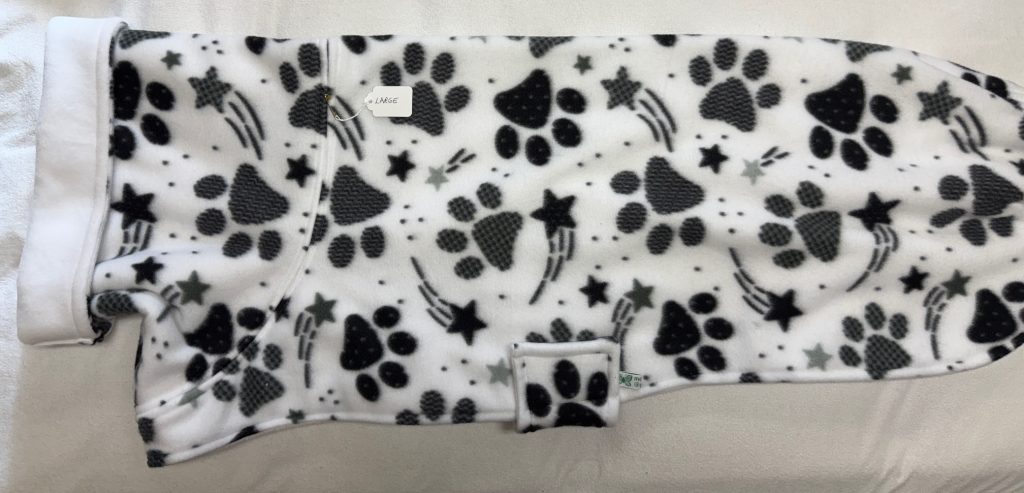
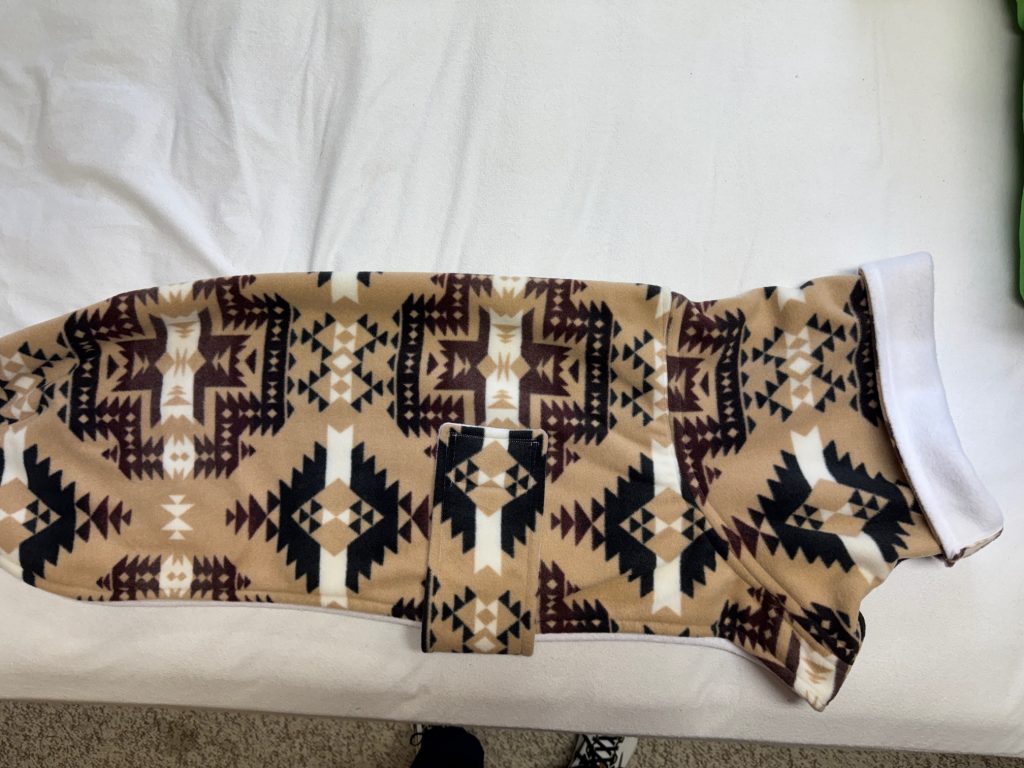
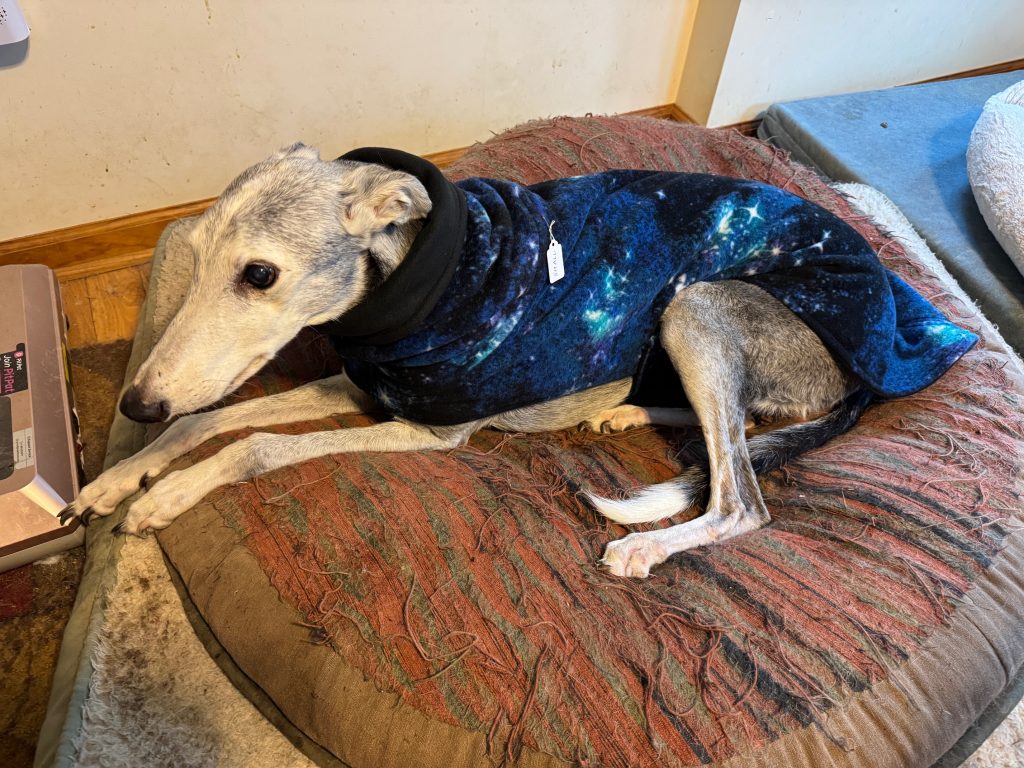
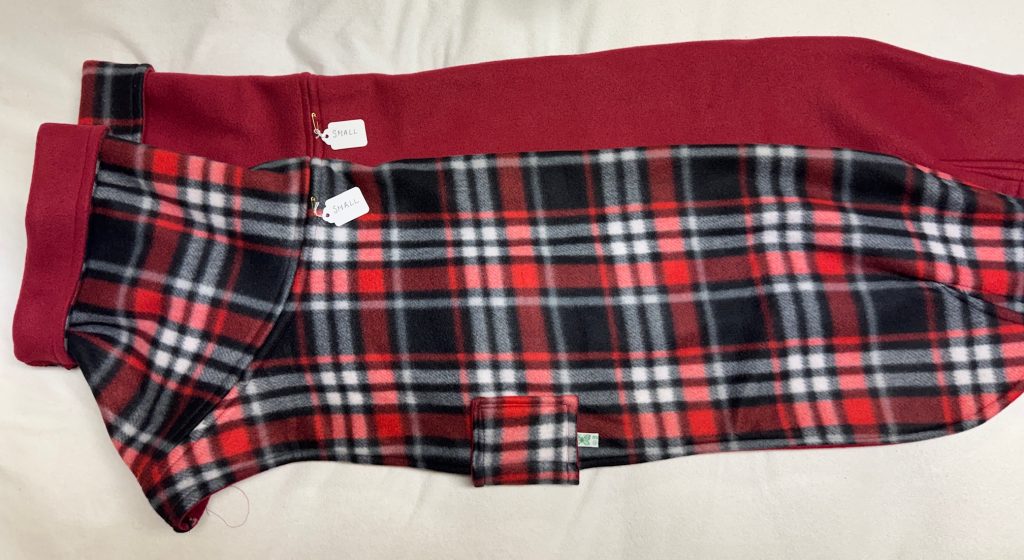
So, while I’m watching my charts and sticking to my diet I’m finding I really need to stay busy! Luckily, I’ve got lots of fleece and have been cranking out coats for my beloved greyhounds! Here are some I just finished!
Now I just have to continue monitoring when I start my marathon baking! Wish me luck!
Please email me directly if you have questions, comments or advice at maryjkisner@gmail.com.
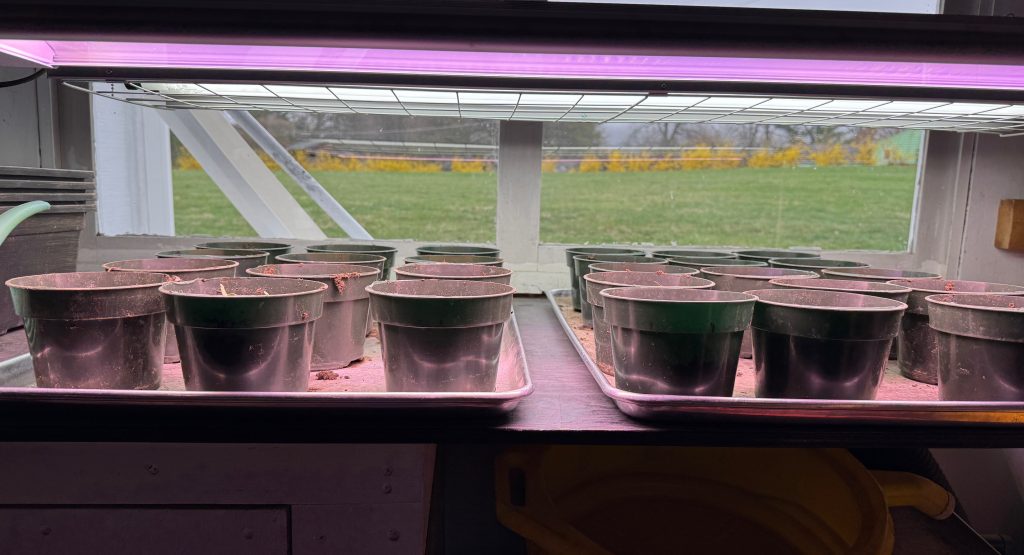
Spring has sprung! It may not look like much gardening is going on in our backyard…yet. Without fanfare, Bert started tomato seeds under grow lights in the shop a week or two ago and with daily watering and constant light they’ve already popped up!
Last week the forsythia was just getting started…and now the color is beautiful!
With all the rain we’ve been having it seems like Bert should get the rain barrels ready, but he reminded me that until it doesn’t freeze at night, the barrels are at risk of freezing and cracking if they have water in them. Makes sense and we certainly don’t need the water yet…nothing can be planted in the garden so far!
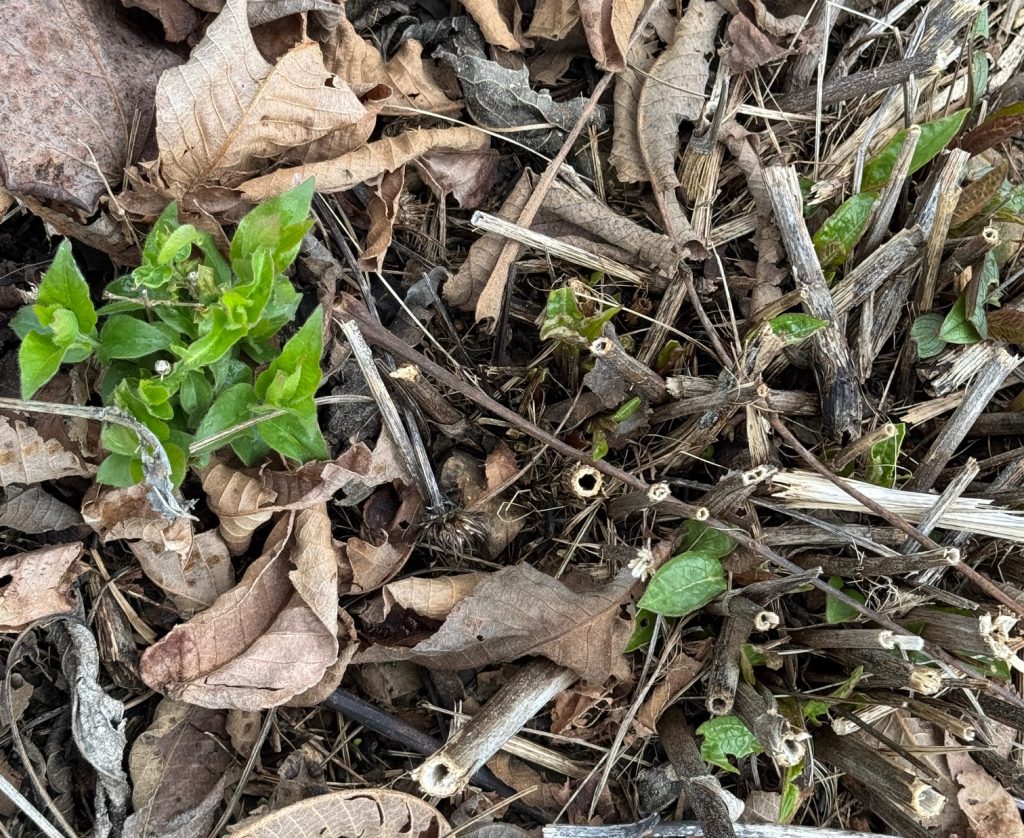
When I checked the Echinacea bed this morning, I thought it looked pretty dismal until I got up close. Check out the new growth!
Then I wandered down the hill to check on the asparagus and look what I found! The first stalk! We transplanted these roots last year and probably should not cut very much this year but it’s still exciting that it has begun!
I’ll be posting Garden Updates by date, so you should be able to follow along as things grow. So much more to come. We don’t have the biggest garden in the neighborhood but it’s just right for us…two senior citizens who enjoy watching things grow that we can eat! Enjoy!
Please email me directly if you have comments or questions at maryjkisner@gmail.com.
This last week has been intense while I’ve been tracking all the food I’m eating and testing my blood sugar four times a day! Next week I meet with a specialist to discuss everything about the meds I’m taking and the food I should be eating to manage my blood sugar. So far, I’m doing well at tracking and I can see the immediate results of the benefits of low-carb eating on my blood sugar. My health care providers (April and Laura, who both read this blog…smile) would be very proud of me! You are my inspiration to tackle this issue!
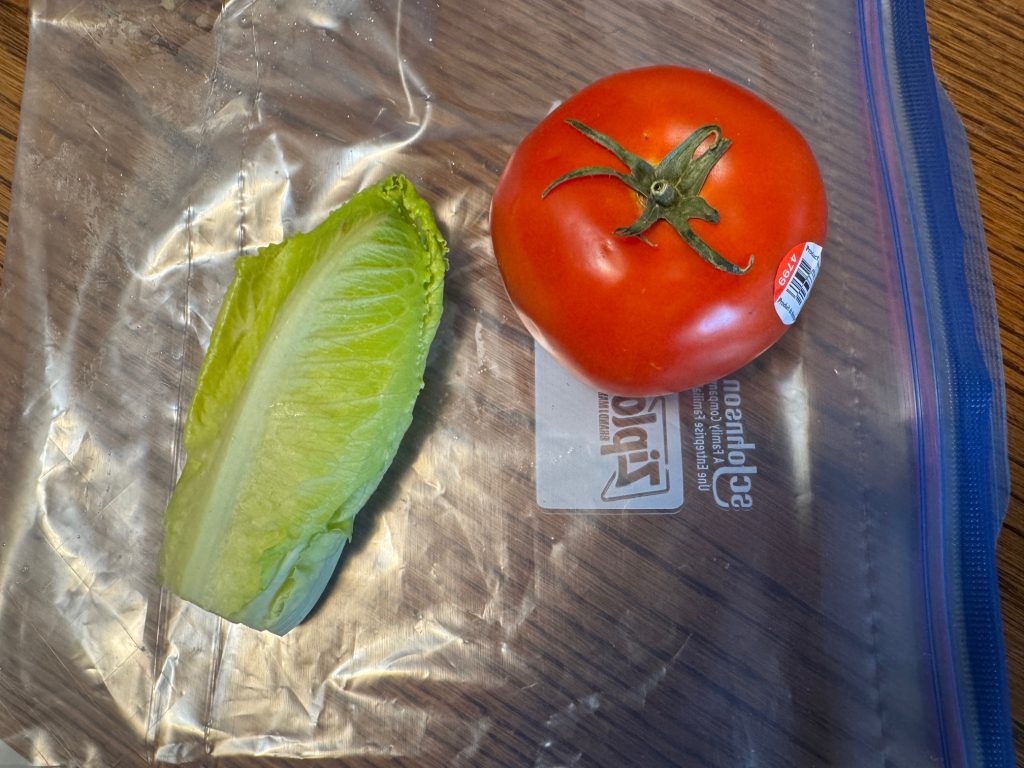
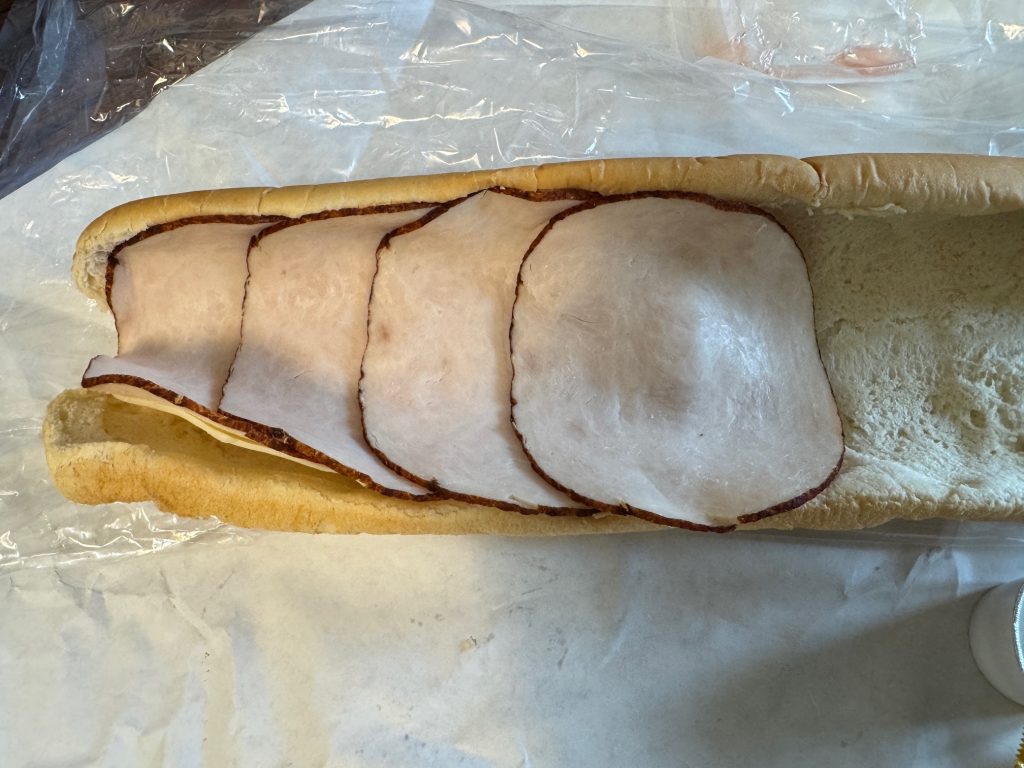
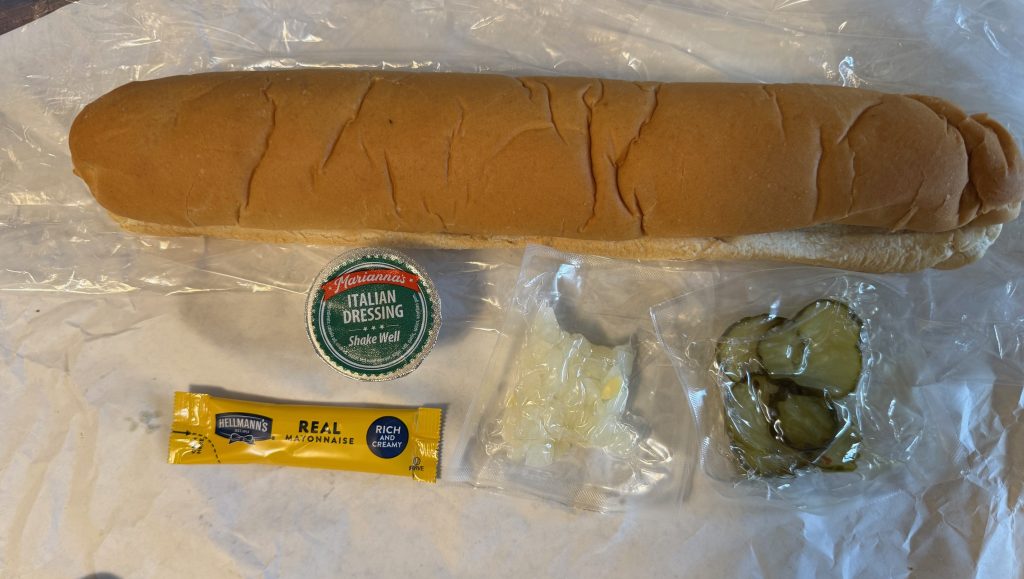
Several weeks ago a young neighbor girl came to our door selling hoagies as a fund-raiser for her school. We always try to help. Of course, the hoagies arrived yesterday afternoon! I knew I could not consider the bun part of my new food plan! So, I opened the package to see what I could salvage for supper.
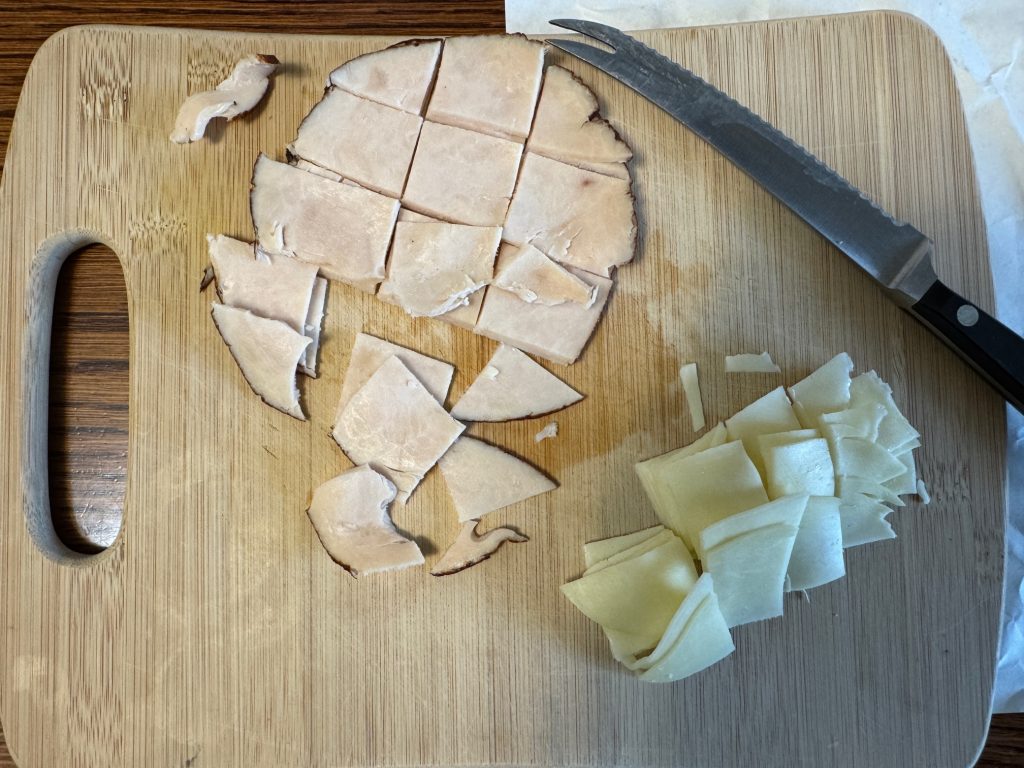
The meat and cheese were in the bun, with all the other components shrink-wrapped and laid inside. Very easy to deal with.
I started by putting the lettuce and tomato slices in my salad bowl. I usually like more tomato and lettuce in a salad, so I added some:
I set aside the mayo, dressing, pickles and chopped onion…Bert often uses my onions! Then I chopped half of the turkey and cheese. The other half went into the fridge for my next salad!
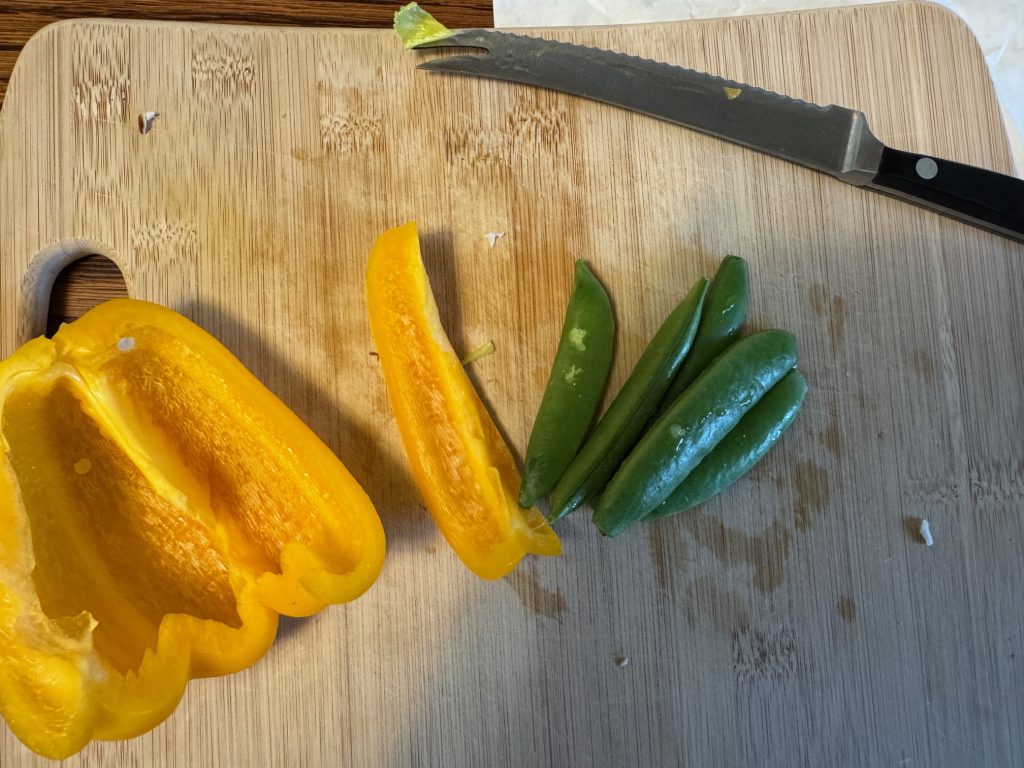
Finally, I wanted more vegetables in my salad, so I added some chunks of yellow sweet pepper and a few sugar snap peas.
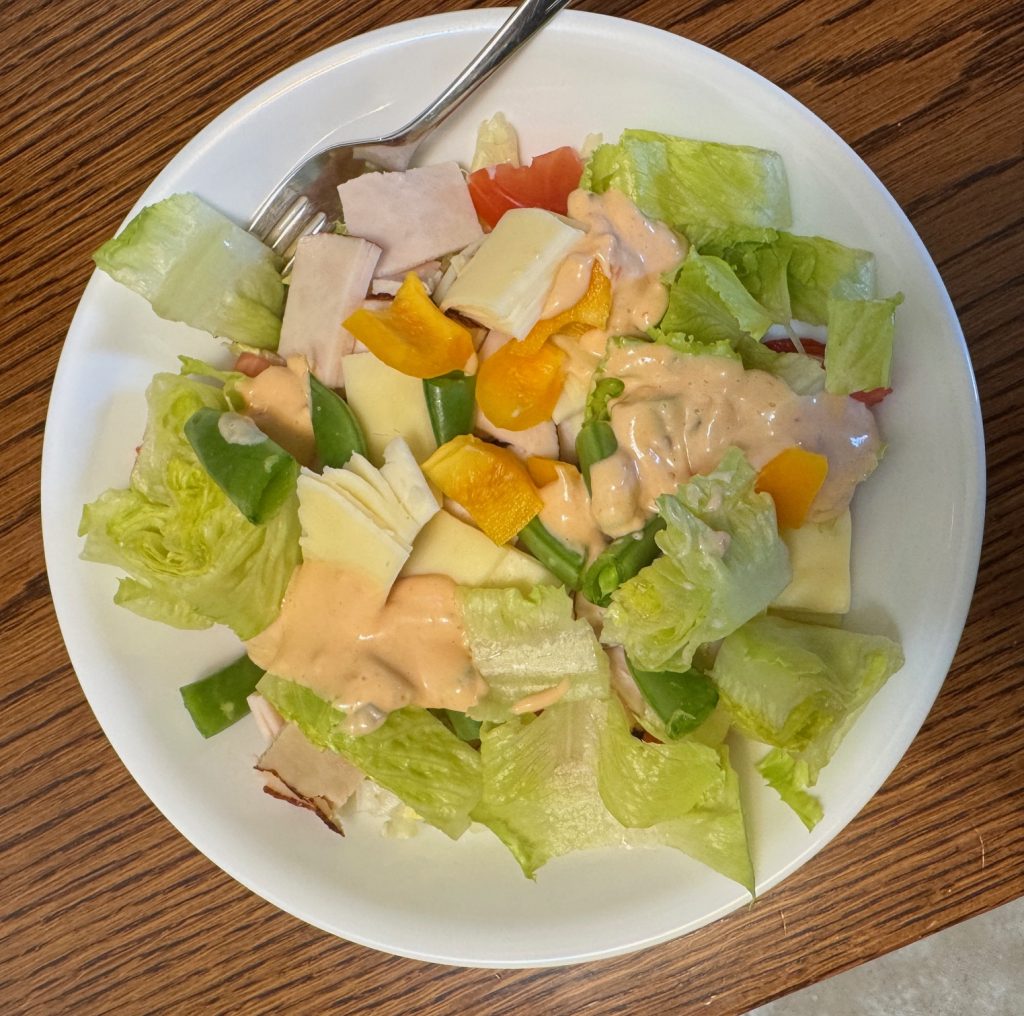
This all made a great salad!
So, what happened to the rest of the hoagie? The other half of the meat and cheese went into the refrigerator.
The mayonnaise also went into the refrigerator. Bert liked the idea so he deconstructed his hoagie and added my onions, pickles and dressing to his salad. We were left with two buns. Bert ripped them apart and put them near the bird feeders. They are visited by various animals during the night. So, no waste!
This is helping me think about the challenges of eating at a restaurant. Most places have some kind of garden salad. I should be able to order a plain hamburger or meat entre and put it on top of a salad, right? I usually bring my own dressing so that works!
Anyway, while I’m staying out of the kitchen, I seem to be able to really crank out greyhound coats. It keeps my hands busy and Nittany Greyhounds is grateful for the coats! Enjoy!
If you have comments, questions or ideas for low-carb meals, please email me directly at maryjkisner@gmail.com.
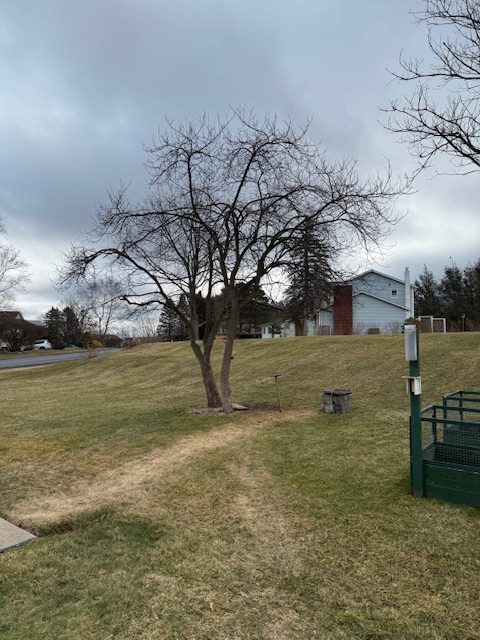
Take a walk with me around our property. I think spring is holding her breath right now! We are finally free from snow piles, but the grass is just waiting to see if it’s safe to turn green. I walked up the hill to see if the forsythia was starting to bud out. From a distance, the plants have a slightly yellow cast, but the buds are still pretty tight.
The garden on the hill is also waiting…no new green shoots yet for the echinacea or the lavender. They are my bookends for the garden.
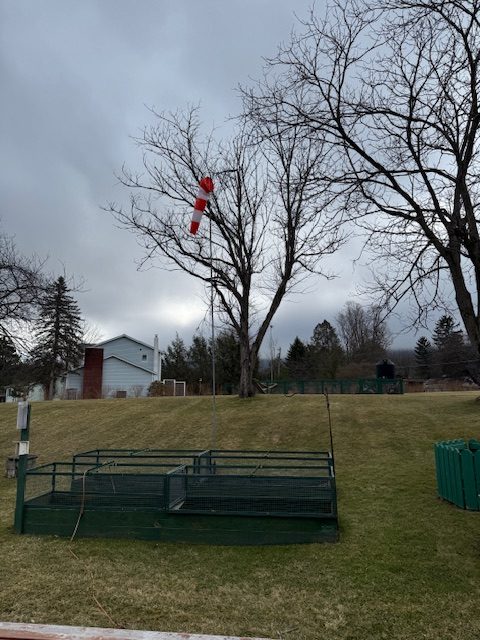
From the hill, I wanted to document the two Butternut trees. From this view, the tree on the right is the one that is dying. Last year it barely had leaves. Every time we have a windstorm limbs come down. It really looks pretty sad in the summer. In the next month or so, when it isn’t so muddy, Bert will cut it down and use the wood in the shop stove. When he does that, I’ll try to document the process.
You can see the various planters near the patio just waiting for spring planting!
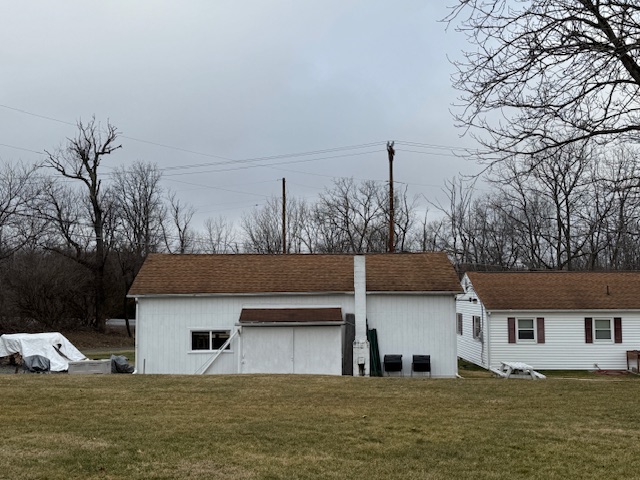
The back of the shop has our compost tumblers. One is in active use and the other just gets tumbled. Bert will add that compost to some of the garden soil. It’s amazing how much stuff we put in there and at the end of the season there’s hardly anything in it but black ‘gold.’
The space to the left of the shop under the spouting is ready and waiting for Bert to set up the rain barrels. He waits until we stop having freezing weather…frozen water in the plastic barrels could crack the plastic. Without plants in the garden, we don’t need that water yet anyway.
Here’s another view of the Butternut trees. You can see the one on the left looks pretty straggly.
And finally, our group of Red Bud trees struggle every year but Bert keeps trimming the dead limbs. I’m sure the birds would not be happy if we lost those trees…it houses our bird feeders and bird bath that the deer also visit every night.
Not much to see yet, but plan to follow along with my posts about our Garden of 2026. We are ready!
If you have questions or comments, please email me directly at maryjkisner@gmail.com.
I could just share with you the recipe to make Rye Pocket Pita Bread and pictures of the final product. However, I thought you might enjoy reading, or seeing pictures of, how it took three tries to get it right! Never be afraid to try something more than once (even if you set off the smoke alarm!). I now have a simple recipe to make sandwich buns, an old recipe for Rye Pocket Bread (which I will not use again!), and a great recipe that makes a delicious Pocket Pita Bread that uses Rye flour. Whew!
Finding a New Recipe
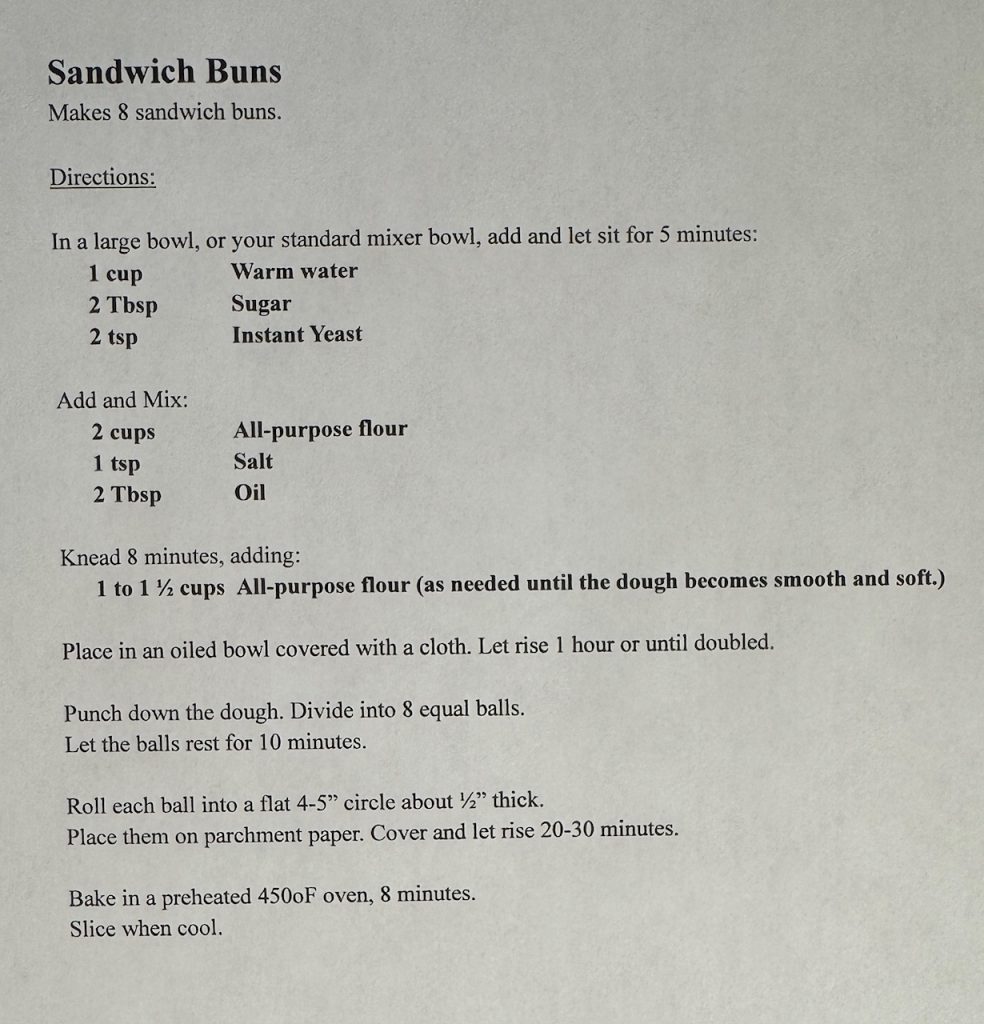
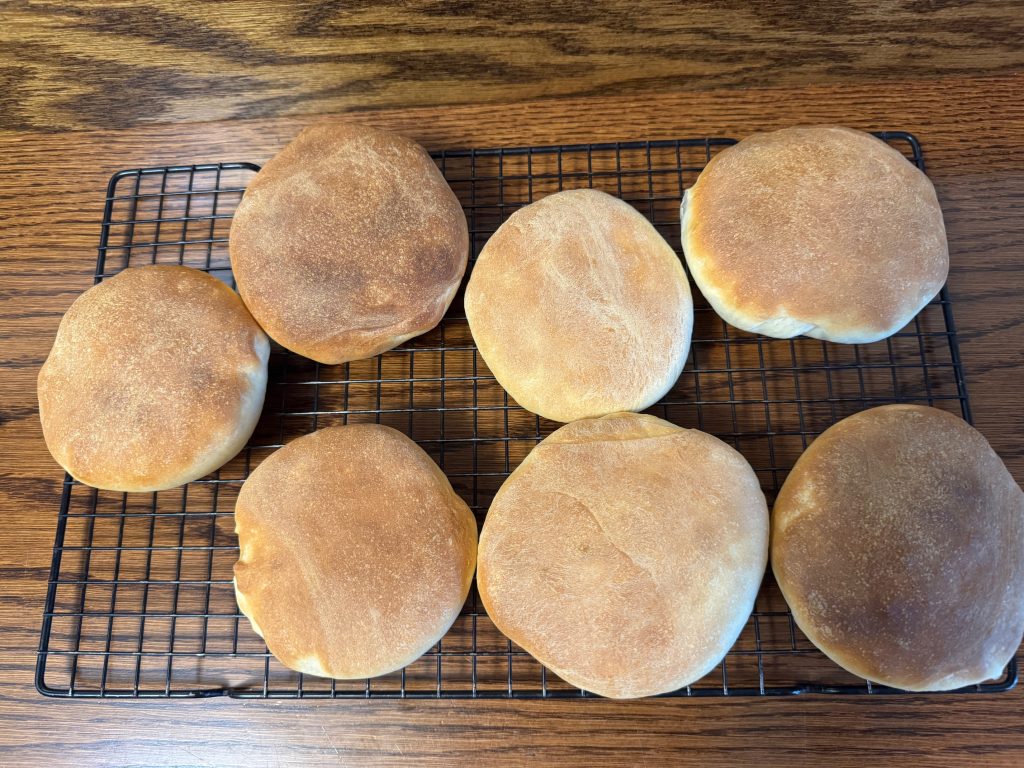
It all started with a recipe I found online called, ‘Soft & Fluffy Homemade Pita Bread.’ It sounded pretty easy but the layout of the ingredients list was awkward. I went ahead and mixed up a batch in my mixer. It was a pretty dry mix. I should have started with less flour and added more as needed. My mistake. Anyway, the finished rolls were tasty but did not make a ‘pocket’ when baked. The rolls were delicious and soft, so I revised the format of the recipe and renamed it, ‘Sandwich Buns.’ Below are pictures of the buns and the recipe so you can try it yourself. I did take pictures along the way, but I’m not going to post them all here…my goal was to find a good recipe to make flat breads that make a pocket.
Sandwich Buns
Finding an Old Recipe
I had remembered that about 45 years ago when my kids were little (1980 or so) I met a woman in a mother’s group. She was from the Middle East and was in State College because her husband was studying at Penn State. She graciously offered to show me how to make pita bread with pockets. I spent an afternoon at her apartment while she whipped up a huge batch of rye pocket bread. She was making enough to last her family for a week…it was their bread of choice. By the time I left I felt confident I could make them myself…and I did for quite a while.
Of course, time passed, the recipe stayed in my notebook and my life got more complicated. Needless to say, I had to really hunt to find the recipe again yesterday. The recipe called for plain yogurt and rye flour. I had neither! I knew I had some whole wheat flour that could substitute for the rye flour. I picked up some yogurt at the grocery store.
This time I decided to mix the dough up by hand…big mistake! My hand/arm strength could not mix the flour in well enough so I had to do most of the kneading by hand. Next batch…use the mixer!
It was a very soft dough, thanks to the yogurt. Everything worked well except…I tried to lay the circles of dough on cornmeal on the cookie sheet. Might have worked if I hadn’t made the oven too hot. The old recipe called for 500 degreesF and it was just too hot for the loose cornmeal on the cookie sheets. Just as I was taking the cookie sheets out of the oven the cornmeal was smoking hot and of course the smoke alarms were set off! Geez!
In the end, the pocket bread made fairly nice pockets but I’ve now revised the old recipe and will try it again tomorrow. I now have a small bag of rye flour, enough yogurt to make the recipe again, and will make the oven temperature only 425 to 450 degreesF.
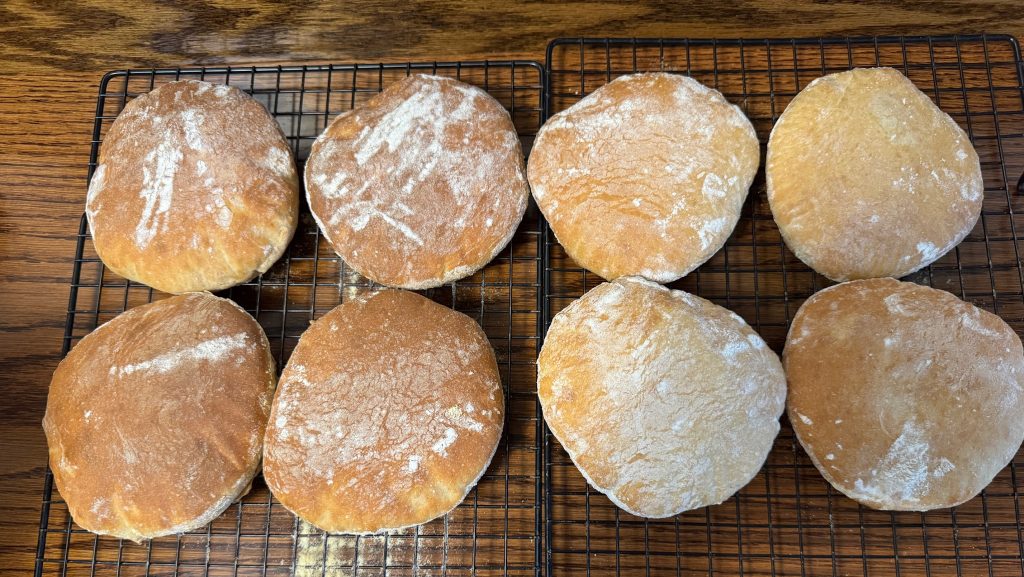
So, here is the revised Rye Pocket Bread recipe and a picture of the finished products.
Rye Pocket Bread
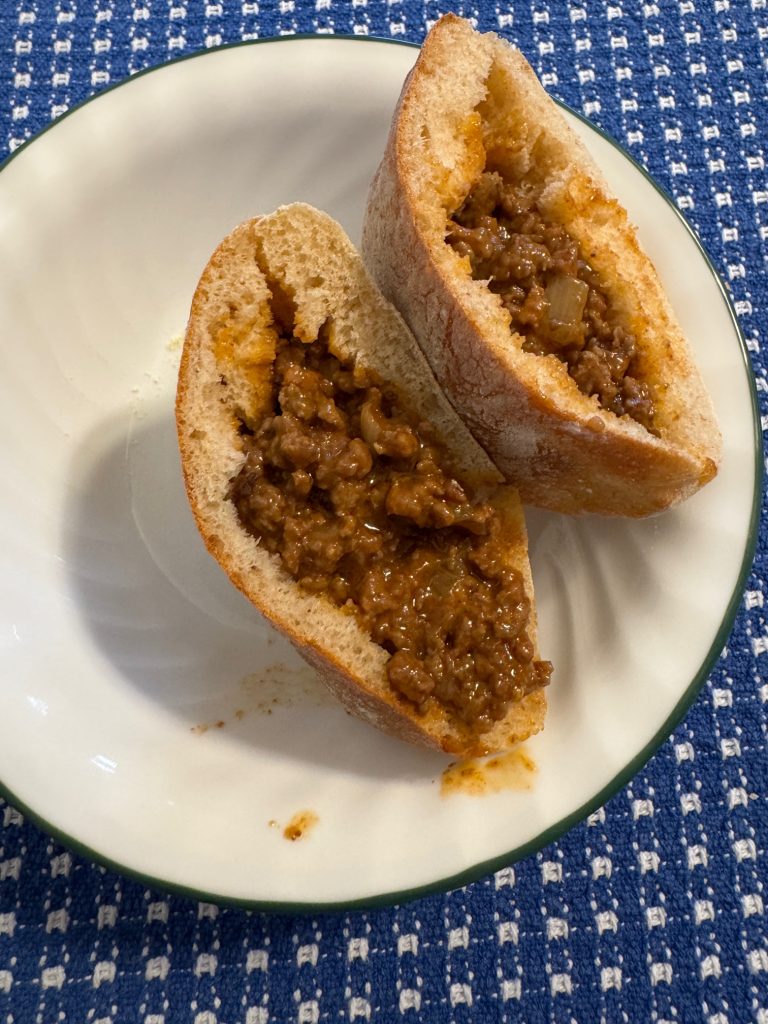
Pocket Bread with Sloppy Joe
Sometimes, making a new (old)recipe leads to some changes. In this case, I ended up with two good recipes and one old recipe that got ‘retired.’
If you have comments or questions, please email me directly at maryjkisner@gmail.com. Let me know if you’d like me to post the step-by-step to make this recipe!
I apologize for my silence for the last two weeks! It’s been a long slog of VERY cold weather and the lack of sunshine has been tough. We’re finally getting a few 20-degree days and occasional sunshine, so things are looking up. I have not been very motivated to do much except make bracelets and listen to music.
I wanted to share how my own blog posts have helped me think about projects I’ve done and what I’d like to try next. I also realized how nice it was I had pictures to remind me HOW I did things and if the results were worth it! I’d like to share 5 projects I worked on these last two weeks and how they pulled me through my mid-winter funk!
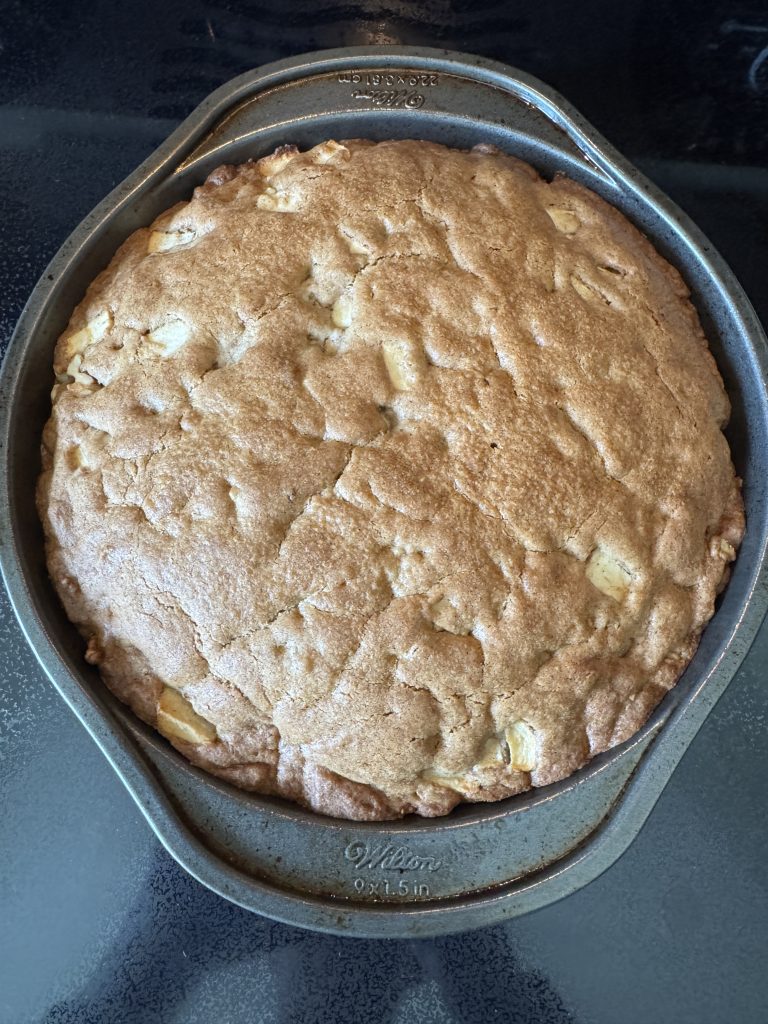
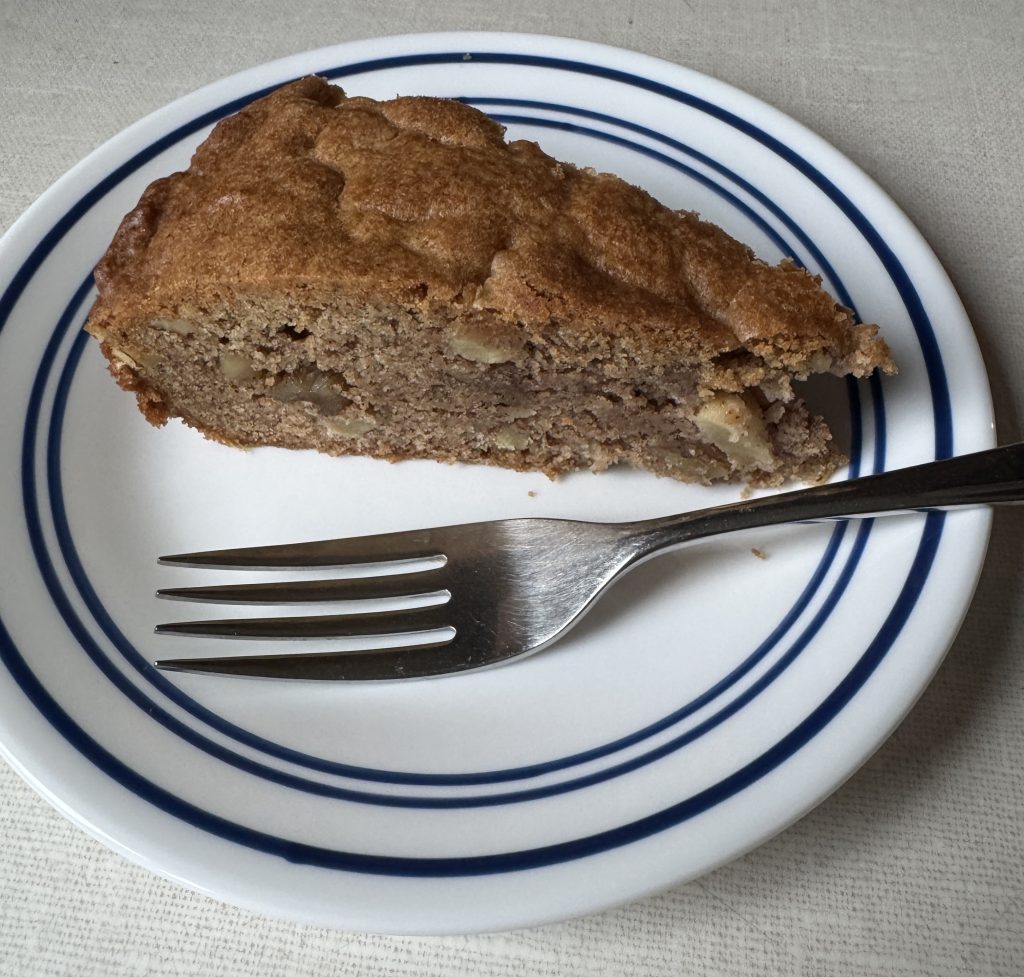
#1: Making Cinnamon Apple Cake
I had a few apples that needed to be eaten, cooked or pitched soon. Bert suggested I make an Apple Cake…but if you’ve followed along, I’ve made 4 different cakes and not all have been delicious. So, to help me remember, I looked up the four posts that described them. You can see them here:
After reading those four posts and looking at the pictures, we decided we liked the cinnamon apple cake the best, so that’s what I made last week.
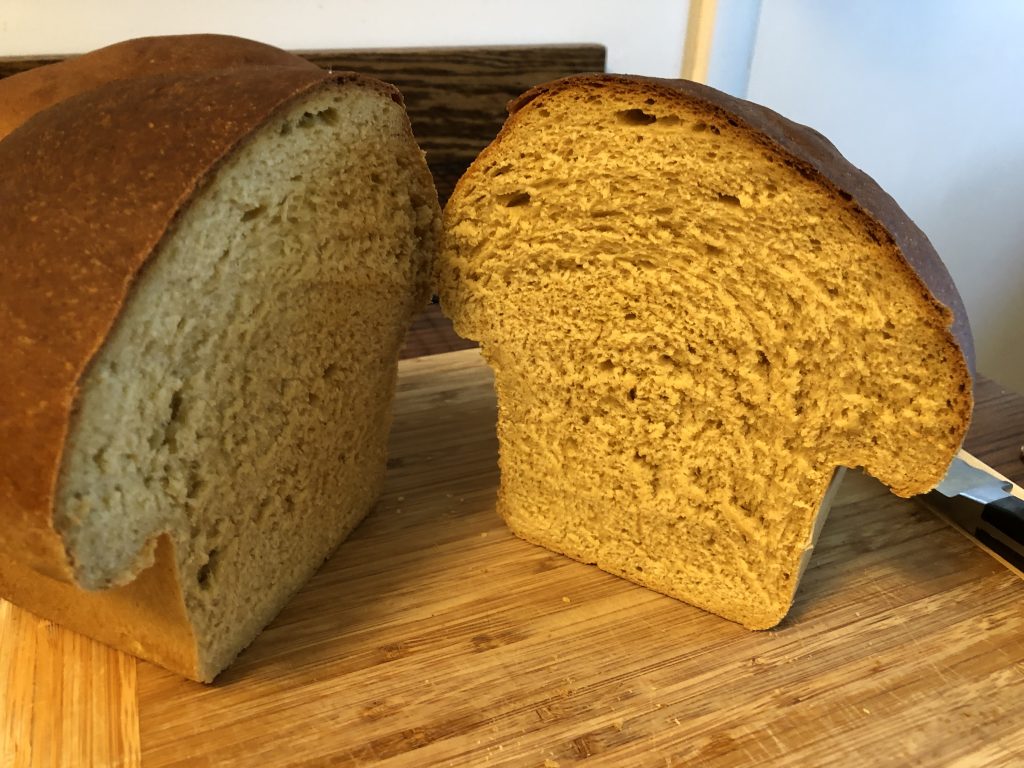
#2: Making Sweet Potato Yeast Bread
Next, I wanted to bake bread…my go-to-activity when it’s really cold and snowy! In the freezer I found mashed sweet potato (in a 1-cup container) and a bag of whole wheat flour that I had ground a few months ago. I found my post about making Sweet Potato Yeast bread (https://marykisner.com/making-sweet-potato-yeast-bread/). It made 3 small loaves…just right to go with homemade soup during the snowstorm!
When I got done, I remembered I had earlier made Vegan Sweet Potato Buns and could have made them instead. I’ll do that next time I feel like baking! Check out that recipe here: https://marykisner.com/making-vegan-sweet-potato-buns/
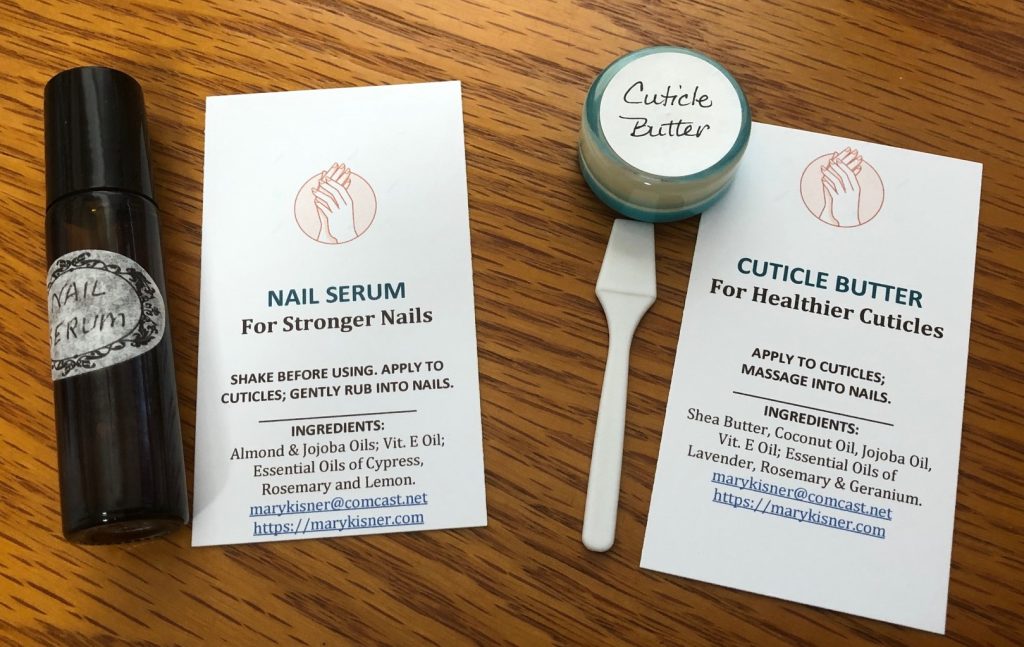
#3: Making Nail Serum for a Friend
While we were snowbound, I had a text from a friend who asked if I still had any of my nail serum and cuticle butter left. It’s been a while since I made both, so I sorted through my bins of stuff to see if I had any left.
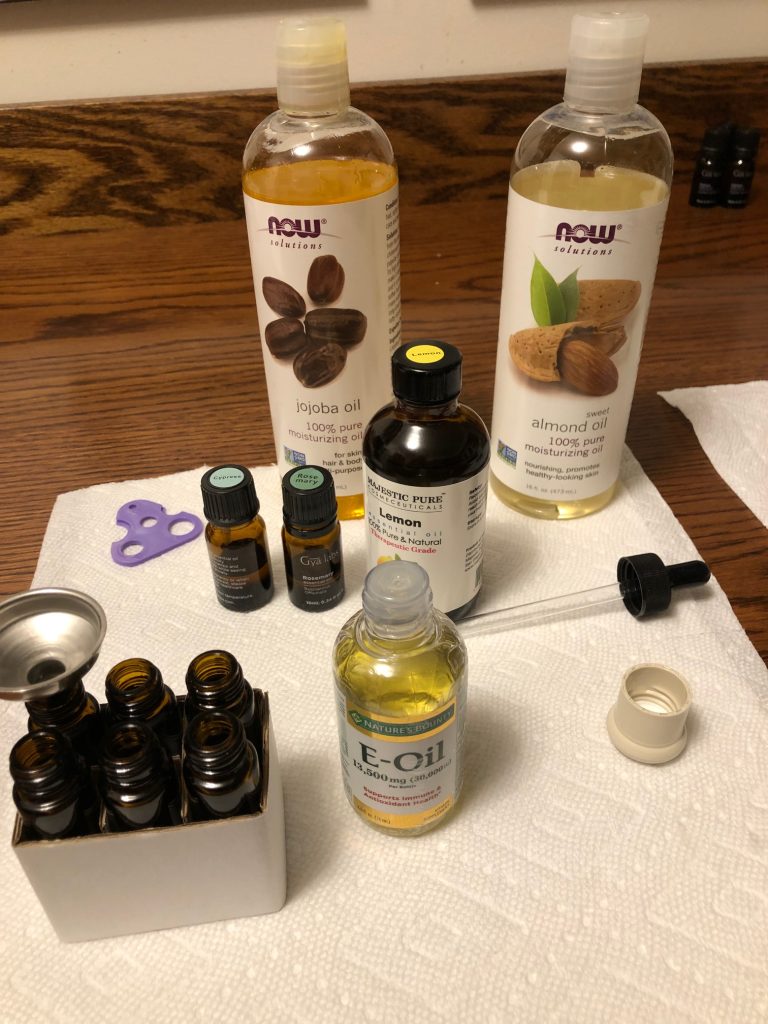
I did have a bunch of tiny cuticle butter containers left but no nail serum (in rollerball containers). I pulled out the blog post for the recipe to make more nail serum. I ended up making a few. You can read about it here: https://marykisner.com/essential-oils-and-nail-care/
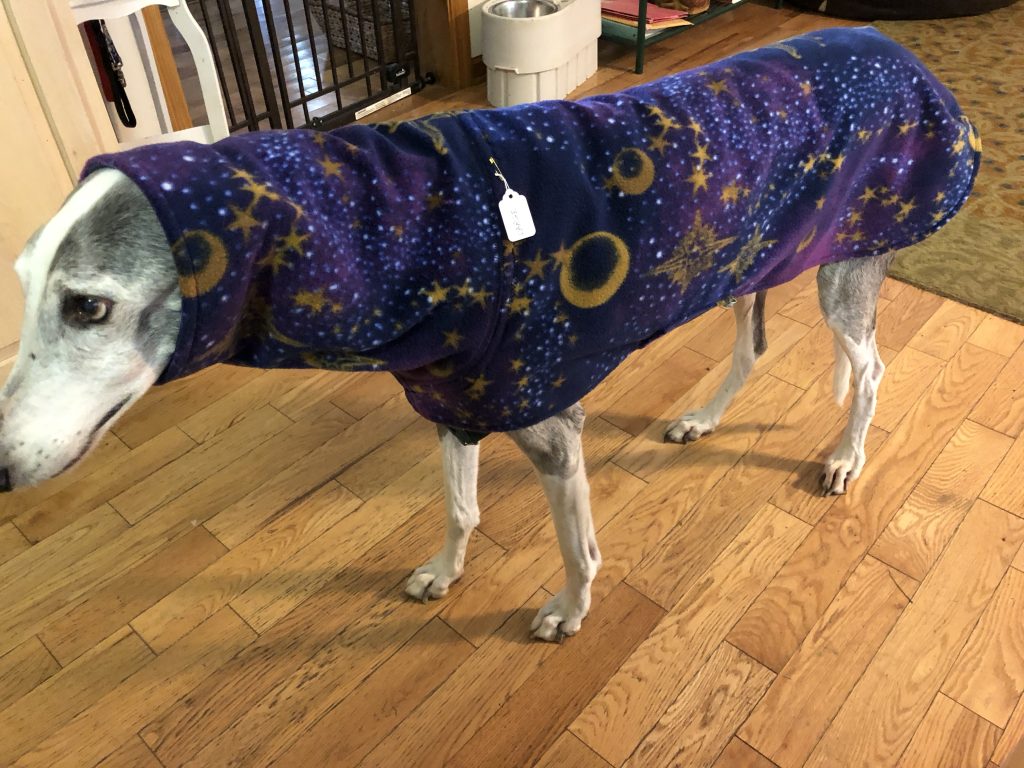
#4: Sharing Links about the Greyhounds
This last week I also had a query from a greyhound owner about whether I still made coats for greyhounds. I had to explain my dilemma about making the coats. I have not made coats for at least a year. I was basically burned out and was turning my attention to my bracelets. I am still able to do custom orders for coats, but now that JoAnn Fabrics is out of business, affordable fleece fabric is hard to find. I have found a few offerings on Amazon, but they are mostly solid colors and very expensive. To buy the fabric (in one color) to make one coat could cost $45-60. Then, my time to make the coat and mail it to a customer is another $50. I just don’t see that being feasible.
I ended up sharing with the greyhound owner the six blog posts I’ve written about my work with the greyhounds:
As I’ve mentioned many times, I’m willing to share my patterns for the coats and teach someone else how to make them. We worked hard to design them so they fit well. I’m proud of how cozy they are. Of course, my work with Nittany Greyhounds was a volunteer job so there isn’t much money in making them although Nittany always paid for the fabric. I have seen coats being sold on Etsy for $75-100. I just can’t see it’s a lucrative activity without a good source of affordable fleece. So far, I have found few people who even know how to sew.
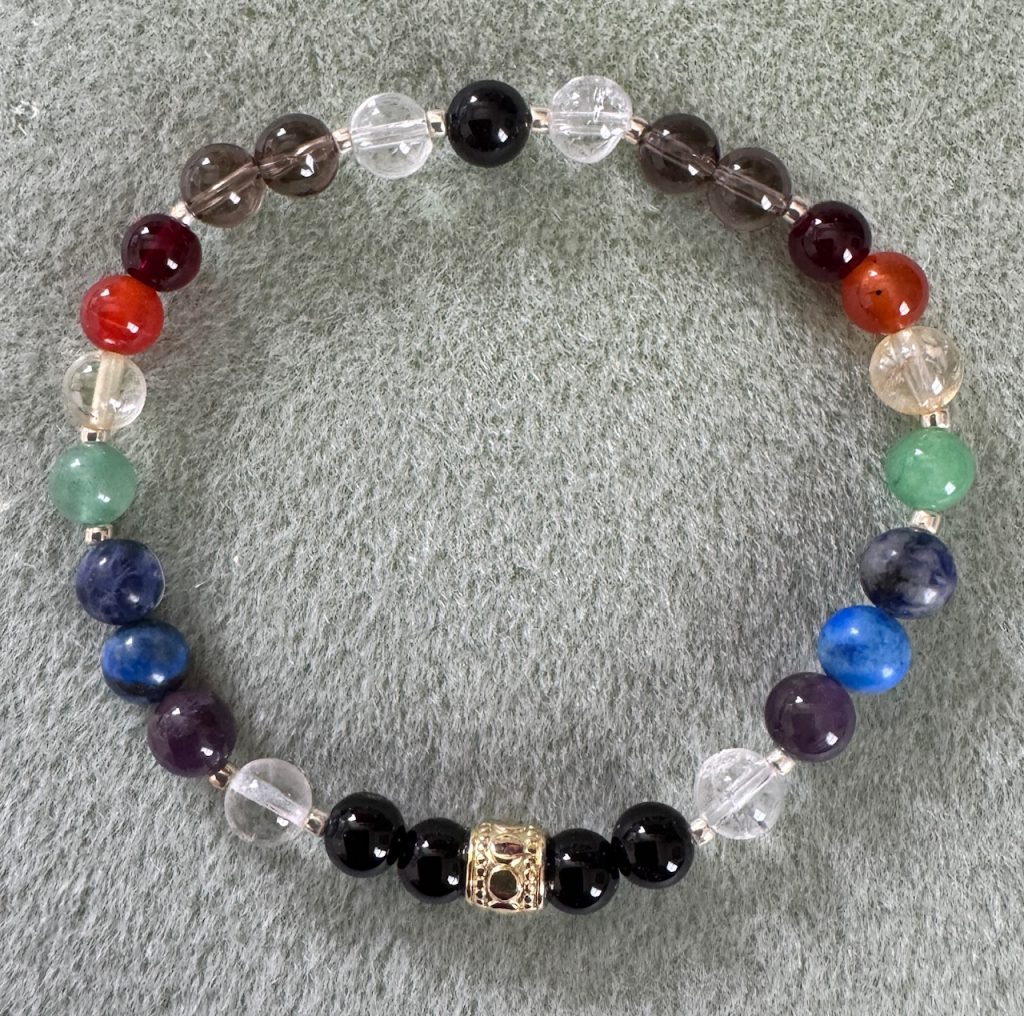
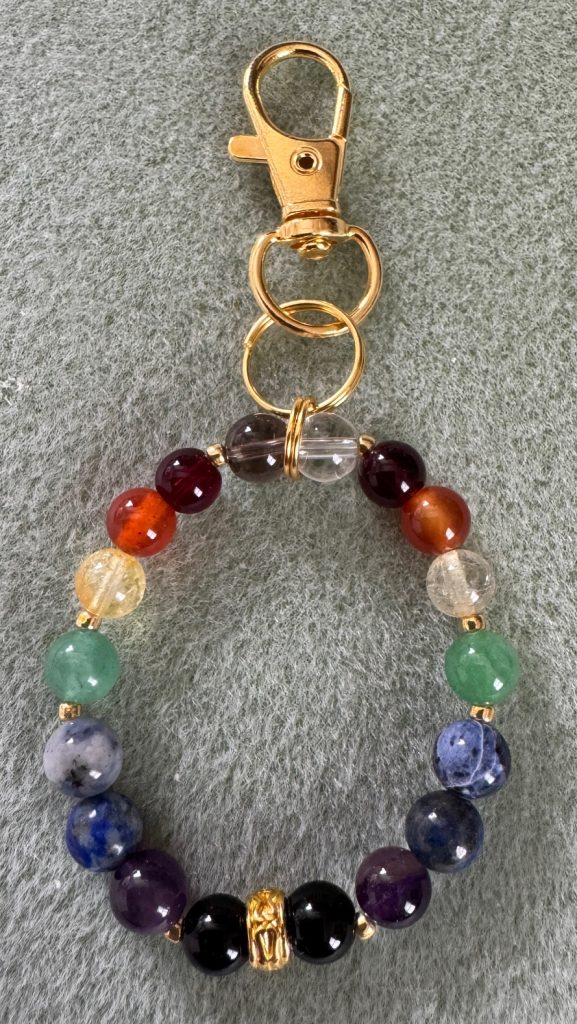
#5: Designing a New Bracelet for Well-Being
Finally, around all the baking, nail serum making and greyhound conversations I was thinking about designing a new bracelet for general well-being. Most of my specialty bracelets start with the idea that the best thing I can make will help a person stay balanced and is focused on keeping their chakras strong and aligned. The chakras are the energy centers in the body and when one is blocked or weak from illness, stress or environmental conditions my focused intentions always target bringing a person’s energy back into balance. The various stones have their own vibrations that help that intention.
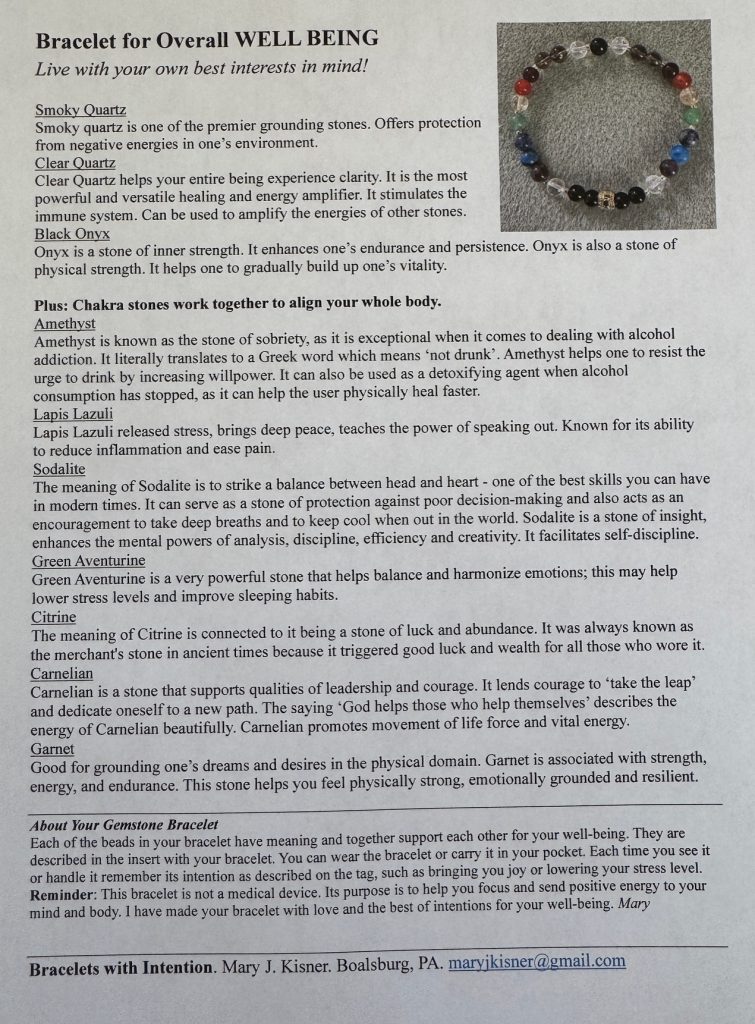
The latest bracelet I’ve made is based around two sets of the chakra stones, plus smoky quartz, clear quartz and black onyx. Those last three stones provide grounding, clarity and inner strength for whatever issue a person is facing.
Then I made a key chain accessory to go with the bracelet so well-being can be carried with you. Making that set was fun and kept my mind busy as the snow piled up!
Here is the description that I include with each bracelet. The key chain accessory just has fewer beads but still has the two sets of chakra stones.
So, that’s what I’ve been doing! Silence doesn’t mean I’m not doing stuff. I may just be revisiting posts to try something again. I hope you are staying warm (or cool) depending where you live!
If you have comments or questions, please email me directly at maryjkisner@gmail.com.
Yesterday I wrote about how the charms on a charm bracelet could prompt recall of memories. I truly think I should consider making a new charm bracelet for myself…just in case my memory slips a little. I might be about to jog my memory by thinking about individual charms like my sewing machine, a kitchen mixer or my greyhound charm. You can read about the charms at https://marykisner.com/preserving-memories-with-a-charm-bracelet/
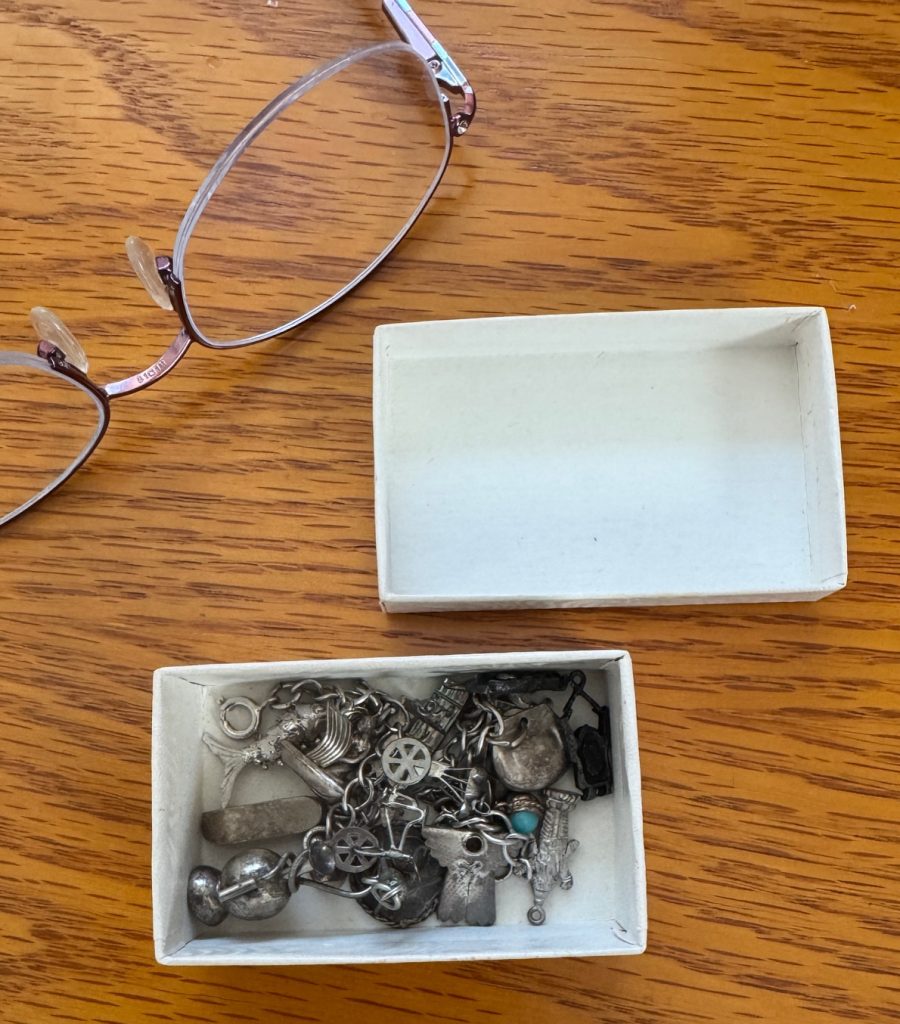
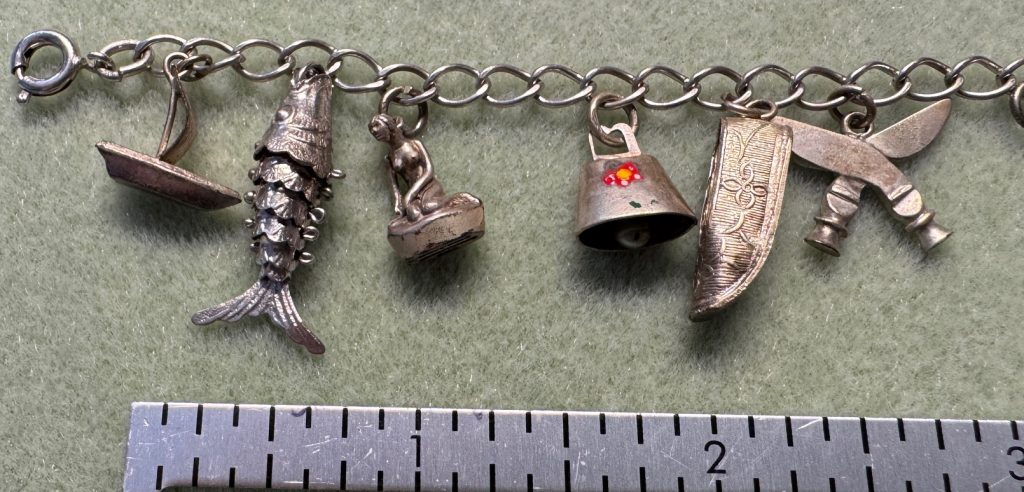
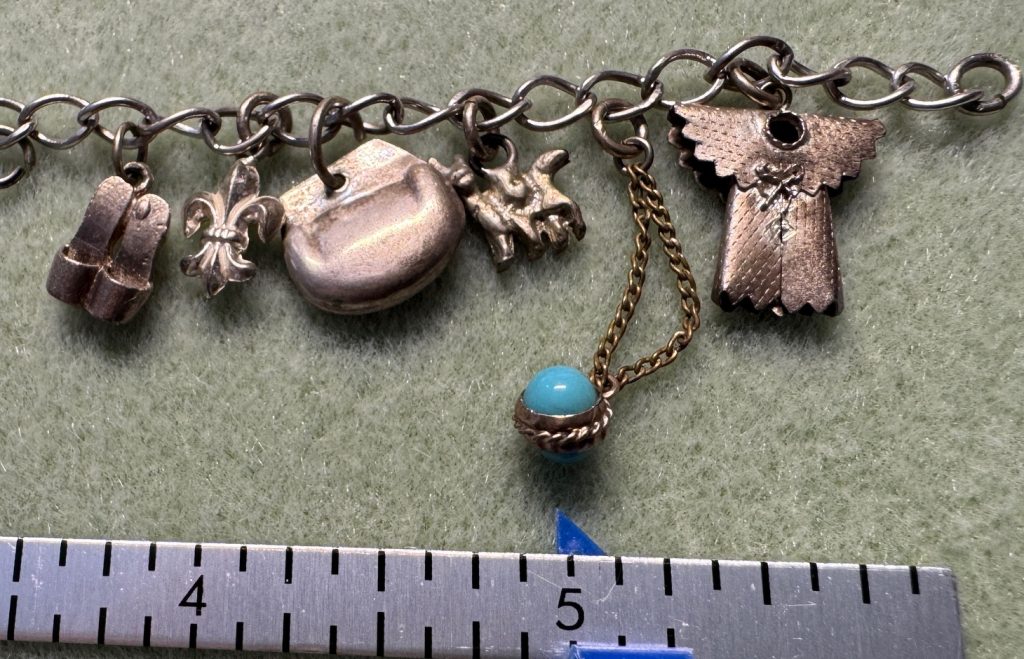
While I was thinking about various charms for that post, I remembered a charm bracelet that had been tucked in with my mother’s jewelry. I hadn’t thought about it in years, and she passed away in 1988. the bracelet and charms fit into a tiny box. I vaguely remember she picked up these charms on one or more of my parent’s overseas trips…one charm in each place/country they visited. She never really told me about them, plus I was home with two toddlers and just couldn’t relate at that time. When she passed, all chance of asking about them was gone. Of course, my dad lived another 22 years, but of course that little box was tucked away…out of sight, out of mind! The lesson here is…if you have an assortment of charms in your jewelry box that have a memory attached, consider writing down what they mean to you…otherwise, you’ll be passing on a mystery to someone else!
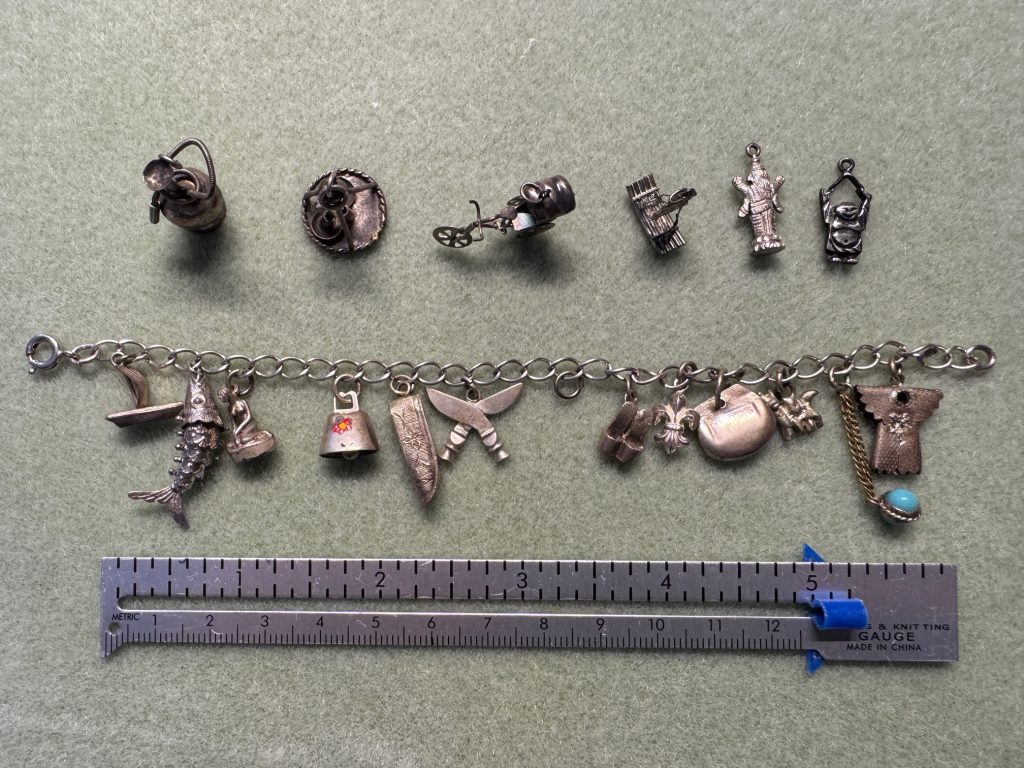
I carefully emptied the box to take pictures of the charms. I know most of their travels were to and from Southeast Asia, but I’m sure they had stops along the way. These charms were silver (or tin?) and many were quite delicate. I don’t know if they were arranged in any specific order or if she had a favorite.
The mystery is…I have no ‘stories’ or ‘memories’ to go with the charms. I don’t know what countries they are from. I’ll share the pictures below. If you recognize a charm that represents a specific country I’d love to hear about it! Otherwise, imagine the stories I could make up using these charms to tie an adventure together! Any fiction writers out there?
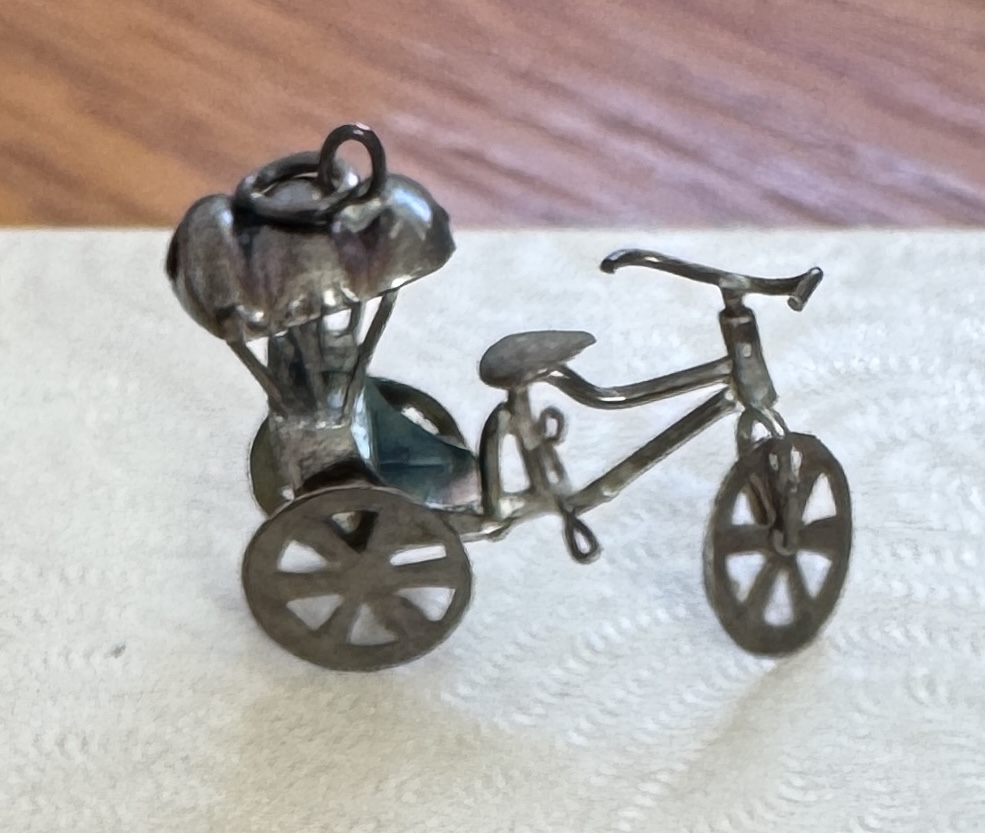
My favorite charm in the whole pile…this very delicate bike with a seat for a passenger! I know I saw those in the Philippines…in 1955-56!
Please email me directly if you have comments or questions (maryjkisner@gmail.com) I also post links to this article on Facebook and you can comment there. Enjoy!