Add Stories to Your Family Tree

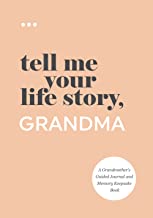
I noticed the other day as I walked through Cracker Barrel many reminders that Holiday Season is almost upon us! While the ornaments and decorations are always lovely, this year I noticed a large book being offered as a place to have our older relatives jot down memories and stories about their lives. The pages in the book offered writing prompts to help folks focus their stories like…What was it like for you as a child in such a big family? or What were your favorite school subjects?

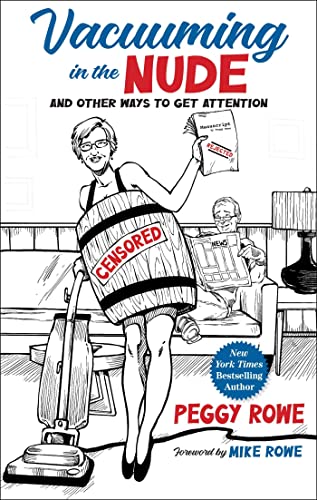
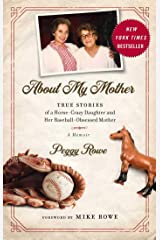
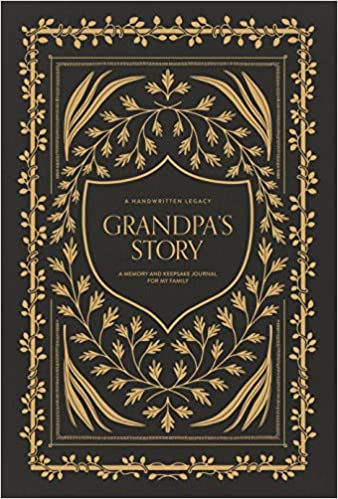
Here are some sample books from Amazon:

Trying to capture the events of a long life are difficult, but with writing prompts like these, many stories can be captured for posterity. If relatives are nearby, younger relatives could offer to do the writing by listening or recording and transcribing the stories.

Books like these are a great idea for relatives who live farther away, but sometimes all we have are little snippets of memories that come up when we’re eating Thanksgiving dinner together.

These memories and stories can really enhance a simple Family Tree Diagram.

I described how to make a simple Family Tree for young children in a previous post last year (see https://marykisner.com/building-a-simple-family-tree/). I’m now suggesting that adding some of these stories will help younger family members understand interesting details of their lives.

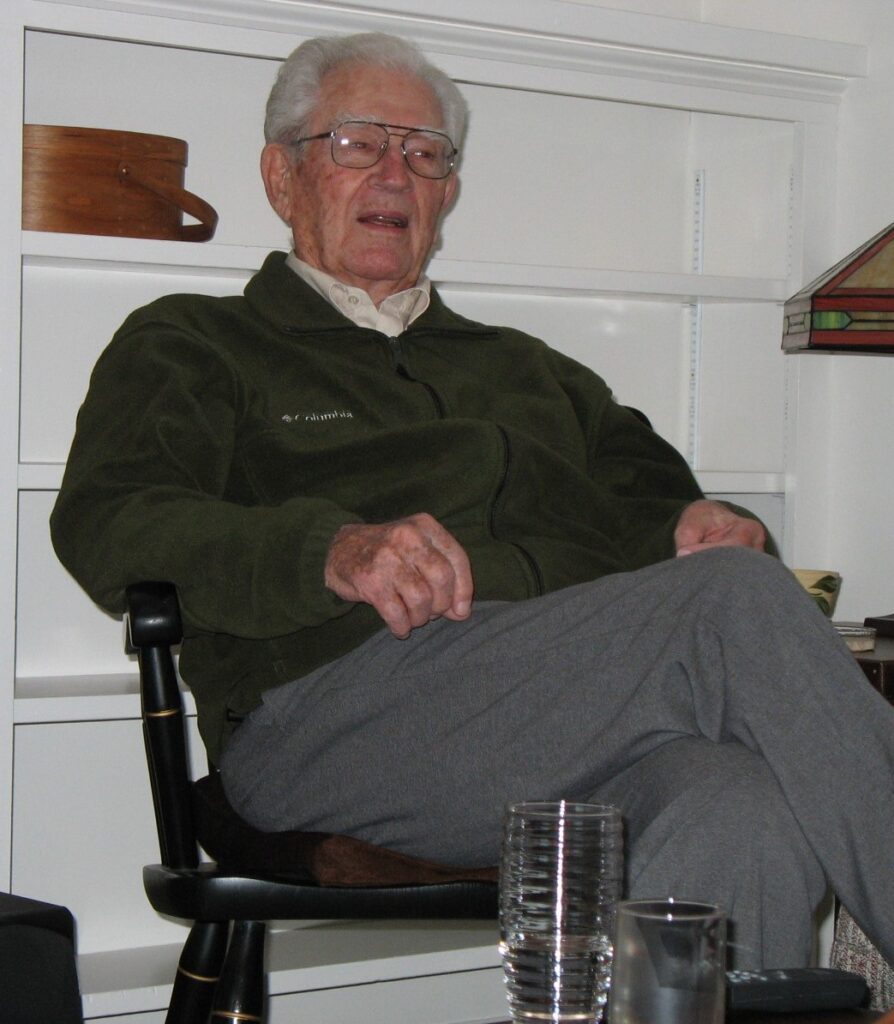
I feel fortunate that both my father (Paul Bixby) and my grandfather (John Bixby) were prolific writers and left behind a pretty complete accounting of their growing up years. I’d like to share two stories that could certainly tell my grandchildren a lot about their great grandfathers that they will never meet or met when they were very young and don’t remember them.

Story of the Early Years from Grandpa John

John Bixby (shown top right) 1882-1982.

“I was born on a farm in Aurora Township, Minnesota, December 26, 1882. Eventually I had 3 brothers and 2 sisters: Jacob, Lottie, Abraham, Isaac and Gertrude. The winter of 1882-1883 was a severe one with deep snow and blocked roads. That is the reason I arrived one day late for Christmas!

The first 6 years of my life are pretty much a blank as I remember them now, but I must have grown at a tremendous rate for before I was eight years old, I was raking hay with old Nellie (our work horse) and the new self-dump rake. That fall I was plowing with four big horses and the 2-wheel sulky plow.

The years from 1888 to 1893 were spent in school and helping where I could on my father’s 240-acre farm. The school year back then was a 5 or 6 month term mostly during the winter. My father taught two of those winter terms, the first when I was six. During that winter we learned how to read a bit, count, add and subtract and write our names. When father taught, he would rise at 4:30, do a lot of farm chores, eat a hurried breakfast, pile us kids into the wagon or sleigh, pick up several more kids on the way, put his team in a nearby farmer’s barn and be ready to ring the bell at nine.”

A Memory of Tough Love from Grandpa Paul

Paul Bixby (1913-2012)

“When I was about eight years old I had a calf named Daisy. I had begged Dad to let the new-born Guernsey be mine, and promised to take care of it through the summer until a fall sale would bring dollars to buy my new shoes for school. She was too small to drink from the cattle tank so she was staked out in lush grass near the house. She depended on me for water. Mother had made it very clear that if I were to claim ownership, responsibility for chores also would be mine. Dad had agreed. All was good fun for a while but as the summer weeks passed, other interests lured me. More than once Mother had reminded me to carry water to Daisy.

One morning Mother, Dad and my baby sister Ruth were headed to town and I wanted to go too. It was always fun to go to town with its big grocery store and the Post Office. But going to town meant the chores had to be finished. Daisy couldn’t be left without fresh water.

That morning there had been a note of annoyance in Mom’s call about water. I dallied a bit with the new ‘invention’ I was working on in the shop and in what I thought was plenty of time I dropped my tools and started for the pump with my pail. However, that was when I realized I was too late to finish the chore and still go to town. They left without me!

I was crushed and cried like a baby. I filled the tub properly and sat under a tree to mope and slowly began wondering what Dad might say or do when he returned. When they finally returned, two-year-old Ruthie ran to meet me; Mom said Aunt Clara wondered where I was; Dad glanced at the water in Daisy’s tub and said nothing. Lesson learned…chores before fun!”

Capture Those Shared Stories and Memories

I think one of the most common things to happen when extended families gather over the holidays are the shared stories and memories. Take advantage by encouraging older folks to share these stories with the younger ones. They will never forget those special times. Please enjoy your loved ones throughout the holiday season!

Please comment or email me directly at marykisner@comcast.net.

Tis the Season Part 2: Clay

This post is a continuation of Part 1 (See https://marykisner.com/tis-the-season-part-1-paper-soap-and-fabric/) Keep in mind that making gifts or decorations for the holidays is a great way to involve the whole family. Using clay (polymer or air-dry) is familiar to most folks. The youngest have used some kind of play dough since preschool. Older folks may not have worked with clay, but the physical manipulation of soft moldable stuff is similar to working with bread dough in the kitchen or even putty in the workshop.

The two kids of clay I’d like to share are Polymer Oven-Bake Clay and Air-Dry Modeling Clay.

Polymer Oven-Bake Clay

This clay comes in small, 2 oz. packages. There are several brands available and many colors. The Sculpey brand shown above is my preference because it’s a little softer to work with. The best thing about oven-bake clay is that it can be molded and remolded as desired until you like the finished product. Unused pieces of clay can be stored in a zip lock plastic bag and easily used another day. Once you have determined you are done making something, then it is baked in the oven (or toaster oven). When completely cooled, it is firm and unbreakable. At that point it can be painted or shined with mica powder as desired.

Young children can enjoy working with this clay and the final process of baking can be handled by an adult.

Basic Tools to Work with Polymer Clay

This clay will need to be worked on a firm surface. I have a piece of thick 3/8″ class that Bert got from the local glass business. I can use it right on top of my tablecloth. It gives me a firm surface that is easy to clean after working with the clay.

These are the basic tools you will need:

–a rolling pin or something easily washable

–a long blade to slide under pieces of clay to remove them from the work surface

–assorted hand tools to mark, poke or cut pieces of clay

–a plastic straw to make a hole just the right size to hang your project, if desired

–an oven or toaster oven to bake the finished project. (I have an old toaster oven that is dedicated to baking this clay)

Note: If you will be using your regular oven, consider making a smaller “oven” space with disposable foil roasting pans. The clay will emit fumes that you might not want on the next meal you bake. Just take two large roasting pans, make one the lid and clip them together with binder clips. Objects will need to bake for about 30 minutes at 265 degrees F.)

Making Flat Objects with Polymer Clay

To make flat objects with this clay, you will need to flatten it out with a roller of some kind. Then you may want to press a design into the clay. Almost any item with an interesting texture can be used to make a design. Here are just a few ideas:

Interesting designs on rollers that are used in working with fondant are available in the cake decorating section of a craft store. Many stamps that are also used with ink can press a design into the clay. Acrylic shapes often come in craft magazines. They can be peeled off the plastic and placed into an acrylic block. This is then used to press the design into the clay.

Cutting Out Shapes in Polymer Clay

Once you have a design pressed into the clay, choose a shape to cut out the final piece. (If you cut out the shape first, pressing the dough may change the shape…so press designs first.)

Now is a good time to pull out any cookie cutters you have. The metal ones are sharper and will give you a clean edge. The tiny cutters above can be used to make decorative holes…or cut clay pieces in a different color to glue on to the finished product after baking.

Samples of Flat Objects

Here are some examples of things I’ve made over the years. Most seem to end up as ornaments for Christmas.

I used several colors of clay and rolled and folded them together before rolling the clay out to cut out the circles.
These were basically flat pieces when I pressed designs and cut holes. Then I stood them up and anchored them to a flat round base of clay. They couldn’t be any taller because of the size limits of the toaster oven. The little LED lights were just perfect!

Free Hand Clay Objects

When I first started working with polymer clay, I found many ideas on Pinterest. I started with miniature plants. It looked so easy…not! My first few plants were probably all I’ll ever make, but they’ll last forever!

Then I thought I’d try a tiny trumpet and drums for my grandkids.

Making objects in the shape of an animal is definitely not my strength. However, if you can follow directions, you will find many great ideas on Pinterest. These step-by-step instructions will appeal to a generation of folks that were raised on LEGO instructions! Check out how to make a Turtle!

From Pinterest.

The best surprise was my Christmas present from my grandkids the year I was working with all this clay. I had given them an assortment of clay and tools and we had fun playing with them When Christmas rolled around, they gifted me my own crate of clay vegetables…perfect for a gardening grandma!

I think my grandson, age 12 or 13, had fun making the garden produce!
And my very own rainbow heart from the youngest granddaughter!

Air-Dry Modeling Clay

After working with Polymer Oven-bake Clay, I found working with Air-Dry clay difficult. It was not as forgiving and started to dry very quickly. It tended to crack easily, so pieces had to be thick enough. Solid objects took forever to dry completely.

So, my work with this clay focused on smaller circles of clay that could be quickly pressed with a design and left to dry. I did find that pieces had to be at least 1/4″ thick or more or they would not dry flat. I spent the day carefully turning each piece over as they dried.

The best advantage of using air-dry clay, was its ability to absorb essential oils. Now I had a way to capture my favorite oil scent to make my drawers and closets smell good. I also made a bunch of Christmas ornaments that could be soaked with the scent of the holidays to add to the Christmas tree. So, this clay has its uses.

Making clay objects or holiday decorations with kids and grandkids can be a fun way to get everyone involved. Skill levels can vary and everyone can participate. Enjoy!

Please comment or email me directly at marykisner@comcast.net.

Autumn Around the Kisner Homestead

Autumn weather is fully entrenched around here now. Parts of northern Pennsylvania had a dusting of snow this morning; here at our house we’ve had temperatures in the low 30’s so far, but not a really hard freeze yet. The changes in scenery are subtle, but as an example, our Japanese dogwood trees a few weeks ago still had green leaves while the seed pods were a beautiful bright orange.

Now, while the seed pods still look orange, they are getting soft. The leaves are now starting to turn color too.
The row of trees all along the front of our property are lovely.

I had designed and painted this quilt block (below) on wood in late August for the front door. It feels like it’s time to put up the quilt block from fabric that I had made a year ago for the late fall season.

This was a good decoration for my front door in the late summer, early fall. See how it was made at https://marykisner.com/autumn-door-quilt-on-wood/
This quilt block, made last year, seemed better suited for late fall. See more about this block at https://marykisner.com/fall-door-quilt/

When I took a walk around the garden today, I was totally surprised that the lavender is still blooming! I may have to grab my shears and snag a few stems!

The carrots that we left in the garden are still doing well. The tops are still green and the carrots should be OK until after Thanksgiving right there in the ground. They actually keep better in the ground than in the refrigerator.

Just a few carrots left in this row. We’ll dig them up next.
These carrots were an experiment. They were planted around mid-August and we weren’t sure they would do well. We’ll harvest them last.
The echinacea have gone to seed and will drop them over the winter. Next year’s patch should be spectacular!
The Butternut trees are losing more leaves every day.
The Red Bud trees keep their leaves the longest.
The neighbors down our street have these beautiful bushes. Glorious color every year!
And our wood pile is ready for cold weather. While our house has electric heat, nothing beats the warmth of wood heat from our stove in the basement. It keeps the floors warm!

So that’s what is happening around our house. Happy Autumn from our house to yours!

Please comment or email me directly at marykisner@comcast.net.

Honey Nut Granola

I was really in the mood for something different for breakfast today. We haven’t had cereal around for a long time but today I wanted to put my frozen blueberries on a bowl of granola. Soooo…guess it’s time to make some!

I found a pretty simple recipe online and gathered ingredients. The original recipe calls this “Healthy Granola” but I decided to call it Honey Nut Granola. The link to the original is here: https://cookieandkate.com/healthy-granola-recipe/

Here are the ingredients:

And here is the recipe:

Making Granola

Step 1: I prepped a 9″ x 13″ cake pan with parchment paper and preheated the oven to 350 degrees.

Step 2: I measured out the dry ingredients and put them into a large bowl. (I did chop the nuts into smaller pieces.)

Pecans and Walnuts

Dry Ingredients: Rolled Oats, chopped nuts, salt and ground cinnamon.

Step 3: Mixed up the wet ingredients in a small bowl before adding them to the dry ingredients: coconut oil, maple syrup and honey (I used 1/4 cup each), and vanilla extract.

Step 4: Mixed up the granola to lightly coat “every oat and nut.”

Step 5: Poured the granola mixture into the prepared pan. I used a spatula to press the granola into the corners.

Step 6: Baked granola in 350-degree oven for about 24 minutes. (I stirred it halfway and pressed it back down in the pan with the spatula).

Steps 7 & 8: Remove the pan from the oven and let it sit to cool completely (at least 45 minutes).

Step 9: I broke the granola into big pieces with my hands and put it all into a large bowl.

Step 10: I stirred in 2/3 cup of golden raisins and let it cool some more.

Cooled granola and golden raisins.

Step 11: I dumped the granola into a gallon ZipLock bag and put it in the freezer.

This recipe is supposed to make 16 – 1/2 cup servings. We’ll see!

Tomorrow’s granola breakfast should be delicious with a helping of frozen blueberries on top! Try it yourself! Enjoy!

Please comment or email me directly at marykisner@comcast.net.

Tis the Season Part 1: Paper, Soap and Fabric

This may be the year we will want to focus on handmade gifts for the holidays. Of course, the latest gadget, tool or toy is always fun to receive, but with supply chains disrupted or delayed you may be forced to consider other kinds of gifts.

Giving a gift you created yourself is sometimes the most meaningful. Many of the posts I’ve written about over the last two years have been inspired by friends and family who have expressed an interest or need for something I can make. Now I can see that others might enjoy receiving handmade items also.

In this post, I’d like to remind you of some of the projects that you or your children or grandchildren could make that would be a special gift for someone. Think about what those folks might need…or appreciate…from a hot or cold neck wrap, novelty soaps for the guest bathroom or a unique gift bag or box to hold a special gift. Most of the projects I’ve chosen here are simple enough for a young person to make (or help make). It helps to make the season special to focus on the recipient of the gift and what they might like to receive.

So why am I talking about this in October? Handmade gifts take time…time to round up the materials and time to gather kids or grandkids around to create together. In this post I will focus on just three mediums: paper, soap and fabric. I’ll save clay projects, skin care items and baked goods for another post.

As a reminder, you can always see and download the whole list of posts I’ve written over the last two years by going to the Welcome page and clicking the link at the bottom of the page. You can download the list to your computer and explore it at your leisure. The most recent 10 posts are always listed on the Welcome page.

Paper Gift Bags

Small gift bags made from recycled calendar pages is a handy way to use some of those extra calendars that come in the mail.

If you’d like to make small gift bags like these, see https://marykisner.com/make-a-small-bag-in-a-flash/

By December I can usually count on 5 to 8 calendars arriving for the next year…often with lovely photographs of scenery, animals and inspirational messages.

Once I’ve decided which calendars I will display on my refrigerator and use on my desk, I take the rest and choose the pictures I like. I cut the calendar apart and discard the front and back. The pictures fit in a file folder so can make a gift bag when I need one.

Paper Boxes

Another project using paper starts with heavier paper or card stock.

See https://marykisner.com/how-about-a-folded-paper-gift-box/

The very tiny boxes could also have a string or thread attached at one corner and be a unique tree ornament. They can be made from Origami paper, sold at art and craft stores.

Guest Soaps

Everyone seems to be interested in washing their hands frequently and tiny handmade soaps can be a unique addition to any guest bathroom.

See https://marykisner.com/simple=guest-soaps-gifts/
See https://marykisner.com/aloe-vera-gift-soaps/

Choosing Melt & Pour Soap bases makes these gift soaps very easy…you literally melt chunks of soap and pour it into molds. When cool, they can be popped out and used! There are so many silicon molds available on Amazon and at arts and crafts stores. A basic shape like hearts can be used for many occasions…but the dog bones are fun too!

The Goat’s Milk soap base works well for most people and makes a nice lather.
Clear Glycerin soap works well, especially if you want to try embedding a toy or coin in the soap.
A plain round mold that is deep enough for the toy works well. See https://marykisner.com/making-soap-with-an-embedded-toy/
A new coin from the bank will give a kid incentive to wash their hands! See https://marykisner.com/making-soap-with-an-embedded-coin/

Fabric Crafts

Most of the projects I make with fabric begin with scraps I already have. If you like to sew, these projects are pretty simple and might really provide comfort to folks on your gift list.

Hot or Cold Pillows or Wraps

How often have you quickly needed a cold compress and have struggled to get ice cubes to stay secure in a washcloth…or pulled a bag of frozen peas out of the freezer to apply to a bruise?

Making a pillow for a headache or a neck wrap that could be used hot or cold requires an appropriate stuffing that can handle being microwaved or frozen. I’ve found whole flax seeds to be the perfect stuffing.

If you really love certain scents, dried flower buds like lavender can be added, but for frequent use, I’d recommend a drop or two of lavender essential oil instead.

Here are some projects that can be used hot or cold.

See https://marykisner.com/making-a-hot-or-cold-eye-pillow-for-headaches-or-toothaches/
See https://marykisner.com/hot-or-cold-neck-wrap/
See https://marykisner.com/pocket-hand-warmers/

Bowl Cozy

Here is one additional project that might be a useful gift…a bowl cozy (or hot pad) for a bowl of soup or ice cream:

See https://marykisner.com/make-a-bowl-cozy-for-soup-or-ice-cream/

As you can see, any of these projects can be customized to be appropriate for the season…winter pictures on gift bags, clever mold shapes for soaps, or holiday fabrics for the season. With a few extra supplies around you can make a special gift for any occasion! Enjoy!

Please comment or email me directly at marykisner@comcast.net.

Hilarious Books by Peggy Rowe

Have you ever had a week where you really needed a good laugh? My week has involved too much “hurry up and wait” times in doctors’ offices and waiting rooms…not all for me actually. This used to be the time I would pick up a Reader’s Digest in the waiting room…except…there were no magazines at all to choose from! There were too many distractions around me to really enjoy the mystery story I was in the middle of reading.

I recently downloaded a new book by Peggy Rowe called, Vacuuming in the NUDE and Other Ways to Get Attention. This was a series of small stories and observations about people she had met over the years. She has a real gift to write about tough issues she and others had faced, from funeral issues to sensitive health issues, in a tasteful and humorous way. This is her third book and the one that has finally reached a wider audience. I think the title alone is a draw!

As you may know, Peggy is the mother of Mike Rowe (of Dirty Jobs fame) and apparently has been writing all her life. She was often heard saying she wasn’t a real writer because she hadn’t published a book. She had, however written stories and poems for her elementary students and articles in magazines. She was even asked to lend humor to eulogies at funerals.

Her introduction to the publishing world made it seem like she was an overnight success at 80+ years of age; yet she was playing by the rules established by publishing companies. Rules like specific ways to submit manuscripts and submitting to only one publisher at a time. The bureaucracy was truly a stumbling block.

Originally, publishers were not interested in Peggy’s first two books. The subject was interesting but they felt no one knew who Peggy Rowe was in the first place so why would folks be interested in her mother? Finally, Mike took charge and self-published About My Mother. It was so successful she was finally able to get her second book About Your Father published more quickly. With Mike’s endorsement folks began reading her work. He also began including his mother’s work in his Podcasts and Facebook posts. And the rest is history!

I haven’t read these two books yet, but I’m looking forward to a few more hours of hilarious stories by Peggy Rowe!

I suspect the clever title and general breadth of the stories in her third book Vacuuming in the Nude, have appealed to wider audience. It has received great reviews. Now, folks are discovering her first two books that did not get such wide press at the time.

If you need gifts for your adult children for Christmas, I highly recommend Vacuuming in the Nude by Peggy Rowe. It might help them understand us as we face their own aging and health issues. Enjoy a laugh!

Please comment or email me directly at marykisner@comcast.net.

Analyzing My Whole Wheat Bread

A cold snap in our area always entices me to make soup and homemade bread! Bert had purchased a large ham with the bone the other day and after cooking and taking off the meat, I boiled the bone and trimmings along with other vegetable scraps to make Ham soup stock. While it was boiling away, I whipped up my whole wheat bread.

Not exactly appetizing yet…but the stock will make great soups!

I wrote about this bread recipe last May, using all whole wheat that I ground myself (https://marykisner.com/from-wheat-berries-to-bread/). This time, I used up some of the flour I had ground before. I store it in the freezer to keep it fresh.

Here is the recipe again:

This time I wanted to analyze the recipe to see if it was as nutritious as I thought it was. I used the chart tool that you may have read about a week or two ago (https://marykisner.com/analyzing-a-recipe/).

While the bread was baking (and the soup stock was boiling) I pulled out a blank chart and started by listing the ingredients in the recipe. I looked up each ingredient in my little book or online.

Here is the finished chart:

The hardest part was deciding how many slices there were in a loaf…sometimes we’ll cut it thicker!

So, it looks like each slice of bread will be about 146 calories, 25.6 gm of carbohydrates and 5.5 gm of protein. It was a good reminder that it compares well with commercial bread, tastes better and has no extra preservatives or chemicals. I keep the loaf we are using in the refrigerator and freeze the extra. And of course, commercial bread from the store doesn’t make the whole house smell so good on a cold day!

Give this recipe a try! Your whole house will smell great!

Please comment or email me directly at marykisner@comcast.net.

Signs of the Changing Seasons

The changing of the seasons is one obvious aspect of life in central Pennsylvania. Where you live there might be different signs of the seasons or they may be more or less obvious. Mother Nature seems to prepare us in the northeast, by providing a display of color, like the maple trees…

…and the seedpods on our Japanese Dogwood trees.

I call these our “Halloween Trees” because the seed pods look like pumpkins!
One year, I tried to save them to decorate in the house, but they turned brown quite quickly. Oh well.

As a crafter, I am reminded of the impending change of the seasons by the ads for craft items. Beginning in August the craft and fabric stores have sales of the materials used to make various decorator items. Here are some examples:

Why not make new decorations for your front porch!
Baskets are a way to give a thoughtful gift that may not require any “crafting” skills.
It takes time to pull some of these projects together!
How about clever ways to decorate gifts! Start collecting appropriate items now.
Unique ornaments are always a big hit but they take time to make!
Even kids can help make clay ornaments.

And of course, there are signs in my kitchen today that let me know it will soon be soup season, so I’m cooking up a big pot of ham stock. I may have to go get a roasting chicken or two so chicken soup can be on the menu in the winter! (See how to make chicken stock at https://marykisner.com/making-chicken-stock/)

Online, using pumpkin in recipes is popular for autumn weather. Here are two I’ll be working on:

It also helps me get in the mood for fall weather to wake up to 39 degrees a few mornings in a row! After the heat of this summer, it’s really refreshing…for a while. Winter weather isn’t far behind. We really appreciate Spring when it gets here.

The changing of the seasons, no matter how it manifests in your area is a good time to renew your surroundings…whether it’s outside or inside your home. Enjoy!

Please comment or email me directly at marykisner@comcast.net.