
Of course…two seconds after I figured out how to put the PDF into the WordPress Media Library, I realized I had #195 mislabeled!! Geez! The correct hot link for Entry #195 is https://marykisner.com/blog-update-september-5-2022/ Feel free to correct it in the list. It will be fixed when I upload the next revision to the Media Library. I guess this is what “lifelong learner” means! Enjoy!
Author: mjkisner
Blog Update, September 5, 2022
Hi Readers!
I just wanted to share this PDF with you. It is a list of all my blog entries from #1 to #195. Each entry in the list has a hot link in the right column so you can click on it and go directly to the entry.
I’m aware that WordPress has another way to create an index to entries, but I’ve never figured out how to that. If I wanted to go back over each entry and create a list of key words or tags, I think the computer would create an index but now that I have 195 entries it seems like a formidable task to go back and do that! I created this PDF along the way for myself so I could easily find a specific article. Now, I’m discovering other folks want a copy too.
So while I’m trying join the 21st century in blogging, this is a lower tech way to index my articles.
I will provide the link to the PDF document below and if you would like to have it, just save it to your computer. After you scroll down the list, if you see something you are interested in, just go to the right-hand column and click on the hot link. If you have any problems, it might be a typing error on my part so let me know if one doesn’t work for you. Just email me any problems at marykisner@comcast.net.
Here is the link to the PDF document:
https://marykisner.com/wp-content/uploads/2022/09/Blog-Entries-1_195-marykisner.pdf
Making a Soap Pouch for the Shower
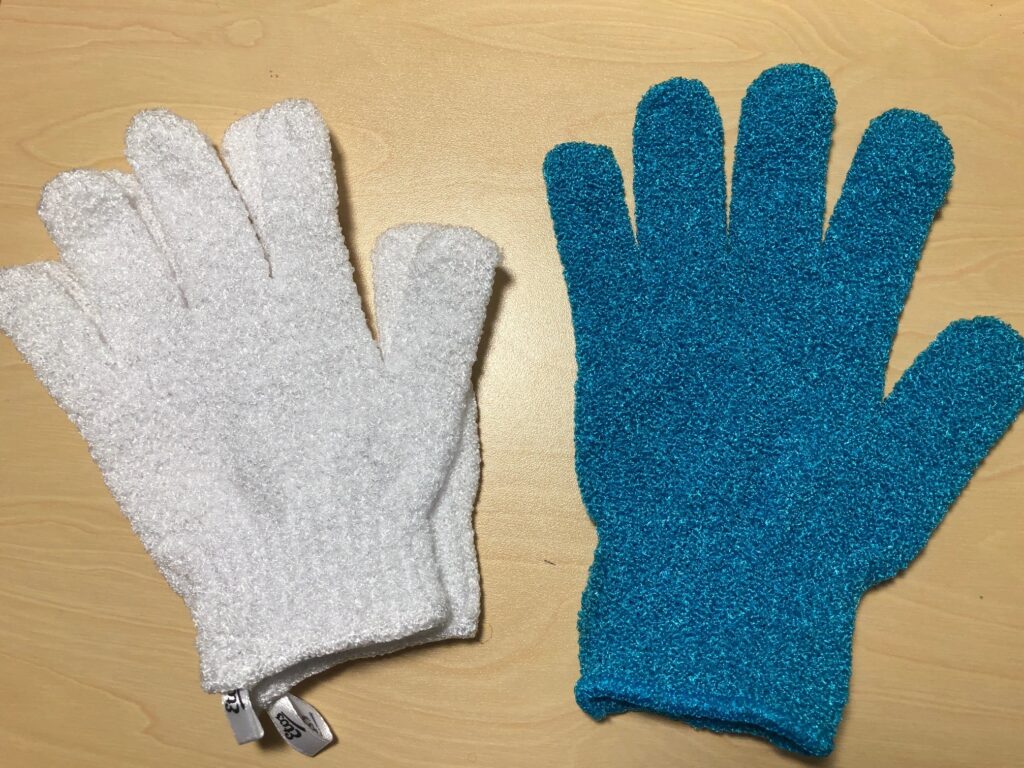
I’ve recently had to switch to using a bar of soap in the shower from a liquid shower soap. I guess there are too many chemicals in the liquid and even ones that say “for sensitive skin” just make me itch all over! Since I’ve had good luck with my Aloe Vera soap for my hands, I thought I could easily just use that in the shower.
However…not so fast! It has been many years since I’ve used a bar of soap in the shower and it kind of depends on the soap’s ability to make a lather on the washcloth. My Aloe Vera soap does not easily make a lather. I know this particular soap does not make me itch, so all I had to do was figure out how to use it in the shower without a washcloth.
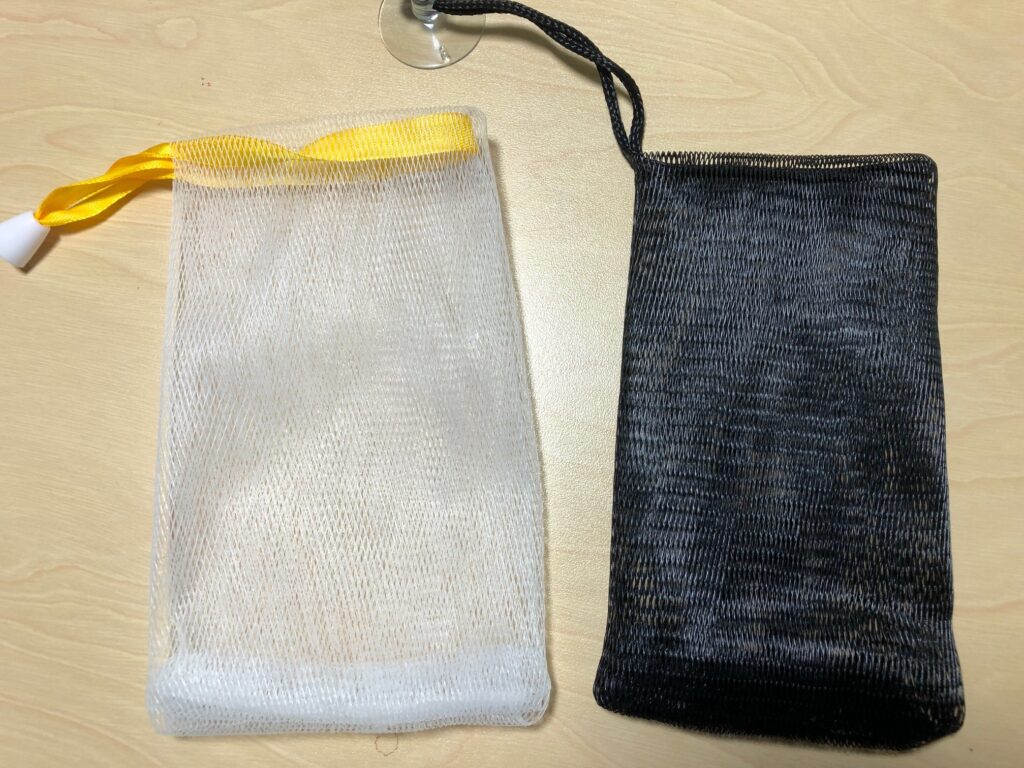
A little research online and asking around provided several choices. I found gloves and pouches made of a loofa-type texture that were supposed to work. I ordered some online, like the ones below:

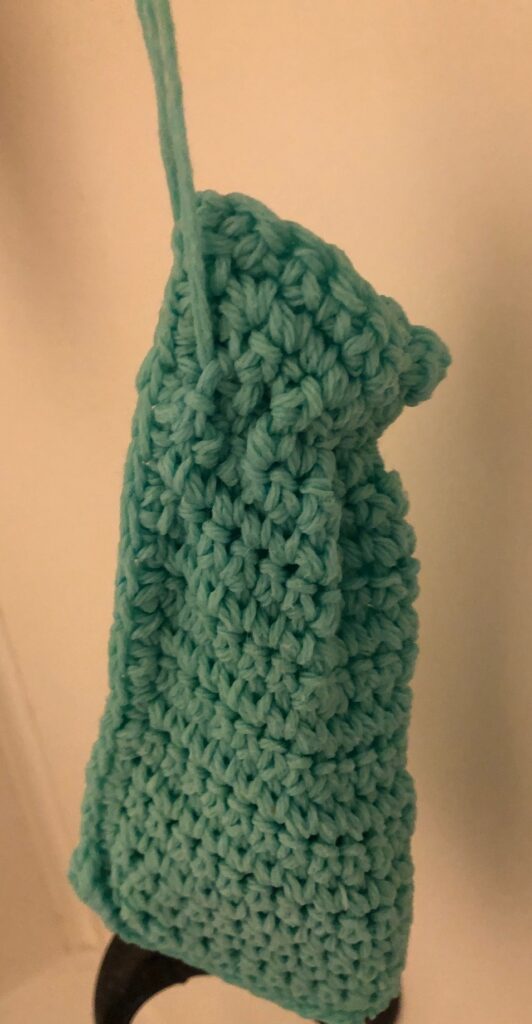
I also found patterns to crochet a pouch, using cotton yarn that is also used for pot holders and doilies. I made a trip to Wal Mart and picked up crochet yarn.
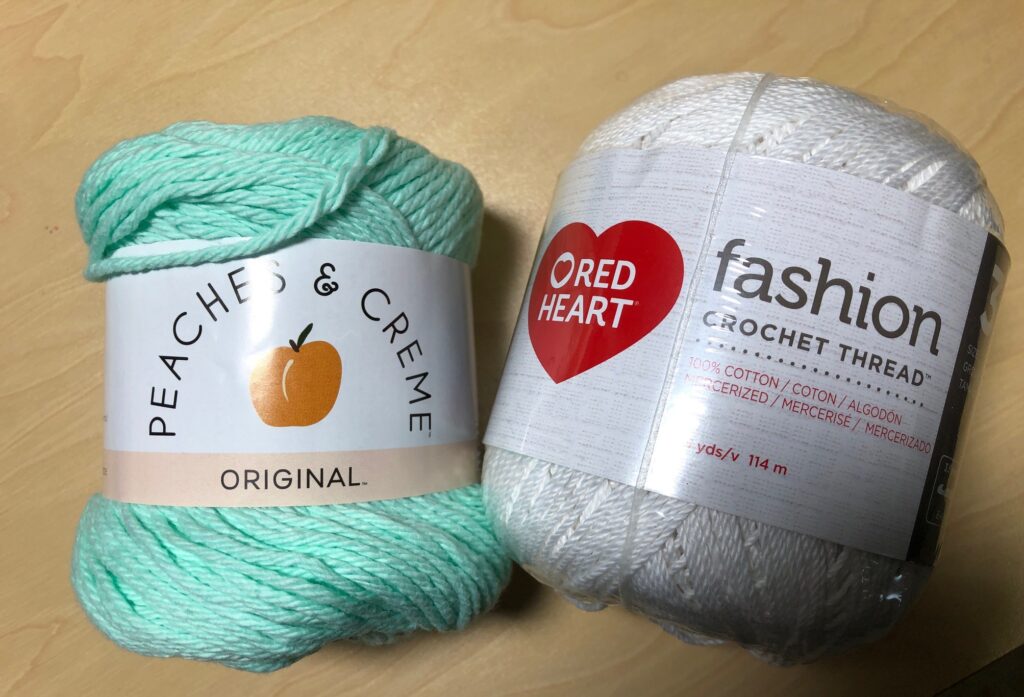
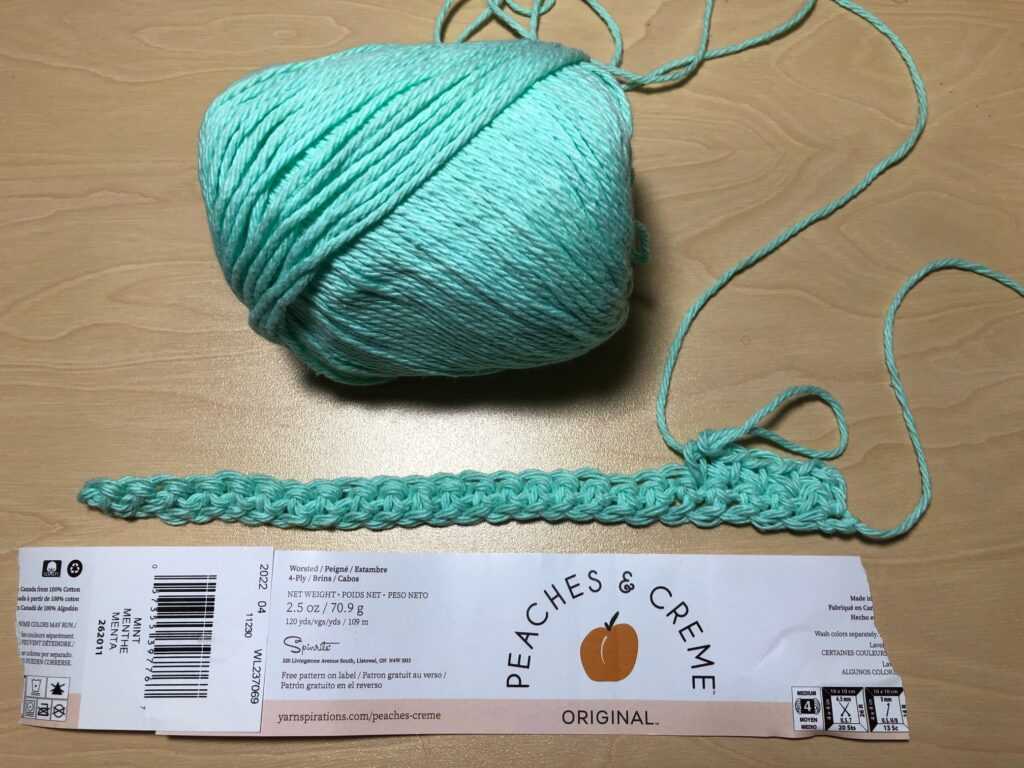
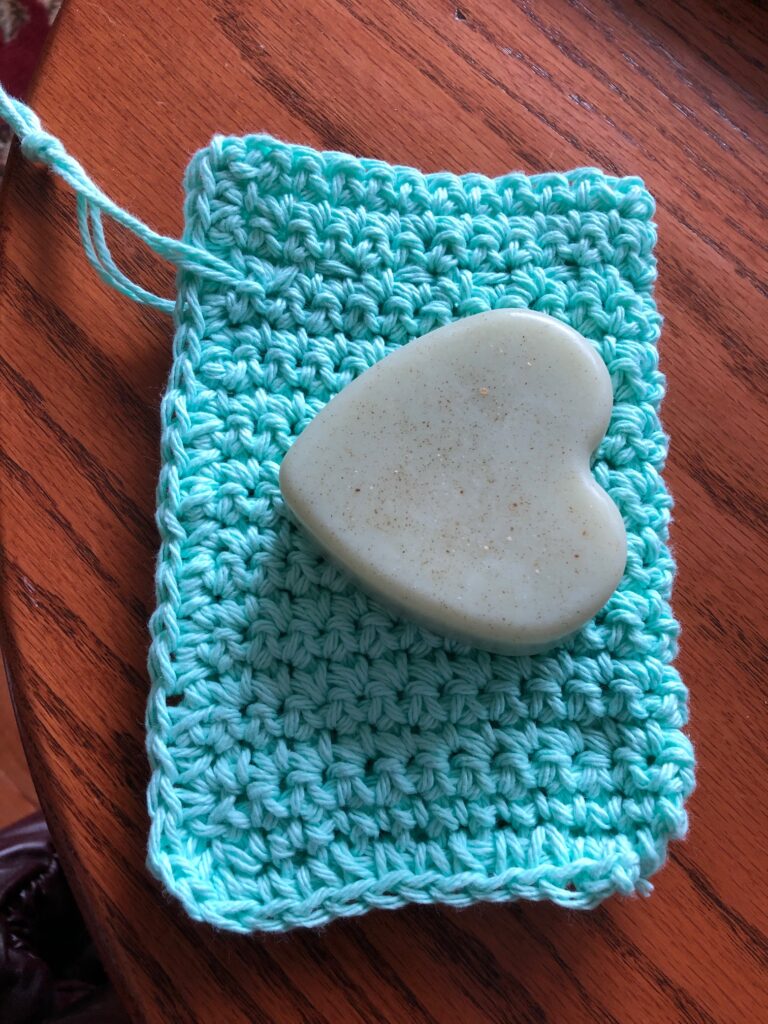
I started with the light green cotton yarn and just used a simple single crochet stitch, using an H hook, starting with 25 stitches. It made a small pouch for one of my small heart-shaped soaps.
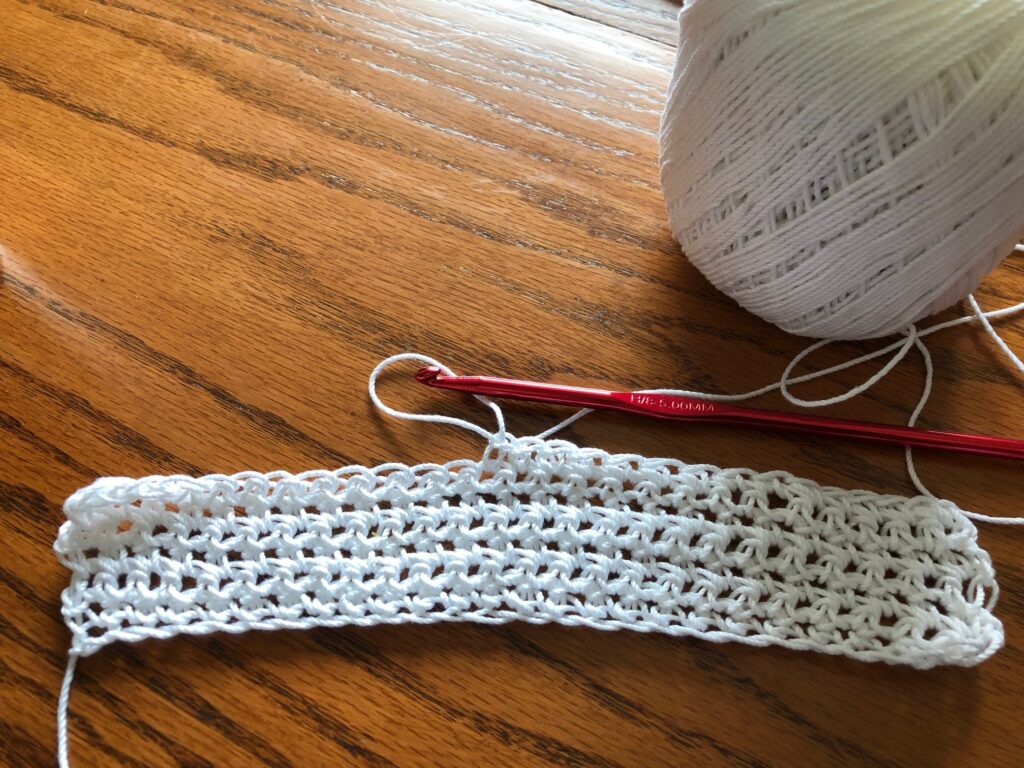
So finally I made the small bag with the white crochet cotton. It has more holes and should not get so heavy when wet.
What a process! If this last one works, I may make some to package with my soaps for Christmas presents! Let me know if you have found a solution to using a bar soap in the shower! Enjoy!
Please comment or email me directly at marykisner@comcast.net.
Carrots for Daisy
In a few days we will be headed out of town to our Granddaughter’s 10th birthday party! I can’t believe it’s been 10 years since she was born…and even at three she was a cutie! By now, at age 10, she’s turning out to be quite a lovely young lady!

Of course, we can’t go visit the family without something special for our Grandpuppy…Daisy!

We used to bring assorted toys and chew bones for her to play with, but we’ve been asked to substitute healthy snacks…which turn out to be raw vegetables! Who knew! At Christmas time, I brought a few huge carrots just to see what she would do with them. She loved them!! They were better than a giant rawhide bone! So today, I got a bag of carrots cleaned up and ready for her.


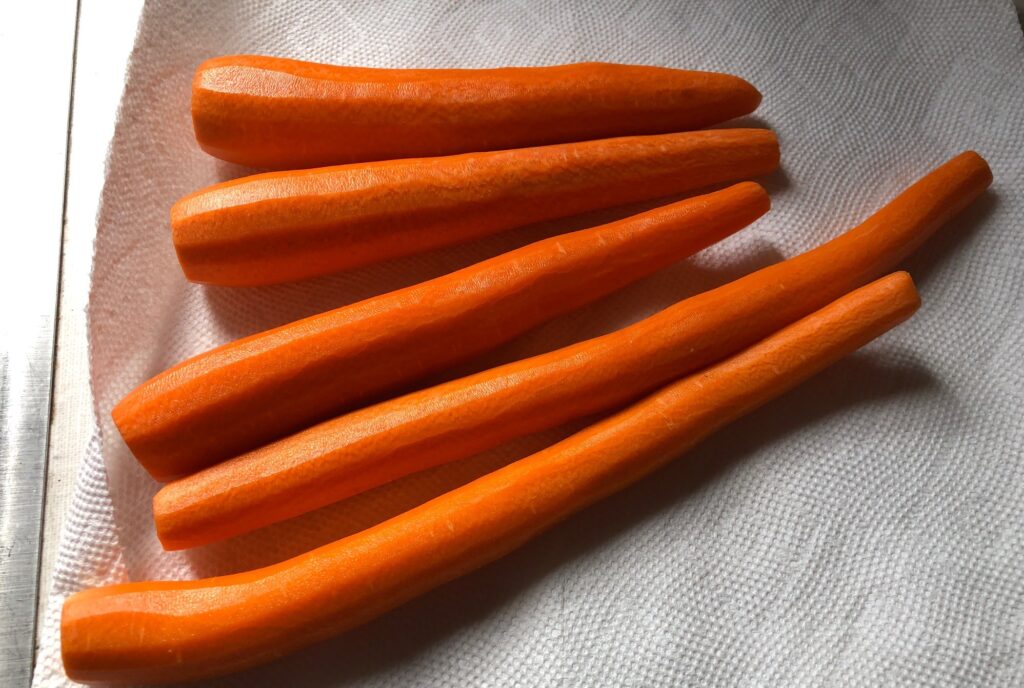
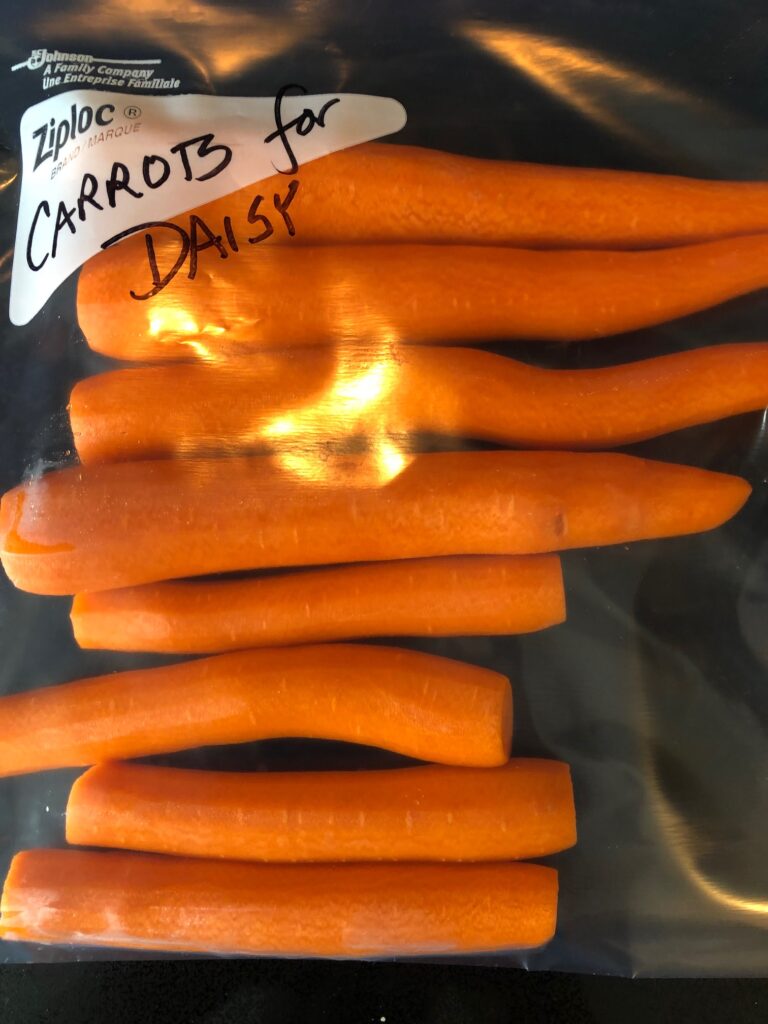
These should keep Daisy busy for a while. She should be set with fun snacks for several days! Maybe she’ll think it’s her birthday too!
Please comment or email me directly at marykisner@comcast.net.
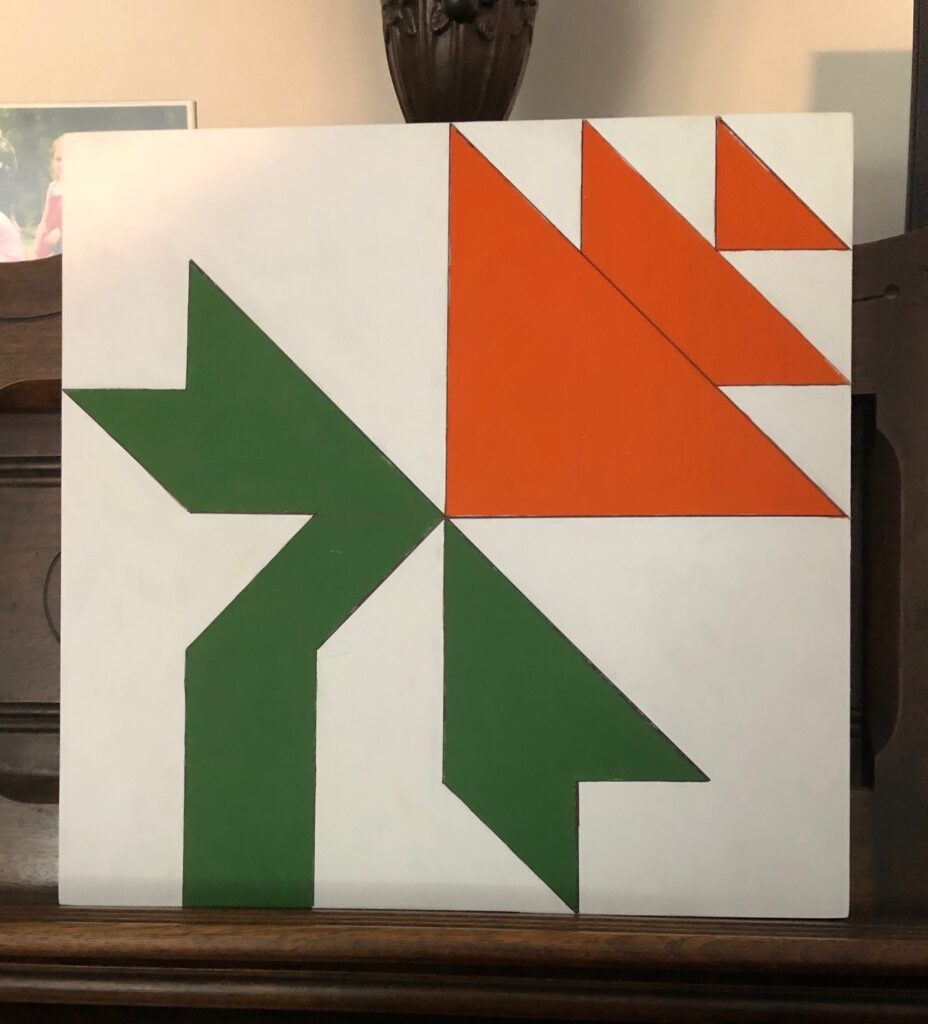
Autumn Door Quilt on Wood
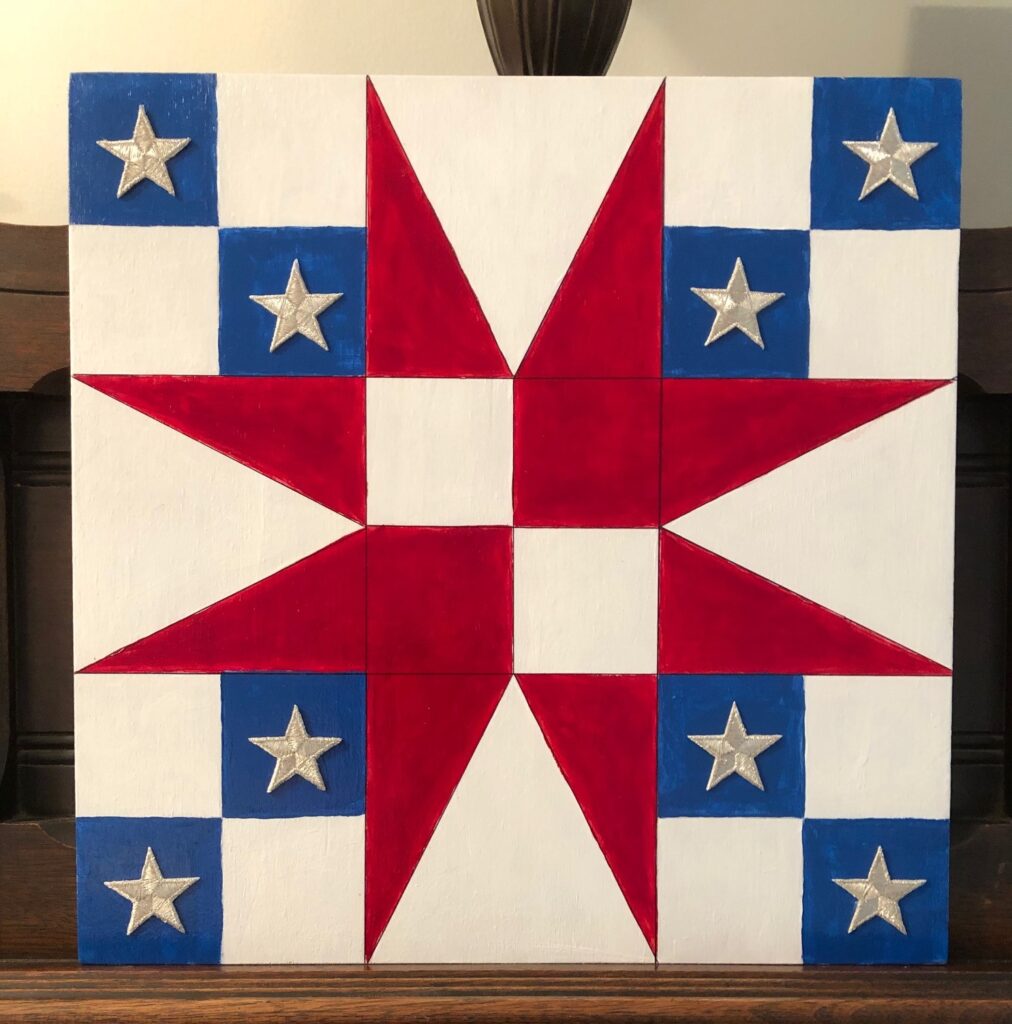
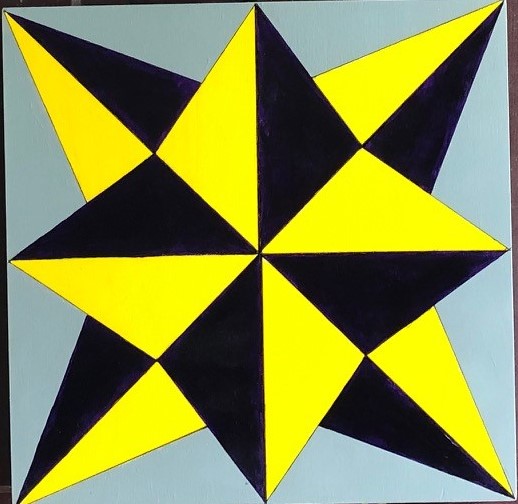
This week I was determined to choose a new quilt block that I could paint on wood. I wanted something different and colorful for Autumn. I enjoyed painting my first two blocks and you can see them below. If you want to read how I made them, click on the link under each picture.
For the Autumn block I wanted something totally different. I pulled out my favorite book for ideas:
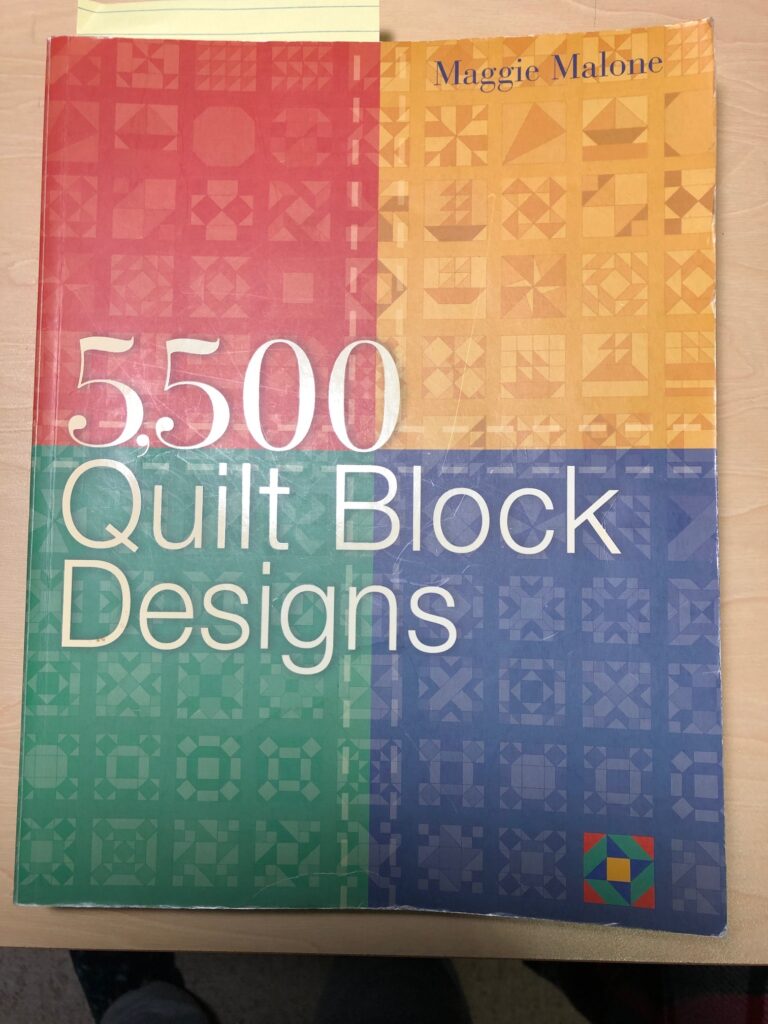
This book organizes quilt block designs by the grid they are based on:
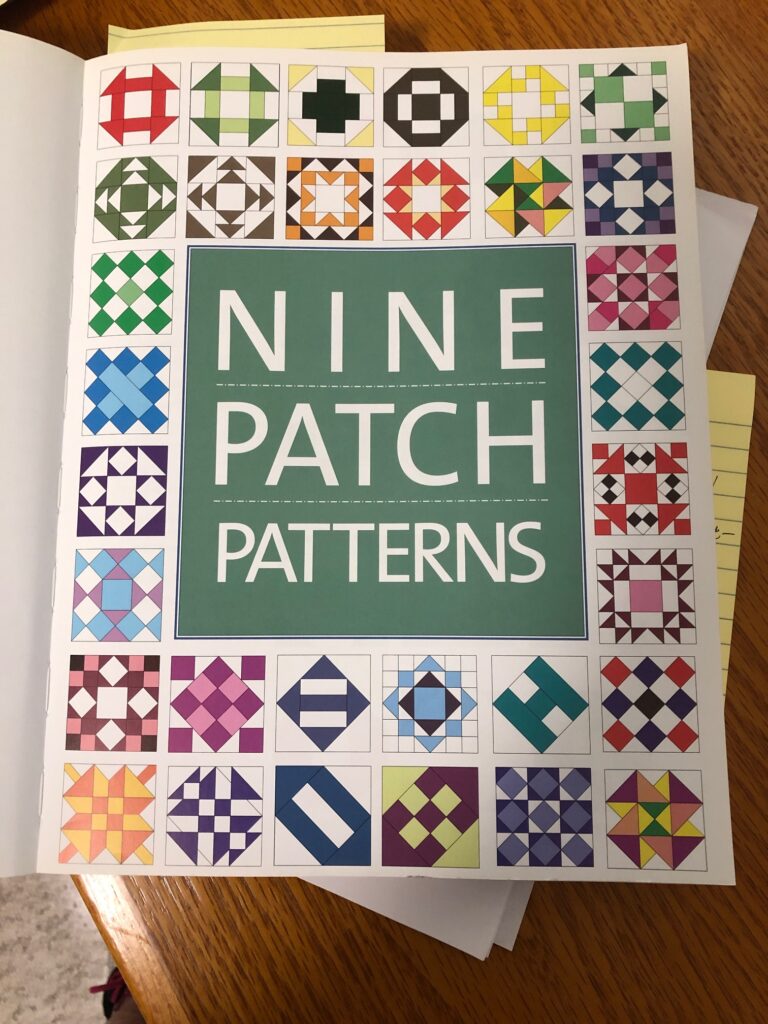
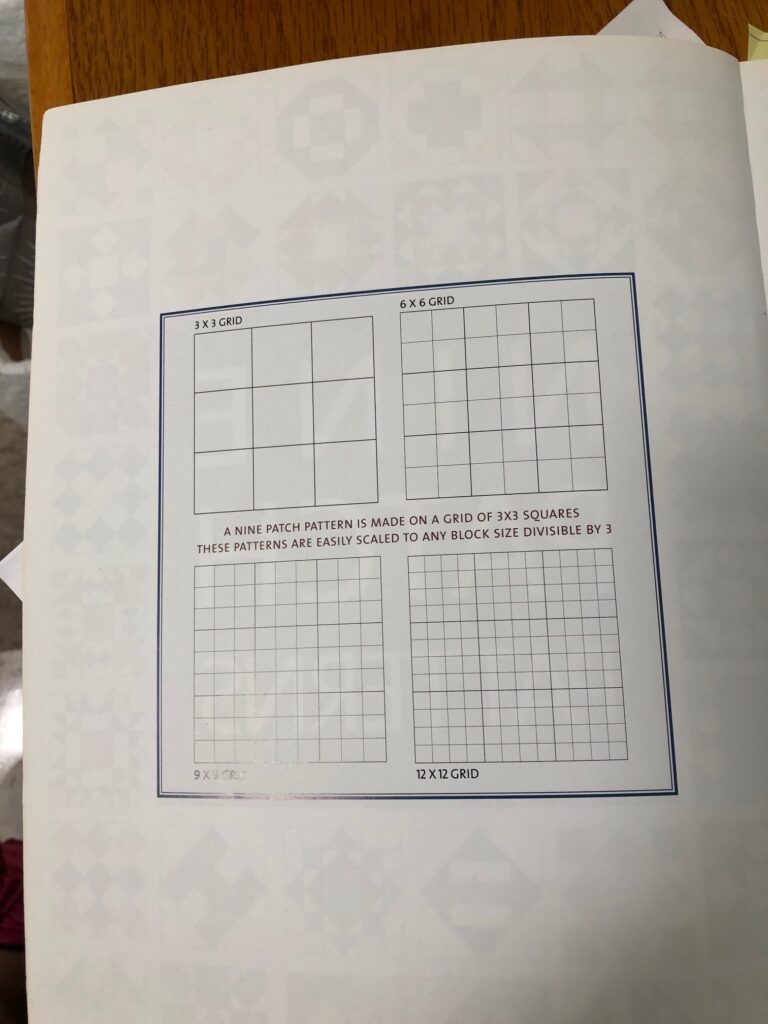
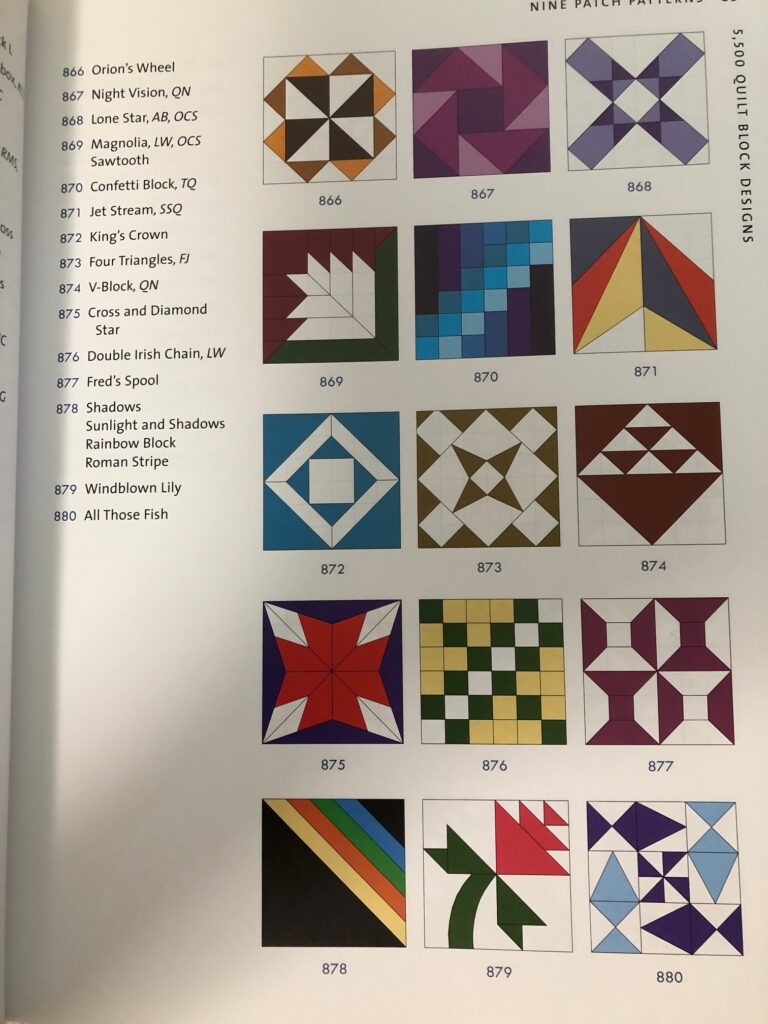
And followed by pages and pages and pages of sample blocks! Thank goodness there is an index, by names, of all the patterns. I usually start by just browsing through the book. So many choices!
I ended up choosing this block:
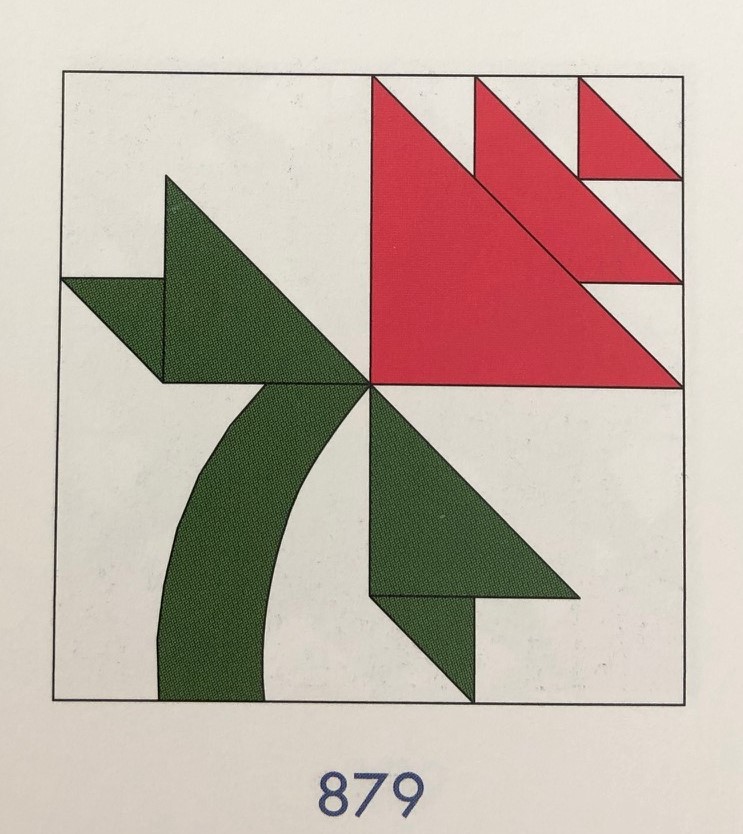
Next to the picture was a number and the name was in the list to the left.
I really liked how different the block was and figured I could make the flower in orange, which would make me think of all the autumn flowers I see right now. I don’t think it matters that it’s called a “Lily”–I can call it anything I want!
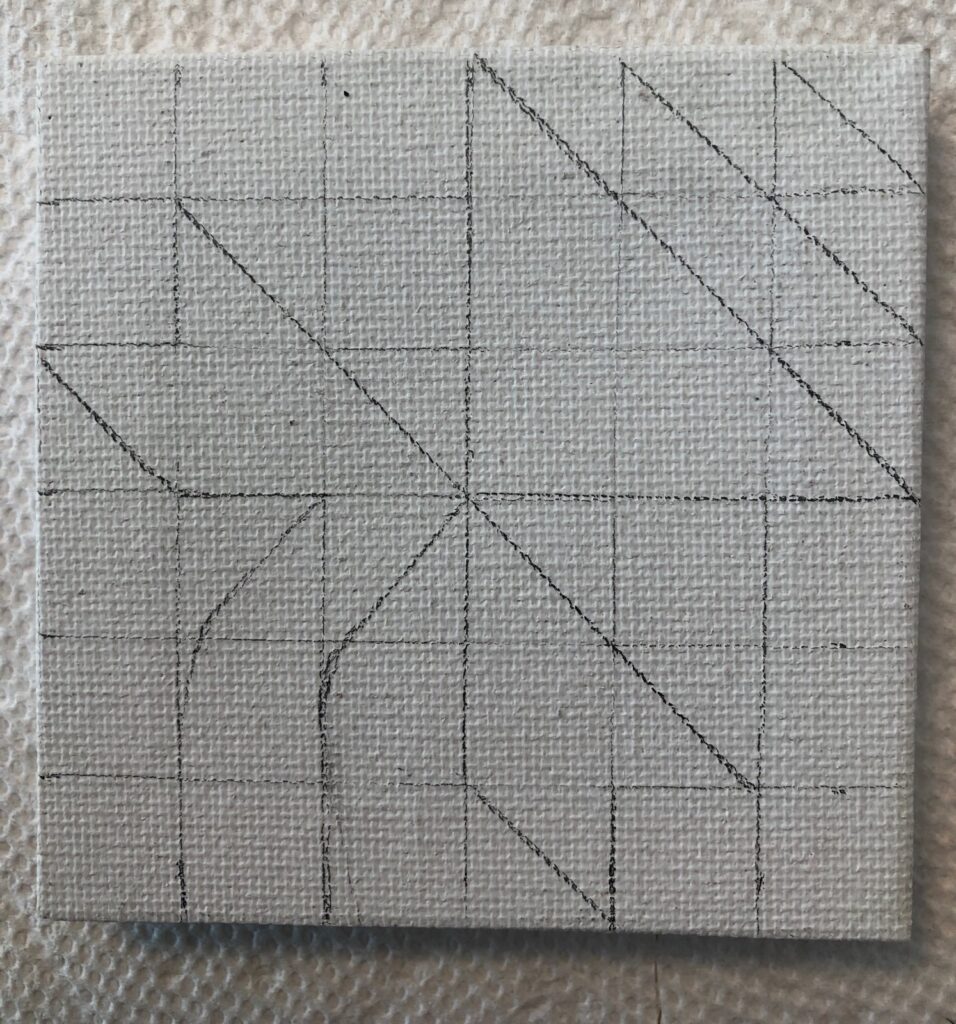
Making the Sample Block
I like to start with a 3″ x 3″ tiny canvas. It helps me visualize the layout on a small scale. I don’t worry about making mistakes or erasing pencil marks. When I make this sample, I can decide if I like the colors I’ve chosen. It’s much easier to throw it away and start over if I need to.
Making the Full-Size Block
Step 1: I pulled out the 12″ x 12″ piece of 3/8″ plywood that Bert had cut out for me and sketched out the pattern with a pencil.
Step 2: I flipped the wood over and painted the back and edges white just to protect the wood from the weather.
Step 3: I painted the first coat of orange and green. I can still see the internal lines so a second coat is necessary.
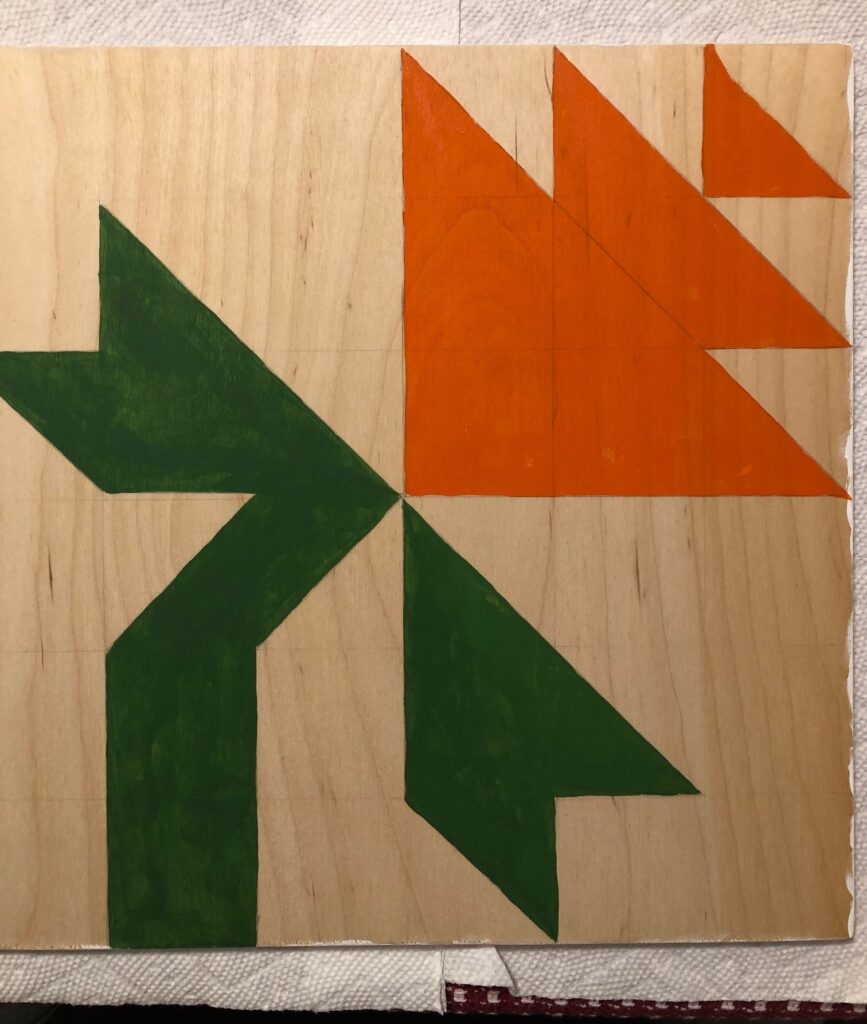
Final Step: I will spray both sides of the block with a clear acrylic spray so it can handle the weather on the front door. Finally, Bert will attach magnets to the back so it will stick to the front door! Yea!
I think this block will be cheerful this fall and will show through the screen door well. Don’t be afraid to experiment!
Please comment or email me directly at marykisner@comcast.net.
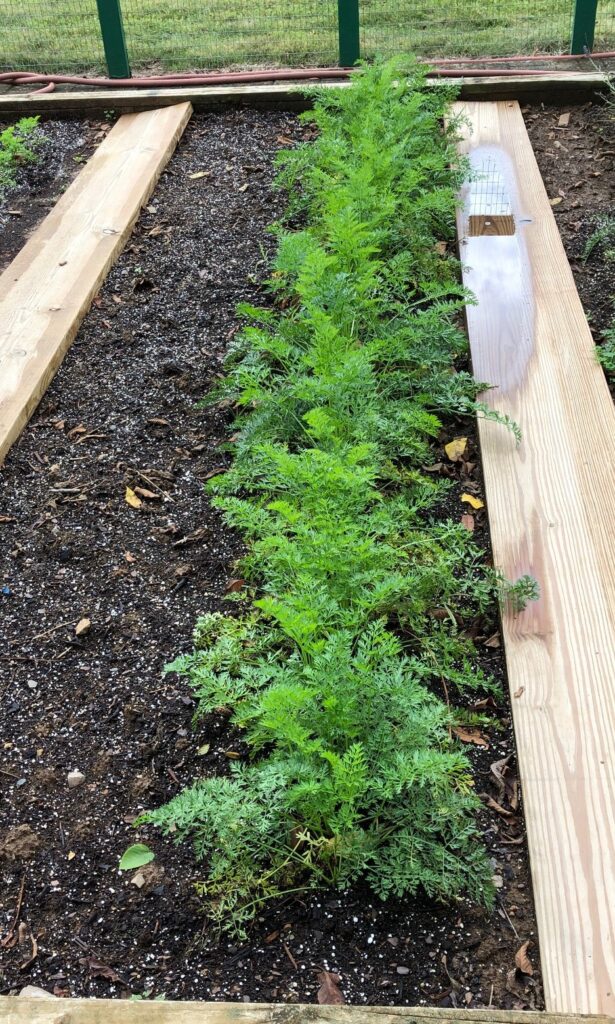
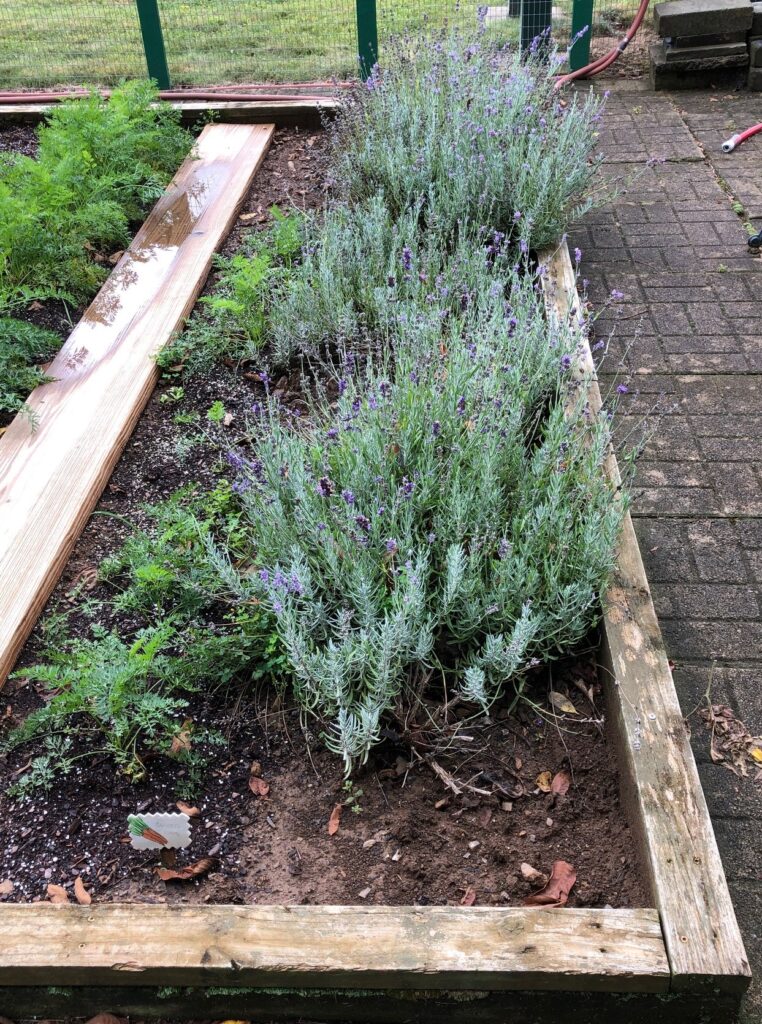
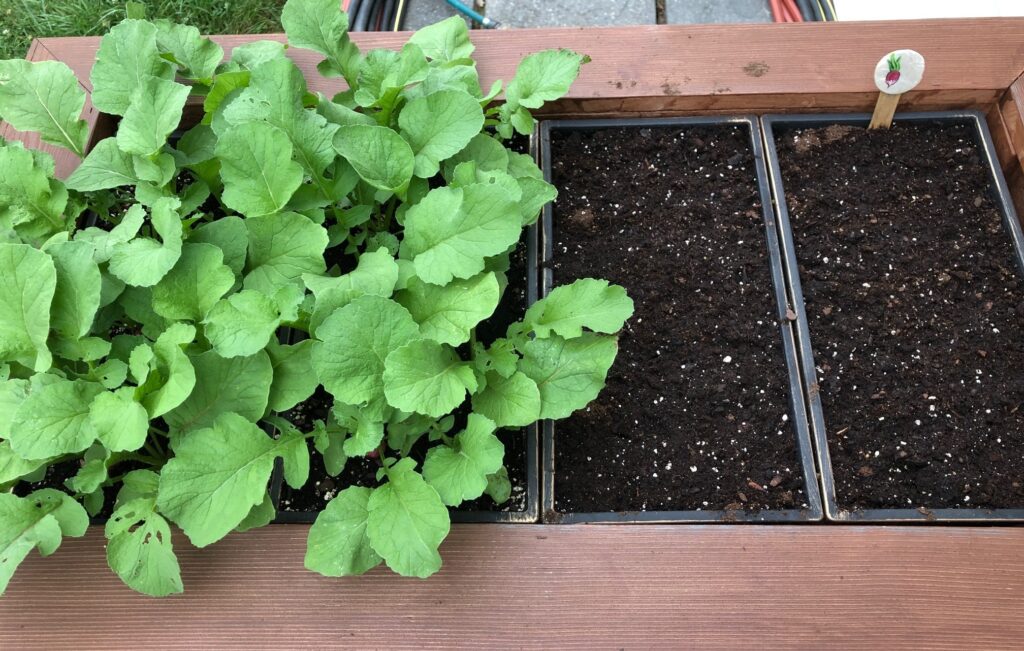
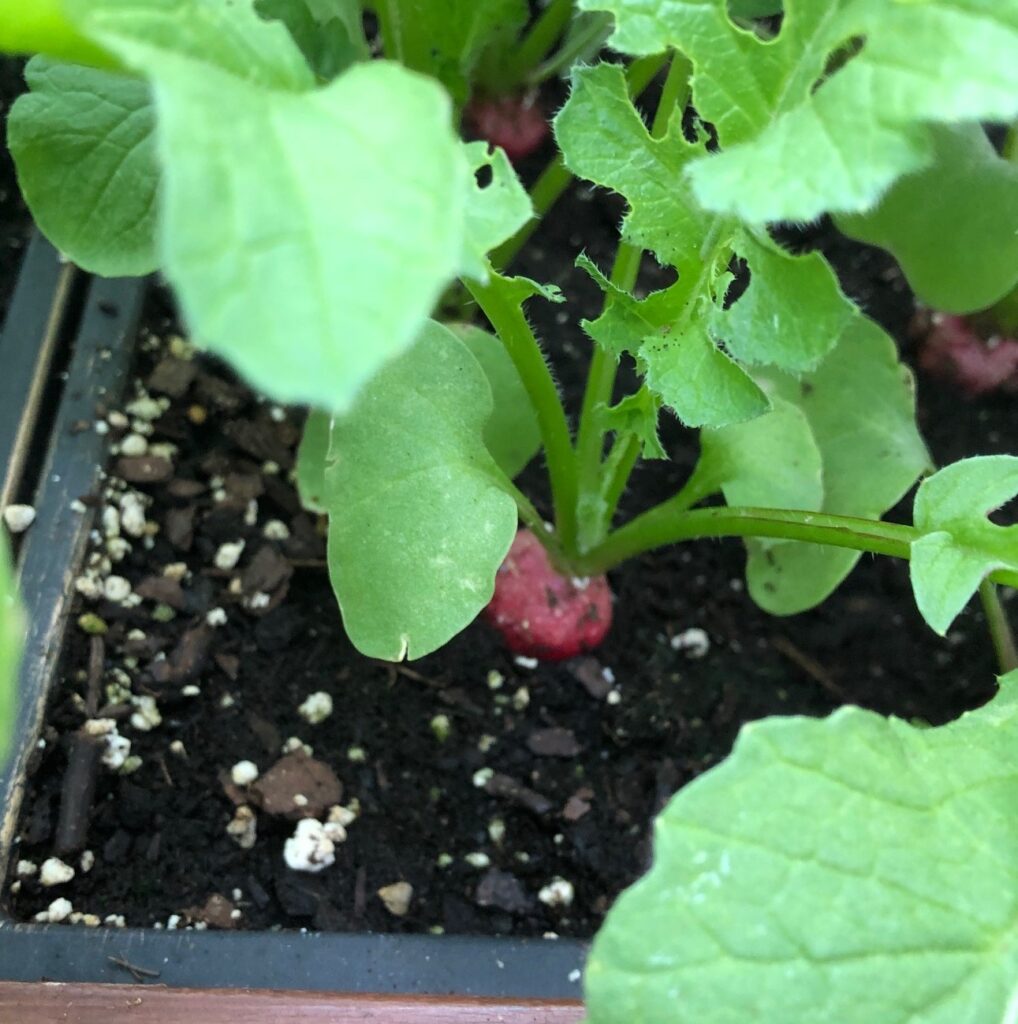
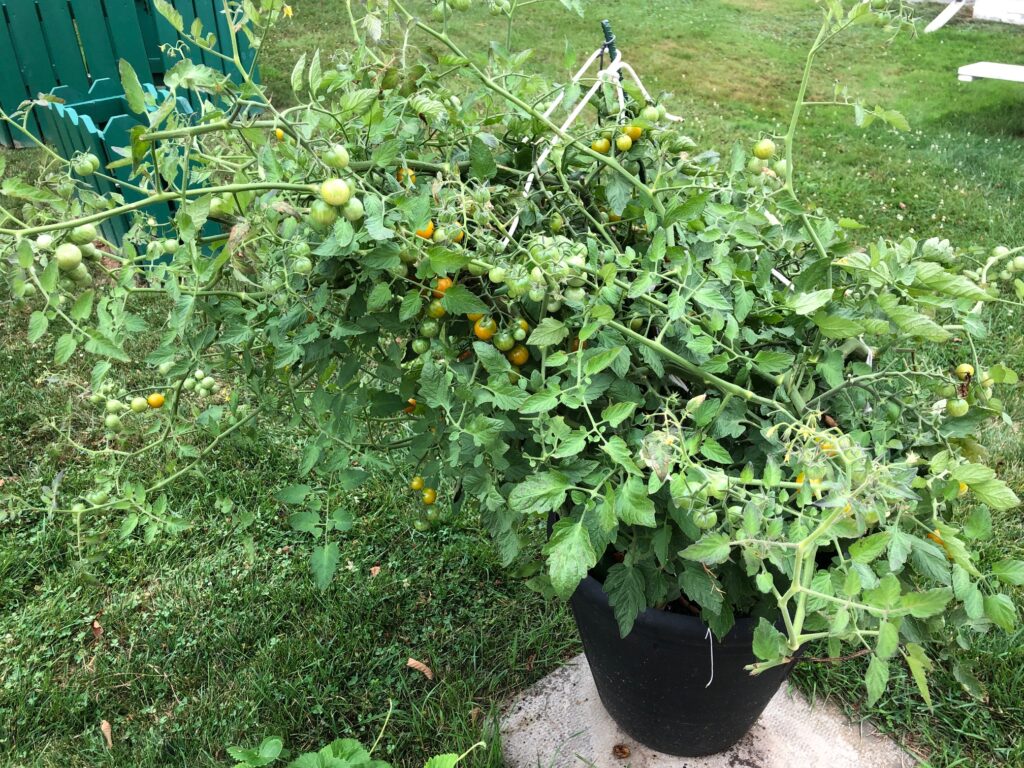
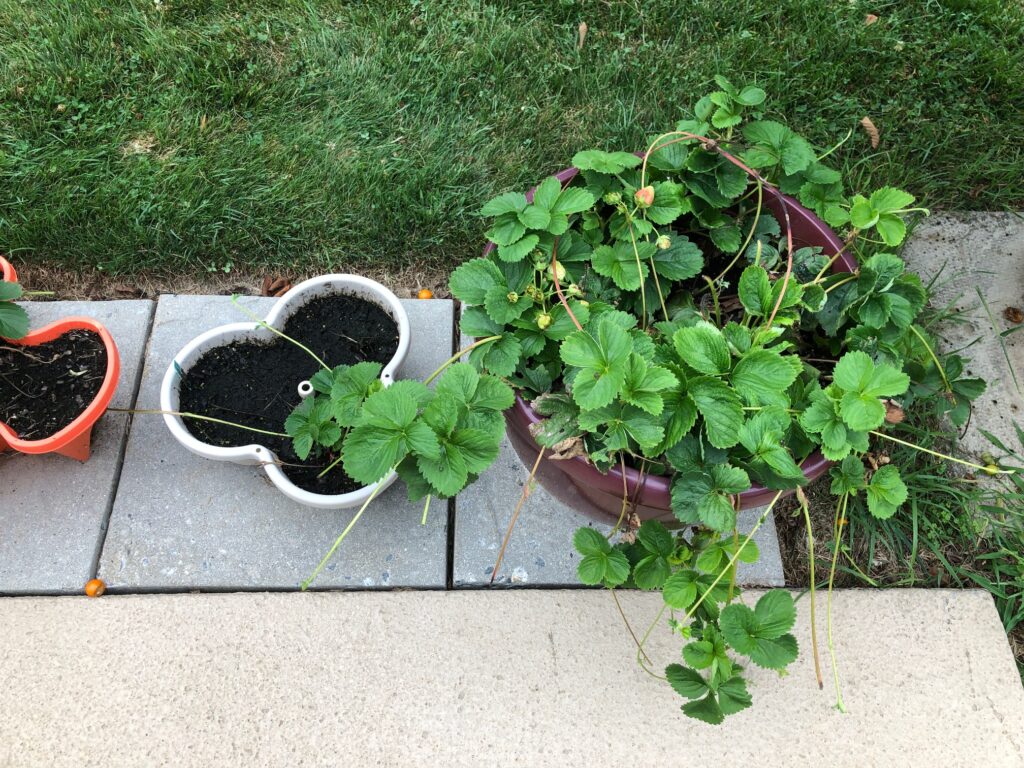
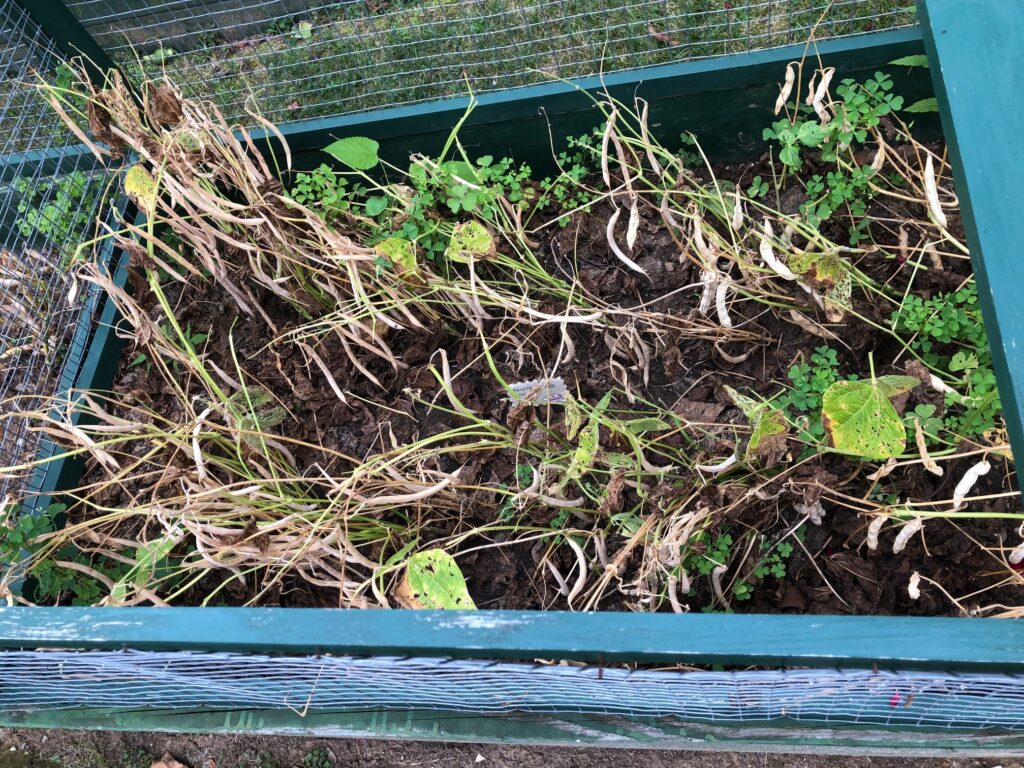
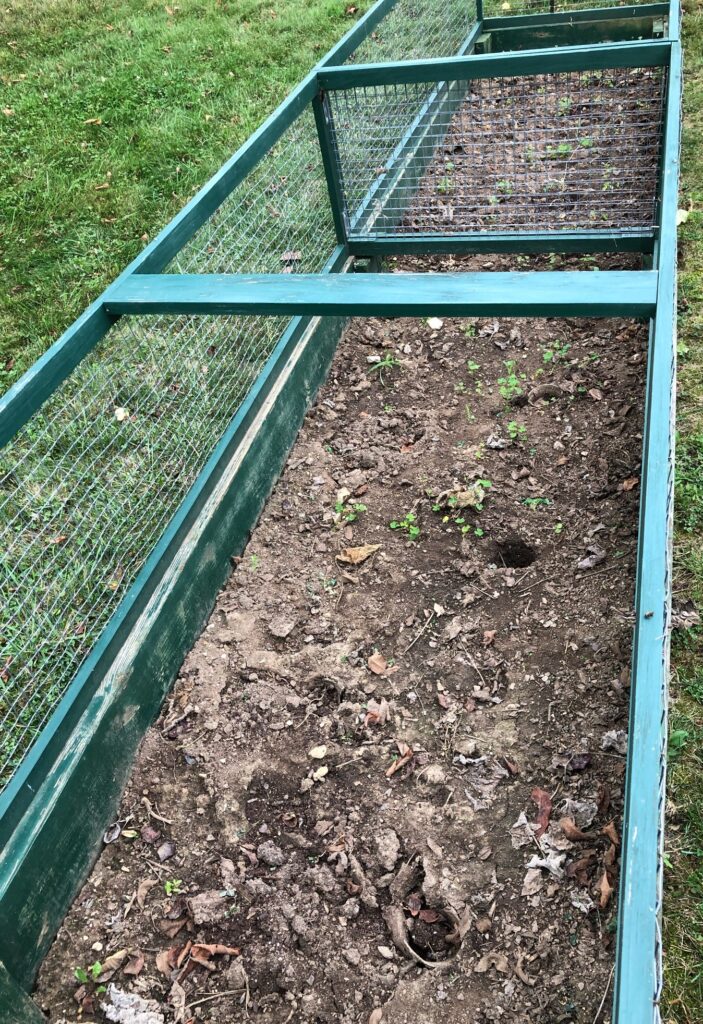
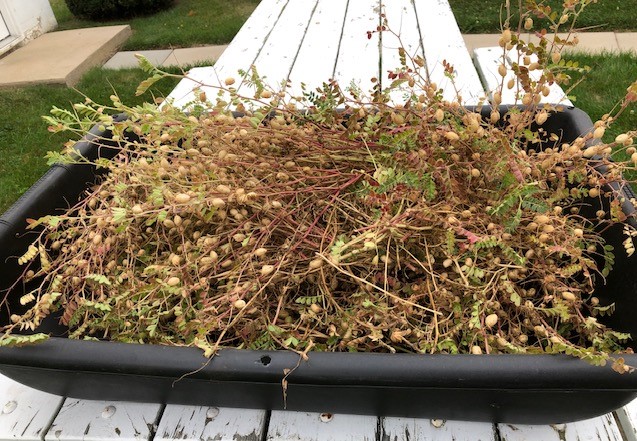
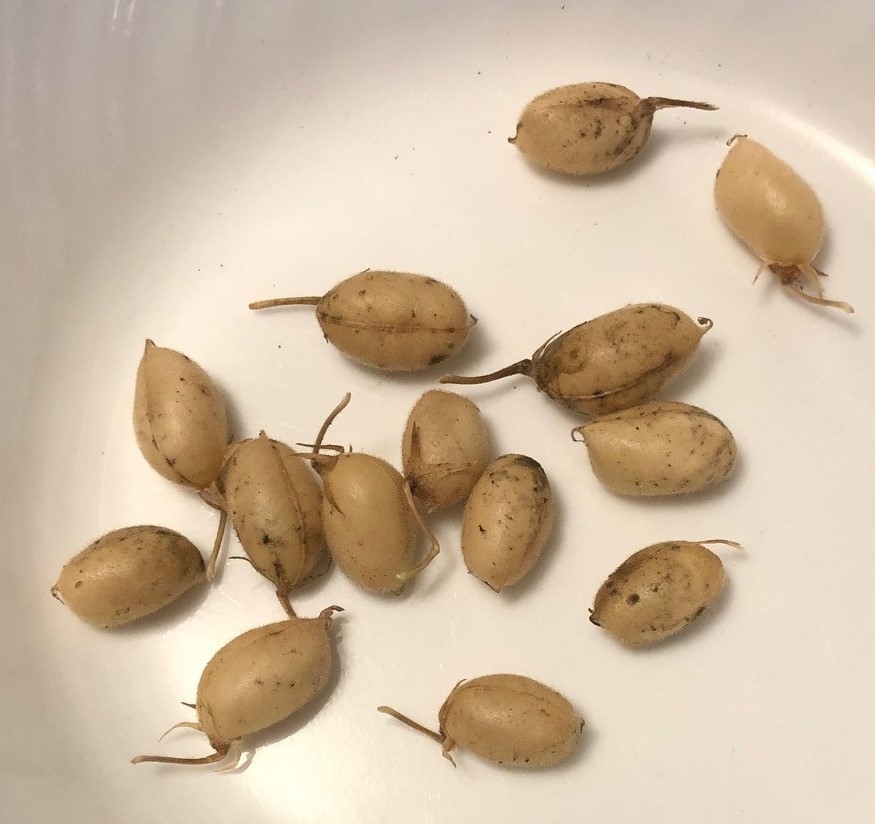
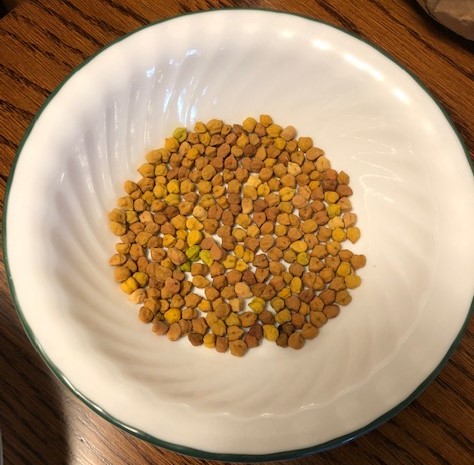
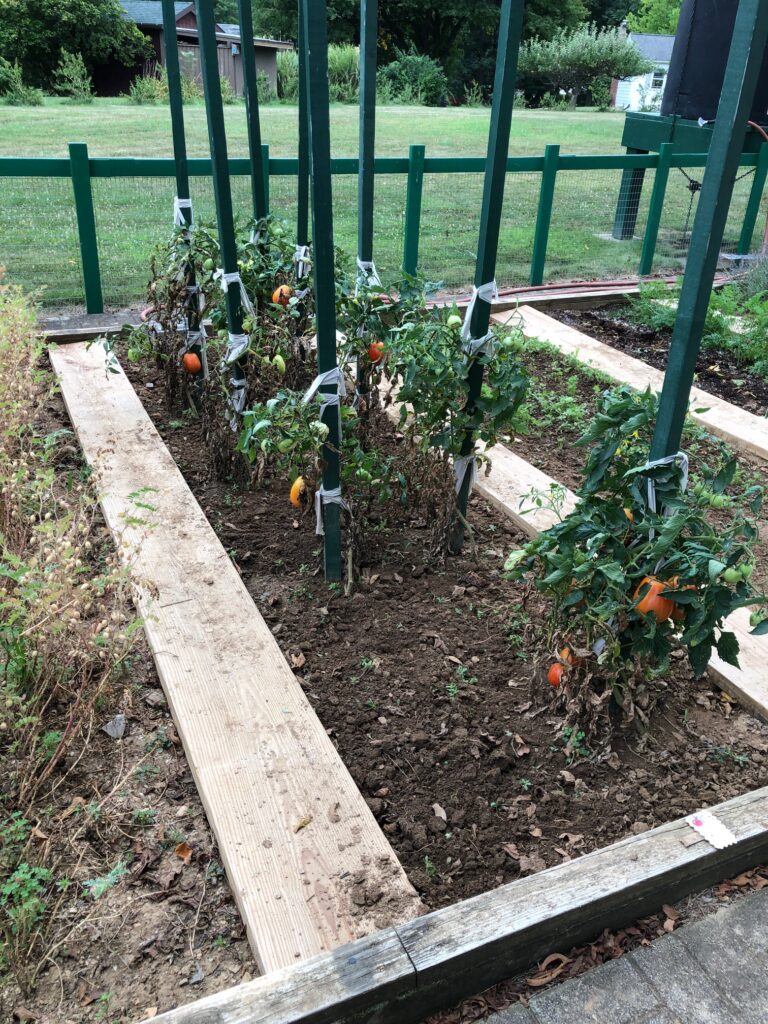
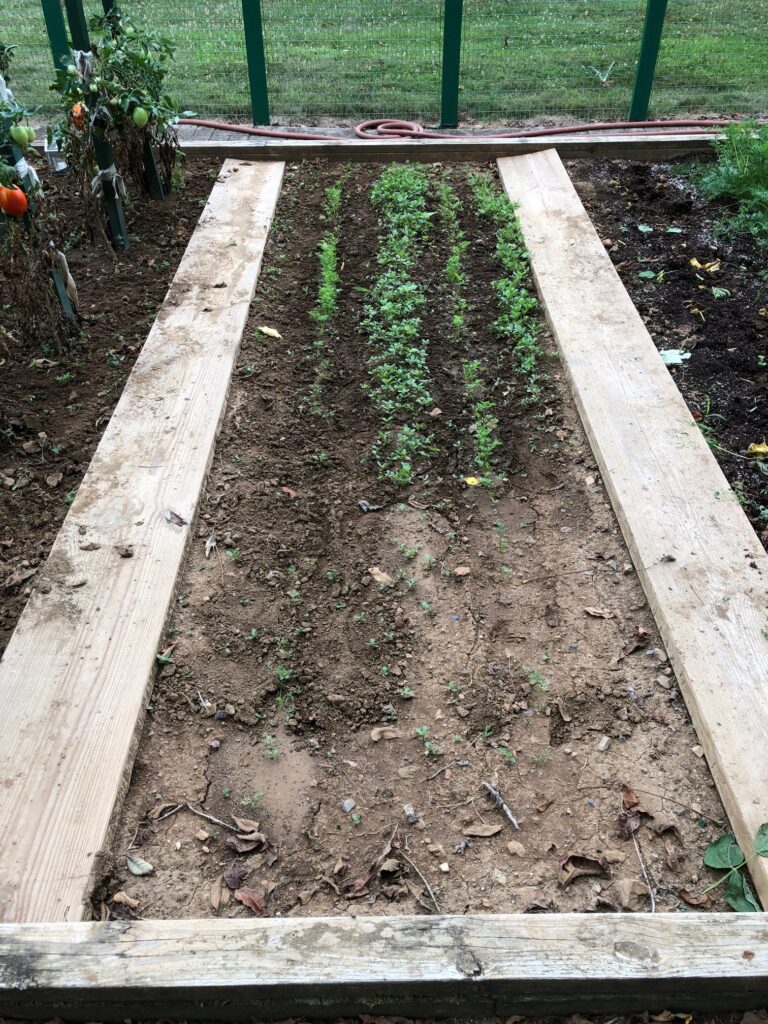
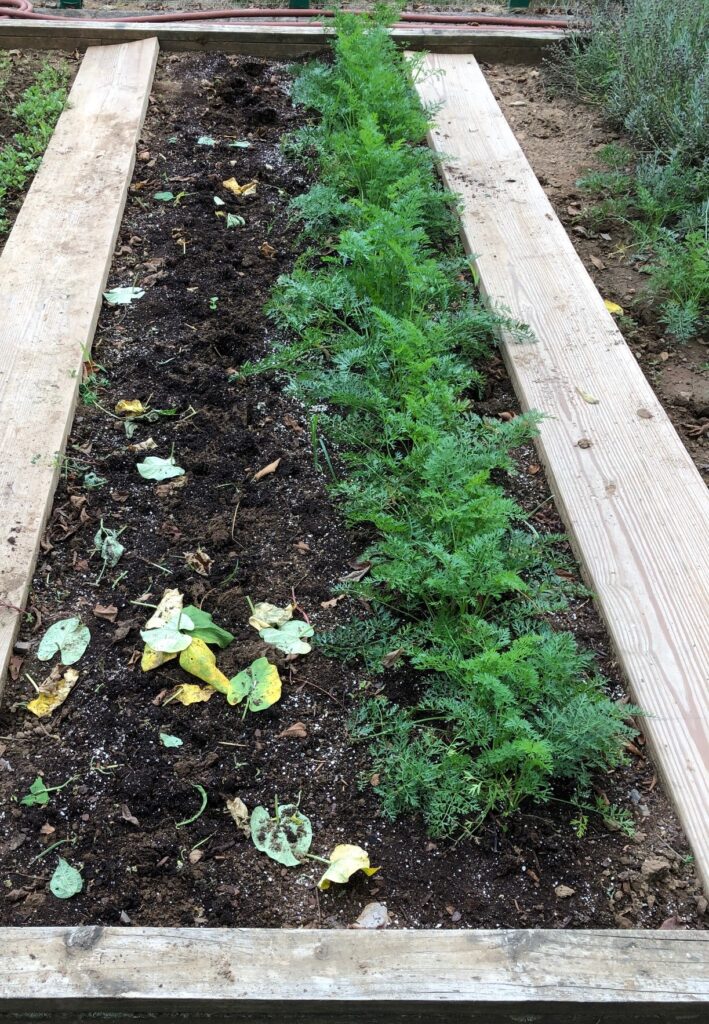
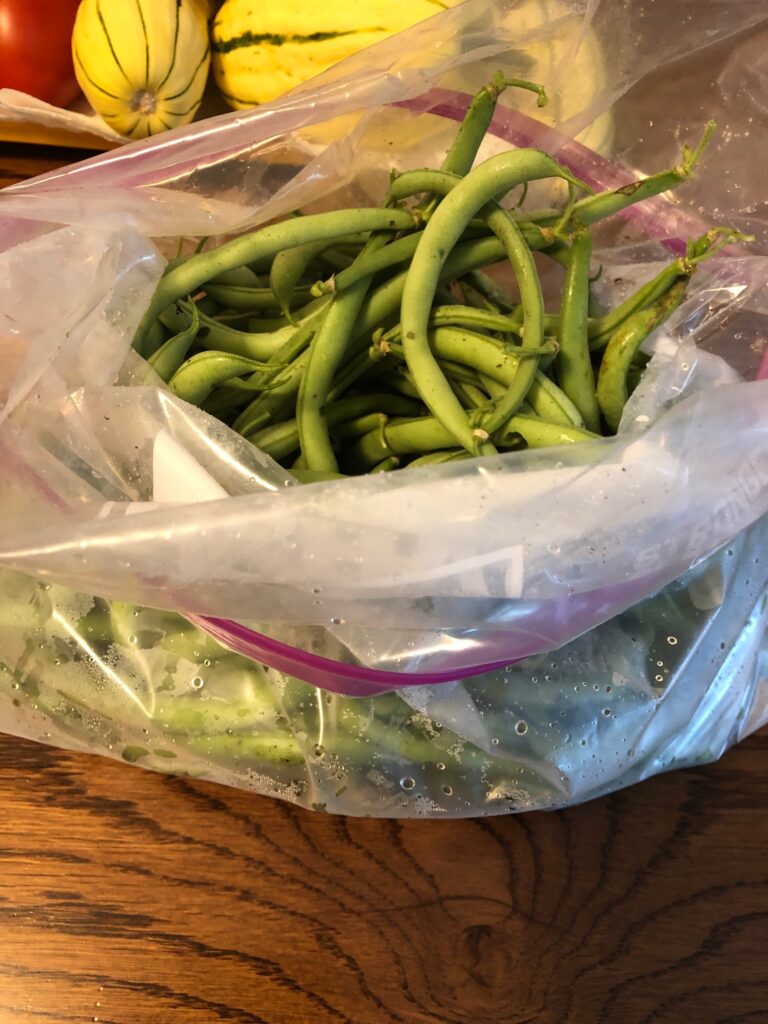
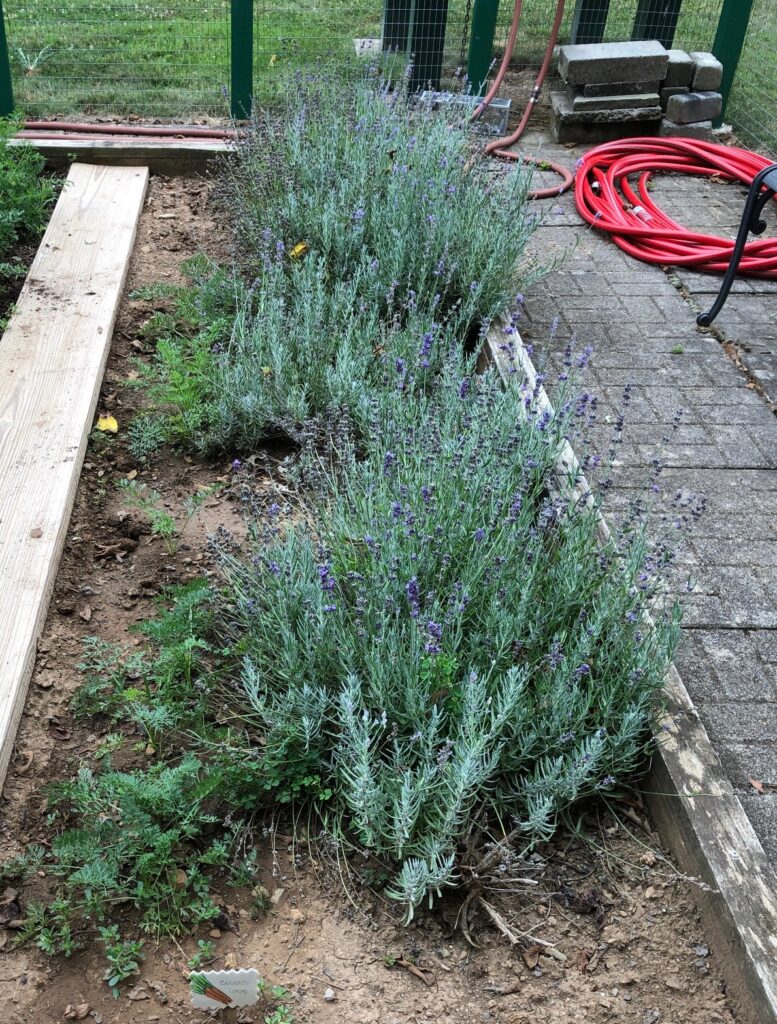
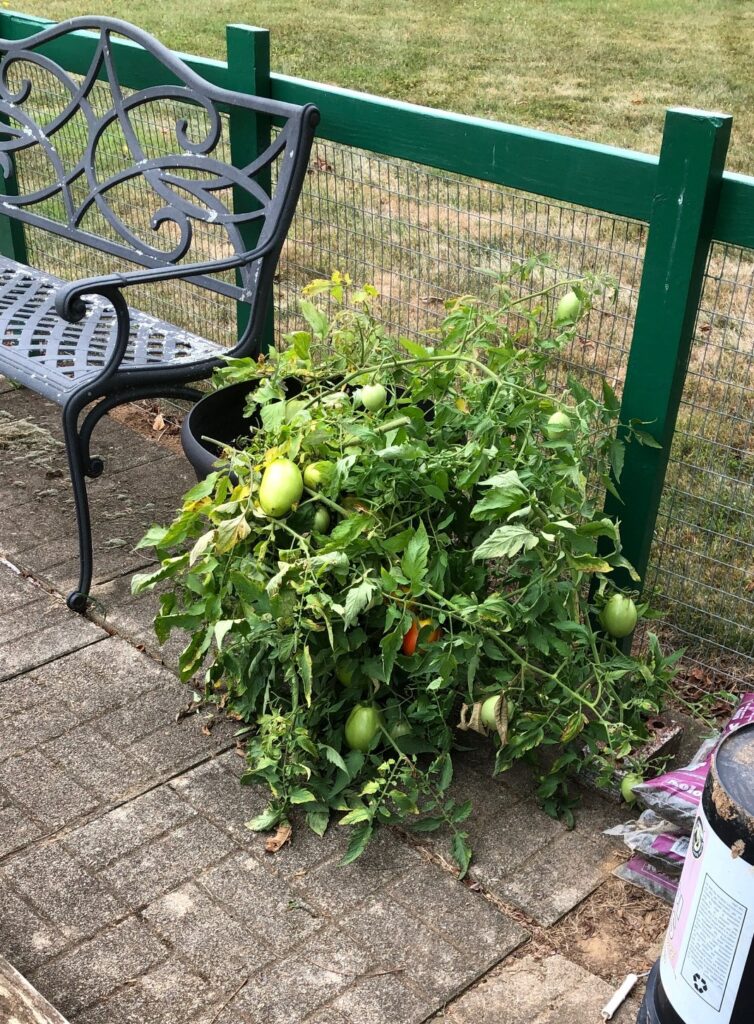
Garden Update August 23, 2022
Thanks to the dry August, I think autumn has decided it’s time to make an appearance! In the last three days we finally had a storm track right over us and we ended up with almost 2″ of rain! The grass will be happy. We’ve been able to keep the few plants left in the garden watered, but I think most of the plants were just ready to get on with fall weather.
Here’s where we stand in the garden today:
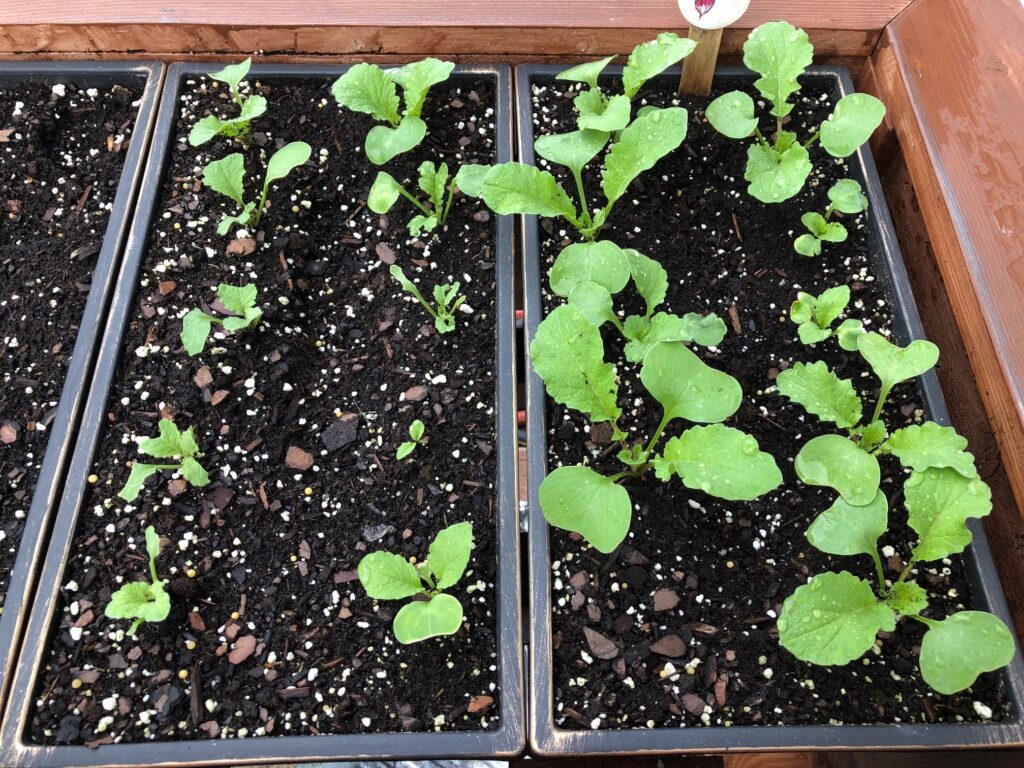
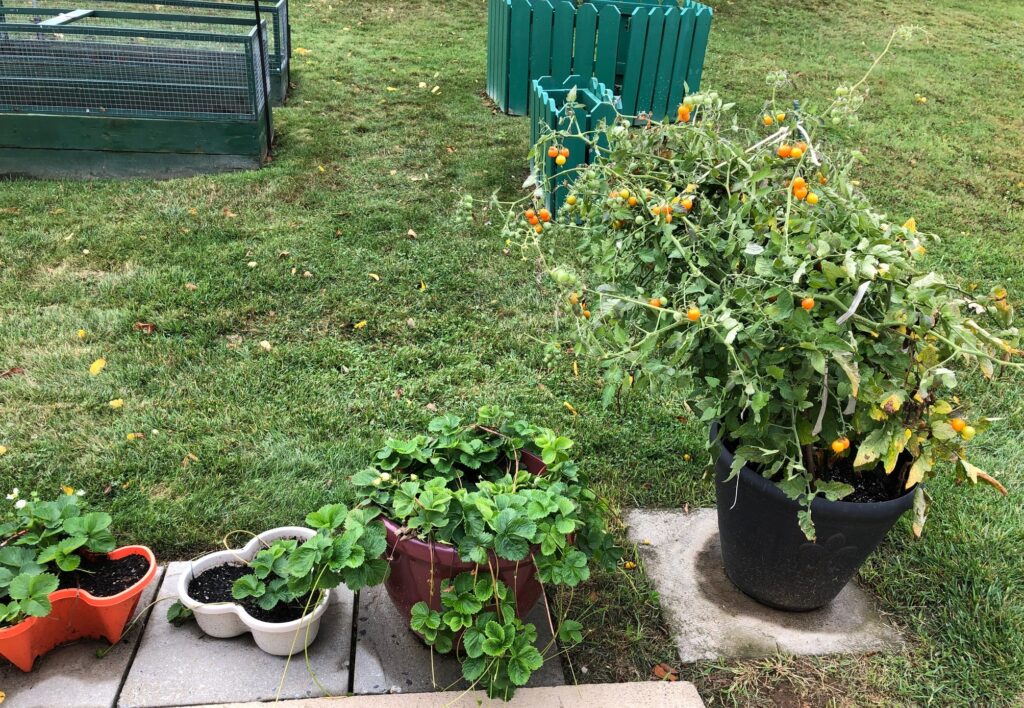
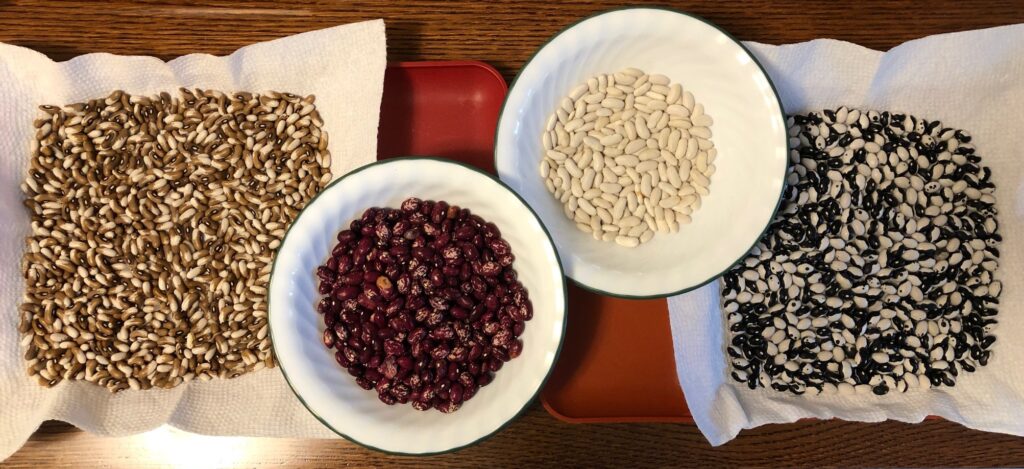
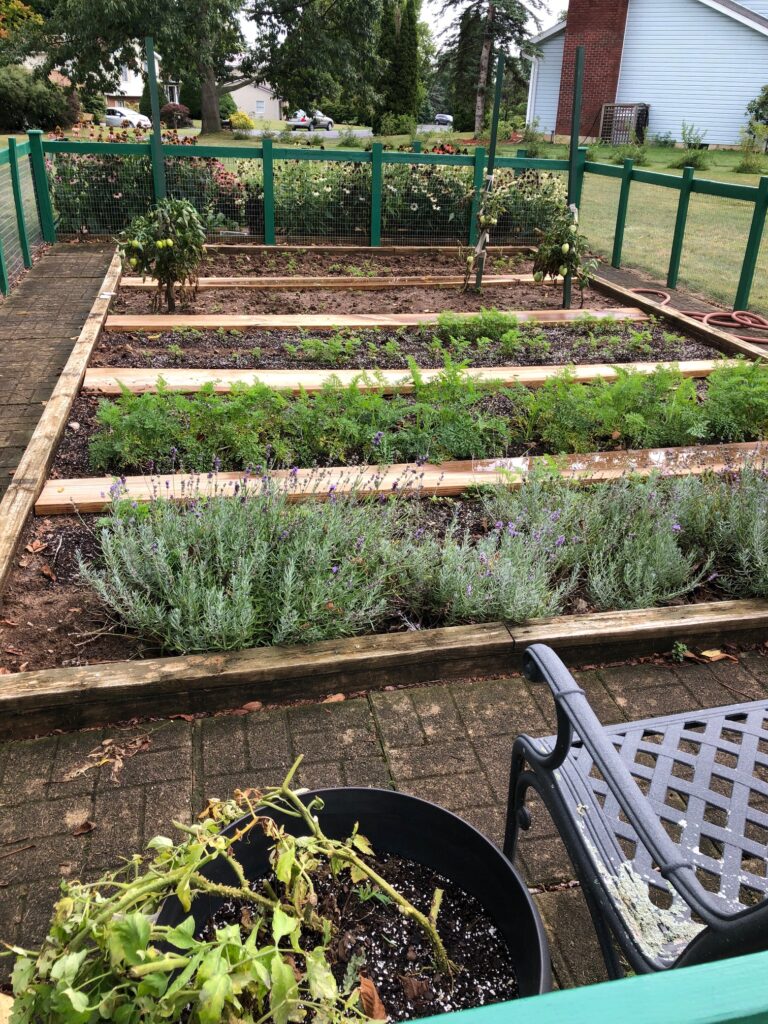
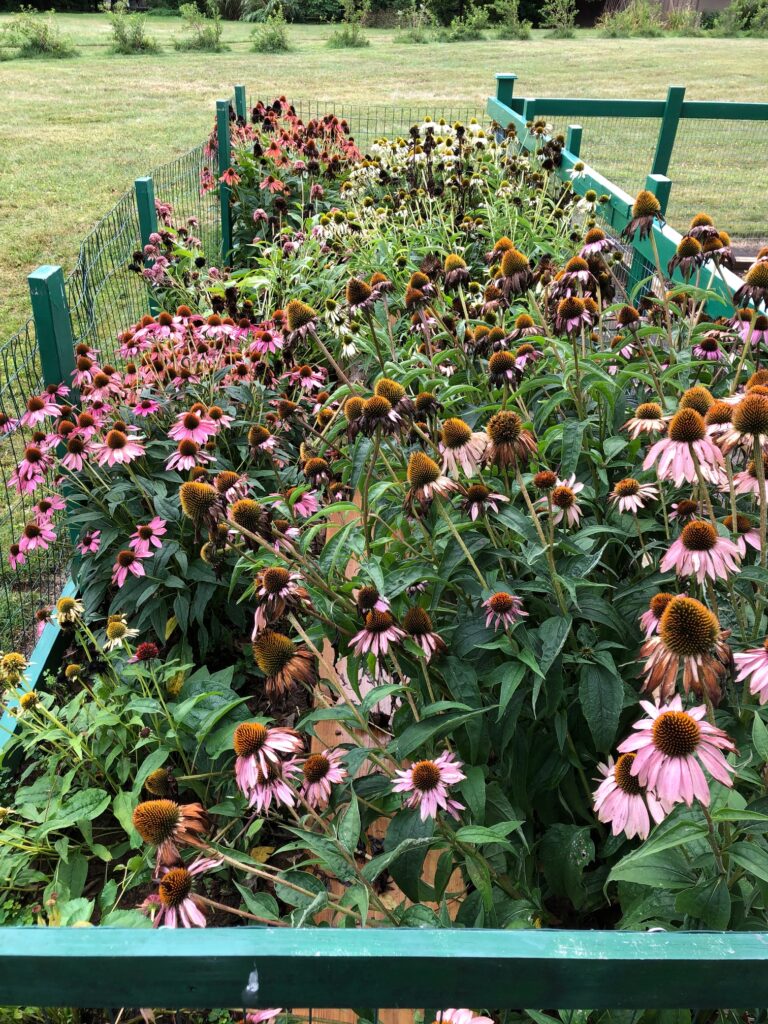
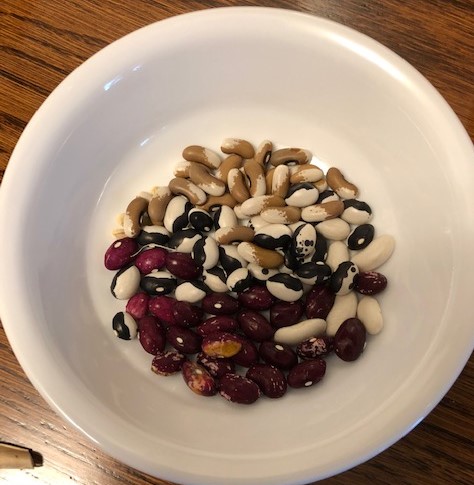
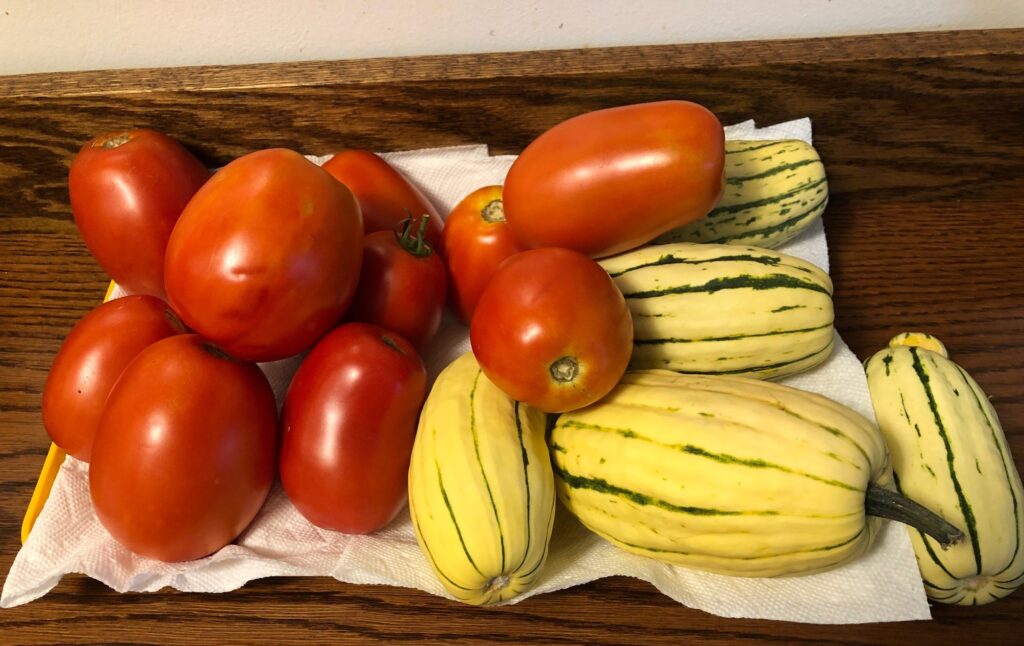
As you can see, Bert tidies up the garden as things finish so the final clean up doesn’t take too long. I’m ready to put all the canning supplies away for now. All I have to do is look at my shelf of canned foods to see how the summer went…pizza sauce, 4-bean salad and pickle relish. The memories of meals with fresh green beans, tomatoes, salads with fresh lettuce and radishes are there too! So that was our garden for 2022! Thanks for sharing the journey!
Please comment or email me directly at marykisner@comcast.net.
Making an Eye Cream for Dark Circles and Puffy Eyes
Not enough sleep? Allergies making you look like you didn’t get enough sleep? For a while I’ve wanted to try this recipe for an eye cream. I had seen various brands of specialty eye cream for sale but somehow the cost seemed extreme. when I stumbled upon this recipe on one of my favorite websites, I thought I’d give it a try (https://joybileefarm.com/diy-eye-cream/). This author has many DIY recipes that are easy to follow and she provides good supporting research on the ingredients used. Many of the products I make started with one of her recipes. Check it out.
For this eye cream, the cost of the ingredients made a good case for just ordering something already made. However, where would be the fun in that! I’m always trying to find and use products that have the least amount of chemicals and artificial ingredients. The older I get, the more sensitive I am to various products I use. Plus, if I can make it myself, I’ll be able to make more if I need to. That makes me smile!
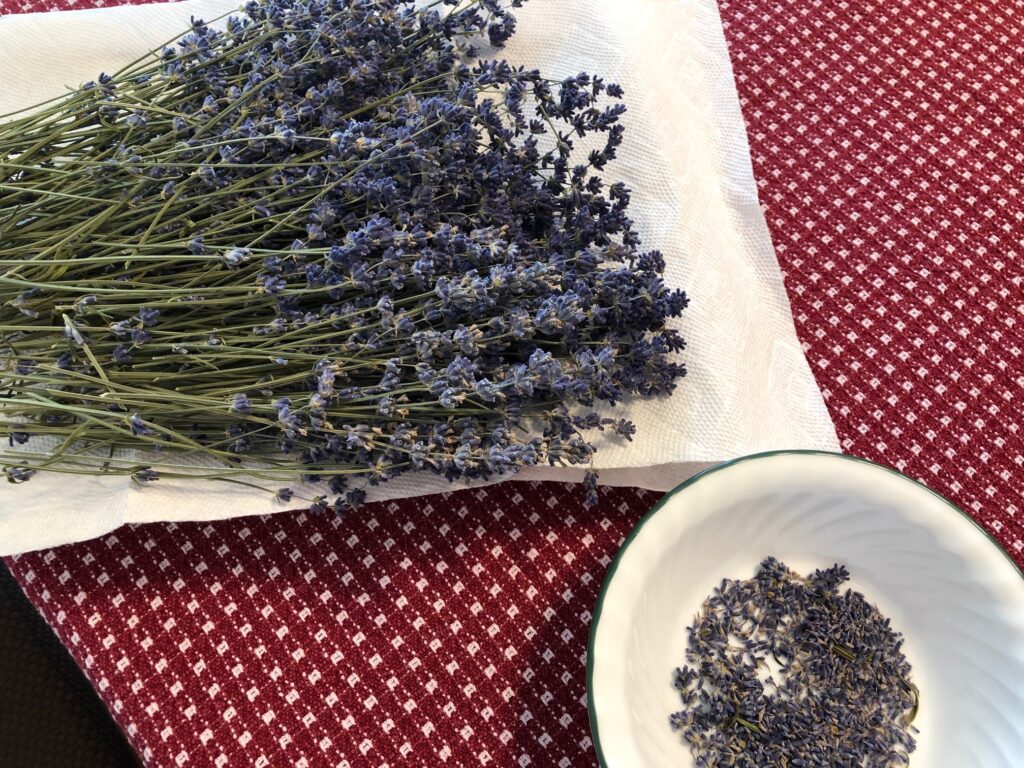
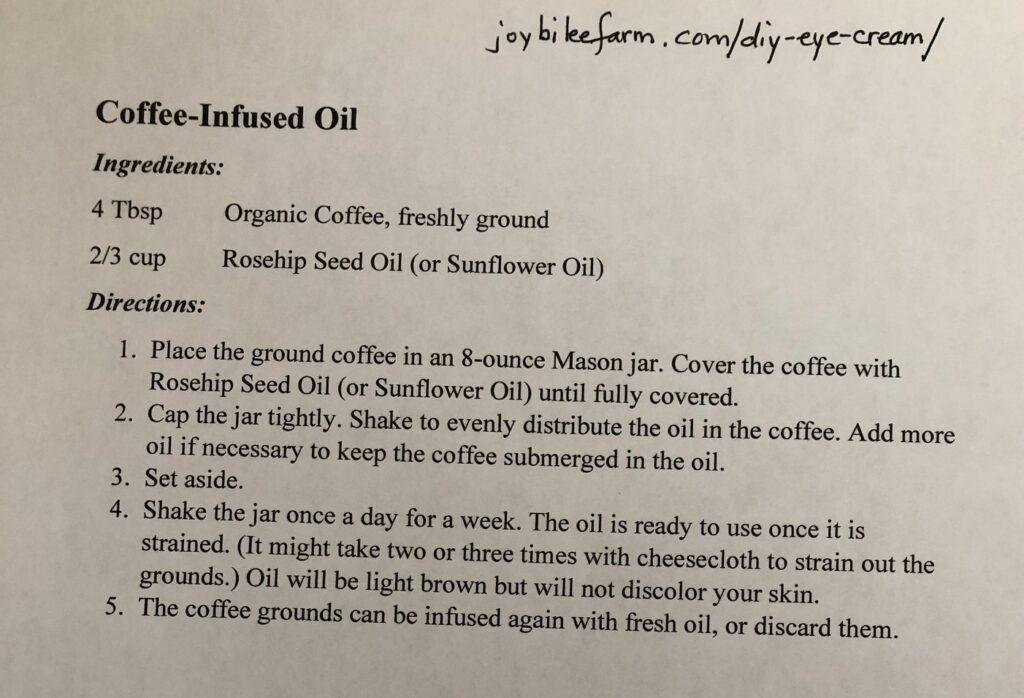
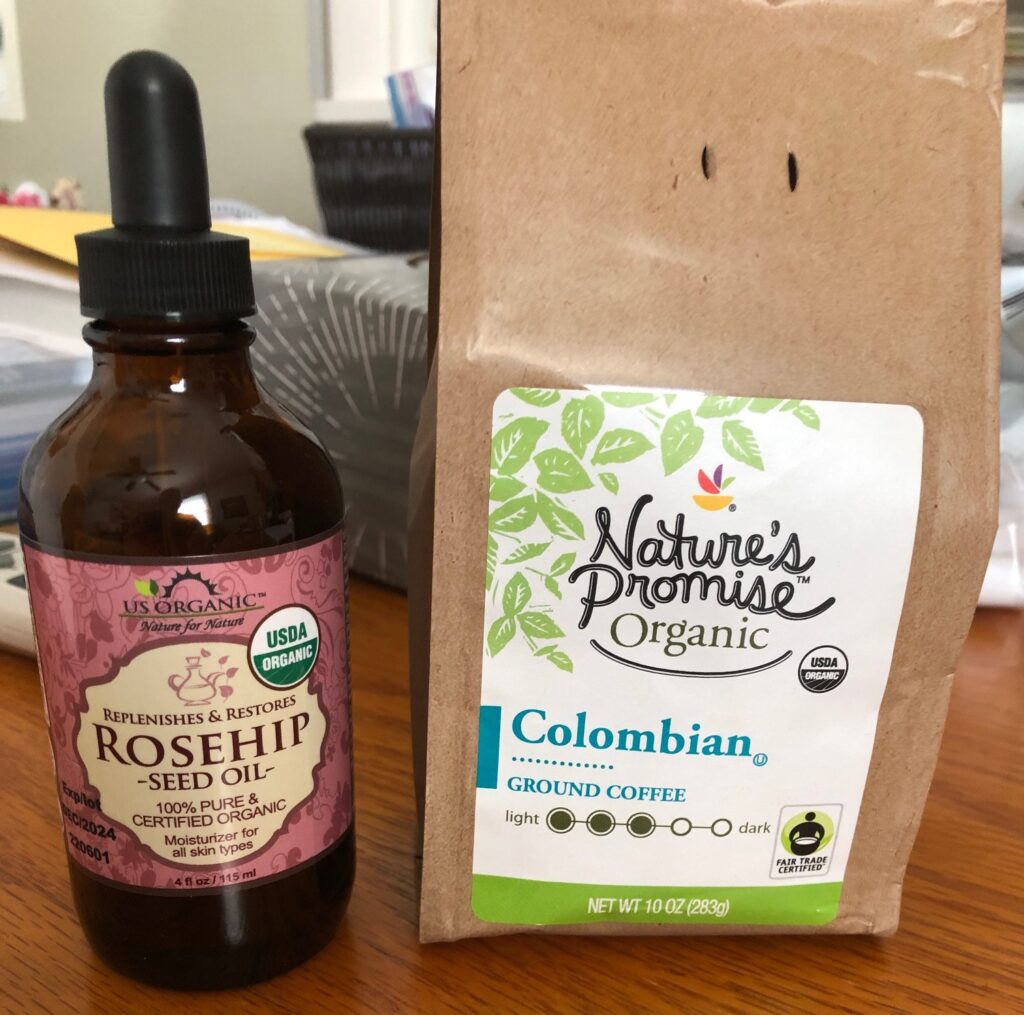
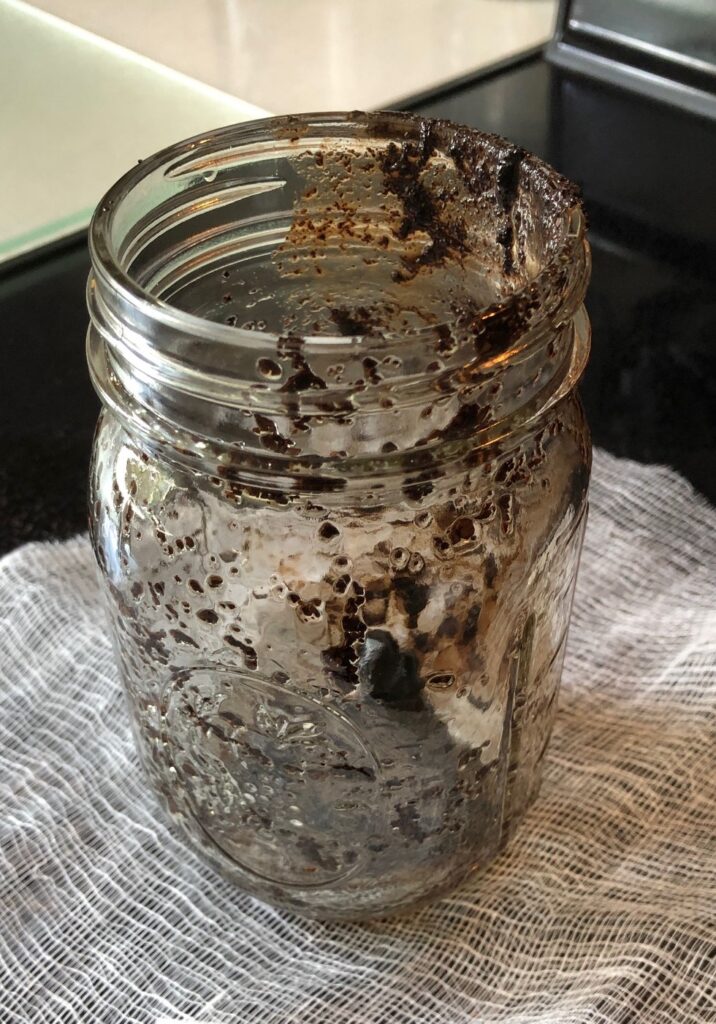
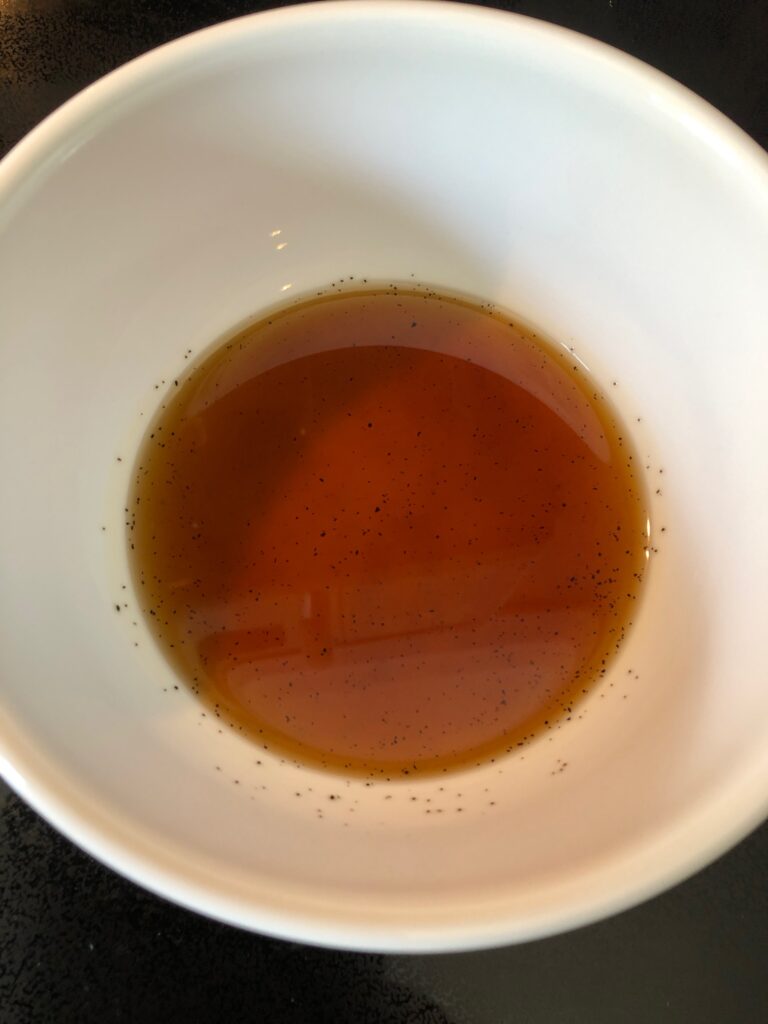
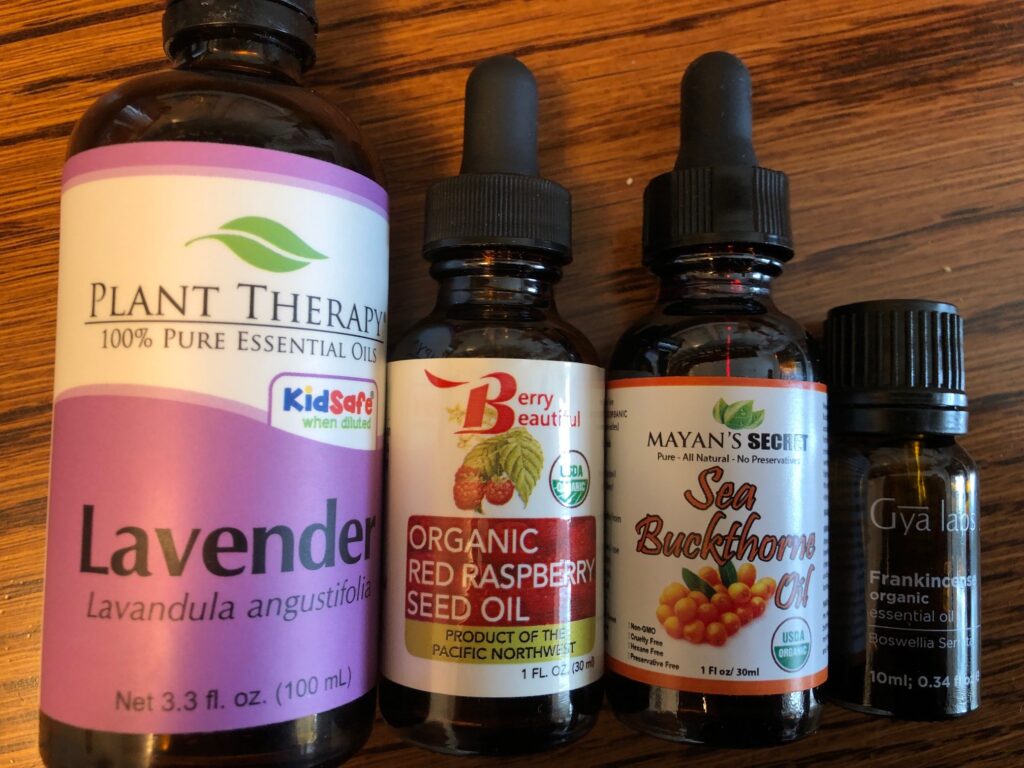
This eye cream begins by making a coffee-infused oil, similar to the infused oils I’ve made with calendula and lavender flower buds, except it took longer because I couldn’t simmer it on the stove and be done in one day. This recipe required me to soak coffee grounds in rosehip seed oil for a week, shaking the jar every day.
I put the jar on my desk so I could keep an eye on it and finally today I strained out the grounds. No small task! The grounds had made a thick sludge on the bottom that I could barely scrape out. Next time I’ll use more oil (and possibly substitute Sunflower oil, which is less expensive) so I can keep it loose…maybe even open the jar and stir it up with a long-handled spoon.
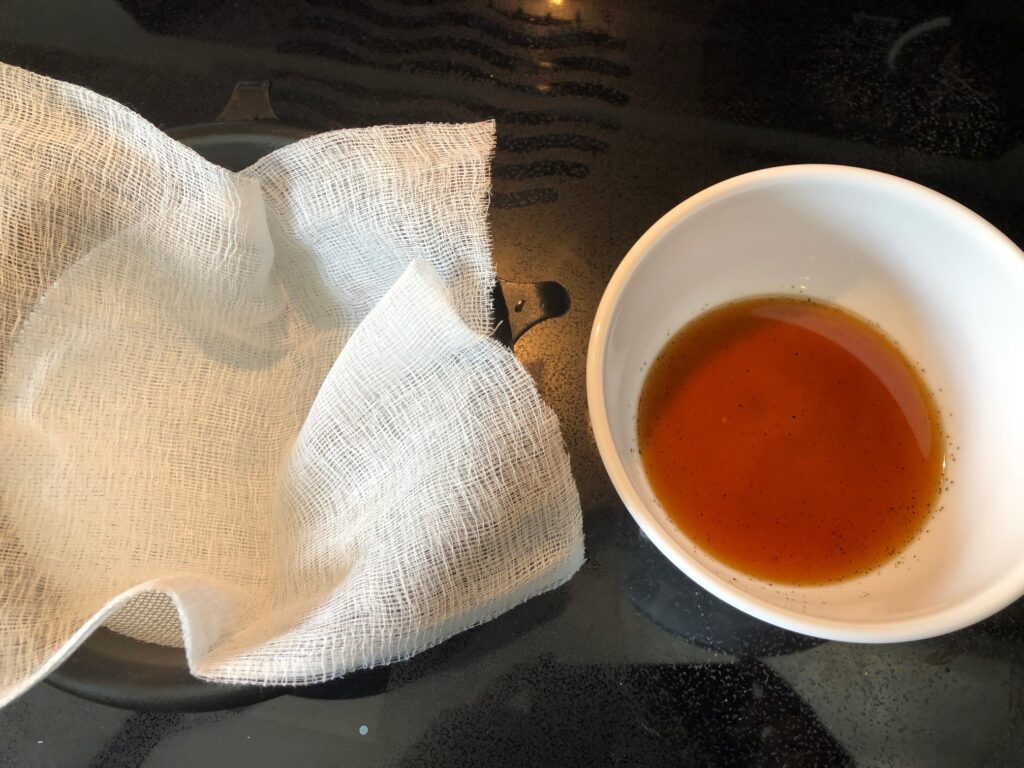
After pouring out as much as I could to strain out the oil, I ended up scraping the grounds, filling the jar with soap water and dumping the slurry outside. I didn’t want that oily mess going down the drain.
I lined my strainer with cheesecloth and poured the oil through it. When it finished draining, I picked up the cheesecloth mess and threw it in the garbage.
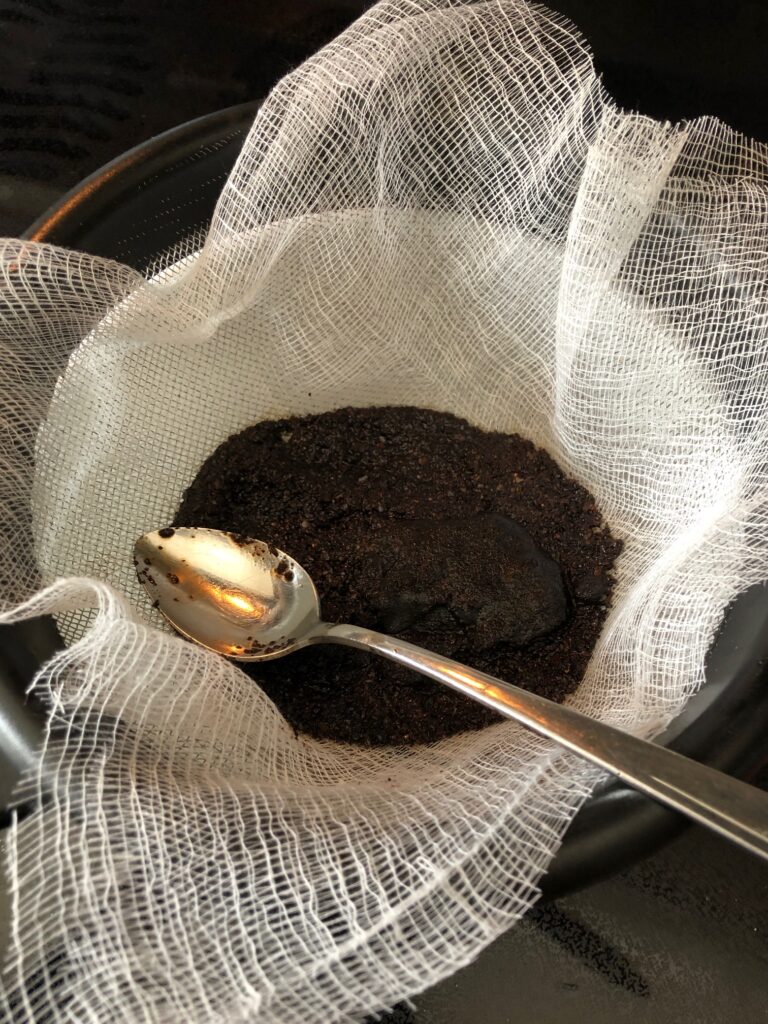
Then, I strained it twice more, finally using four layers of cheesecloth to filter out the last of the grounds.
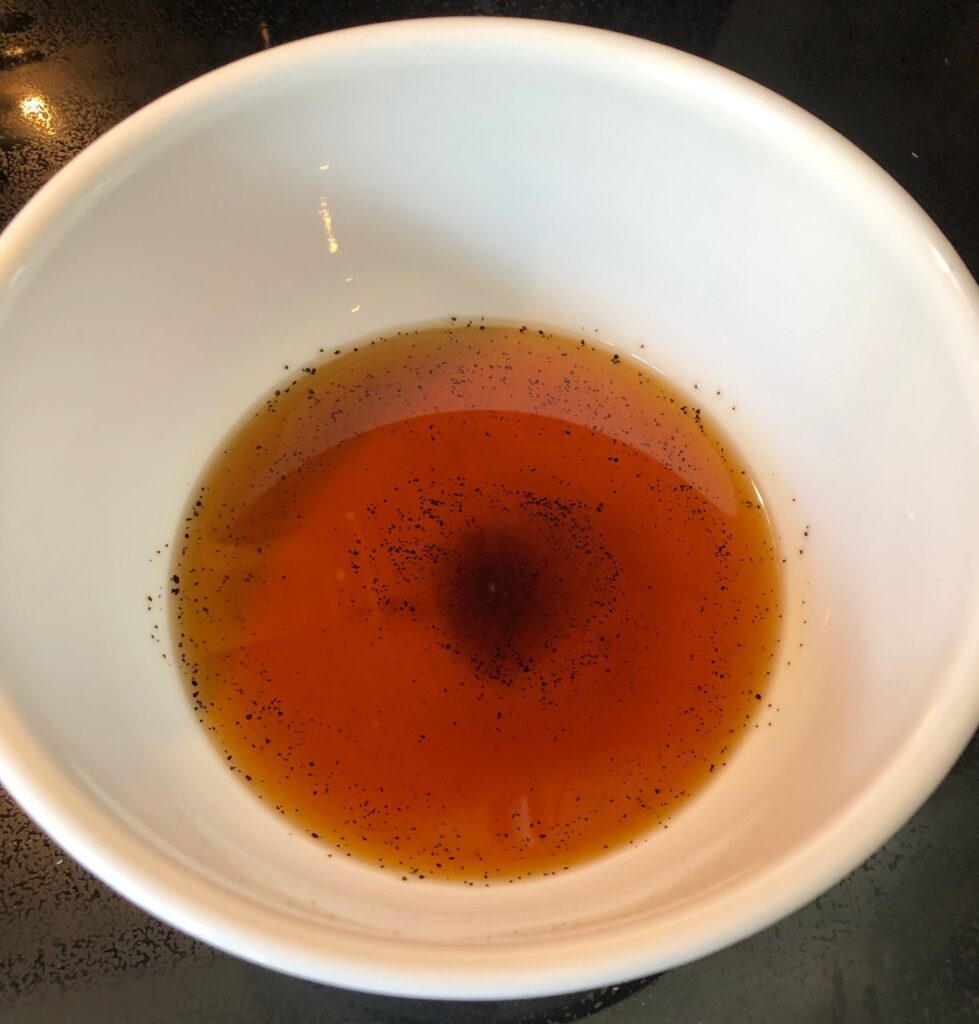
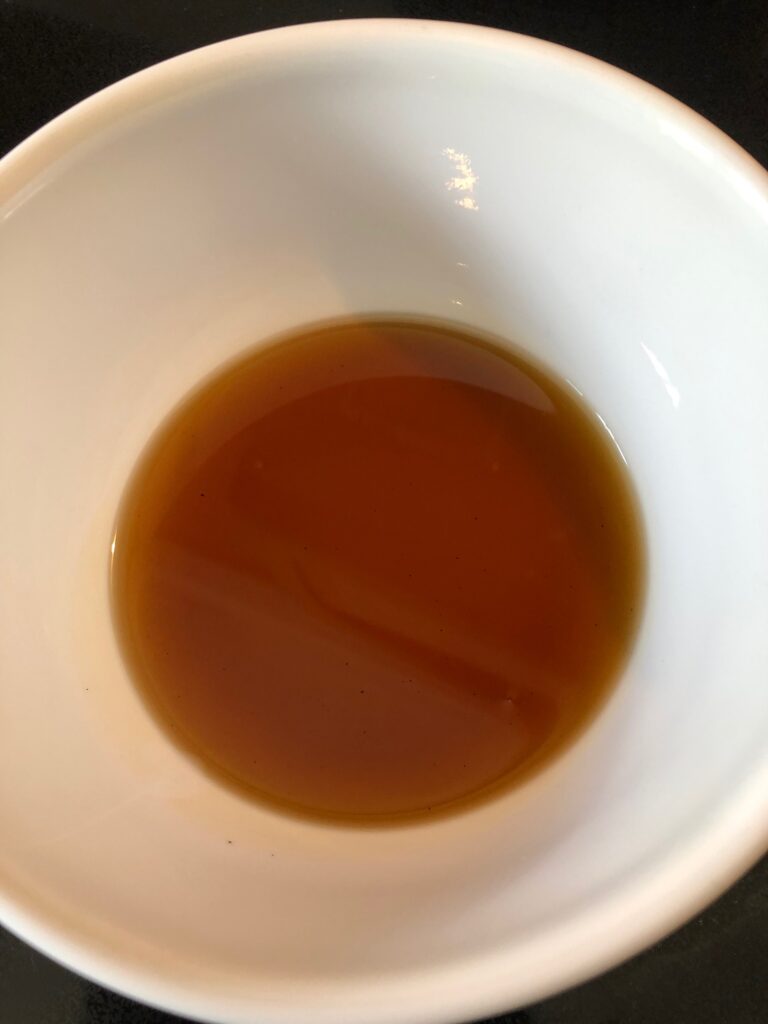
Now, I was ready to use this coffee-infused oil in the recipe for the Eye Cream. Here is the recipe:
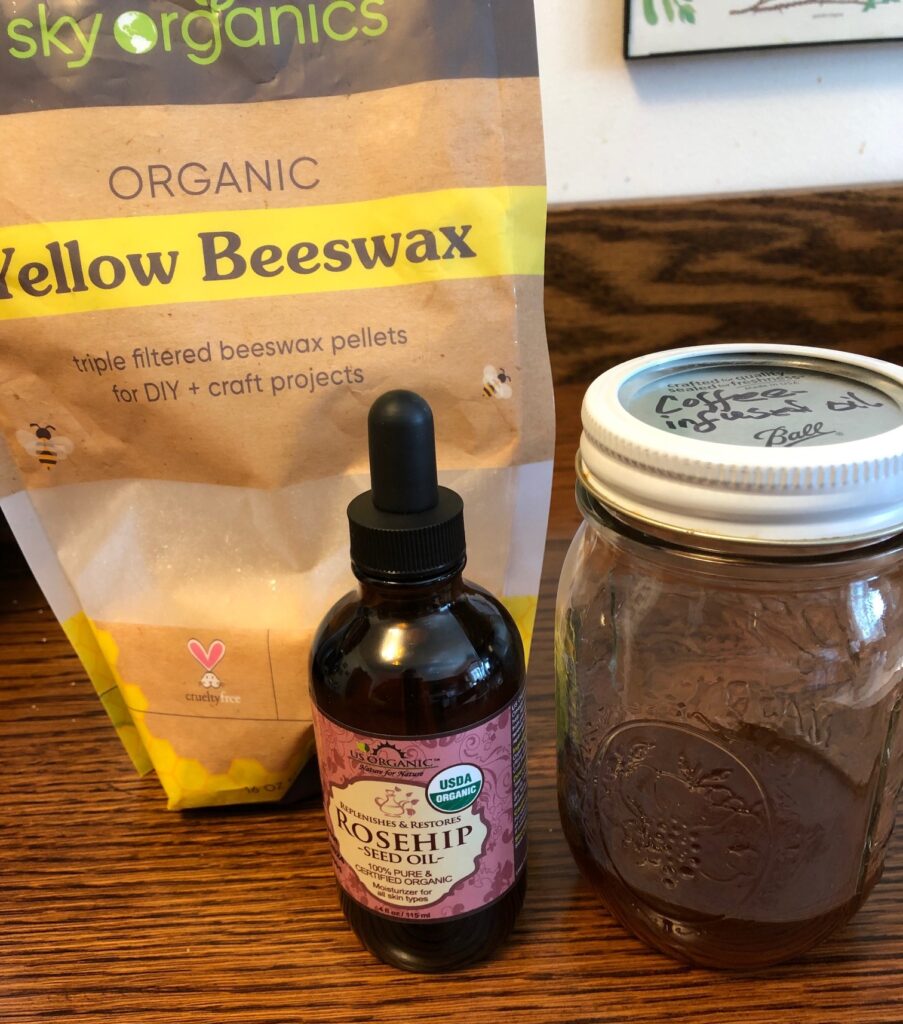
It didn’t take long to melt the beeswax. Then, I added these oils and stirred them in:
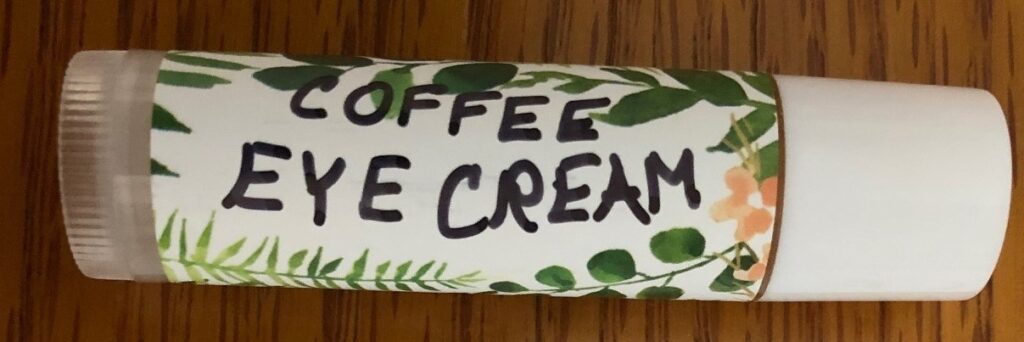
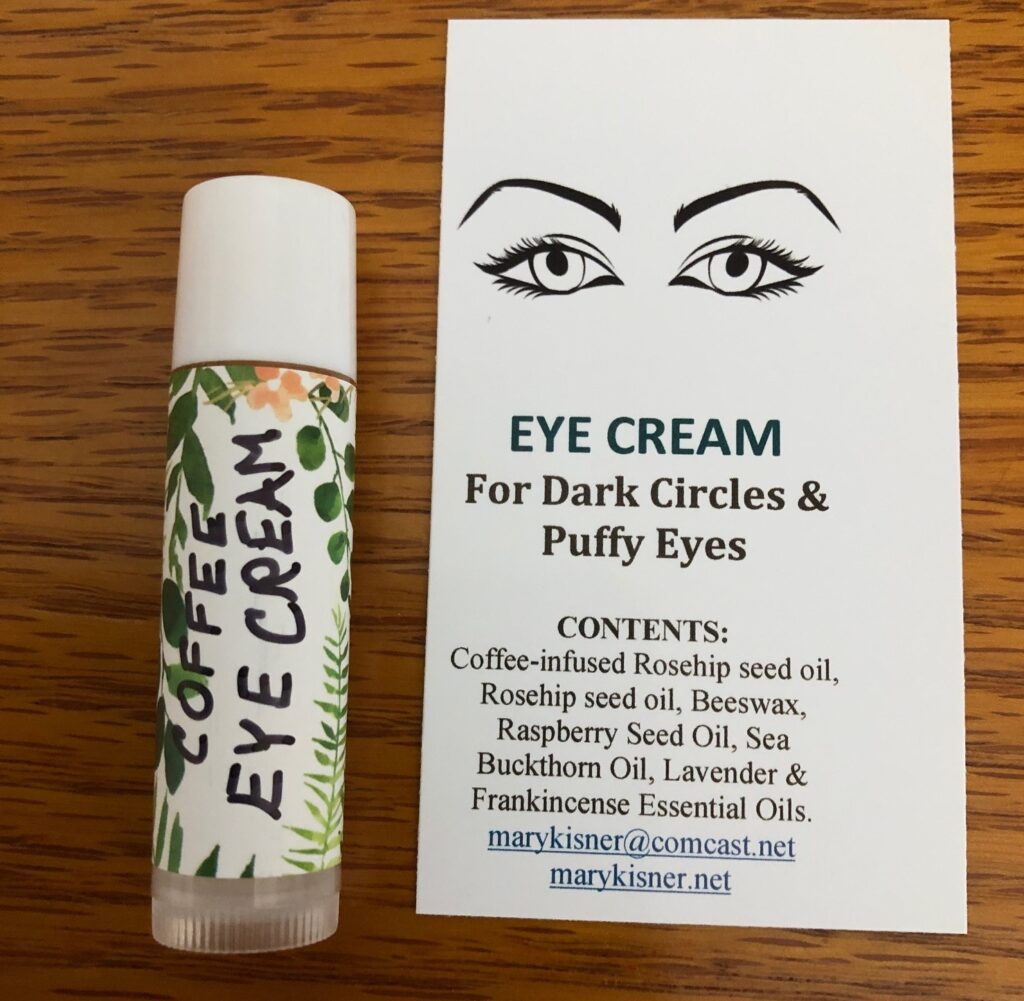
Using a disposable pipette I filled the lip balm tubes (sorry, forgot to take a picture!)
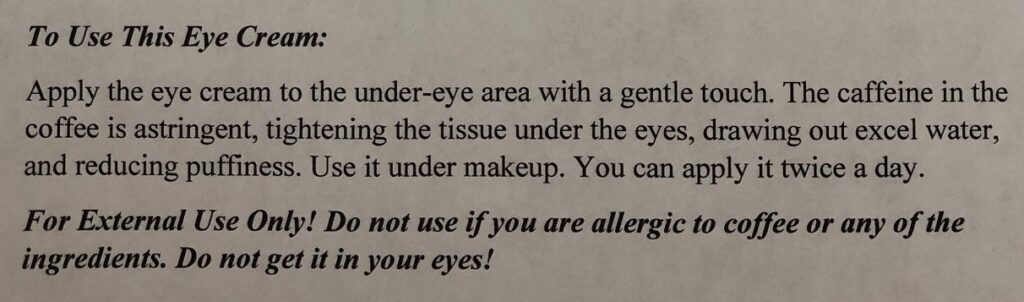
When they were cool, I labeled them and made the ingredient cards to go with them. I’ll have to figure out how much information to put on the back of the card. I’d like to include the last two paragraphs of the recipe on the card:
Hopefully, I’ll find some willing friends to test the cream with me to see if it actually works!
All the ingredients are available on Amazon…I did pick up the ground coffee at the grocery store. Give it a try! Enjoy!
Please comment or email me directly at marykisner@comcast.net.
Make a Holder for a Roller Ball
It seems I’ve been making several items that are dispensed with a roller ball…from perfume, to nail serum, to serum to soothe bug bites. I thought it would be easy to pull out my notes on making a roll ball holder to protect them. The notes were in the folder with my sketch of how to make a lip balm holder, so I pulled them out.
While the lip balm holder was pretty simple, and I managed to make a bunch at the time, the instructions were sketchy. Back in April of last year I did a post about it and had taken pictures so the instructions made sense (https://marykisner.com/how-about-a-holder-for-the-lip-balm/). At the time, I also made a few roller ball holder for a friend for her essential oil business.

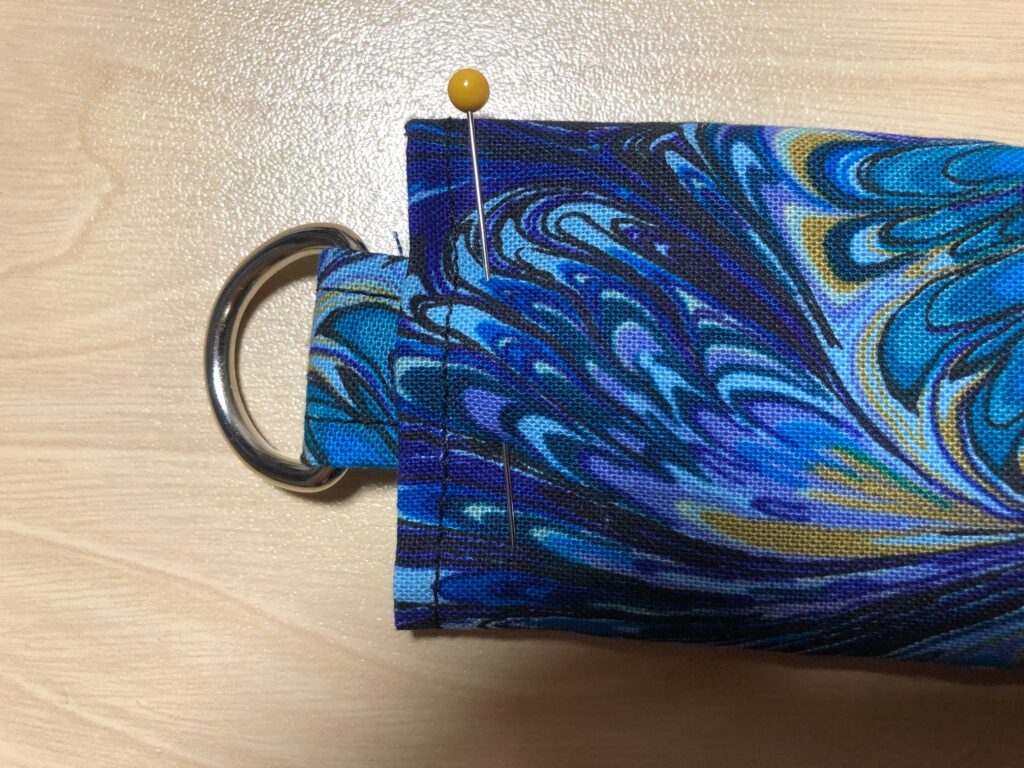
However, when I pulled out the notes for the roller ball holder the instructions were VERY sketchy so I spent all day trying to reconstruct how to make them. In the end, it isn’t hard but things had to be done in a certain order or the finished product looked really messy. (The first attempt ended up in the trash!)
This time I took lots of pictures while I made the second one. When I was finished, I tossed my original notes and will file a copy of this post as my new instructions! Enjoy!
Directions to Make a Holder for a Roller Ball
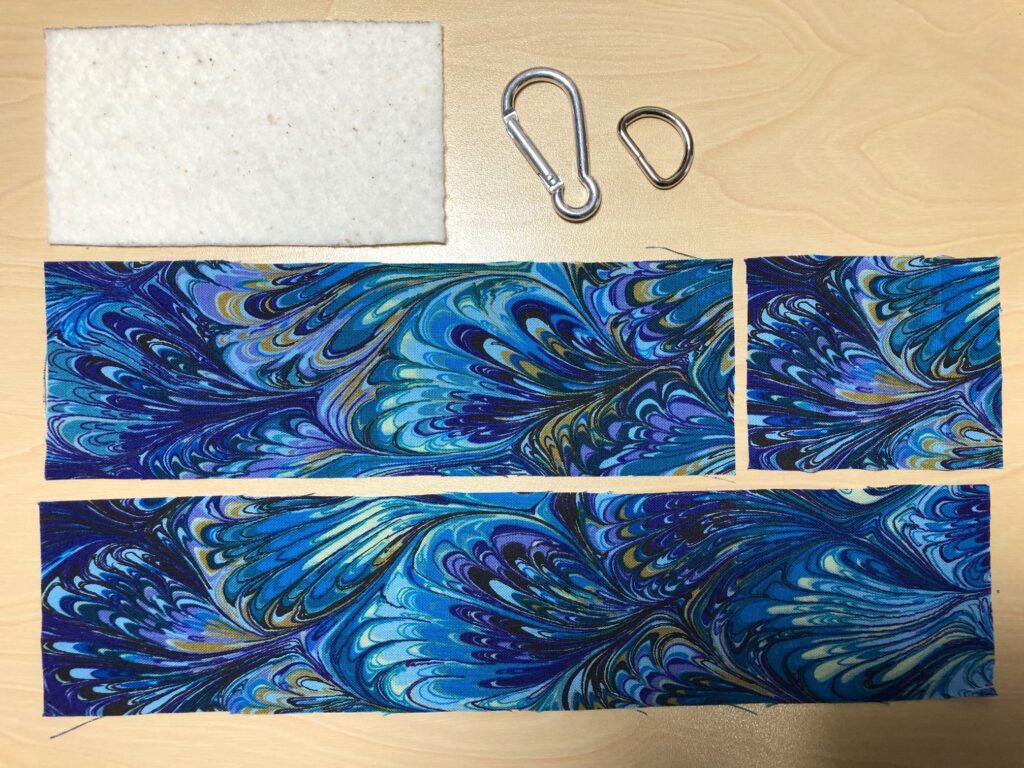
- Assemble Materials:
1 – 11″ x 2 1/2″ Cotton fabric: Outside fabric
1 – 8″ x 2 1/2″ Cotton fabric: Pocket fabric
1 – 3 1/2″ x 2 1/2″ Cotton fabric: D-ring strap
1 – 3 1/2″ x 2 1/2″ Thin batting
1 – 3/4″ D-Ring
1 – small carabiner clip
2. Sew batting piece to wrong side of outside fabric, lining it up with the center fold. Stitch in place.
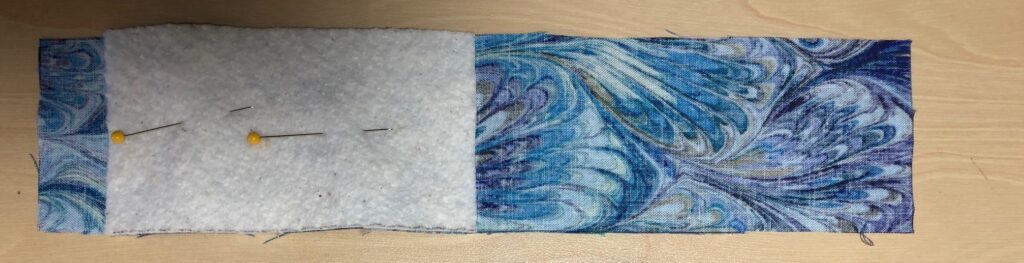
3. Fold D-ring strap fabric, long sides to the center, and stitch edges. Insert strap through the D-ring. Stitch close to the ring.
4. Fold down the top edge over the batting, apply D-ring strap and stitch to the folded edge.
5. Finish the opposite edge of the outside piece by folding the edge 1/4″ and stitching.
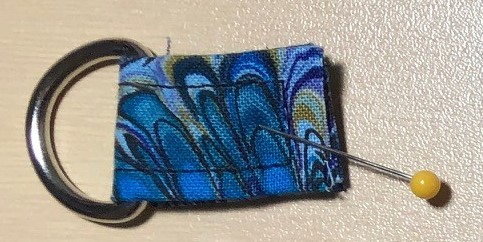
6. Turn the outside fabric piece right side up and apply pocket piece with folded edge toward the D-ring and the raw edges at mid-fold of the outside piece.
7. Fold the outside fabric right sides together, matching the hemmed edges. Stitch around 3 sides, leaving the edge near the D-ring open for turning.
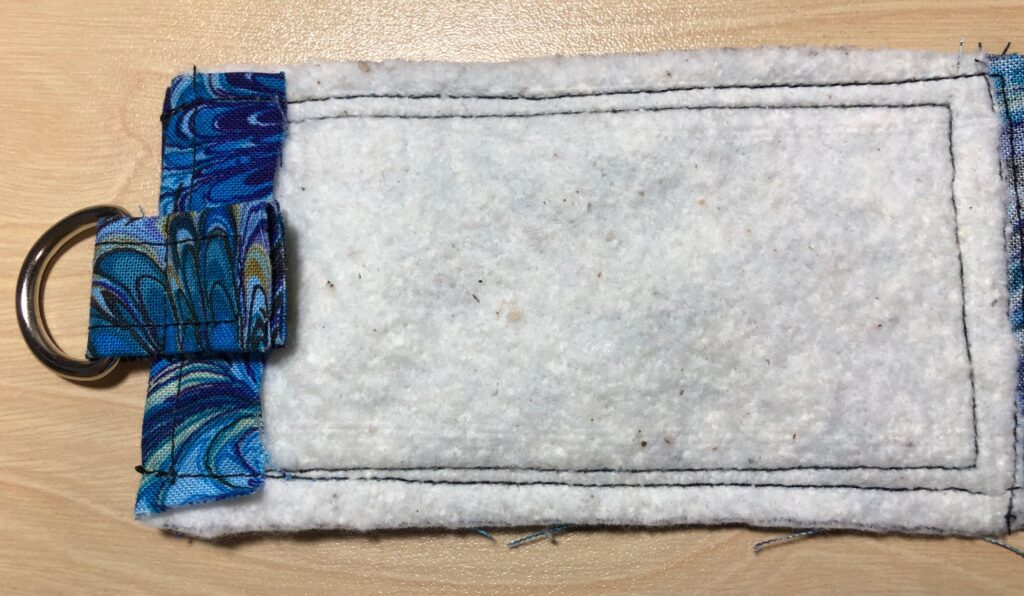
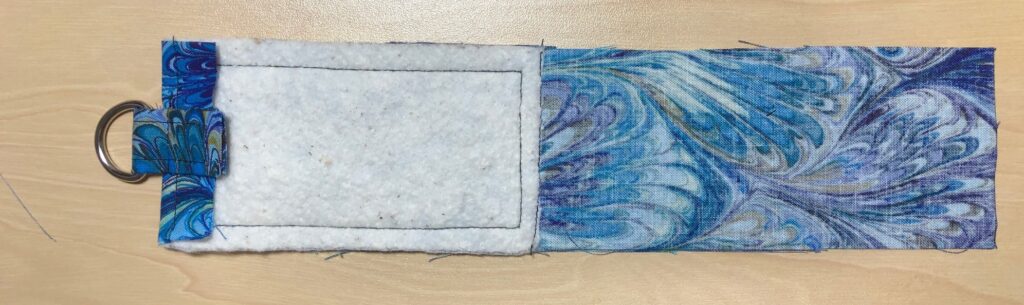
8. Trim corners. Turn right side out.
9. Top stitch around all four edges. Insert roller ball into pocket.
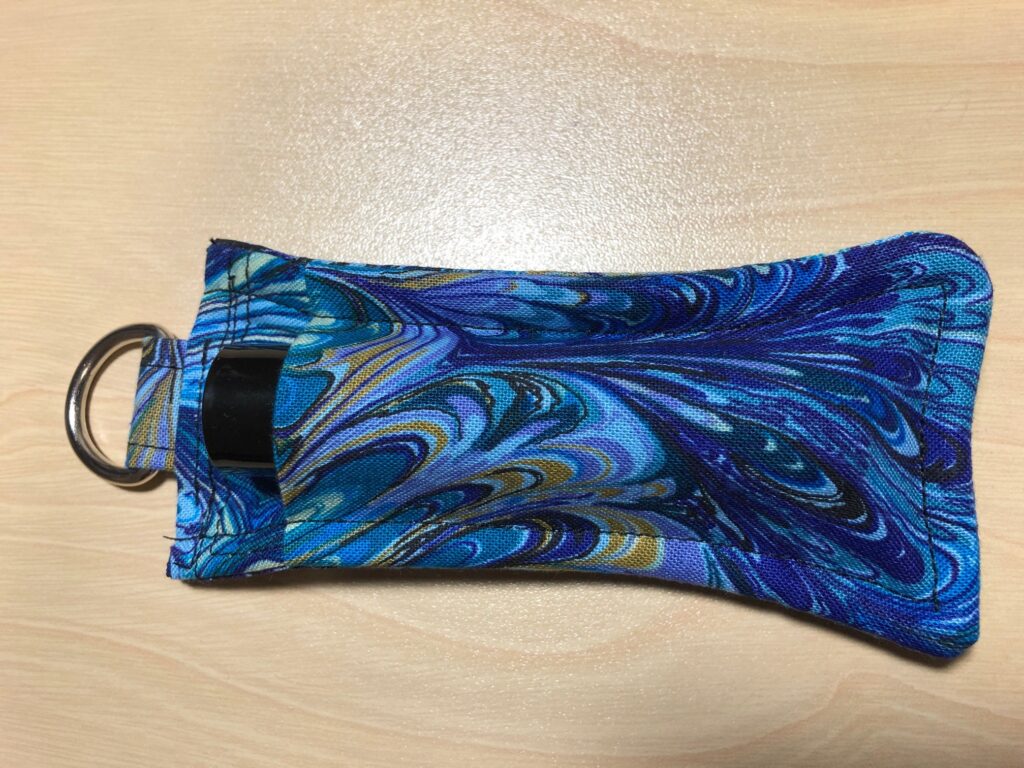
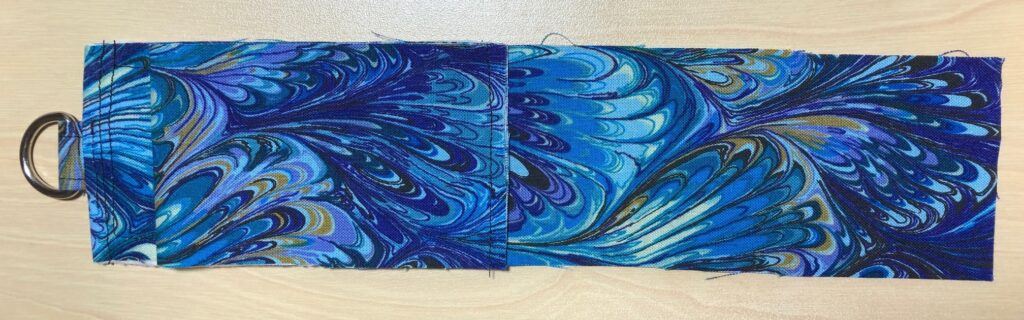
10. Attach carabiner clip.
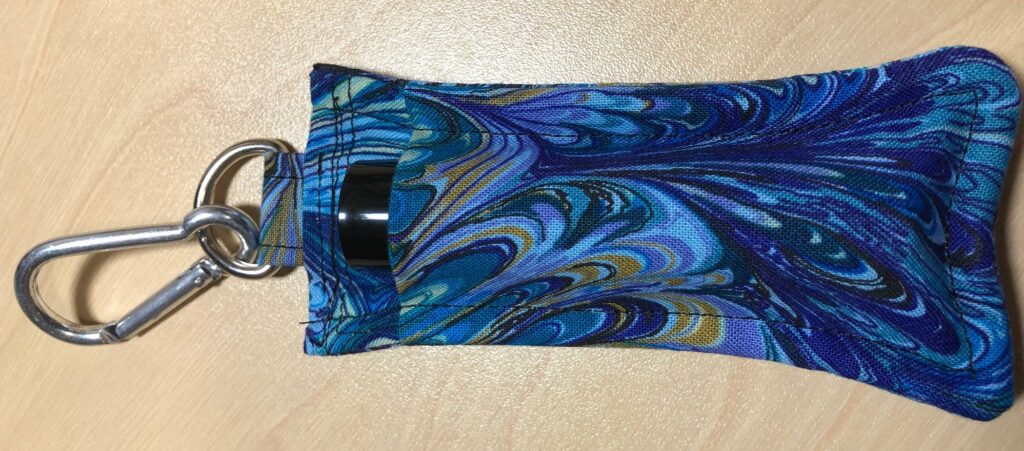
So that’s how to make a roller ball holder…in case you want to make one yourself! See the link above for the instructions to make a lip balm holder.
Please comment or email me directly at marykisner@comcast.net.
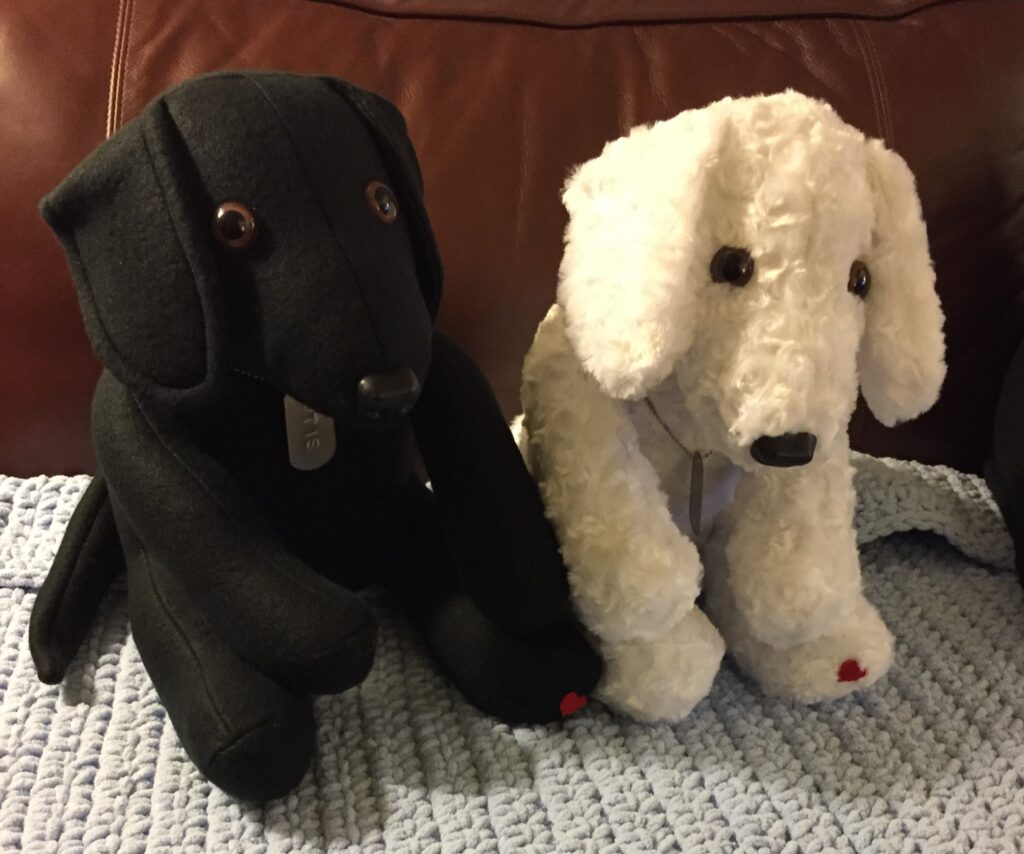
Review How to Make a Memory Bear
Recently, I was asked about how I got involved with making memory bears; and then this morning, Facebook reminded me that one year ago I posted the story with instructions about making bears. If you did not have a chance to read that post, I thought I’d post the link to that story. (https://marykisner.com/making-a-memory-bear/)
Making memory bears is more about saving a memory than creating a fancy stuffed bear. Almost any stuffed pattern can be used…it’s the fabric that matters. This could be from a favorite shirt, pajamas or bathrobe worn by a loved one.
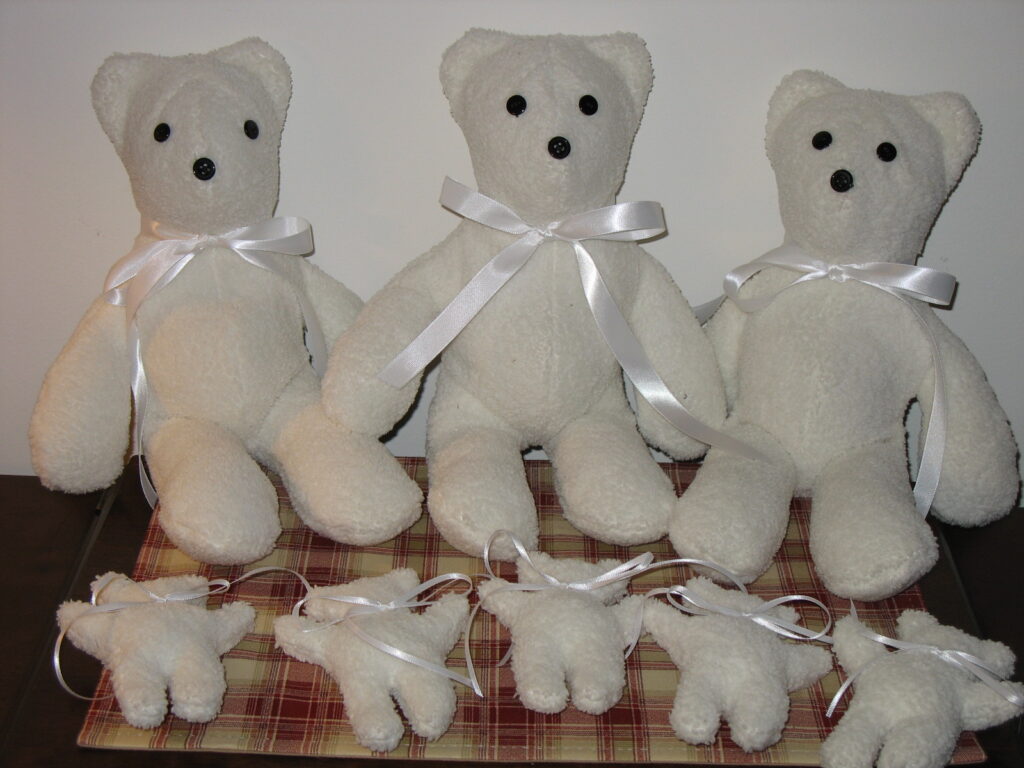
My first bears were made with a simple pattern. Then I chose a different pattern that gave a little more shape to the bear. I love being able to add a little heart button to the foot of a bear, and simple buttons for the eyes and nose keep it looking homemade. I have had to be mindful to ask if the bear will be used as a toy by a small child considering the risk of a child choking on a loose button. Sometimes I have had to use no buttons at all so it’s safe.
Please enjoy a few of the many pictures of bears (and dogs!) I’ve made over the years and see the instructions how to do it yourself. It has been a while, but I have fond memories of making memory bears. Enjoy!
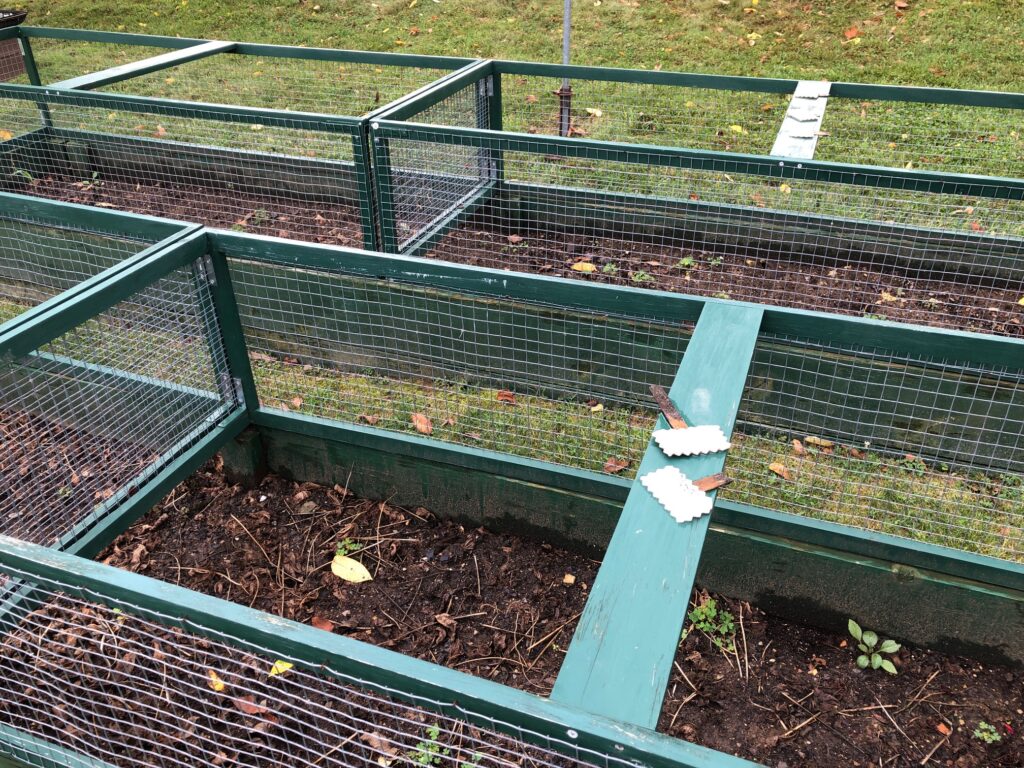
Garden Update August 10, 2022
Thanks to the ongoing heat and lack of rain, the plants in the garden are maturing faster than I expected. I know it’s been only 11 days since my last update on the garden, but things change that quickly. While we’ve been able to keep the actual plants watered, for some reason they have just decided it’s time to wind down. Mother Nature seems to have her own timeline.

So, that’s the tour the second week of August, 2022. Mother Nature has ruled the garden this year. I wonder what kind of winter we will have…maybe less snow? We can only hope! Enjoy!
Please comment or email me directly at marykisner@comcast.net.