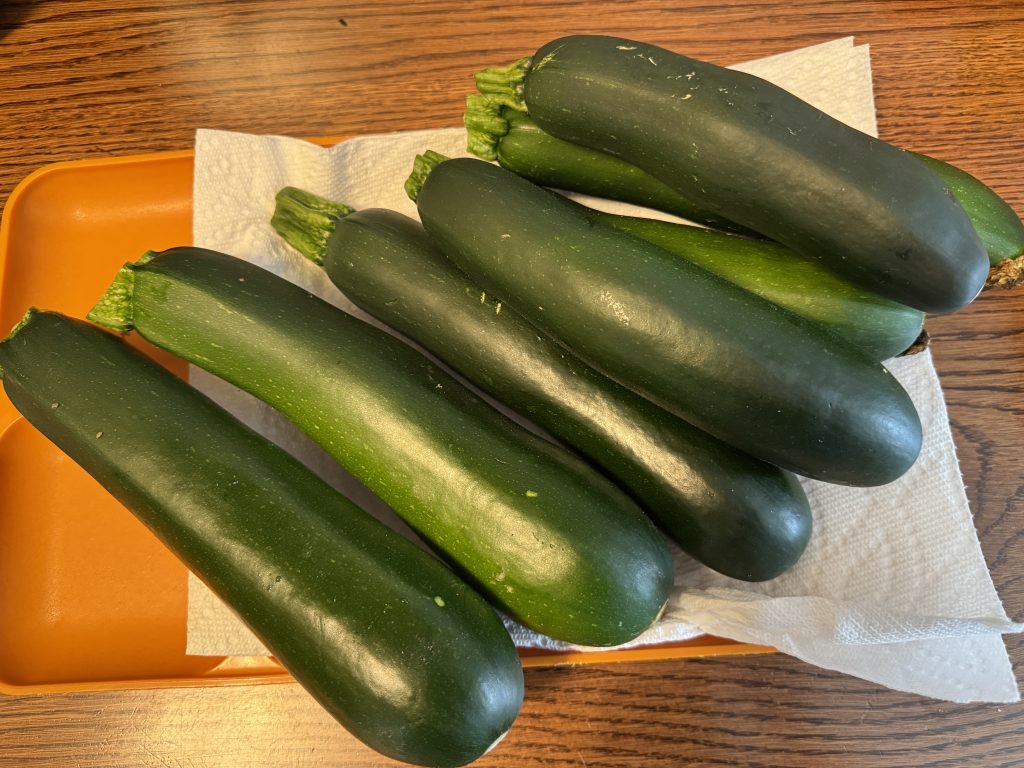
Garden season has begun spilling over into the kitchen…at least with zucchini! The last month or so has been all about keeping plants watered and watching them grow. Now it’s time to make room on the kitchen counter for assorted tiny tomatoes and zucchini. Finally, all those recipes for zucchini that I’ve been collecting over the last year will be useful.
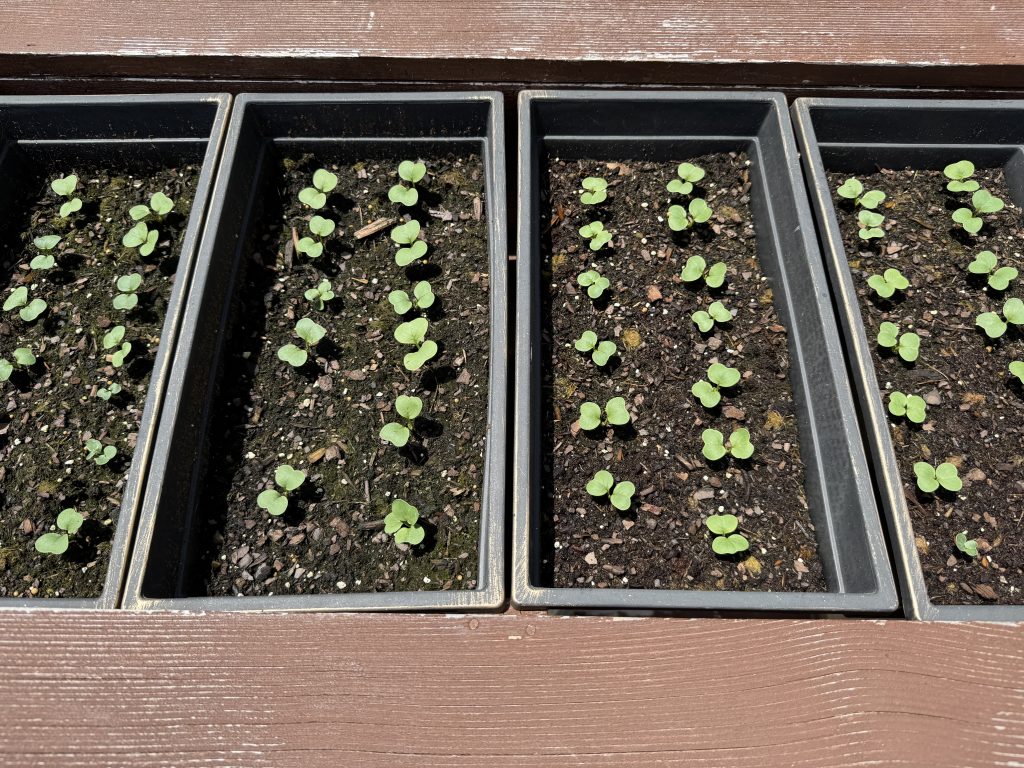
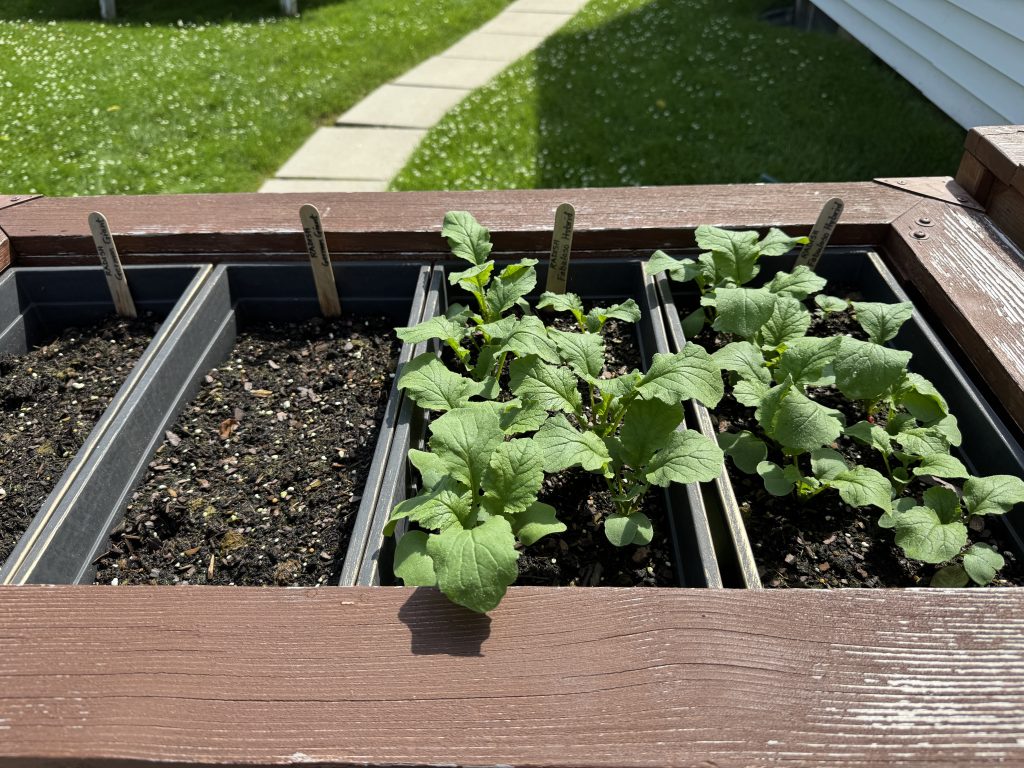
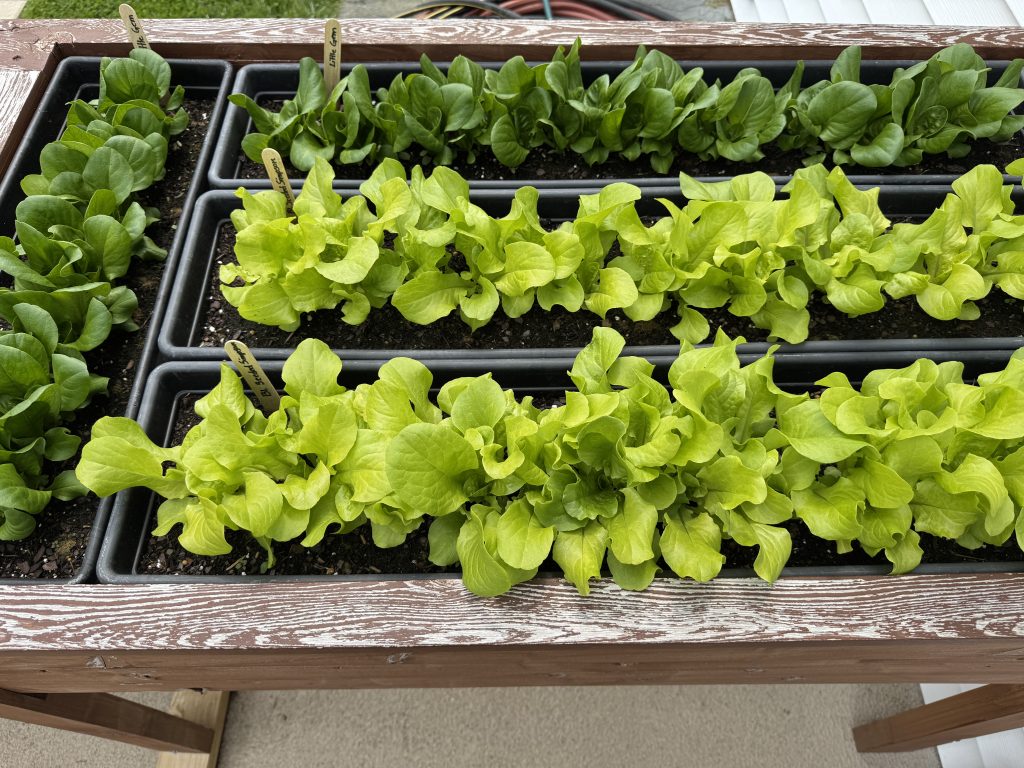
If you’ve been following along with each update, you should be able to see that the plants are starting to really produce! The second planting of lettuce (Black Seeded Simpson and Little Gem) have finally popped up. I’ll plant the next section later today.
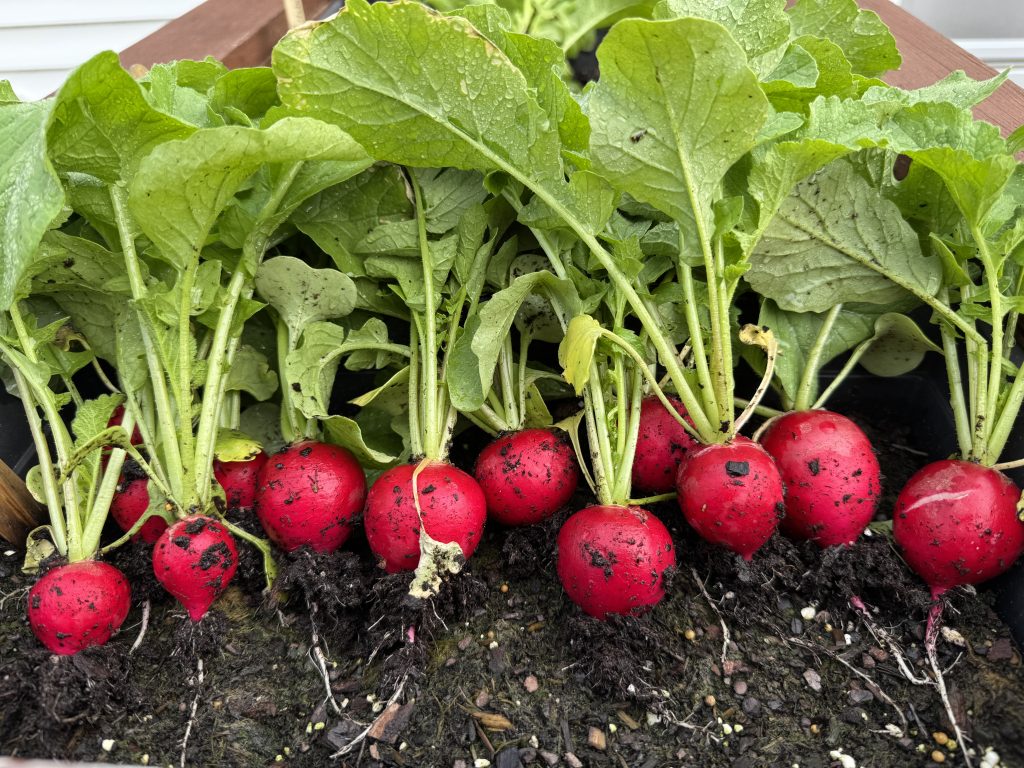
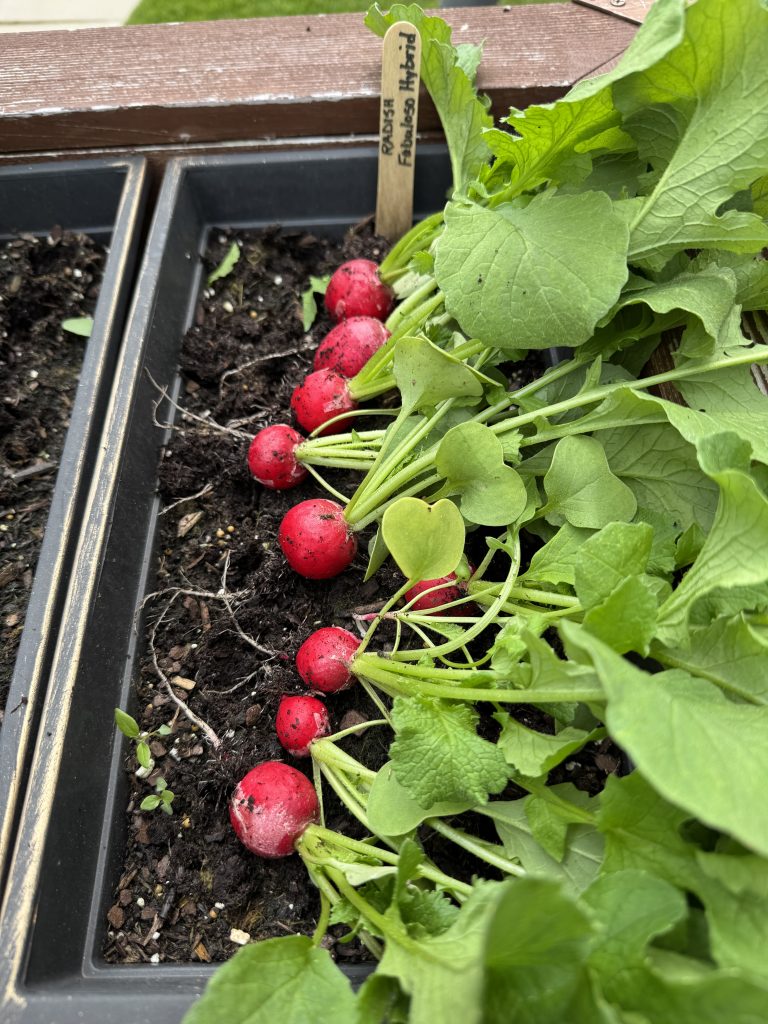
The radishes grow quickly and taste delicious! I’ll pull them today and replant for the next batch.
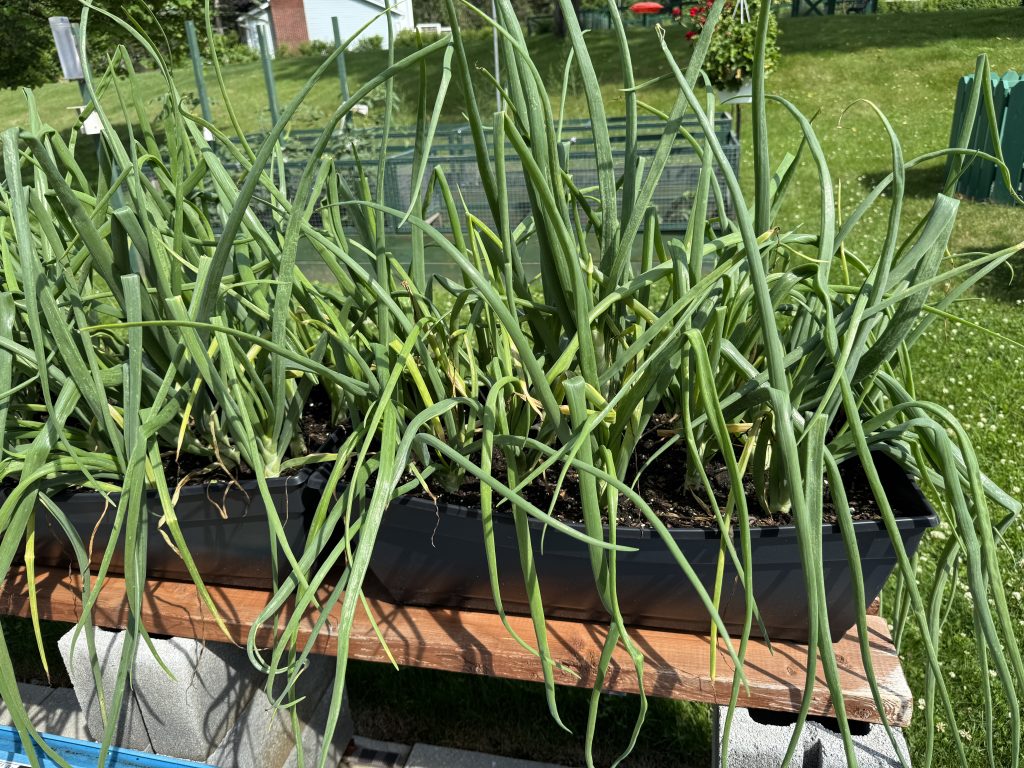
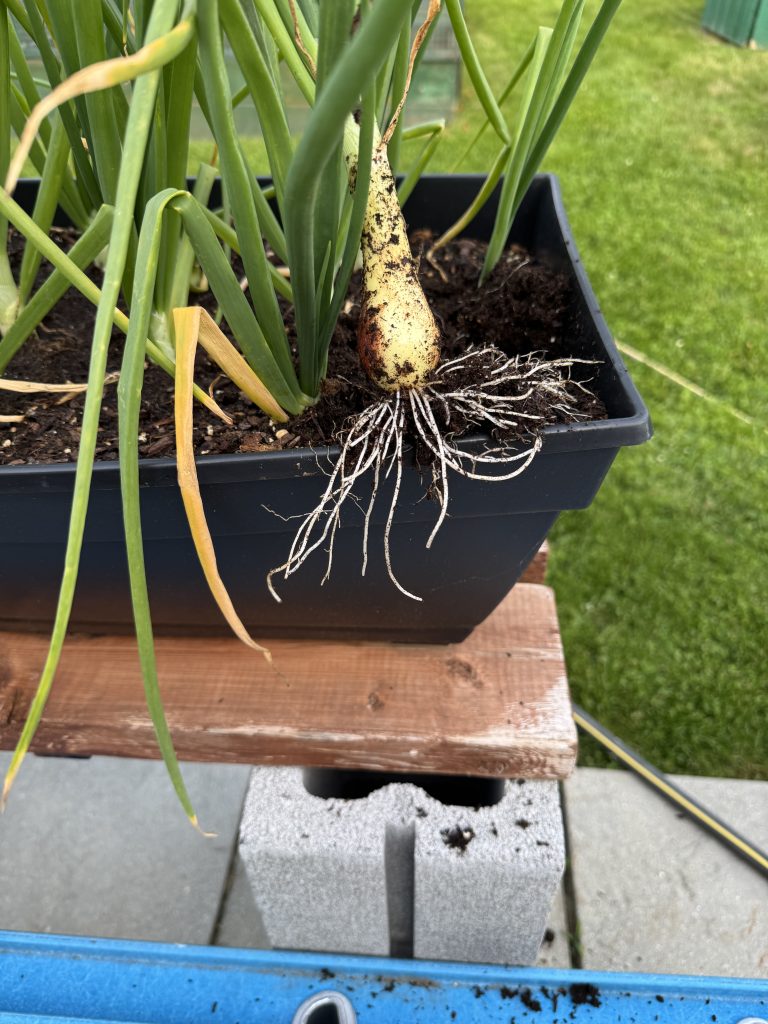
The onions are bursting out of the planters…we are using them one at a time, but it might be time to dump them out!
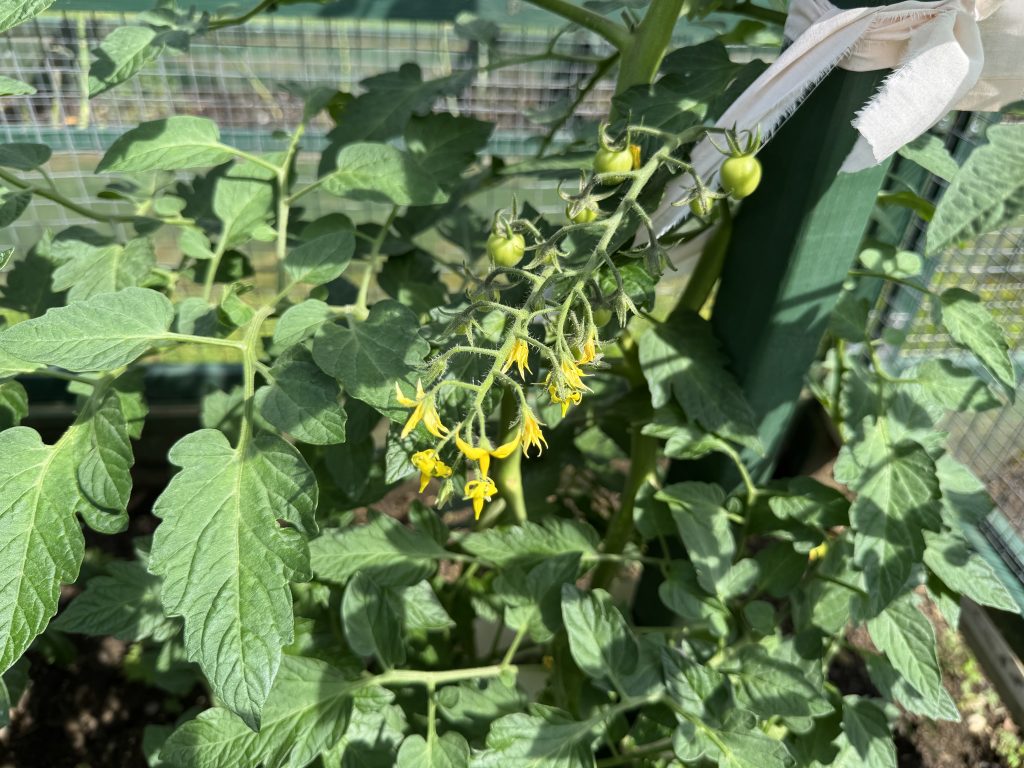
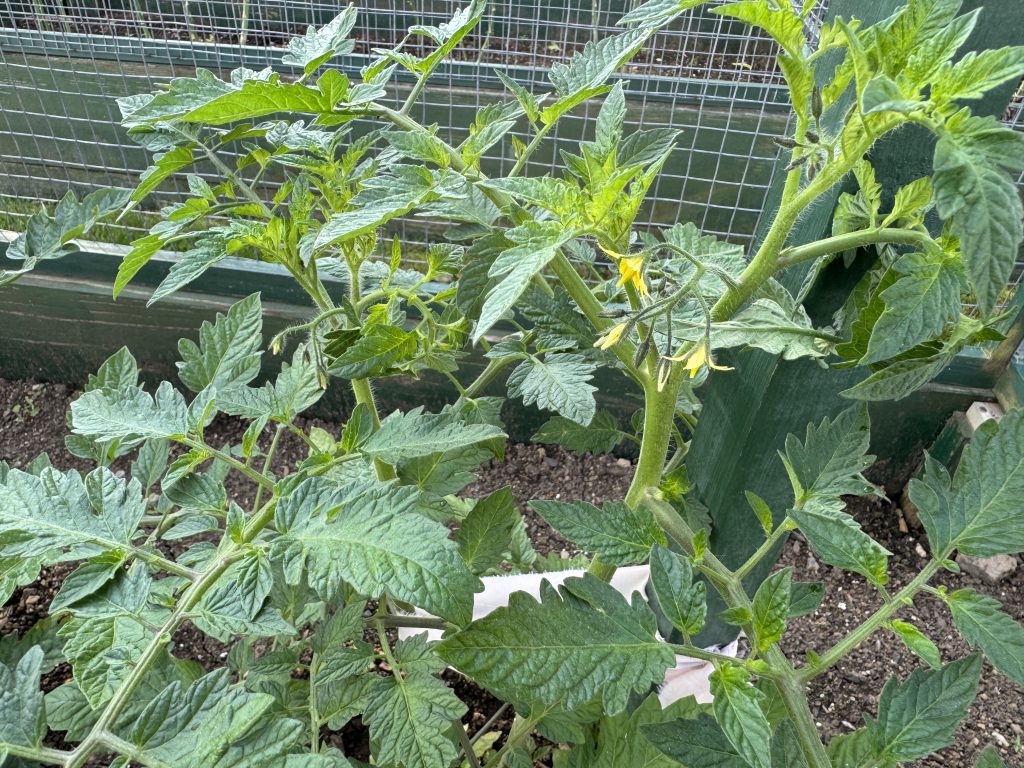
The small tomatoes (called Raindrops) are finally starting to ripen. From a distance, they look like of strings of pearls hanging on the plants.
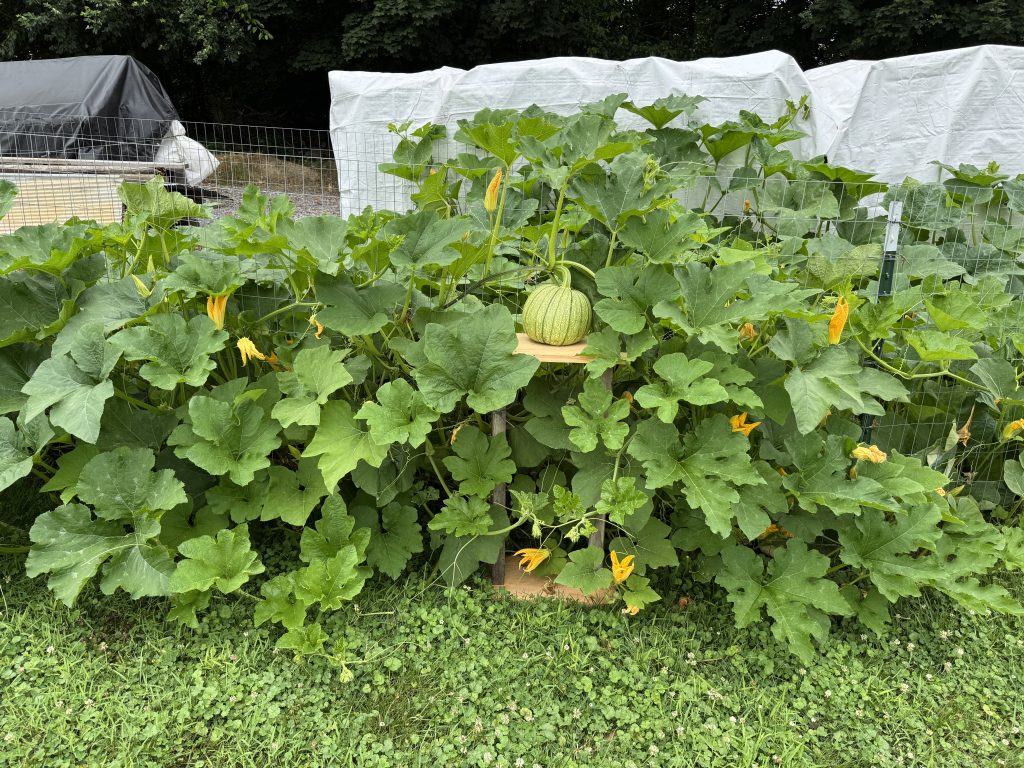
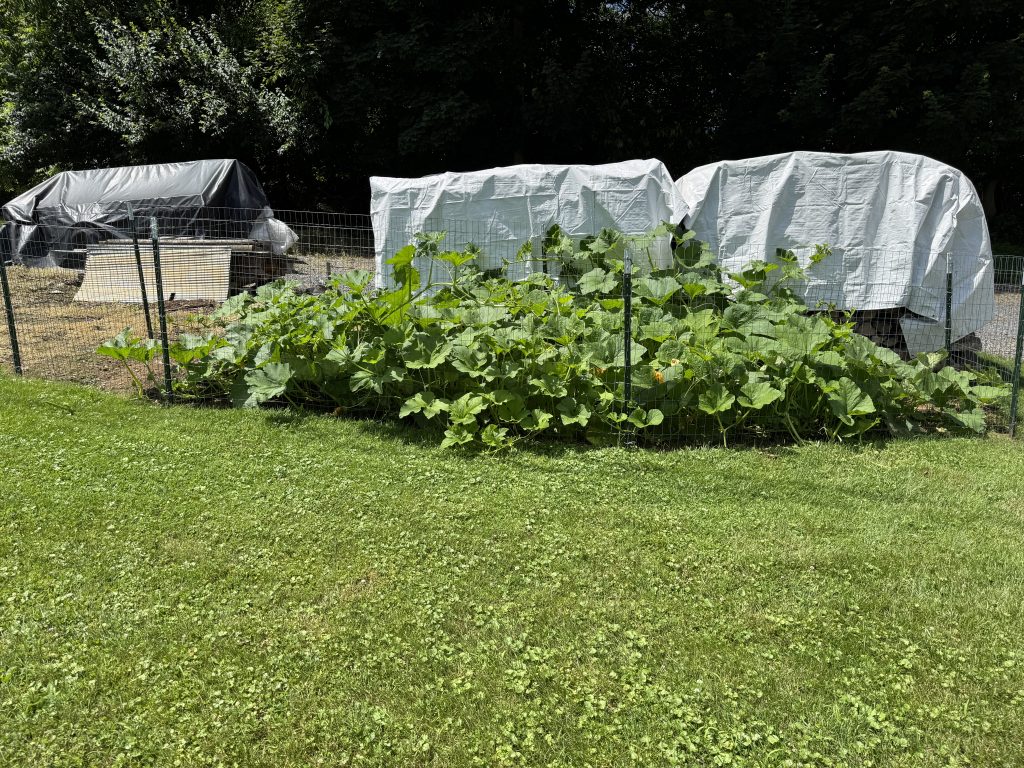
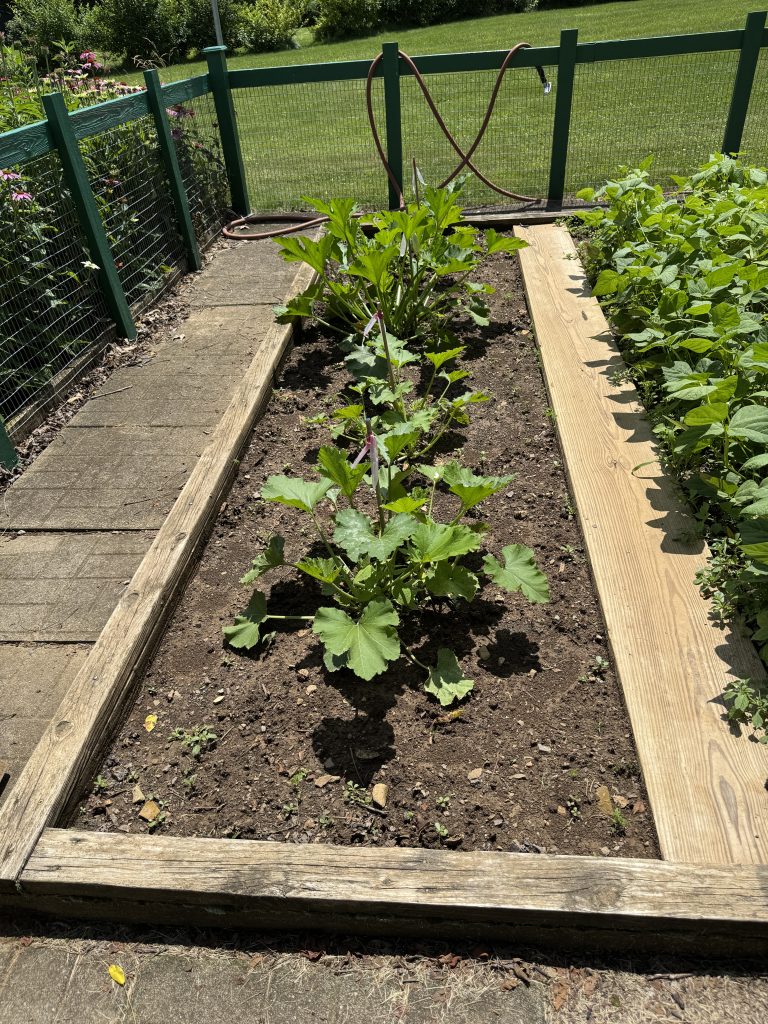
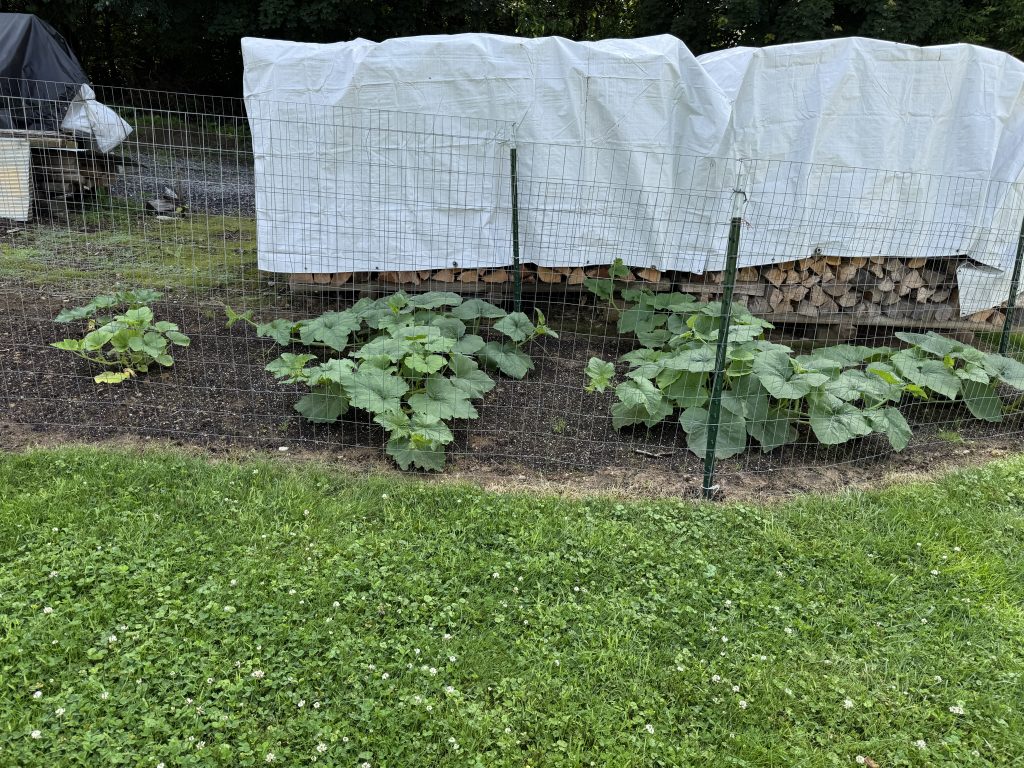
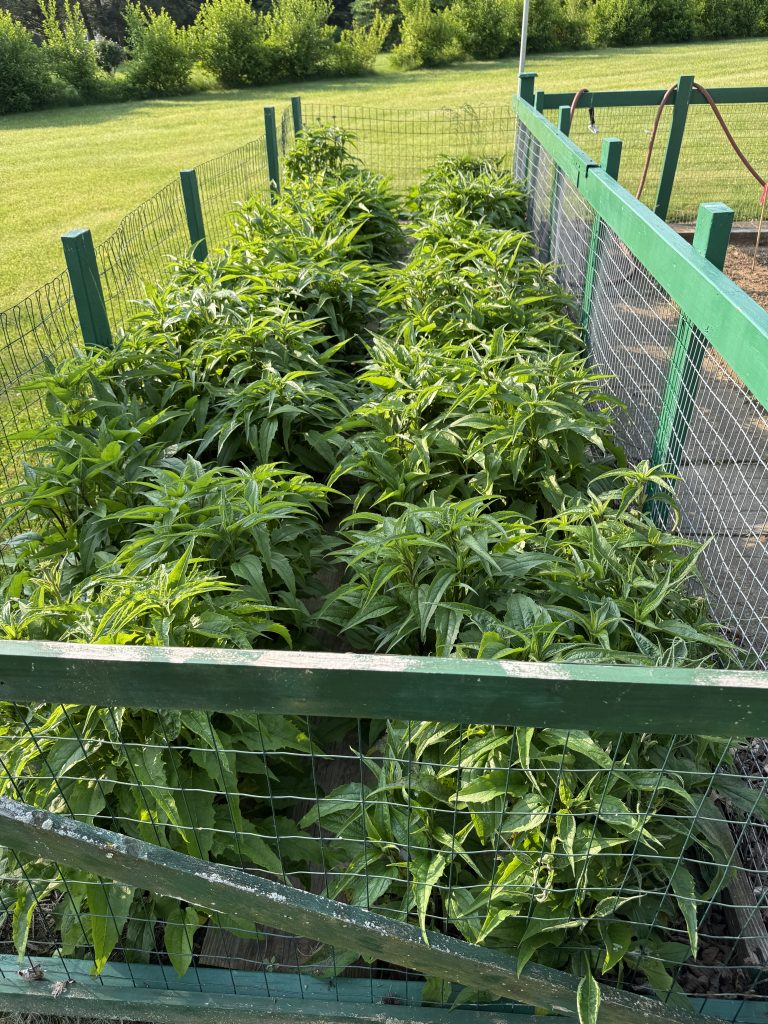
The pumpkins are going nuts! Bert made a little stand for one pumpkin that was hanging over the fence. So cute! There are more hiding under the leaves.
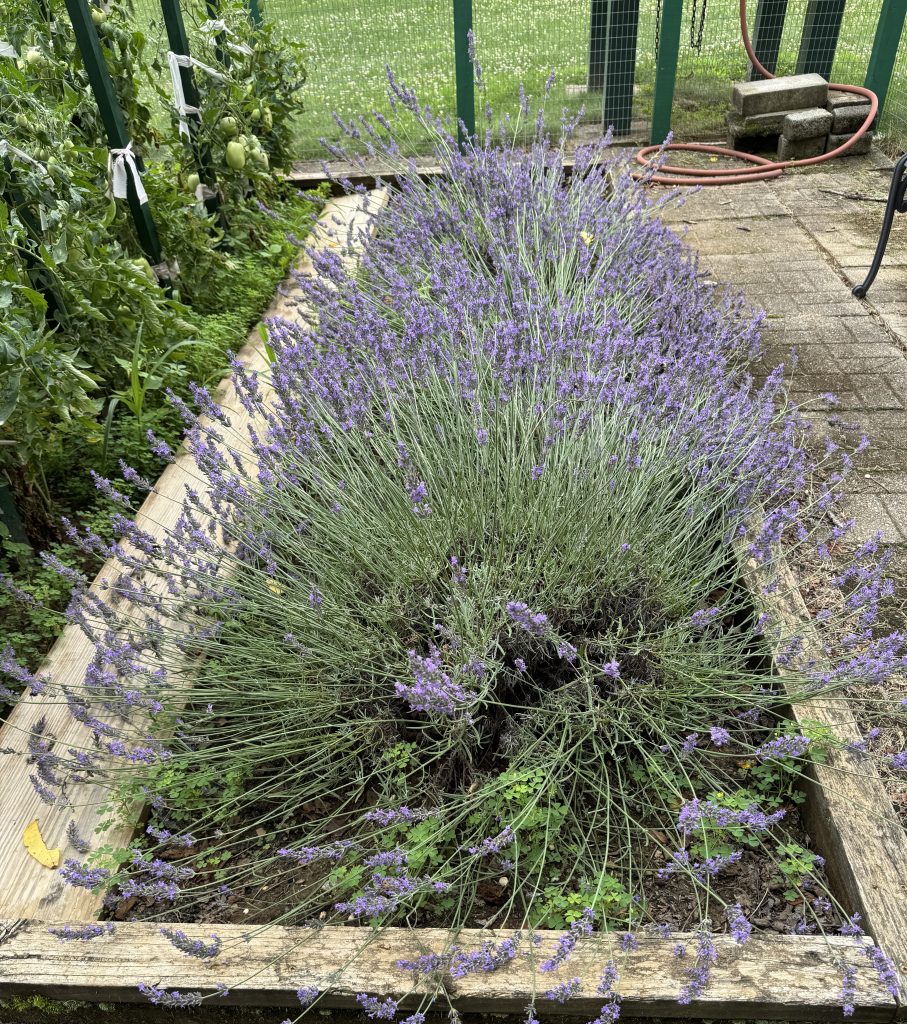
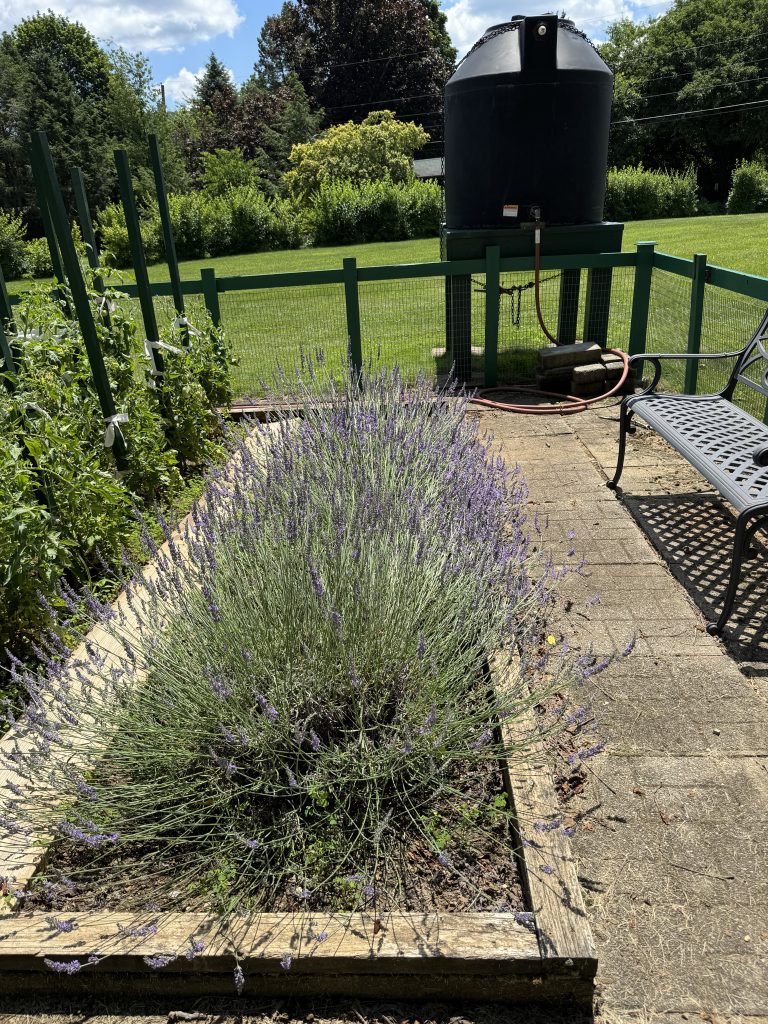
Up in the garden on the hill, everything is going strong. The lavender has been beaten down by the rain, but the bees don’t care. I’ll try to cut some and avoid the bees.
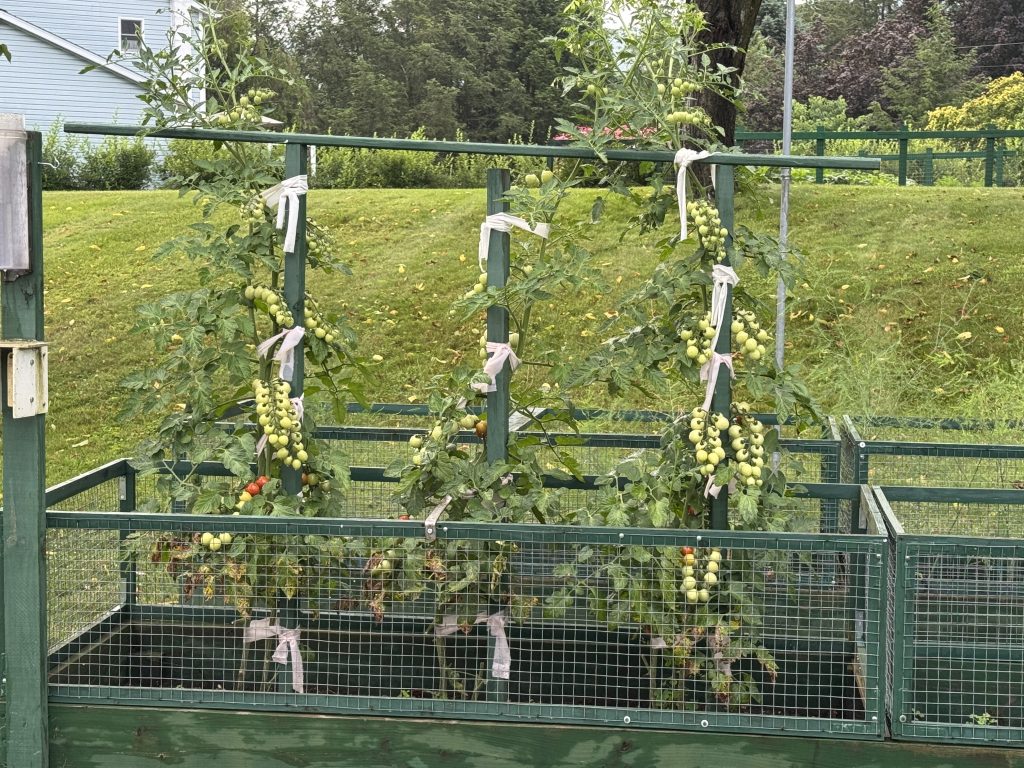
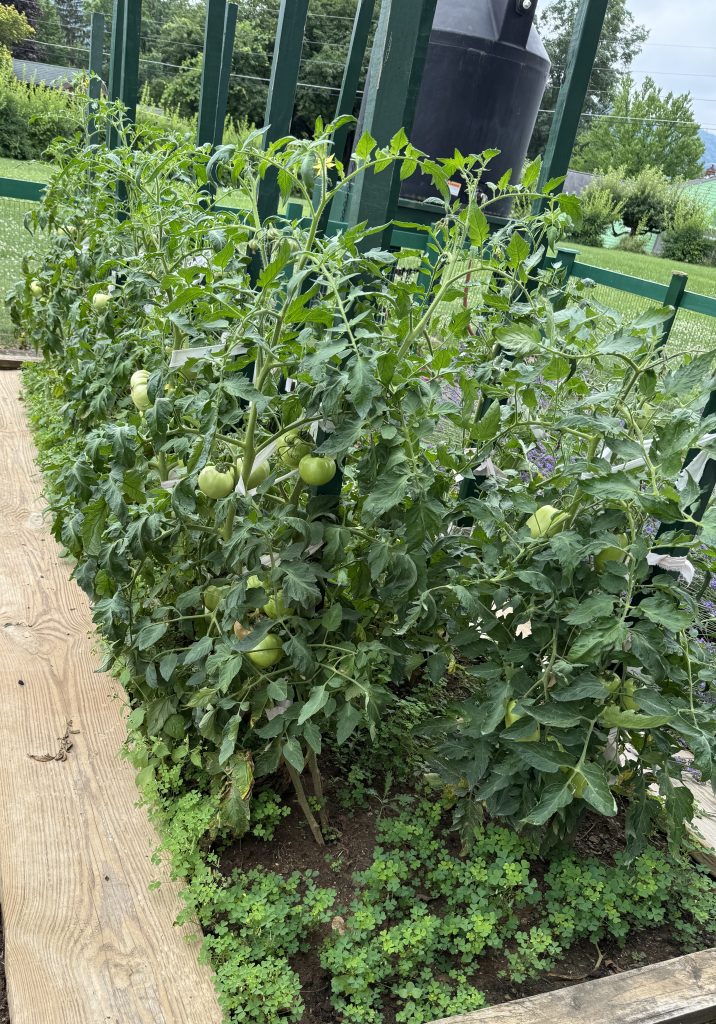
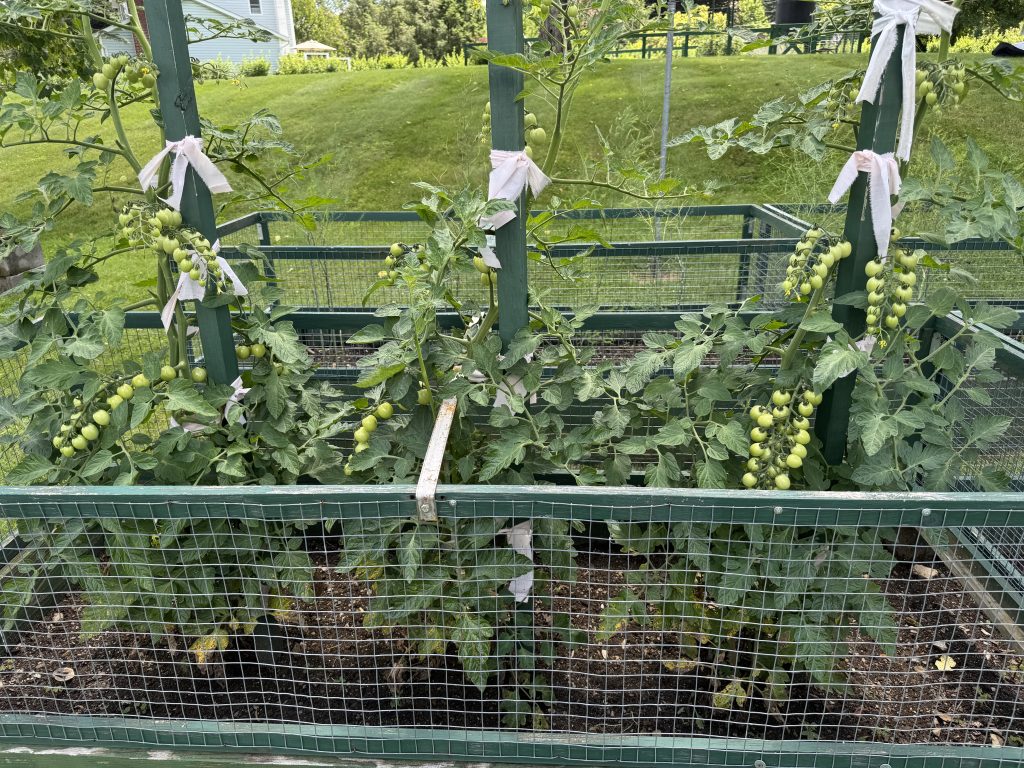
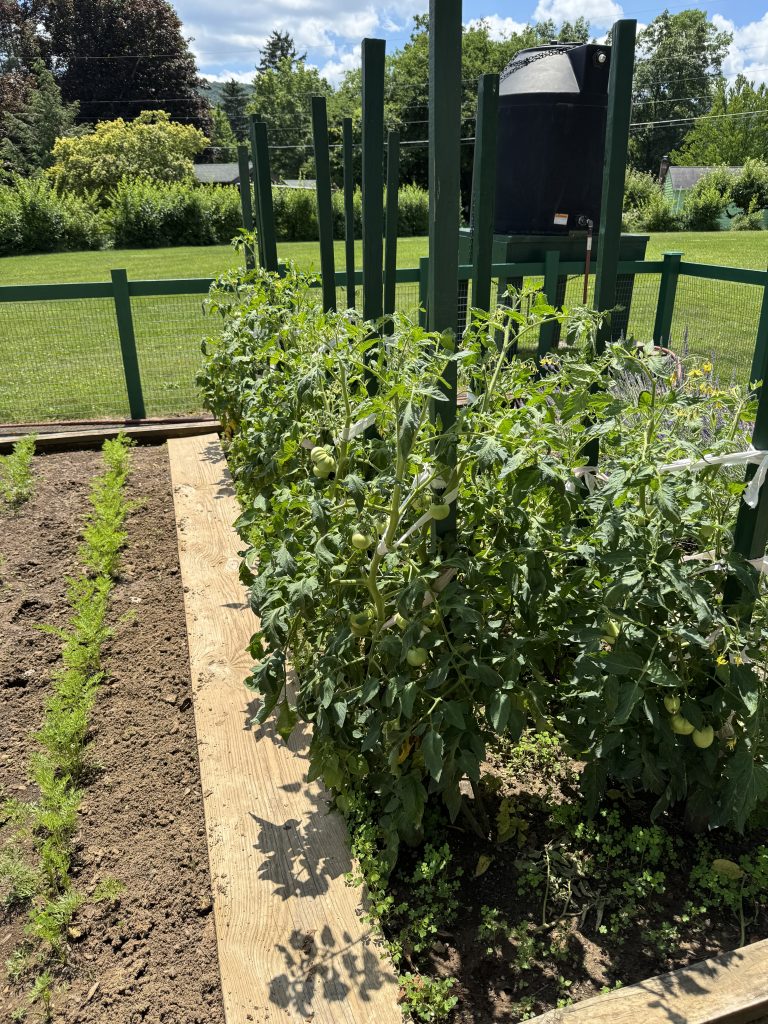
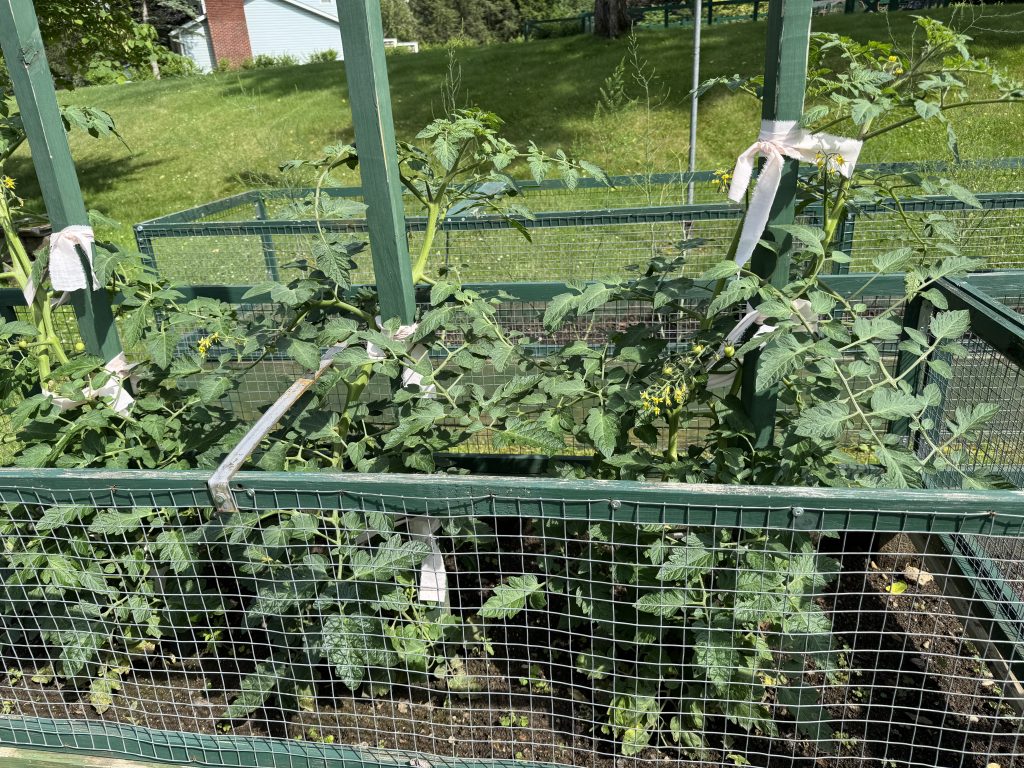
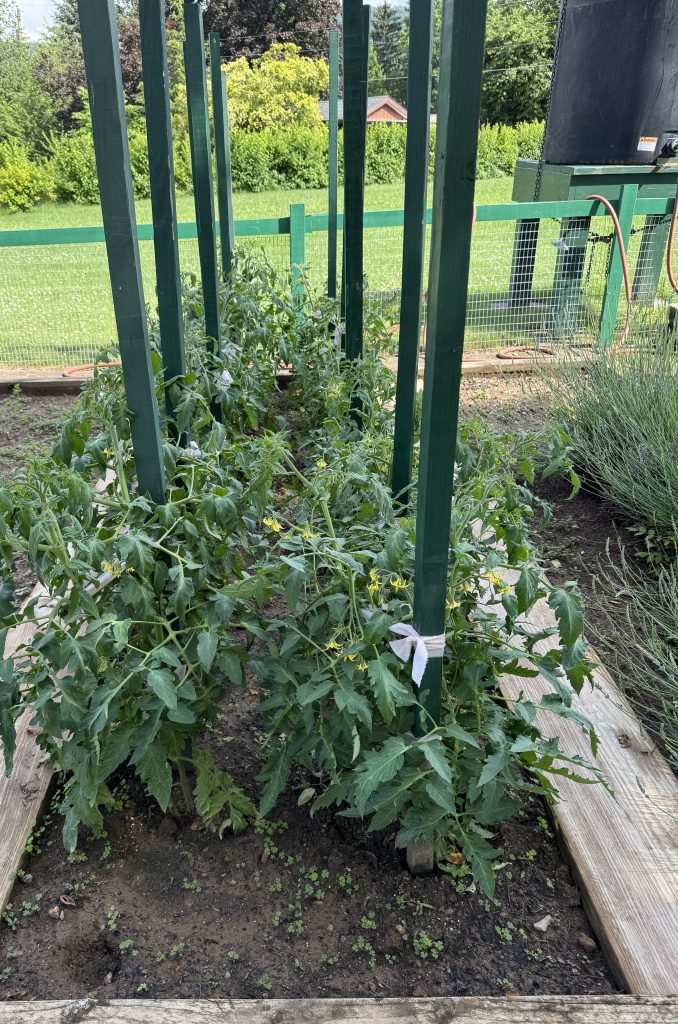
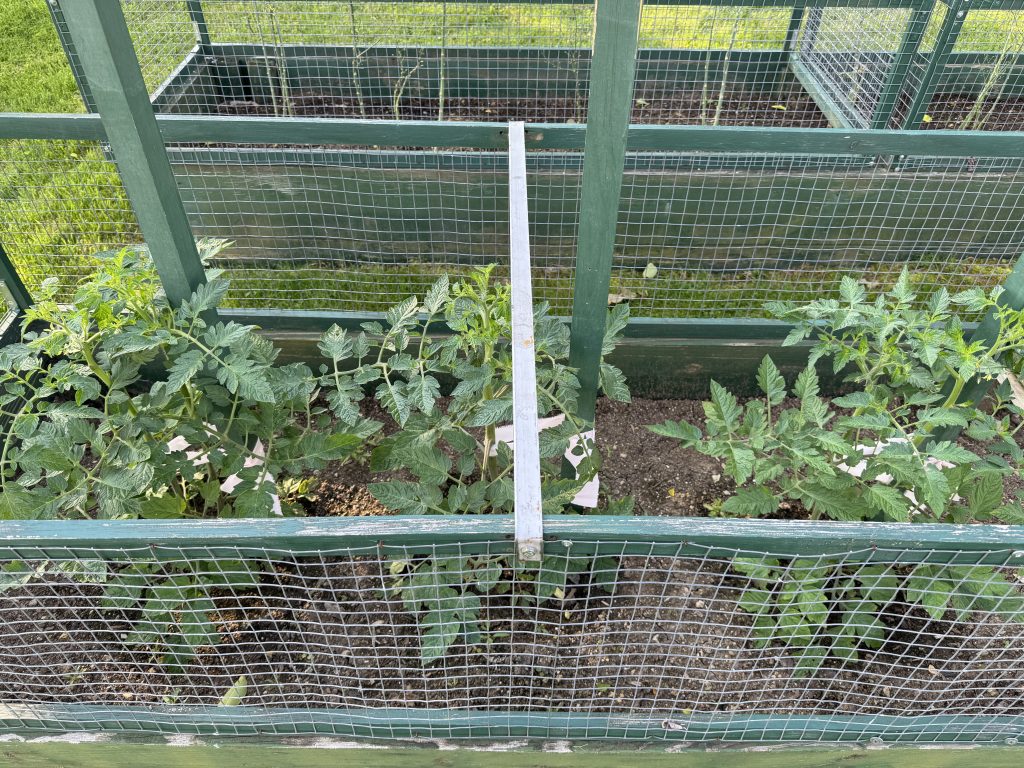
The tomatoes are producing well. When they start to ripen my days will be filled with cooked tomatoes…and BLT’s!
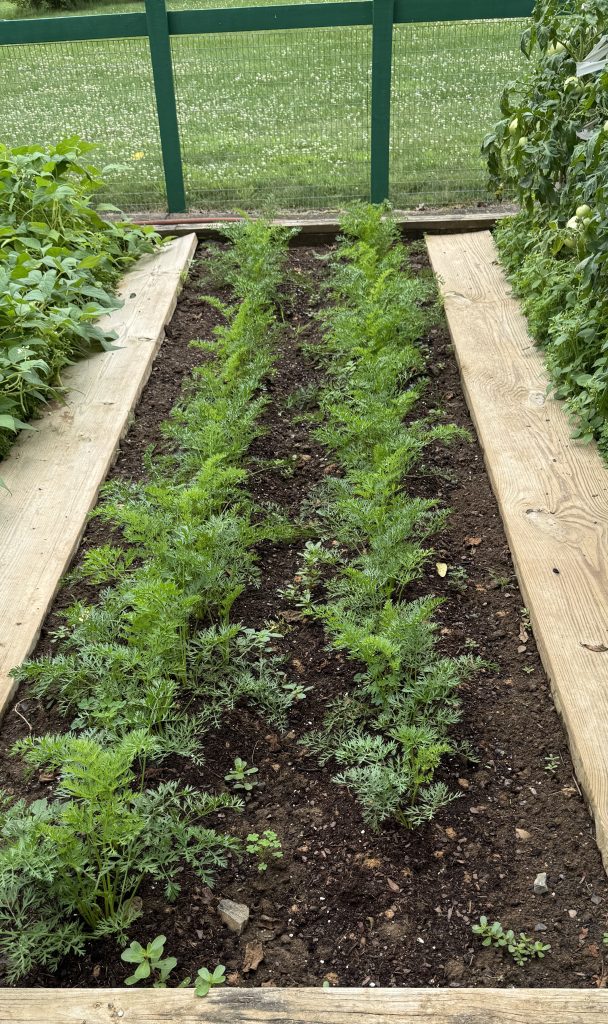
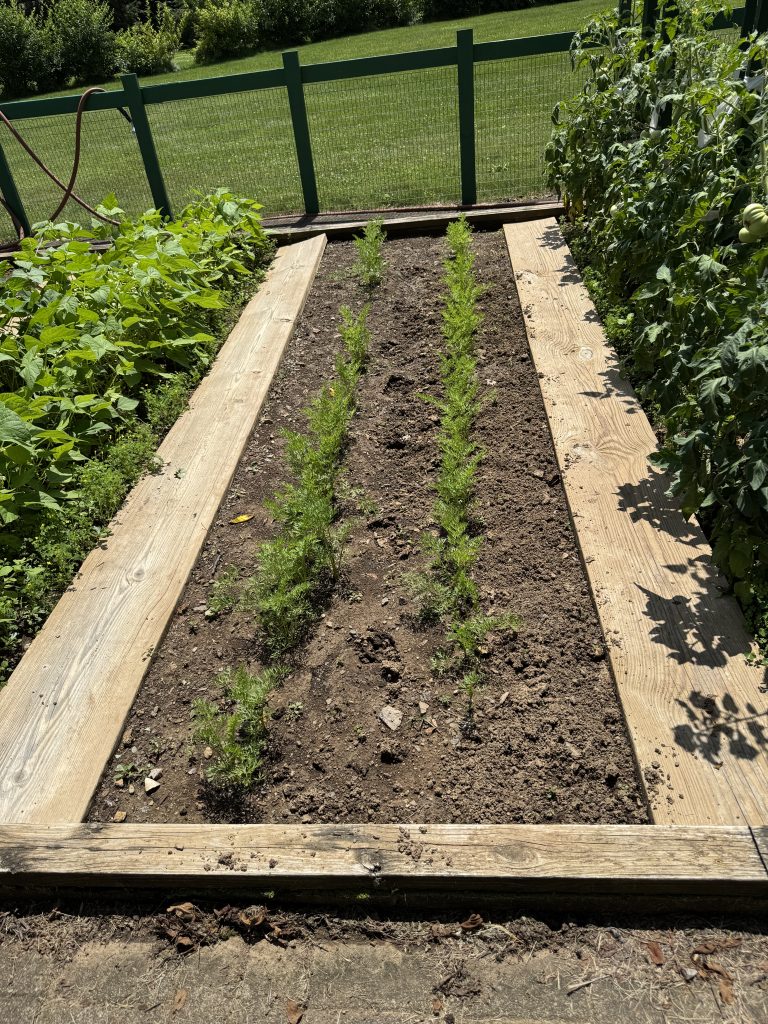
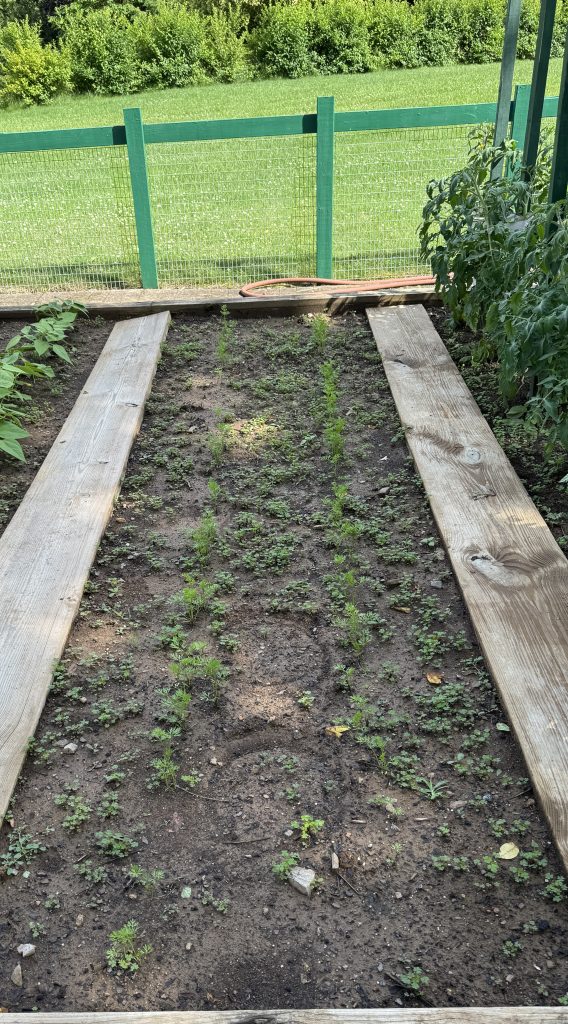
The carrots are finally looking healthy!
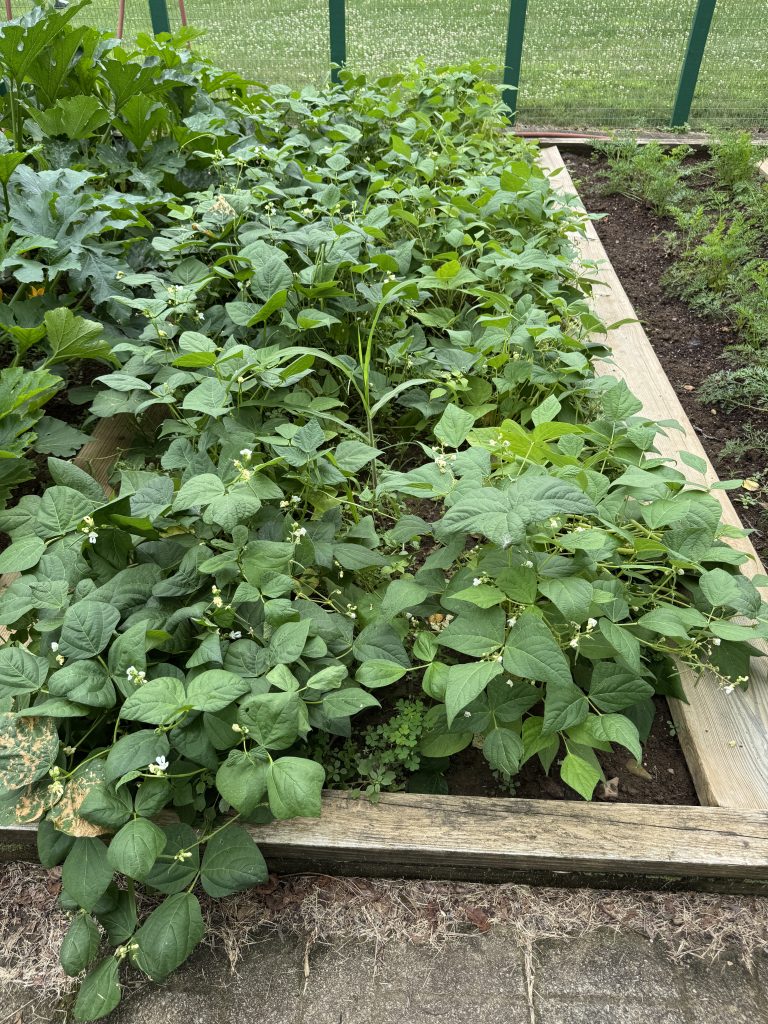
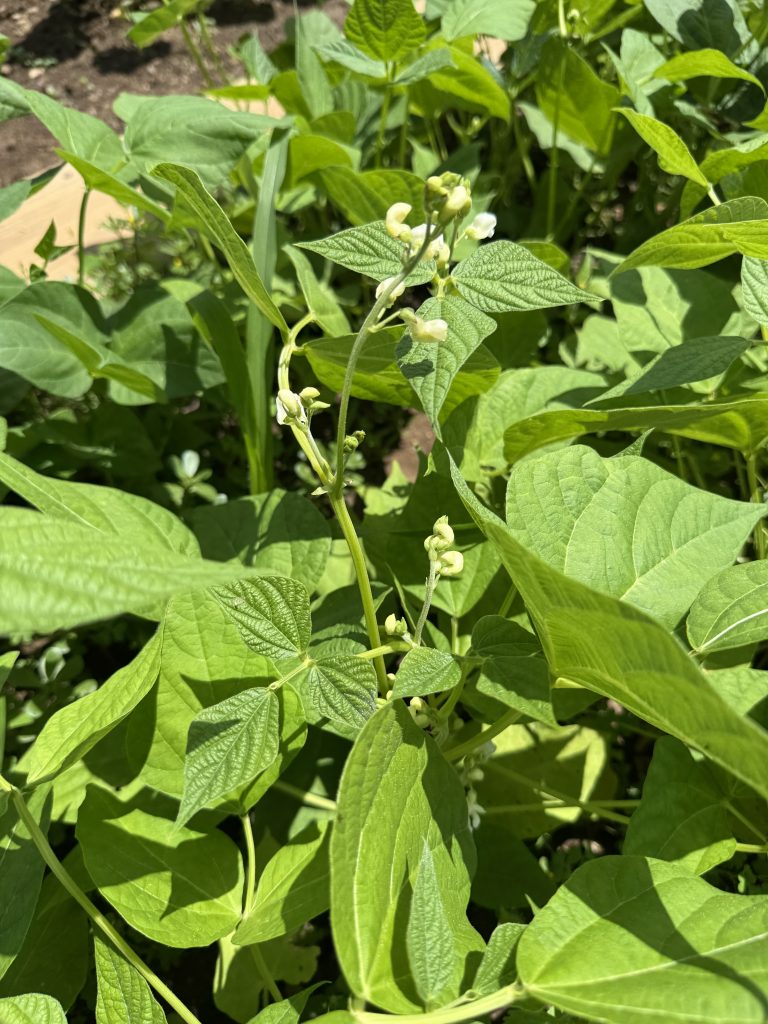
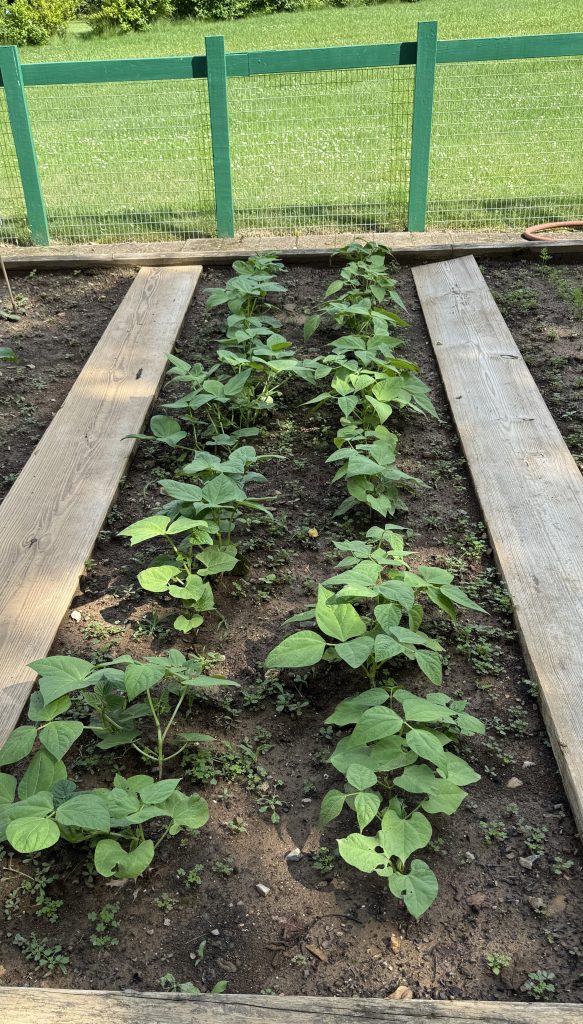
I’ve picked beans twice now…they are yummy when fresh.
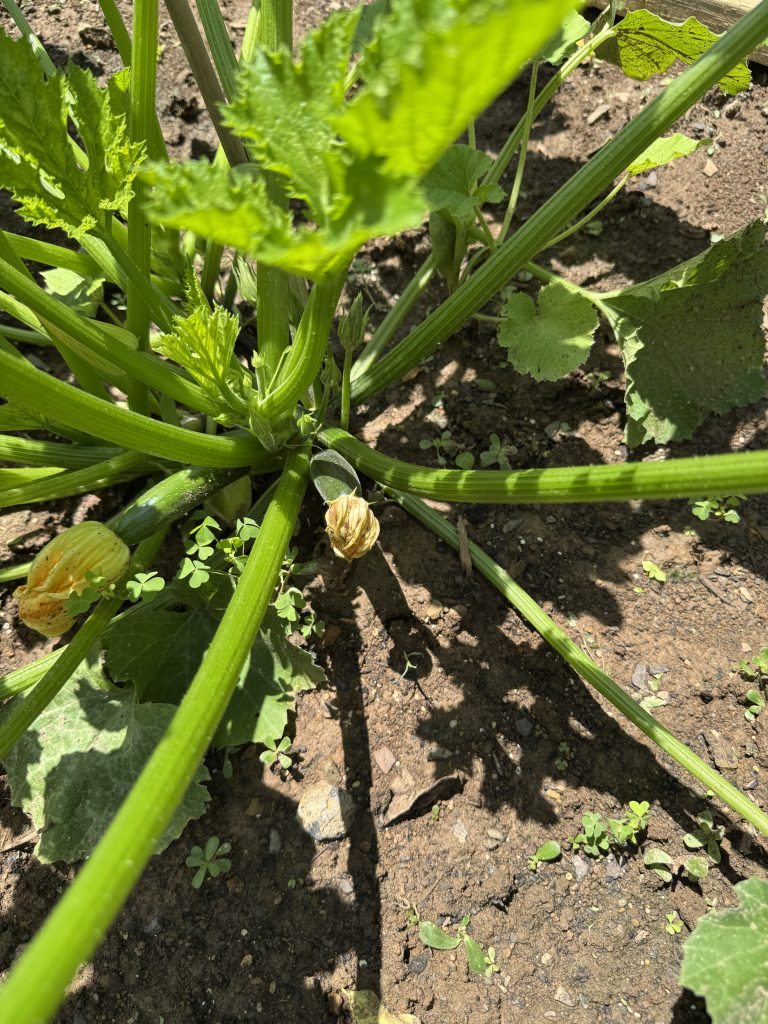
The zucchini explosion has begun! I will need to check them every day!
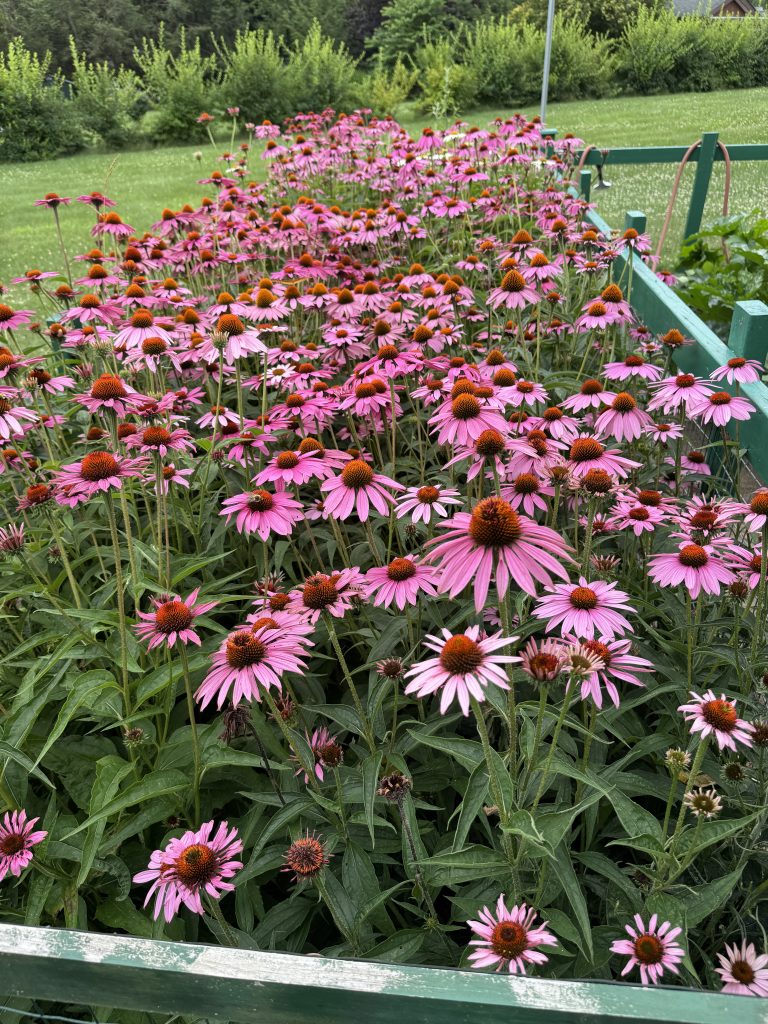
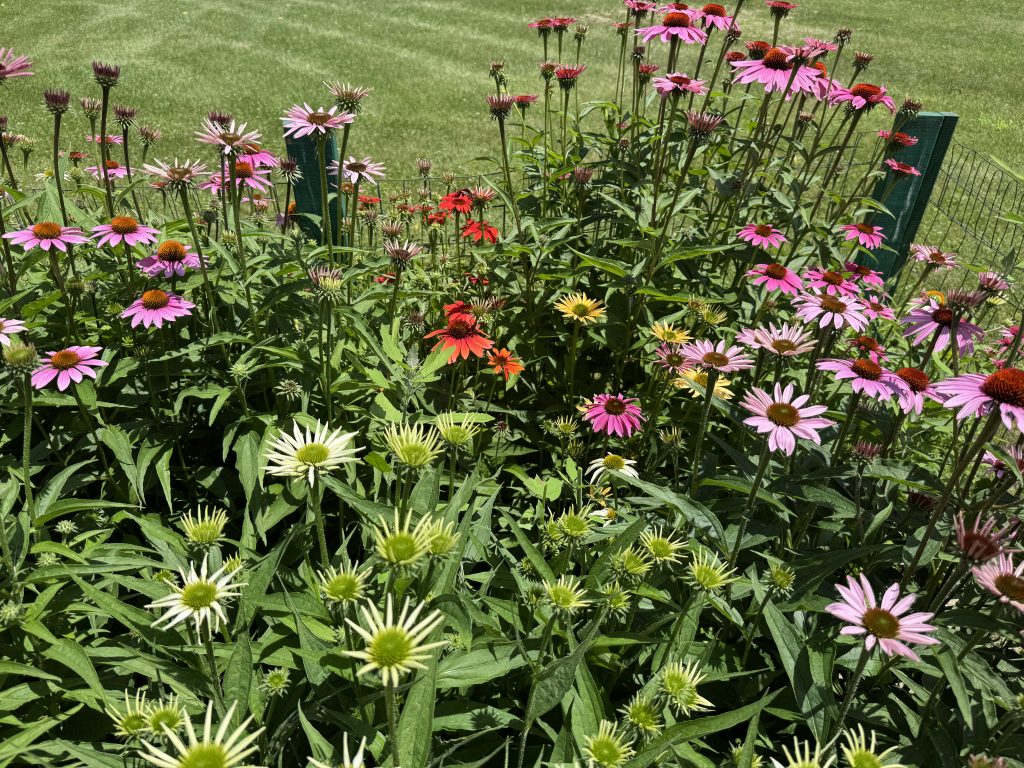
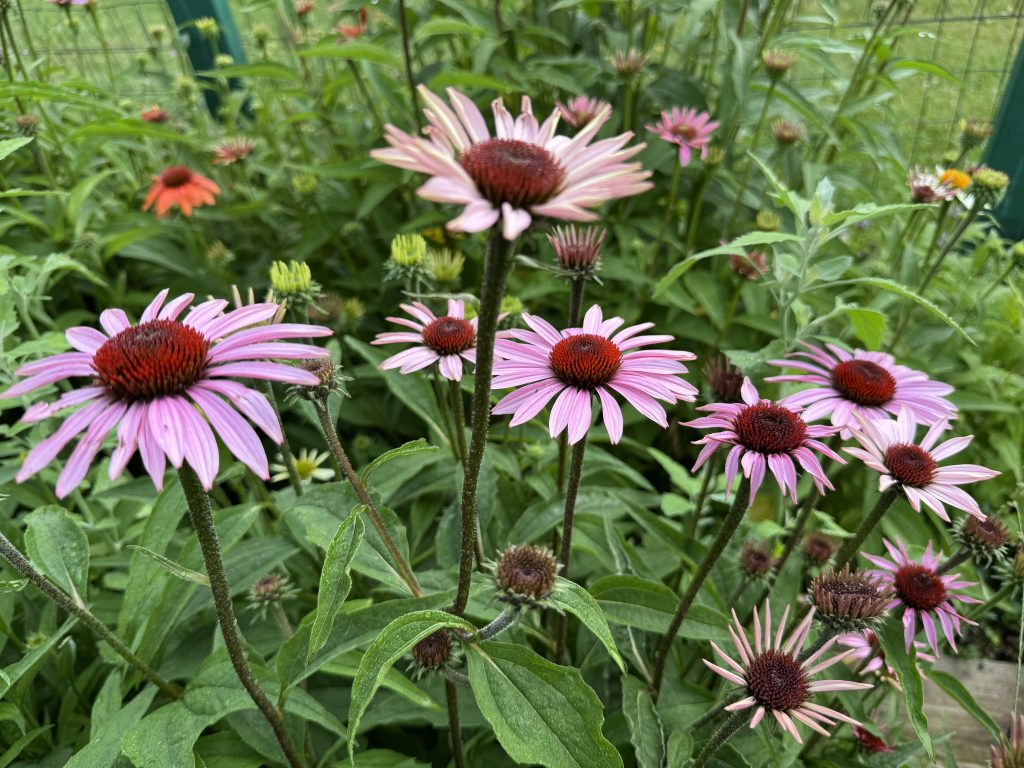
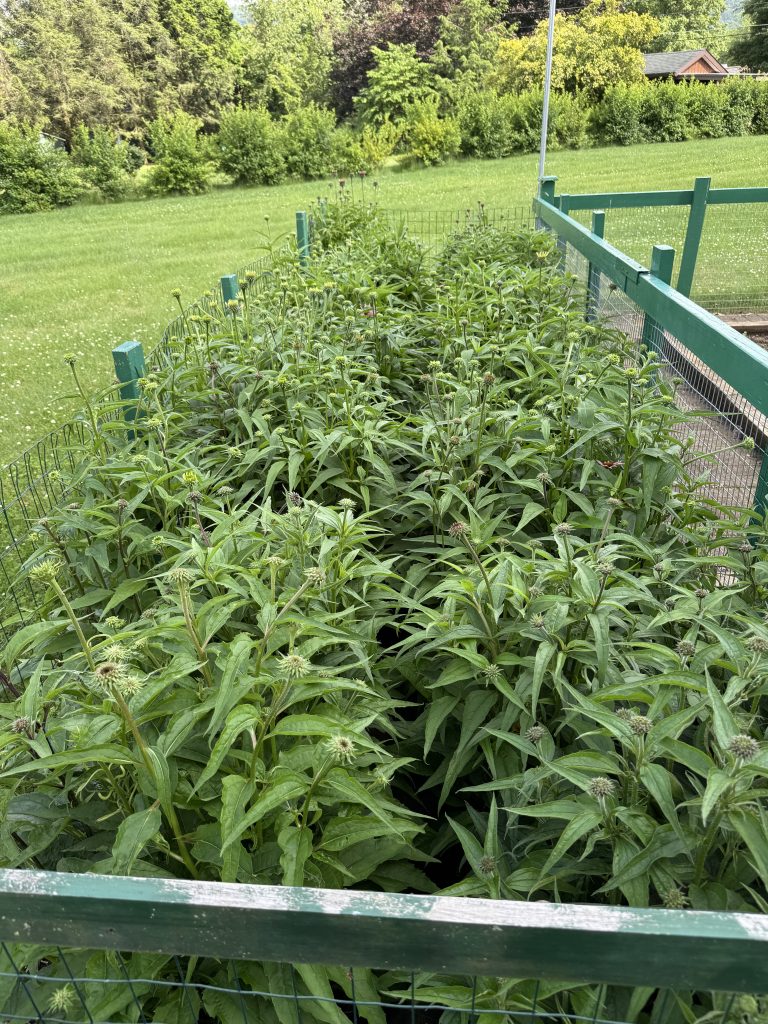
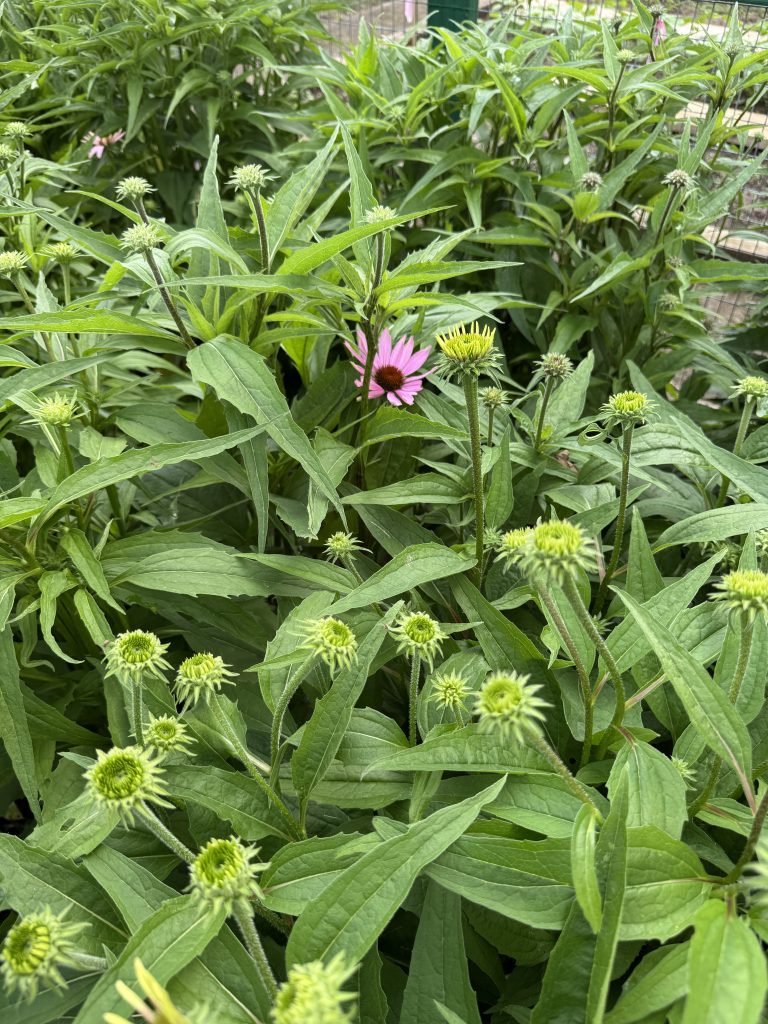
The echinacea are covered with bees and butterflies. Makes me happy!
So that’s the garden today! I hope you are enjoying your summer!
If you have comments or questions, please email me directly at maryjkisner@gmail.com.
I hereby declare that the Art in the Orchard Festival was a success…for me at least! With temperature hovering about 100 degrees in the sun, I’m amazed I did so well. It was a long three days in the sun and I have the suntan (blisters) to prove it. However, I have $700 ready to deposit at the bank!
As a vendor it it entirely a different experience from being a visitor to a festival. Because visitors are constantly streaming by, I really could not wander too far to check our other booths. When I did leave our booth, I was on a mission to hit the restroom or grab something to eat from the food court trucks nearby. Having a good friend to chat with while we waited for the next visitor was a blessing. Yes, we had a cooler with ice for drinks and I had cut up vegetables and fruit to shack on…but how often do I get to snack on sweet kettle corn!
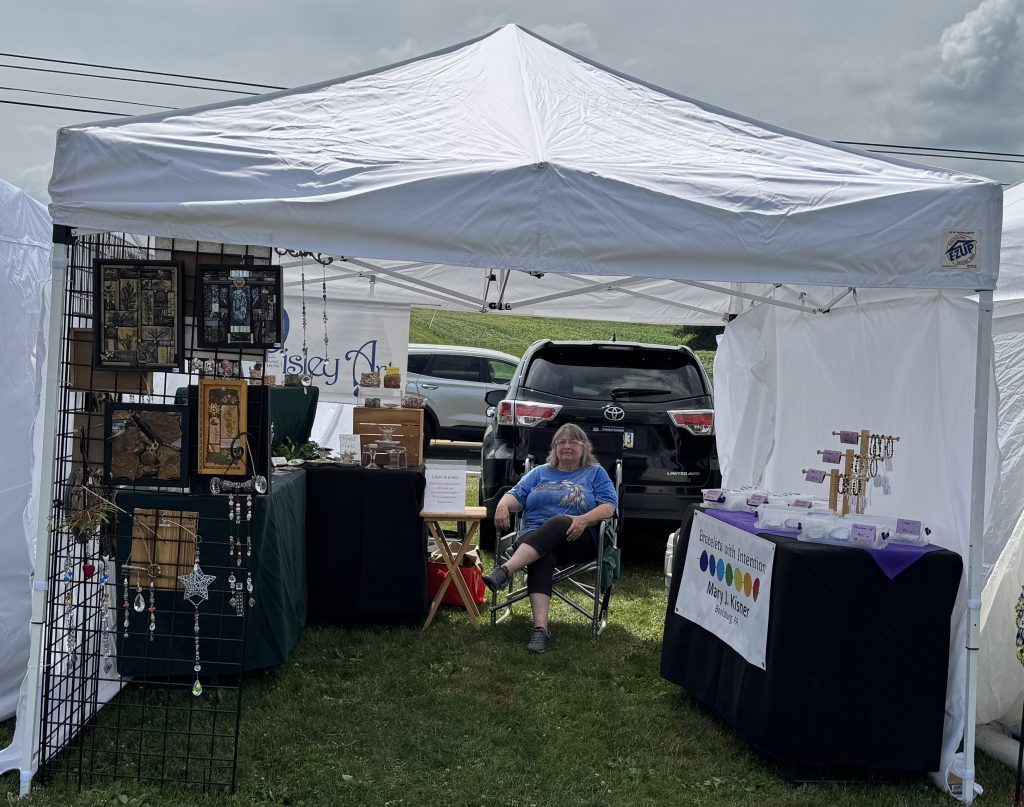
I was able to chat with the vendors on each side of our tent. The woman on one side had been doing festivals like this for 15 years and was debating whether it was time to stop; the young woman on the other side was brand new to being a vendor and her whole family struggles to figure out how to set up her tent! Beyond that, I have no information about how other folks were doing, what they were selling, etc. except by what the children were carrying as they went by our booth. I was grateful my booth-mate Toni was an experienced vendor.
It was so hot, I could hardly focus on taking pictures so I could write a decent story about the festival. I didn’t even get a ‘selfie’ of me! Lame, I know! So, here are a few pictures of our booth.
First, here’s the map of where our booth was located. I marked our booth (#4) on the map and the location of our booth last year…down a hill and on the opposite side of the field. Our location this year meant we were one of the first booths people saw as they came from the parking area. Many looked hard and then said they’d be back after they saw everything else! Many actually came back! So, we saw a lot of folks at the beginning of their visit and they were enthusiastic about the festival.
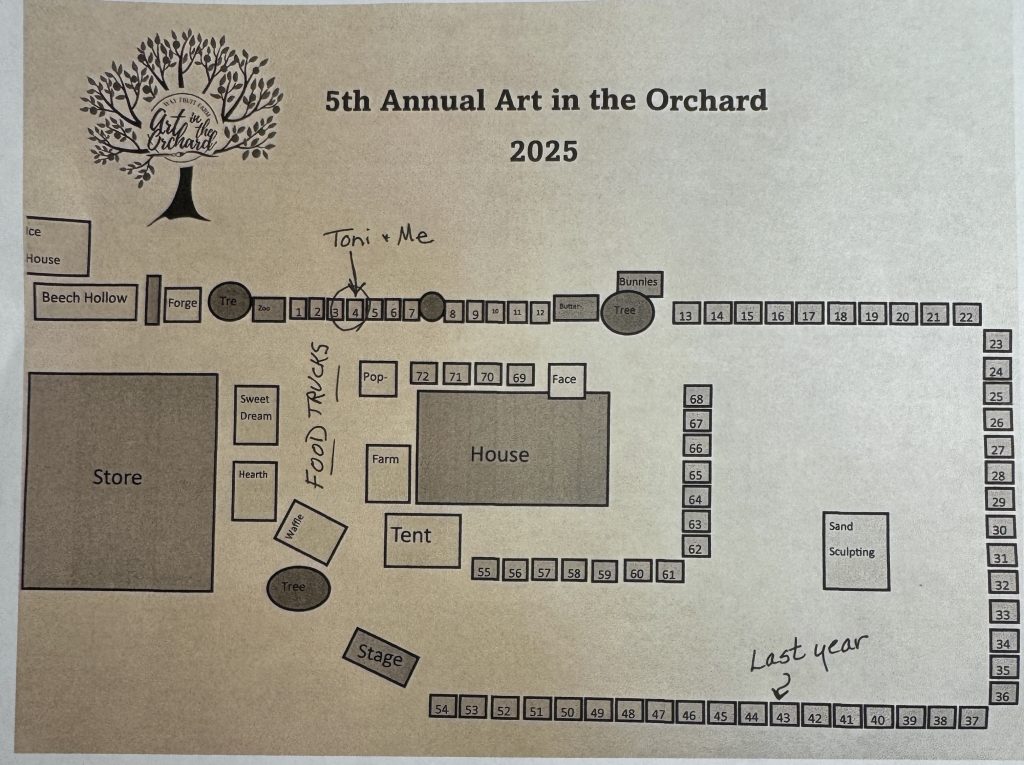
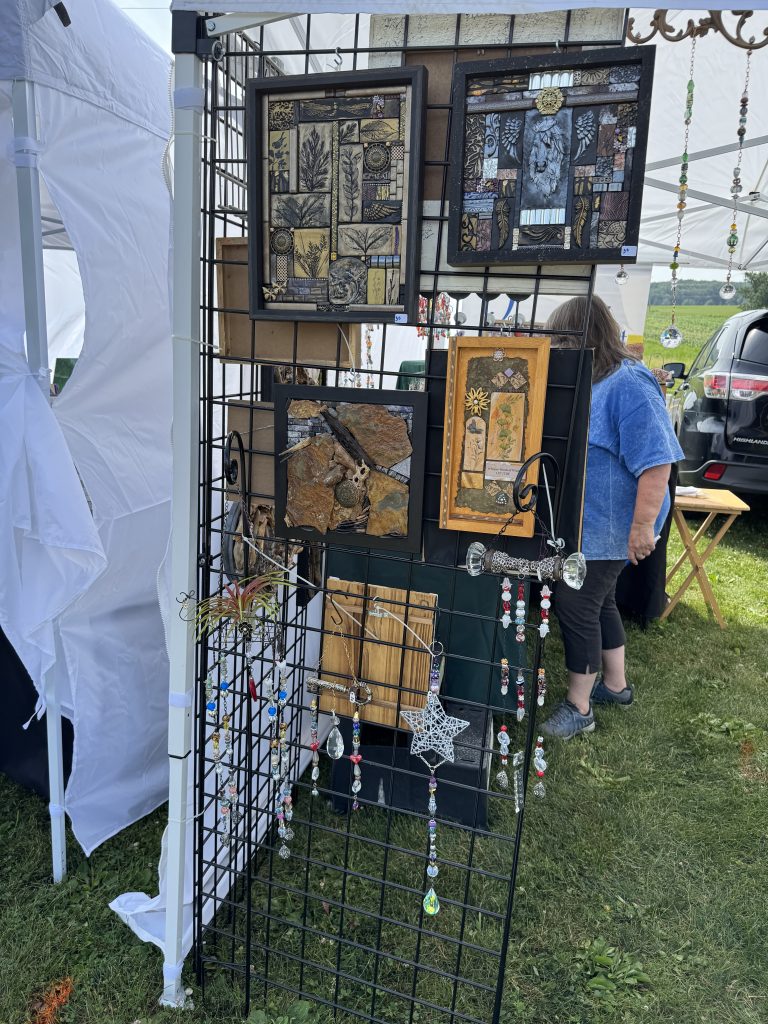
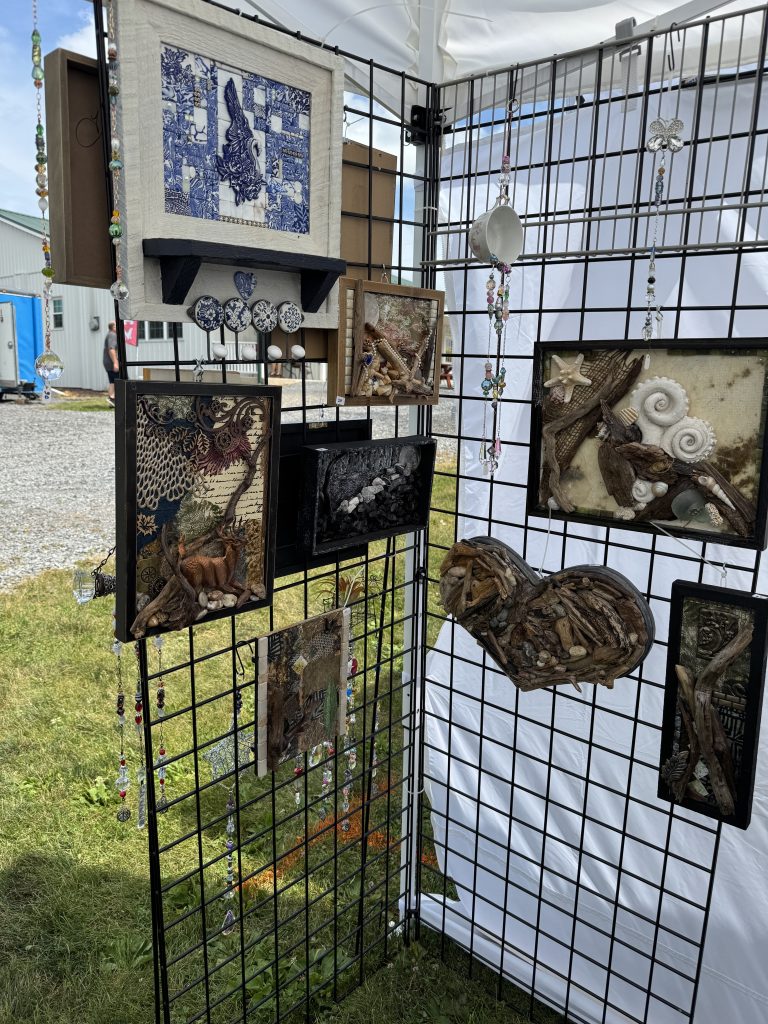
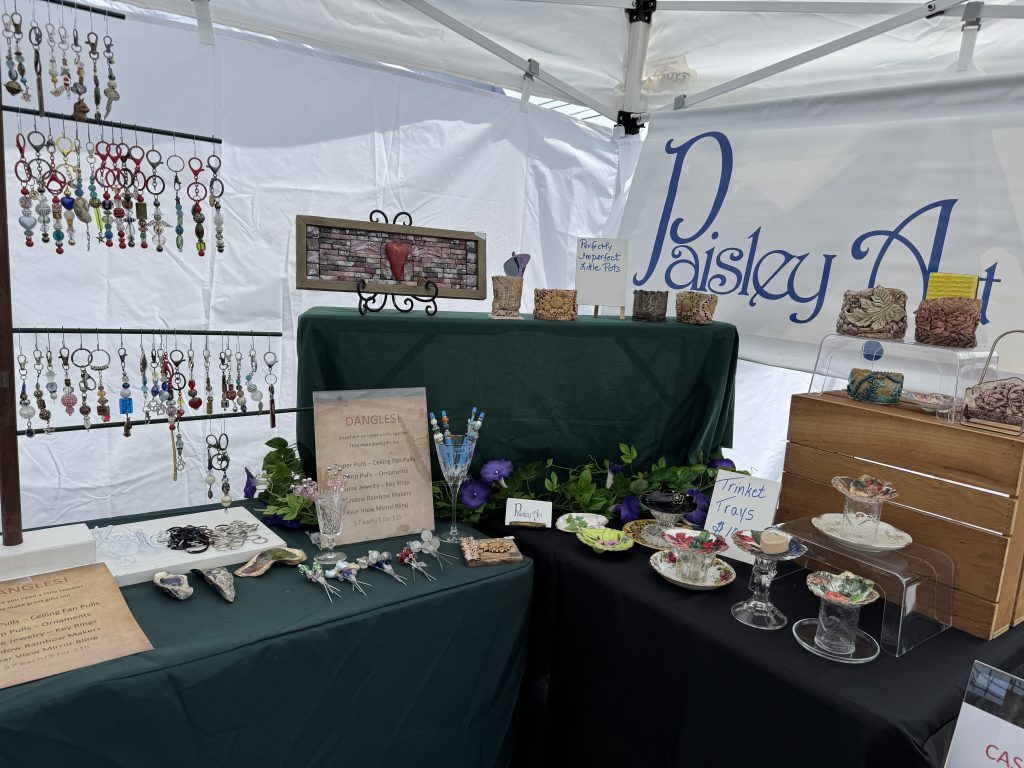
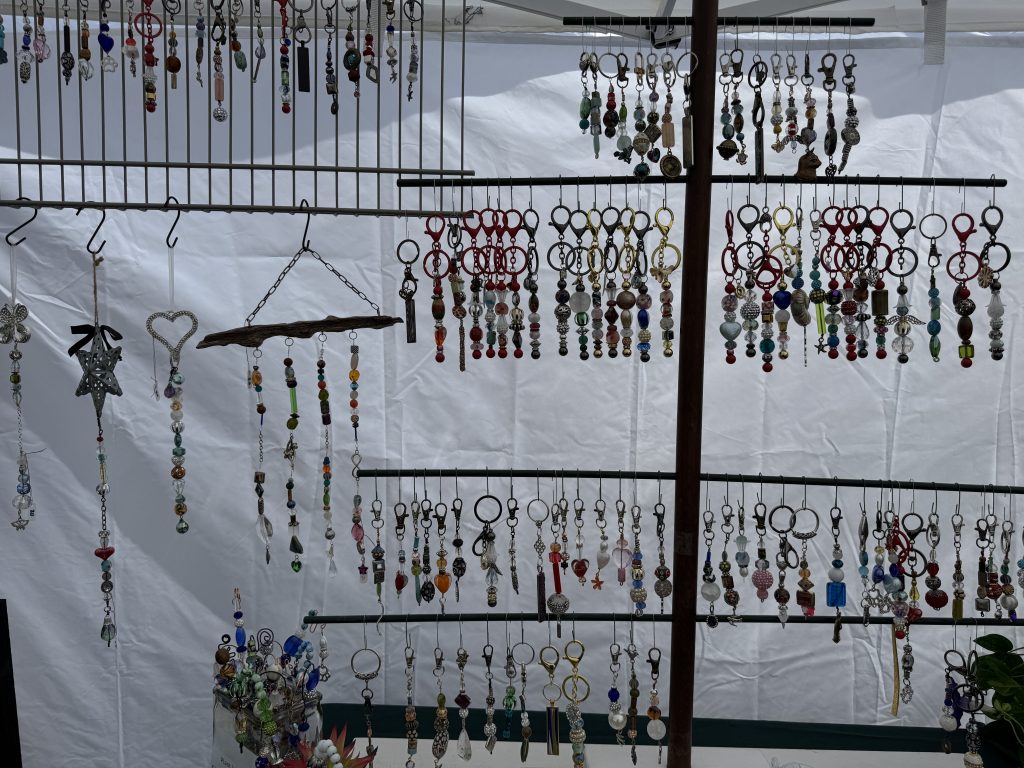
Toni’s company is called Paisley Art. She does impressive collages and sparkly sun catchers. Her “pictures” attracted a lot of attention as people walked by…and then they came in and saw all the sun catchers…and then they turned to go and stopped to see my bracelets! OR sometimes they say my sign and headed to the bracelets; then they turned around and continued to check out Toni’s stuff. It was very interesting to watch. Compared to the few other booths I saw, our inventory was limited and people seemed to be willing to check it out. So, here’s a brief tour of our booth:
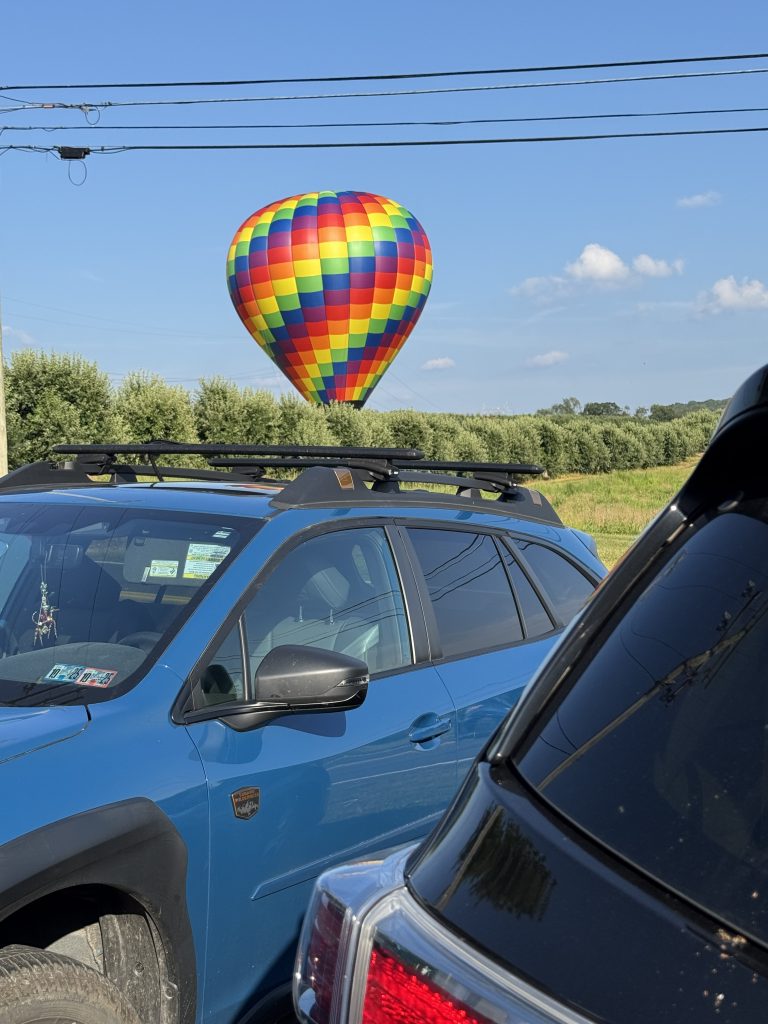
Late in the afternoon on the first day, people walking by suddenly stopped and looked out the back of our booth. When we turned around to see what was so interesting…a beautiful hot air balloon was being inflated! For a fee, you could take a ride straight up a few hundred feet and look around…not sure what you could see, but the balloon was beautiful!
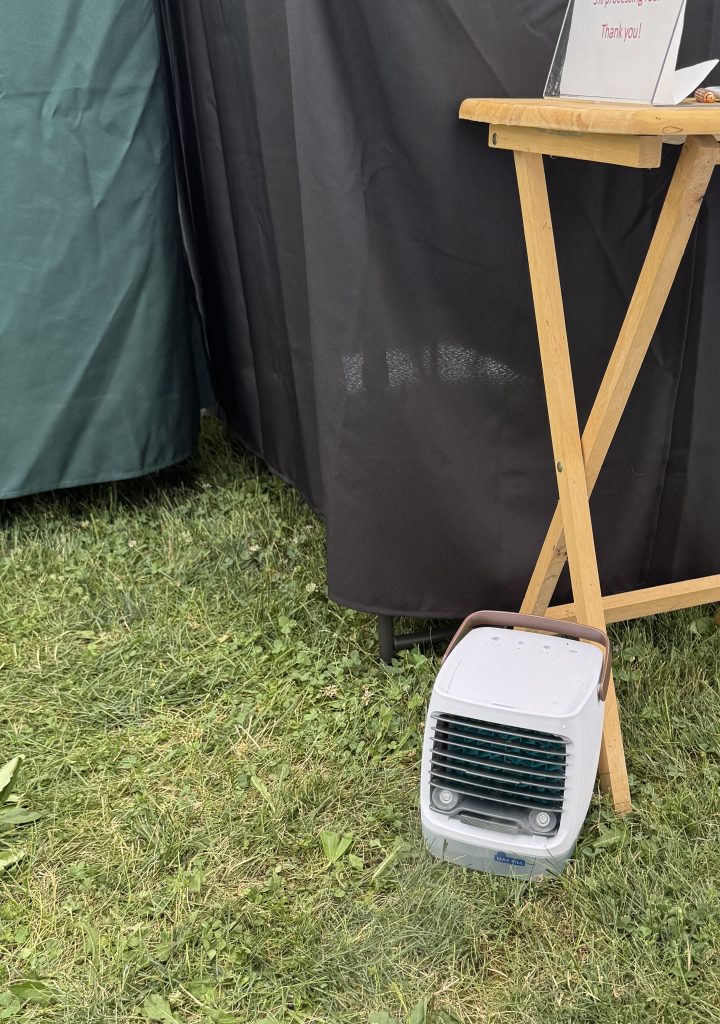
We did try to stay comfortable with the heat, but don’t believe the ads about the tiny air conditioners that seem to blow air over ice water and used a battery. The could blow moist air in our face or on our ankles for a few minutes. The could not keep up with the 100 degrees in an open tent.
By the third day, we were putting the melting ice from our cooler into a large zip lock bag and using it as a compress on our arms, legs, neck and shoulders. That worked the best! We were grateful for Bert’s help in setting up the tent, and then coming back on Saturday evening to help us tear down. This whole event was not a one-person job!
Check out Art in the Orchard Festival next year! I’d love to see you! If you have comments or questions, please email me directly at maryjkisner@gmail.com.
I now have a folder full of zucchini recipes to try…and we finally have some zucchini! I just couldn’t make myself buy zucchini when I saw the plants in the garden a few days ago. In three days since I took this picture, I picked two that were about 8″ long.
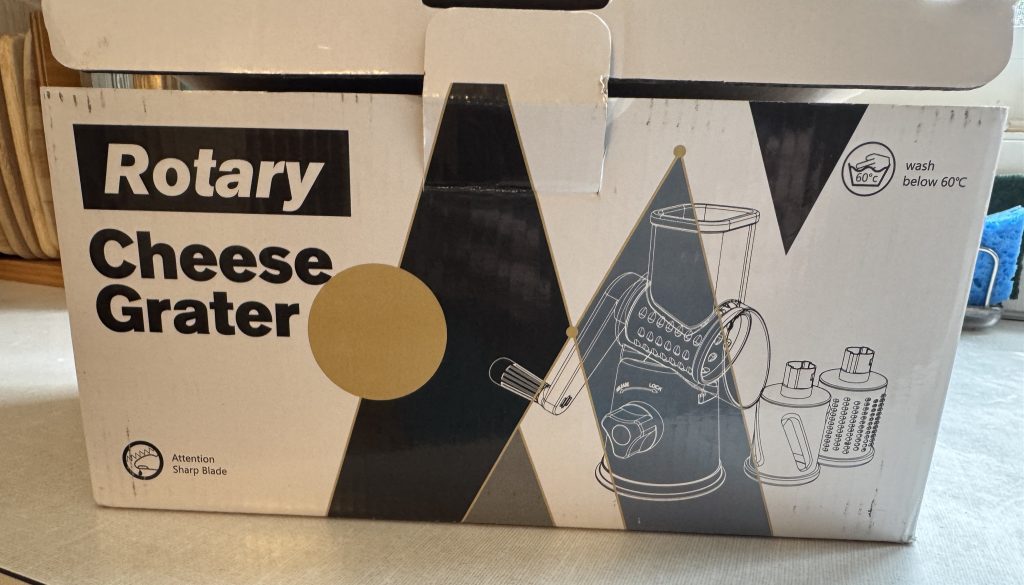
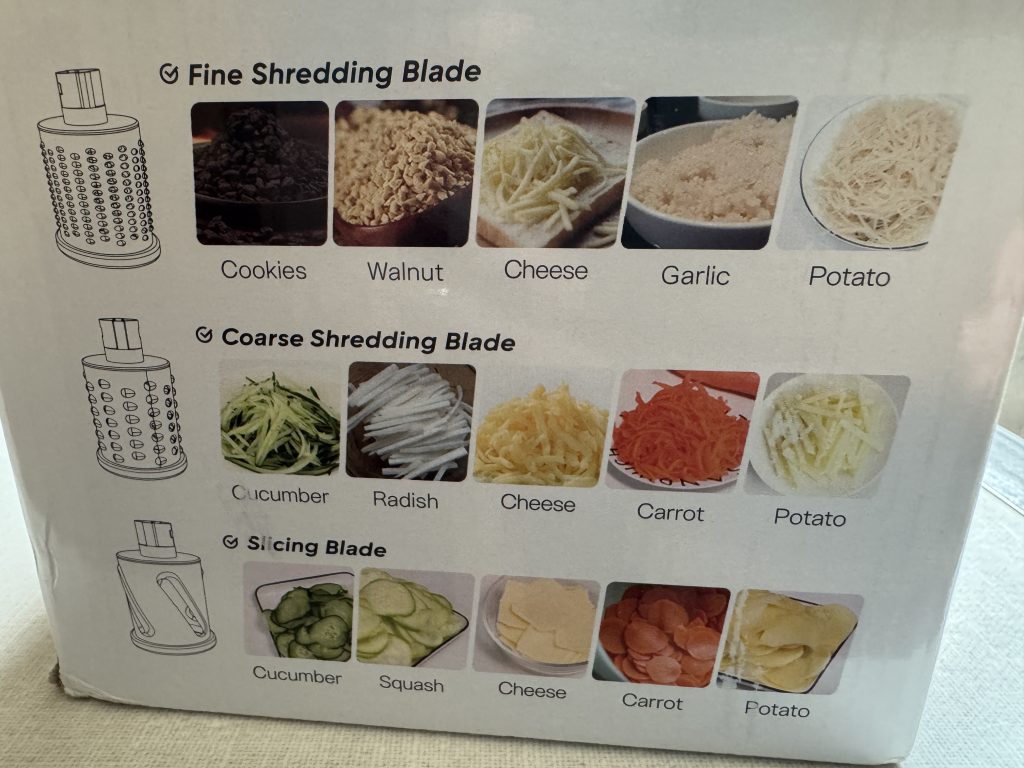
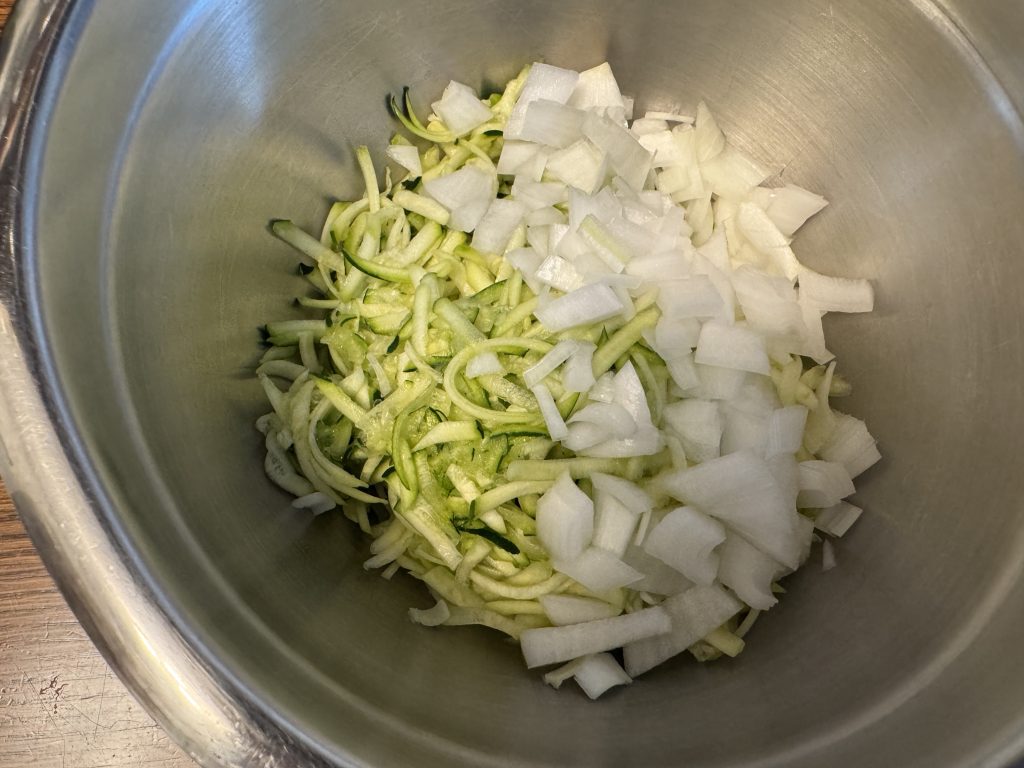
Of course, I forgot to take a picture of them before I put them through the shredder! This little hand-operated shredder worked just great for two zucchini.
The recipe came from https://allrecipes.com and I didn’t retype it yet. I’m starting to like the way allrecipes.com formats their recipes.
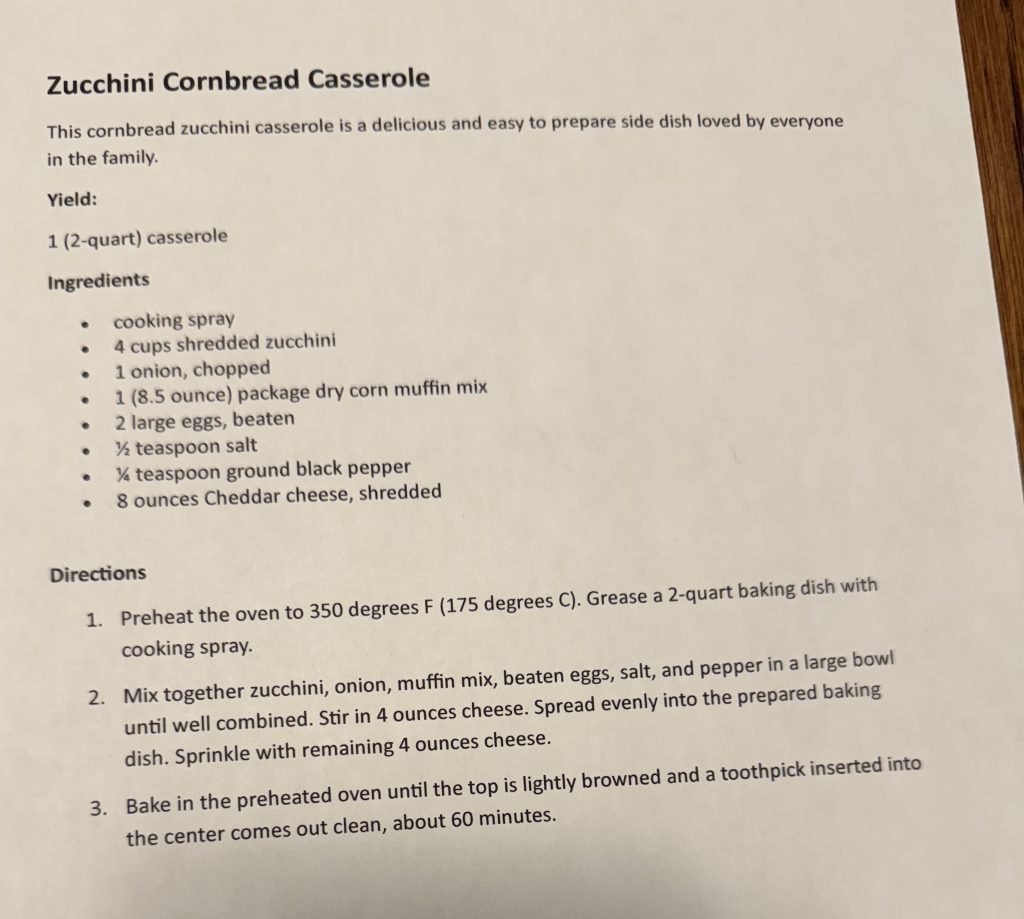
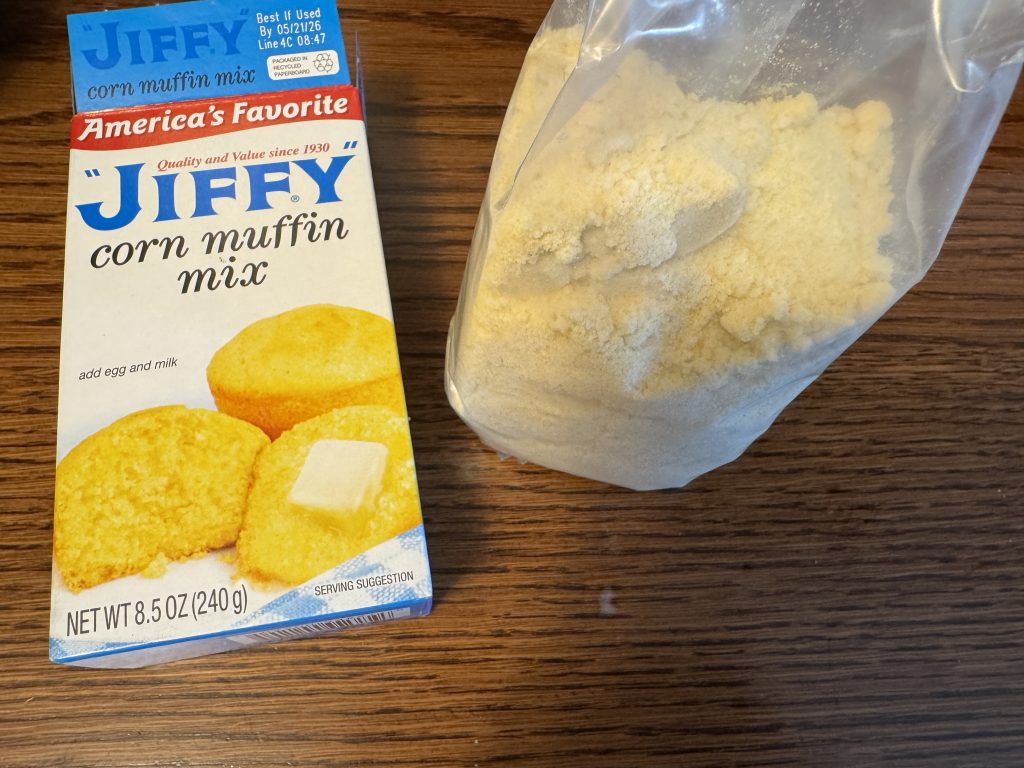
When I looked at the ingredients, I saw I needed a dry cornbread mix, 8.5 ounces. Interesting. I thought that must be a small mix. Sure enough, it was a Jiffy cornbread mix!
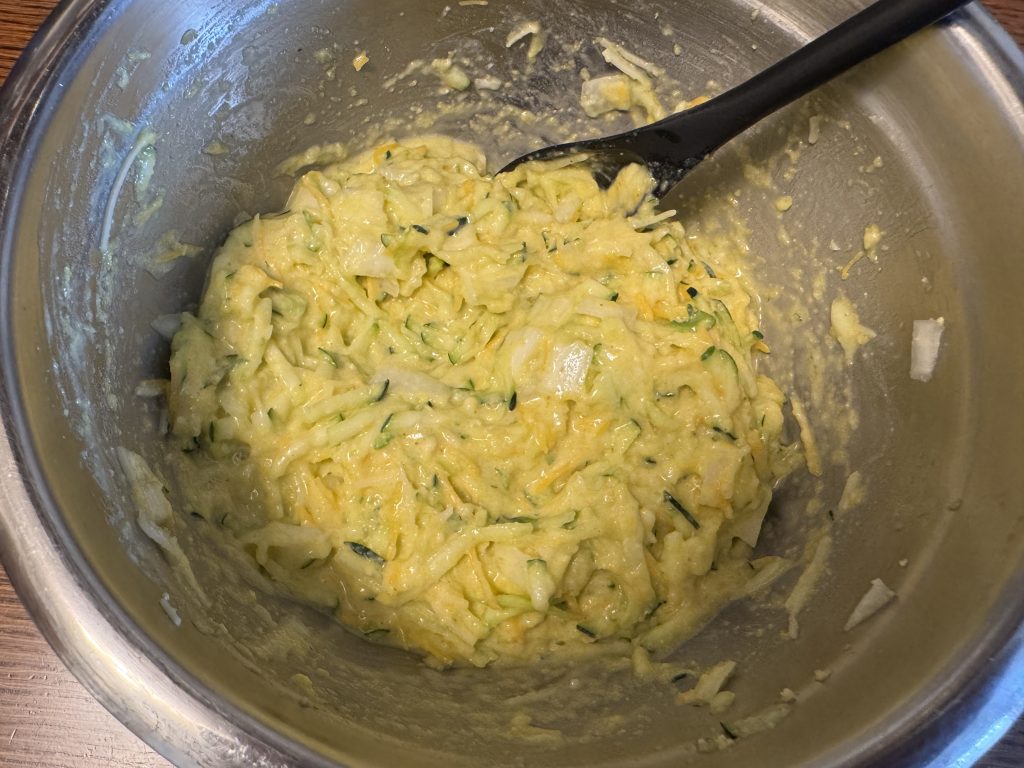
I started by shredding the zucchini and chopping an onion.
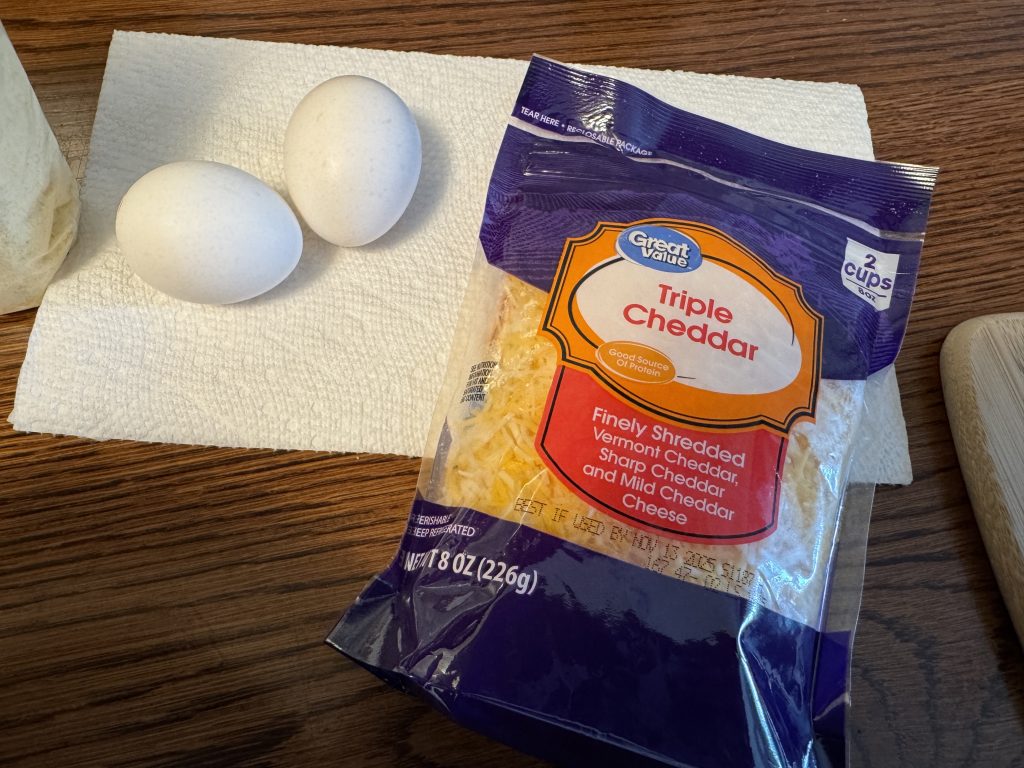
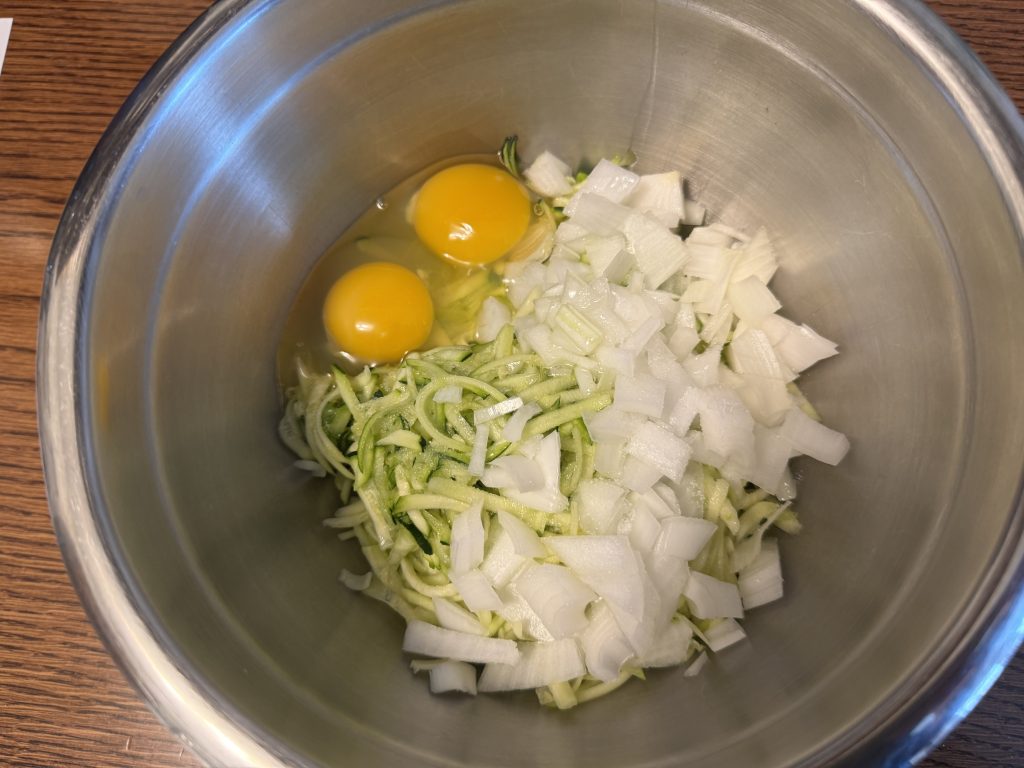
Then I added two eggs and mixed in the 4 oz of cheese.
Then I added the cornbread mix.
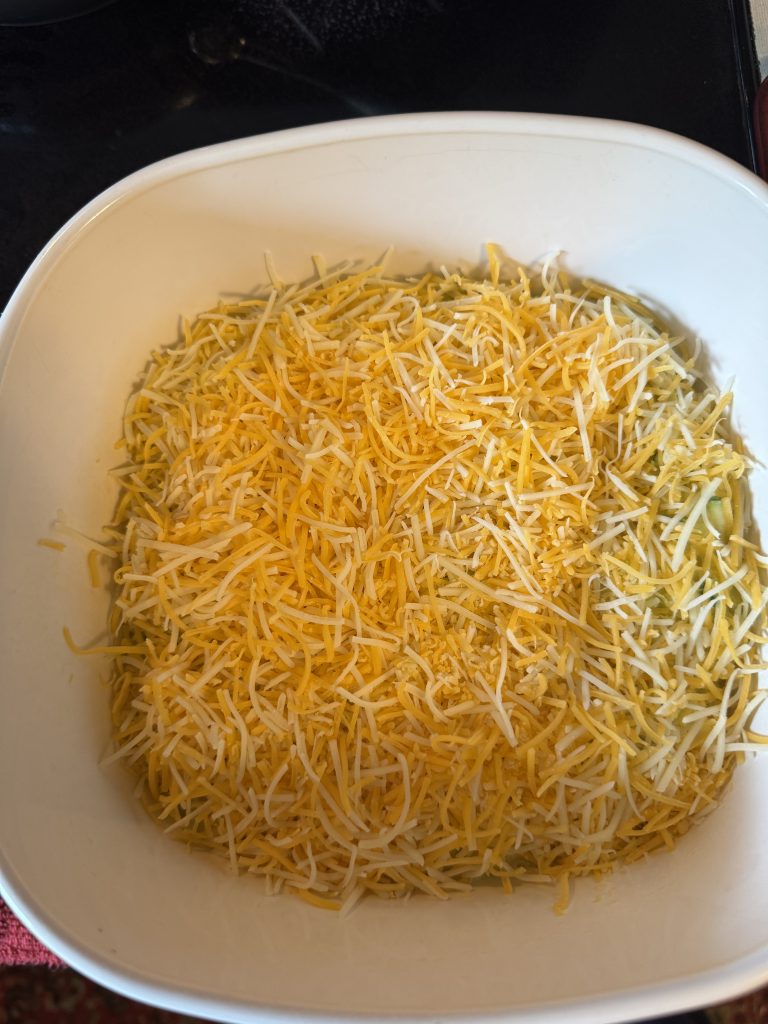
I put this mixture in a casserole sprayed with oil, and sprinkled the rest of the cheese on top.
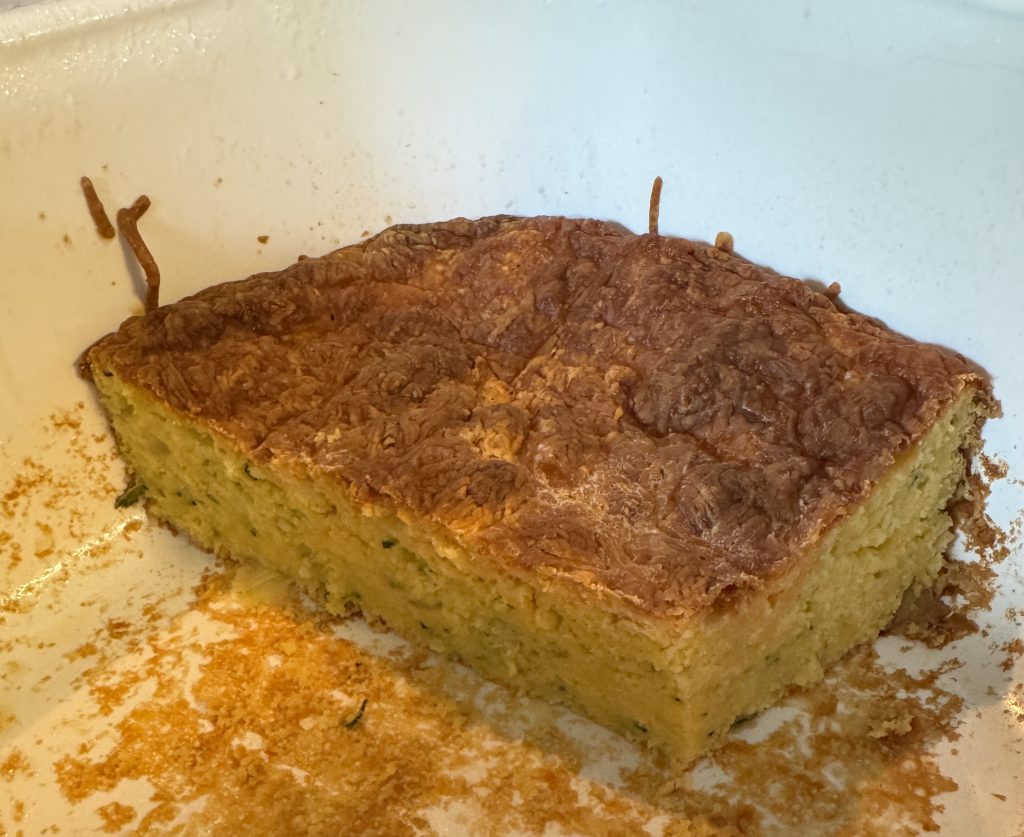
I put the casserole in a 350-degree oven timed for 55 minutes instead of 60 minutes as called for in the recipe, just in case my oven temperature was still unpredictable. After 45 minute the cheese on top was very brown. I took the casserole out of the oven, worried that the top layer of cheese was baked too hard even though the inside could probably bake another 10 minutes.
The casserole tasted fine, but next time I’ll wait until the last 15 minutes to put the cheese on top. Here’s what it looked like after we’ve eaten most of it. It really was pretty tasty!
I will count this recipe a success and will make it again! If you have a question or comment please email me directly at maryjkisner@gmail.com.
What a difference the sun makes! Here’s the latest from my cruise around the garden. On the patio, the onions have exploded! They are so tightly packed we’ll have to cut them out of the planter…or maybe we’ll just dump them on the ground and pull them apart. Obviously, they were planted too close together! I shouldn’t have to buy onions the rest of the summer!
The next round of radishes has sprouted. Last week I pulled them all out. Bert refilled the planter with fresh dirt so I could plant again.
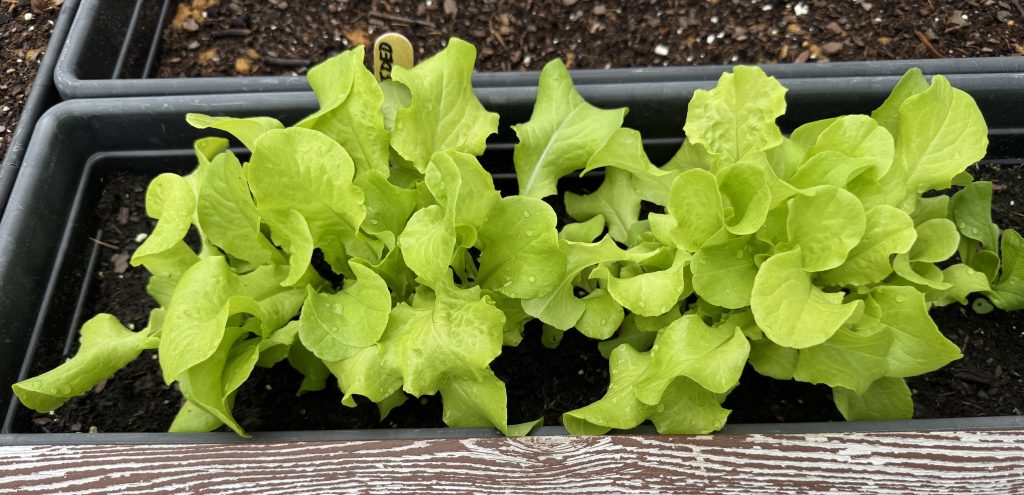
The new lettuce seed has sprouted:
The small ‘Raindrop’ tomatoes are doing well…I’m hoping they start to turn red soon!
The pumpkins are reaching out and up!
Up in the garden on the hill, the lavender is finally turning purple and boy does it smell good when I brush my hand over the flowers!
The tomatoes are looking good…I’ll have a lot to work with in August!
The carrots have finally decided to grow!
The green and yellow beans are now flowering…the yellow beans seem to be about a week ahead of the green ones.
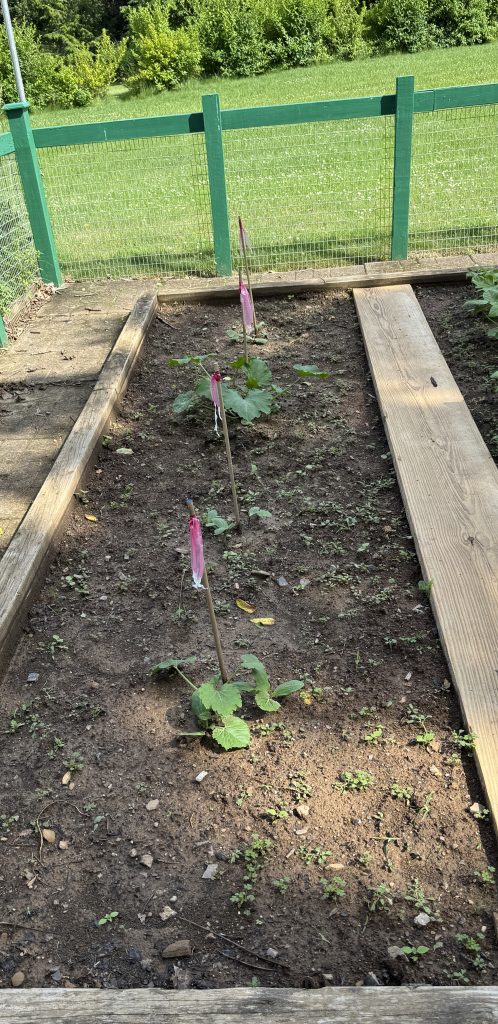
One of the zucchini plants is actually making zucchini!
And of course, the Echinacea is going nuts. Most seem to be pink, but in the far corner I can still see some of the other colors I planted.
It’s amazing what a little sunshine will do to get things growing. If you have comments or questions for me, please drop me an email at maryjkisner@gmail.com.
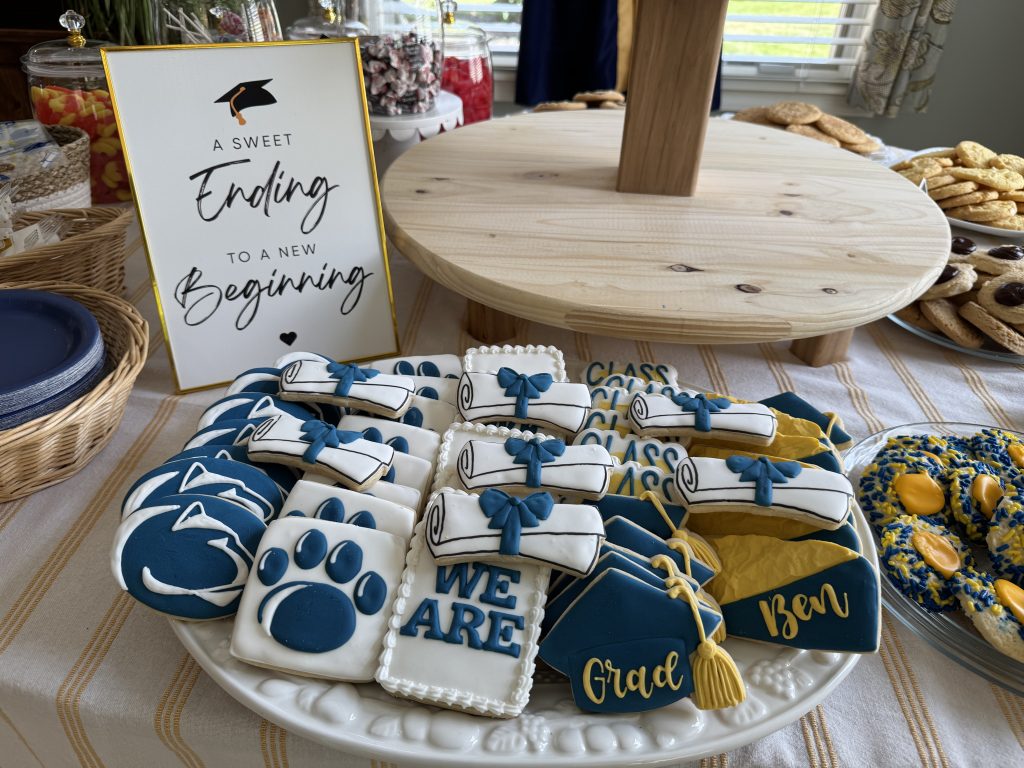
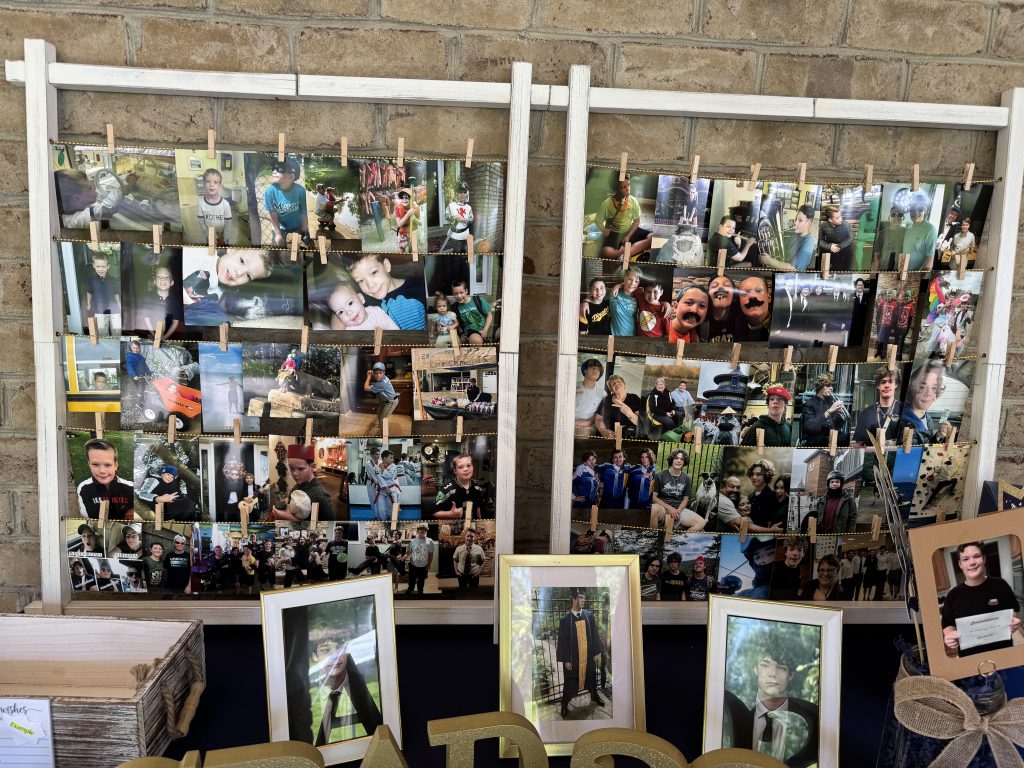
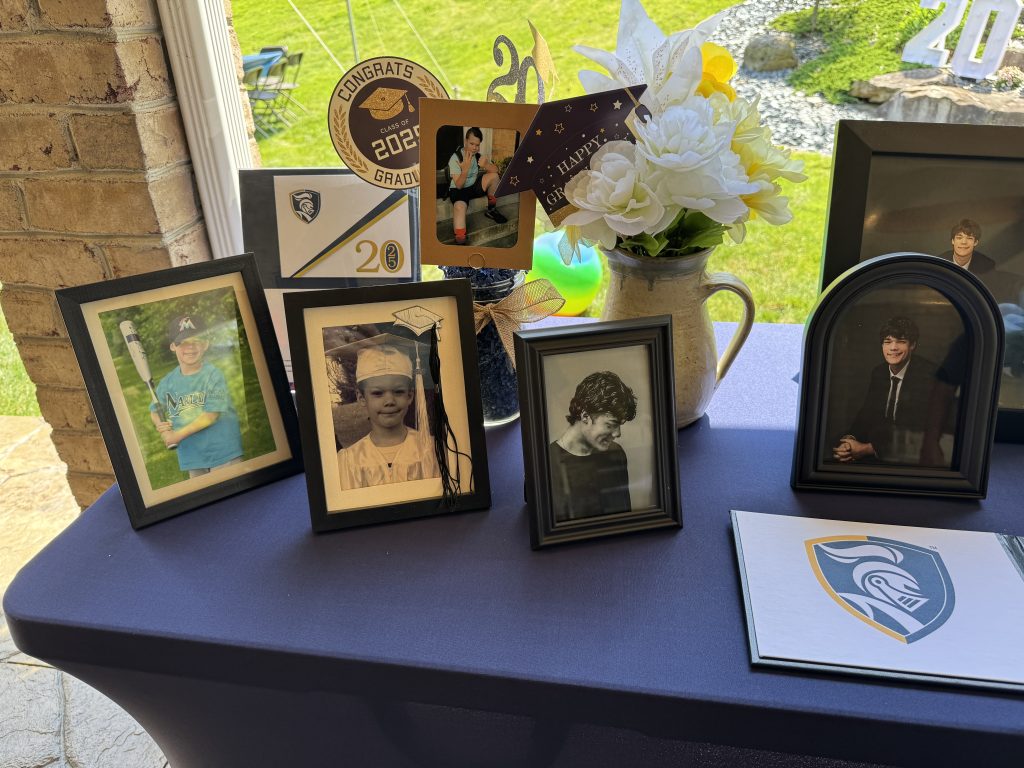
Last weekend was busy! We went to our daughter’s home outside Pittsburgh to attend our grandson’s high school graduation party. Quite a party! I think our daughter could start a business of party planning…if she should ever decide to leave Pharmacy! Haha! I managed to get some pictures before 70+ people showed up…and then I totally forgot to take any once I started visiting!
First of all, my grandson is still much taller than me! And he got his hair all shaved off! Quite a surprise! Since he’ll be here this fall at Penn State main campus, I’m looking forward to seeing him now and then.
The party decorations were wonderful…and yummy!
So many snapshots of him growing up!
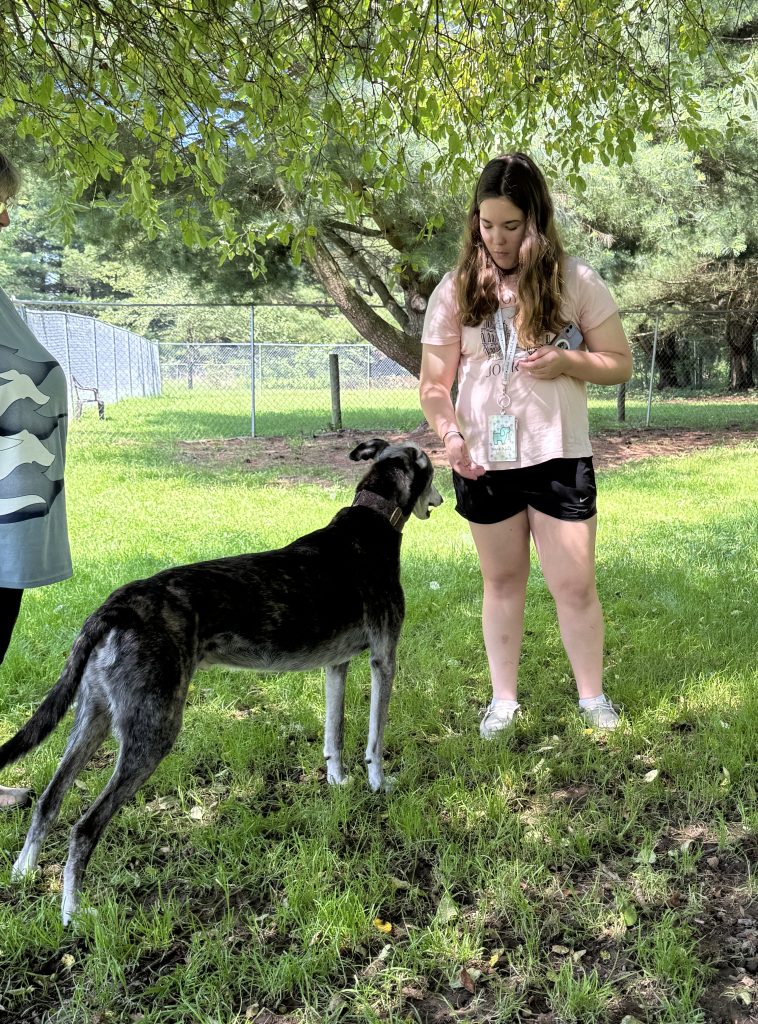
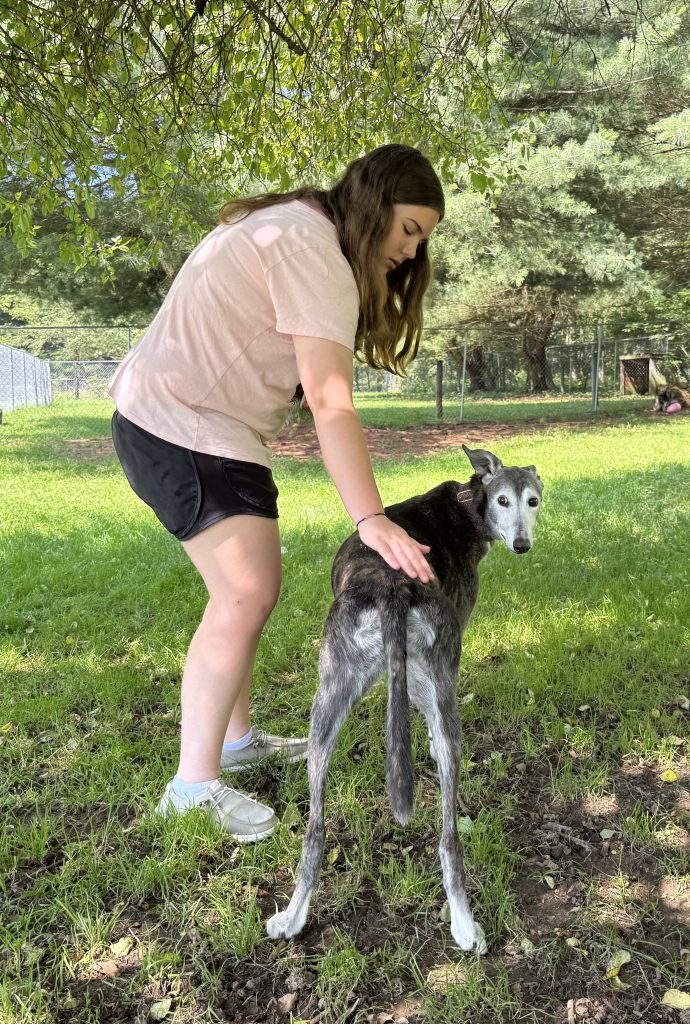
We drove down and back in one day so we could be ready for their whole family to come visit us the next day! Ben and parents were to attend orientation meetings for new freshmen. Ben got to spend the night in the dorm and the parents (and sister!) slept at our house. The next day while Ben and parents were attending meetings, Anna and I had a chance to do some shopping and visit the greyhound kennel. My friend Toni let us check out a few dogs and give them some treats.
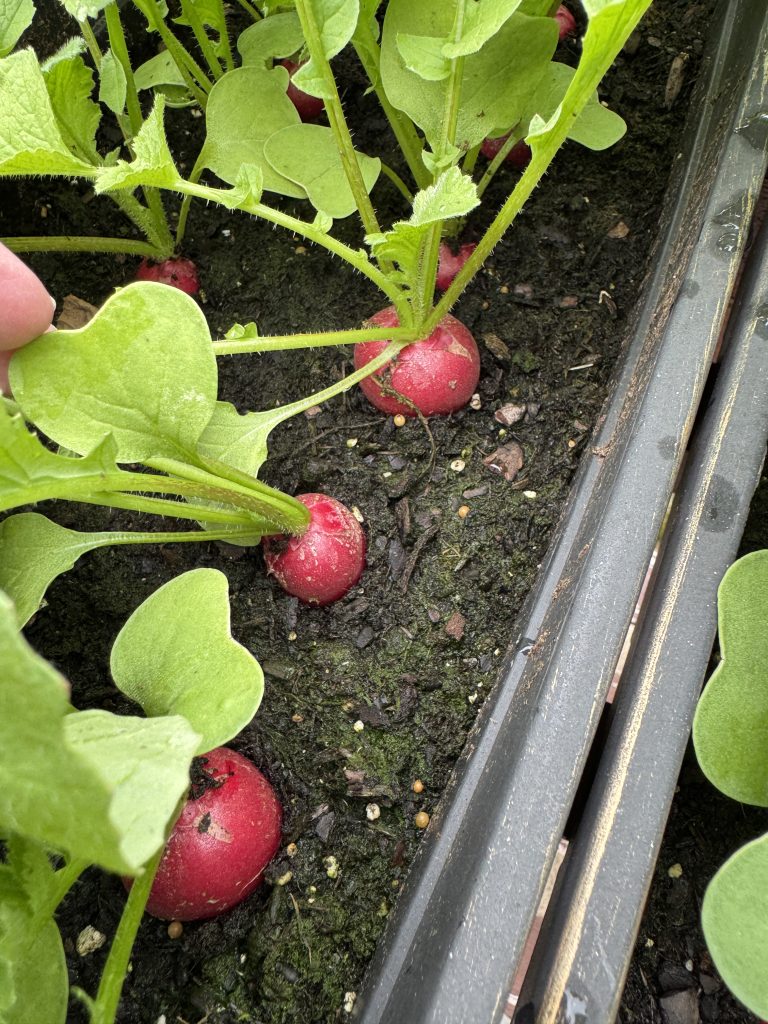
When the dust settled and everyone went home, I was able to check out the garden. The radishes were ready to pull! Yum!
And the Echinacea was looking good!
Busy weekend. I’m grateful we had a few dry days without rain! Enjoy!
I’ve spent the last year looking forward to the Art in the Orchard festival. This year it will be held July 10-12, 2025 in the big field next to Way’s Fruit Farm on Rt. 550, just past Stormstown, PA. This is the same weekend as the Central PA Festival of the Arts in State College and the People’s Choice Festival at the Grange Fairgrounds in Centre Hall. Busy weekend for all.
Last year was quite a learning experience for me. Being a vendor is so different than just visiting an arts festival. I discovered how complicated it was to set up a booth, display my stuff and interact with the public for several days. Thank goodness I was with my friend Toni, who had done this before. She had the tent, the tables and the know-how to set everything up. Here was my display last year:
This whole year, my focus was on building my inventory of bracelets to sell. With just two weeks to go, I’ve had to stop making bracelets and figure out how to display things. I also knew I needed new business cards, some kind of sign and my own table with a cover. I would be providing the 10×10 tent and we just ordered the side walls. Next, we need to figure out how to assemble it ourselves.
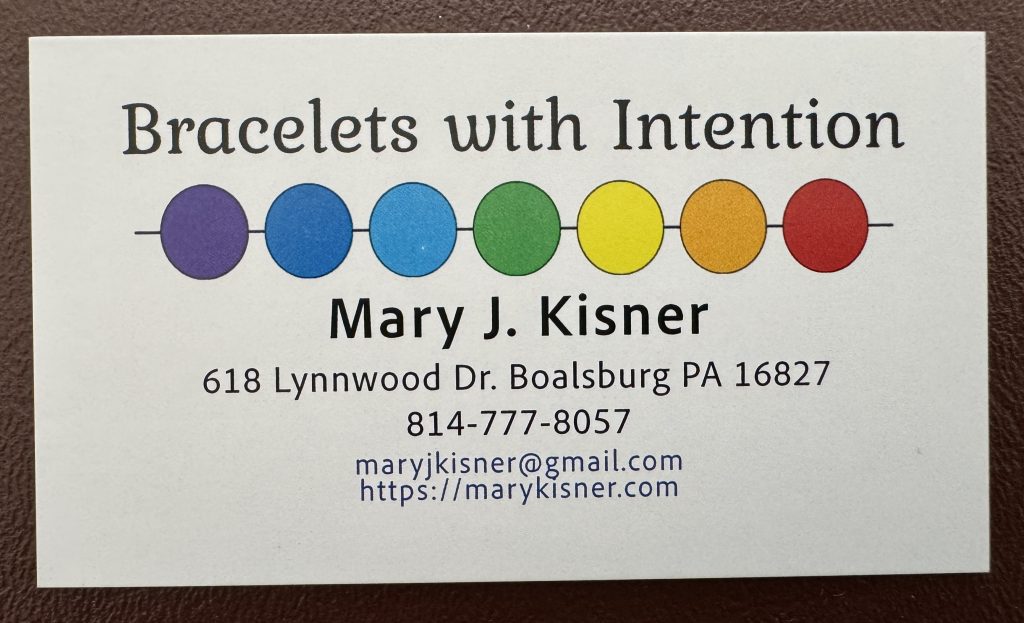
I’ve been trying to make own business cards, but it’s been hard to design what I want with a Word program and card template. (I sure do miss PageMaker!). My original idea was this:
I couldn’t get the “beads” to center properly and I wanted a line to be the “string” holding them together. I could not get the circles to travel together!
I finally went to the printer and ordered cards…and tried to explain my issues with the program. This is what I ended up with:
Not quite what I had in mind…but I had 200 printed. I’ll revise for next year!
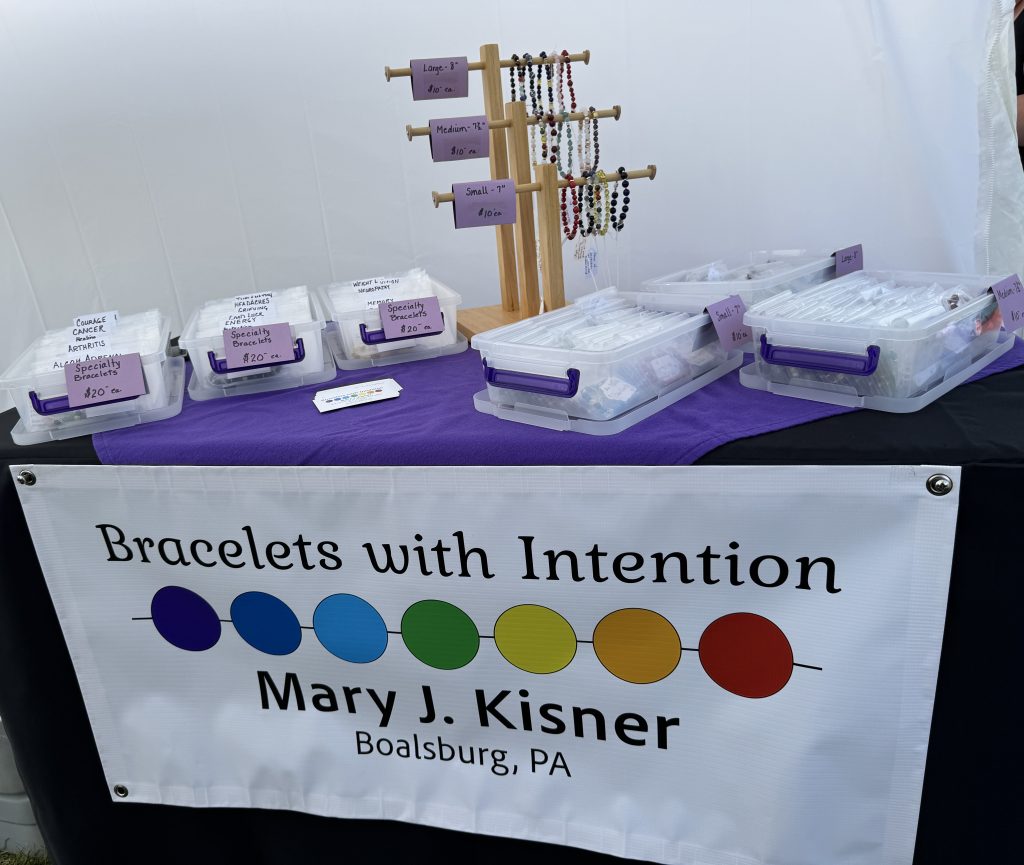
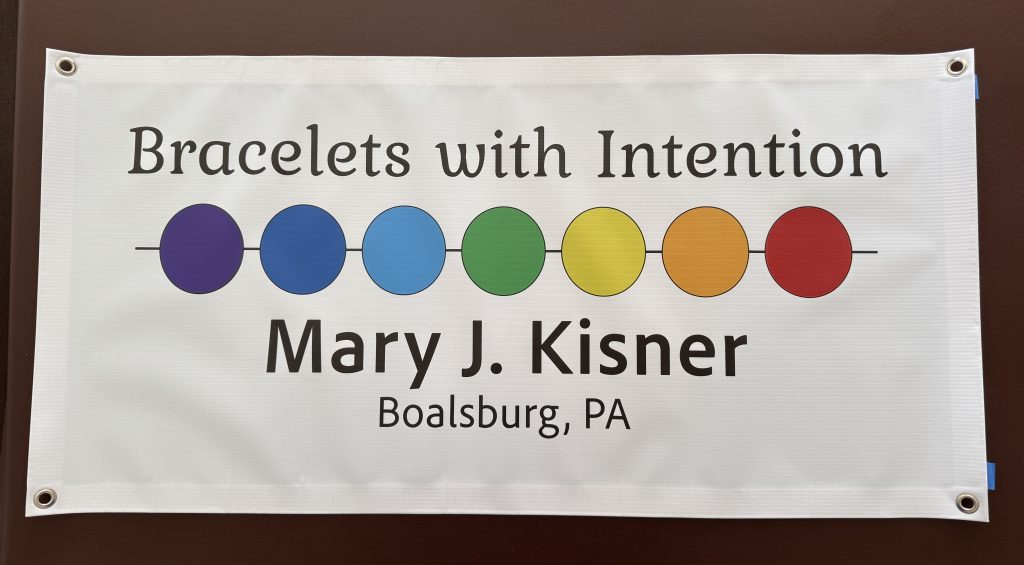
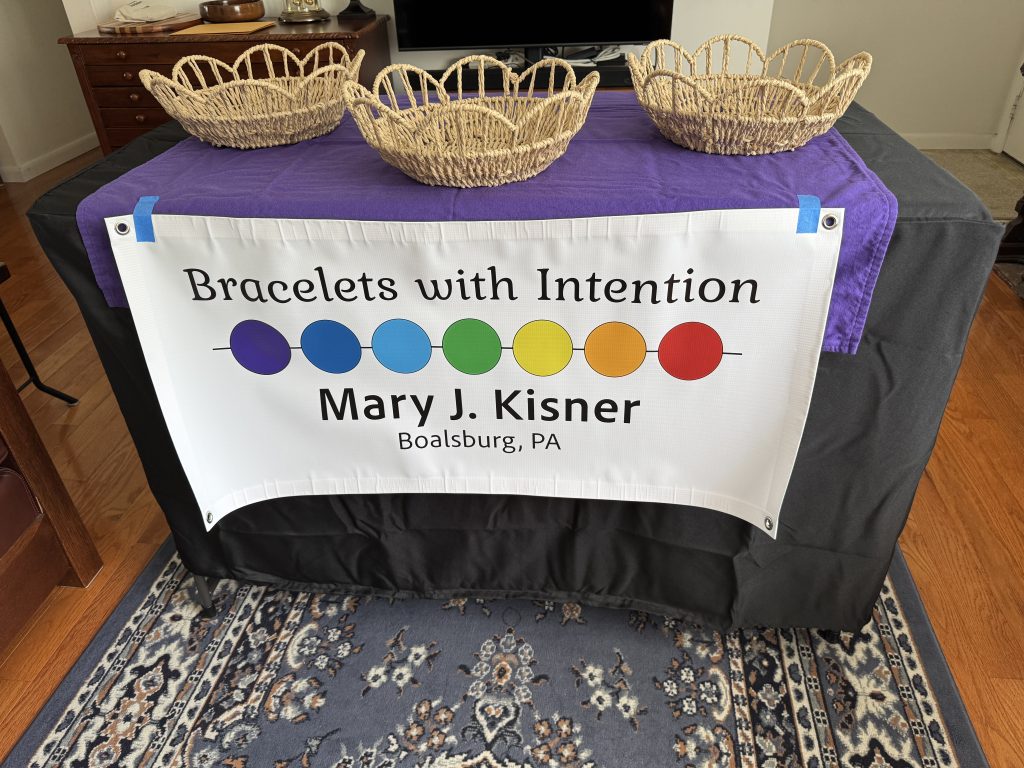
Of course, the vinyl sign I ordered matches the new card:
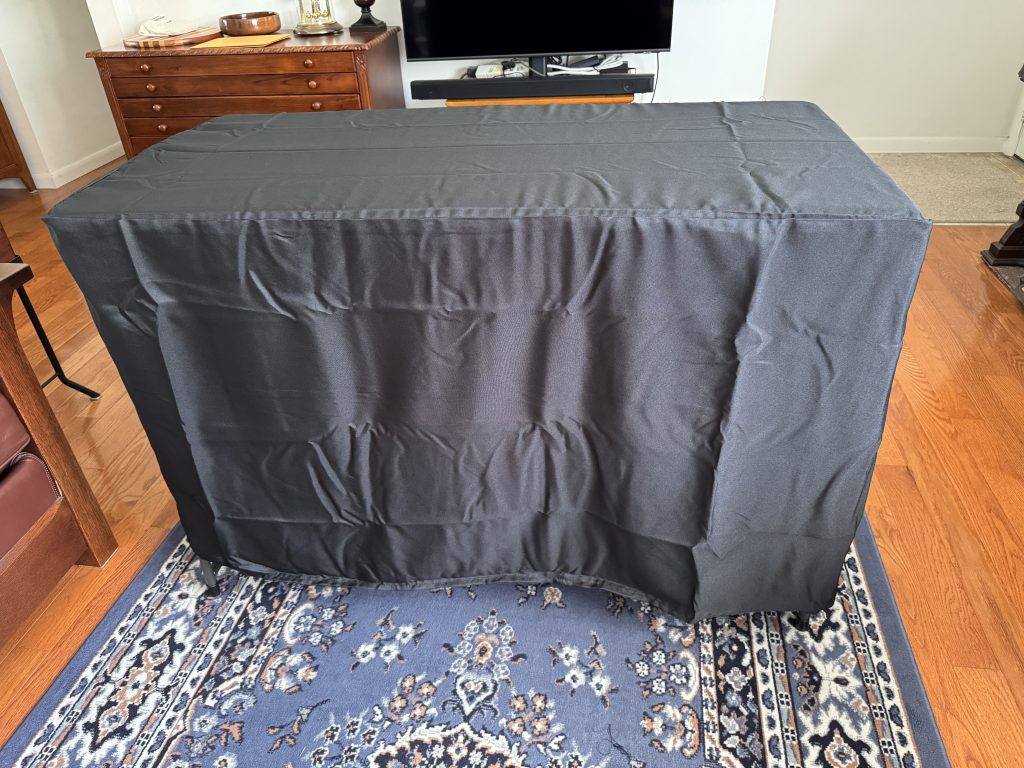
So now it’s time to assemble my display. (First, Bert had to show me how to open up the folding table!) The cover obviously needs to be ironed!
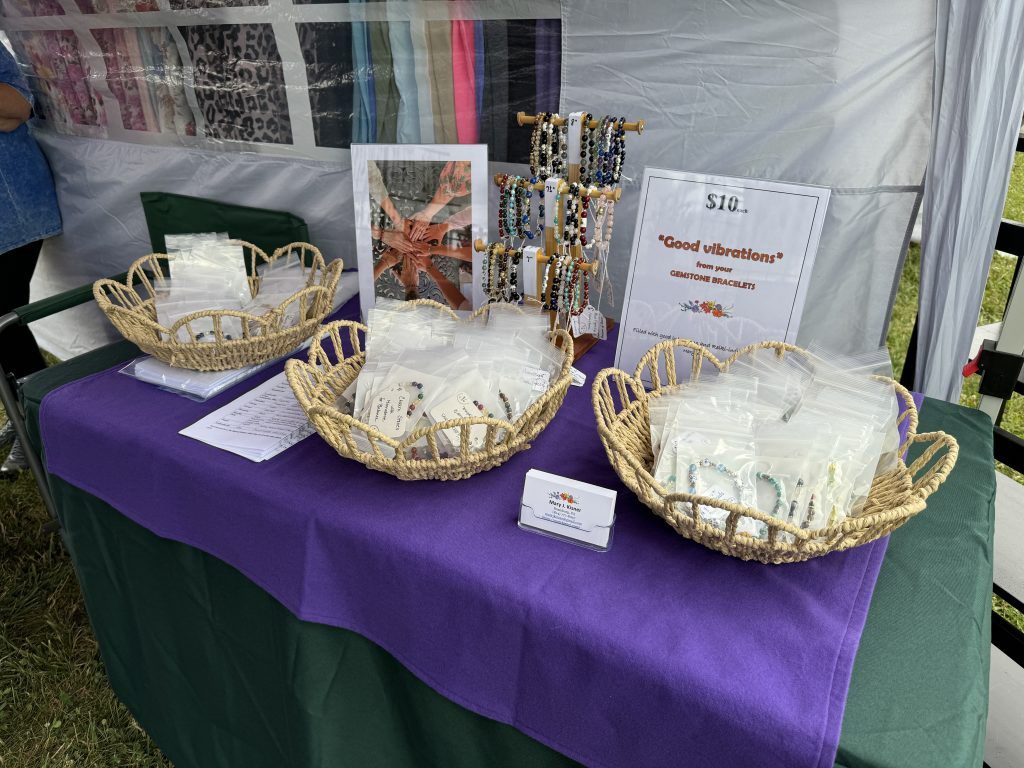
Last year I used baskets to hold each size bracelet:
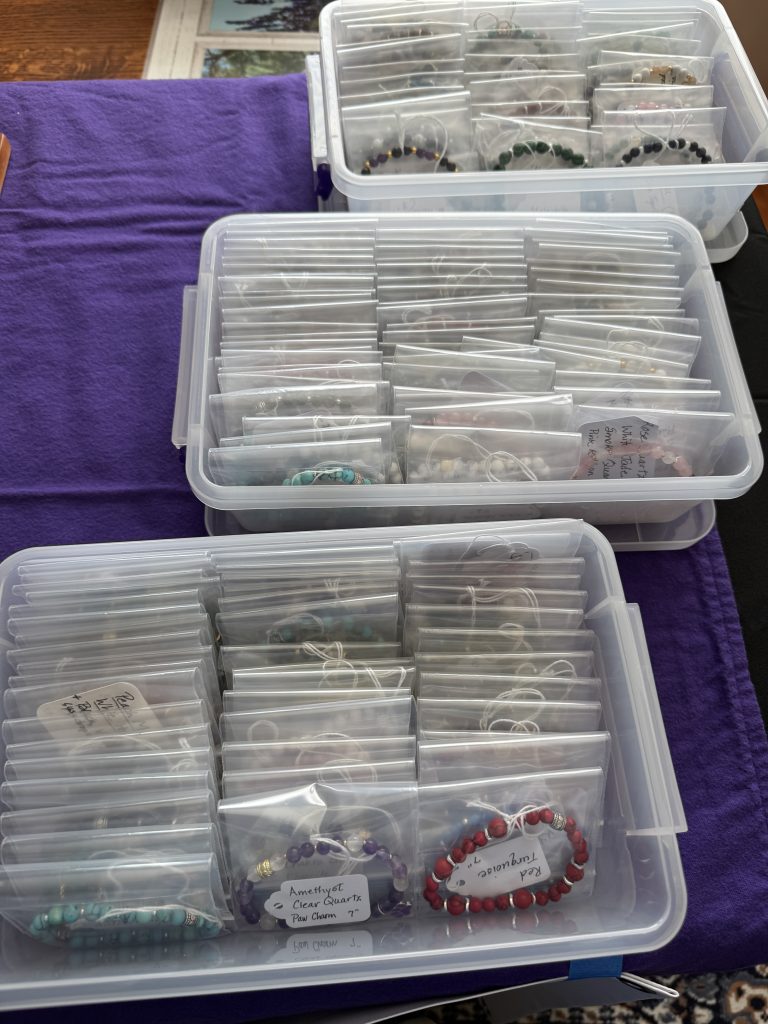
This year that won’t work…I have too many bracelets!
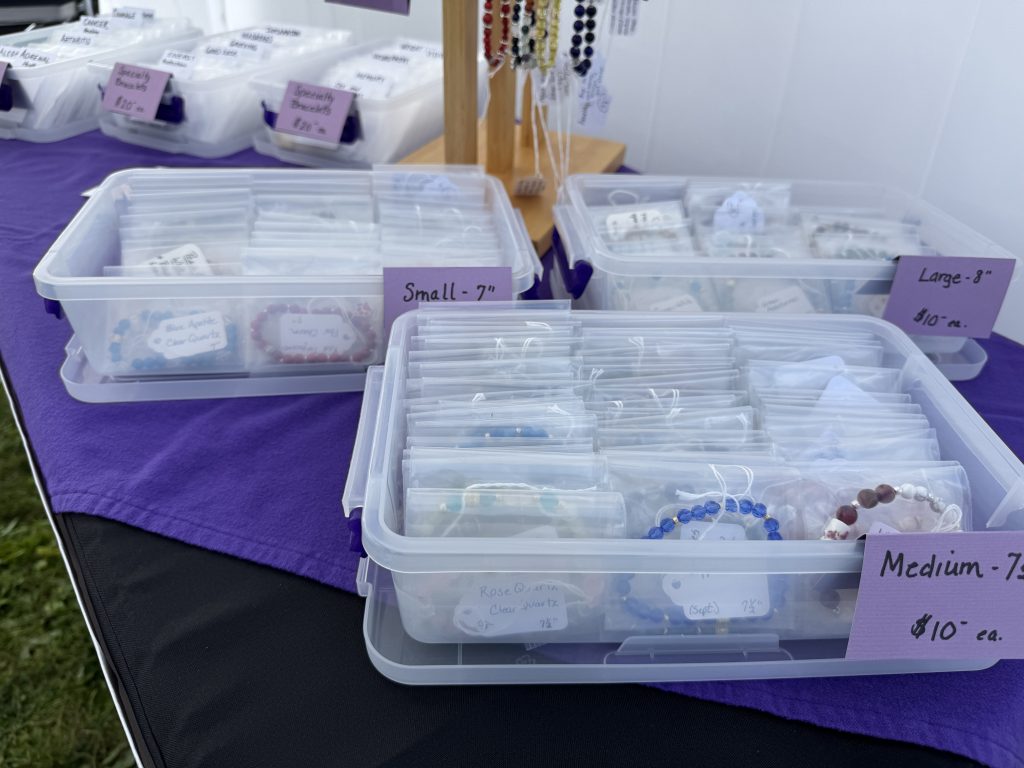
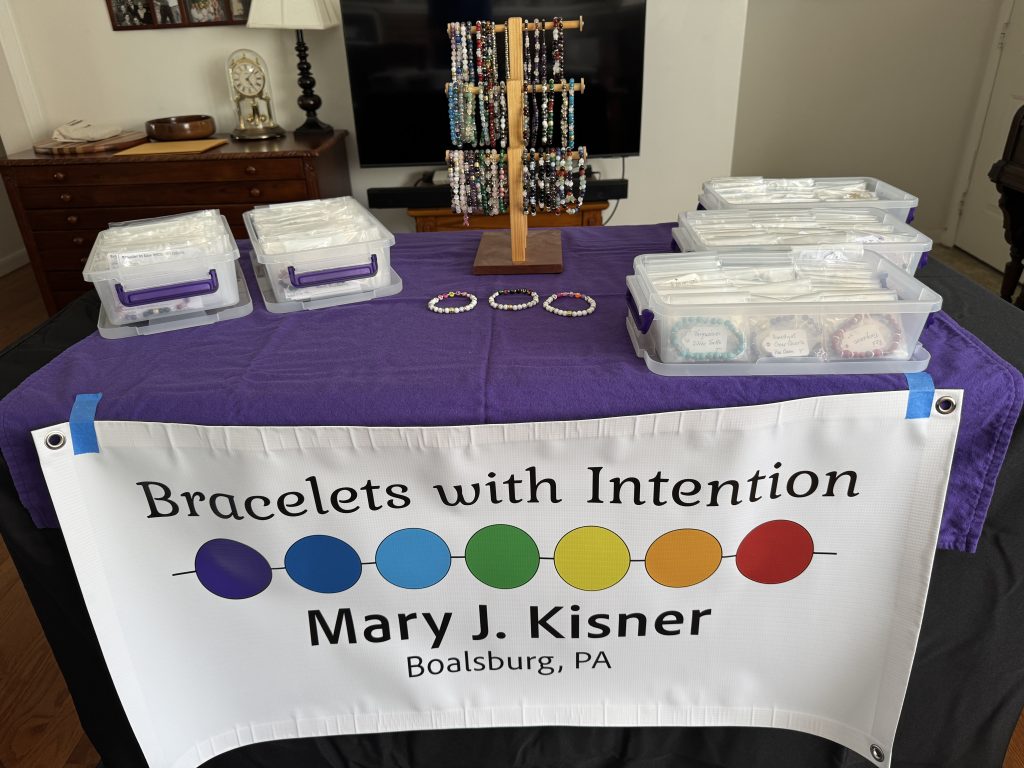
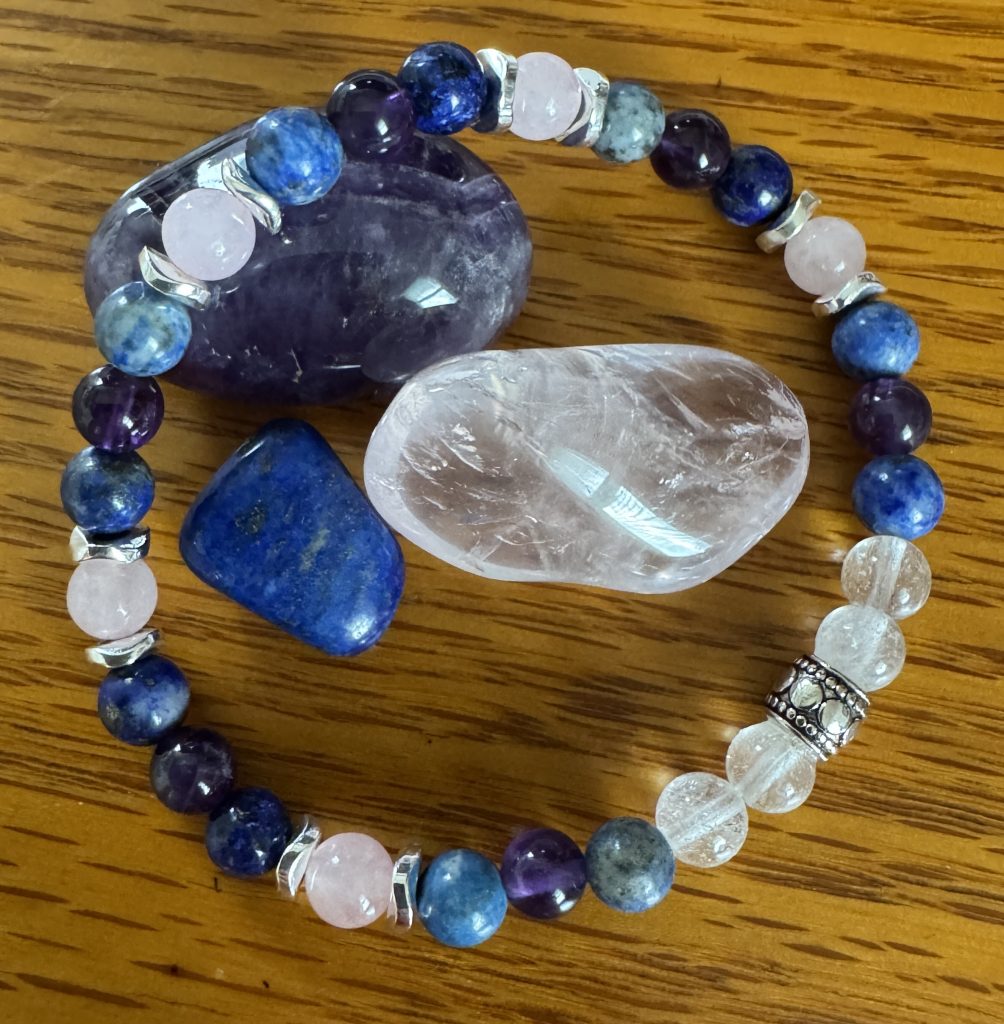
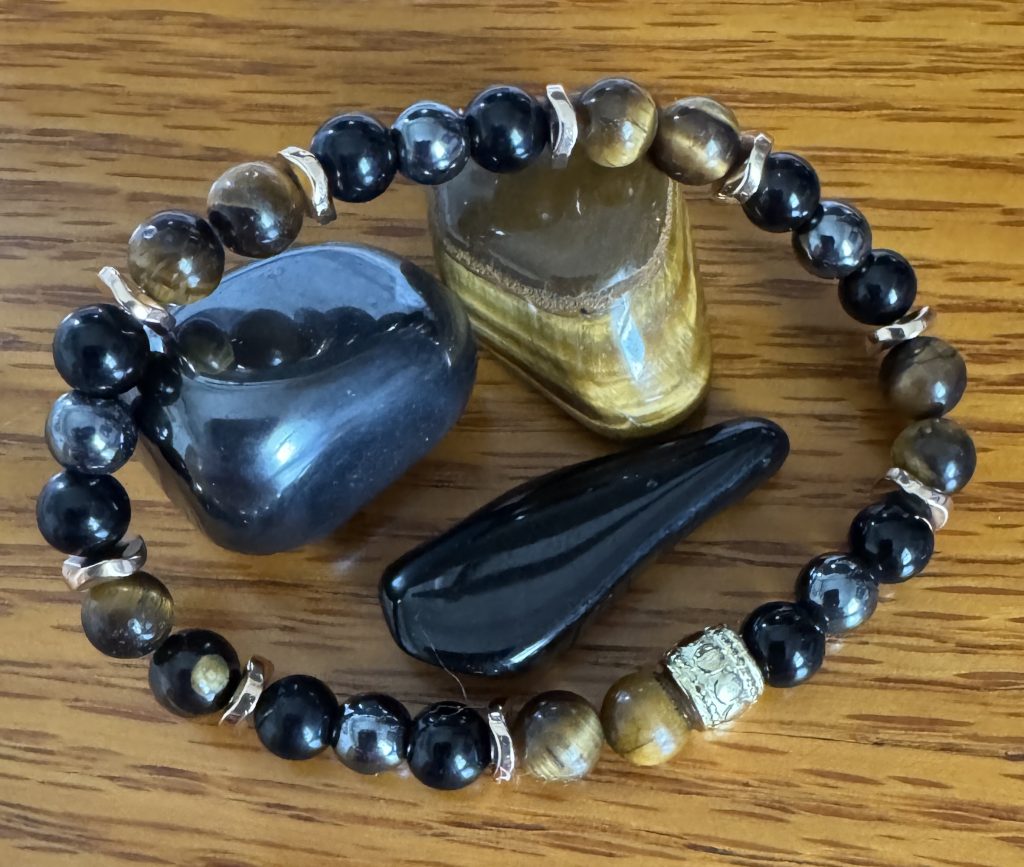
I also need to figure out how to hang the sign…it kept falling off! The regular bracelets are on the right, and they will the closest to the visitors passing by. We’ll see how long they stay neat and organized! They will be $10 each and come in three sizes: 7″, 7 1/2″ and 8″.
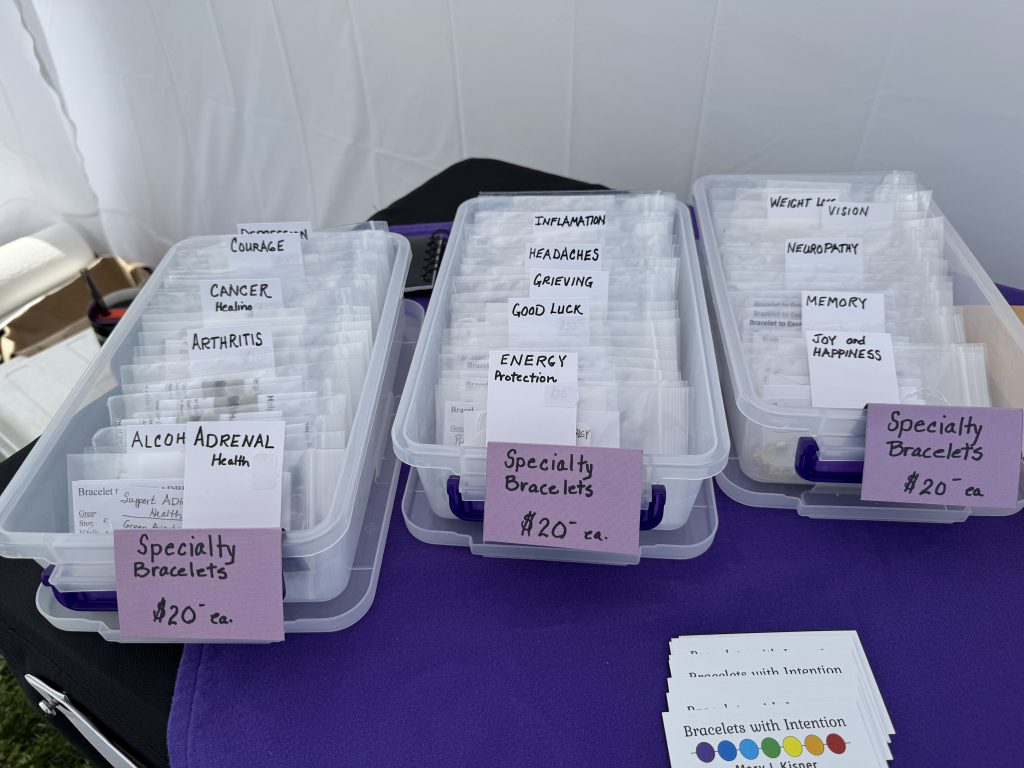
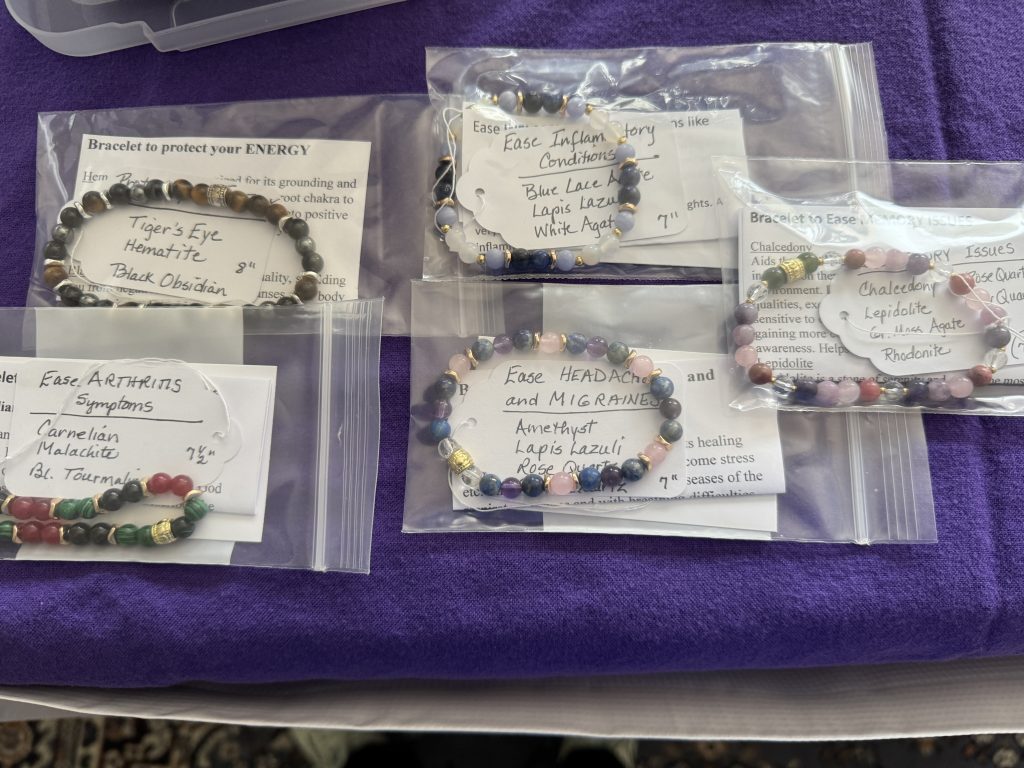
On the left side of the table will be my specialty bracelets. They will be more expensive ($20) and also come in three sizes. There aren’t as many bracelets… 15 different topics from “Ease Arthritis Symptoms” to “Headaches and Migraines” to “Supporting Weight Loss.” They have become very popular but they use several beads together and have a print out of what each stone contributes to the Intention.
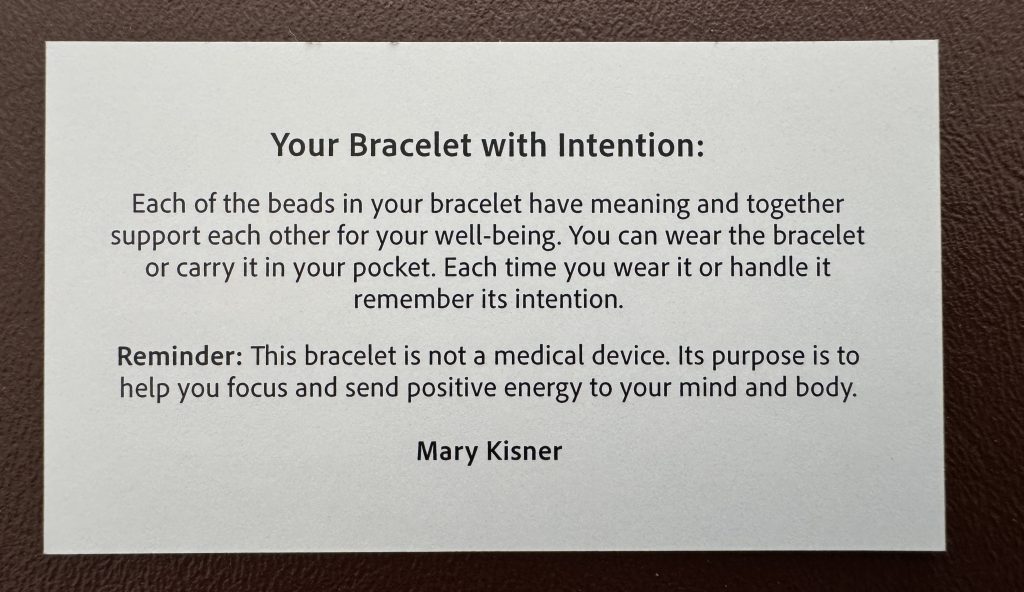
On the back of my card, that is included with each bracelet, is this disclaimer:
When it says “Bracelet with Intention” it means when I make the bracelet I’m thinking about how it might help you, and the beads themselves hold meaning. It is not a medical device but it can help you focus your mind to help with the intention.
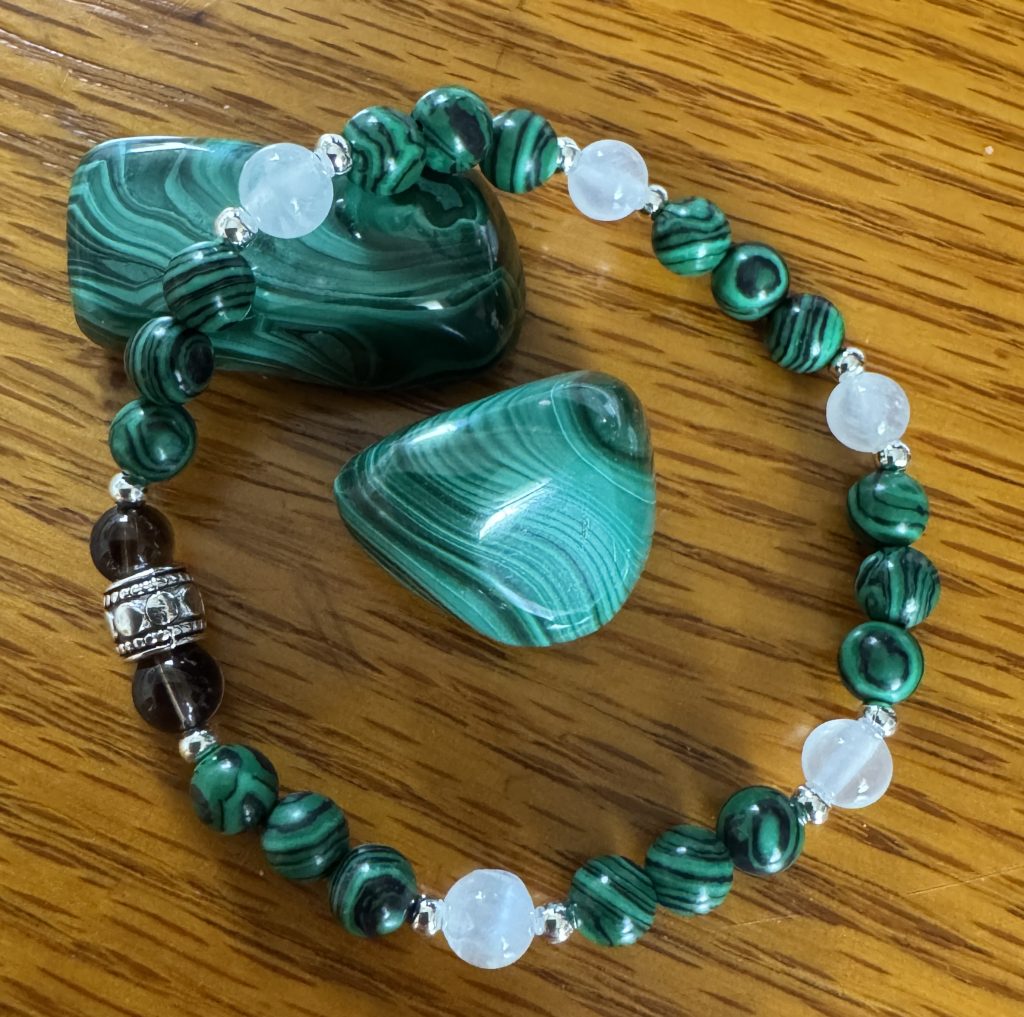
Finally, I’m trying to get better at taking some pictures that look a little more interesting. I’d like to make a booklet of the various specialty bracelets I’ve made. Luckily, when I first started learning about the stones themselves I collected a variety that I can now use in setting up some pictures. I’m not sure I need to have more stones. I’ll have to worry about this project after the festival!
Most of my bracelets are made with 6mm beads. I’m now getting more requests from guys (my grandson Ben, age 18, is often asking for a bracelet to help with a specific thing, like clarity and focus when he starts Penn State this fall.) So, I’ve started adding larger beads (8mm) to my supplies. Geez…it’s starting to add up! Not a cheap hobby, but so rewarding.
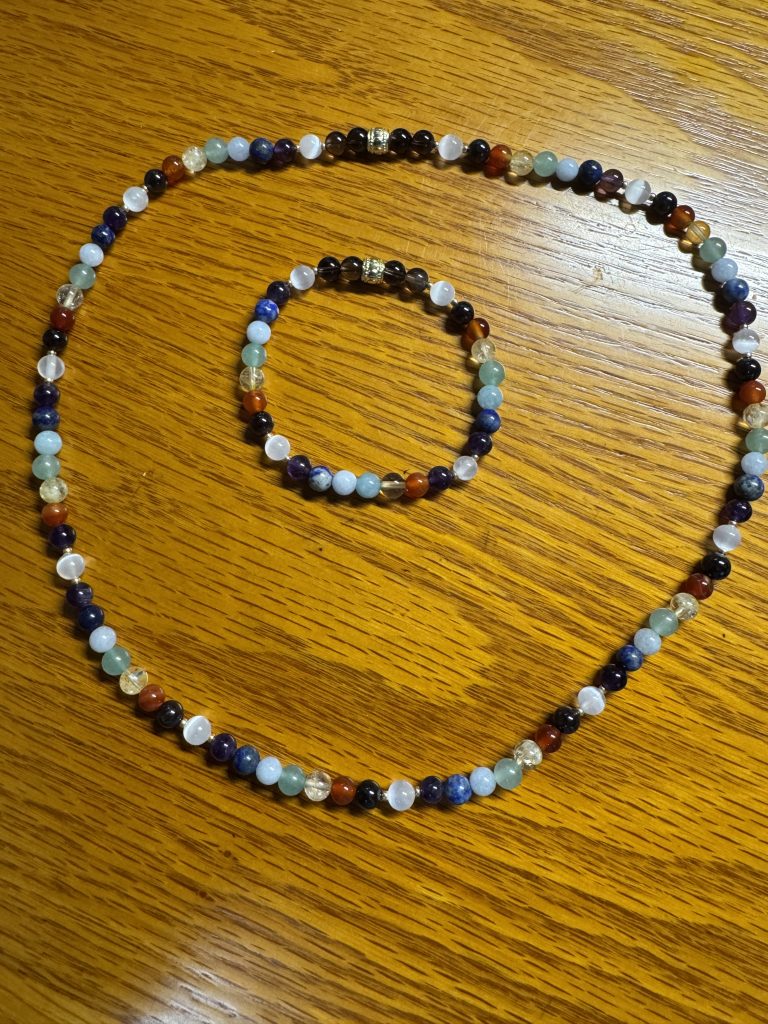
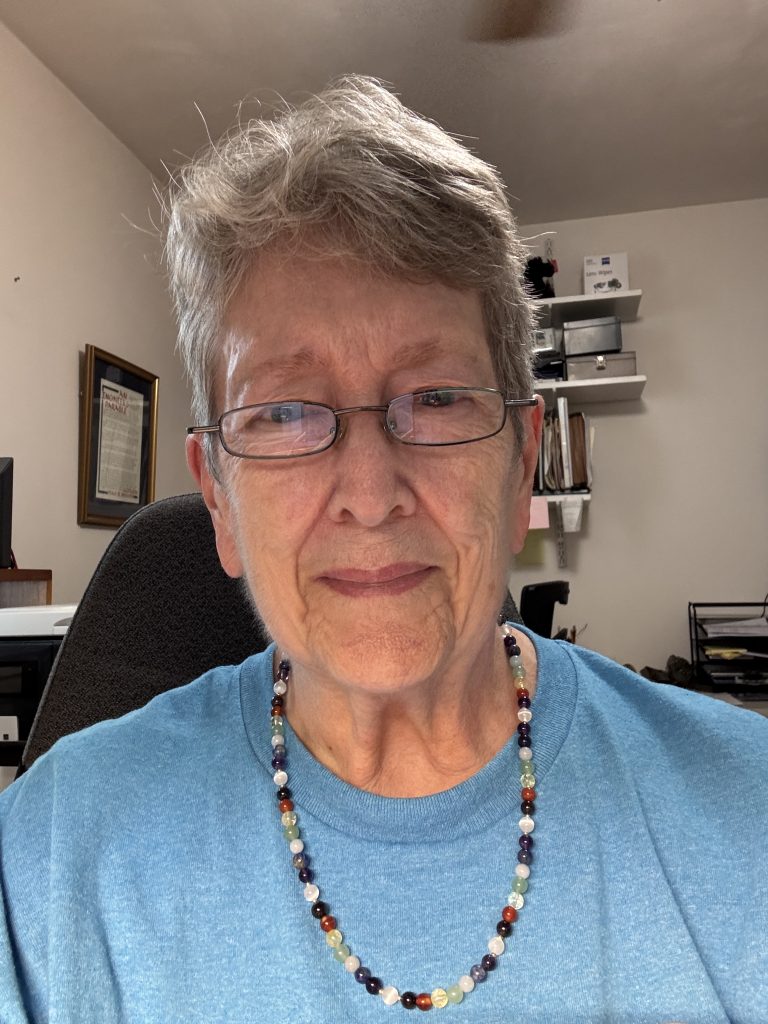
I did have a question from a friend…did I make necklaces? So far…no. But I thought I’d give it a try to see if my elastic was strong enough to handle a necklace of 6mm beads. I made a necklace of a repeating pattern of chakra stones and then made a matching bracelet:
It looked pretty, but was it comfortable?
It was more comfortable that I expected but I had to use over 75 beads…enough for 4 bracelets! Maybe if I had enough of the 4mm beads it would be worth it, but for now I think I’ll skip necklaces! If you’d like to see more of my bracelets, come find me at the Art in Orchard festival July 10-12, 2025! If you have questions or comments about this post, please just email me directly: maryjkisner@gmail.com.
Enough rain already!! We certainly have not had to water the garden for several weeks. Unfortunately, the plants also need sunshine! Bert has been keeping an eye on the plants and the focus has been more on fungicides and slugs. Today, the sun actually came out for a few minutes, so I put my old sneakers and slogged out to take some pictures. The grass is so tall my ankles were soaked in minutes!
I’ve pulled the first round of radishes and replanted. The first batch were yummy, but a few were a little spicy. The second planting is doing well.
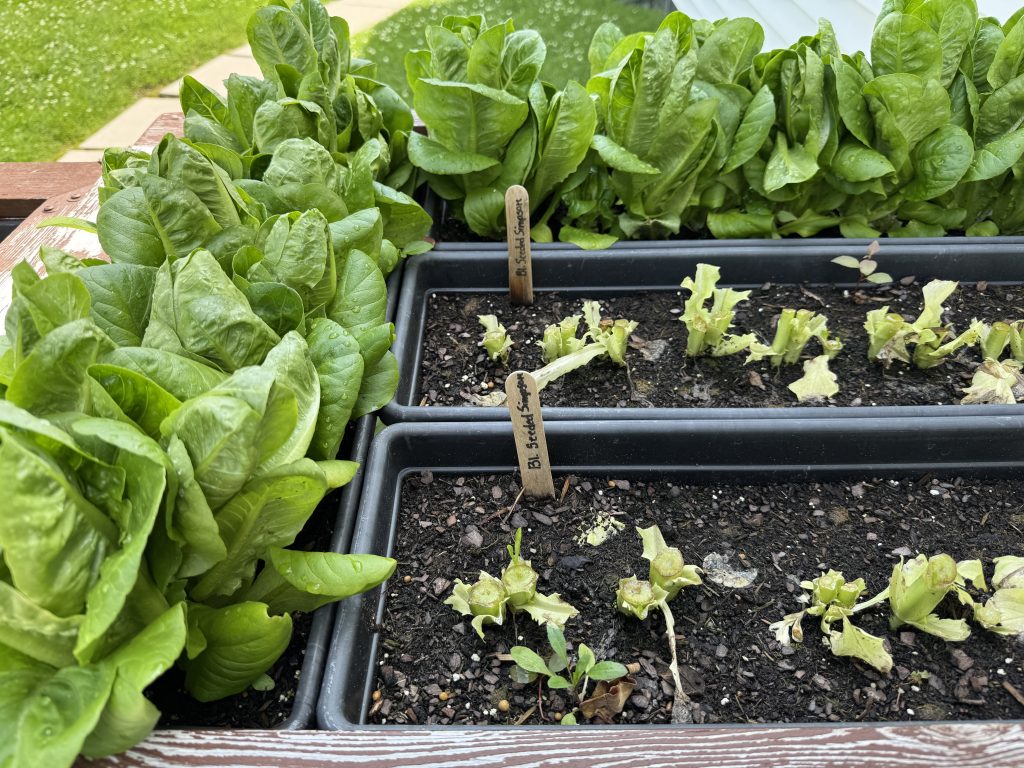
I cut the Black Seeded Simpson lettuce a few days ago and we’re enjoying it in salads. The other lettuce is ready to eat. When I replant, I’ll stagger the plantings so it isn’t all ready at once!
The onions are crazy. We’re pulling them as we need them.
The small tomatoes…called Raindrops…are doing very well. They will be great in salads!
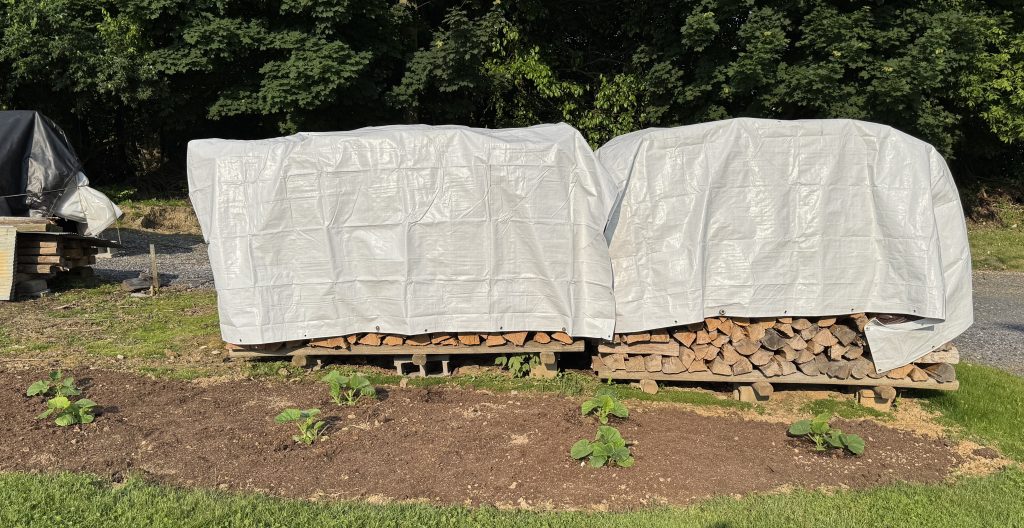
On my way up the hill to the other garden, I stopped to check out the pumpkins Bert planted by the wood pile. The fence seems to keep the rabbits away.
Up in the garden on the hill, the lavender stems are filling out.
The tomatoes are making flowers so there’s hope tomatoes will follow!
We can finally see the carrot tops! I was sure they had drowned!
Yay! We have bean plants!
Bert had to buy more zucchini seeds, but finally we have plants.
My beloved Echinacea have spread to fill up the space! Lots of potential flowers…and one daring to open all alone…for now!
I was outside for about 20 minutes…and then it rained AGAIN! And then the sun came out about an hour later…for a few minutes and it rained again. Geez!
If you have any comments or questions about our garden, please just email me. Every day I get about 100 spam comments in foreign languages. I don’t want to miss anything from a REAL person and I’d love to hear from you so use my email! maryjkisner@gmail.com
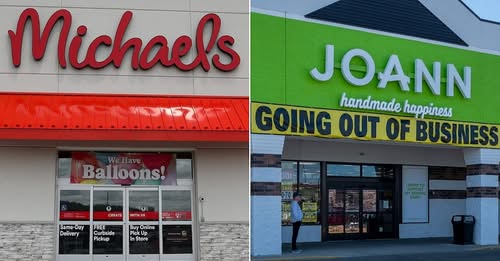
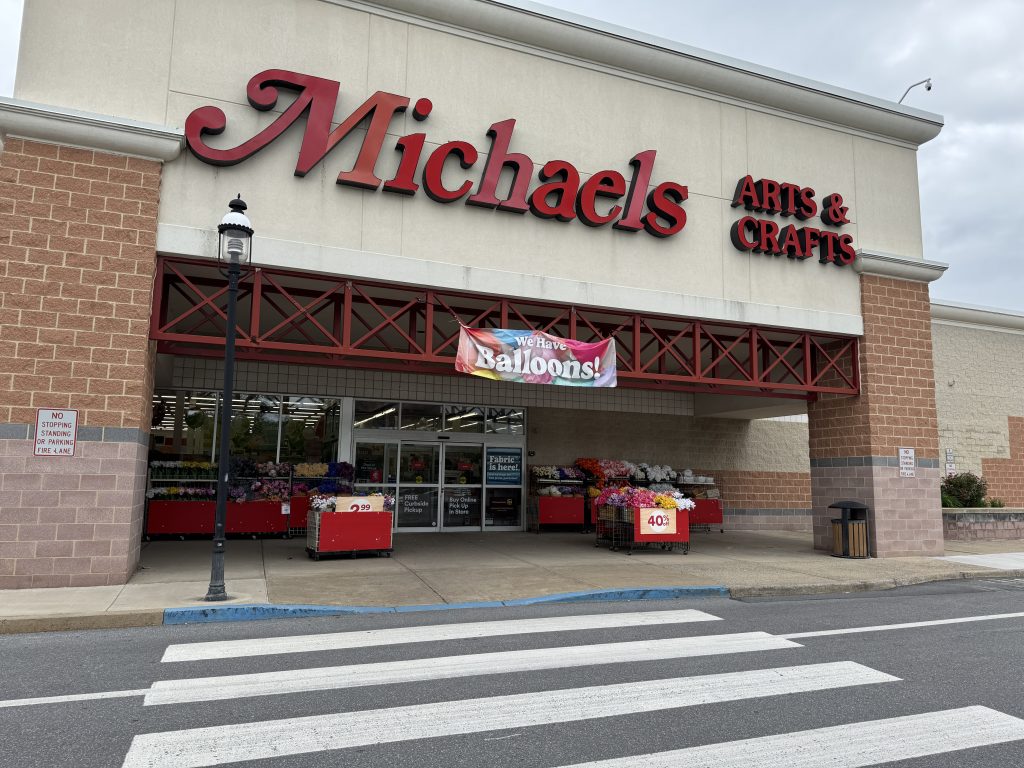
To continue my review of fabric resources in the area now that JOANN Fabrics has closed, I checked out our local Michaels store. I also just saw the headline that Michaels has bought out JOANN’s. If a JOANN’s store reopens near you, know that it is owned by Michaels. Interesting.
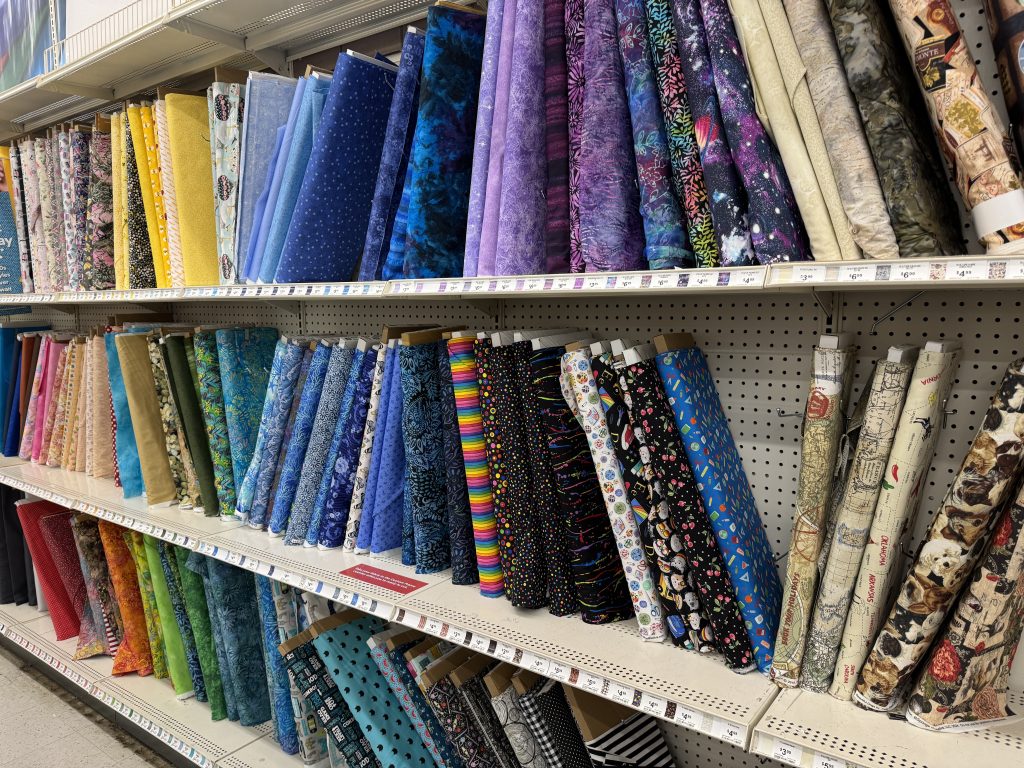
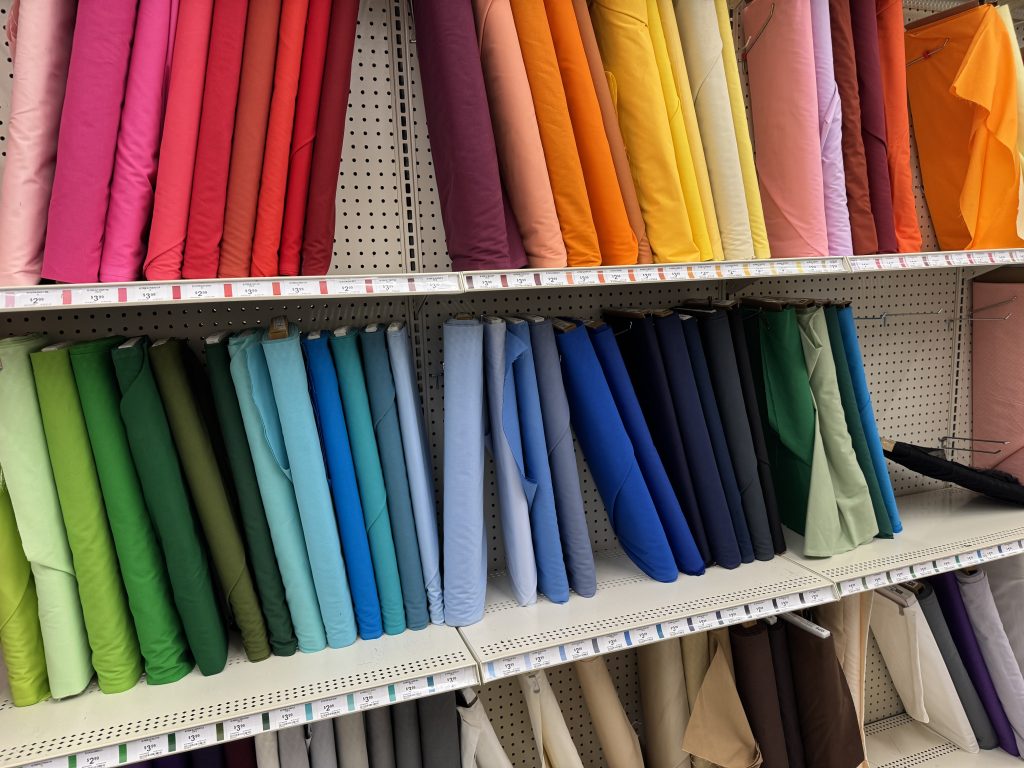
Anyway, I stopped by our local store to see what was happening. Just in the last several weeks, they seem to have expanded their fabric collection.
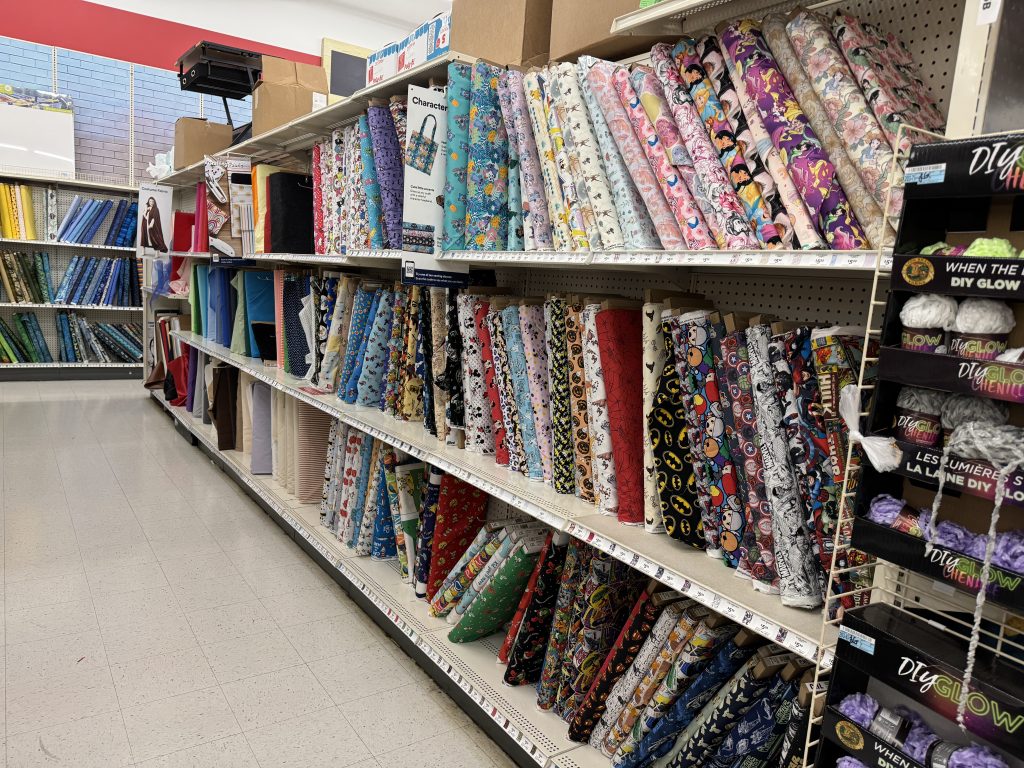
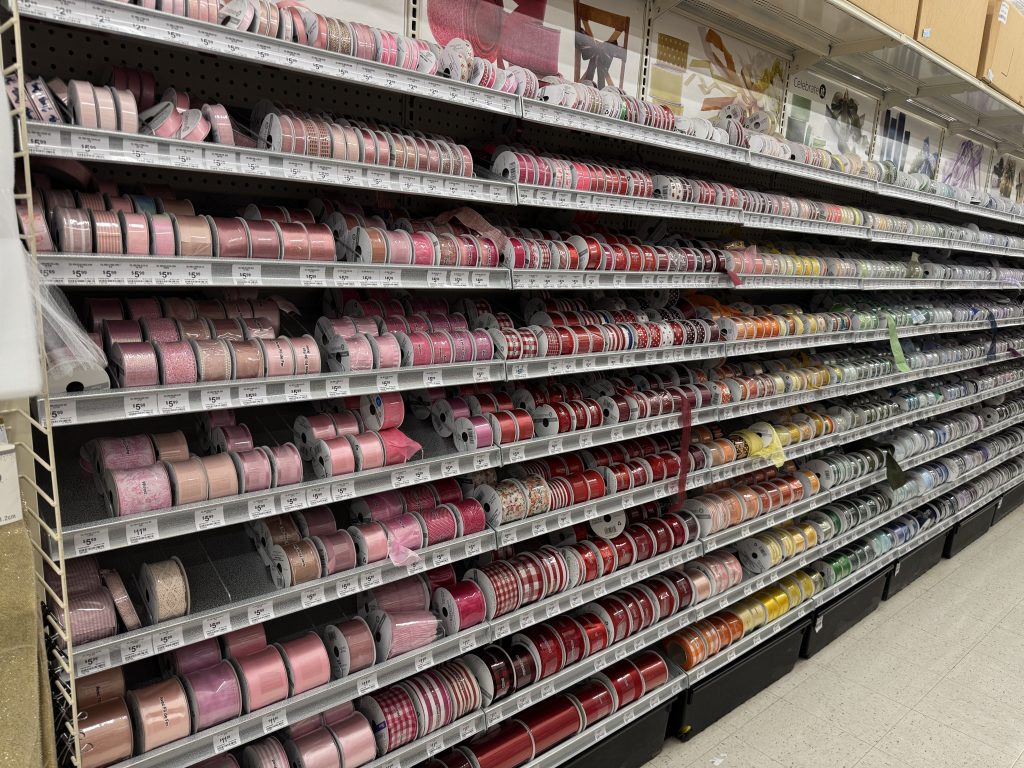
Ribbon selection is good.
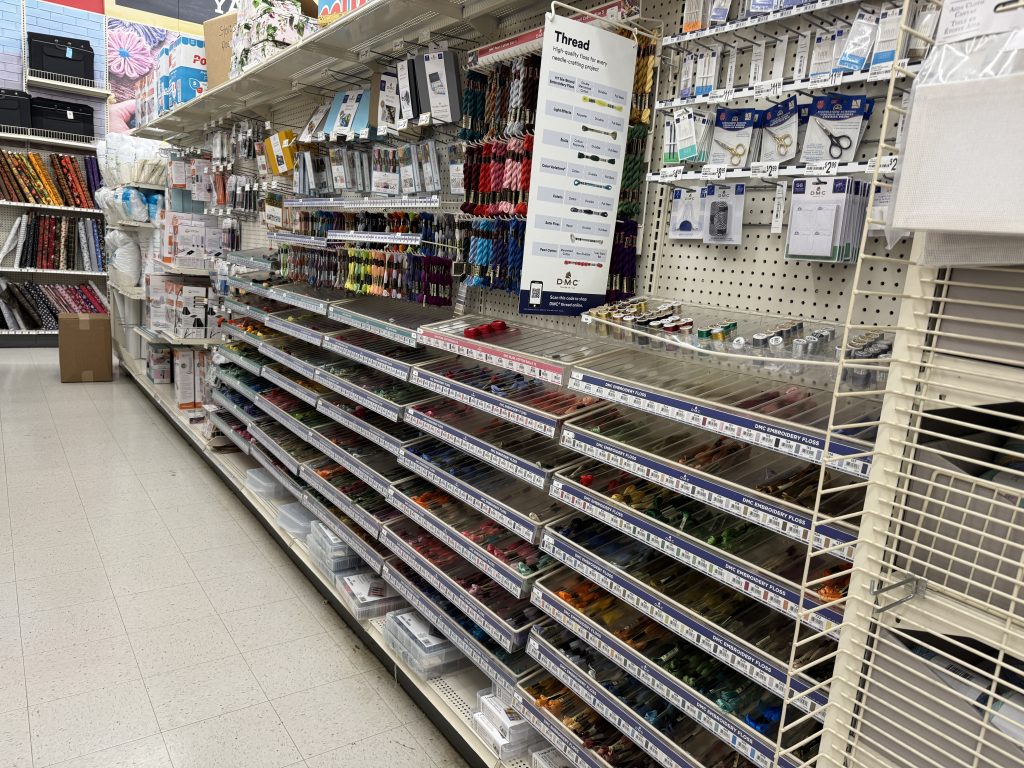
Embroidery floss looks all organized.
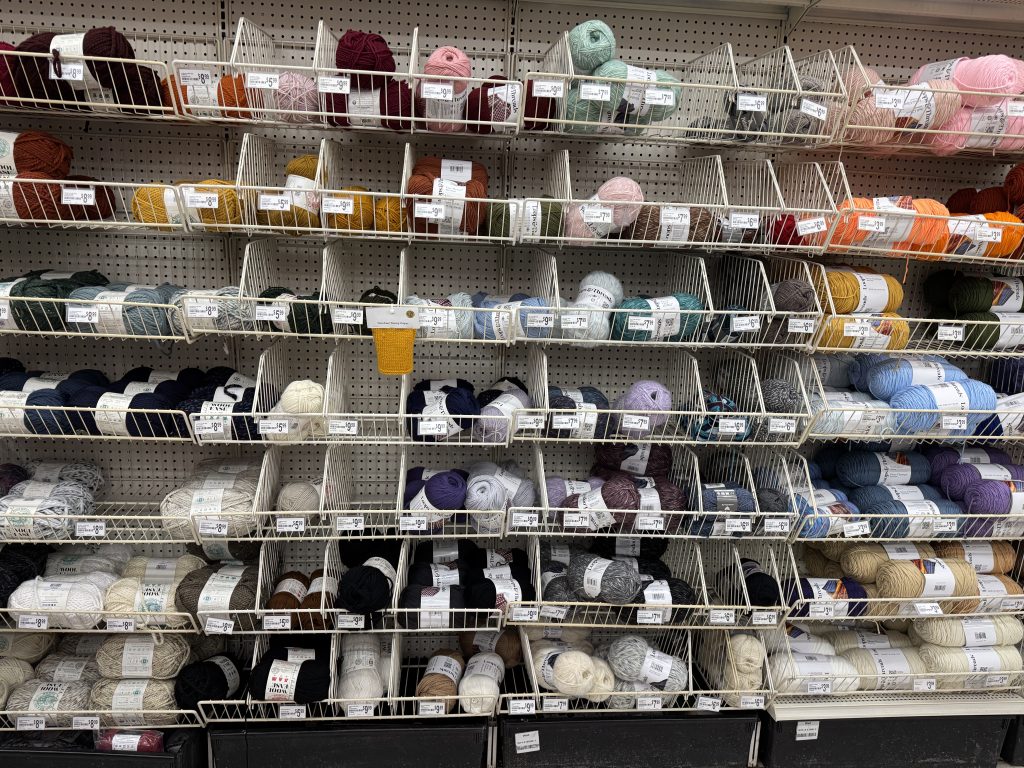
They still have their wide collection of yarn, although I don’t know if they’ve begun incorporating the brands from JOANN’s.
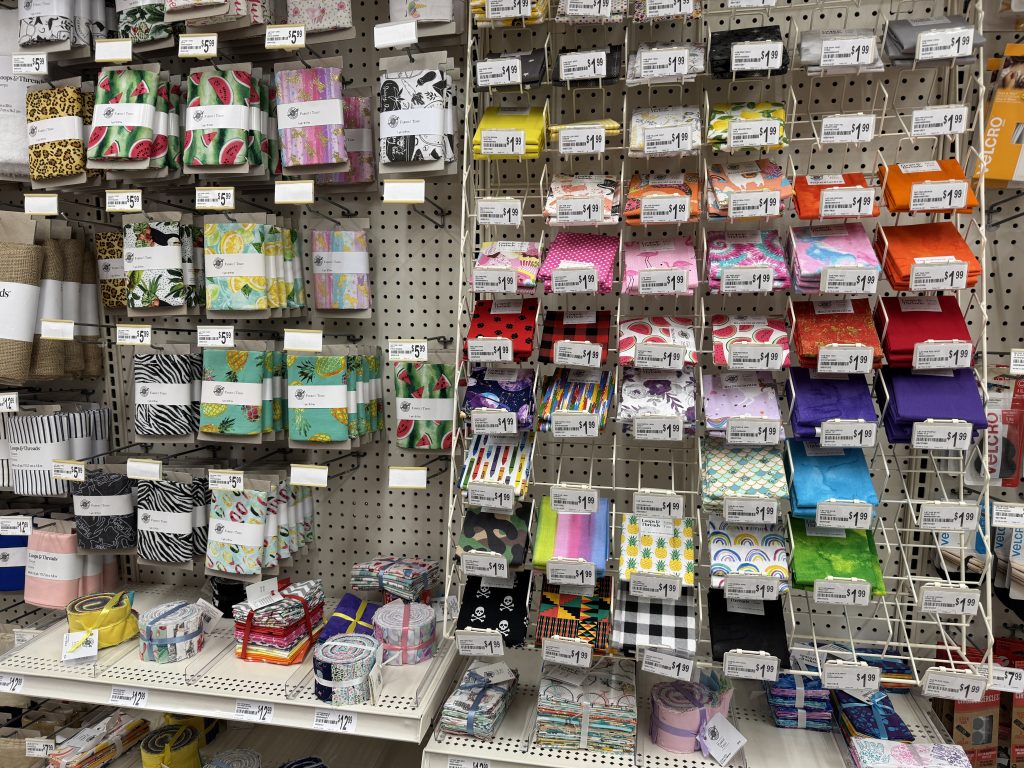
They have some cut and packaged pieces, but WalMart seems to have a much broader selection.
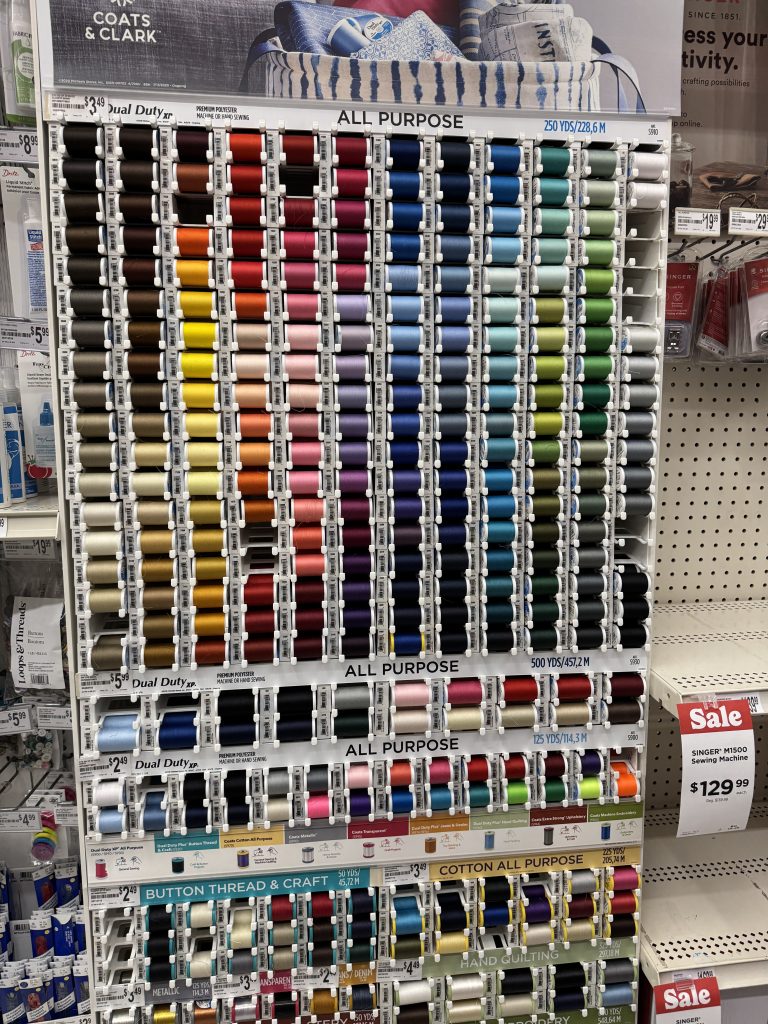
They have this standard display of thread.
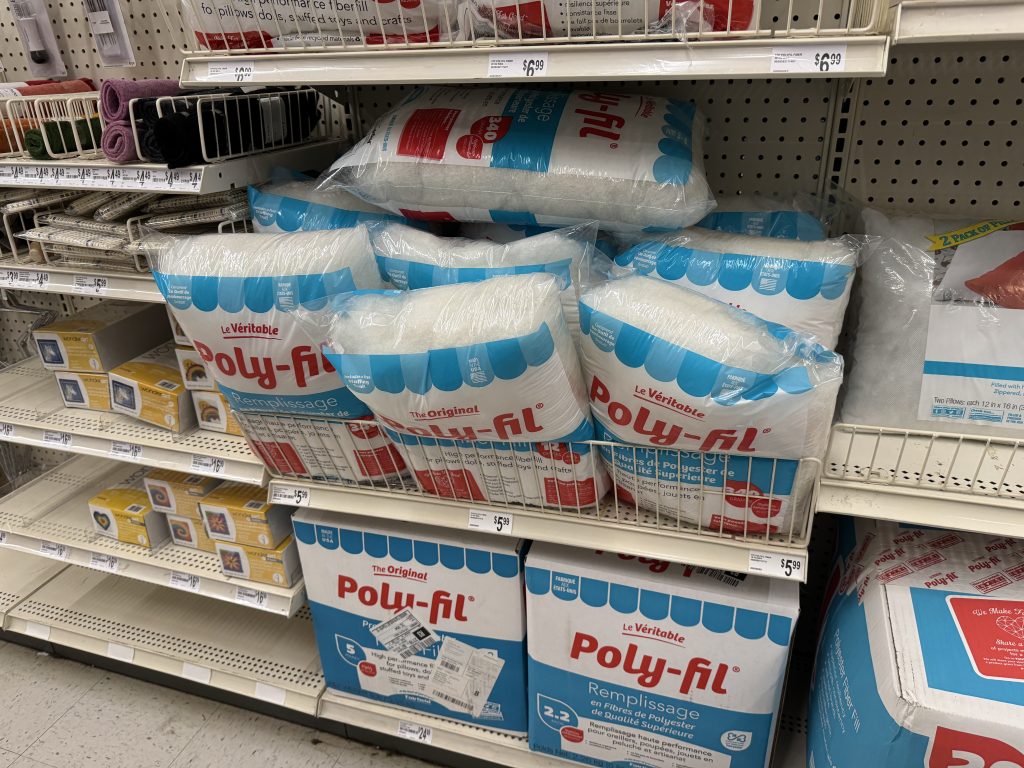
They have a small selection of batting and stuffing.
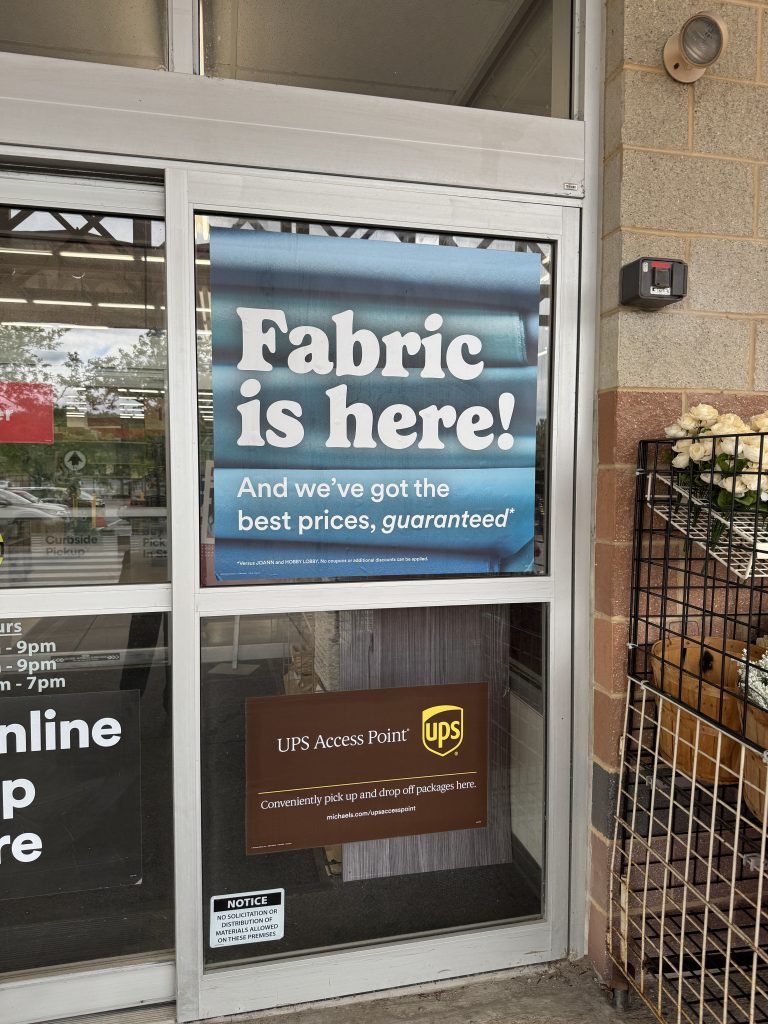
Within days of JOANN’s closing, Michaels had this sign on their State College store!
I can see, eventually, there will be more fabric choices around town. Depending on where you live, you may also have a favorite independent fabric store near you. It’s nice to know I still have choices near me, but I might have to look a little harder to find which store has what I need. Enjoy!
With more than 6 inches of rain over the last month, the garden is having a hard time getting started! We finally have a few days with some warm sunshine, so I expect everything will go crazy. Here are a few pictures to show you how things are doing today!
The dogwood trees in the front yard are finally in bloom and the blossoms are turning from an off yellow/white to a brighter white.
On the patio, I’ve pulled the first batch of radishes and replanted with new seed.
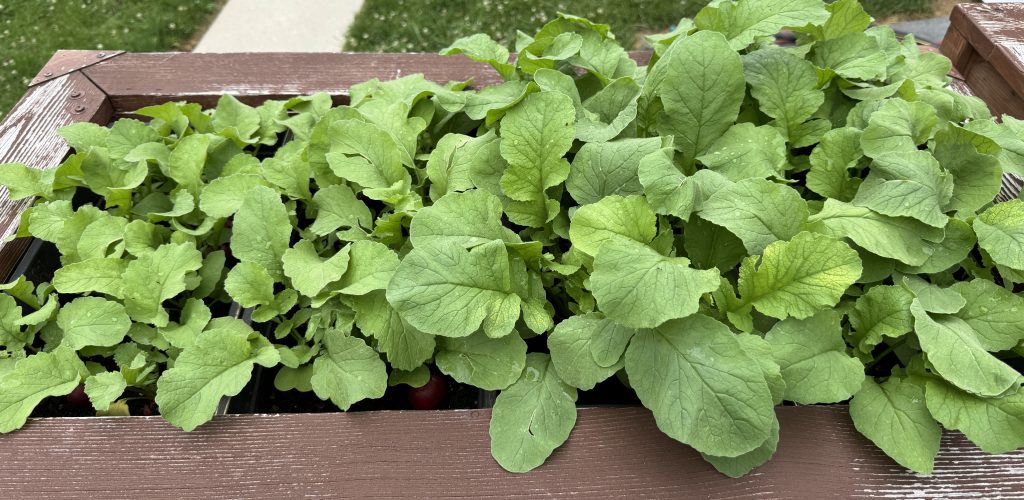
The lettuces…Little Gem and Black Seeded Simpson…are ready to be thinned (and eaten!). Yum!
Bert has been thinning the onions and eating them! Here’s how big they are now:
The cherry tomato plants are doing well, with blossoms showing their color!
Up in the garden on the hill, the established plants like lavender and echinacea are doing well.
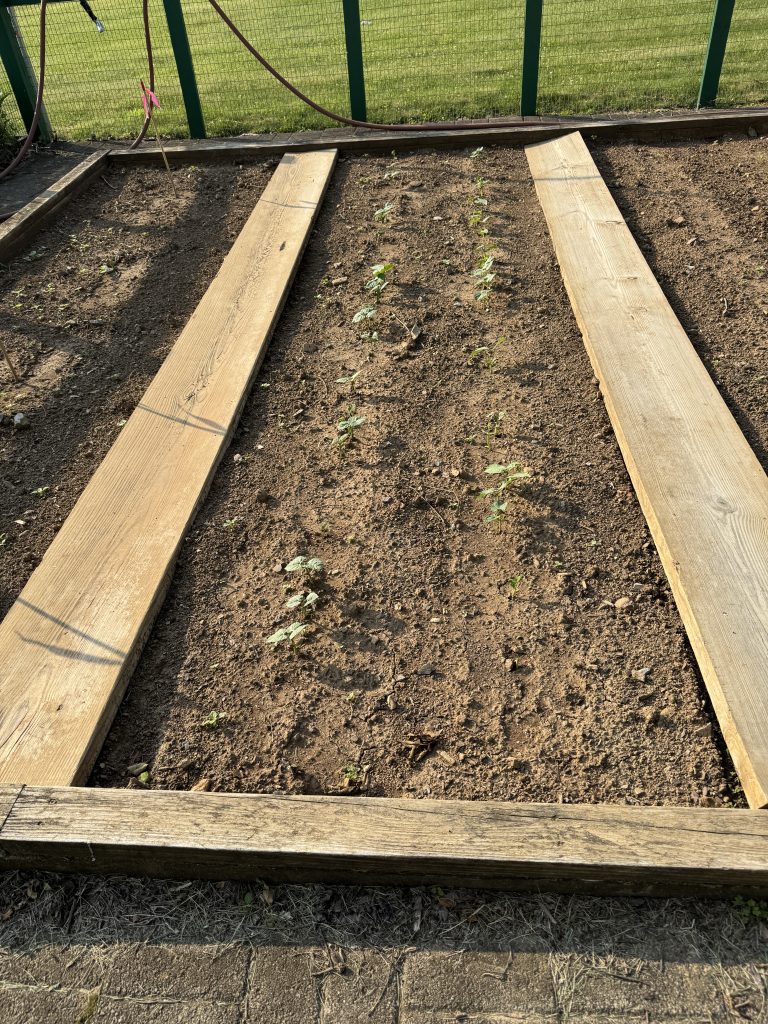
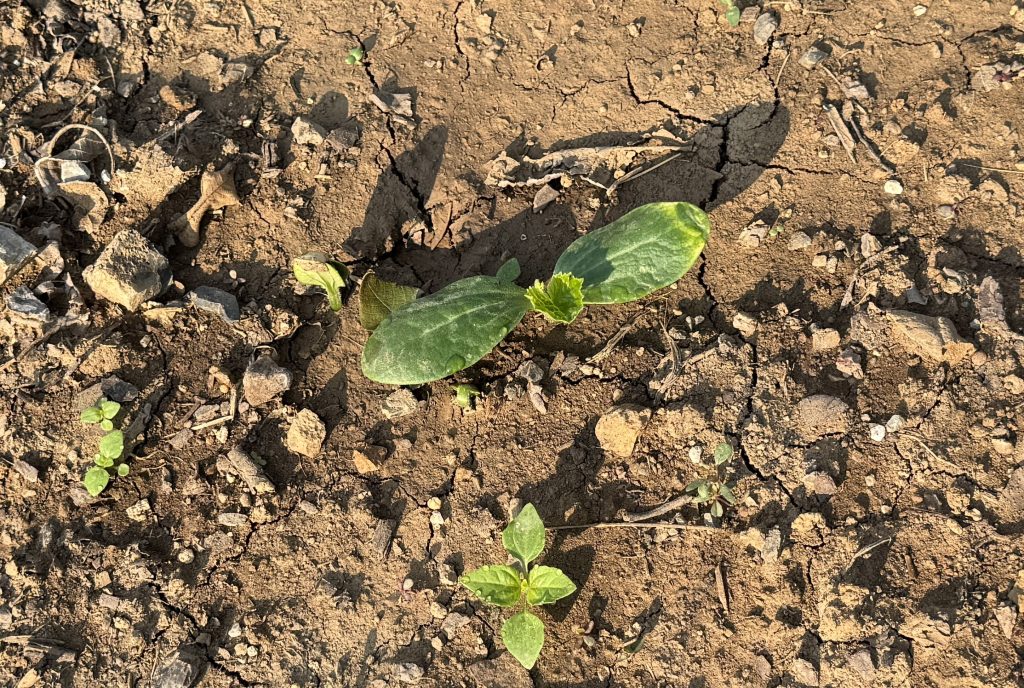
However, the seeds for carrots, beans and zucchini are barely coming up…just too much rain. I’ve had to add some bean seeds to the rows because the birds were picking them out of the ground as they tried to sprout.
So far, one tiny zucchini plant has made it out of the ground! Somehow, the weeds are doing very well!
One final group of seeds/plants I had not included before…Bert started pumpkin seeds a month or two ago and decided to plant them right beside the wood pile…no fence at all. I hope they get big quick so the rabbits don’t see it as their own salad bar!
Hopefully, with the sun finally coming out, the garden will do well. Enjoy!
If you have comments or questions, please email me directly at maryjkisner@gmail.com.
It appears the automatic spammers have found my website. What started as a few inconvenient “comments” that made no sense or were written in another language has exploded into 25 to 50 “comments” every day relating to old posts or no specific posts. Occasionally, I hear from one of you about a specific post, so I have to be careful to check the expanding list so I don’t miss your comments! From this point forward, I have turned OFF the comment feature on any future posts.
However, I do love to hear from you…it reminds that maybe someone is actually reading the posts or trying to make something similar. It is encouraging! I usually post a partial story on Facebook with a link to my website and some of you just comment there. I enjoy that also!
So…if you want to comment on anything I’ve posted, please just send me an email directly and I’ll see it right away…maryjkisner@gmail.com. Thanks!