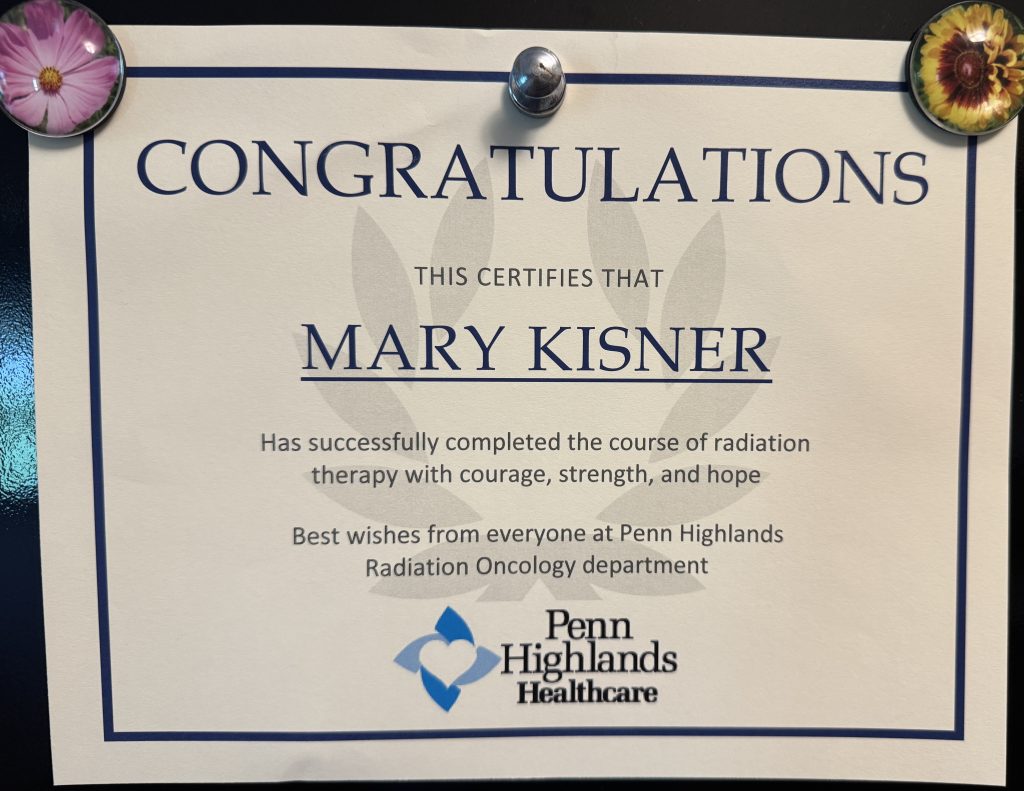
Over the last 5 months I’ve had the opportunity to consider my health in depth. I’m 78 this year and this was the year I thought I was certainly old enough maybe I didn’t need to do mammograms anymore. I’ve never had a negative screening, so of course I wouldn’t live long enough for anything to be a problem! Haha! Never say never! Of course, my yearly check up was my wake up call.
January and February was spent with multiple mammograms to study a suspicious spot on the Xrays. In March, I had a “lumpectomy.” Surgery was successful and recovery was not too bad (just don’t ask Bert about all my complaints!). In April, I started on an estrogen-blocking pill (that will continue for the next 5 years). No side effects from the pill so far. Now in May, I just completed 7 radiation treatments. I guess I’m good to go on living! The details of all this are not necessary for me to describe, but I thought some of you might like to know what’s been happening over the last 5 months. No one really needs to know all the nitty-gritty…just know that the little round stickers they use to protect all those permanent ink marks they made on my body to line up for radiation were the most painful part of the radiation treatment! Must be the old, thin skin in a sensitive area that was the problem! Now that they have been removed, I can start healing!
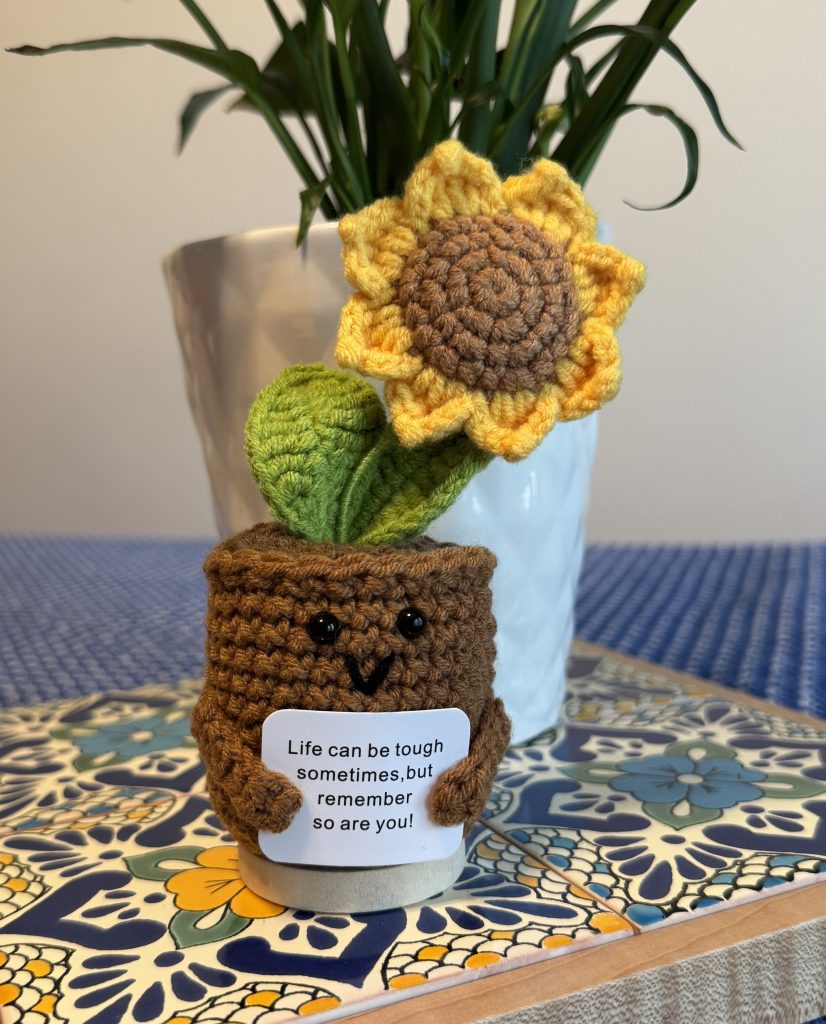
Much of the last 5 months has been “hurry up and wait.” While I was waiting, I tried to stay busy and if you’ve been following along you’ve seen my activities with various projects. Making/baking things has filled my time around all the appointments. Many of you have blessed me with flowers, cards and sweet calls. Thank you so much! Just as radiation treatments started, I got a mystery box in the mail from my niece…my very own Emotional Support Sunflower! Really made me laugh!
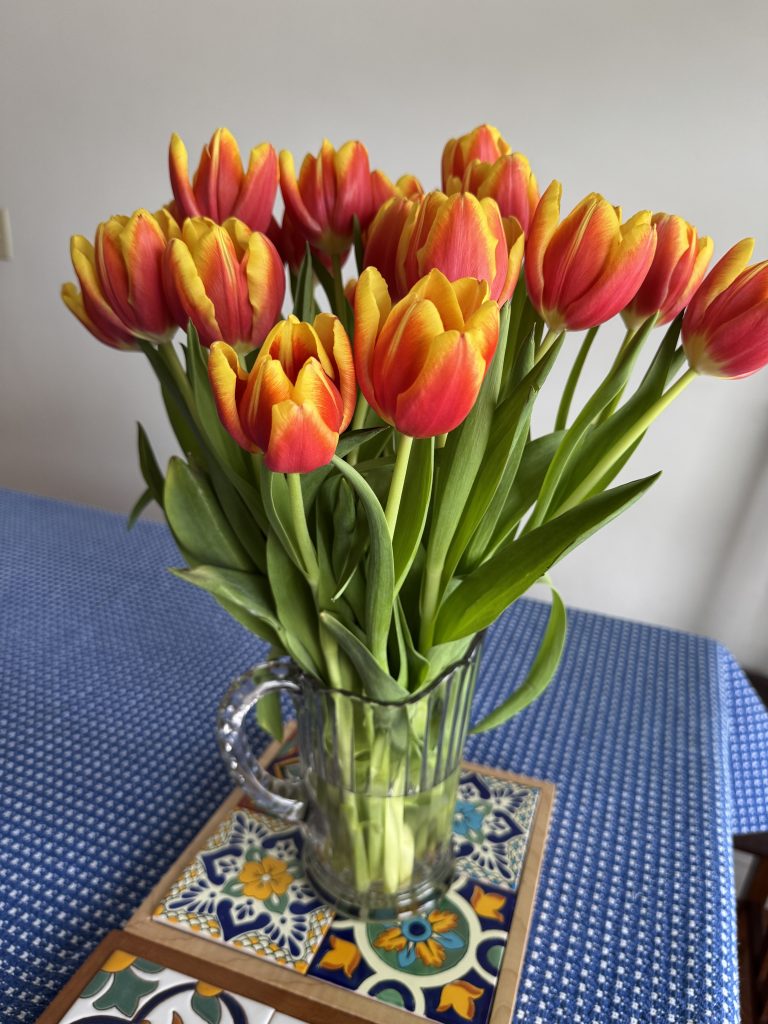
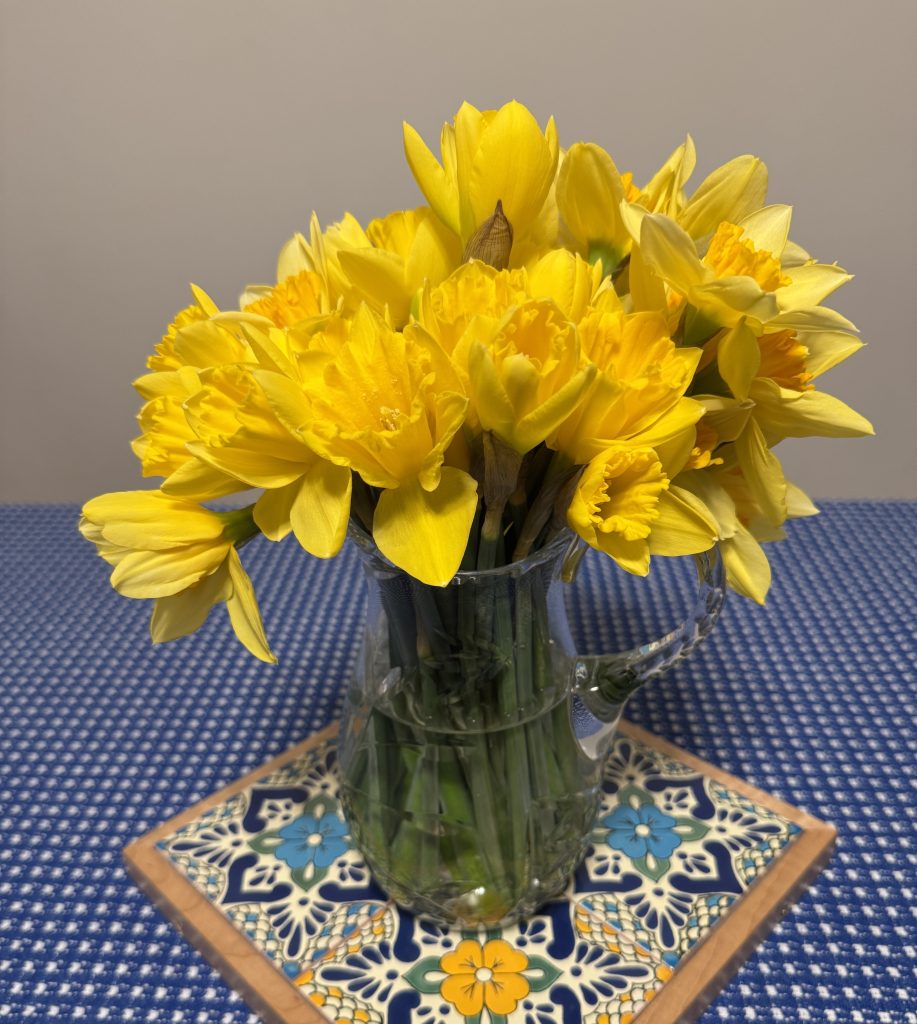
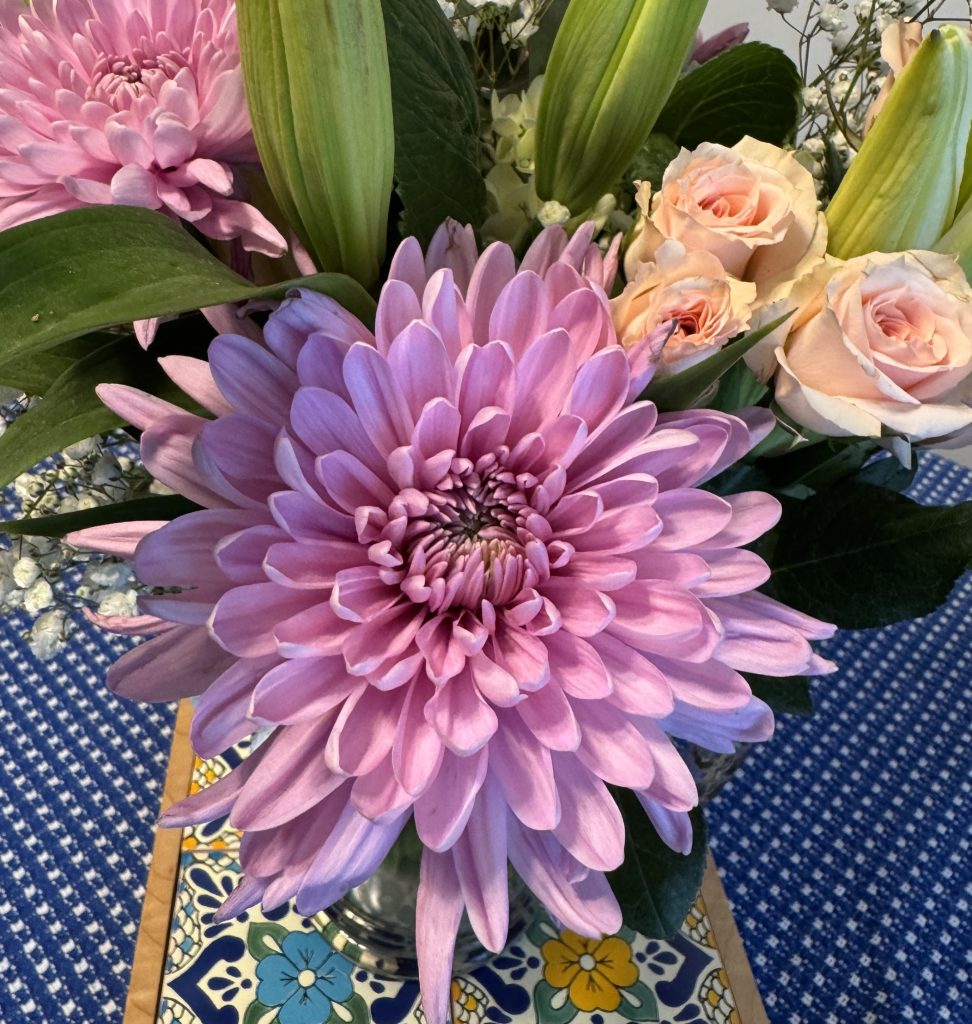
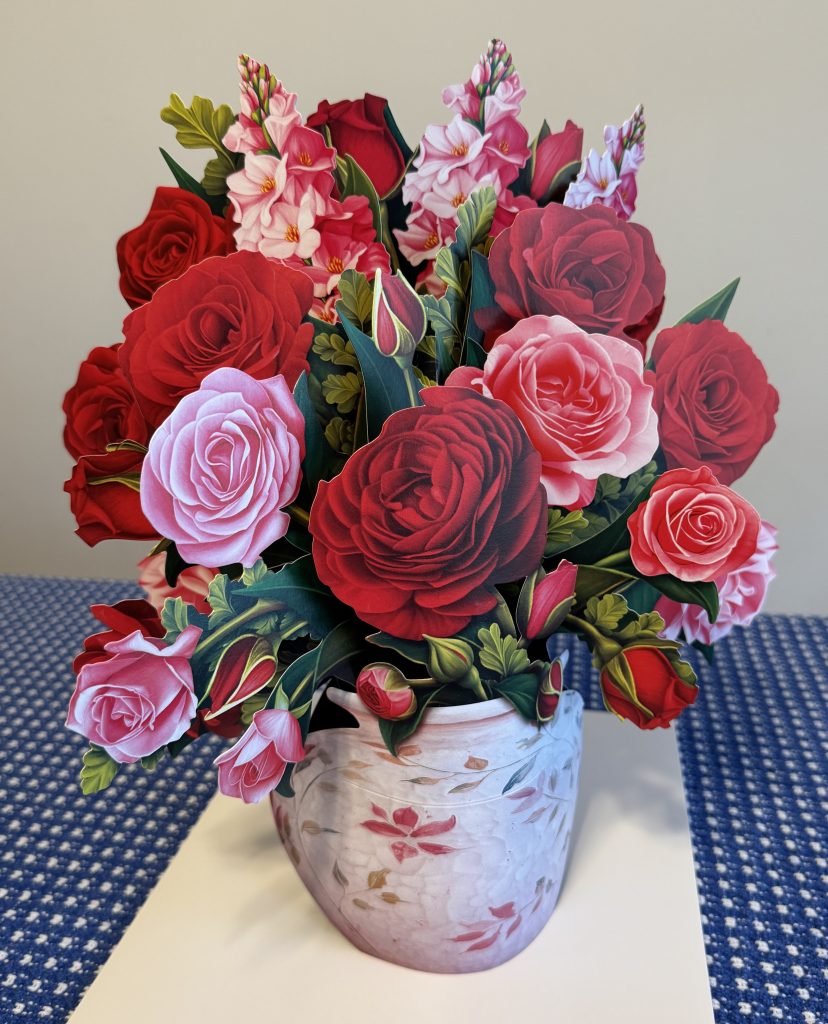
Along the way I had flower surprises from many friends…even a pop-up card of flowers that looked almost like the real thing! My thanks go out to all of you that were thinking of me. I discovered a lot of my friends have gone through similar health issues, so if you are a woman…or have a mother, wife, sisters or daughters in your life, I encourage all of them to continue routine screening for health issues!
Here are some of the lovely flowers I’ve enjoyed these last few months. Thanks to all!
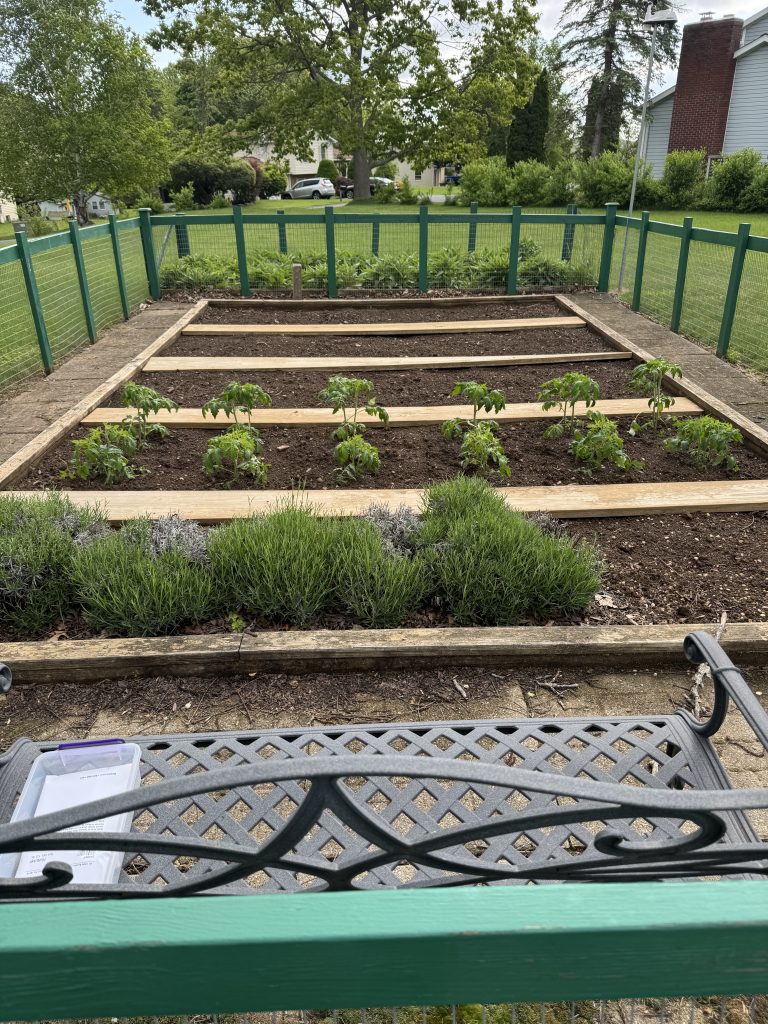
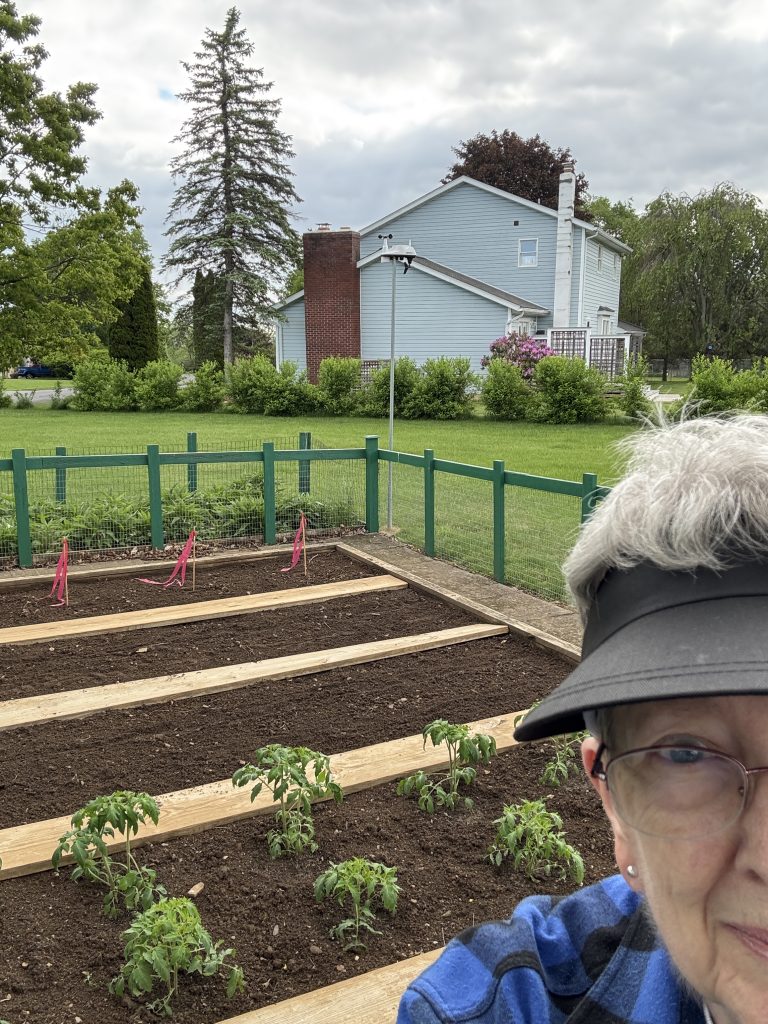
The garden is all planted. Yay! I’ll try to show you the pictures in the same general order each time so you can compare from one post to the next.
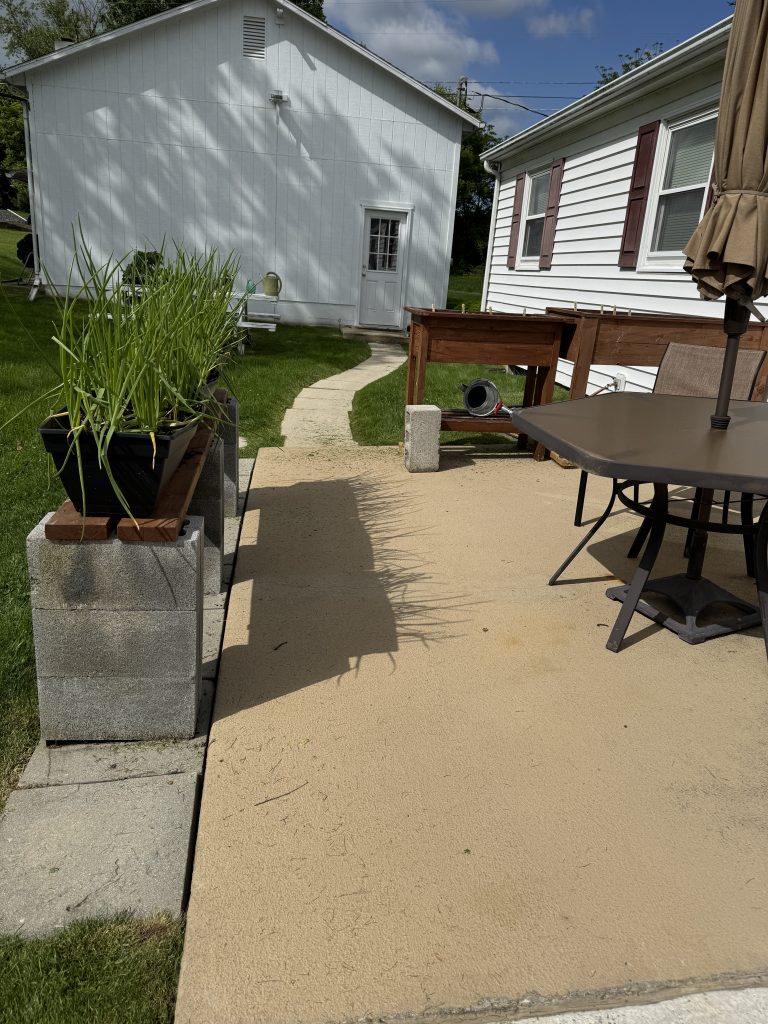
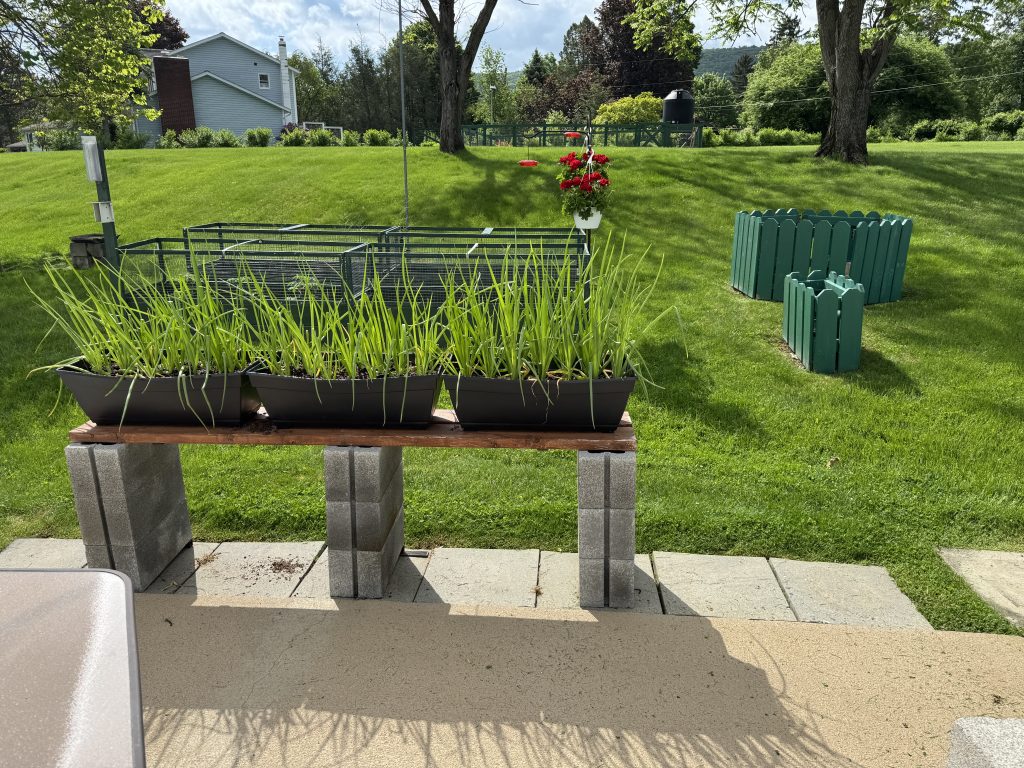
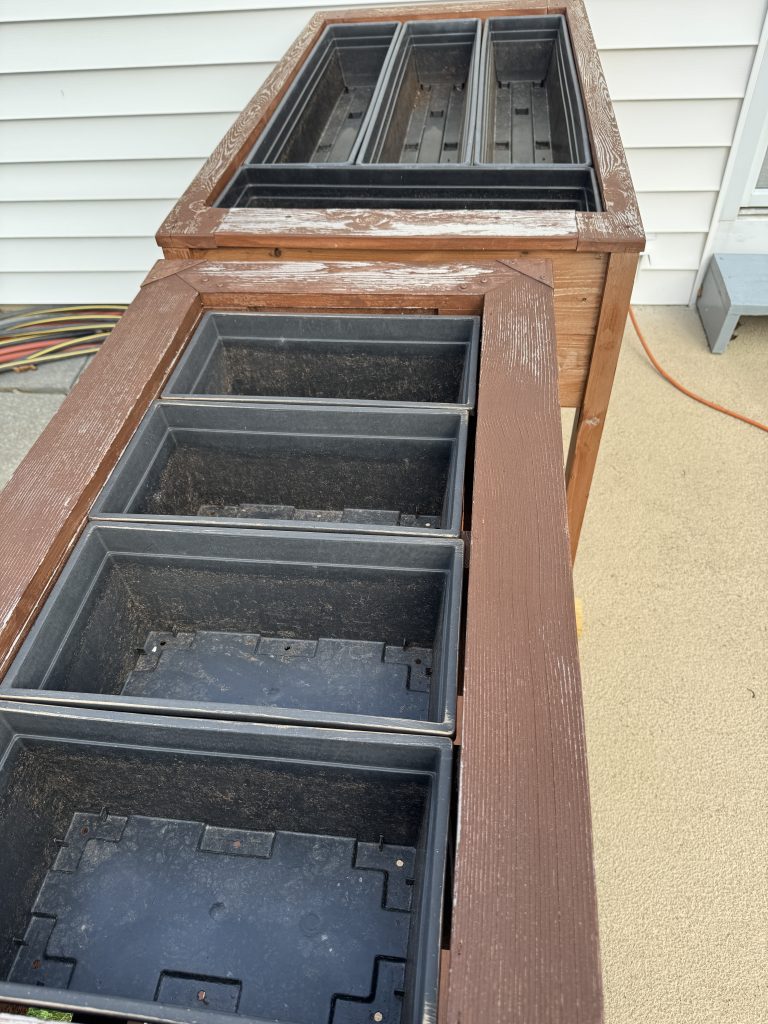
First, the planters on the patio are arranged like this:
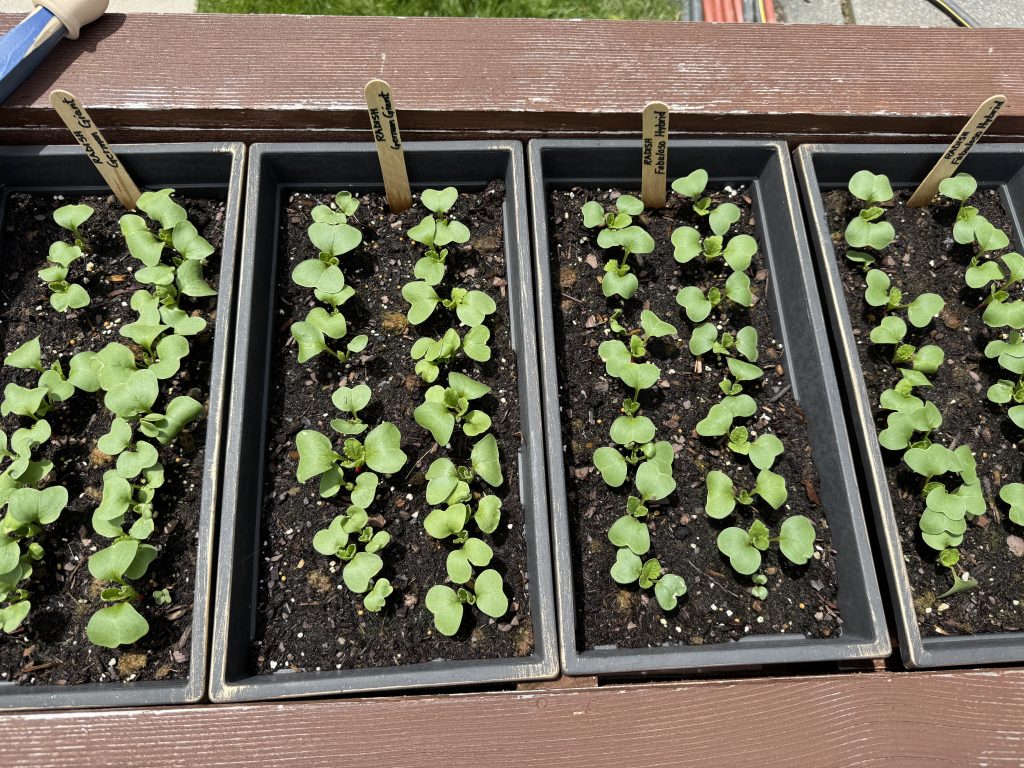
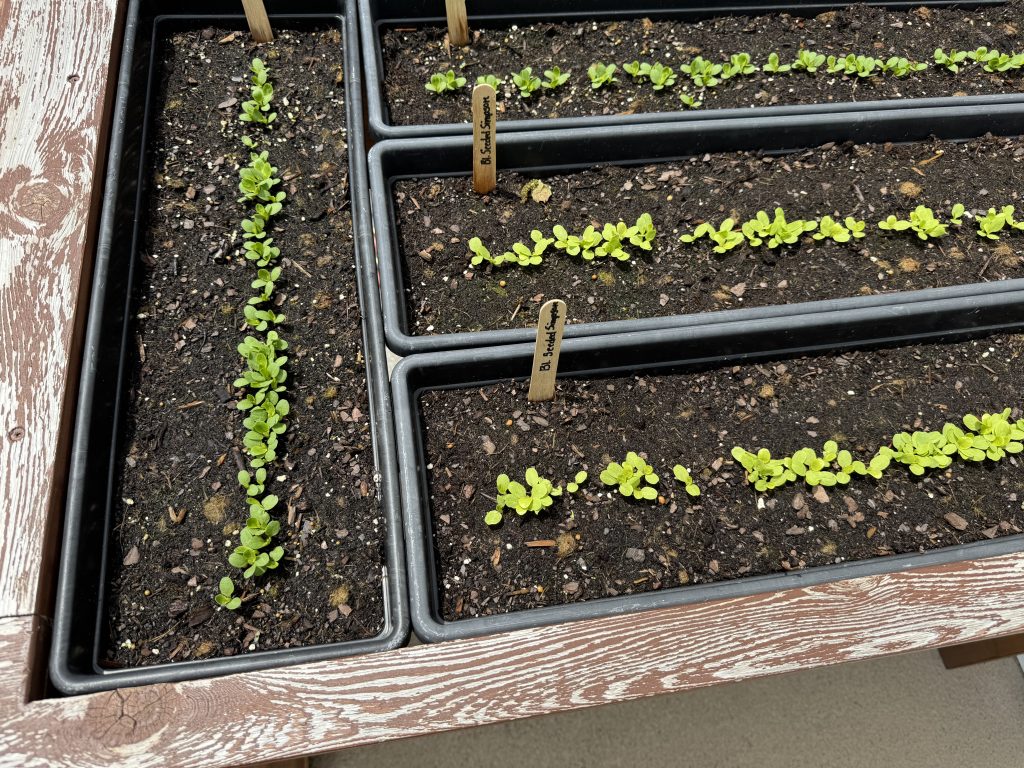
Radishes:
Two kinds of lettuce:
…and the onions:
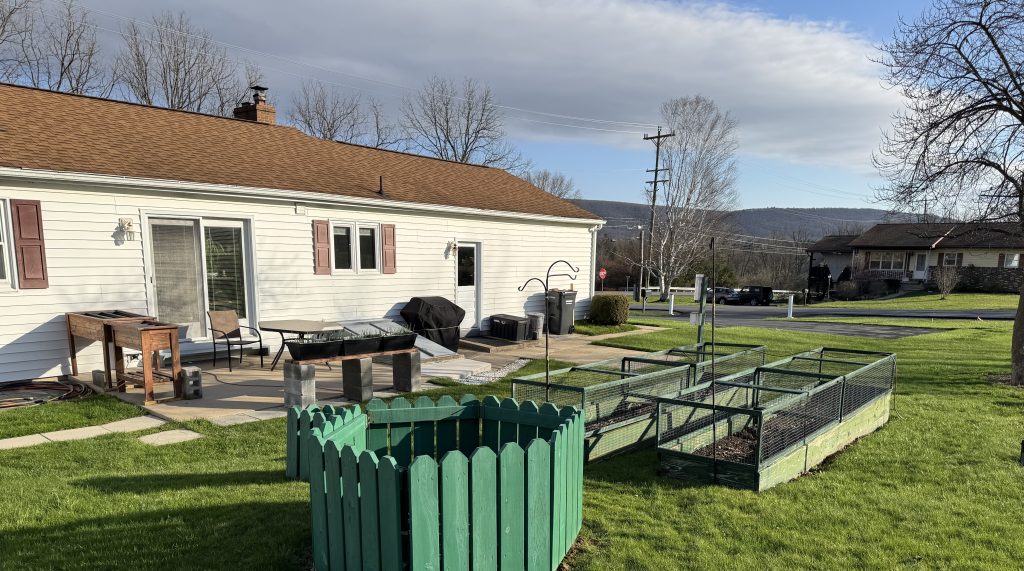
You can see the fenced garden beds just off the patio and garden on the hill from here. Here’s a close-up of the garden on the hill:
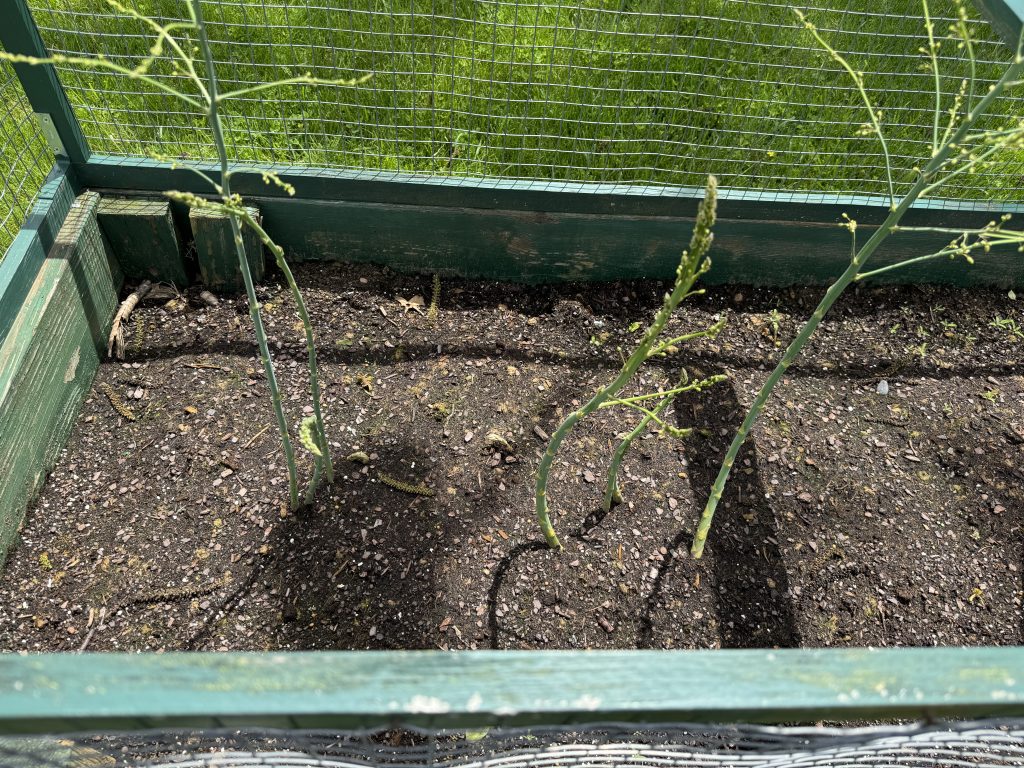
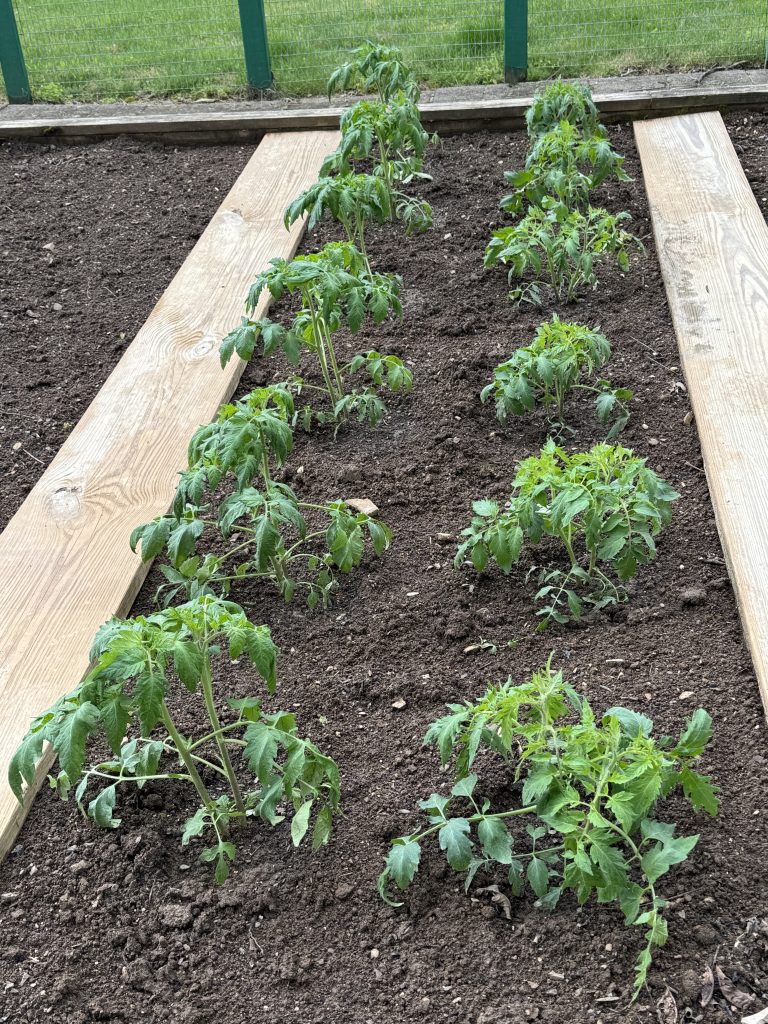
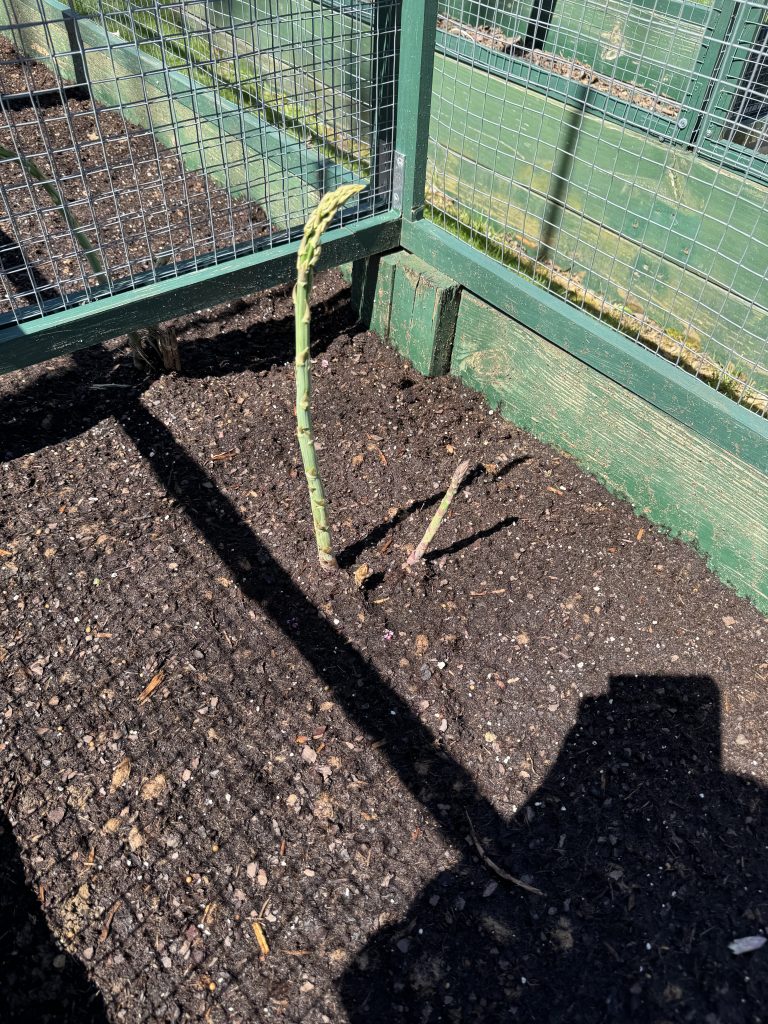
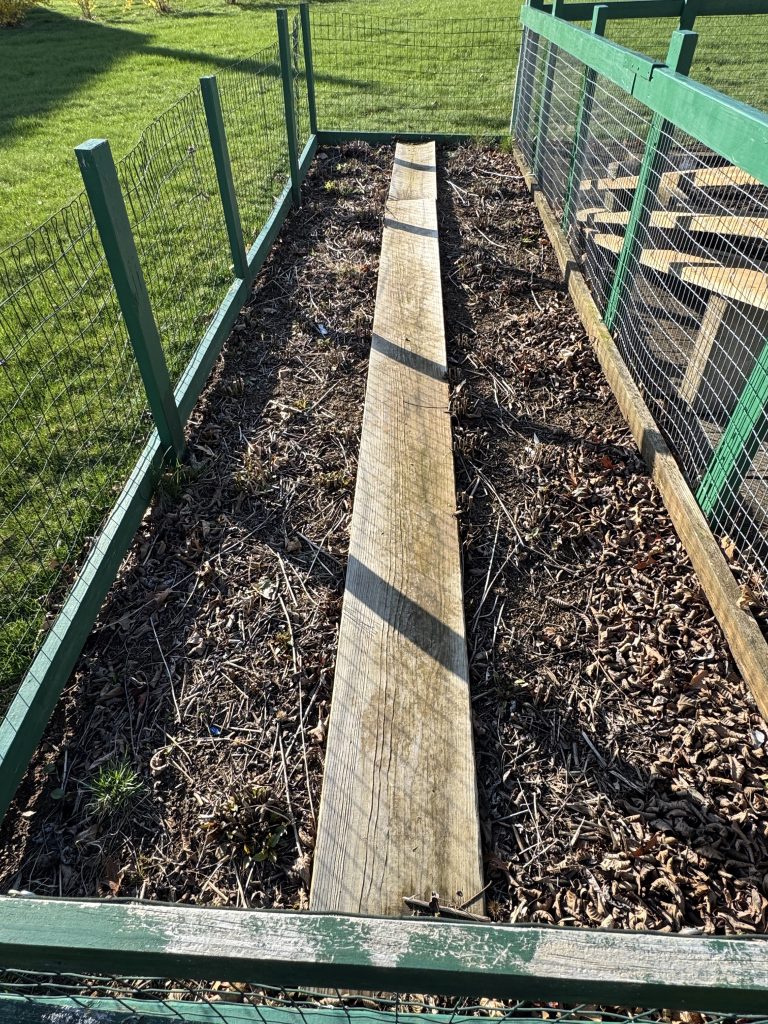
OK…back to the fenced beds just off the patio. The asparagus crowns we transplanted in the far bed are growing…we won’t cut them until next year, but it will probably do best in another year.
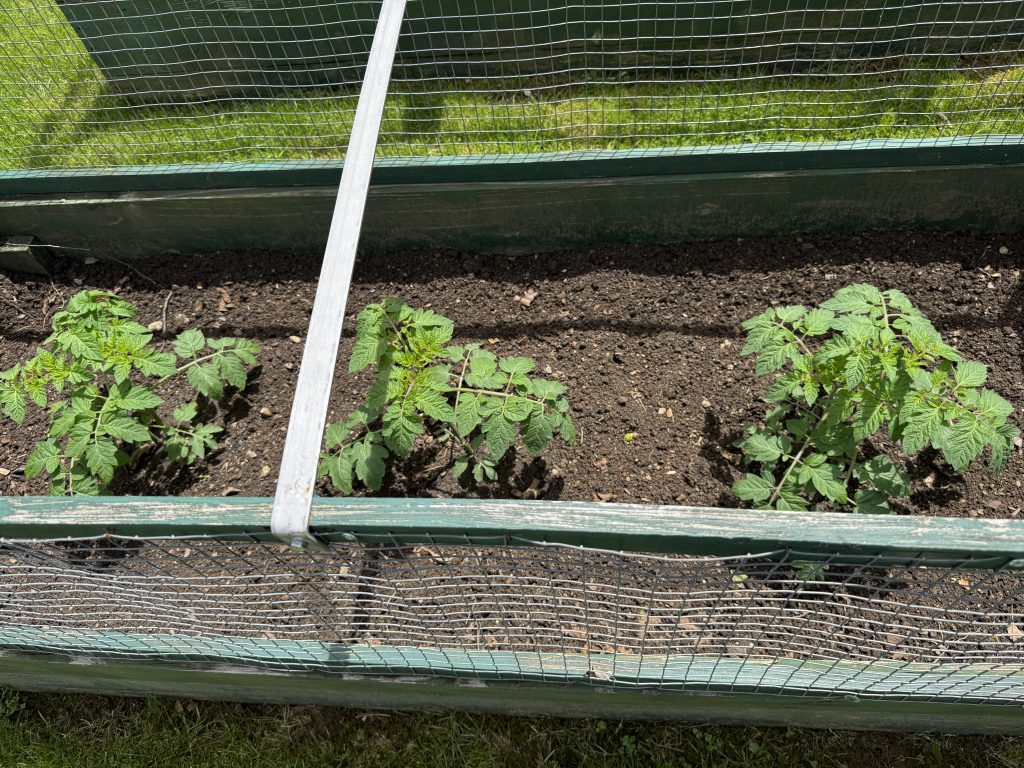
In the front bed, we planted our small tomatoes, called Raindrops. If they are as prolific as our cherry tomatoes last year, the neighbors may find bags of tomatoes on their front porches! We’re leaving the right bay of this bed empty for now. We might plant some flowers just for color!
The garden up on the hill looks good so far. My job this morning was to plant the last three sections with carrots, beans and zucchini.
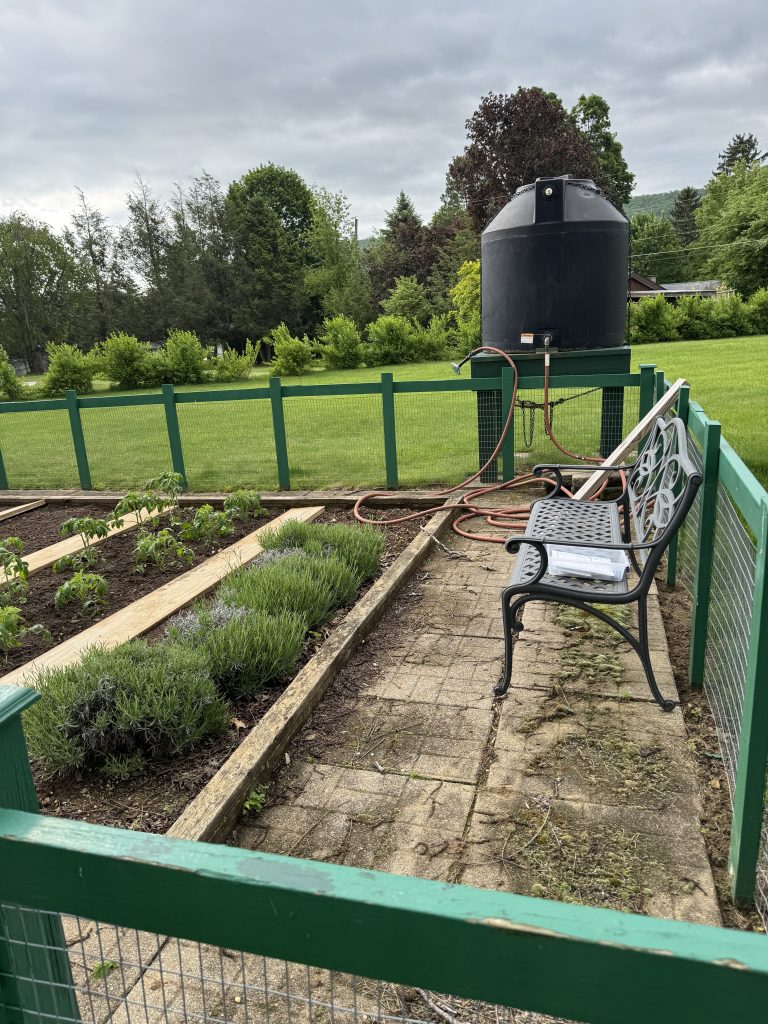
The lavender is turning green. The rainwater tank is almost full and the rain barrels will top it off this weekend.
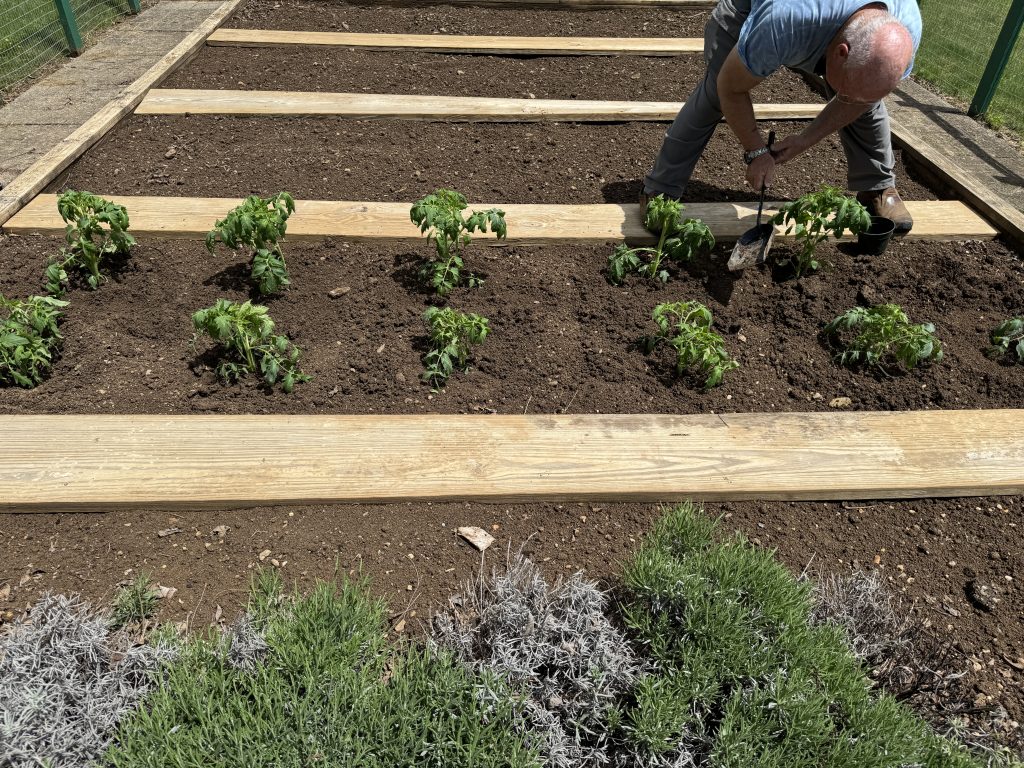
Bert planted the tomatoes yesterday! Proof…Bert does most of the heavy lifting in the garden.
The 6 plants on the right are the SuperSauce tomatoes from Burpee. The 6 plants on the left are called “Bodacious” and they are big and meaty!
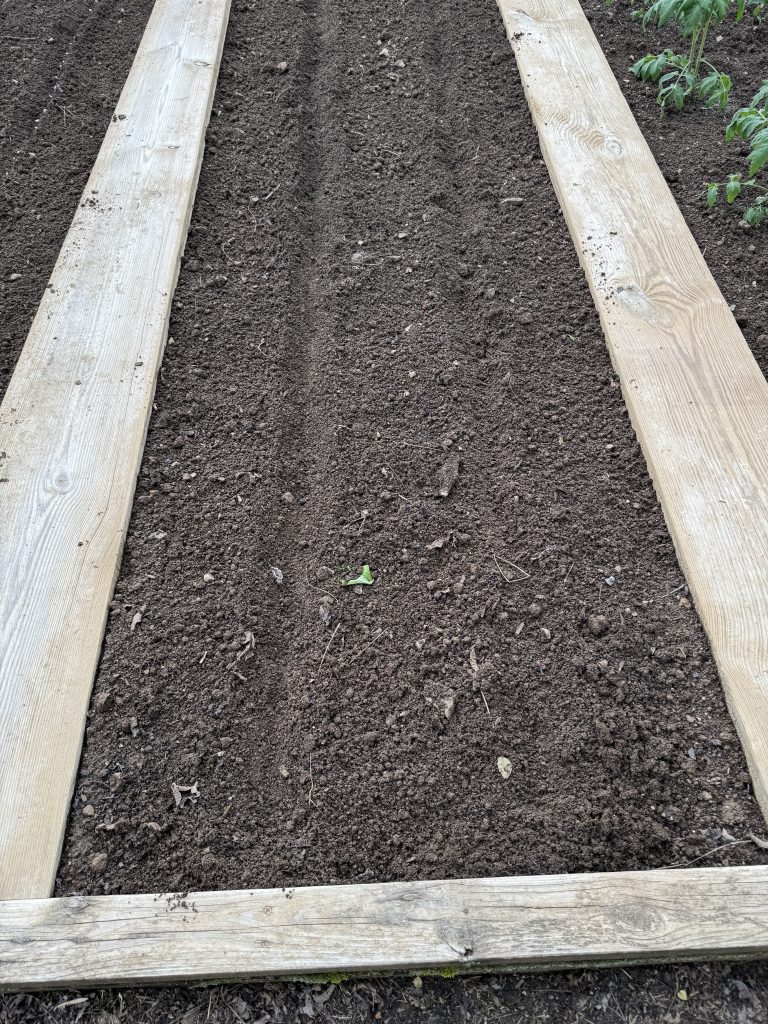
The next section is planted with carrots. We have found the YaYa variety does well for us. Nothing to see yet!
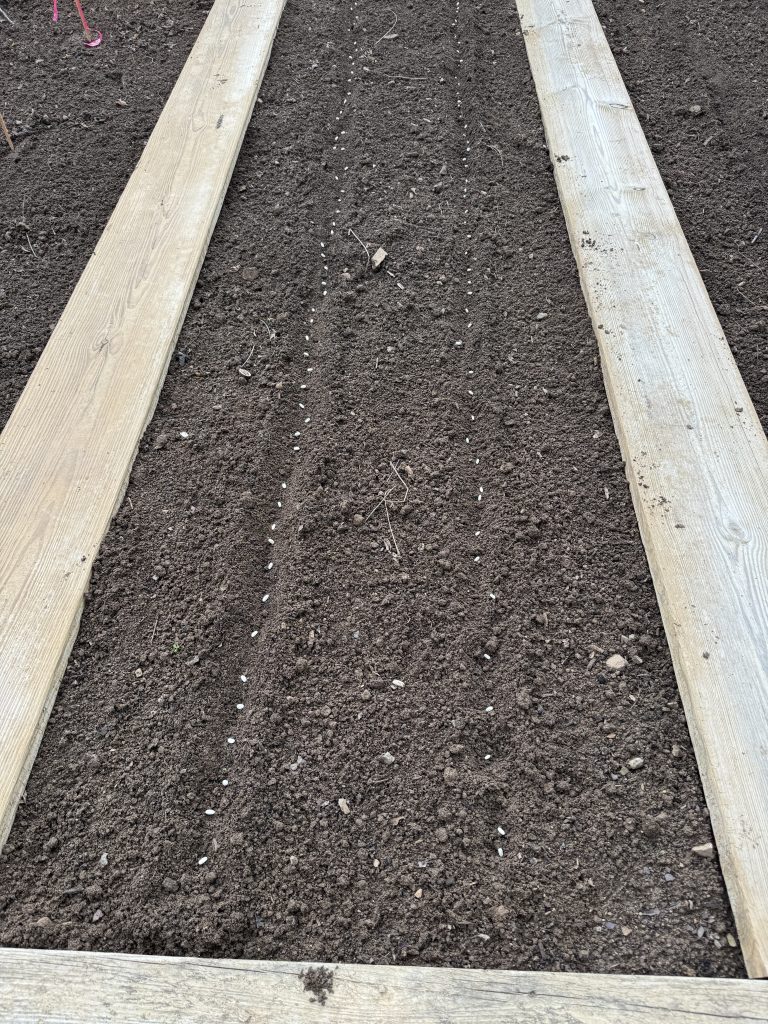
The next section has green and yellow beans…yellow on the right.
And in the last section, 4 hills of zucchini. I know, we must be nuts to plant so much but last year we put a few plants in the beds where the asparagus is now. They just didn’t do well…and I spent all that energy last year anticipating a bumper crop so I was ready with many recipes to try. This year I’m really ready!
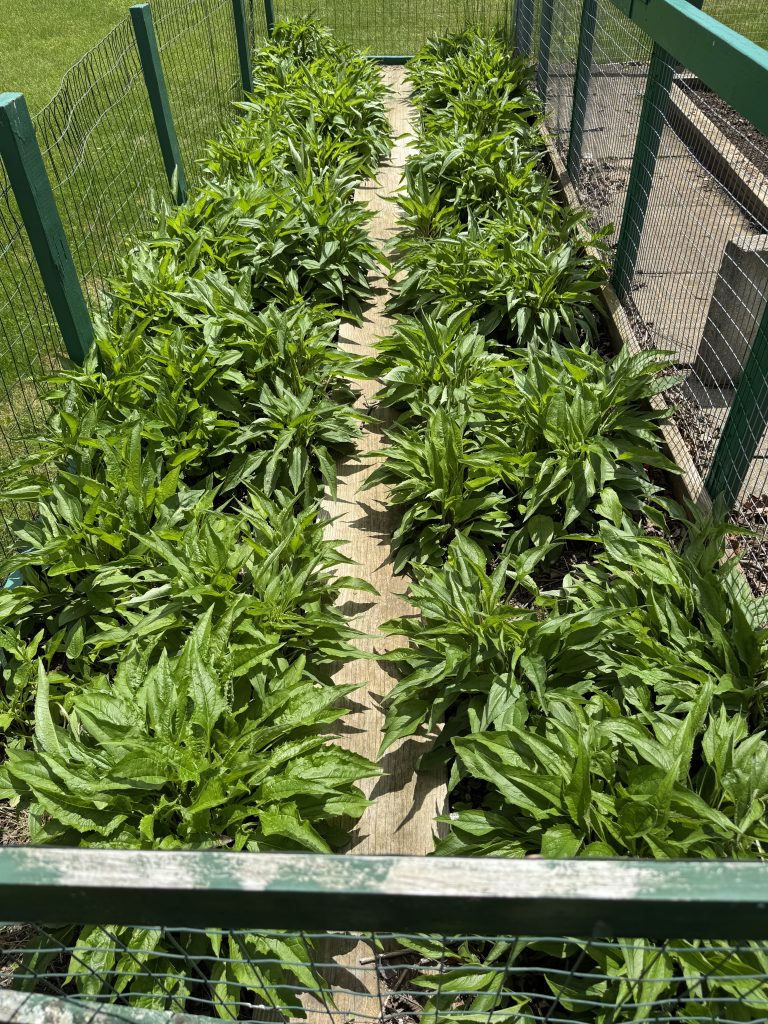
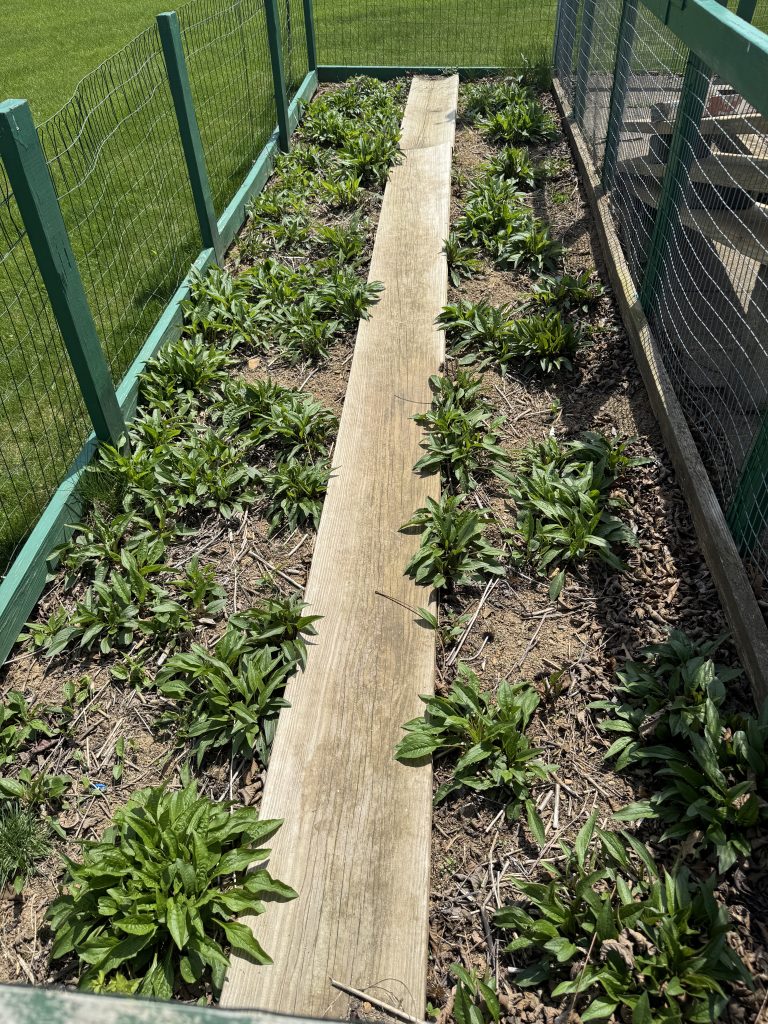
And, finally, my beloved Echinacea bed! I hope the bees are happy this year! I can hardly wait for the color!
So, that’s our garden this year. Each year we modify the choices of seeds, depending on how well it worked out the year before. Some things that we use only a little, like garlic…we buy from the local farmer’s markets. Other produce that I need a whole lot all at one time…I buy from the local Amish market because they usually have a lot at one time…like cucumbers when I make relish.
For the first time I tried to take a selfie up in the garden. My phone case with a cover makes it hard to handle with one hand. However, here’s proof that I actually planted some seeds in the garden today, although I’ll credit Bert with doing all the heavy lifting! Enjoy!
I recently used my Facebook Cover Photo to share my memory of two special dogs…my grandpuppy Otis and his buddy Max. Max belonged to my daughter’s mother-in-law and Otis and Max spent a lot of time together. Otis was just a puppy when Kathy and Steve were first married and I had the privilege of driving to their house on the other side of town to let him out during the day. He was exuberant and playful…often running off when it was time to come inside. He became a loving friend when I was thinking about quitting my job at the time…his hugs were so special! I would stop at McDonalds on my way to let him out and of course I’d share a few chicken nuggets with him. He seemed willing to come inside more quickly. I guess I didn’t hurt his health too much…he lived over 16 years!
“Yes…I’m thinking about you Otis!”
When Kathy and Steve moved closer to Pittsburgh and his mother, Max became a frequent companion for the whole family. Unfortunately, Max was older than Otis and passed away first.
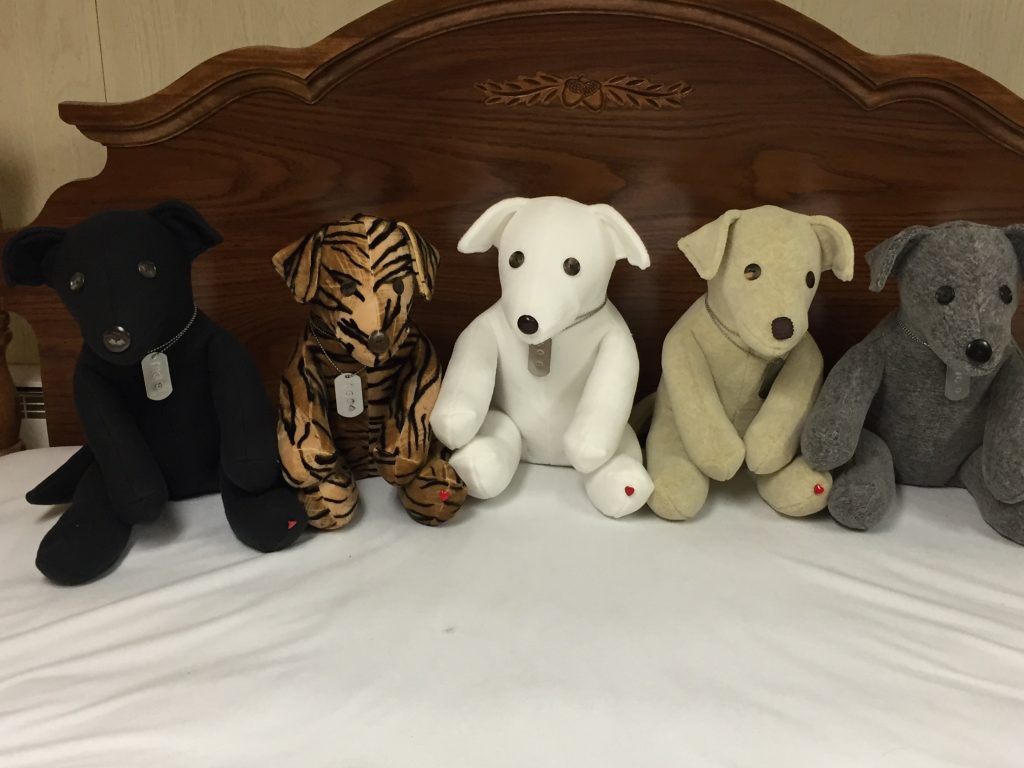
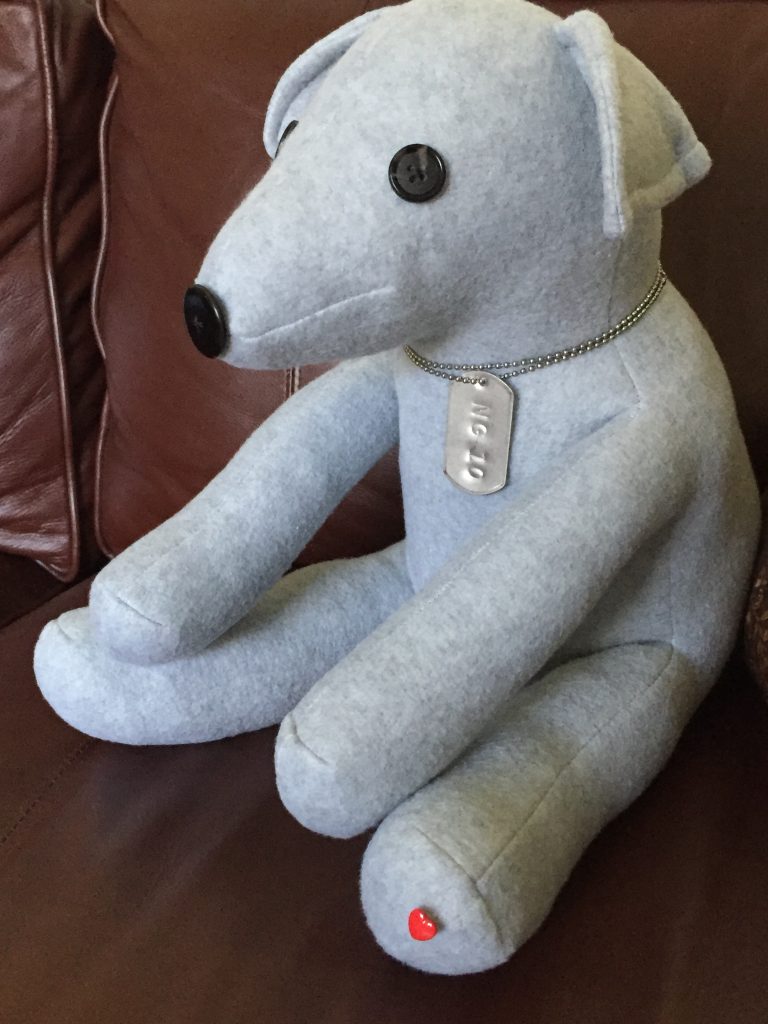
At the time, I was making stuffed dogs for Nittany Greyhounds and trying to alter the pattern to get the greyhound nose shaped just right. Here are a few of the stuffed greyhound dogs I made at the time:
Making the nose longer and the ears shaped differently helped it look more like the greyhounds.
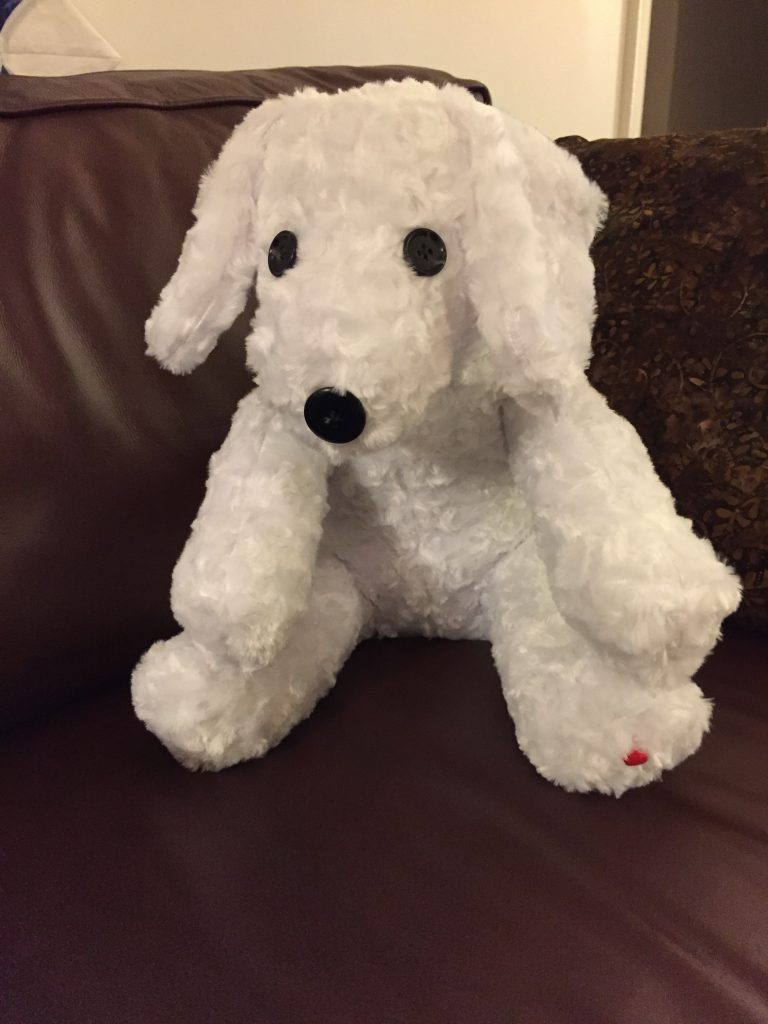
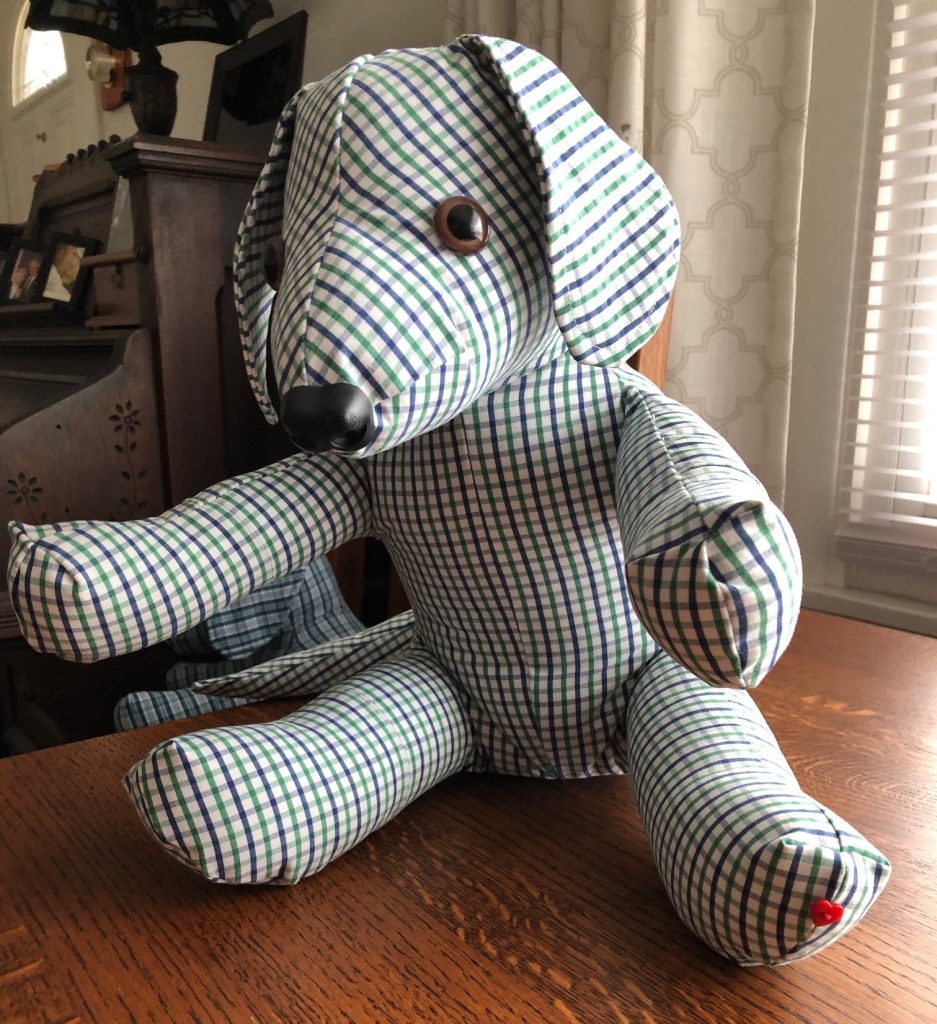
When Max passed away, I wanted to make a memory dog for all of us. I modified the pattern so the ears would be closer to a regular dog shape. Compare the shape of the stuffed Max with his photo above:
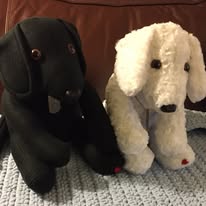
I made three of these…one for Kathy’s family, one for her mother-in-law and one for me. Max had meant a lot to us all.
Shortly after that, before Otis passed away, I made black stuffed dogs for all of us. It wasn’t exactly a “memory dog” but a few years later it was perfect. I put away my “Max” and “Otis” at that time, but I think of them frequently.
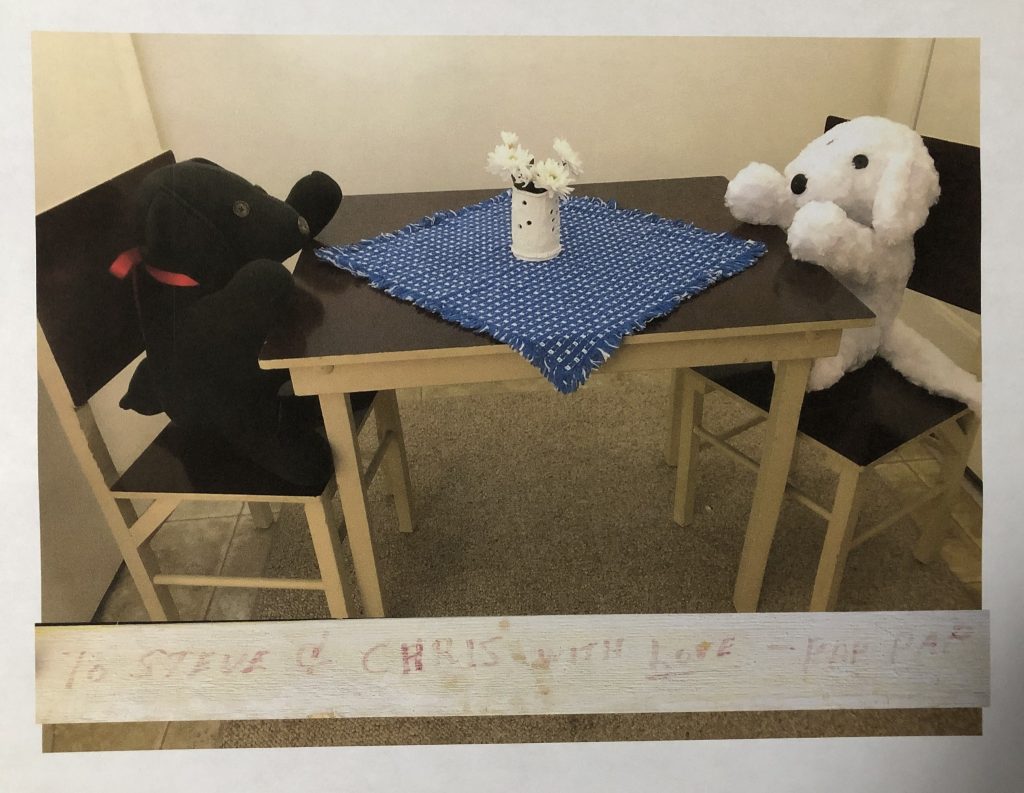
Two years ago, Kathy’s mother-in-law was cleaning out stuff for a yard sale and wanted to let go of a small child-size table and chairs. Before I put it out for sale, I arranged the two dogs at the table like they were having a tea party. Such fun! You can read about that story here: https://marykisner.com/preserving-a-memory-of-a-childs-table-and-chairs/
I had the photo enlarged and framed for Kathy’s mother-in-law. A great way to preserve the memory without having to keep the table and chairs!
I’ve also used the pattern for the regular-shaped dog to make a memory dog for another family. Using a standard cotton shirt instead of fleece made a whole new challenge. You can read about that here:
So that’s the story behind the picture of the stuffed dogs on Facebook! There are many ways to preserve a memory…sometimes just photos will work. In my case, I seem to enjoy making memories that are soft and huggable! Enjoy!
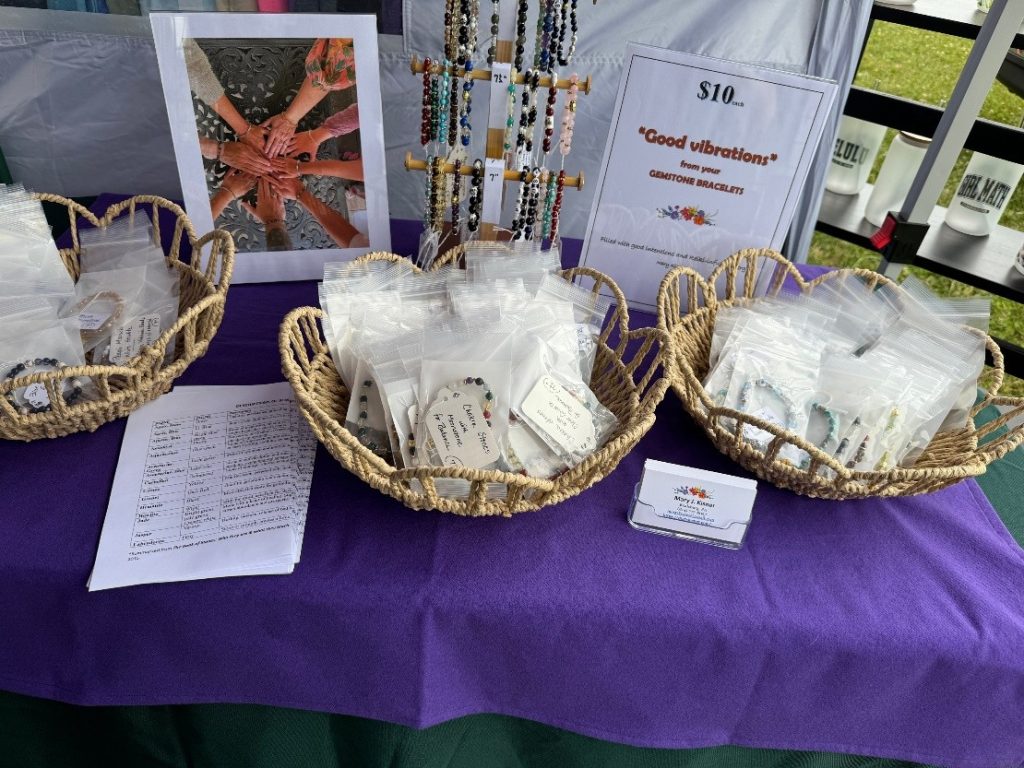
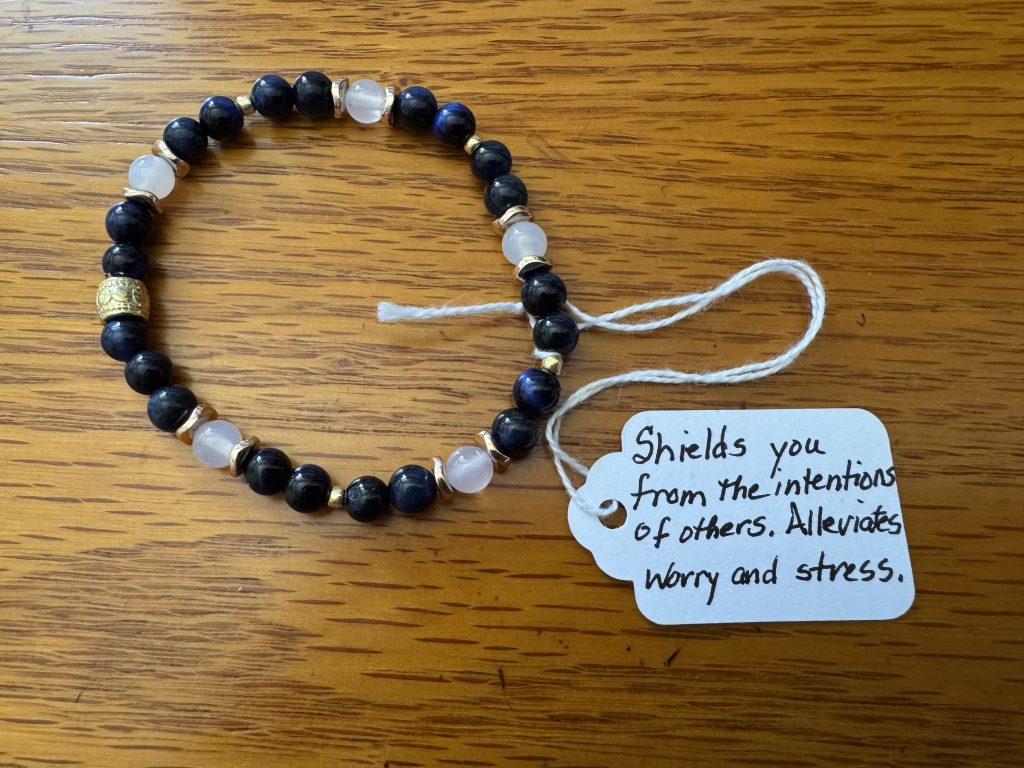
Over the last year and a half, I have spent a lot of time and money to learn about, design and make gemstone bead bracelets. This hobby was perfect to satisfy my need to learn something new and provided the motivation to work toward a goal of selling the bracelets at a mid-summer arts festival. This festival was held in mid-July at Way’s Fruit Farm outside of State College. Last year I was able to make and sell $60 bracelets for $10 each. I also came home with a healthy respect for all the vendors who attend multiple festivals and fairs during the year. Sitting, standing and interacting with hundreds of people during three hot days last July was quite a challenge for me! I’m already thinking about which shirt and hat I can wear this year to protect me from the sun!
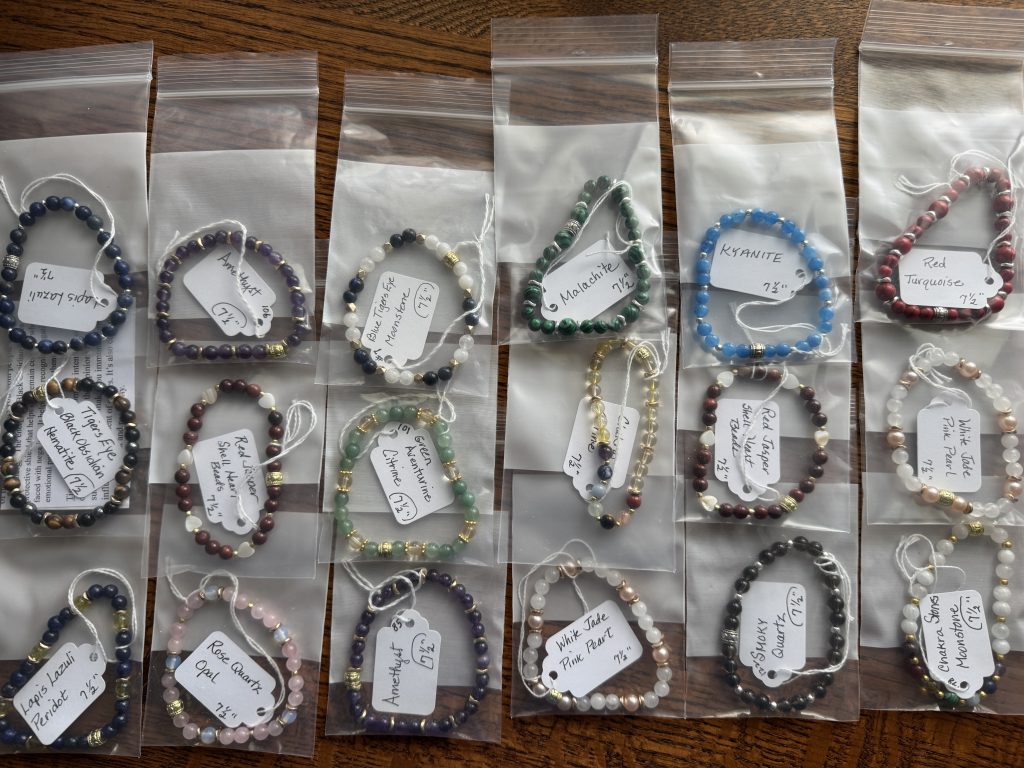
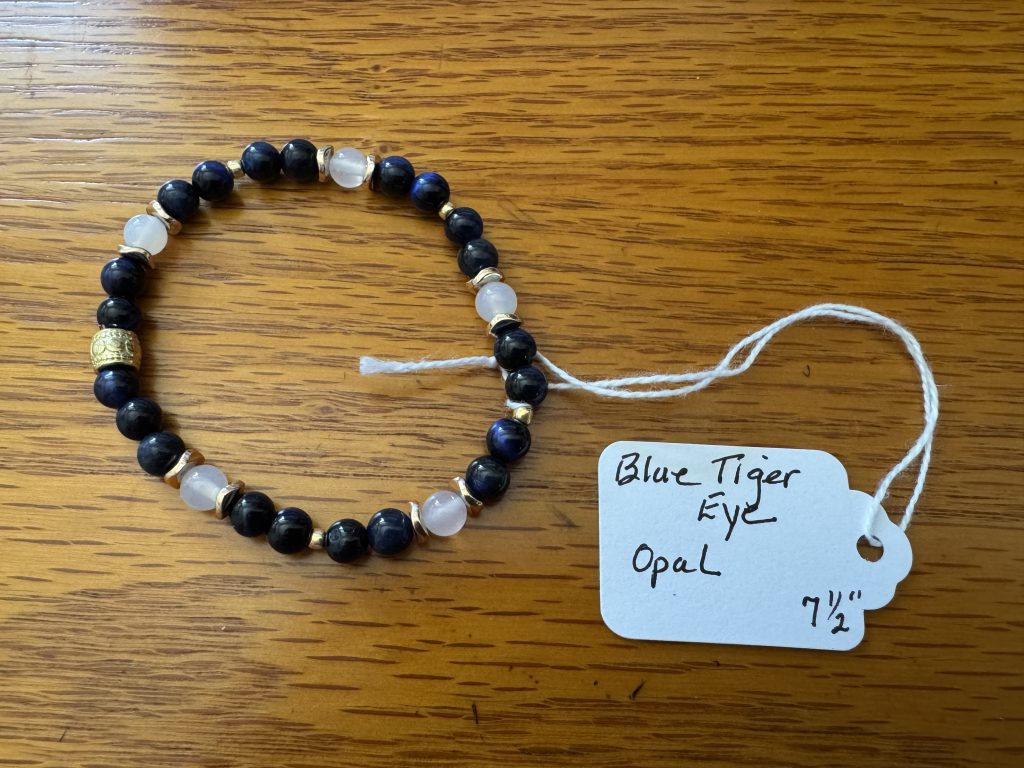
This year so far, I have about 130 bracelets in three sizes ready for sale. Each bracelet has a tag that identifies the stones in the bracelet and a brief phrase that describes the stone and how it could be used.
Additions for This Year
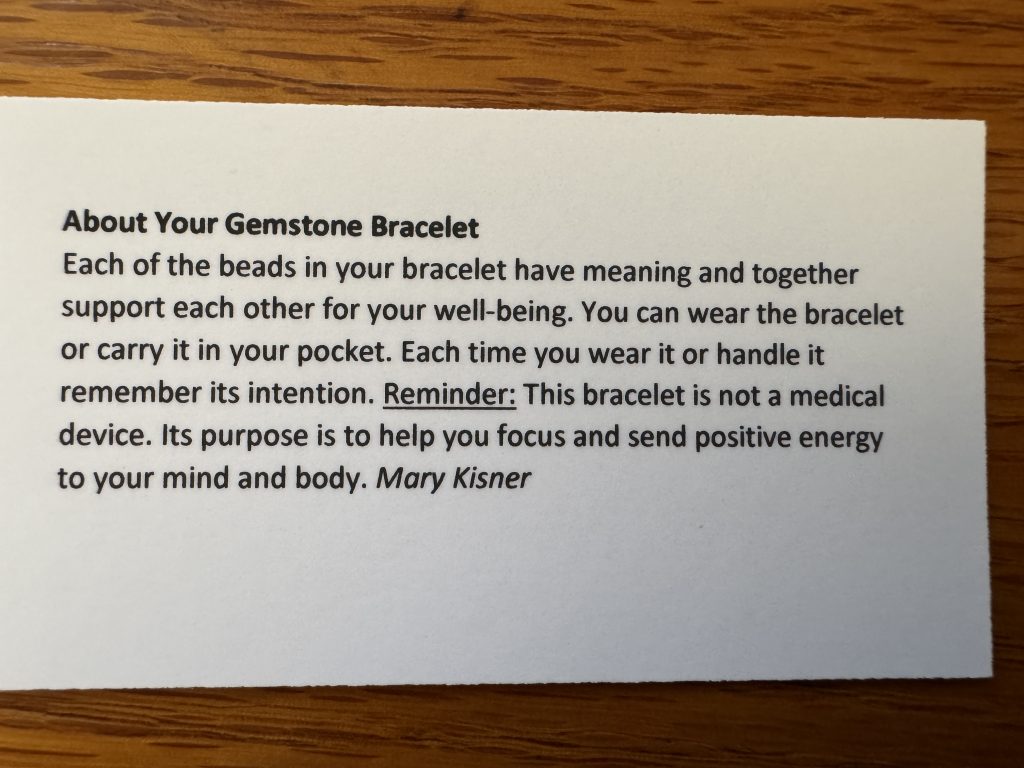
This year I’ve been learning more about how the various gemstones are used to help folks with specific health issues. I am aware that wearing a bracelet is not a medical device! I’m certainly not promising that certain stones can help ease medical symptoms. I see them as serving a purpose like the native American dream catchers. If they ease a person’s mind by wearing, holding or having a stone nearby, why not! And most of the stones/beads I use are pretty too!
I decided to add a statement to the back of my business cards that will be available with each purchase:
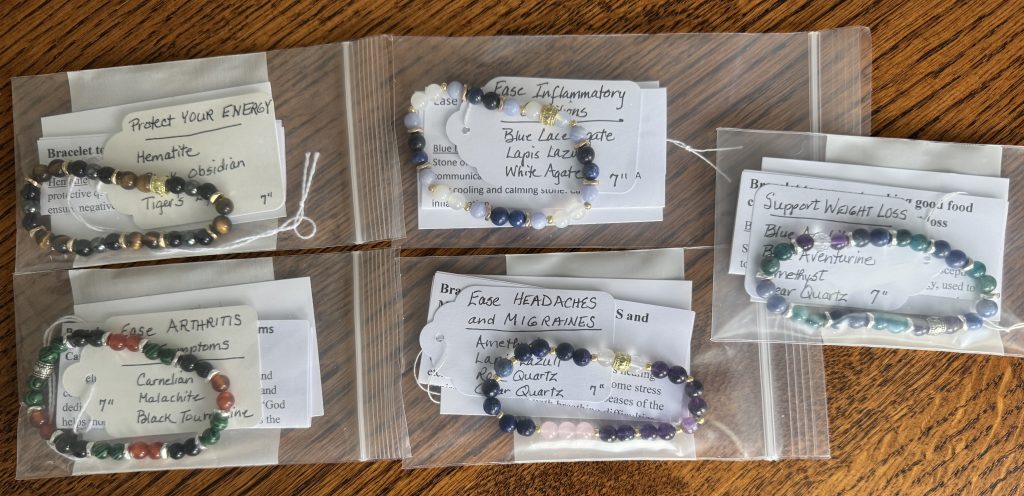
So, my next focus for research was how the stones I use have been used in history for various ailments. I did a search on “Best crystals for…” and typed in the ailment. Many different stones are recommended and described why they could help…of course if you believe they will help ease your worry about something, they might help! I now have a new way to design bracelets.
I’m now putting together bracelets that have a specific intention, not necessarily by color. That makes some interesting combinations! I have bracelets that could ease arthritis symptoms, ease inflammatory combinations and support better food choices which might help with weight loss. I’m hoping to offer a few of them at the Festival this summer just to see if folks might be interested.
I do not plan to sell these bracelets through this website…ever. You can come to the festival (Art in the Orchard July 11-13, 2025 at Way’s Fruit Farm near Stormstown, PA). If you have questions about the bracelets, please email me directly instead of leaving a comment on my blog…I now get over 100 spam comments a day from automatic servers. It takes me time to make sure I don’t miss a real comment. Use email…it’s quicker! maryjkisner@gmail.com
If you’d like to read about how I started this hobby last year, please see:
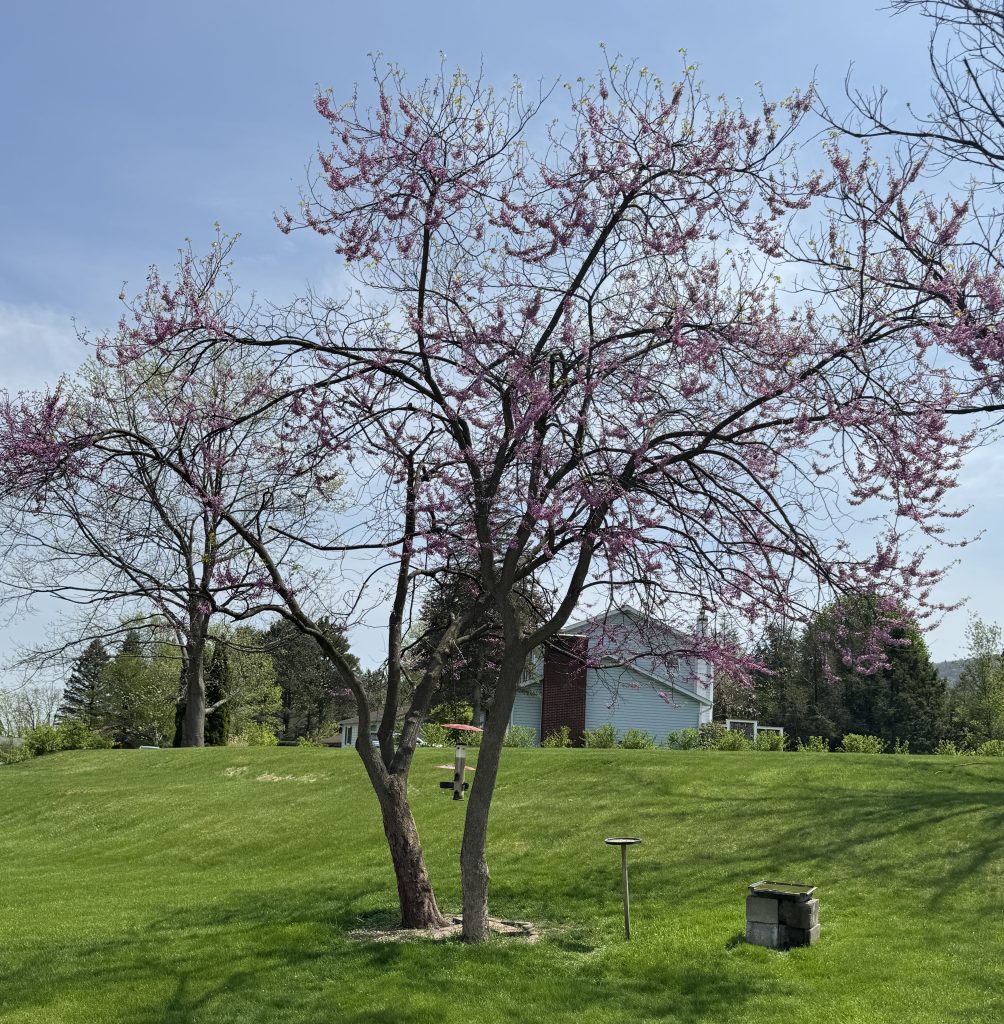
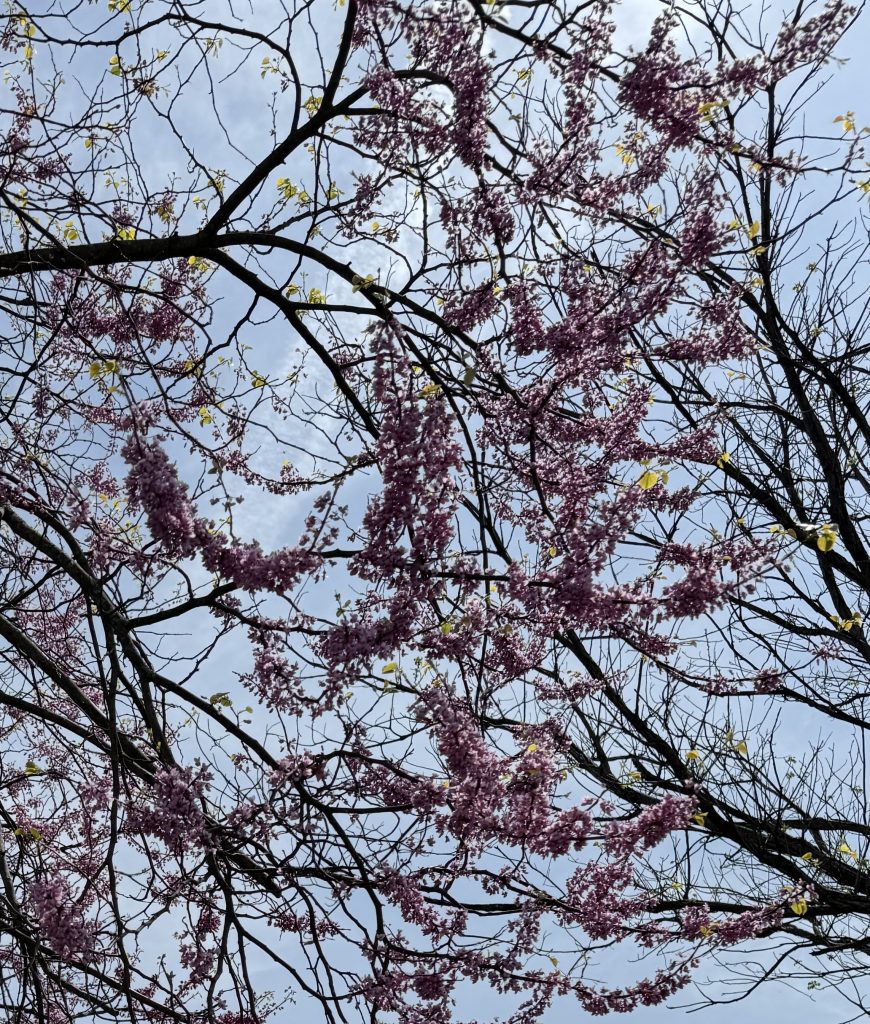
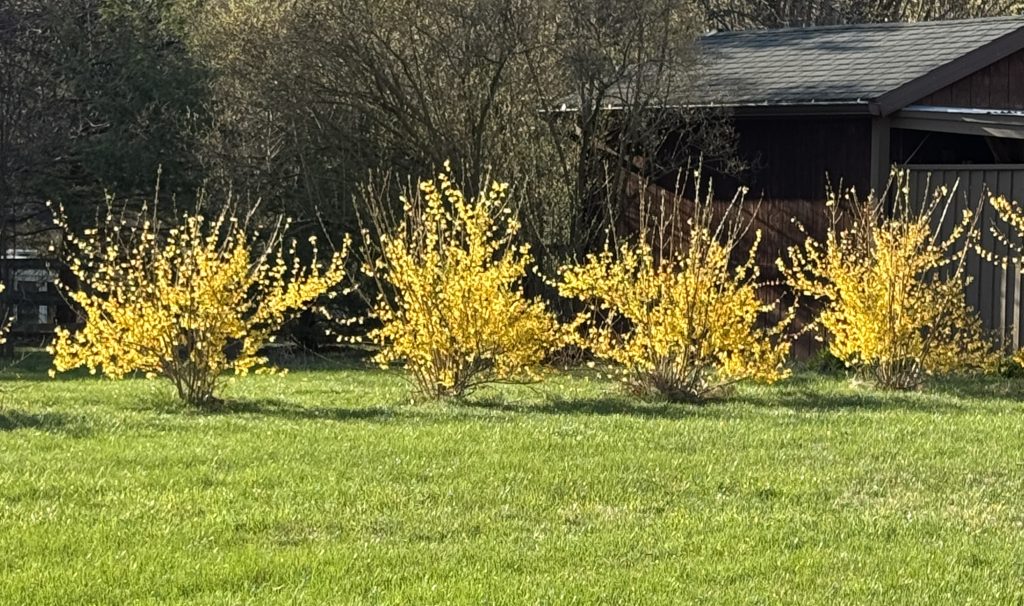
It seems awfully early in the spring to be talking about planting the garden. We’ve had hard frosts and even snow in May so we’re careful to protect the tender plants for a few more weeks. However, the grass is very green and Bert has had to cut it twice already! After the forsythia blooms, the next color I notice is the blooms on the Redbud trees. They are such a pretty pink but they don’t last long…just trying to get a decent picture is hard. But they do make me smile!
Here’s a close up of the flowers:
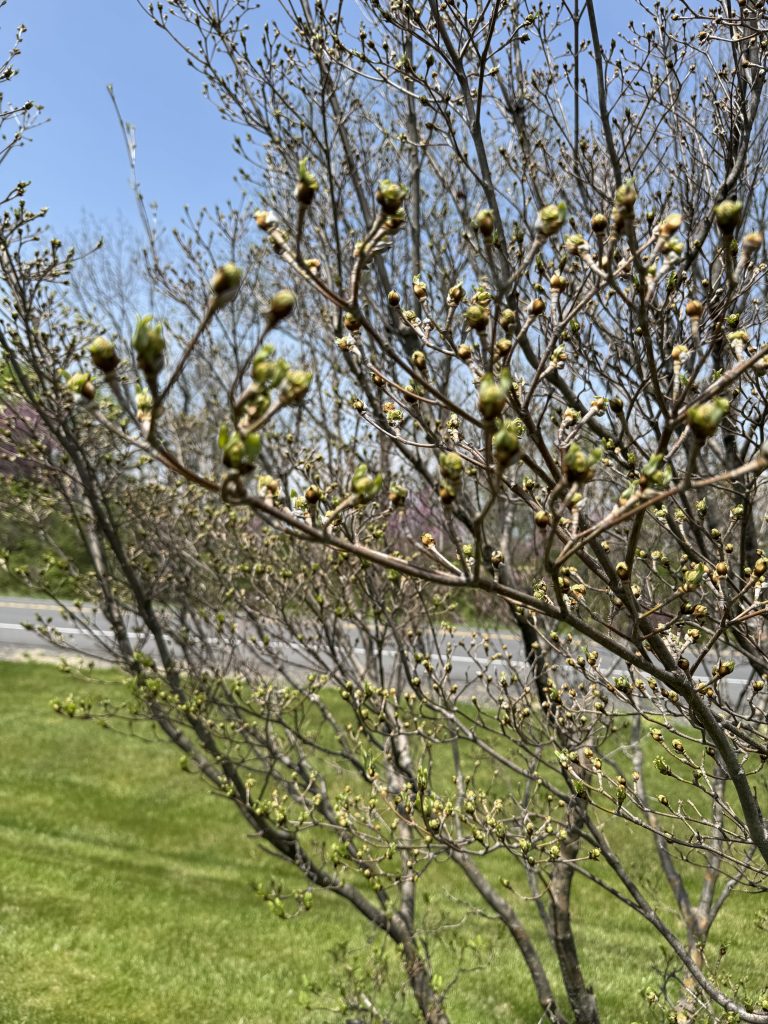
The Japanese Dogwood trees in the front yard are budding out. I’m looking forward to when this whole row of trees is in bloom!
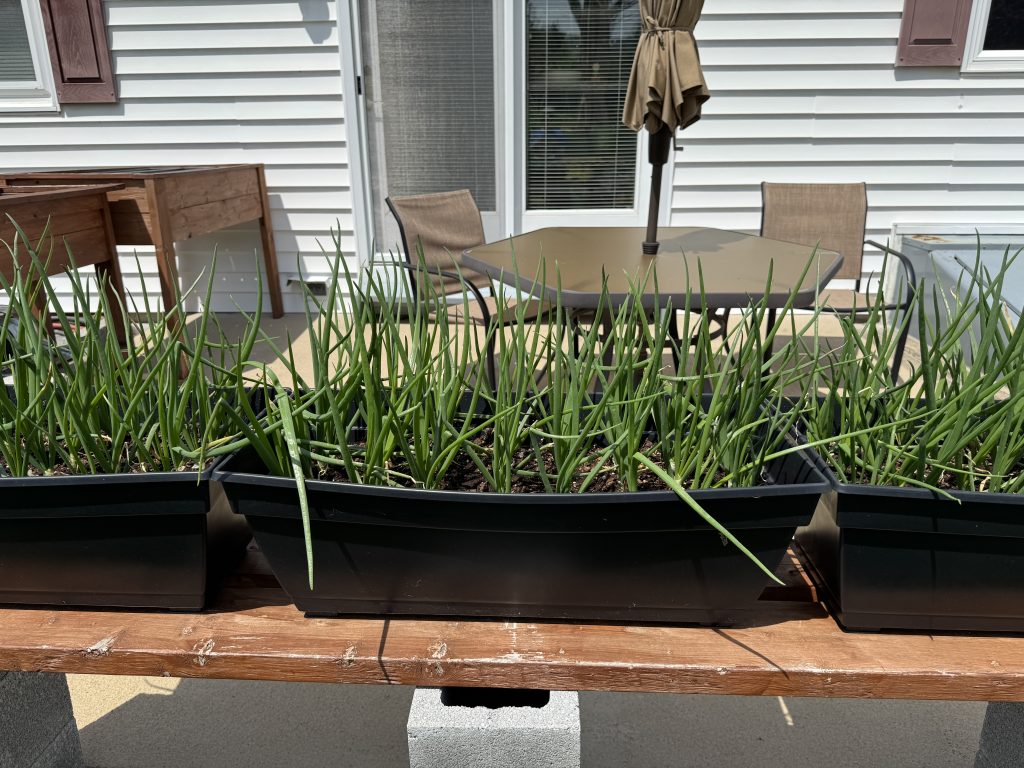
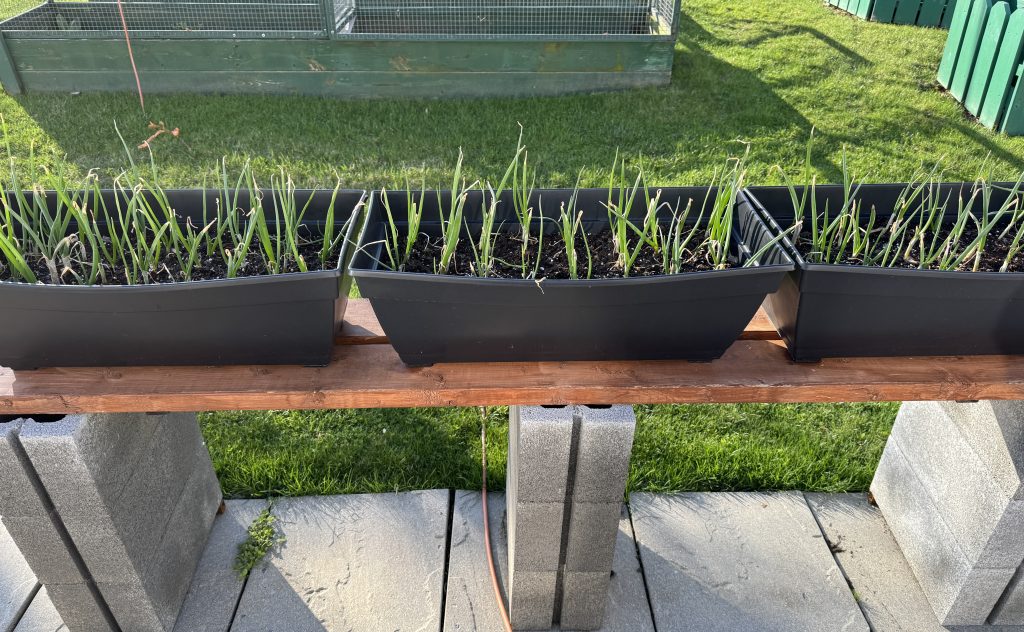
Of course, the huge batch of onions in planters by the patio are doing well. They look crowded, but we’ll eat them as we thin them.
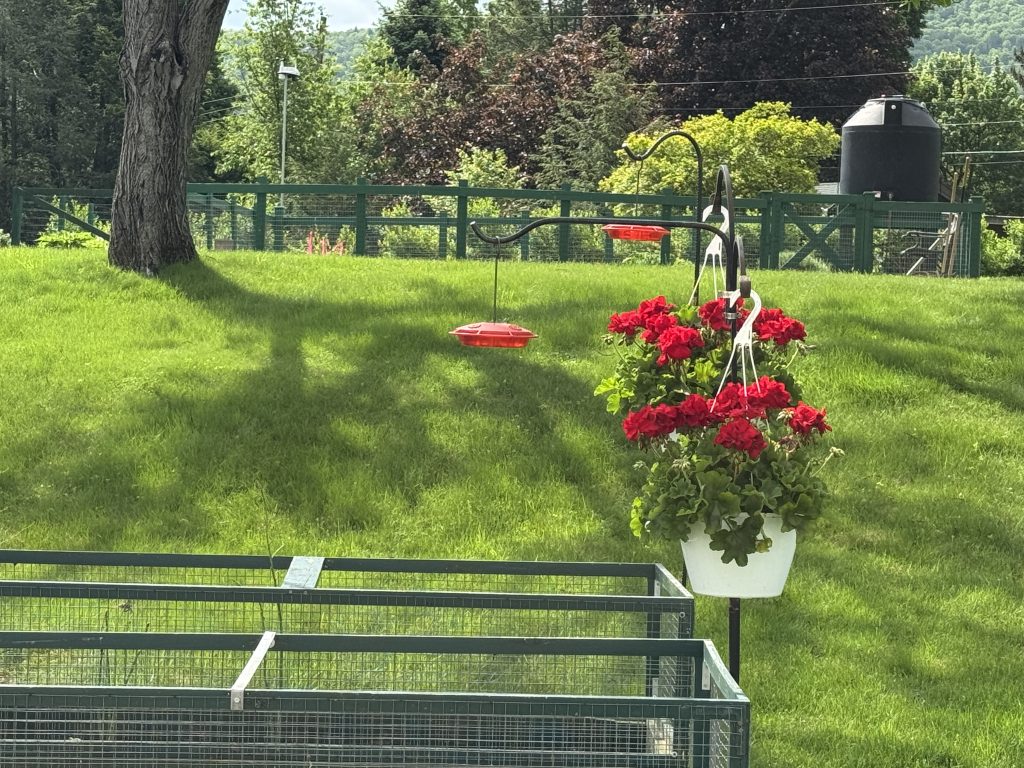
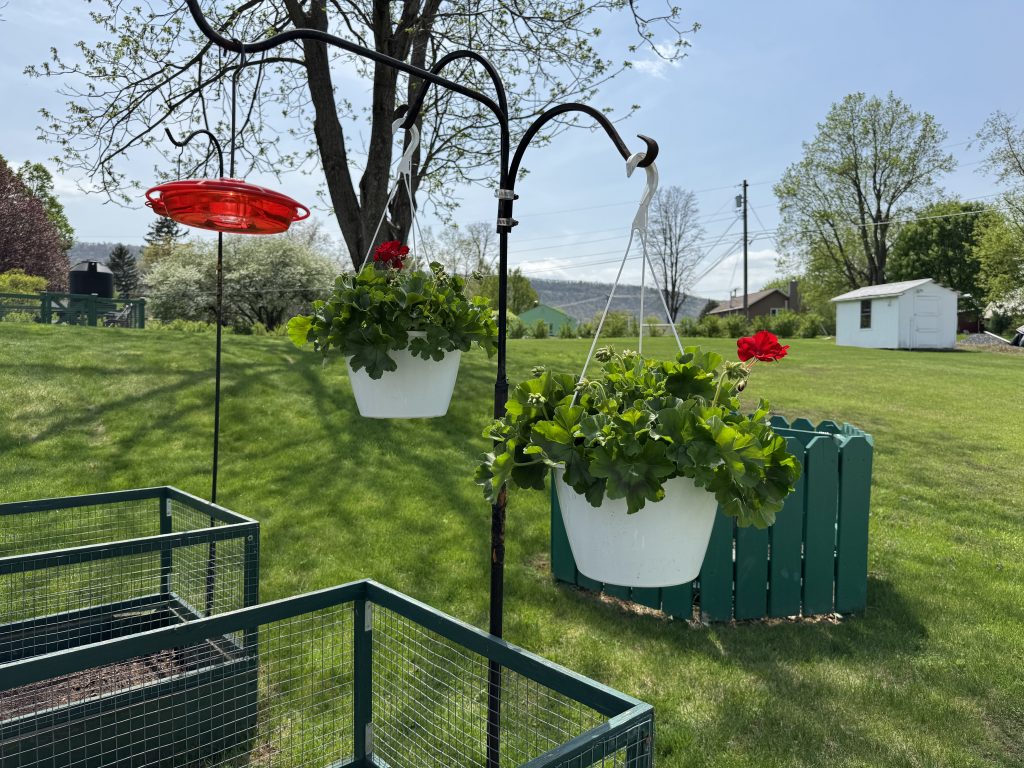
We saw our first hummingbird so we quickly bought our favorite begonia plants. The red flowers match the feeders and help attract the birds.
Kathy and Ben came to visit last weekend and brought us a bunch of asparagus roots from their property. The roots had spears that looked ready to eat…but we’ll leave them alone this year and give the roots time to get established. Since they are pretty vigorous roots, we may be able to get a meal or two out of them next year.
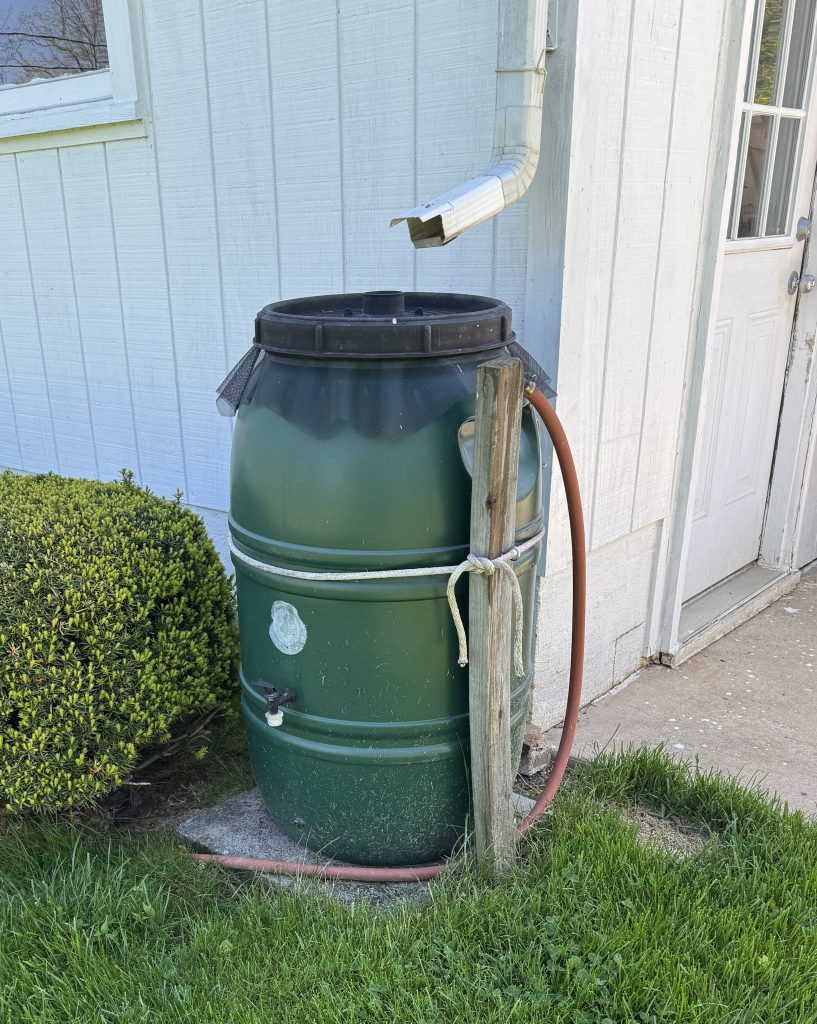
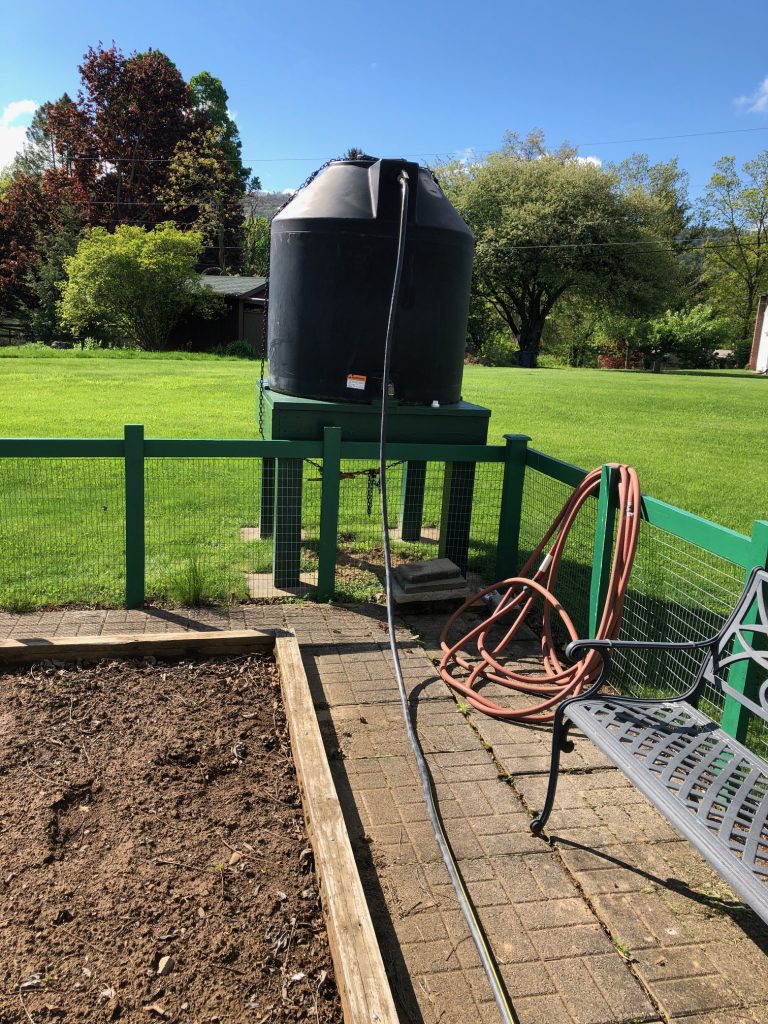
Bert set up the rain barrels last week and they are now full! It takes about 1/4″ of rain on the roof of the shop to fill the barrels. See the set up at https://marykisner.com/setting-up-the-rain-barrels/
Here is the big barrel up by the garden. If we plan it right, we can use rainwater all summer to water the garden. You can read about how Bert pumps the water from the rain barrels up to the large tank at https://marykisner.com/pumping-the-rain-barrels/
Our tomato plants are doing well under grow lights in the shop. Each day that isn’t too windy Bert sets the plants outside to harden them up. If it’s hot and sunny, he puts them in the shade by the shop so they don’t get sunburned.
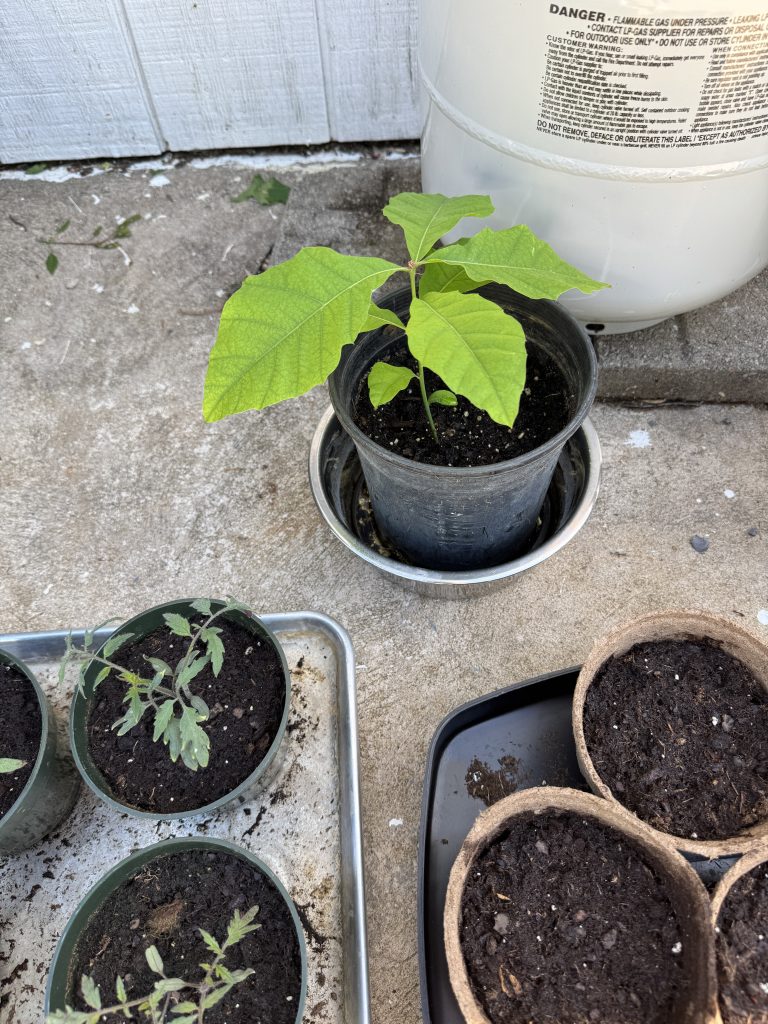
Amazingly, Bert has been babying a tiny oak tree that sprouted from an acorn from the tree in our yard. That tree was also sprouted from an acorn that came from the Kisner hunting camp, so he’s pretty protective of the plant!
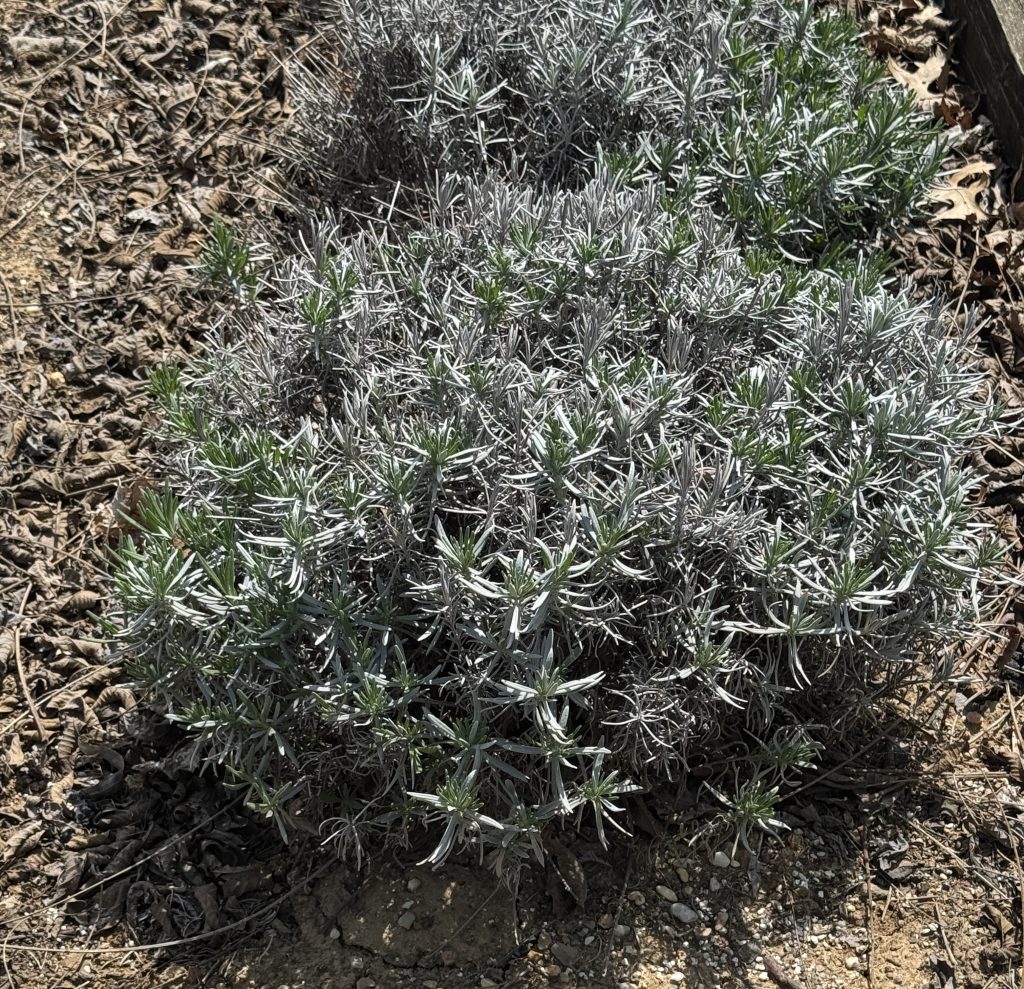
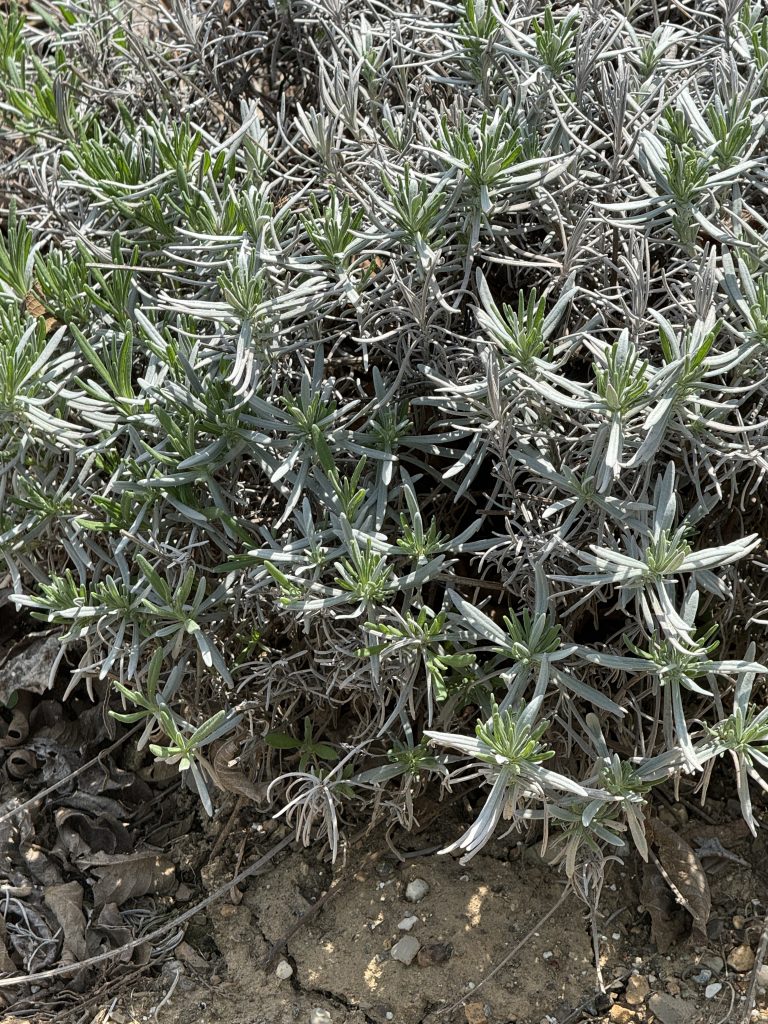
Up in the garden, I finally see the new growth in the row of lavender plants. I should have a nice crop of lavender to dry this year.
Here’s a close up of the new growth:
And of course, the Echinacea bed is going to town with new growth. The flowers really make me smile and make the bees happy!
So, that’s what’s happening on the first of May, 2025. Next week I hope to plant lettuce and radishes in the raised planters on the patio. In the meantime, we’ll be careful to protect the tomato plants…in the past, due to a late freeze in May, we’ve had to totally replace all the tomato plants because we planted too early. Live and learn! Mother Nature has an agenda of her own!
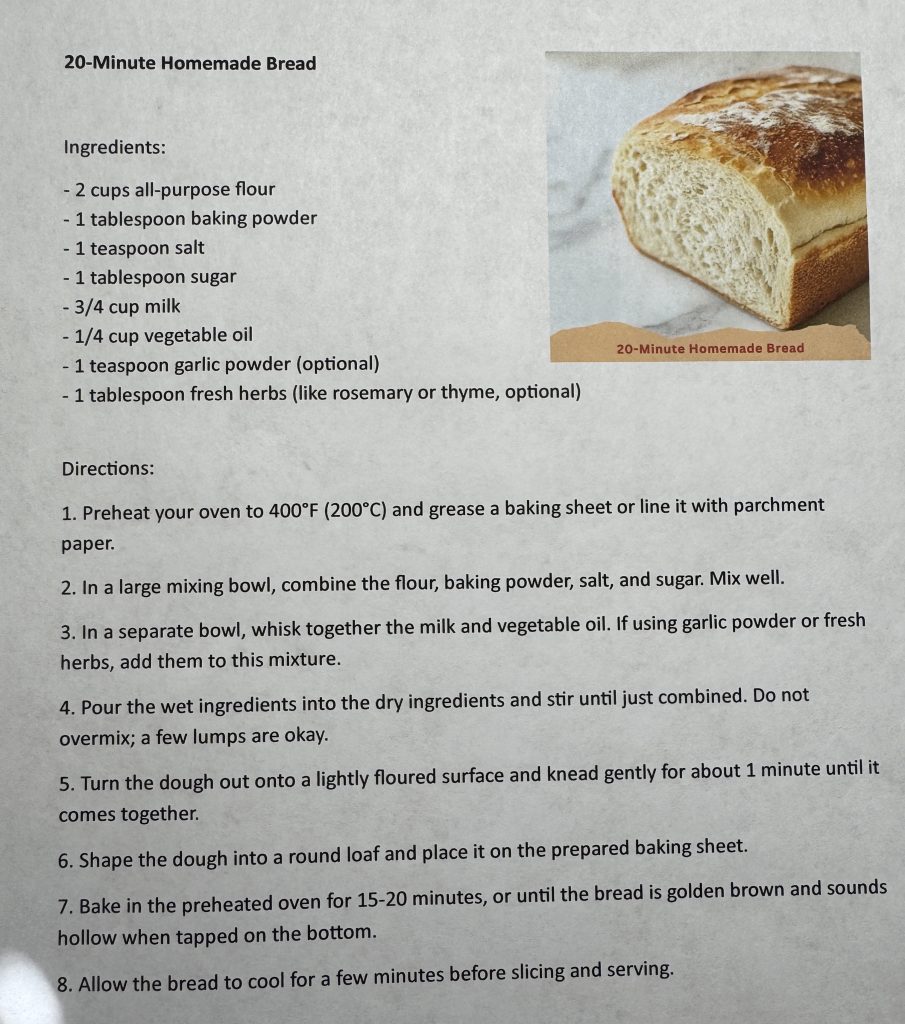
I should know better! When a recipe says, “20-minute Homemade Bread” I should be careful. It’s never 20 minutes! That’s the bake time. And of course, the picture looks nothing like what I produced. I’m always looking for new easy bread recipes…however, the lovely picture of a loaf of bread and the 20-minute headline seemed too good to be true.
Here’s the recipe that I found on Facebook:
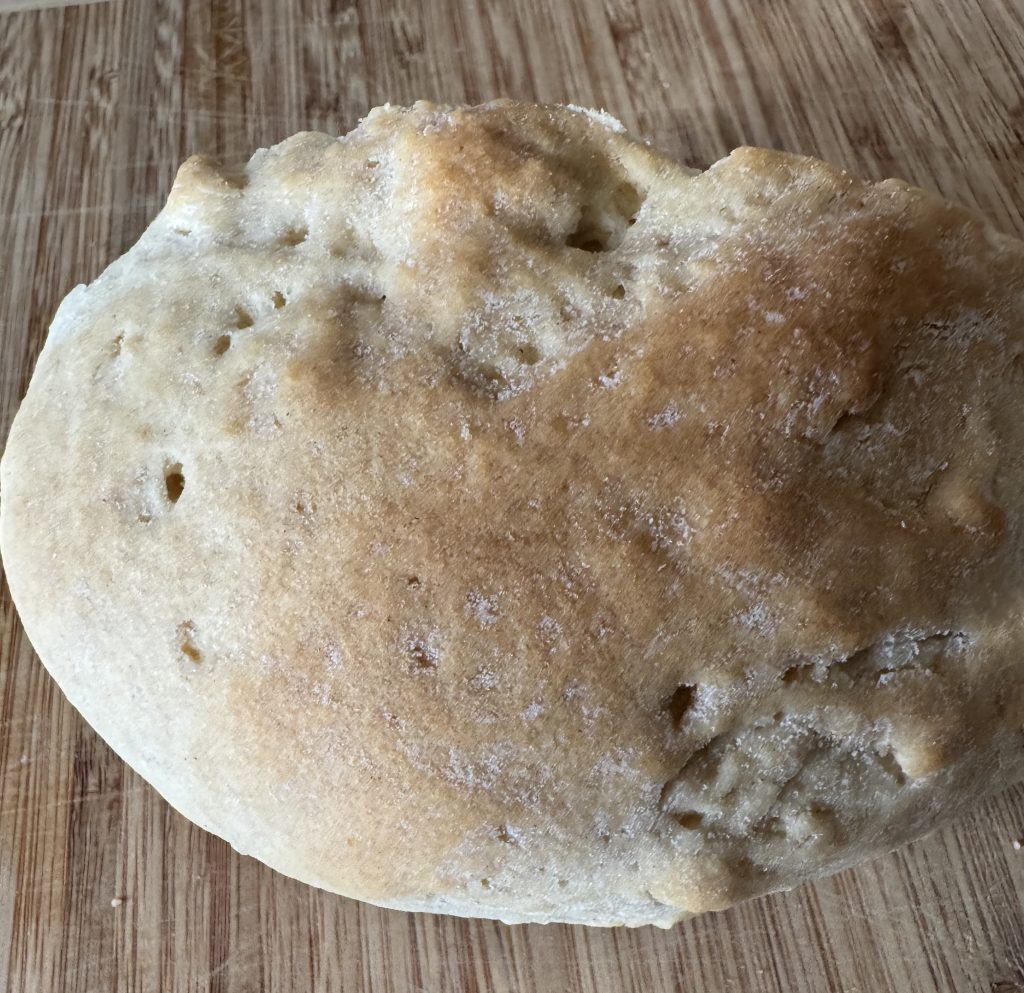
I was able to mix it up by hand and made a round loaf like it suggested. It tasted OK but because it did not have yeast, it really was just a huge baking powder biscuit! It fell apart like a biscuit and did not rise very much.
I think the rest of the loaf will be crumbled and dispersed for the birds! I don’t plan to make that bread again!
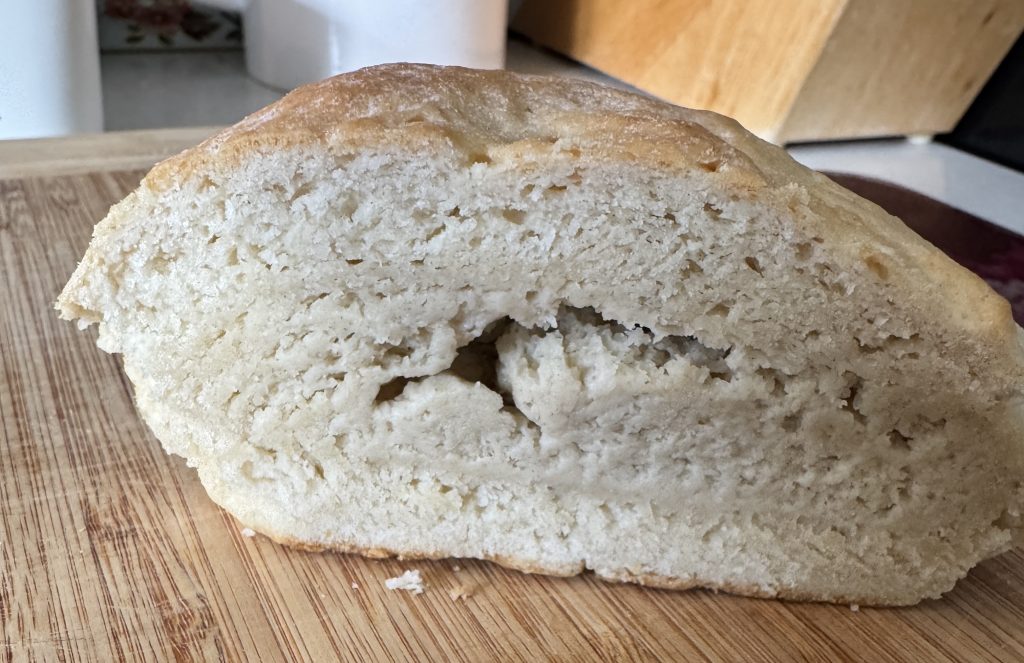
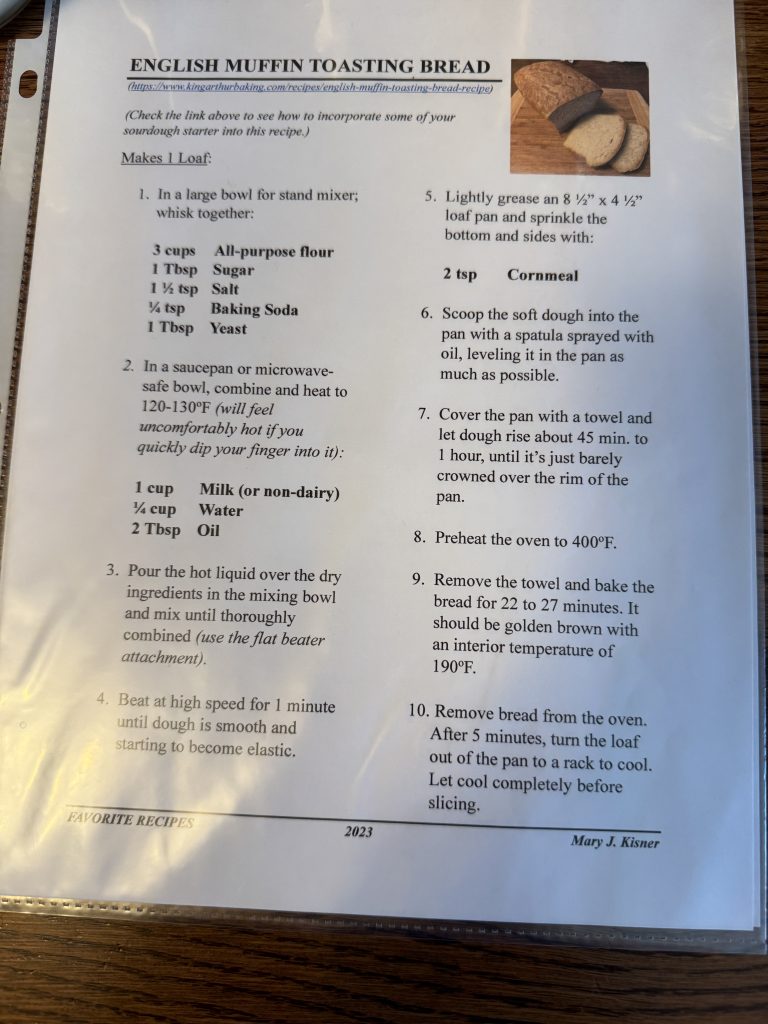
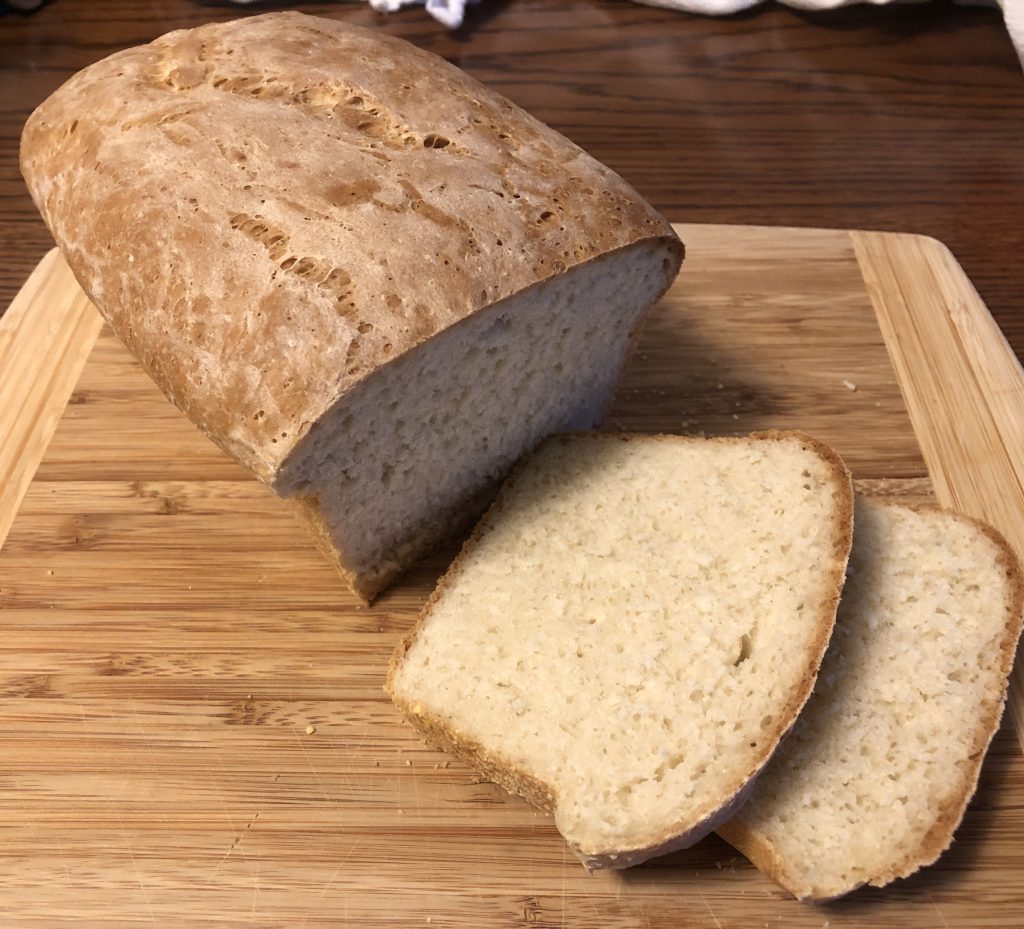
I still wanted to make a single loaf of bread. So today I pulled out my recipe for English Muffin Toasting Bread. I wrote about it in November, 2023. It is not a complicated recipe and does not require kneading. It’s more of a batter bread with yeast. If you compare bake time…this bread takes 22-27 minutes. It tastes so much better!
Here is the recipe:
The instructions above are pretty clear. If you’d like the step-by-step pictures, please see my post…https://marykisner.com/making-english-muffin-toasting-bread/
This loaf turned out great and really tastes good!
I think I’ll stand by my tried-and-true recipes that I know taste good and aren’t too complicated. It’s a waste of ingredients and a waste of my time to experiment. (However…I’m always a sucker for words like “simple” and “quick.”) I’ll try to resist!
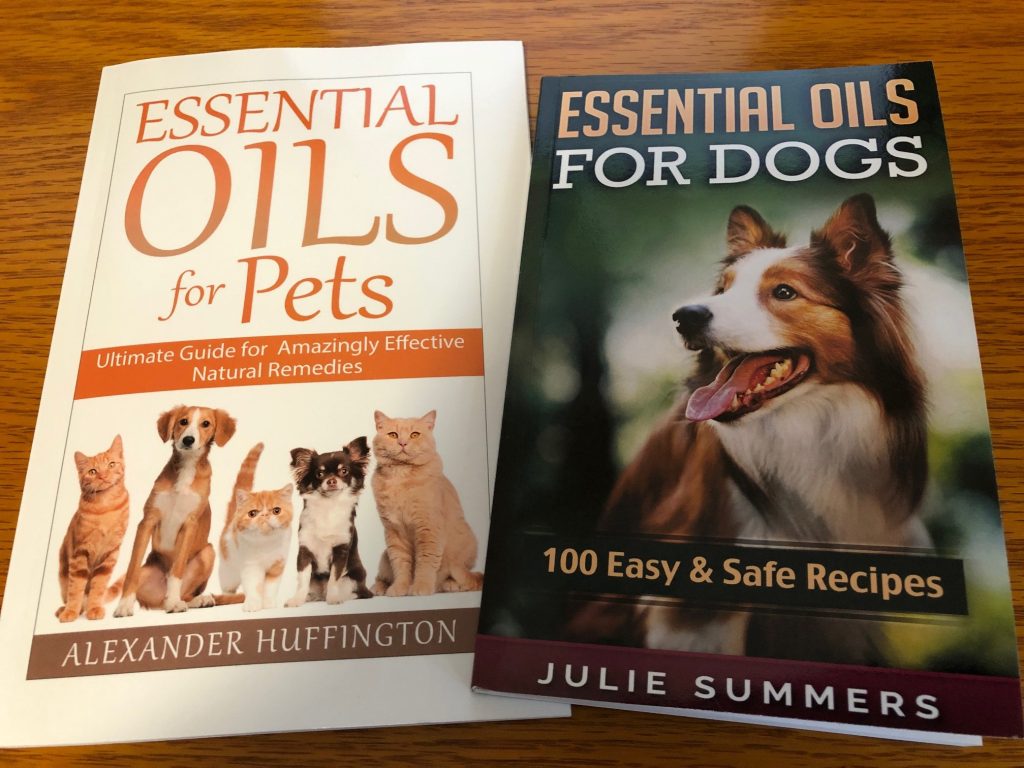
Spring is the time to start thinking about finding a good bug repellent for you (and your dog). Four years ago, I was deep into learning about how essential oils could be used, and one of the first products I made was a natural bug repellent for my greyhound friends (human and dog!).
My research started with making sure that the essential oils I used were safe for the dogs. Here are two books I started with, along with research on the internet.
Most recipes for a natural bug repellent had pretty similar ingredients…water, essential oils and an emulsifier to disperse the oils. The most important issue was making sure the specific essential oils were safe for your pets. Amazingly, most were fine for dogs, but only a few were safe for cats! I suspect this is because cats will lick their fur and ingest the essential oils.
You can read more about using essential oils with your pets at the end of this post. For today, I wanted to share the natural bug repellent spray recipe that I’ve found to be effective for you and your dogs! Once you’ve sprayed your dog and rubbed it into its fur, you’ll have it on your hands. Rub your hands on your arms and legs. An extra spray on your clothing can keep the bugs away from you too!
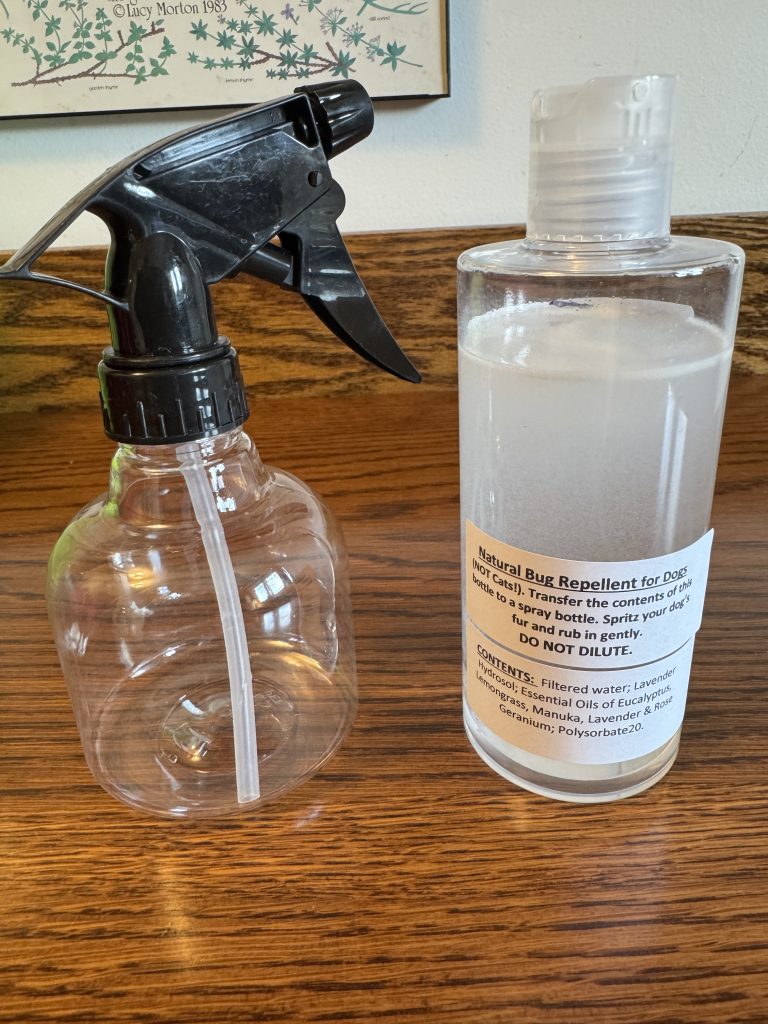
This bug repellent is safe for you and your dogs. It is not necessarily safe for your cats! Please check with your veterinarian for a safe repellent for your cats!
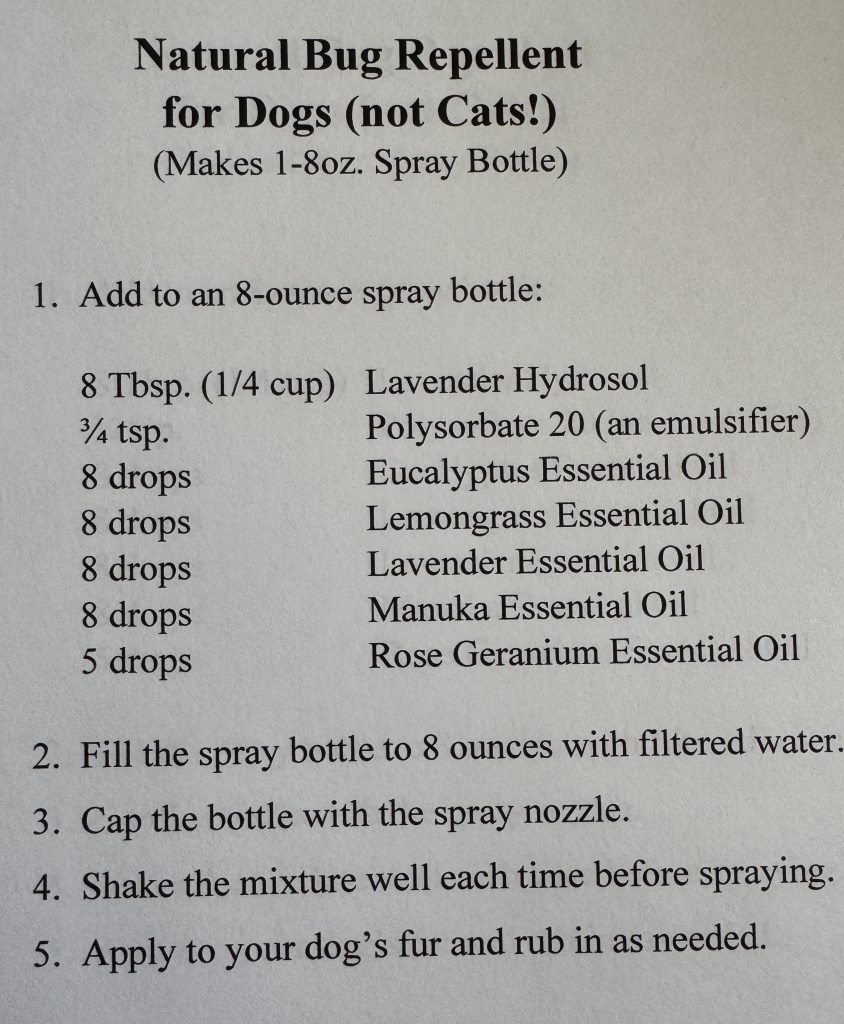
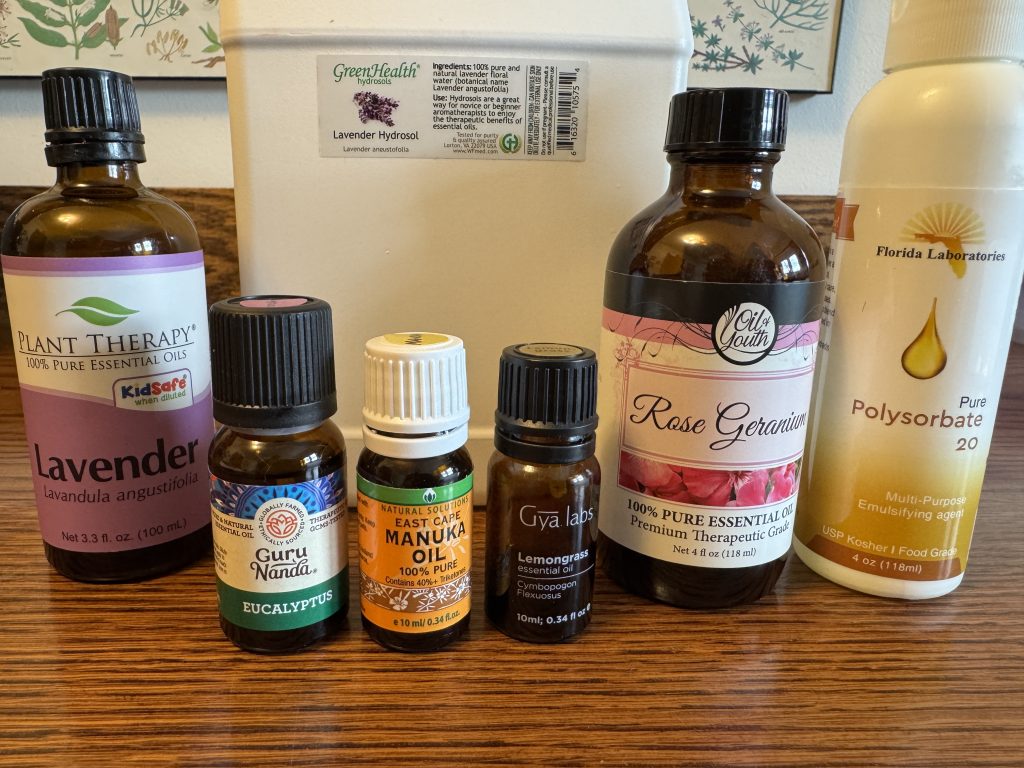
Here is my recipe for a natural bug repellent:
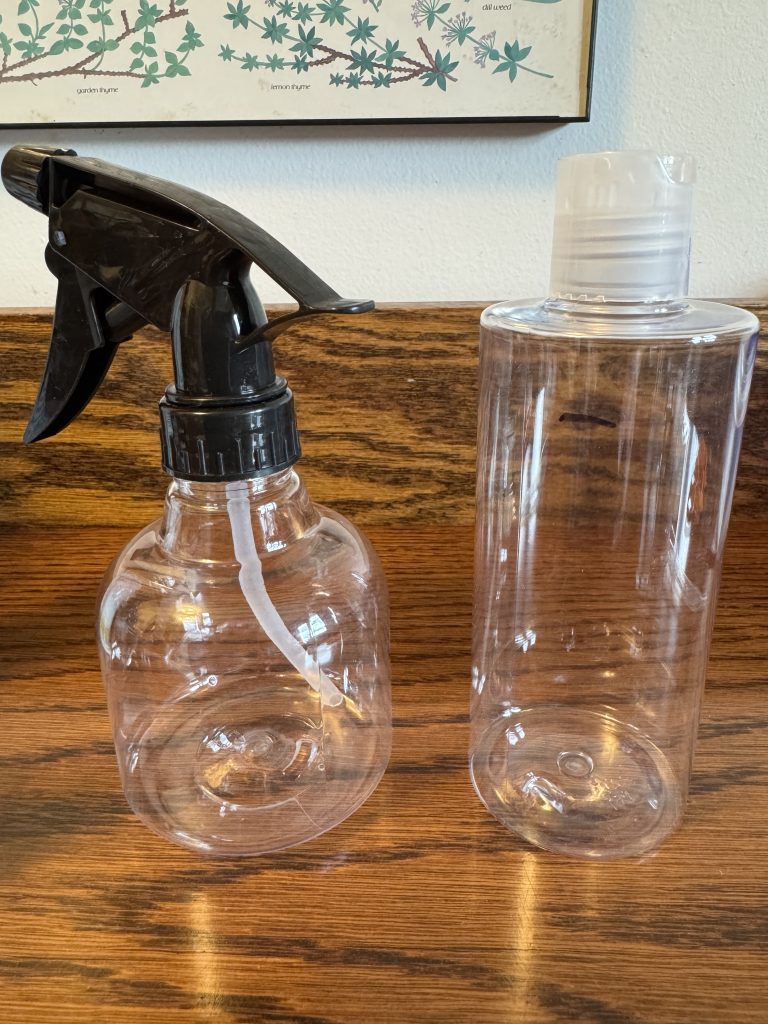
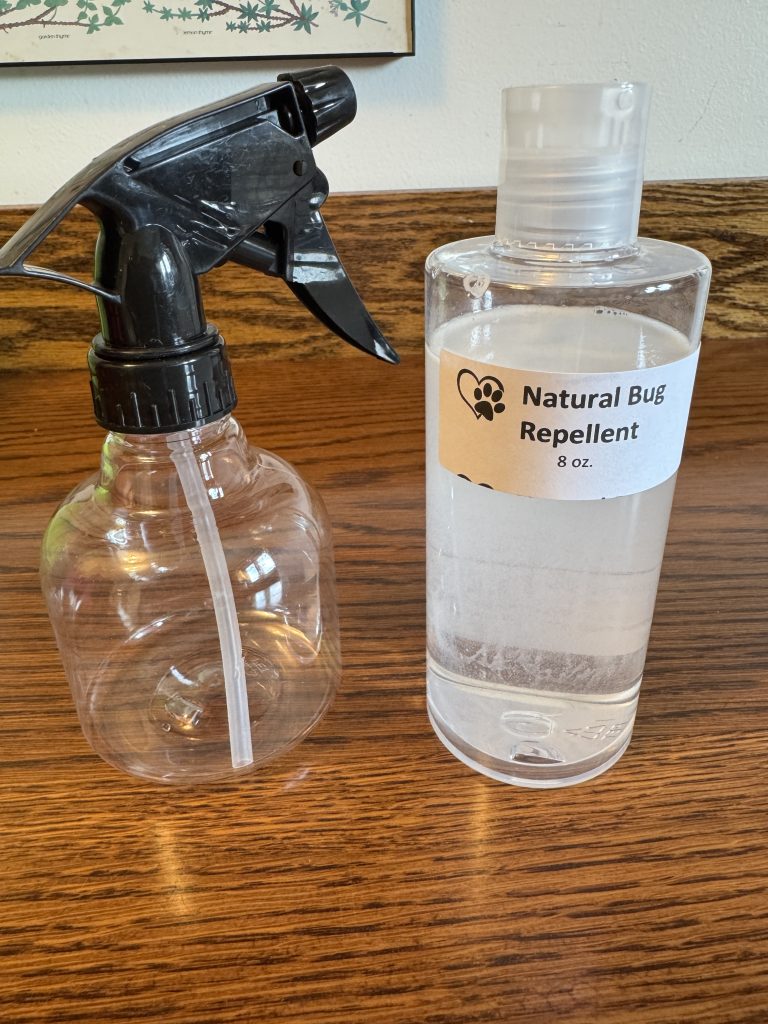
All of the ingredients in this recipe are available at Amazon. You can mix this up directly in an 8-ounce spray bottle. I’ve been mixing it up in an 8-ounce bottle with a screw top lid so I can more easily share it without having to worry about the spray bottle leaking in transit. I just include the empty 8-ounce spray bottle.
Here are the ingredients I use:
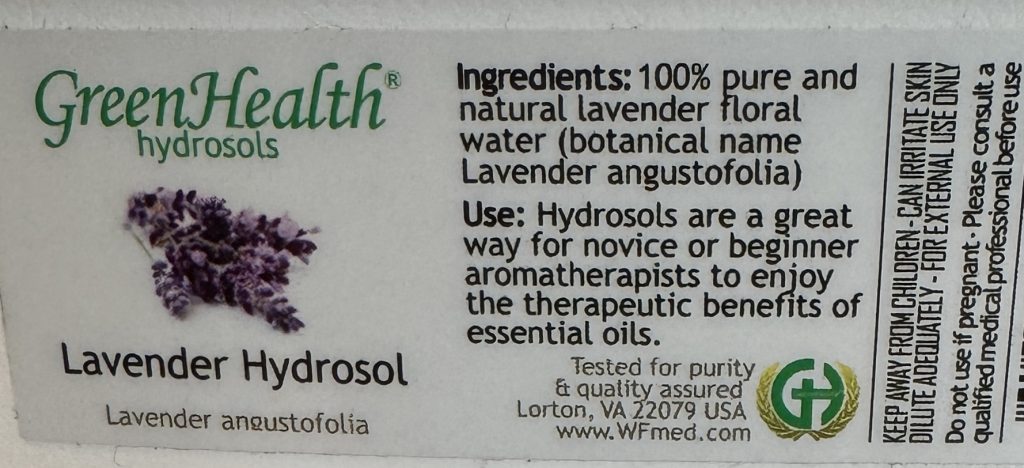
Here’s a close up of the Lavender Hydrosol label on the jug in the back row:
Labeling the bottle and/or spray bottle is important.
So try this recipe yourself! Enjoy the warm weather without the bugs or harmful chemicals!
In another article, she provided a list of essential oils that are safe for dogs and a separate list for cats. Her information also included how to treat essential oil poisoning in dogs and cats. If you use any product with essential oils in them on your pets, please keep these lists nearby!
Essential Oils Safe for Dogs:
Cedarwood oil; Chamomile oil; Citrus oils (including lemon oil and orange oil); Eucalyptus oil; Fennel oil; Frankincense oil; Lavender oil; Lemongrass oil; Peppermint; Spearmint; and Rose Oil.
Chamomile oil; Jasmine oil; Lavender oil; and Rose oil.
How to Treat Essential Oil Poisoning in Dogs and Cats:
If your dog or cat is experiencing mild respiratory irritation after inhaling an essential oil, move them to an area with fresh air.
If a concentrated essential oil came in contact with your pet’s skin or fur, wash the area with a pet-safe dishwashing liquid, such as Dawn.
If your dog or cat ingested an essential oil, consult with your veterinarian or poison control center immediately. Do not induce vomiting.
Essential Oils and Pets: Tips and Advice
Fortunately, the majority of essential oil toxicity cases carry a good prognosis with prompt detection and veterinary treatment. However, prevention is key. Pet parents can reduce the risk of harm to their dogs and cats by following these safety tips when using essential oils at home:
SAFETY TIPS FOR USING ESSENTIAL OILS AROUND PETS
Only use pet-safe essential oils from reputable brands, and dilute appropriately with a pet-friendly carrier oil before administering to your dog or cat. Avoid use around animals more susceptible to ill effects. Never feed a highly-concentrated product to your pet or apply it topically.
Never force an essential oil on your pet…even those deemed pet-safe…if they don’t appear to like it. Try the “smell test” to introduce your pet to the oil first.
Do not add essential oils to your pet’s food.
Keep essential oil bottles and products out of your pet’s reach or locked in a cabinet. This includes the reservoirs for diffusers and liquid potpourri, which pets can easily knock over if left unattended. Ingesting large quantities can be fatal!
If using a passive diffuser, make sure your pet can get away from the area. Avoid use around birds.
Avoid using an active diffuser when your pet is in the room, especially around birds and pets that groom frequently, such as cats.
Limit your use of diffusers, sprays, and other essential oil products to a short period of time, and air out the room before allowing your pet inside.
Avoid combining different oils (which can inadvertently raise the concentration), and avoid using pure products or blends in which the concentration is not specified on the label!
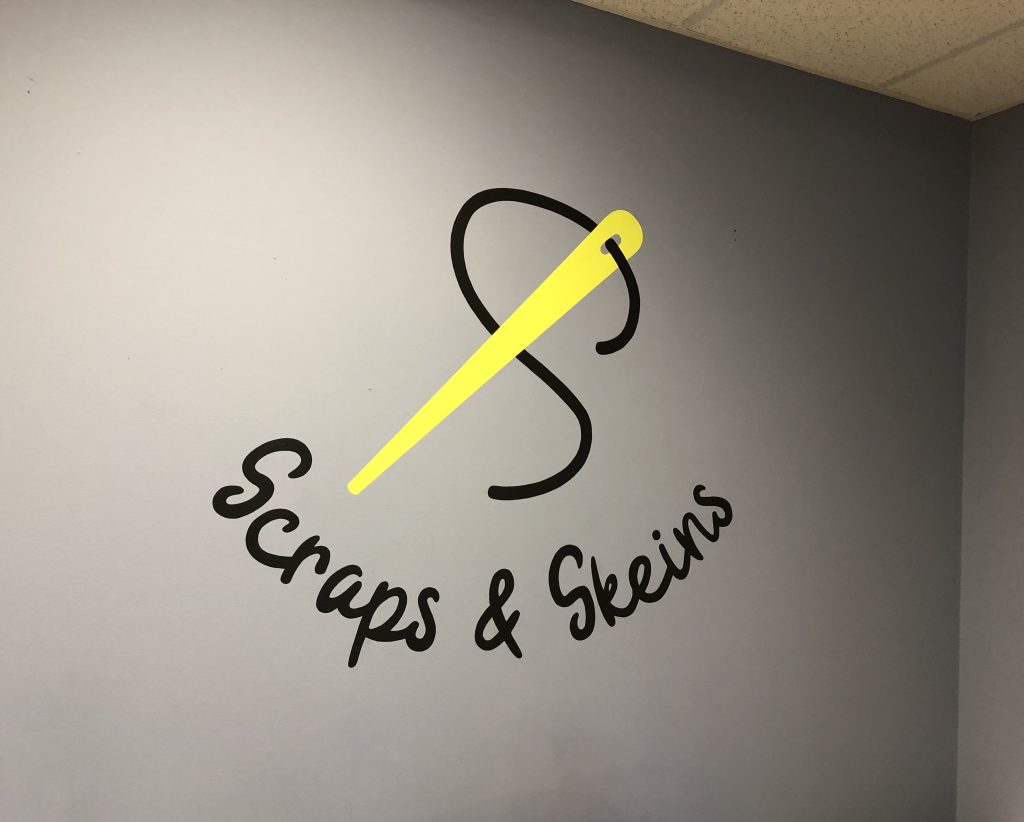
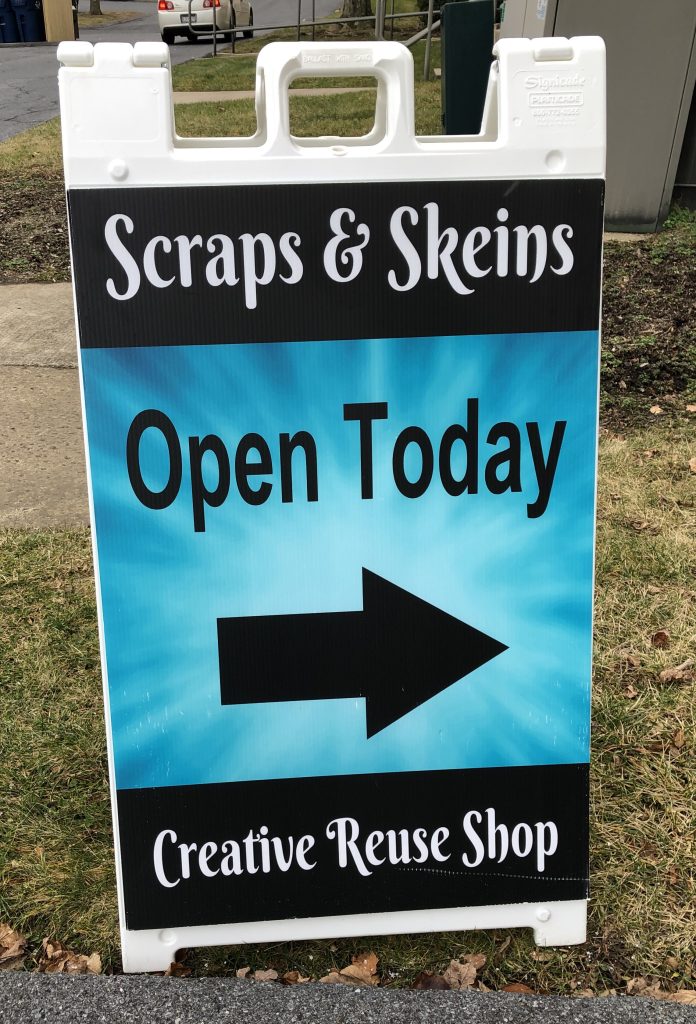
I posted over a year ago about the Scraps & Skeins Shop with an eye out for a place to donate items as I started thinking about downsizing. It looked like the perfect place…when the time comes to donate my various sewing supplies, fabric and yarn. Now, I’m considering how this shop can fill a need with the closing of our local JoAnn Fabric store.
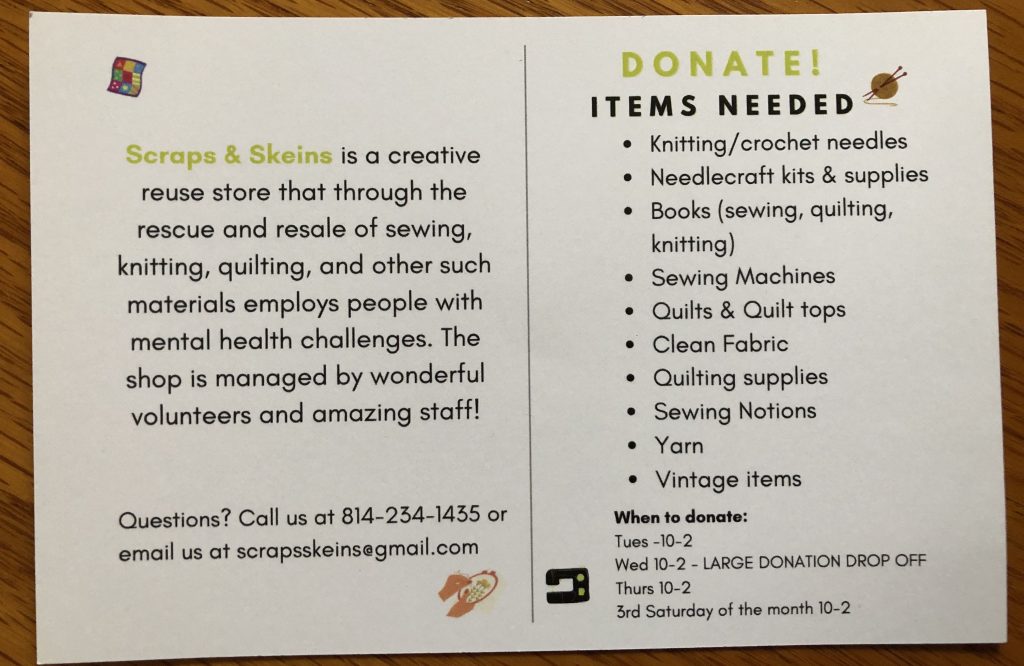
Their printed literature says Scraps & Skeins is a creative reuse store…meaning they accept donated items such as fabric, yarn, quilting supplies, knitting needles, books, patterns and even refurbished sewing machines! These items are organized and repackaged for resale to the public. This store provides employment opportunities for adults with mental health challenges. This is a win/win as far as I can see!
Scraps & Skeins was officially opened in 2015 under the umbrella of Strawberry Fields with the mission to create employment opportunities for adults with developmental delays, intellectual disabilities, and mental health issues. All proceeds support Strawberry Fields Inc., a United Way affiliate.
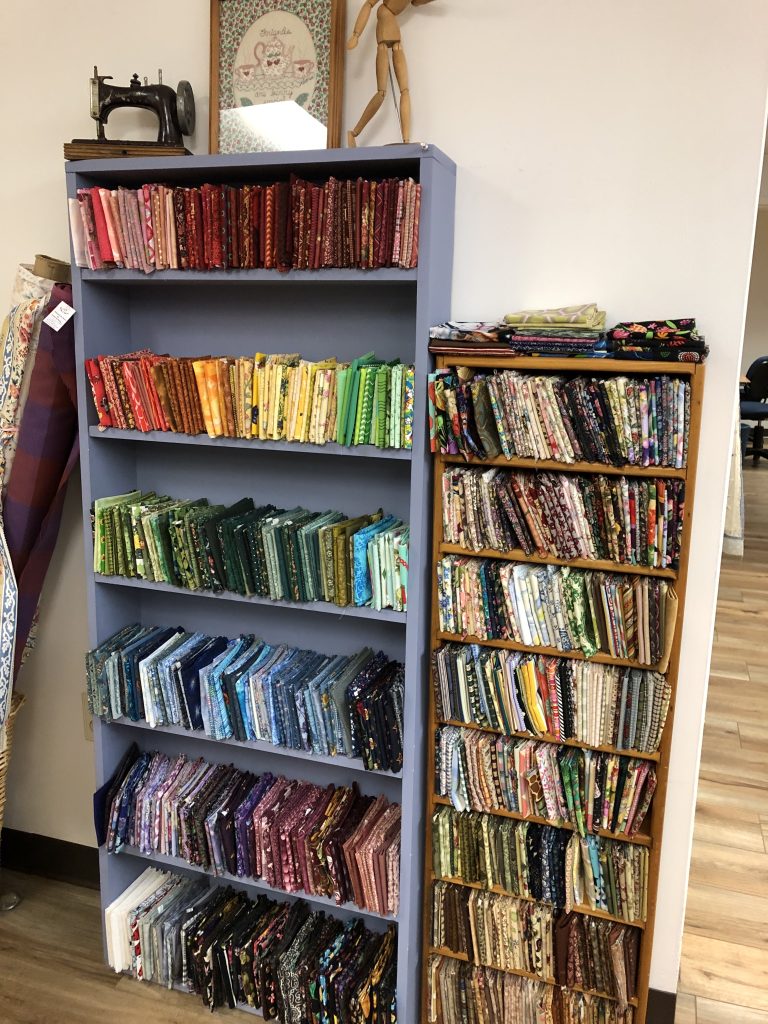
Since 2015, Scraps & Skeins has grown from a single showroom and storeroom into the six-room shop and workspace located behind the Strawberry Fields’ administrative office. It now employs a store manager and multiple employees.
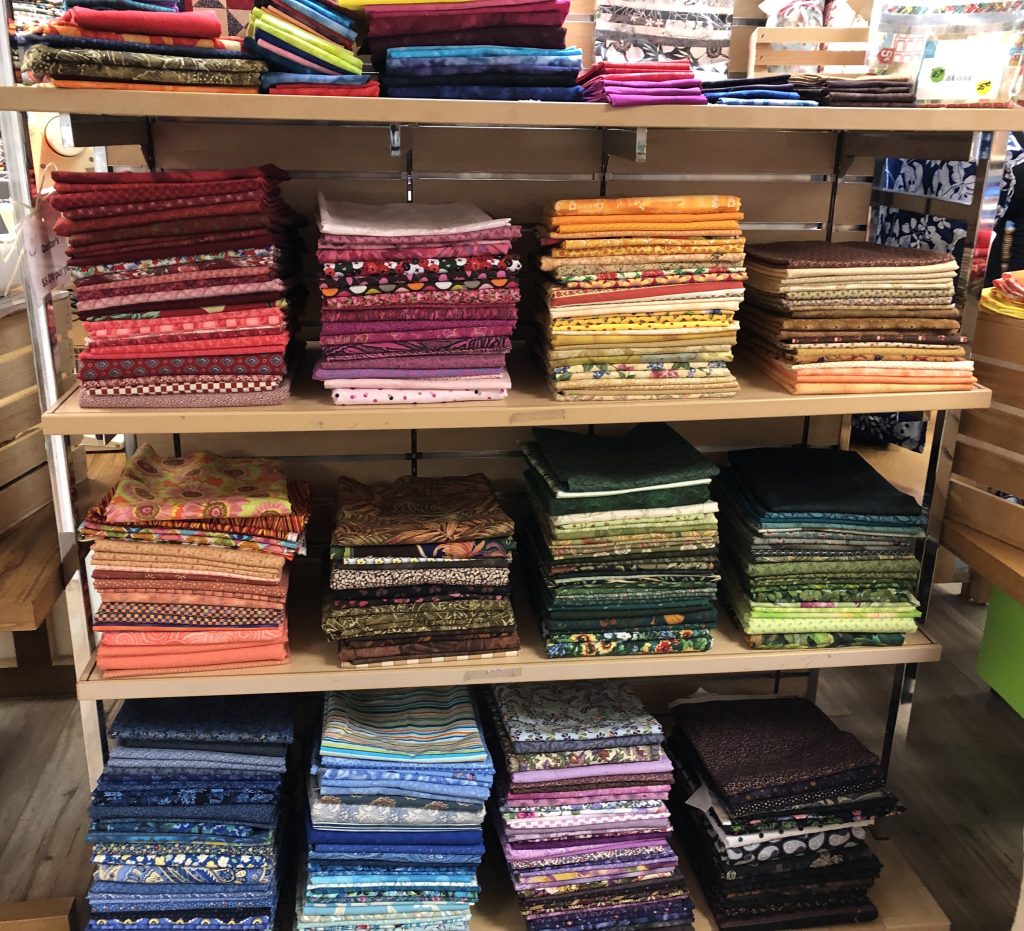
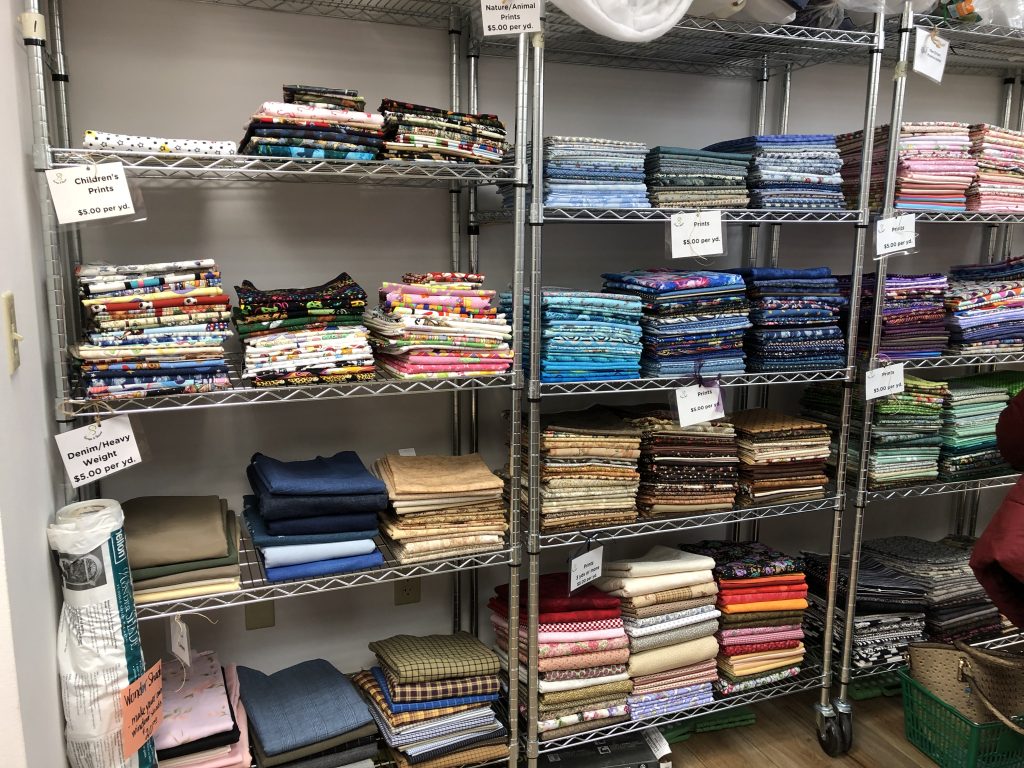
When wandering around the shop, the colorful displays of fabric are enticing! It feels like a fabric store! All the fat quarters, 1/2 yard and full yard pieces make an organized explosion of color!
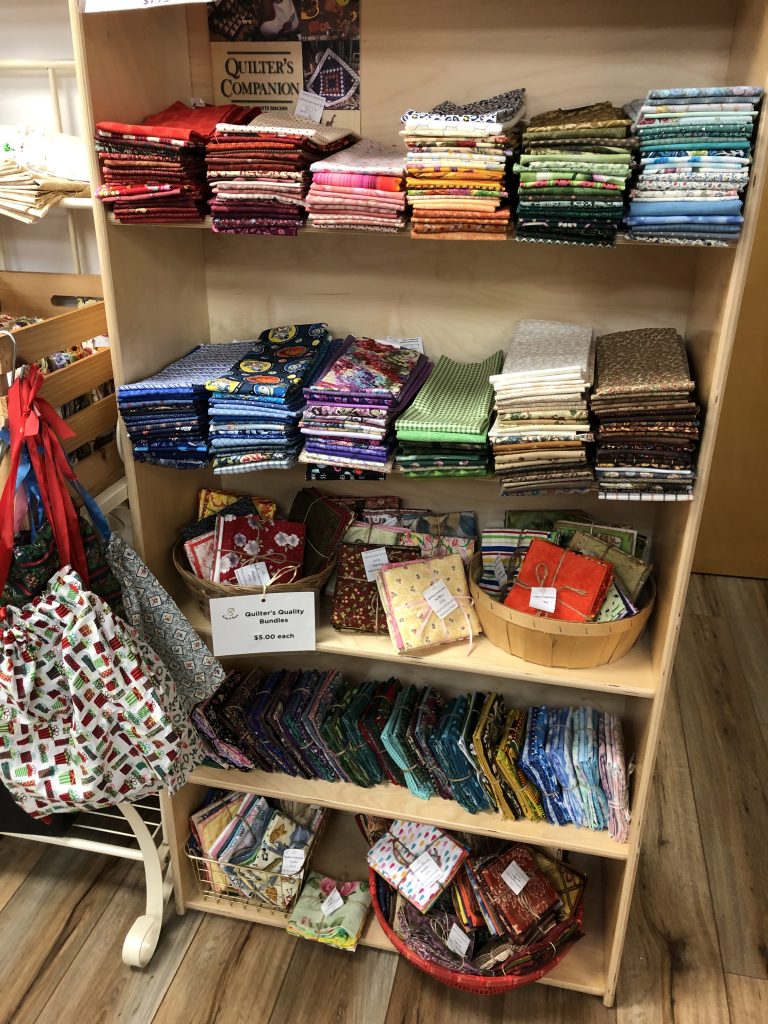
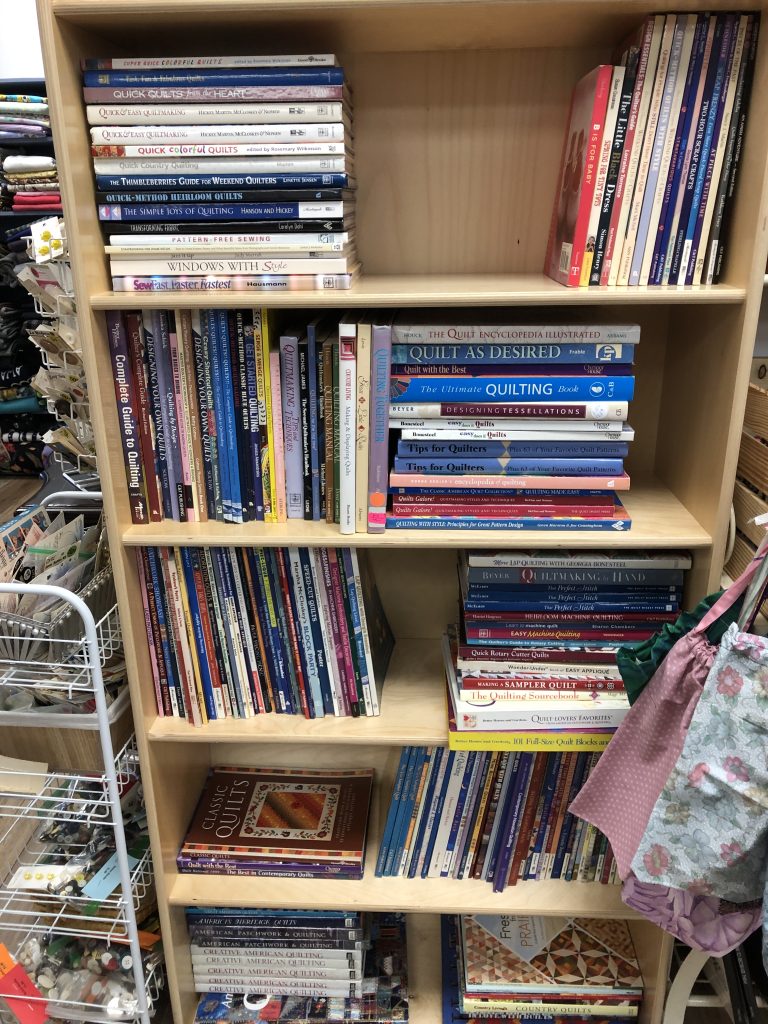
There are many books available for sewing, knitting and crafts projects.
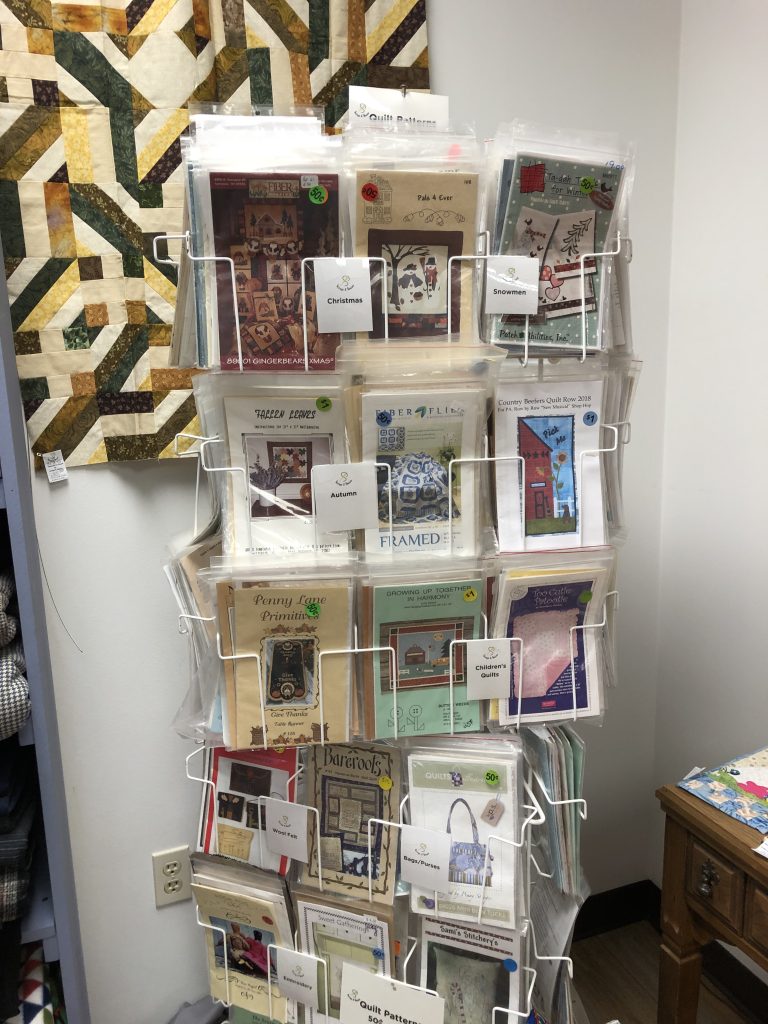
They even have some patterns available!
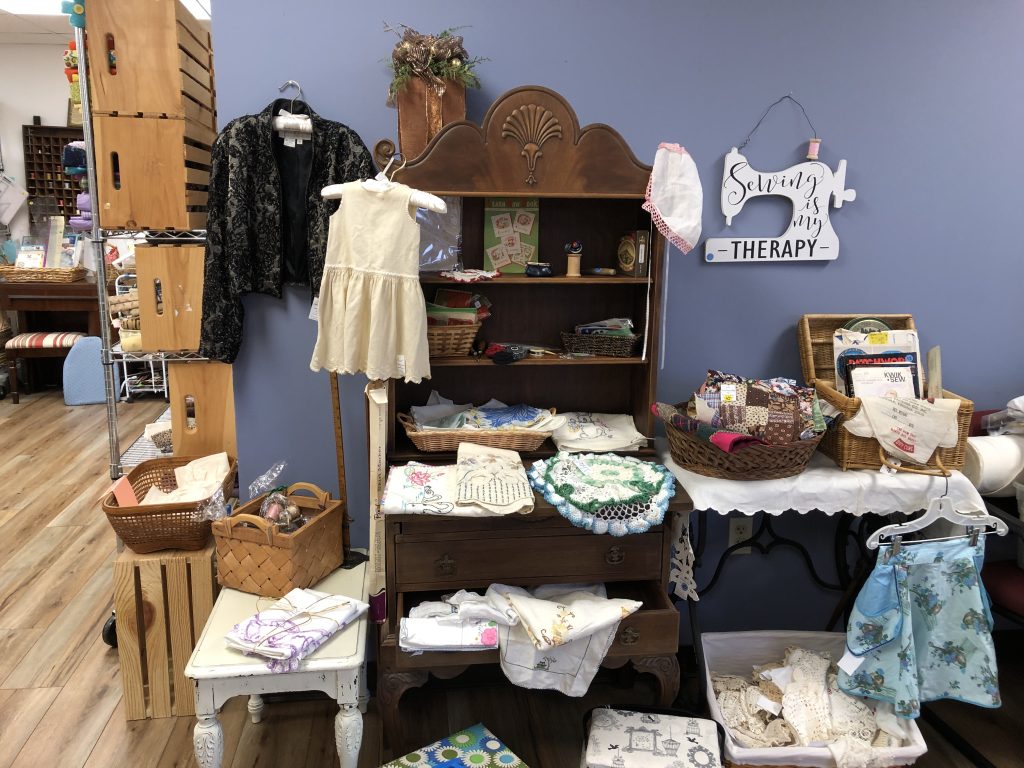
They had a display of various vintage fabric items for sale!
They also had a whole room filled with notions…like thread, sewing needles, knitting needles and a lovely selection of yarn. (The room was crowded so I didn’t try to get pictures.)
Finding the Scraps & Skeins Shop
Their store is a little difficult to find the first time, but when you find it…you’ve found a treasure! Their address is 2766 West College Ave., State College, PA 16801…but to get there I find it easiest to turn off West College Avenue onto Bristol Avenue and then turn right onto Enterprise Drive. The first right takes you behind and between the buildings and when they are open, they put out a sign that really helps.
The store is open Tuesdays, Wednesdays and Thursdays, 10 a.m. to 2 p.m., and every third Saturday of the month from 10 a.m. to 2 p.m. You can reach them at 814-234-1435 or email at scrapsskeins@gmail.com.
Helpfully, they also post regularly on Facebook and remind you of their hours and new stuff they have! They even offer select items on their website that can be ordered online! (https://scrapsskeins.shopsettings.com)
Because their offerings come from donations, their inventory is always changing. Stop by frequently to check them out! If you don’t live nearby, check out what’s available for purchase at their website.
Of course, if you’d like to donate YOUR extra fabric and yarn, here are the kind of things they accept! Know that your donation will keep the good stuff in circulation for the rest of us! Enjoy!
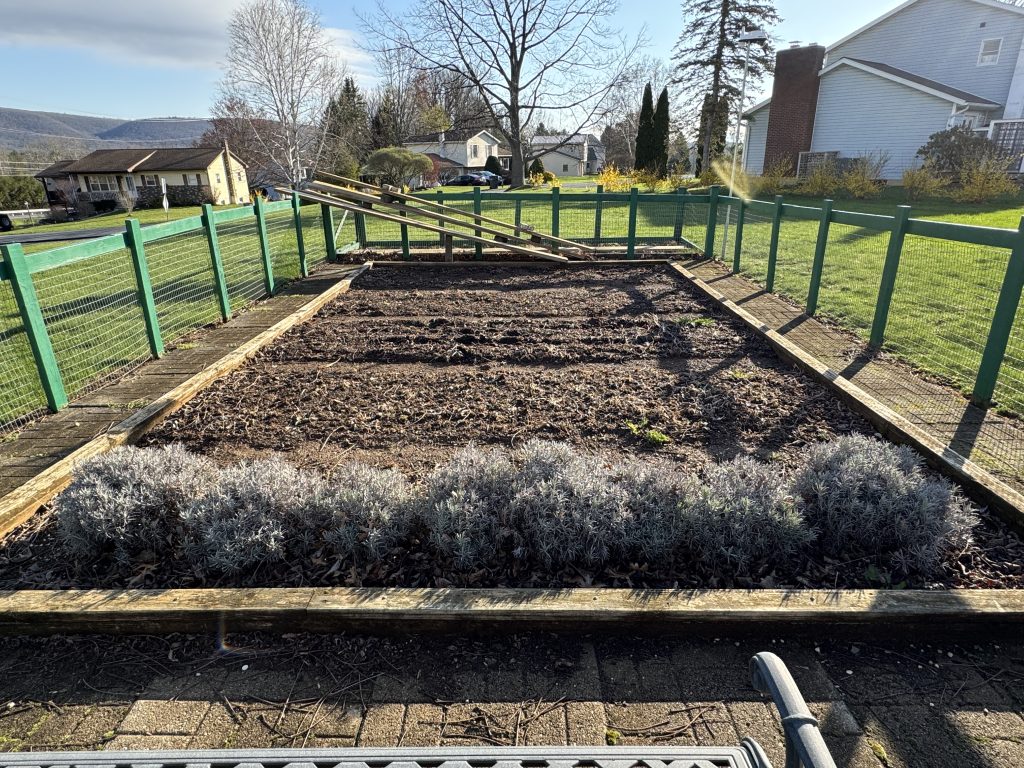
I hereby declare that our garden season has begun for 2025! I’d like to give you an overview of the upcoming season…sort of a baseline…so as the season goes on you’ll see progress. We are always hopeful at the beginning of the season!
So far, the planters by the patio are filled with 100+ onion plants. They seem to have weathered the below freezing temperatures just fine. We’ll thin them as we eat them so we’ll see how they do over the summer.
The planters along the side of the patio will have lettuce and radishes but it’s still a little early to start them.
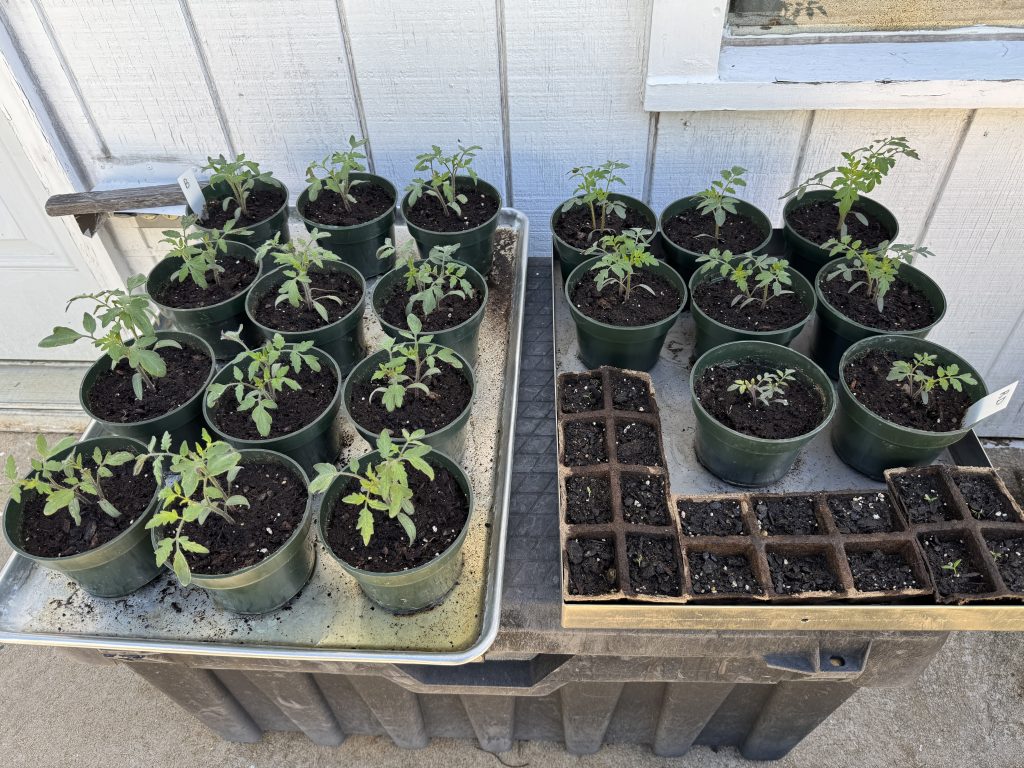
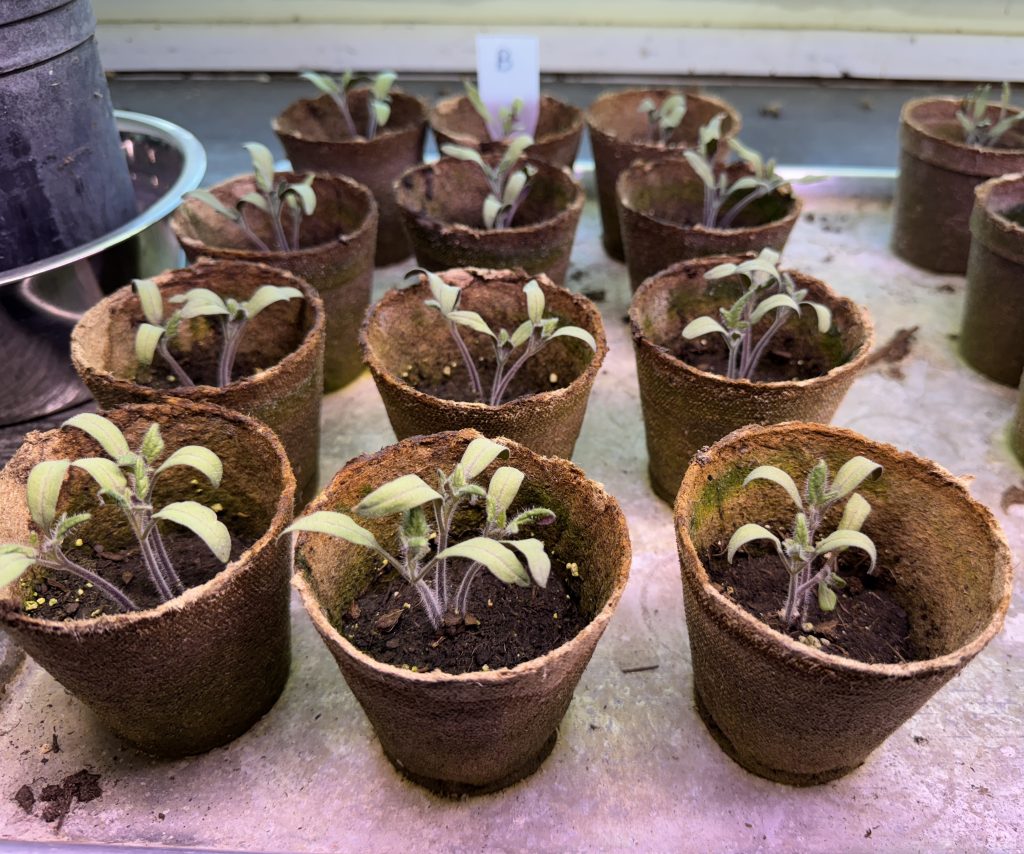
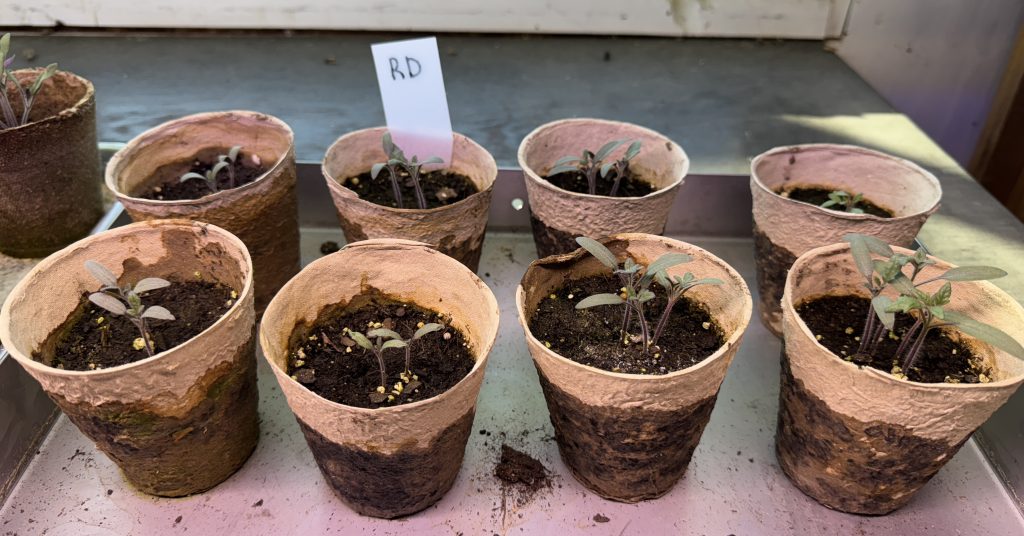
Bert started the tomato plants in the shop under grow lights about two weeks ago. Today they are big enough to take pictures of them. We have three kinds: Bodacious…a large regular tomato; Super Sauce…a large Roma style; and Rain Drops…a large cherry-type tomato. They will soon be thinned and transplanted to larger pots. It’s probably 6 weeks before they’ll go in the ground.
Bodacious
Super Sauce
Rain Drop
In the planters off the patio, we’re hoping to plant asparagus and the Rain Drop tomatoes. Not sure if we’ll fill in with flowers.
As I walked up the hill to the fenced garden, I noticed the forsythia around the property still looks beautiful.
Up in the garden on the hill, the lavender (in the foreground) still looks silver green. So far nothing is happening there. We’ll have room for tomatoes, carrots, green and yellow beans and zucchini. We grow what we’ll eat and I’ll can, freeze or dehydrate the extra. I fill in with produce from the local farmer’s markets.
At the other end of the garden is our section of Echinacea…my favorite! It looks like nothing is happening, but when you look closely, tiny green shoots are starting!
As soon as overnight temperatures are above freezing, Bert will set up the rain barrels. So, watch for future updates as the season progresses. Enjoy!
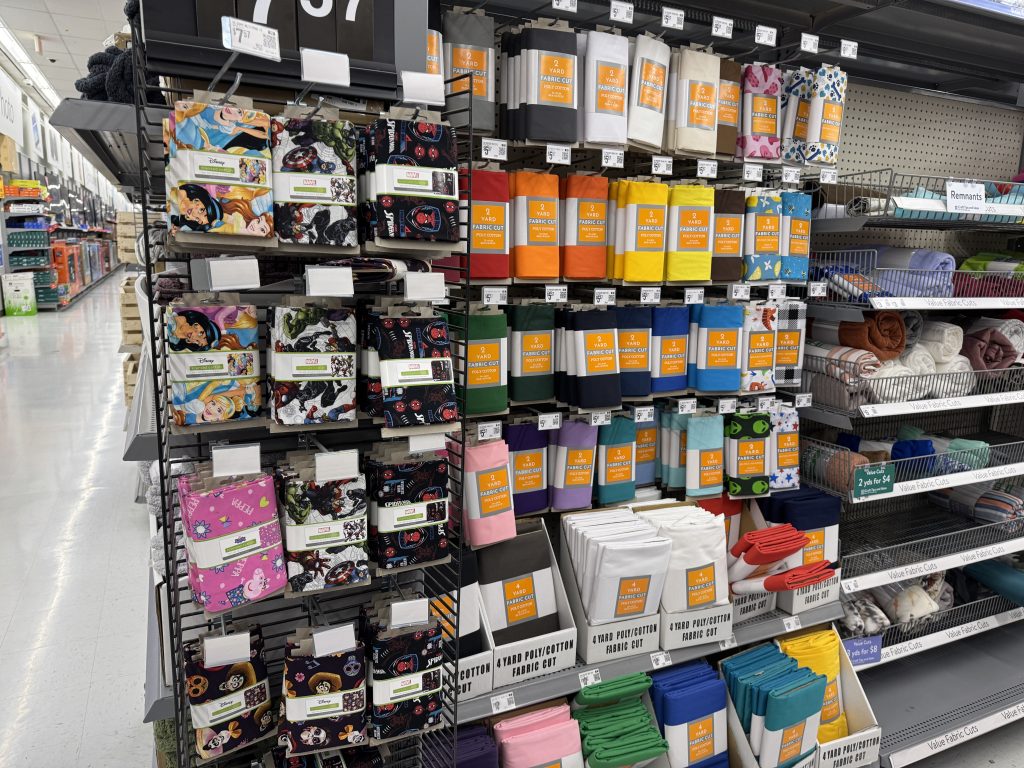
With the reality of JoAnn Fabrics stores closing all over the country, those of us that actually sew are looking for new sources of fabrics…especially where we can touch and feel the fabric. In my area, central Pennsylvania, JoAnn’s has been the go-to source for many years. Recently, I really haven’t needed much except fleece for the greyhound coats. Now that I’m not making as many coats, and my other sewing projects involve using up the fabric I have, I realized I didn’t know what my other choices were.
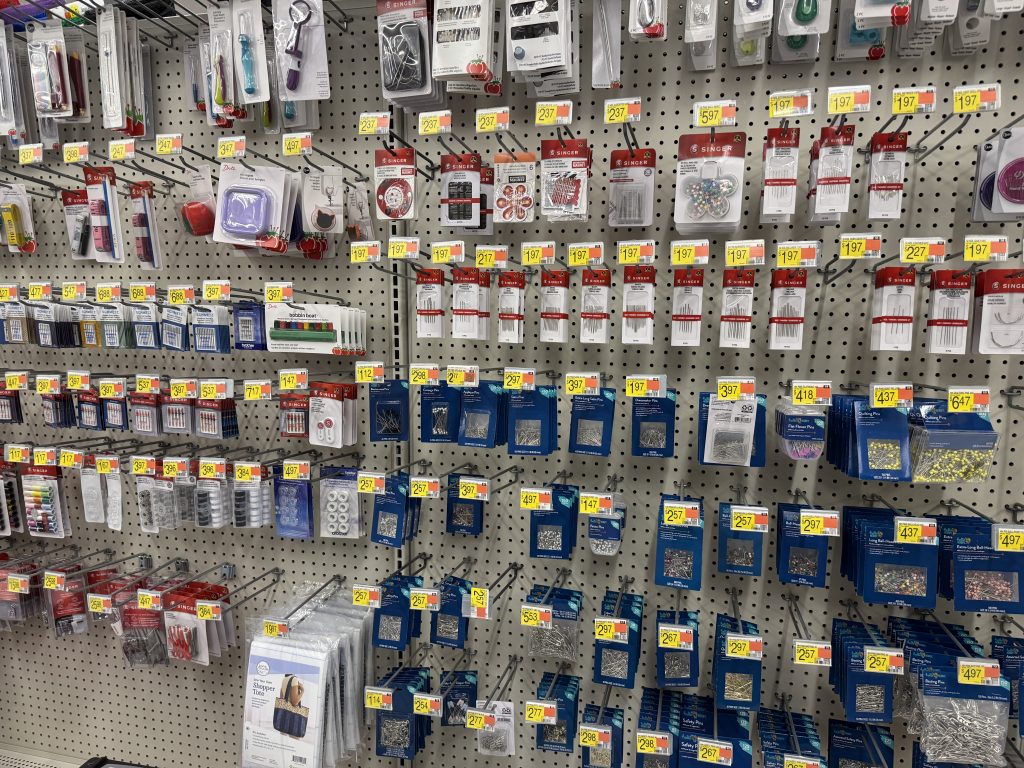
Today I’d like to share what I found at my local WalMart for fabric and sewing notions. A store near you may have other choices.
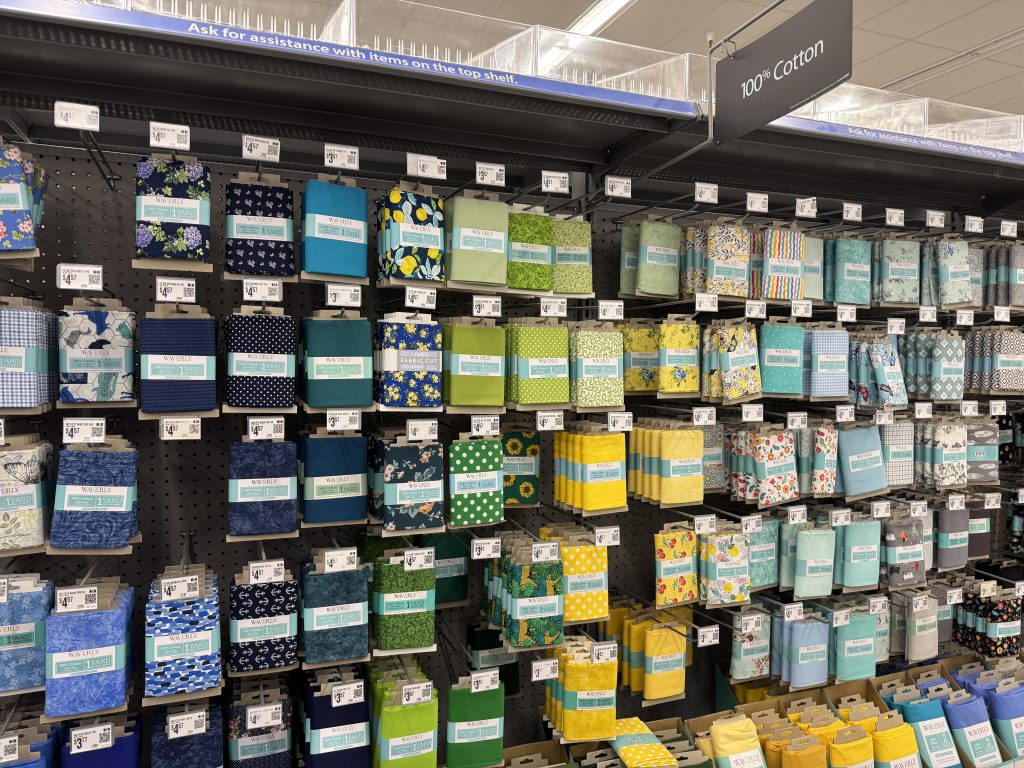
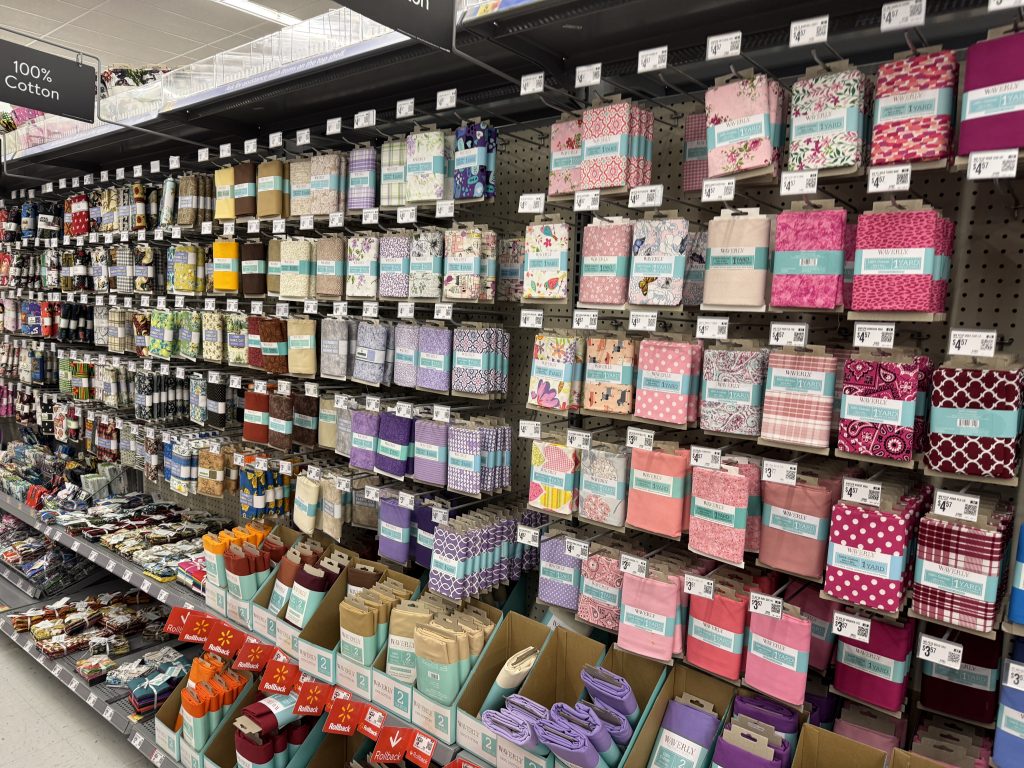
I found many prepackaged yards of fabric…mostly 1-yard and 2-yards…of poly/cotton blends and 100% cotton. Prices were pretty standard.
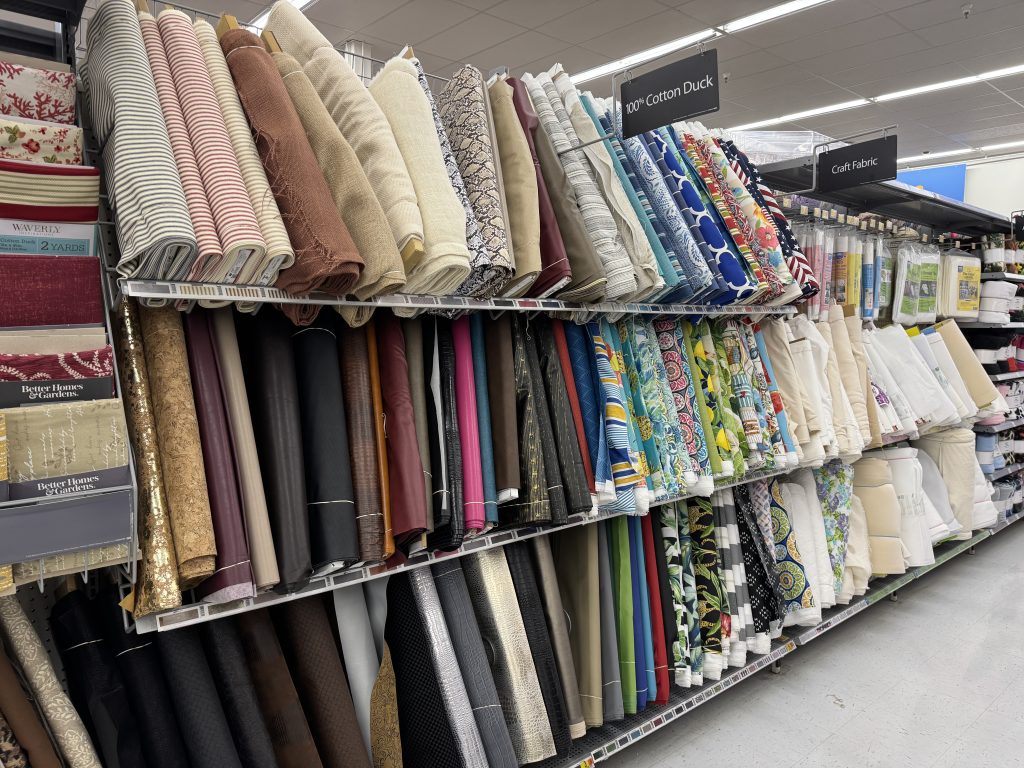
They offered a section with utility fabrics, ready to cut to length…assuming someone was nearby to do the cutting.
A whole section of cotton fabric, ready to cut, was available.
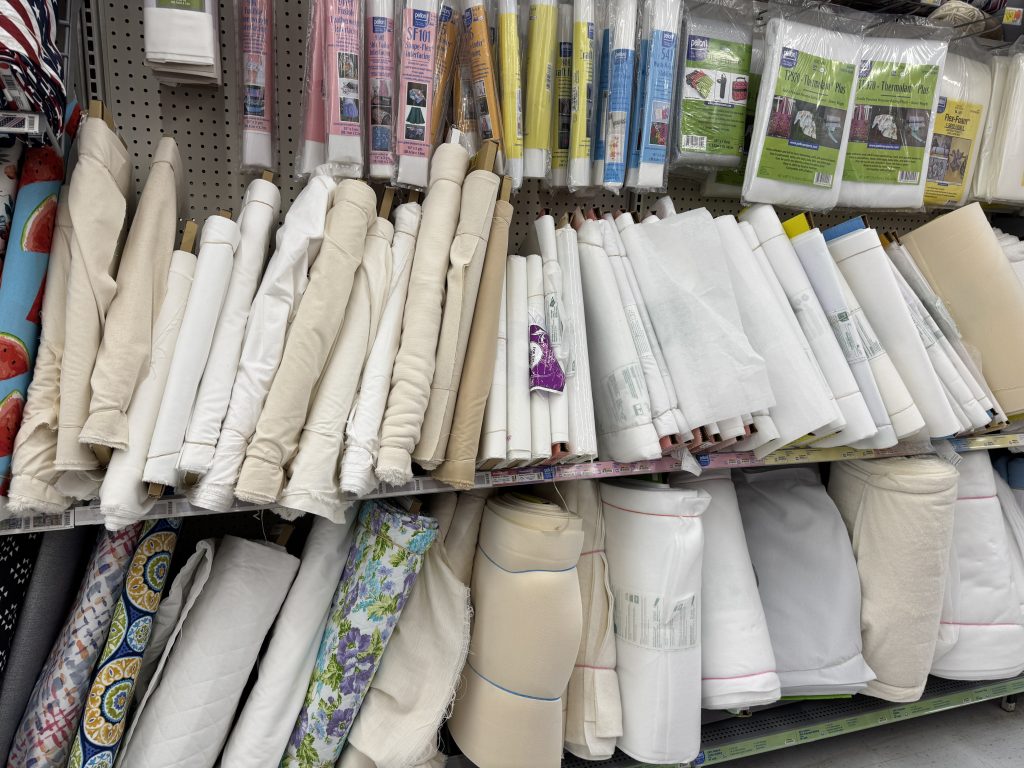
Muslin and interfacing were available.
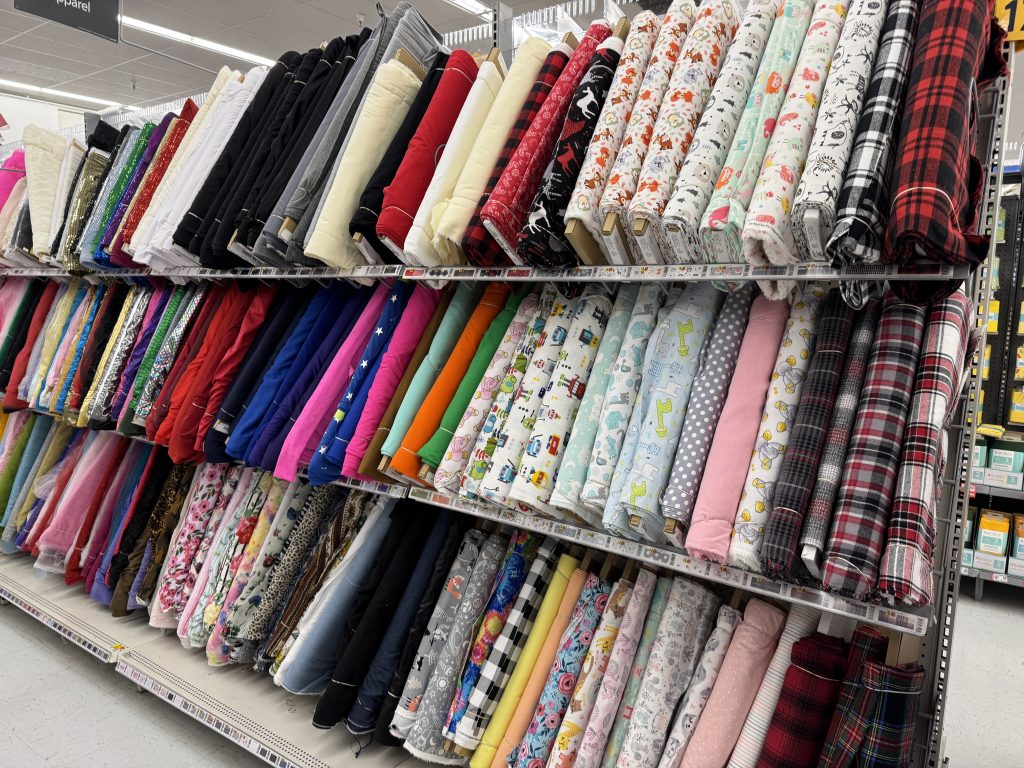
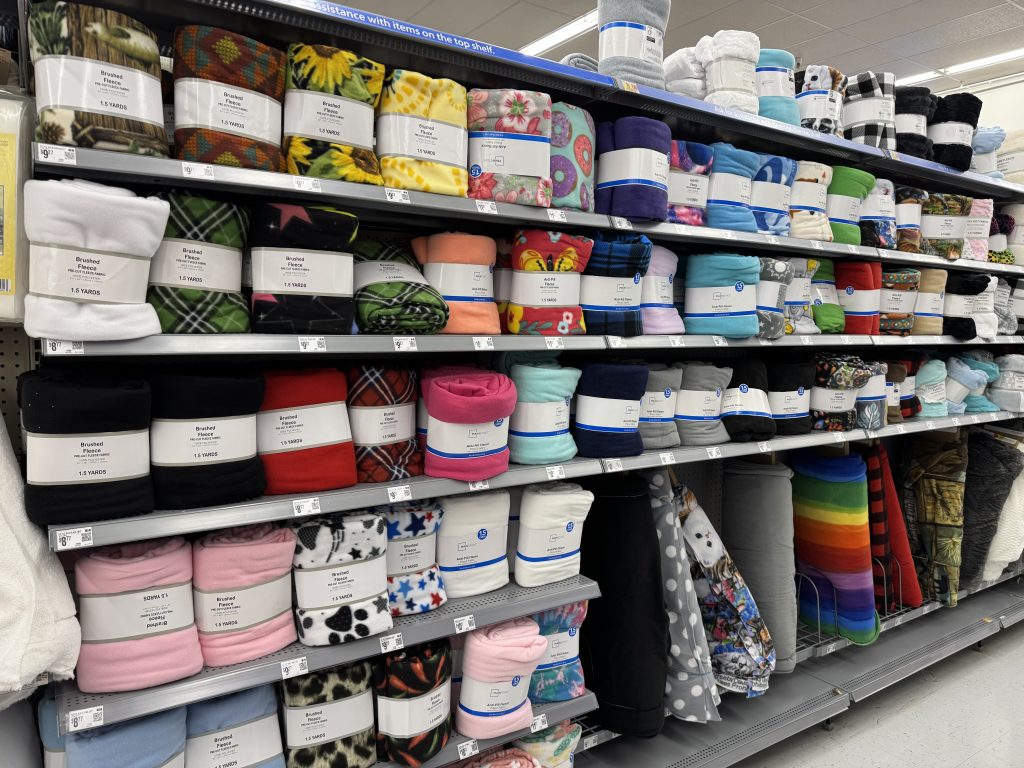
Fleece, prepackaged into 1 1/2 yards was available. I could make two coats out of one package, plus the linings out of another.
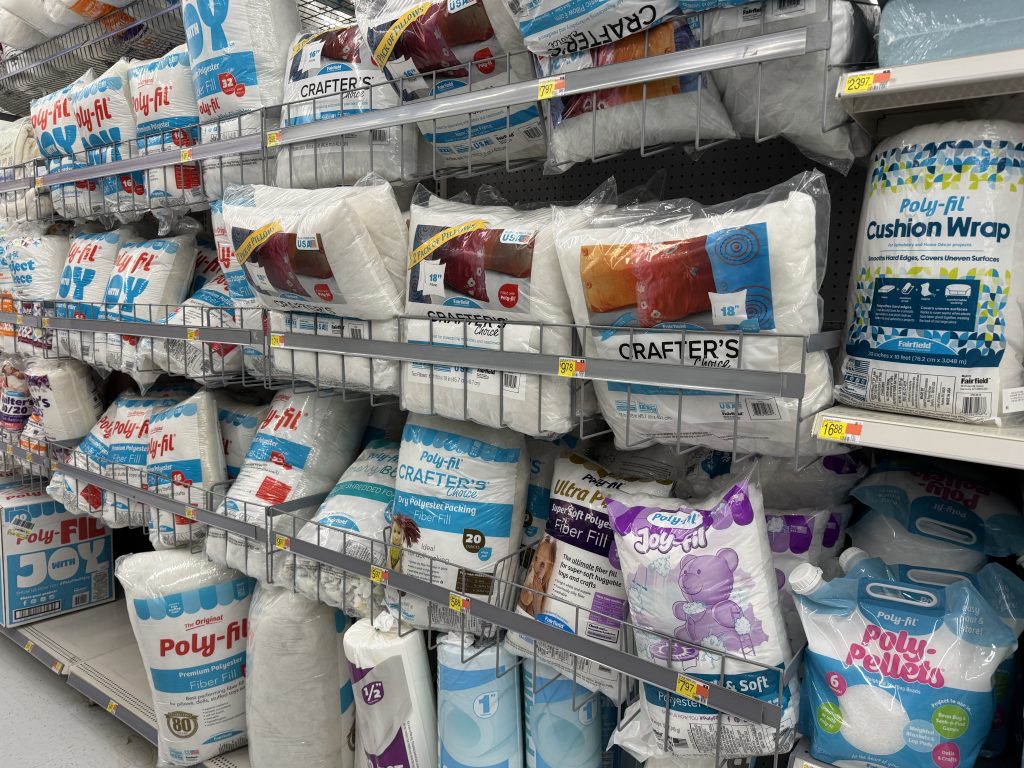
Poly-fil stuffing and pillow forms are stacked up.
The price of patterns in stores and online are crazy now! The display at WalMart seemed to be focused on the needs of families…clothing for children, costumes, etc., and ranged from $2.97 to $4.97!
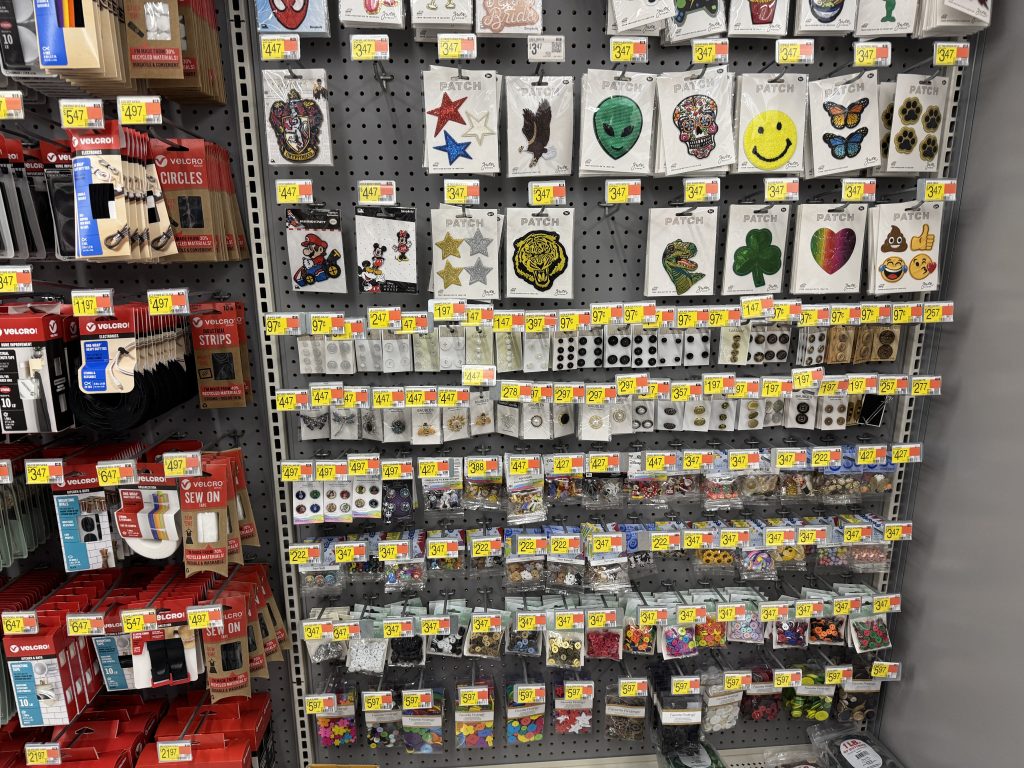
The offerings for appliques and buttons were pretty sparce, but I can see those can easily be sold online…probably even at WalMart.com.
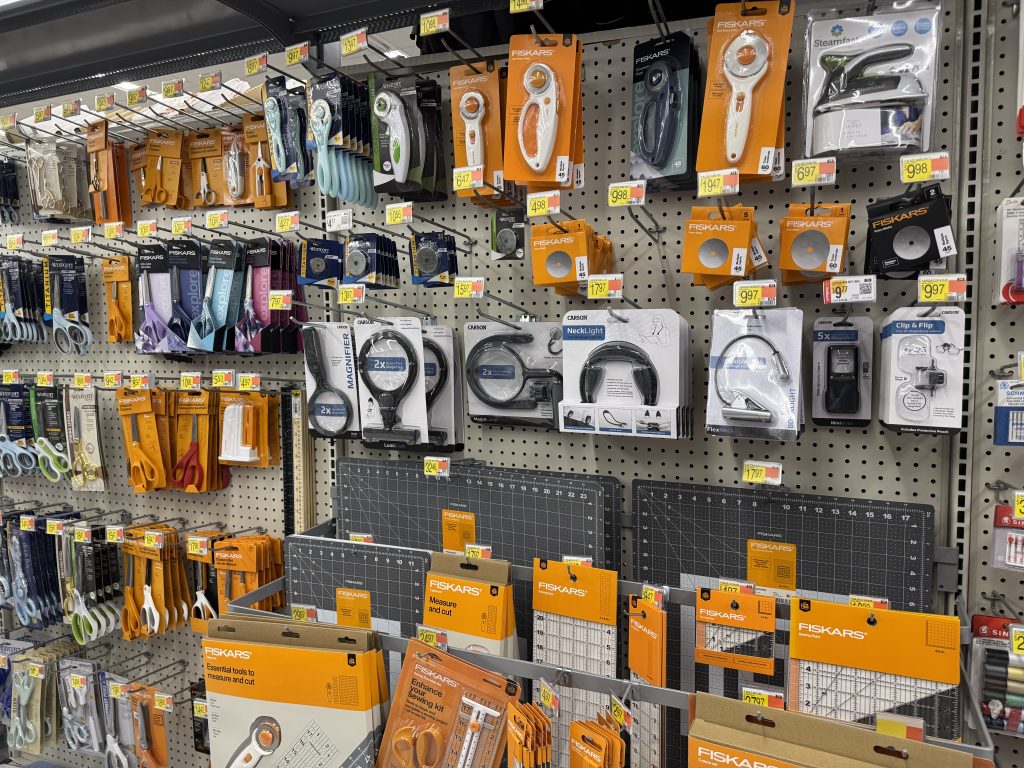
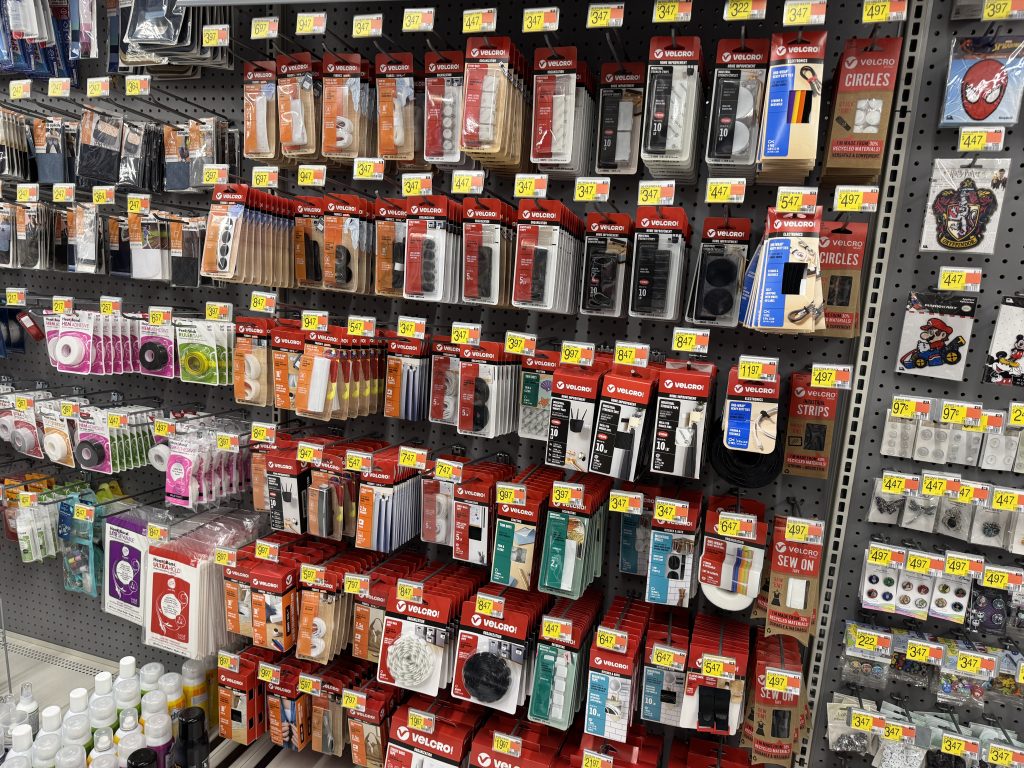
The rest of the items for sale were tools and other notions that could be useful to folks that sew or craft…scissors, rotary cutters, magnifying lights, Velcro, needles, rulers, safety pins, etc.
WalMart’s offerings of sewing fabric and supplies can certainly fill a need for those many useful items that you might need right now when you’re in the middle of a project. If you’re looking for specialty fabric, or high-quality fabric for clothing or quilting, you may want to find another source for that. I’ll continue exploring resources in the area for those projects.