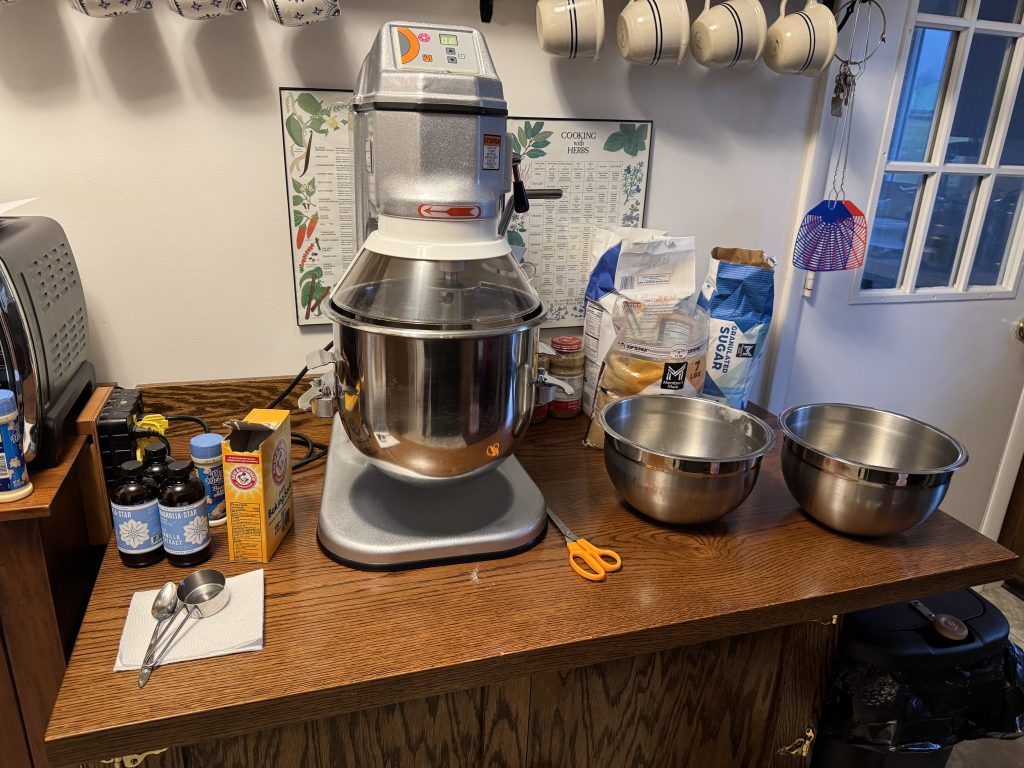
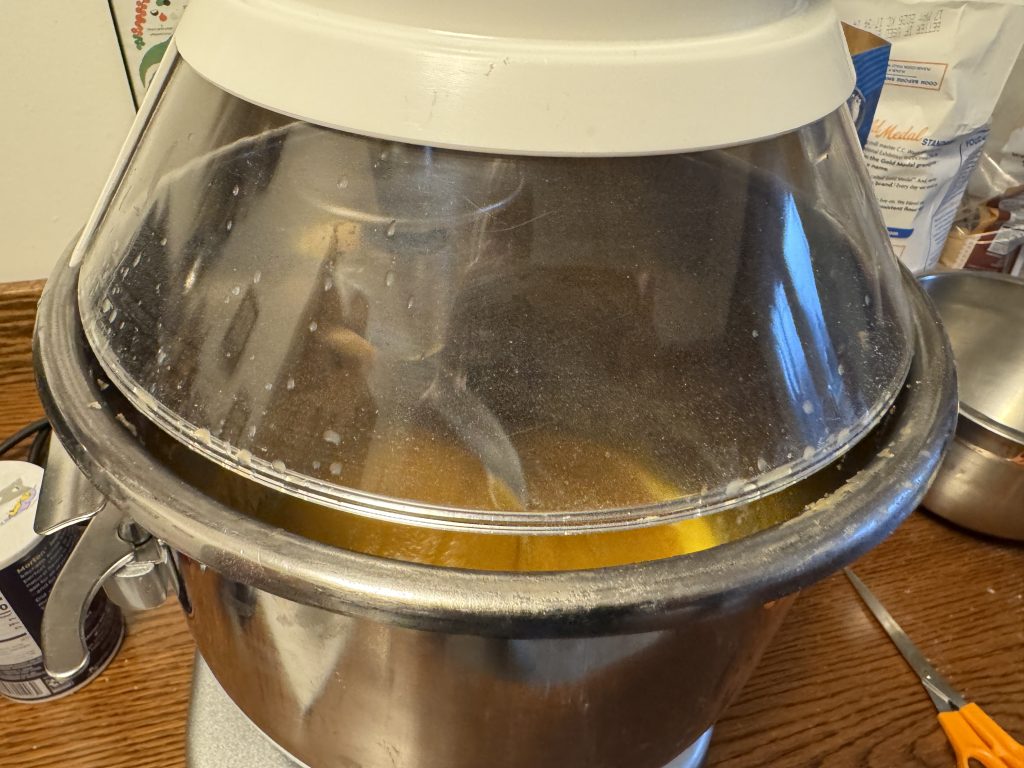
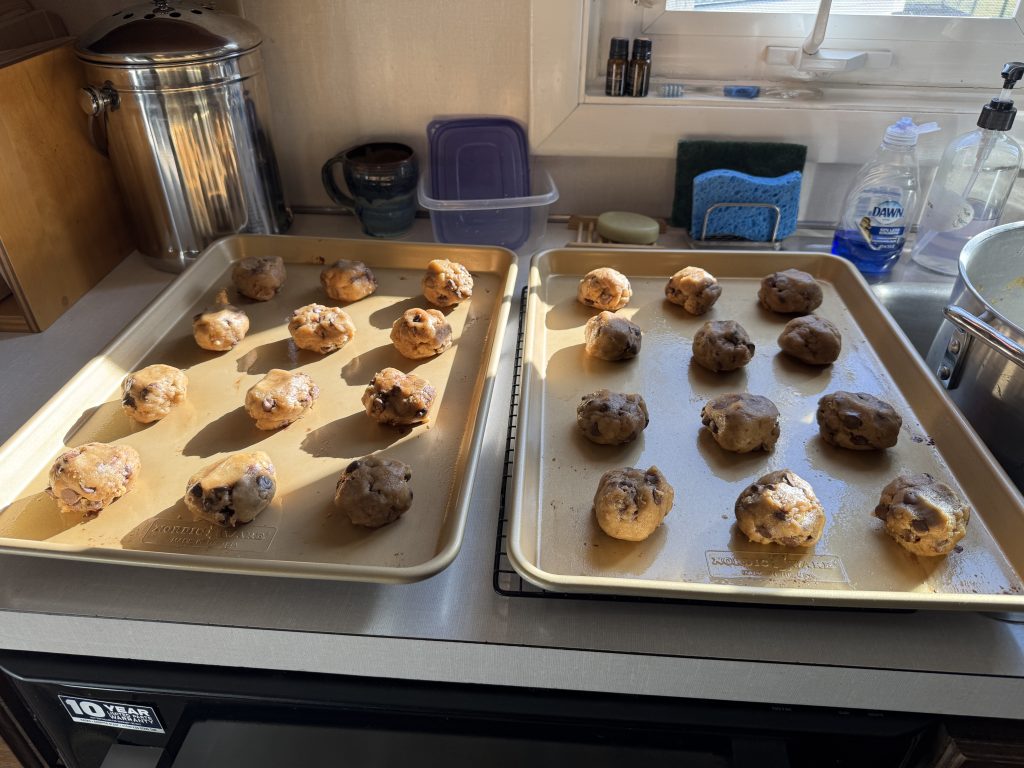
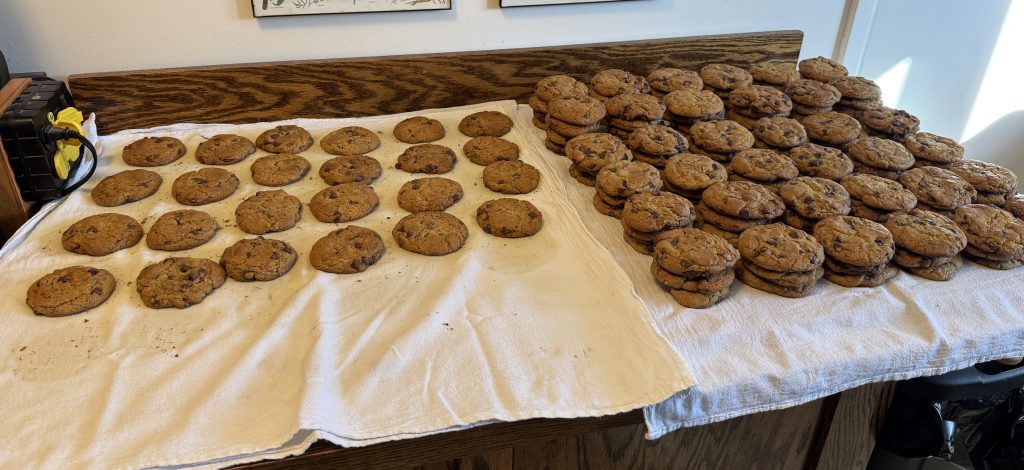
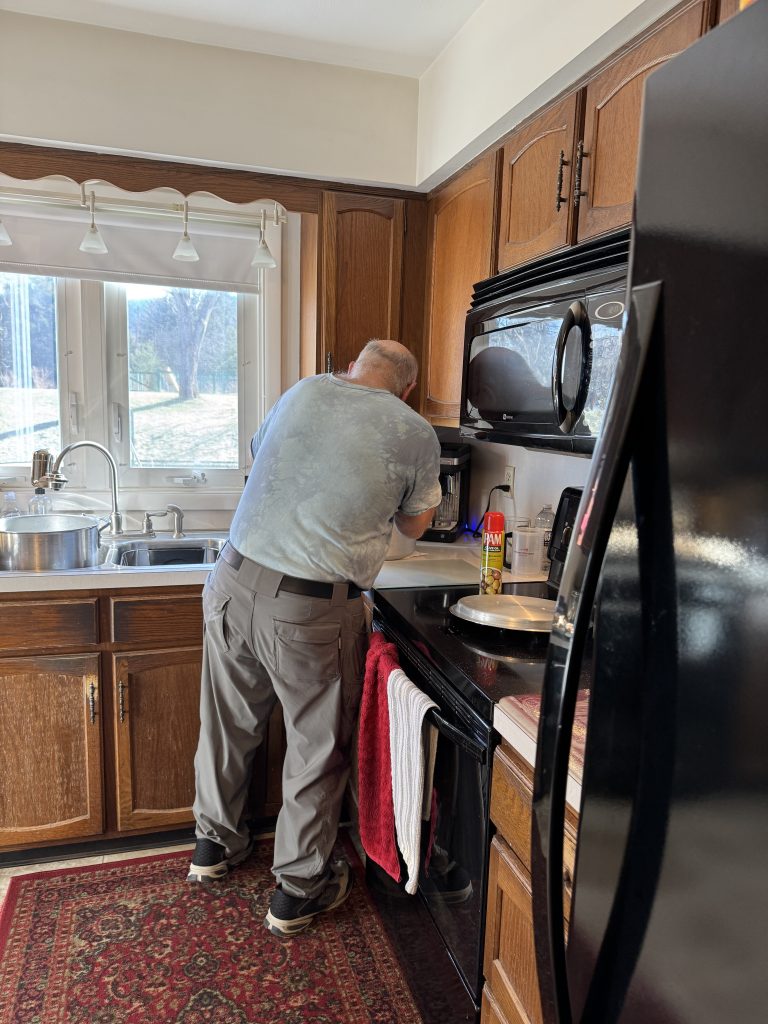
Yes! It’s that time again! For at least a week each December the kitchen is tied up with Bert’s marathon cookie baking! He makes about 170 pounds of dough and bakes about 140 dozen chocolate chip cookies. Of course, the refrigerator in the kitchen, the extra refrigerator in the basement and various tubs in the garage are packed with dozens of eggs, butter, flour, sugar and chocolate chips for a week before the mixing and baking begins.
Bert has been doing this for the last 60+ years so this is just a normal December for me. You can see the recipe and more photos in the two other posts I wrote about his yearly project:
Before I got out of the way this time, I planned ahead and made a batch of chicken salad and egg salad and got a loaf of bread out of the freezer so we could grab food for lunches around all the baking activities! There is no counter or table space available once he gets started!
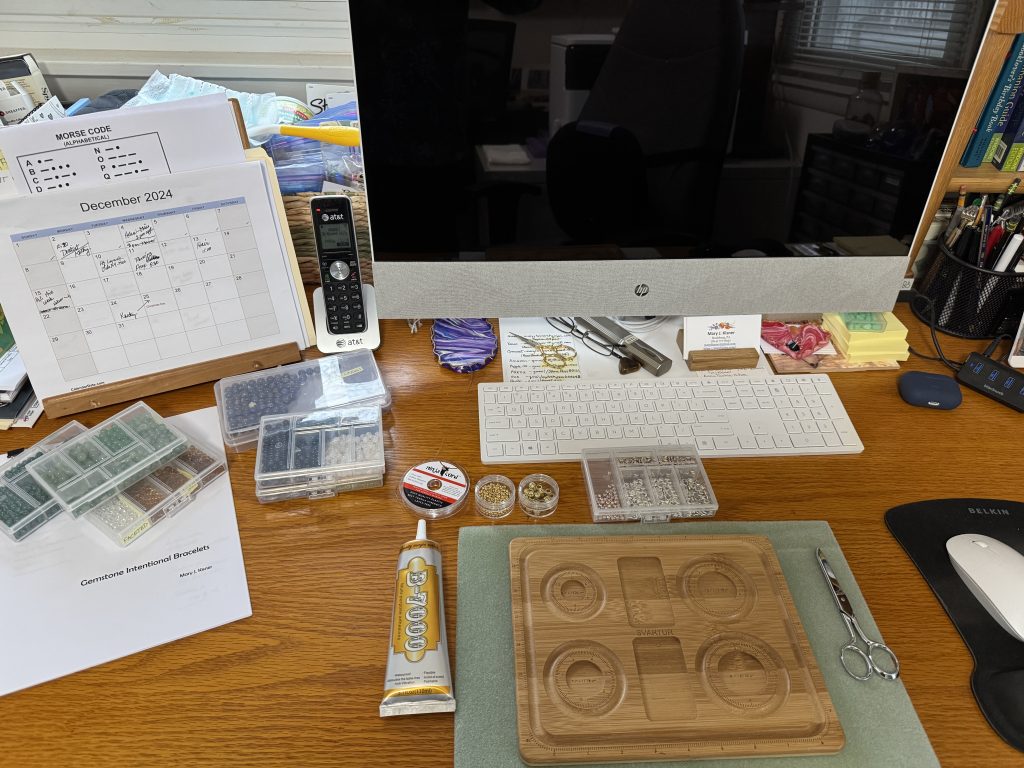
While the kitchen is off limits for any baking I want to do, I took a few pictures of my ongoing projects in other spaces in the house.
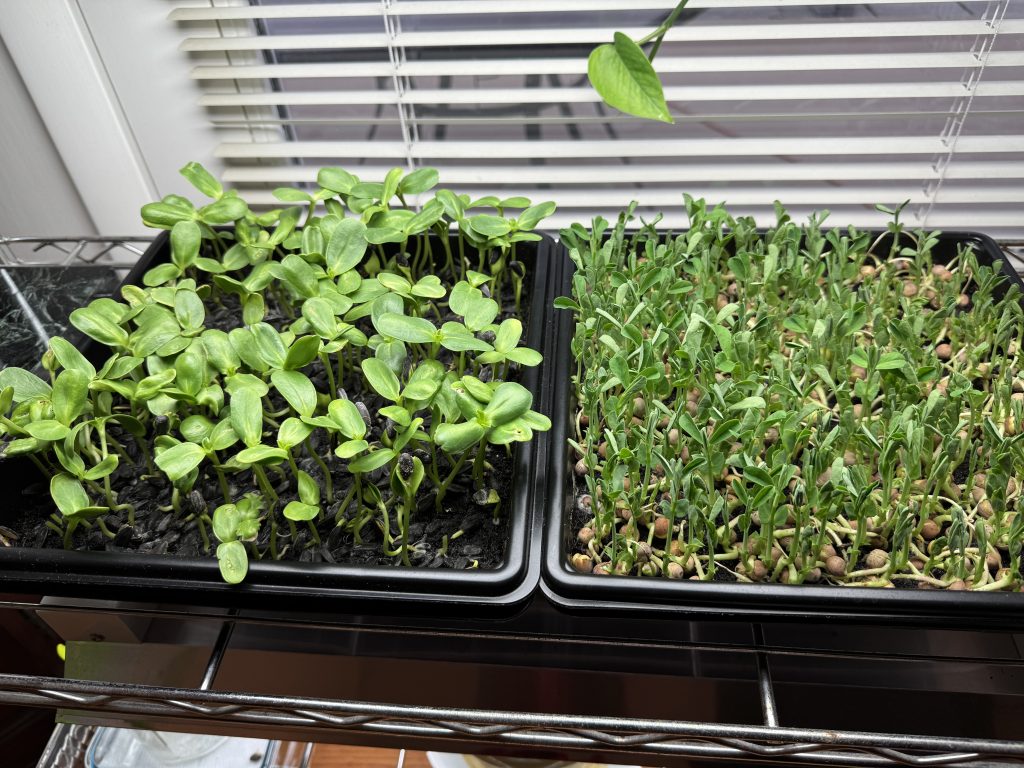
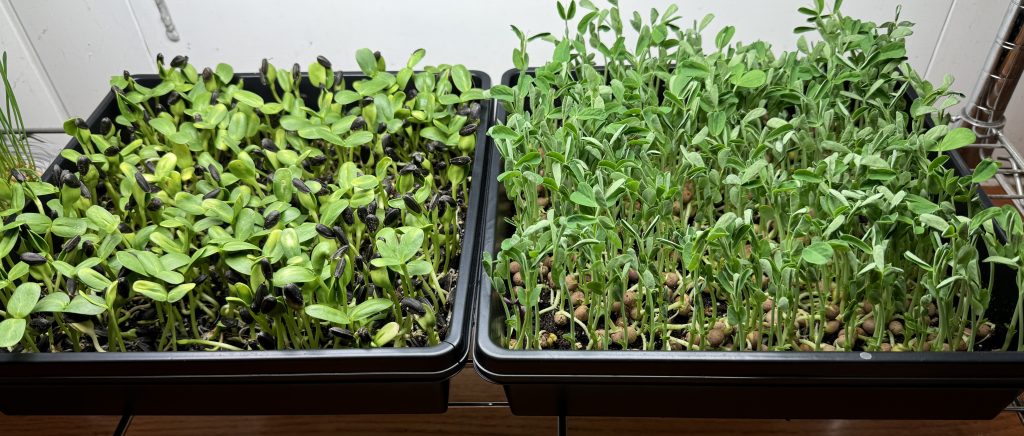
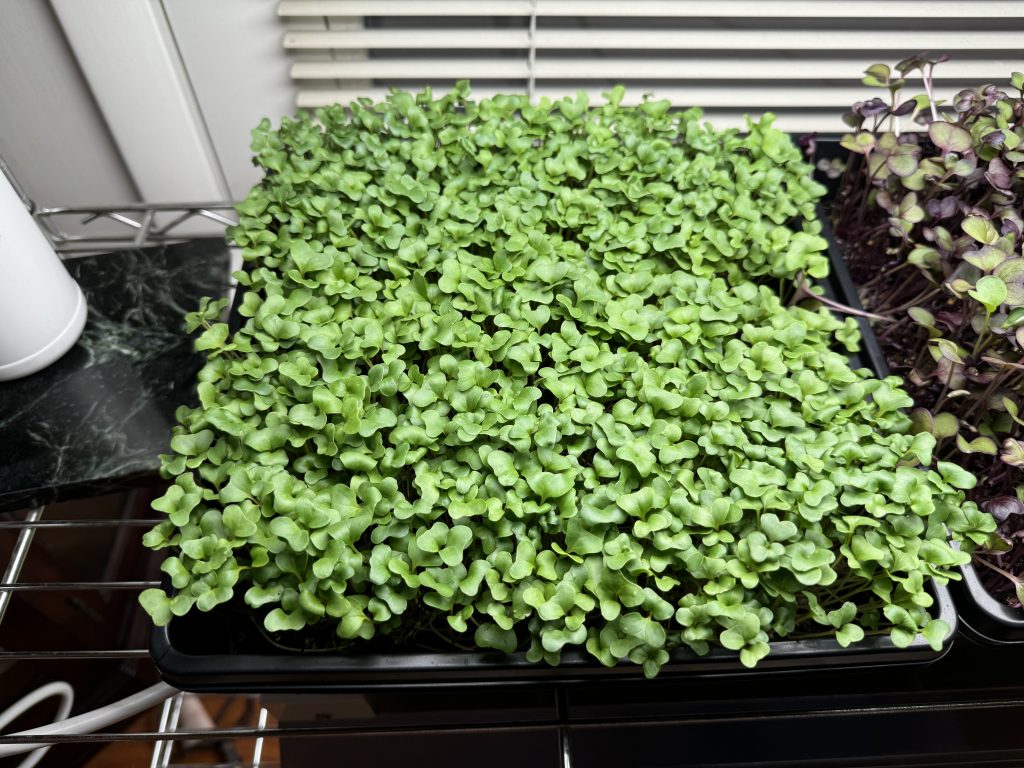
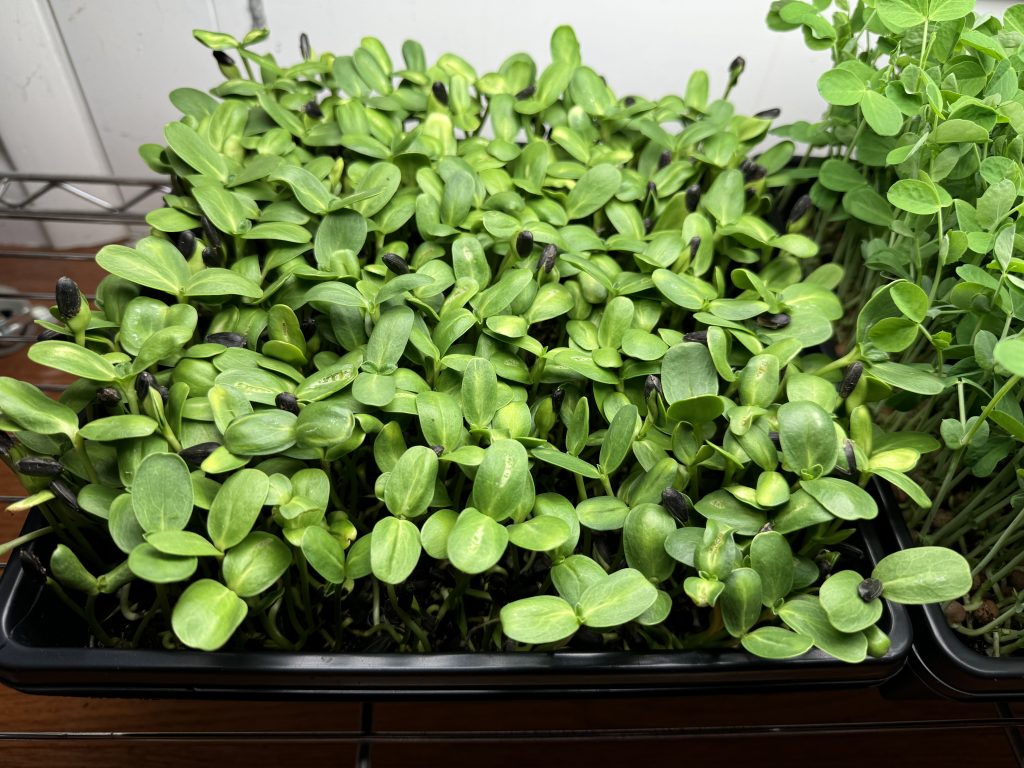
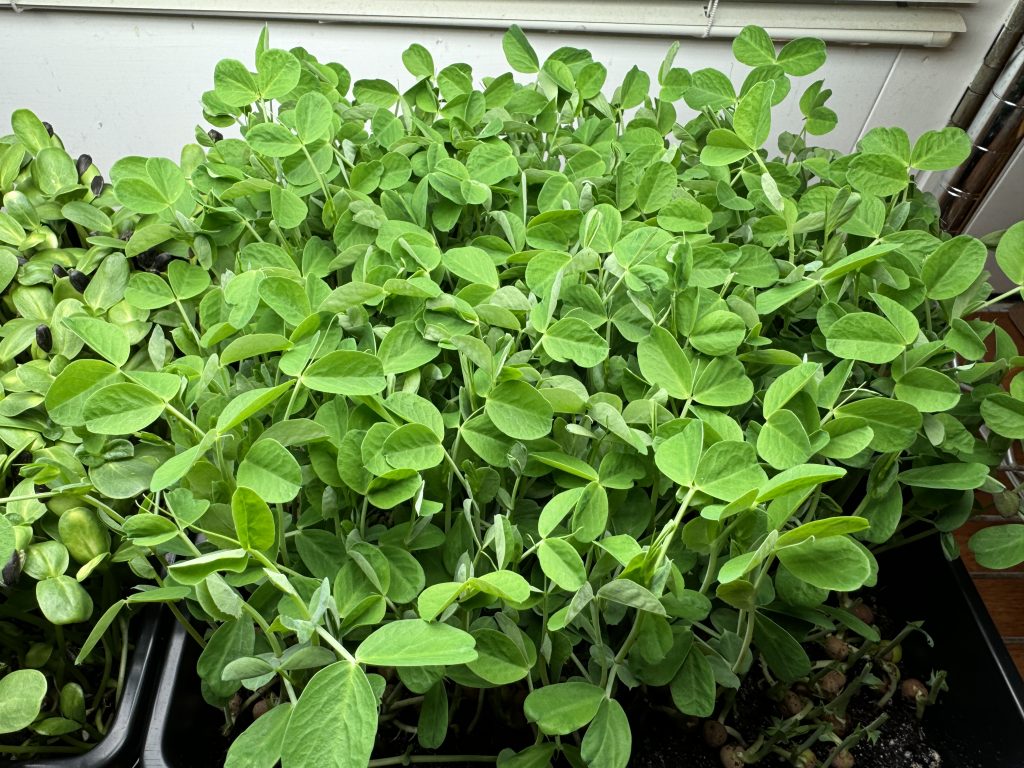
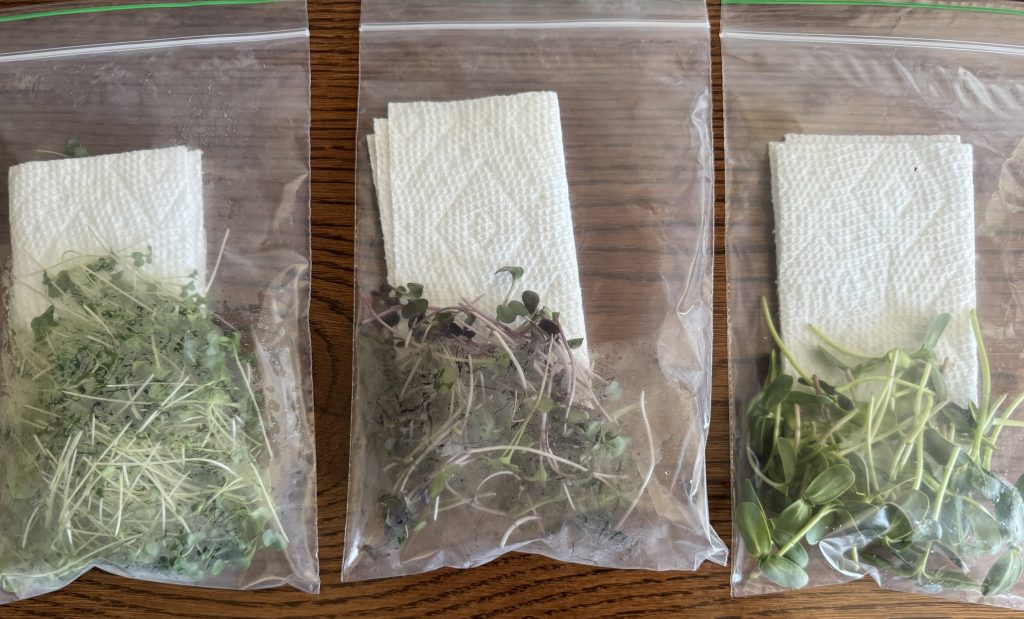
In the dining room I’m keeping my microgreens growing. This batch of sunflowers is about ready to cut. They are not very thick because many of the seeds did not sprout. The seed was saved from last year and it is probably time to order some new seed. The peas (on the right) need a few more days to fill out.
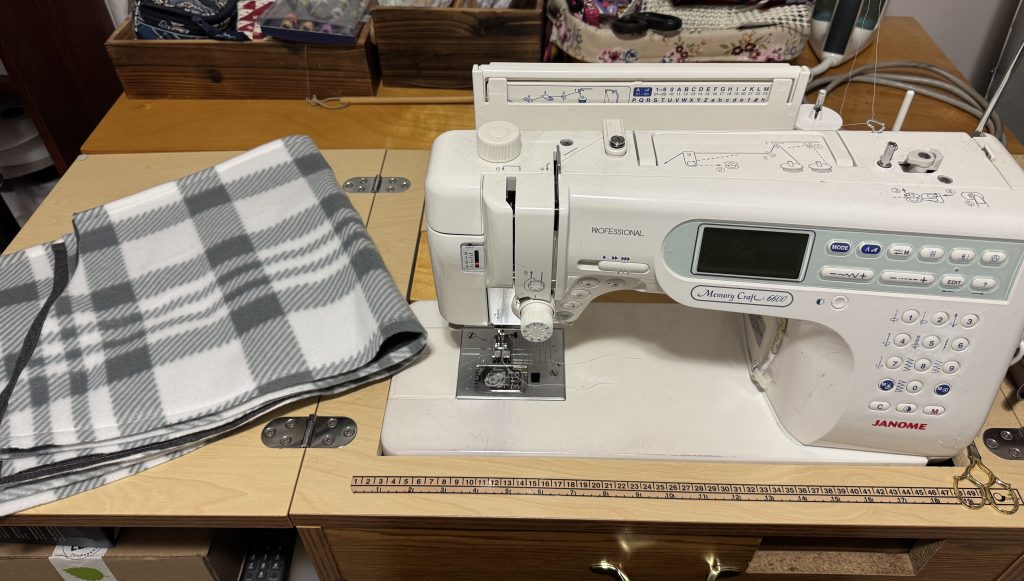
In my sewing room, I have 4 greyhound coats to finish before Christmas. I have a TV to entertain me with the latest Christmas Hallmark movies!
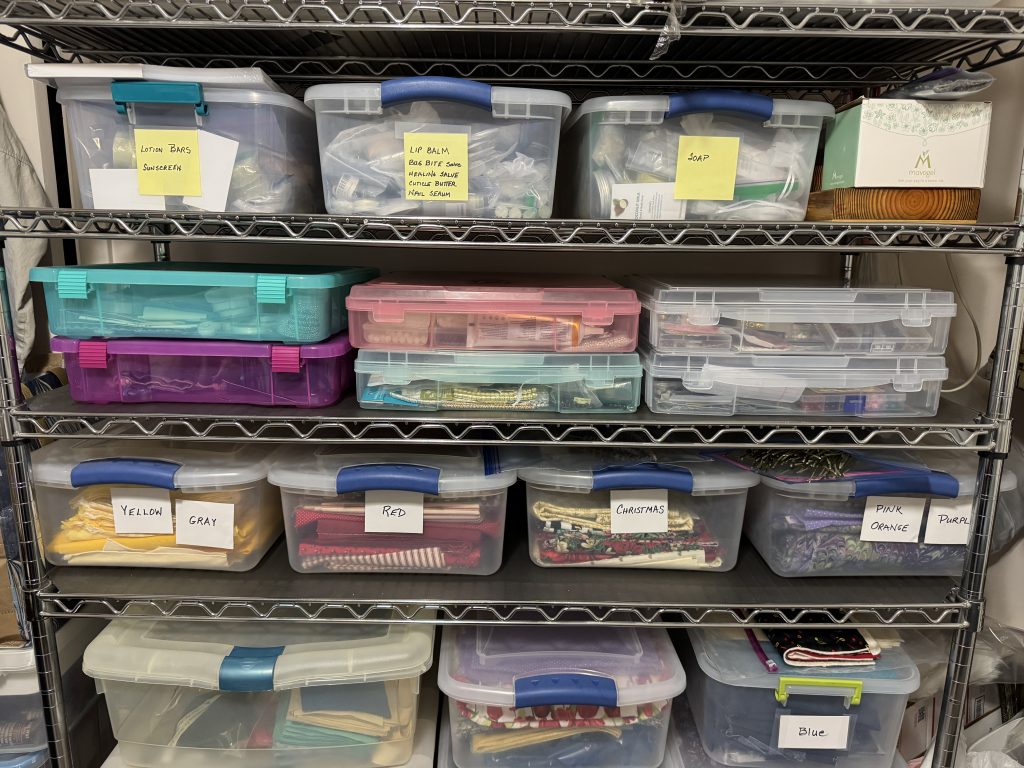
In my sewing room, I also have my beads stored ready to finish a few bracelets. Can you see the second shelf down with flat boxes? All my beads fit in those 6 flat boxes! Of course, when I want to work with them, I lay them out on the bed and choose the beads I need. Work on the bracelets has to happen at my desk in the office.
In the office, I can write my posts OR I can make bracelets! Such a multipurpose desk with a good light!
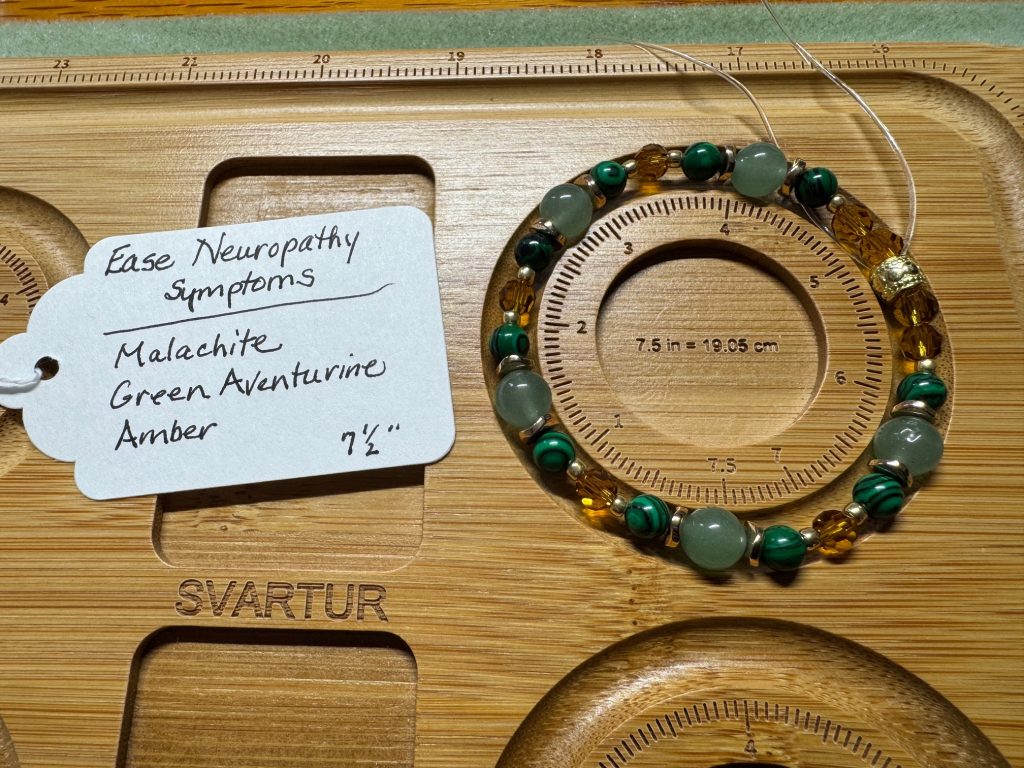
Here’s the latest bracelet I finished today!
So, you can see I have many choices of things to do when I can’t get into the kitchen! I can always do laundry around my projects…but you’ll seldom see me choosing to clean or dust or vacuum! Just too many fun projects to distract me! Haha! Enjoy!
The whole point of learning how to grow microgreens from a workshop with an expert was to be able to do it myself at home. I learned about starting tiny seeds, like broccoli and radishes and larger seeds, like peas and sunflowers. You can read about my successes with those seeds here:
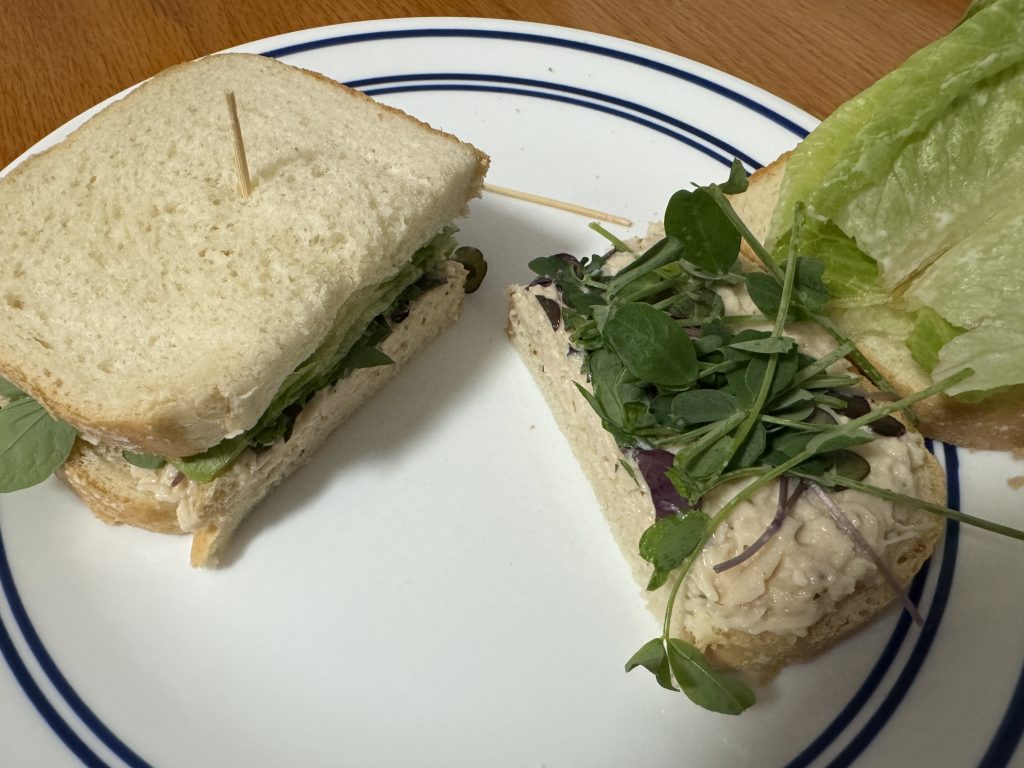
I’ve shared the greens with friends and added them to my salads and sandwiches. Now that I’ve composted the leftover roots and cleaned out the trays, I’m ready to try something else.
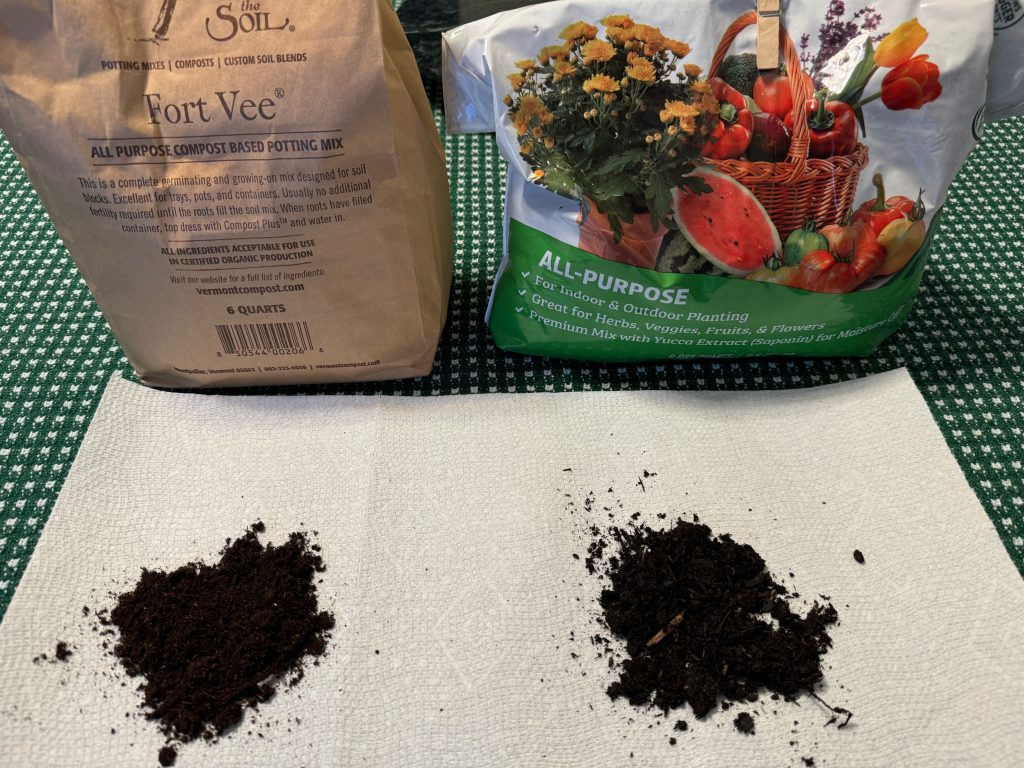
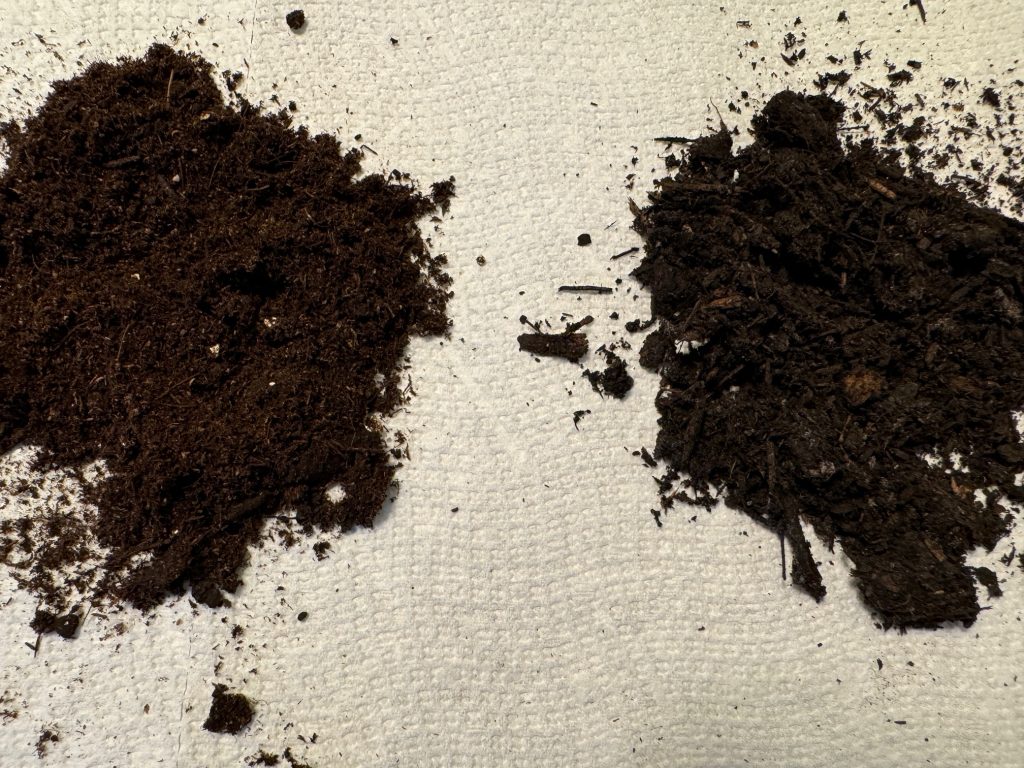
I ordered some potting soil from the Vermont Compost Company, that was recommended by the High Mowing Seed Company (recommended at my workshop). This mix was pretty smooth and loose.
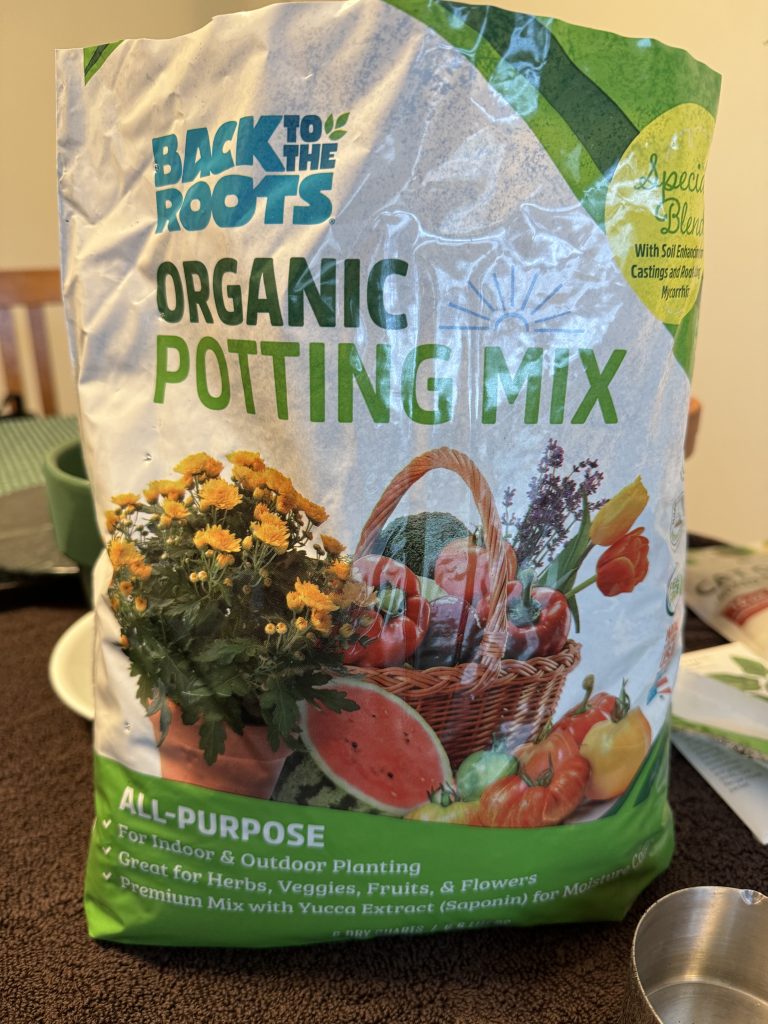
Given the description online of that grow mix, Bert went to Lowes and tried to find a similar product. He ended up with this one:
They looked different from each other…the one from the Vermont Compost Co. was pretty consistent with no big chunks. The one from “Back to the Roots” (above) had chunks of bark and twigs along with the compost mixture.
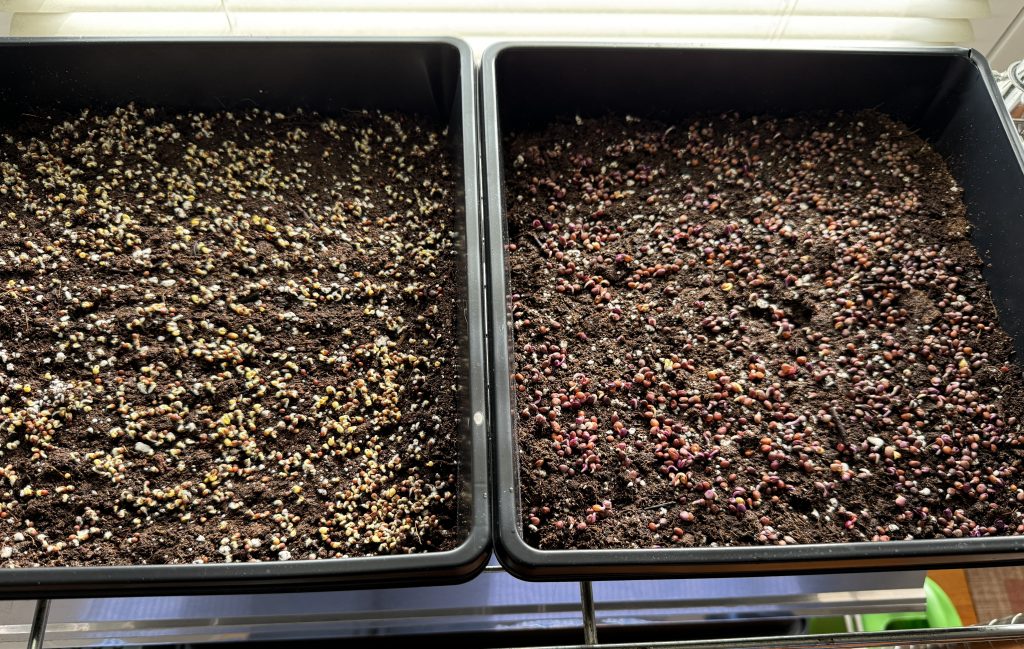
Next, I needed to decide what to plant. I had some broccoli seeds, some sunflower seeds and a mixed bag of peas, lentils and red beans. I’ll save them for later, because for my second try, I wanted to try something new.
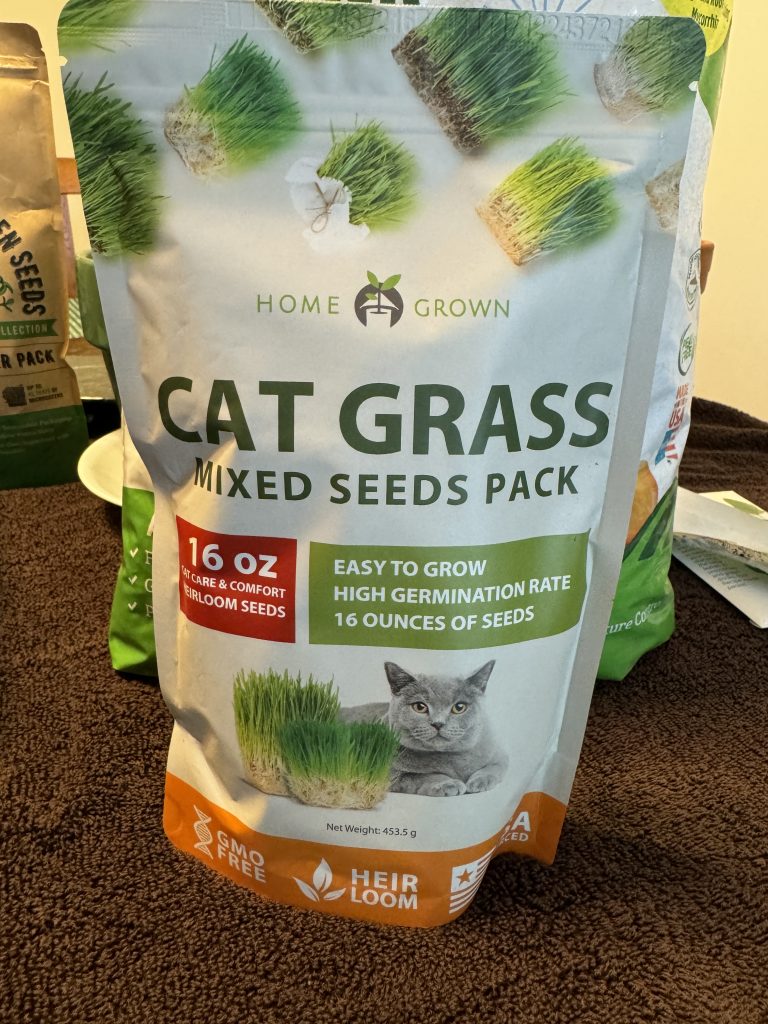
Cat Grass and Catnip
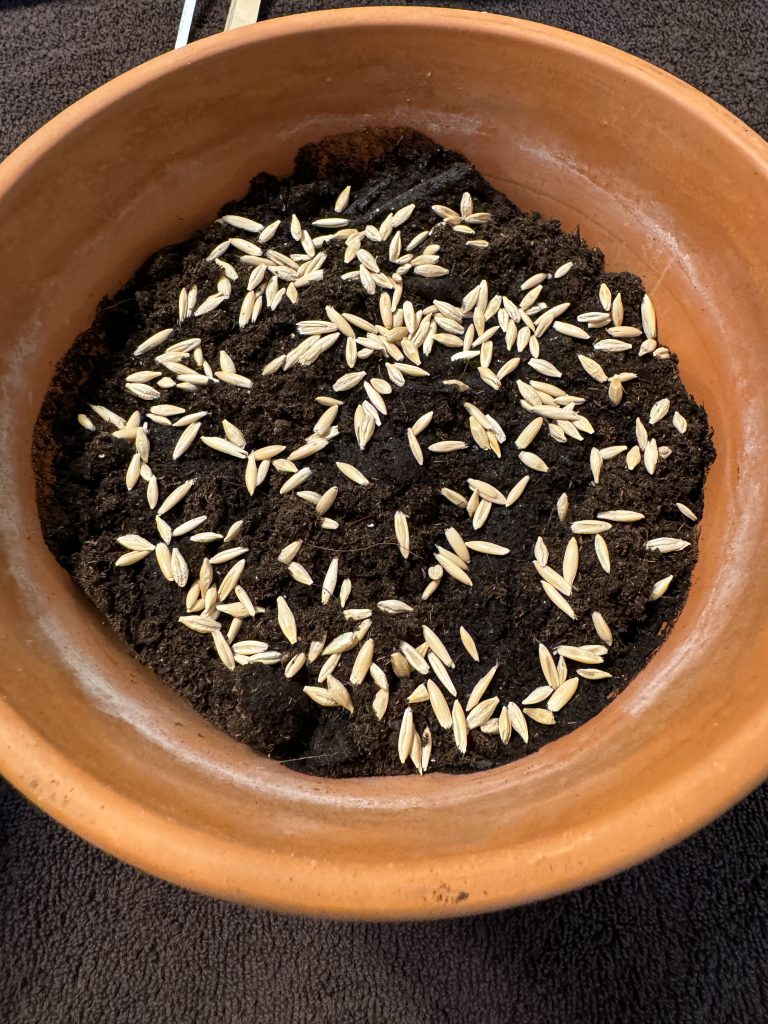
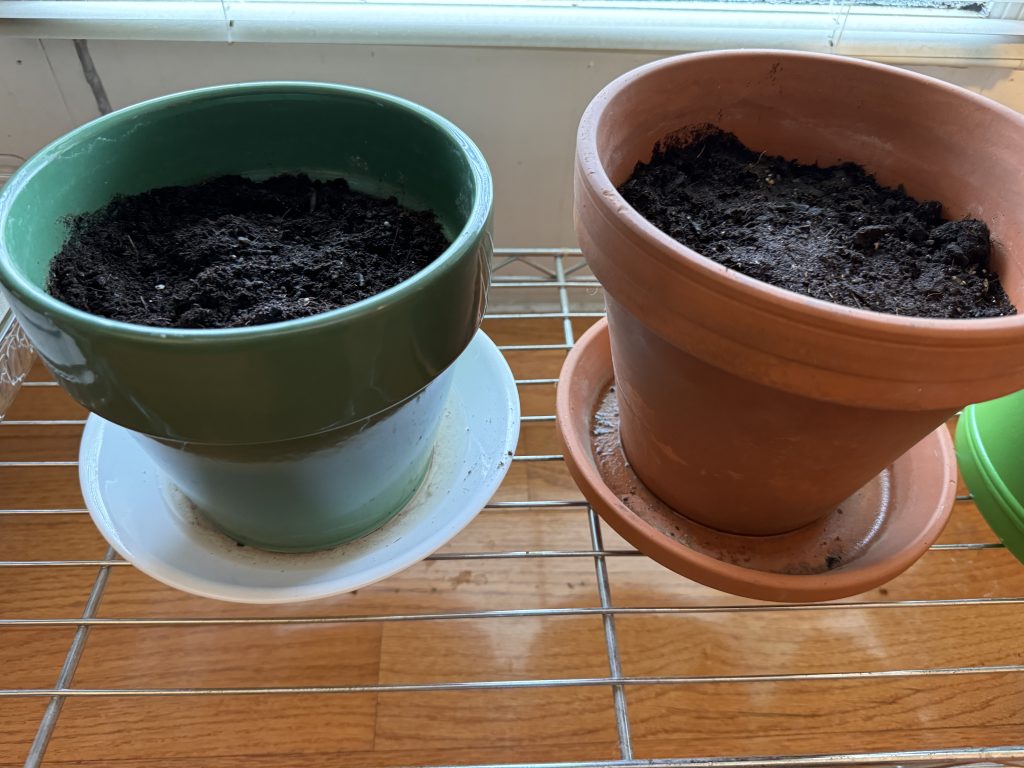
First, after the success of the wheat grass with a friend’s cats, I thought I’d try real cat grass (oats and barley) for another friend with a cat. Because the pot needed to be sturdier, I chose a hefty clay pot that would help the grass last longer and be easier to water.
The cat grass seeds were pretty big, so after I filled the pot with potting mix and soaked the soil, I sprinkled the seeds on the top and covered them with a tiny bit more of the potting mix. I’m sure they won’t be as quick to sprout as the smaller seeds but I’m in no hurry.
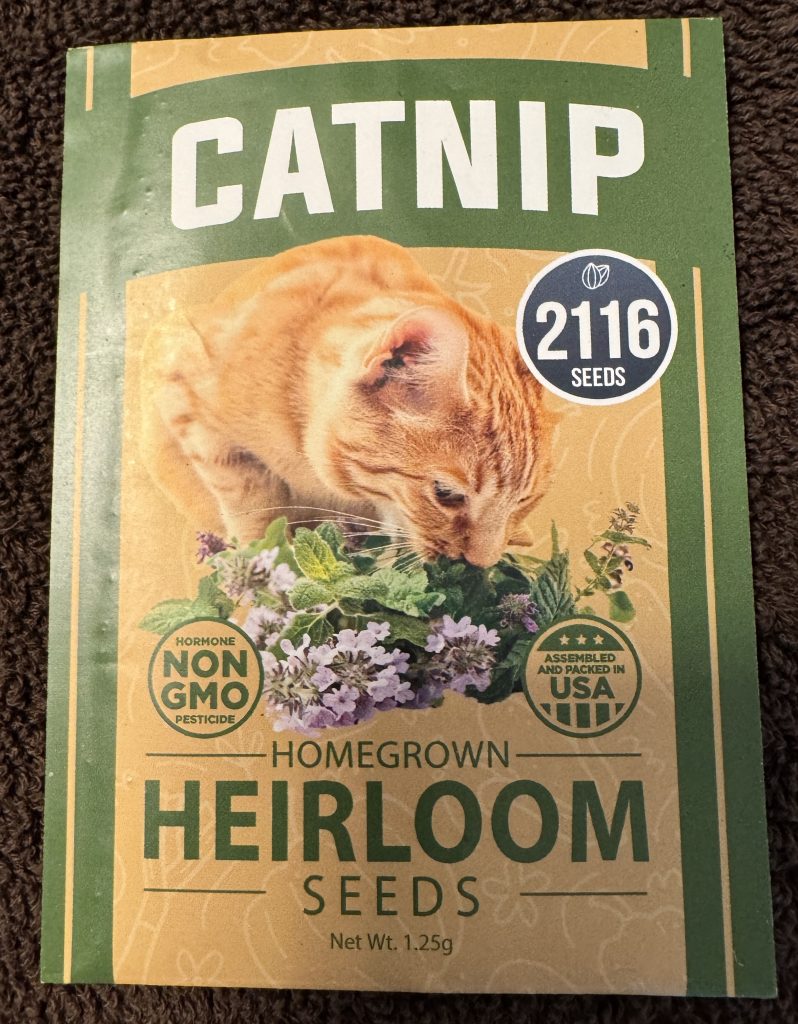
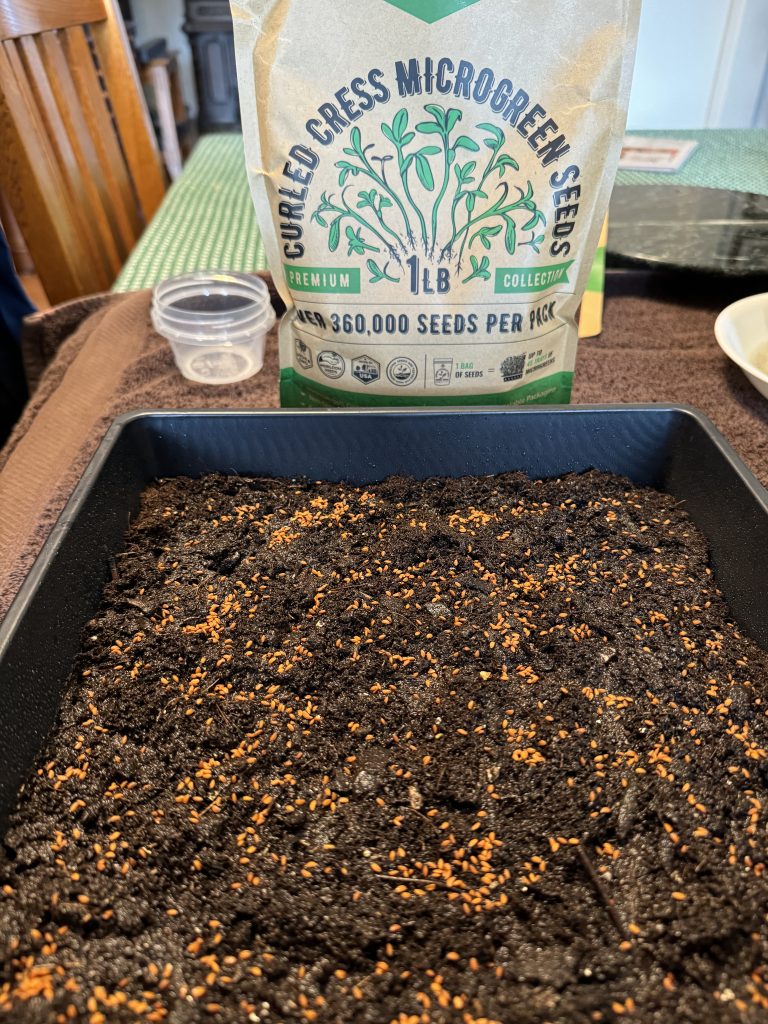
The catnip seeds were VERY tiny so you can’t even see them on the dirt. We’ll see what happens!
Watercress and Baby Spinach
I had a friend interested in whether watercress would work as a microgreen. I ordered a bag of seed. If it works, I’ll give her the whole flat! We could probably use the extra seed to make a lot of watercress for a long time. Look out Becky!
Since the watercress seeds are tiny like the broccoli and radish I did first, I soaked the soil, spread the seed around the tray and sprayed the seeds with water. Finally, I covered the tray with an extra tray to keep it dark for a few days.
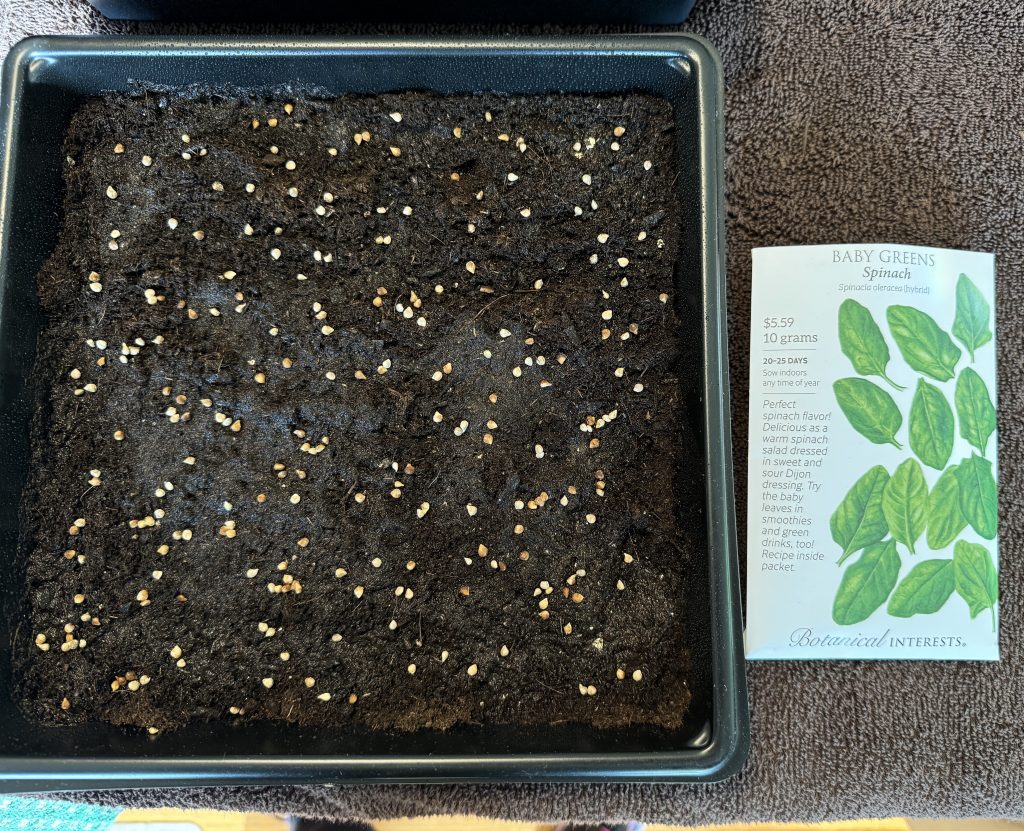
The final seeds I wanted to try were these Baby Spinach greens. Not sure if they’ll work, but we’ll see! I started with the seeds you can see below…not very dense. I ended up adding more so it looked like the seeds were better distributed. This flat I also soaked the soil, spread the seeds and sprayed the top. Then I covered it with an extra tray for a few days of darkness.
So, in this next phase, I’ll see if I can get the cat grass and catnip started in regular pots (and under grow lights if they sprout!). I’ll handle the watercress and baby spinach like my first trays of tiny seeds.
Growing microgreens for the past 10 days has been a rewarding learning experience. The best part is watching how quickly a handful of seeds can grow into a delicious addition to salads and sandwiches! You can read about how I got started a week ago at https://marykisner.com/growing-microgreens-part-1/
I’d like to share the progress from seed to greens to sandwich (or to bunny snacks) with this post. I came home from the workshop on November 15 with four planted trays of broccoli, radish, sunflower, and peas along with a smaller container with wheat grass seeds.
I quickly had to spray the seeds and keep them in the dark for several days. I didn’t need the grow lights at all during this time.
The seeds sprouted well in the dark.
About Day 2-4
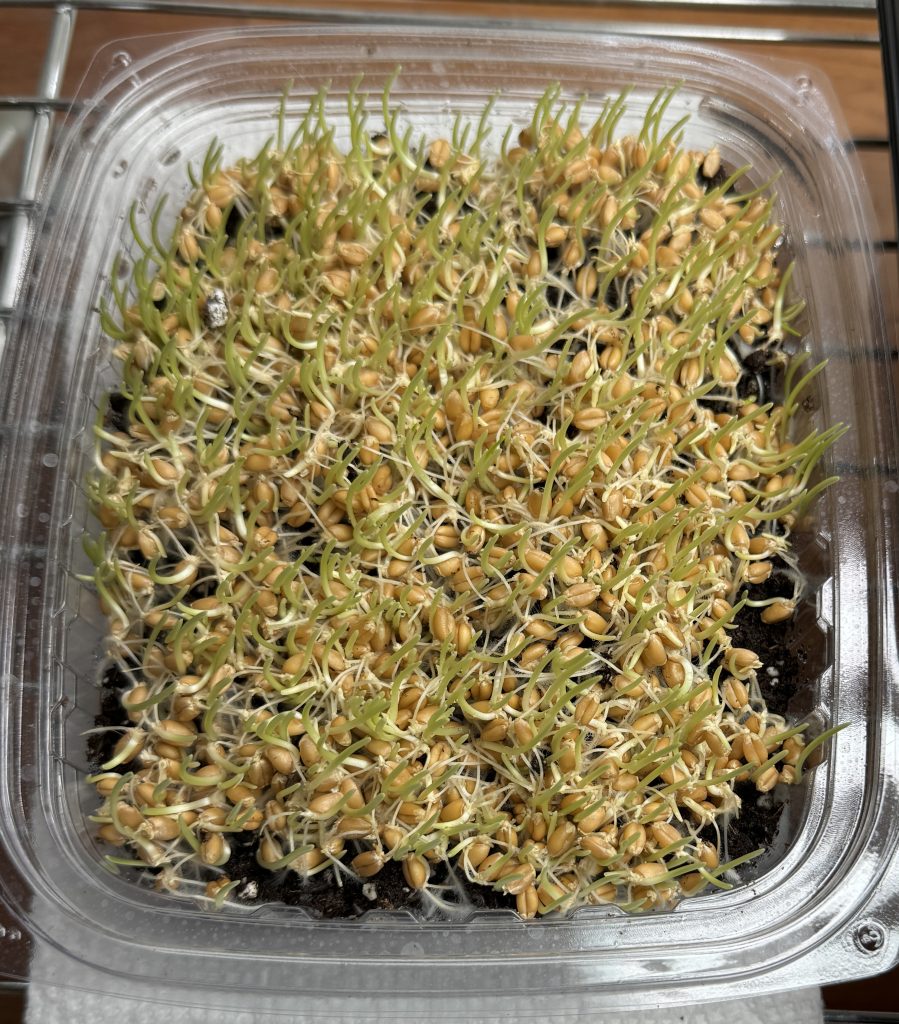
Wheat Grass
Broccoli and Radish
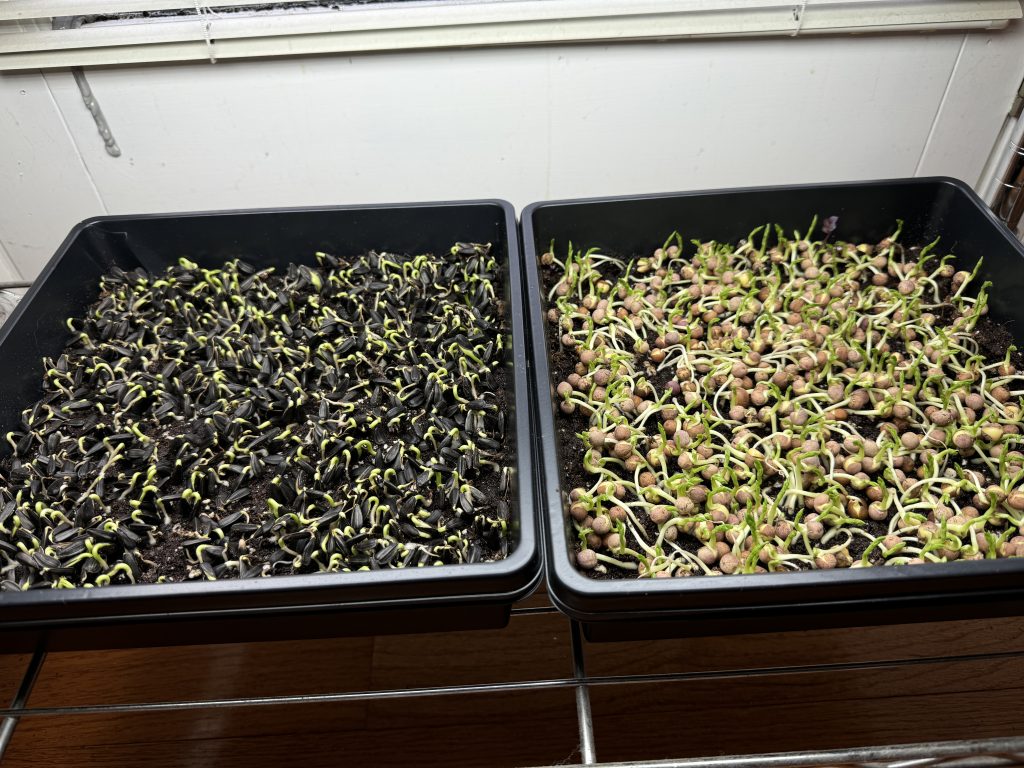
Sunflowers and Peas
I showed this picture to Dan (my microgreen expert!) at the next Farmer’s Market and he suggested putting an empty tray with a weight on top of the sunflower seeds to encourage them to get stronger and break out of their seed pods. I added an empty tray with a heavy weight in it. After several days, the sunflowers were cracking the seeds and emerging.
I removed the tray and weight off the sunflowers to take this picture. They were emerging fine. I left the weight on just the sunflowers another day. I had to fight my natural inclination to not squish the plants, but they did fine!
In just a few days I had them under grow lights and had to add water to the bottom tray instead of spraying on the top. Each tray was a double layer and had one with holes in it on top with a second tray underneath where I could add water.
Days 5-8
Wheat grass
Broccoli and Radish
Sunflowers and Peas
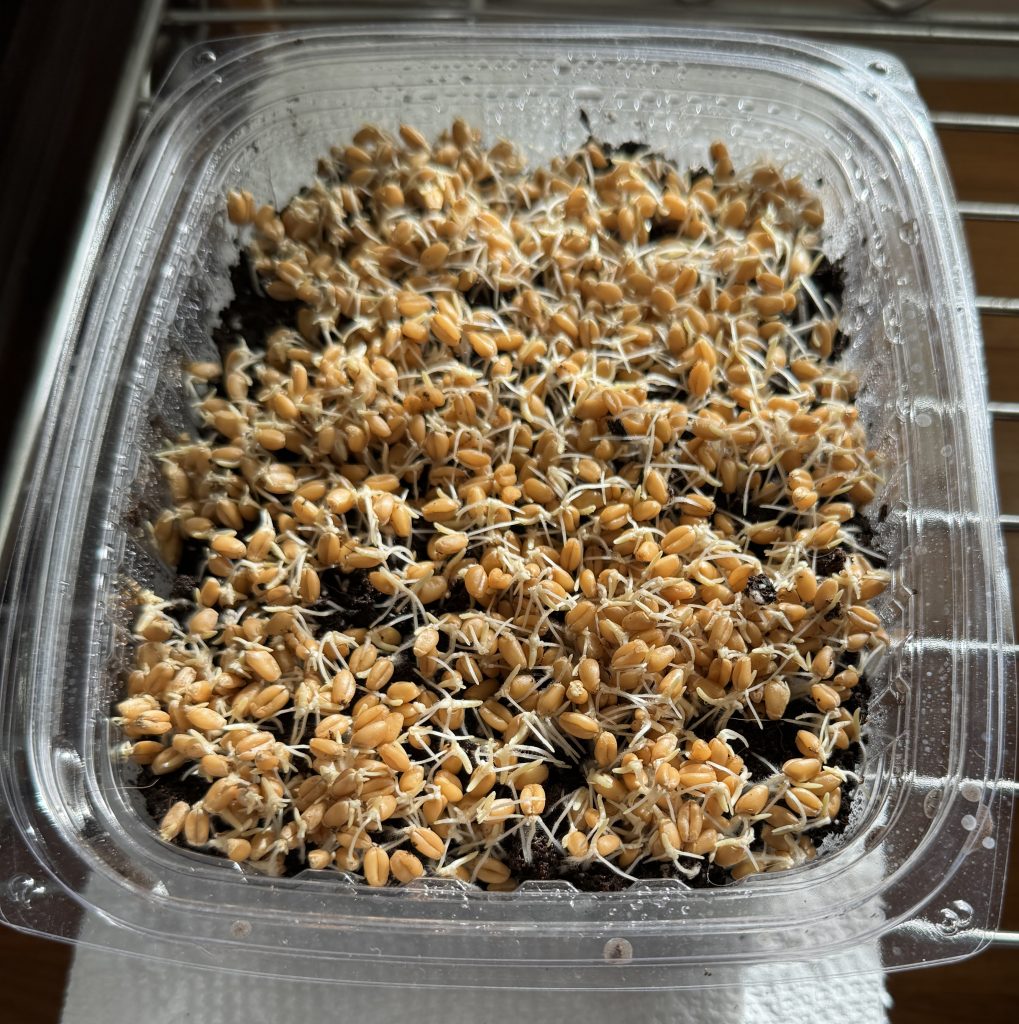
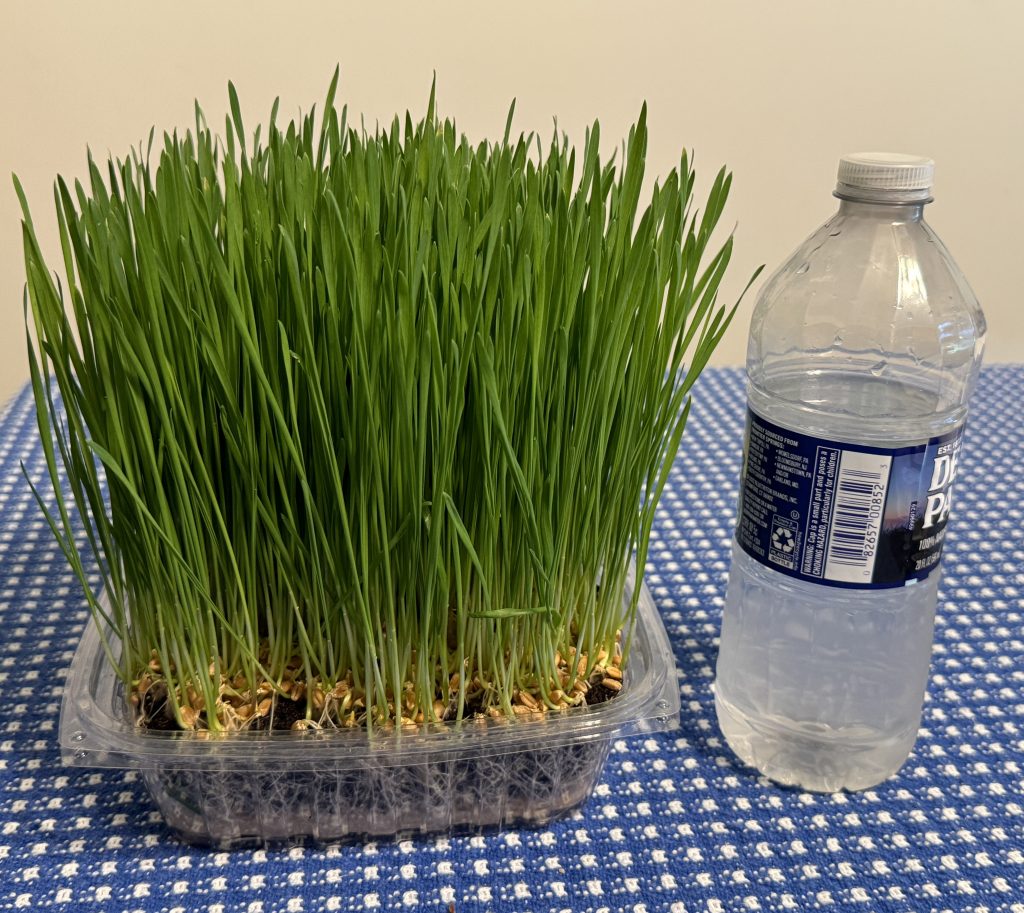
By Day 9, the wheat grass was getting top heavy! Time to donate to a neighbor’s bunnies.
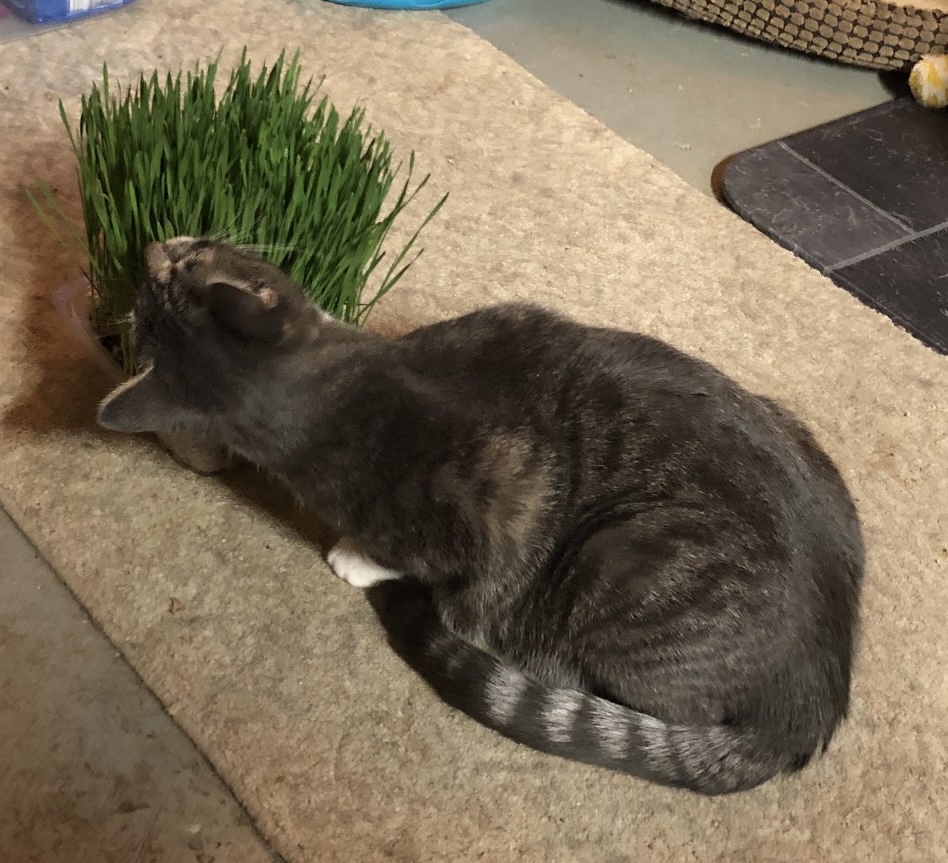
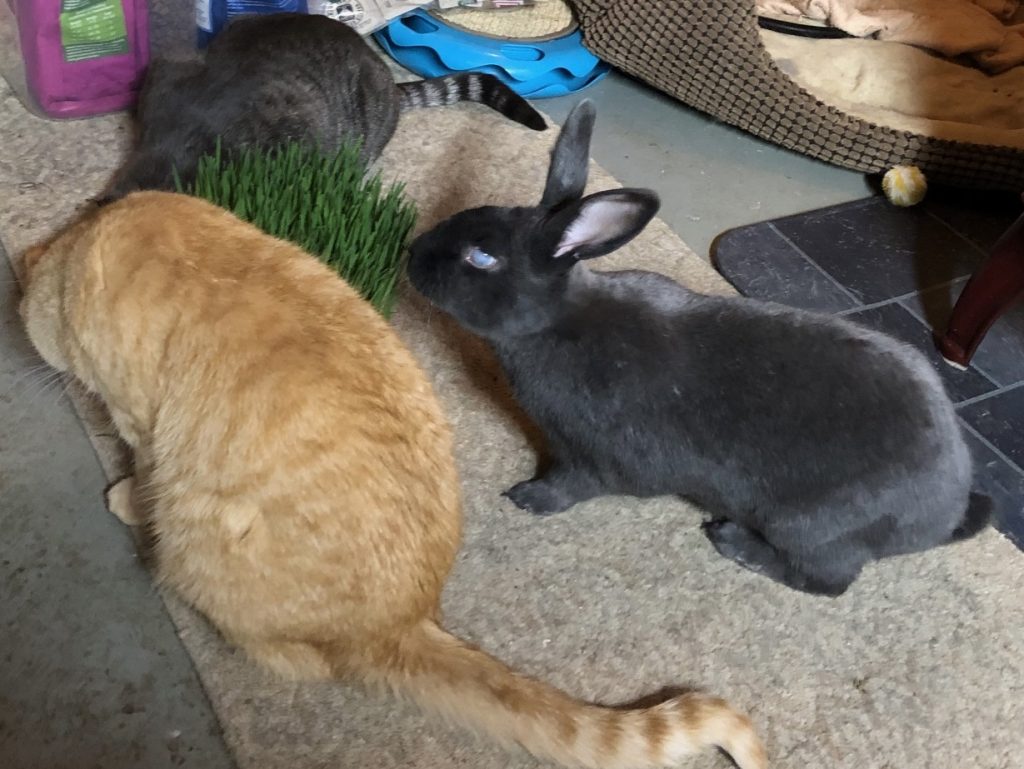
We wondered what the cats and bunnies would do with the grass. They were indoor pets and were used to greens being offered in a cut pile, not a vertical plant! Bert was able to get pictures of a cat rubbing its nose in the grass and the bunnies were munching away. I think it will be a hit!
I think I see potential for regular cat grass(usually oats and barley) and maybe catnip plants (seeds have been ordered!).
Day 10
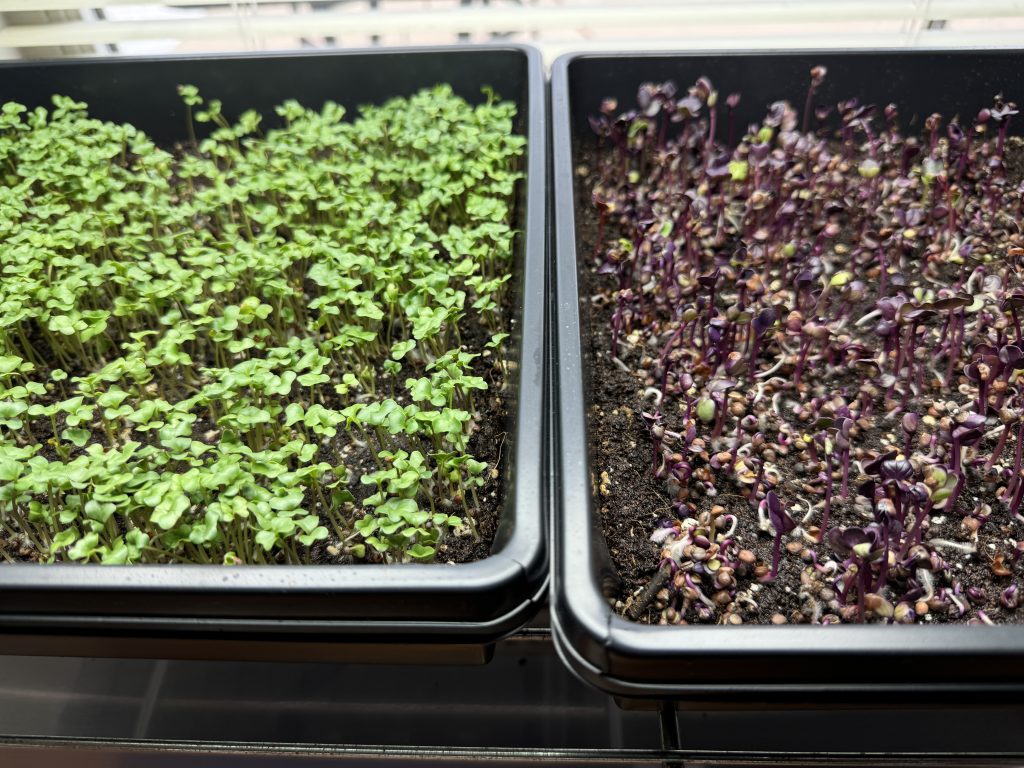
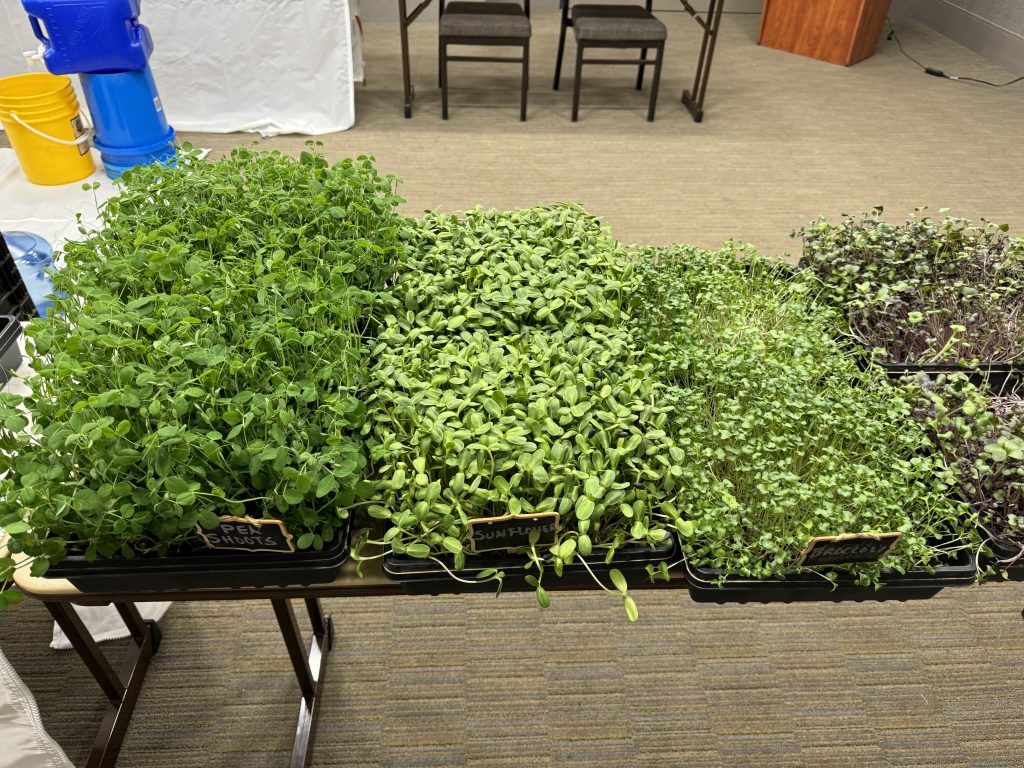
The broccoli and radish look ready to cut. The sunflowers and peas could wait another day or so…I think.
Broccoli
Radish
Sunflowers
Peas
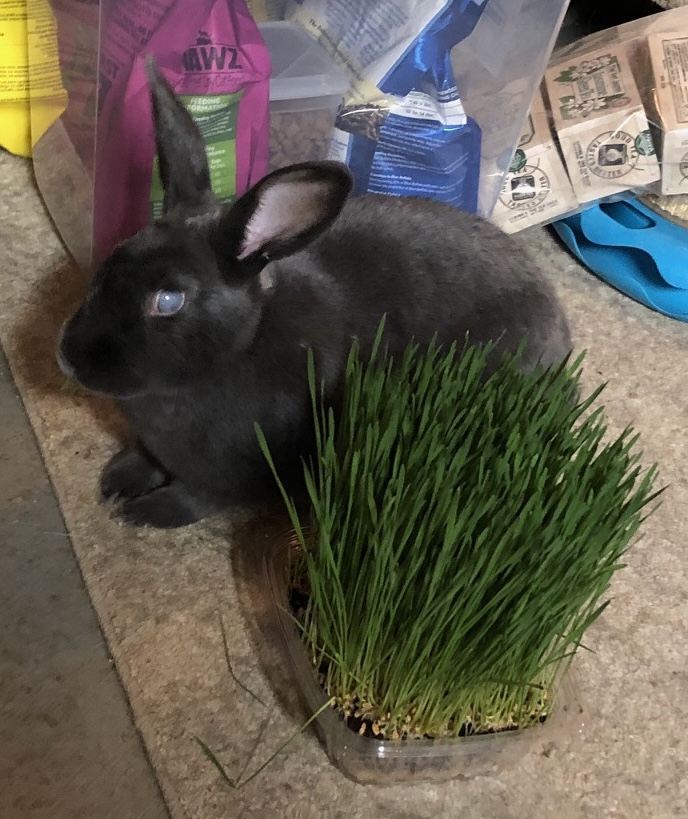
You can see a little missing piece from the broccoli and peas (in the right corners)…they went into my chicken salad sandwich today!
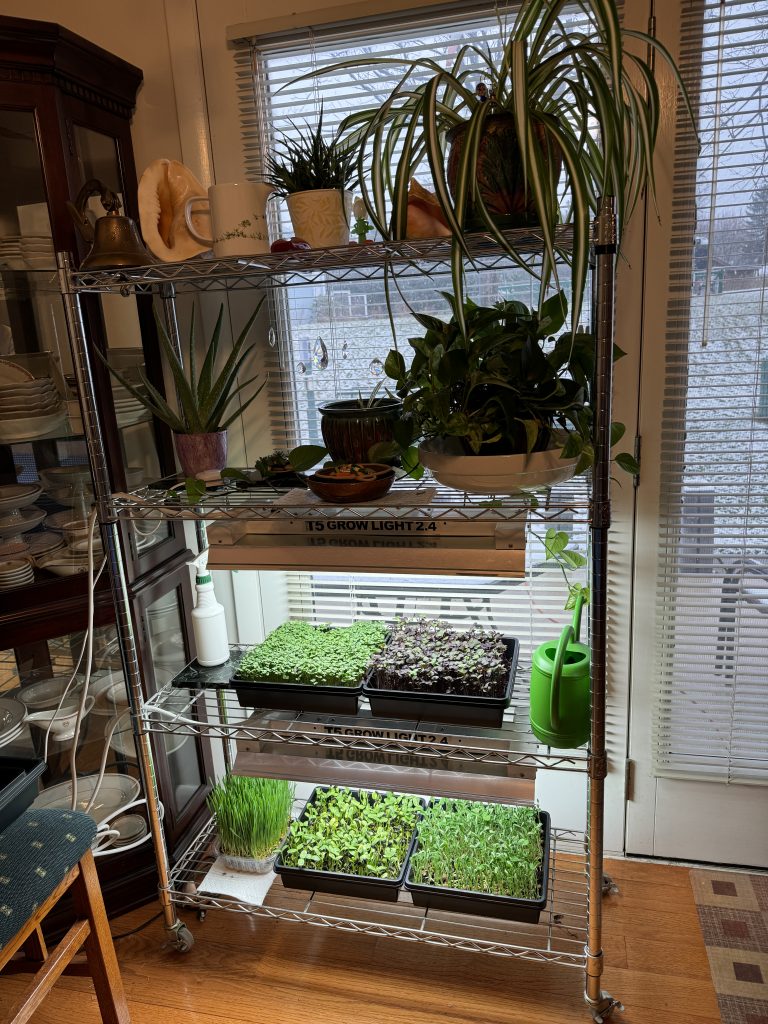
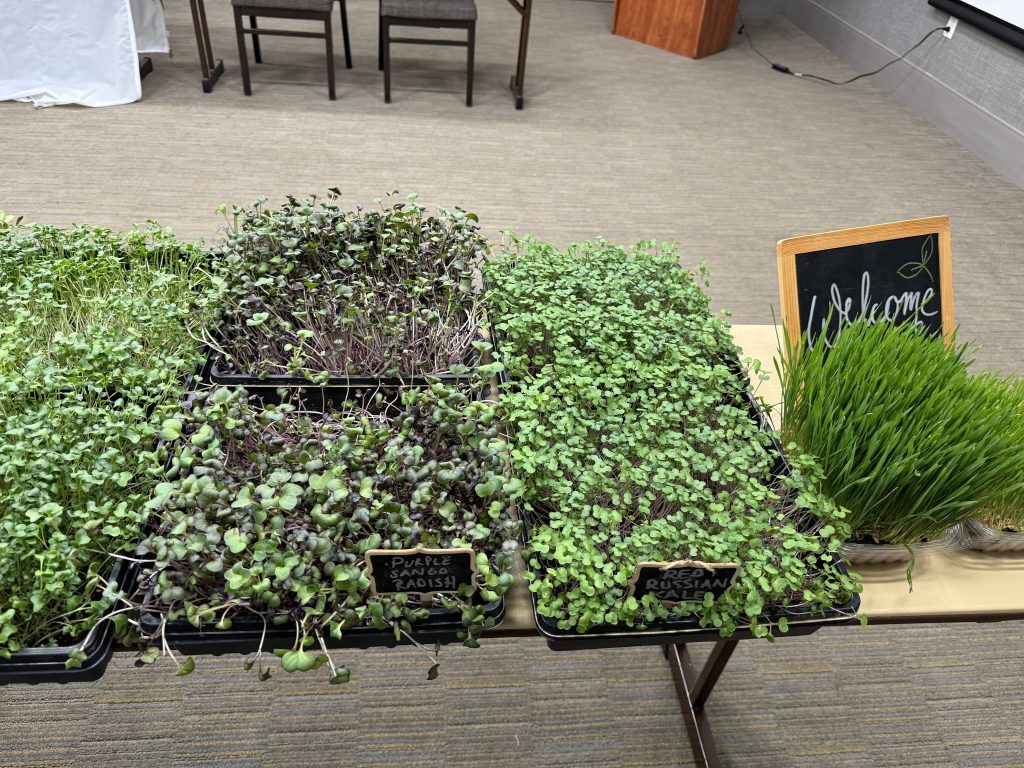
This is how my growing area looked yesterday…before I gave away the wheat grass:
Tomorrow I will cut off all the greens and share some with a neighbor. What we can’t use I will leave in the growing trays and take them to the bunnies!
What’s next? I have ordered cat grass and catnip seeds. I hope to start a tray of watercress for a friend. I have broccoli seeds and sunflower seeds that I’ll start in a few days. Oh my goodness, so many choices!! Enjoy!
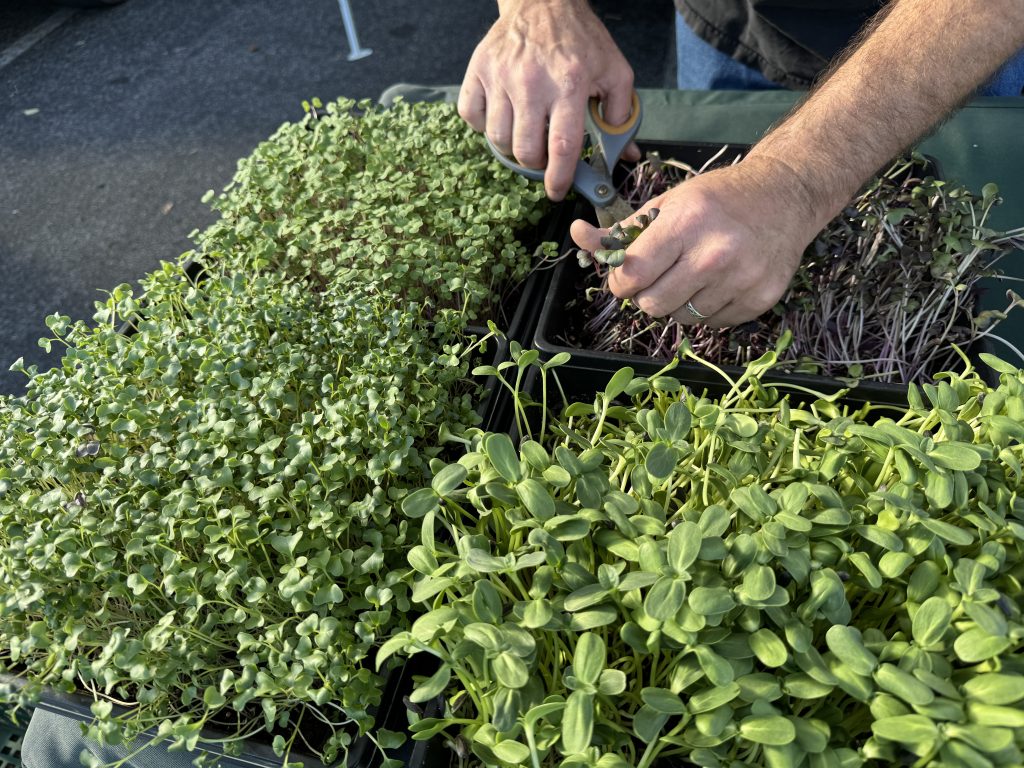
Two weeks ago, at the Boalsburg Farmer’s Market, I found a vendor selling microgreens. He took the time to explain a little about how he grew them and then cut three 1-ounce portions from three different trays…including sunflowers, radish and broccoli. I felt like I had three little bags of nutritional gold!
Then he shared information about a workshop he and his wife were offering to learn to grow them myself!
I came home with my loot and signed up! I’ve tried doing this in the past and I could never seem to get it right. I was looking forward to learning the process.
Hands-on Workshop
I arrived at the workshop and was greeted with multiple trays of beautiful microgreens and supplies to grow my own. Very inspiring!
I had enough trays to plant four different seeds, along with a smaller tray to plant wheat grass. An adorable little scale was at my station. It was perfect for weighing out tiny amounts of seeds. (Of course, as soon as I got home I had to order one from Amazon!)
The workbook had tons of information about starting with the right organic soil and seeds.
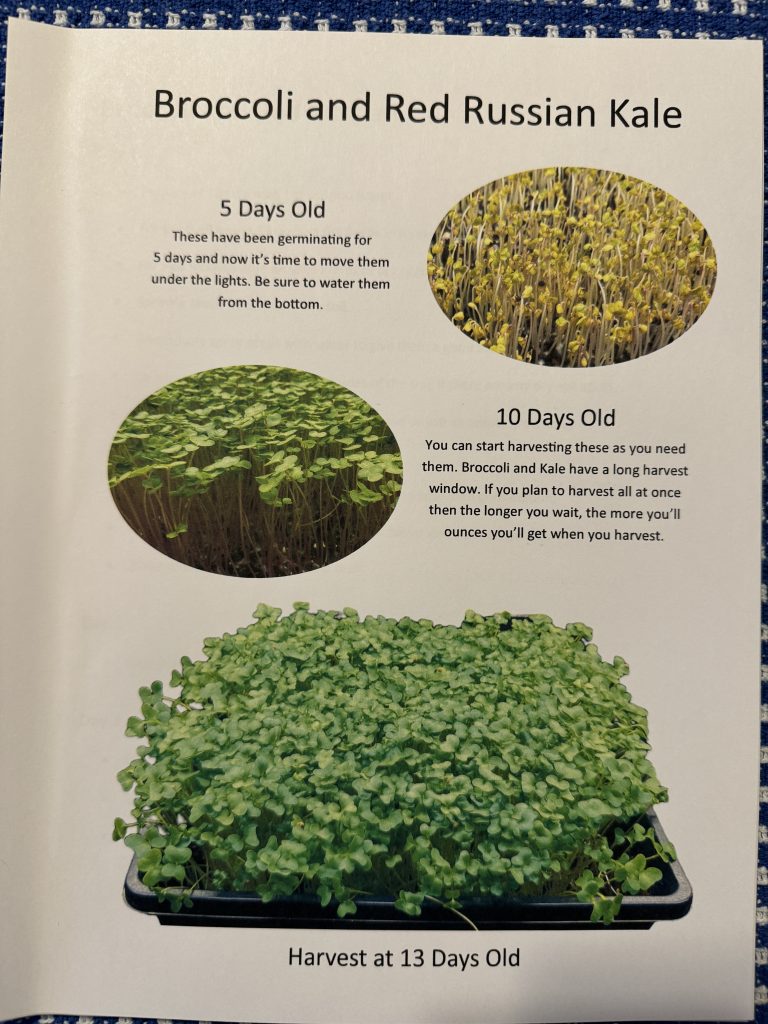
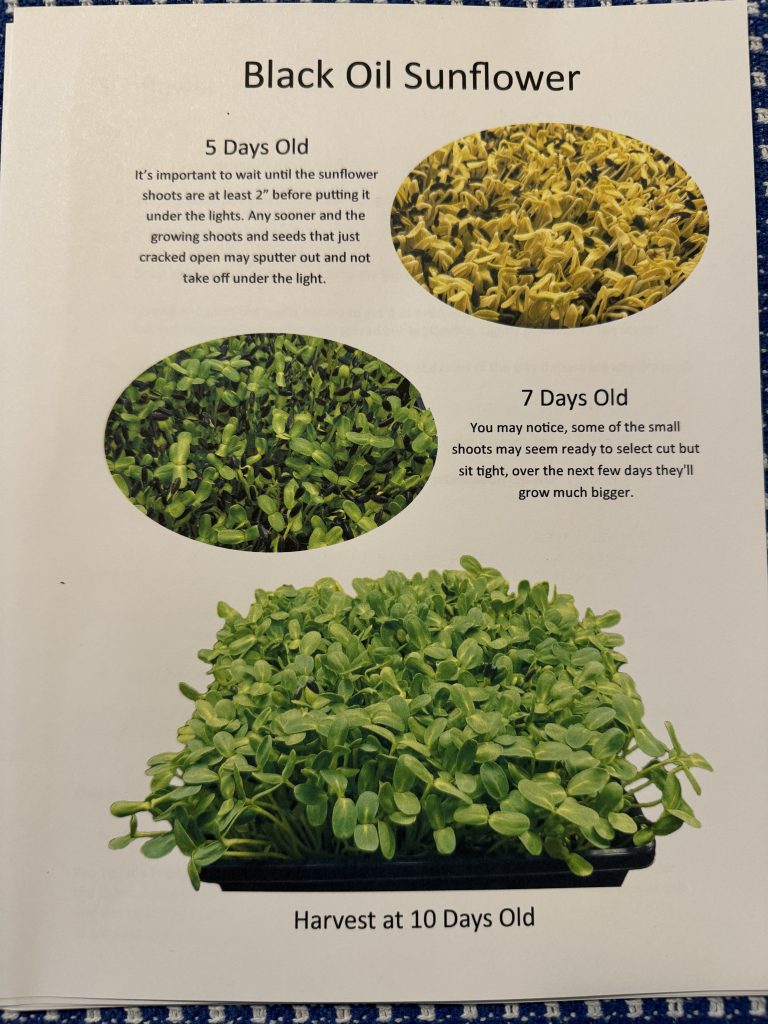
I can’t possibly share the whole step-by-step process for each kind of seed (not my workshop…not my expertise) but the most informative part of the presentation were the detailed slides of what the seeds/sprouts would look like on Day 1, Day 2 up to Day 10+ which was harvest day. The workbook had pictures to show the progression of each individual seed, but the slides were much more detailed. Of course, being able to actually see the ready-to-harvest plants was helpful.
I’m grateful for the workbook to take home, because once we started on the hands-on portion of the workshop, I just couldn’t take pictures…of course, I’ll remember the details of planting because I did it myself!
At the end of each section of planting, Dan harvested a try of greens to show me how it was done…where to cut, how to store, etc. Little did I know the cut greens were being arranged into a salad by his wife that I got to take home! No picture, because by the time I thought of it I had already eaten it! Delicious!
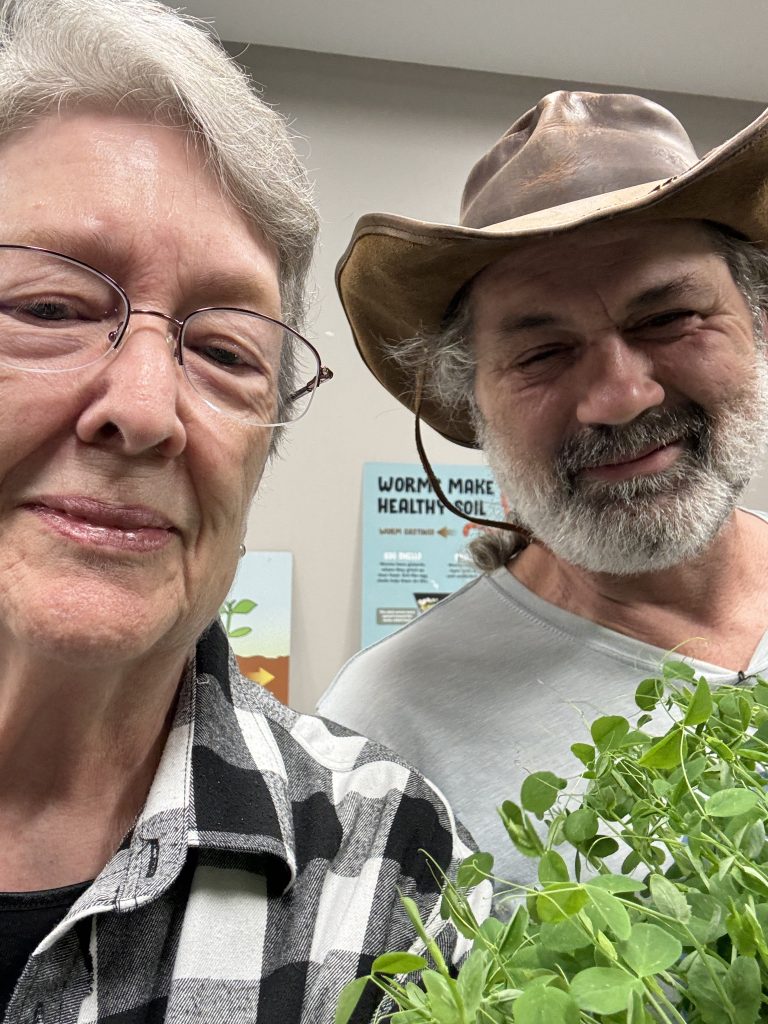
I am certainly not an expert at taking selfies, but Dan and his wife graciously let me take our pictures:
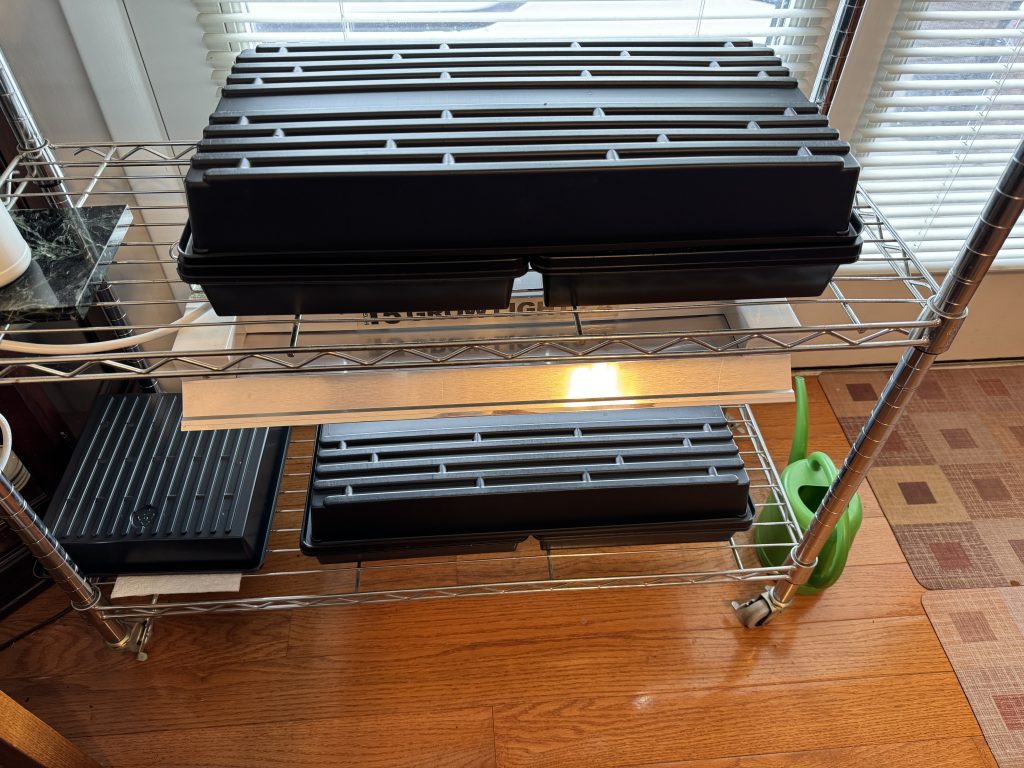
My Set-up at Home
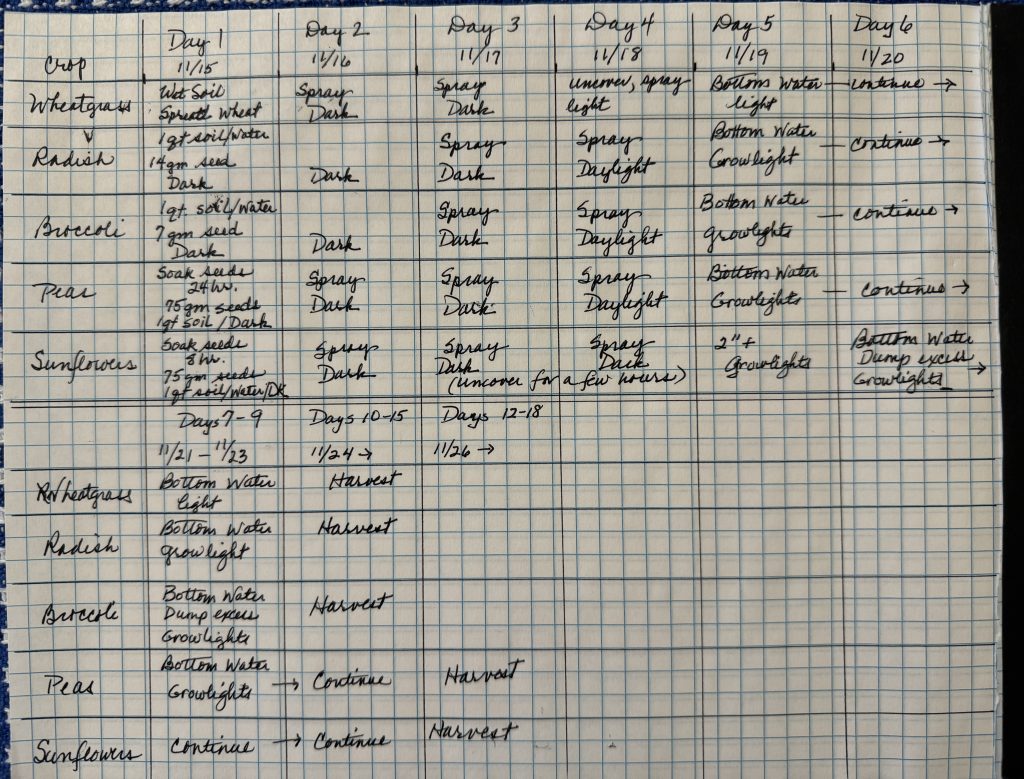
I came home with a stack of 5 trays of planted seeds. Each kind had a day-by-day set of instructions in the workbook of when to water them, when to expose them to light and when to turn on the grow lights. Of course, I couldn’t help myself…I had to make a chart so I knew what to do each day for each kind of seed!
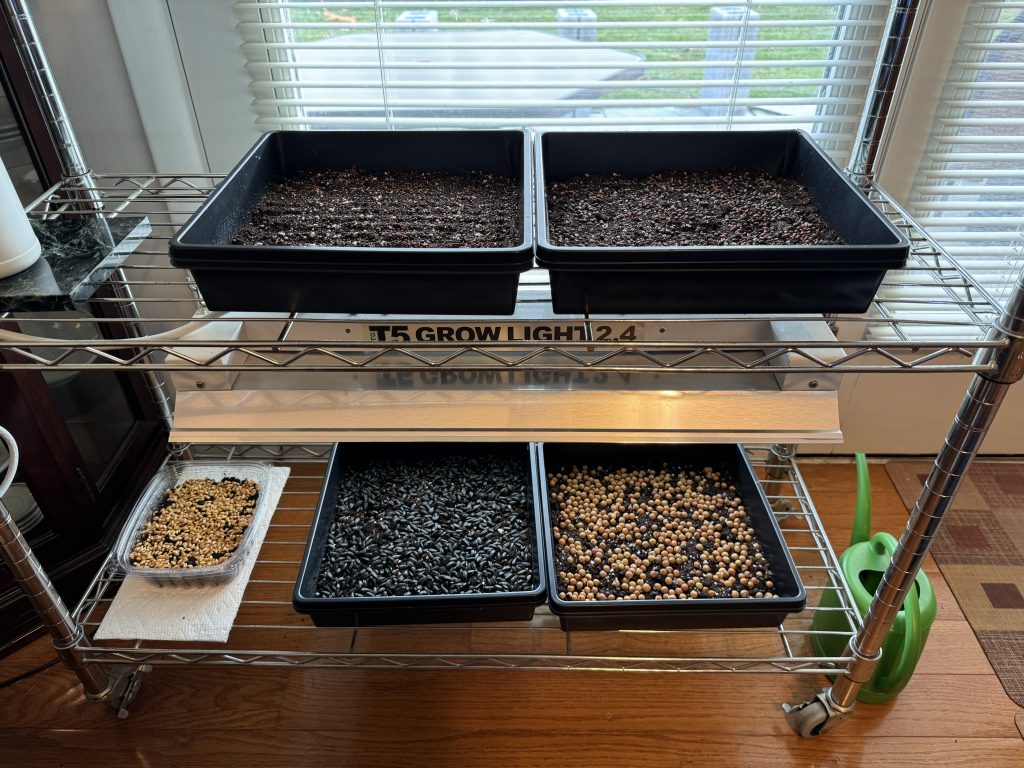
I put the trays on the shelves by our patio door.
They will need to be in the dark for several days, so I used some larger trays to cover them. I can easily take them off to spray the seeds each day. I’ll take them off when I turn on the grow lights and start watering them from a bottom tray.
So, at the moment, my dining room is a miniature greenhouse!
This concludes Part 1 of Growing Microgreens. I’ll start taking pictures each day to show how they’re doing and will share those in Part 2…in about 10 days! Enjoy!
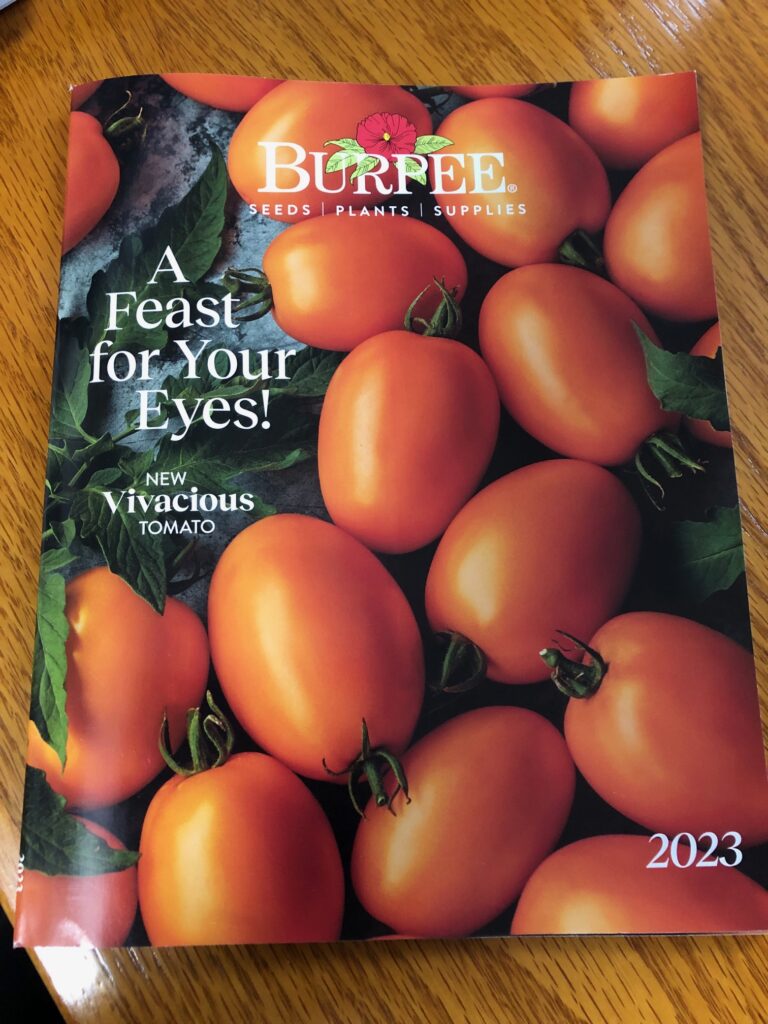
This is the time of year that we start planning our garden for the next growing season. Why? Well…the garden seed catalogs have arrived to entice us with beautiful photos of garden plants and produce, of course! It’s called “marketing!”
We’re sitting here while we watch the snow/drizzle/rain/sleet outside our windows and the mail arrives with catalogs like this:
Who could resist thinking about these lovely tomatoes!
We have gardened long enough to be mindful that not every plant in the catalog will grow successfully in our backyard. We also have tried many vegetables that did well…but we’d rather not eat a lot of them. As long as there are great Farmer’s Markets nearby, many of our vegetables can be purchased from accomplished growers.
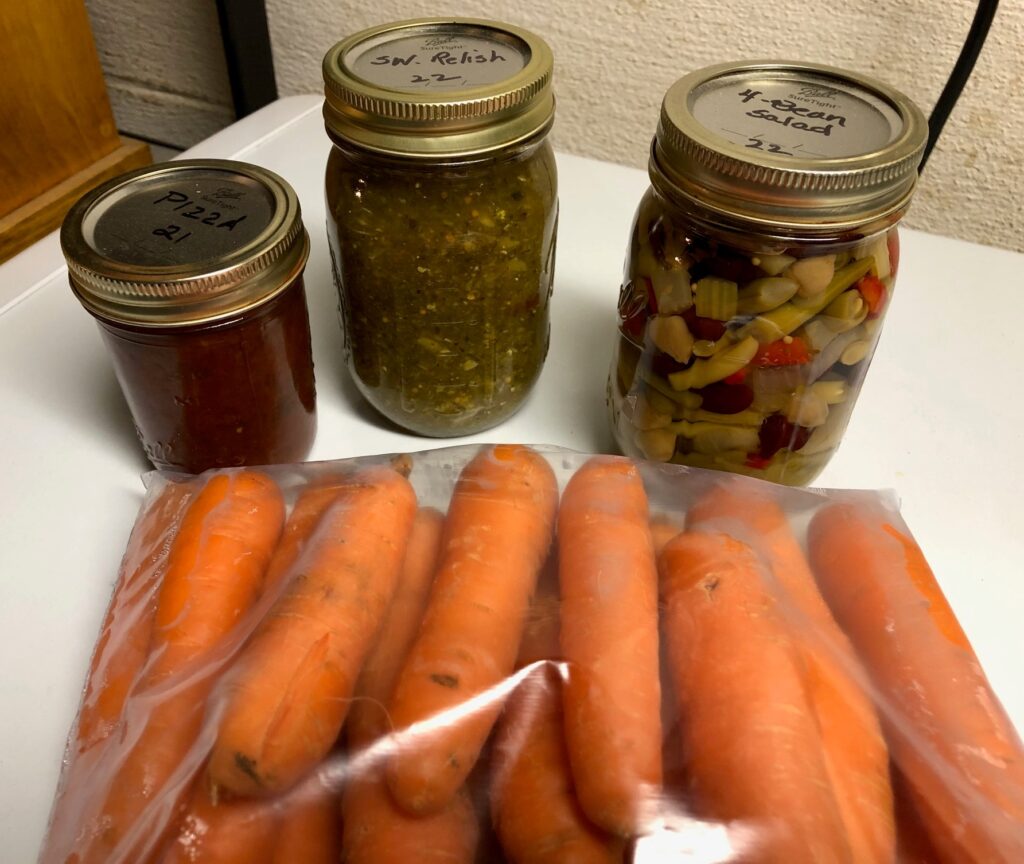
So, each year after we get the catalogs, I first check my shelves for the things I grew and preserved last year. I know we ate our share of fresh tomatoes, cucumbers and green beans. Lettuce and radishes were the base of many salads. Then, I preserved tomatoes as pizza sauce, cucumbers as pickle relish and beans as 4-bean salad.
Pizza sauce, sweet pickle relish, Four-bean salad and fresh carrots.
If you’ve followed along during the year, you’ve seen my posts about some of those crops. You know that we didn’t grow everything we needed but we grew the vegetables that did well for us and then filled in with vegetables from the Farmer’s Market.
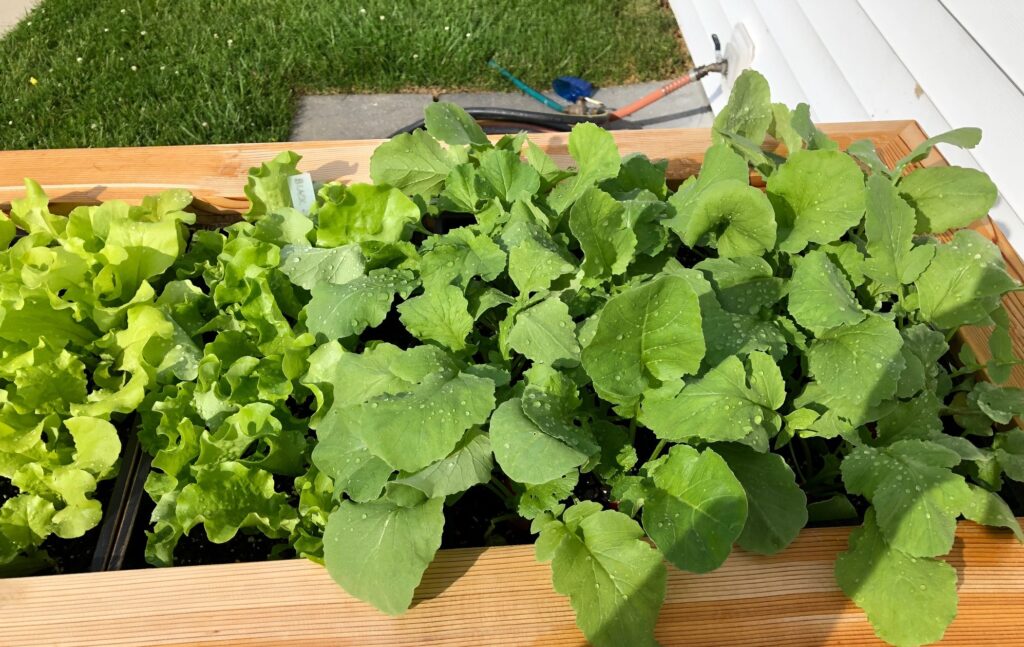
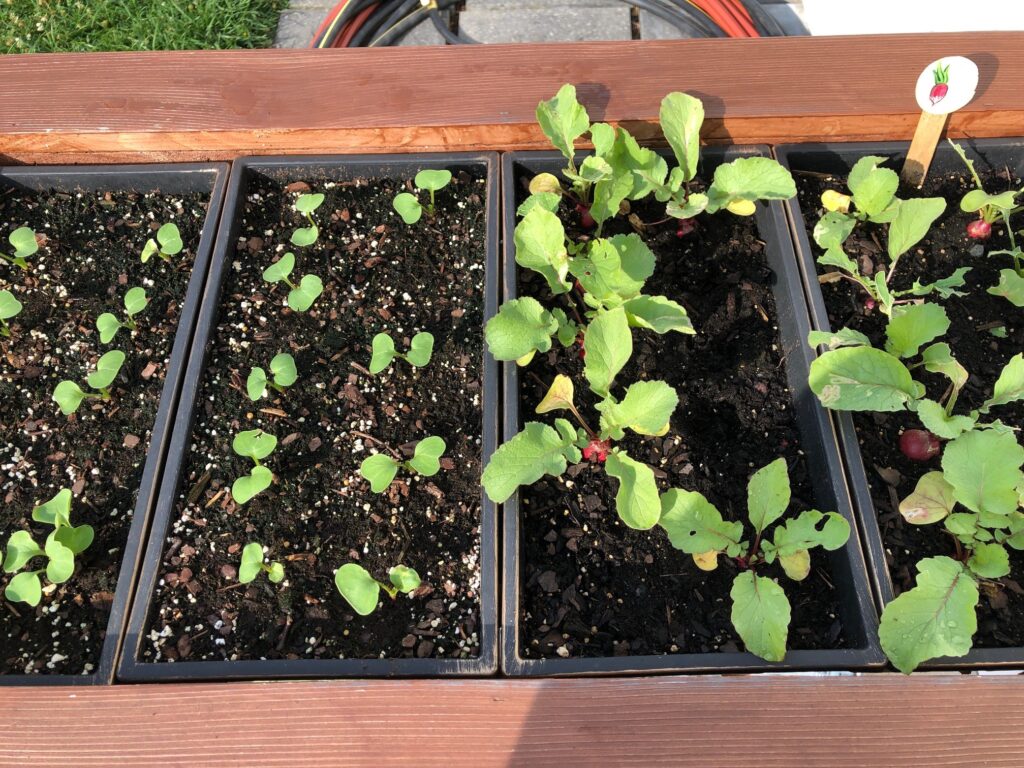
Lettuce and Radishes
We grew lettuce and radishes in a raised planter. They did beautifully and I had 5-6 plantings throughout the summer. We’ll make sure we order the seed that did so well! Watch for our Garden Updates throughout the summer.
Lettuce and radishes
Pizza Sauce
We love our Super Sauce tomatoes from Burpee. Bert starts them in the shop under grow lights around the end of March. We plant about 10-12 plants in the garden and end up giving away the extra plants to neighbors. They do well for us and make great sauce. You can read about how I make pizza sauce at: https://marykisner.com/time-to-make-pizza-sauce/
Four-Bean Salad
This pickled salad has our green and yellow beans, kidney beans and chickpeas. I can wait until I have picked enough green and yellow beans and then add canned kidney beans and chickpeas. Delicious all winter long! You can read about canning this salad at: https://marykisner.com/canning-four-bean-salad/
Four-bean salad ready to add the kidney beans and chickpeas.
Sweet Pickle Relish
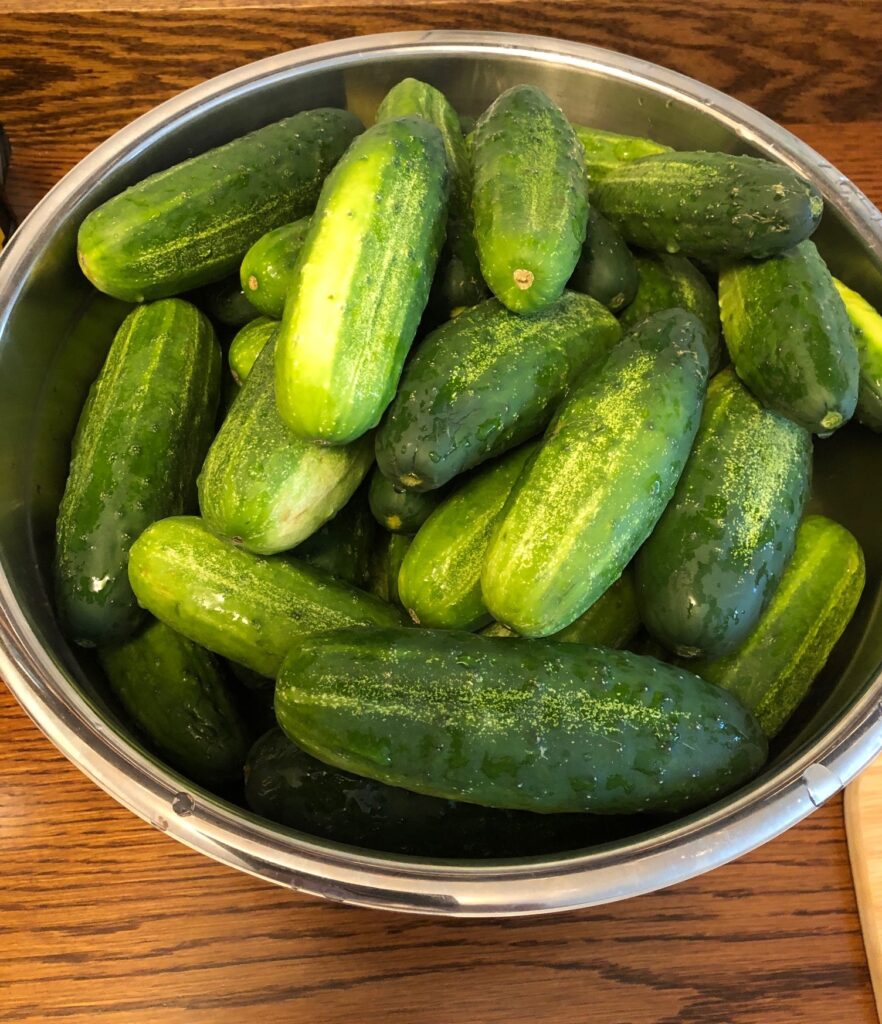
This last year our cucumbers did not produce well. I had enough to eat but not enough to make the relish. This is where the Farmer’s Markets come to the rescue. I was able to pick up a whole box of cucumbers for less than $20 at the end of the summer. You can read about making the sweet pickle relish at https://marykisner.com/canning-sweet-pickle-relish/
Applesauce
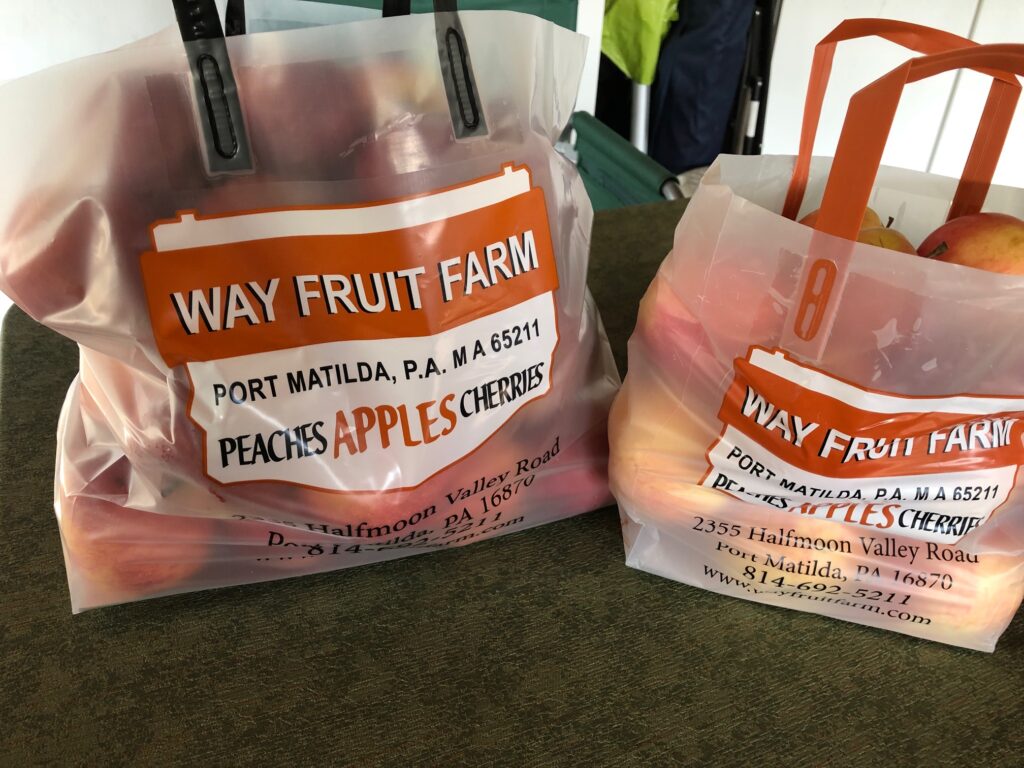
I love to have small jars of applesauce in my cupboard. I can regulate the amount of sugar added (usually not at all) and it’s just the right size for the two of us. Since we do not have apple trees, we head to Way Fruit Farm on the other side of town. I try to make applesauce in the early summer. Remember, the apples we buy here in PA in June were grown last summer. Then they were stored in a climate-controlled setting and by June they are much easier to peel. I think last year I purchased 3/4 bushel of apples. You can read about canning applesauce at: https://marykisner.com/a-fond-memory-while-canning-applesasuce/
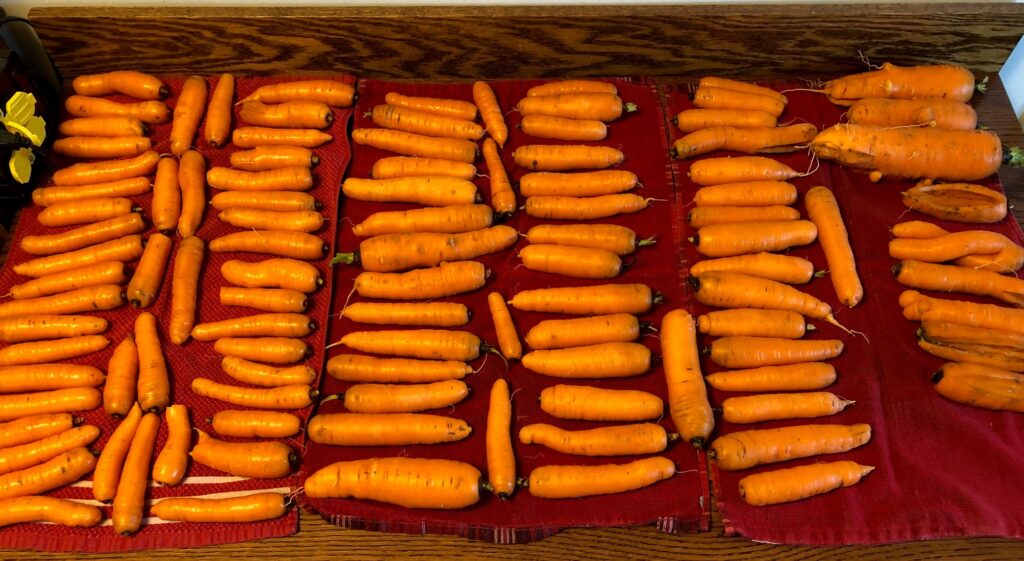
Fresh Carrots
We like our carrots fresh. Since we don’t have a root cellar that would control temperature and moisture for storage, we’ve discovered that we can leave carrots in the ground until late December. Then we clean them up and store them in the refrigerator. That way, we can have fresh carrots most of the year. You can read about our carrot crop at: https://marykisner.com/carrots-the-last-of-the-2022-garden/
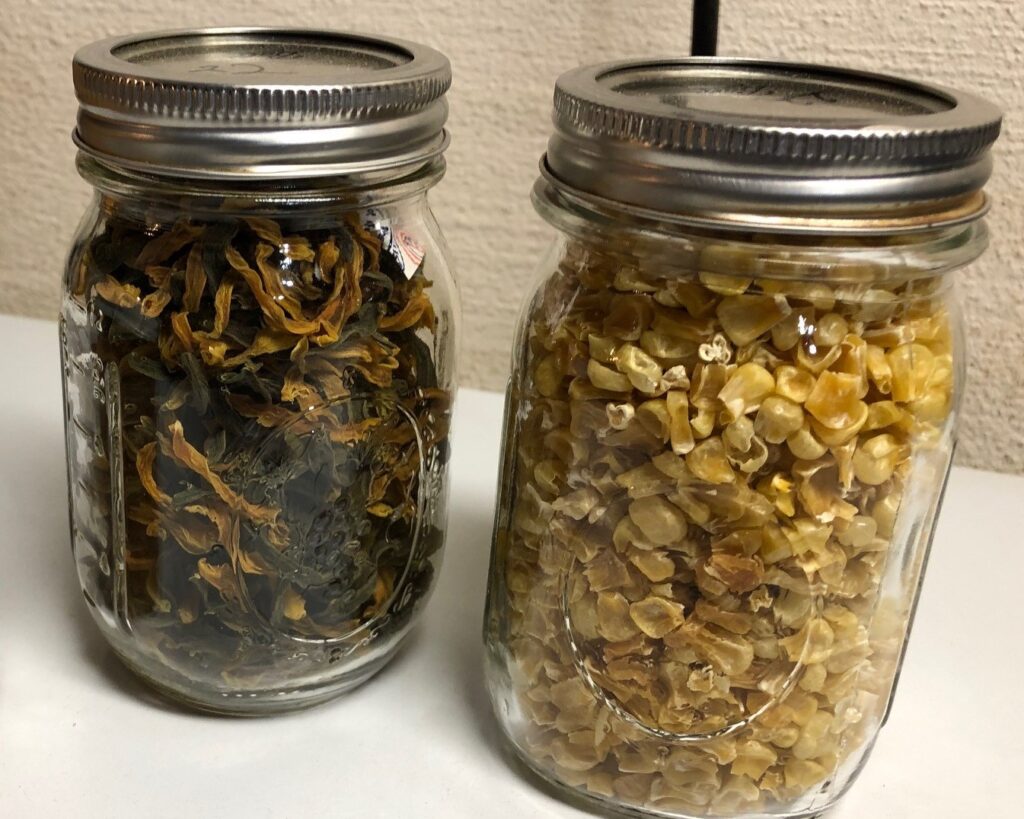
Dehydrated Green Beans and Corn
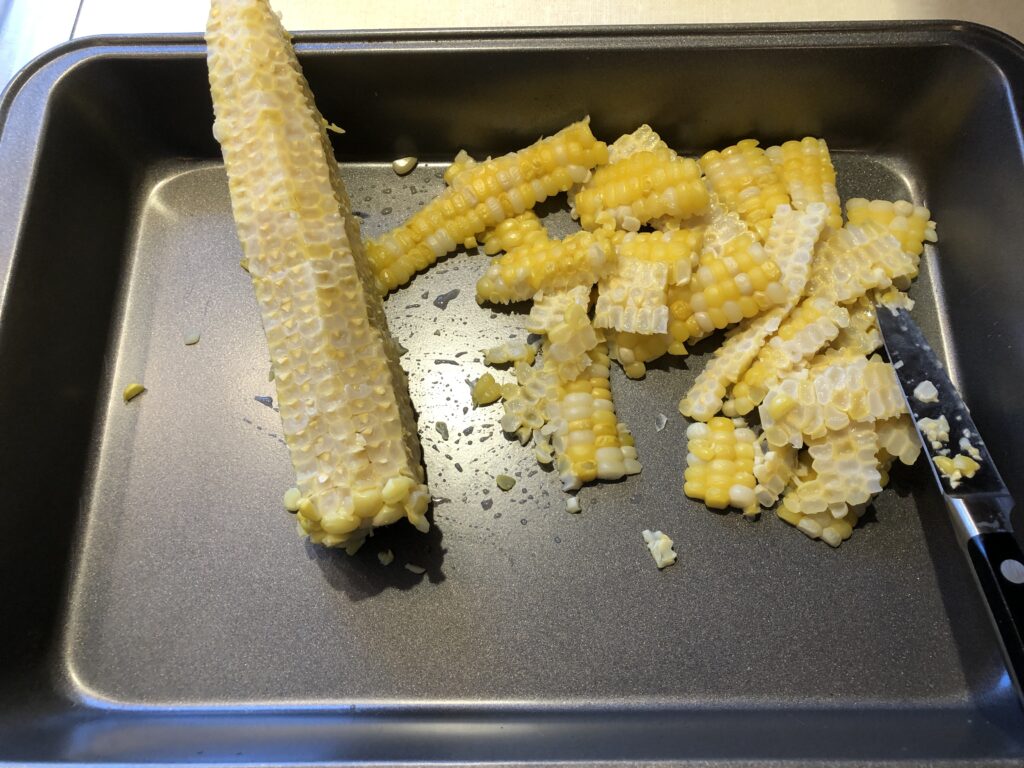
Throughout the summer I dehydrate small batches of vegetables like green beans and corn. I use them in vegetable soup all year. Snapped beans need to be blanched and chilled and then spread out on the dehydrating trays. It’s amazing how many fit in a jar when they are dehydrated!
Corn is available at the Farmer’s Market around the middle of August. I will buy 1-2 dozen ears, cook it for eating and whatever we don’t eat I’ll cut it off the cob and put it in the dehydrator. After 3-4 times, I have several jars of dried corn ready to throw into vegetable soup.
I’ll try to remember to post about dehydrating vegetables this year!
Corn cut off the cob, ready for the dehydrator.Green and yellow beans; corn cut off the cob and dehydrated.
Chicken Stock
The last thing I want to remember for this summer is to can chicken stock. I use a lot of it and last year I made stock and froze it. Big mistake! It takes up so much room in the freezer. If I wait to make it when all the canning equipment is easily, I think it will be much more practical. I could even make several pots over several days. You can read about making chicken stock at: https://marykisner.com/making-chicken-stock/
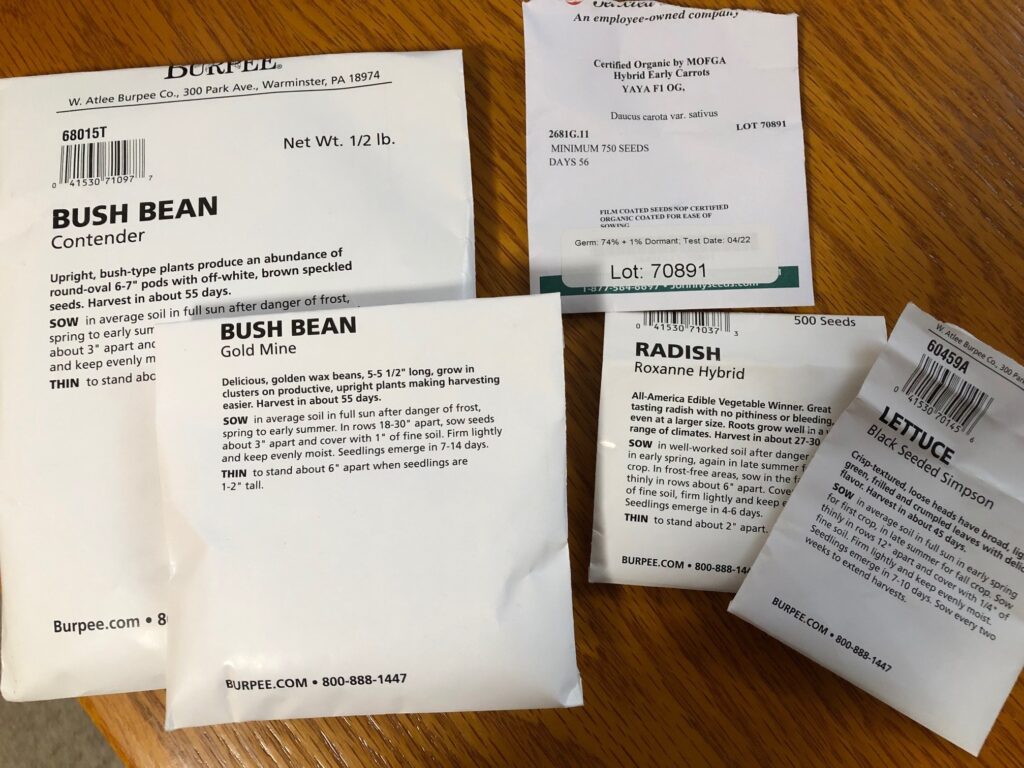
Garden Plan for 2023
Given what grows well here and what we like to eat…NOW we can look over the 2023 Burpee Catalog, see what seeds we ordered last year and order seeds for the coming growing season.
Seeds left from 2022. No tomato seeds were left!
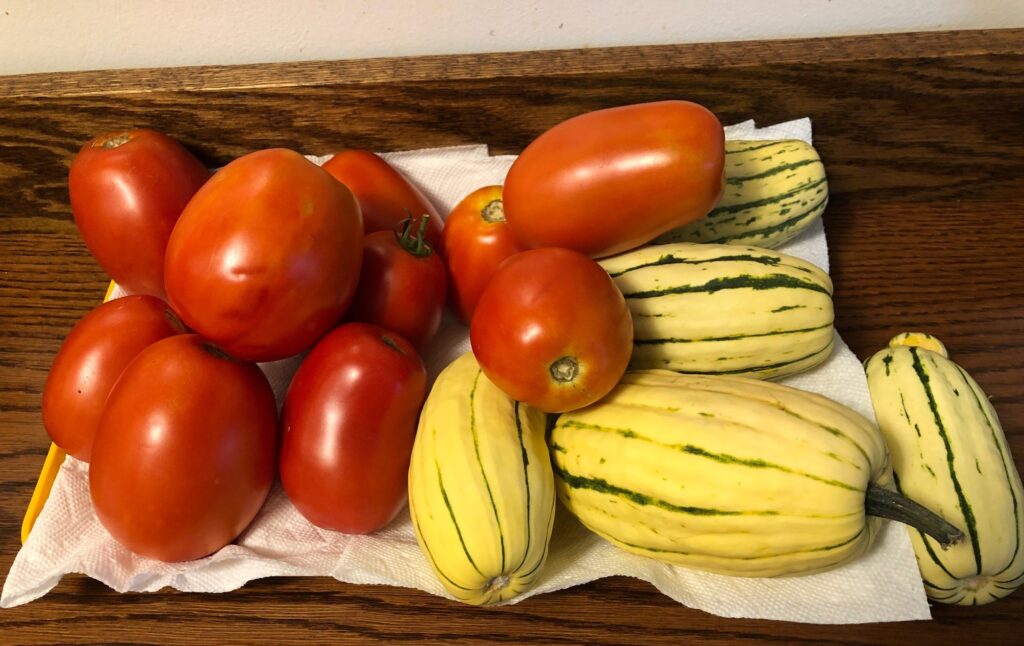
We decided to NOT plant any shell beans or cucumbers, but we may add potatoes and Delicata squash in the spring.
Using last year’s order from Burpee, we know what we need for this year.
Finally, we’ve made decisions about this year’s garden! Seeds have been ordered! A great New Year’s Day activity!! Enjoy!
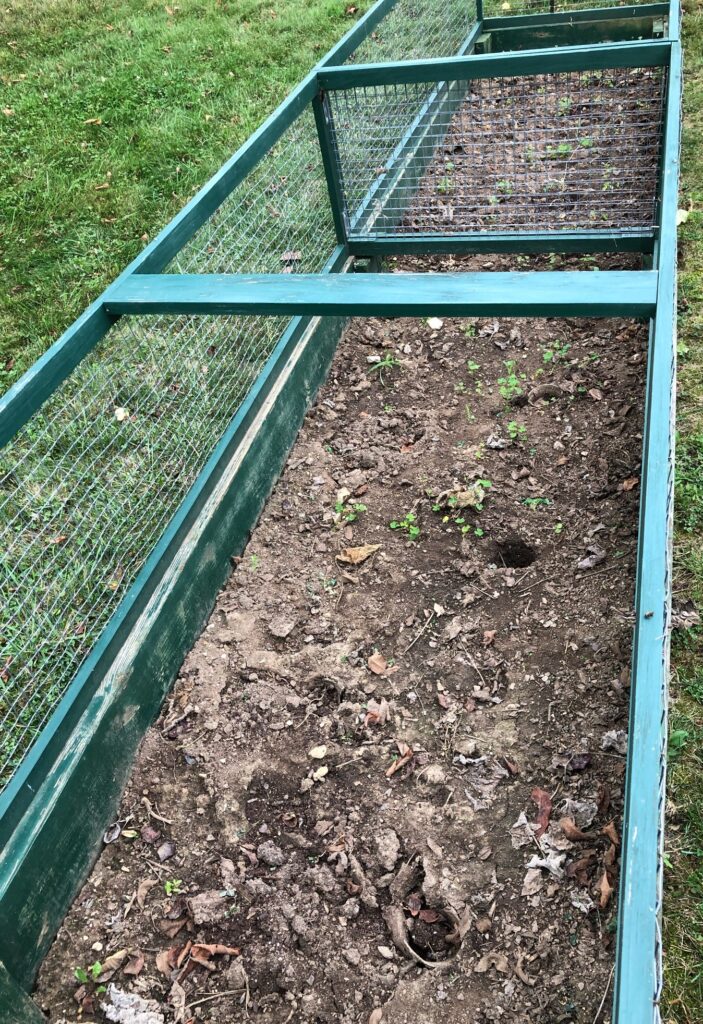
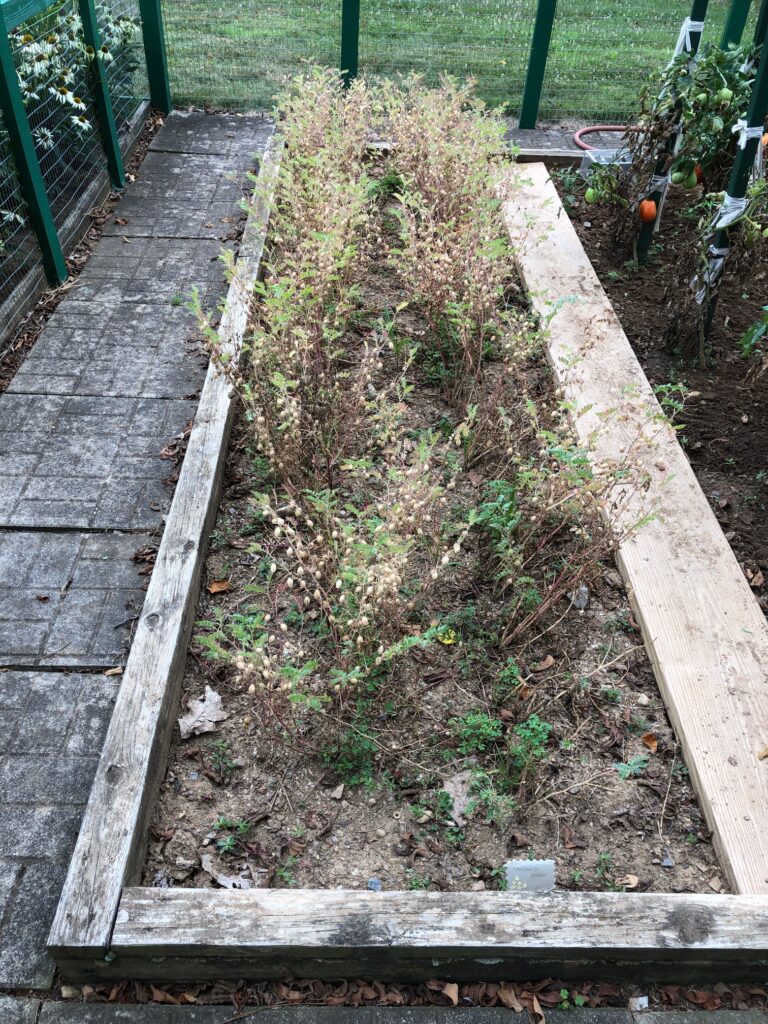
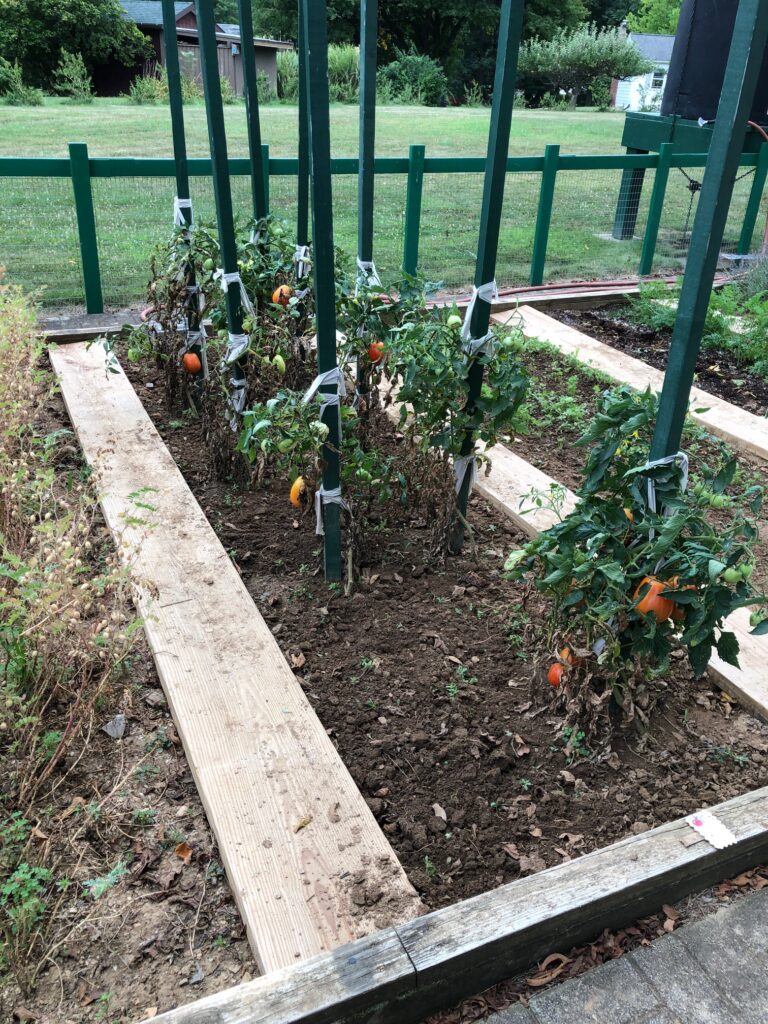
When I last posted about the garden, in late August I think, the only vegetable that was still in the ground was carrots. Our plan was to leave them in the ground as long as we could and around Christmas we’d dig up what was left. In the past, we dug them up in early September, cleaned them up and stored them in the refrigerator in the basement. They took up a lot of room and did not keep well. Last year and this year we figured they’d do just as well right in the ground.
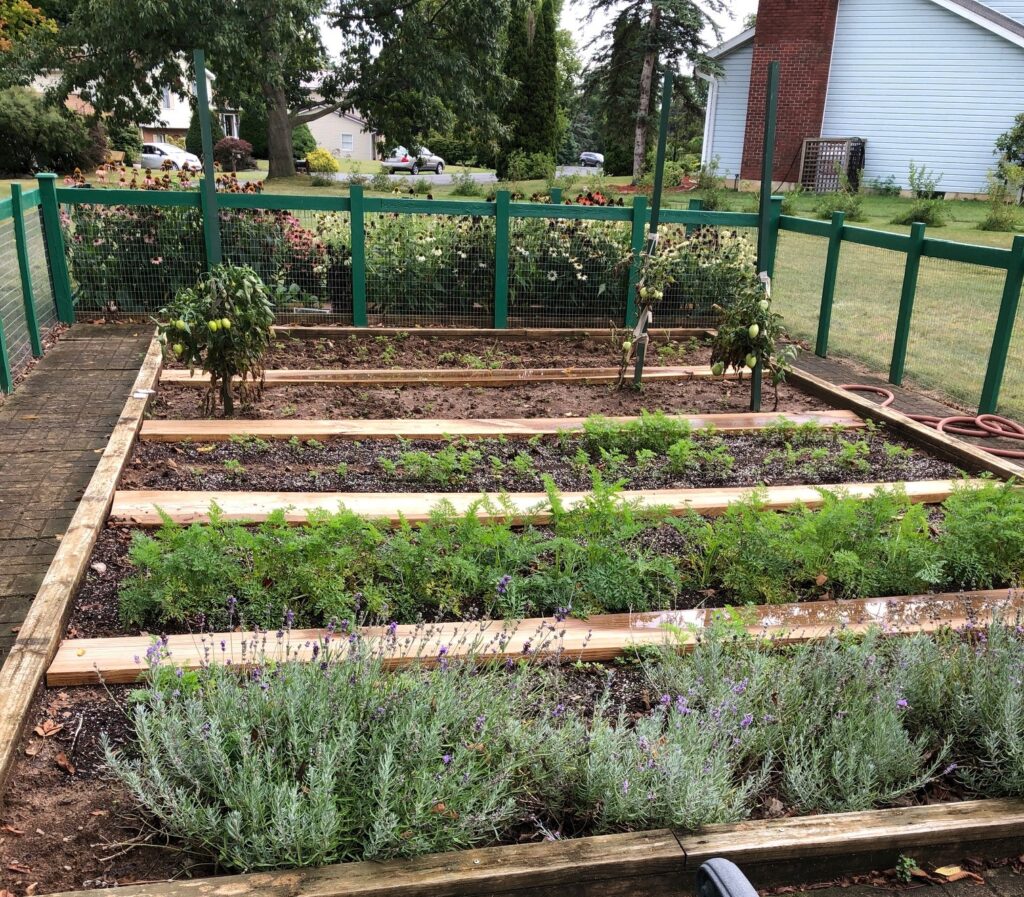
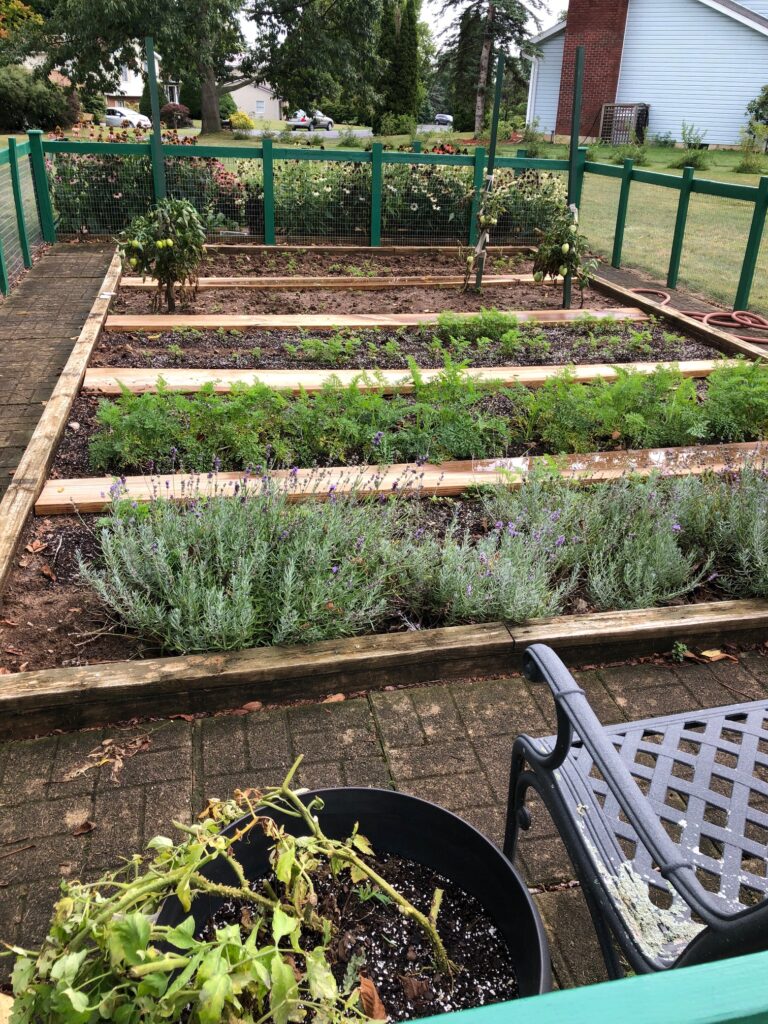
This is what the garden looked like in early September:
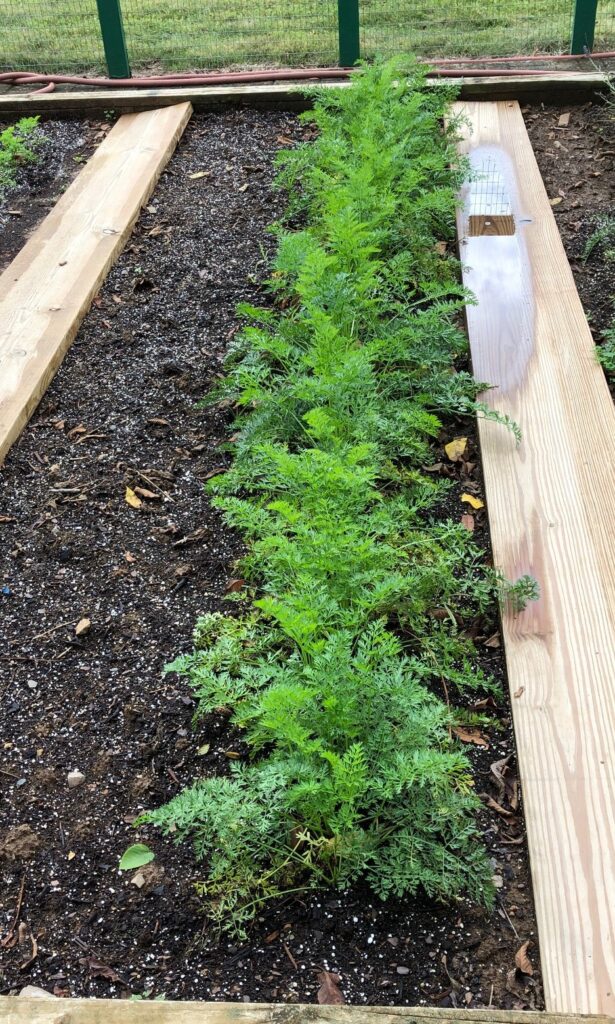
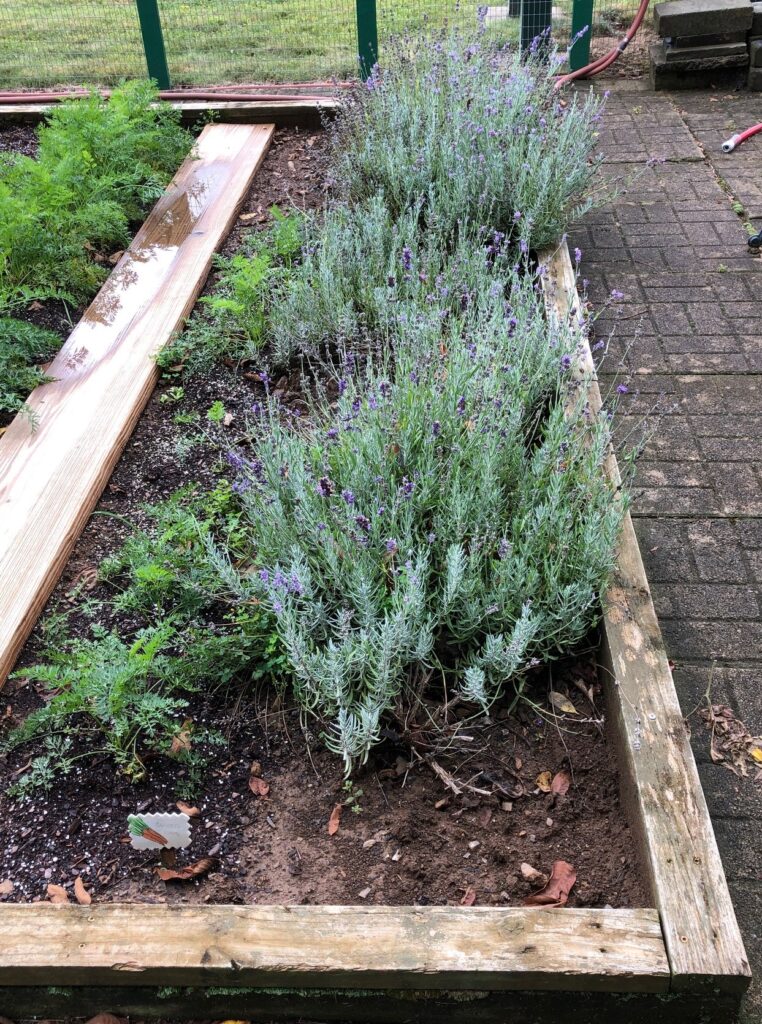
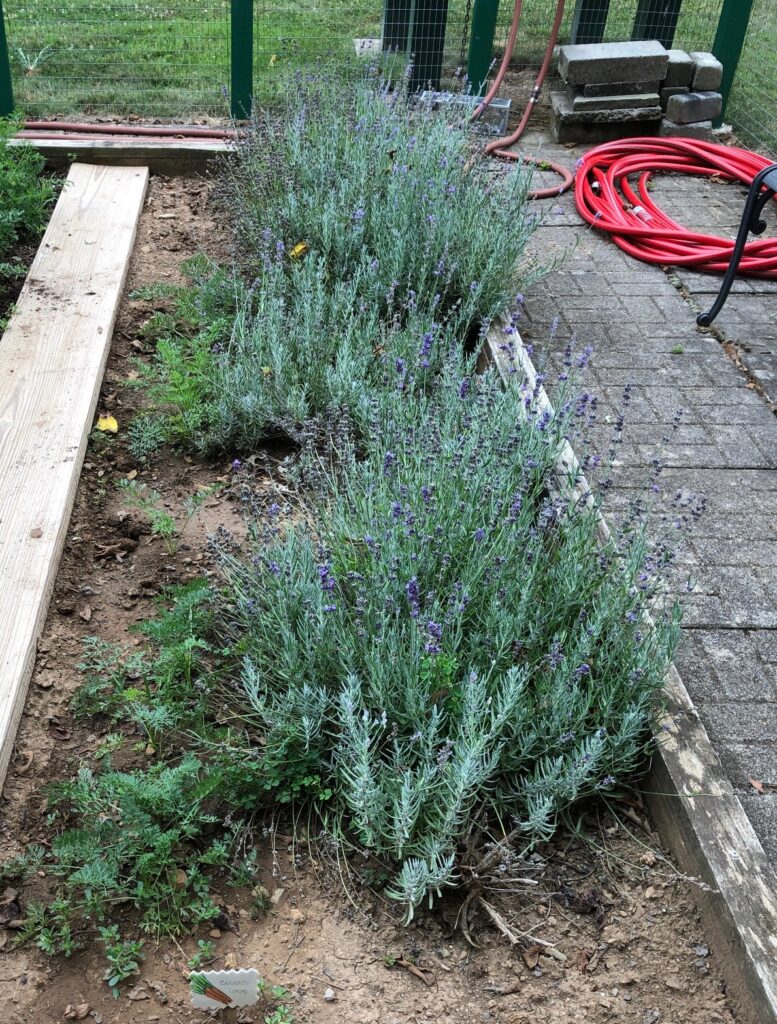
The first row from the bottom is the lavender. The carrots are in the second and third rows. That third row looks pretty sparse because we planted so late but we wanted to wait to see what would actually grow in the fall.
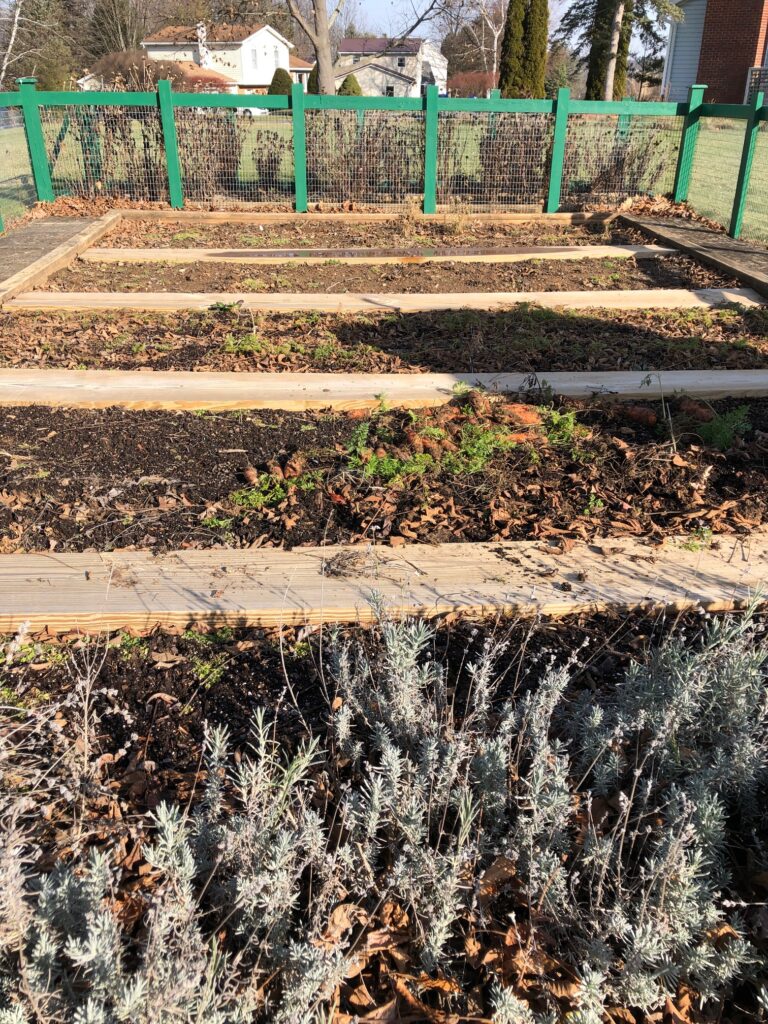
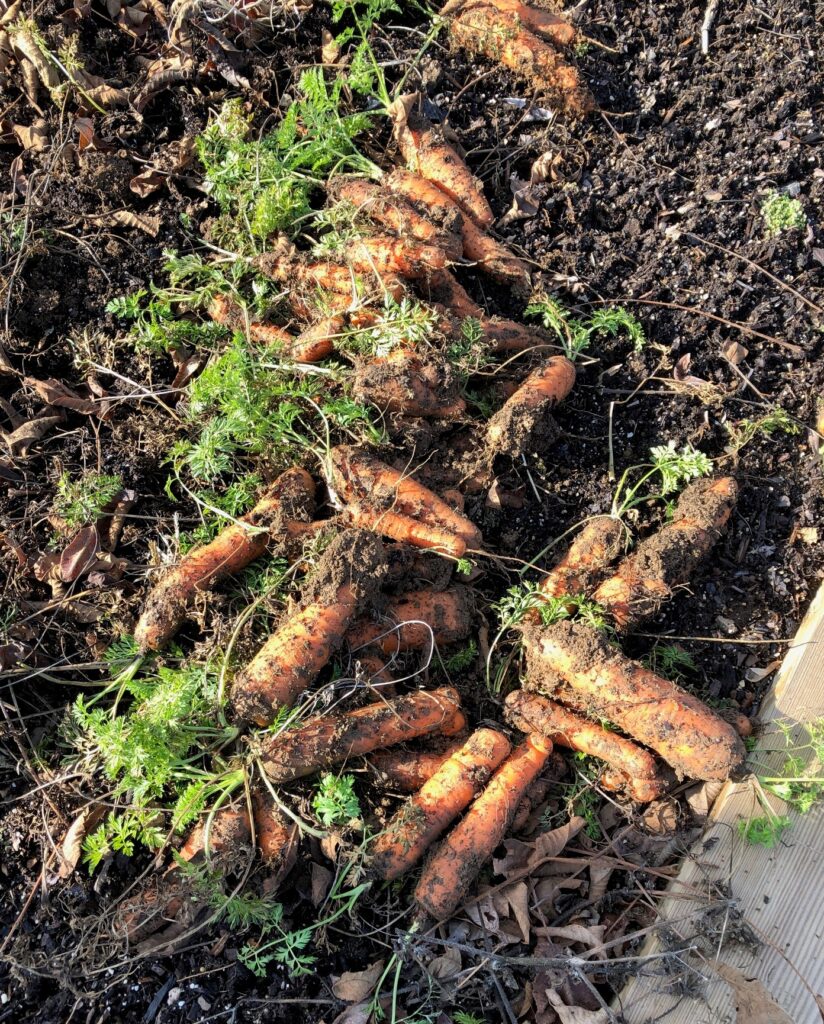
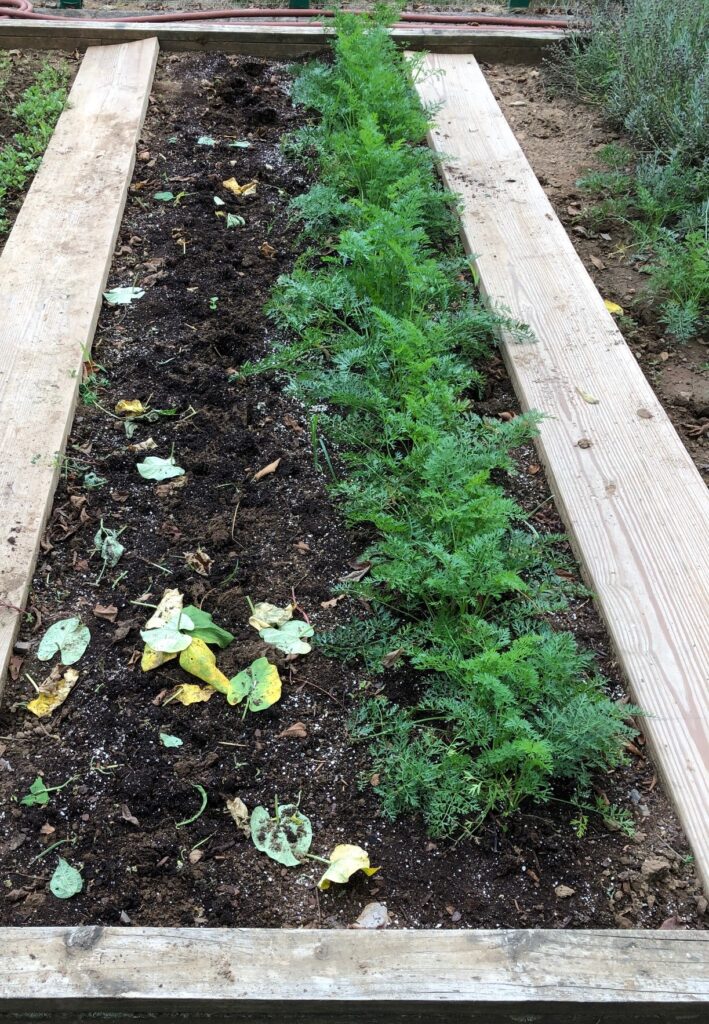
This is the garden now:
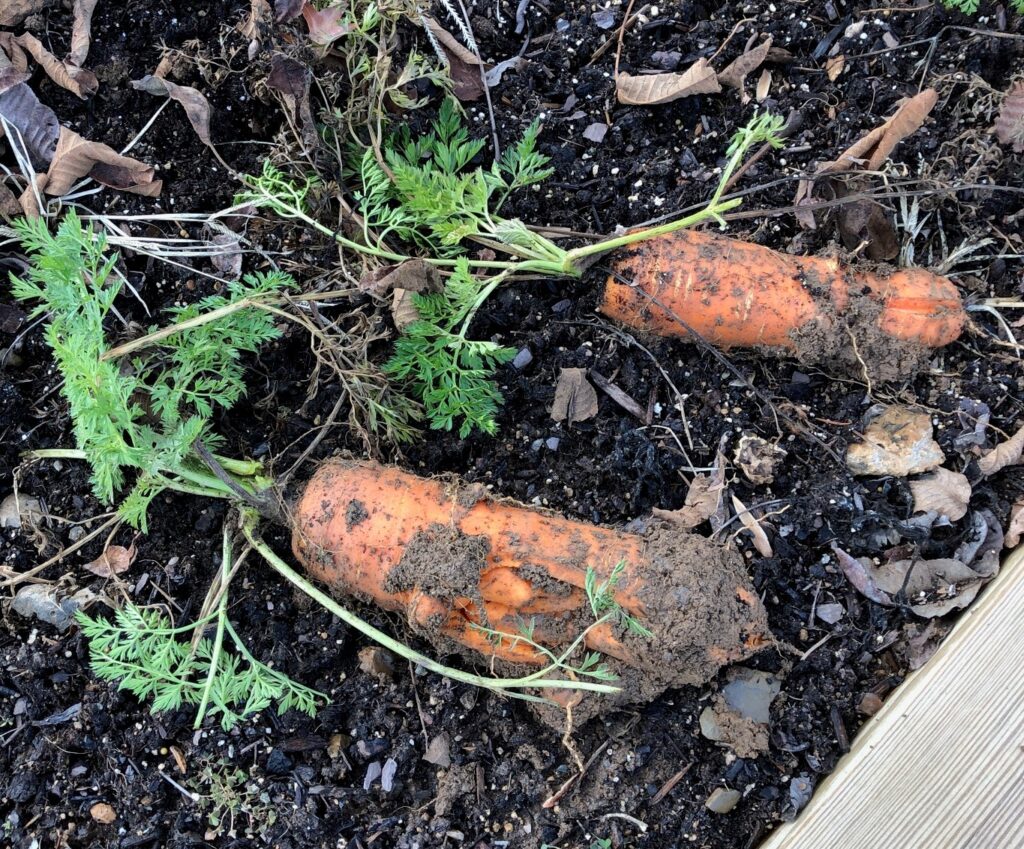
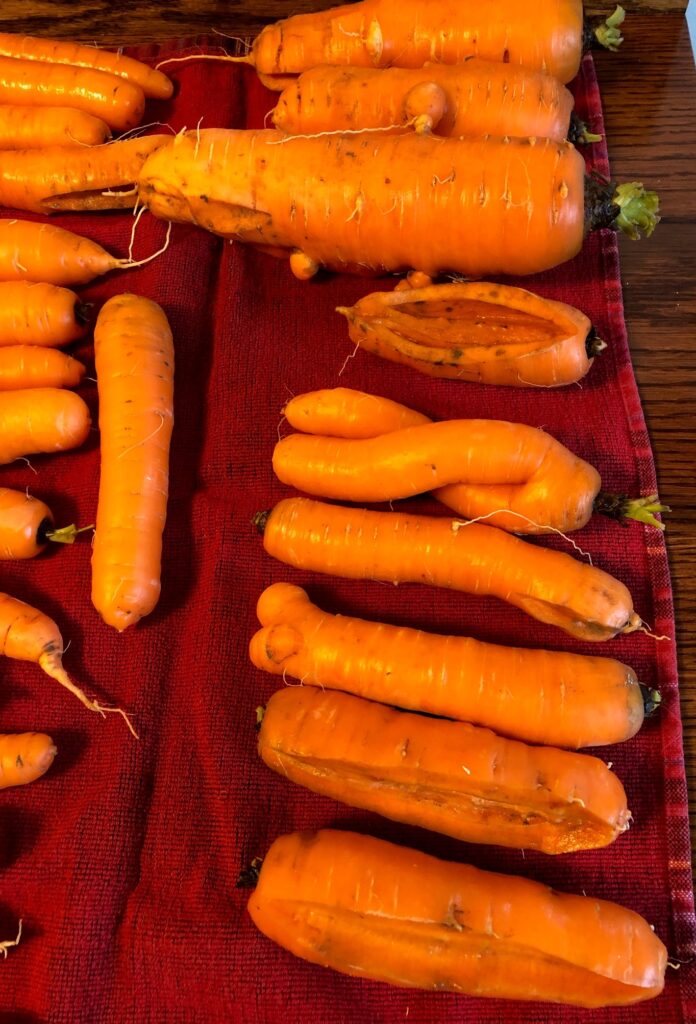
The lavender is resting and should come back next year. Bert has started to dig up the second row of carrots.Here is a close up of the pile of carrots.A few were really huge!Bert hosed them off and needed a scrub brush to get some of the mud off. The very tiny carrots got separated out for a friend’s pet rabbits.The rest of the carrots were laid out to dry on the kitchen table for a few hours.This row of carrots were extra large but were not perfect. I’ll clean them up and they’ll be just right for Daisy (see previous post https://marykisner.com/carrots-for-daisy/ )
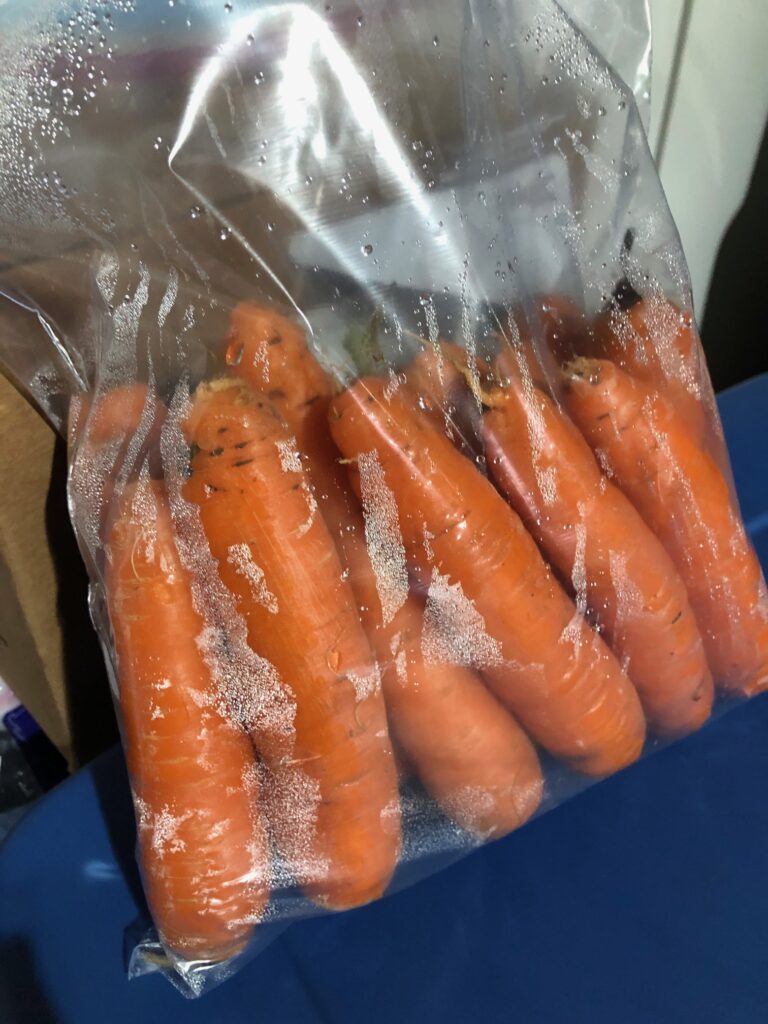
When they were finally dry and not so cold I packaged them up into Ziplock bags, standing upright. Then I put them down into paper bags from Trader Joe’s) and set them in the garage.
Overnight they still had lots of moisture in the bags so I opened them all up. They will keep better if they are dry.It will be easy to grab a few for dinner or a snack!
It’s too bad houses today don’t have root cellars, where the conditions are perfect for storing vegetables over the winter! Enjoy!
Thanks to the dry August, I think autumn has decided it’s time to make an appearance! In the last three days we finally had a storm track right over us and we ended up with almost 2″ of rain! The grass will be happy. We’ve been able to keep the few plants left in the garden watered, but I think most of the plants were just ready to get on with fall weather.
Here’s where we stand in the garden today:
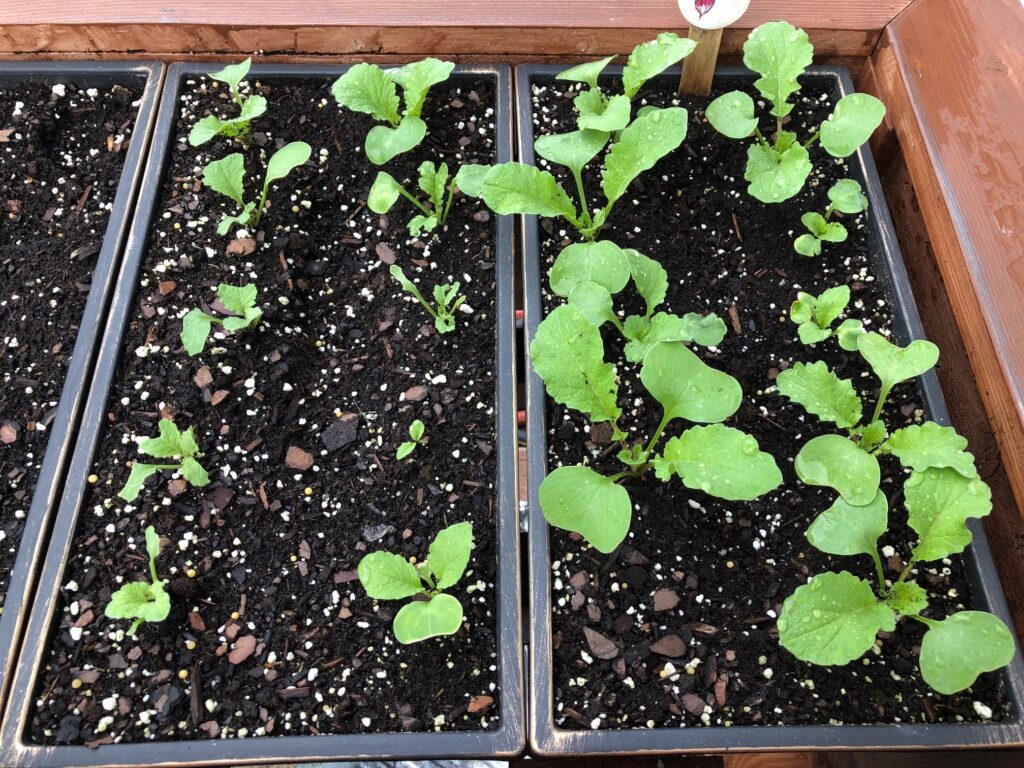
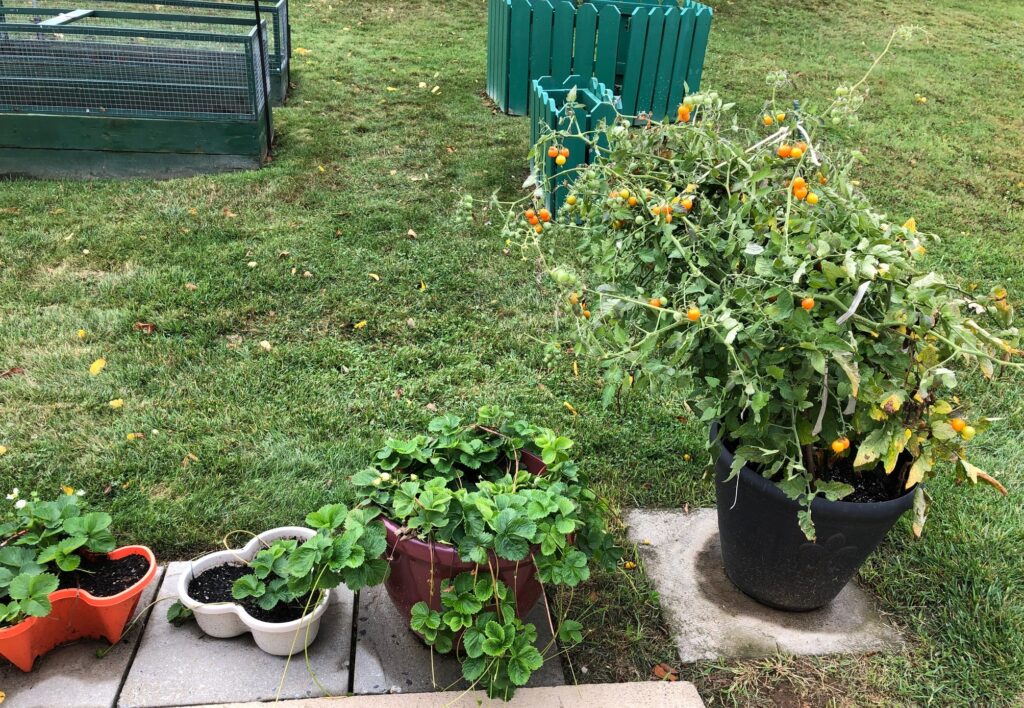
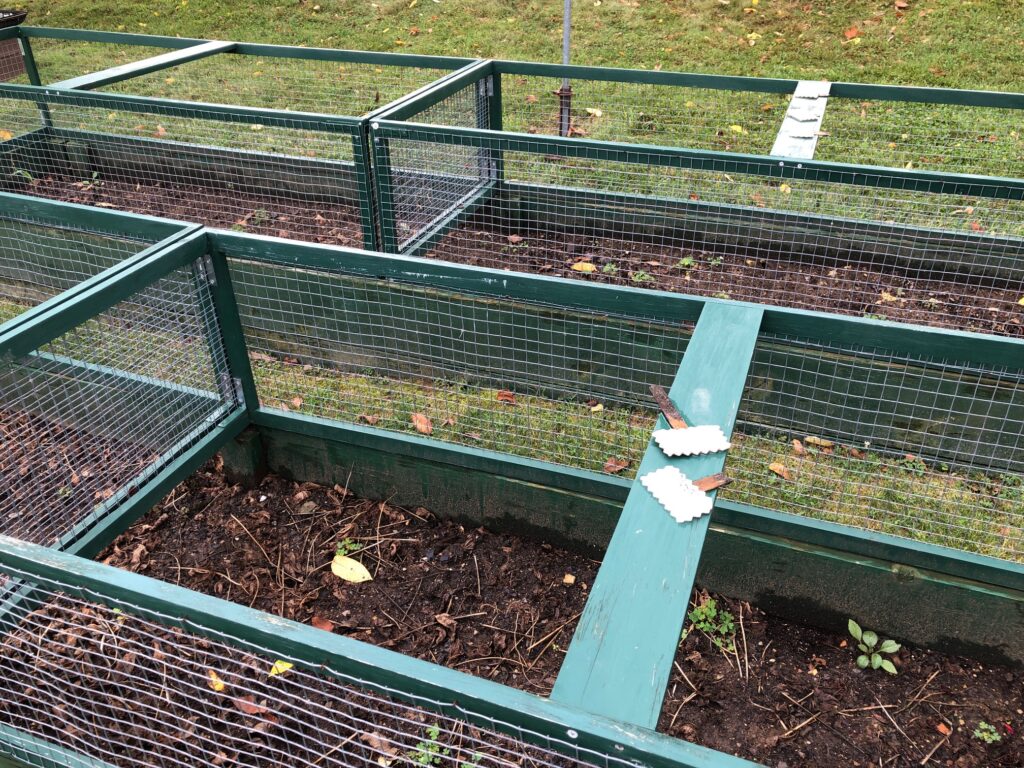
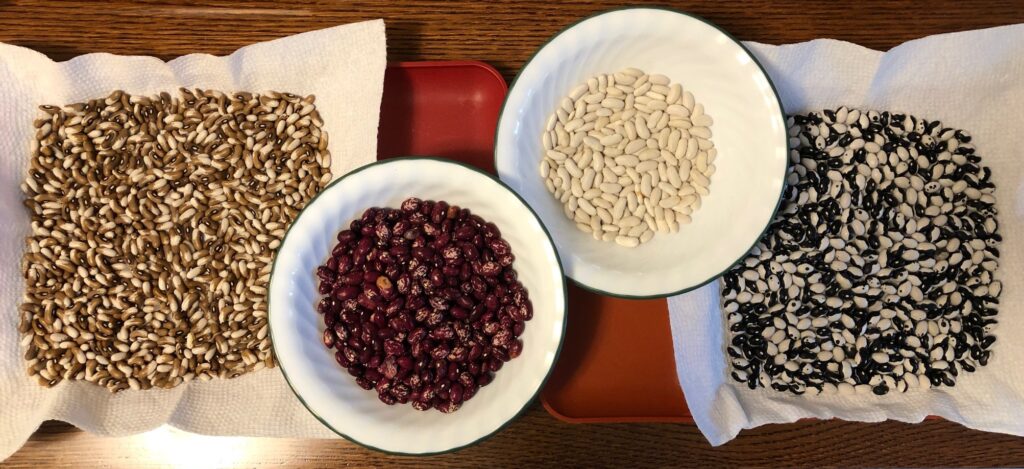
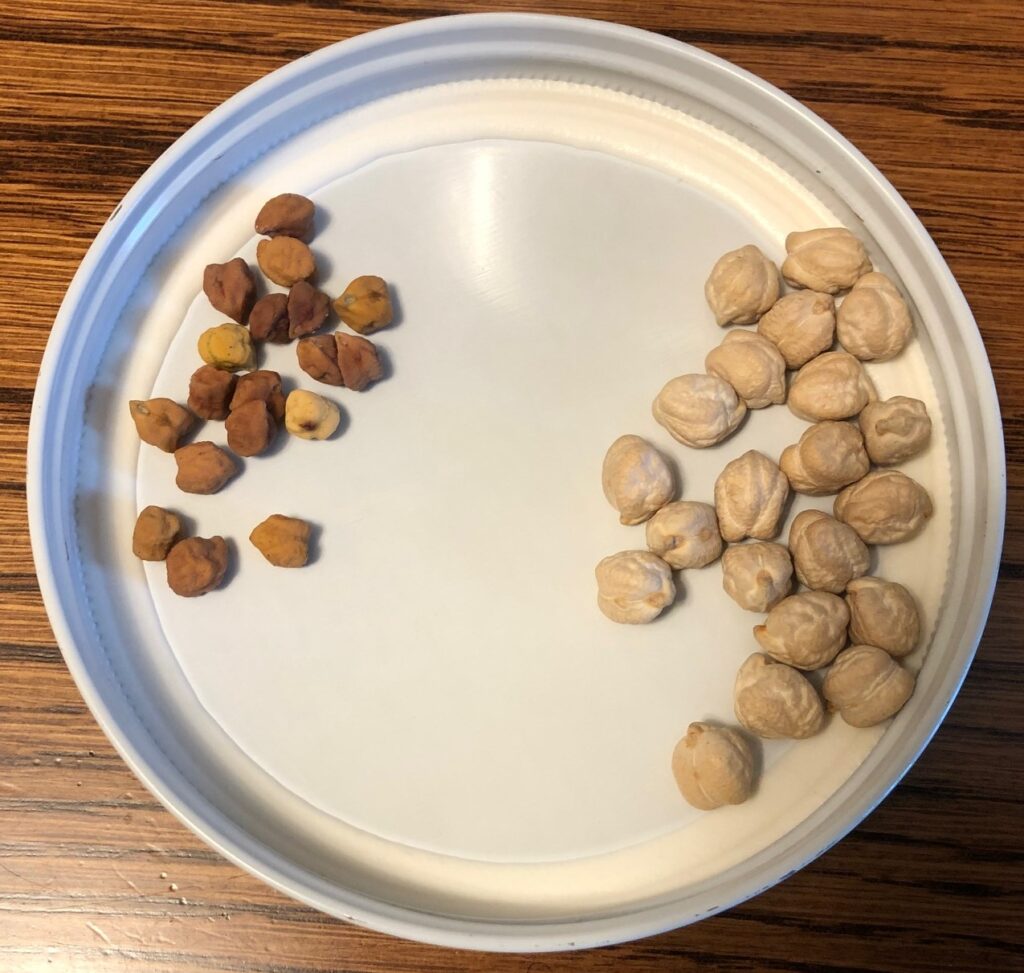
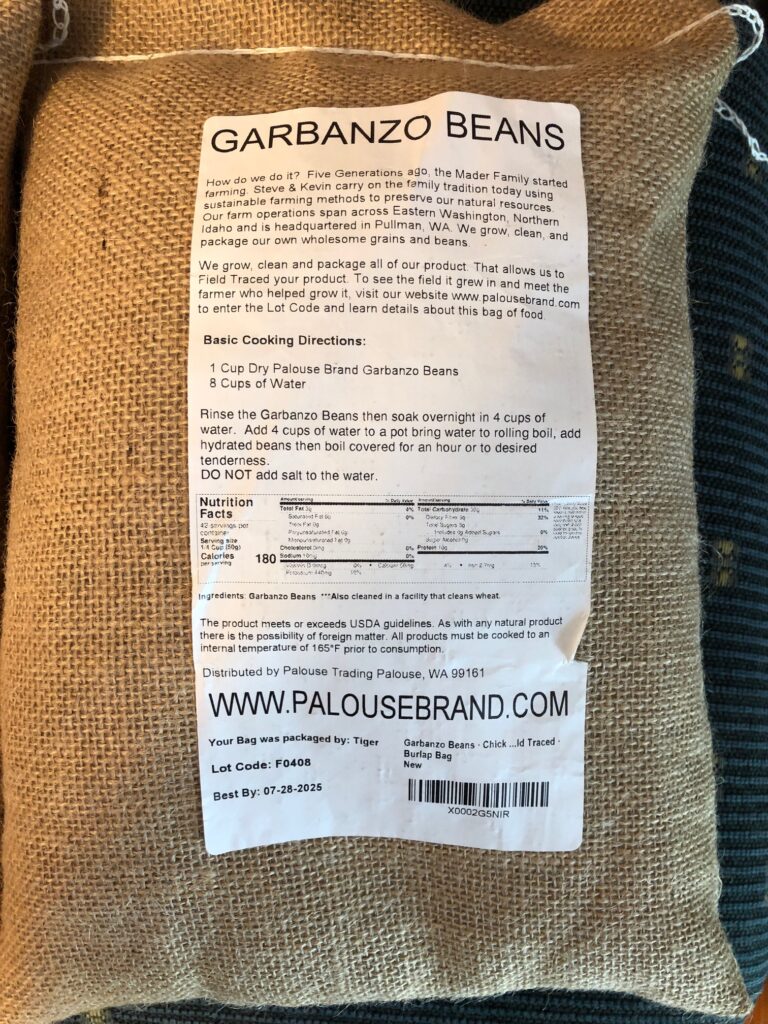
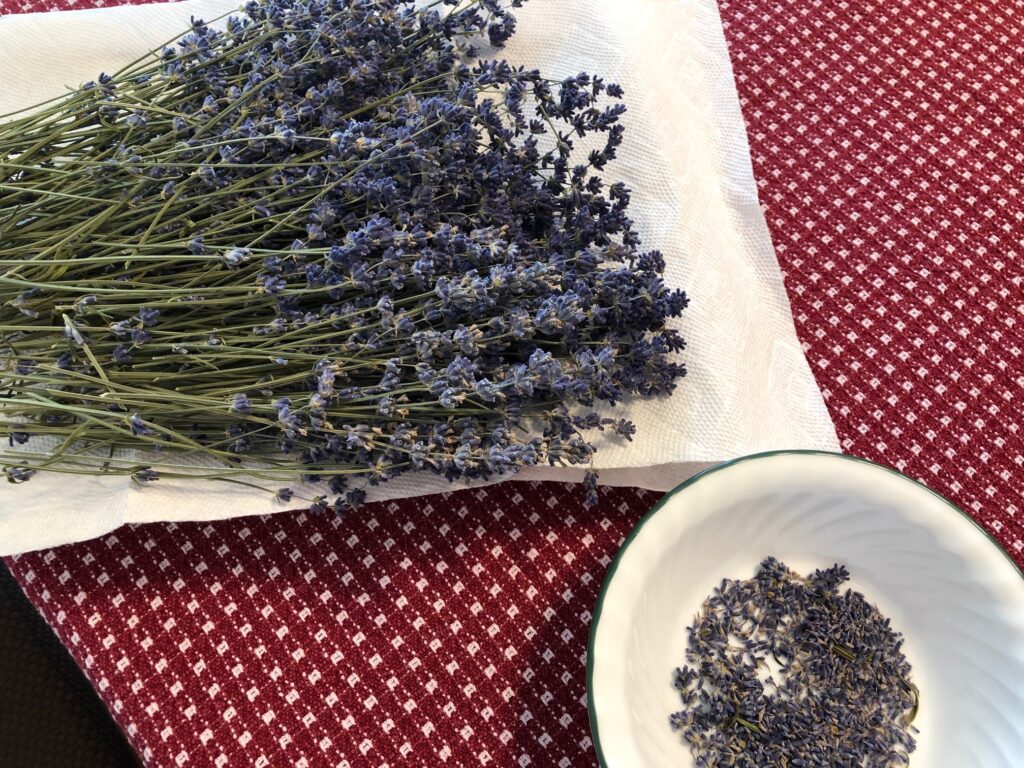
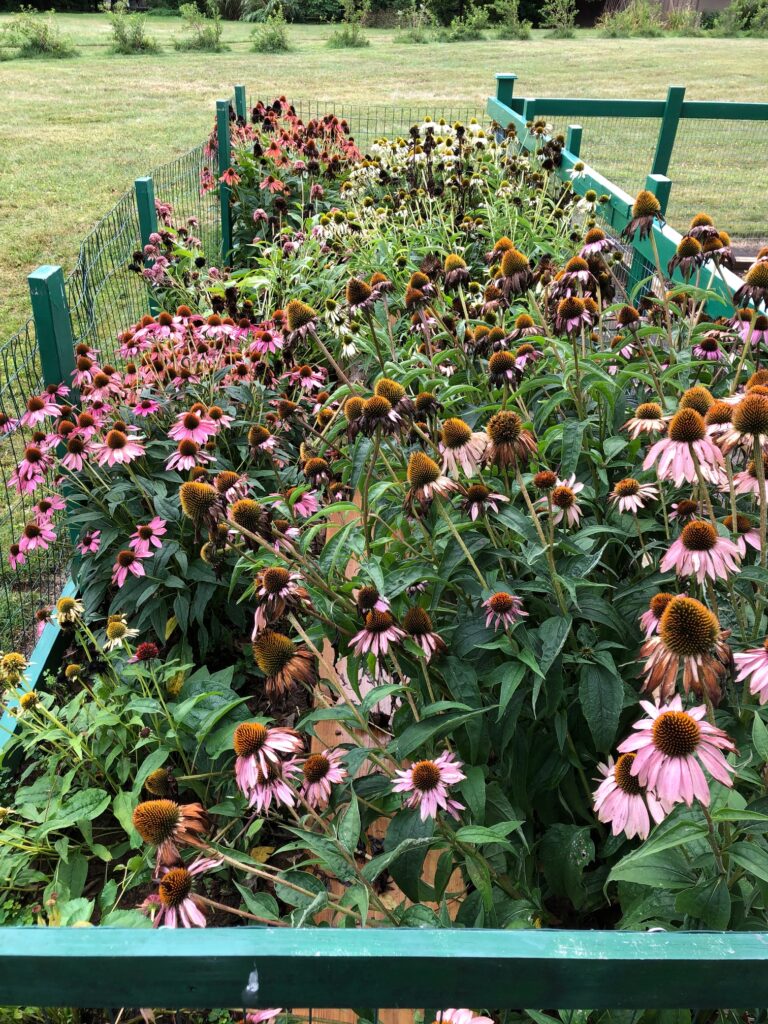
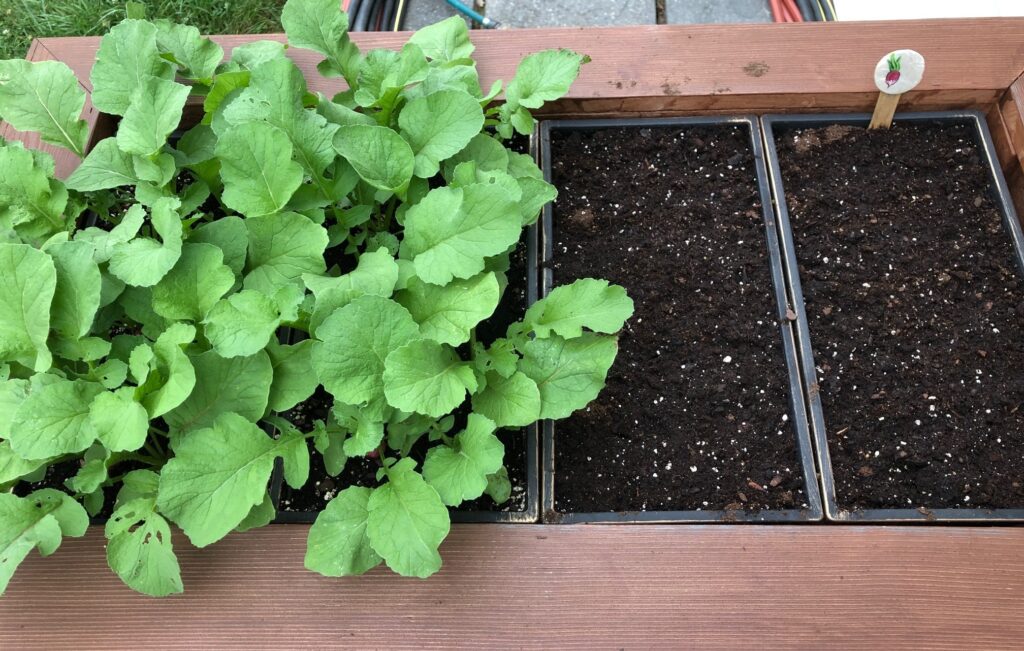
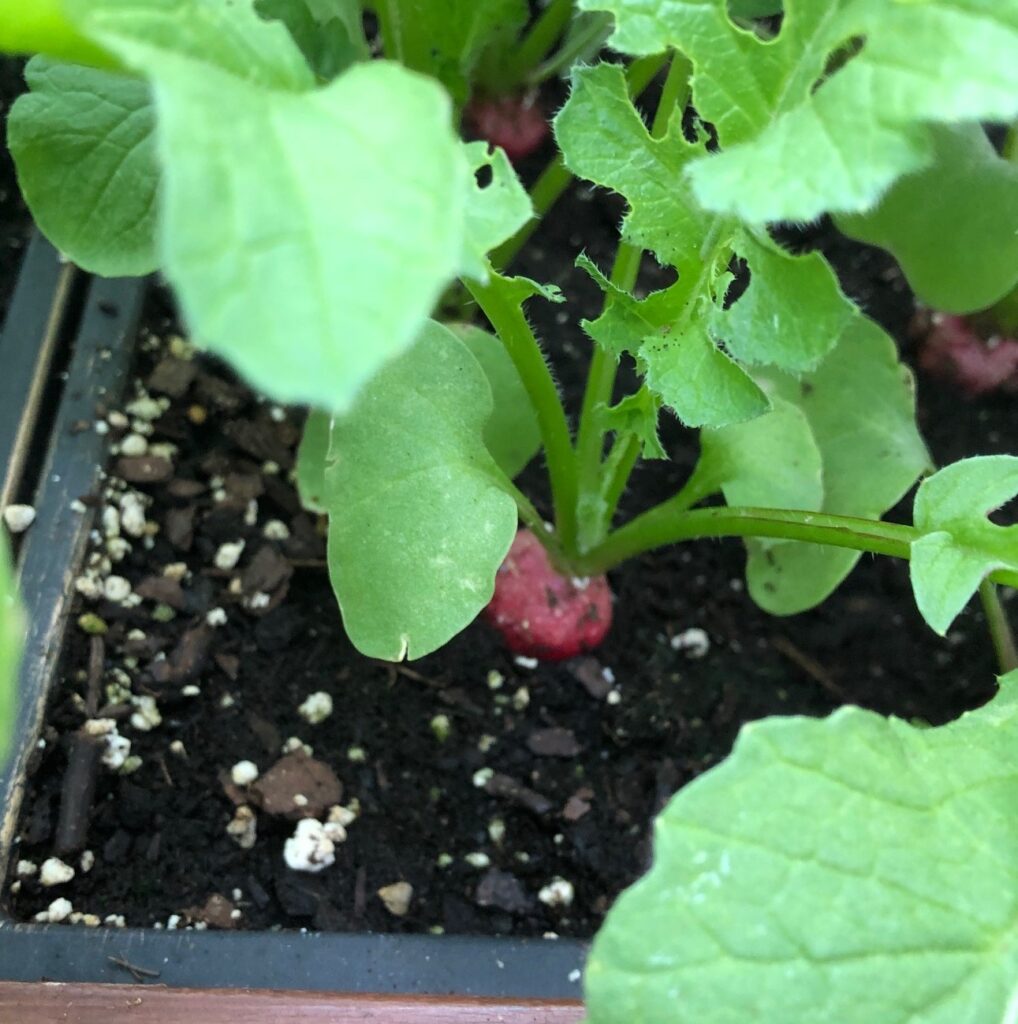
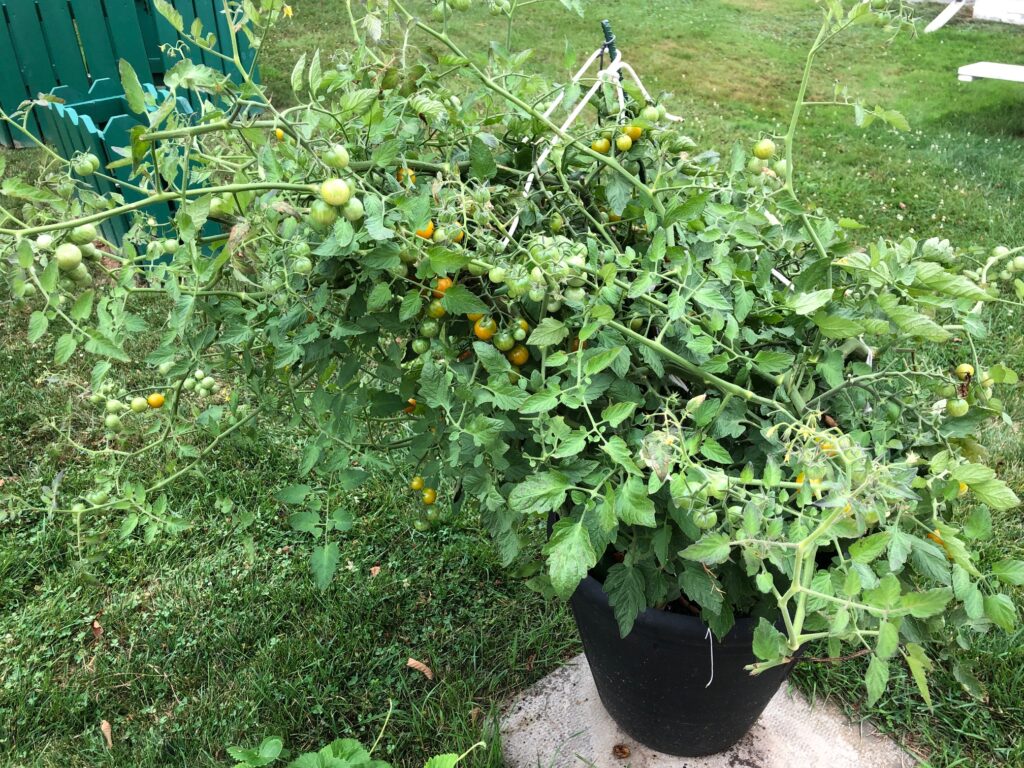
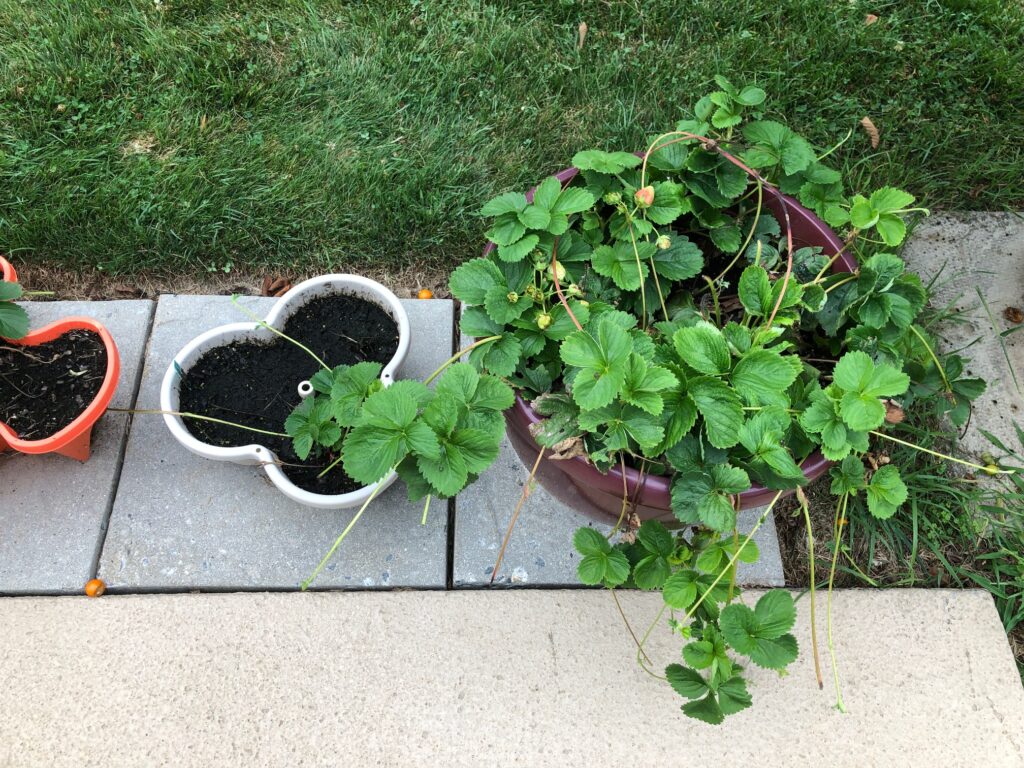
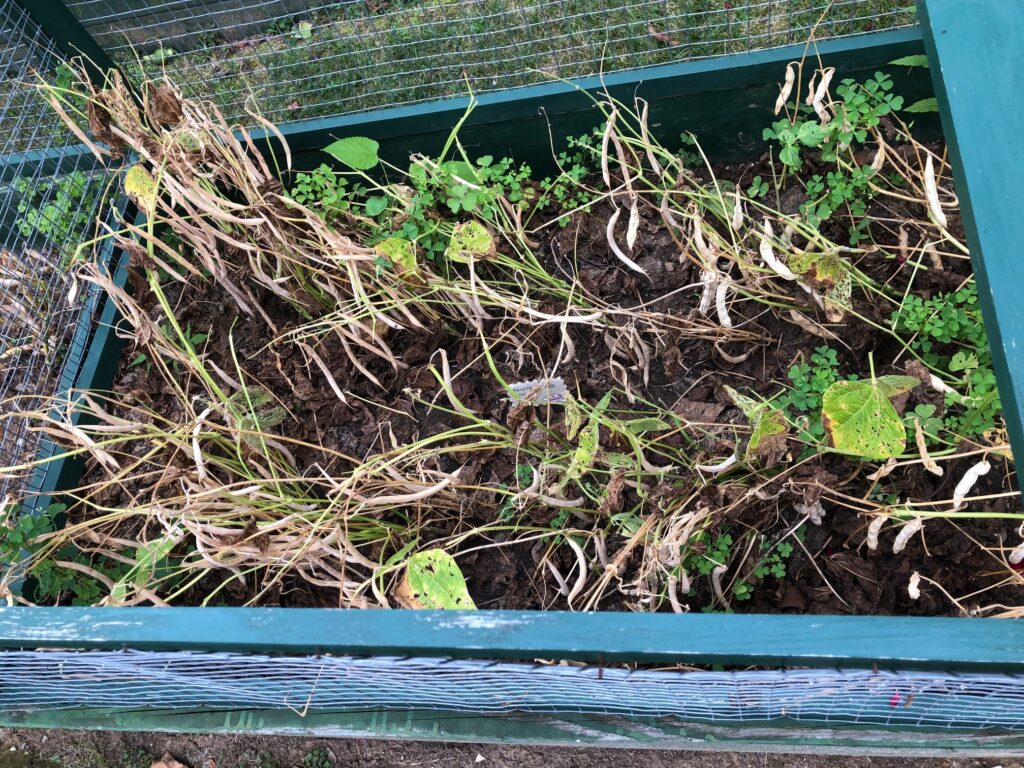
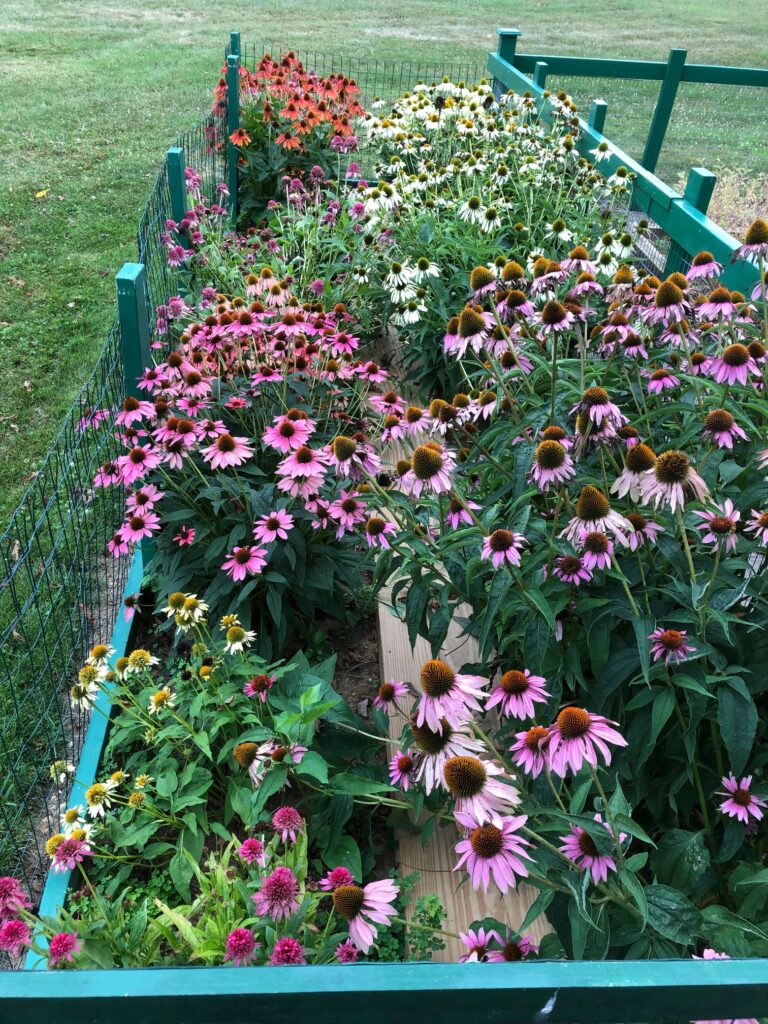
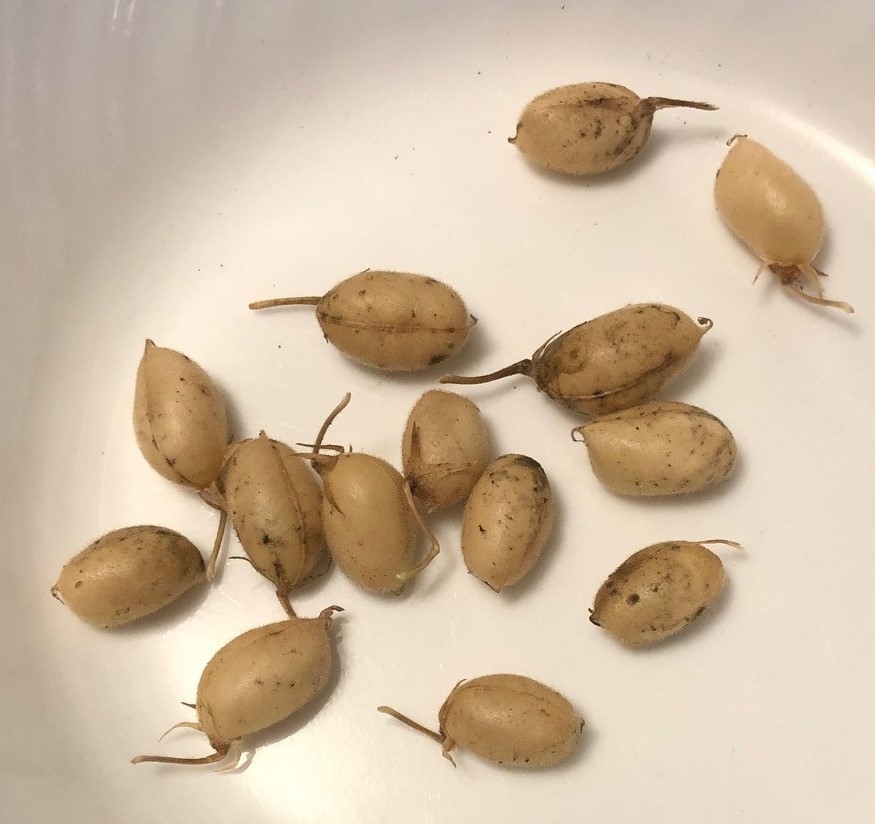
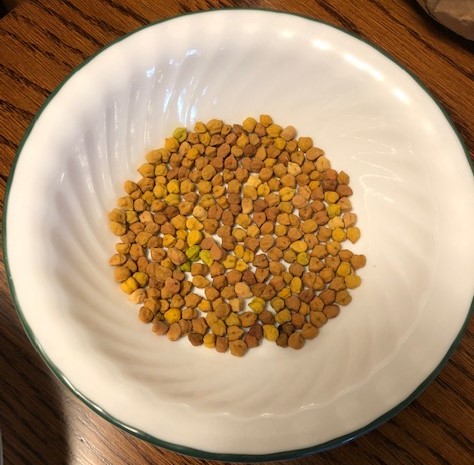
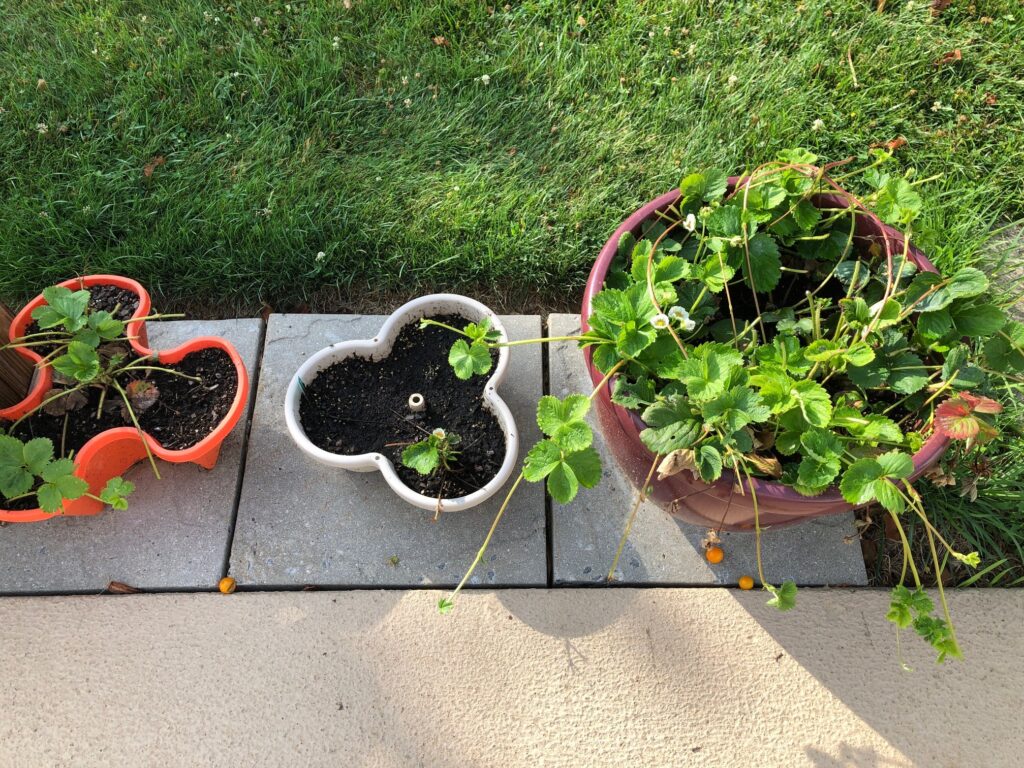
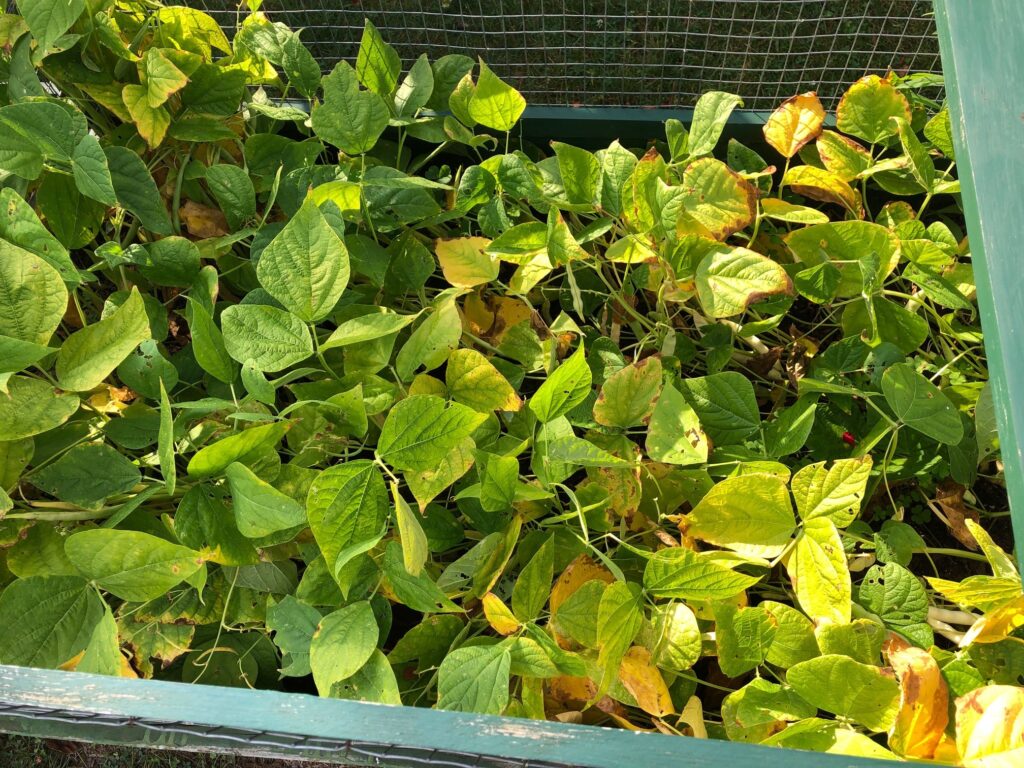
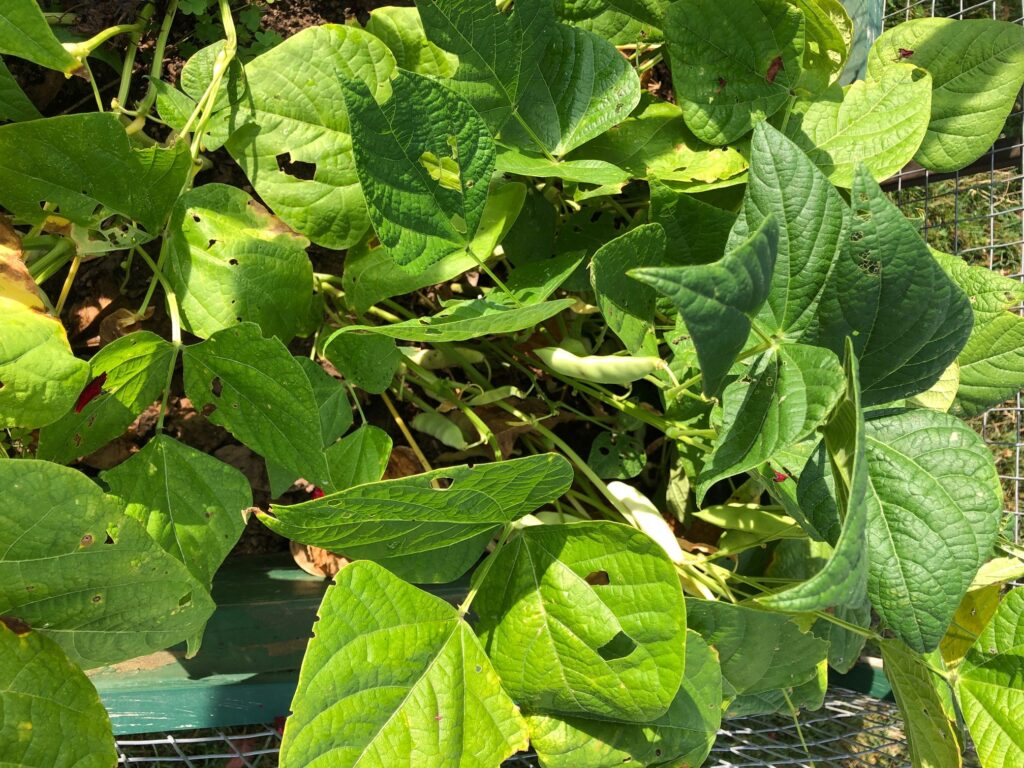
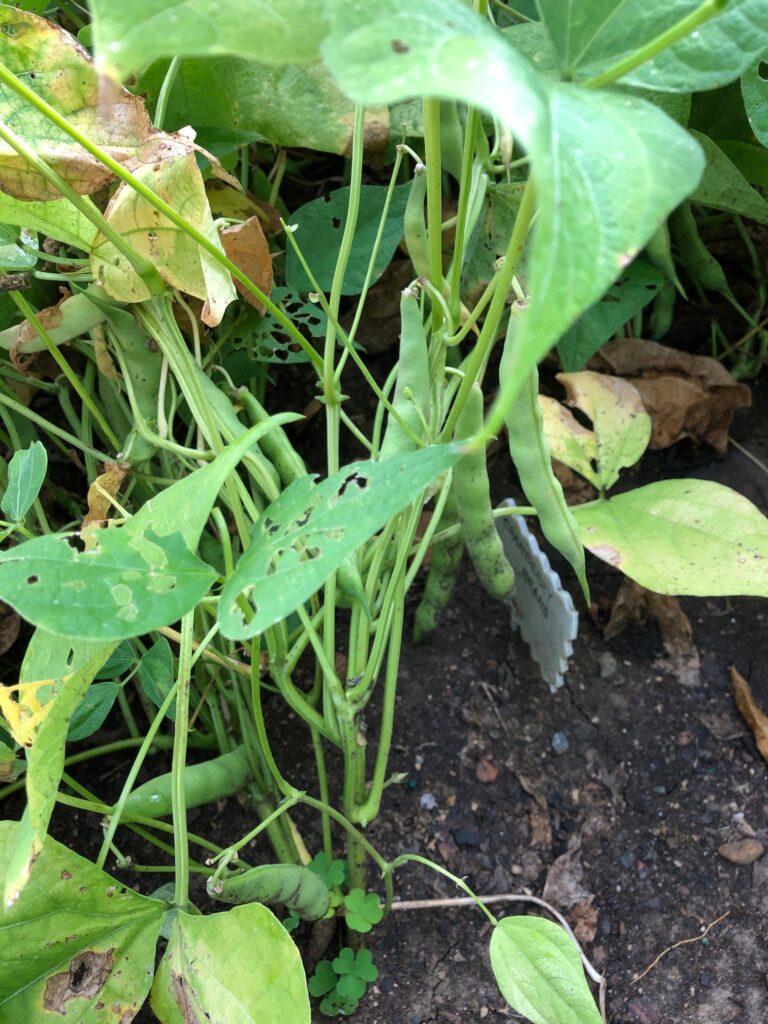
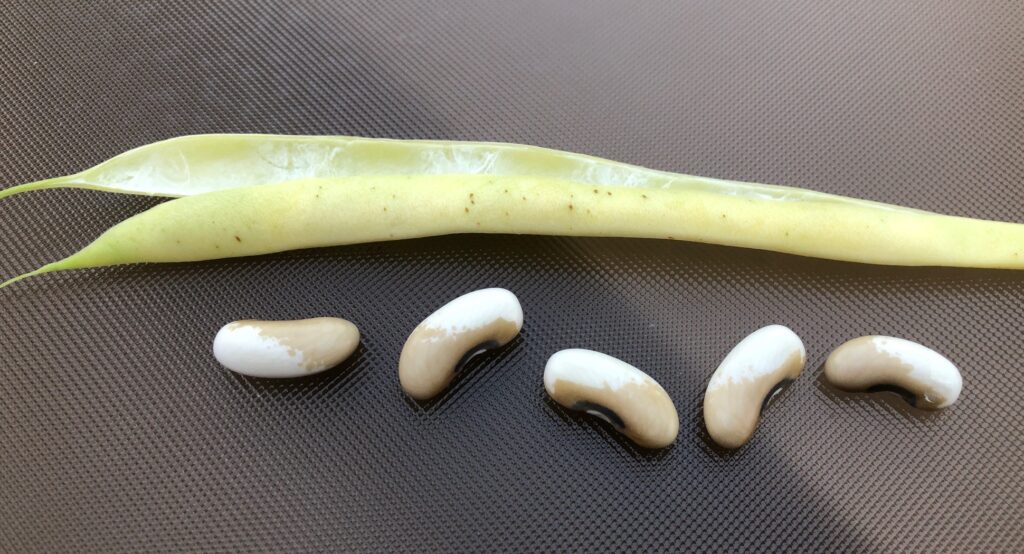
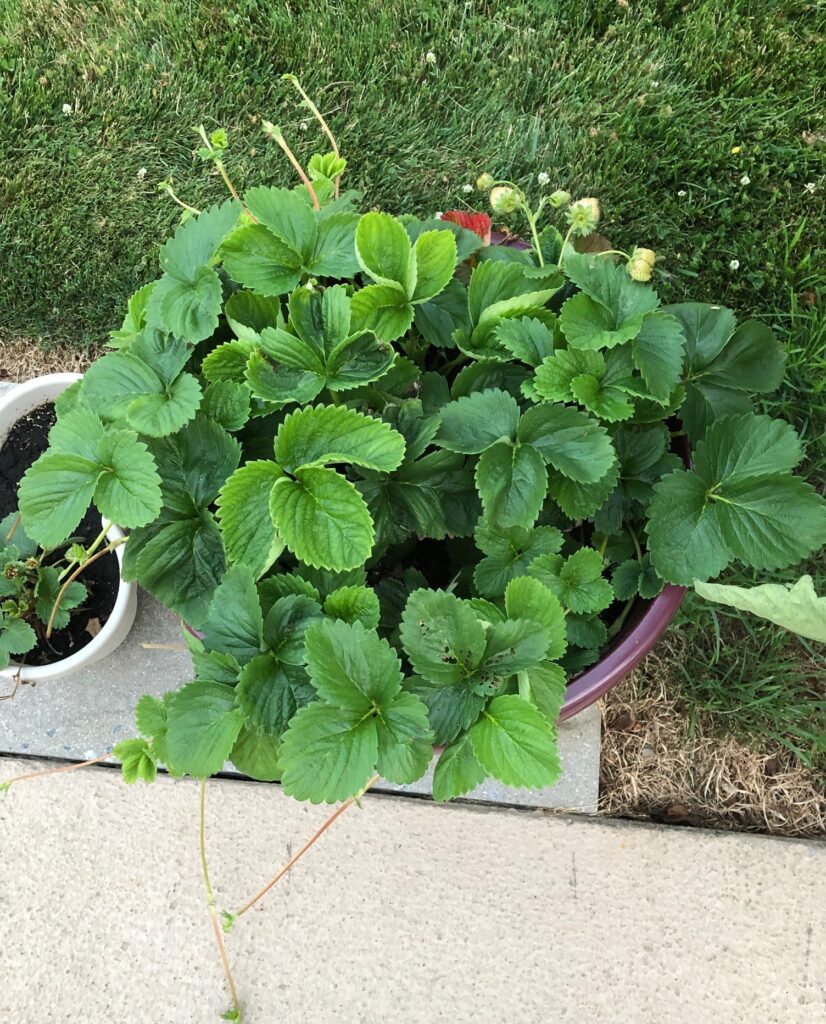
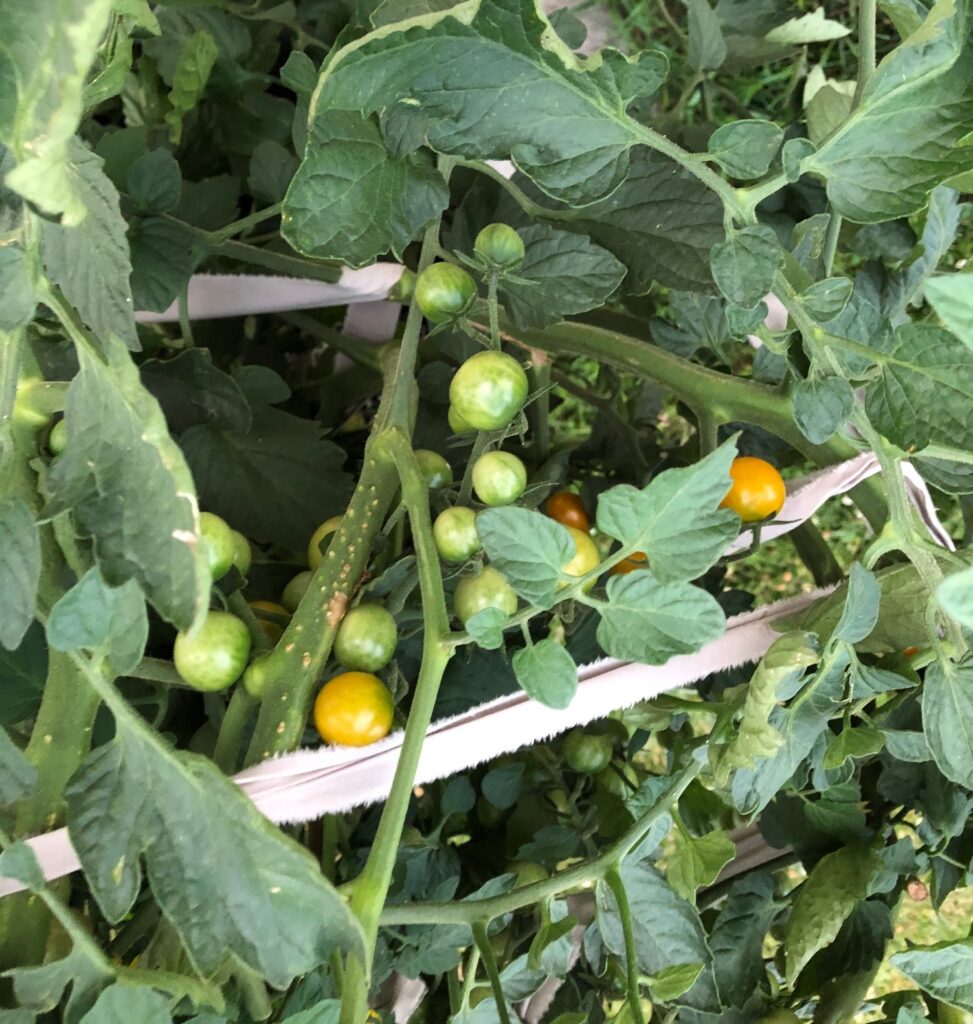
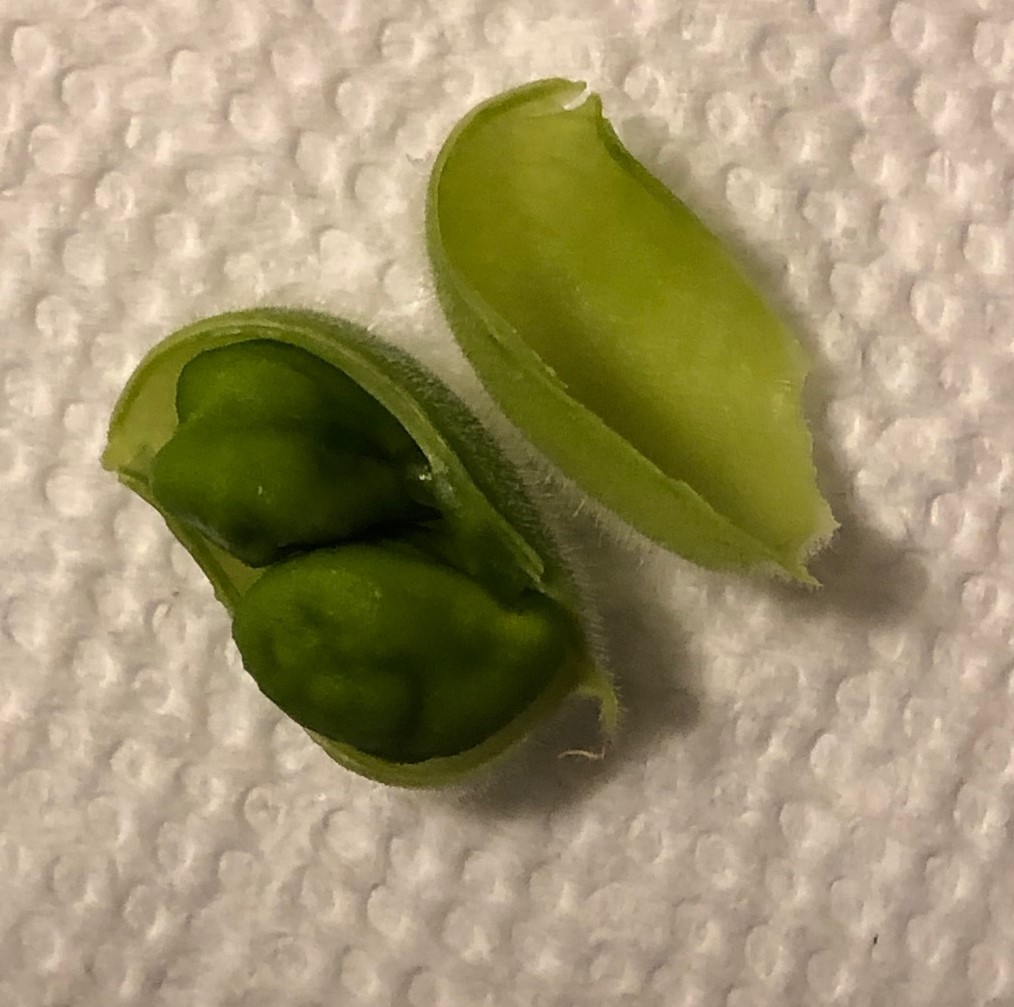
The last planting of radishes. This is the raised planter, but somehow some munching insect took bites out of the radish leaves. I probably have two dozen radishes in the refrigerator so I’m set for a while.The strawberry plants keep trying, but really no actual strawberries made it. the yellow/orange cherry tomatoes have finally reached their limit…so did I! Most of the tomatoes have split and rotted, so that plant will be dispatched shortly. I still have 2-3 dozen in the refrigerator so I’m good for now.These are the planters that had the shell beans, the cucumbers and Delicata squash. Everything was removed and cleaned up two weeks ago.The shelled beans, from left to right: Painted Pony beans, Cranberry beans, a baking bean and Calypso beans.The chick peas were cute and tiny and a complete pain in the neck to shell! I ended up with several cups of tiny peas. Not sure if they’ll cook up into anything worth eating. Very disappointing. Who knew there were two varieties of chickpeas. The ones on the right are the ones I’m familiar with.I finally solved my dilemma of wanting chickpeas by ordering some online from the Palouse Co. in Washington. I’m determined to try making hummus sometime.The main garden is pretty empty now, with just carrots to harvest. We’ll dig them up as we need them. Last year we dug up the last of the carrots for Christmas dinner!Carrots are looking good!The lavender looks pretty good and will probably be fine for any wandering bees until the first frost.I had already picked the lavender that I wanted to dry and put it in a paper bag. I pulled it out to see how it was doing. It needs a little more time so I laid the bunch out on a tray and will let it continue to dry.The Echinacea flowers are letting me know that fall is coming…they are already looking pretty sad!
As you can see, Bert tidies up the garden as things finish so the final clean up doesn’t take too long. I’m ready to put all the canning supplies away for now. All I have to do is look at my shelf of canned foods to see how the summer went…pizza sauce, 4-bean salad and pickle relish. The memories of meals with fresh green beans, tomatoes, salads with fresh lettuce and radishes are there too! So that was our garden for 2022! Thanks for sharing the journey!
Thanks to the ongoing heat and lack of rain, the plants in the garden are maturing faster than I expected. I know it’s been only 11 days since my last update on the garden, but things change that quickly. While we’ve been able to keep the actual plants watered, for some reason they have just decided it’s time to wind down. Mother Nature seems to have her own timeline.
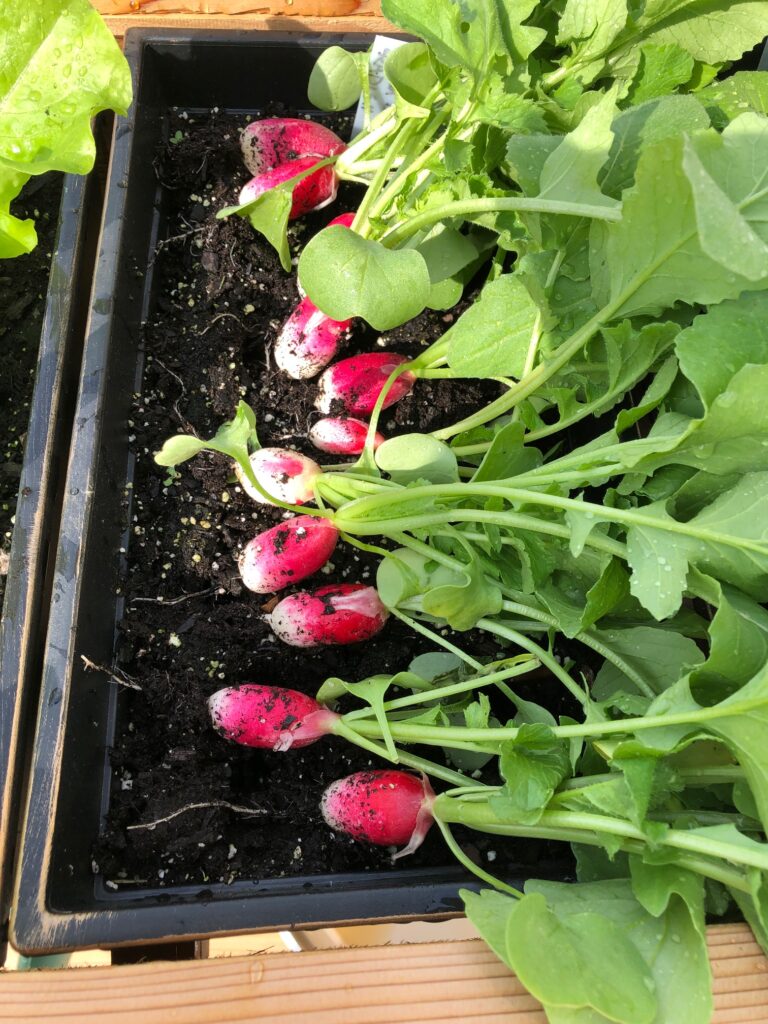
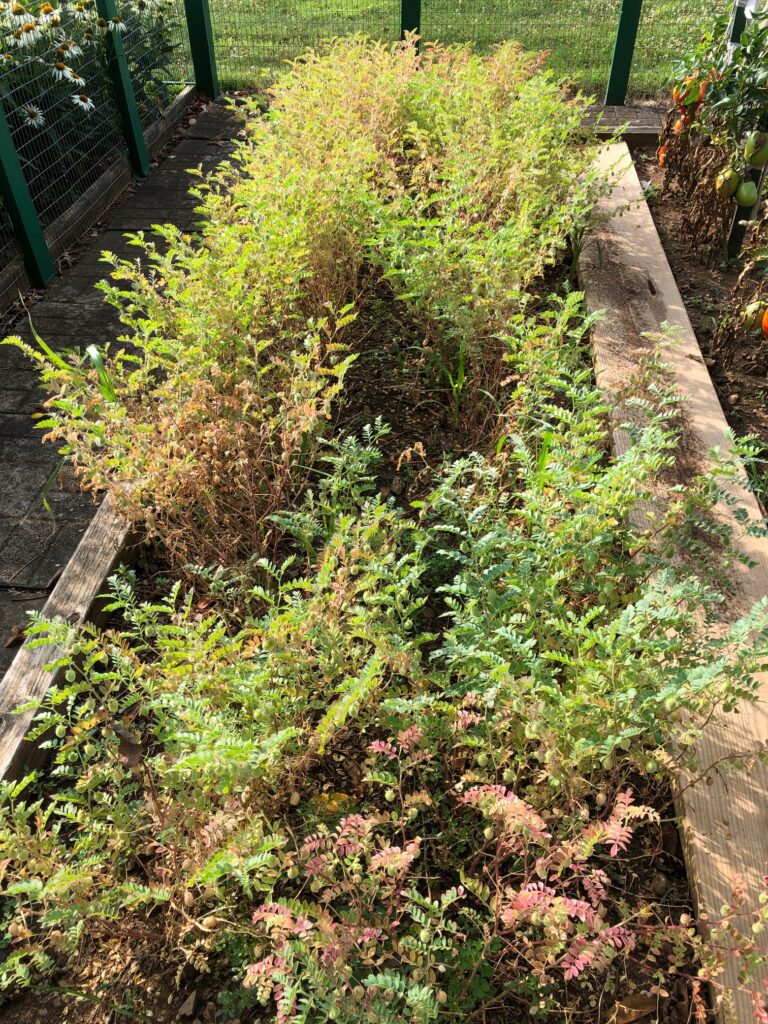
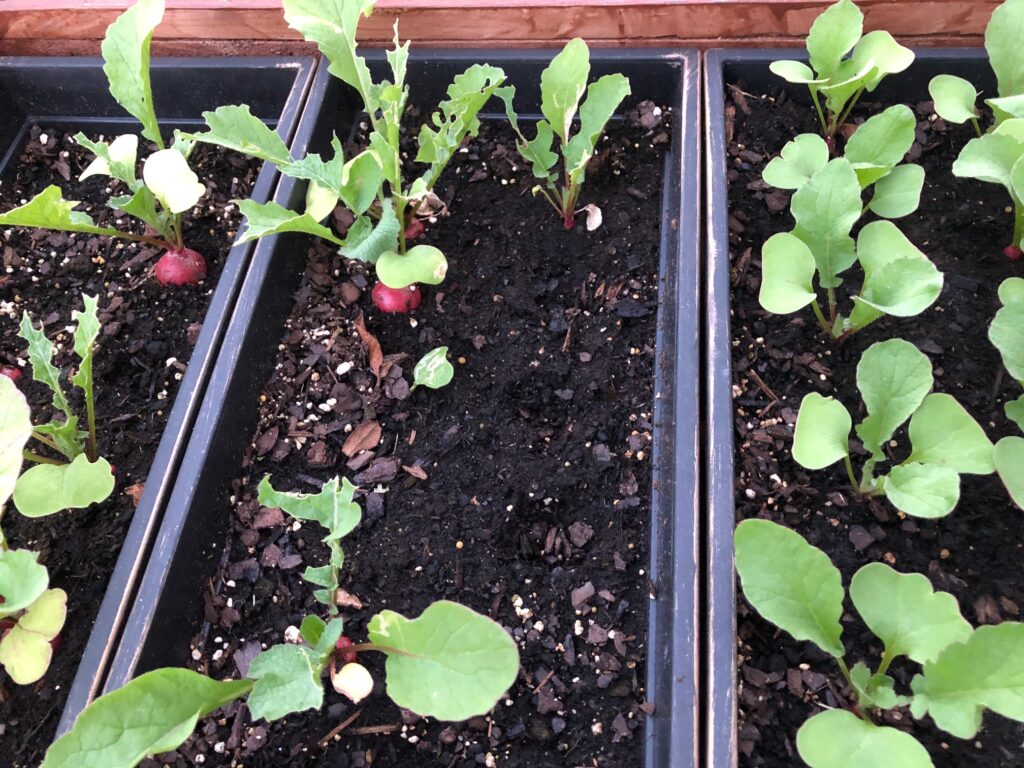
I’d say the radishes were my most successful crop! I’ve just replanted the sections on the right with 10 more seeds in each.The ones on the left are almost ready!We continue to eat yellow cherry tomatoes even though the plant looks like it will fall over at any time!The strawberry plants are still trying…we may get a few of these to eat!The 4 kinds of shell beans have drooped. Most of the pods are getting brown. The only green plants are weeds!They don’t look like much but……they really are looking great inside!These empty beds had the Delicata squash and cucumbers.The squash now have tough skin so they’ll keep for a while. Only a few misshapen cucumbers were left (sorry, no pictures of the cucumbers).The garden up on the hill is looking sparse.The Echinacea are still looking pretty good. The bees are happy!The chick pea pods are brown and crunchy. Had to get this picture before Bert cut them off.Bert collected the chick pea pods and will leave them out today in the sun to dry some more. He’ll store them in the shop so they can keep drying while I start shelling them.I’ve been collecting the pods over the last few weeks and now they pop open very easily. I was concerned they were beginning to look moldy so they were picked today.My collection of chick peas so far!Every day we pick a few tomatoes. (See the earlier picture of the tomatoes on my kitchen table.)This second planting of carrots are struggling with the heat…but the weeds are happy!The row on the left had the last planting of green beans. I pulled the plants yesterday. The row on the right is the first planting of carrots. We’ll leave them in the ground and eat them all fall. They are about 4-5″ long.This is the last picking of green beans.The lavender is still attracting the bees. There are a few carrots on the left trying to grow. I think the lavender plants don’t like them nearby!This plant has survived the deer munching on the top, but it keeps trying!
So, that’s the tour the second week of August, 2022. Mother Nature has ruled the garden this year. I wonder what kind of winter we will have…maybe less snow? We can only hope! Enjoy!
This is the time in our growing season we start to notice what worked and what didn’t. Dry spells and very hot days really stresses the lawn, but Bert has been able to keep the garden plants watered. The first planting of green and yellow beans have been preserved as part of a 4-Bean Salad mixture (see https://marykisner.com/canning-four-bean-salad/).
Radishes have flourished in our raised planter on the patio, so they are part of my daily salad mix. I’ve been able to keep up with planting new seeds after I remove the ones that are ready to eat. I will deem the raised planter with radishes a rousing success this year!
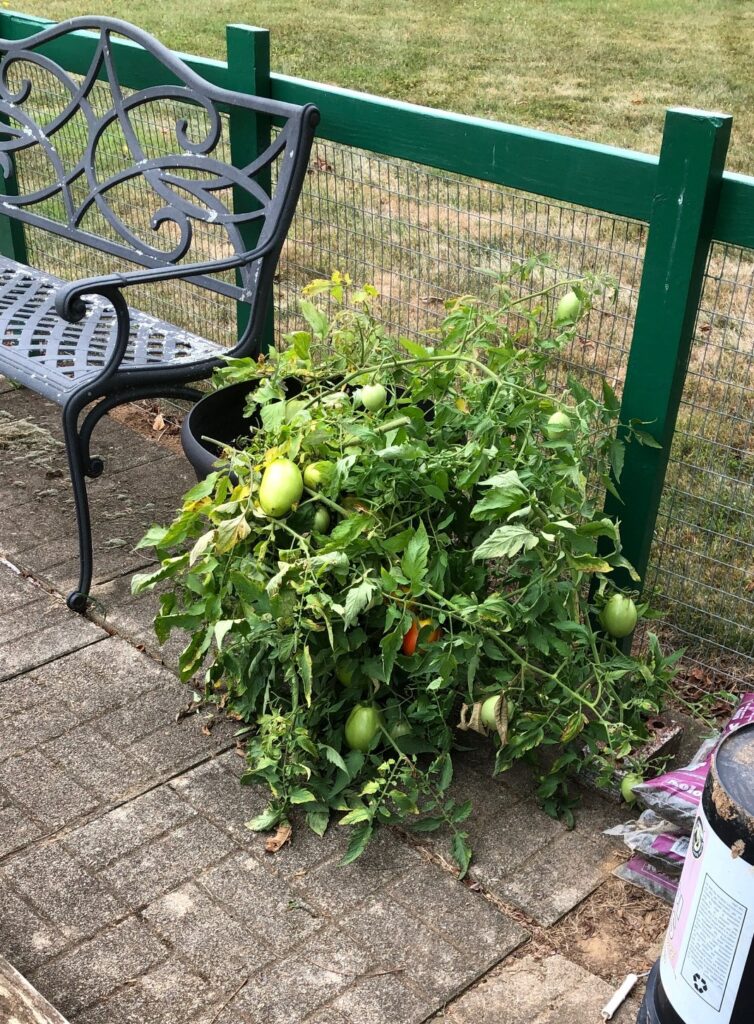
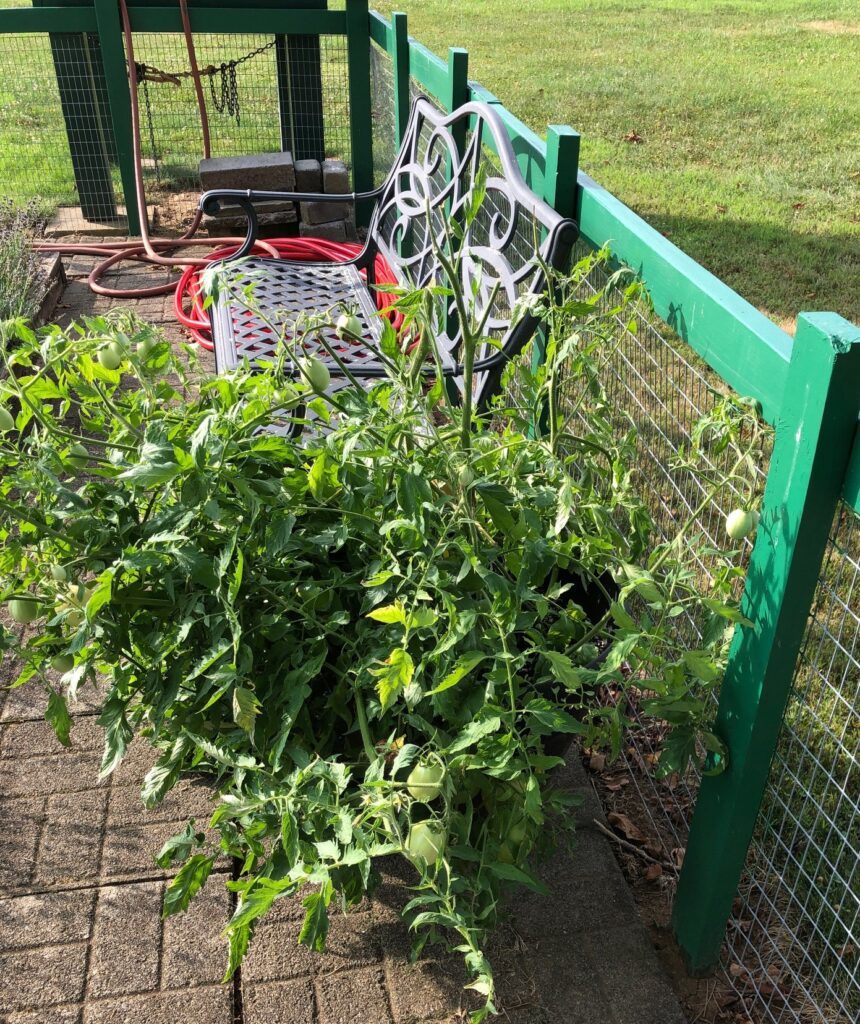
The cherry tomato plant in a large pot on the patio seemed like a good idea in the spring, but I don’t think we’ll do tomatoes in a pot next year! Even with just one plant (the tag said good for a pot) it was just too big and top heavy. It has fallen over multiple times. That was tolerable, the tomatoes themselves, while they tasted good the skins were so tough I felt like I had to discard a piece of plastic when I was done chewing. I have been collecting them and will include them when I make pizza sauce in a few days. Hopefully after they are cooked the skins will easily chop in the food processor. I’ll probably not grow cherry tomatoes again.
The strawberry plants were down low and vulnerable to the wandering bunnies and chipmunks. I’ve eaten 3-4 strawberries as soon as they ripened but hardly worth the trouble.
The Black Seeded Simpson lettuce did very well. It has now bolted and is waiting for Bert to dump out the pot. He is using the leaves now for bait in groundhog traps!
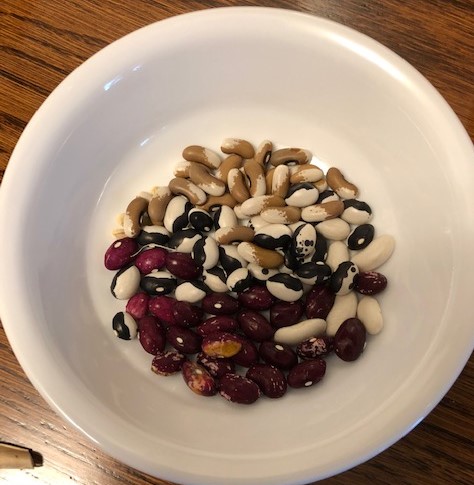
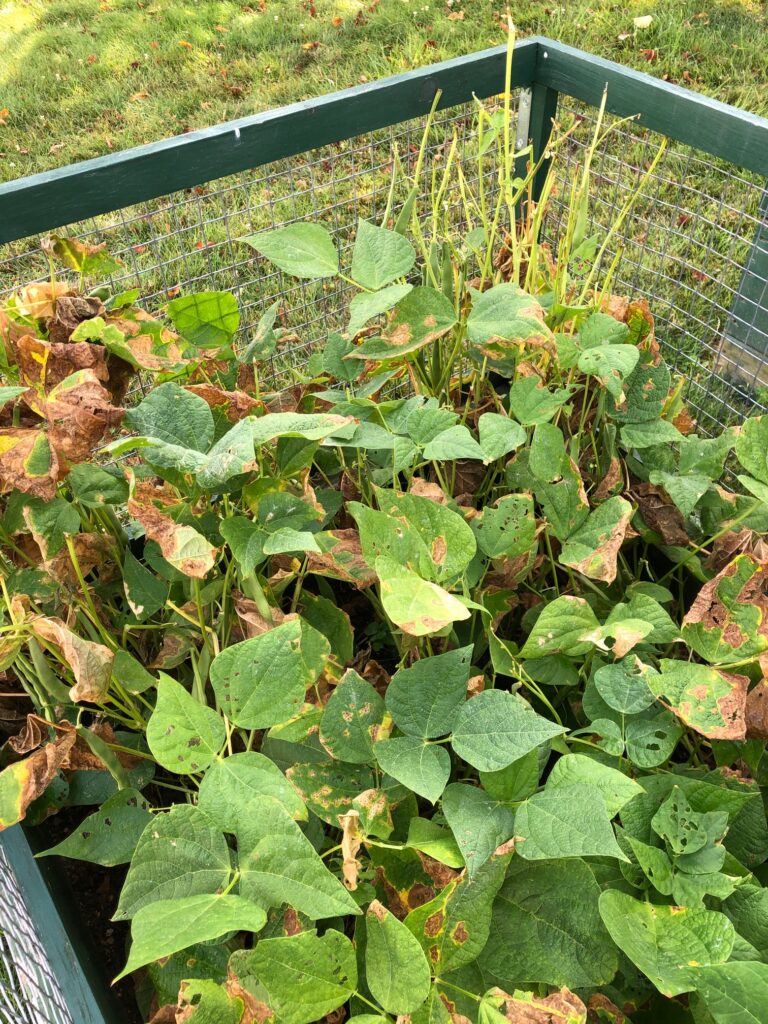
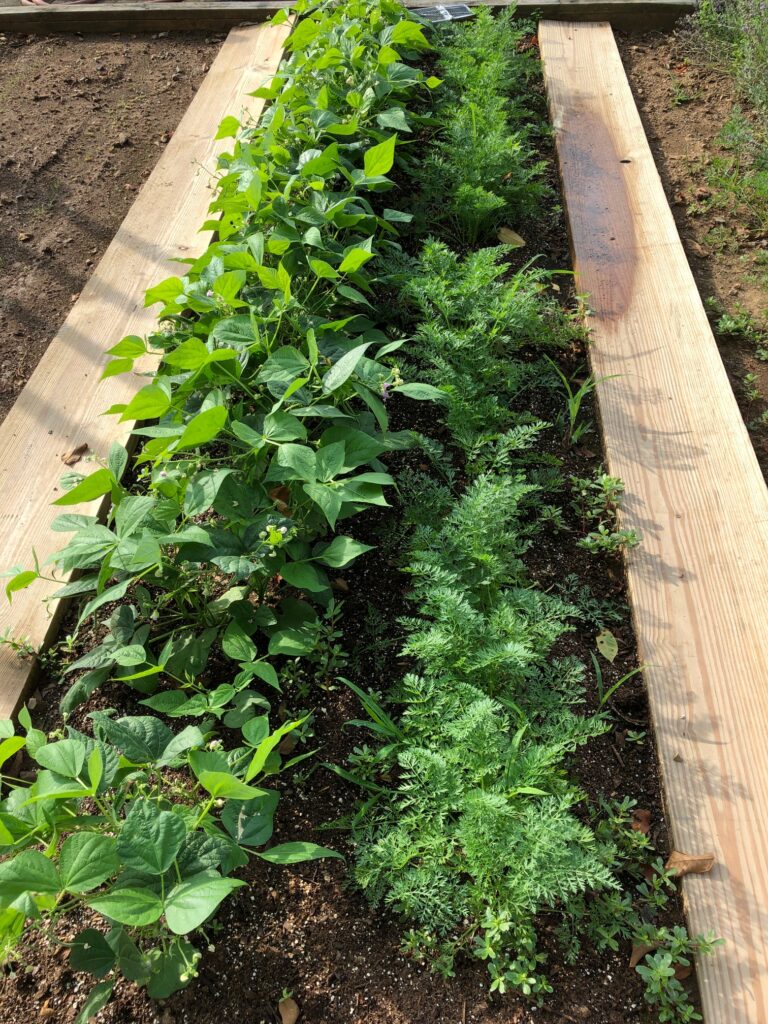
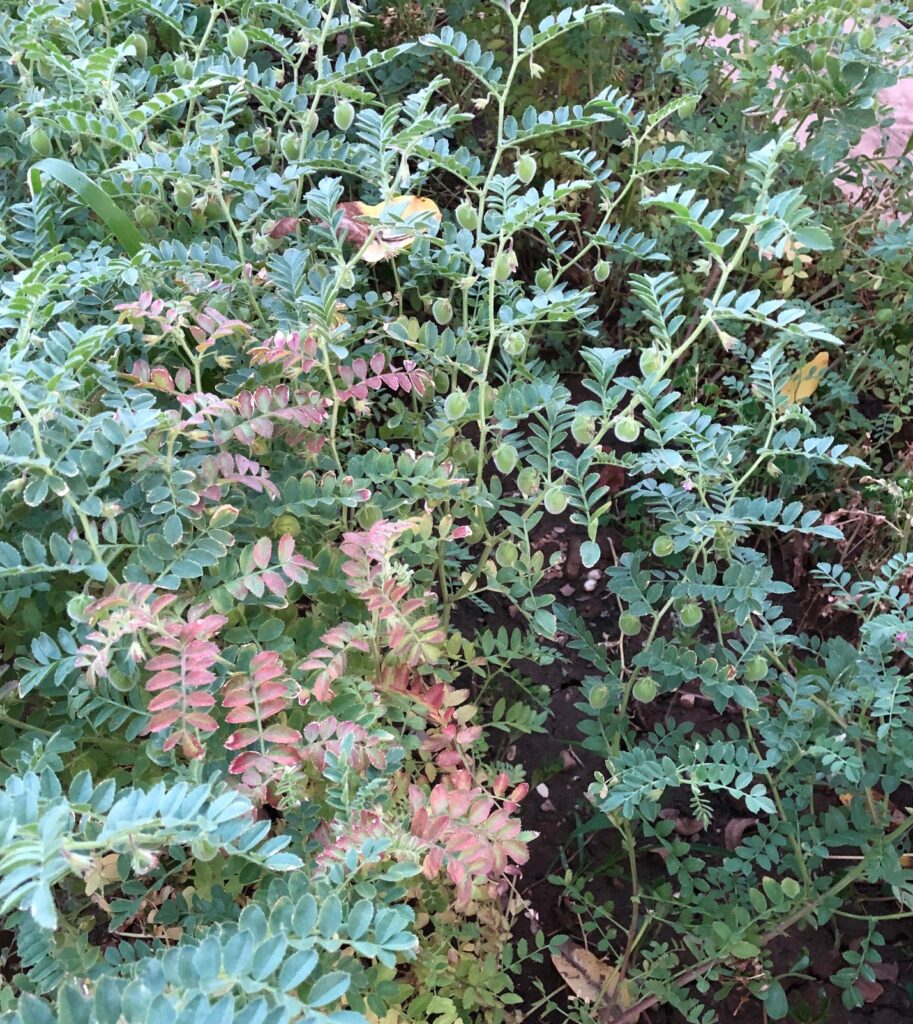
On to the shell beans. If you recall, I’m growing five different beans that we will leave in the garden until fall. The labels for them are hiding under the plants right now so I’m not sure which is which. First, here are what the plants look like now:
Can you see what’s left of this plant at the top of the picture…chomped right off! We have a group of deer that visit the bird feeder every night and this poor plant was tall and tasty. It didn’t have a chance!
I was able to pick a few bean pods to see what was happening inside:
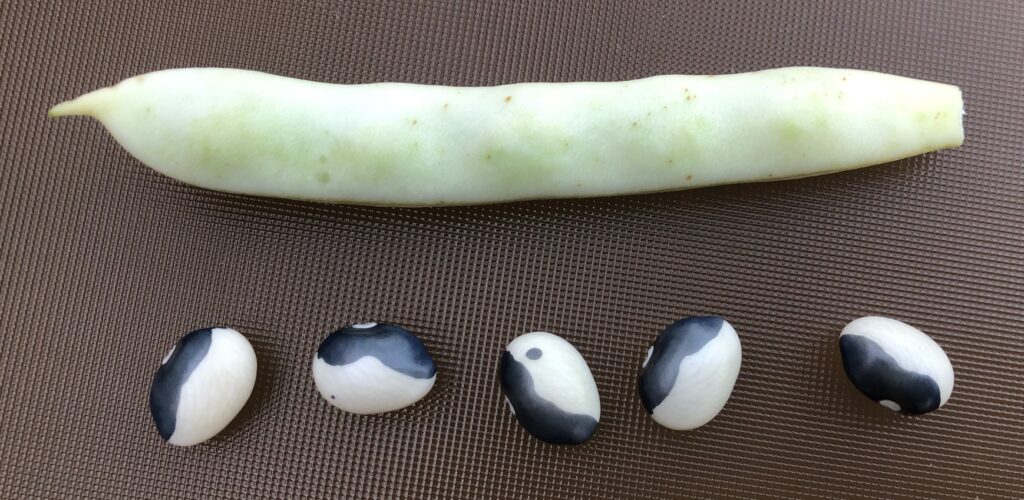
The Calypso Beans are finally turning black and white!The Painted Pony beans have noticeable color.
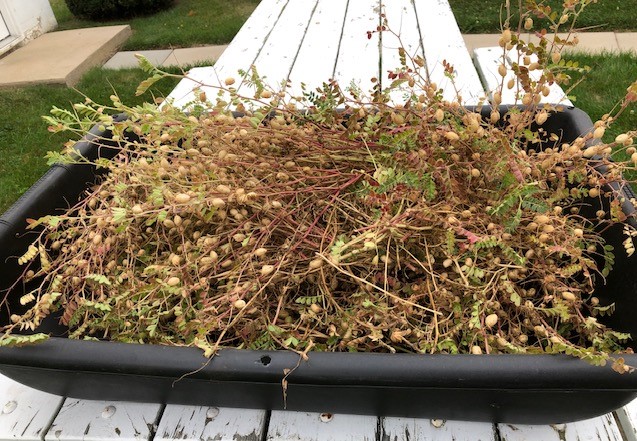
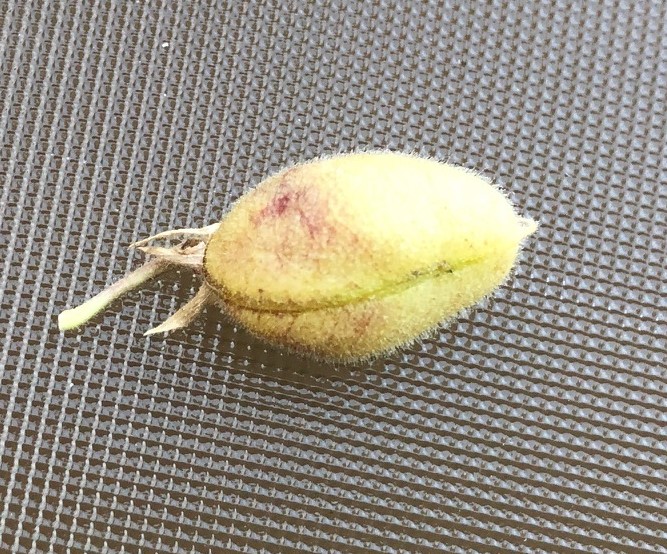
The most fun are the Garbanzo beans (Chickpeas) up in the garden:
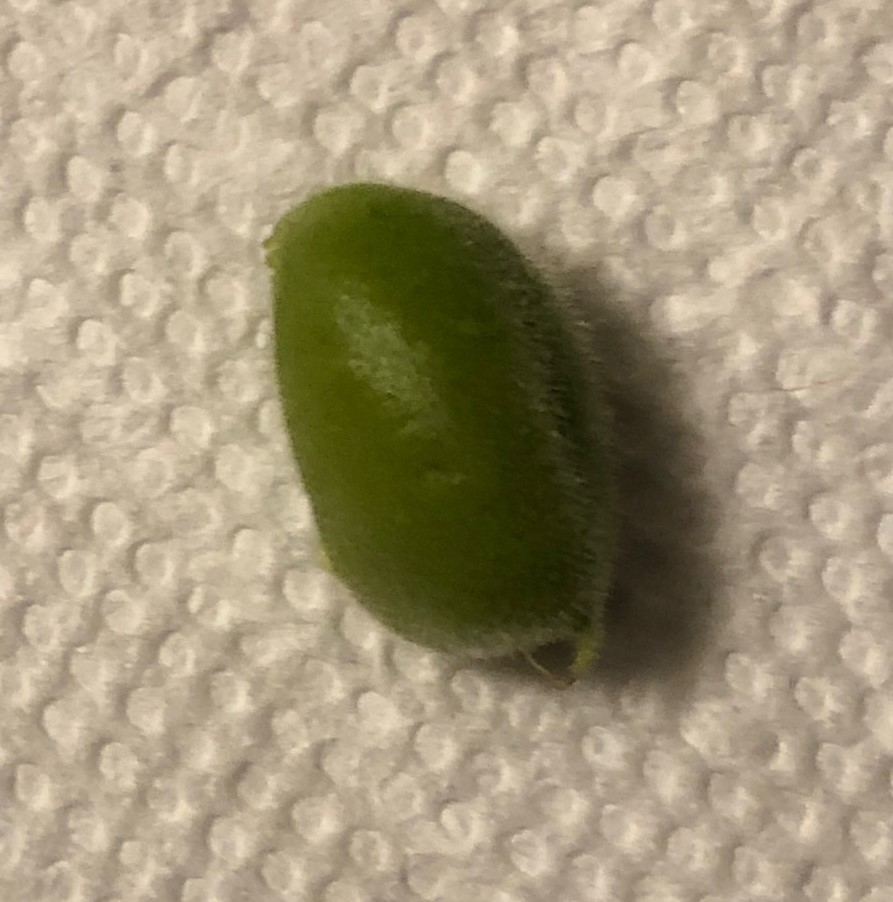
Chickpea pod.They are tiny, but they look like familiar chickpeas!
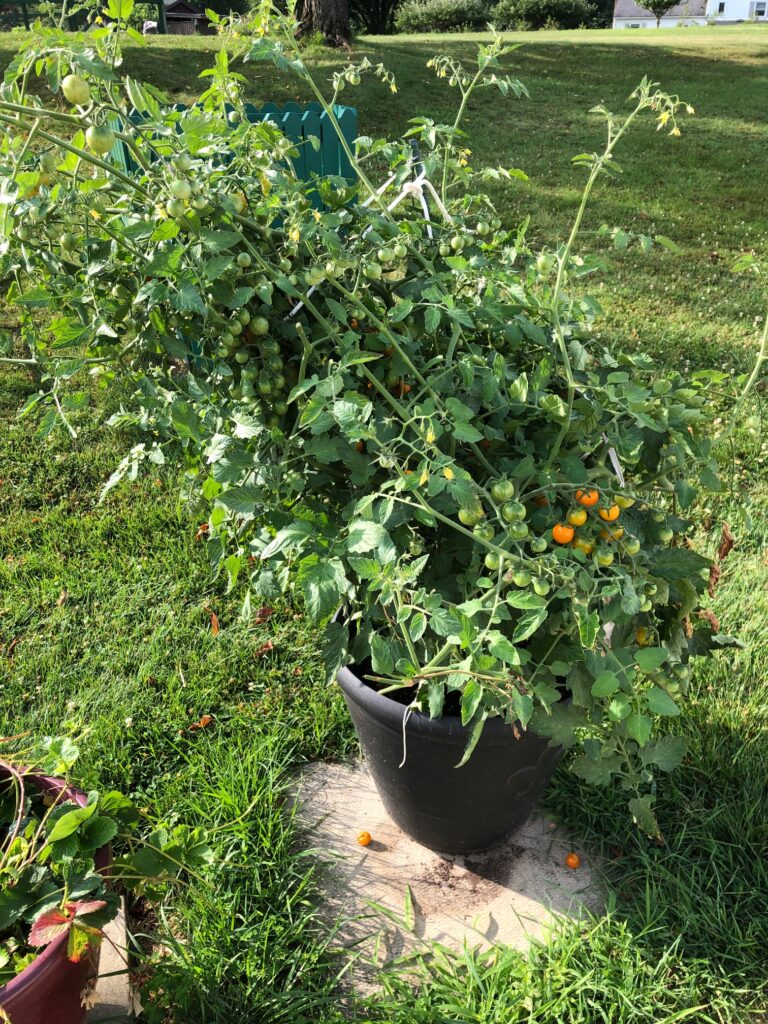
Up in the garden, we put a few tomato plants in a pot rather than throwing them away in the spring. They were tucked next to the fence and we kind of ignored them. The visiting deer seemed to find the tops that were close to the fence pretty tasty!
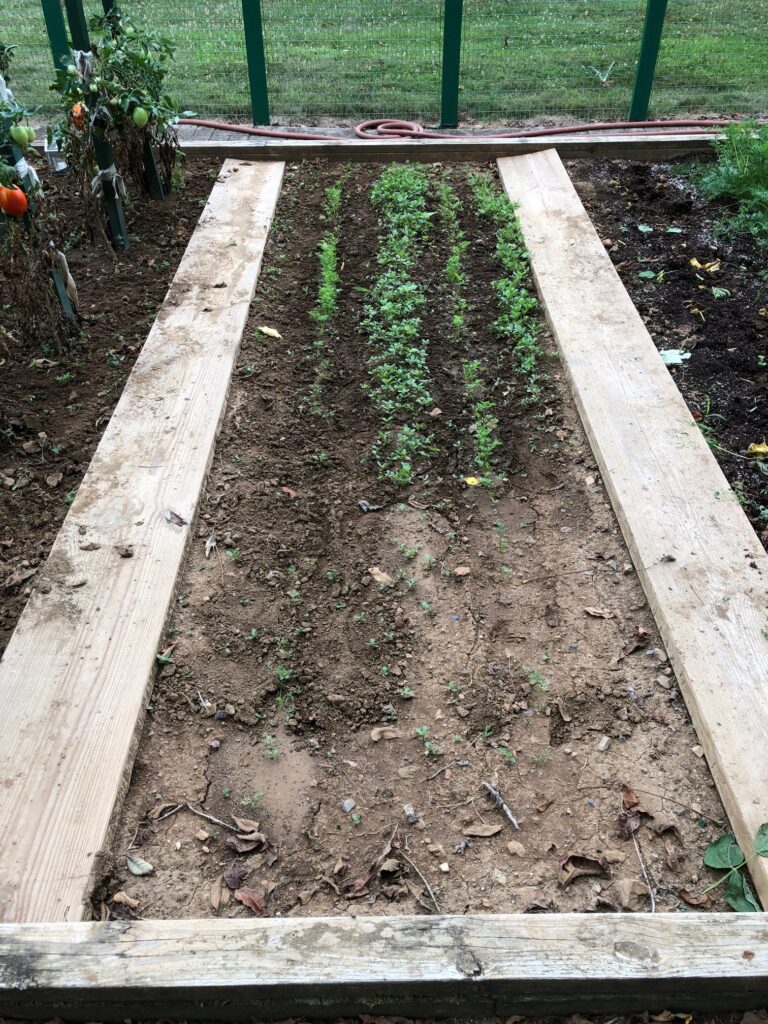
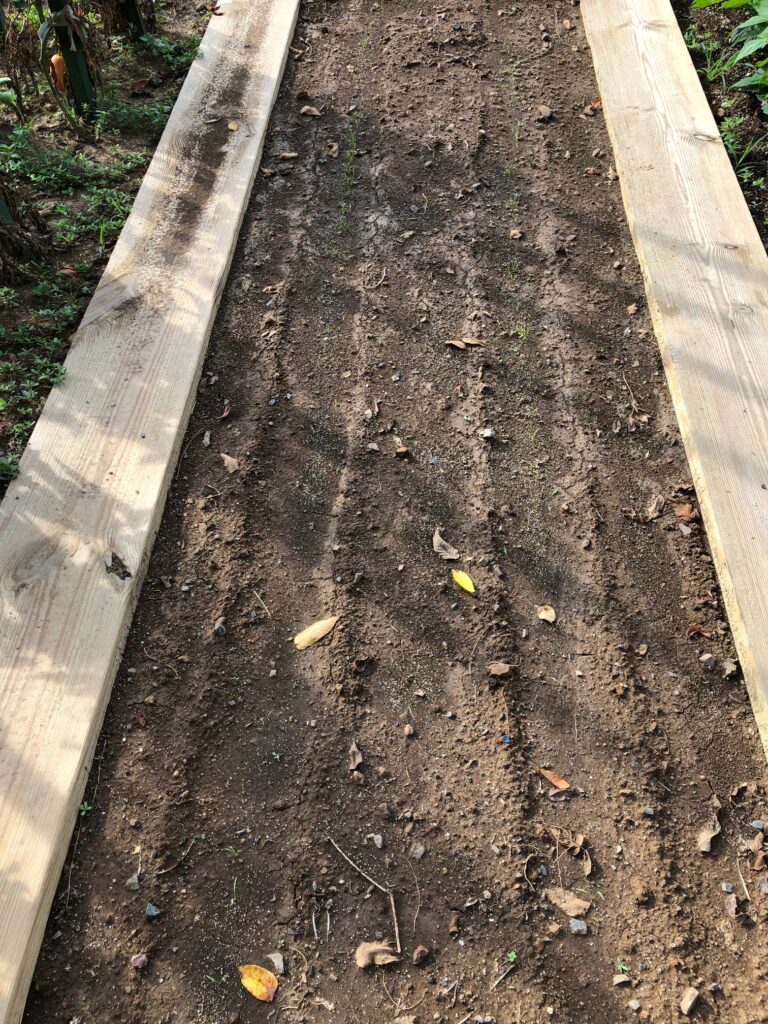
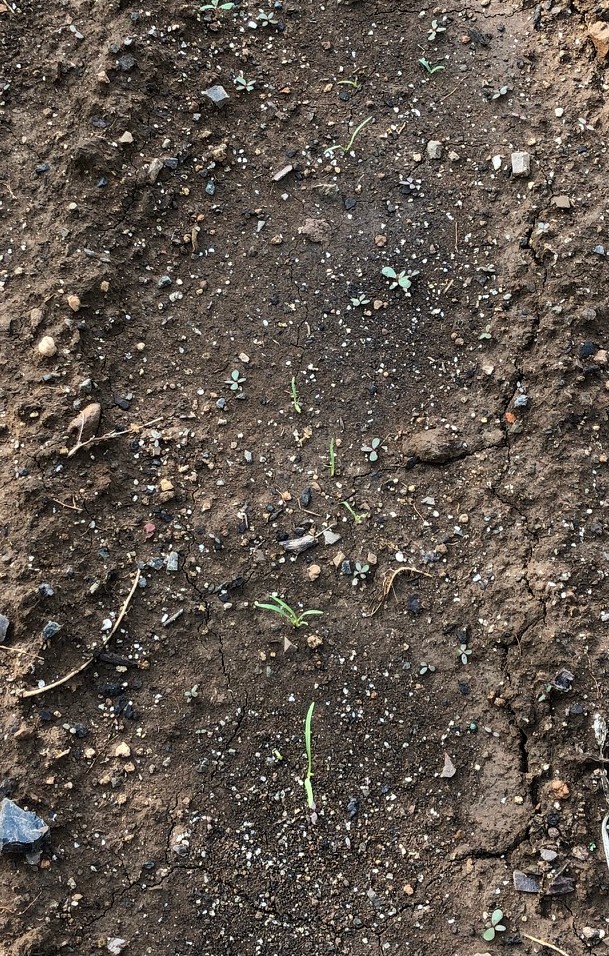
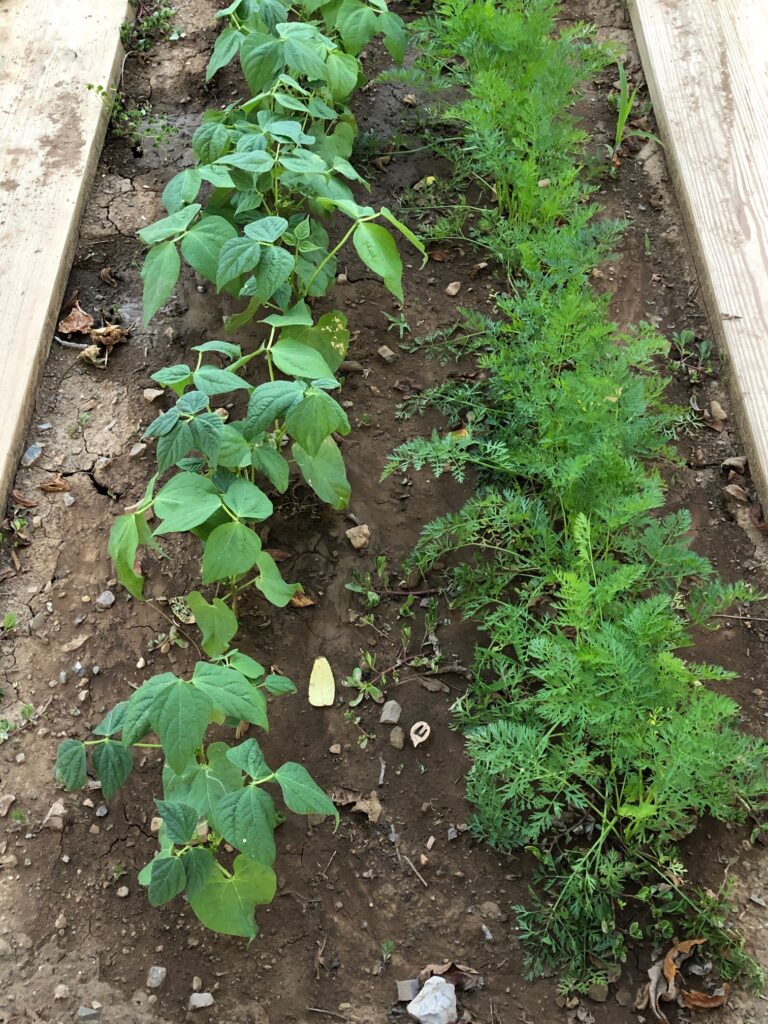
The single row of green beans and carrots are finally perking up:
The row where the green and yellow beans were, got a second planting of carrots. Not sure if they’ll have time to make carrots, but we’ll see.
Can you see the tiny carrot sprouts up the middle of the row?
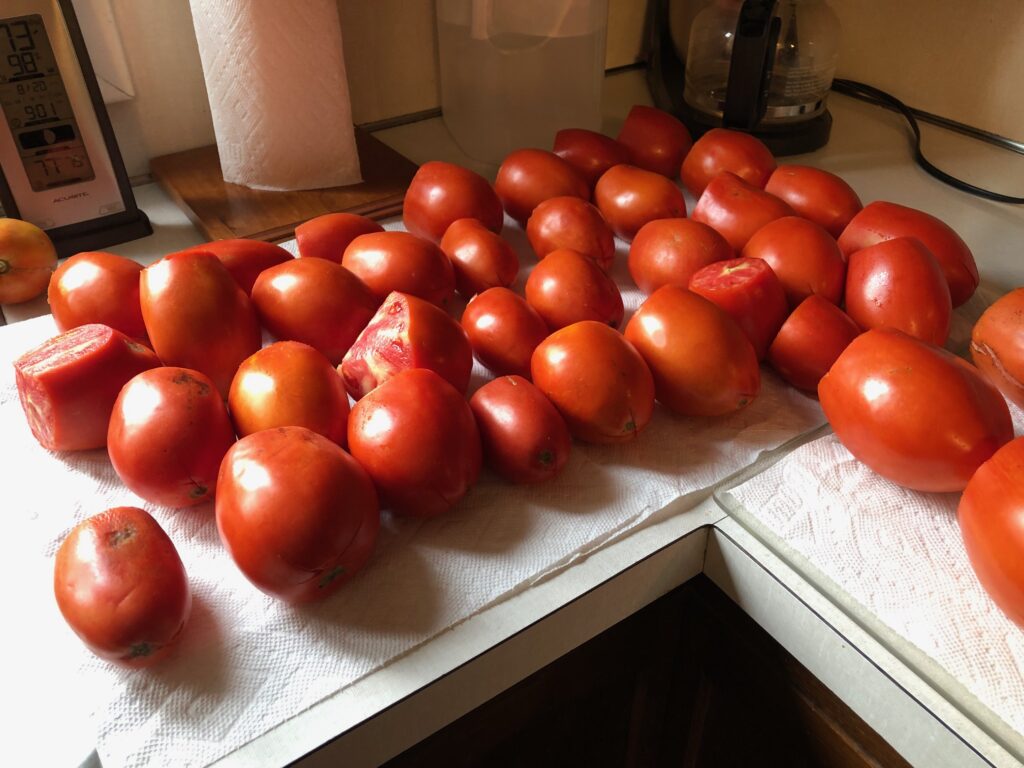
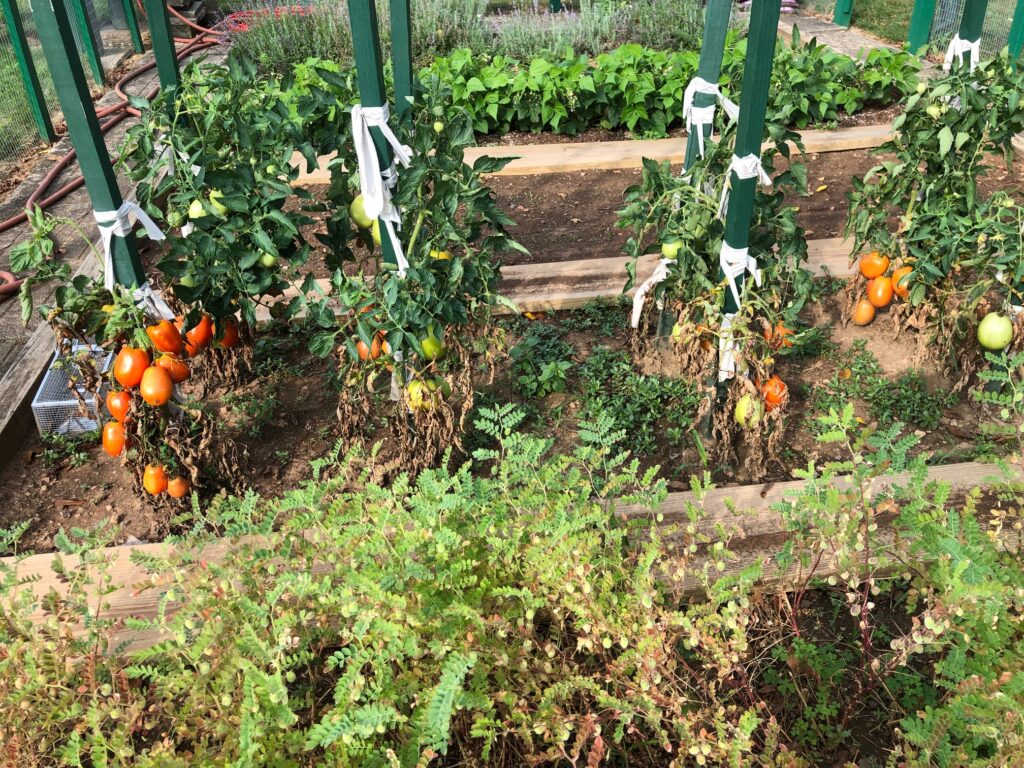
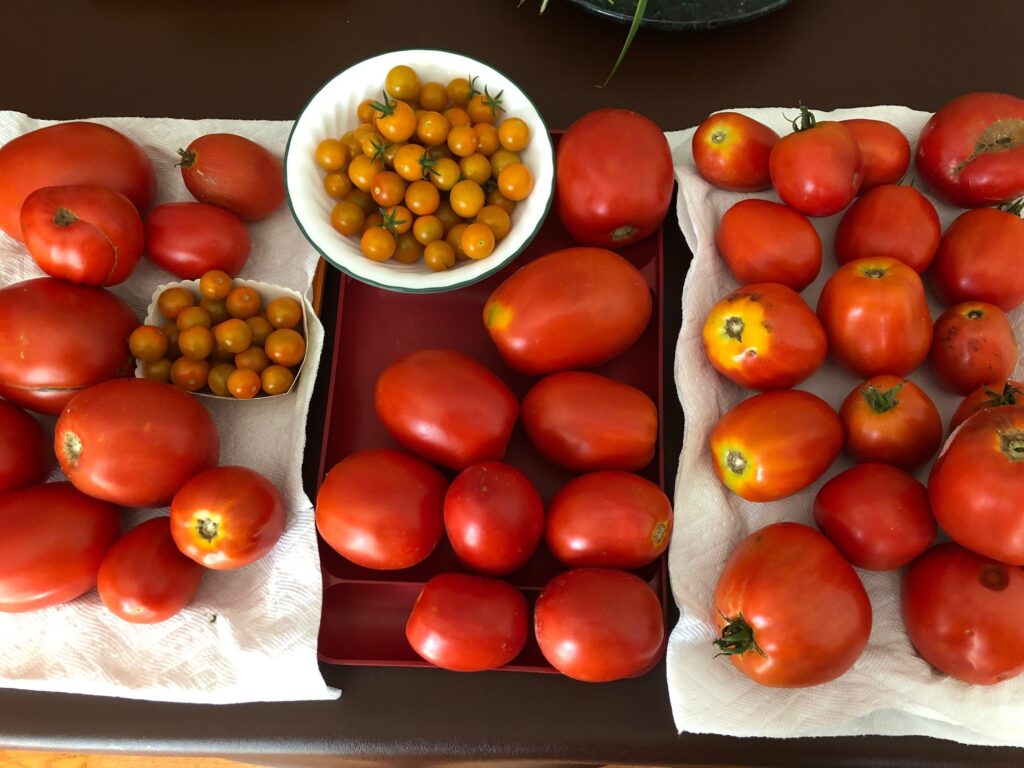
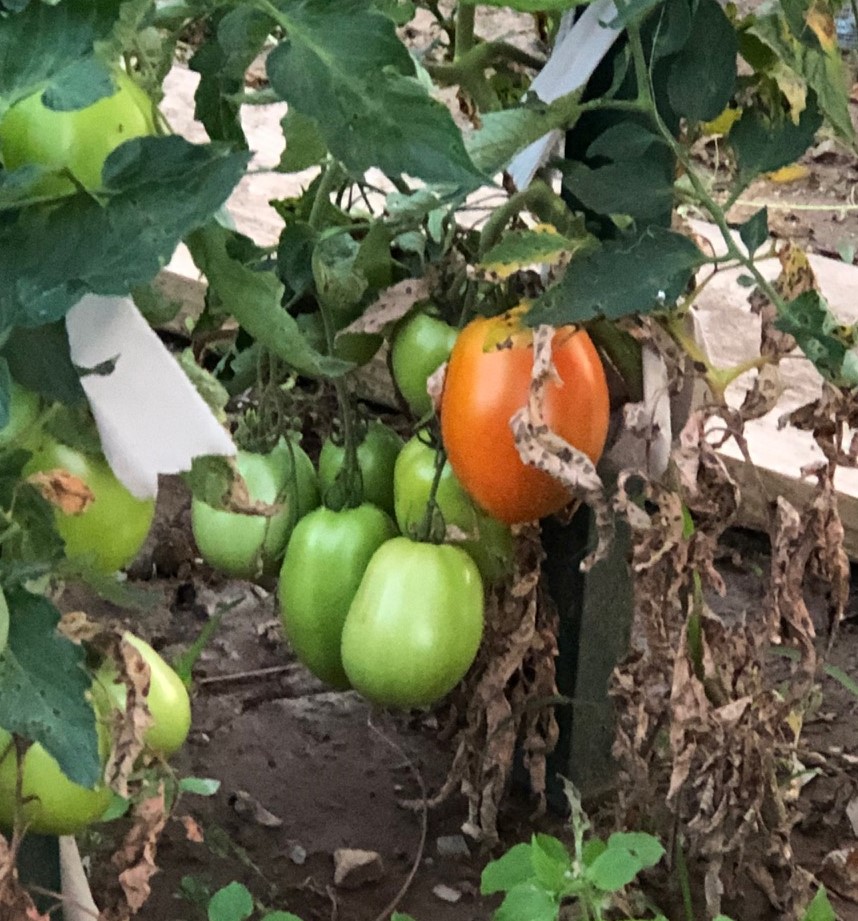
The Super Sauce tomatoes are ripening fast so we’re picking every day.
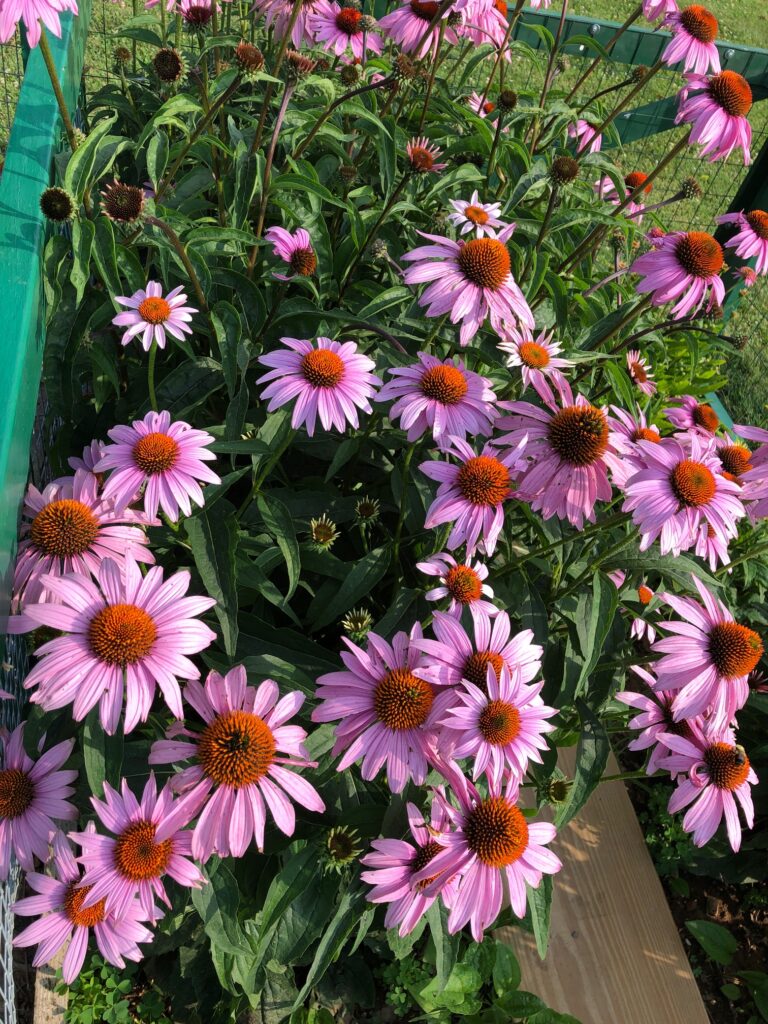
This batch of tomatoes will be pizza sauce in a few days!Of course, the Echinacea plants always make me smile!
So, that’s the tour! Looking at the shell beans and chickpea plants, it feels like fall is on its way. Of course, today is 95 degrees with little rain in the forecast. Fall weather sounds delightful! Enjoy!
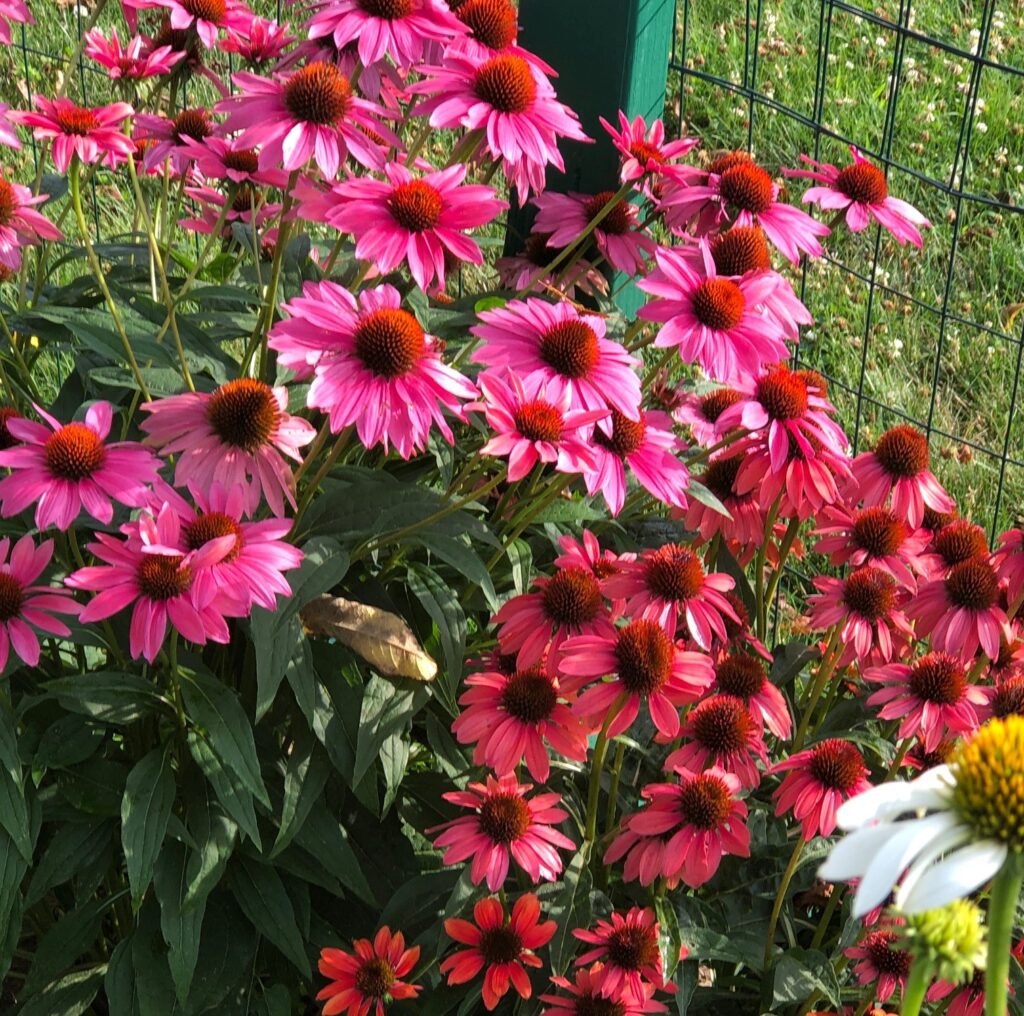
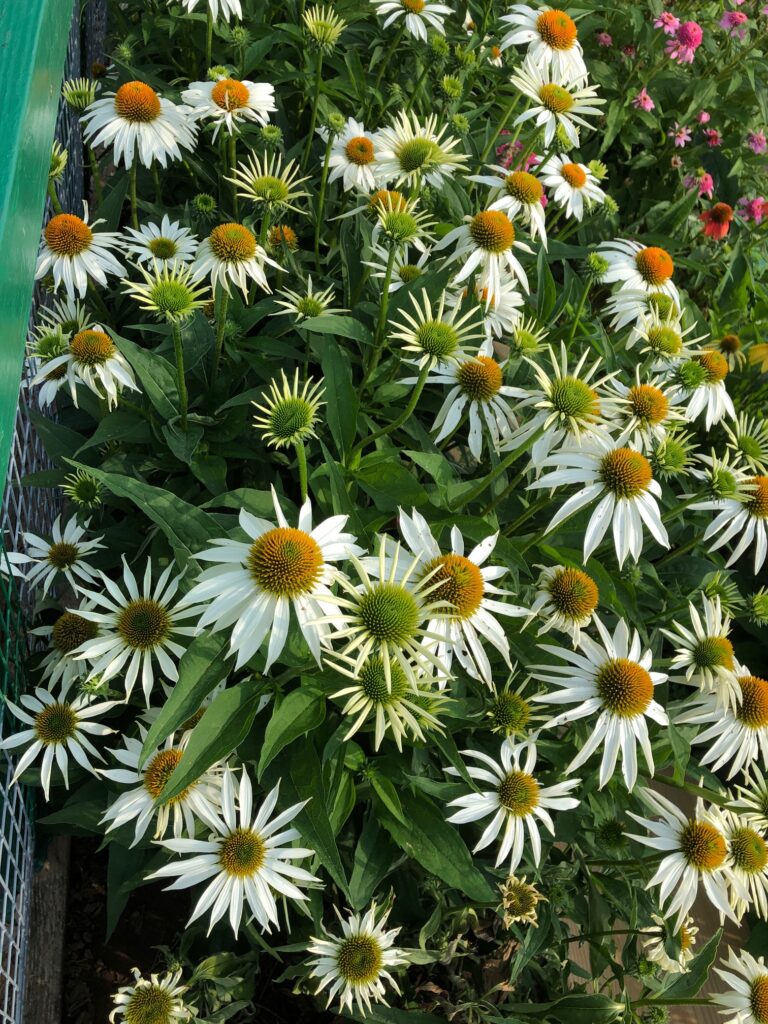
Things are ripening fast. Time to share what we’re able to enjoy from the garden. The echinacea plants are going crazy and the bees love them. So pretty…they make me smile!
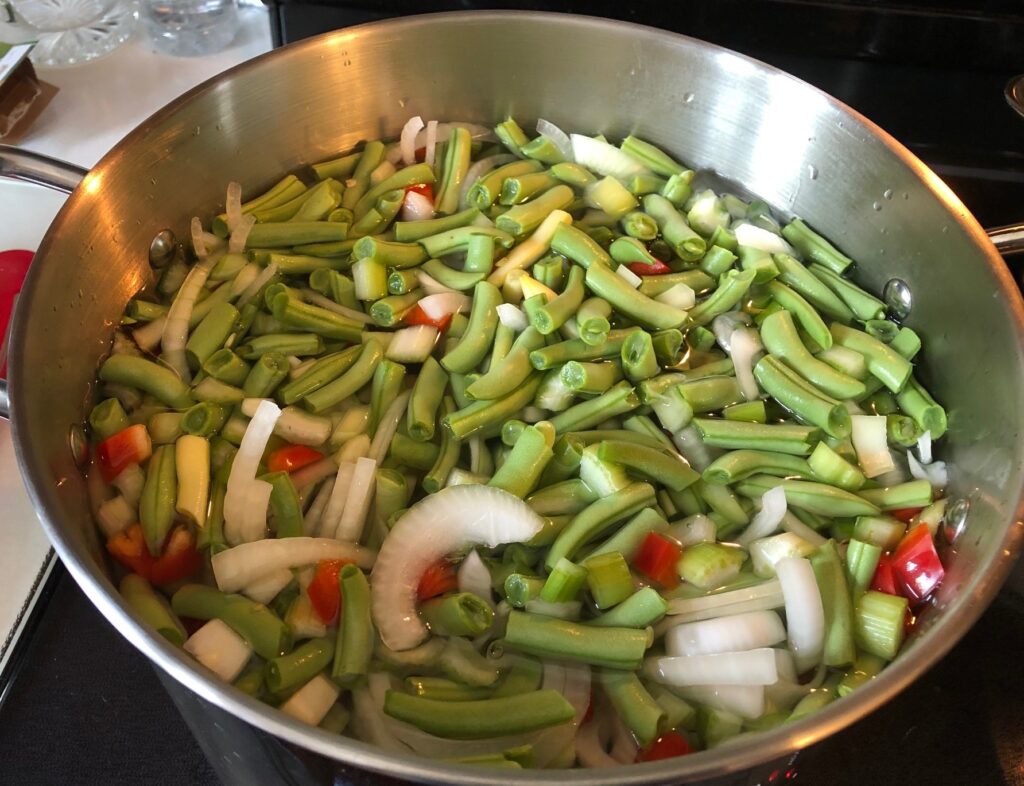
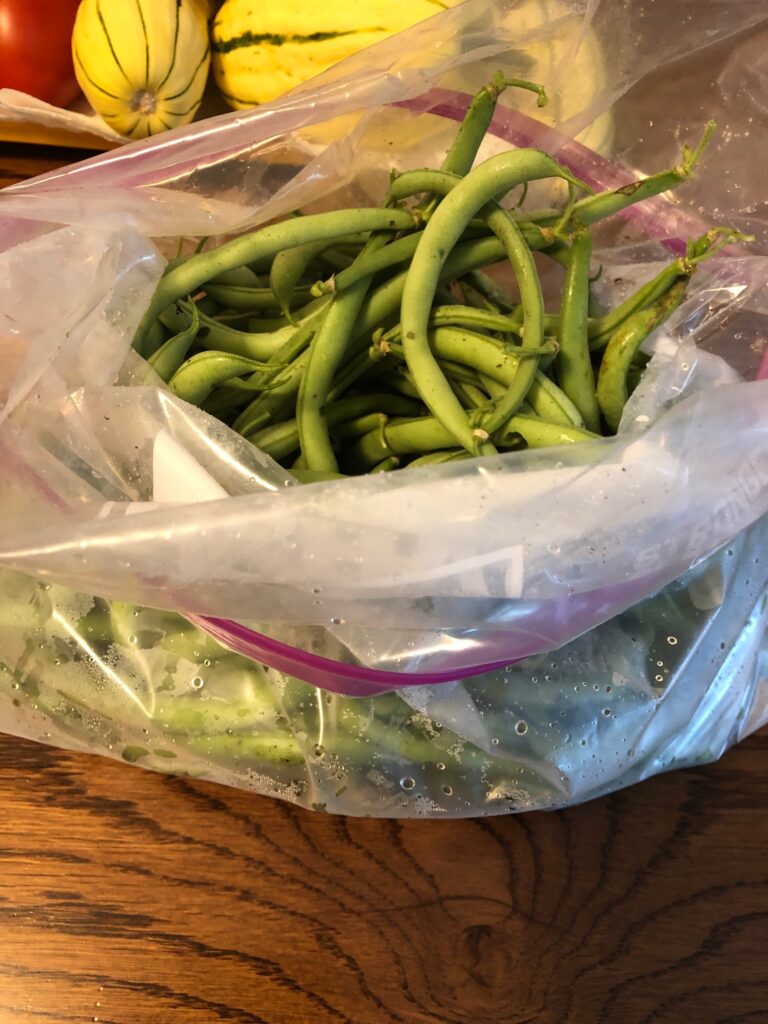
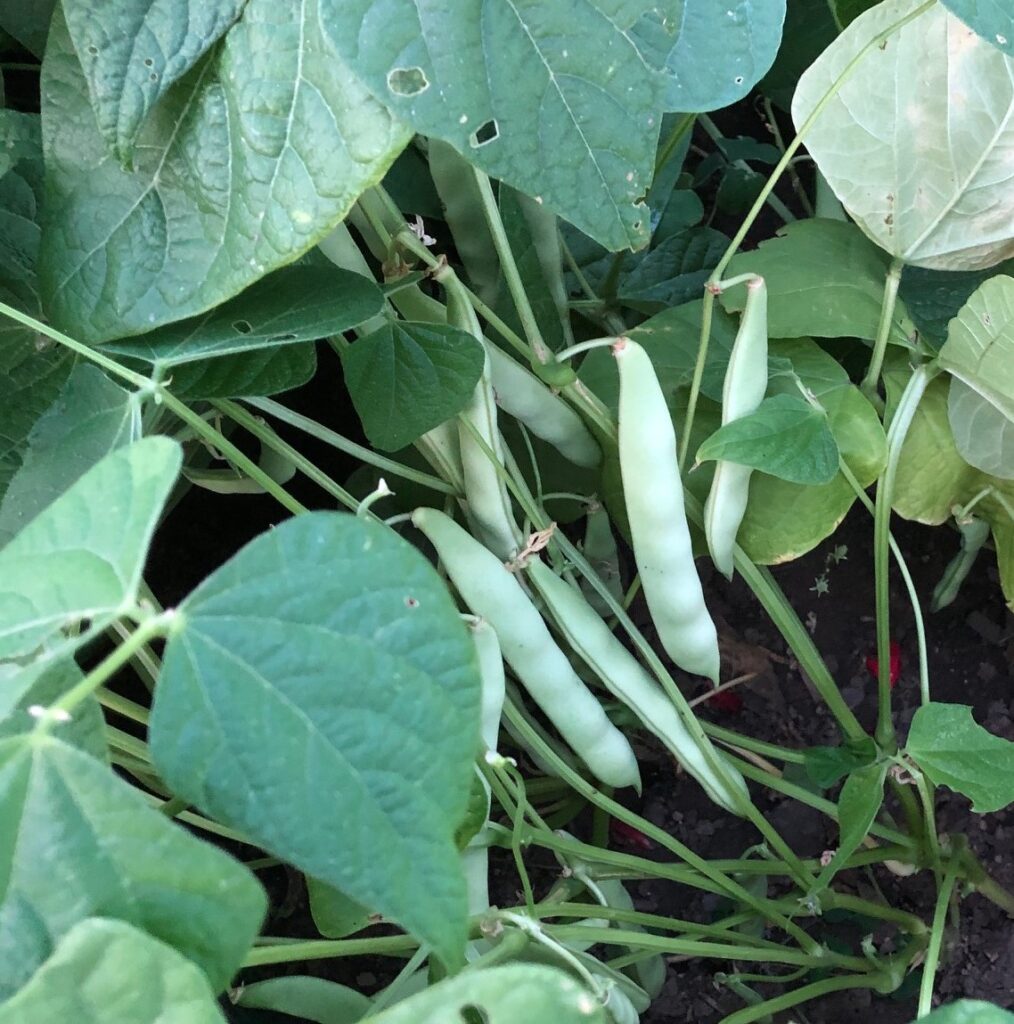
I’ve picked all the green and yellow beans. I ended up with 6 pounds of beans so I have enough that I can make a big batch of 4-bean salad. I will can them in pints, adding canned kidney beans, canned chickpeas, red sweet pepper, onion and a pickling brine. I’ll be doing that tomorrow so I’ll post that recipe and pictures in a few days.
The single row of beans that are next to the carrots will be ready in a few weeks and we’ll just eat them.
Here are some other things that we can eat right now…or soon!
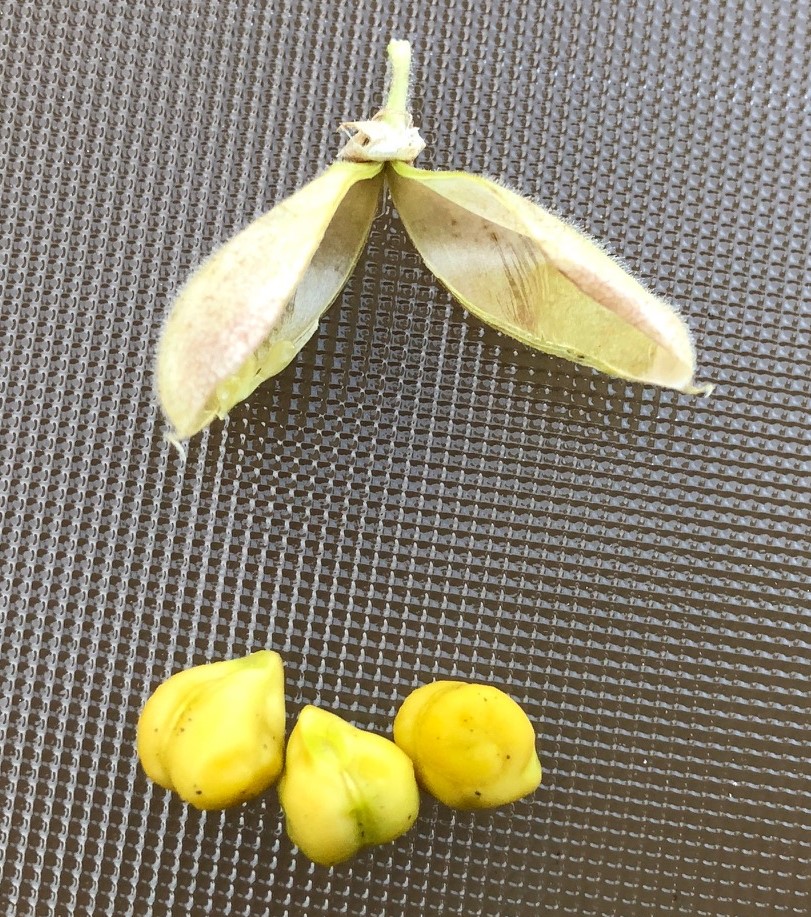
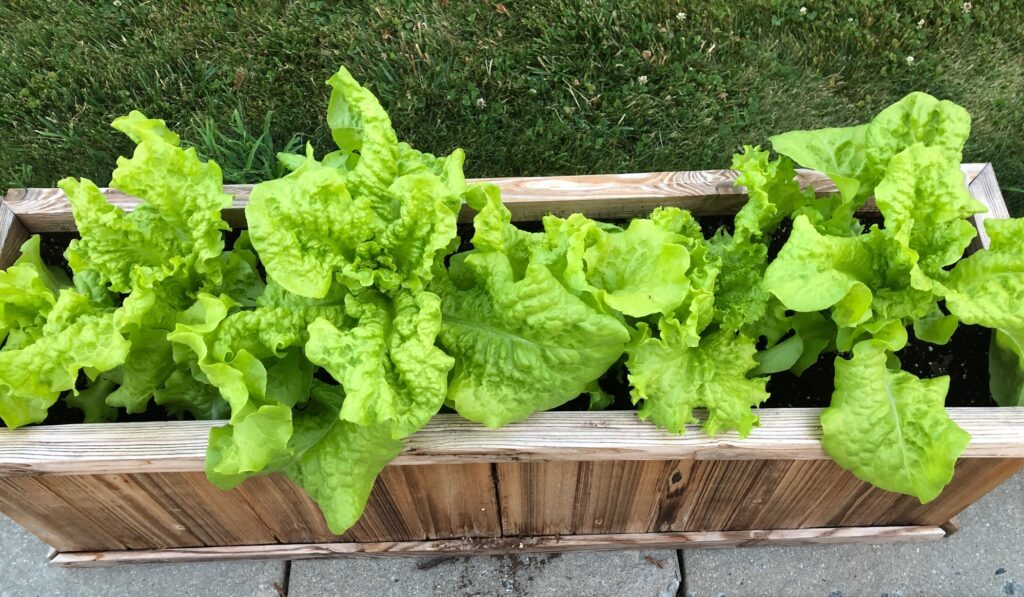
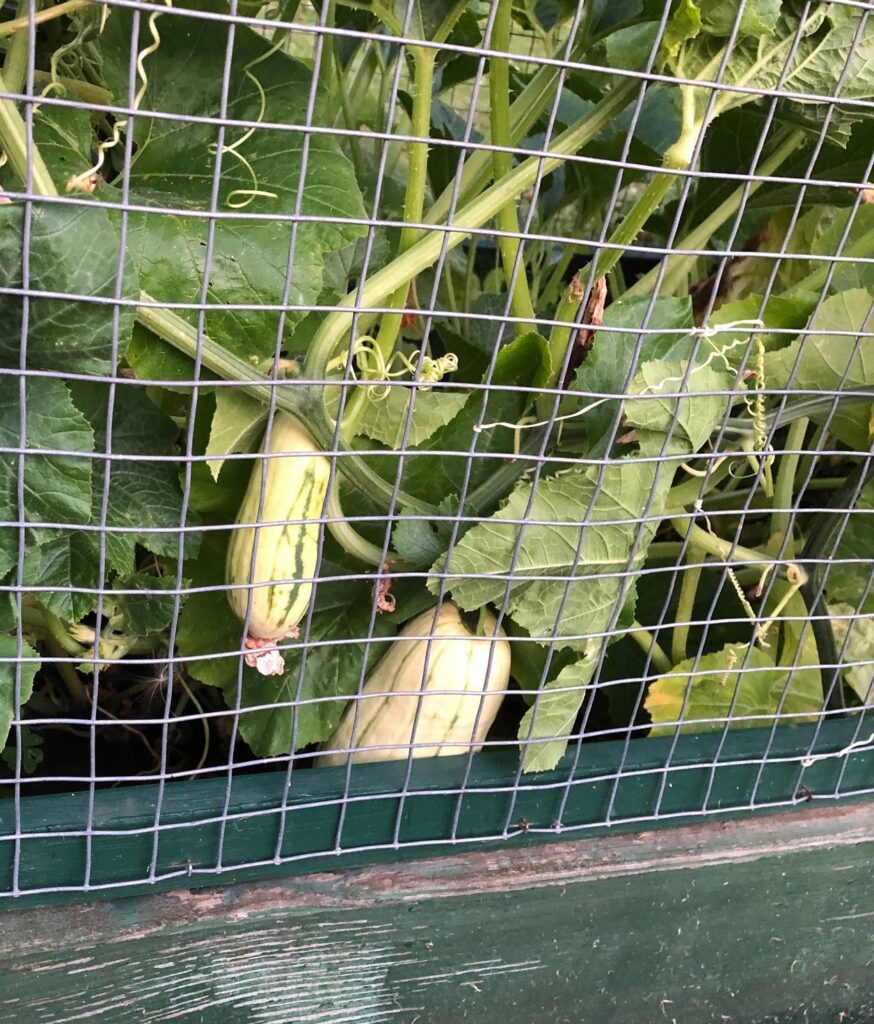
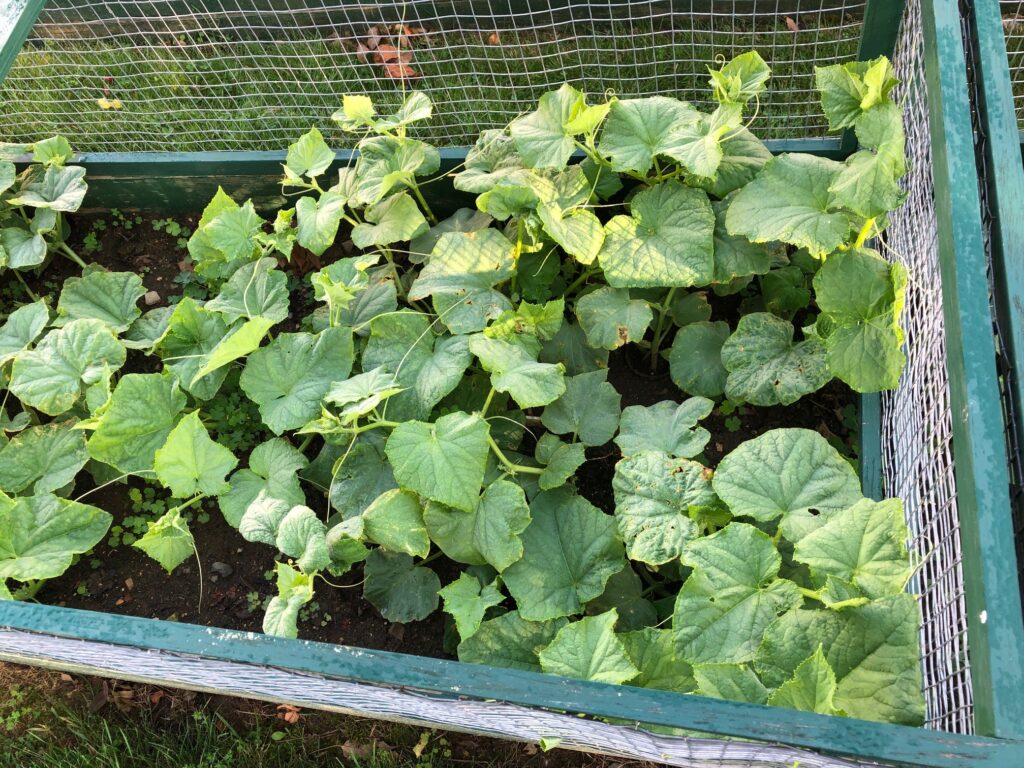
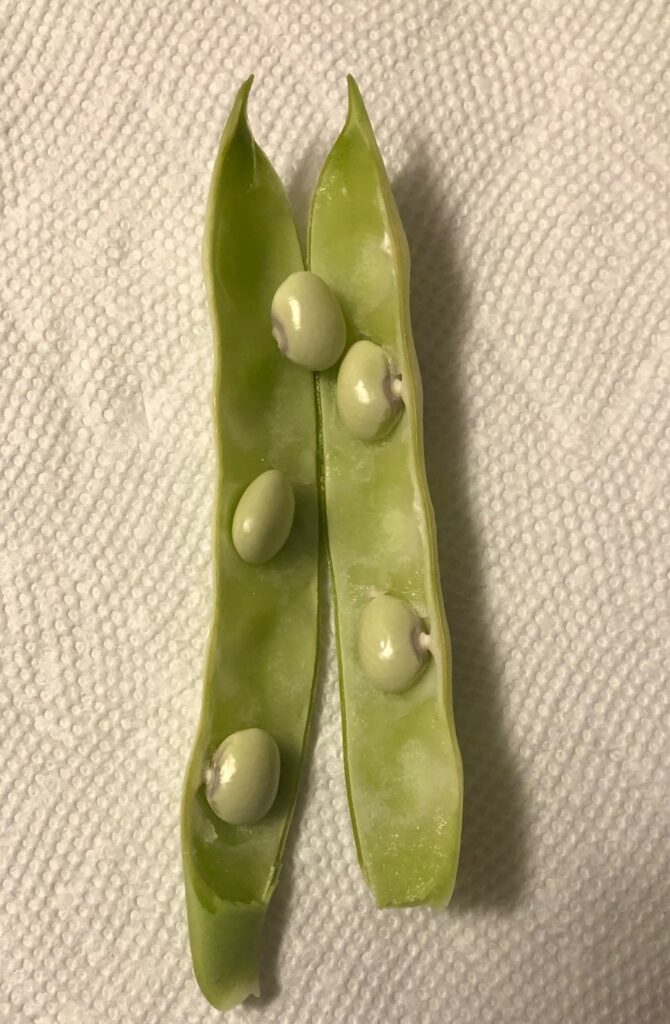
The Black Seeded Simpson lettuce is looking good.We’ve been eating radishes. The ones on the right are just beginning. I’ll replant the spaces on the left as soon as I pull the remaining ones.The one pot of strawberries is trying so hard…I doubt if we’ll have more than a few to eat unless the chipmunks get them first!The yellow cherry tomatoes are great to toss in salads.The Super Sauce tomatoes are ripening fast. We’re ready to add them to meals.The Delicata squash is finally getting those green stripes. I’m not exactly sure when they are ripe…so we’ll have to experiment.The cucumbers are producing and I’ve been able to have at least one cucumber every day for a week or two. Love them!These are the Calypso shell beans. They will stay in the garden until fall but I couldn’t resist seeing what’s happening inside. they are supposed to be black and white when they are ready.Certainly not ready yet!I think part of the plant thinks it’s fall! The Garbanzo beans (chickpeas) are hanging in there. I just had to see what was happening inside the pod.Looks like each pod has two beans (peas).
So that’s what’s happening in our backyard. We’ve not had a significant rainfall for several weeks so the grass looks pretty brown, but we’ve been able to keep the garden watered thanks to the rain barrels. If it doesn’t rain soon, we’ll have to drag the hose up the hill to the garden to keep things green. Oh, the life of a gardener! I feel for the farmers who can’t solve the rain deficit with just a hose.
Off to prep the green and yellow beans for canning tomorrow! Enjoy!