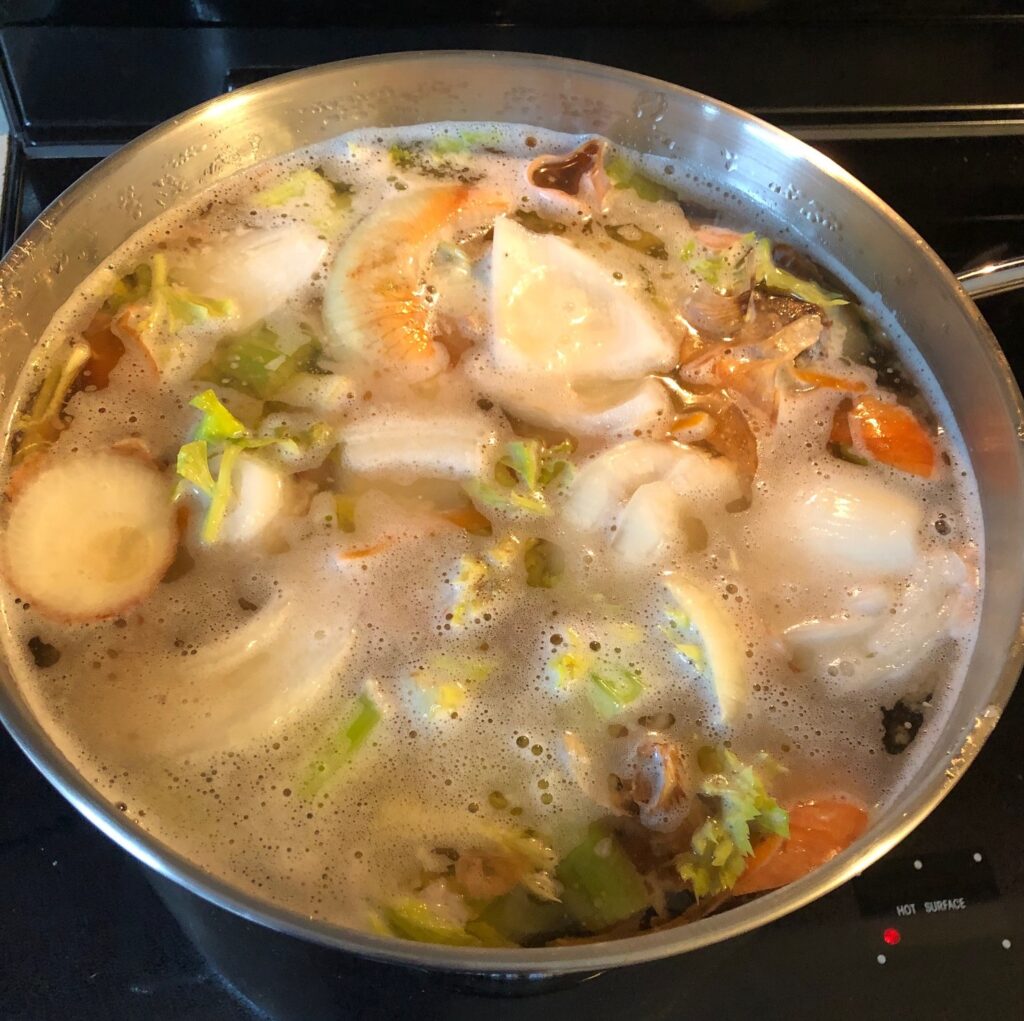
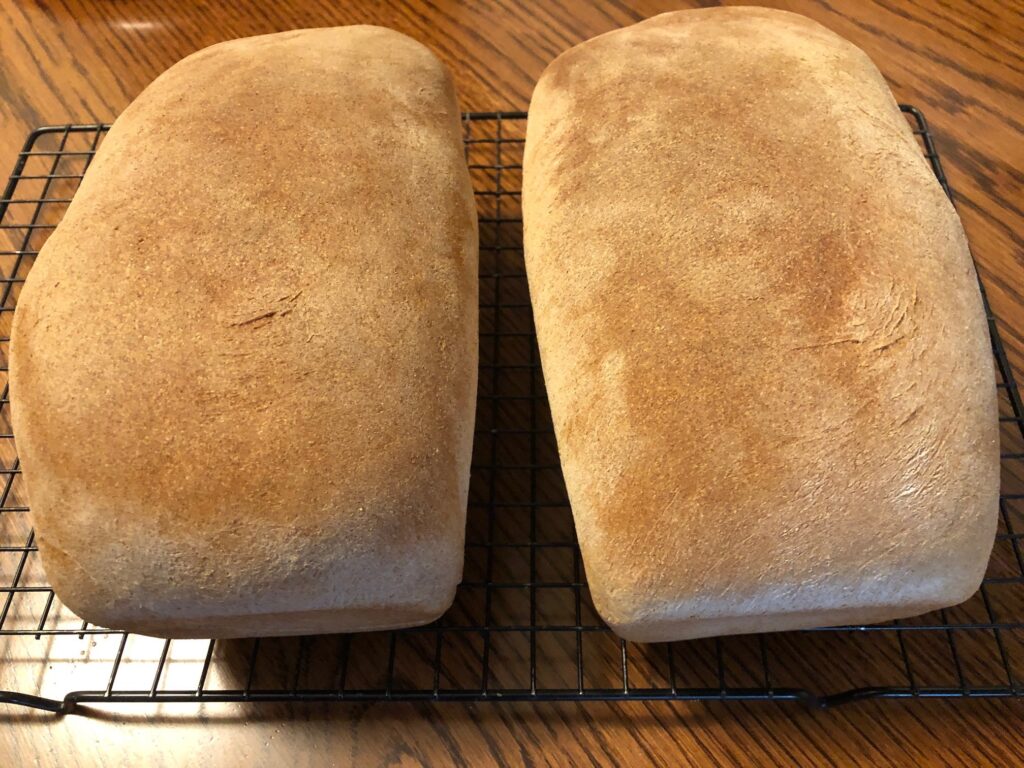
A cold snap in our area always entices me to make soup and homemade bread! Bert had purchased a large ham with the bone the other day and after cooking and taking off the meat, I boiled the bone and trimmings along with other vegetable scraps to make Ham soup stock. While it was boiling away, I whipped up my whole wheat bread.
Not exactly appetizing yet…but the stock will make great soups!
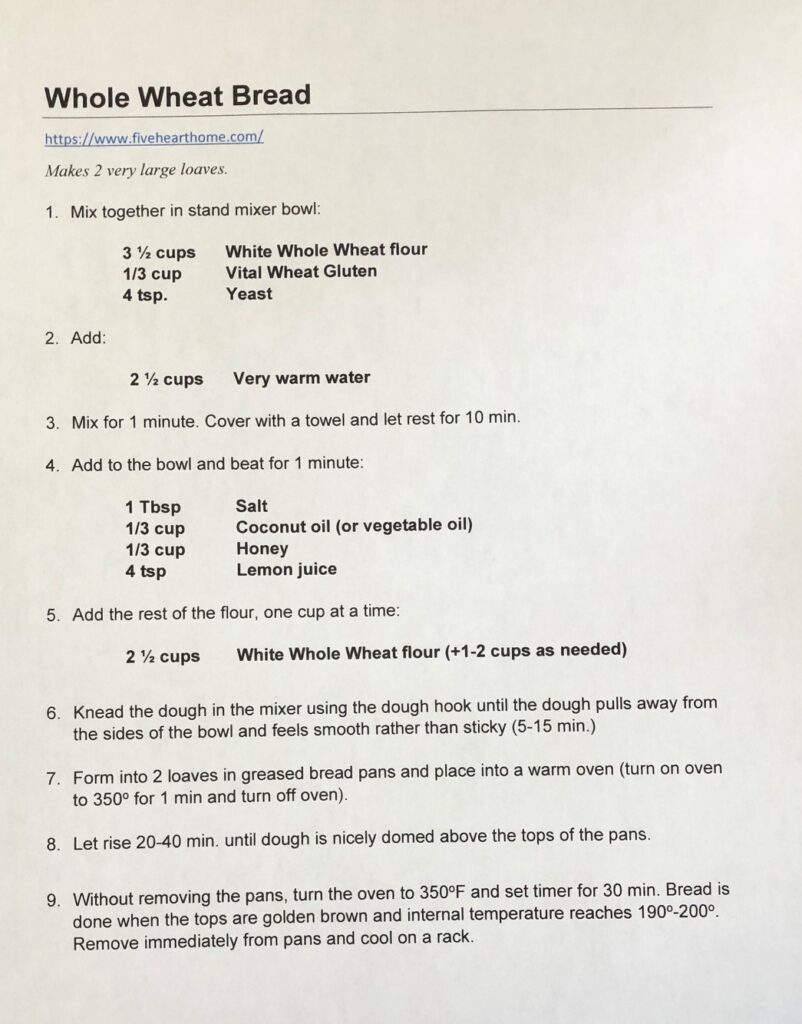
I wrote about this bread recipe last May, using all whole wheat that I ground myself (https://marykisner.com/from-wheat-berries-to-bread/). This time, I used up some of the flour I had ground before. I store it in the freezer to keep it fresh.
Here is the recipe again:
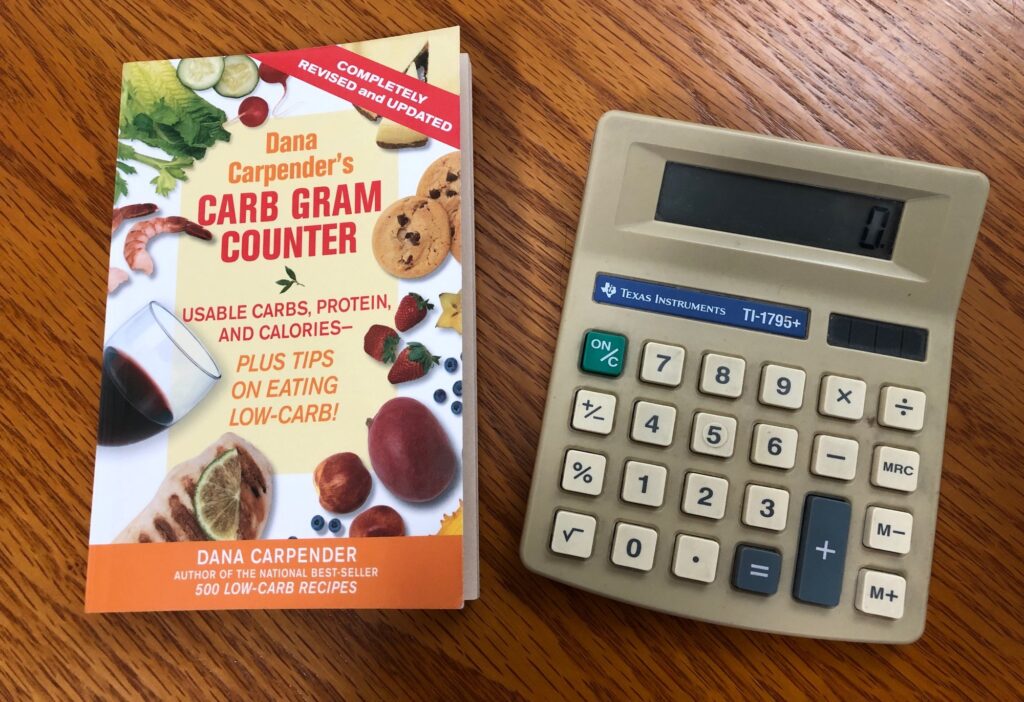
This time I wanted to analyze the recipe to see if it was as nutritious as I thought it was. I used the chart tool that you may have read about a week or two ago (https://marykisner.com/analyzing-a-recipe/).
While the bread was baking (and the soup stock was boiling) I pulled out a blank chart and started by listing the ingredients in the recipe. I looked up each ingredient in my little book or online.
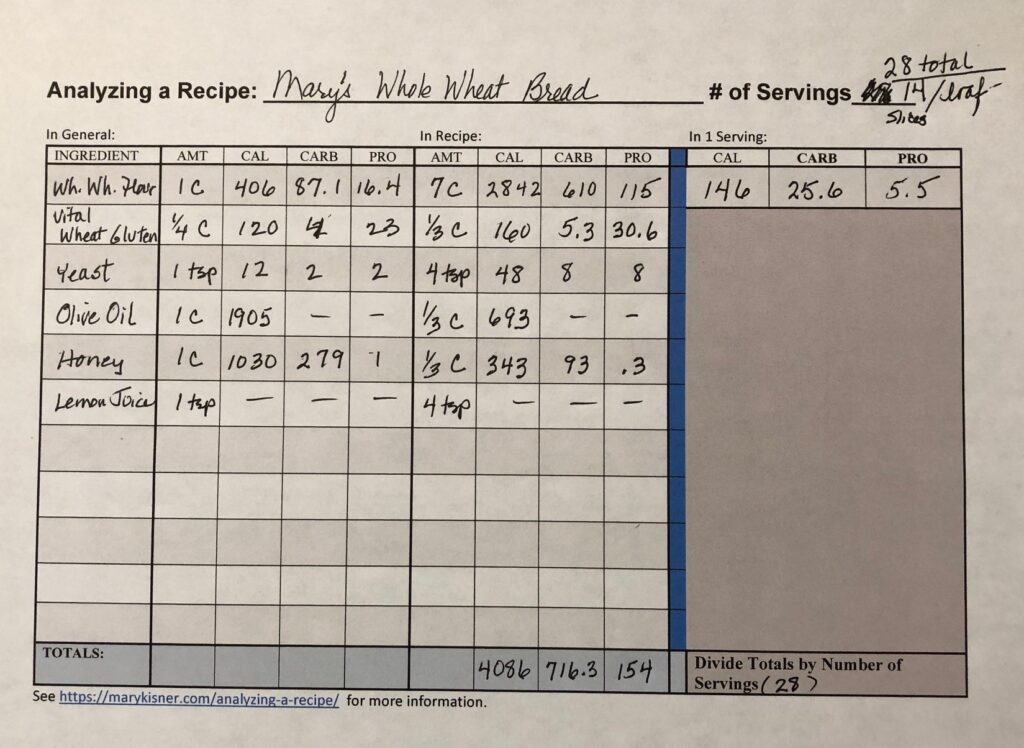
Here is the finished chart:
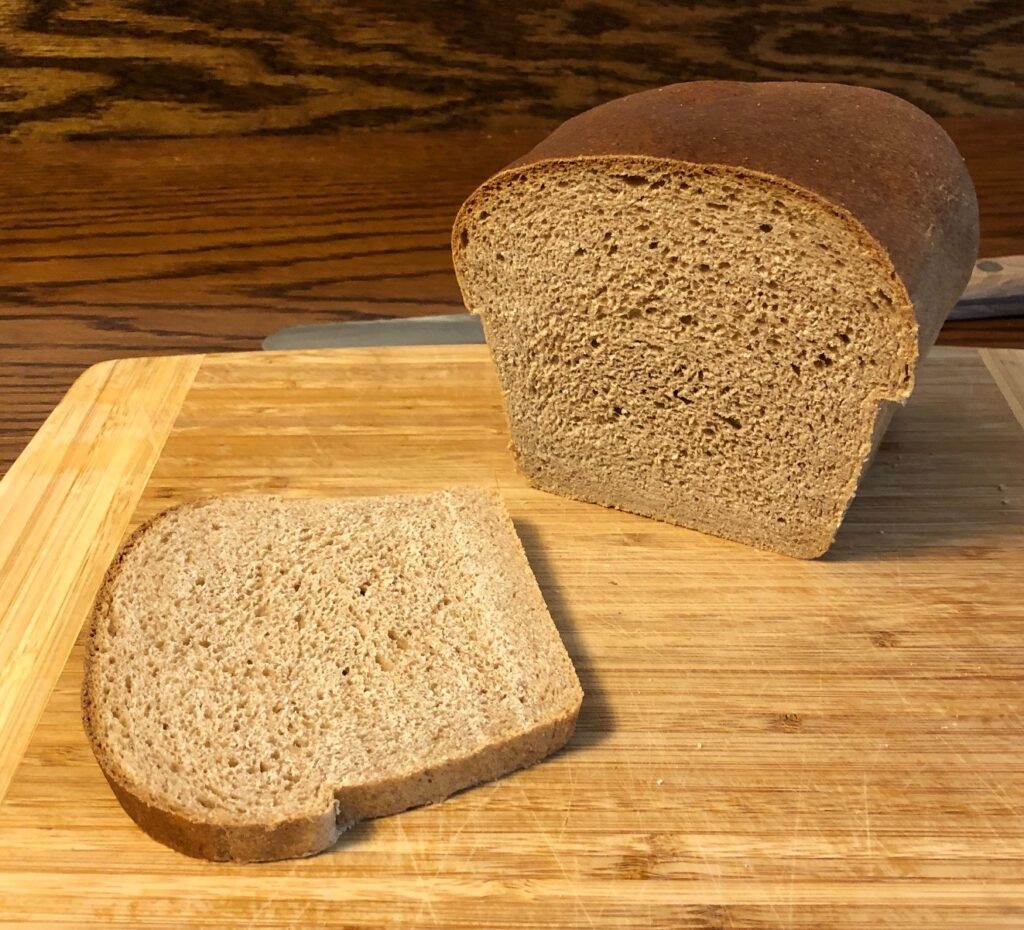
The hardest part was deciding how many slices there were in a loaf…sometimes we’ll cut it thicker!
So, it looks like each slice of bread will be about 146 calories, 25.6 gm of carbohydrates and 5.5 gm of protein. It was a good reminder that it compares well with commercial bread, tastes better and has no extra preservatives or chemicals. I keep the loaf we are using in the refrigerator and freeze the extra. And of course, commercial bread from the store doesn’t make the whole house smell so good on a cold day!
Give this recipe a try! Your whole house will smell great!
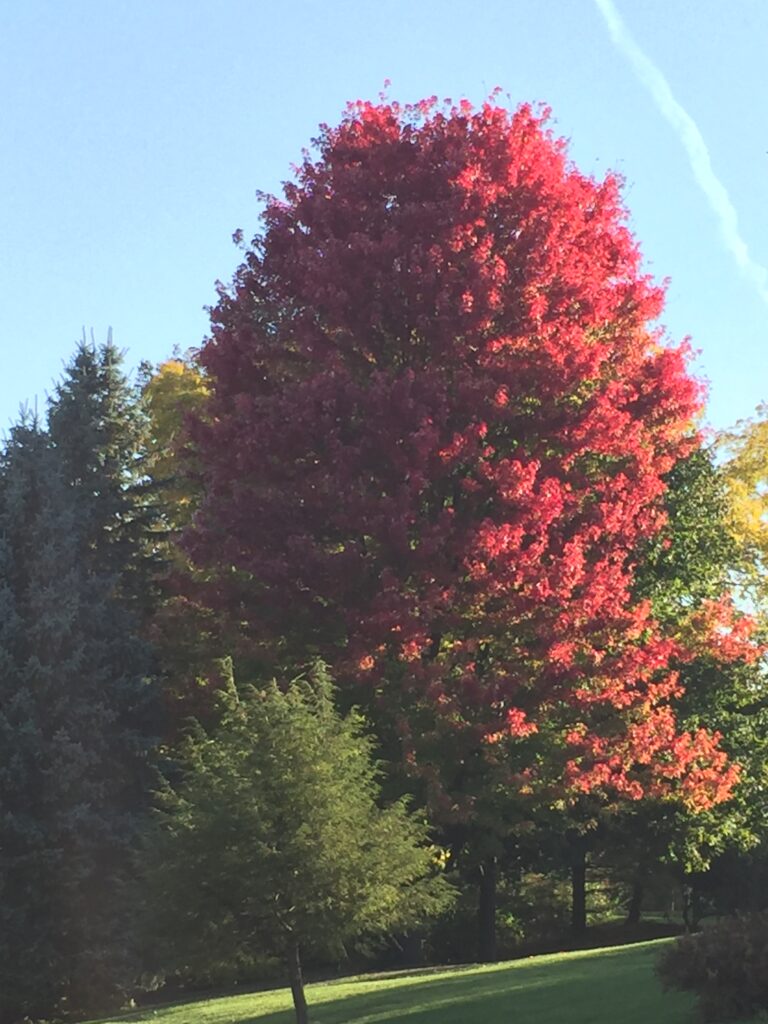
The changing of the seasons is one obvious aspect of life in central Pennsylvania. Where you live there might be different signs of the seasons or they may be more or less obvious. Mother Nature seems to prepare us in the northeast, by providing a display of color, like the maple trees…
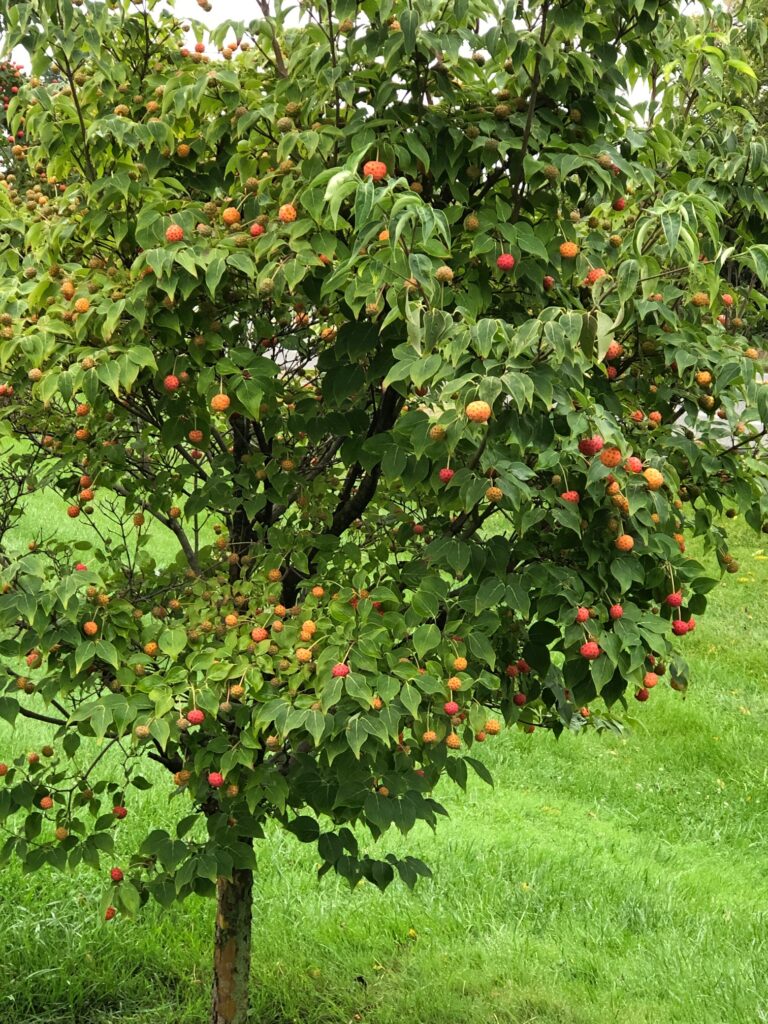
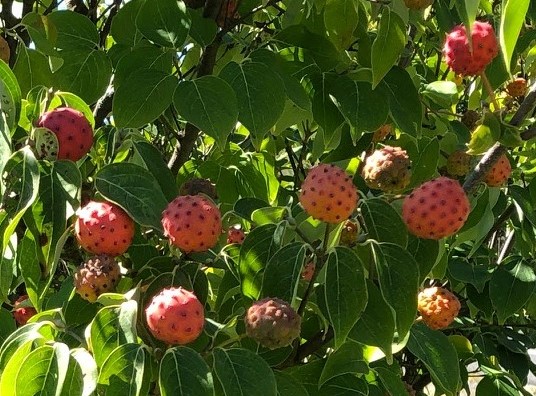
…and the seedpods on our Japanese Dogwood trees.
I call these our “Halloween Trees” because the seed pods look like pumpkins!One year, I tried to save them to decorate in the house, but they turned brown quite quickly. Oh well.
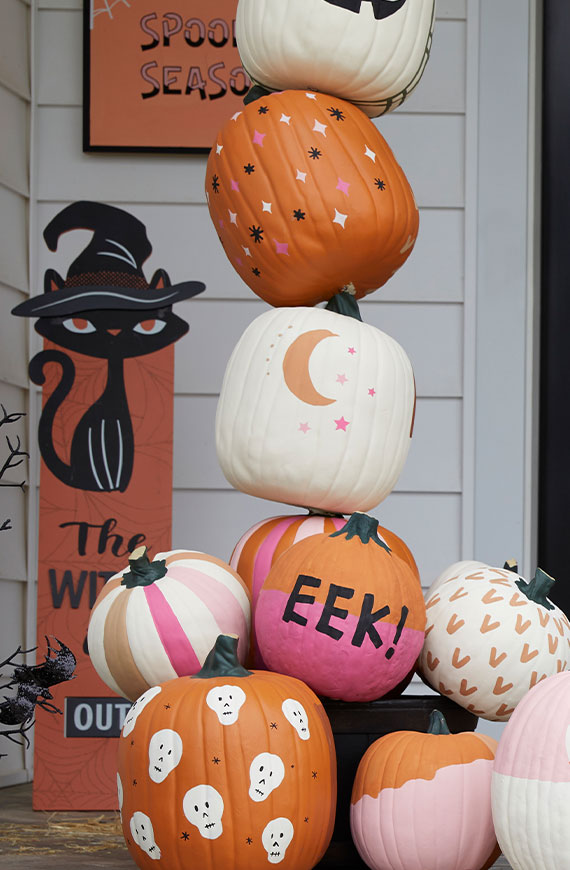
As a crafter, I am reminded of the impending change of the seasons by the ads for craft items. Beginning in August the craft and fabric stores have sales of the materials used to make various decorator items. Here are some examples:
Why not make new decorations for your front porch!Baskets are a way to give a thoughtful gift that may not require any “crafting” skills.It takes time to pull some of these projects together!How about clever ways to decorate gifts! Start collecting appropriate items now.Unique ornaments are always a big hit but they take time to make!Even kids can help make clay ornaments.
And of course, there are signs in my kitchen today that let me know it will soon be soup season, so I’m cooking up a big pot of ham stock. I may have to go get a roasting chicken or two so chicken soup can be on the menu in the winter! (See how to make chicken stock at https://marykisner.com/making-chicken-stock/)
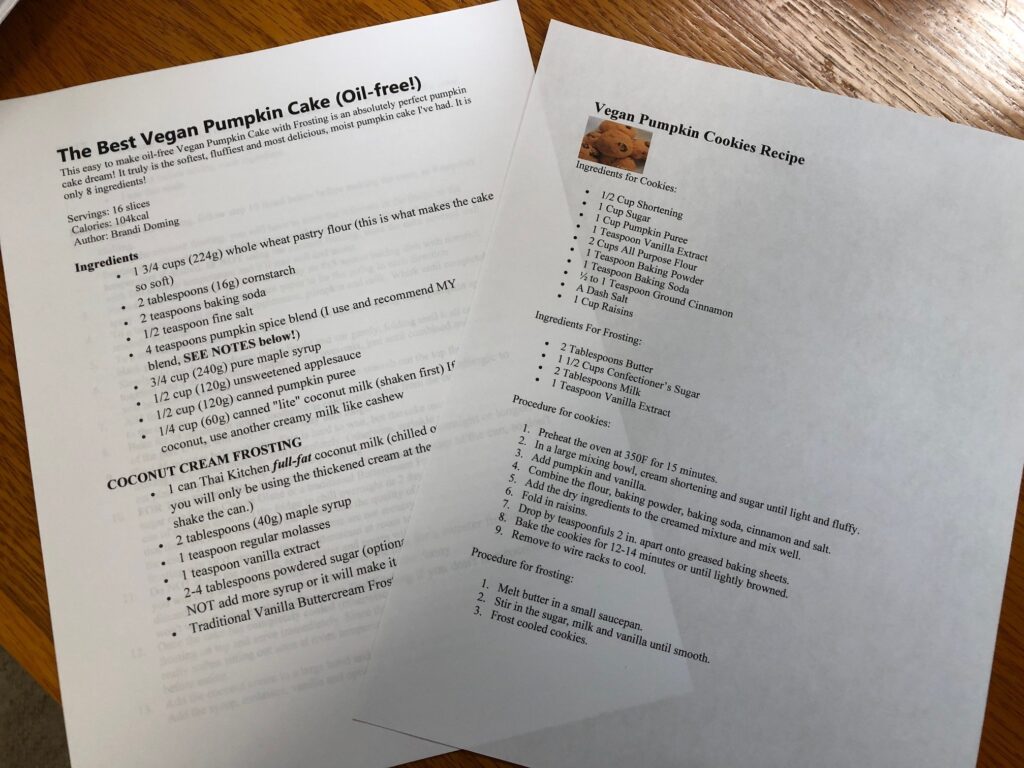
Online, using pumpkin in recipes is popular for autumn weather. Here are two I’ll be working on:
It also helps me get in the mood for fall weather to wake up to 39 degrees a few mornings in a row! After the heat of this summer, it’s really refreshing…for a while. Winter weather isn’t far behind. We really appreciate Spring when it gets here.
The changing of the seasons, no matter how it manifests in your area is a good time to renew your surroundings…whether it’s outside or inside your home. Enjoy!
Have you ever wondered how many calories or carbs are in a favorite recipe? It’s pretty easy if you bought that cake or package of dinner rolls at the store. But what if you make it yourself? There are no labels on your own homemade goodies. Sometimes a recipe is posted on-line and will include the various nutritional numbers, but not always.
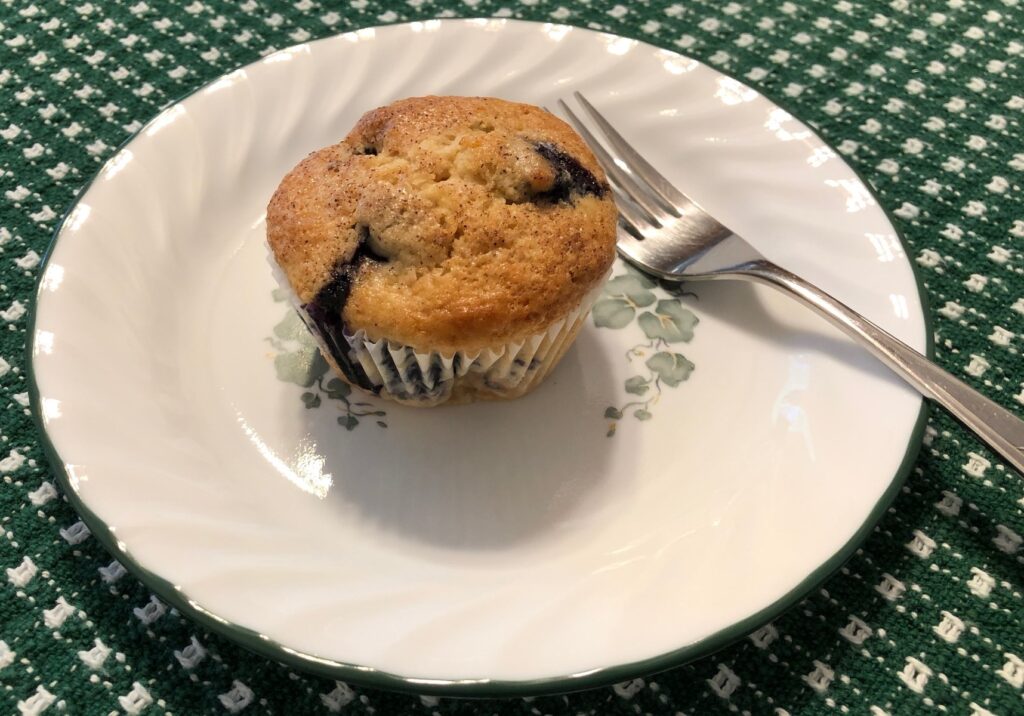
Sunday I was motivated to make a big batch of my favorite muffins…Blueberry Banana Walnut Muffins. This is a Vegan recipe…meaning no dairy or egg involved. I had tweaked the recipe over the years so while the original may have had nutritional information now I had no idea about those values.
Recently, I found out that I’m no longer so sensitive to egg protein and wondered if adding one egg to the recipe would boost its protein level or make no difference. I figured adding one egg to a recipe making 12 muffins would also be safer for me as I tried to introduce even a small amount of egg protein to my diet.
While I was mixing and baking, I wondered if I could figure out the nutritional content of a single muffin, specifically calories, carbohydrates and protein.
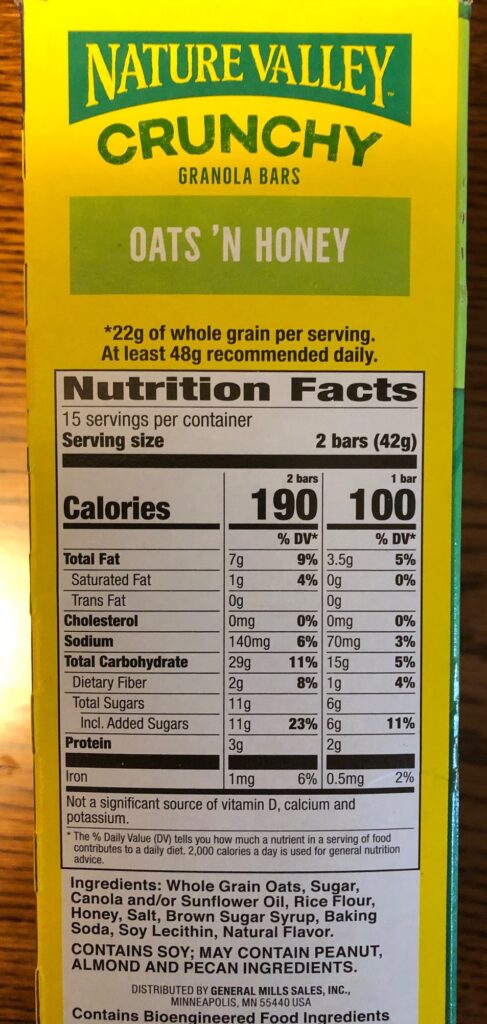
It is so much easier to buy a packaged item and look at the Nutrition box on the package. I’ve been reading the information on the back of almost every package I buy, since I’ve been careful to avoid all dairy and egg products. I’m sure you’ve read them too. For example:
This information is required by law now and is very helpful if you or your family members have allergies to certain foods.
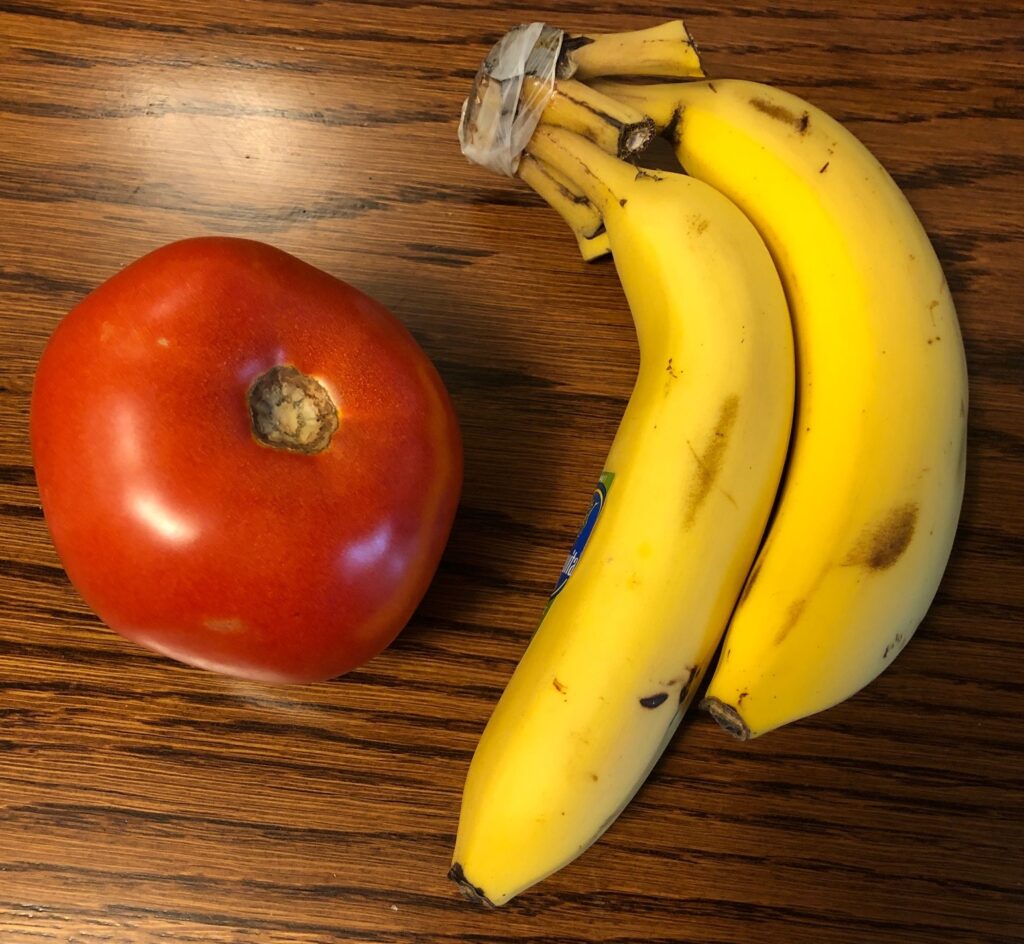
However, in my house, most everything I make is from scratch so the nutrition labels only refer to an individual ingredient, like flour or sugar. Some items have no labels:
So, I spent Monday creating a chart to include the items I wanted to know about in my muffins…like calories, carbs and protein. I could have added fiber, fat or sodium if I had wanted to track those nutrients.
The two items below were essential to make this chart…a general book listing most foods and their nutrition content…and a calculator. I also used this website: https://calorieking.com/us/en/.
I printed out the revised recipe with the addition of one egg. Of course, adding the egg meant it was no longer a Vegan recipe. If I find the egg bothers me, I know the recipe is just fine without it.
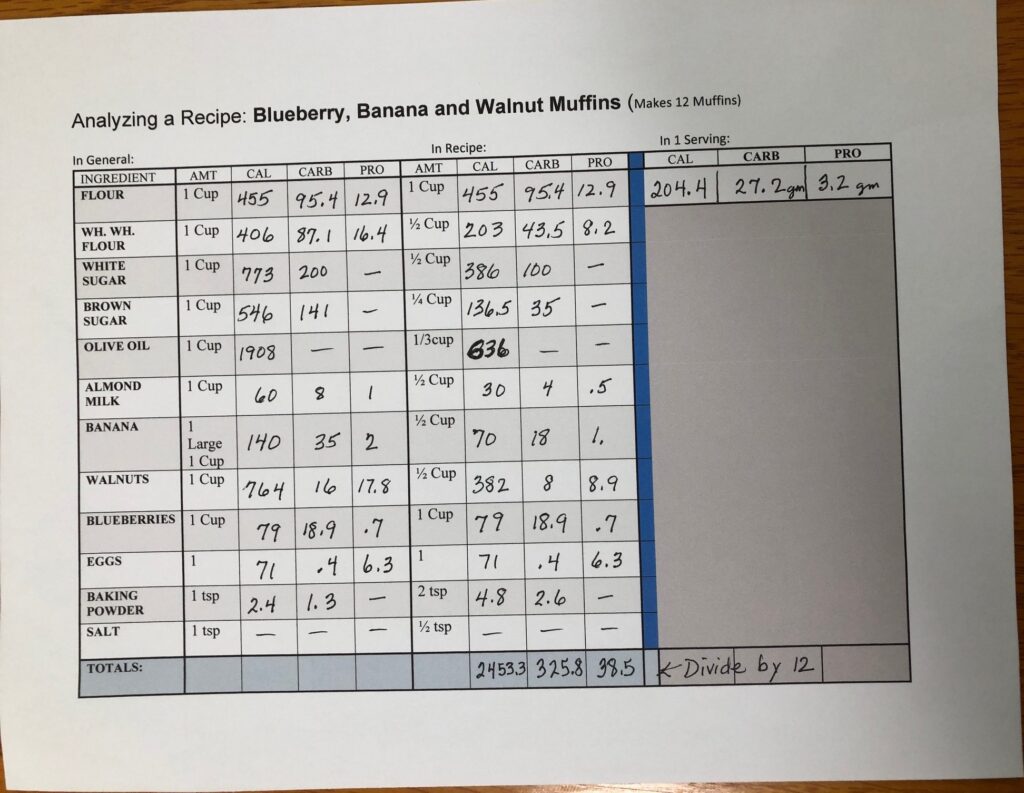
I first started scribbling on sheet of paper and finally decided to make a Table in Microsoft Word (shown below).
The first section of 4 columns is for the standard measure of the ingredient; the next 4 columns is the amount in my recipe. Once the numbers are added up (shown at the bottom of the columns, I divided each number by 12 and got the final amount for each muffin.
First, I listed the separate ingredients in the first column. Then I looked up each one to find the basic measure (like 1 cup) and recorded the three values: calories, carbs and protein.
Then I recorded the amount used in my recipe and computed the three values in the second set of 4 columns. I finally tallied the totals at the bottom and divided by 12 (muffins).
Now I could say a single muffin would provide about 204 calories, 27.2 gm of carbs and 3.2 gm of protein. Adding the egg to the recipe increased the protein a little, but I could easily leave it out if this tiny bit of egg protein bothered me.
Note: This method isn’t perfect. I can’t guarantee that every muffin has the same number of blueberries, but it’s good enough for me!
At the end, I made my table into a Template by deleting all my notes about the muffins and saved it as a PDF. I will use it when I want to know the nutritional value of any other recipes I make. If you would like a PDF of this chart send me an email at marykisner@comcast.net, or you might be able to capture it right out of this post.
You can make a table yourself like this in Word and include the categories you are interested in. I probably should find someone who knows how to set up an Excel spreadsheet Template that would let me type right into the form and add up the numbers automatically! Wouldn’t that be nice! As it is, I’m happy using a pencil or pen for now. Enjoy!
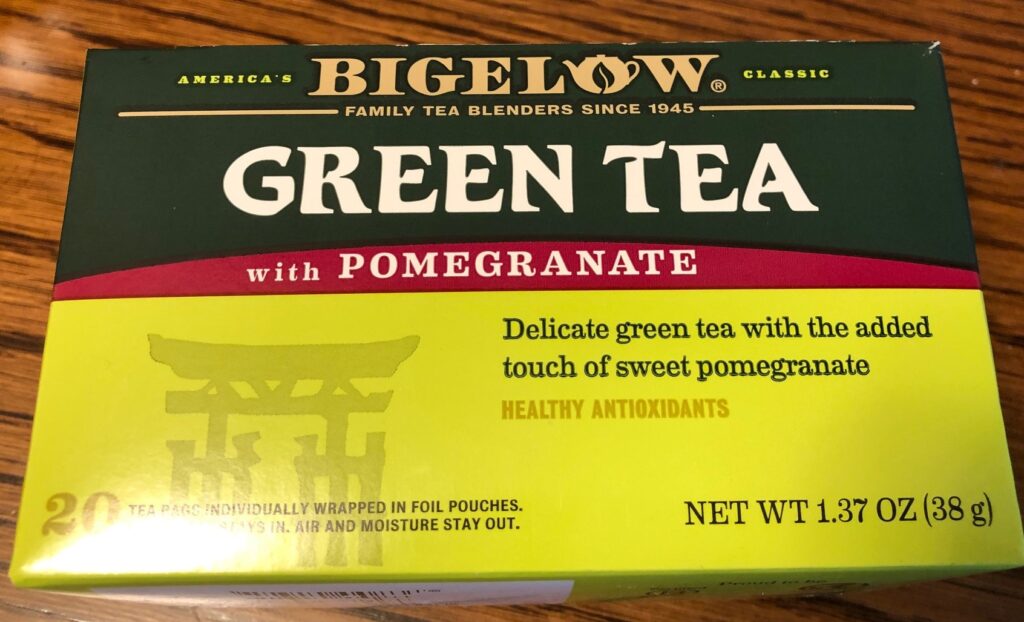
This first Saturday of fall the sun is shining, but we woke up to 42 degrees! The forecast was for sunny with a high of just 65 degrees. I wanted to try sun tea, even if it took all day. I really don’t care for hot beverages but I needed the boost of green tea. So I found some at the grocery store that had added pomegranate to it for flavor. I’m sure there are many brands and flavors, but this is what I bought:
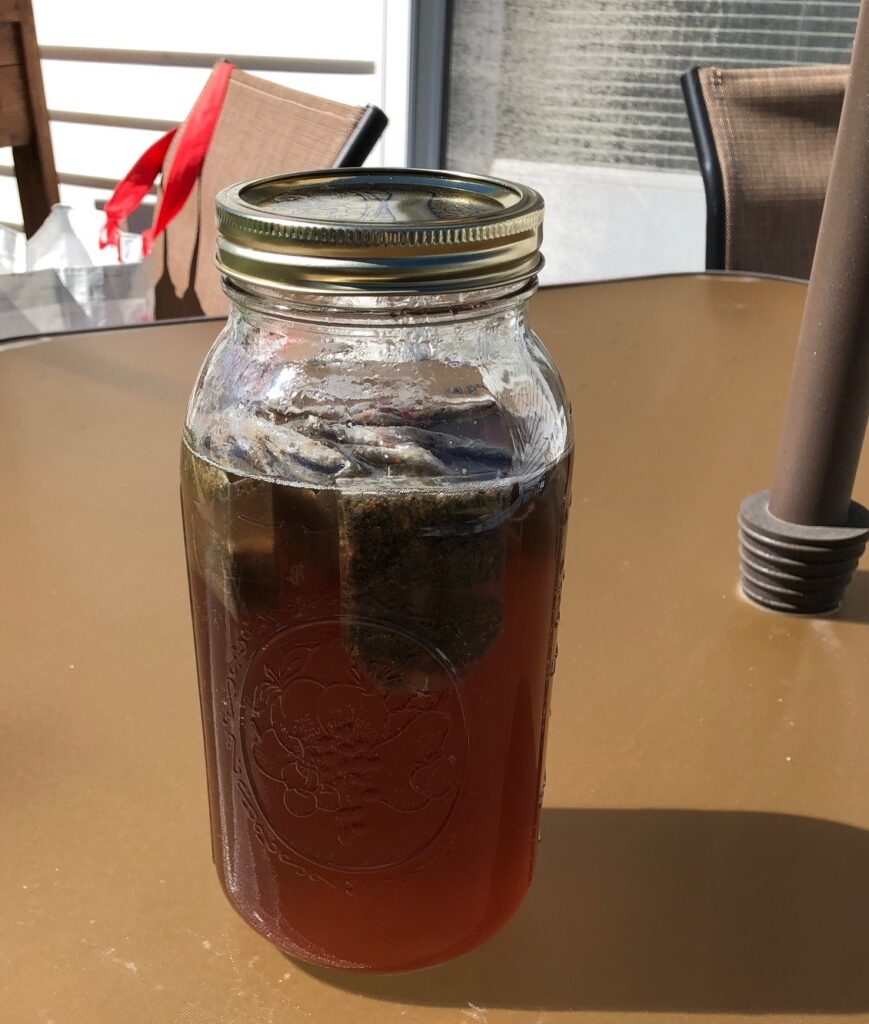
I had a 2-quart jar and filled it with cold filtered water. I pulled out 7 teabags and cut off the strings.
I put the jar on our patio table in the sun and crossed my fingers. By late this afternoon, I had green tea ready to be chilled and poured over ice!
I probably should have used a 1-quart jar!
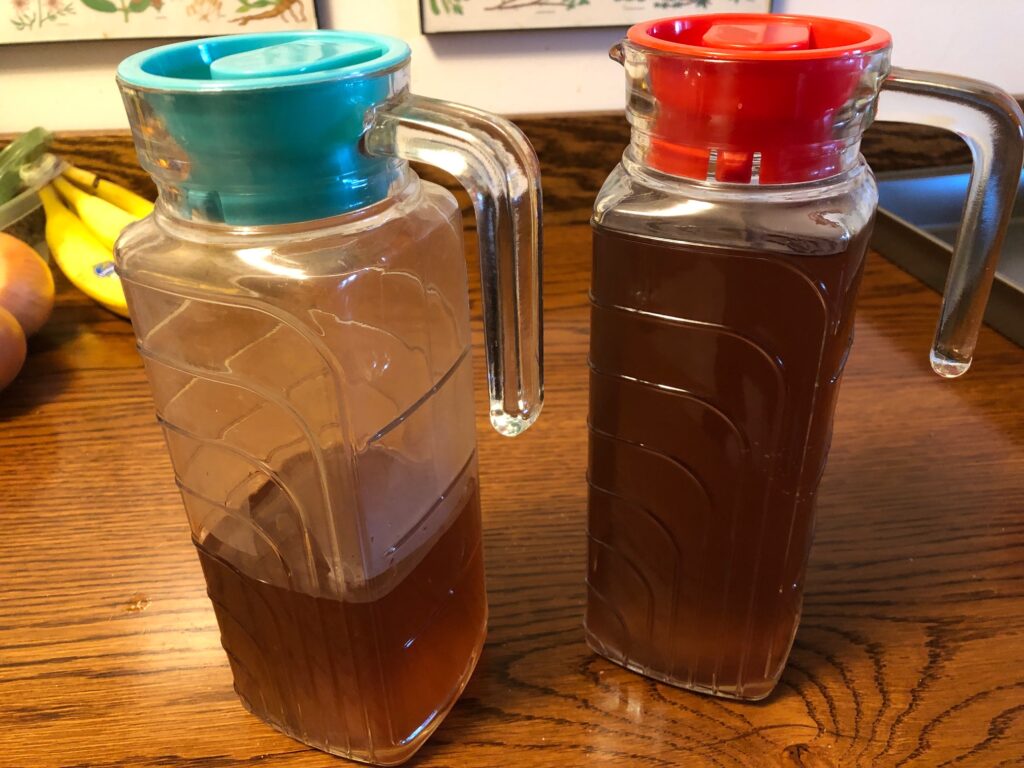
Seemed to work just fine! I’ve done this before for Bert’s favorite tea, but never in cool weather. It seems like a good hot summer weather thing to do, but this way works too! Enjoy!
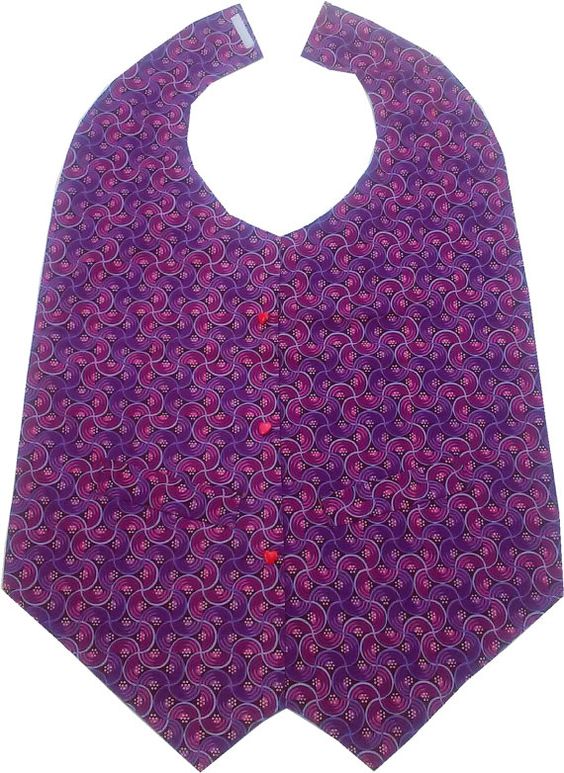
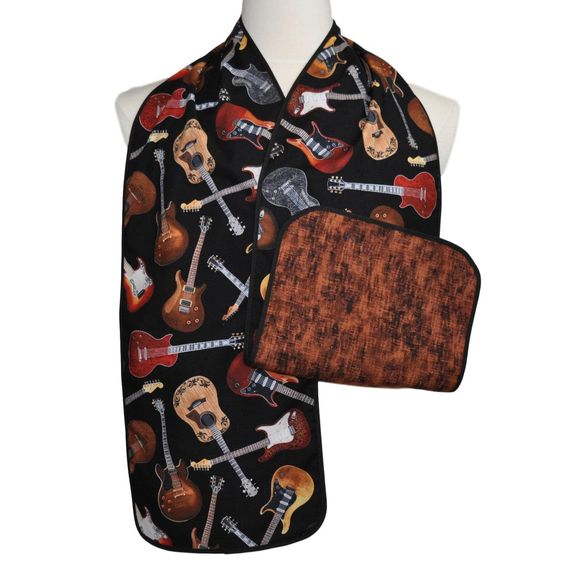
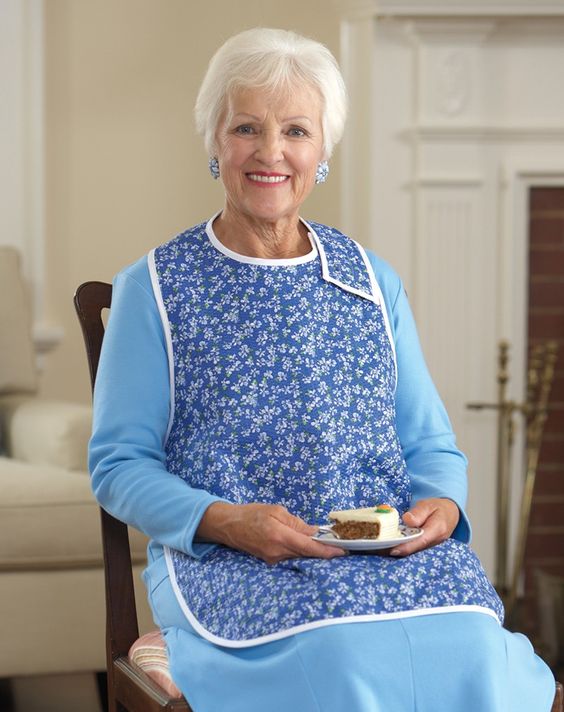
I never thought much about sewing an adult bib…but a friend asked if I could use one she had as a pattern and make another. Now at the moment, I don’t know anyone in a nursing home so it hasn’t occurred to me as a potential project. This is the bib she shared with me:
However, I do remember working with a female Professor at Penn State who spent much of her time traveling to Extension Offices around the state. She was always wearing a nice suit and always managed to show up for presentations looking very professional. I traveled with her once and was surprised she traveled with her suit on AND she stopped for fast food to eat on the way. She quickly grabbed something from the back seat and pulled a large bib-like towel over head. We continued on our trip while enjoying our lunch. When finished, she had hand wipes ready and removed the towel. Her suit remained spotless! What a good idea!
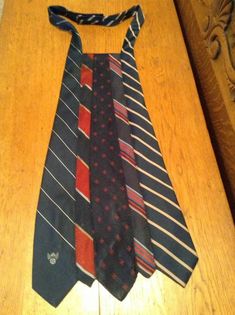
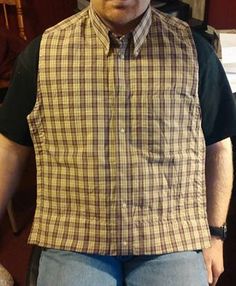
It wasn’t until I did a search on “adult bibs” on Pinterest that I found a whole world of ideas to make these bibs…or “dining vests” or “dining scarves.” Who knew! Here are some pictures of items others have made:
My professor friend had something like this!Clever!This is cool, but make sure the ties are washable…the inks often run when wet!No need for a pattern…just recycle the front of a favorite shirt!A dining scarf for your favorite guy!I’ve got to make something like this to keep in my purse!This is what I was expecting for an adult bib!
Well, almost too much information, but I sure got some good ideas for Christmas gifts! I did come across simple patterns like this one, which looked more like the one I was asked to make:
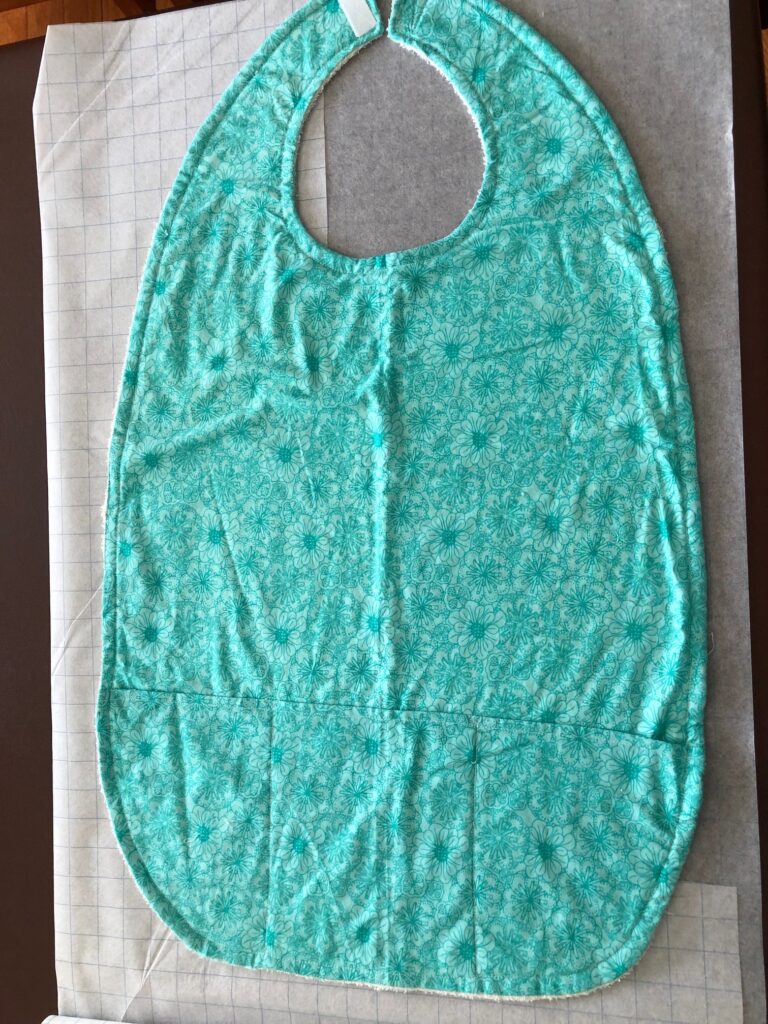
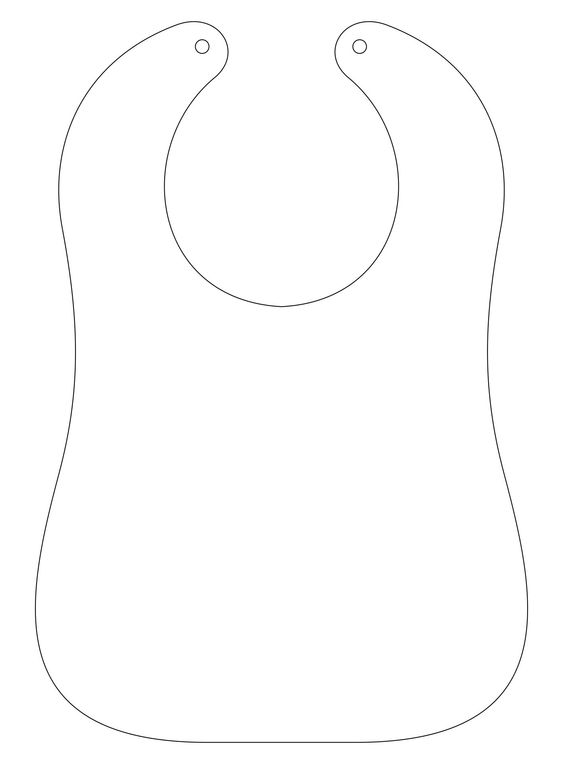
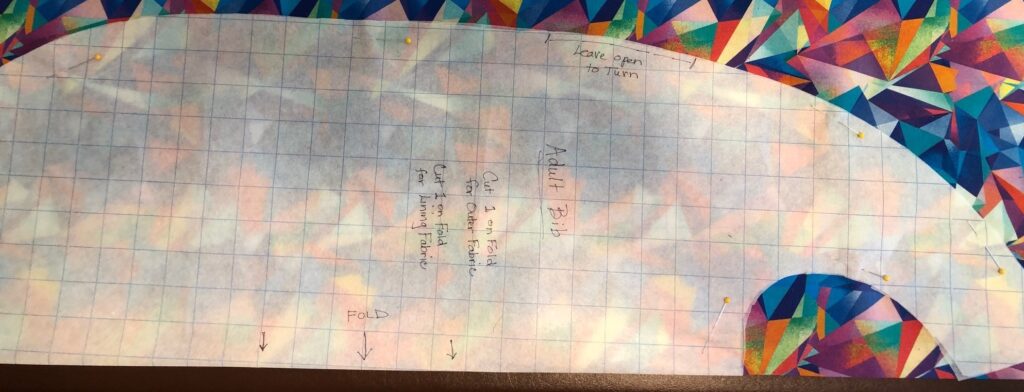
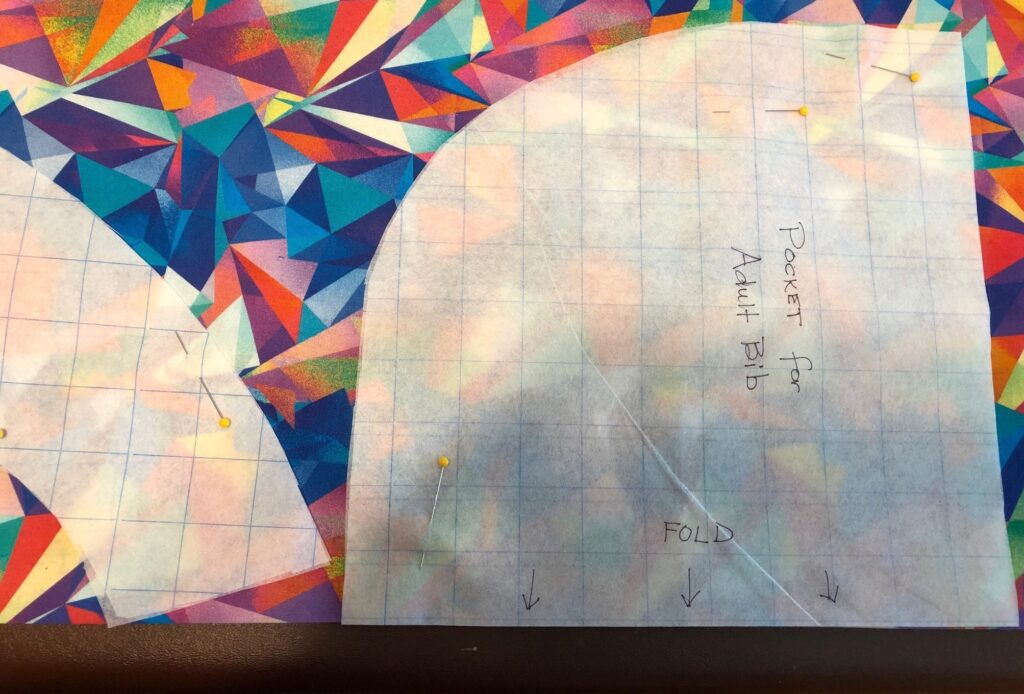
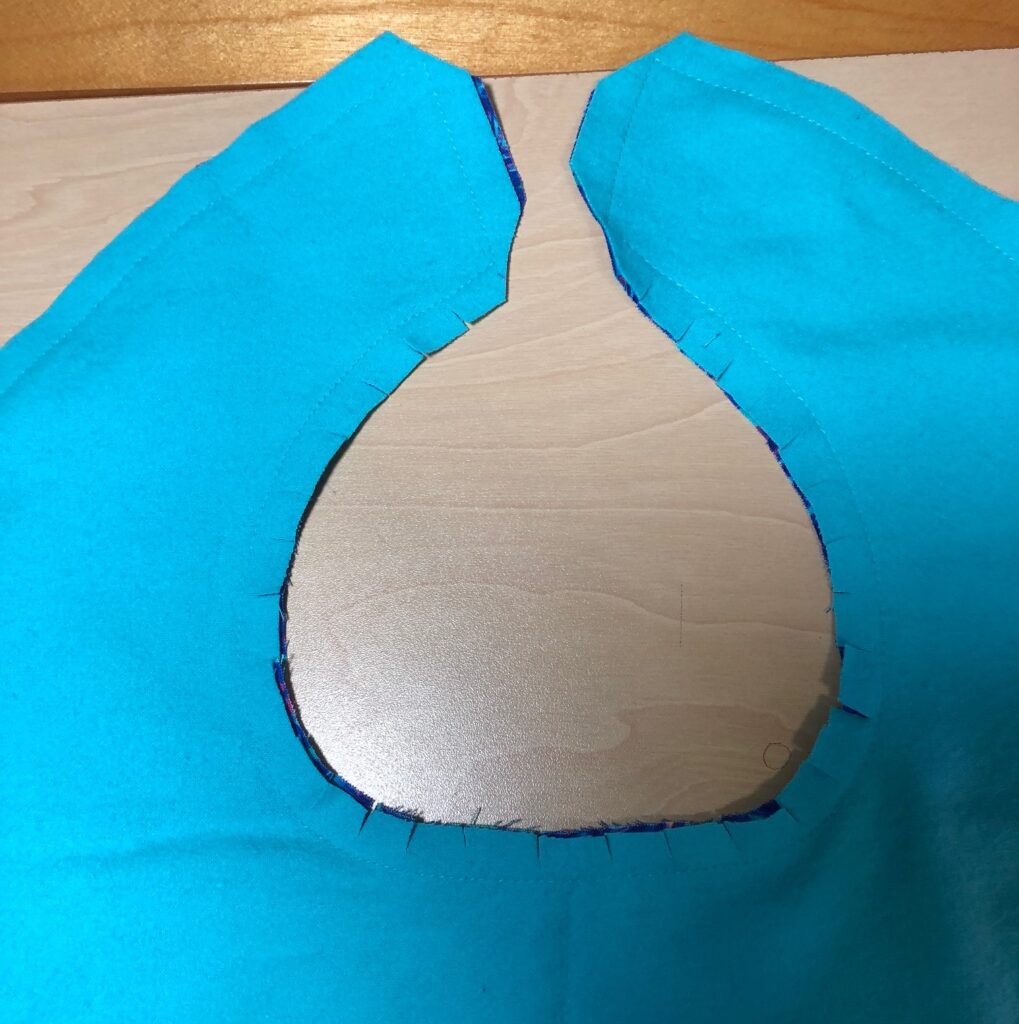
I started by making a pattern on quilting grid paper. This if very thin non-woven stuff with 1″ grid lines printed on it. I laid out the sample bib (see the first picture above) and basically drew around it, adding about 1/2″ for the seam allowance.
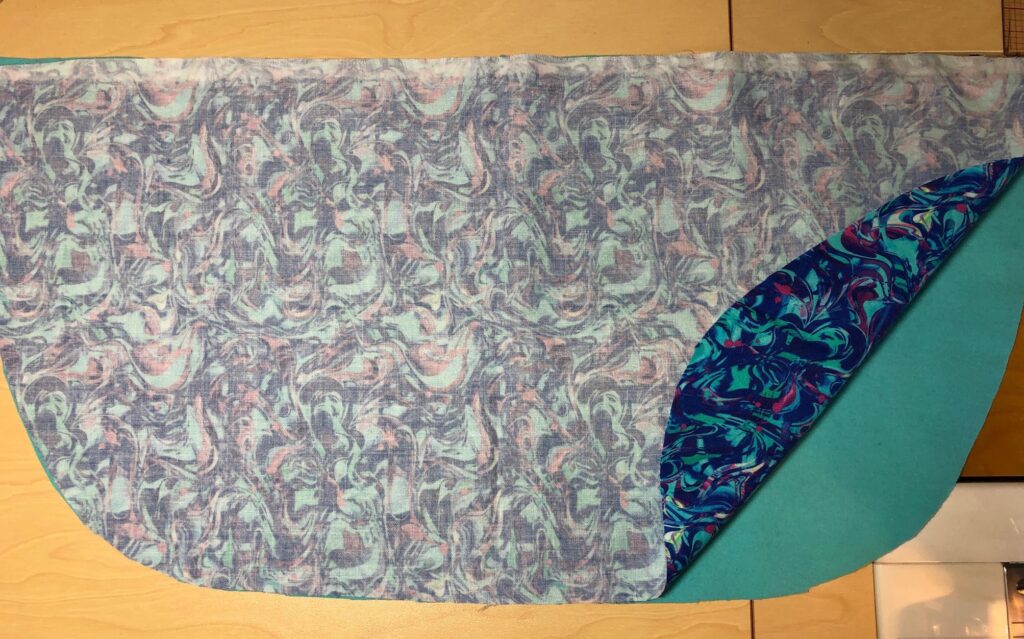
After cutting it out, I folded it in half lengthwise to trim it so the two sides are the same. Now I can lay the pattern on the fold of the fabric. Much easier to cut out. I copied the curve along the bottom to make a deep pocket pattern.
This is the pattern on one of the two fabrics I chose. Figured it wouldn’t show anything…from soup to spaghetti sauce!This is the pocket pattern…on the fold.
I cut out two bibs with linings of flannel in two colors. I will make one and have my friend try it before I make the other one. She may decide the pocket is unnecessary.
Making the Bib
Materials:
1 1/2 yards of washable fabric for the outside of the bib and pocket.
1 1/2 yards of washable fabric for the lining of the bib and pocket.
1 piece of Velcro hook about 1″ x 2″
1 piece of Velcro loop about 2″ x 2″ (or two 2″ strips of 1″ Velcro loop)
Thread
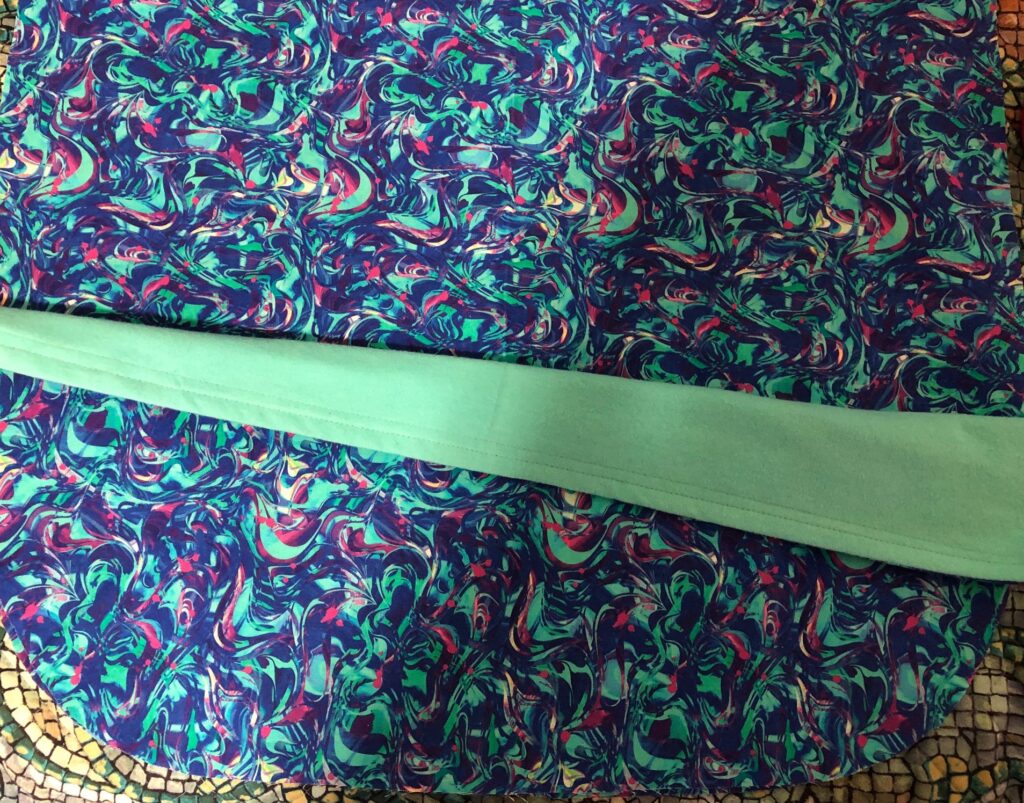
Step 1: Prep the Pocket. Place the pocket and lining pieces right sides together. Stitch the straight side using a 1/2″ seam allowance.
Step 2: Finish the Pocket: Turn right side out and top stitch along the straight edge. This is the top of the pocket.
Step 3: Place the pocket onto the right side of the bib fabric, matching the edges along the curve.
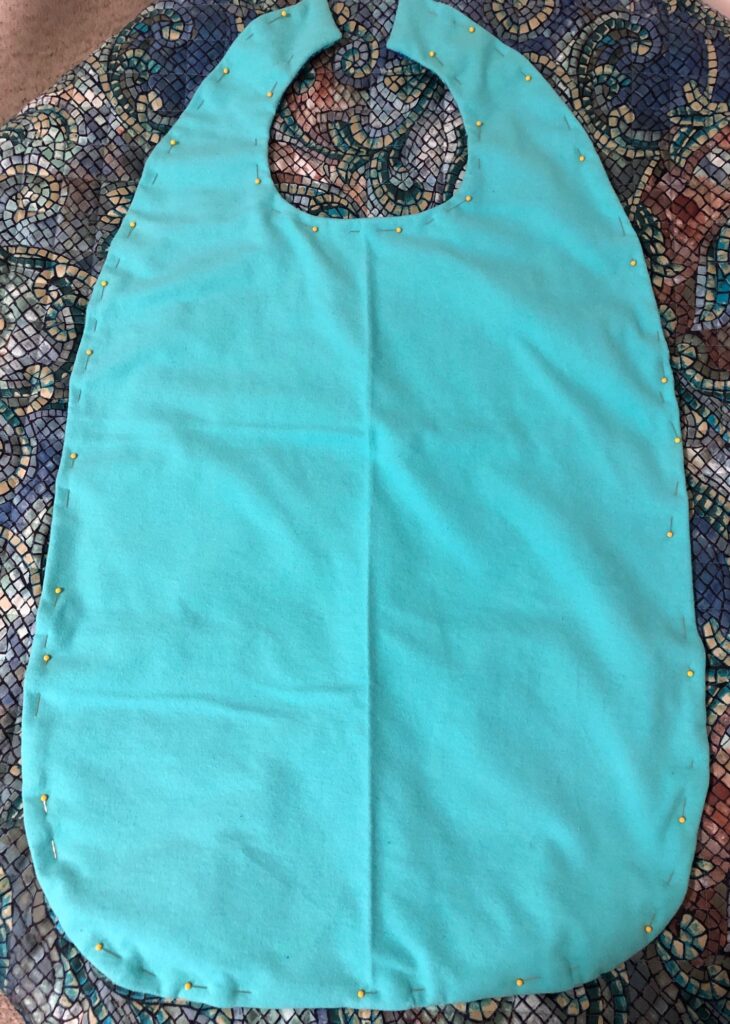
Step 4: Place the lining piece, right sides together, onto the bib outside piece (covering up the pocket). Pin around the edges.
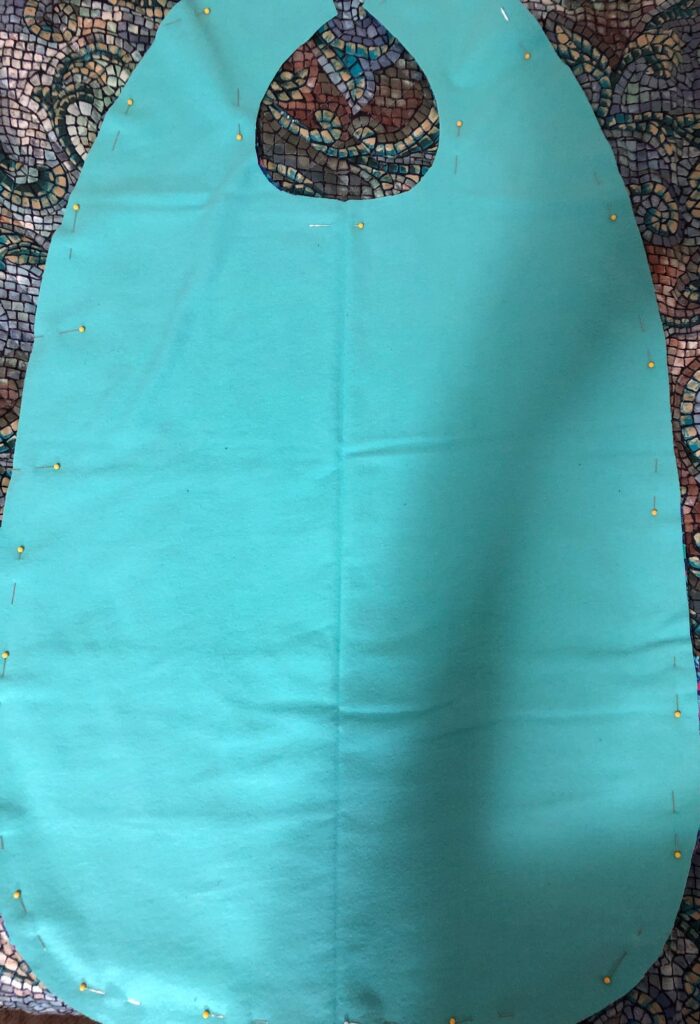
Step 5: Sew around the whole bib, leaving a 4″ space on one side (above the pocket) to allow for turning. Before turning, clip the neck opening to keep the seam lying flat after turning.
Step 6: Turn the bib right side out through the opening you did not stitch. Pin around all edges. Top stitch about 1/2″ from the edge.
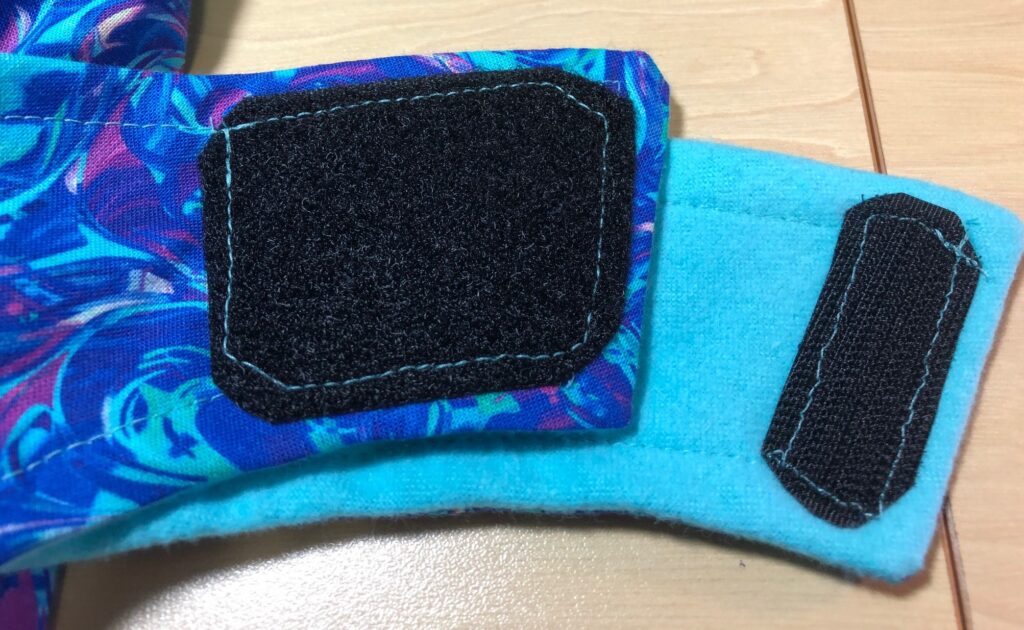
Step 7: Prepare the Velcro. I use 2″ wide Velcro, so I needed one piece about 2″ x 2″ of the loop, and 1″ wide piece of the hook.
Note: If you are using 1″ wide Velcro, use two pieces of the loop side by side to make a wider patch for the hook to find. Much easier to close the hook on a larger patch of hook.This is how the Velcro look sewed down.
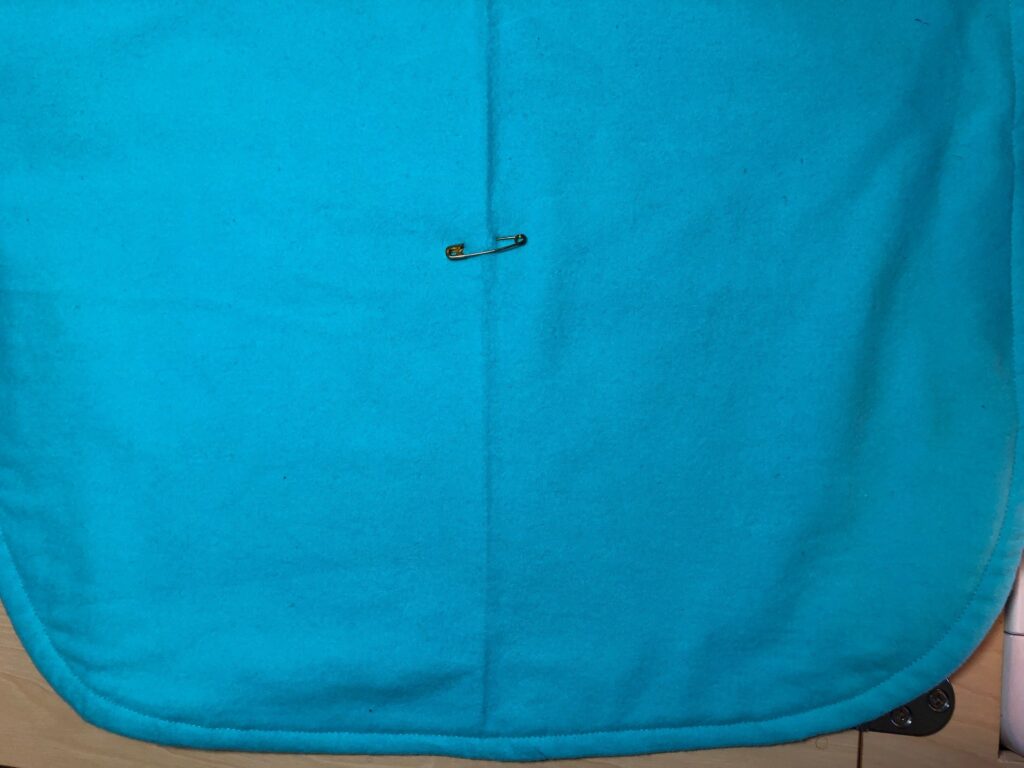
Step 7: When finished, hold up the bib and see if the pocket hangs open. You can top stitch sections to stabilize into small pockets. (See the original picture at the top.) I was asked to leave it open for now, so I added a safety pin through the back to hold the pocket snug to the bib. It could be removed for washing, or I can sew it down later.
It probably took me longer to make the pattern than to make the bib, so it’s pretty simple. Let your creativity make it special for the person you are giving it to! I’d love to see pictures if you try something unique! Enjoy!
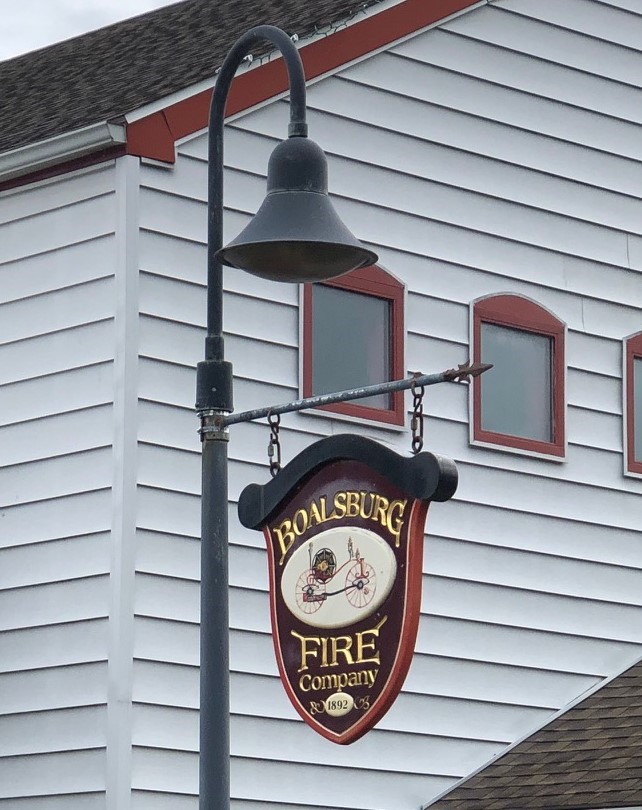
Each Spring and Fall the Ladies Auxilliary to the Boalsburg Fire Company hold a Flea Market (indoor yard sale) at the Fire Hall. There are usually 30 tables available for local folks to reserve a space to sell assorted items. I guess by having different people manning each table (the flea market model) means buyers give money to separate sellers…instead of the yard sale model where buyers can pick up a bunch of items and pay for all of them at the end.
This flea market is one of the major fund raisers for the auxilliary and this money goes to help the Fire Company purchase new equipment. The side benefit is sellers have an opportunity to get rid of stuff!
So, yesterday and today the Fall flea market was held at the Fire Hall.
We had a small crowd but that didn’t stop us from having a good time visiting with each other. If sellers made some money, who knows how many buyers were auxilliary members!
This year had similar items but different ones. Halloween and Christmas seemed to be the theme for some tables and I was able to pick up my Halloween costume very inexpensively!
Can you guess which item on this table will serve as my costume? See my simple costume at the end of this article!
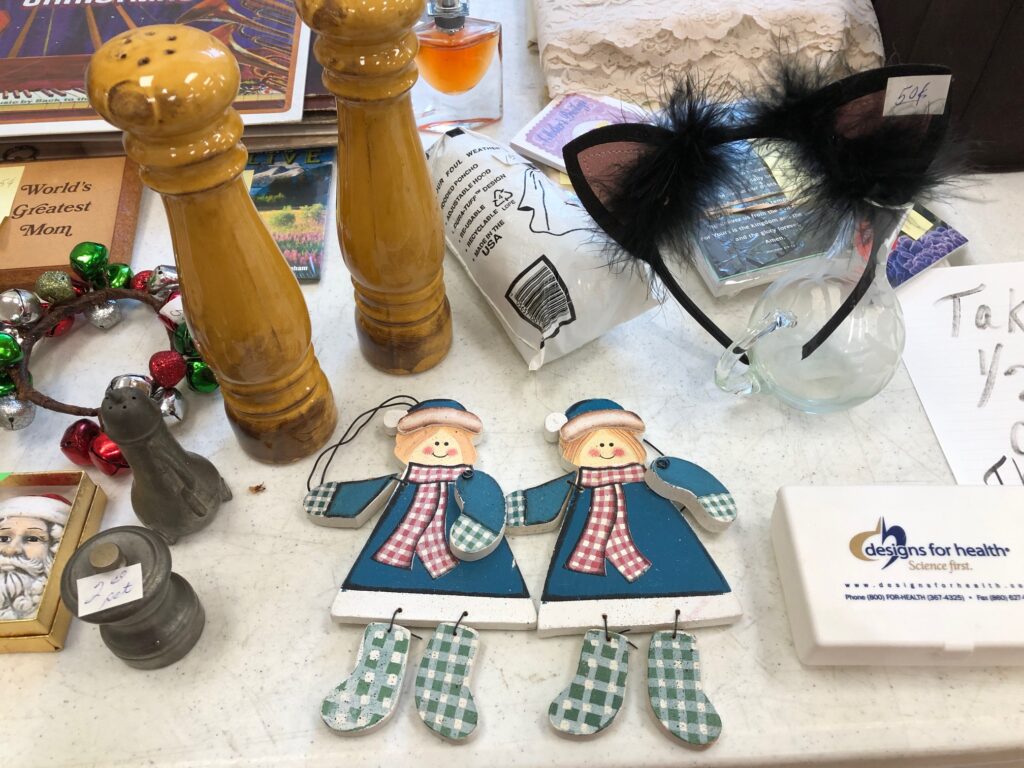
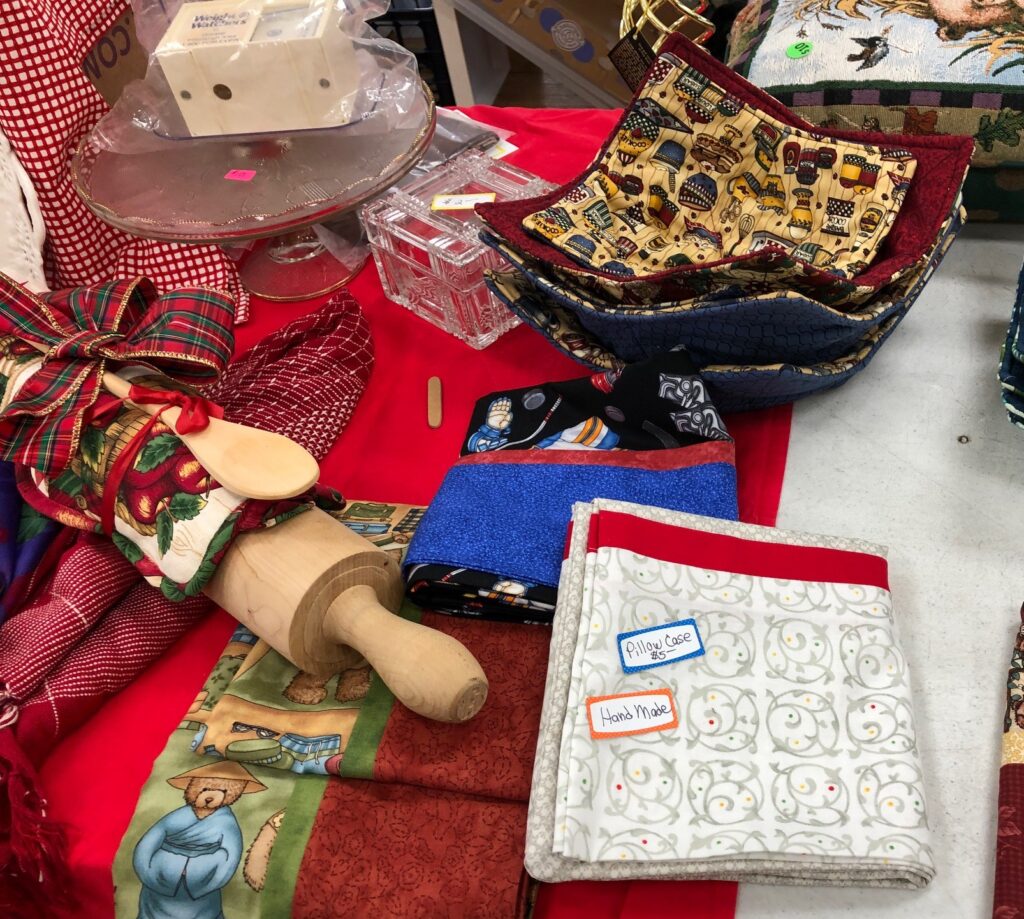
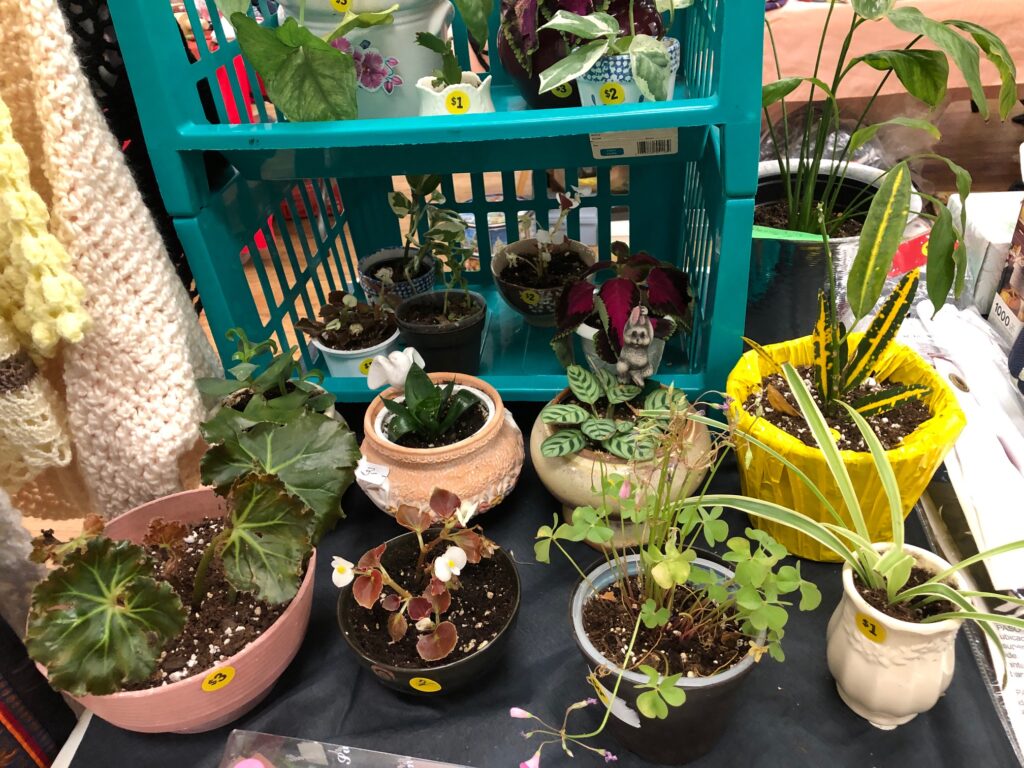
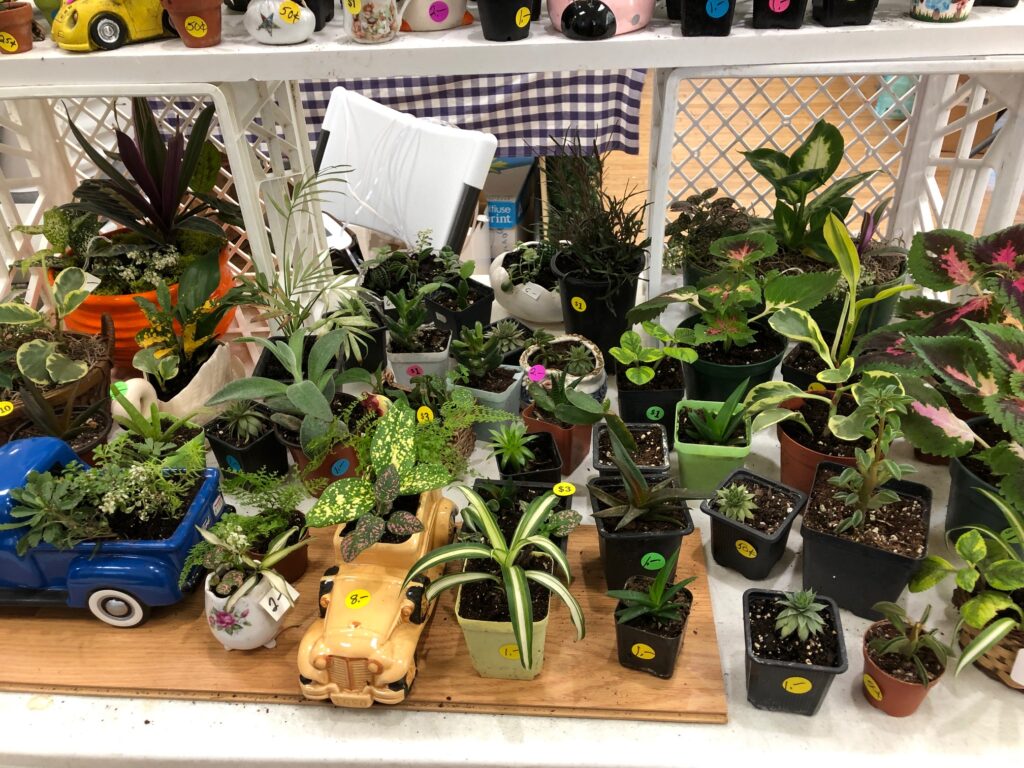
Here are some other treasures for sale:
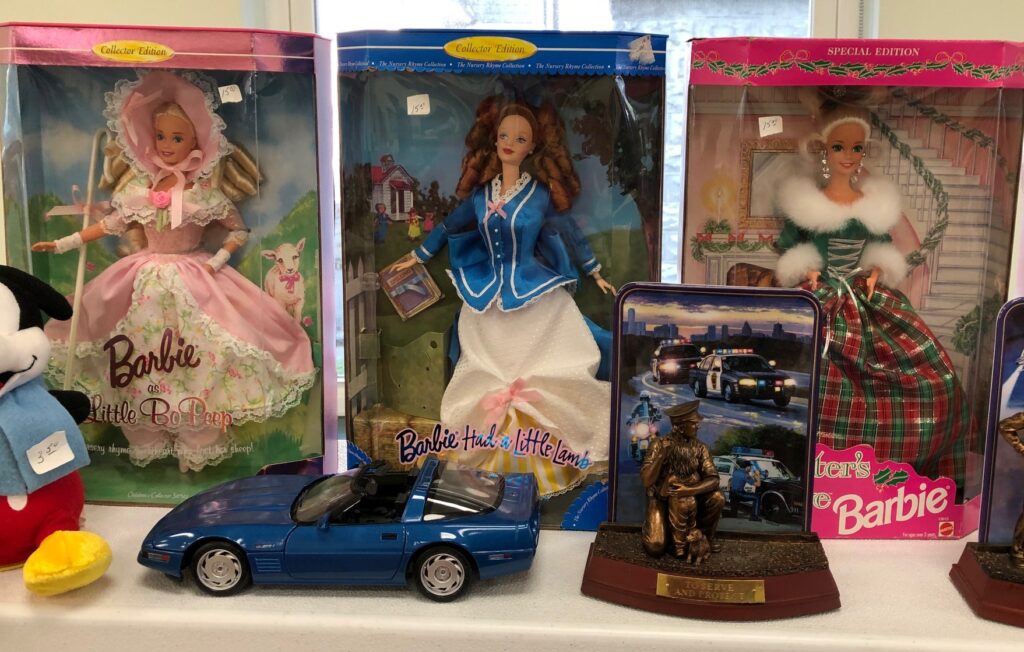
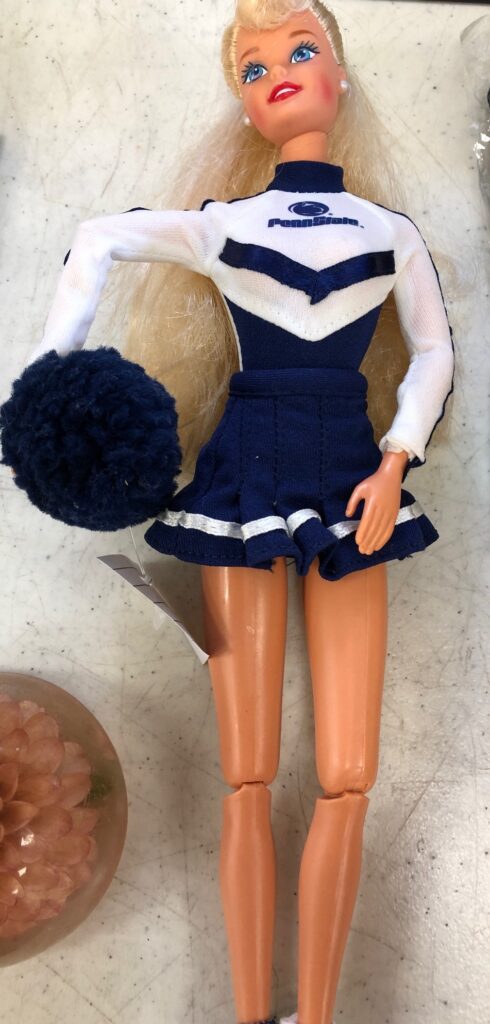
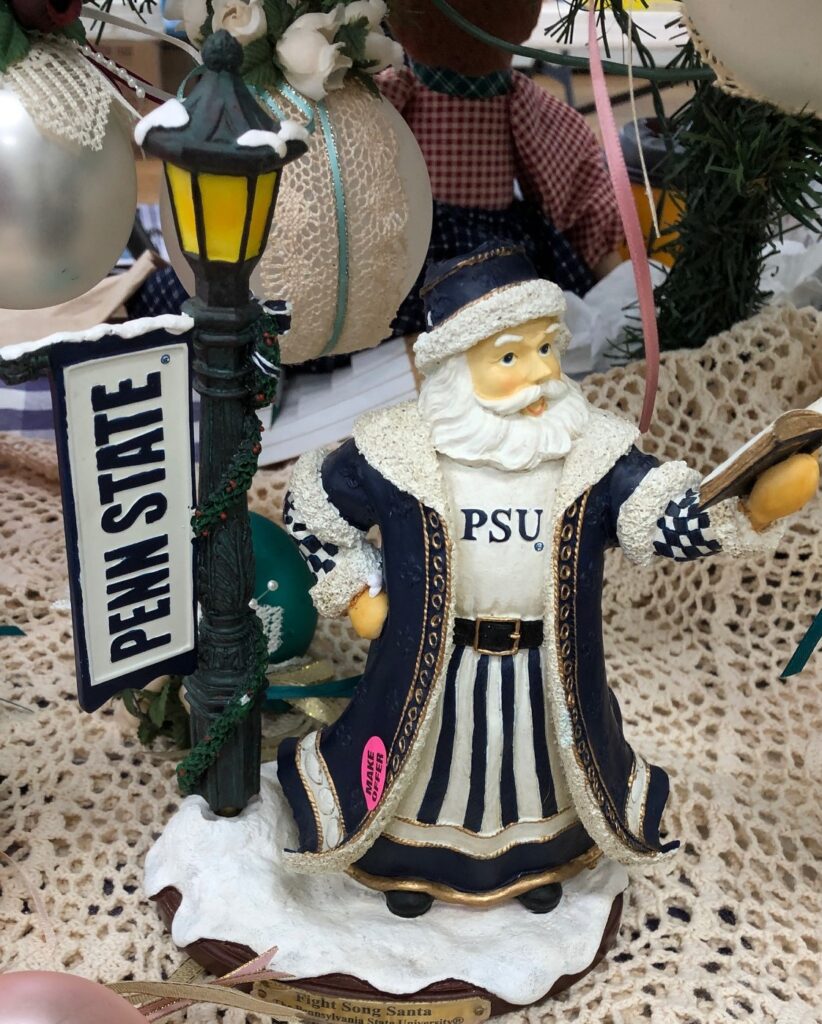
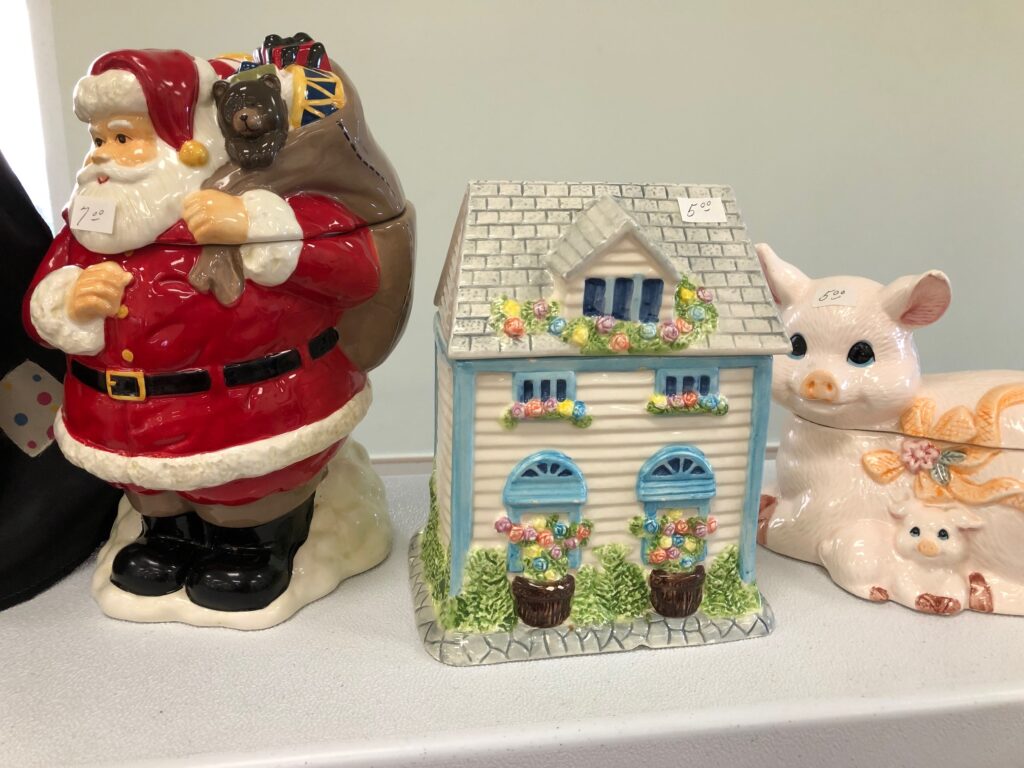
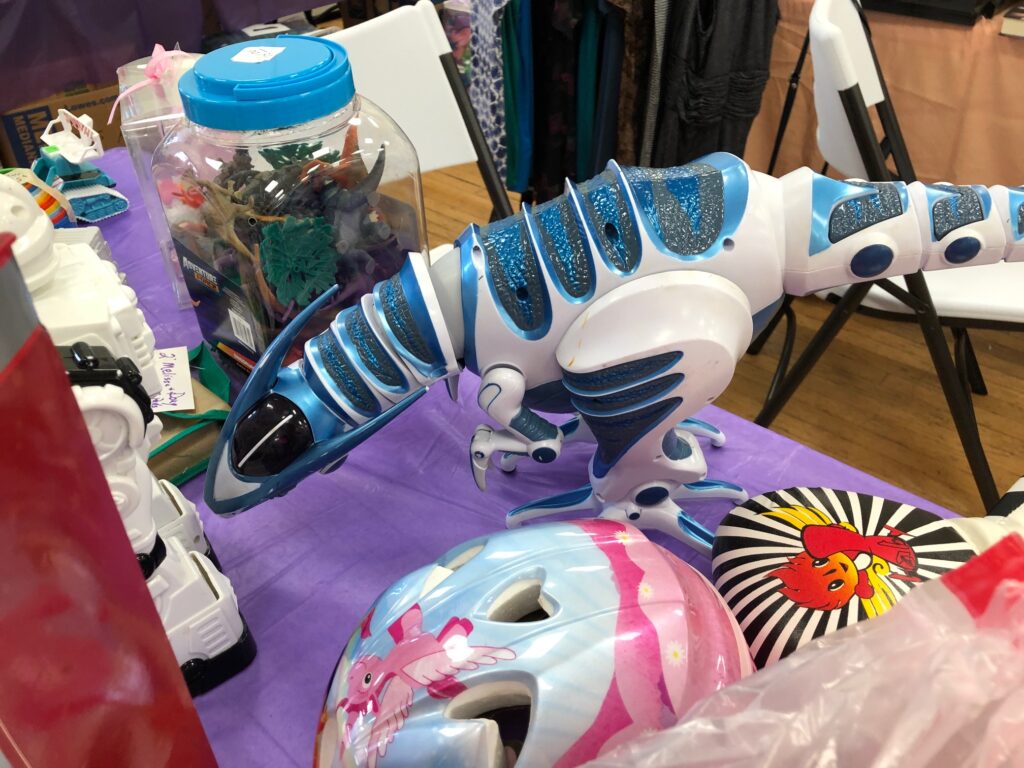
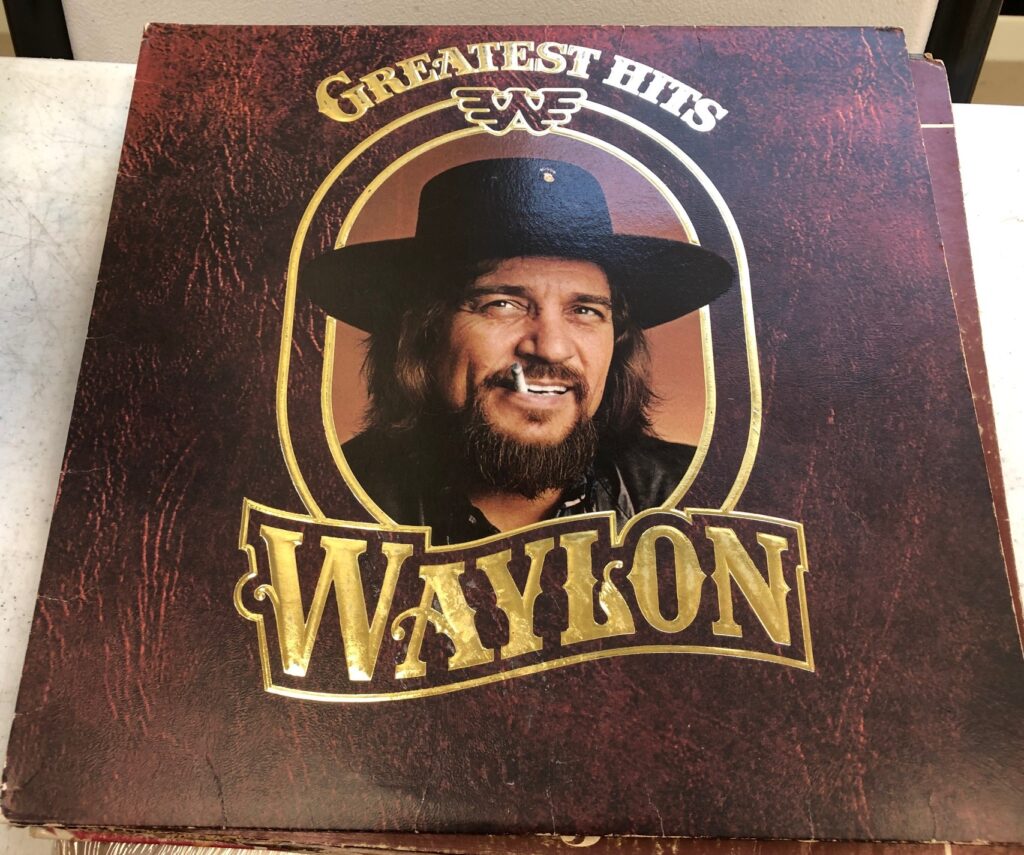
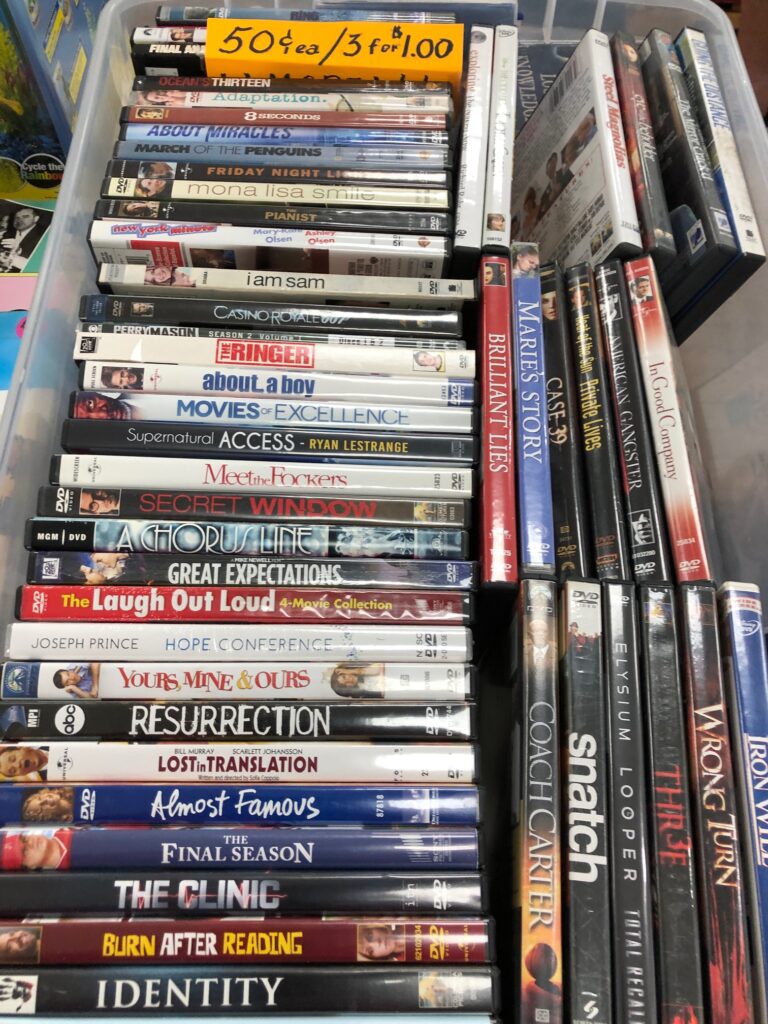
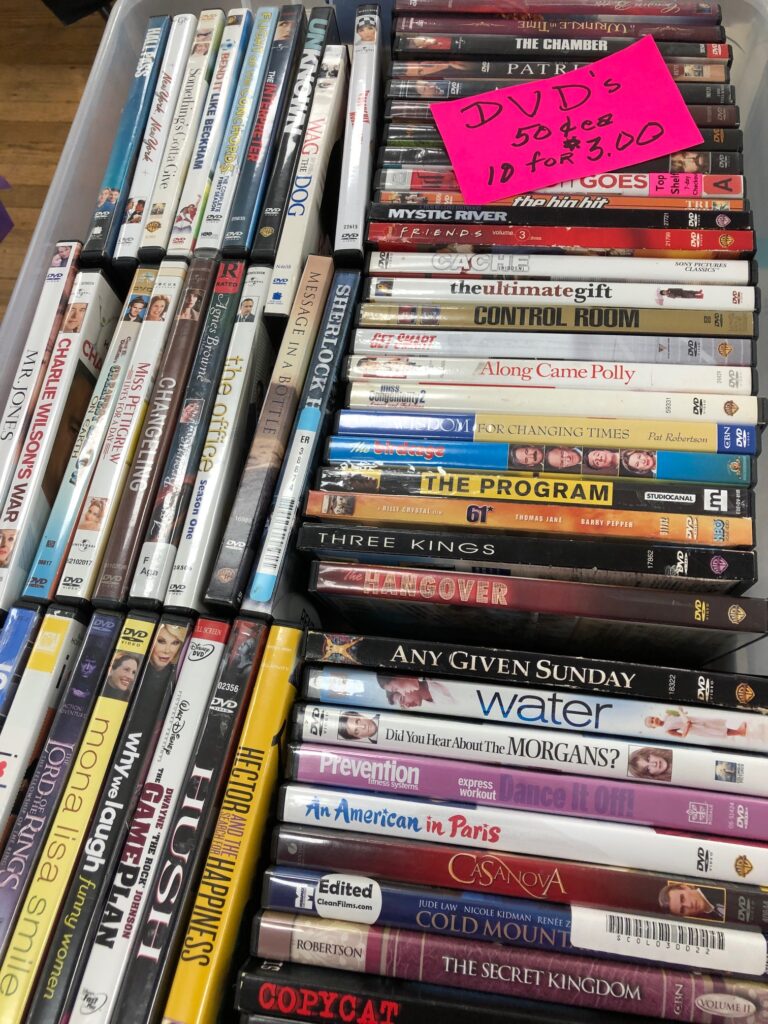
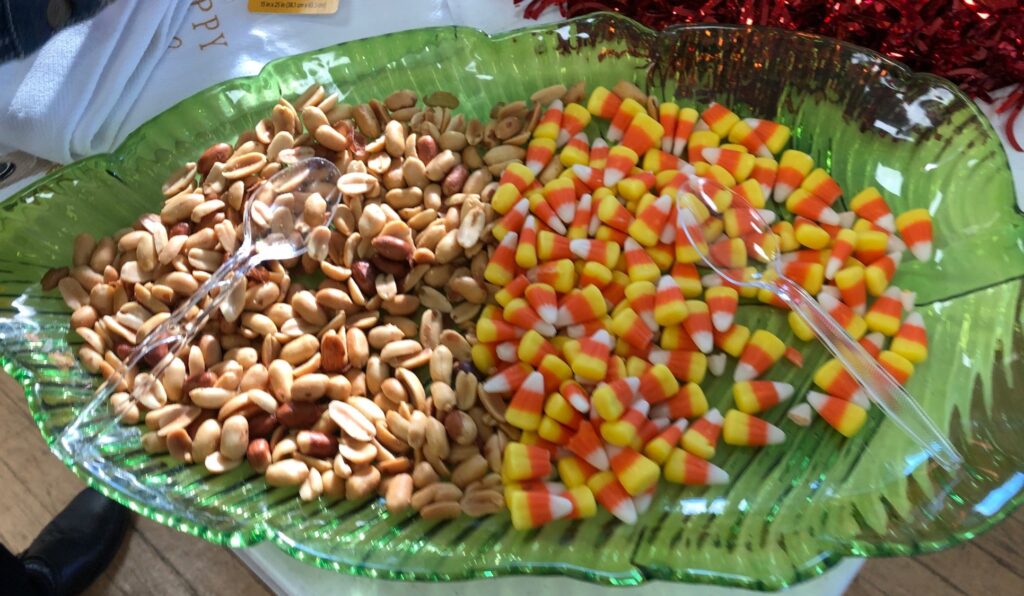
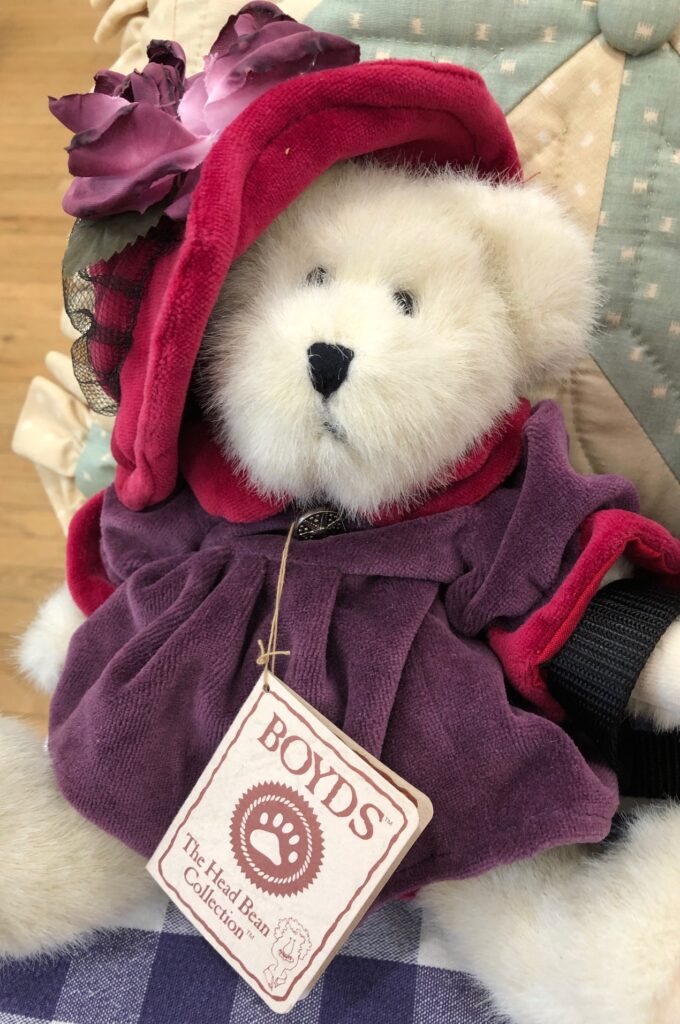
Toys like Barbie and model cars.Even a Penn State Barbie!How about a Penn State Santa!Various items for Christmas gifts.Many plants and……more plants!Cookie jars.More toys.Vinyl records are making a comeback.DVDs…folks are probably moving to Streaming and Netflix now.And more DVDs.Always snacks to grab your attention as you wander by!Sometimes I have to pick up something up just for me…well, maybe for my granddaughter!
And finally…my Halloween Costume!
I think if I wear a black T-shirt and black pants, I’ll be able to go trick or treating as Cat Woman (or at least answer the door for other ghosts and goblins who ring my doorbell!)
So that was how I spent my day. Now I’m set for Halloween and Christmas! A good time was had by all! Watch for information for our next flea market in the Spring.
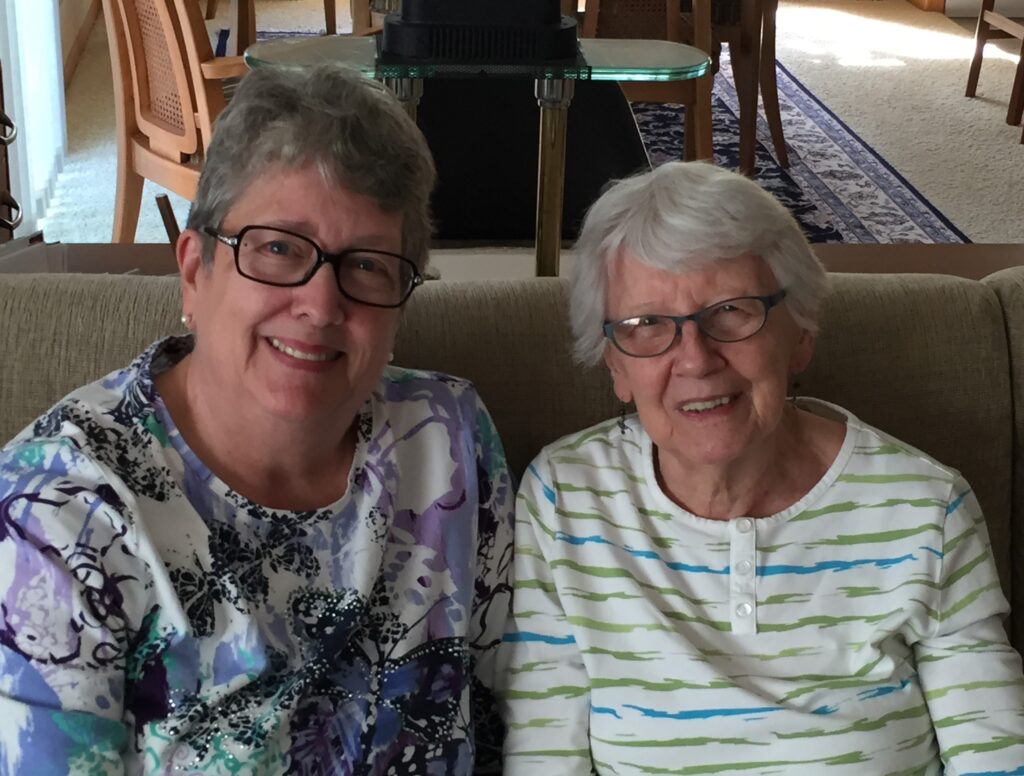
My Aunt Janice is 92 this year and she’s the only one of my dad’s four sisters that are still with us. My dad was the oldest and she was the youngest so I guess I can say she’s the last of that generation of Bixby’s.
Mary and Janice in 2016
She still lives in Minnesota and it’s been too long since I’ve seen her in person. Since my dad passed in 2012 it’s been difficult for her to come to Pennsylvania. We drove out to visit in 2016.
Amazingly, after my mother passed in 1988 Janice would call me on my mother’s birthday to tell me she had been thinking about her. We would have a brief visit on the phone. I thought she and my mother were close and that’s why she remembered her. Haha…it was because it was her birthday also! Of course!
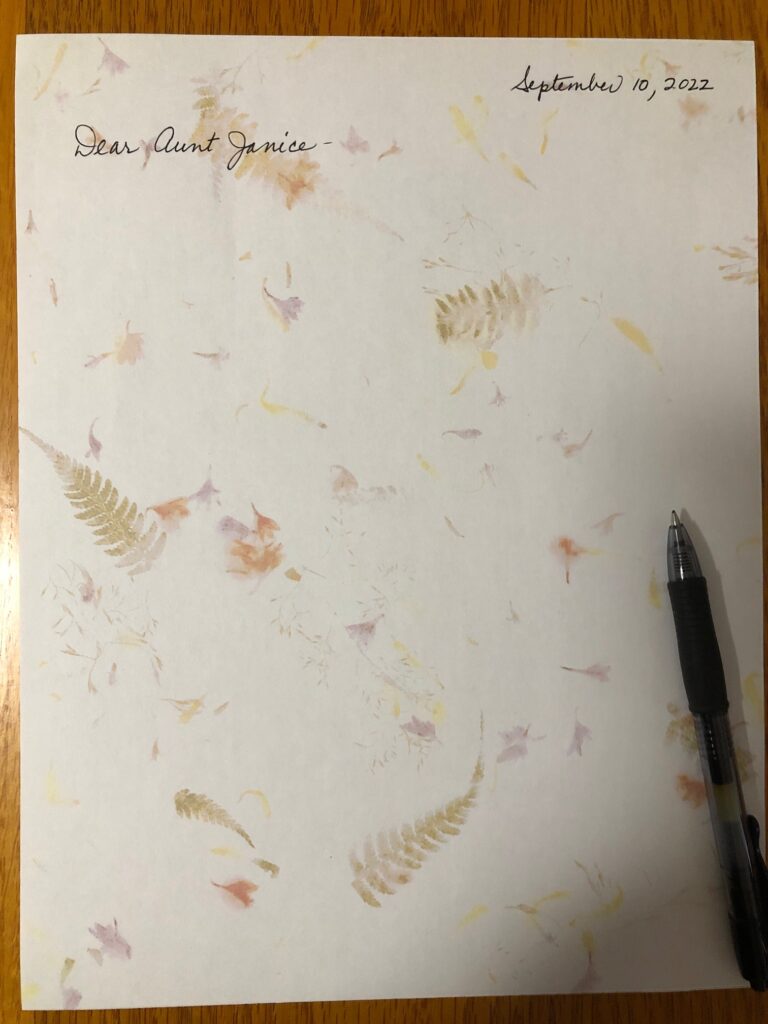
I was thinking of her a few weeks on my mother’s birthday, but we didn’t manage to connect on the phone. I know it is difficult for us to connect with our busy schedules and the internet/email is not a natural way for her to communicate. So, I decided to surprise her with a handwritten letter!
It has been so long since I hand wrote a long letter to anyone. I pulled this book off my shelf that I’ve had for years to get some inspiration.
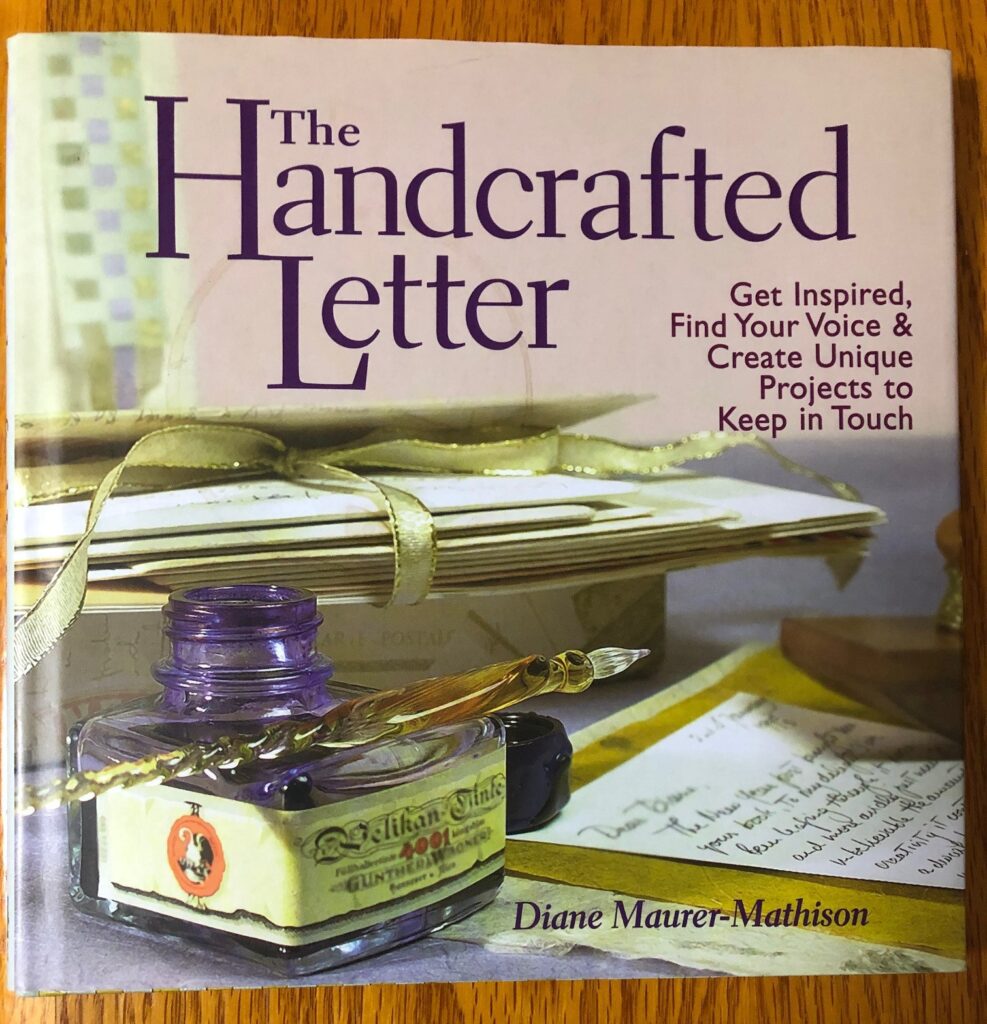
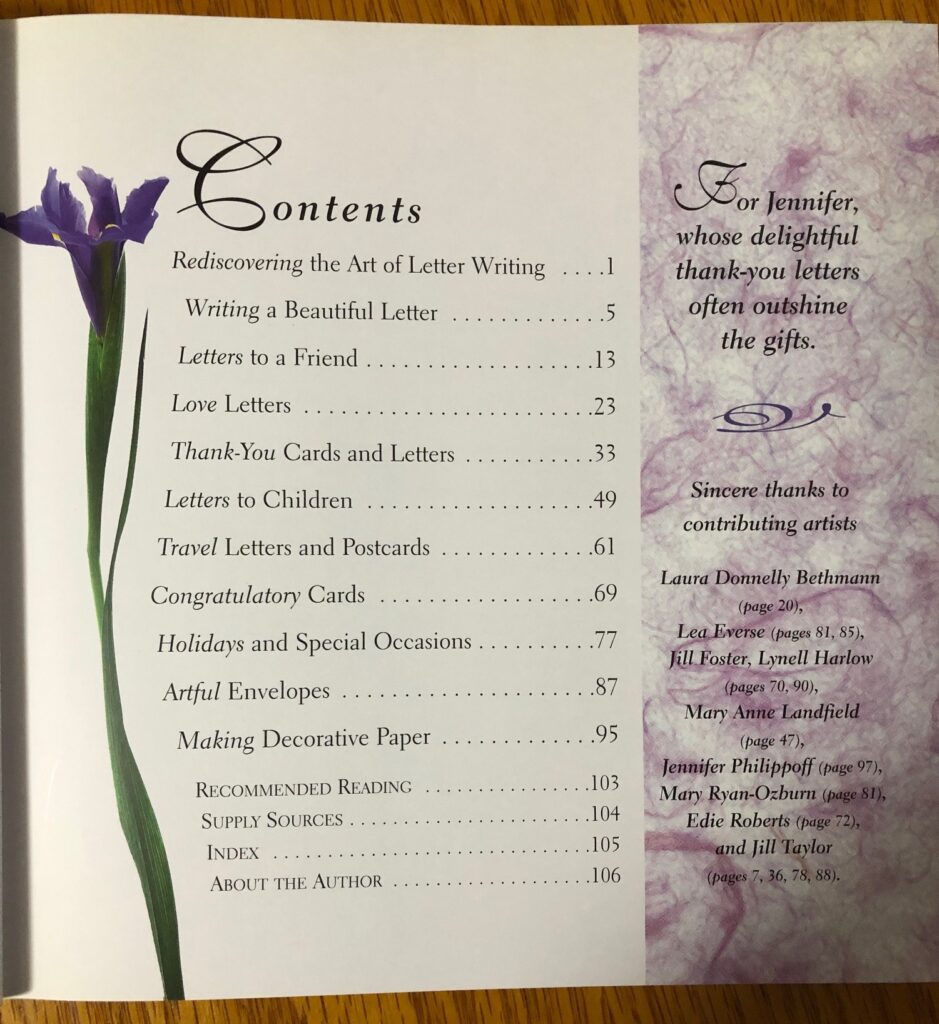
This book, The Handcrafted Letter by Diane Maurer-Mathison (2001) is a beautiful book. It is still in print and I reach for it often. It covers all kinds of written material, from letters to thank you cards and special holidays. It is full of illustrations about special papers and unique additions to gift cards. Here is the Table of Contents to show you the many topics covered.
The author is a native of Central Pennsylvania. I first saw her work using handmade paper items at local art shows. She’s a truly inspirational artist!
I really just wanted to write a letter, but I haven’t invested in “stationery” for a very long time. I did not have time or expertise to make my own paper! I decided to use a few sheets of paper that I had bought years ago that could so through my printer. It had pictures of embedded dried flowers that looked sort of handmade.
At this point, I could have typed the letter and printed it on this paper…but where’s the challenge in that! At least she will be able to read the cursive writing. I have to be careful when writing notes to my youngest grandchild because she isn’t comfortable reading or writing in cursive yet.
Luckily the flowers were subtle so I didn’t feel like I had to write around the pictures.
So began my letter writing exercise! It has been a VERY long time since I wrote four pages in cursive. I had forgotten how comfortable I’ve become typing and editing right on the computer…not a pencil in sight! Thirty years ago I wrote my whole Thesis out with a pencil and then typed it into the computer. I could only think and organize my thoughts with pencil and paper. Look how far I’ve come!
By the third page, I had to slow my thinking down so I could avoid skipping words and making spelling mistakes. I can’t write as fast as I can think! I kept wishing for a “backspace” button to fix the mistakes. My hand certainly had a few cramps after this marathon writing exercise! At least I know she will be able to re-read the letter as needed and I feel better about staying touch.
Do you have a special friend or relative who would love to receive a hand written note or letter from you? Break out those old skills, just for practice! You might make someone’s day! Enjoy!
This is my Grandpuppy Daisy. She doesn’t need a winter coat but she sure loves her toys.
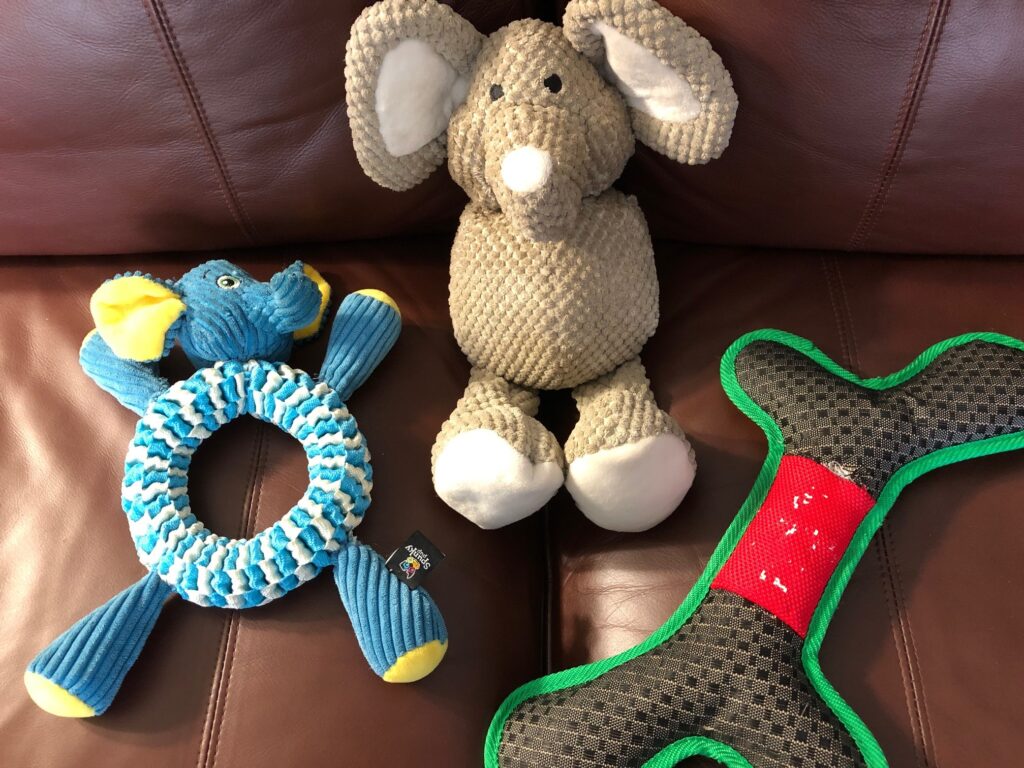
Each time I come to visit my daughter’s family I’m handed a bag of toys that have met their match with Daisy. She loves to chew them and rip them apart. Unfortunately, she sometimes eats the pieces…so the toys are put aside to see if Grandma can fix them. This last visit I collected three toys needing some TLC.
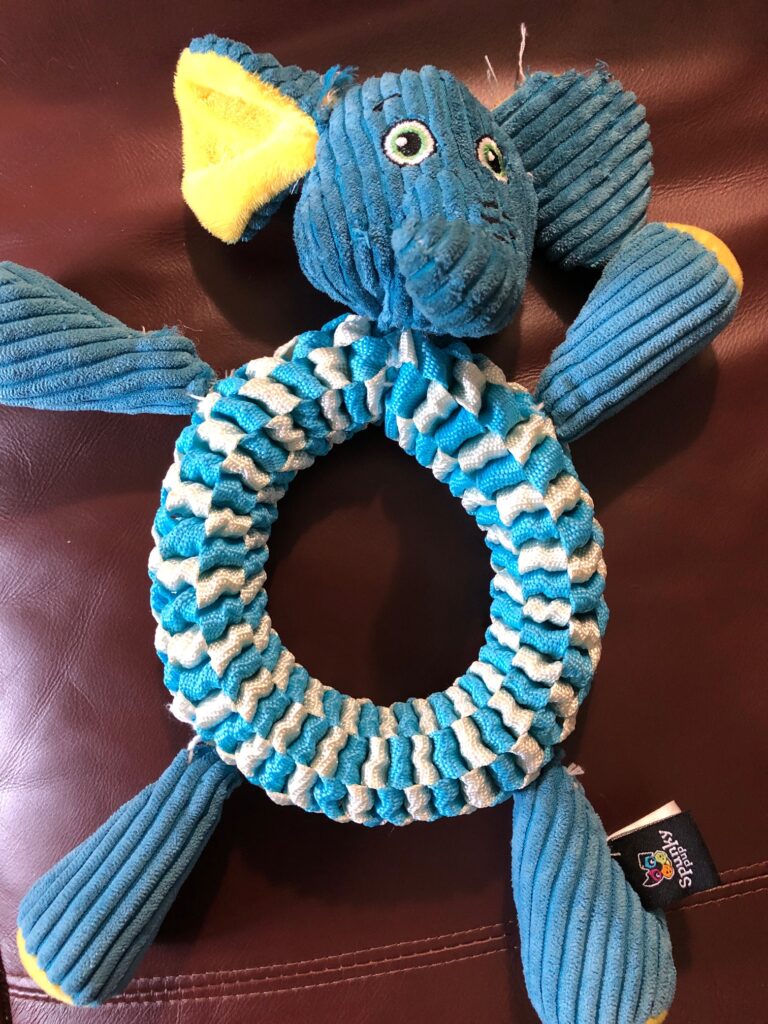
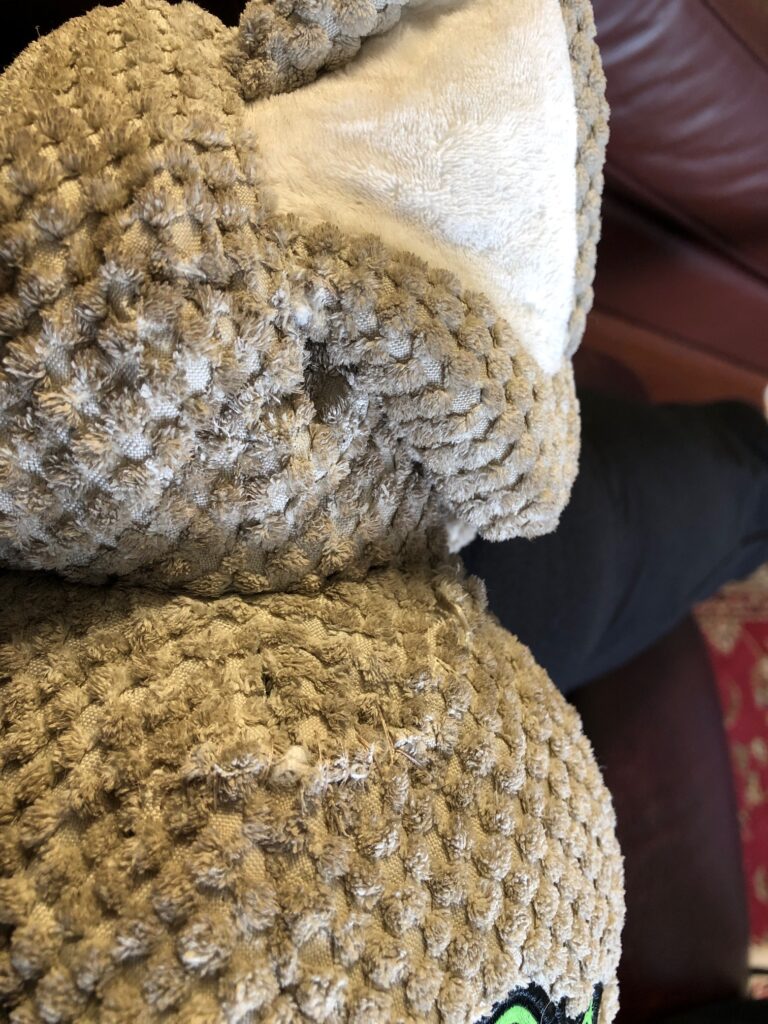
I’m amazed the variety of ways toys for dogs are made…some are like stuffed animals like a small child might enjoy. Others are tough and hard to destroy. The first one that needed help was both!
The center of the toy was very stiff and indestructible material. The head, arms and legs were soft and squishy. Of course, most of the damage was right where the soft pieces joined the tough center. One ear was also falling off. This was hard to sew by hand because while my needle would easily go through the soft material, I practically needed plyers to get the needle through the hard vinyl webbing that made up the center. I’m going to recommend when the pieces get pulled off again, they should just cut them off and Daisy will have a ring to chew on.
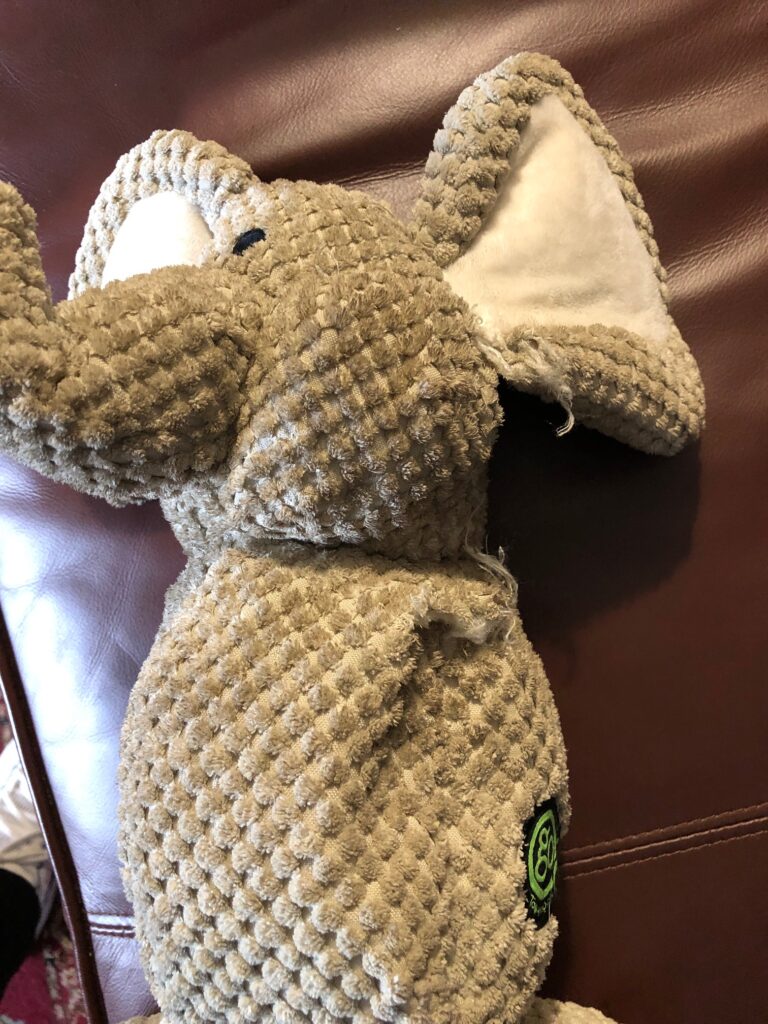
The second toy was one I’ve seen before! The arms are missing completely so the holes needed to be sewn shut. Then there were a few other holes evidently caused by Daisy’s teeth.
This animal just needed the ear reattached and the holes mended. It must be soft in her mouth because it’s well loved.
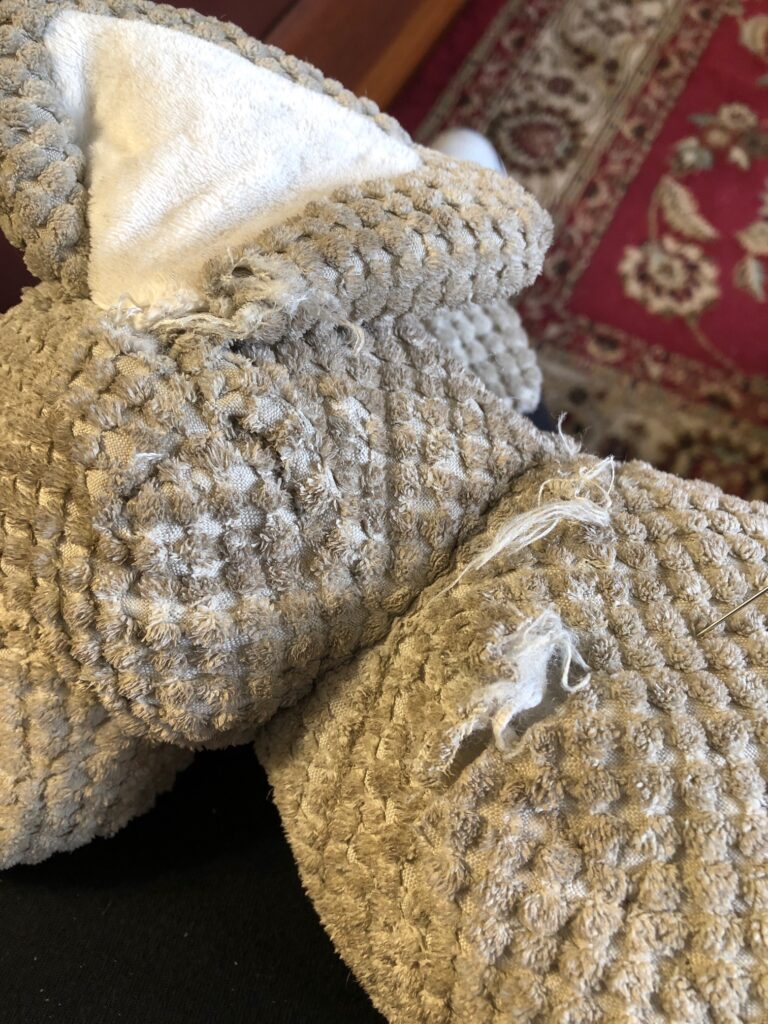
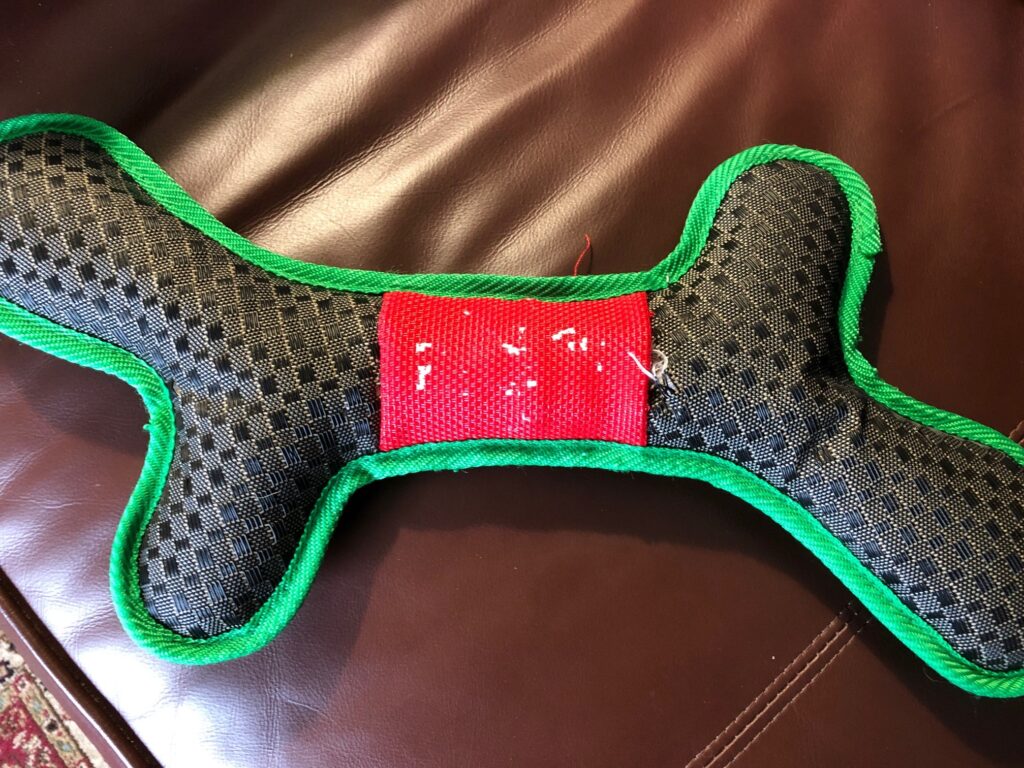
The third toy was a tough bone-shaped toy with an additional stripe of red across the middle. The fabric was like nylon webbing material that is used to make lawn furniture. That one little piece of red must have gotten caught by a tooth and pulled away…shredding some of the webbing material. This toy should also be discarded the next time it needs to be repaired.
When I finished, the toys looked better and they’re ready for Daisy!
Then, while I was watching TV to keep me entertained while sewing, I saw an ad for a new kind of toy for dogs where the ears, arms and legs of a toy were attached with Velcro. They are from Tearrible Instincts. I found them online. They are a new company, https://tearribles.com. I checked them out to see exactly how they attached the arms and legs.
They had 4 different “animals” for sale.
Here was a picture of how they came apart, but I really can’t tell how they attach. A short video is on the website showing how they are put back together…each arm fits into a pocket on the side of the animal, so the arms have to be tucked into the pocket where the matching Velcro piece is attached.
I ordered two of the toys and maybe I can figure out how to make them myself before I give them to Daisy for Christmas! Enjoy!
Of course…two seconds after I figured out how to put the PDF into the WordPress Media Library, I realized I had #195 mislabeled!! Geez! The correct hot link for Entry #195 is https://marykisner.com/blog-update-september-5-2022/ Feel free to correct it in the list. It will be fixed when I upload the next revision to the Media Library. I guess this is what “lifelong learner” means! Enjoy!
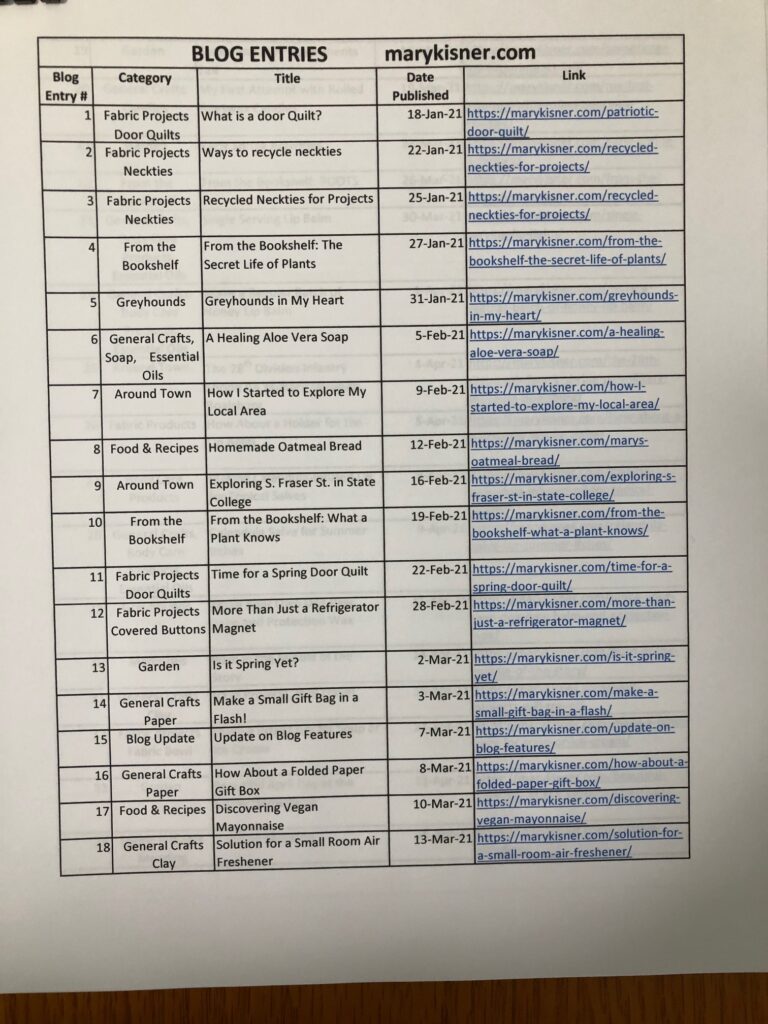
I just wanted to share this PDF with you. It is a list of all my blog entries from #1 to #195. Each entry in the list has a hot link in the right column so you can click on it and go directly to the entry.
I’m aware that WordPress has another way to create an index to entries, but I’ve never figured out how to that. If I wanted to go back over each entry and create a list of key words or tags, I think the computer would create an index but now that I have 195 entries it seems like a formidable task to go back and do that! I created this PDF along the way for myself so I could easily find a specific article. Now, I’m discovering other folks want a copy too.
So while I’m trying join the 21st century in blogging, this is a lower tech way to index my articles.
I will provide the link to the PDF document below and if you would like to have it, just save it to your computer. After you scroll down the list, if you see something you are interested in, just go to the right-hand column and click on the hot link. If you have any problems, it might be a typing error on my part so let me know if one doesn’t work for you. Just email me any problems at marykisner@comcast.net.