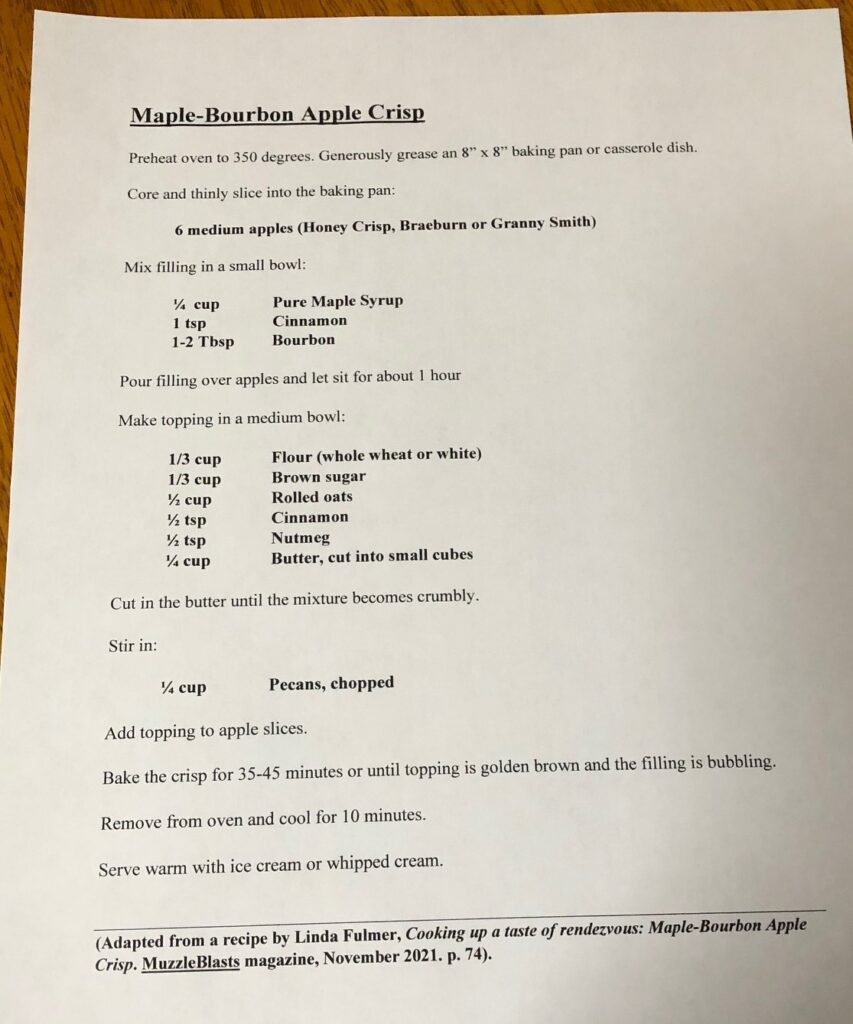
A few weeks ago Bert found this recipe in a magazine he receives, MuzzleBlasts, that is all about Muzzle-loading rifles and events. The magazine even has a recipe and a monthly quilt block article with instructions for the rest of the family. Of course, we like apple crisp, but I guess the maple flavor and bourbon ingredients sounded interesting. We bought apples and then got busy with other projects. The apples were shifted around on the counter for a few weeks while other activities took our time (like cookies)!
I finally decided it was time to make this recipe before the apples spoiled. You can see from the photo below that trying to follow the recipe with all the background pictures was difficult. I retyped the recipe into the format I prefer and that follows the magazine picture.
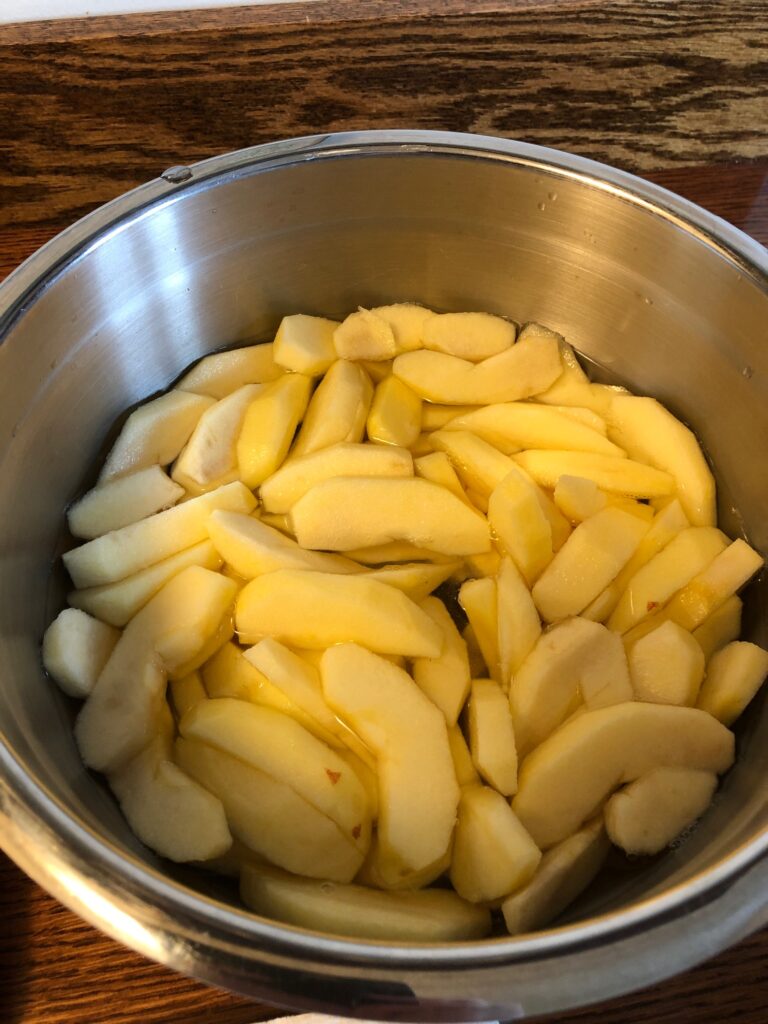
The recipe was not too hard to follow. Bert didn’t have any bourbon around so he substituted whisky. The hardest part was cutting up the apples!
I put the apples in cold water to keep them from turning brown until I got them all cut up.
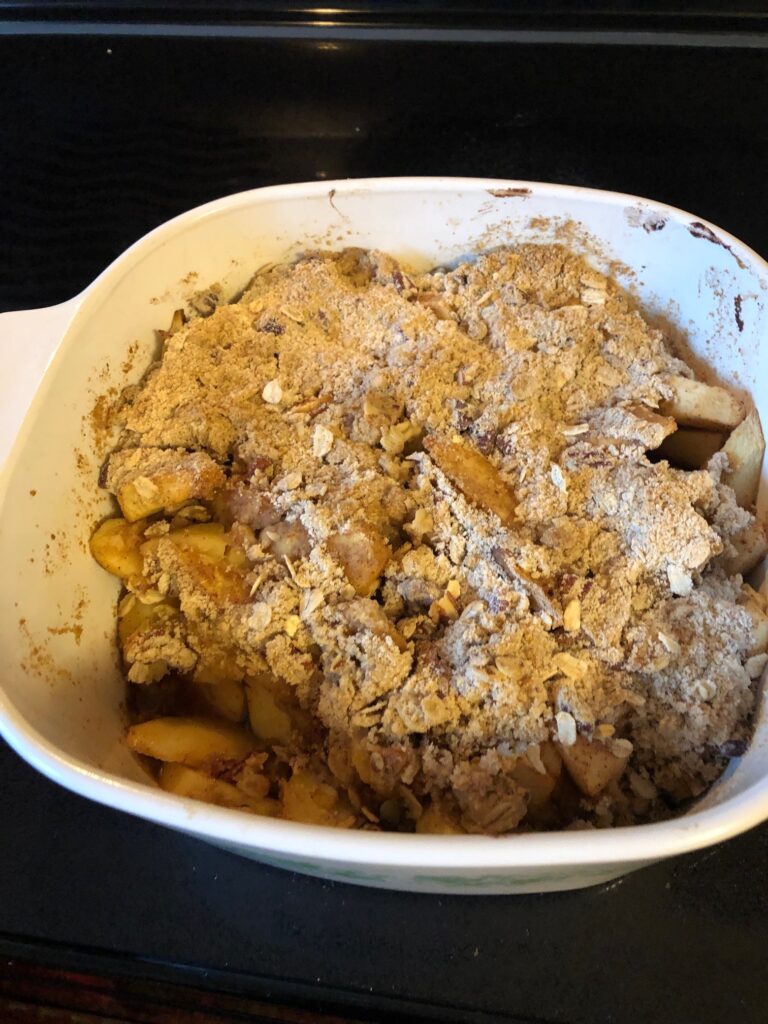
This large casserole dish worked well. It was deep enough that if it bubbled up it wouldn’t spill over the top. Of course, we had a taste before I could even get a picture!
Not bad! Next time I would skip the bourbon or whisky, but the maple syrup added lots of flavor. Pretty quick and easy…except for the time to cup up the apples. Give the recipe a try! Enjoy!
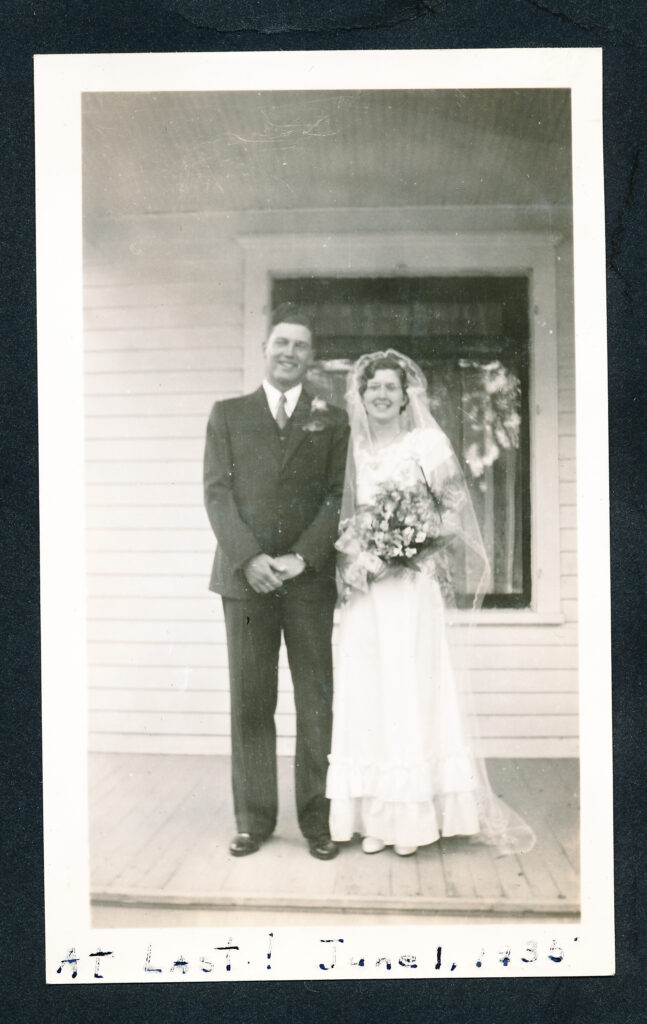
Today would have been my Dad’s 108th birthday. He passed away in 2012, just a week shy of his 99th birthday. He grew up on a farm in Minnesota, the oldest with 4 younger sisters. He always yearned to see the world. As a child, he thought being a “diplomat” would be the most exciting career. As a lifetime educator, his yearning led him to opportunities to explore the world. He married my Mother in 1935 and headed off to college in St. Cloud, Minnesota.
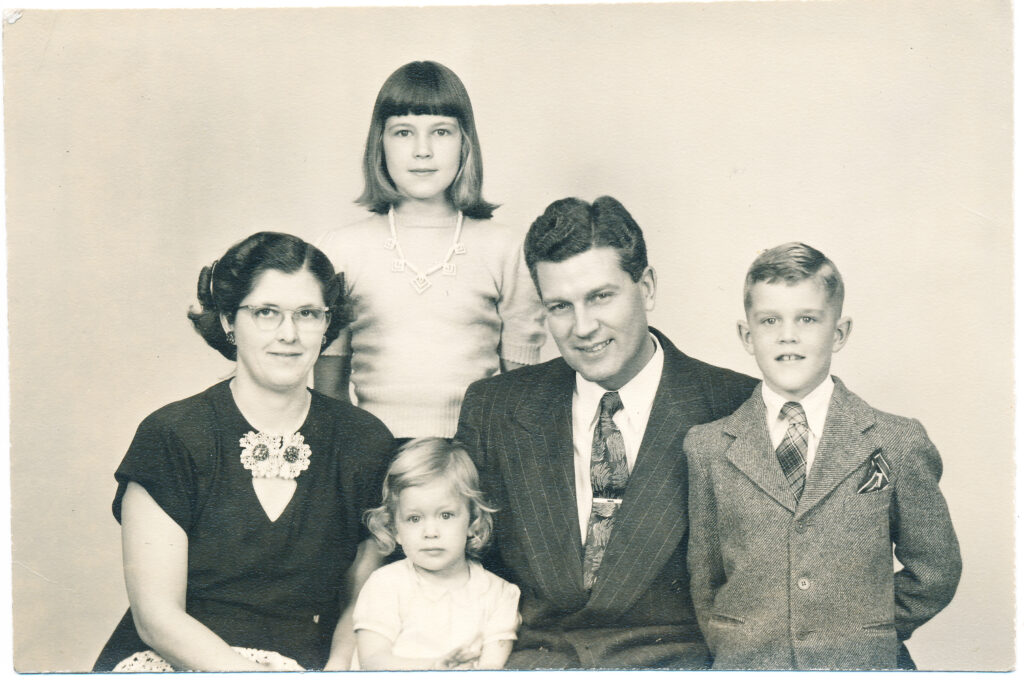
From there he continued his education in New York at Columbia University. By the time I was born (1946) he was ready to continue his career in Higher Education at Penn State University.
About 1949.About 1952.
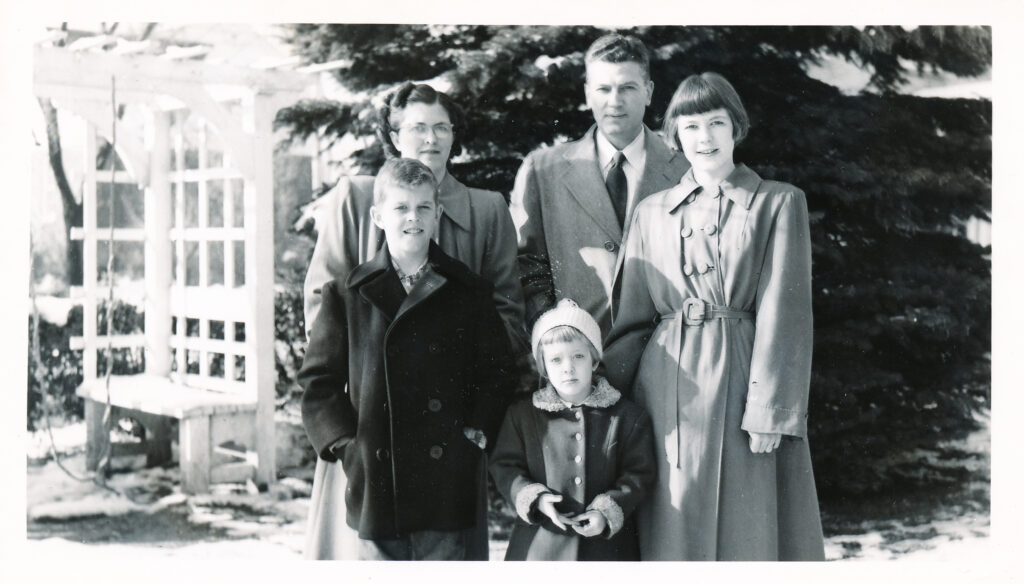
We spent 1955-56 in the Philippines, while Dad taught at the University of the Philippines. He was enjoying the challenges of international travel and education, while Jean, Mark and I experienced normal life appropriate to our age levels. Jean had just graduated from high school and was learning about native Philippine music and dance; Mark was a sophomore in high school and experiencing high school life in another culture; I was in 4th grade and trying to figure out how to fit in in elementary school. Mom was just trying to hold us all together! We each had our challenges!
About 1956.
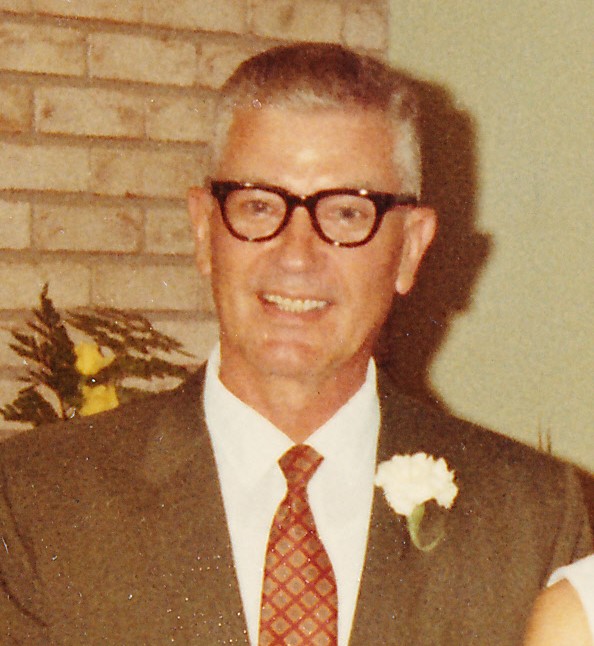
Here is a picture of my Dad in 1968 when Bert and I got married (or should I say, celebrated our wedding…ha ha…that had happened in 1967, when we eloped but didn’t tell anyone!). That’s another story!
In 1968.
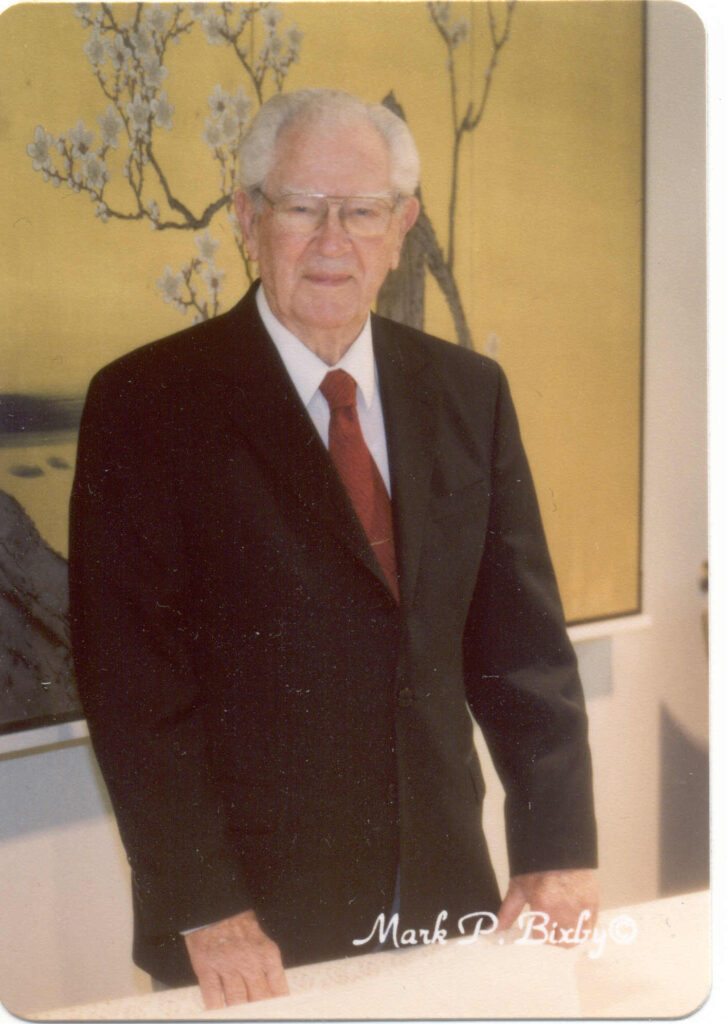
Here is Dad around 2000. He was definitely in “elder statesman” mode and enjoyed living in Foxdale after Mom died. He served on many committees and was acclaimed as a great listener. He stayed actively involved in the development of Foxdale as a mature, continuing care facility.
In 2000.
And finally, as a father of three, grandfather of nine, great grandfather of 17 and great-great grandfather of 4, everyone loved to come visit him, to pick his brain for great stories or share their own life adventures.
After he passed, I was reminded that he wasn’t just my Dad…many people saw him as a “father figure” or as a kindly, interested “grandfather figure.” Each year, this close to Christmas, he’s never far from my thoughts.
If you have a treasured memory you’d like to share, leave a comment or email me directly at marykisner@comcast.net. Thanks.
Yesterday I was ready to try two new lip balm flavors: Maple Coffee and Orange Vanilla. I wanted to do this last weekend, but I had to order the ingredients for the Maple Coffee (of course, from Amazon).
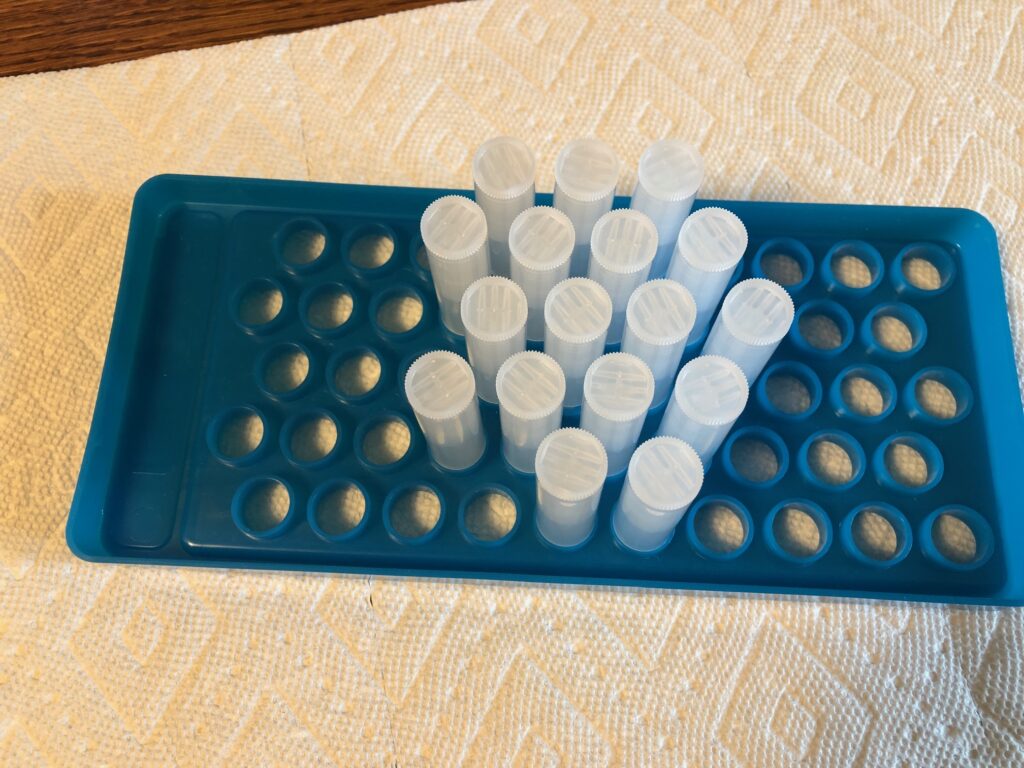
Usually, I insert the empty tubes into this holder and when I stand the holder up, I can pour the hot melted lip balm from the top:
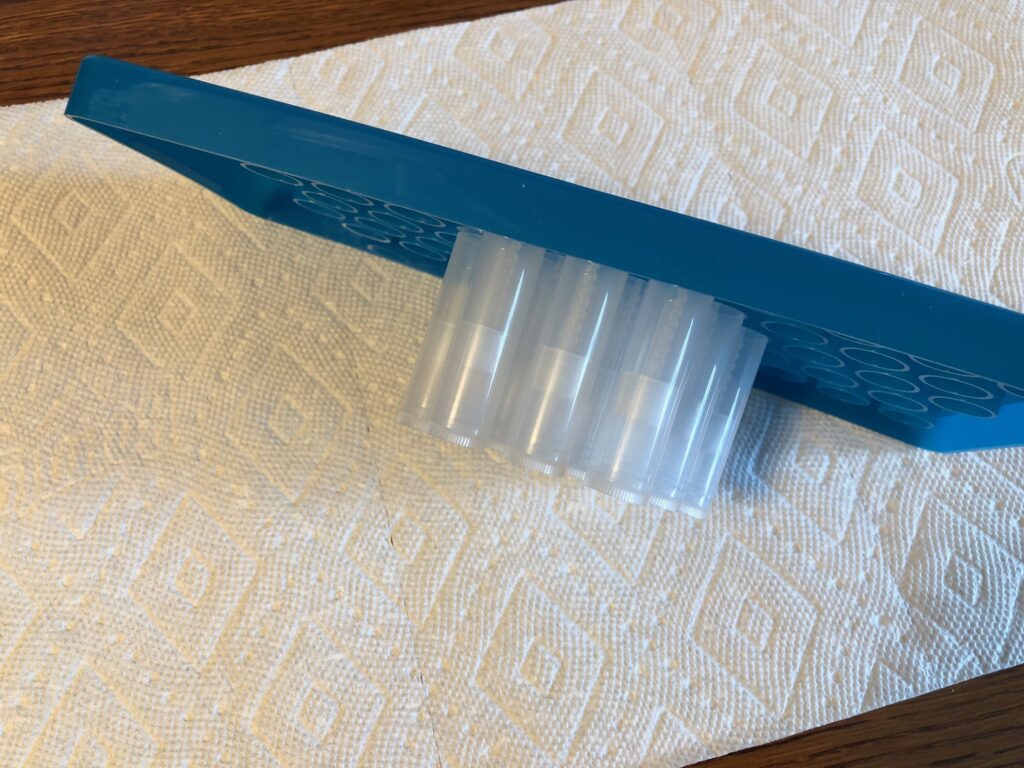
However, the latest batch of holders were from a different company and they fell right out before I could flip the holder over. On to plan B!
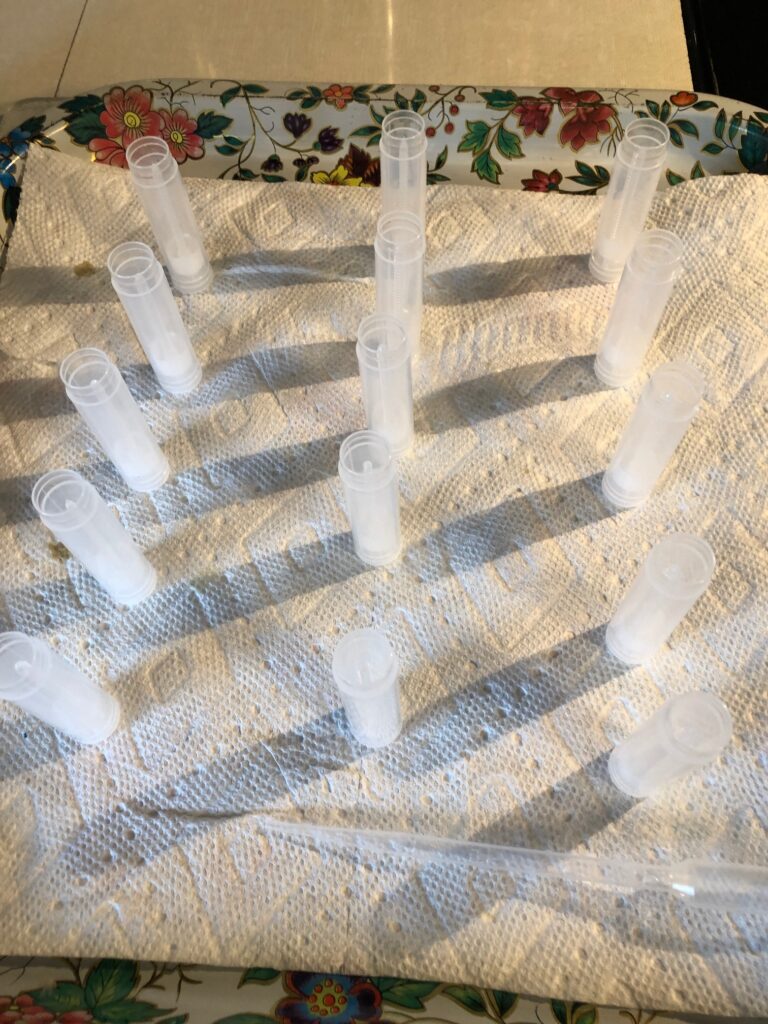
I had to change how I filled the tubes. I decided to line the tubes up on a paper towel and fill them with a disposable pipette. I had to be really careful to not bump the tubes as I filled them so they wouldn’t fall over:
It took longer to fill each tube but luckily I didn’t tip any of them over filled with hot stuff.
Now…on to the recipes!
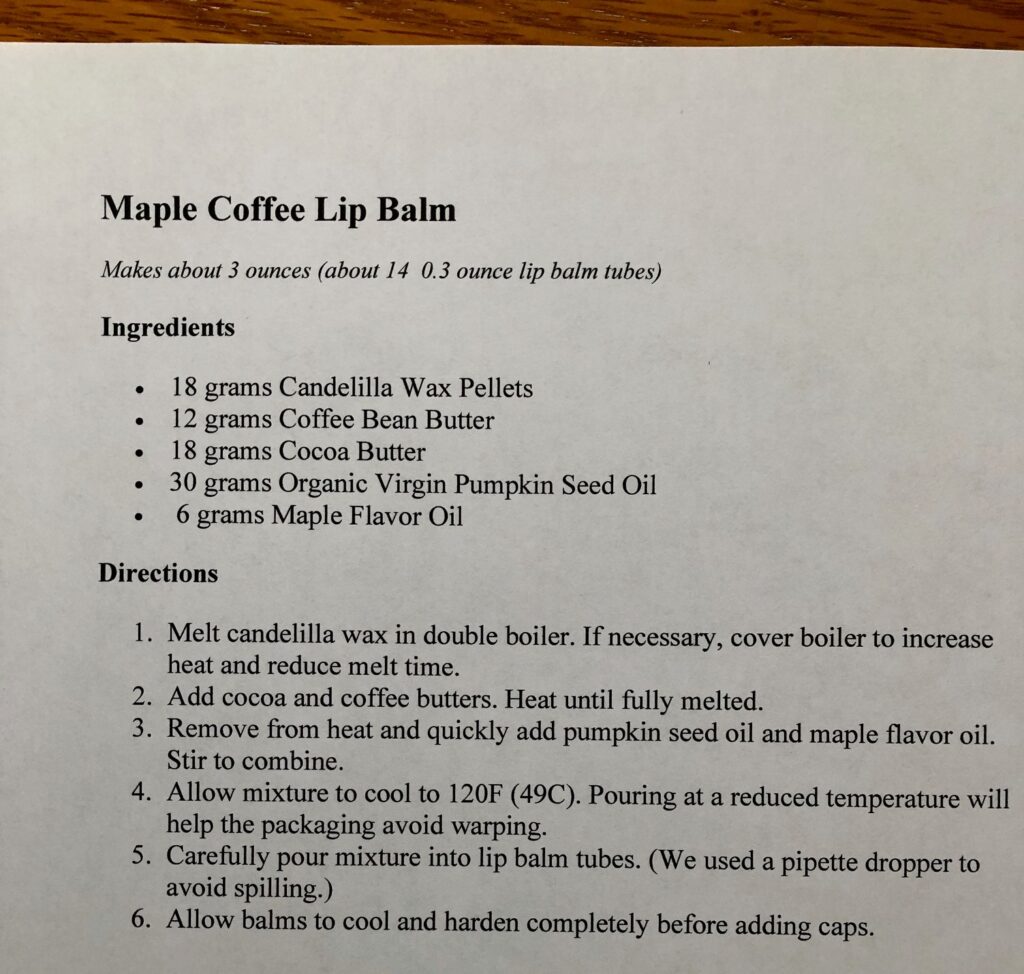
Maple Coffee Lip Balm
First, I made the Maple Coffee Lip Balm. Here is the recipe:
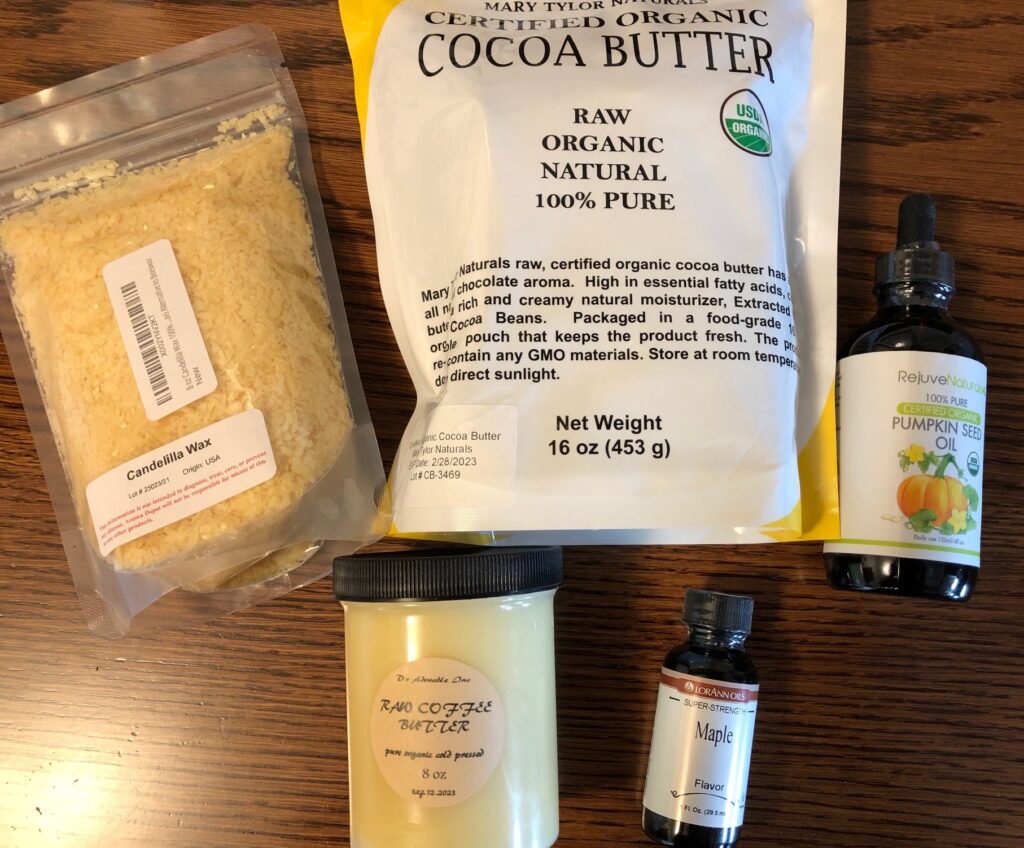
Here are the ingredients:
The Candelilla Wax has a higher melting point than beeswax and is similar to Carnauba Wax. I should be able to use it in other products. I can use the Maple flavoring in soap or cooking. I will have to research how Pumpkin Seed oil and Coffee Bean Butter can be used. Since I don’t care for the smell or taste of coffee, the coffee butter will probably be used only in lip balm for others! I’ll have a few coffee lovers test the lip balm for me!
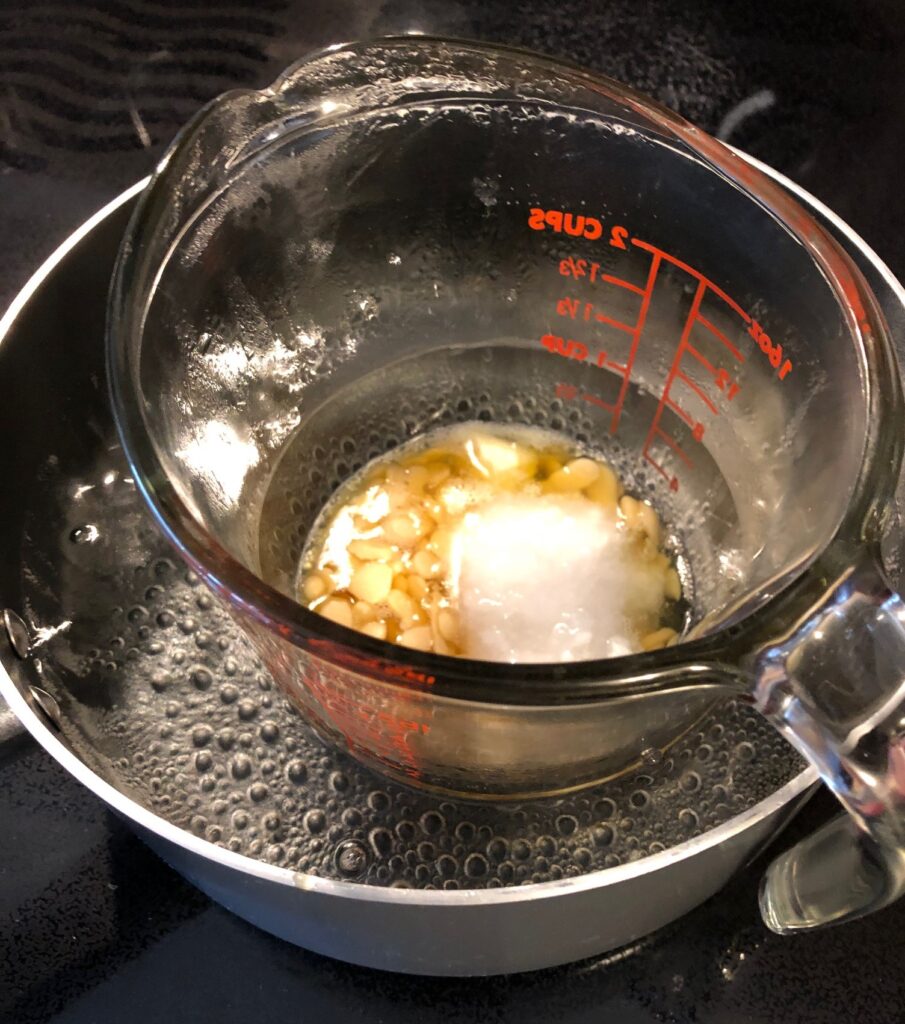
Following the recipe, I melted down the wax, cocoa butter and coffee butter; then I added the pumpkin seed oil and maple flavoring.
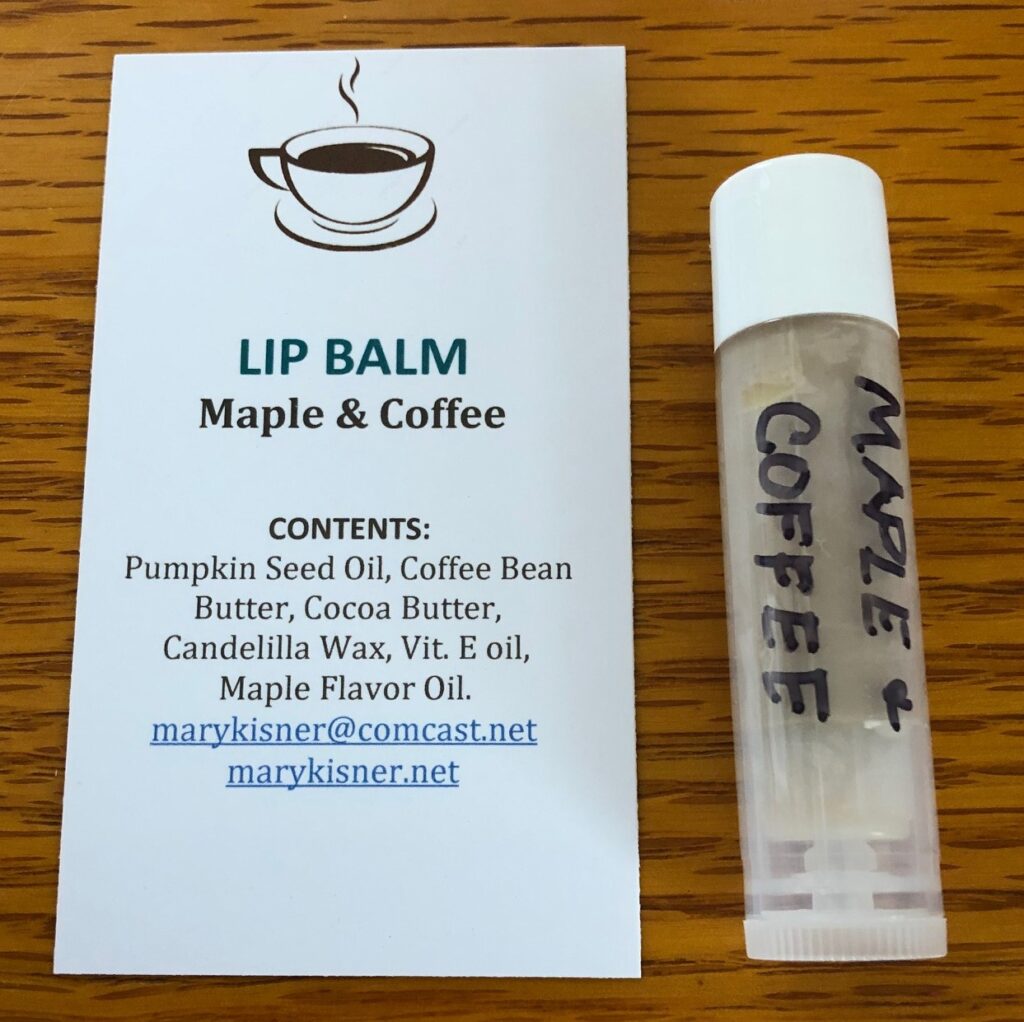
This lip balm turned out darker (like coffee!) but I think it was the Pumpkin Seed oil that did that.
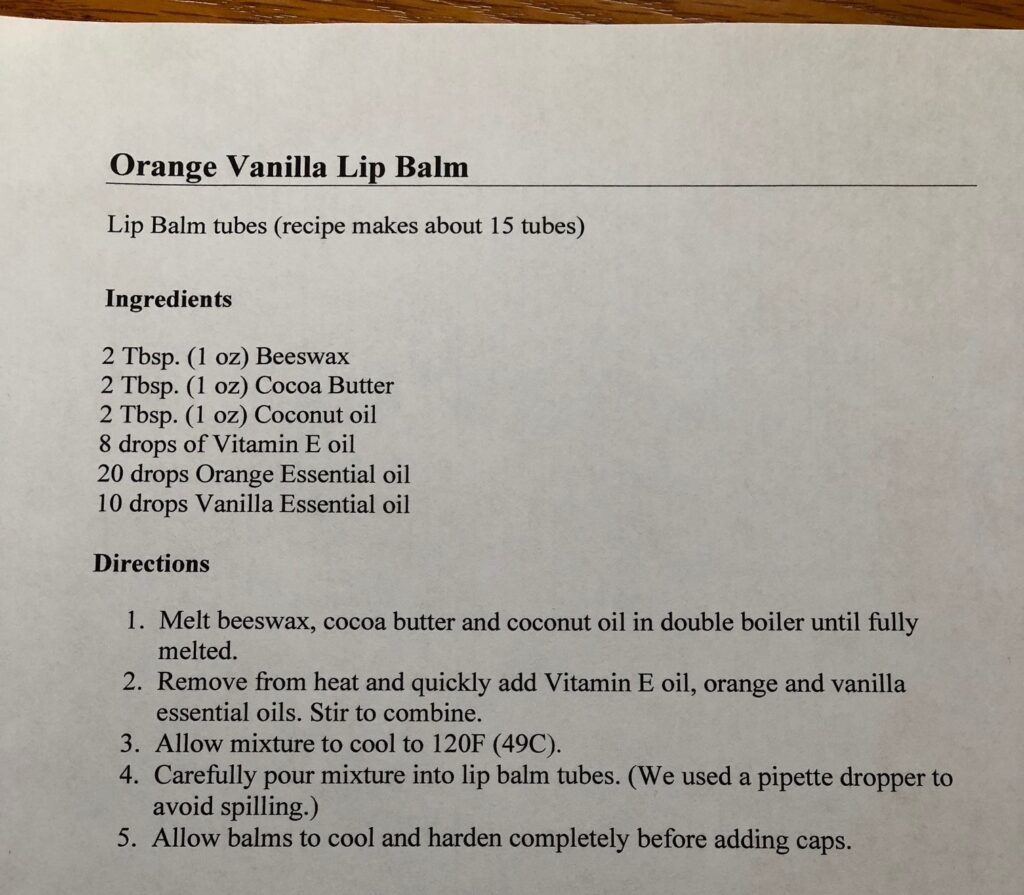
Orange and Vanilla Lip Balm
Here is the recipe:
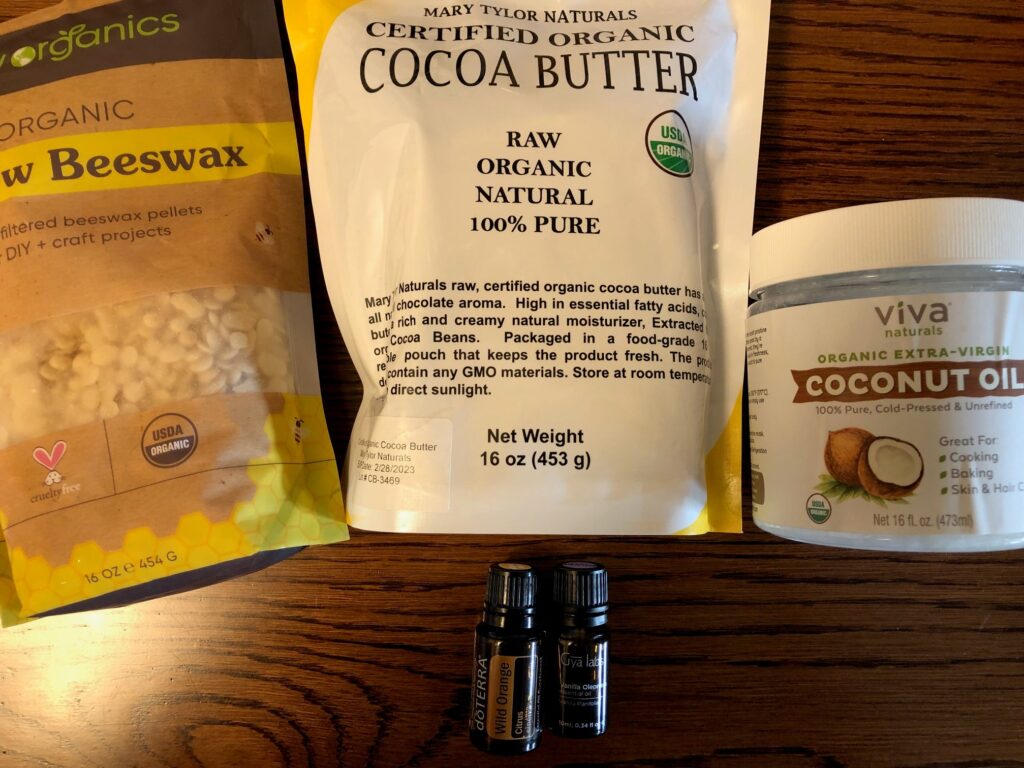
Here are the ingredients:
Following the same procedure as above, I melted down the wax, cocoa butter and coconut oil, added the orange and vanilla essential oils and carefully filled the tubes with the pipette.
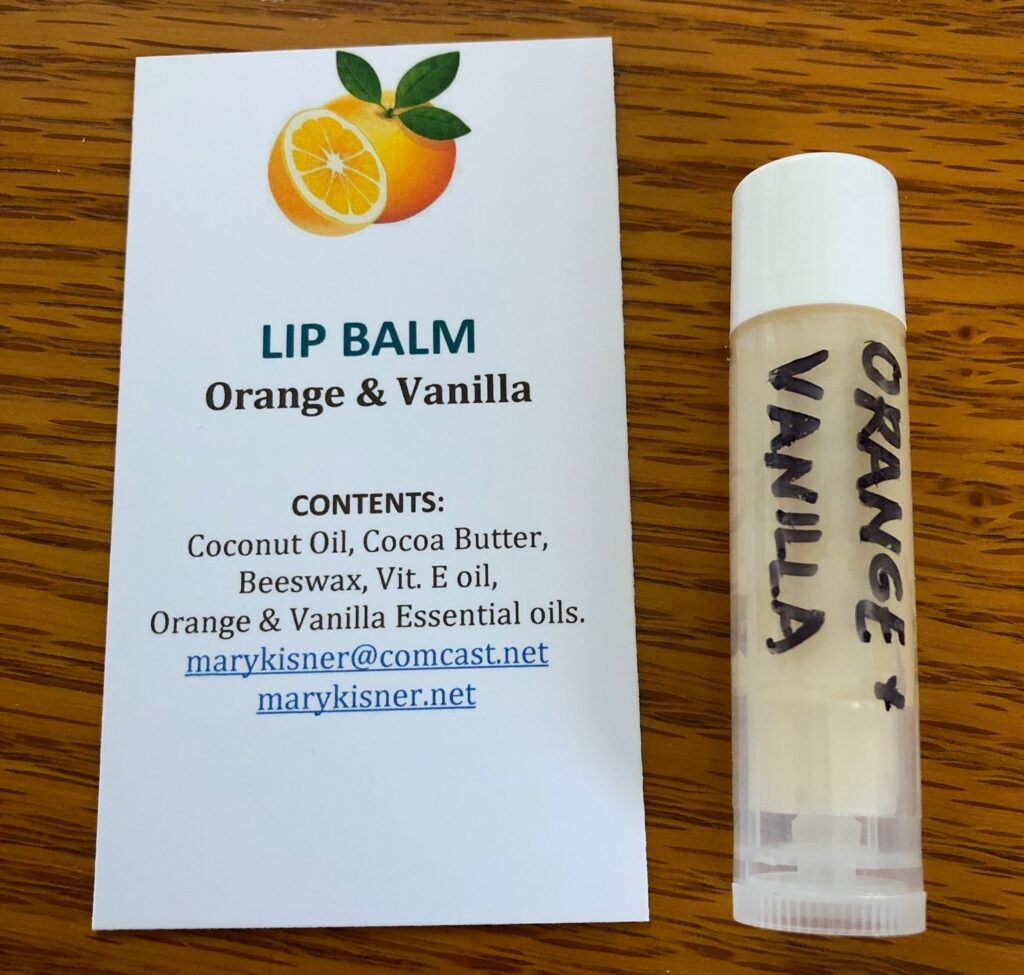
They turned out great!
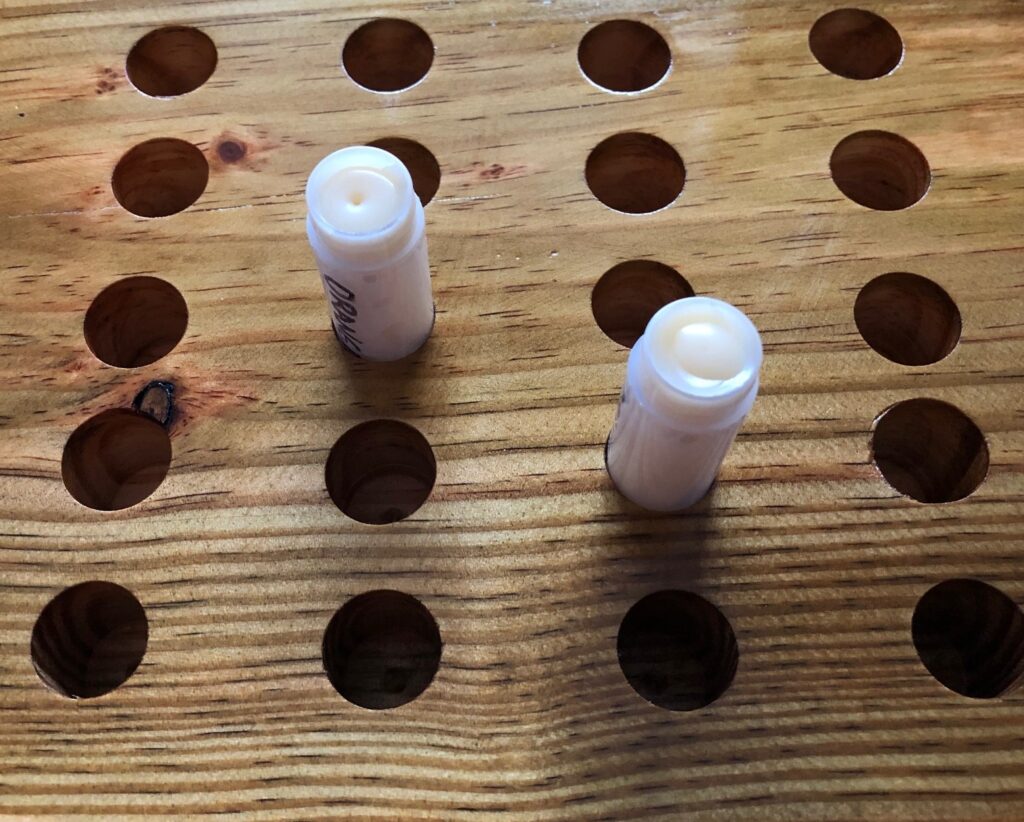
Bert’s Invention
Bert watched me filling the tubes and said he had an idea. I sent him out to the shop with an empty tube to make me some kind of holder for the next time. This morning he presented me with this great holder!
The tubes just fit and I can do two batches without knocking anything over! I did have to order some more disposable pipettes, but YEA! Next time, I’ll enjoy using Bert’s cool tool to hold the tubes! Enjoy!
For as long as I’ve known Bert (58 years to be exact!) even before we were married, he has made chocolate chip cookies. He started baking with his Mother using the recipe for Toll House Cookies on the back of the chocolate chips bag. He would usually end the baking with one very large cookie the size of a pizza pan! Over the years, the number of ingredients has expanded along with the actual volume of cookies. At the beginning the cookies were just for family. Now, he mails 10-12 boxes around the country to family and friends that have moved away. Of course, some local friends and family benefit from his obsession with chocolate chip cookies too. I get to benefit with how wonderful the kitchen smells while he’s baking! (With my allergies to eggs and dairy I haven’t tasted them for several years!)
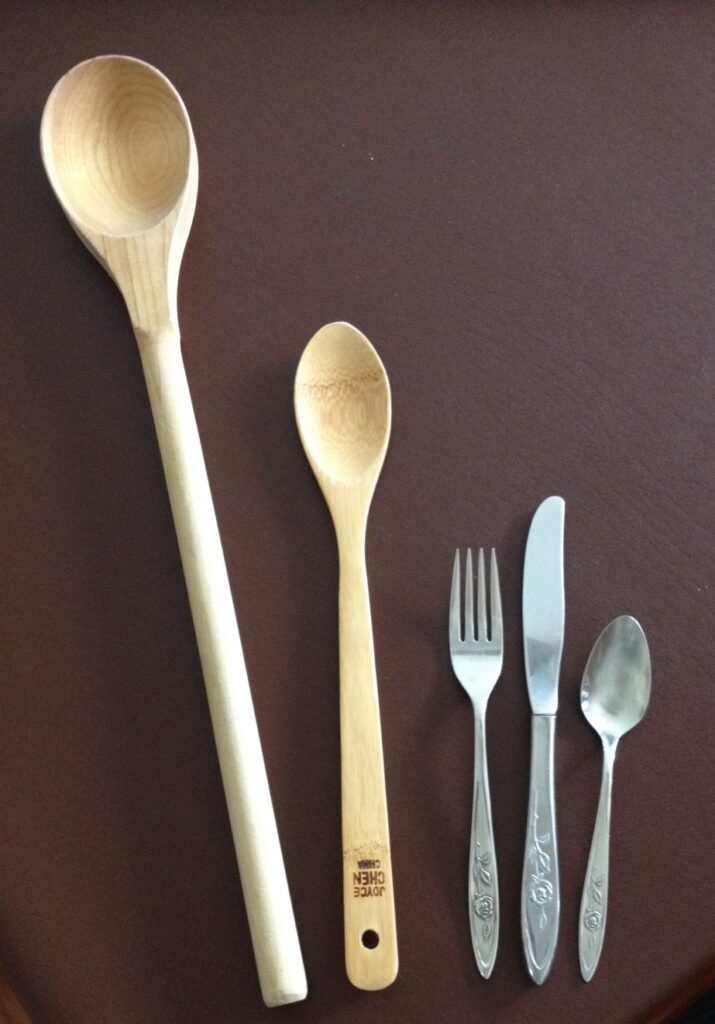
When he first started baking, he mixed everything by hand with a very large wooden spoon. Here it is next to a regular wooden spoon and silverware.
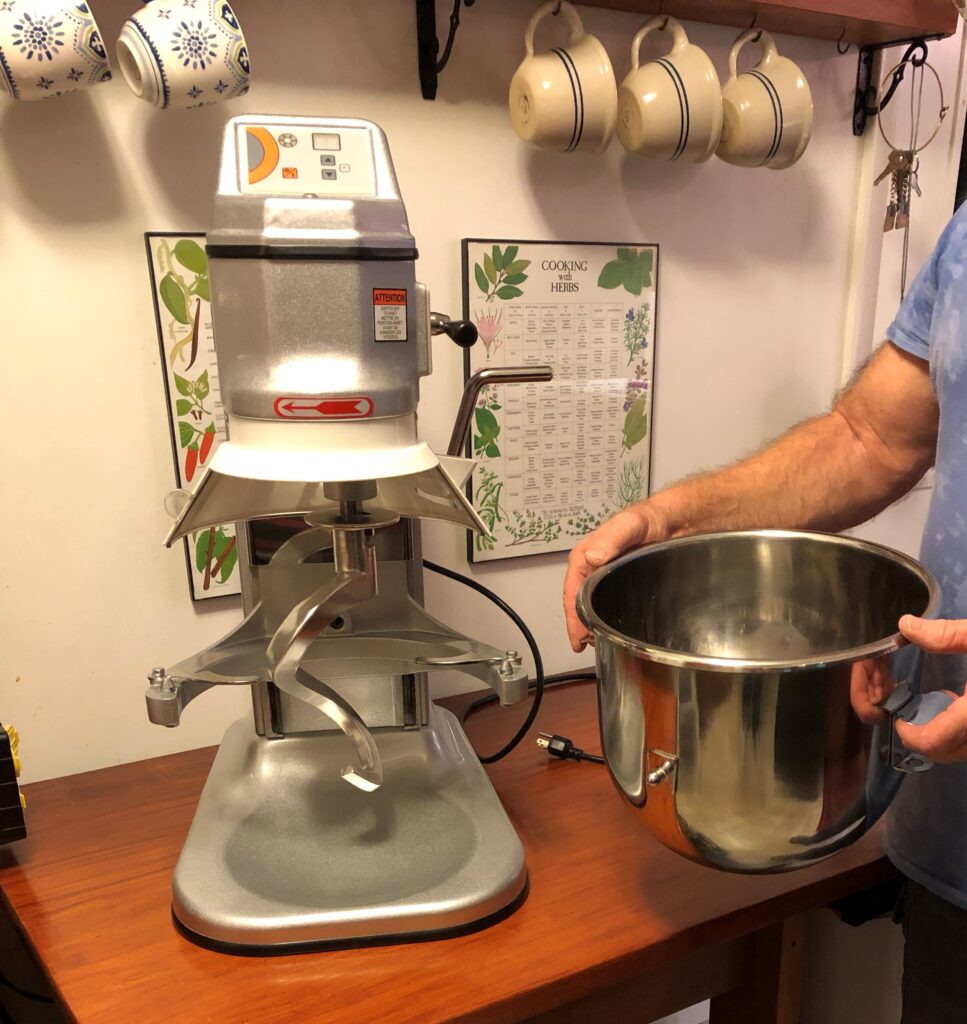
Several years ago, he invested in a large commercial mixer that makes the job much easier.
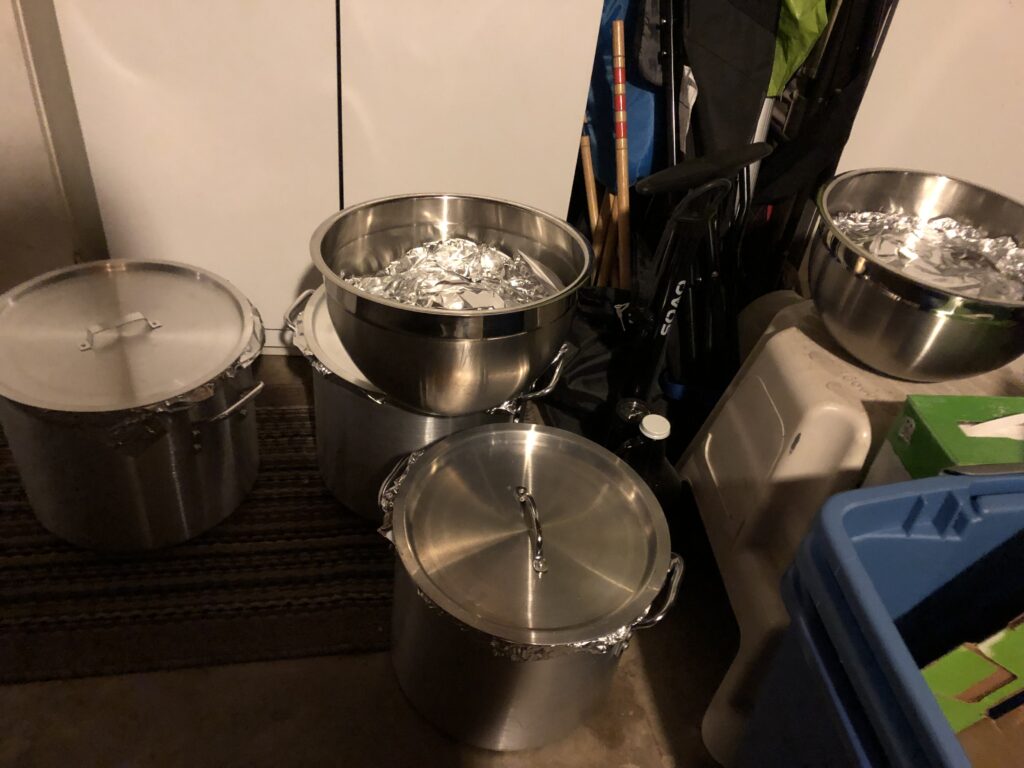
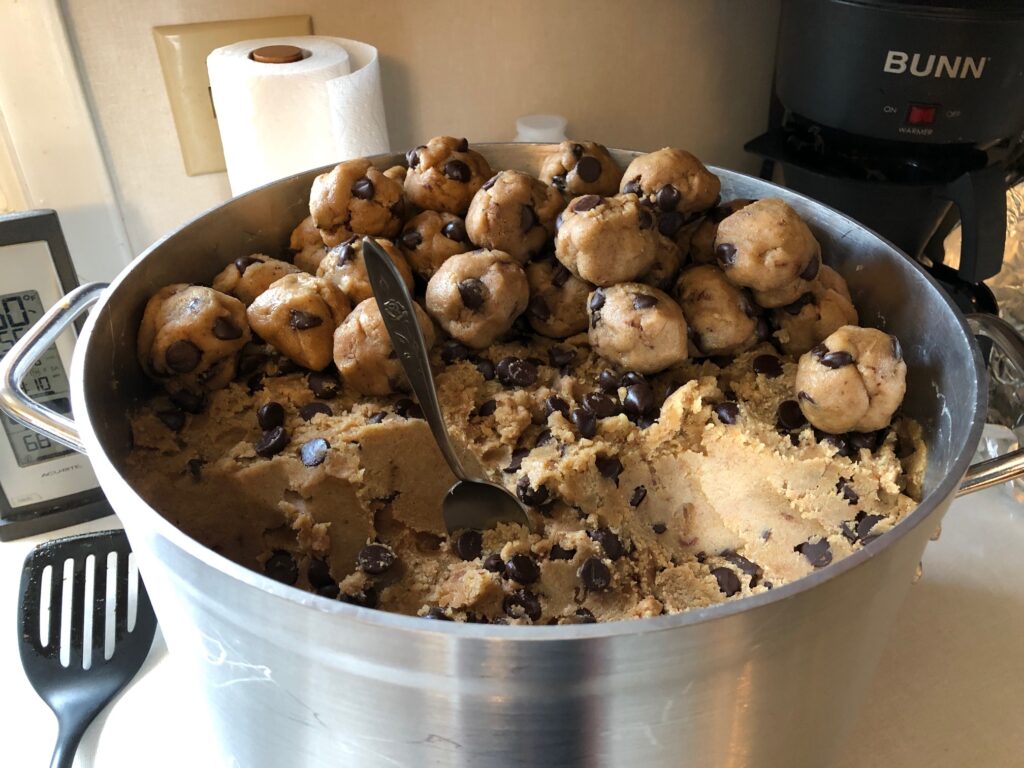
He mixes up all the dough in one day and stores it in the garage in giant stock pots and bowls.
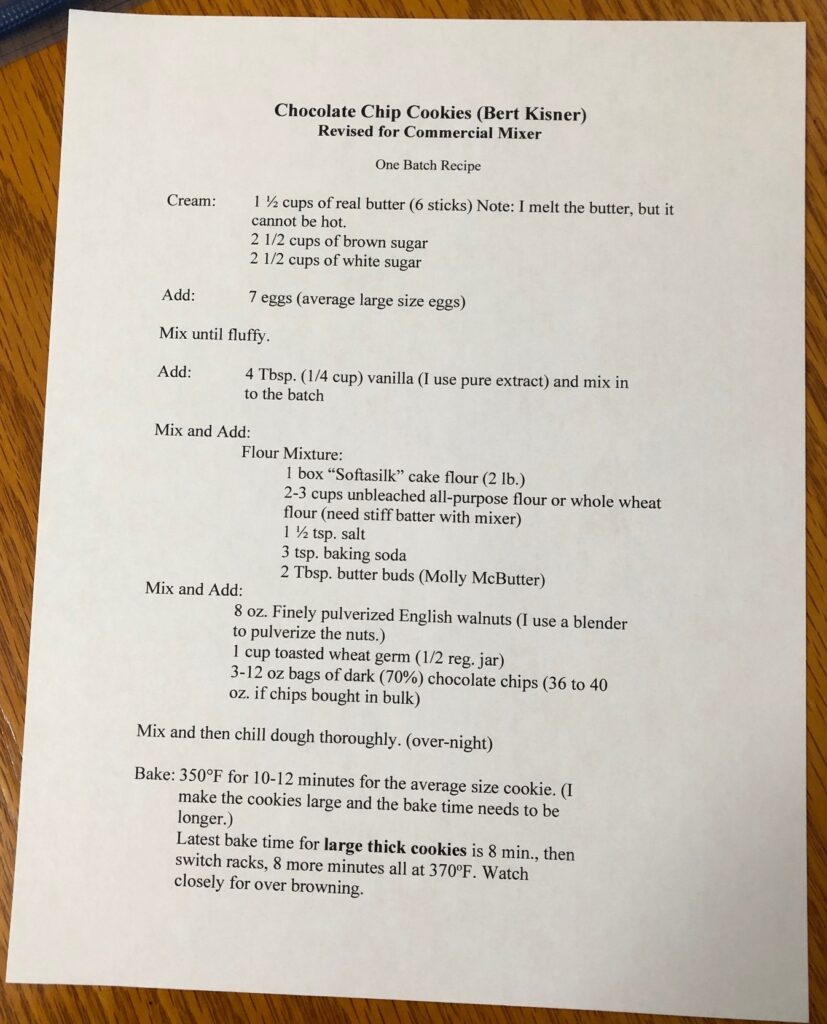
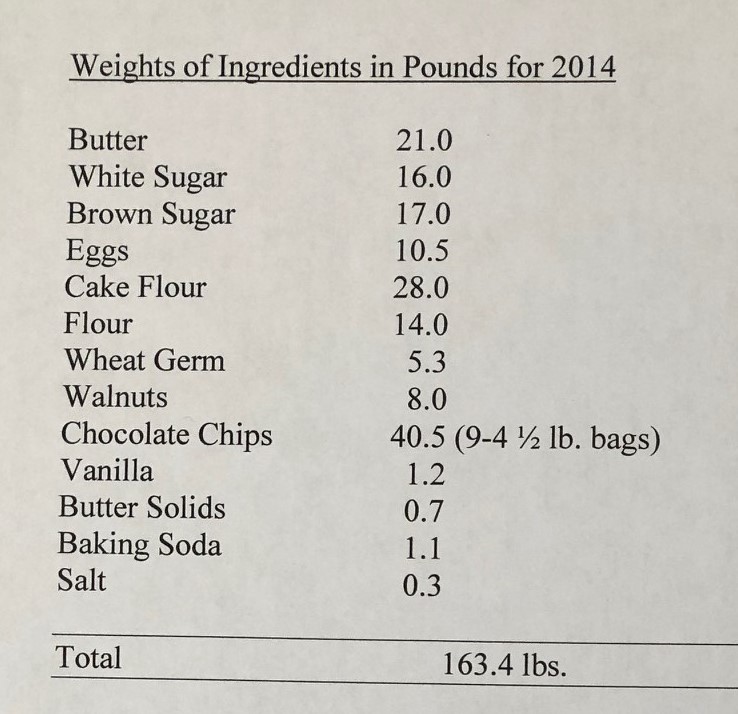
His recipe is impressive and the ingredient list is no longer being tweaked. This year he was unable to get Soft-as-Silk cake flour, so he got a different brand. He noticed the difference!
Here is the recipe. I think he made 10 batches in one day! Crazy, I know!
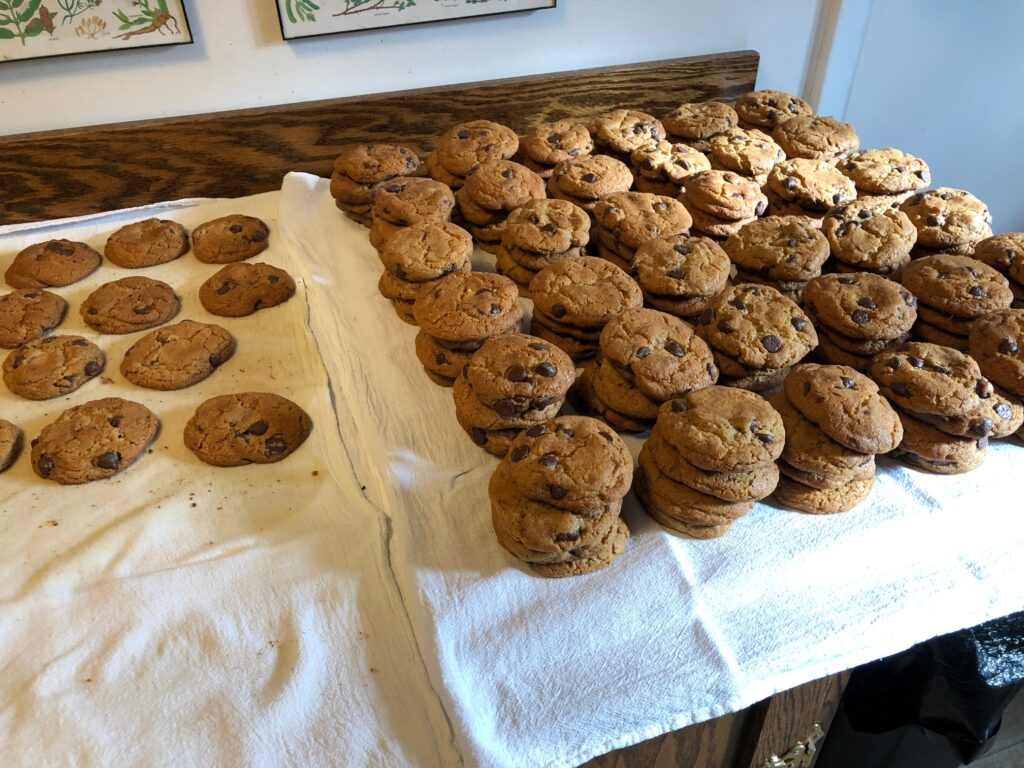
I just found his tally from 2014 that figured out the total ingredients in pounds. He said this year he made about 170 pounds of dough, which will make about 120-130 dozen large cookies!
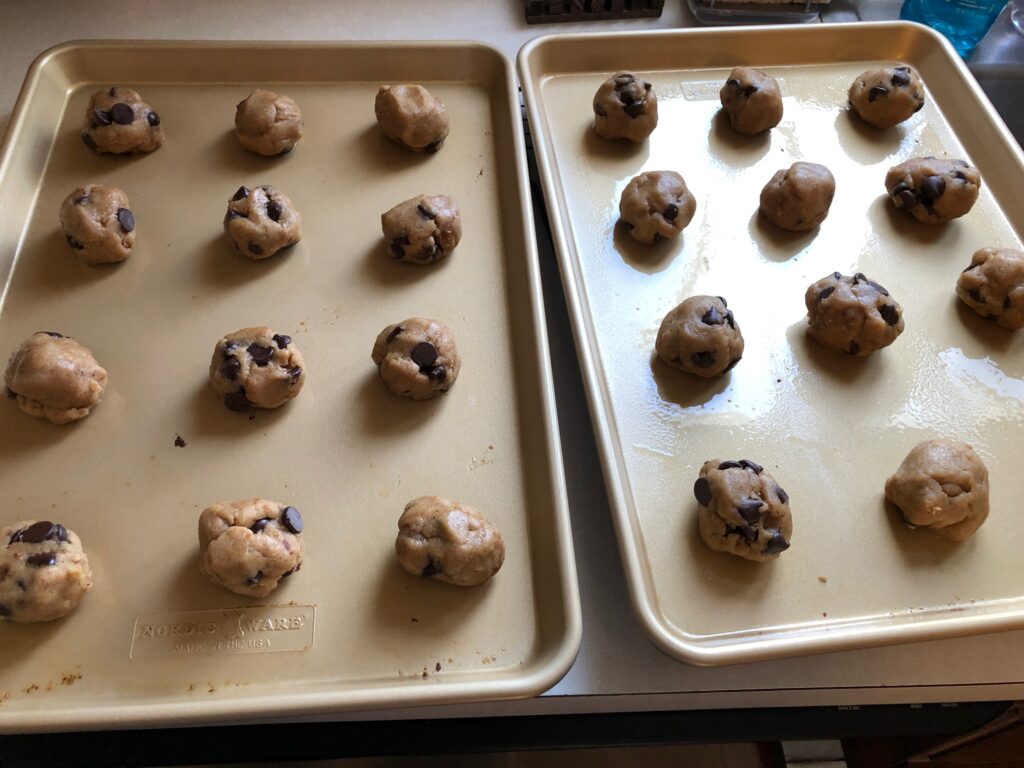
And so the marathon begins:
So, the question is…do I bother making cookies at Christmas? Absolutely not! I may, however, make a batch of oatmeal bread in the big mixer when it’s sitting right here in my kitchen!
Yesterday I attended an Open House at the Boalsburg Heritage Museum. This is truly a hidden treasure in our small community. I’ve known about it for years but had not managed to make the time to explore the building and grounds.
At least 40 years ago, when I was teaching elementary school in Boalsburg, one of my colleagues was actively involved in helping her young classes learn about the history of the local area. These youngest students would learn to read using stories about the “olden days” in Boalsburg. She was instrumental in developing curriculum materials and organizing field trips to see the artifacts to learn how folks lived in the Boalsburg area back in the late 1800’s. Ruth Corter’s advocacy stimulated community interest in collecting and preserving tools, household items and stories in a museum that could be enjoyed by all residents of the area. Her work inspired us all!
In 1983, the Sarah Sweet house was purchased by Mr. and Mrs. Thomas Aikens who presented the property to the newly formed Museum Association as a gift. The property of the Sarah Sweet House, currently the site of the Boalsburg Heritage Museum includes the house itself along with the Light House, the 2008 rebuild of the Bank Barn, and the Summer Kitchen. You can read more details about how the house and property became the Boalsburg Heritage Museum as their website, https://boalsburgheritagemuseum.org.
I’d like to share a few special displays that I found in my exploration of the museum.
How wonderful to see this tribute to Ruth Corter (1907-1997) presented in 1996:
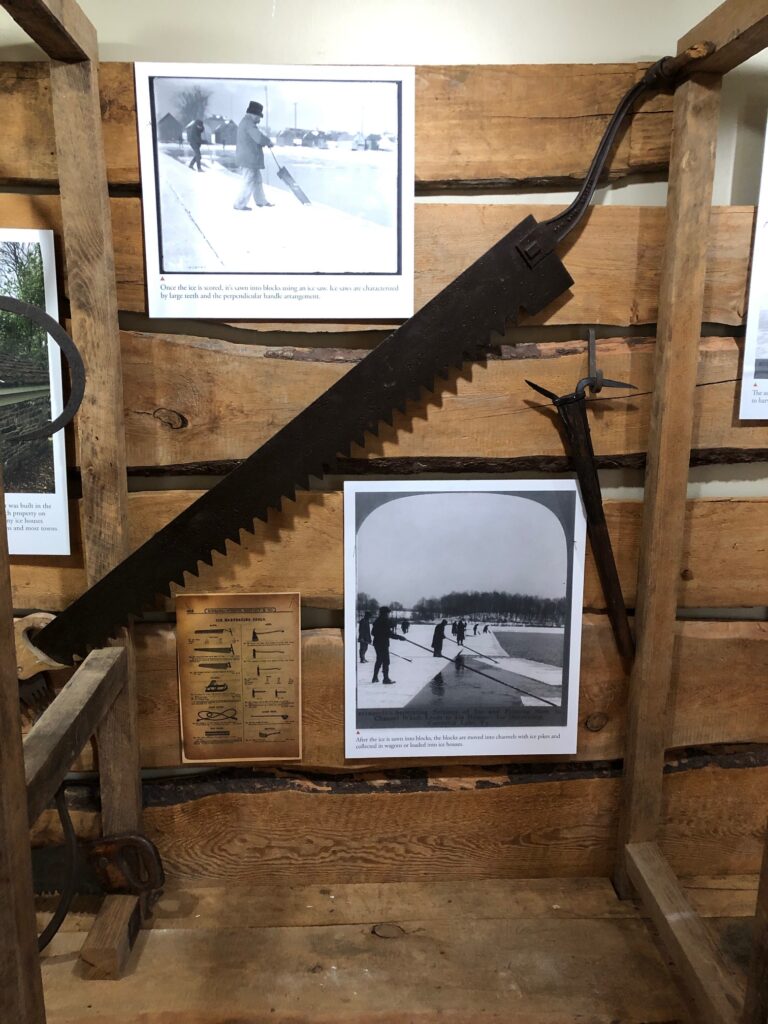
The first room in the Museum had information about how ice was collected and stored before electric refrigerators were common. The displays about the process and the giant tools used to cut and collect the ice were very interesting.
I love the display of the ice box with instructions to the housewife:
Many musical instruments were showcased, from brass instruments from the Boalsburg Brass Band (around 1861-1865) to the Parlor organ:
Who knew Dr. Richard Ishler (our family doctor) and his wife donated this Parlor organ!
One of the upstairs bedrooms was set up as a one-room school. I found this interesting, since both of my parents and my grandfather taught in one-room schools. Mother shared many stories about being a “city-girl” trying to adapt to a “rural school” setting, with keeping the stove fire going and handling all the grades in one room. Some of her students were bigger than she was!
And of course, what child in 1900 wouldn’t want to play with this doll house!
I took the time to see the “Summer Kitchen” in a separate outbuilding near the back of the house. I could imagine all the bread and stews that were cooked in that kitchen!
On a nice day this summer, I’ll explore more of the outbuildings. For this tour, the drizzling cold rain limited my tromping around.
Please check the Museum’s website for more information. They are an integral part of our yearly Memorial Day activities and offer a wonderful look into our past.
I recently bought an air freshener for my car at the drug store counter. It clipped onto the vent on the dash. I lasted about 3 minutes before I threw it out…the scent was so strong and sickening I couldn’t stand it. It seemed like a good idea at the time!
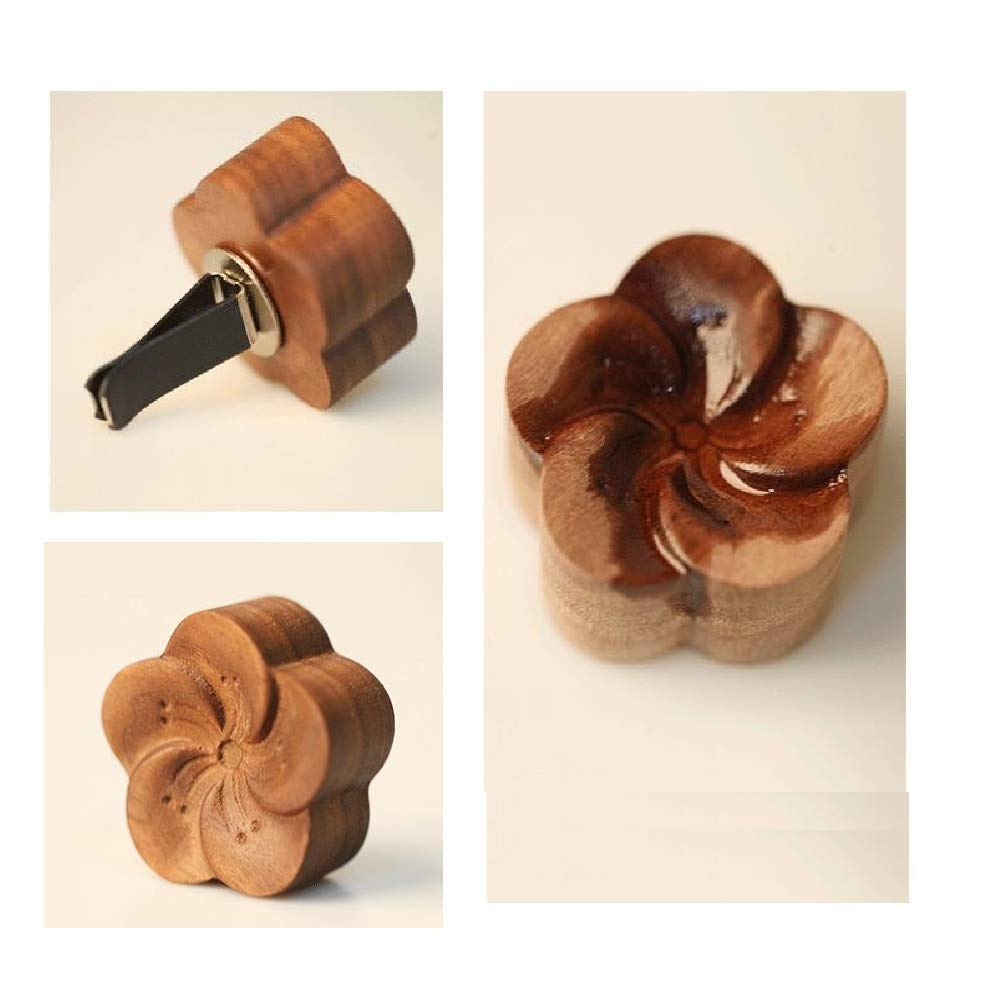
Then I saw an Ad online that showed some air fresheners made of a simple chunk of wood with a clip attached. You were supposed to add drops of your own preferred essential or fragrance oil. At least I could choose the scent!
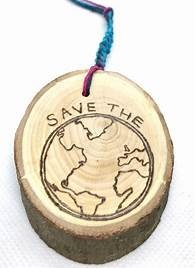
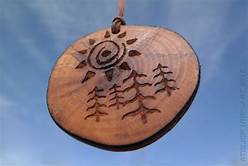
I found some samples online by just typing in “wood air freshener for the car.” There were interesting shapes like flowers with a clip on the back, or slices of a tree branch meant to hang on the mirror.
I wasn’t sure the oils would soak in properly and then provide a nice smell in the car without being overpowering.
With Bert’s help, and a bag full of wood scraps that he uses for all kinds of little projects, we gave it a try.
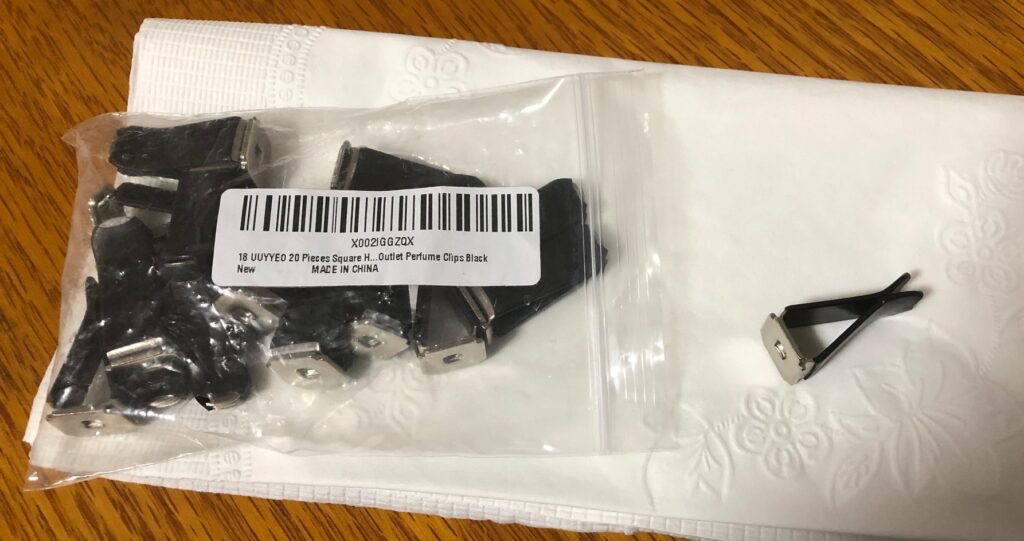
First, I ordered the clips from Amazon…they were called “Square Head Car Air Vent Clips.” A bag of 20 clips were $6.99.
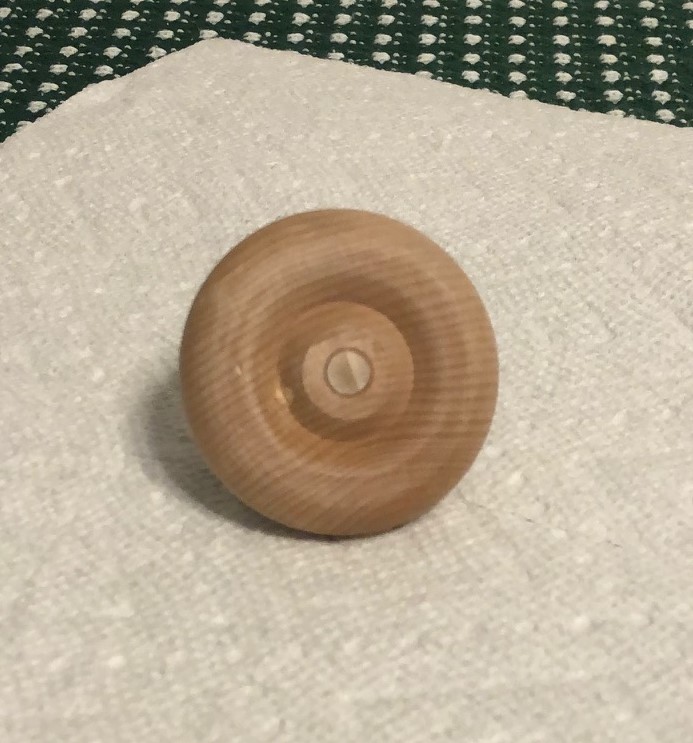
They were a very tight clip. Next challenge…finding some chunks of wood. Bert came in with some round, fairly flat, disks to see if they might work. The groove around the center could capture the oil until it soaked in.
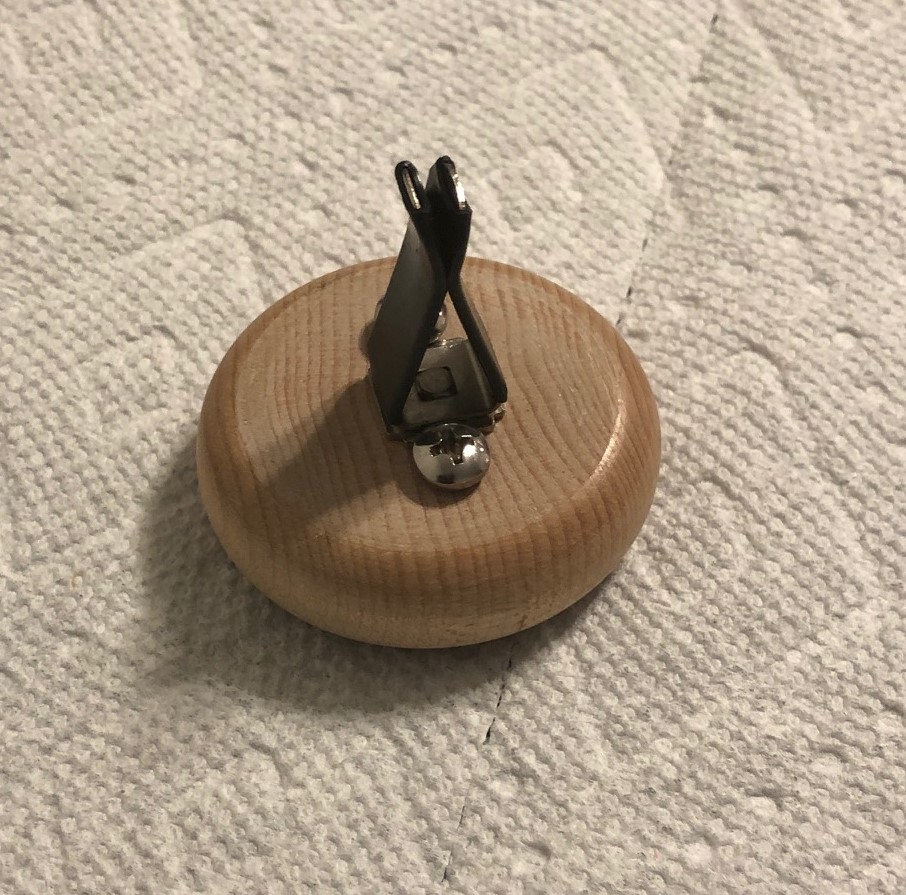
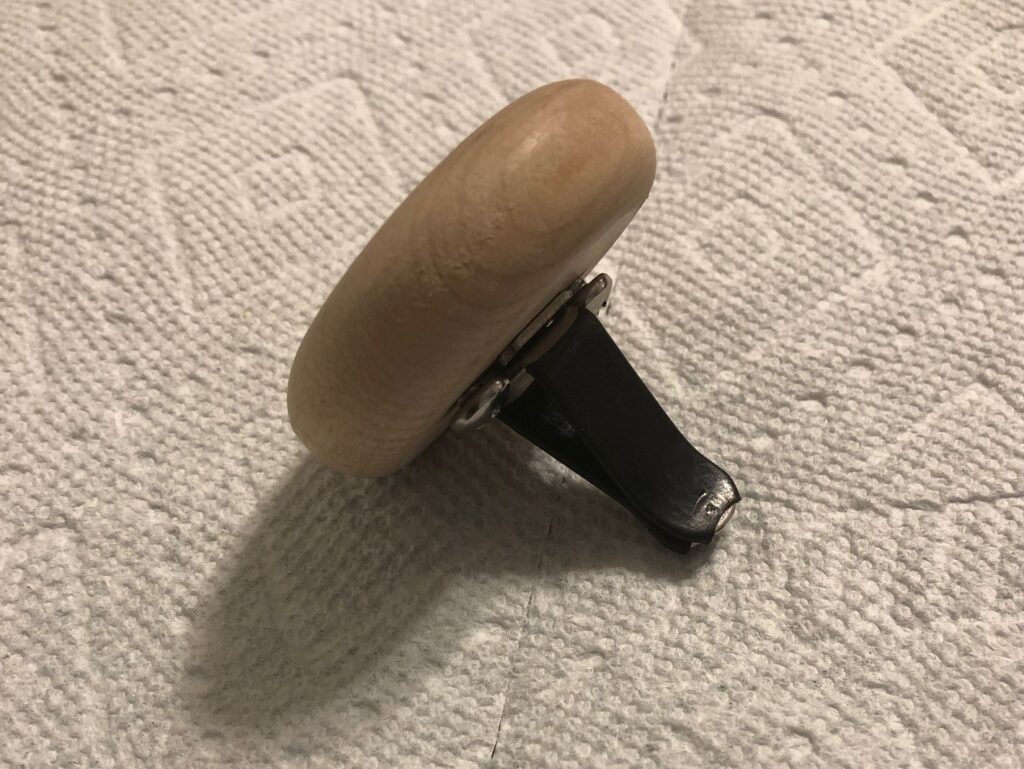
He experimented with how to attach the clip to the back. Plain glue would not work because of the kind of stress it would be under to pull it from the vent. He found a way to put a screw on each side of the base, with the edge of the screw overlapping the base. It worked great for now. He had some other ideas for the next batch.
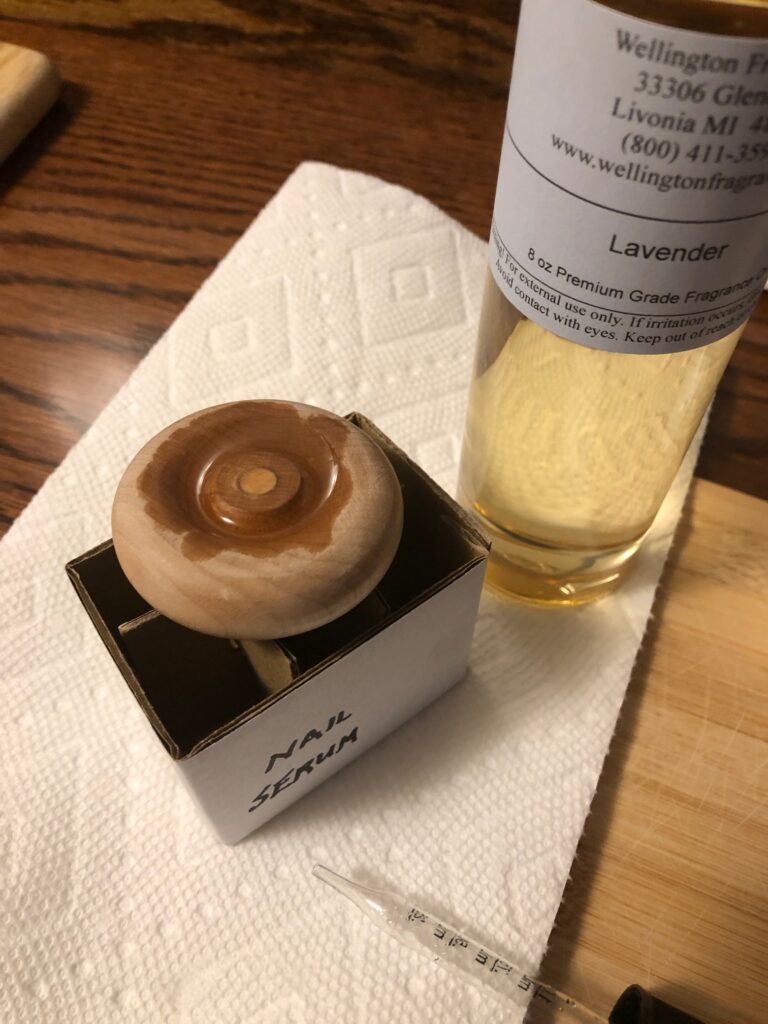
Now that the base was secured, I needed to add drops of scented oil…I chose Lavender fragrance oil…mostly because I had a big bottle of it, and I could stand the scent.
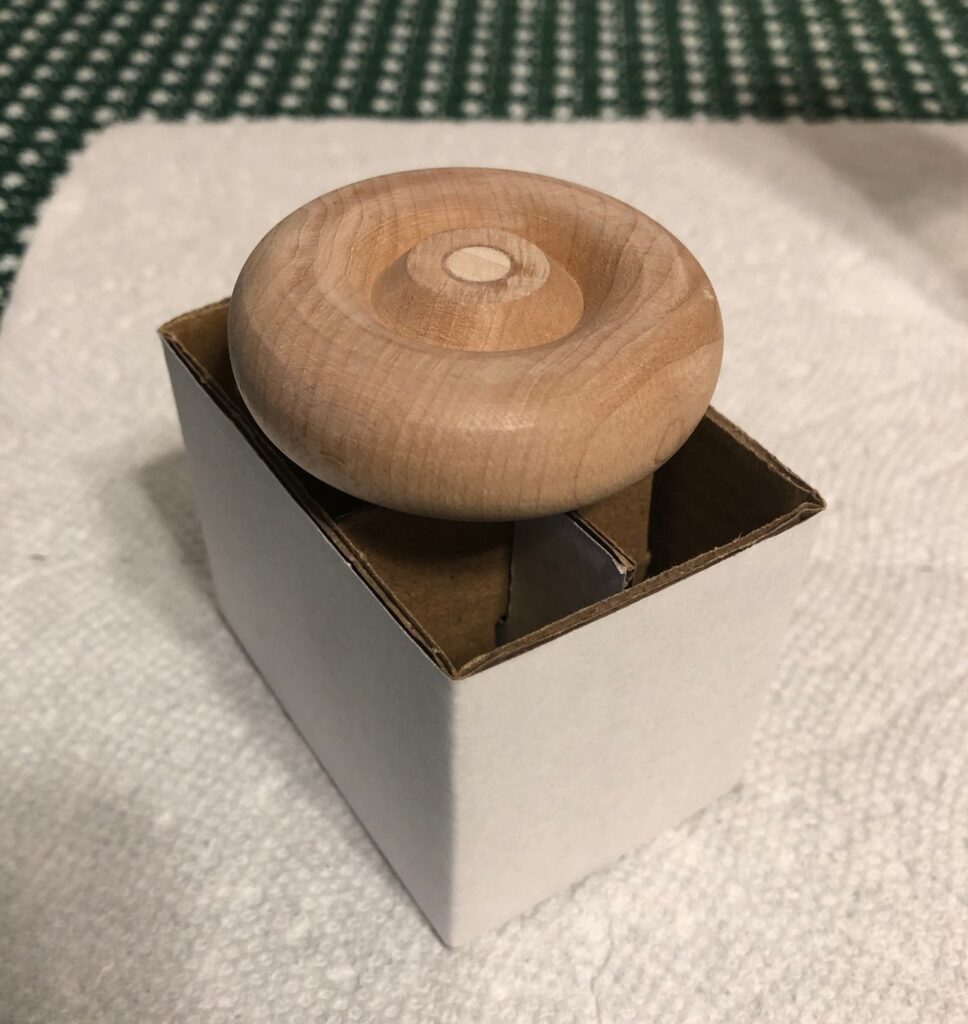
First, I had to figure out a way to keep the whole thing vertical so the oil wouldn’t drip off before it soaked into the wood. I had this small box that held the roller balls in shipping. The clip just fit over the center divider and kept it upright while I added the oil.
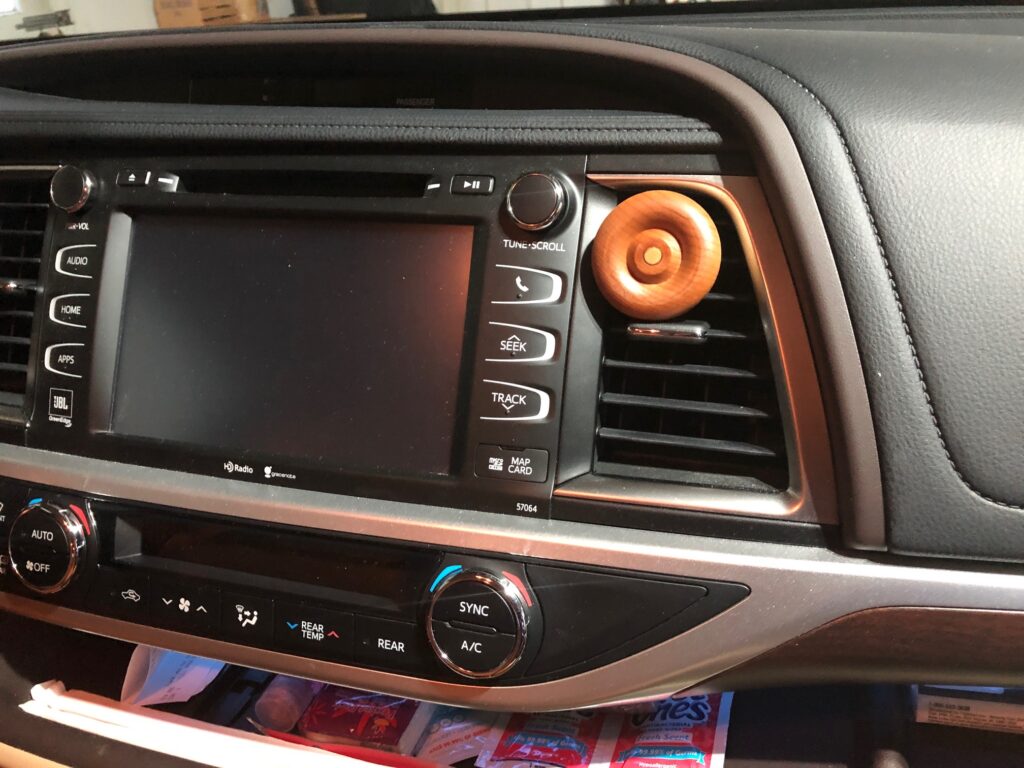
Using the dropper, I filled the center ring and let it soak in. I did that several times over the next few days. Then I put it in the car vent. It helped to be driving around with the heated air coming through the vent. The first day it was quite noticeable, but by the second day it was very pleasant. Not sure how long it will last, but when I can’t smell it anymore, I’ll pull it out of the vent, bring it into the house, add more oil and put it back in the car.
Bert did make me five of these so I could switch up the scents. I’ll store them in labeled zip bags so I know which one had which scent. Pretty slick!
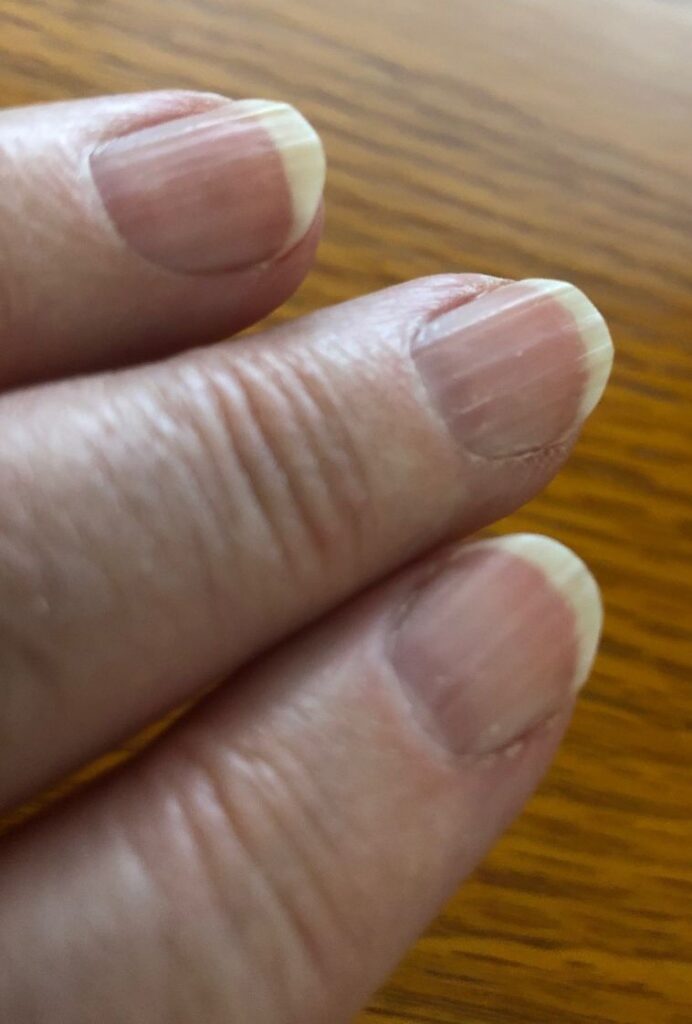
I’m always looking for new ways to experiment with essential oils. I now have enough supplies to try almost any recipe I come across. It wasn’t until I was cutting my fingernails the other day that I realized I needed something to help them be stronger and less ridged. I wasn’t familiar with even commercial products out there. I always just used hand cream to help dry, cracked cuticles, hoping the nails would benefit. I started researching products to help my nails.
I read an article from one of my favorite websites: https://strategiclivingblog.com. Gaye Levy is the author and she has been blogging since 2010. Her philosophy of life really appealed to me and I check in with her website frequently. She recently posted an article called, DIY Nail Serum for Damaged Nails. This serum is applied right to the edge of the cuticle where it meets the nail. She came up with a simple serum to help her nails grow stronger. With her background as a licensed manicurist she knew that, “the issues with my nails stemmed from the nail matrix. This is the area underneath and below the cuticle and this is where all the nail bed and nail plate nourishment comes from.”
Then I came across a recipe for a Cuticle Butter with essential oils that also might help. I’m not sure where the recipe came from, but it was probably one of the following sites: https://joybileefarm.com or https://www.pinterest.com.
I decided to make both of these products to see if I liked the way they felt and if they worked for me.
NAIL SERUM
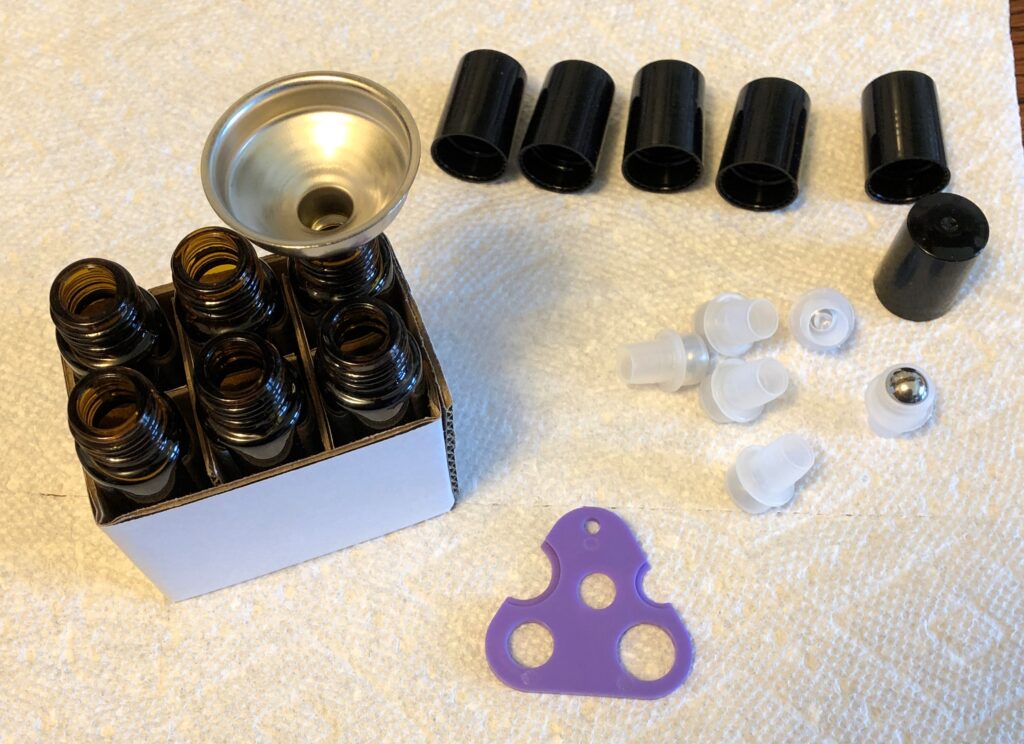
This product is mixed up directly in a roller ball. I ordered them from Amazon, and luckily, they came with a tiny funnel, labels and a plastic tool that helps to lift the roller ball out of the glass bottle. I had never worked with roller balls before so these were very helpful. I have since ordered a packet of six tiny metal funnels, seen in the picture below:
I used the box the roller balls were packaged in as my holder while I added the oils. It kept them from falling over as I worked.
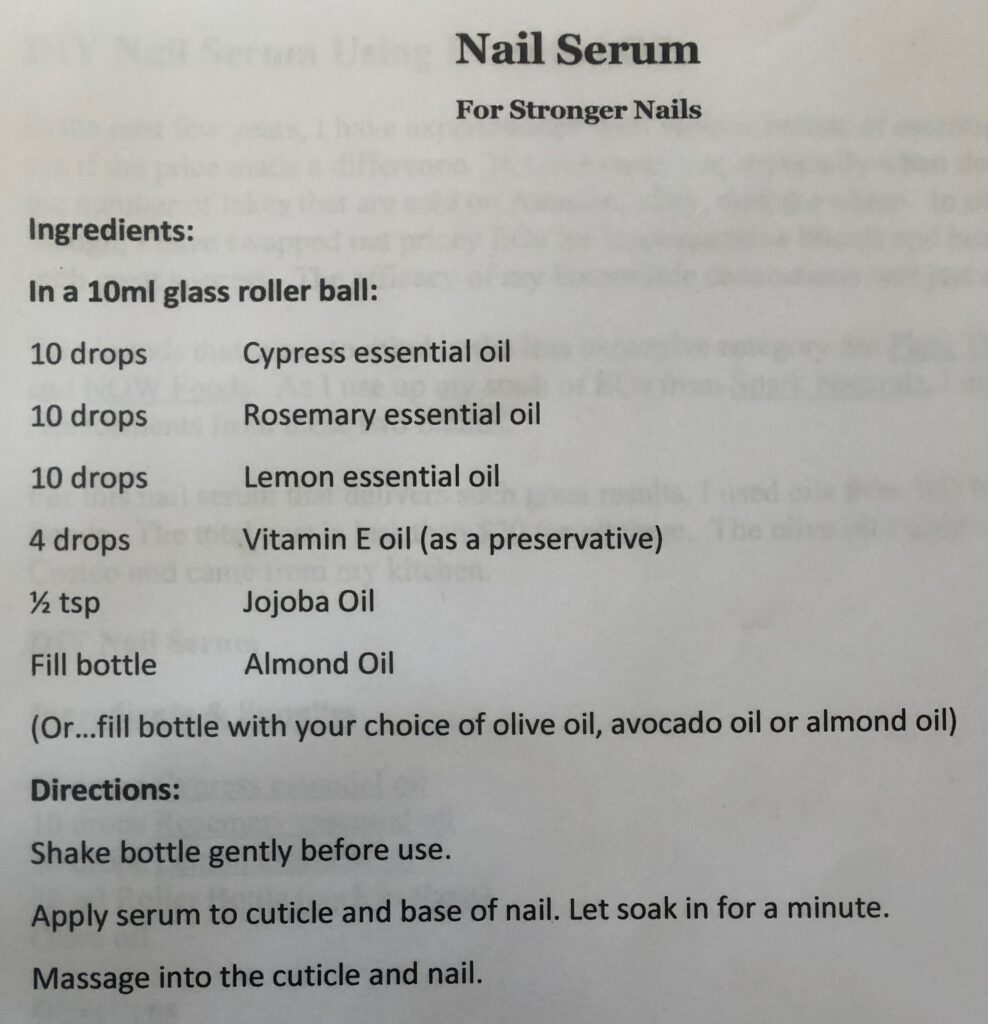
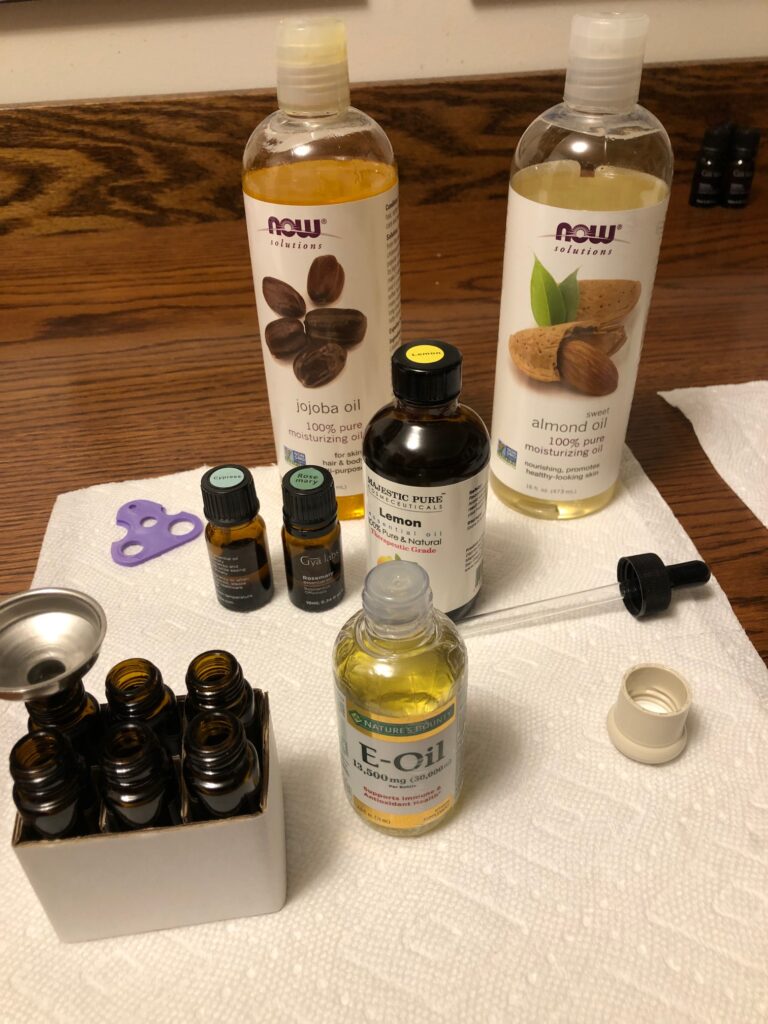
The ingredient list was pretty simple:
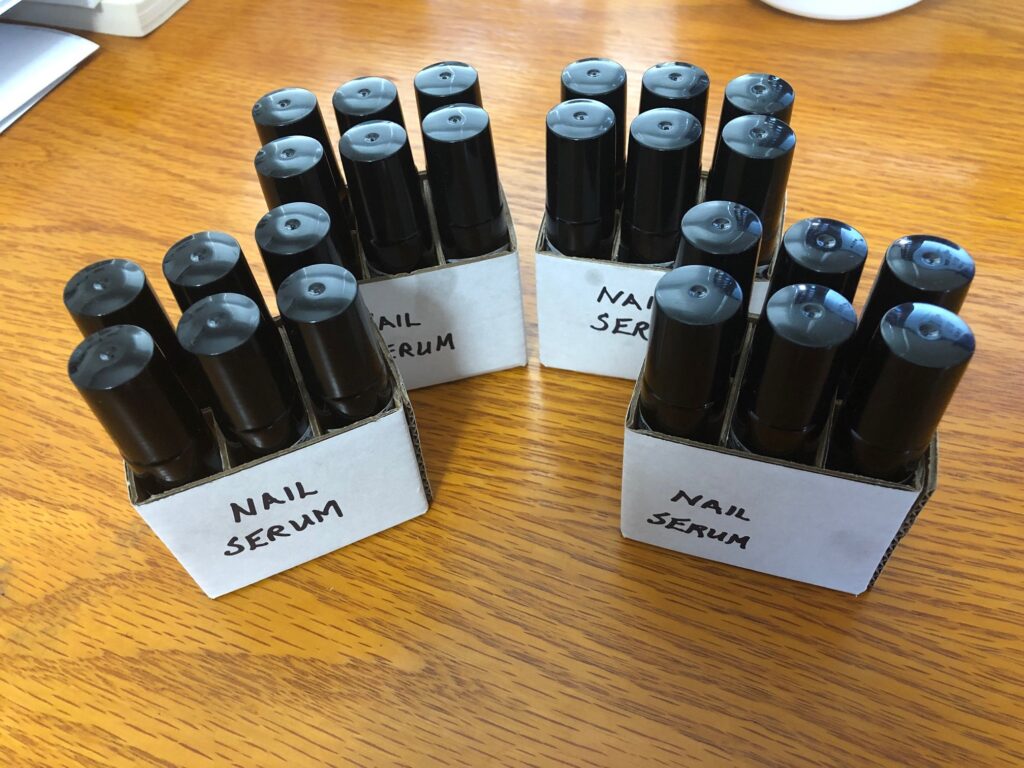
I just added the drops of oil to each bottle. I did six at a time, so I added the 4 drops of Vitamin E oil to each roller balls; then I added the lemon essential oil…10 drops to each bottle; etc. In the end, I had 24 roller balls filled with the Nail Serum…enough to share!
CUTICLE BUTTER
This recipe is also pretty simple:
Step 1: Melt the Shea Butter and the Coconut Oil.
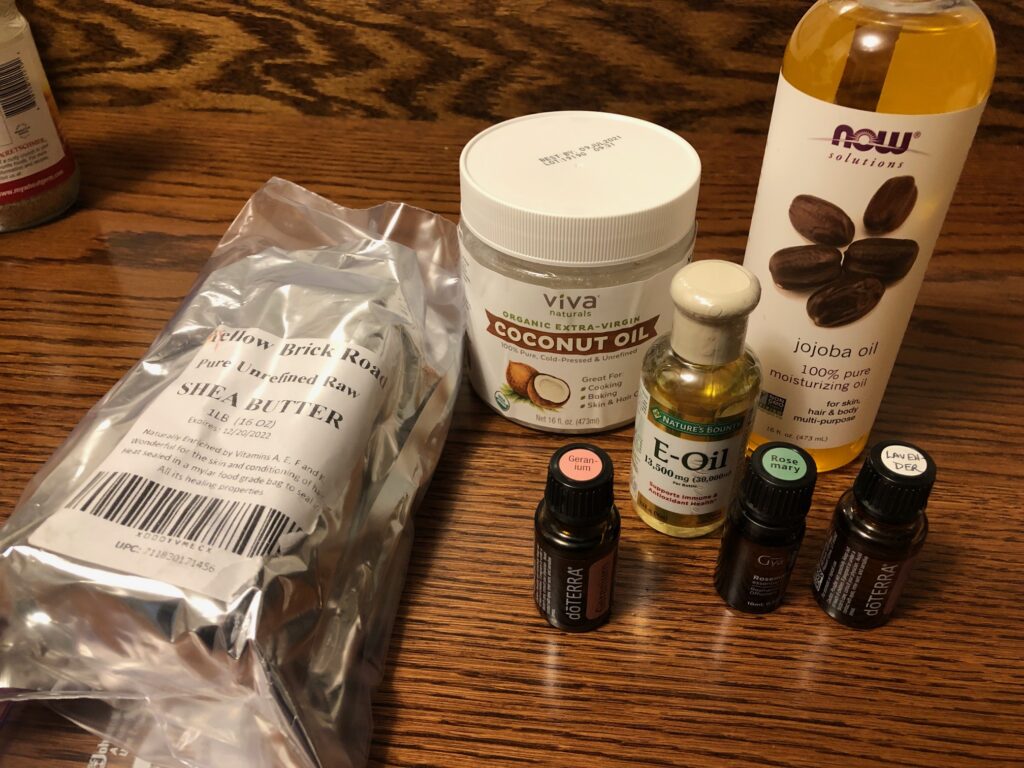
Shea Butter and Coconut Oil
Step 2: Add the Jojoba Oil, Vitamin E Oil and Essential Oils of Lavender, Geranium and Rosemary, and stir well. Pour into containers.
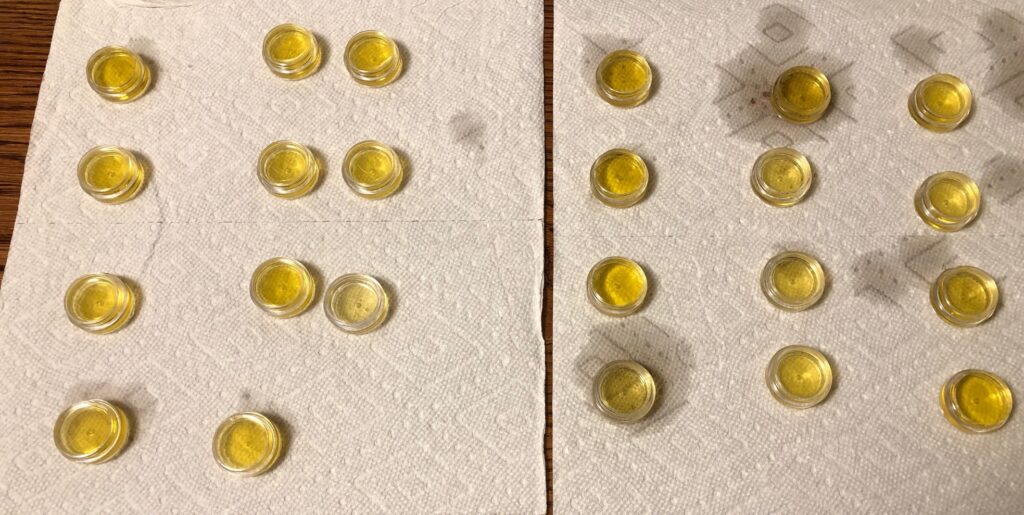
This was a messy process! The containers I chose were just 1″ across. They filled up so quickly I couldn’t stop pouring in time!
Then I waited for it to set up…which was…never! I guess over two days or so it might, but basically it stayed liquid. I tried pouring one into a roller ball, but that was a waste because it did finally get thicker and then wouldn’t come out of the roller ball. I threw that one away!
Second Try
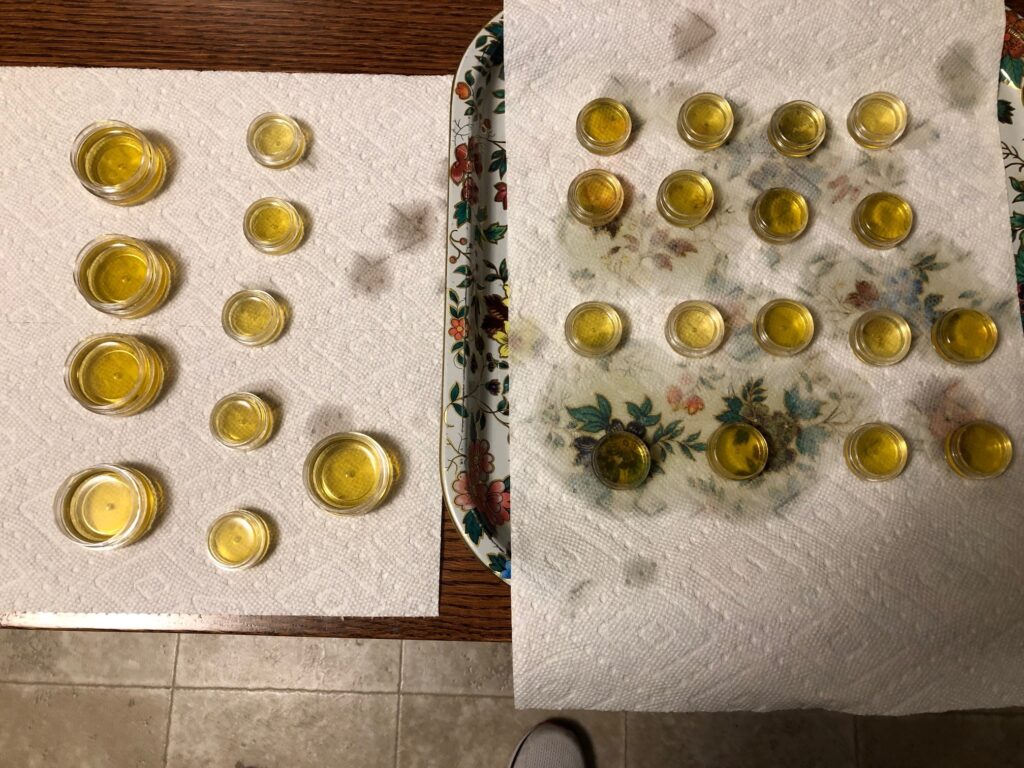
I poured all of the oil from the tiny containers back into the measuring cup, put it back on the stove and added more Shea Butter (you can see the recipe above has 1/4 cup crossed out with 1/2 cup penciled in).
The next time I poured, I set the tiny containers on a tray so I could slide them into the refrigerator. I hoped that would help them set up more quickly. It wasn’t pretty the second time I poured!
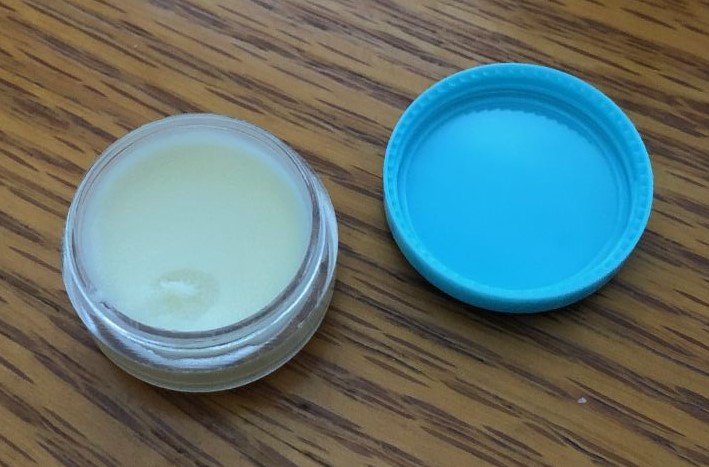
Increasing the Shea Butter and setting the tray in the refrigerator made all the difference. It made a very soft salve that melted in nicely to my cuticles. You can see how soft it is…my finger just barely touched the top of the salve and it left a dent. On a hot summer day I might want to keep it in the refrigerator.
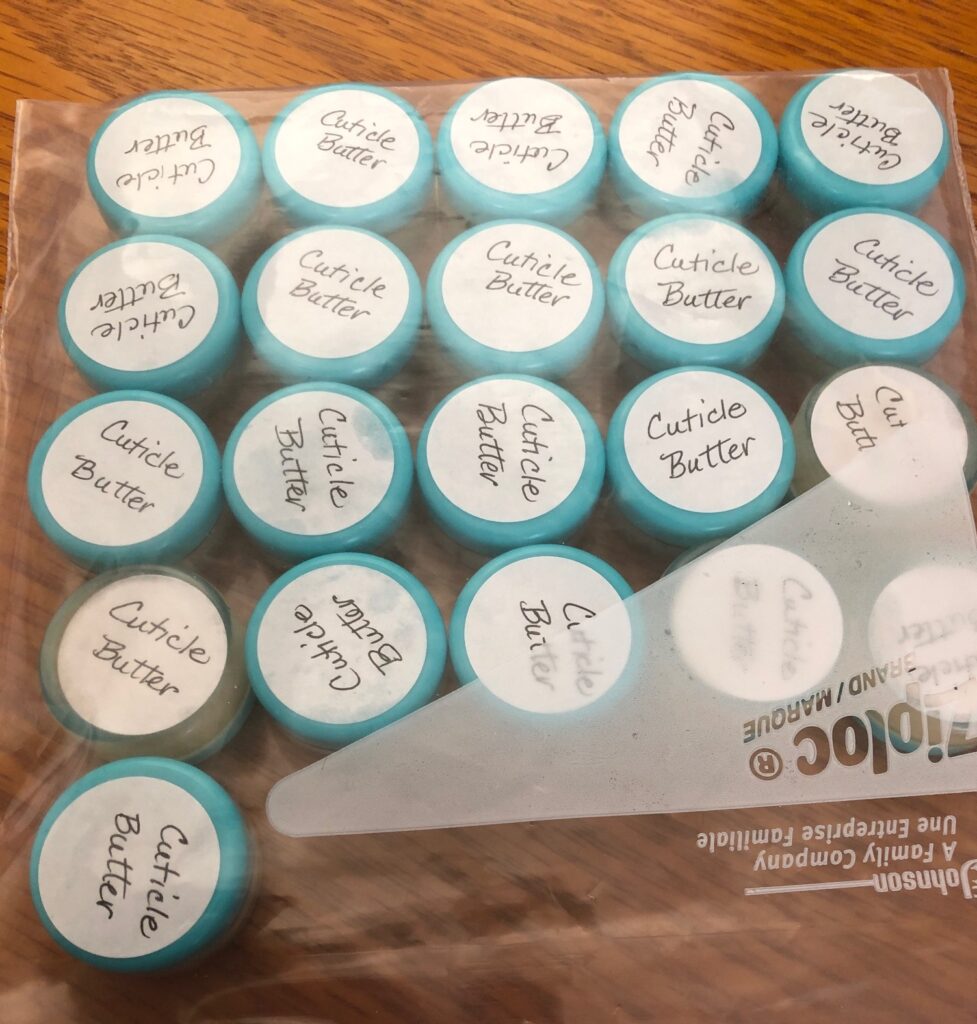
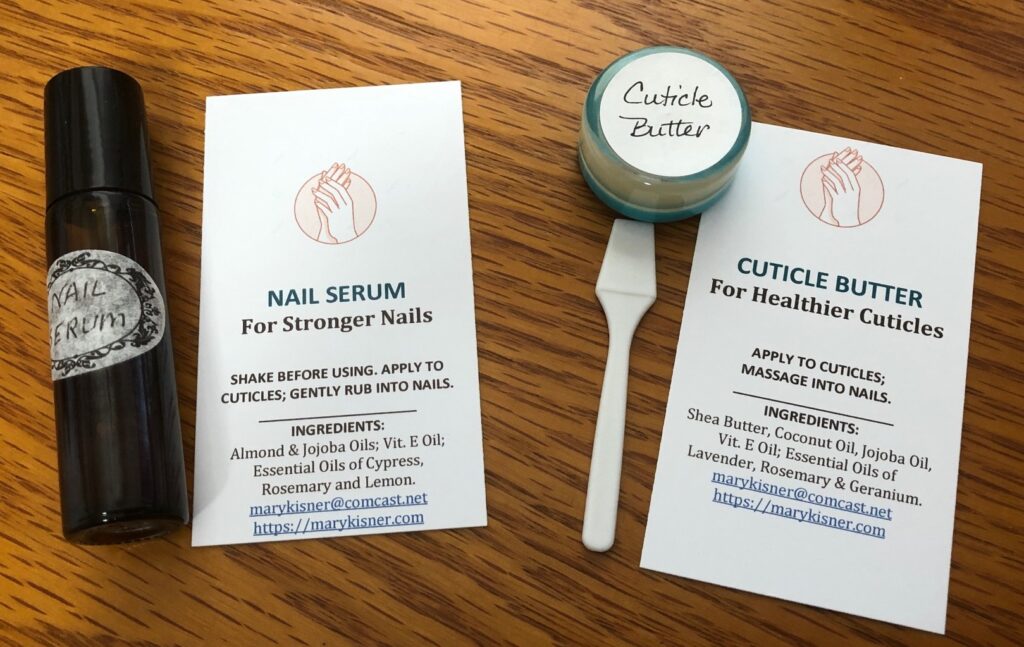
My next step is to share these two products with friends to see if helps our nails. I’ll package them together and ask for feedback on which product is easier to apply.
As always, I include a list of ingredients so folks know what I used.
I’m not sure if I’ll have great nails by Christmas, but maybe by Spring I’ll know if they work! Enjoy!
Today would have been my big sister’s birthday…84 years old. She passed away in 2017, but every December 1st since then I’ve made it a point to recall a few of my treasured memories of her. I’d like to share just a few with you. Some time in the last 20 years, she combined her first and middle name to make one…Jeansylvia. To me, however, she will always be Jean.
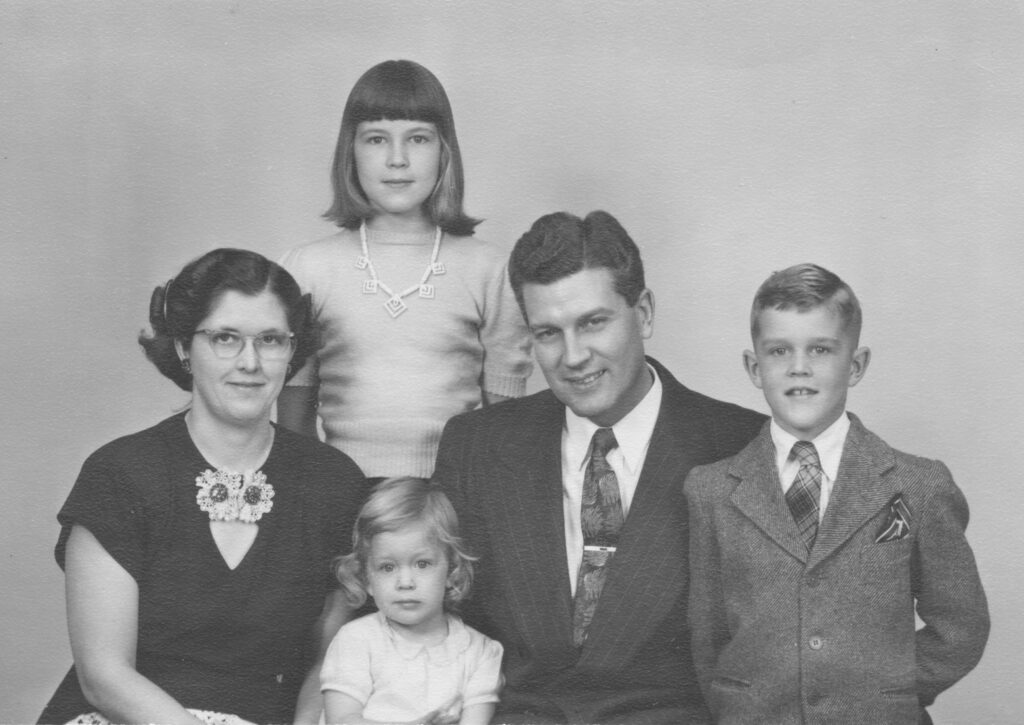
I have only a few pictures of my sister before I was born. Here is a picture of my family before I was born and they lived in New Jersey.
I was born in New Jersey, and 6 months later we moved to State College. Jean must have been 9 years old in the first picture. Mark would have been 6 years old. I’m sure I was a novelty at the beginning.
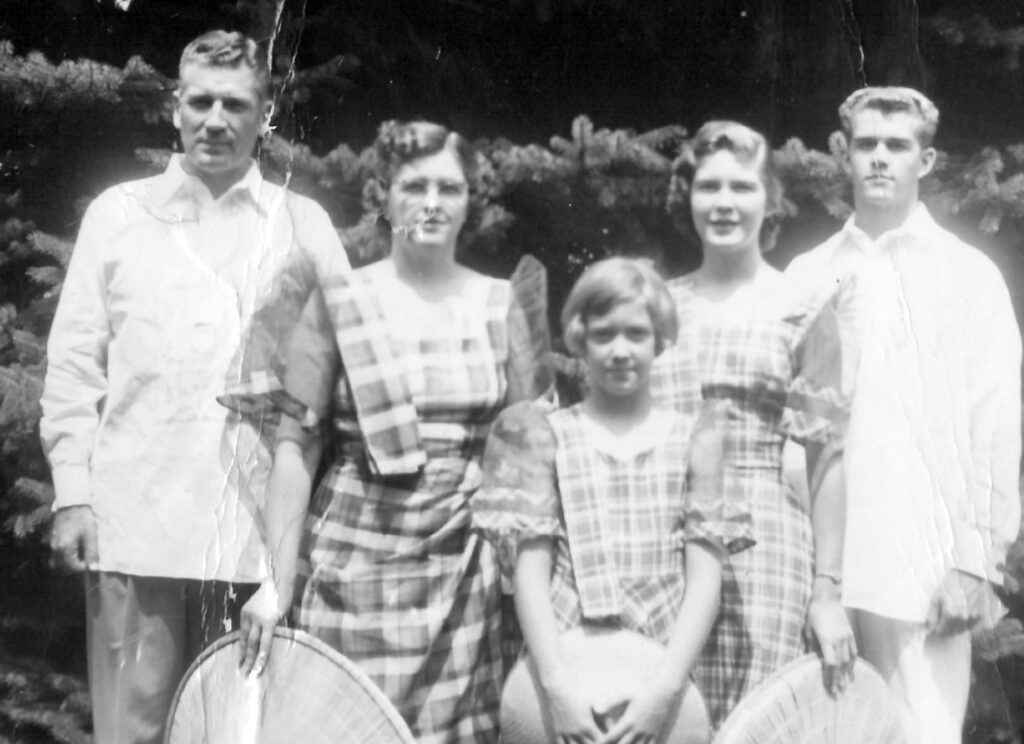
About 1957, when we returned from my Dad’s year-long sabbatical in the Philippines, Jean would have been about 20 years old and in college. For this picture we modeled our special outfits representing traditional clothes from the Philippines:
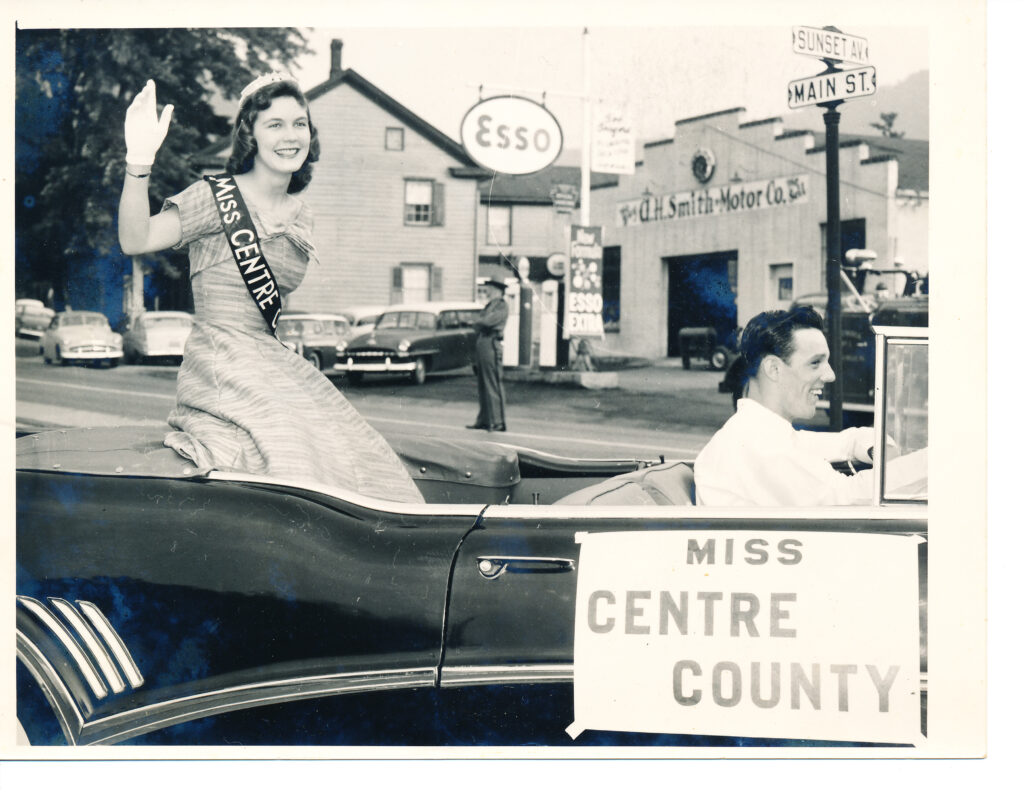
In 1959, Jean competed for the first step in the Miss Pennsylvania Pageant. She won Miss Centre County, but did not go further. This picture below was in the paper. A few years ago, Bert and I attended an 80th birthday celebration of the young man driving the car. (We had no idea who he was in 1959!) This picture was part of his memory board at the party. What a surprise to see my sister on his memory board! I hadn’t seen this picture for many years, so it was a real treat.
More recently we would drive up to Mansfield to have lunch with Jean, Mark and Lita. This is one of my favorite pictures of her:
When she passed away, I had to quickly come up with an obituary while I was in a hotel room. Luckily, her daughter was with me and could fill in all the details of next of kin, etc. However, I wanted to add a sentence or two about her personality. This is what I came up with:
“With a quick wit and engaging smile, she charmed all she met. She was an avid reader, prolific journal writer and nature lover. If you want to honor her memory, love a neighbor, help a friend and pass it on.”
So, CHEERS to you, my big sister! We all miss your smile and sense of humor!
I hope all of you take a minute on a loved one’s birthday to cherish a favorite memory too.
If you’d like to comment or share a memory of Jeansylvia, you can comment here or email me directly at marykisner@comcast.net.
A year ago, about this time, I gave up trying to decorate my front door with seasonal wreaths. Anything I would put on the door that was thicker than an inch or two would get smashed between the door and the screen door that we leave on all year. After a month or so the wreath would look really smashed and bits and pieces would have dropped off, leaving assorted crumbs behind every time I opened the door.
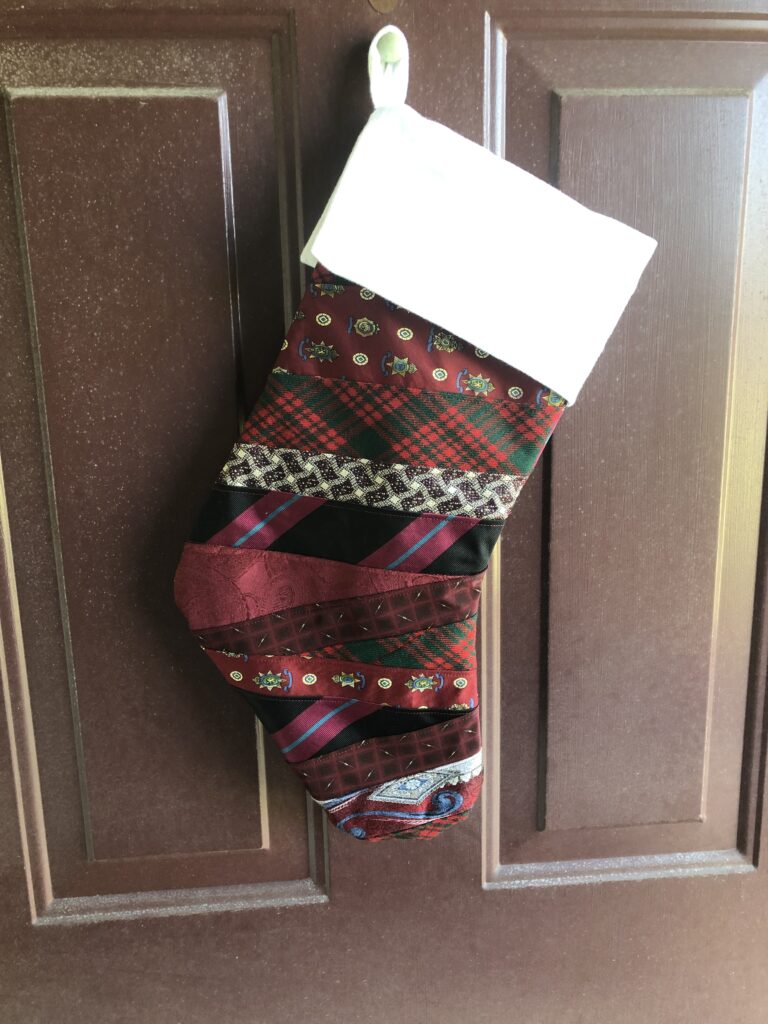
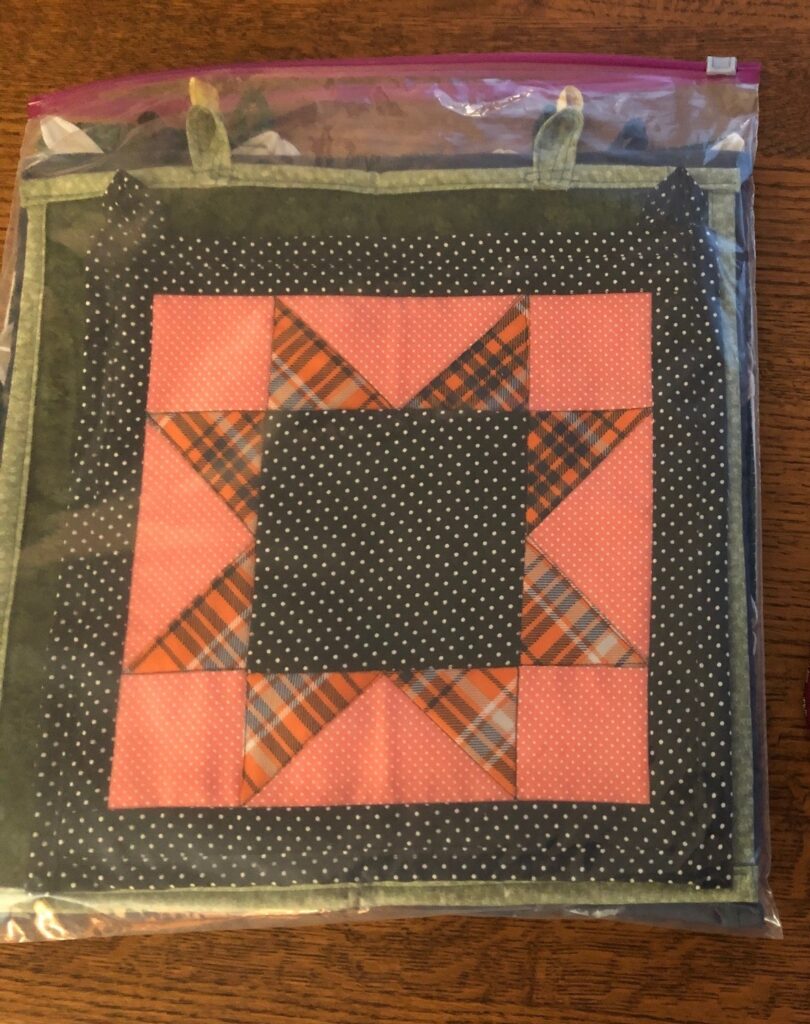
Last Christmas, I decided to try something different. A small quilt based on a single quilt block could be decorative, season appropriate and still be flat. The first one I made was a Christmas stocking…based on the crazy quilt technique but without a lot of hand stitching. I used recycled neckties and ended up with this:
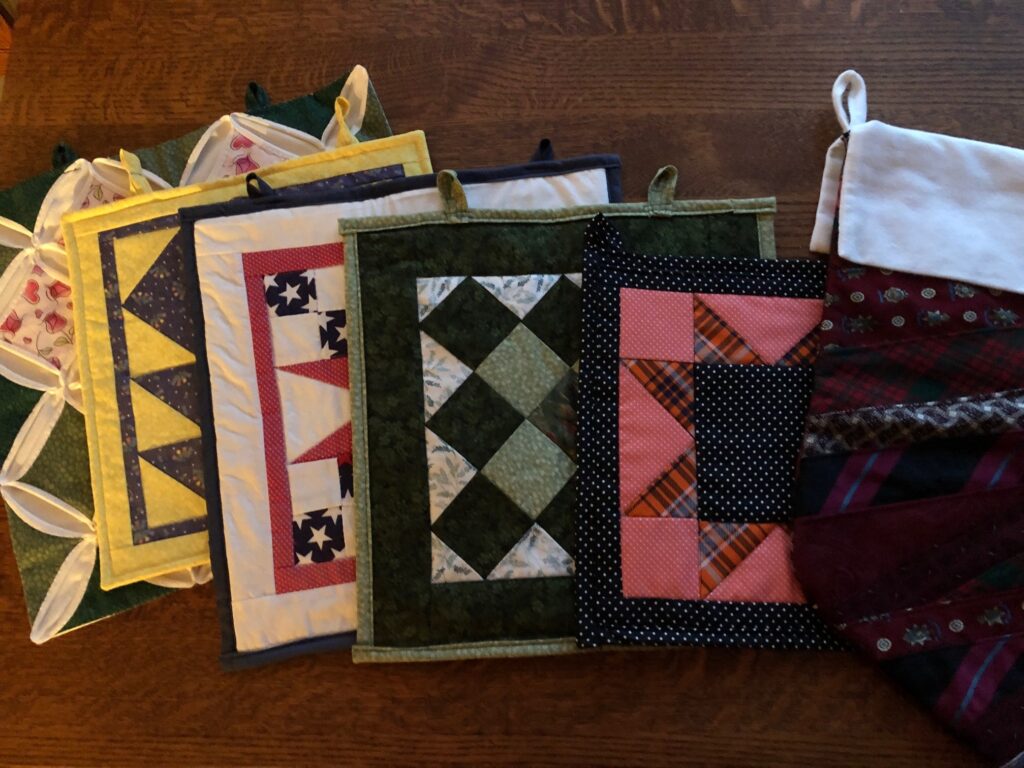
After a month, it still looked good and had not dropped any stuff between the doors. About every two months, I made seasonal quilt blocks to decorate the door.
The best thing about this project was how little space the whole pile took up, compared to 6+ door-sized wreaths. They fit into a large zip lock bag and was less than an inch thick! I could easily store the bag with my sewing supplies. Success!
So now, I’m starting over with the Christmas stocking. I may feel like making more blocks as the year goes on to add variety but I can stop wasting my money and my patience with wreaths.
If you would like to see how each of these were made, scroll down on my Welcome page and search for the Door Quilts category. The articles will be there with the most recent one at the top.
If you would like to see a list of the first 100 articles I’ve posted, take a minute to subscribe to my website (also on the Welcome page) and I will email you a PDF of my first 100 postings with active links to each article. Enjoy!
Happy Thanksgiving Friends and Family! Yes, we had turkey and gravy. Yes, we had potatoes. Yes, we had corn. We did not bother with pumpkin pie because I can’t eat it. We did not have any extra people around so we kept it simple.
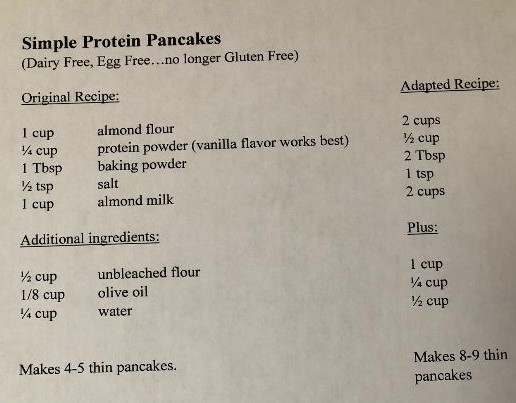
It was a lazy day in general so I enlisted Bert’s help in trying a new recipe. It was a recipe suggested by my nutritionist as a way to work more protein into breakfast for a gluten-free, dairy-free, egg-free pancakes that incorporated my plant-based protein powder.
Bert’s expertise in making great pancakes from scratch (or even from a pancake mix) is well known in the family. He seems to know just how to adjust the ingredients and the heat under the skillet to make lovely, fluffy pancakes (even on the cook stove at camp!). Since regular pancakes have eggs and milk in them, they have been off my list of acceptable breakfast foods for a long time (so sad).
The following recipe shows the original recipe and the additional ingredients Bert added to make an acceptable pancake. On the right is for a double batch, which is what we made. I really don’t have to be gluten-free, but we thought we’d give it a try.
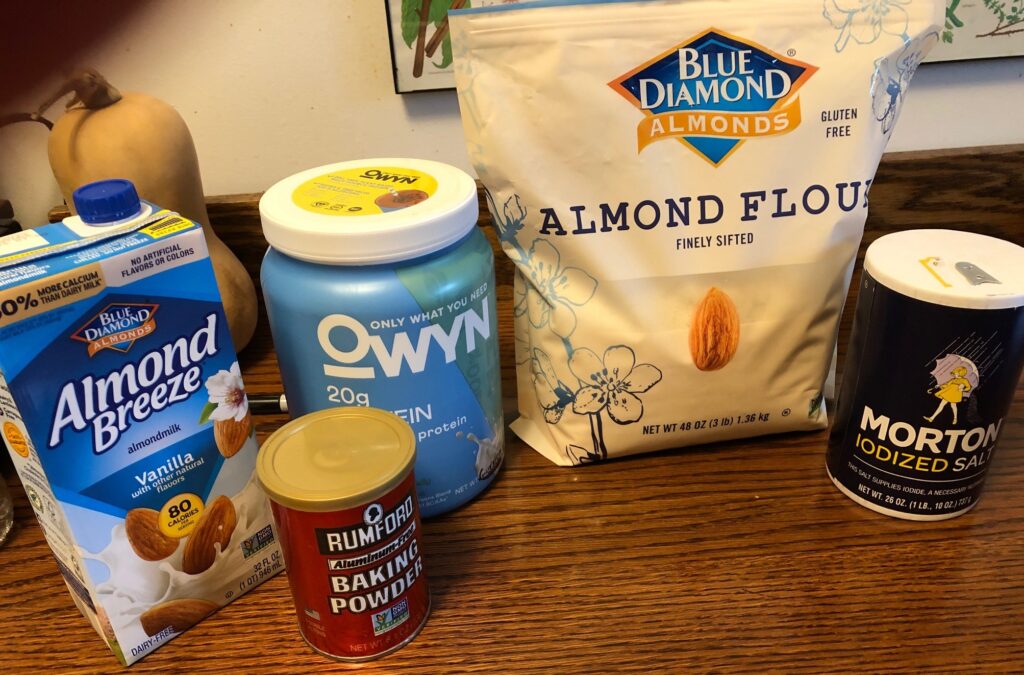
These were the basic ingredients:
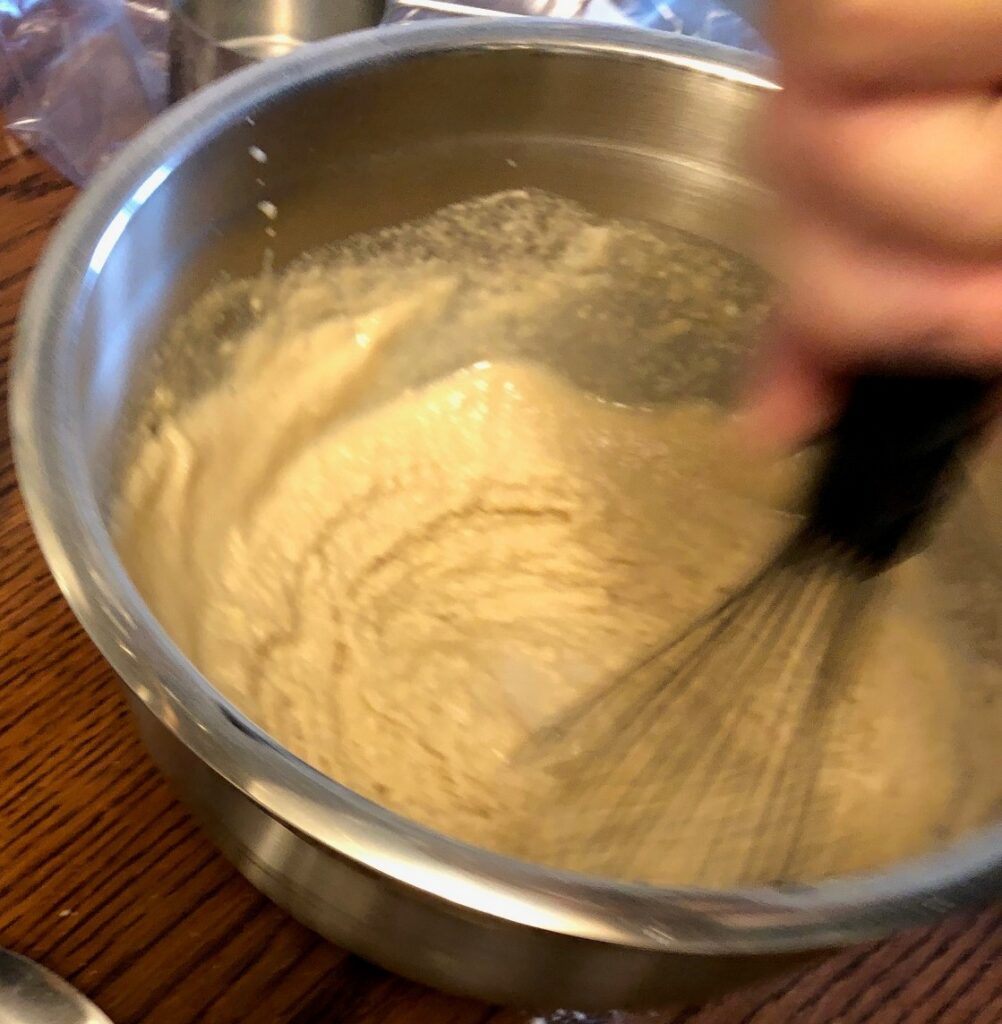
When mixed up it looked like corn bread batter:
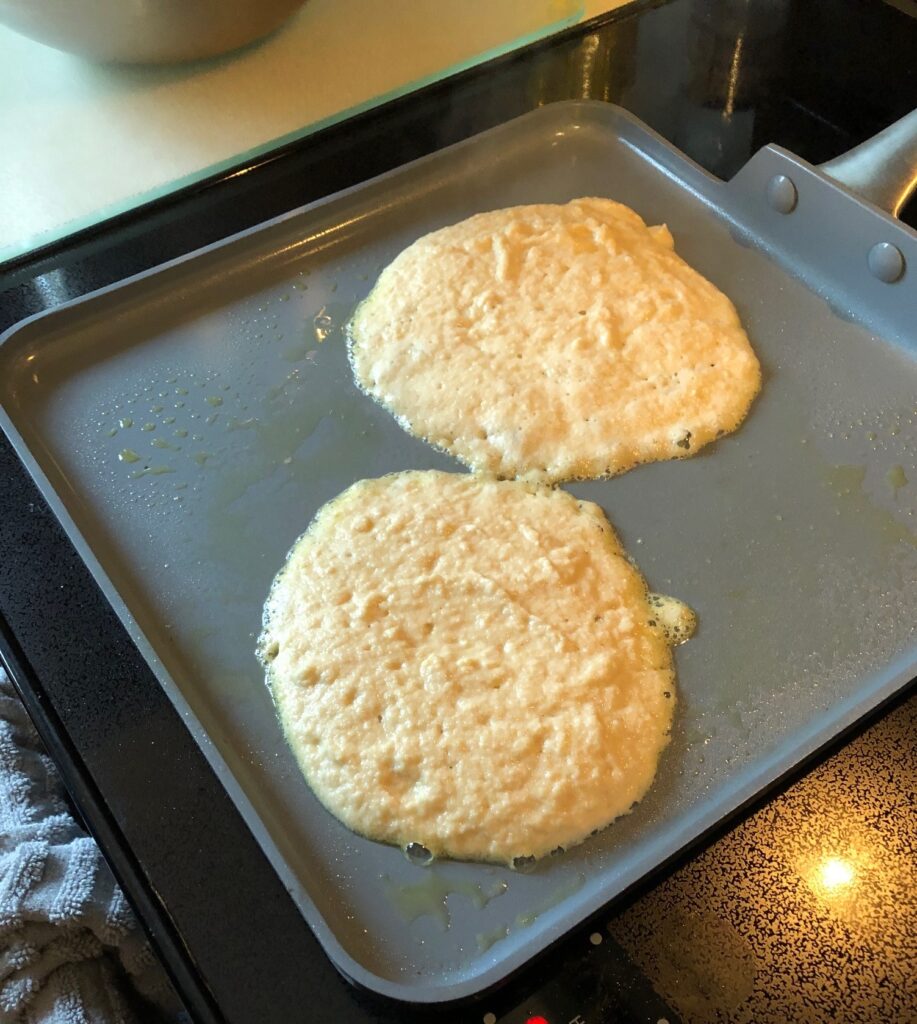
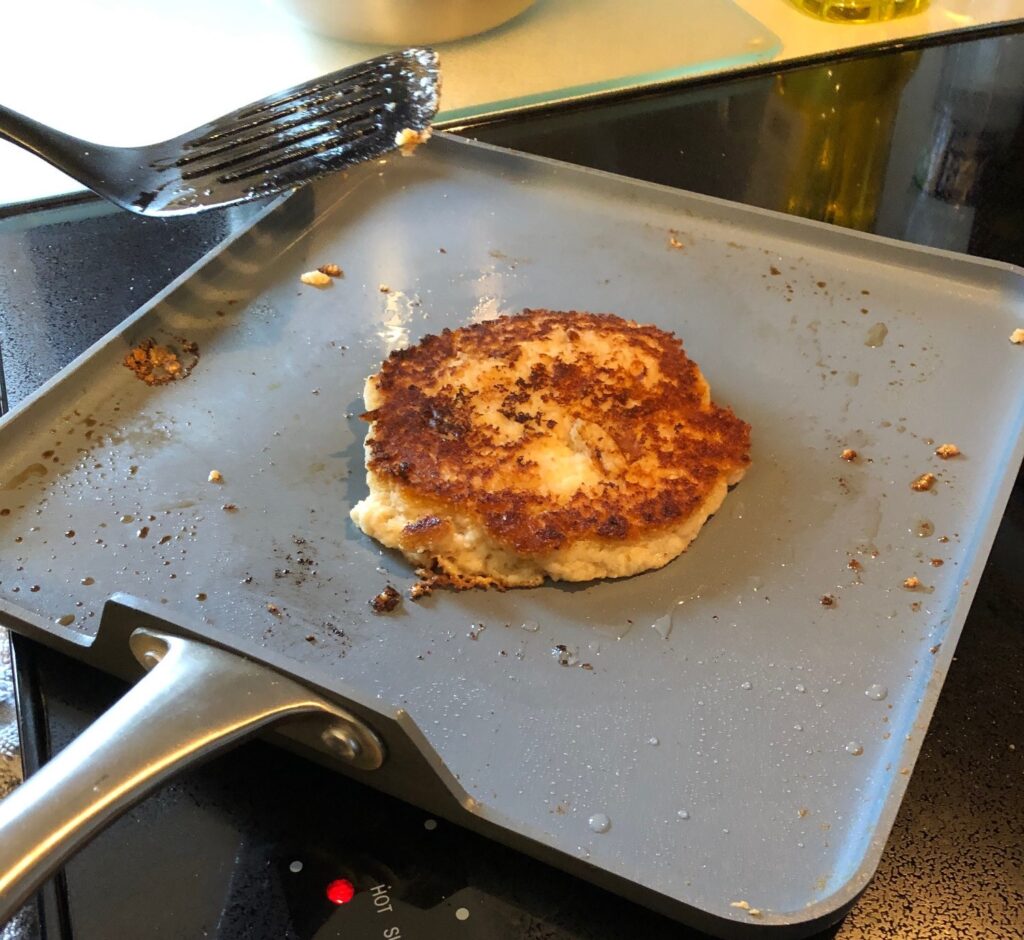
When first placed on the griddle, they looked like it might work…
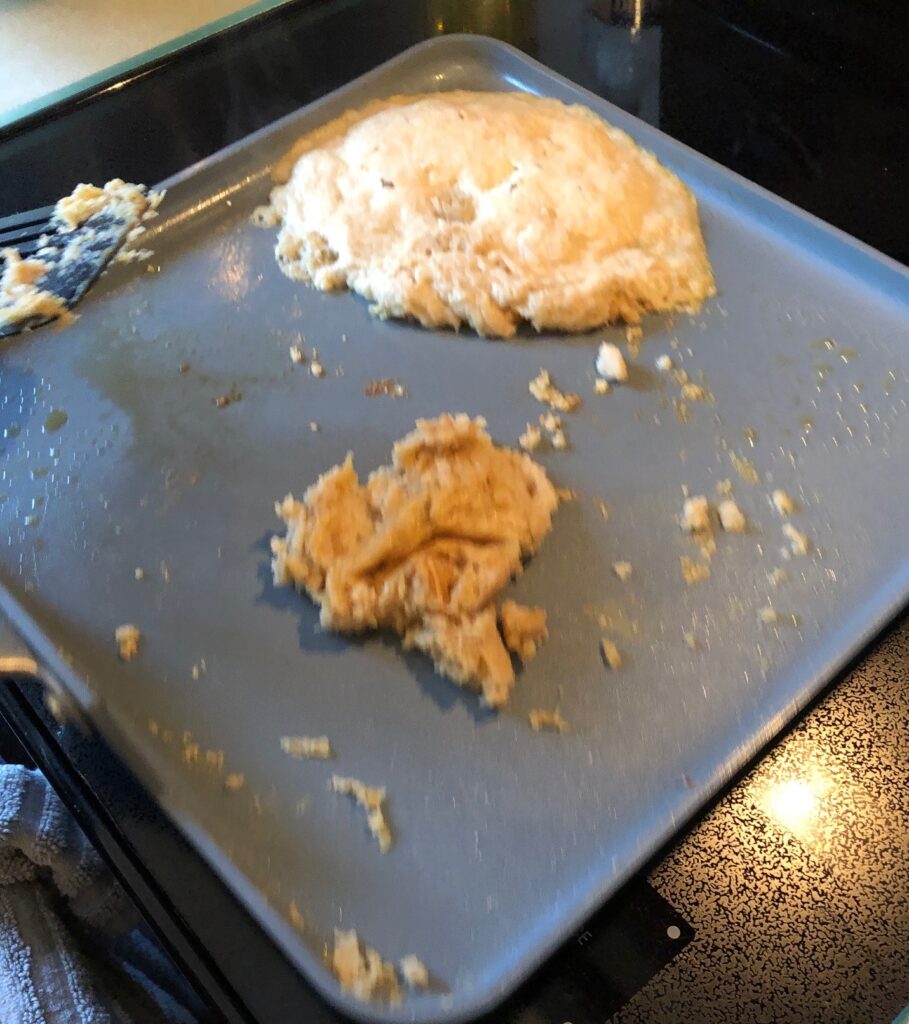
…however, trying to flip them was impossible! The first two pancakes went into the garbage.
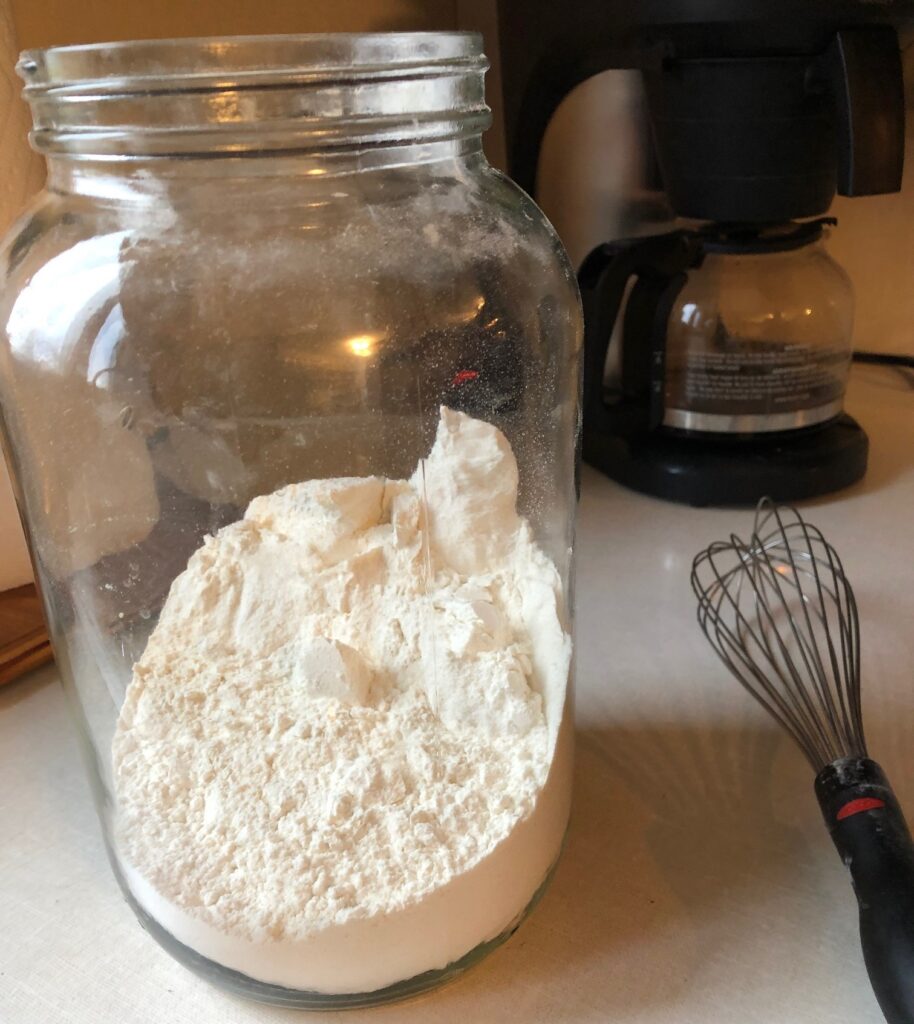
So, Bert added flour, oil and some water (exact measurements were not possible at this point.) Remember…this was an experiment!
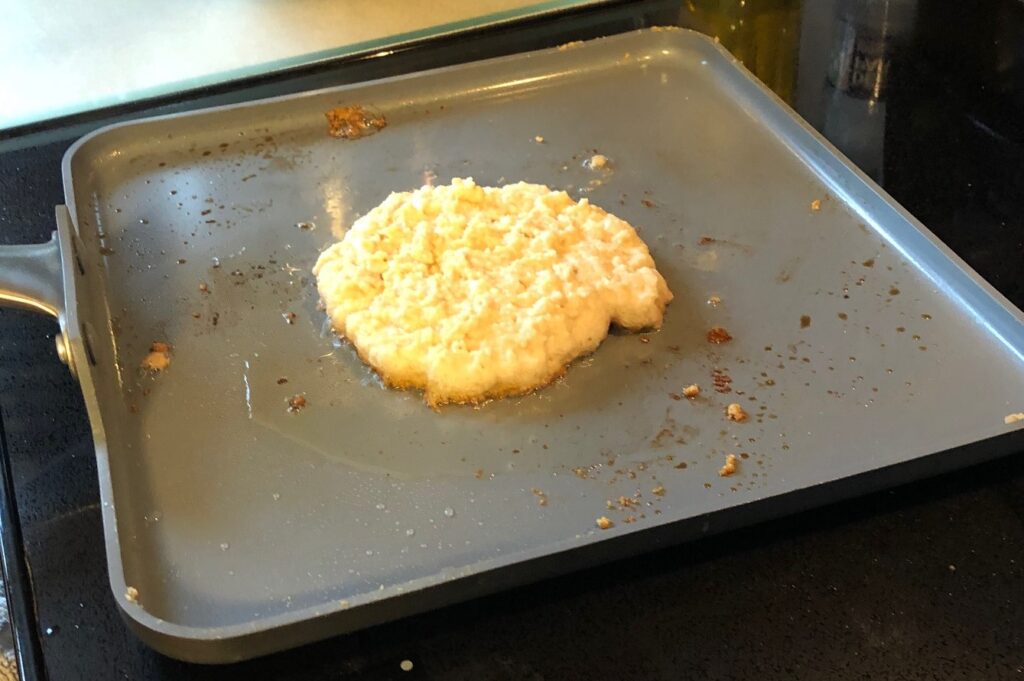
The next pancake worked much better.
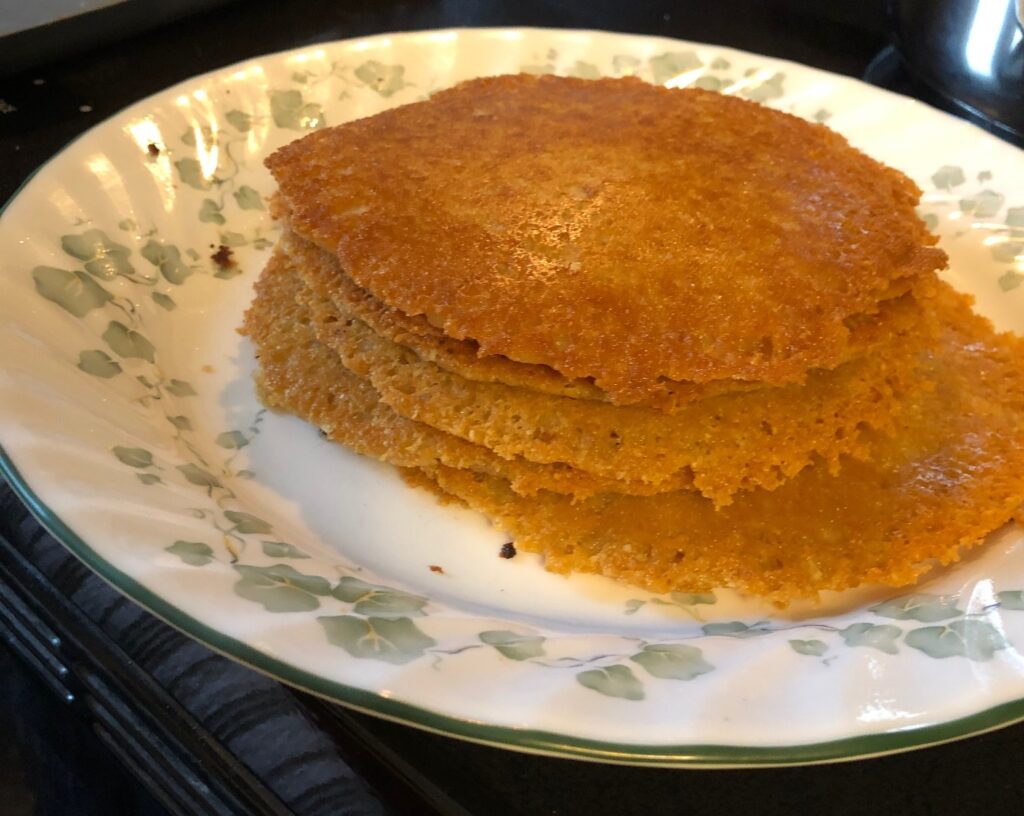
We had to taste this one just to see if it was worth it. It was delicious!
After we nibbled on the first two pancakes, we were left with this lovely stack of thin pancakes.
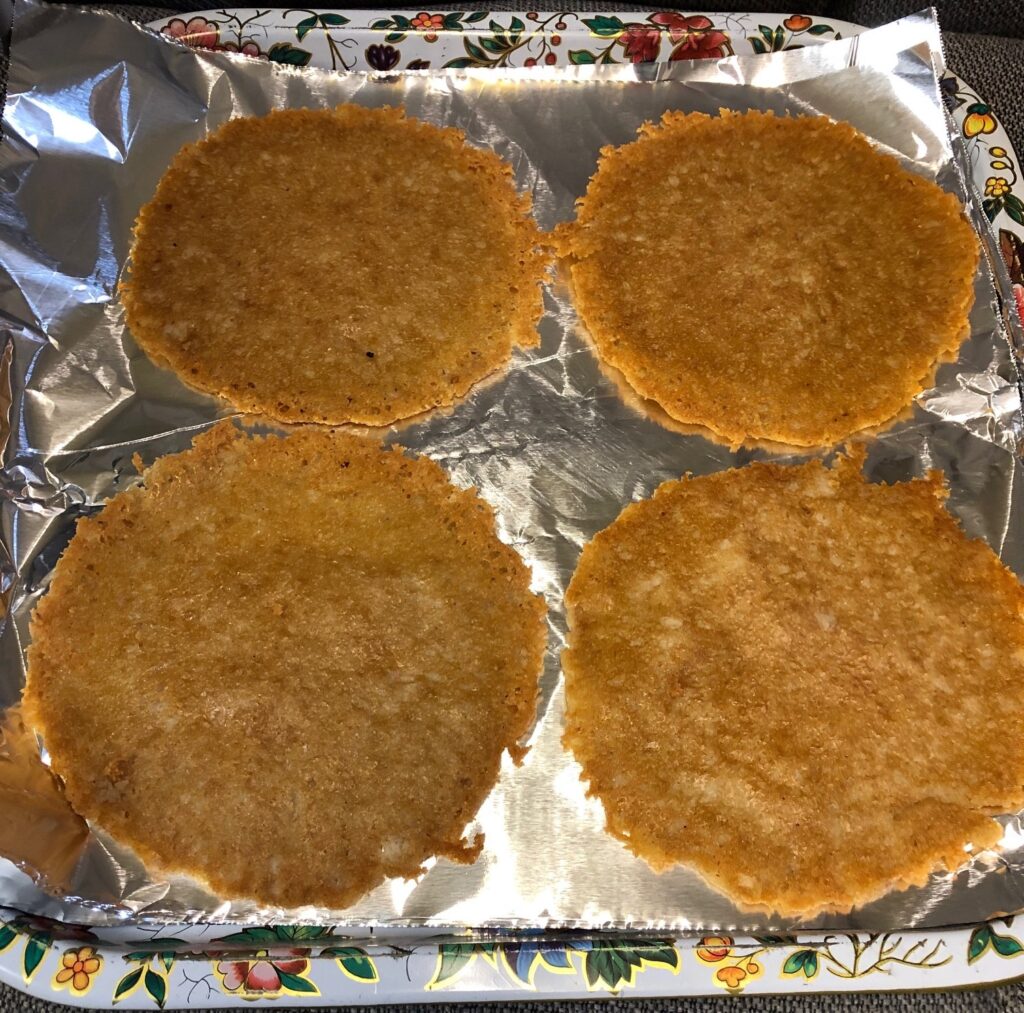
When they were cool, I carefully placed them on foil and slipped them into the freezer. I’ll package them up so I can have them for breakfast. Next time, we’ll just know to add those extra ingredients at the beginning…but they won’t be gluten-free!
My experimental pancakes ended up being delicious. I’m thankful for Bert’s expertise! I hope you all had a great Thanksgiving Day too!